
Leather Seat Repair Using Leatherworld...
 12-26-2014, 06:34 PM
#1
Rennlist Member
Thread Starter
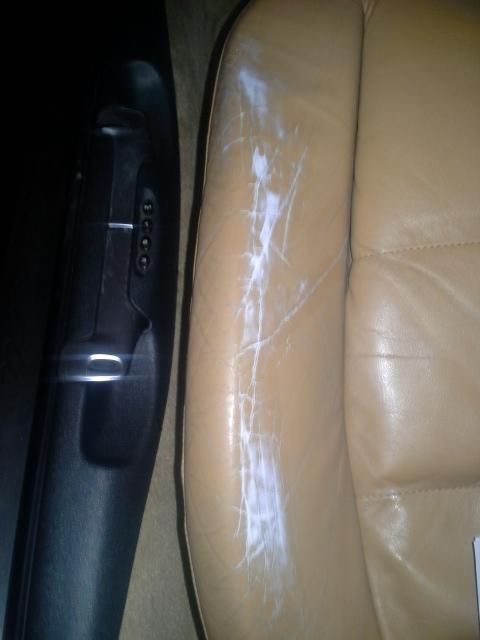
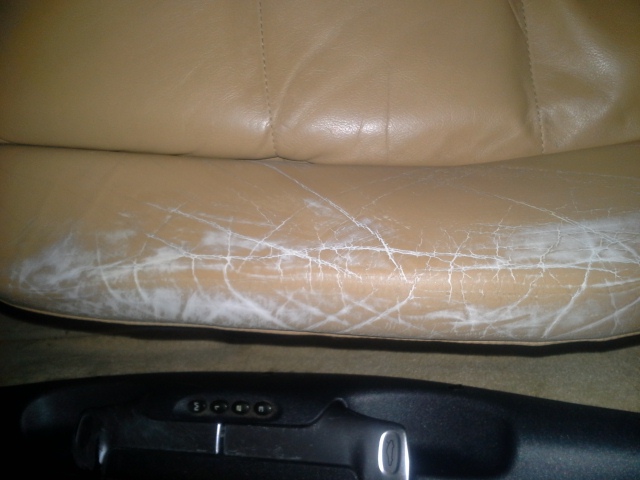
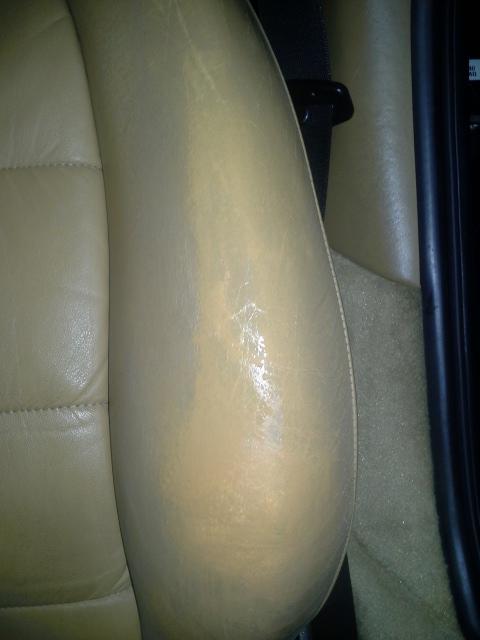
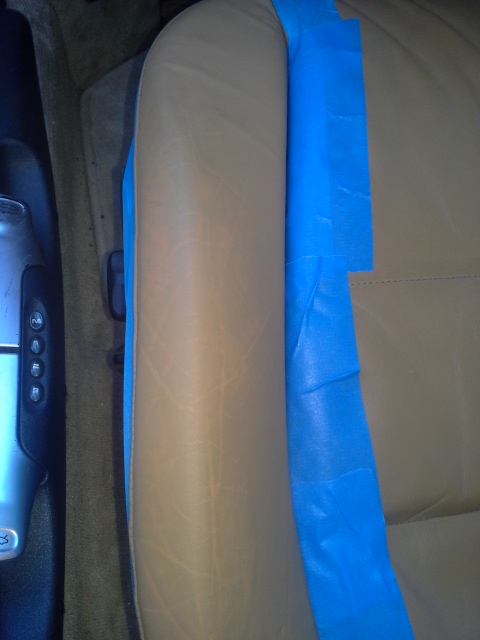
...Deluxe repair/Re-Color Kit. So I had a pretty nasty wear/tear through on my Left drivers side, side-bolster (you know, the one you slide across when entering the car). The following pic's show the process in a before/after fashion. The first photo shows the initial damage right after prepping with the cleaning solution. side/back bolster 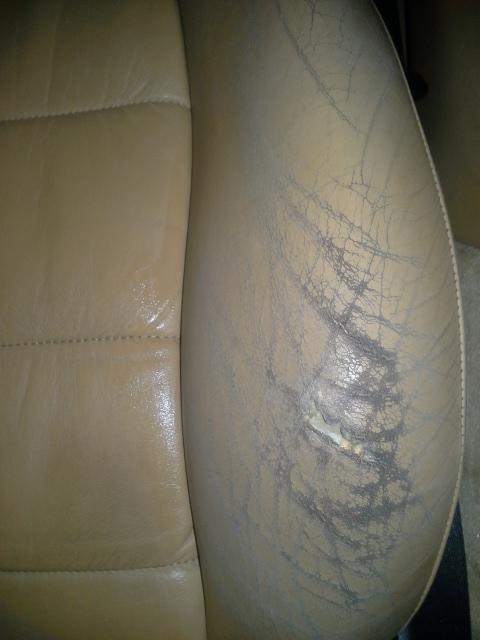
side/seat bolster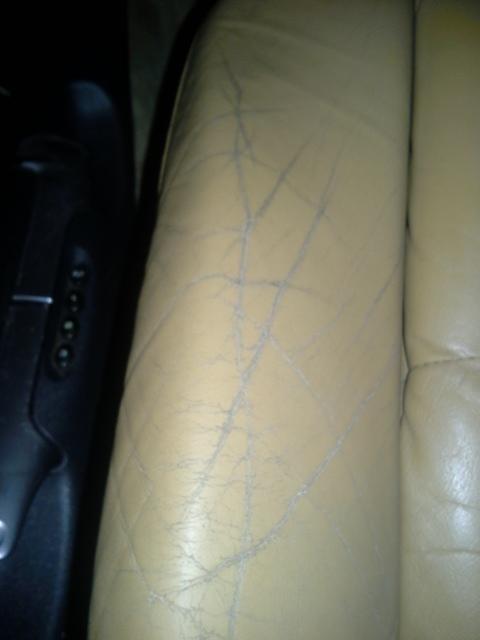
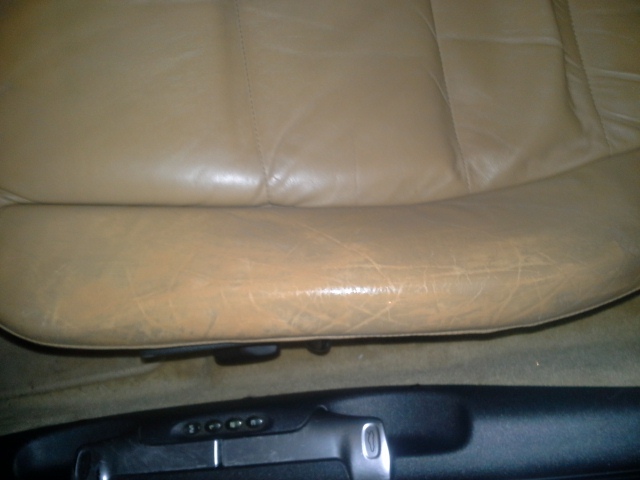
The cracks are emphasized due to being wet with the cleaner...it didn't look nearly as bad when dry.
After applying backing and glue behind the tear in the side/back bolster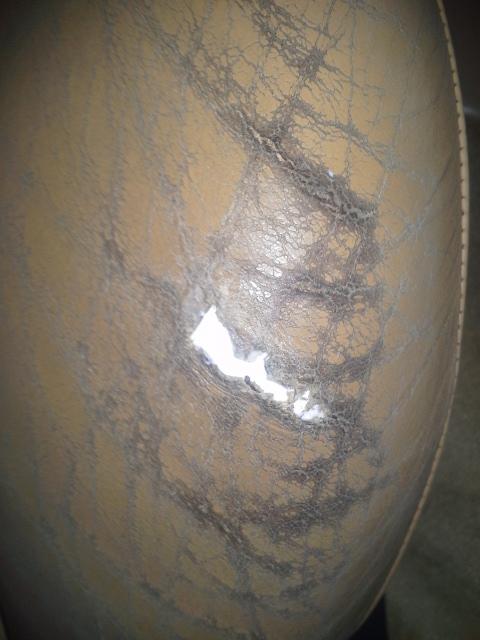
After initial application of filler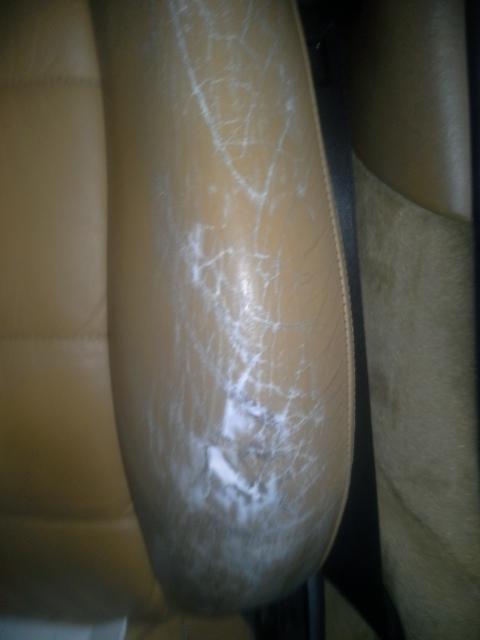
After second app. of filler and sanding (you barely sand - just enough to smooth. If applied properly it should mostly be smooth anyway)

On the side/back bolster I had to do 3 or 4 coats of the filler, but I'll save you all the photo's- suffice it to say it was all nice and smooth/filled before I started the dye/color.
First color coat on seat bolster
side/back bolster
After two coats
After four (final) coats
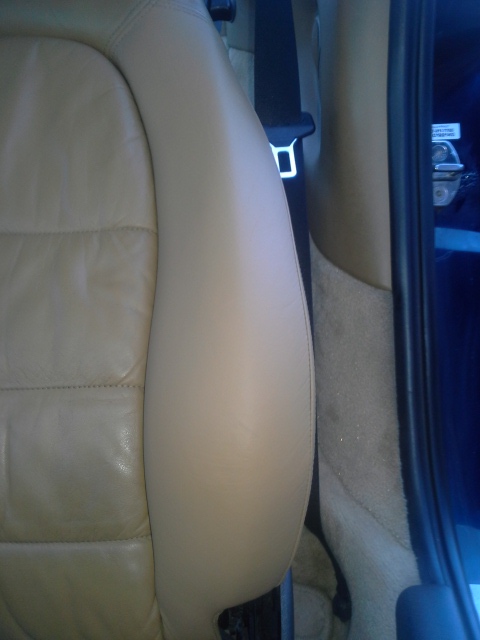
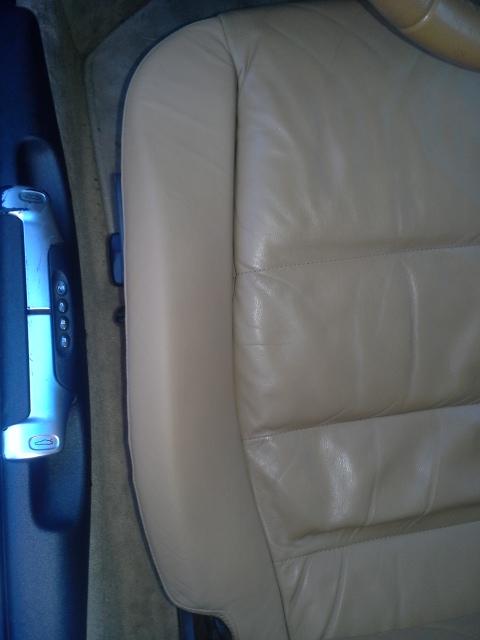
So...That's about it! I did the work over about 5 days, taking my time (I did drive the car a few times in between coats). I'm very happy with the color match, although it's not perfect, it's very close (I didn't expect a 100% match with 15 year old leather seats). The biggest difference is that the new color is is flat, while the old finish has a sheen to it. Leather-world does make a "medium-sheen" finish so I'll probably get some of that and apply it later, if the existing stuff doesn't "buff up"

side/seat bolster

The cracks are emphasized due to being wet with the cleaner...it didn't look nearly as bad when dry.
After applying backing and glue behind the tear in the side/back bolster

After initial application of filler


After second app. of filler and sanding (you barely sand - just enough to smooth. If applied properly it should mostly be smooth anyway)


On the side/back bolster I had to do 3 or 4 coats of the filler, but I'll save you all the photo's- suffice it to say it was all nice and smooth/filled before I started the dye/color.
First color coat on seat bolster

side/back bolster

After two coats

After four (final) coats


So...That's about it! I did the work over about 5 days, taking my time (I did drive the car a few times in between coats). I'm very happy with the color match, although it's not perfect, it's very close (I didn't expect a 100% match with 15 year old leather seats). The biggest difference is that the new color is is flat, while the old finish has a sheen to it. Leather-world does make a "medium-sheen" finish so I'll probably get some of that and apply it later, if the existing stuff doesn't "buff up"


 12-26-2014, 09:49 PM
#5
Rennlist Member
Thread Starter
"Well, I think that looks great - I wonder how durable it will be."
^Yeah, me too^. FWIW, It seems to be pretty tough - basically the same as the original finish...time will tell. While I planned on spraying the last coat or two (I've got airbrush equipment) but it wasn't necessary, I wound up just using the sponge applicator. I wound up getting a few different sizes (especially the ones with the sharp edges) as the large one they give you works great on the flat areas but is hard to work with around the edges and seems - a little "clumsy" if you will.
^Yeah, me too^. FWIW, It seems to be pretty tough - basically the same as the original finish...time will tell. While I planned on spraying the last coat or two (I've got airbrush equipment) but it wasn't necessary, I wound up just using the sponge applicator. I wound up getting a few different sizes (especially the ones with the sharp edges) as the large one they give you works great on the flat areas but is hard to work with around the edges and seems - a little "clumsy" if you will.
12-26-2014, 10:03 PM
#6
Rennlist Member
"Well, I think that looks great - I wonder how durable it will be."
^Yeah, me too^. FWIW, It seems to be pretty tough - basically the same as the original finish...time will tell. While I planned on spraying the last coat or two (I've got airbrush equipment) but it wasn't necessary, I wound up just using the sponge applicator. I wound up getting a few different sizes (especially the ones with the sharp edges) as the large one they give you works great on the flat areas but is hard to work with around the edges and seems - a little "clumsy" if you will.
^Yeah, me too^. FWIW, It seems to be pretty tough - basically the same as the original finish...time will tell. While I planned on spraying the last coat or two (I've got airbrush equipment) but it wasn't necessary, I wound up just using the sponge applicator. I wound up getting a few different sizes (especially the ones with the sharp edges) as the large one they give you works great on the flat areas but is hard to work with around the edges and seems - a little "clumsy" if you will.
Trending Topics
12-27-2014, 10:22 AM
#10
Rennlist Member
Thread Starter
"Nice job. Looks really nice. It looks new. Could you do the rest of the seat? "
First, thanks for all the kind words! With the kit I got for $65.00 (8oz. Cleaner, Dye, leather treatment/conditioner, 2oz. filler, 1 oz. glue/"bonding agent" -looks like white glue to me ) they say you can do an entire seat... Judging by what I used to do the two side bolsters, I think that's probably accurate (my entire seats are leather - obviously if you've got sport seats with the painted backs it wouldn't take nearly as much material). I thought about doing the entire seat, but decided it would be more of a problem visually if the color was off - sort of like chasing my tail if you will...I'm happy with the bolster repair.
I'm also planning on potentially doing my steering wheel,shift **** and my P-Brake as those are a bit worn. My big problem with them is that they're not "damaged" per se'... It's more of patina in their case and I haven't decided if I want the "brand new" look or not... What say ye?
First, thanks for all the kind words! With the kit I got for $65.00 (8oz. Cleaner, Dye, leather treatment/conditioner, 2oz. filler, 1 oz. glue/"bonding agent" -looks like white glue to me
) they say you can do an entire seat... Judging by what I used to do the two side bolsters, I think that's probably accurate (my entire seats are leather - obviously if you've got sport seats with the painted backs it wouldn't take nearly as much material). I thought about doing the entire seat, but decided it would be more of a problem visually if the color was off - sort of like chasing my tail if you will...I'm happy with the bolster repair. I'm also planning on potentially doing my steering wheel,shift **** and my P-Brake as those are a bit worn. My big problem with them is that they're not "damaged" per se'... It's more of patina in their case and I haven't decided if I want the "brand new" look or not... What say ye?
 12-29-2014, 09:25 AM
#13
Rennlist Member
Thread Starter
"That is impressive... pretty amazing results if you ask me... P-Car leather seems particularly susceptible to wear and tear..."
Thanks. I don't think it's "P-Leather" per se'... It's just the seating position (very low) and the way the seats are shaped that makes those particular spots susceptible to heavy wear. Remember as well, that my car is a '99 (15 yrs. old!) and was a DD for 12 -13 of those.
Thanks. I don't think it's "P-Leather" per se'... It's just the seating position (very low) and the way the seats are shaped that makes those particular spots susceptible to heavy wear. Remember as well, that my car is a '99 (15 yrs. old!) and was a DD for 12 -13 of those.
12-29-2014, 01:52 PM
#14
Instructor

Join Date: May 2014
Location: Old Bridge, NJ
Posts: 118
Likes: 0
Received 0 Likes
on
0 Posts
I used a similar product on a Ranger Rover I had. Your results surpass mine. To even out the sheen, I used Connolly Hide Food to treat and condition the leather after it was treated with the color repair. FWIW, it held up well for me.
You did a great job. Very impressive.
You did a great job. Very impressive.
01-02-2015, 02:24 PM
#15
Instructor
Join Date: Jun 2011
Location: Philadelphia, PA
Posts: 116
Likes: 0
Received 0 Likes
on
0 Posts
I've been using the leatherworldtech dyes for a few years now and I'm really impressed with how well they hold up. I did a steering wheel on our daily driver about two years ago and it's still like new. I recommend doing the whole seat or both front seats as I tried just do a bolster and it just didn't match up perfect.
Another nice thing is that on lighter leathers, it touches up and blends easily so if you want to do an annual refresh, it's easy.
I also highly recommend the sponge for application, multiple light coats. I find spraying or brushing just left an unnatural grain. P.S. works great on perforated seats too. One tip, if you do a repair on a perforated section and lose a few of the holes, get a super small drill bit to re-create the opening (by hand of course!).