When you click on links to various merchants on this site and make a purchase, this can result in this site earning a commission. Affiliate programs and affiliations include, but are not limited to, the eBay Partner Network.
Still got a lot to do...RMS, flywheel, clutch, prime the fuel rails (all empty now), and purge the old fuel from the car.
Spent $150 to polish and balance the old 100k flywheel and pressed in a $35 OE pilot bearing... only later on (much later) to find out a brand new LUK flywheel (with a new pilot bearing pre-installed) can be had for less than $400 shipped to your door! Check out Partsgeek, lightning fast shipping.
Of course, I splurged and got a new FW for this build. Will reuse the clutch disc and pressure plate though as they still have lots of miles left on them.
Sell it here !The shipping cost will be significant but you have all the correct packing from your new one.
Awesome pictures....what are you going to do with it when you are done? Swap it out with the engine in your car? If so, what are you going to do with that engine? Just curious. I don't think you have (2) 996's.
Sell it here !The shipping cost will be significant but you have all the correct packing from your new one.
I think I will have a few (good) parts to sell after this rebuild.
Originally Posted by Paul Waterloo
Awesome pictures....what are you going to do with it when you are done? Swap it out with the engine in your car? If so, what are you going to do with that engine? Just curious. I don't think you have (2) 996's.
Thanks! I plan to put it back on the roller and drive it for a while. That's exactly why I bought Cringely's roller as opposed to a broken engine without a chassis. It was well thought out
Thanks! I try to keep it clean and organized especially for the engine rebuild. I like my stow away workbench under the workbench, saves a lot of space and doubles my workbench area when needed.
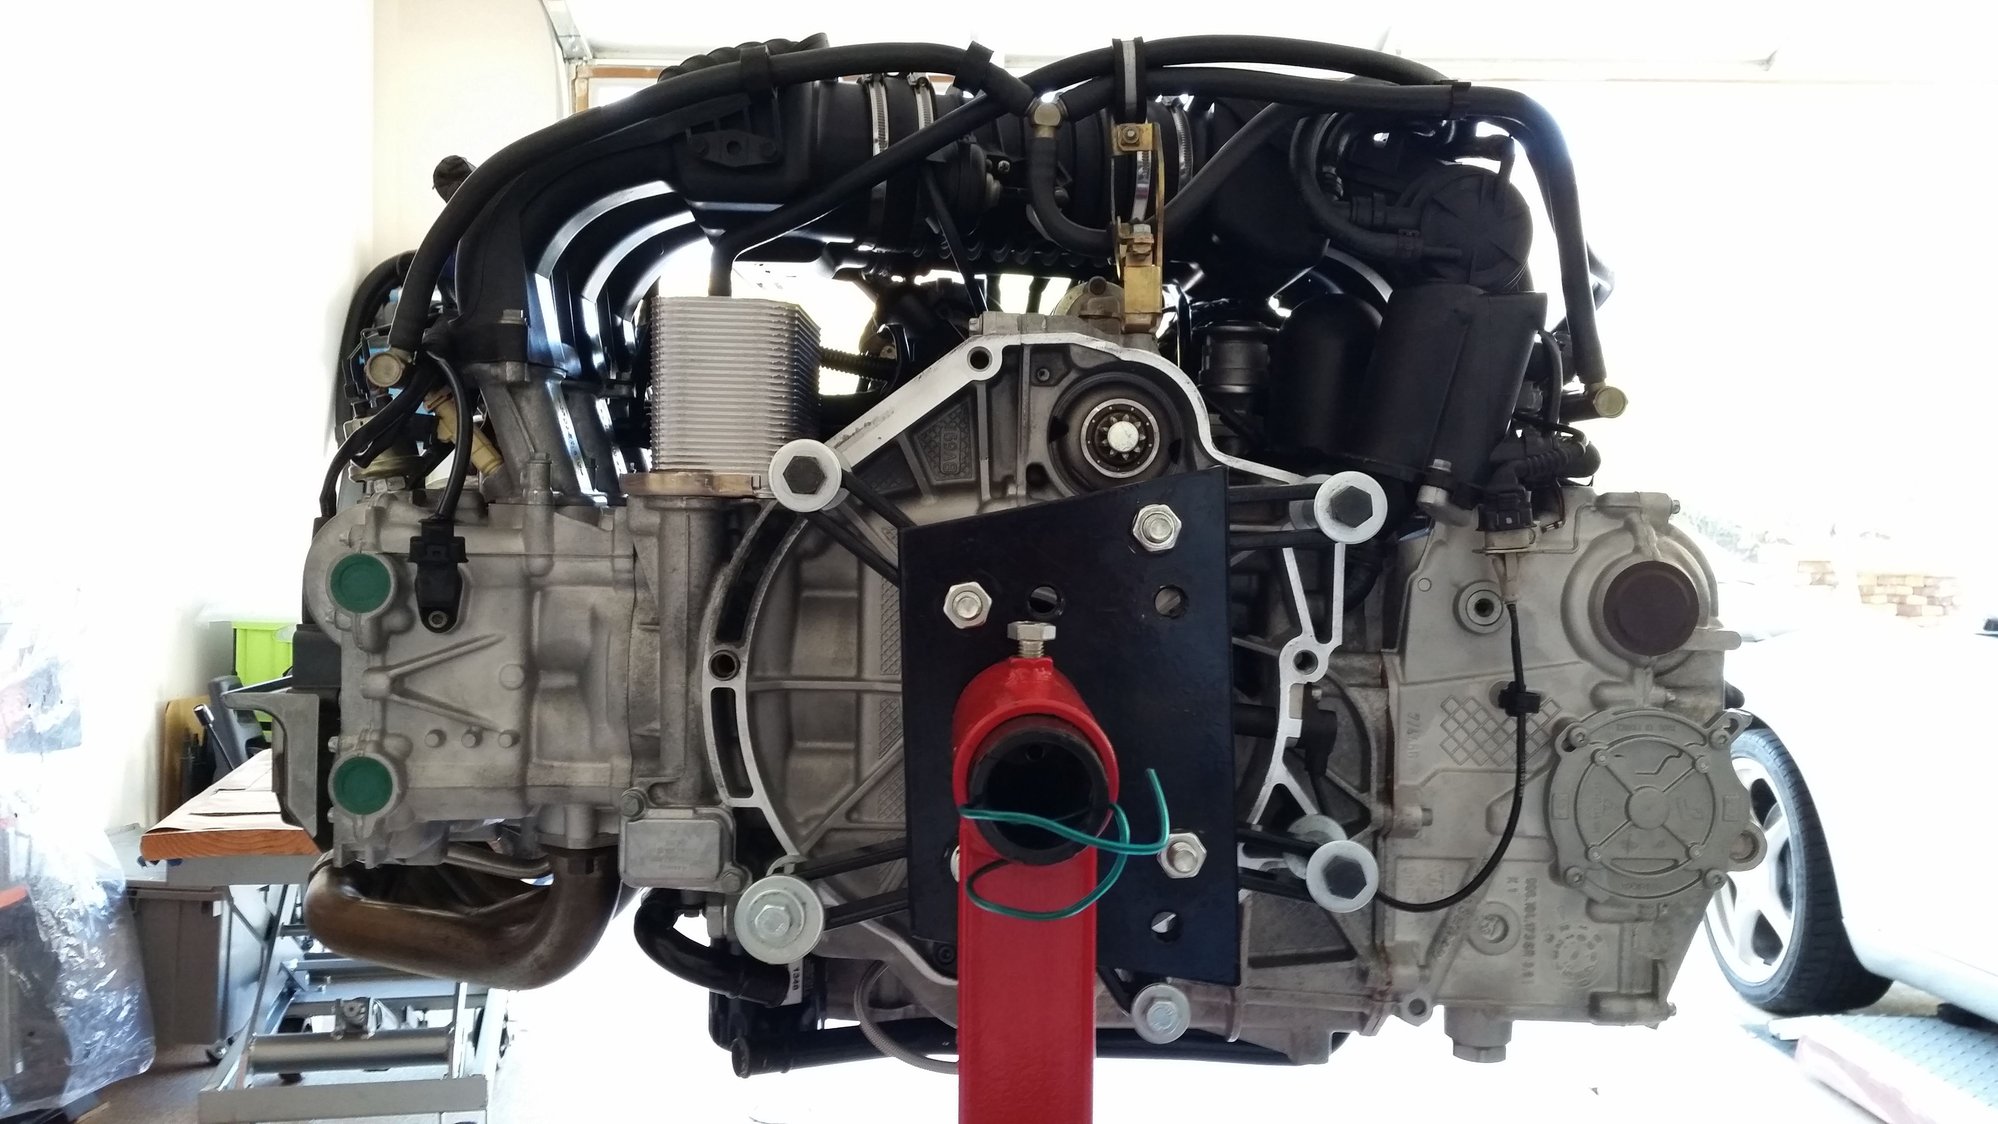
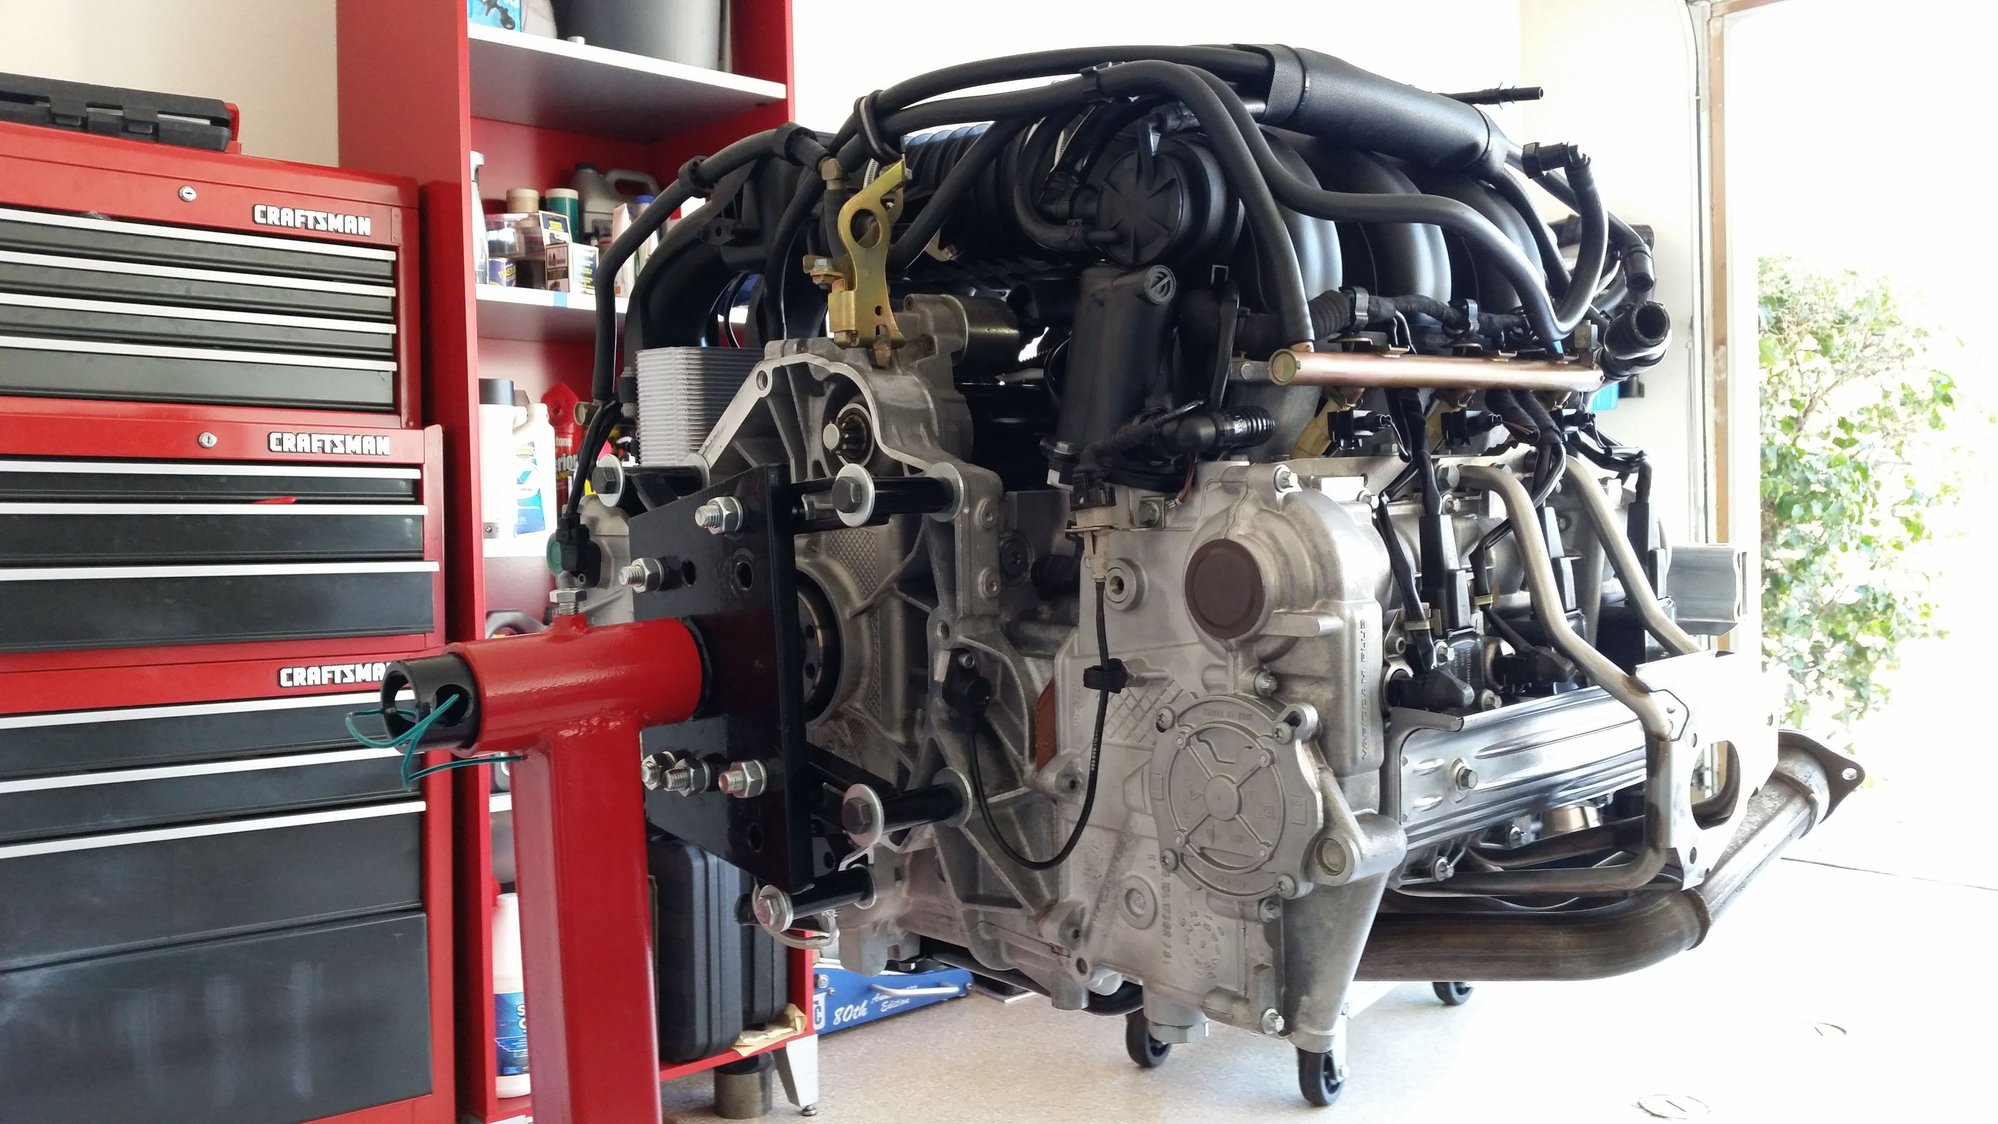
A few photos of the rear of the engine.
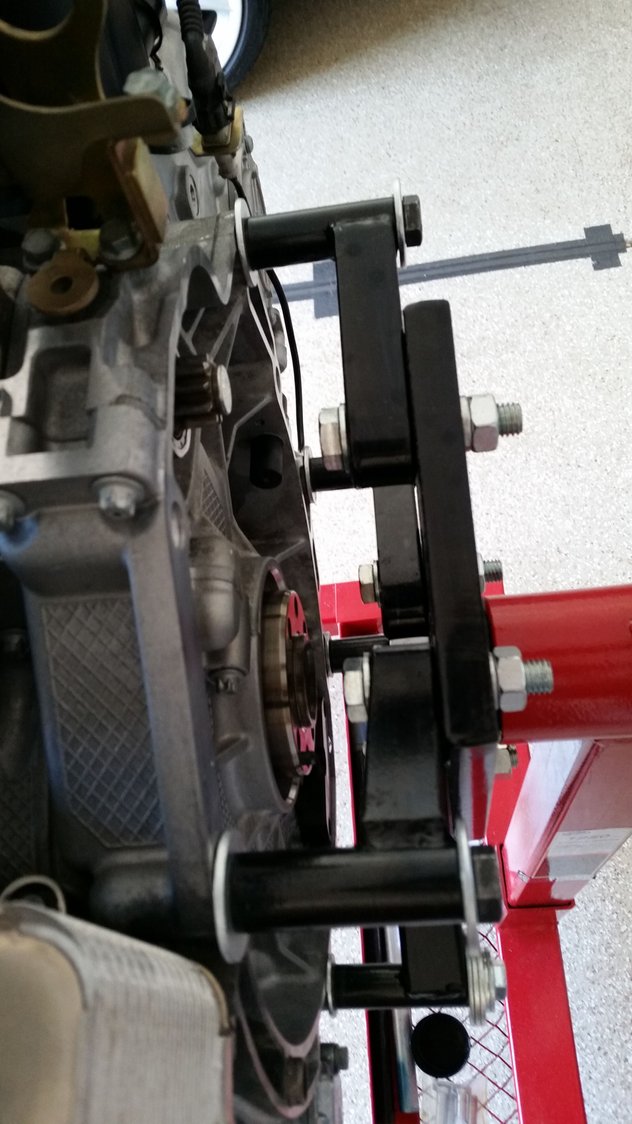
Mounted to the stand with 5 arms.
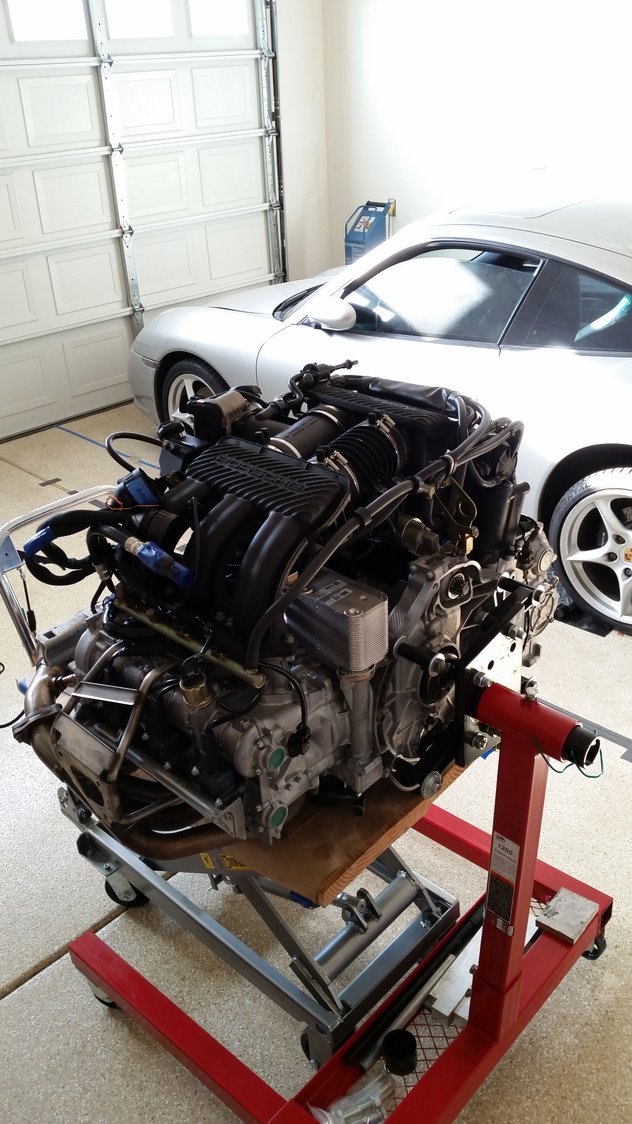
Engine supported by the hydraulic table when not being worked on.
If you don't have the hydraulic cart, a HF scissor trans jack works. Note he uses 5 points of attachment between the stand and the engine. Often you see only 3 ! I used 7 by fabricating extra arms. I used threaded stud, not bolts.That way you can thread the stud all the way into the engine(all the way through the flange in some cases)Use nuts to secure to the stand arms.
The reason for this is that as a noob I had no idea about the risk of 'pulling' or distorting the threads when rotating a fully dressed engine.
You also see people use cheapo 3 leg stands (!) instead of the H frame as in the photo. Just think about the weight transfer issue when rotating or moving the stand if you hit a bump !
I used one of these: https://www.amazon.com/2000-Heavy-Fo.../dp/B000L9LLHG
Sorry I triggered this 3 vs 4 vs 5 vs 7 arms discussion Personally I prefer more arms to spread the stress but that's just me. I like the threaded studs idea. All my mounting bolts are very long so I'm probably not too far from the studs method.
If you don't have the hydraulic cart, a HF scissor trans jack works. Note he uses 5 points of attachment between the stand and the engine. Often you see only 3 ! I used 7 by fabricating extra arms. I used threaded stud, not bolts.That way you can thread the stud all the way into the engine(all the way through the flange in some cases)Use nuts to secure to the stand arms.
The reason for this is that as a noob I had no idea about the risk of 'pulling' or distorting the threads when rotating a fully dressed engine.
You also see people use cheapo 3 leg stands (!) instead of the H frame as in the photo. Just think about the weight transfer issue when rotating or moving the stand if you hit a bump !
I used one of these: https://www.amazon.com/2000-Heavy-Fo.../dp/B000L9LLHG
Yours a great engine stand. I just don't have enough space so I ended up with my straight "H" type. Also I need the wide inside opening so I can roll the hydraulic table up all the way to the mounting plate.
I actually worked with that guy in Ontario to design & make that yoke.Prior to that he did not have an M96 yoke - just VW and other air-cooled. But I was impatient and just cobbled up my own .That is part of the reason I had so many studs. Better more than required than not enough.BTW ,it looked awful !
But just imagine what could happen if you flip a fully dressed M96 and the 3 stud yoke starts to bend..... There is huge cantilever force on the bolts/studs. Hence the suggestion for a trans jack under the pan or the lifting table Ahsai has.
Another mistake I made - greasing the neck of the yoke. The engine is unbalanced when you flip it in some positions of the rotation. And I did a really good job greasing...... no, you do not have the strength to restrain it when it decides to rotate more than you want ! So leave the yoke dry. Once you have greased the yoke and the engine is partially complete, it is really tedious to dismount it & remove the grease.
It is just theory.Some of us are super cautious and meticulous with the M96 ,some not. If it had been a Miata engine I would have been much more casual.
For reference ,look at some of the photos Jake has kindly submitted of his engine stands & ignore my anecdote. Most of Jake's yokes to be bolted to a huge bench !
Yours a great engine stand. I just don't have enough space so I ended up with my straight "H" type. Also I need the wide inside opening so I can roll the hydraulic table up all the way to the mounting plate.
Good point about the tapered legs + the hydraulic table.
I used my old Wudel trans jack to lift and position first the engine and then the trans(Boxster S) .For the 996 lifting the complete assy. with a hydraulic table is a much better idea.Some have done the same with the Boxster -in the Jet videos I posted for example.
I put some 2x4's across the top of the legs to support the HF trans Jack .And a piece of plywood under the pan .
*What would be REALLY interesting would be an engine test stand and associated equipment for the M96. Dealing with little problems after installation is tedious because of access.
I hope others who rebuild the M96 find these few suggestions helpful.
 01-17-2017, 12:44 PM
 only later on (much later) to find out a brand new LUK flywheel (with a new pilot bearing pre-installed) can be had for less than $400 shipped to your door! Check out Partsgeek, lightning fast shipping.