When you click on links to various merchants on this site and make a purchase, this can result in this site earning a commission. Affiliate programs and affiliations include, but are not limited to, the eBay Partner Network.
I've got a ? Jason, do you think you might have a issue with trans pump having same size lines on suction side as the pressure side with the viscosity of trans oil ?
I've got a ? Jason, do you think you might have a issue with trans pump having same size lines on suction side as the pressure side with the viscosity of trans oil ?
Not something that I have really thought about but not sure why there would be an issue.
The pump is designed for gear/trans oil - Tilton relays pump should not be activated until some heat has been put into the oil (I'm not sure I am actually going to follow that direction). The lines are the size Tilton specifies so...
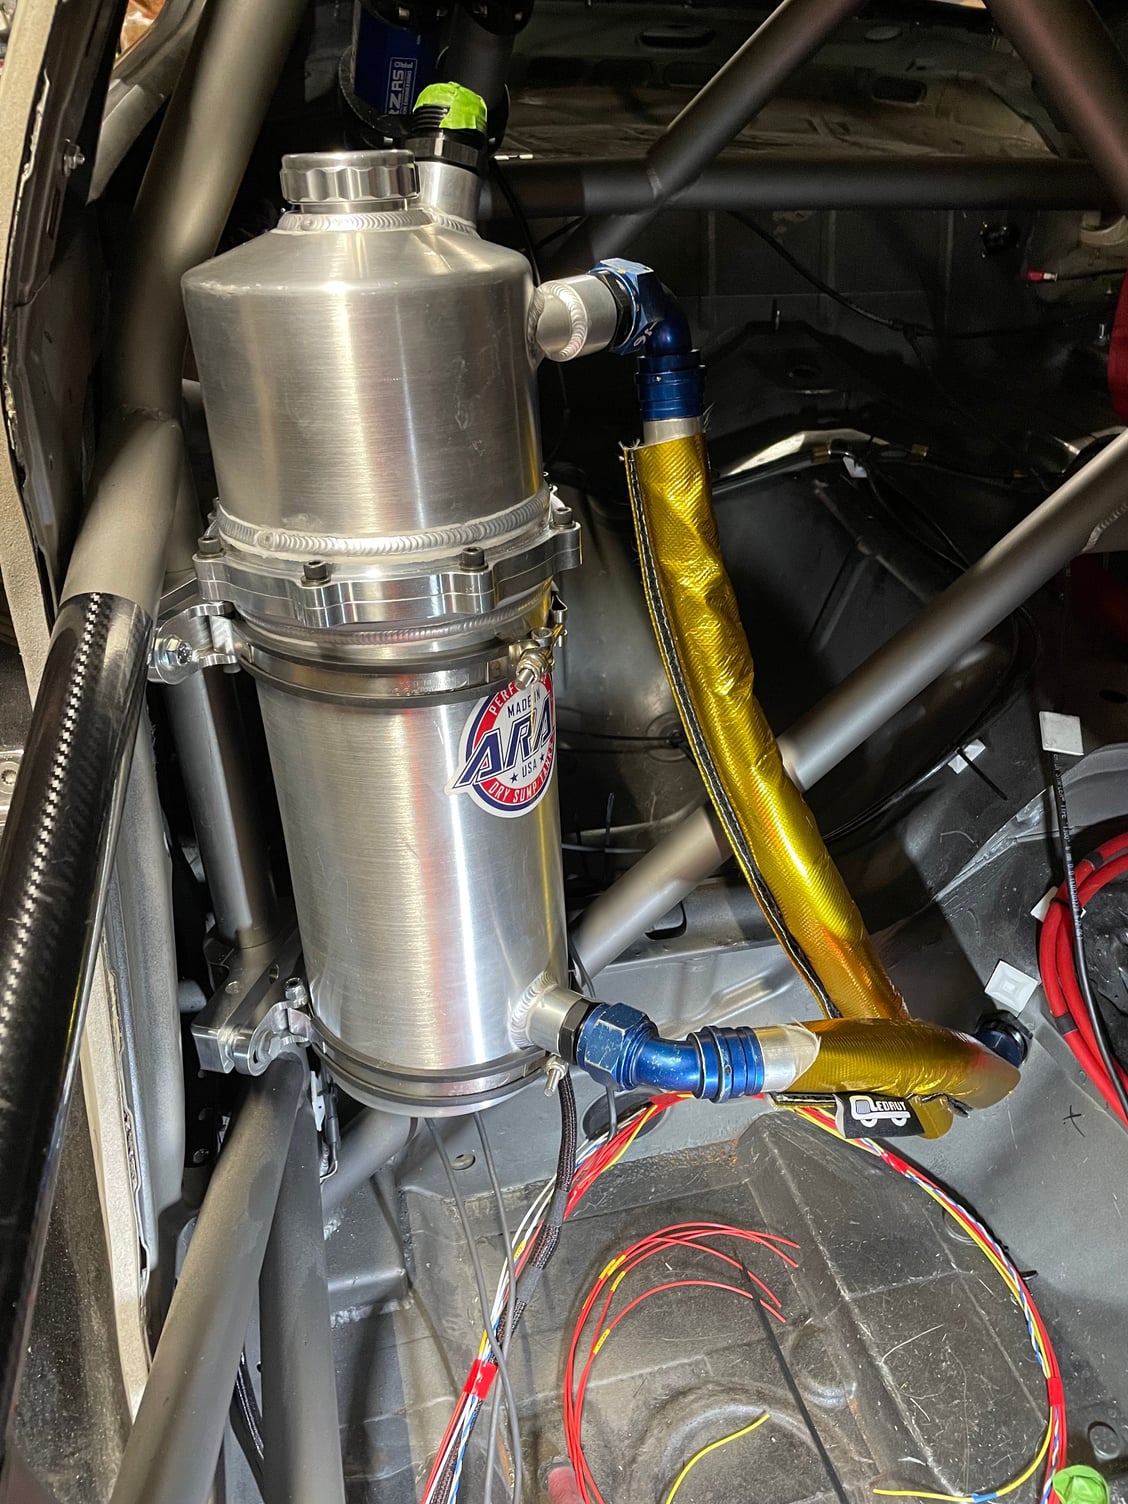
The end of the mount the dry sump tank problem is here and I am relieved. If you will remember, I used mock-up parts to mount the tank and get the lines situated. Then, Aaron said he would make the mounts and we (very much mostly he) came up with a design to take the place of my mock up stuff. Well - when the difference between work and don't work is so fine as with the 2 shorter lines (feed and return), it takes very little to bring you back to square one.
So, today I fitted the mounts and got the tank mounted, although it is not in the same place it was, it is in the same'ish place enough so those 2 lines still work.The tank mounting strength well exceeds anything I can imagine it having to endure so I will not fear it becoming a missile in the cabin should I take a tumble.
There are a couple parts on the car that are a tad unique or hard to find and are needed to get the recipe I want, but these mounts are literally one of one and the only solution to accomplish what I wanted, so, without Aaron making them the entire dry sump system would have to be revised.
Between these mounts and all the stuff MaAaron has helped with and days he spent here helping, Yaz knocking the display mount out of the park, DelewAaron getting more done in an evening than I do in a weekend... I'm super lucky to have these guys as friends and their help with the project - you guys rule.
I've got a ? Jason, do you think you might have a issue with trans pump having same size lines on suction side as the pressure side with the viscosity of trans oil ?
That's not going to be an issue. I run -8 lines from my gearbox to the gear oil pump, and to the heat exchanger, and back to the gearbox with a pair of dry-break fitting thrown in for good measure. Total line length on my setup is over 15 feet. These little pumps only push a small amount of flow. My setup works great and keeps gear oil around 185 at worst, without it gear oil would get to 260+ easily.
Me too man, Men ! To say I am disappointed its not running now, would be accurate. But... One thing this project has really highlighted is, I was, am... in no way qualified to to say "this should take this long"... for MANY of the tasks I've undertaken. I assess a task, think about what the likely hurdles will be, attempt to mitigate them before I start and then get after it. But I have found sooooo many times, hours get chewed up dealing with stuff I did not consider, need to make a run to HD or Oreilly - there an hour or 2 of a day lost. Need to buy parts on the internet, that task extends a day to a week. And when I tell you, its a lot of parts and tools to do this, not big stuff but hardware, adapters, fittings, brackets... the small things have stopped me dead in my tracks on more than a few occasions. Couple that with the... there is no instruction, no I'll just go look up how to do it on youtube... figuring out how this or that will mount, what direction should it face, does it need any isolation damping or heat shielding, will it compromise safety, will it be difficult or impossible to service, how often do I think I will need to service it, are there spares available, will it prohibit mounting of that other thing and on and on and on.
It's been mostly fun, but man has it taught me a lot of ways I suck at building a car - not that I want to but I think if I were to do it again, it would be a lot more fun than this time.
Hopefully I will satisfy your and my excitement pretty soon. Thanks for the support along the way, I do really appreciate it.
I think your progress is pretty good -this is far more sophisticated than your normal ls swap .All new electrics /electronics -new oil system -new cooling subsystem .That is a lot of stuff .
So... goals for this weekend for were for the engine bay cooling system to be done and to finish the wiring.
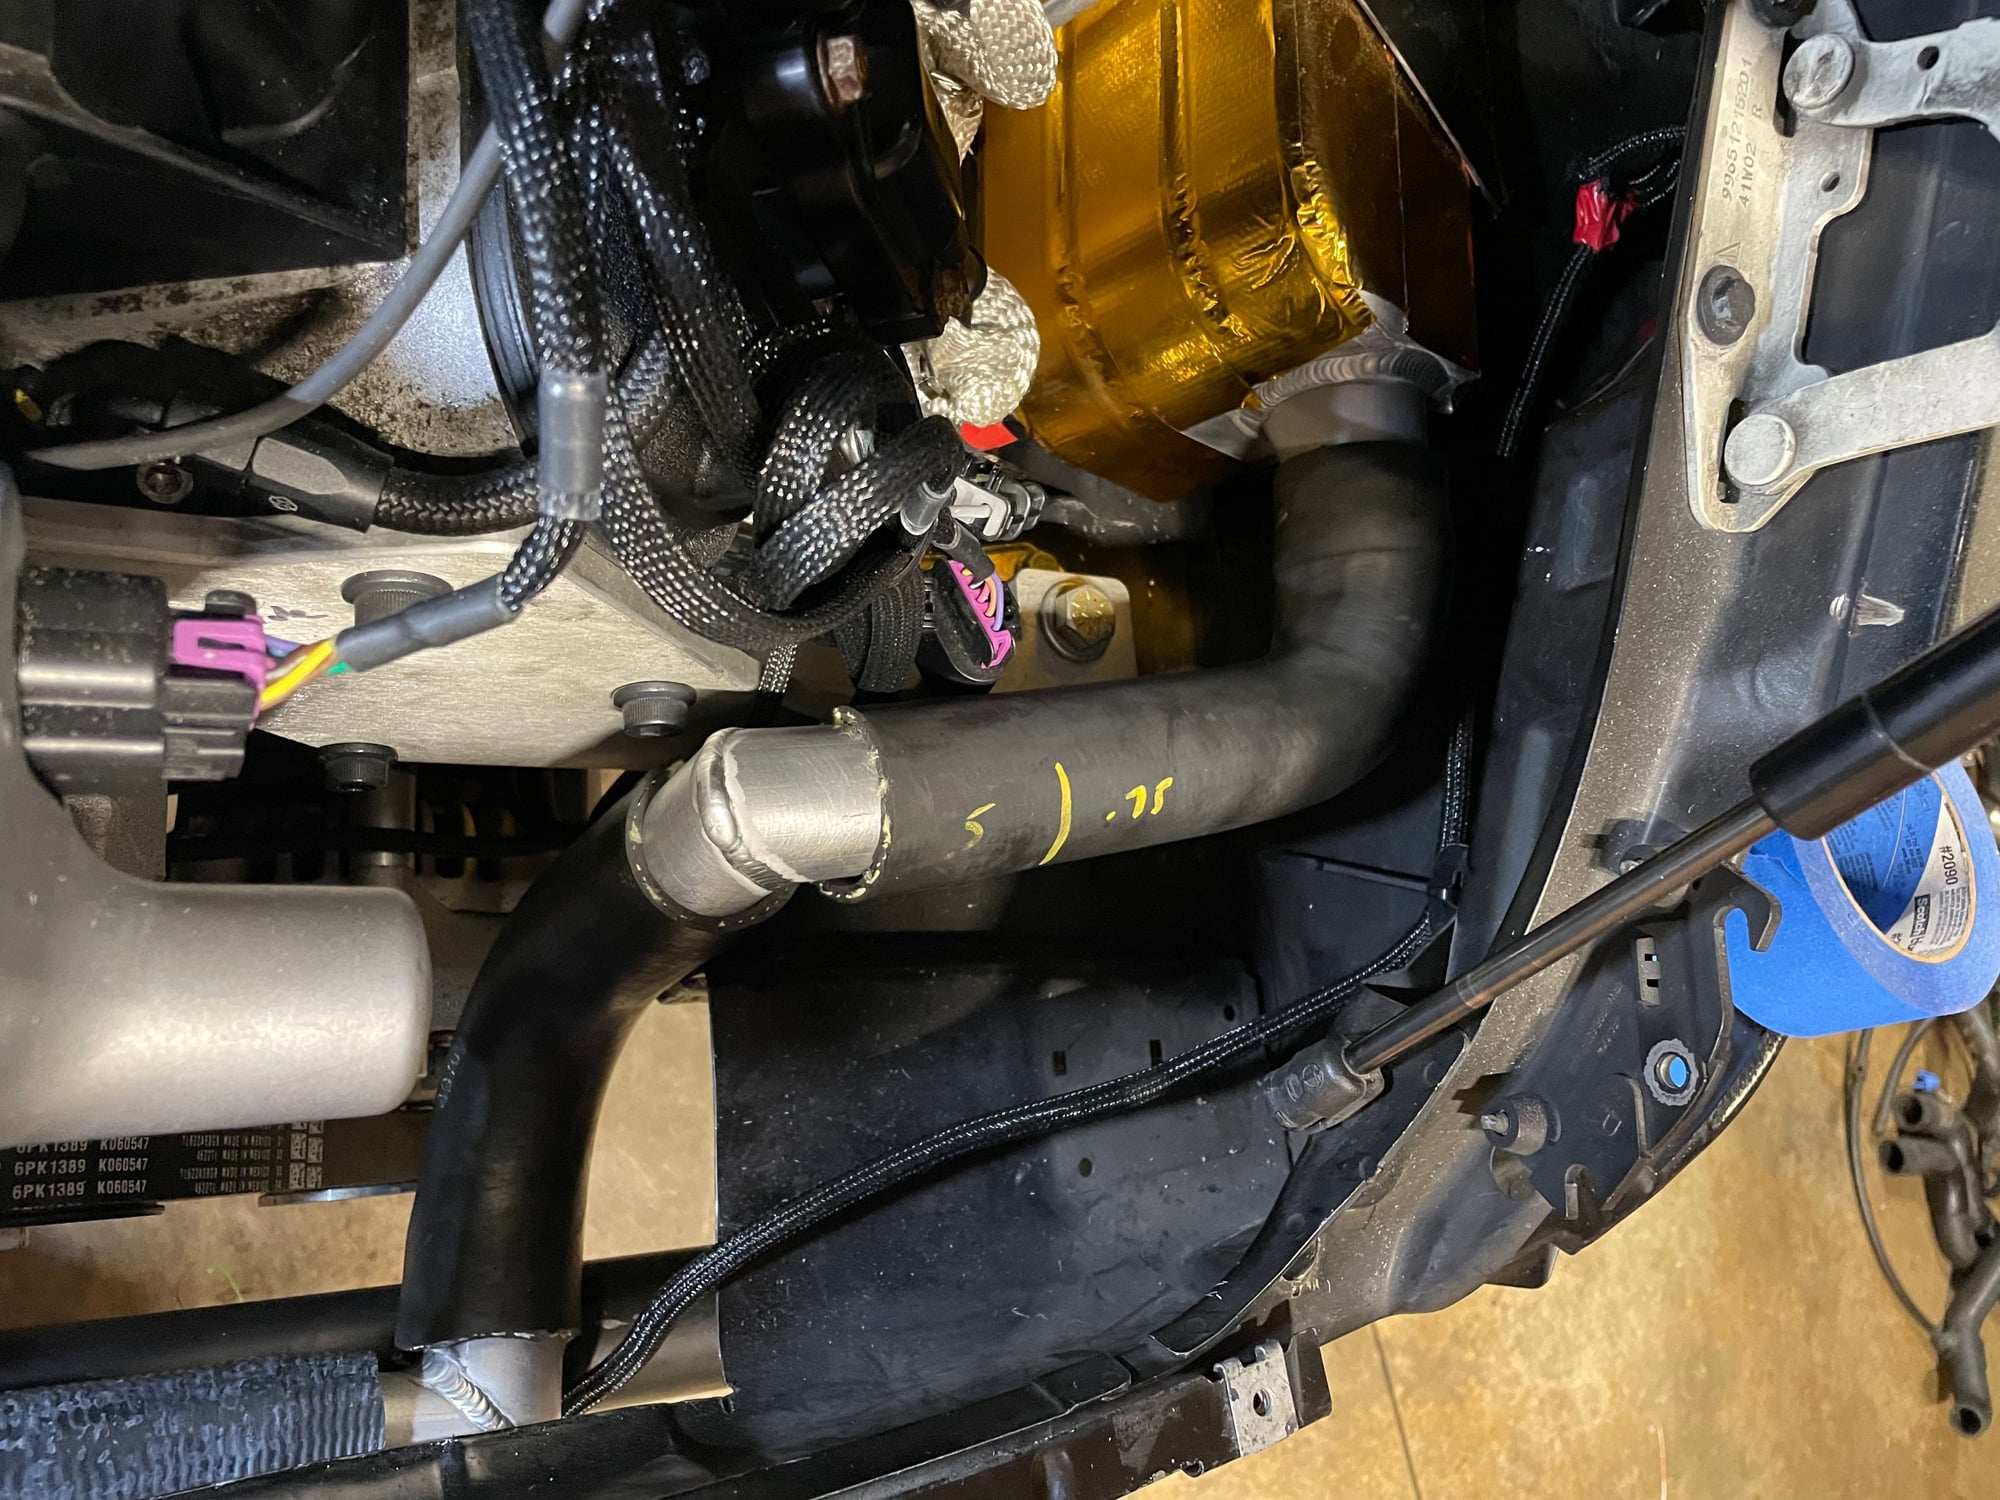
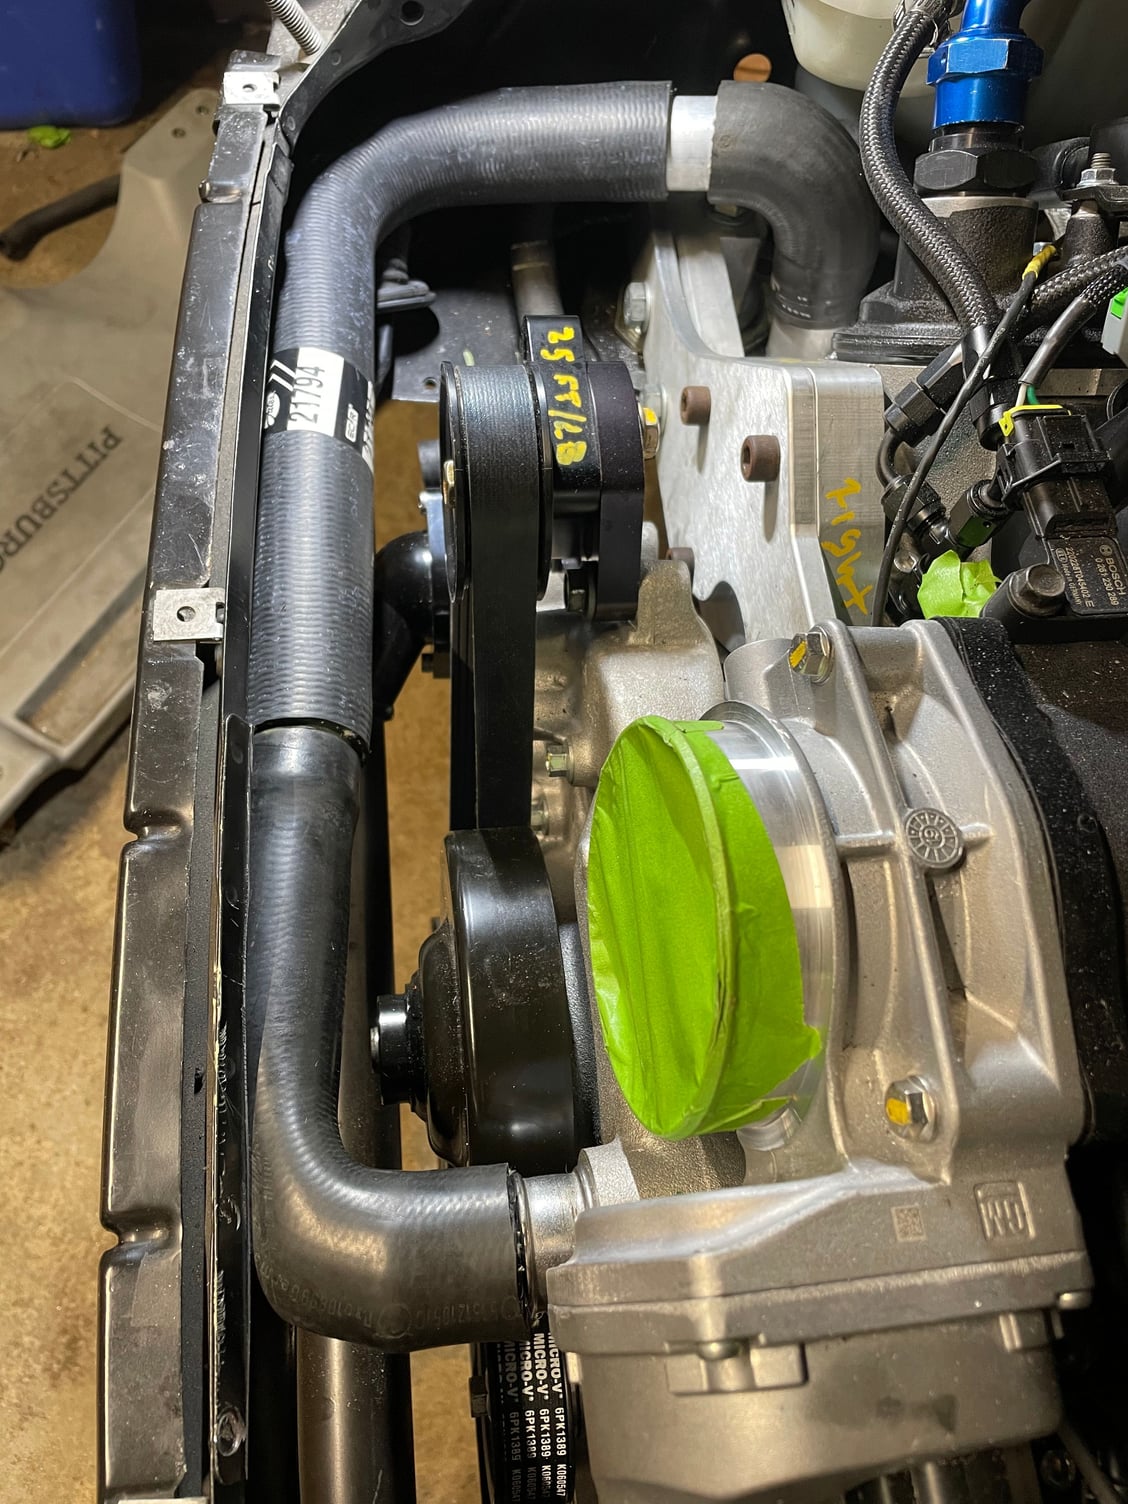
Started working on the engine bay - got a setup I am really happy with BUT... I didn't have all the parts to make it work, I bought 2 of these 90 degree aluminum fittings, 1.5 and 1.75... turns out I needed 2 1.5 and none of the 1.75 - Doh... Back to amazon and the completion of this job will drag to mid week. That said, I did get it all mocked up by moving the 1 fitting I had around and I think it's going to work really well.
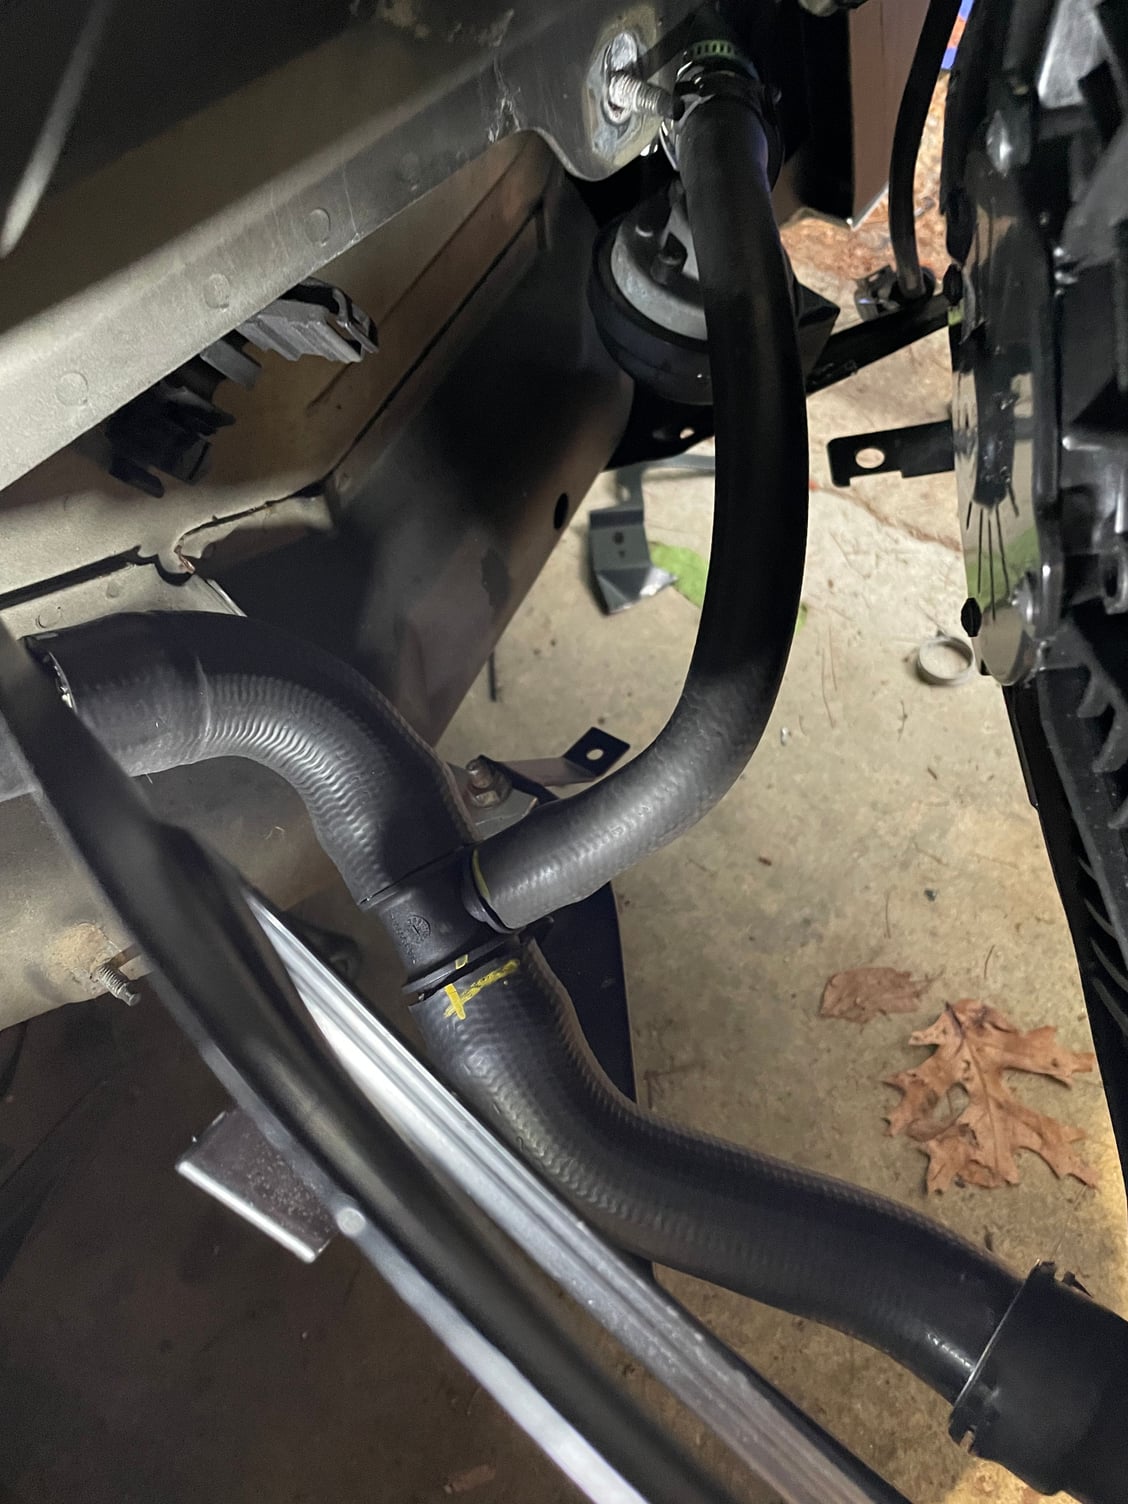
This is the return, cool thing is it utilizes the factory alum coolant pipe (hidden). I cut a section out of the factory rubber hose to steal the special fitting to connect it and lego's from there.
And this is the feed coming from the oil cooler into the thermostat housing. That hose that runs along the bash bar is a portion of a hose I got from Oreilly. I went there with the shape I needed and went through their wall of hoses to find something that would work. Most if not all the other hoses are from MaAaron's stash of many, many totes of cooling hoses (his collection is impressive, and helpful )
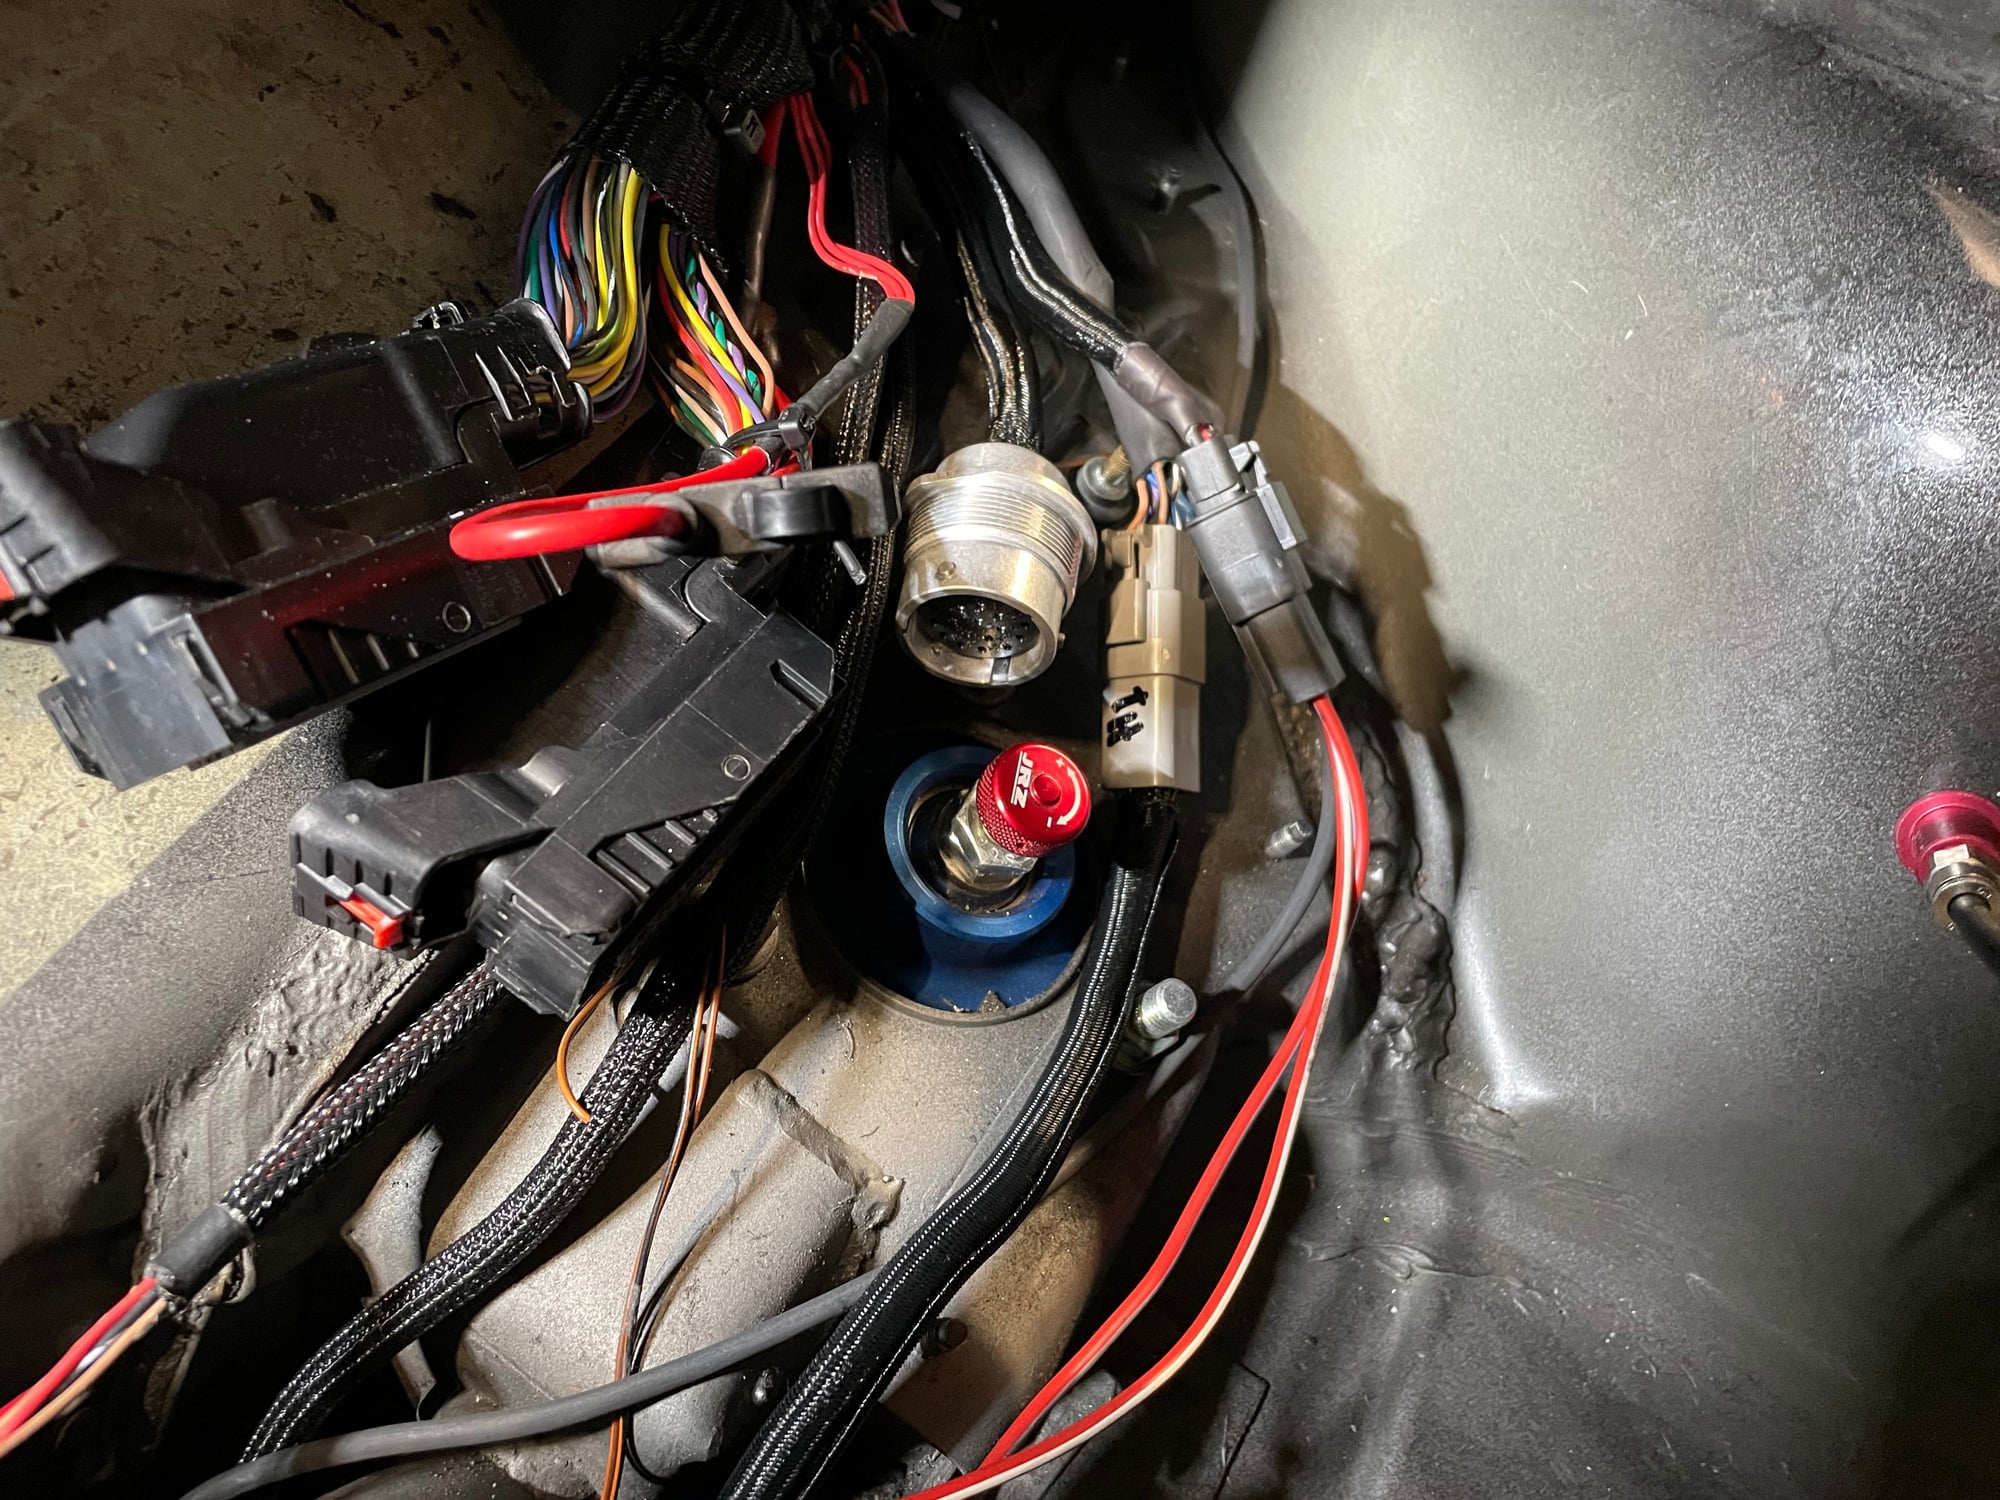
On the wiring front, I had to pull the harness back into the engine bay to have some room to work on it. I cut out and made safe all the wires that are not going to be used. I terminated connectors for throttle pedal, high power starter and injector/coil and chassis harness stuff that will run through the PDM. Heres what it looked like when I got it back in the chassis and most of the mating connectors on. I was supposed to finish the wiring... all of it, but you will notice in the pic below the circular connector doesn't have a mate - I got distracted and mis-pinned it, first one of this adventure and I don't have the extractor tool ,so now I need to wait a couple days for that to come in or see if I can borrow from work, soooo close. The 2 big *** connectors are to the ECU and when I figure out how to mount the ECU on the rear pass inner fender, they will get plugged in .
Lastly, back to the cooling system - clearance is tight for the line that will run to the expansion tank, this goes to a heater core fitting on the water pump - found a trick fitting that will angle up 45 degrees and should be the fix to my problem. The process of getting the fittings removed and tapped on the LS water pump was semi nightmarish... I think I threw 3 hours at it today and still need to tap the 3/8NPT hole for the plug. No pics of this until its done... Youtube made it look soooo easy - I guess I am no youtube mechanic.
Still waiting on some important parts to arrive from the dealer for the cooling system in the front of the car, and all the misc stuff from above, I'm closer, just not close enough.
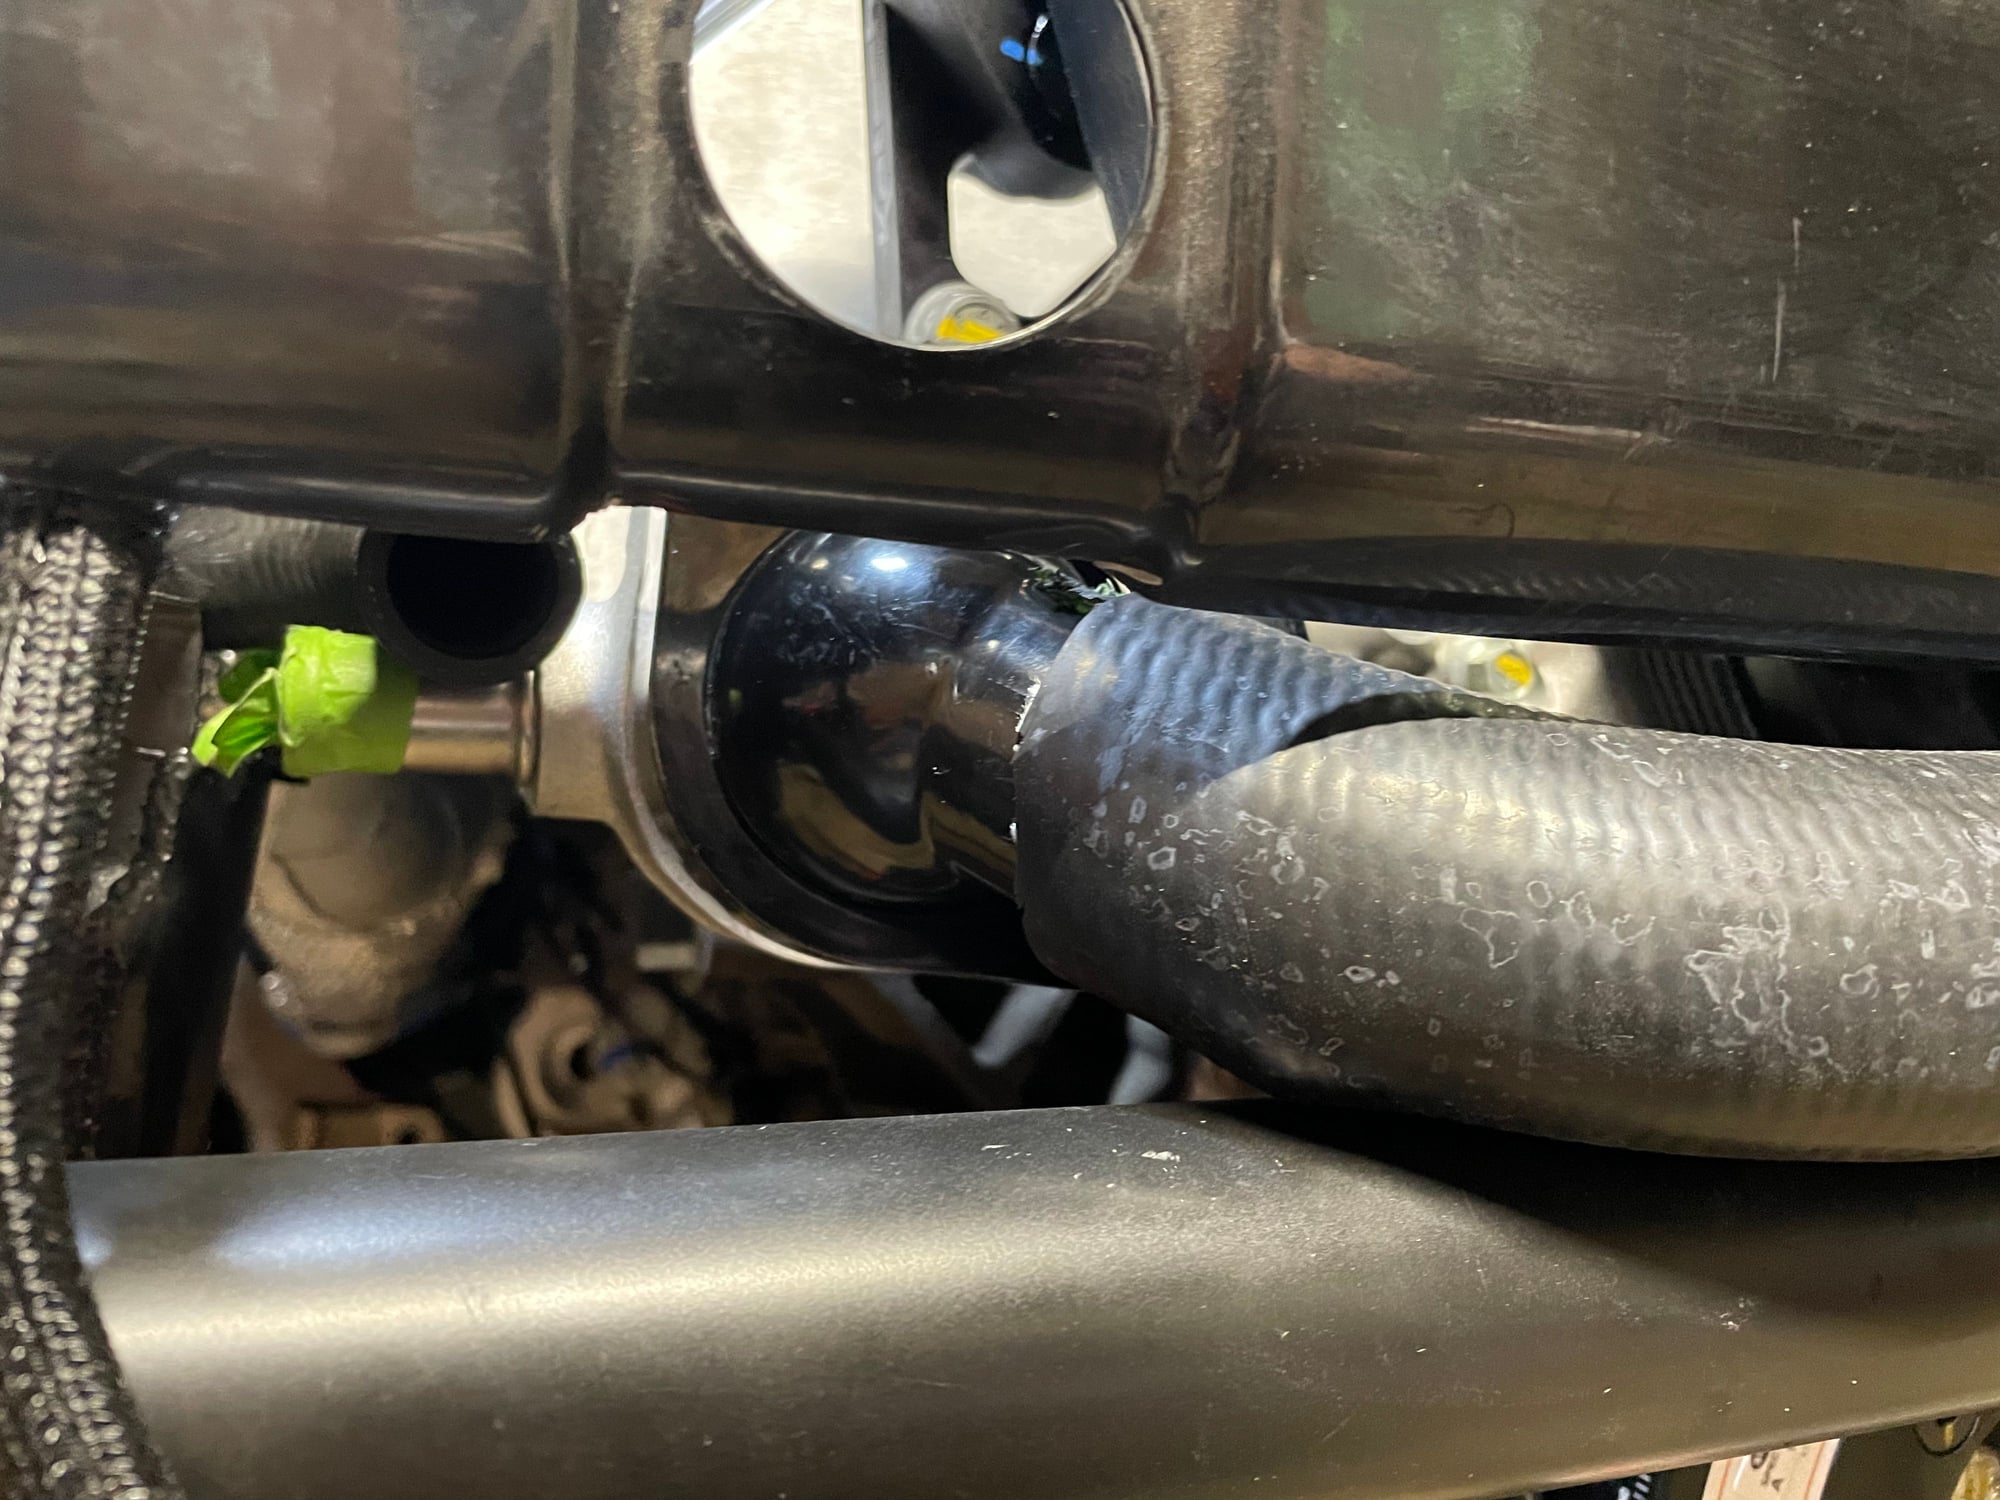
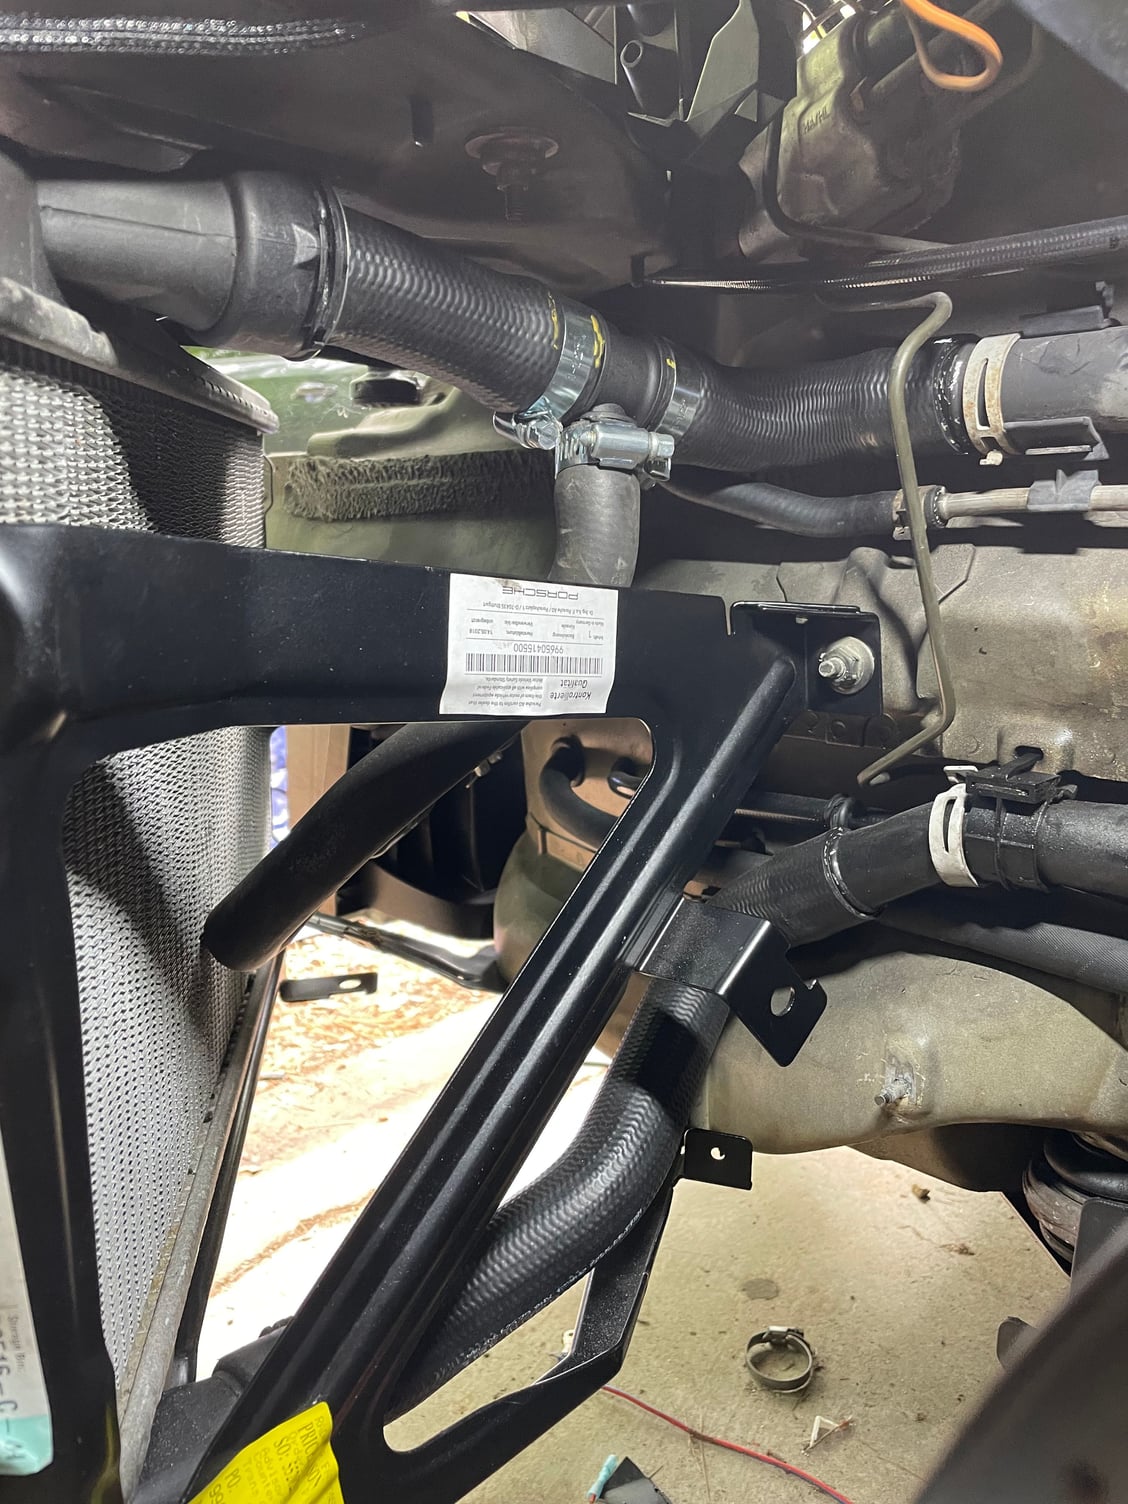
Not a full update... just an I'm excited update. This is the pass side cooling system plumbed including the run to the 997 turbo center radiator... This is a big step and I have the parts on hand (except for stupid 997 center rad omega clips, hopefully dealer has them) to button the other side up tomorrow. That will complete the cooling system And Aaron helped me a ton, he is really quite good at solution finding. And on another note, neither him or I really understand why people bother upgrading C2 radiators when the turbo stuff is really quite close to bolt on and absolutely dwarfs the C2 parts. It's hilarious, if you look at the front end now without the bumper on it is absolutely dominated by radiators, the center turbo rad is also stupid big.
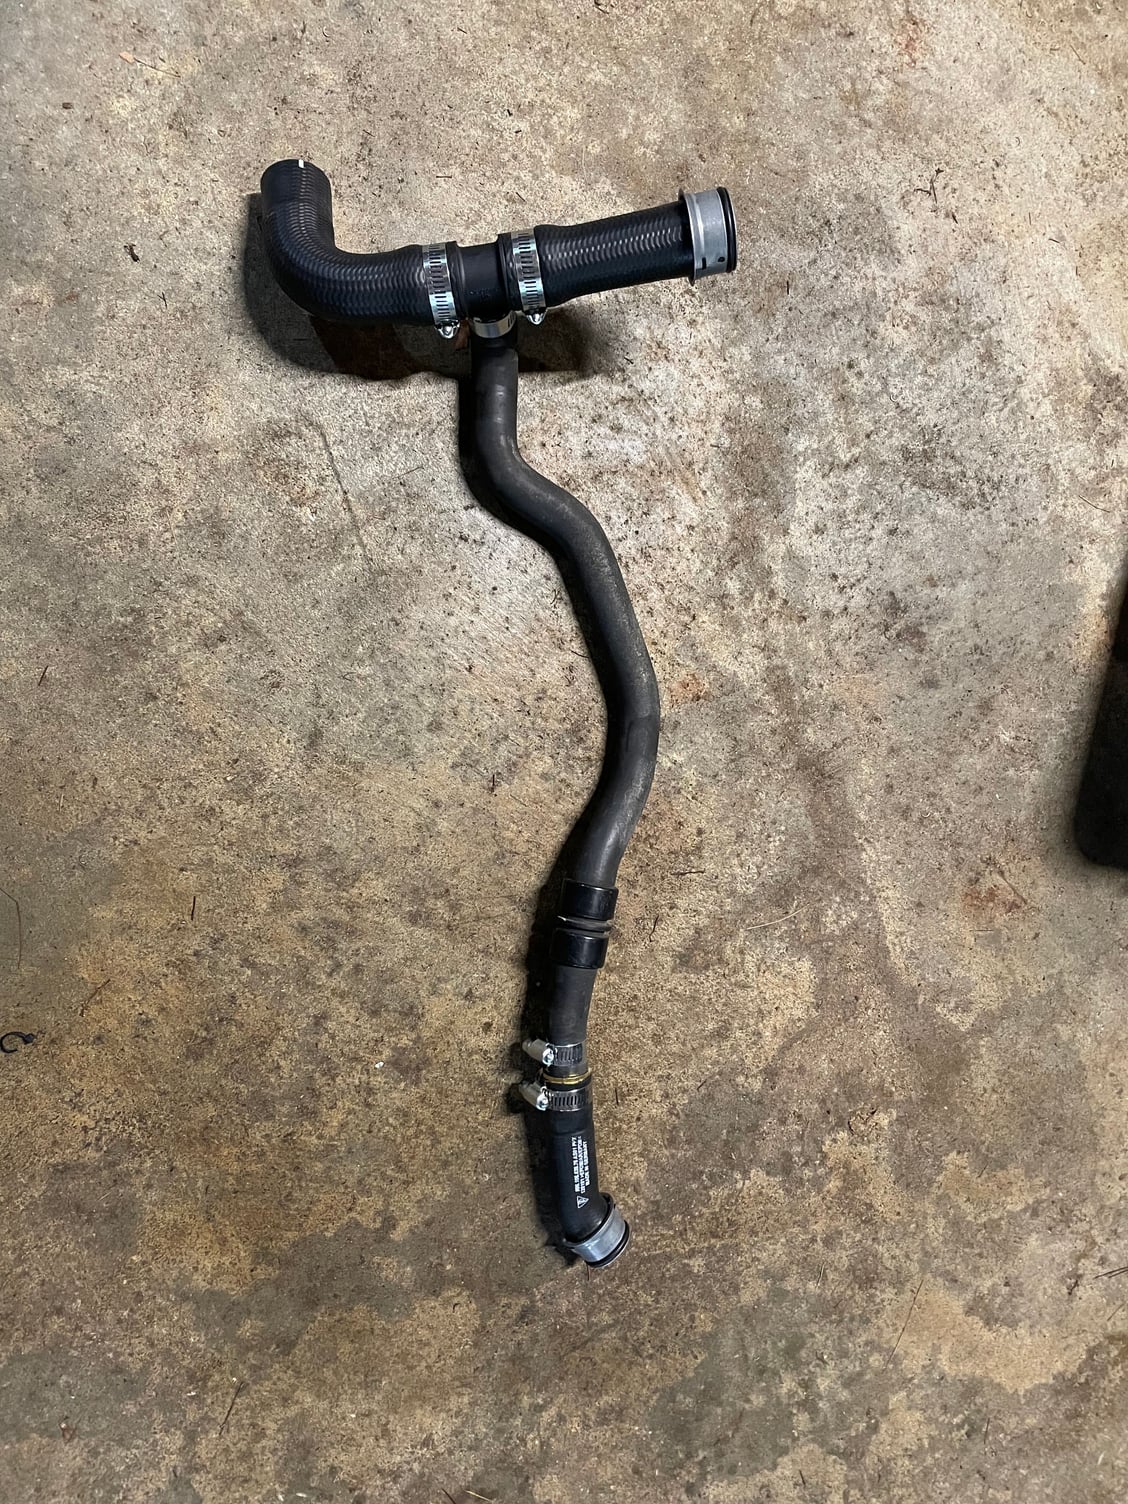
As you can see from the post above, the cooling system was coming together nicely - at this point I just need the 2 center rad clips and it's ready to fill with water. Here are some more pics of the rad hose setup for the front.
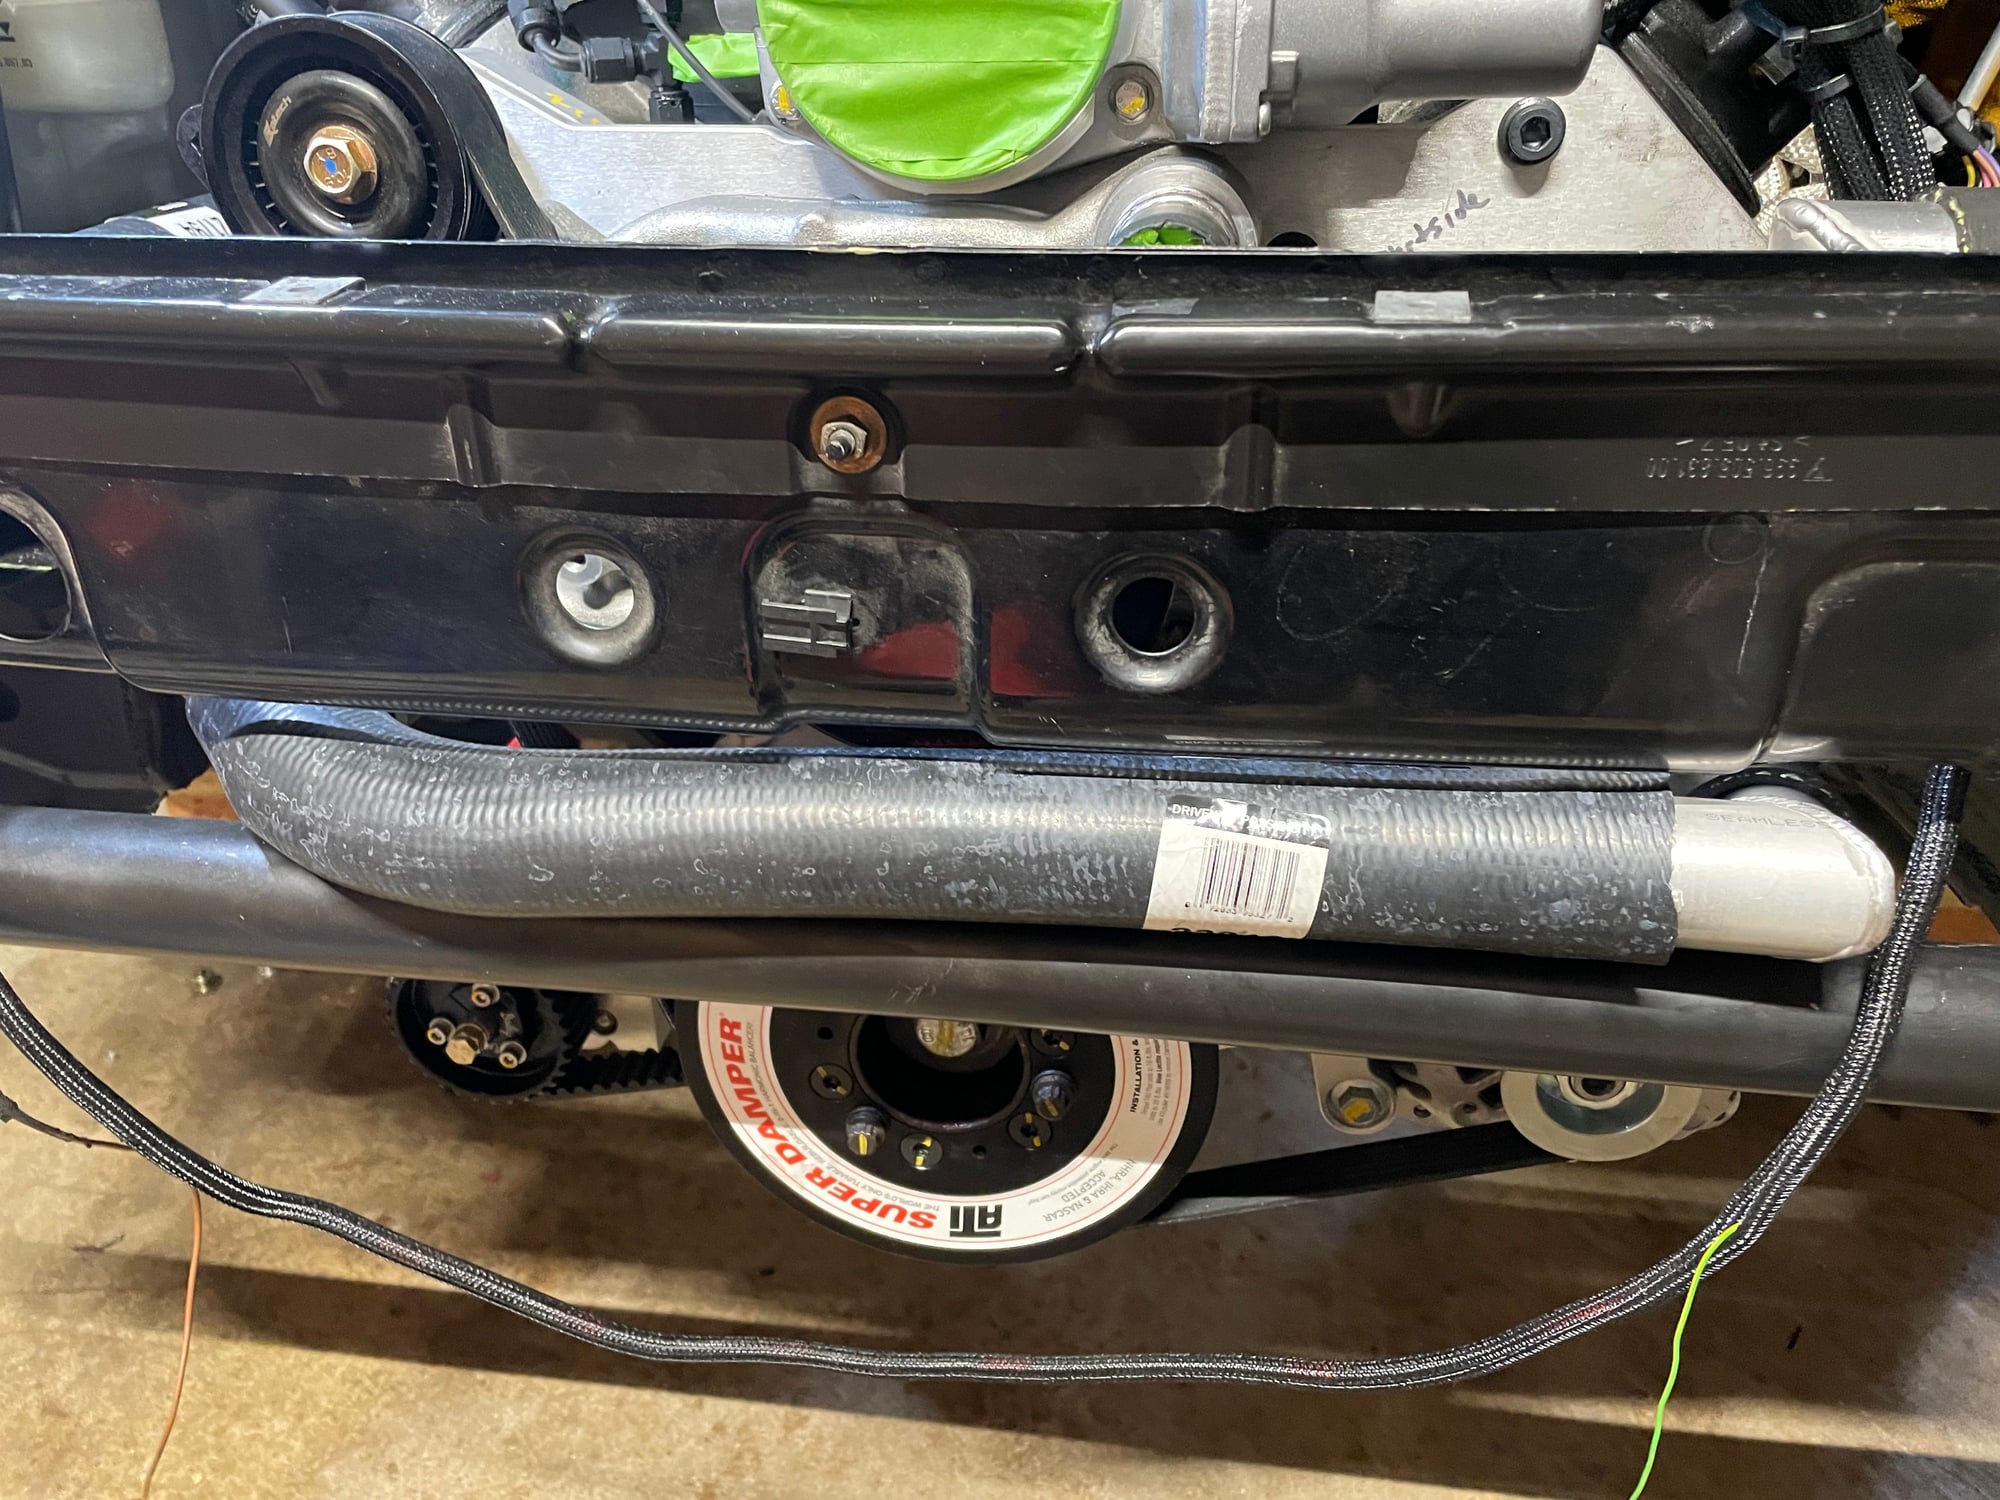
Drivers upper rad hose.
And installed on the car, these hoses came out really nice, I'm happy.
Next up was not documented with pictures. I had to go back into the steering rack to get the high pressure line fittings tightened. In my stupidity during installing, I forgot that the lines are not retained from turning when in the rack, so that line needs to be tightened with a couple wrenches, I managed to get this done in the car by removing the low pressure line to facilitate access, this took a long time. Working on the steering rack blows.
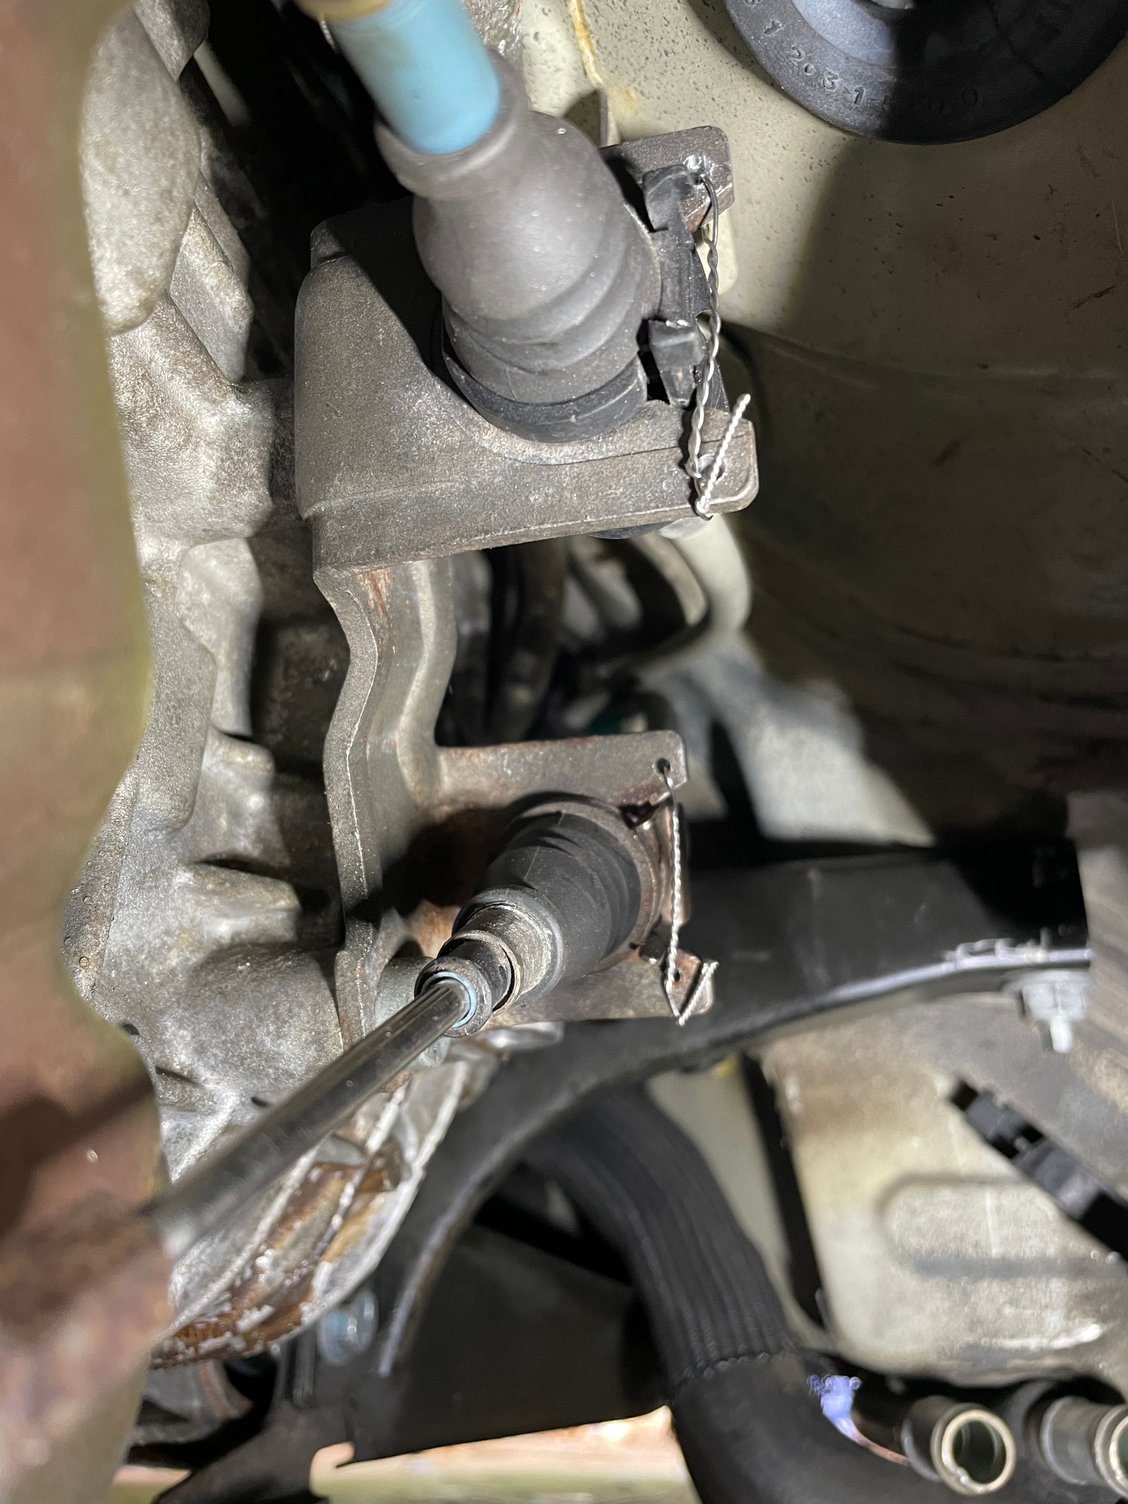
Next was getting the shifter cable back installed. Took the opportunity to safety wire the 2nd shifter cable, I had only been running with the one that was problematic for me done - now I feel like I won't have to fix either during a track day. With the under trays off, this is easy. If you run at the track, I would really recommend doing this. Side note, really nice to feel the shifter hooked up, been a long time since that shift lever was connected to anything,
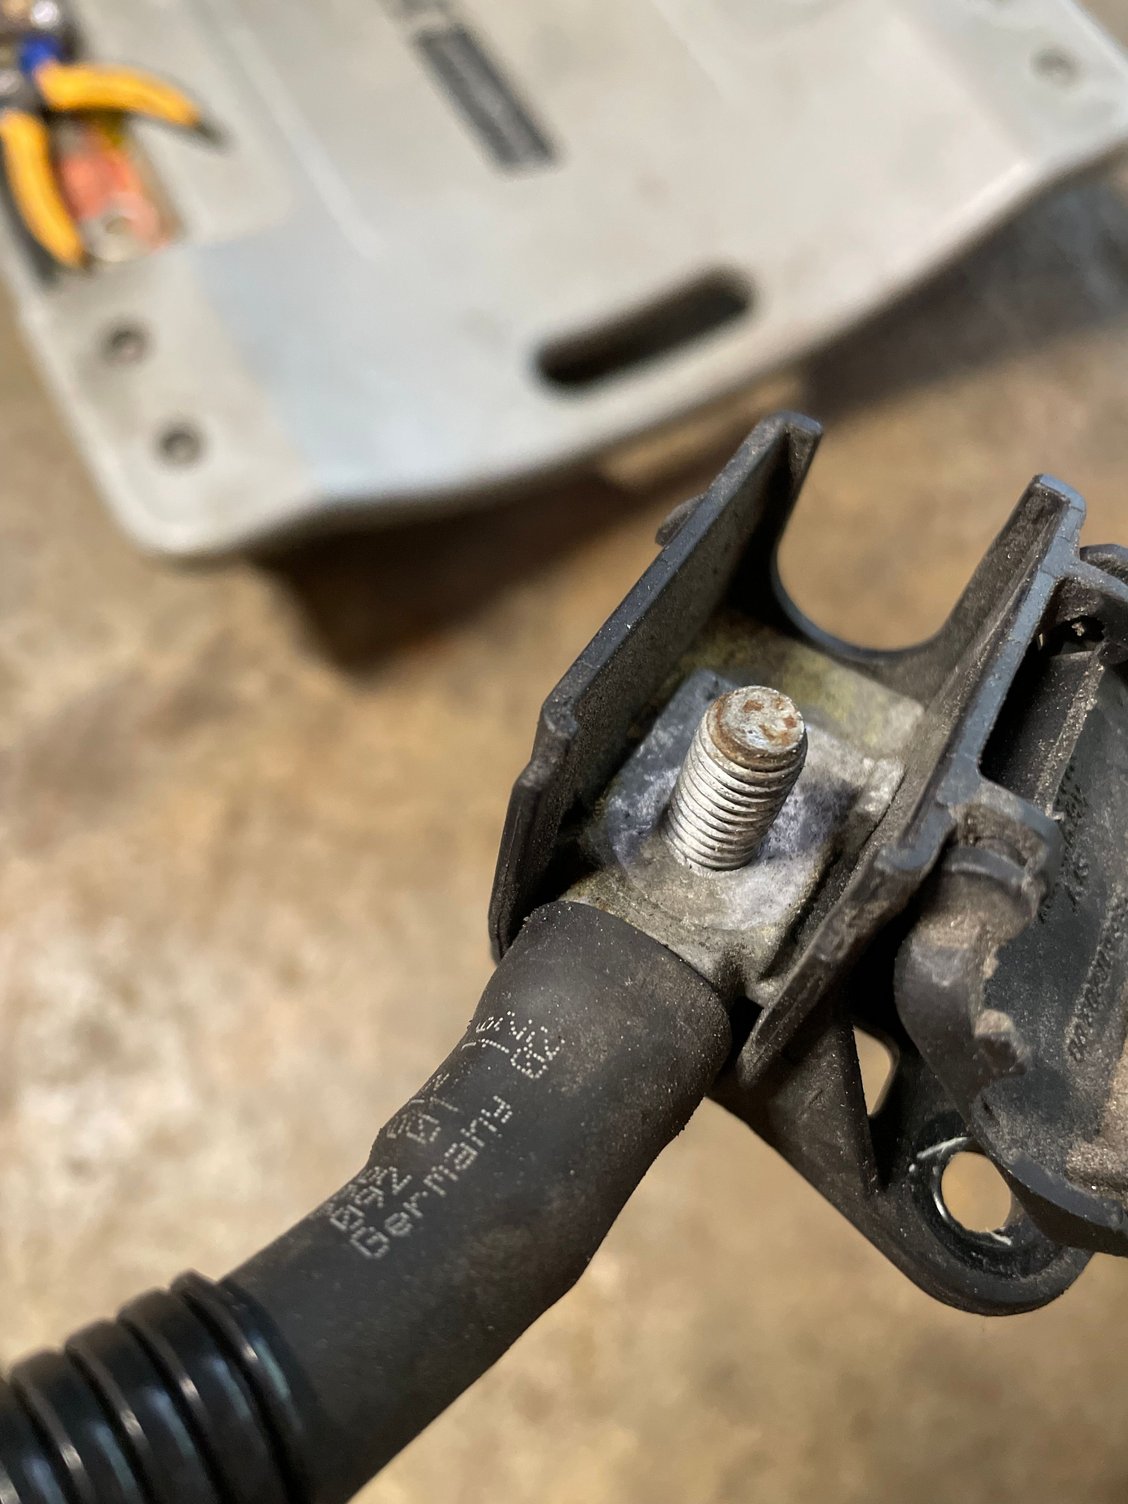
Next was time to add my main starter power cable to the factory junction box. When I got to doing it I realized it wasn't just 2 cables on a stud, it was one cable on a stud and another with the stud integral. Of course the one with the integral stud was the one I needed to remove so I got the assembly removed from the housing and cut the factory cable off and put the stud portion back onto the box so the other end of the factory cable and my new starter cable could run to it, worked out nicely.
Factory cable stud thingy.
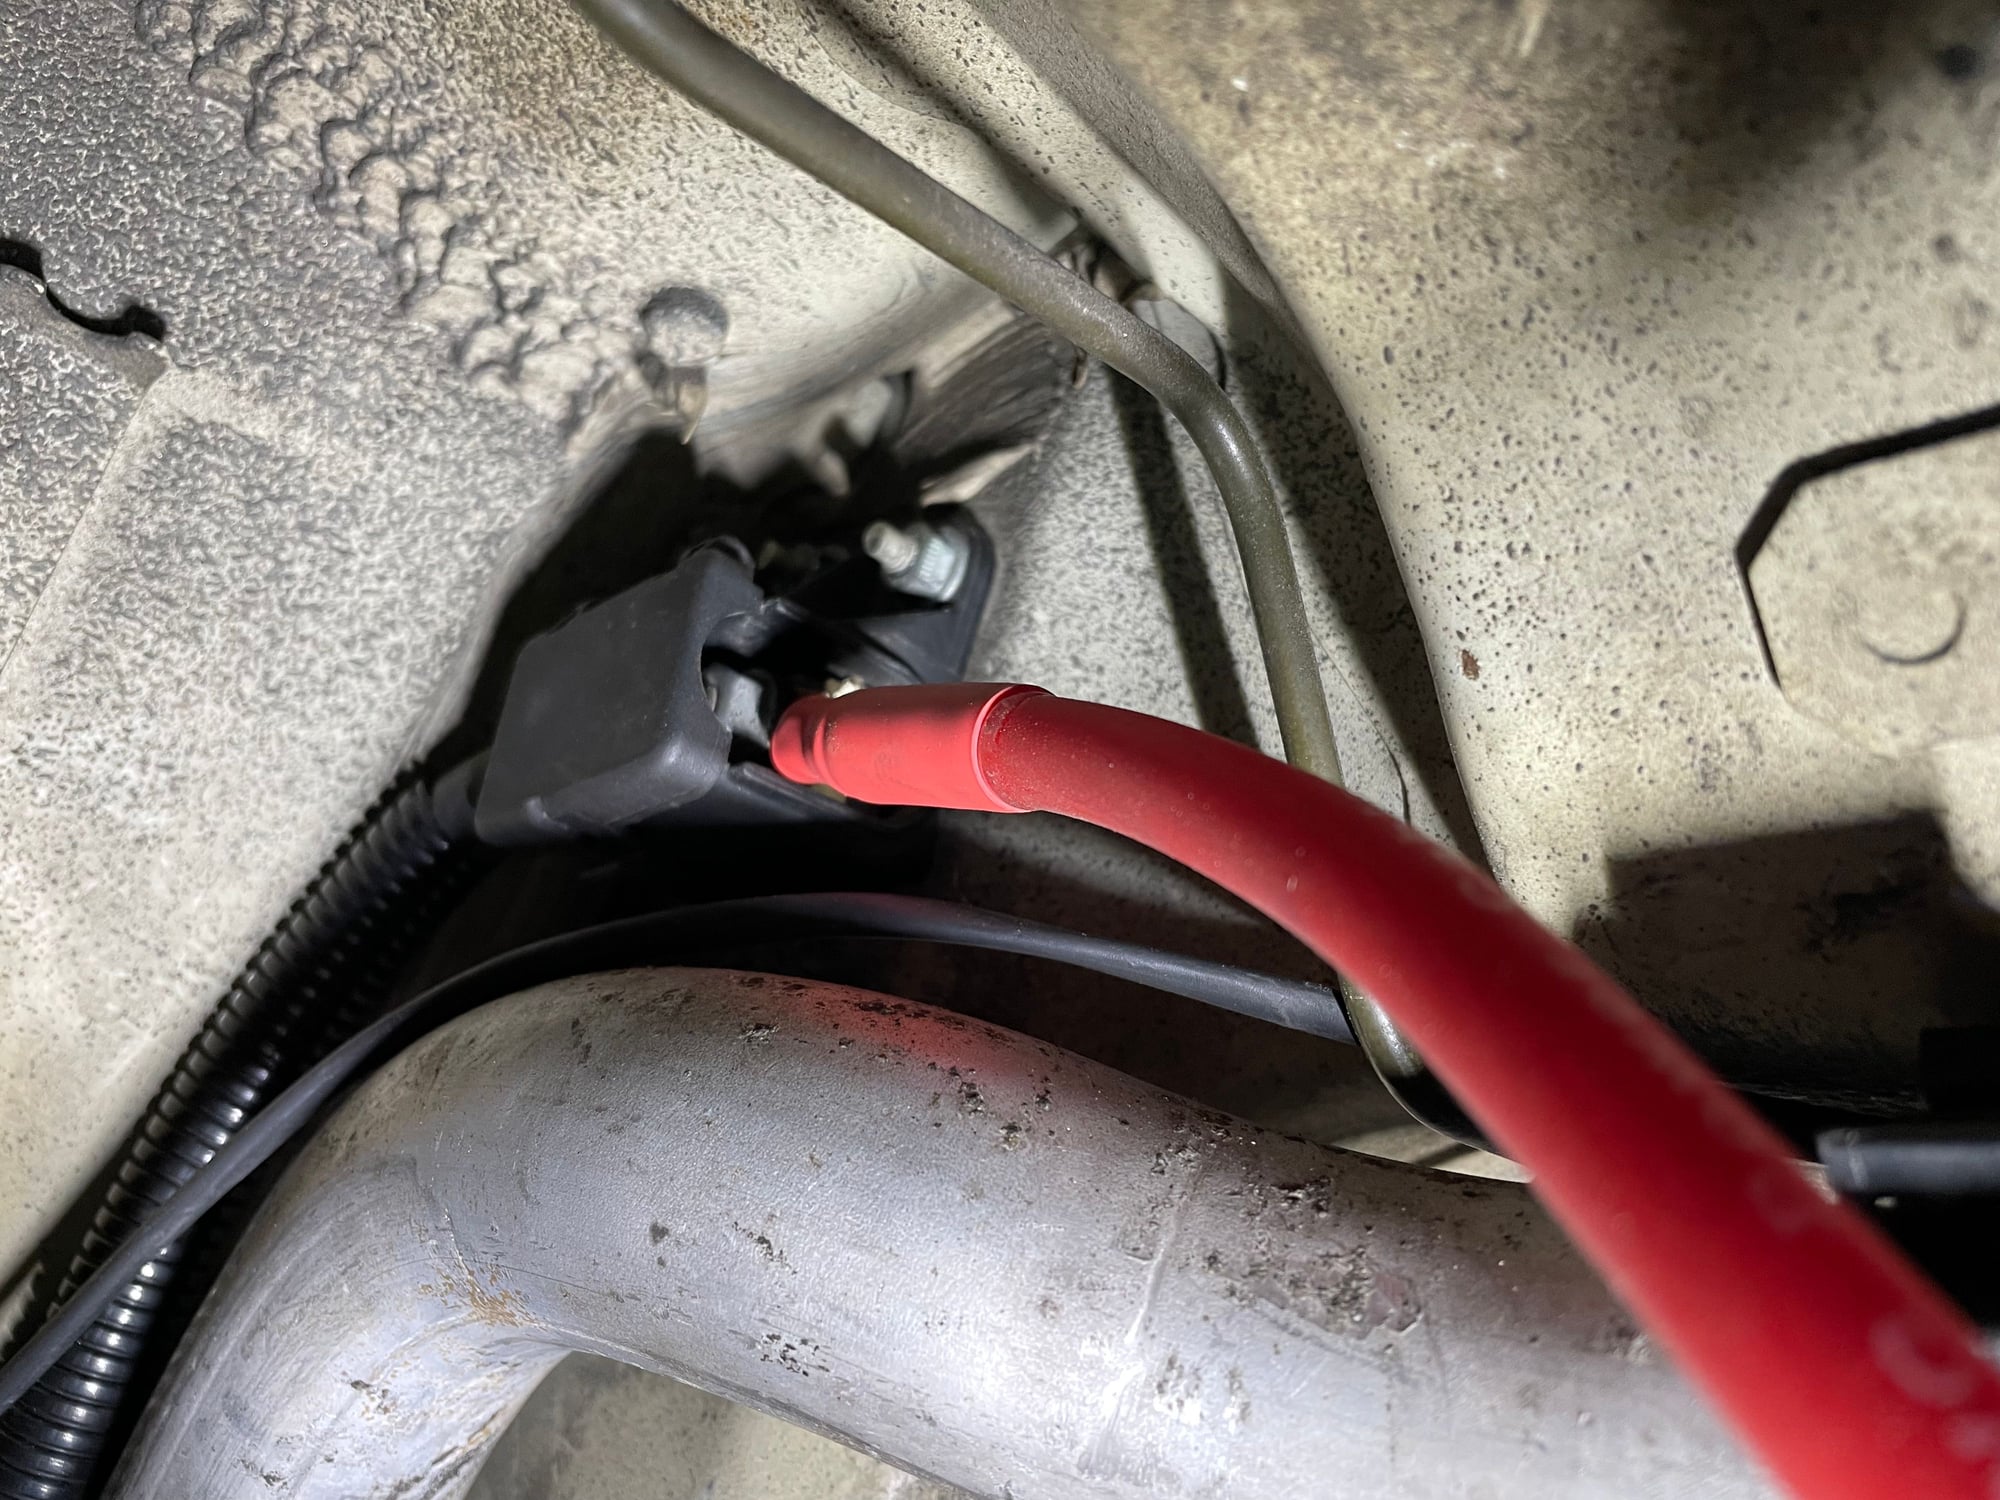
Factory cable stud thingy removed and my new cable installed.
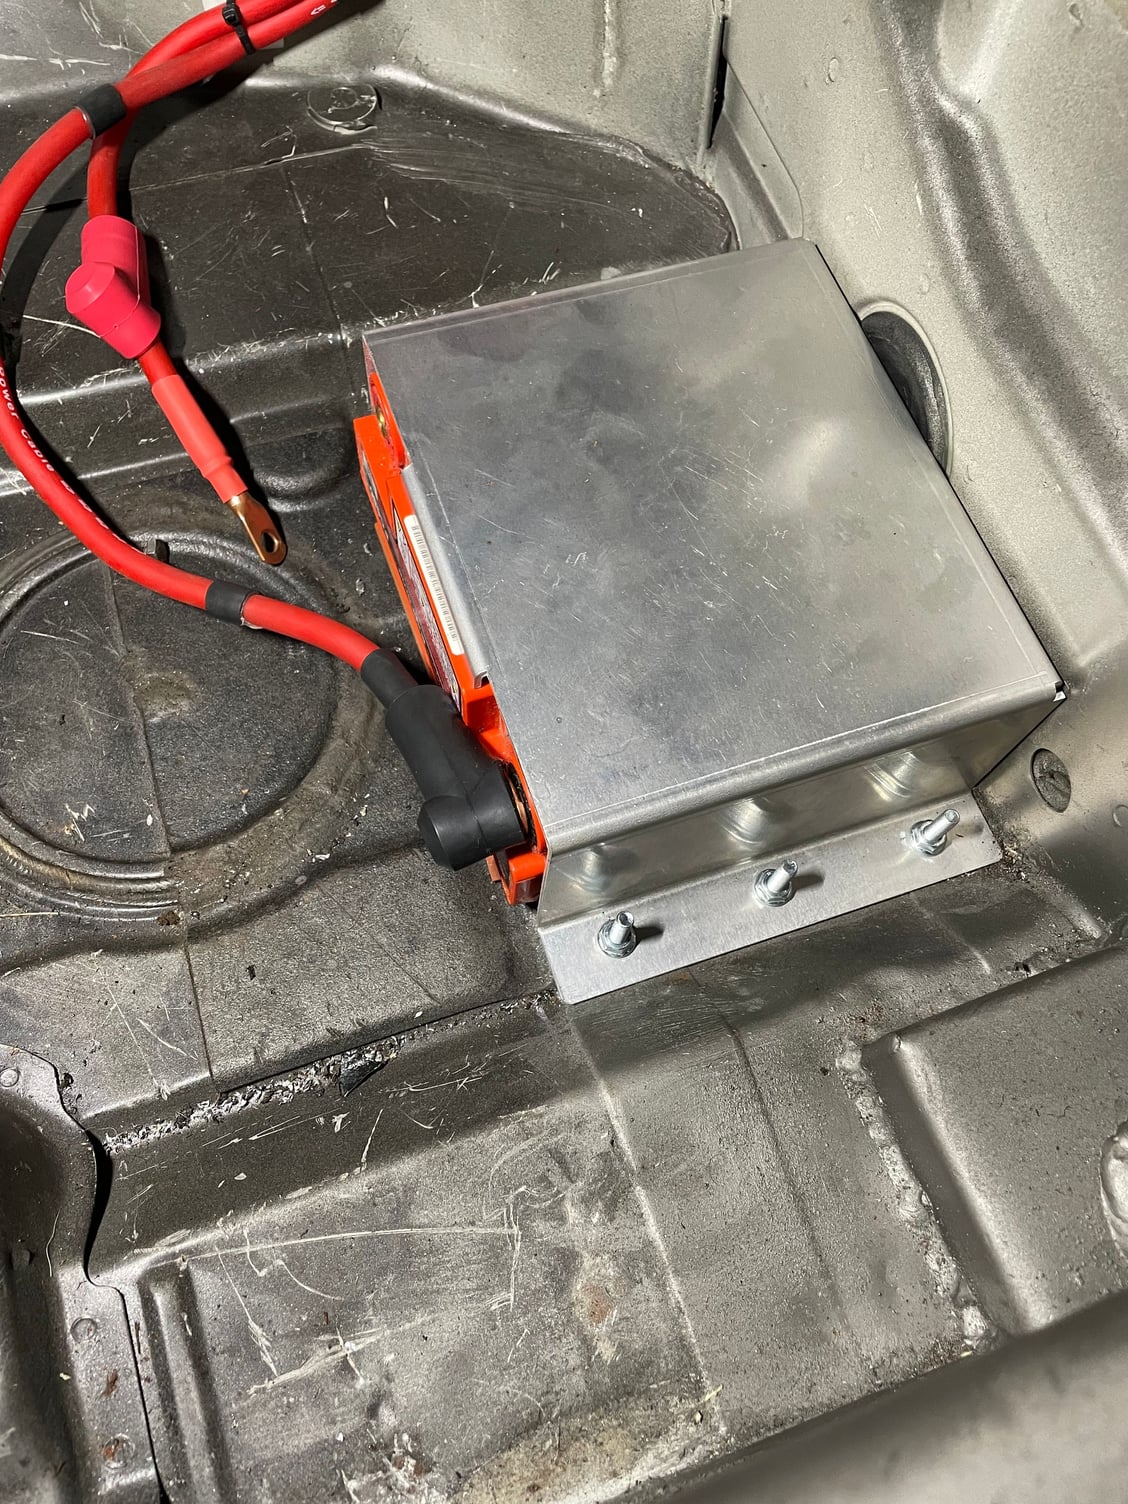
Quick finish up on the battery side, it is now fully mounted, I decided to use bolts and nuts as opposed to riv nuts out of an abundance of safety. No way it will become a projectile under any circumstances now
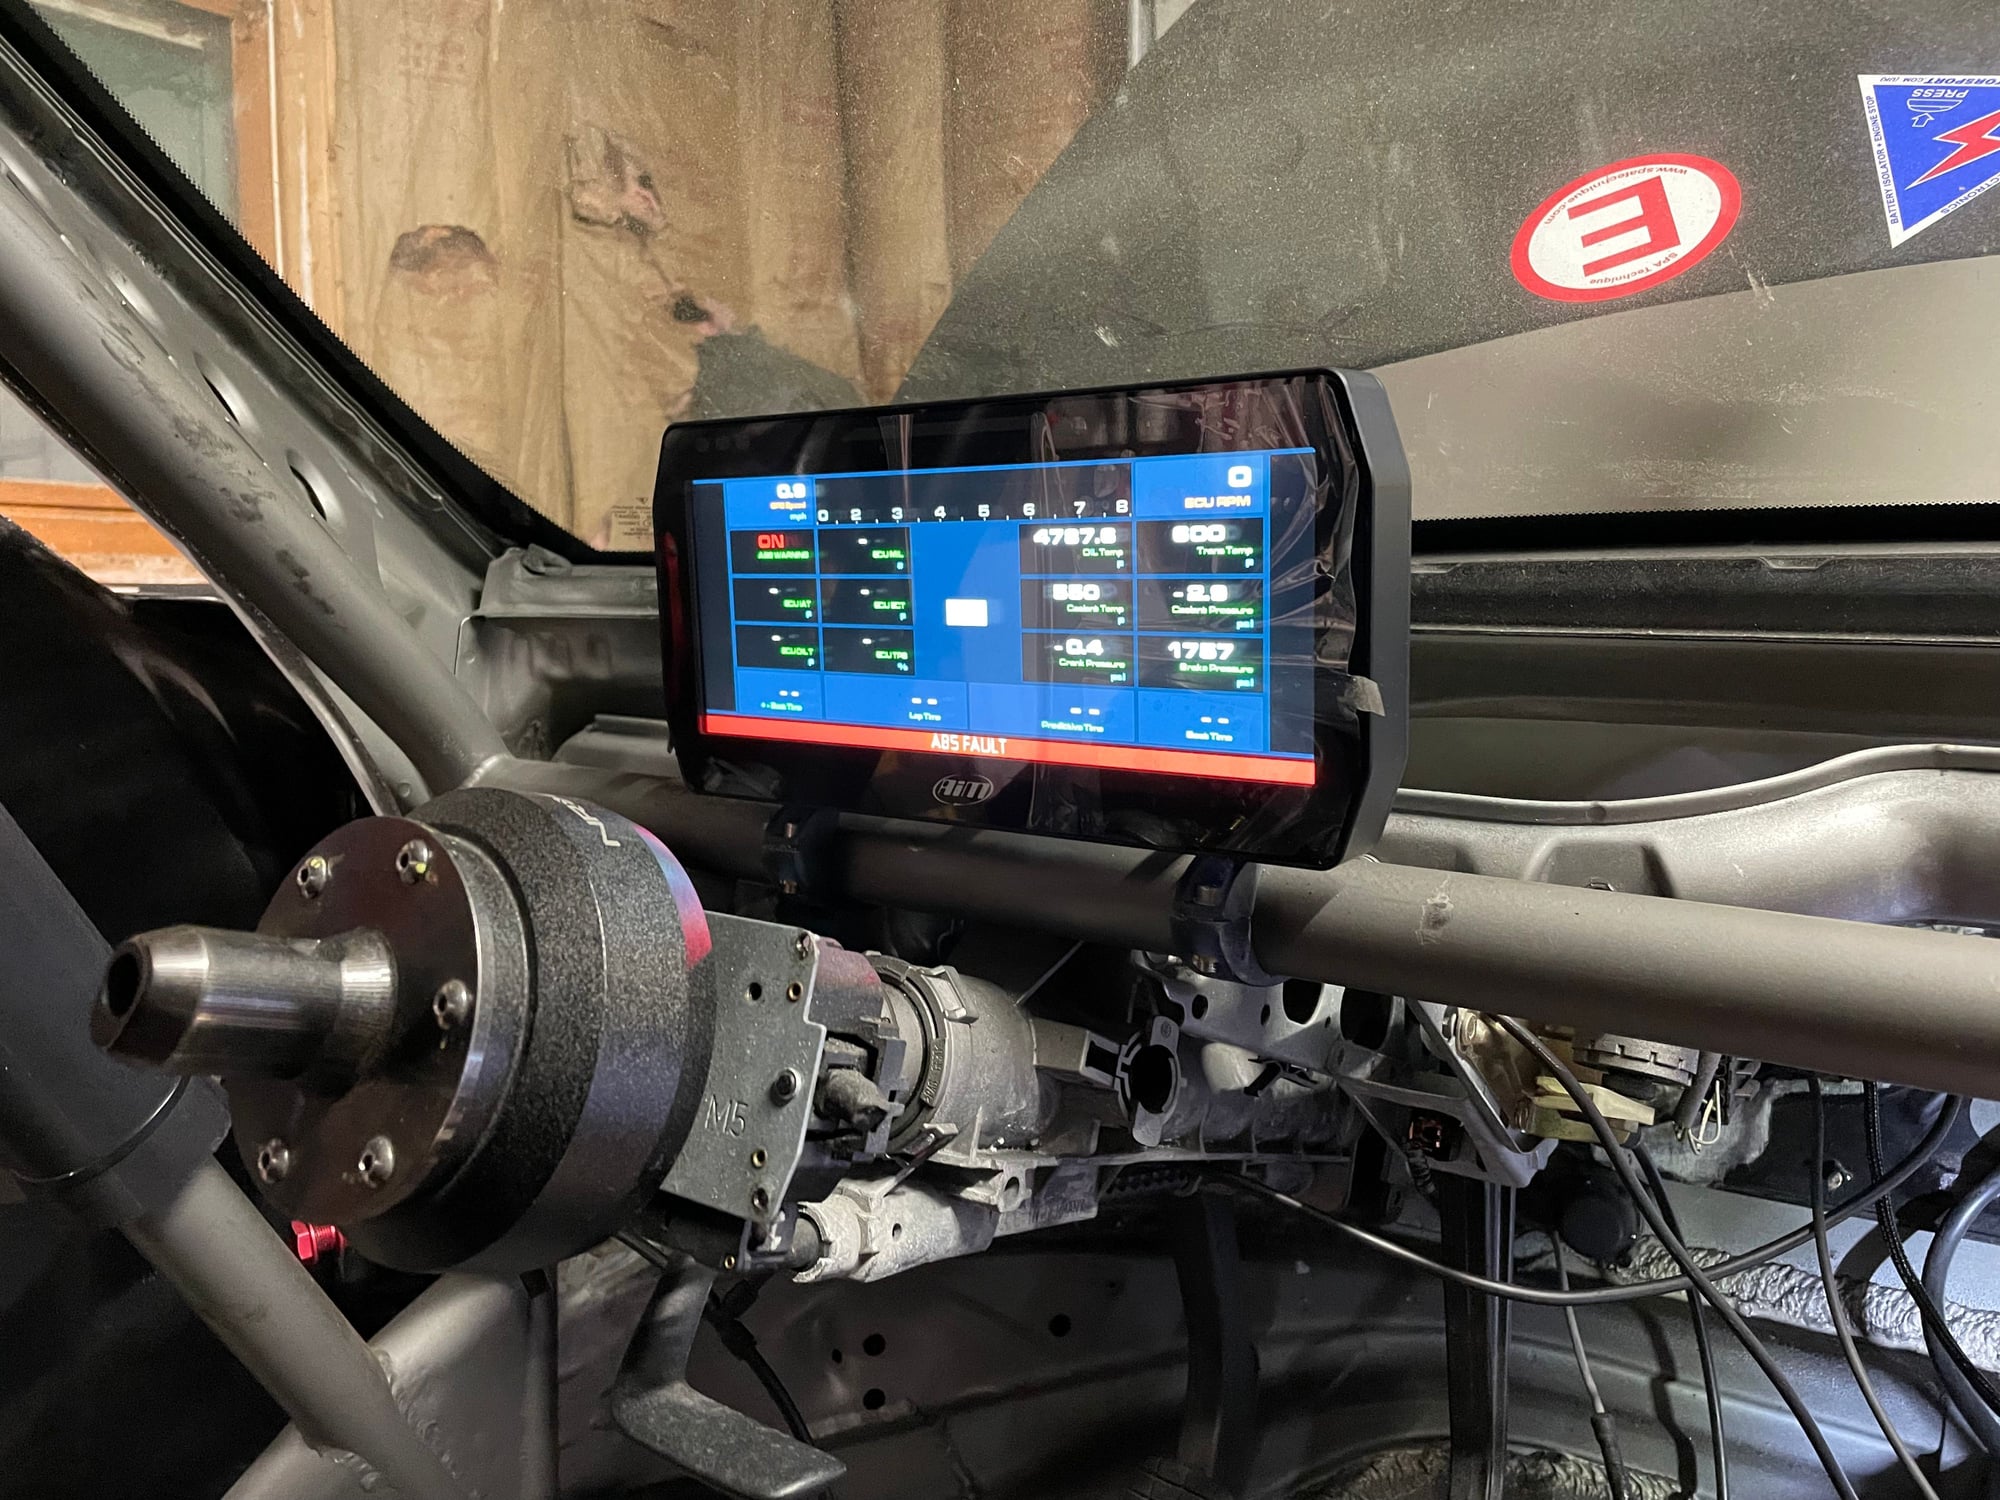
Most of today was spent on the wiring side making sure the car was ready to get power put to it. I will talk more on this part of the process soon but saving the best for last... check out this hawtness. HUGE thanks to @Matt Romanowski for the 4th of July support to work through some configuration bugs I never would have got through on my own. And another big thanks to @theprf for the support and 2nd set of hands - you guys are men.
Awesome progress! Those hose connections are looking familiar Make sure to give the henn connectors on the side radiator a bit of a yank to make sure they are seated well. After a few drives I developed a minor leak. It looks like the clip on the driver side didn't fully seat and had the connector come ever so slightly loose causing a slow drip.
Awesome progress! Those hose connections are looking familiar Make sure to give the henn connectors on the side radiator a bit of a yank to make sure they are seated well. After a few drives I developed a minor leak. It looks like the clip on the driver side didn't fully seat and had the connector come ever so slightly loose causing a slow drip.
Aaron told me you used those T�s, or something very similar and they were the key component for me here, the factory turbo hoses were very much bolt on the the existing 996 hard lines. I needed one more adapter fitting to get it all to work in between the t and the center radiator inlet but I�m please with the result. So now both you and Aaron have told me the importance of tugging on those connections, I did when I put them in but will confirm, those clips suck and the install process did not inspire confidence.
 06-23-2023, 12:43 AM


 )
)