
Group Purchase on Atlas Scissor Lift
 12-28-2013, 05:30 PM
#91
Three Wheelin'

Mark,
Where did you source the stainless angle edges and what are their thicknesses? I am in the middle of cutting the plywood cover and want to account for that additional material inside the hole so it will fit..
Thanks,
Bryan in Cali.
PS.. Lift comes monday. Hole is done.
Where did you source the stainless angle edges and what are their thicknesses? I am in the middle of cutting the plywood cover and want to account for that additional material inside the hole so it will fit..
Thanks,
Bryan in Cali.
PS.. Lift comes monday. Hole is done.
 01-04-2014, 05:10 PM
#92
Three Wheelin'
Found them.. All good. Will update with pics once all finished. Need to wait two more weeks for new concrete to cure before I etch and epoxy it before lift drops in.
It's looking like another CFI but has been a ton of work.
On another note to all those out there with this lift... anyone have pics with motor and trans coming out? Would love to see if there were any challenges during this process.
Thanks.
Bryan
It's looking like another CFI but has been a ton of work.
On another note to all those out there with this lift... anyone have pics with motor and trans coming out? Would love to see if there were any challenges during this process.
Thanks.
Bryan
01-04-2014, 06:52 PM
#93
Rennlist Member
Thread Starter
Found them.. All good. Will update with pics once all finished. Need to wait two more weeks for new concrete to cure before I etch and epoxy it before lift drops in.
It's looking like another CFI but has been a ton of work.
On another note to all those out there with this lift... anyone have pics with motor and trans coming out? Would love to see if there were any challenges during this process.
Thanks.
Bryan
It's looking like another CFI but has been a ton of work.
On another note to all those out there with this lift... anyone have pics with motor and trans coming out? Would love to see if there were any challenges during this process.
Thanks.
Bryan
Glad to hear it is going well Bryan. Stainless, I know you said you found some but here is what I did;
-Called local metal distributors to price it out thinking it would be cheaper to pay and pick up at will call, fell over at the quotes, then looked online (ebay I think) and ordered out of Chicago for almost half the cost delivered.
-Cutting Stainless; bought a metal cutting blade and put it on the chopsaw and set it for 45 degrees, smoked the blade doing the last cut, worked out perfectly.
-Drilling / Beveling / Countersinking holes in Angle Steel; Took it to the machine shop we deal with at work on a weekend and drilled / Coutersunk holes there.
-Anchored Stainless into Concrete using hammerdrill and standard anchors with flat head stainless self tapping screws. Went over everything with a flapwheel on the angle grinder afterwards.
-Had a buddy who is a welder come over to stainless weld the 4 corners.
After all that fun, I then cut 3/4 high grade exterior plywood to fit the opening. I gently radius'd the corners, rolled the outside edges with an 1/8" rounding bit and bought 6 total of these:
http://www.ebay.com/itm/Four-Pack-Pe...item3cd69b5ab1
I routered the recesses for the handles, put 3 coats of rustoleum oil base paint on the plywood top and bottom, let it dry and installed the handles.
Good Luck........Mark.
01-13-2014, 10:11 PM
#94
Three Wheelin'
Mark,
The lift is in and working!!! Couple quick questions:
1) Can you provide a picture of where you placed the articulating arms in the lift for your 993?
2) Roughly where are the pads sitting (what area did you slide them to) on those arms?
Otherwise, I think I'm good. I will update with pics and probably a new thread linking to yours about what I did (after seeing all your great ideas) and what i needed to do additional for my application and how I handled those road bumps (hydraulic line extension, cable release extension, etc.) and finally to create a finished thread where you can add your pics of it finished for future searchers..
Heck, if you want you can start it since you were the brain child behind it and I will add in my additional pics and comments.
Thanks again for all the help and I will be pretty much wrapped up once I hear back from you on the questions above and finalize my trim.
Cheers,
Bryan
01-13-2014, 10:50 PM
#95
Rennlist Member
Thread Starter
Mark,
The lift is in and working!!! Couple quick questions:
1) Can you provide a picture of where you placed the articulating arms in the lift for your 993?
2) Roughly where are the pads sitting (what area did you slide them to) on those arms?
Otherwise, I think I'm good. I will update with pics and probably a new thread linking to yours about what I did (after seeing all your great ideas) and what i needed to do additional for my application and how I handled those road bumps (hydraulic line extension, cable release extension, etc.) and finally to create a finished thread where you can add your pics of it finished for future searchers..
Heck, if you want you can start it since you were the brain child behind it and I will add in my additional pics and comments.
Thanks again for all the help and I will be pretty much wrapped up once I hear back from you on the questions above and finalize my trim.
Cheers,
Bryan
The lift is in and working!!! Couple quick questions:
1) Can you provide a picture of where you placed the articulating arms in the lift for your 993?
2) Roughly where are the pads sitting (what area did you slide them to) on those arms?
Otherwise, I think I'm good. I will update with pics and probably a new thread linking to yours about what I did (after seeing all your great ideas) and what i needed to do additional for my application and how I handled those road bumps (hydraulic line extension, cable release extension, etc.) and finally to create a finished thread where you can add your pics of it finished for future searchers..
Heck, if you want you can start it since you were the brain child behind it and I will add in my additional pics and comments.
Thanks again for all the help and I will be pretty much wrapped up once I hear back from you on the questions above and finalize my trim.
Cheers,
Bryan
Glad to hear all is going well on the lift Bryan. I will get a picture of where the arms are when I get back to town, will likely be mid to late week. I do have to move adjust the pads a little every time I lift a car since the 993 isn't the only thing I use it on. They would probably need adjusting anyway when you pull your car over it since it won't be in the same exact front / rear and side to side position anyway. Bought one of these in 6mm and keep it with 4 hockey pucks sitting on top of the pump:
http://www.ebay.com/itm/NEW-ALLEN-T-...item3a7c772862
01-13-2014, 11:59 PM
#96
Three Wheelin'
Thanks,
My main concern is what fixation point you are using or thought was best for the 993. I do agree that you will have to slide the pads each time but hopefully not the nut and positioning washer as well on the arm itself. That is what I would like to leave alone unless I am lifting another vehicle like you mentioned.
Thanks again,
Bryan
01-18-2014, 10:41 PM
#97
Three Wheelin'
Here she is. Let me know if anyone has questions other than what Mark has covered already so well by this thread.
Took quite some time to get it finalized and had to extend my hydraulic lines and brake release cable to accommodate my pump location but in the end it all works well.
Still looking to see best location for "arms" on the lift. As it sits now (lifted or first time today) I couldn't remove the motor as the trans would hit the back cross member but I'm thinking I could adjust accordingly. I just want to make sure I don't get the car too "rear heavy" on the lift and create a bigger problem when it lift the beast...
01-18-2014, 10:44 PM
#98
Three Wheelin'
I have removed the engine and transfer in my C4S with this lift. I had to turn the washers on the arm bolt sideways so I could move the arms far enough back. With that done I lifted the car and rocked it around to check stability, it was fine. When I unbolt ex everything, of course I supported the enhine from below. I kept checking balance as I lowered the engine and transfer, no issues.
01-18-2014, 10:48 PM
#99
Three Wheelin'
A few more pics of the progress and completion
1) The nipple on my dolly for the lift broke so I had my buddy who welded the SS sides weld it up again... and much better than previously
2) I used fake decking to support the cover (not shown) on the outside like a picture frame
3) I can raise the car all the way and it doesn't hit the ceiling even in my standard height garage.
4) Lastly, I used some underground sprinkler connections (2 couplers and solid threaded 1/2 nipple between the two) to hold the handle correctly. Then, I screwed it to the wall with clamps... works amazing.
Hope this helps someone and thanks for Mark for all the help during the way!!
Cheers,
Bryan
01-19-2014, 04:25 AM
#100
Rennlist Member
Thread Starter
Wow!! Looks great Bryan. Will try to get a pic up of lift arm locations later today, we got socked (again) with snow yesterday then had other obligations last night. Gotta wait for a reasonable hour on a Sunday morning to fire up the snow blower and clear the drive so I can jockey the cars to get to the lift. I am so finished with winter.....
01-19-2014, 11:54 AM
#102
Rennlist Member
Thread Starter
Here is the pic Bryan. For me it worked out best to have the arms mounted in the second from last position on both ends. Other than the 993 I've had kids and wife's cars (Civics, Corollas and smallish SUV) on it and that position worked well for those also:
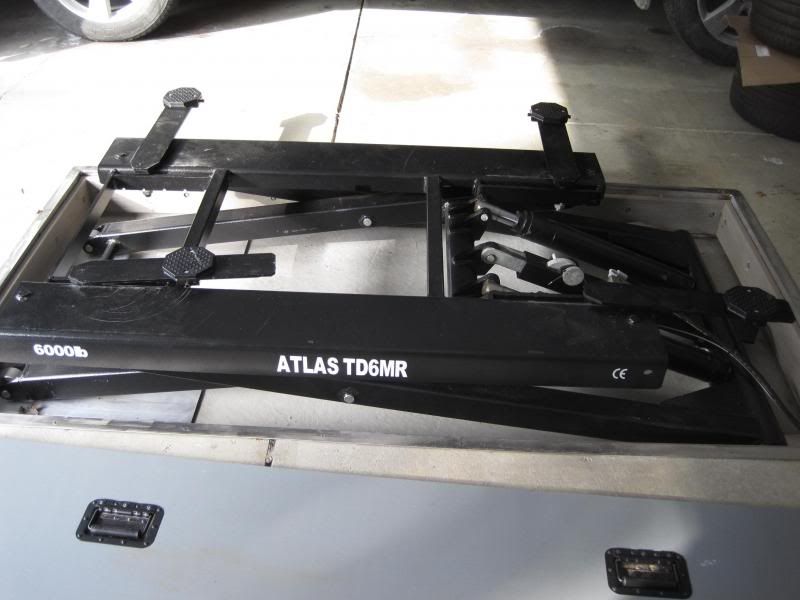
Gratuitous pic of new to me RUF wheels, to give perspective to those contemplating a lift / recessed install, the set of RUF wheels ran more than the entire lift project lol:
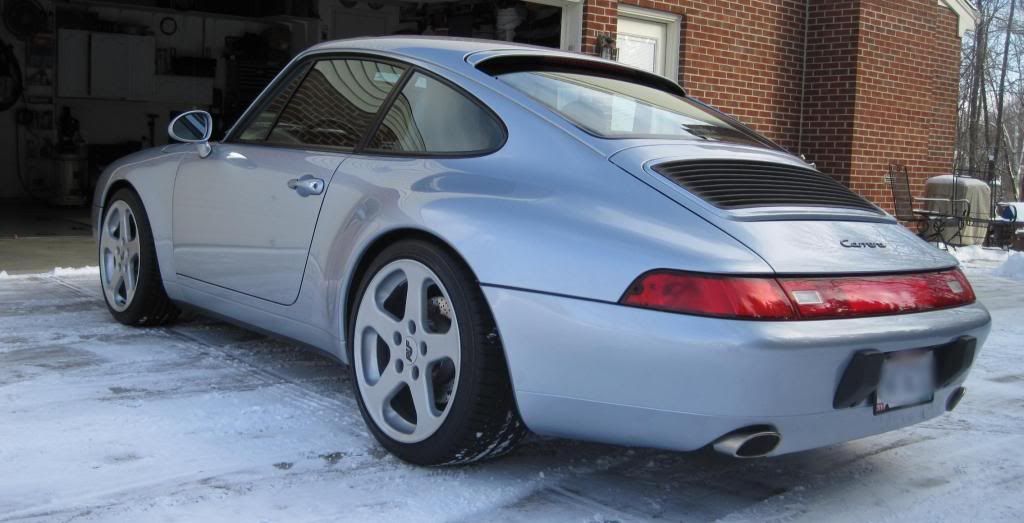
Gratuitous pic of new to me RUF wheels, to give perspective to those contemplating a lift / recessed install, the set of RUF wheels ran more than the entire lift project lol:
Last edited by coreseller; 01-19-2014 at 01:22 PM.
01-19-2014, 12:01 PM
#103
Three Wheelin'
Great pics and thanks for posting. I think its going to be 70 here today... I'm a transplant from MI so I understand your frustration.
I am also curious as to what the best position would be to drop the motor. The poster after my pics (jhg41977) with the C4S did do it with moving the washers out of the slits and to the extreme back. I think my position currently is kind of like yours above which puts the rear of the frame (of the lift) under the nose of the transmission which would hinder engine removal. I wonder if he has a pic as well to show what he's referencing...
Mark, thanks again for all the help!! You made the process so much easier not having to think about all this stuff before hand. The wheels look great by the way. I can't even use them since I have the GT Brembos on my car with 15" rotors... I need at least 19" wheels.
Cheers,
Bryan
