When you click on links to various merchants on this site and make a purchase, this can result in this site earning a commission. Affiliate programs and affiliations include, but are not limited to, the eBay Partner Network.
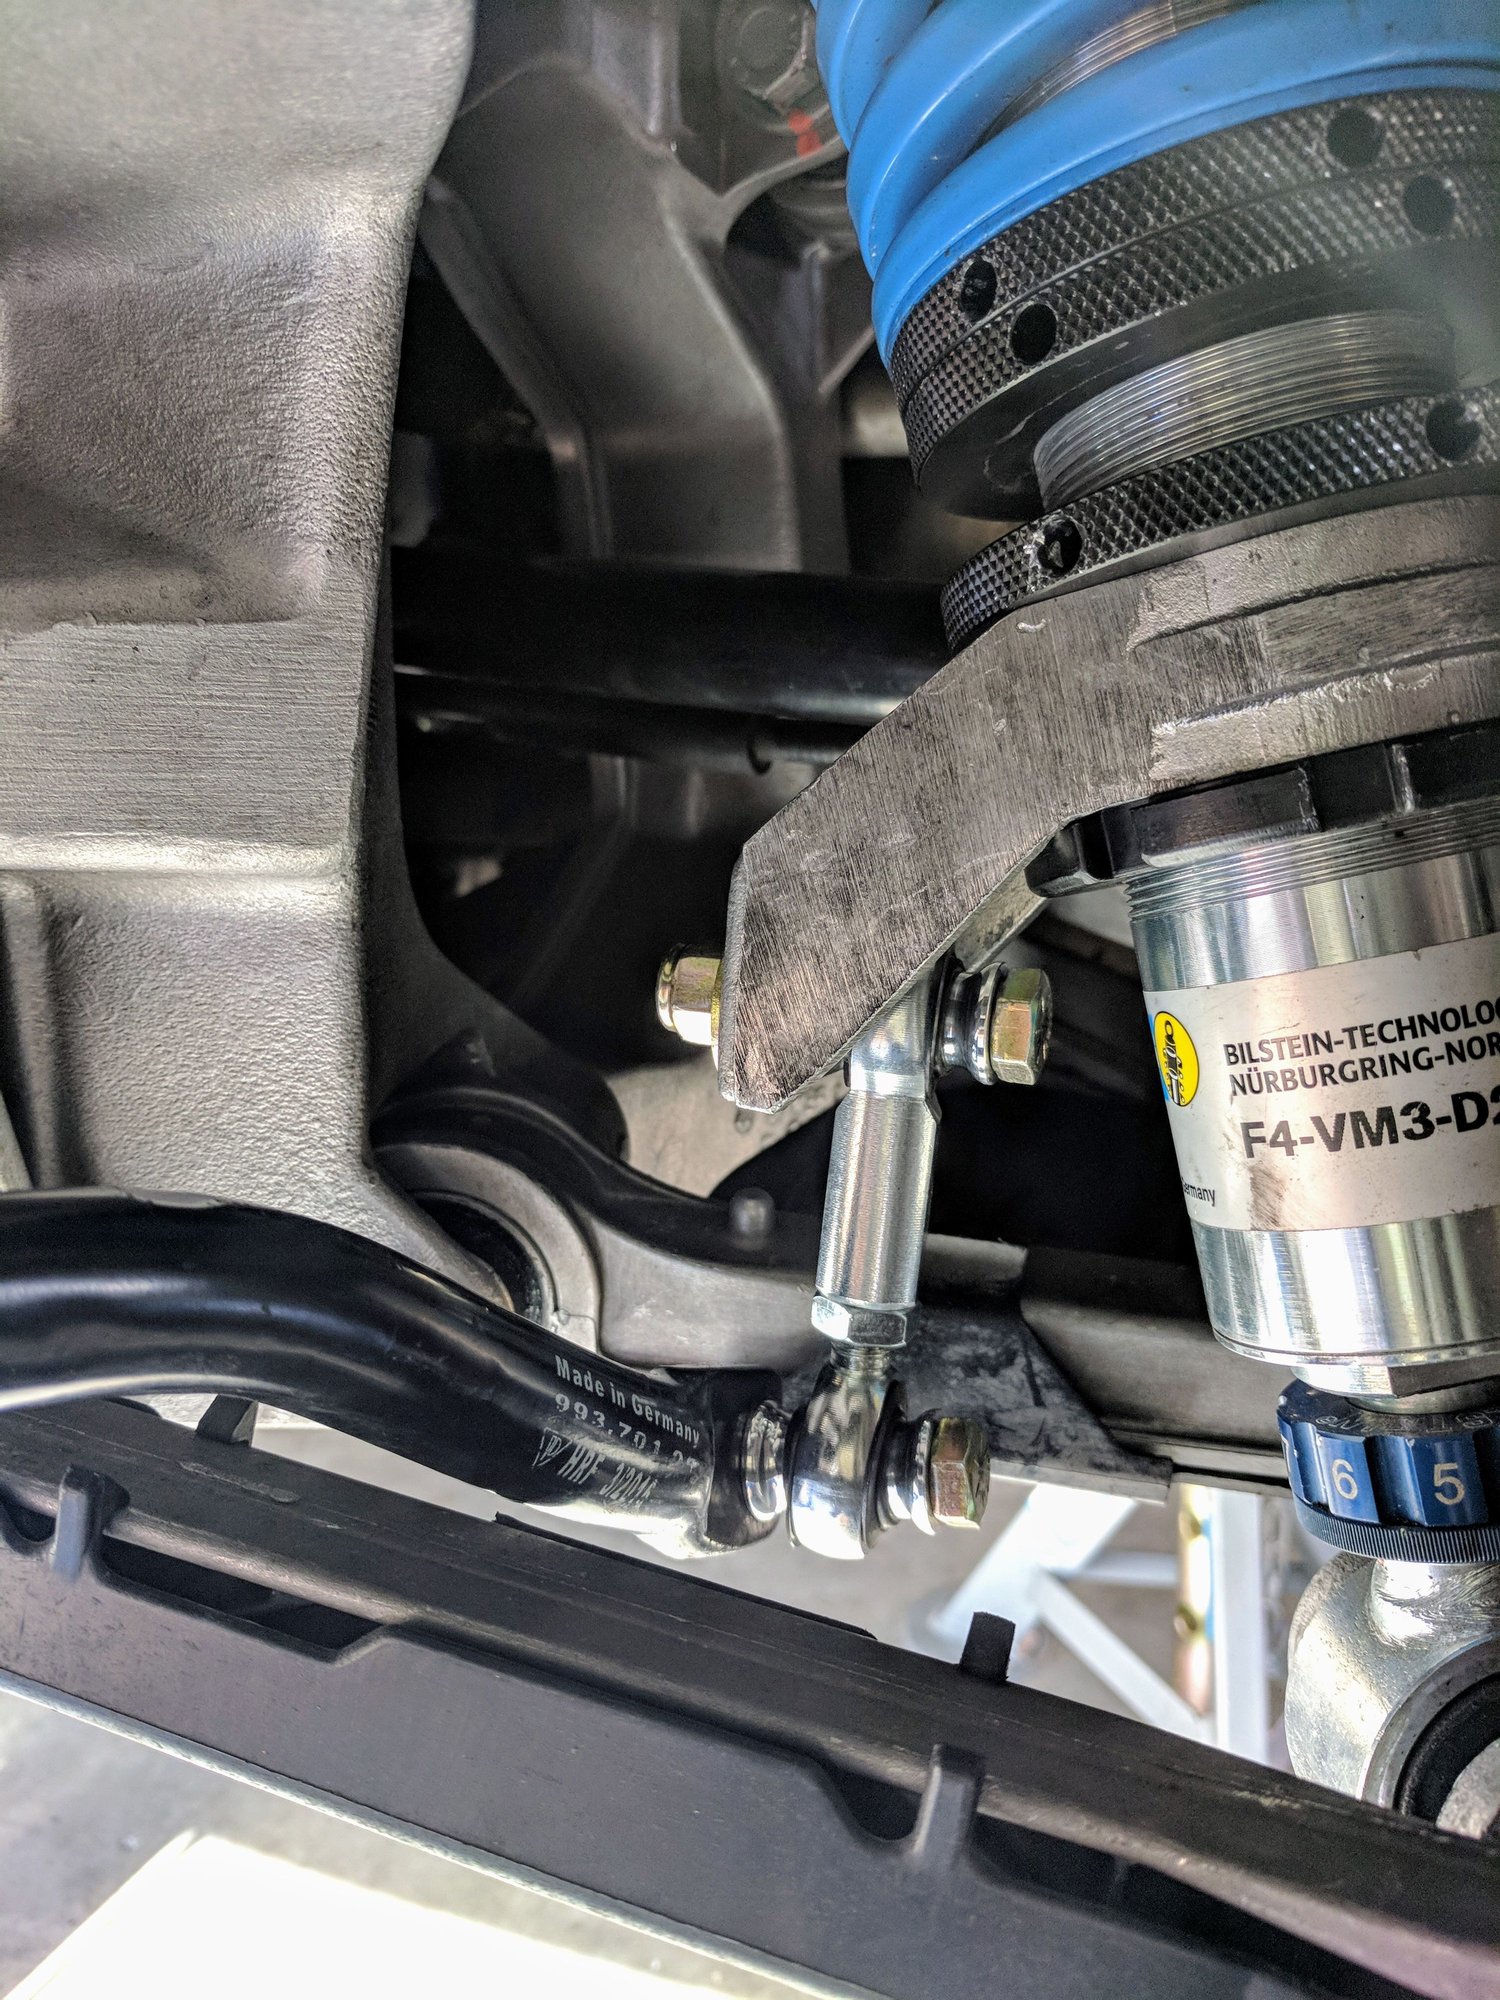
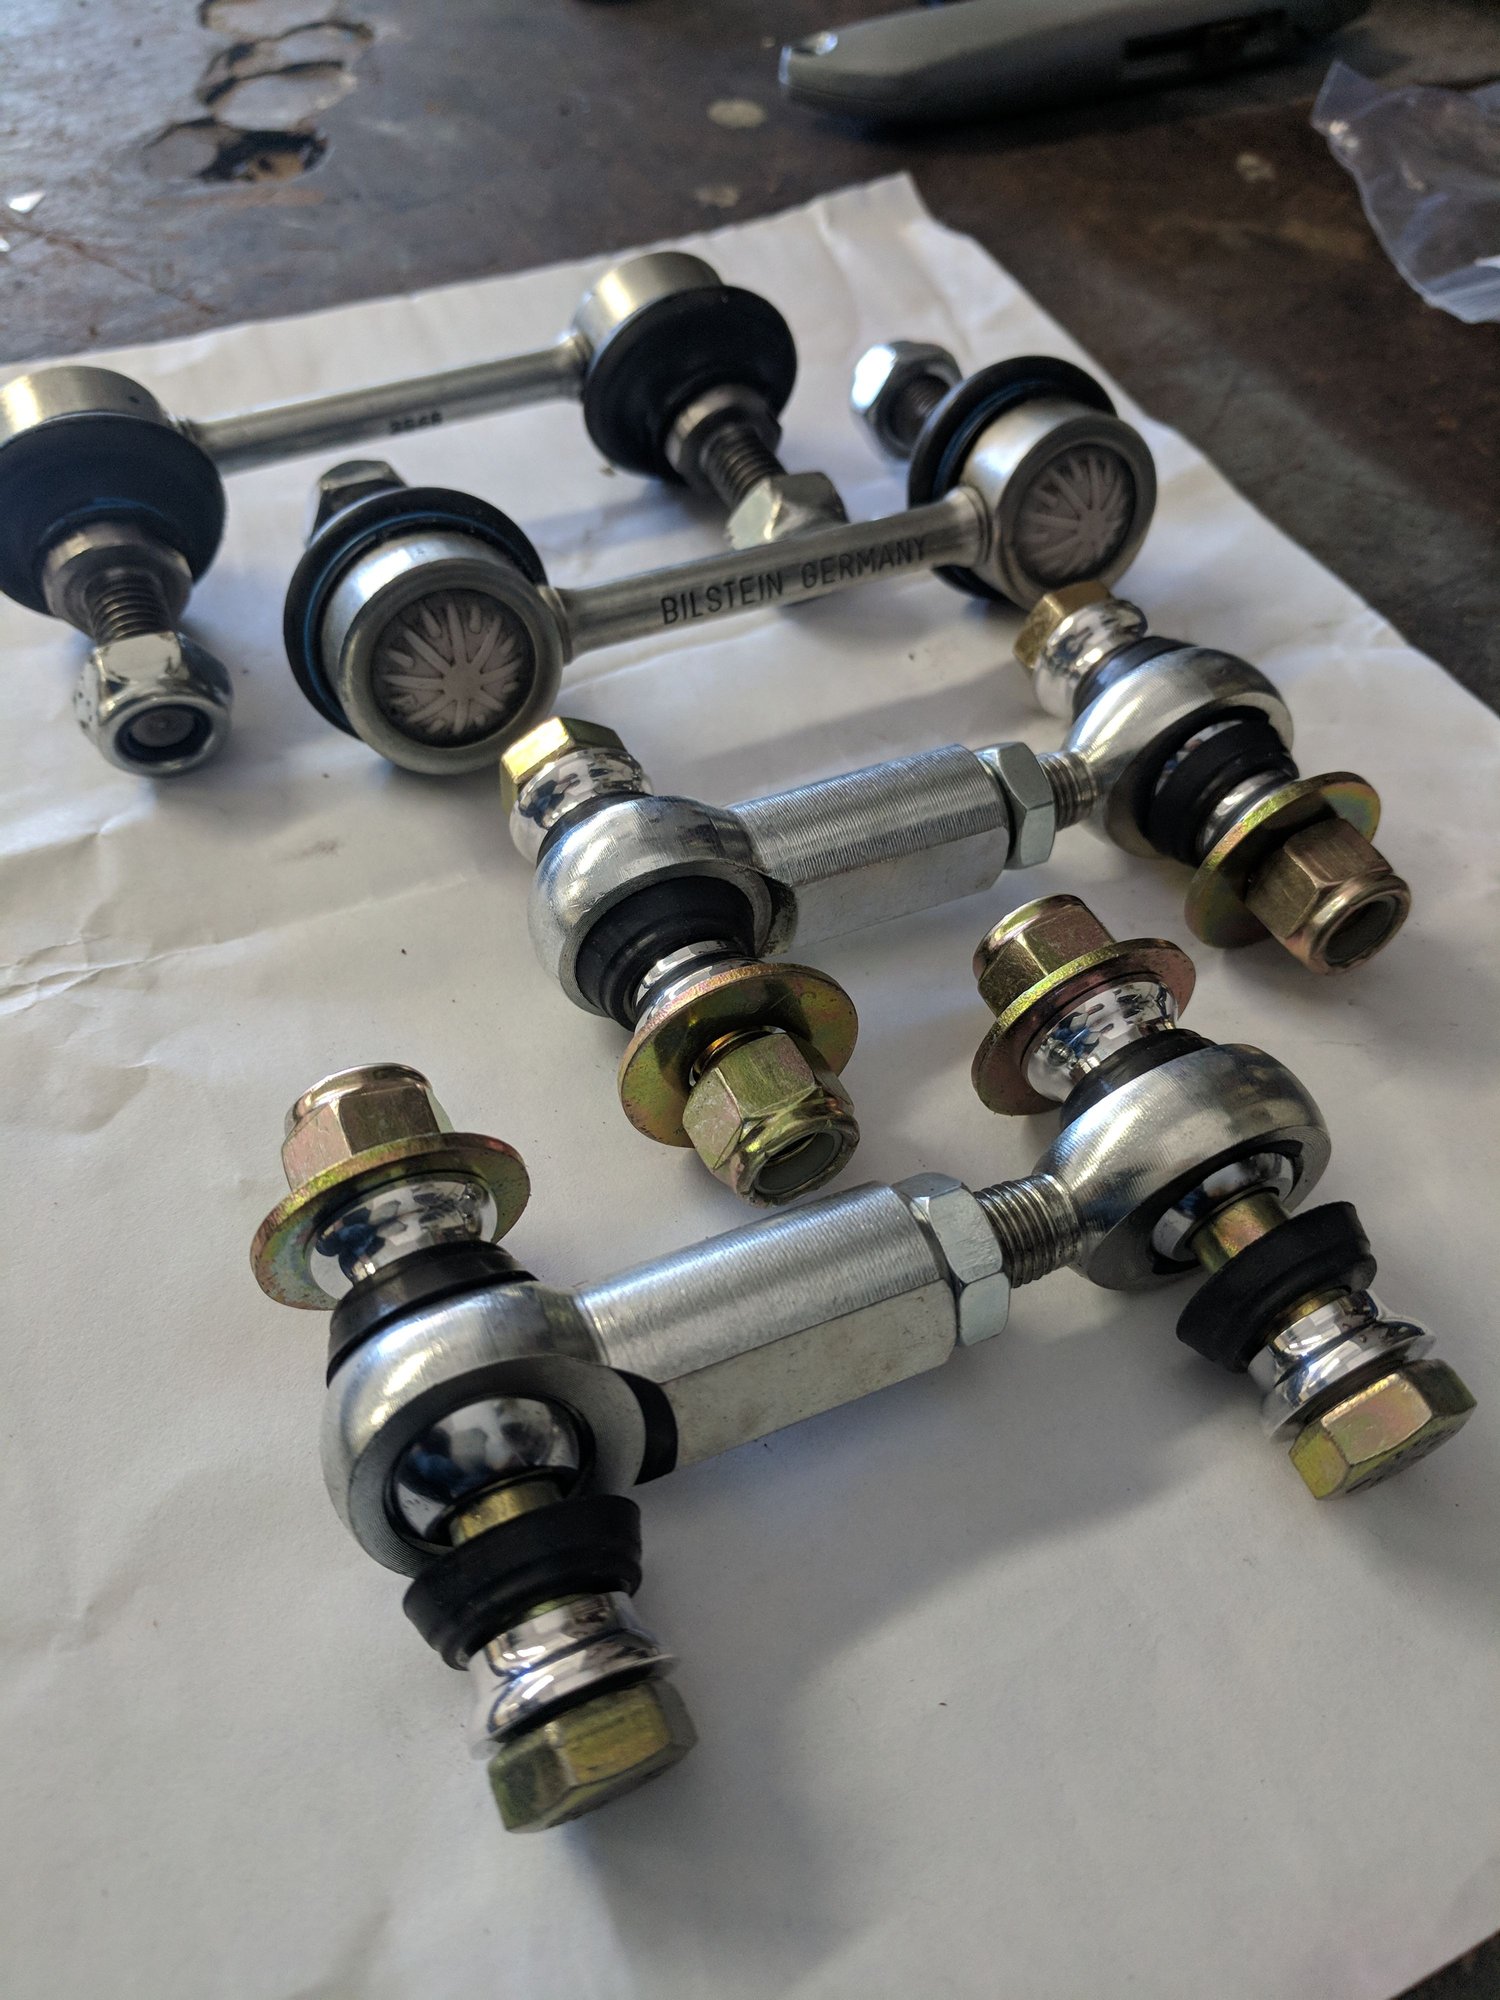
Post the alignment/balance completed the suspension overhaul with some DIY adjustable drop links here as Roger Krause team suggested to make most of the corner balance the ARBs need to be adjustable to balance out the pre-load.
The DIY was super easy as there was a former Rennlister who posted the write up here... best part only $64 and change from Speedway Motors and OSH.
overcast, gray day in Tampa Bay, so this thread is a great way to spend the afternoon waiting for some big event later tonight (finally finished watch the Rolex this morning). Such great work, and write-up. Those pictures are truly worth a thousand words. Thank you for reigniting my interest in getting under the car again.
Thanks! I think I am done wrenching her (for now)... My wife is very curious how my leather/vinyl re-dye adventures go
wow- great progress and love the color!! I like how your attacking the suspension and not so much the power of the engine. I've owned my car for a couple of weeks and i'm pretty content with the power, but i have noticed the front shaking at certain speeds and while braking as you mentioned in the beginning of your thread. Hoping to attack the suspension myself this summer and will be sure to reference your thread.
thanks for sharing!
overcast, gray day in Tampa Bay, so this thread is a great way to spend the afternoon waiting for some big event later tonight (finally finished watch the Rolex this morning). Such great work, and write-up. Those pictures are truly worth a thousand words. Thank you for reigniting my interest in getting under the car again.
Originally Posted by paulkromz
amazing thread!
thanks for sharing your 993 story.
this will definitely be referenced by me in the future.
best,
Paul
Thanks I am watching your dash work as that is my next project to recover it and some other bits!
wow- great progress and love the color!! I like how your attacking the suspension and not so much the power of the engine. I've owned my car for a couple of weeks and i'm pretty content with the power, but i have noticed the front shaking at certain speeds and while braking as you mentioned in the beginning of your thread. Hoping to attack the suspension myself this summer and will be sure to reference your thread.
thanks for sharing!
Thanks. The suspension work was very rewarding. Not only was it great way to learn every inch of the underside, but also she drives so much better after all of the work. Nice color as well!
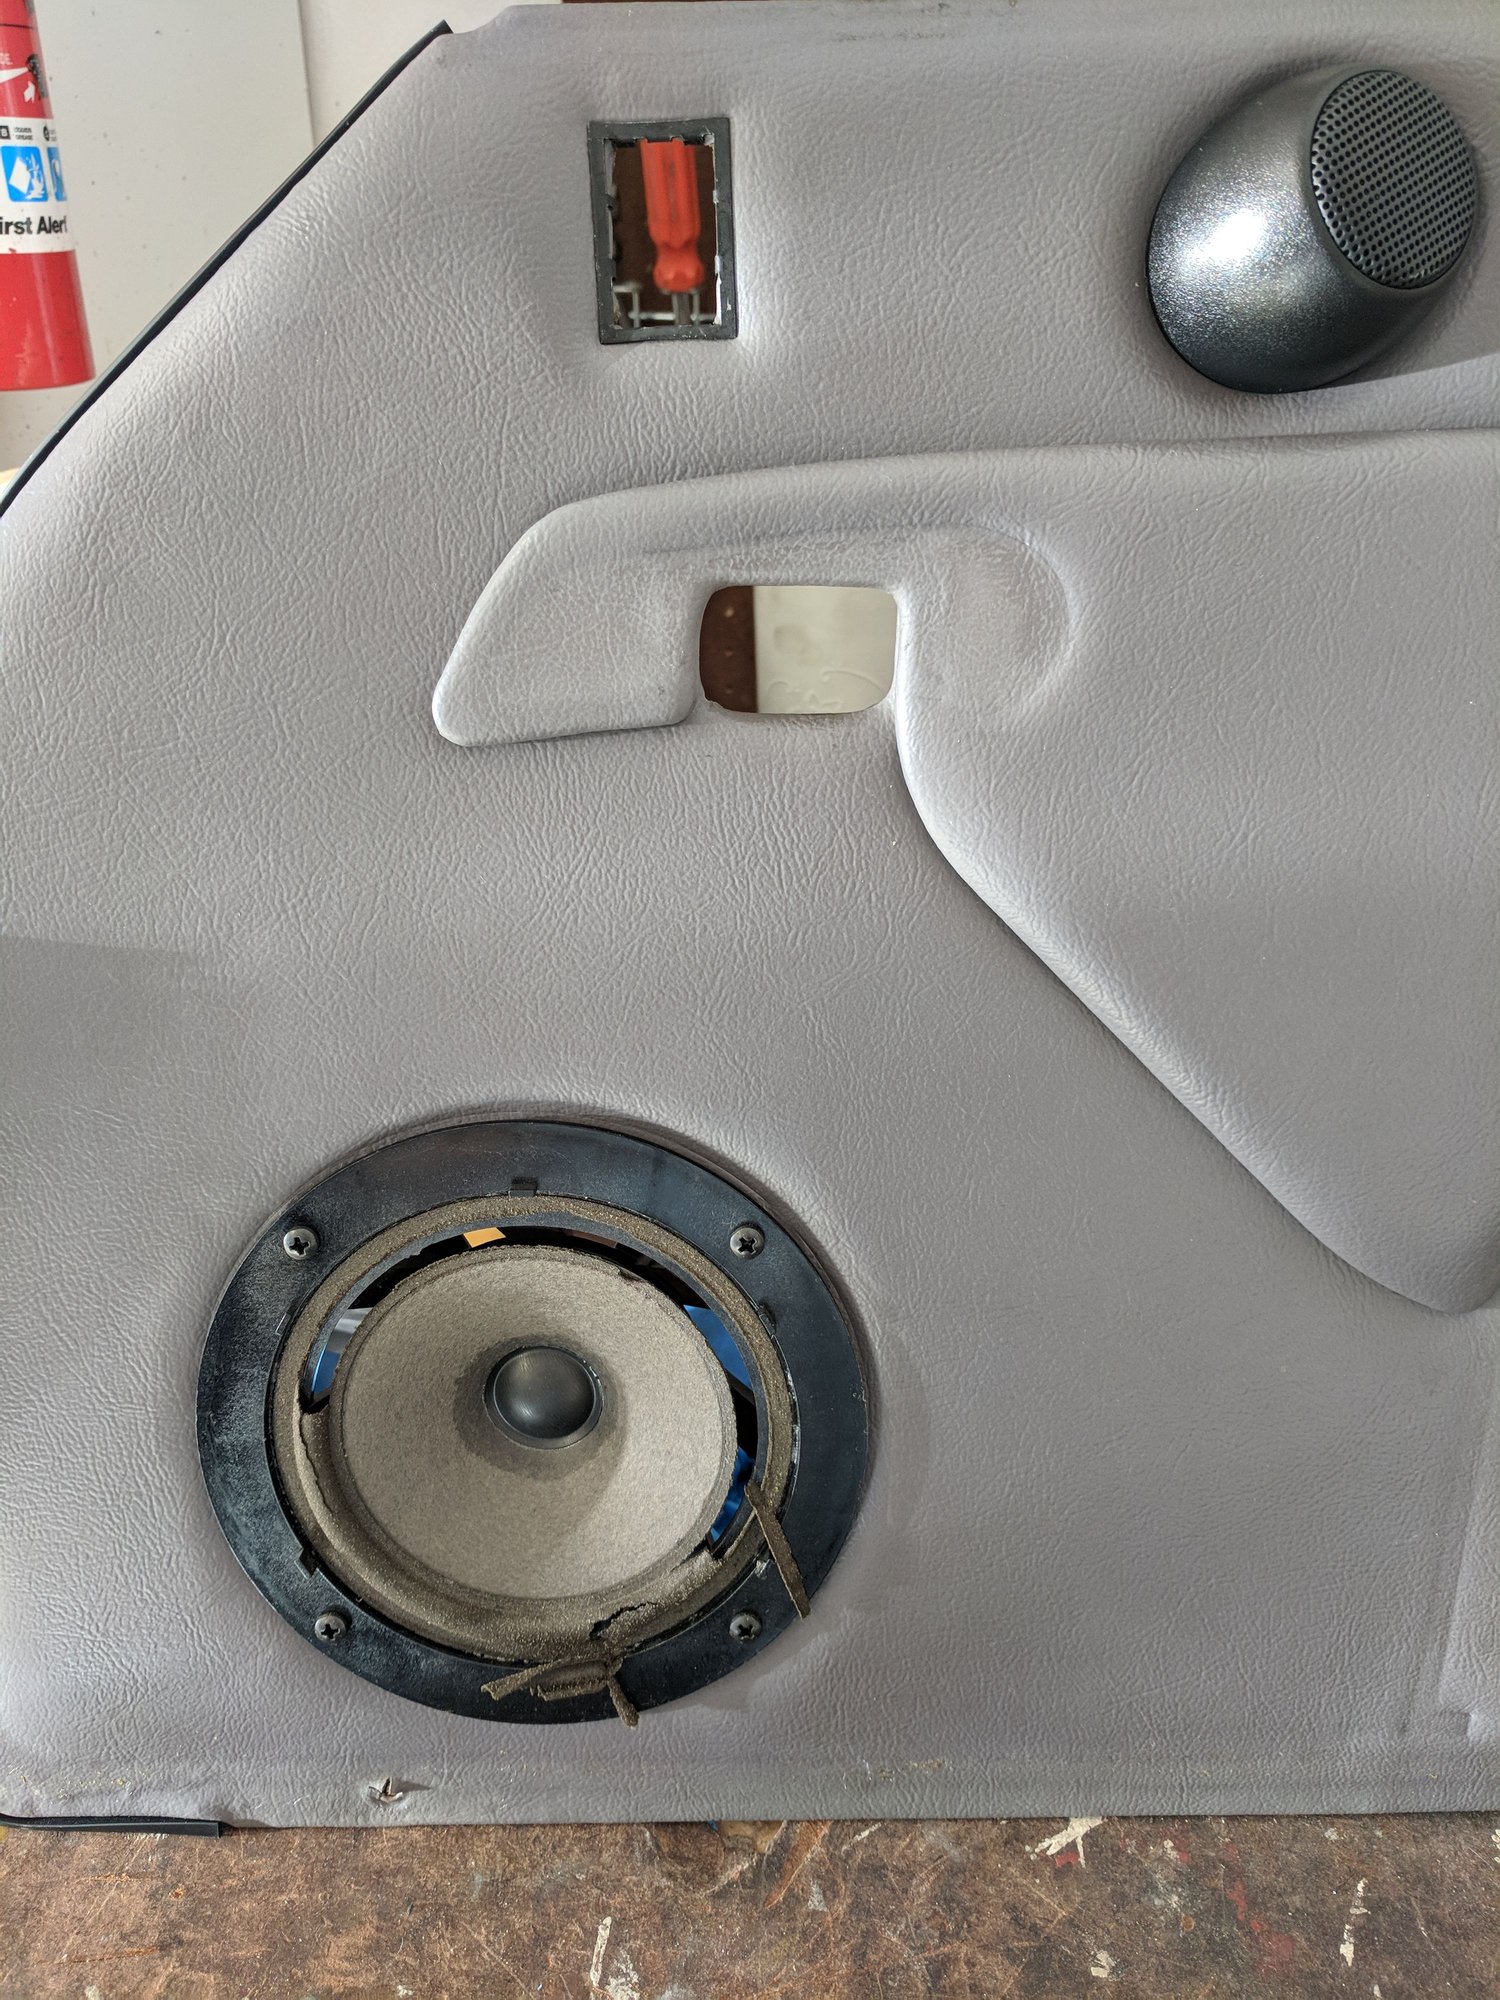
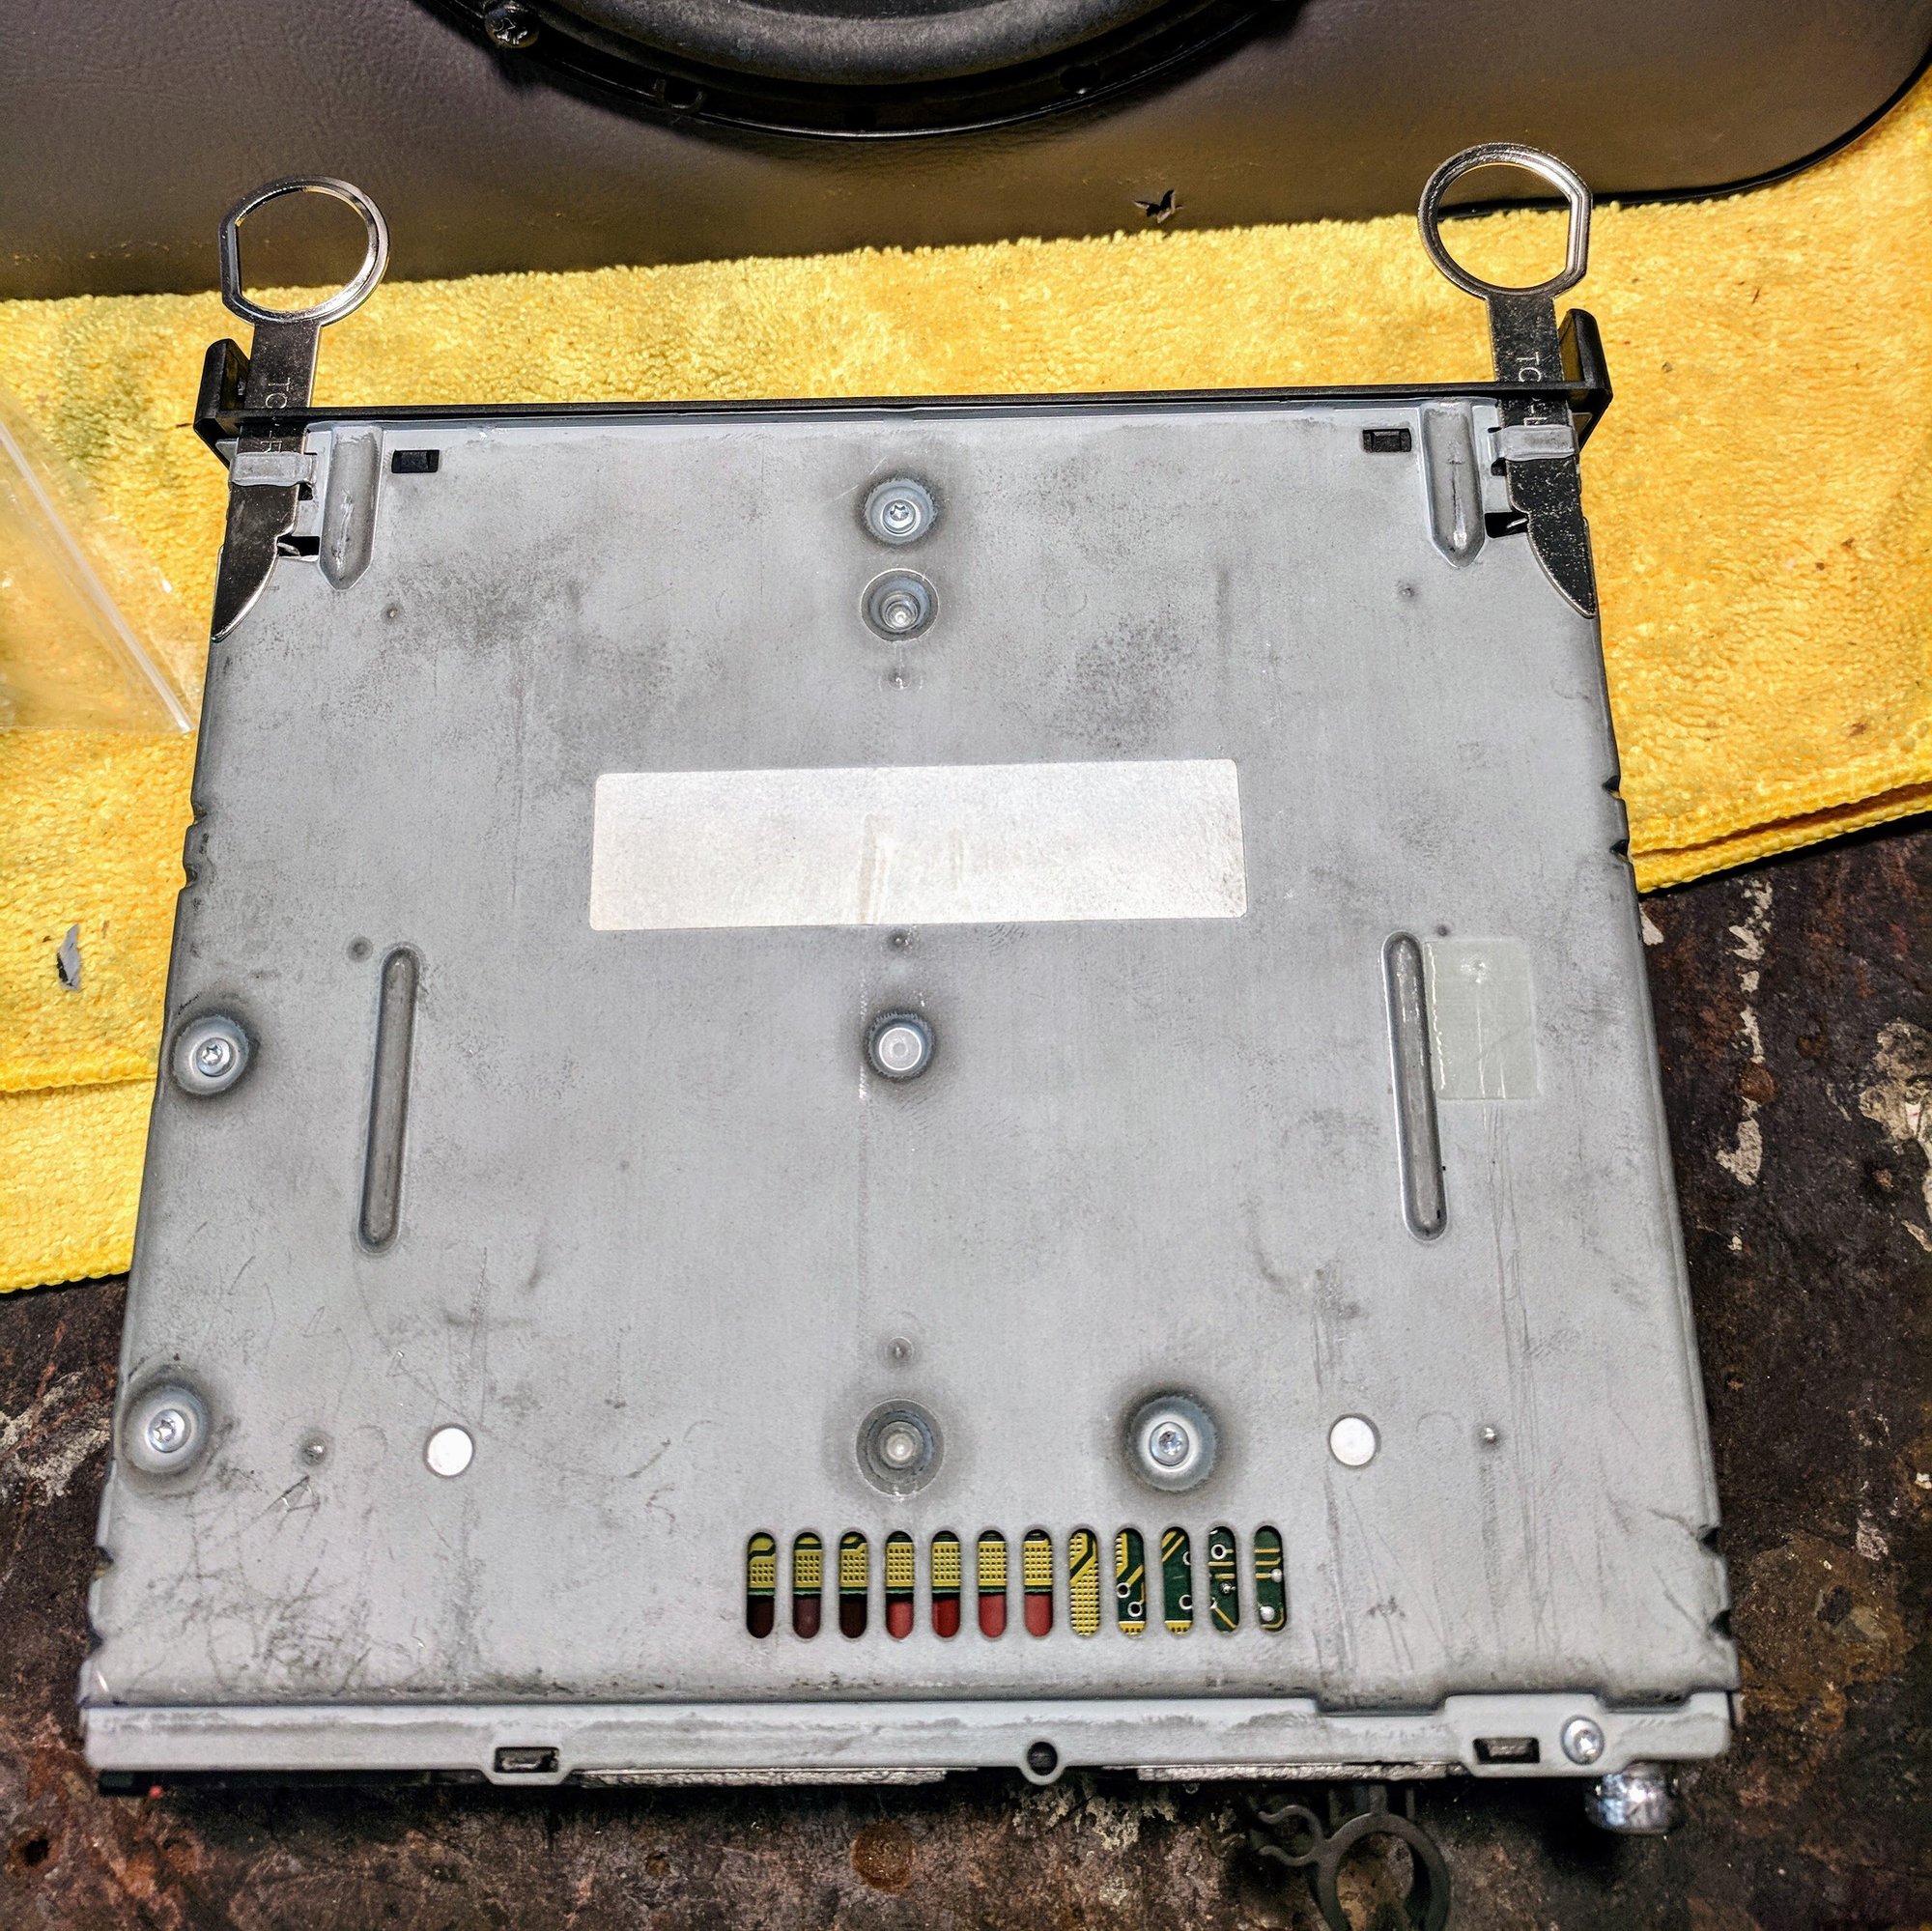
The past few months have been super busy with work and family duties so my projects have been limited to simple cleaning projects. One was cleaning my door cards and when I removed them I found my speakers were toast. Couldn't ignore this so pulled the trigger to upgrade my stereo.
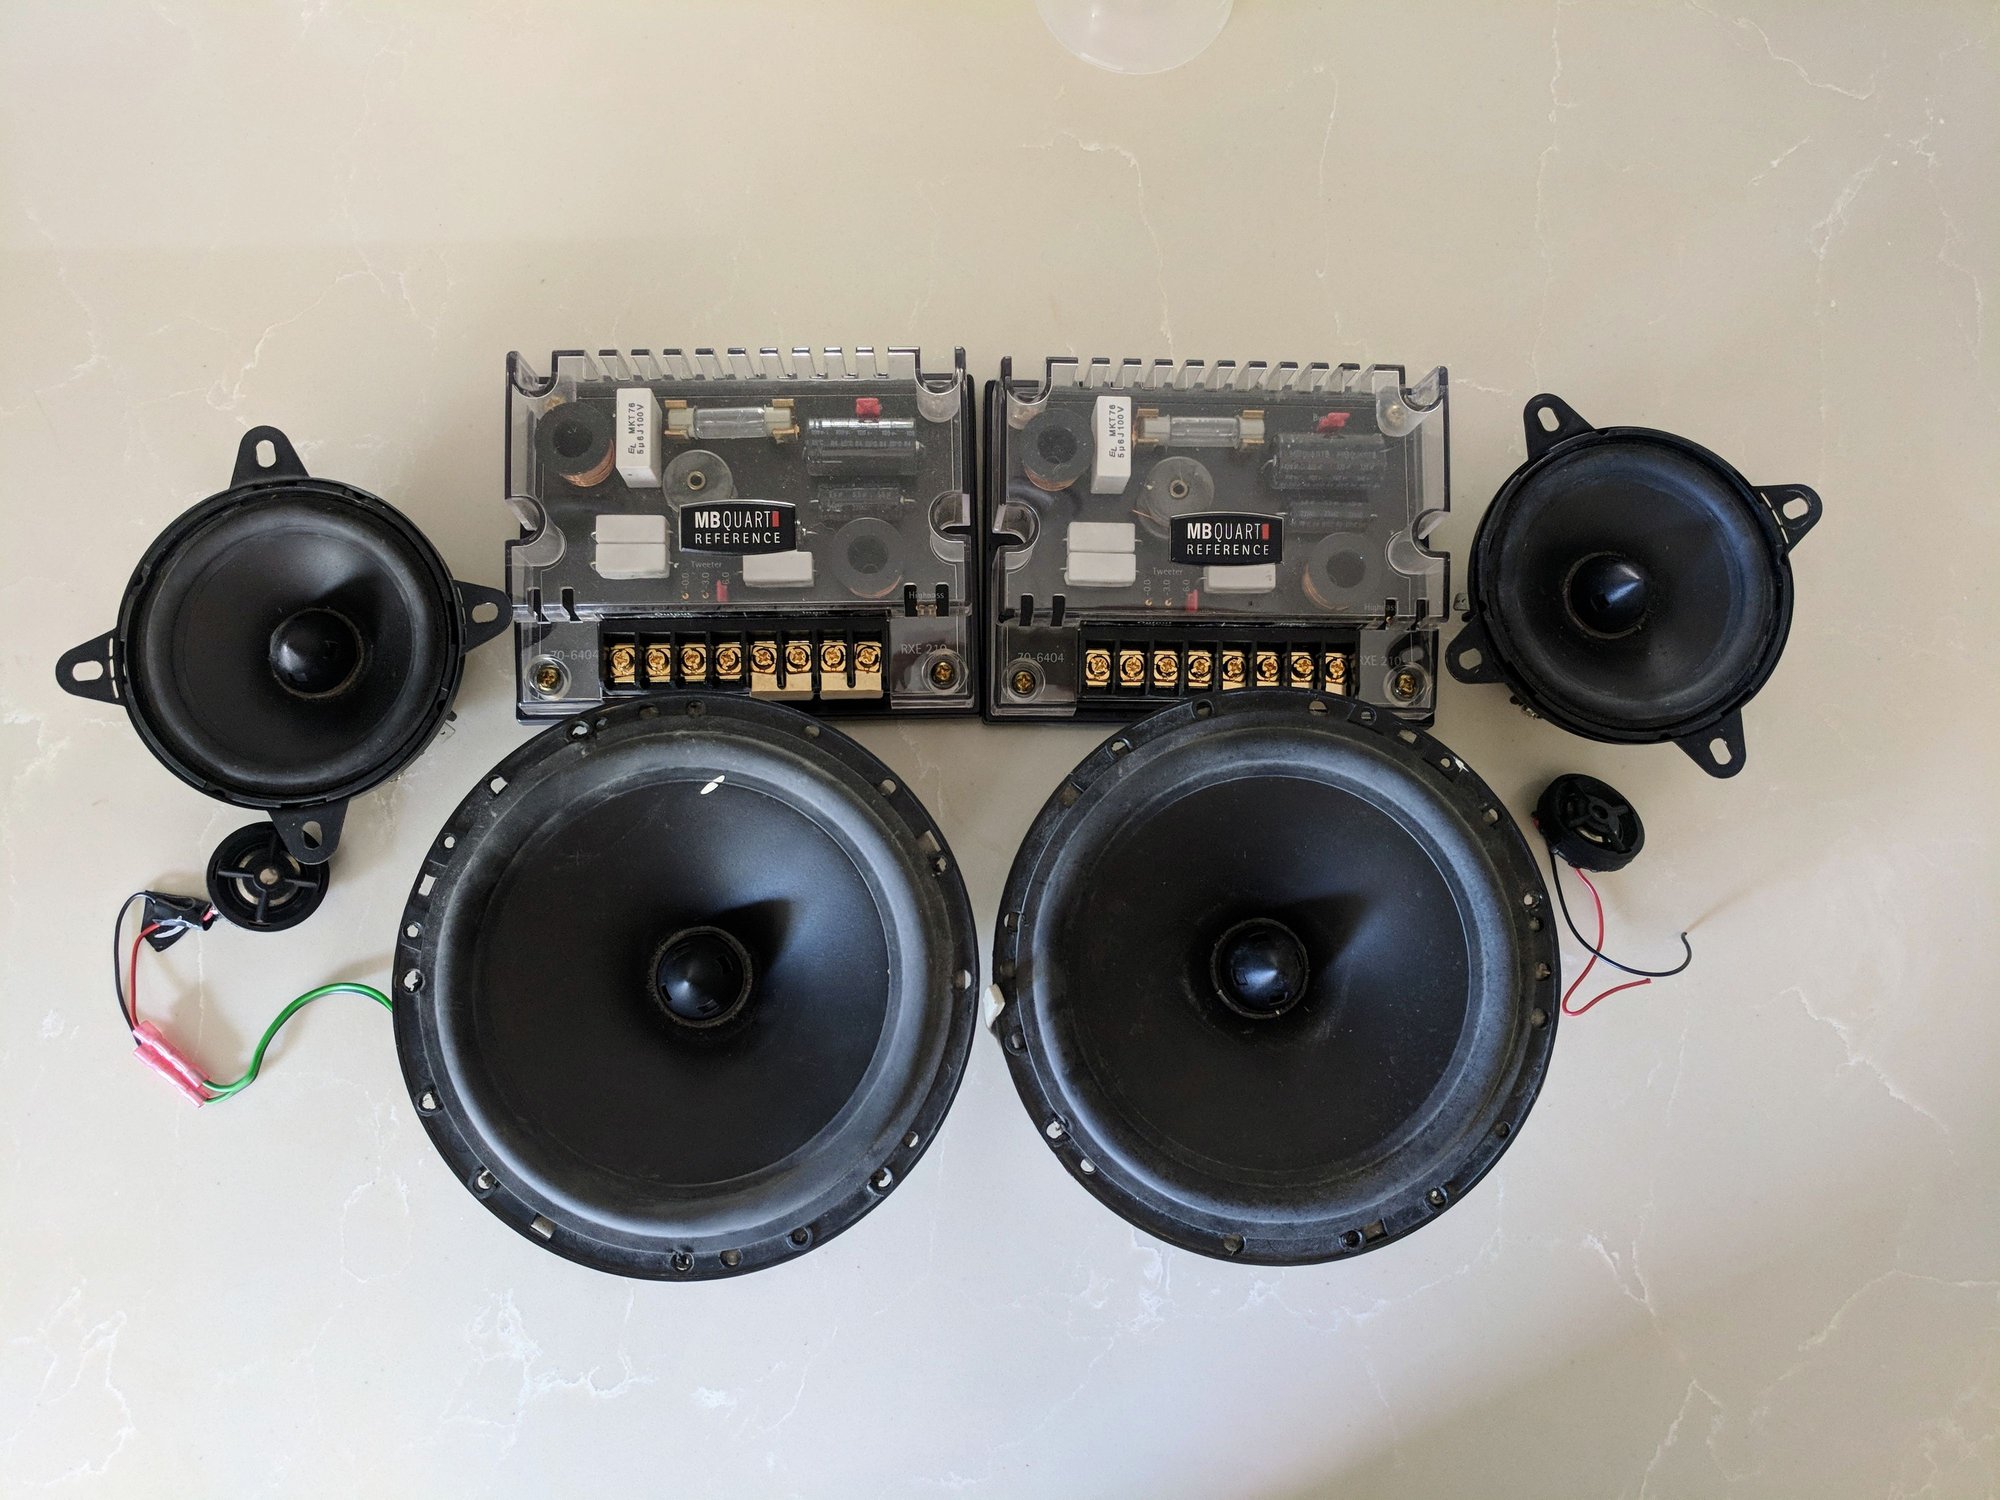
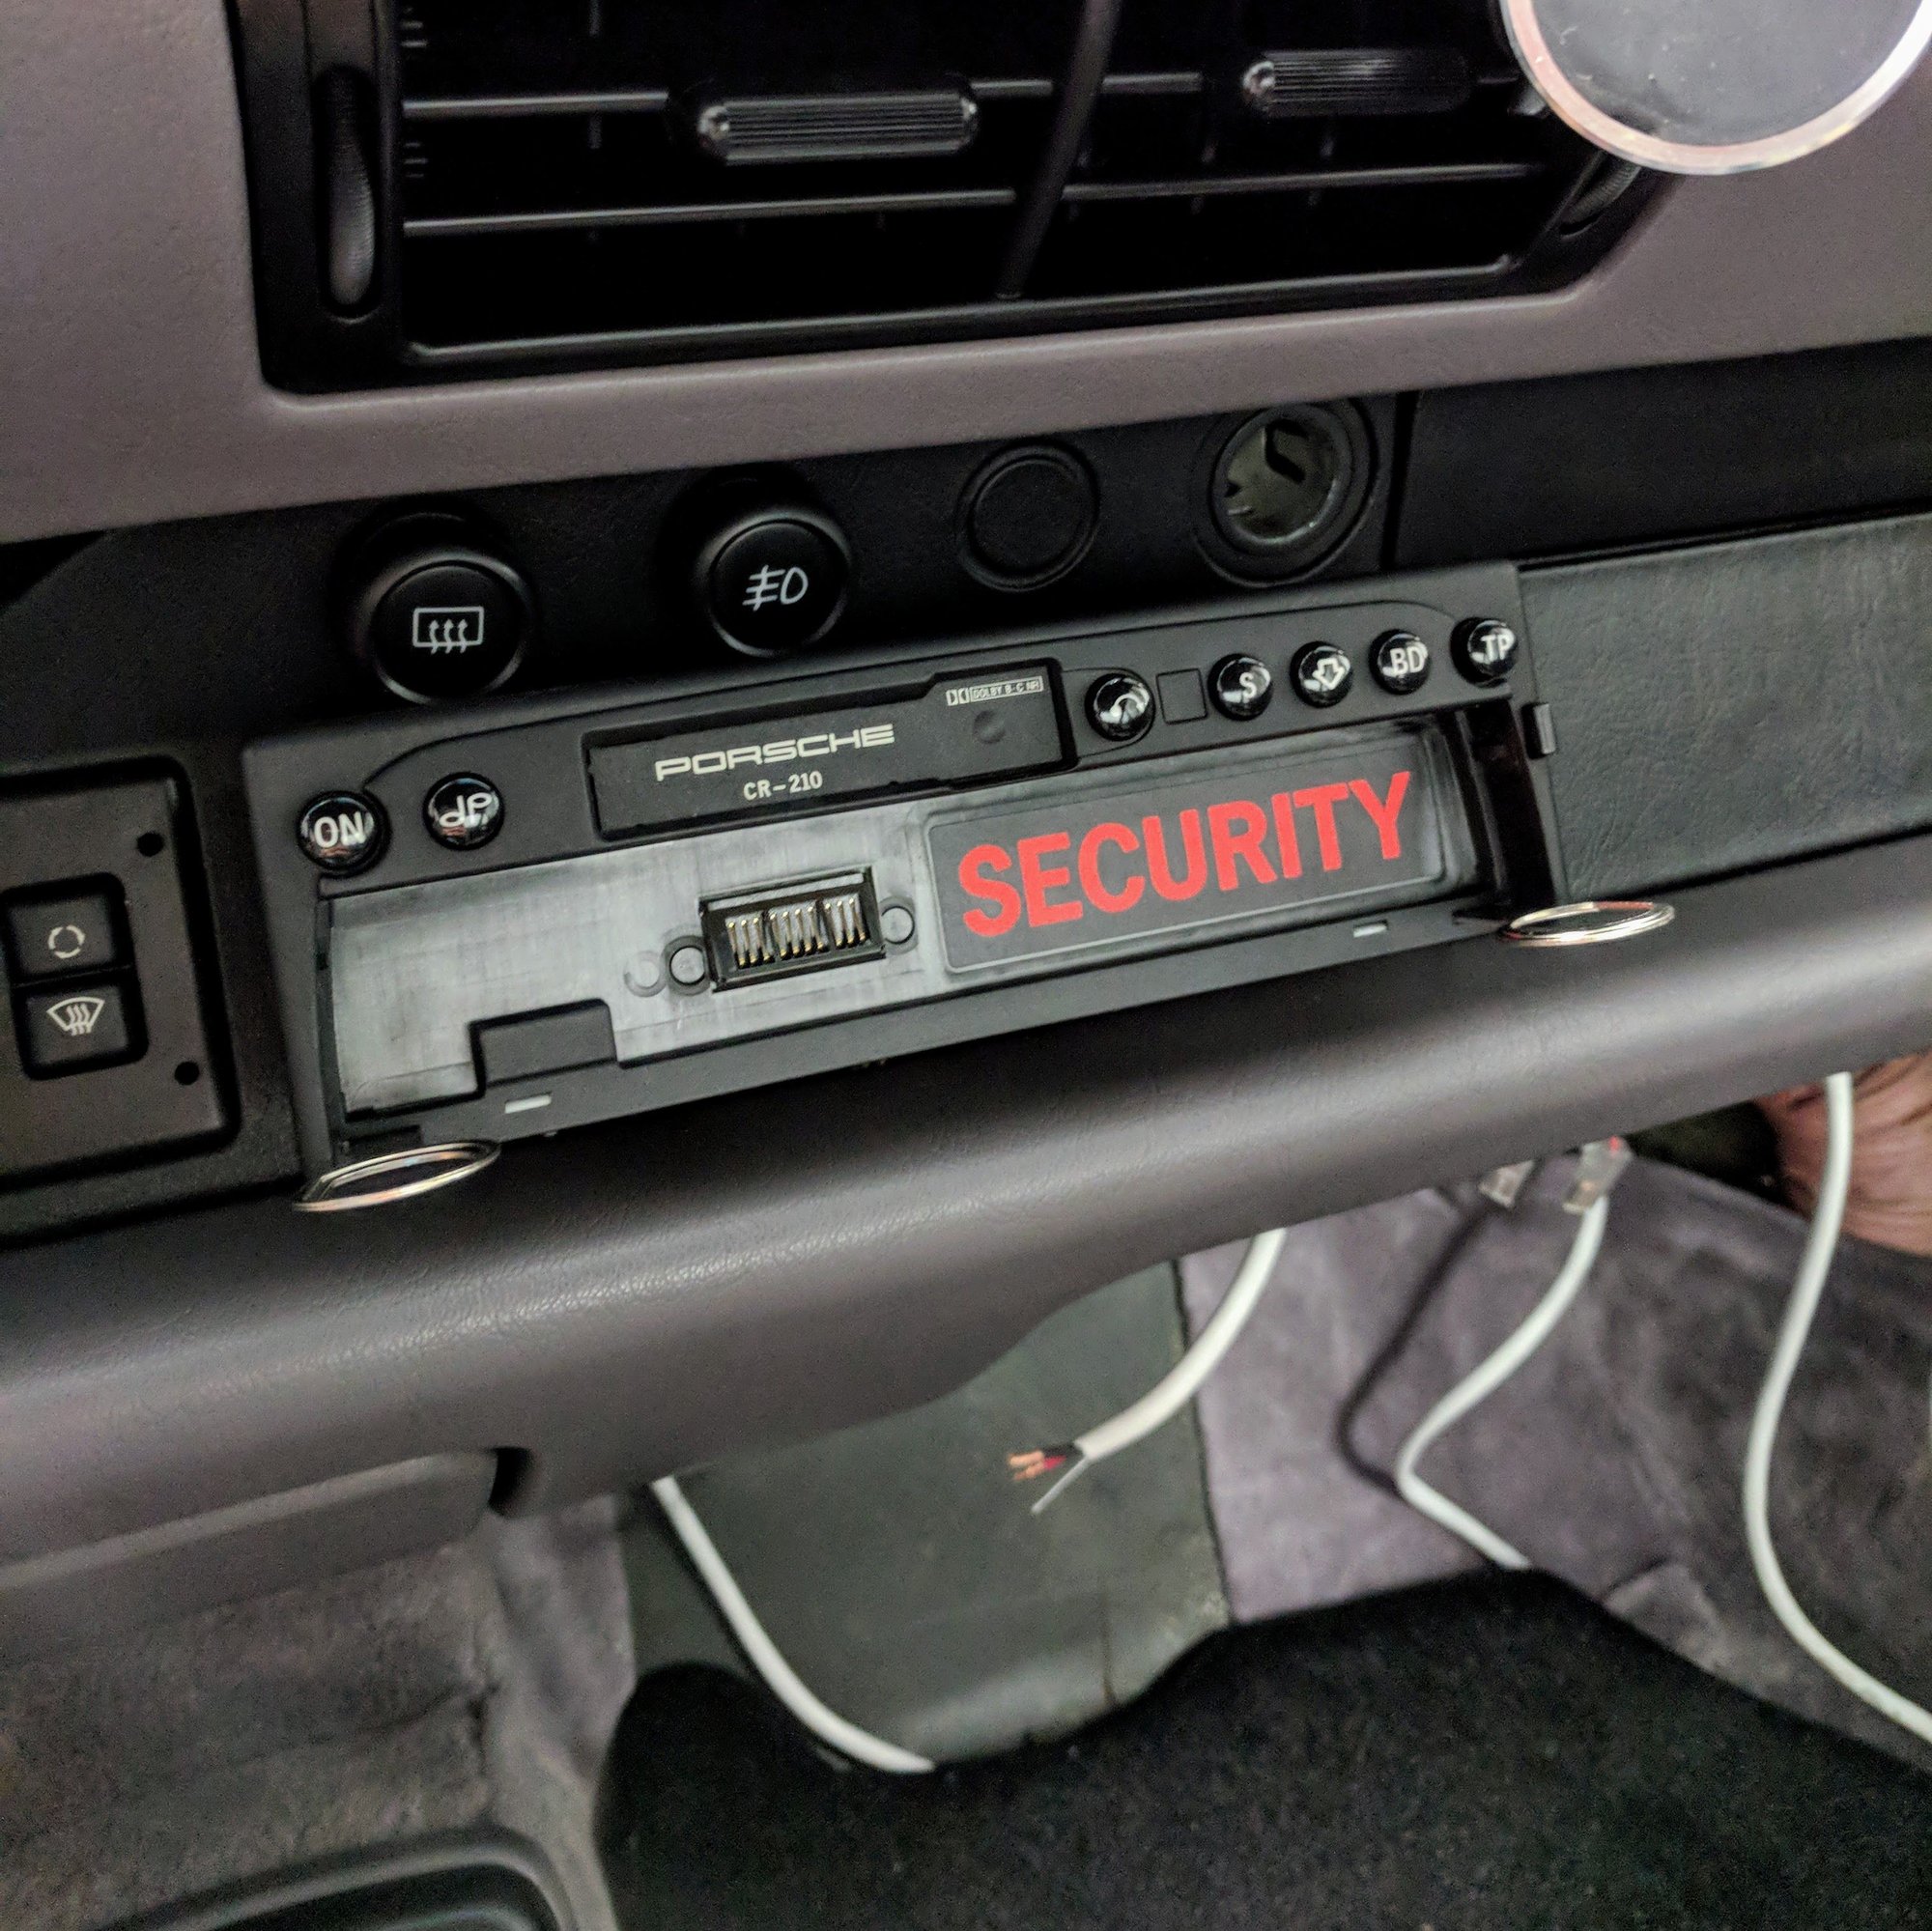
I have been a audio junkie all of my life. Started with vinyl and car audio, but now its my Sennheisers and Schitt or Apogee DAC/amp as I spend more time at my office or on a plane listening to tunes. My original plan to upgrade the 993 audio was to upgrade to a DSP/amp and 6.5" components and integrate a BT receiver as I wanted to use the original CR210 head unit.
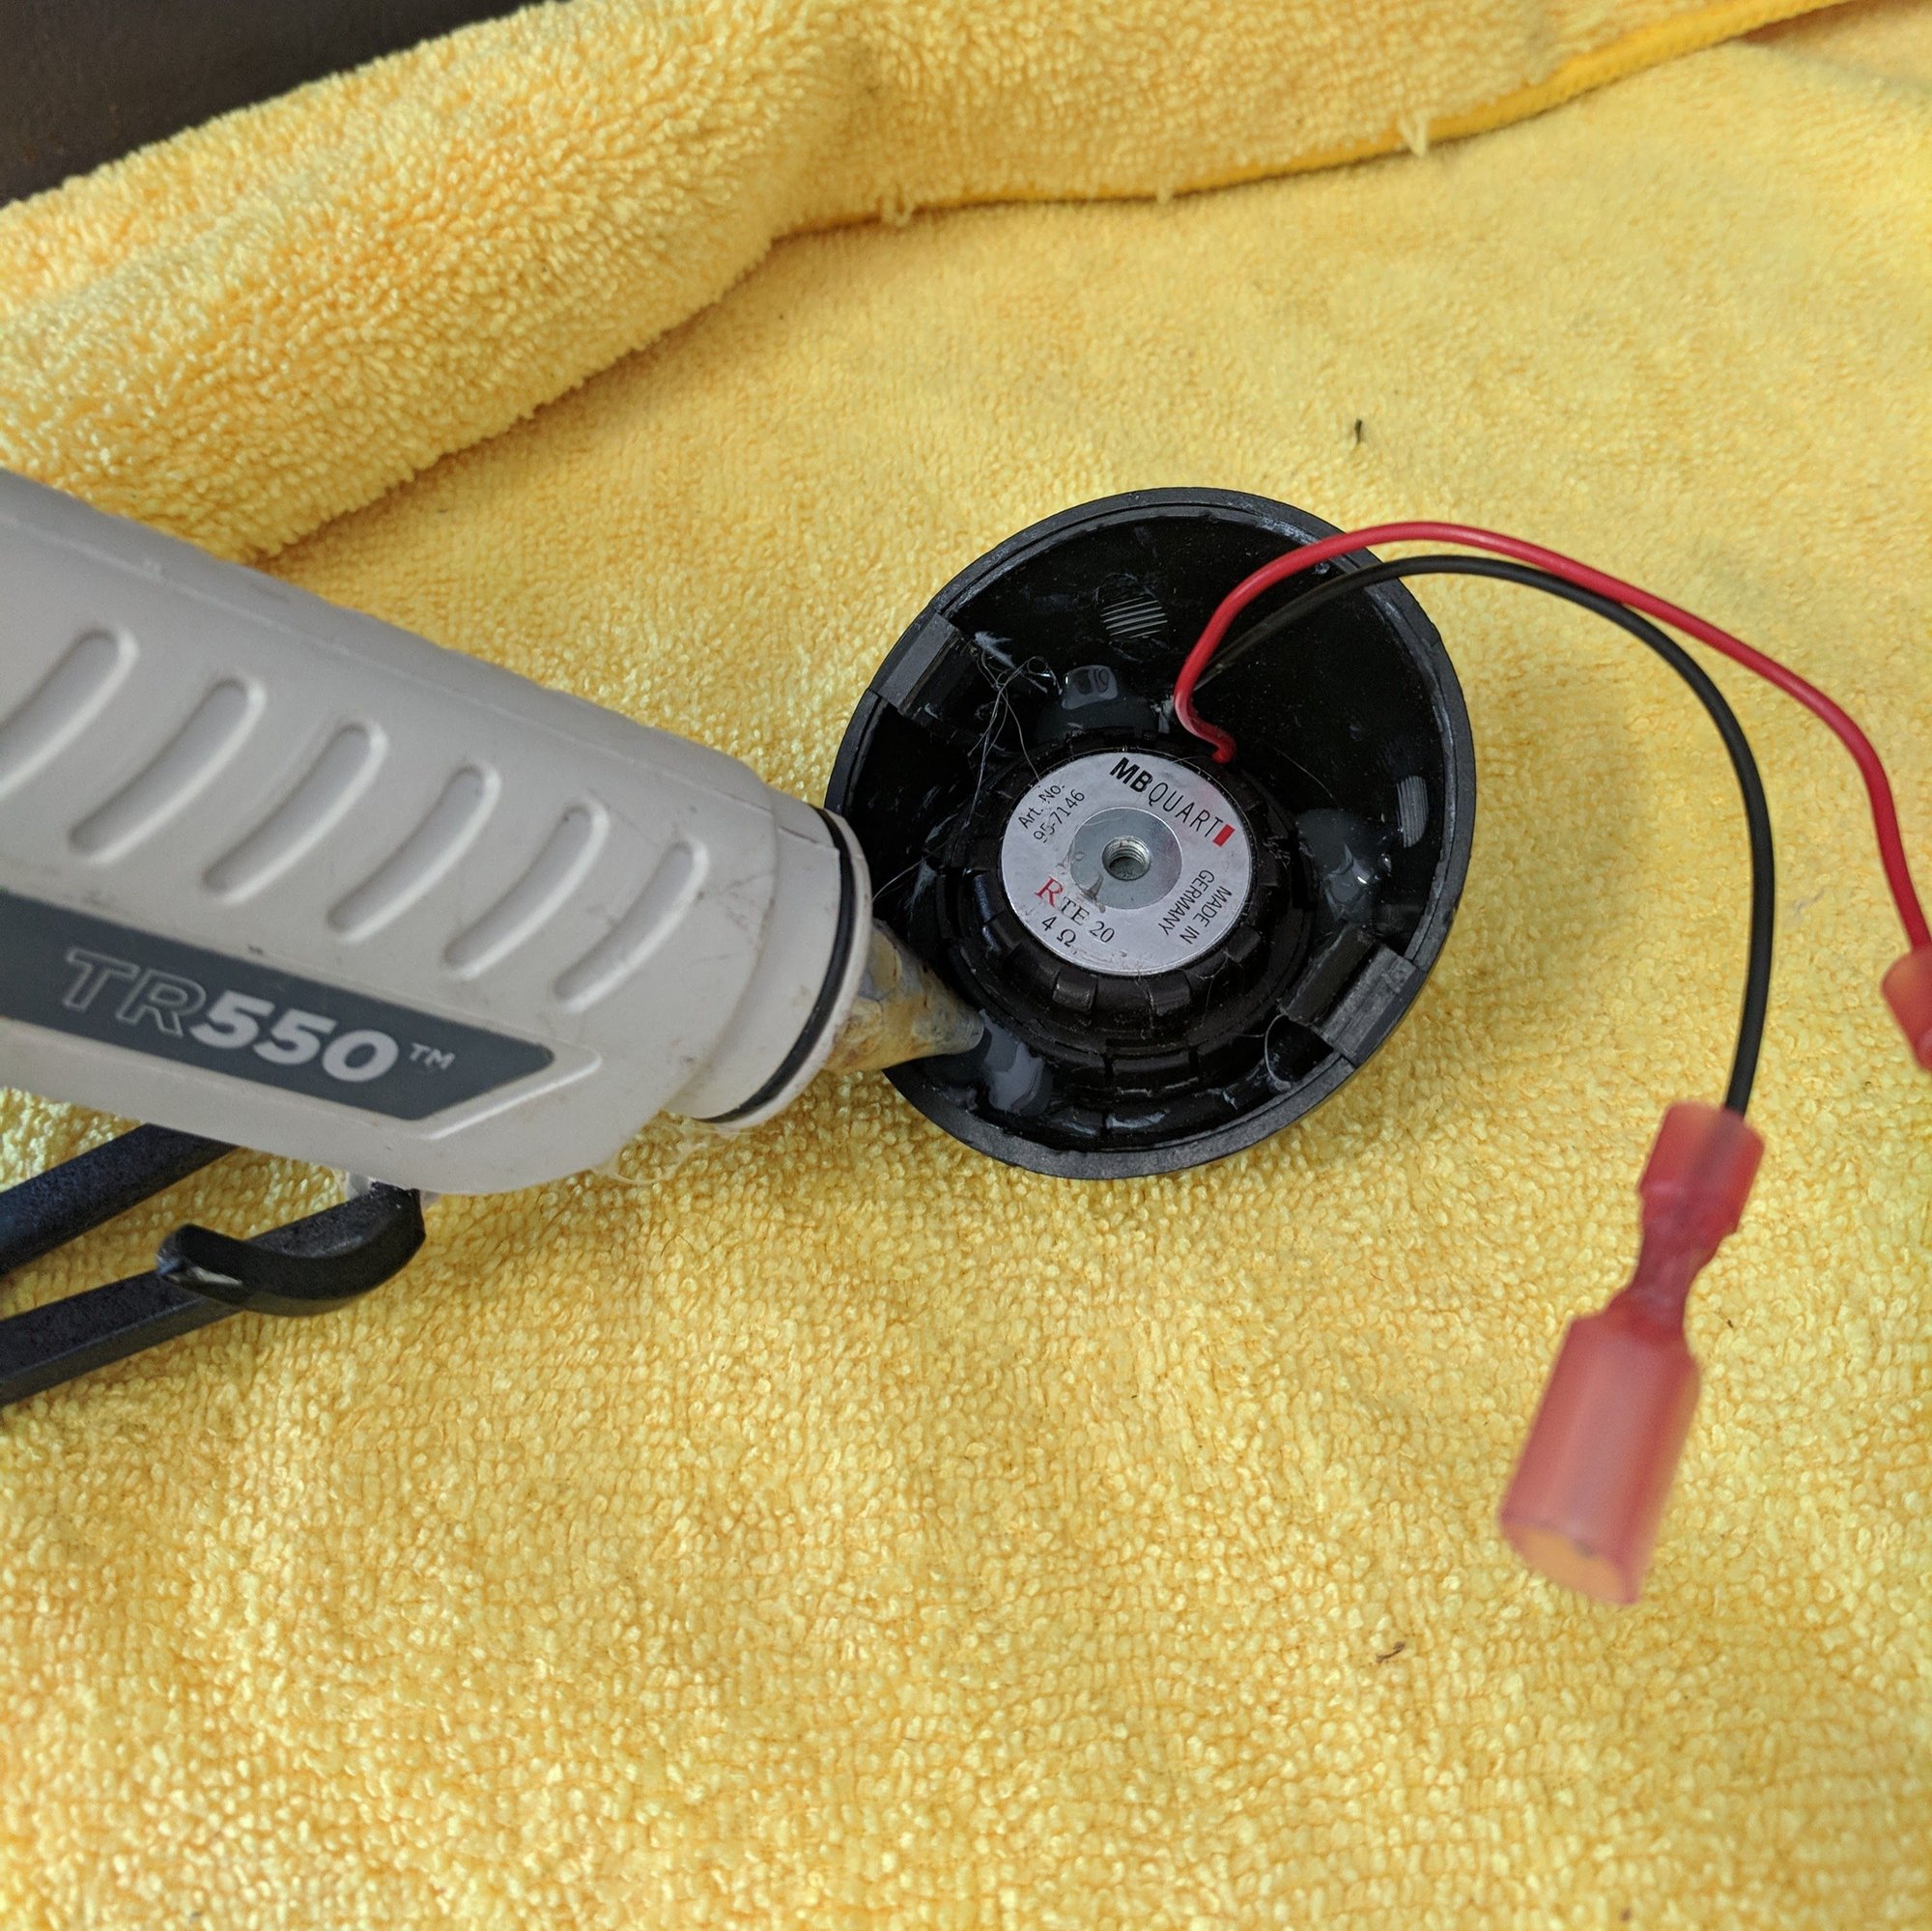
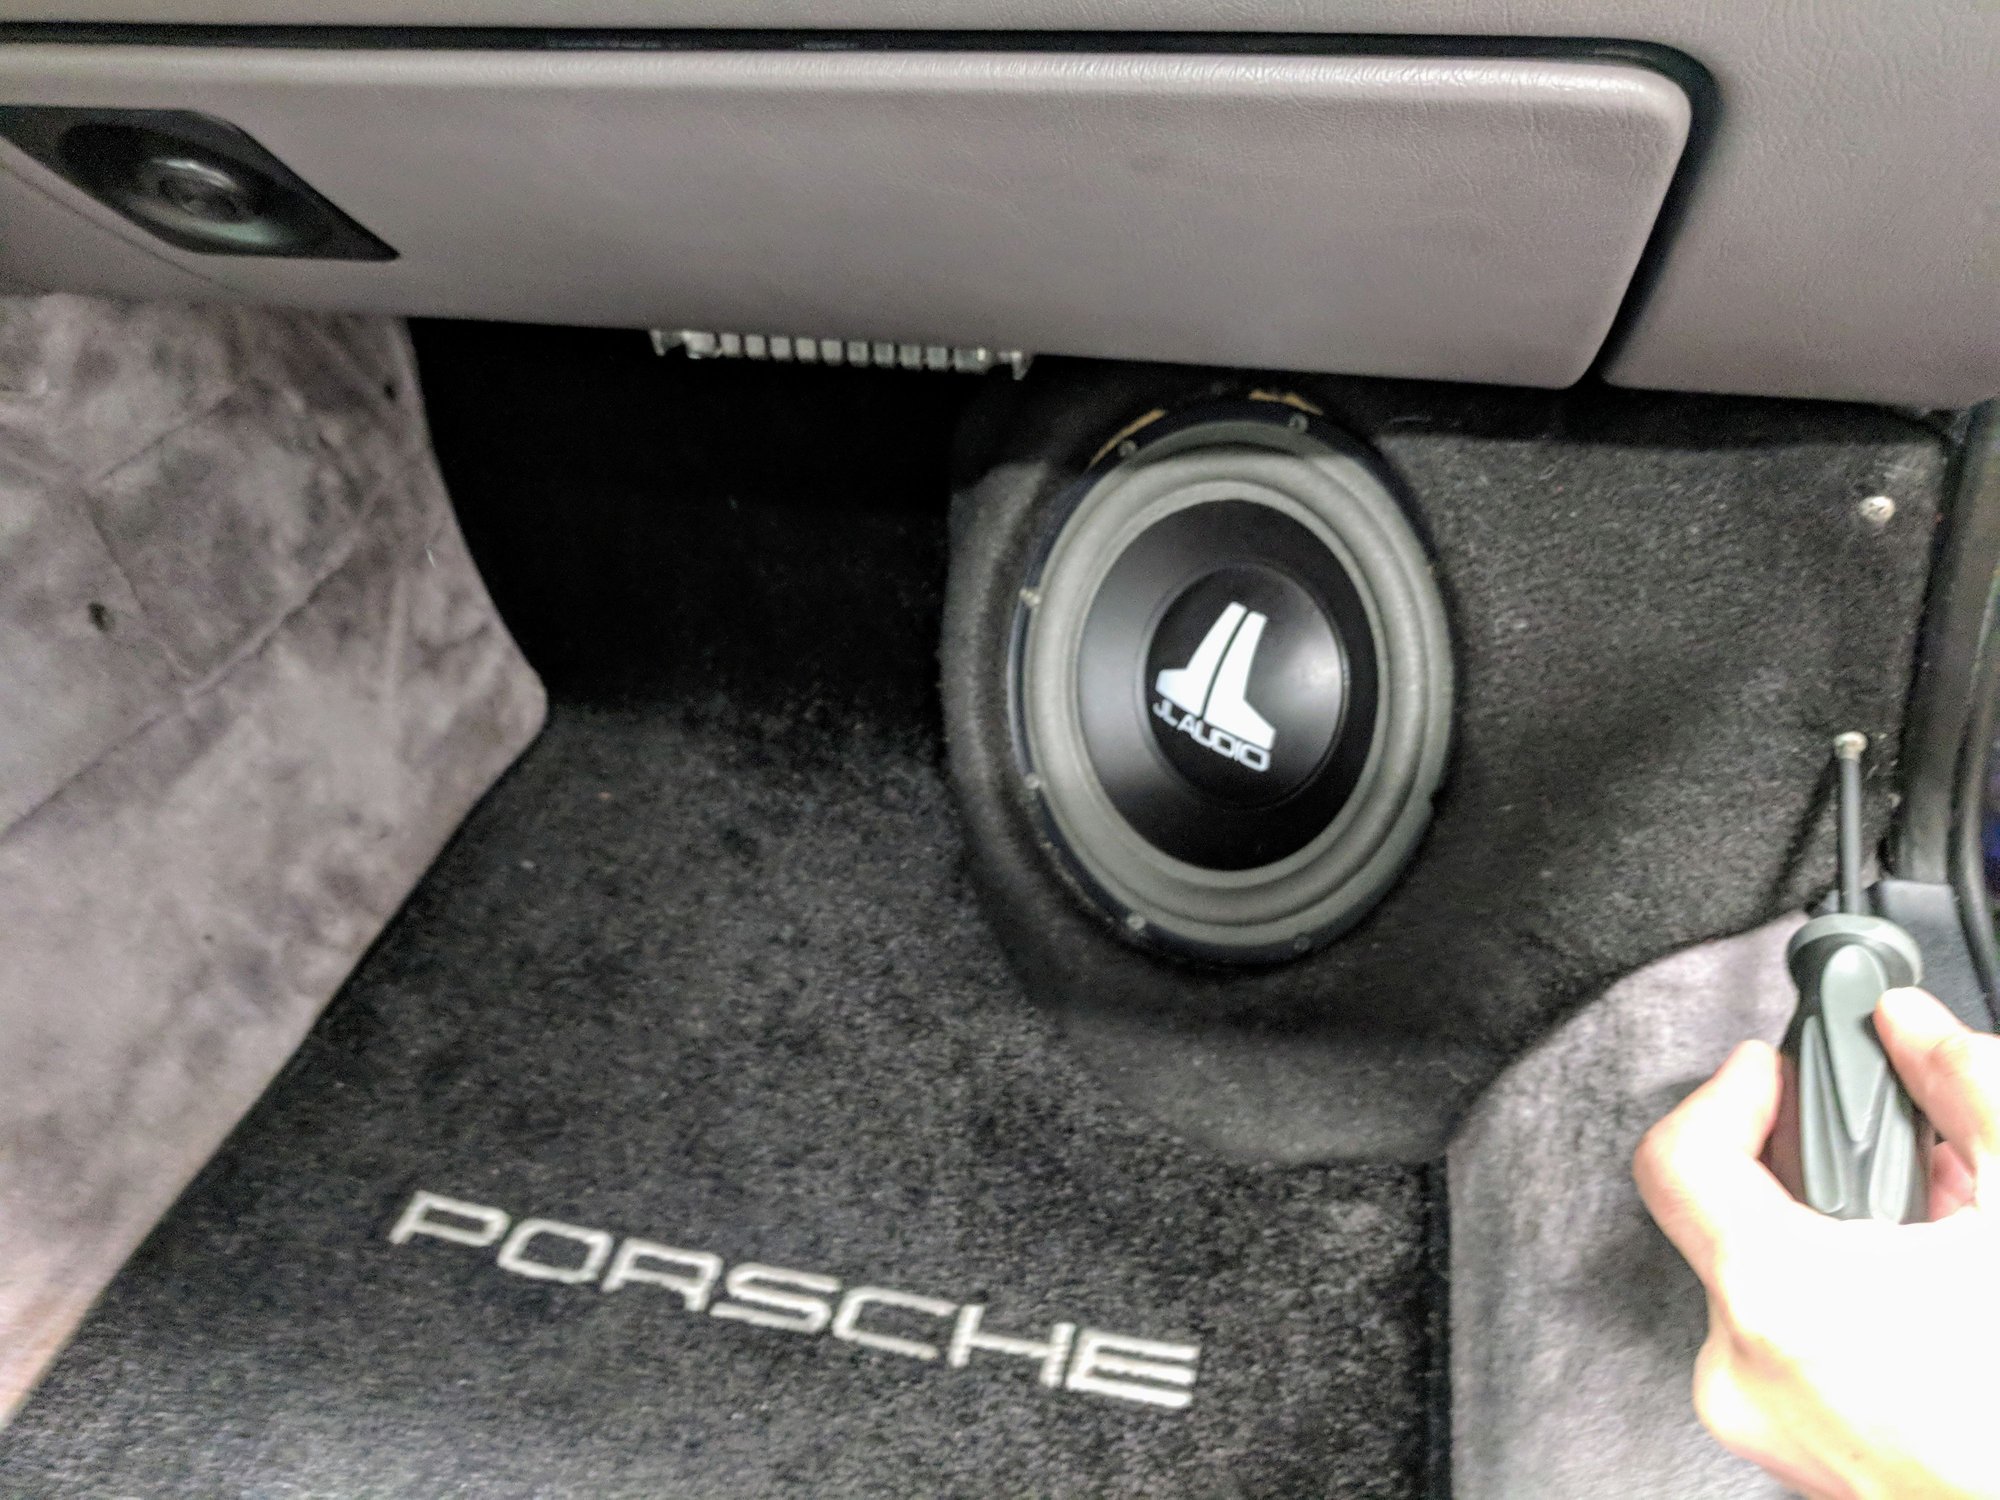
Coincidentally there was a local 993 enthusiast who is converting his 993 C4S into a wide body/flared fender GT2. He is gutting the interior of his car and so practically gave away his custom high-end system that included a head unit with DSP/BT, eclipse amps, front and rear made in Germany mb quart components, and a custom JL audio custom footwell sub. I had a similar system back in the day so I knew this would sound awesome for a fraction I was going to pay for a pair of new speakers. So this was a great score!
So lets start with the DIY...
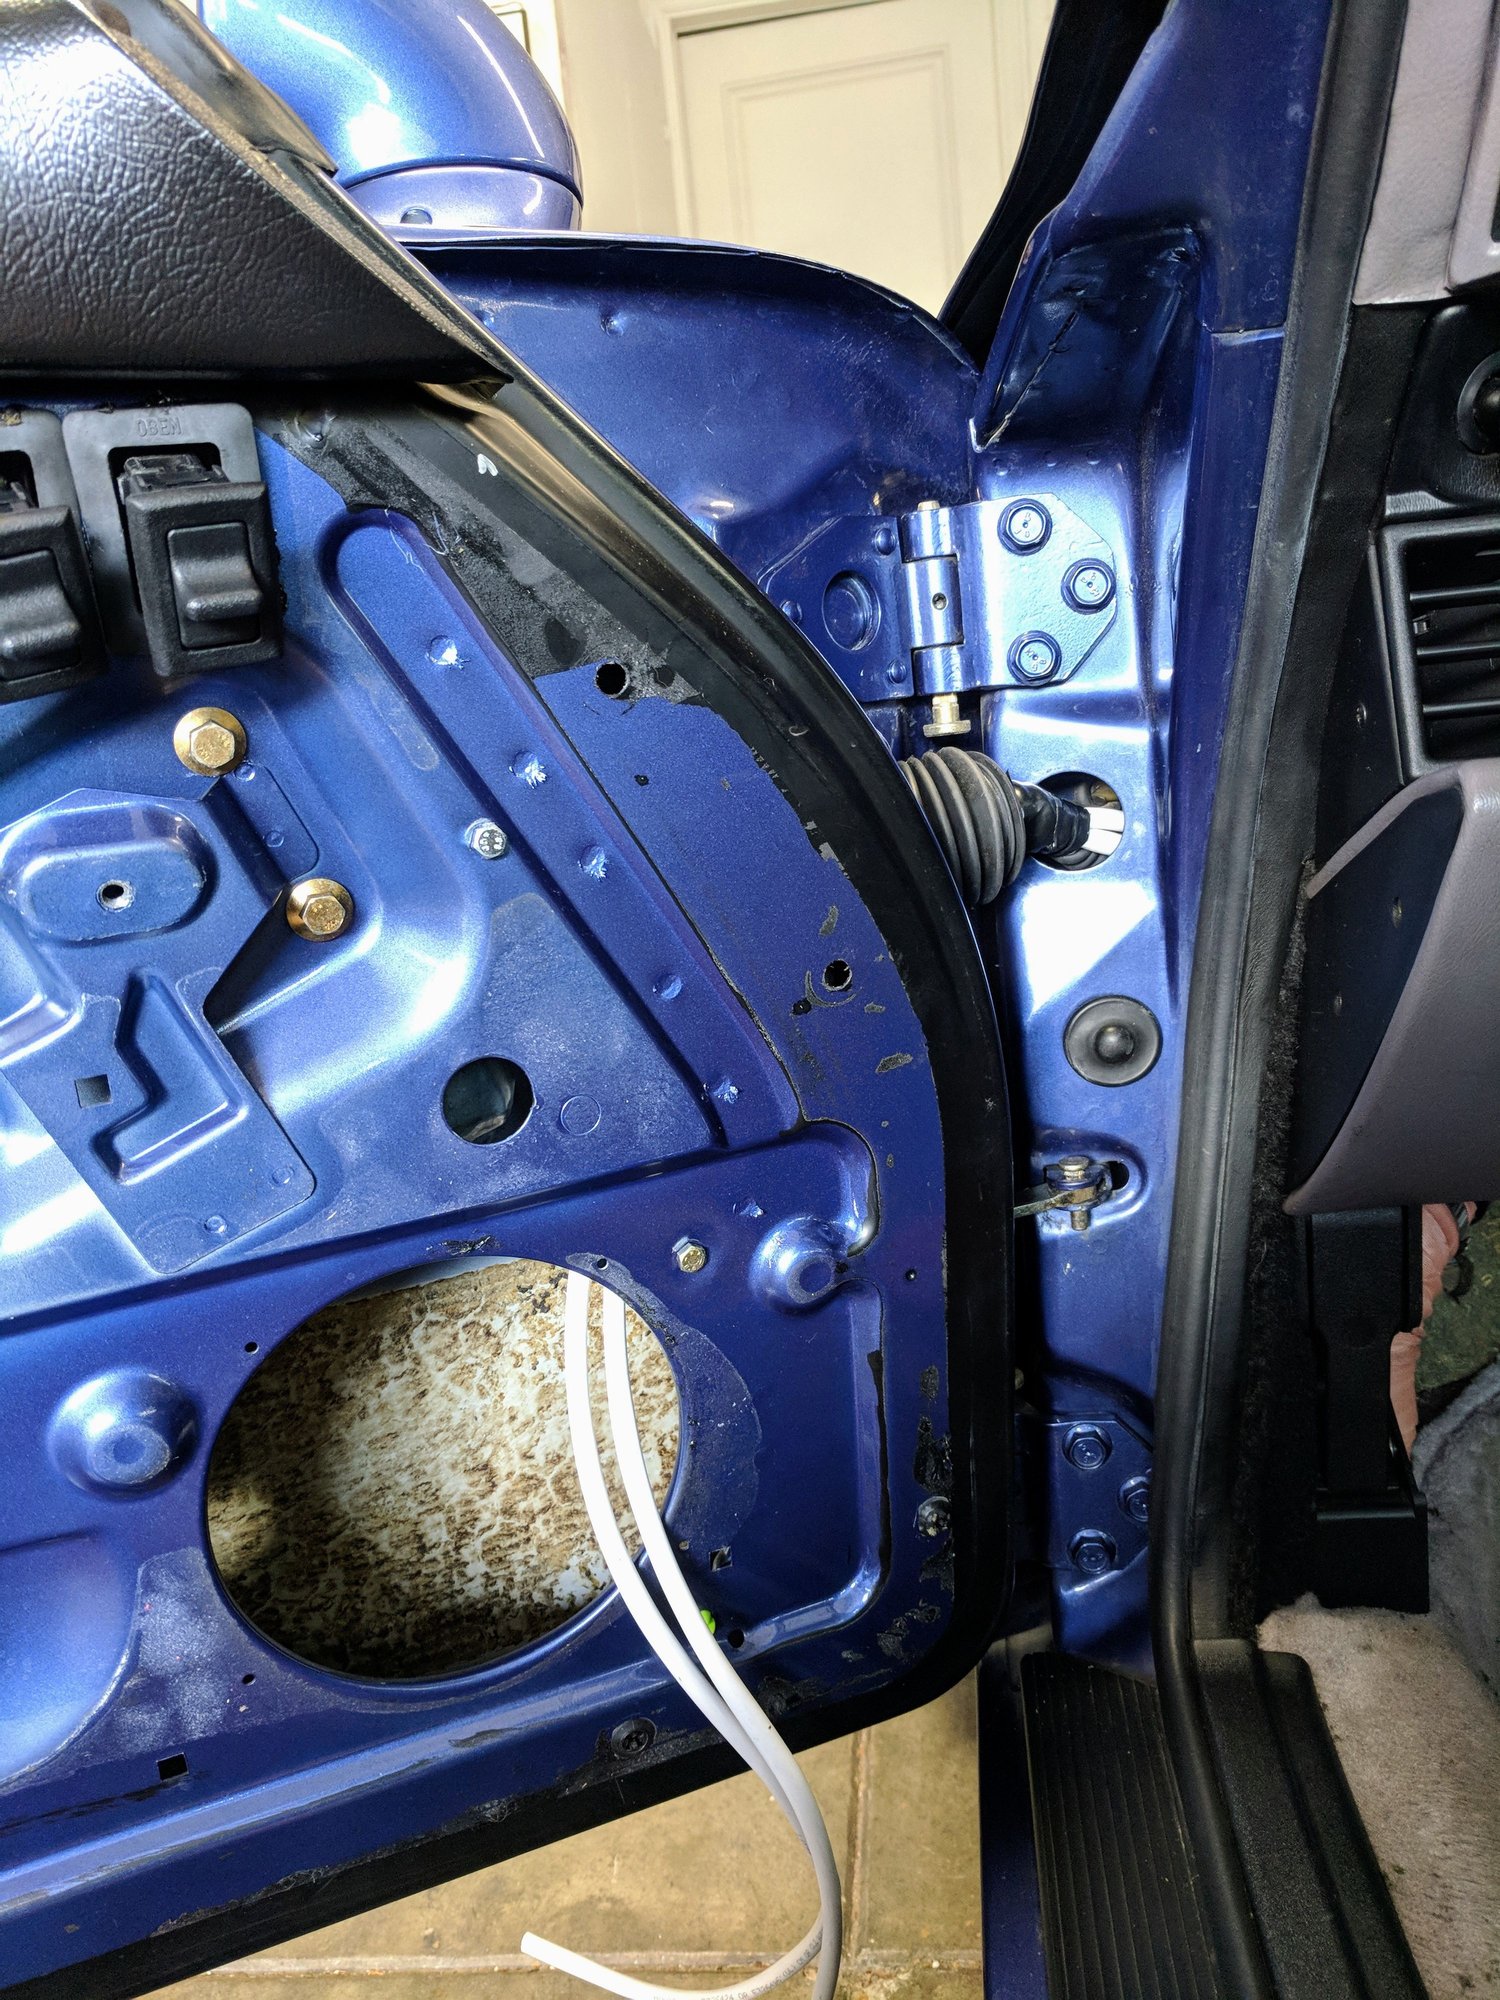
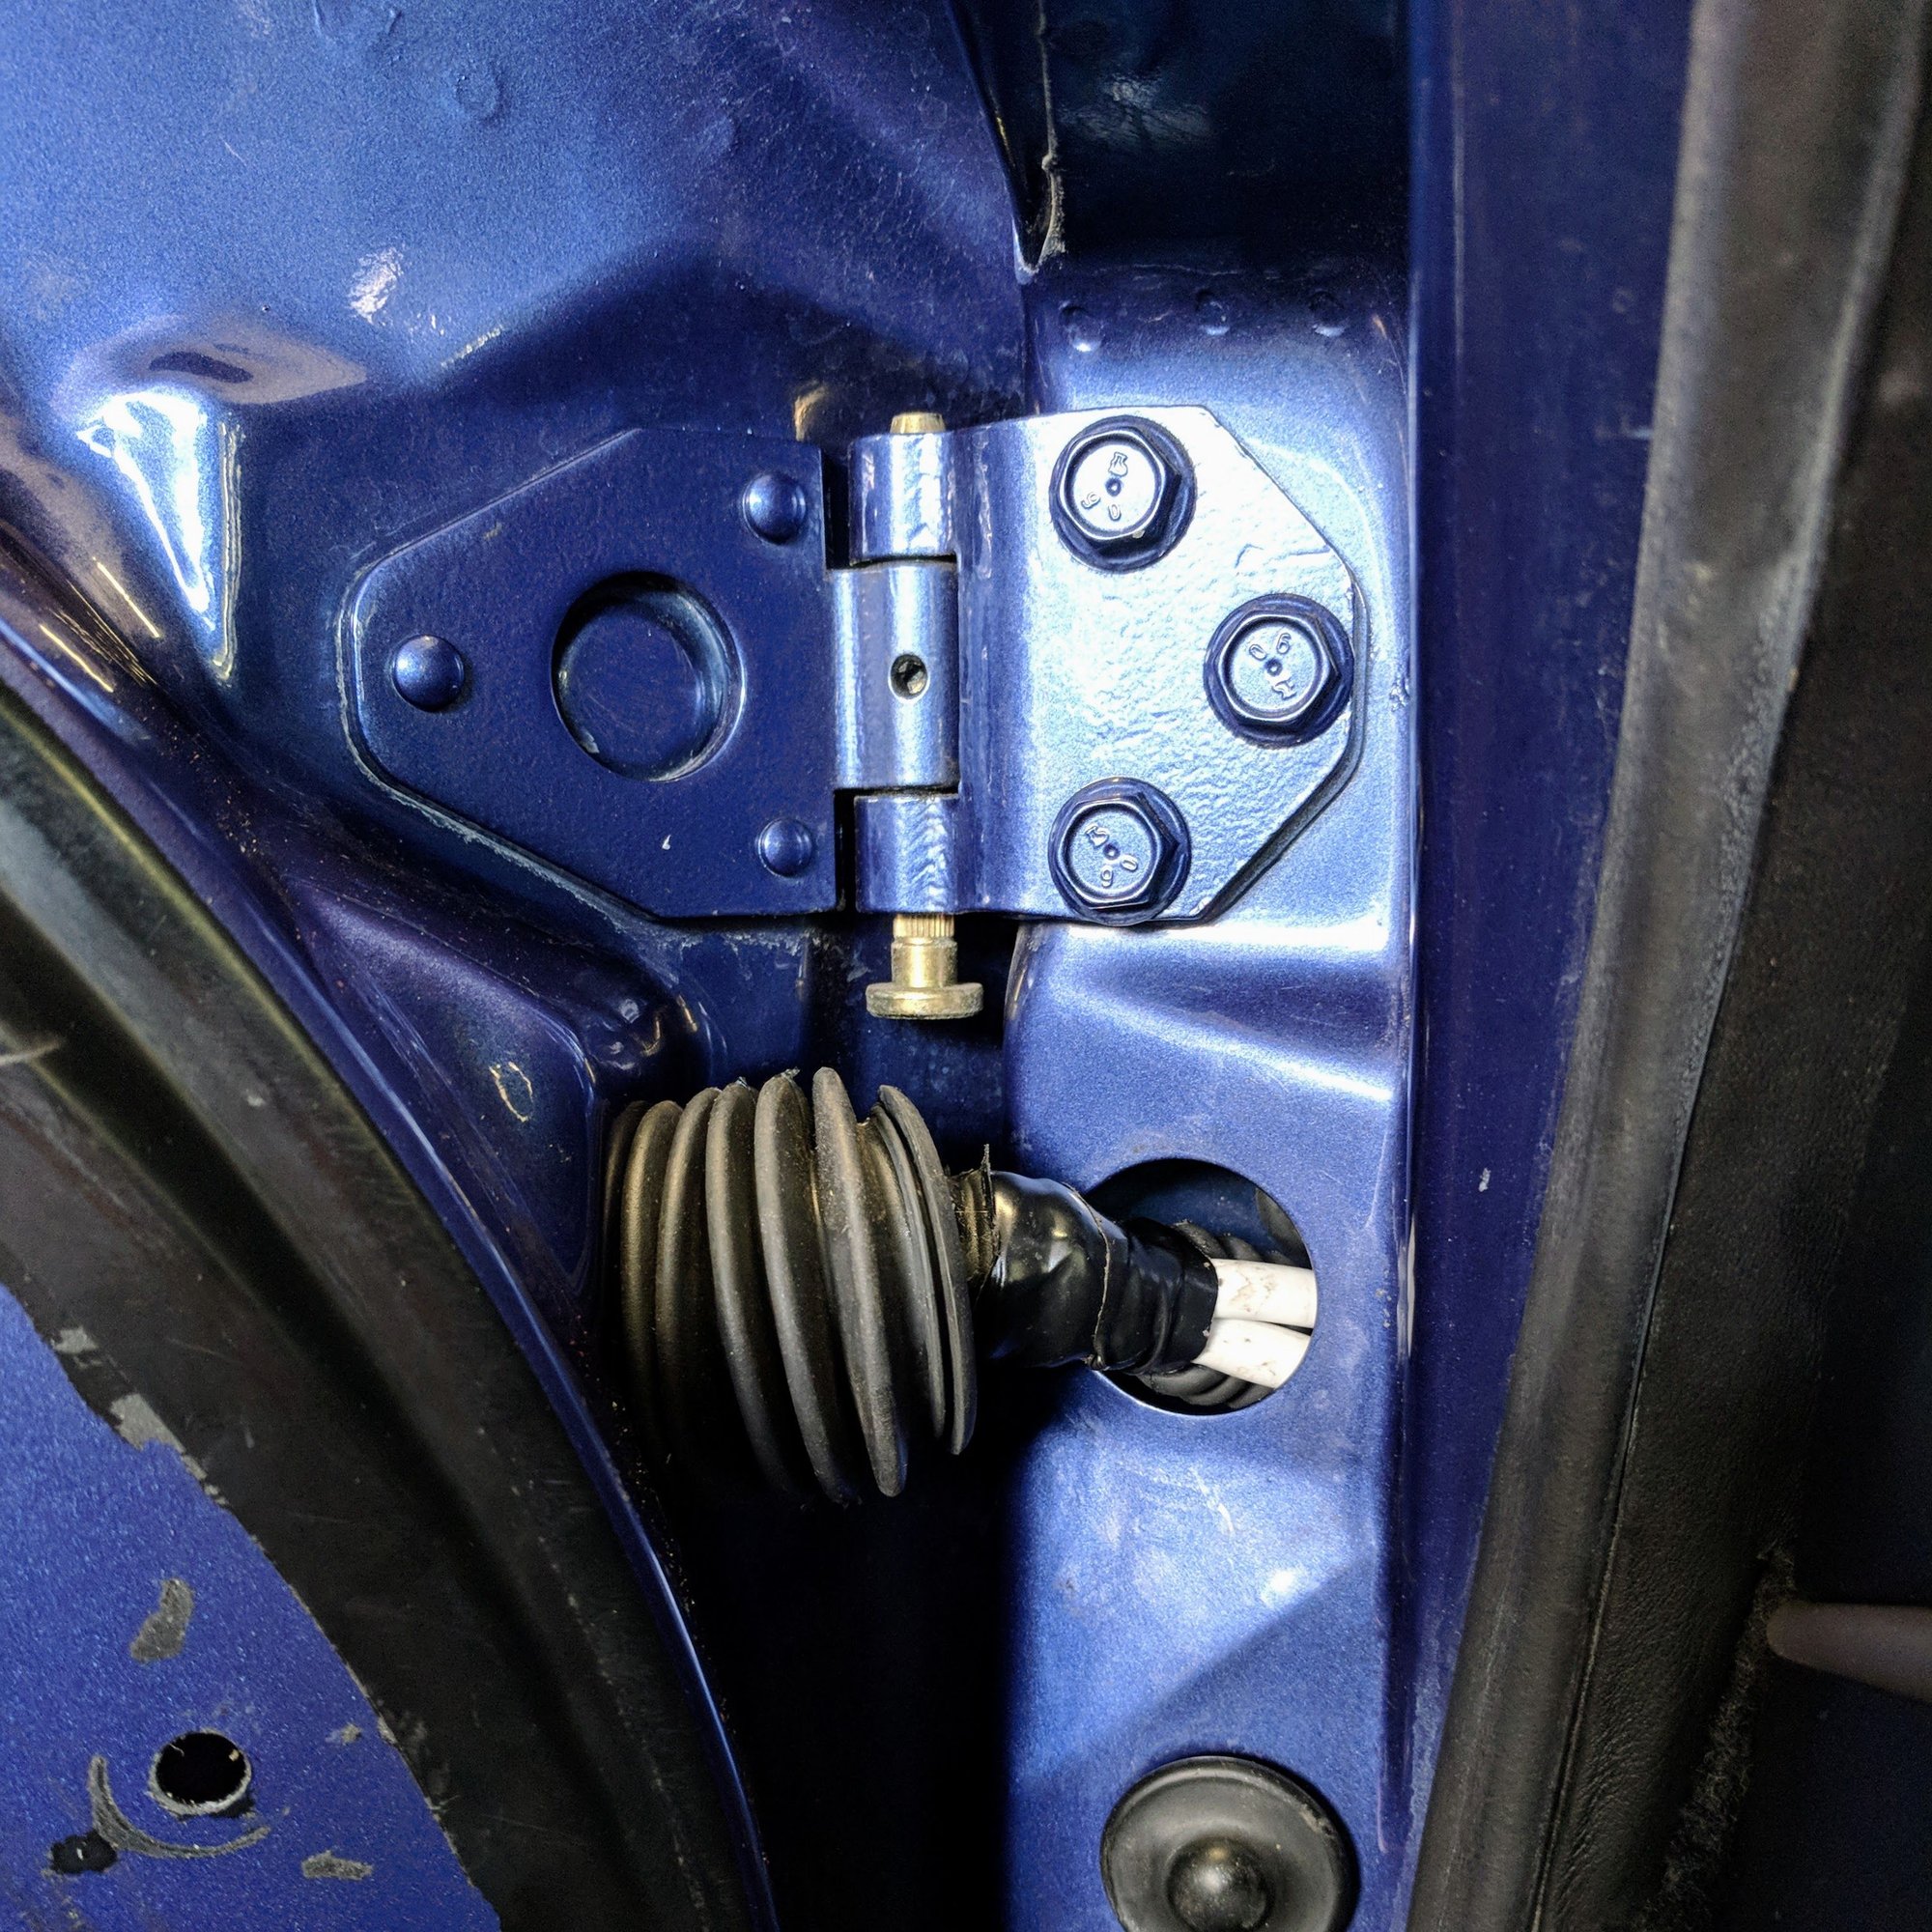
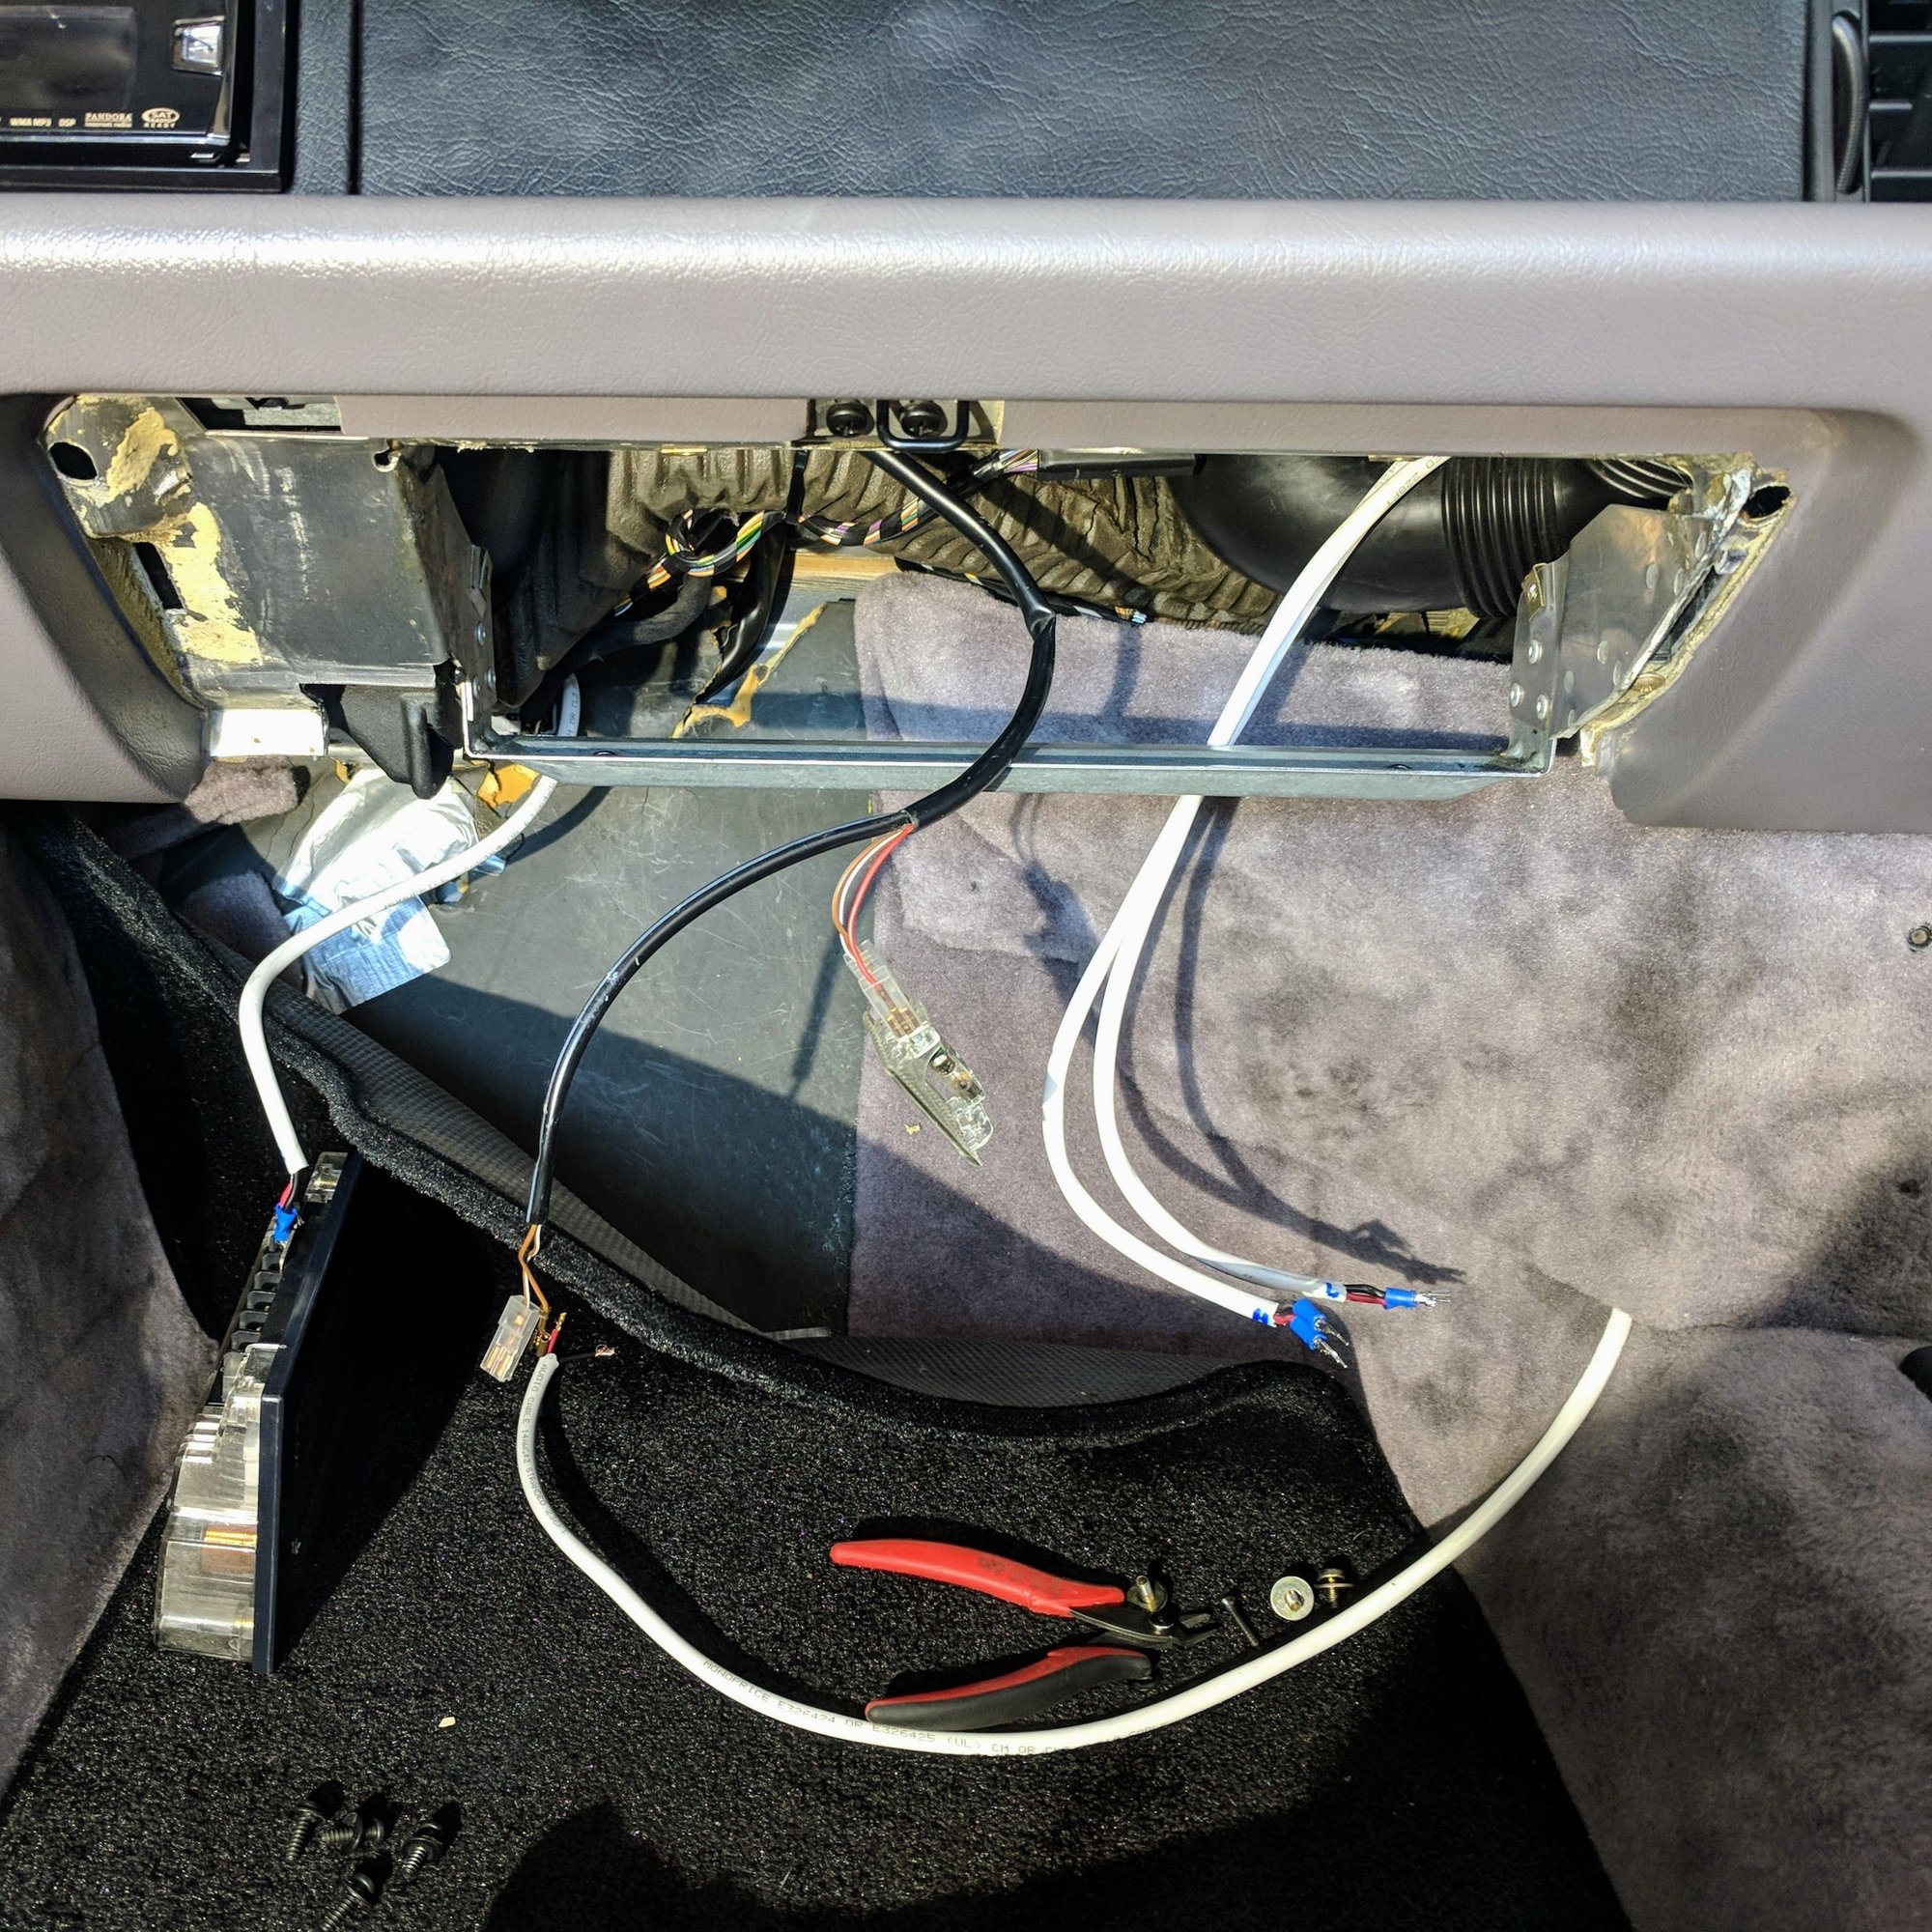
1. Fishing wires was the most time consuming. Luckily the 993 already has convenient factory openings that make it easy to route both the power and speaker wires.
The doors were easy. Remove the door cards and route the speaker wires from the door shell into the rubber sleeve that covers the window, door lock, alarm wires from the cabin into the door. Make an incision into the sleeve and then continue feeding the speaker wire until you have enough in the cabin. Use silicone lubricant spray. Rubber grommets and sleeves generally don't make it easy to slide plastic wire insulation.
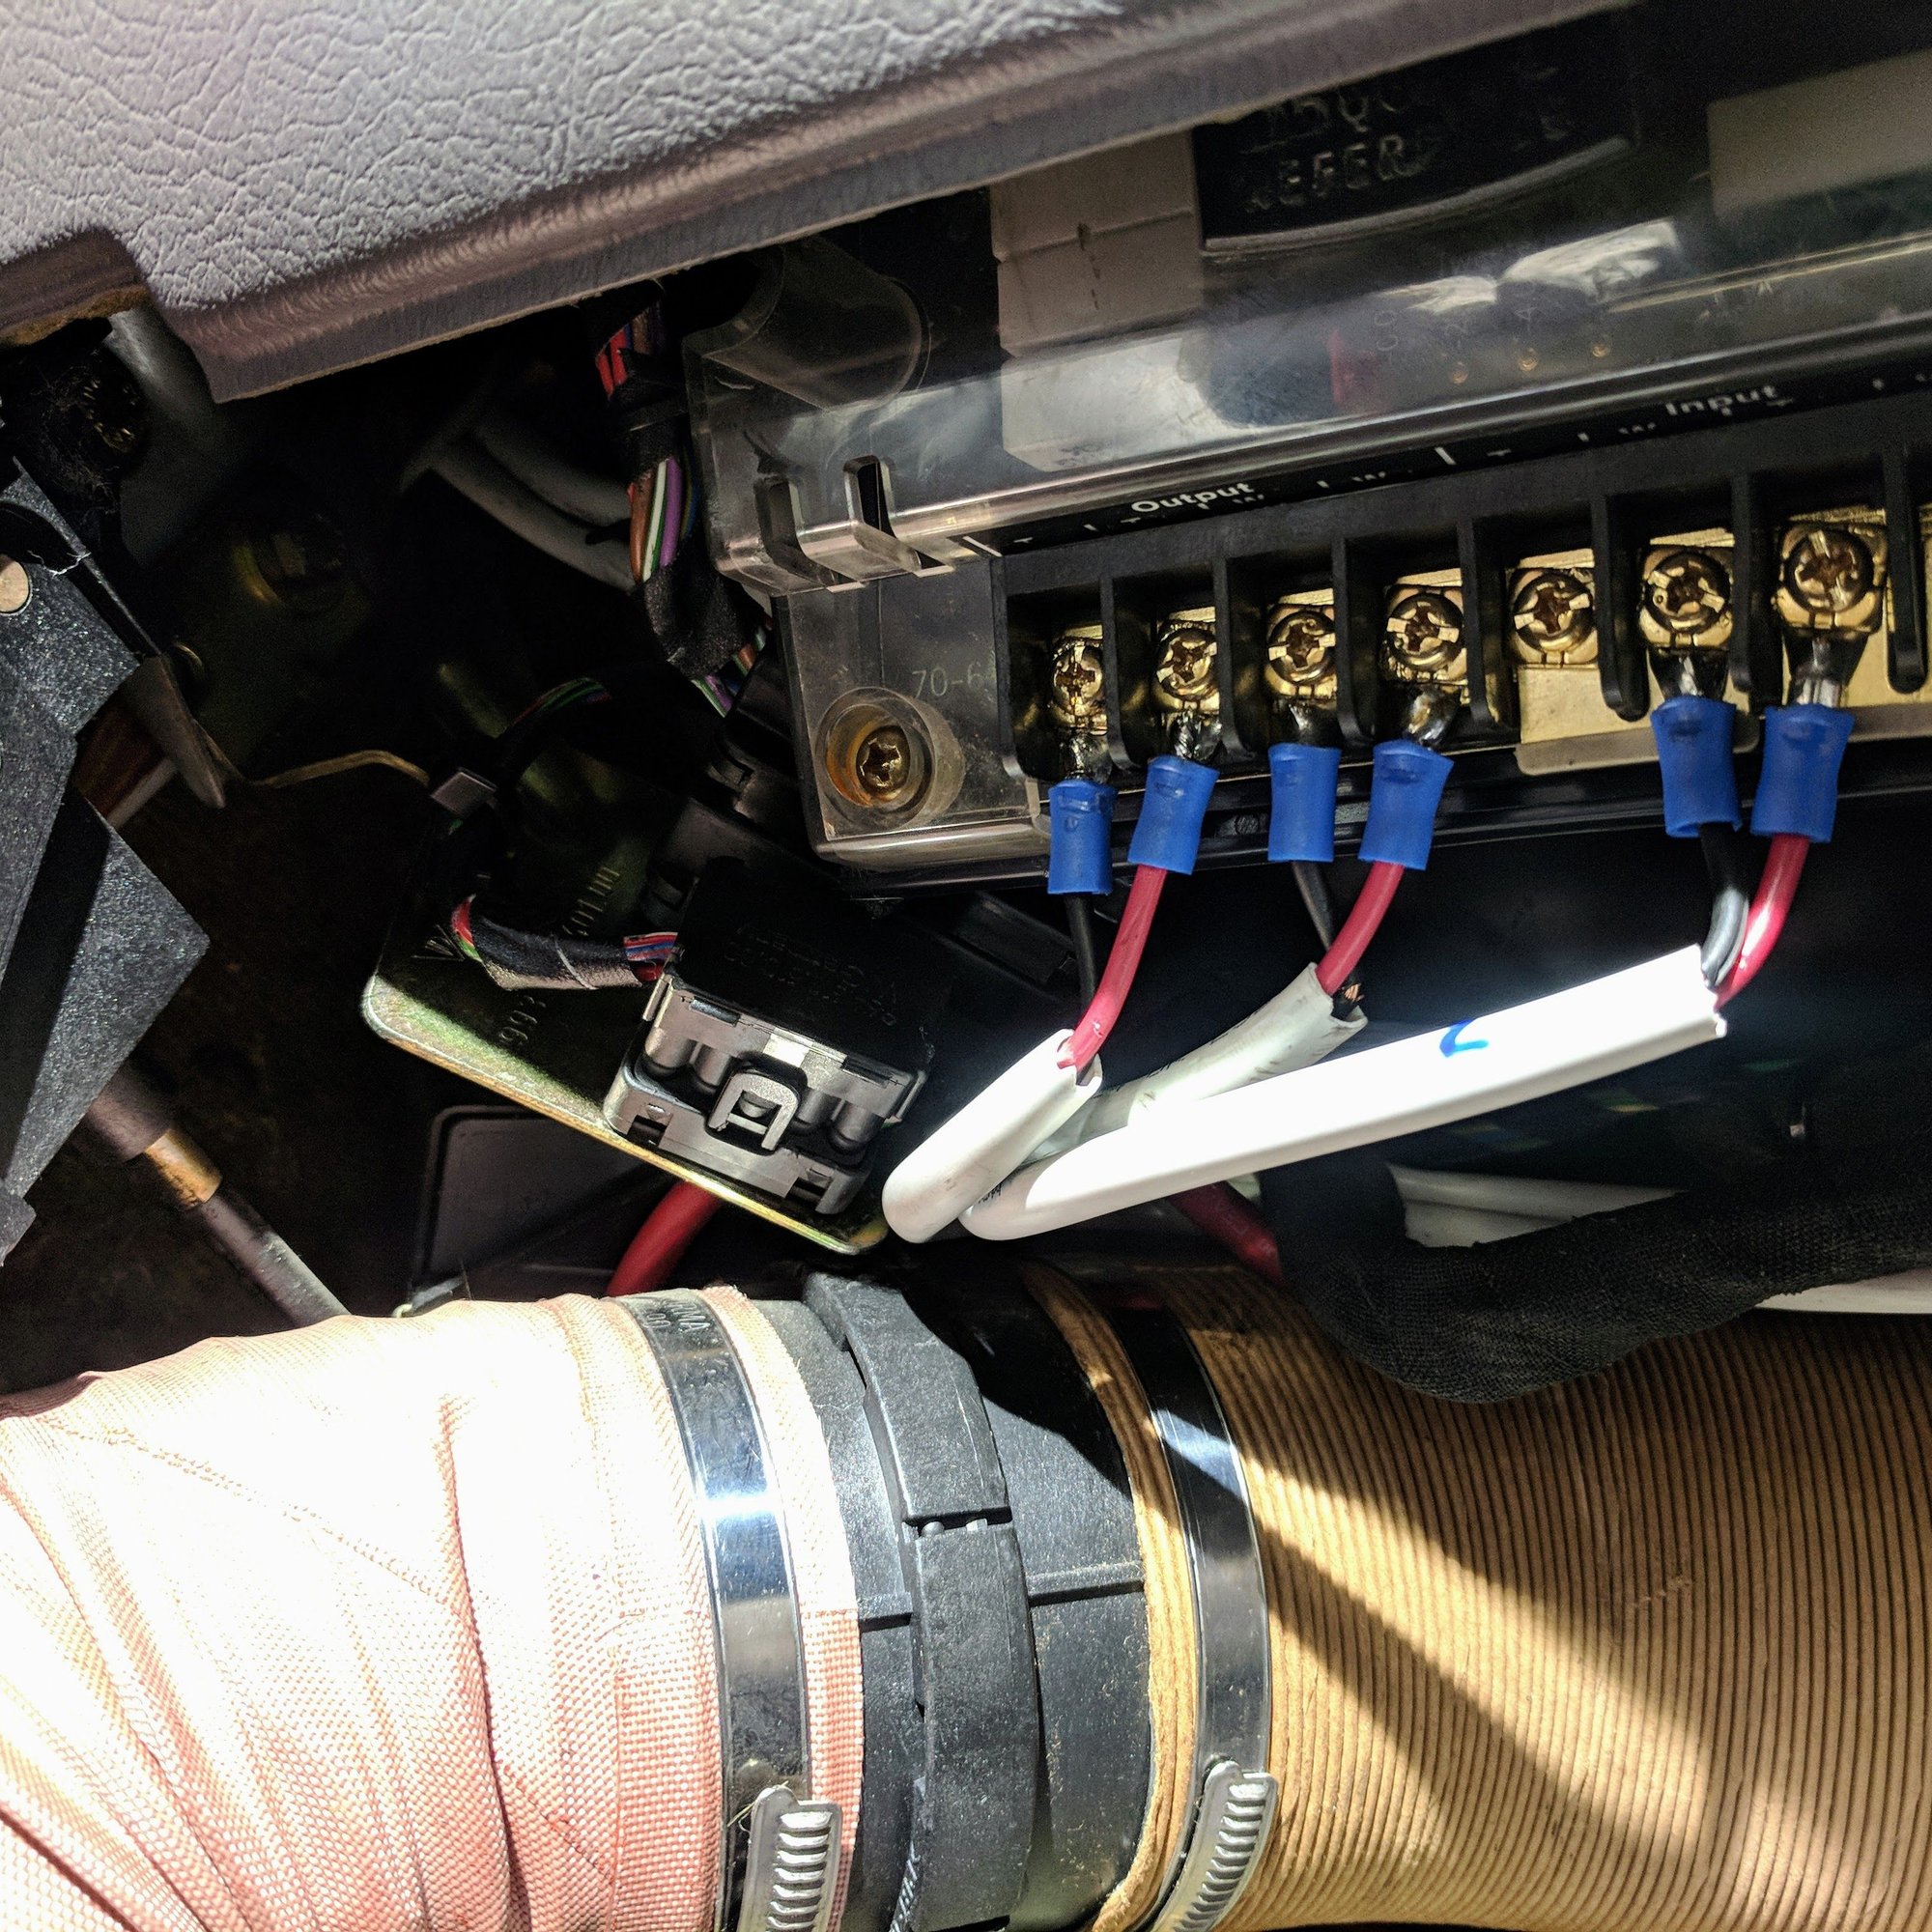
If you keep feeding the speaker wire you will eventually find the opening into the cabin near the HVAC pipes. I don't like installing the component cross overs in the door shell as they can get wet and can rust. The HVAC pipe area has enough space to install the cross over which I did. Given the cross over is in the cabin you will need to fish a pair of speaker wires (4 wires/2 pairs) so you can power both the tweeter and mid bass speaker from the cross over that is in the cabin.
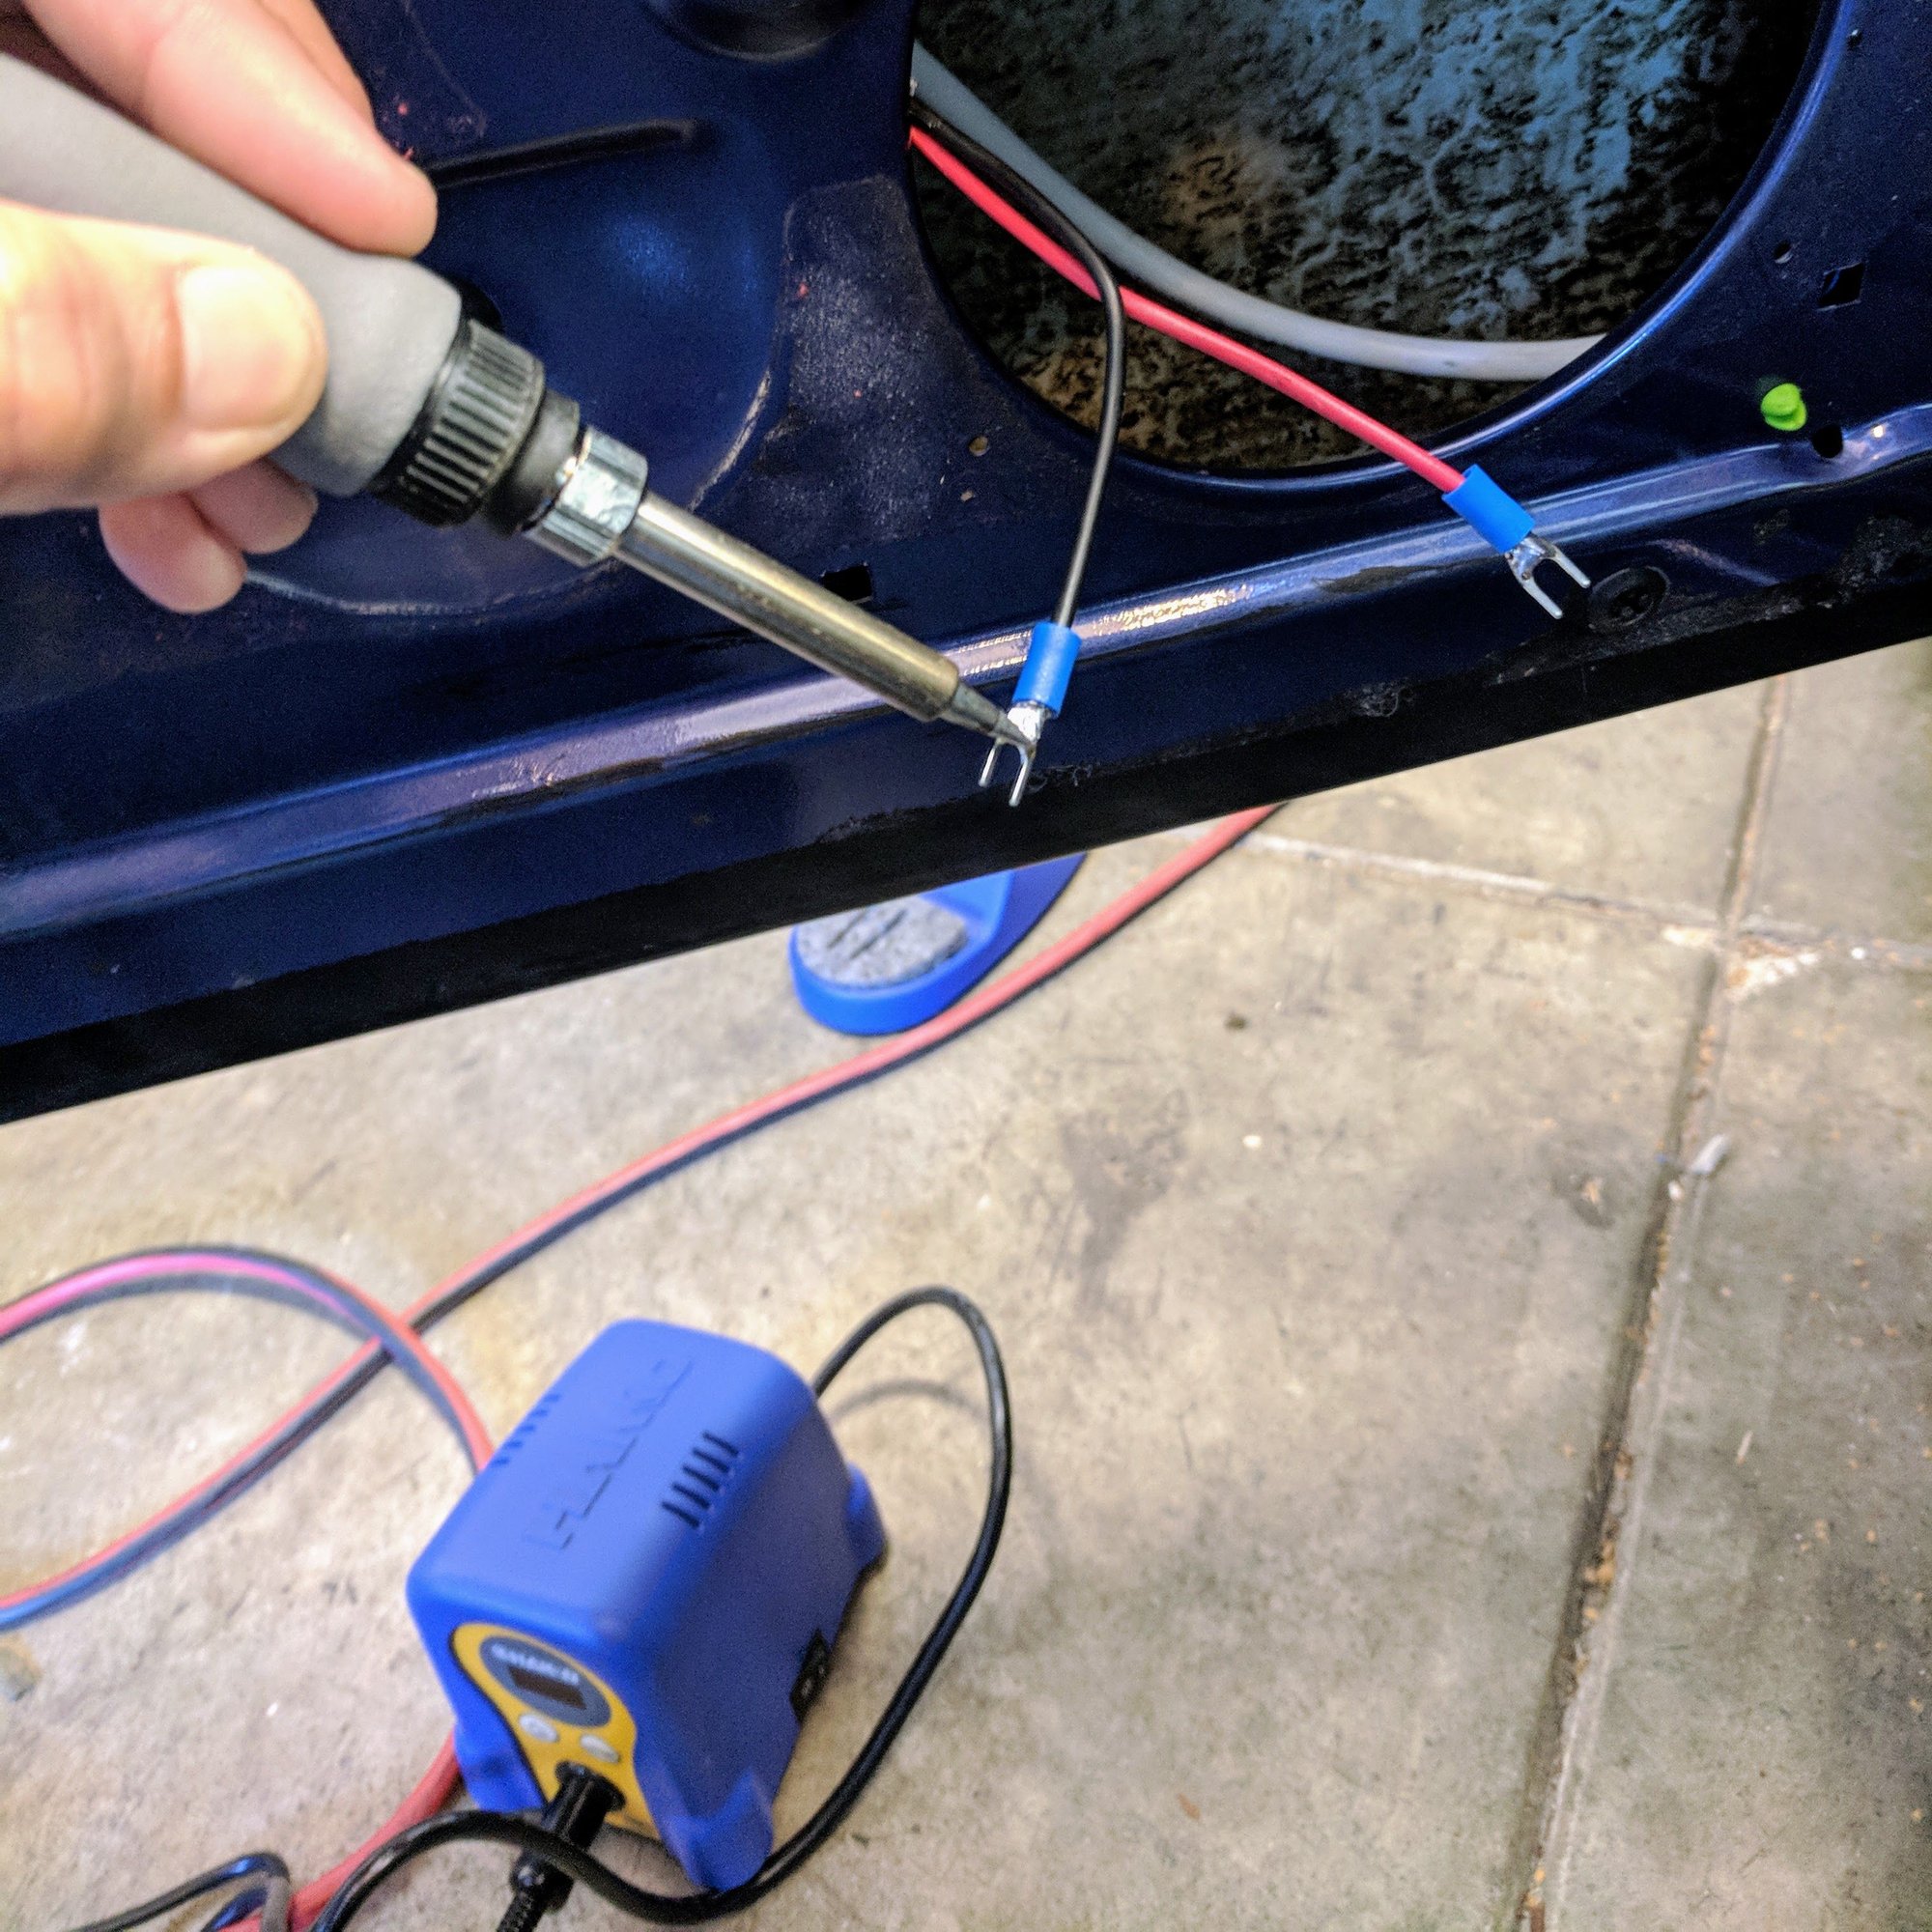
2. It is good practice to solder your connections as the last thing you want is a crimp to come loose and try to diagnose the audio system once it is buttoned up. Notice I am using the claw connectors. I use these if there is an option to use a screw to attach the cable to a speaker, cross over, or amp to be a strong connection.
3. Once you are done with connecting the speaker wires use electrical tape to seal up the door shell sleeve that you made an incision to accommodate the speaker wires.
4. Do the same on the passenger side. Fish the tweeter and mid bass speaker wire from the door shell into the cabin, install the cross over in the cabin, solder the connections, and tape up the door shell sleeve. The speaker wires will also appear in the cabin near the HVAC pipe. I removed the glove box to make it easier to fish and tie down the wires.
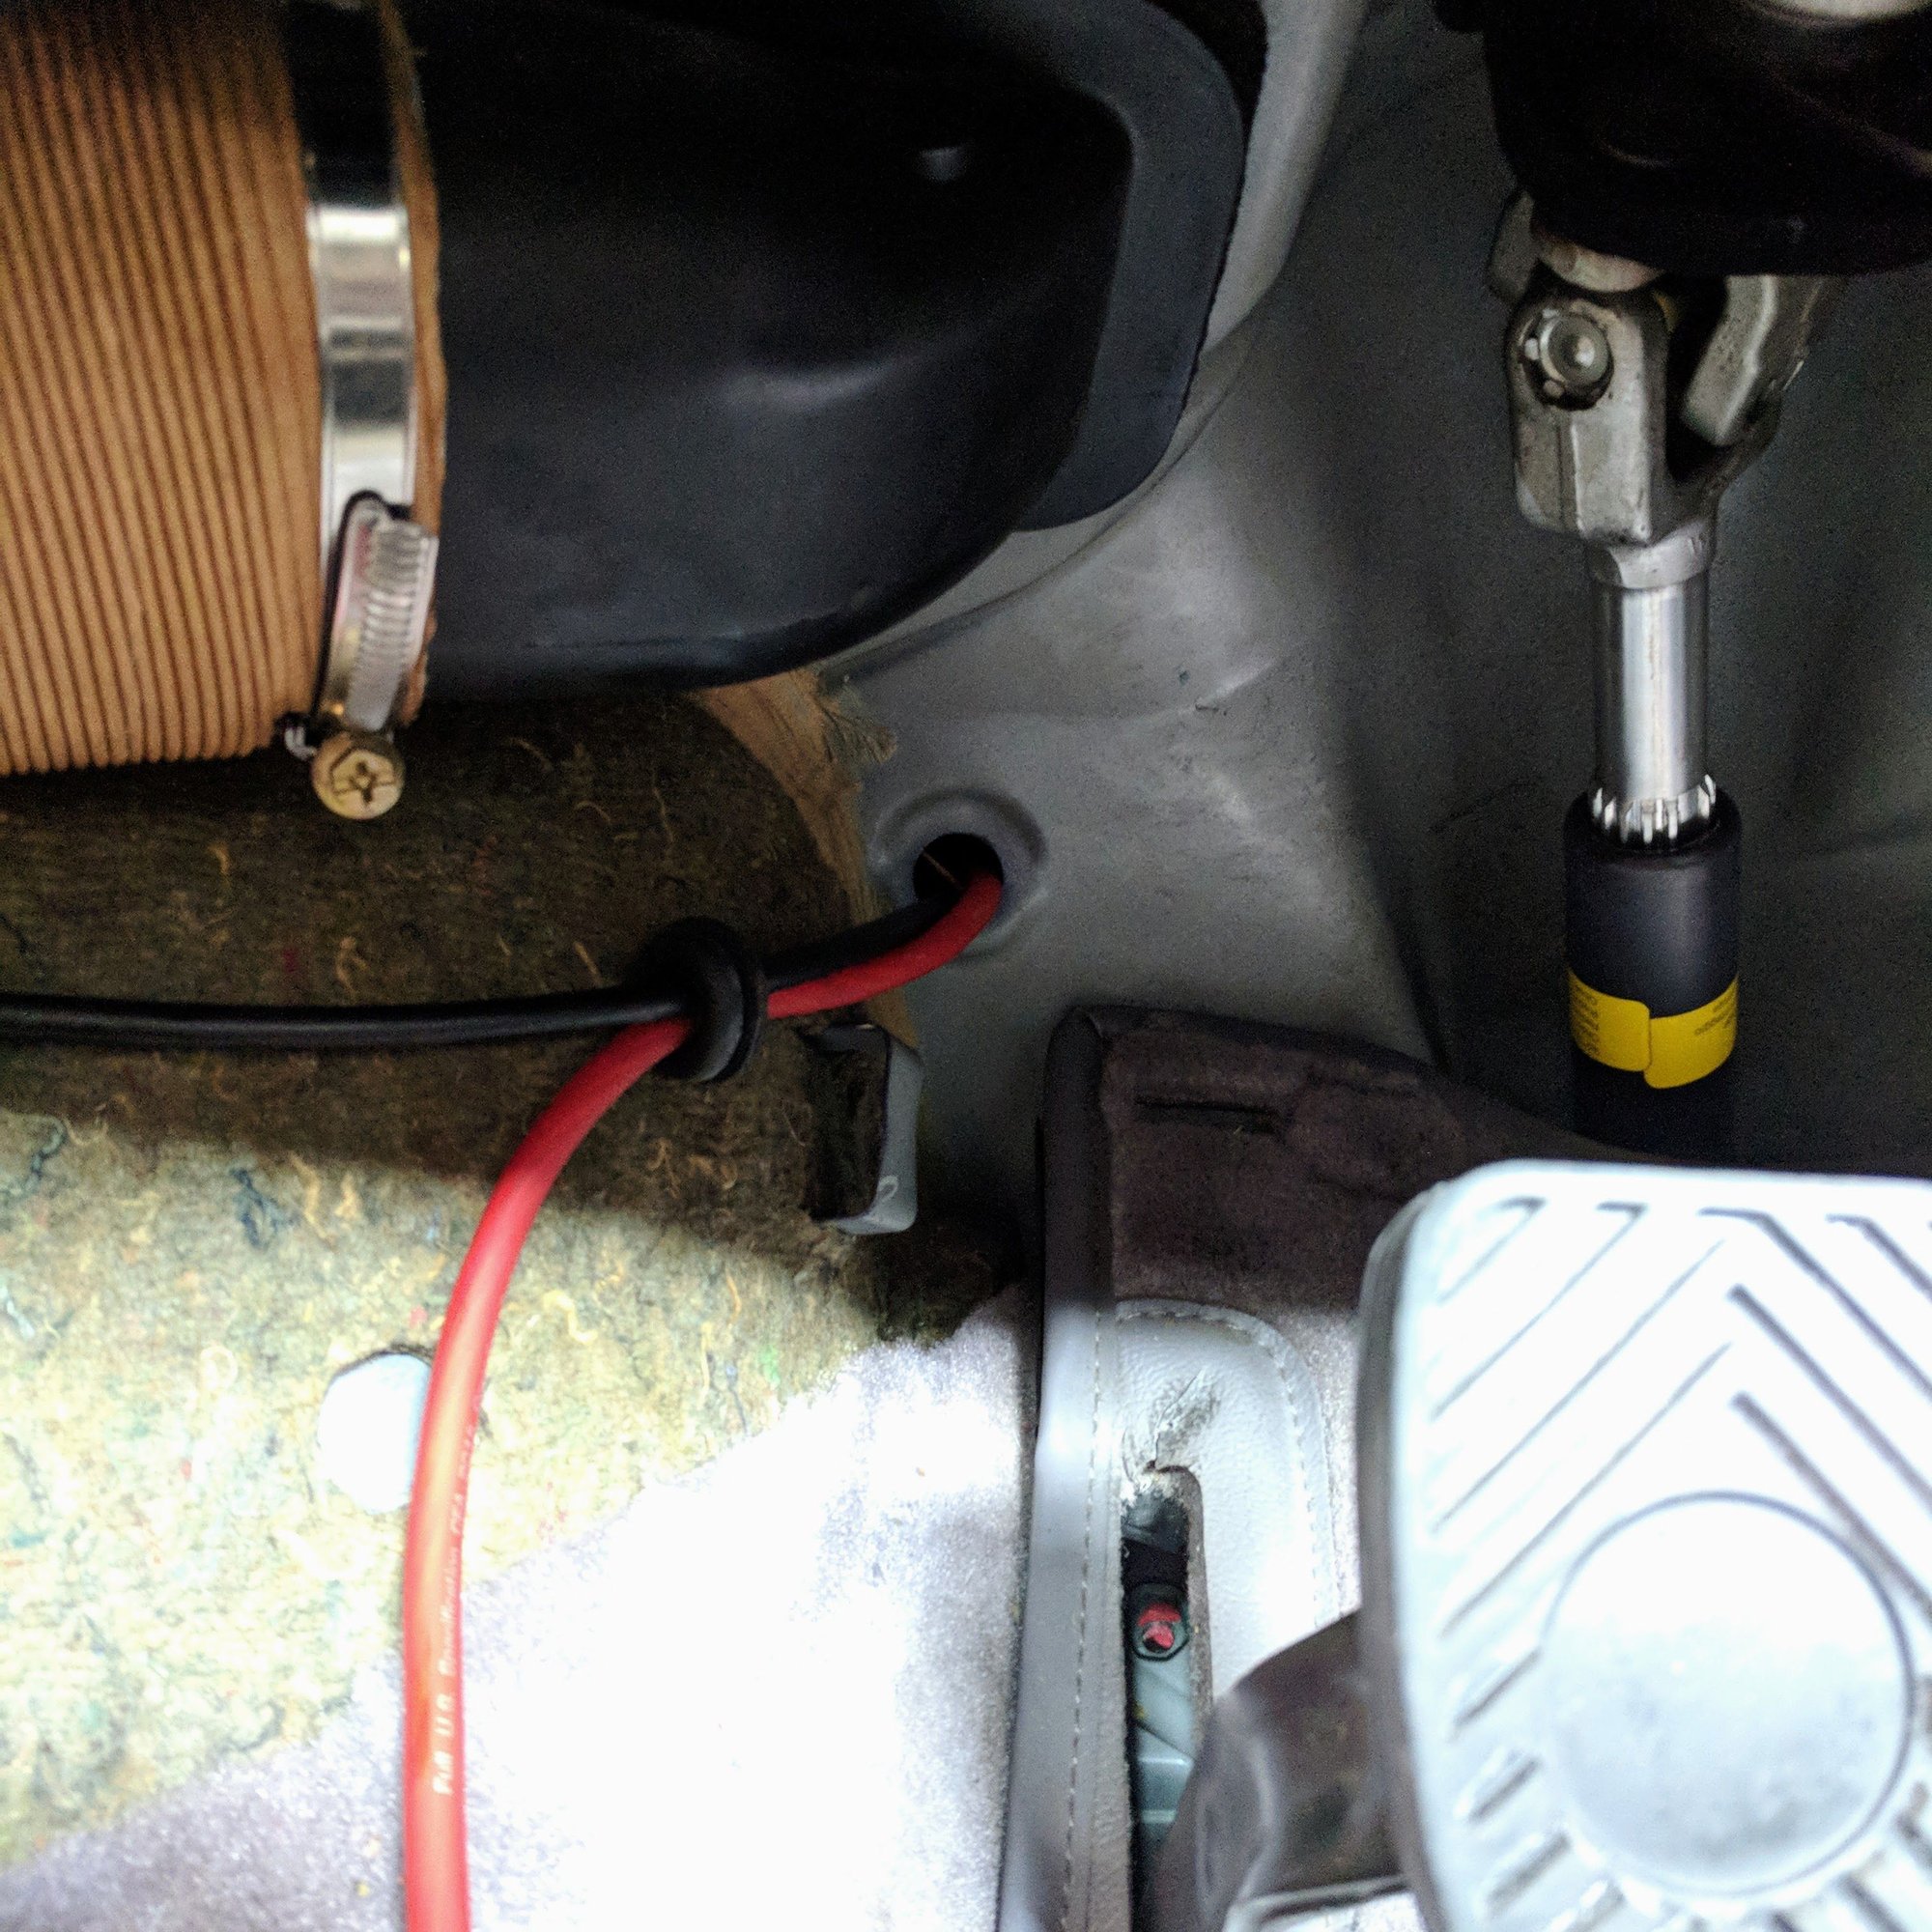
5. Fish the positive power wire from the frunk into the cabin. Use the frunk release cable grommet and silicone spray to make it easy to fish.
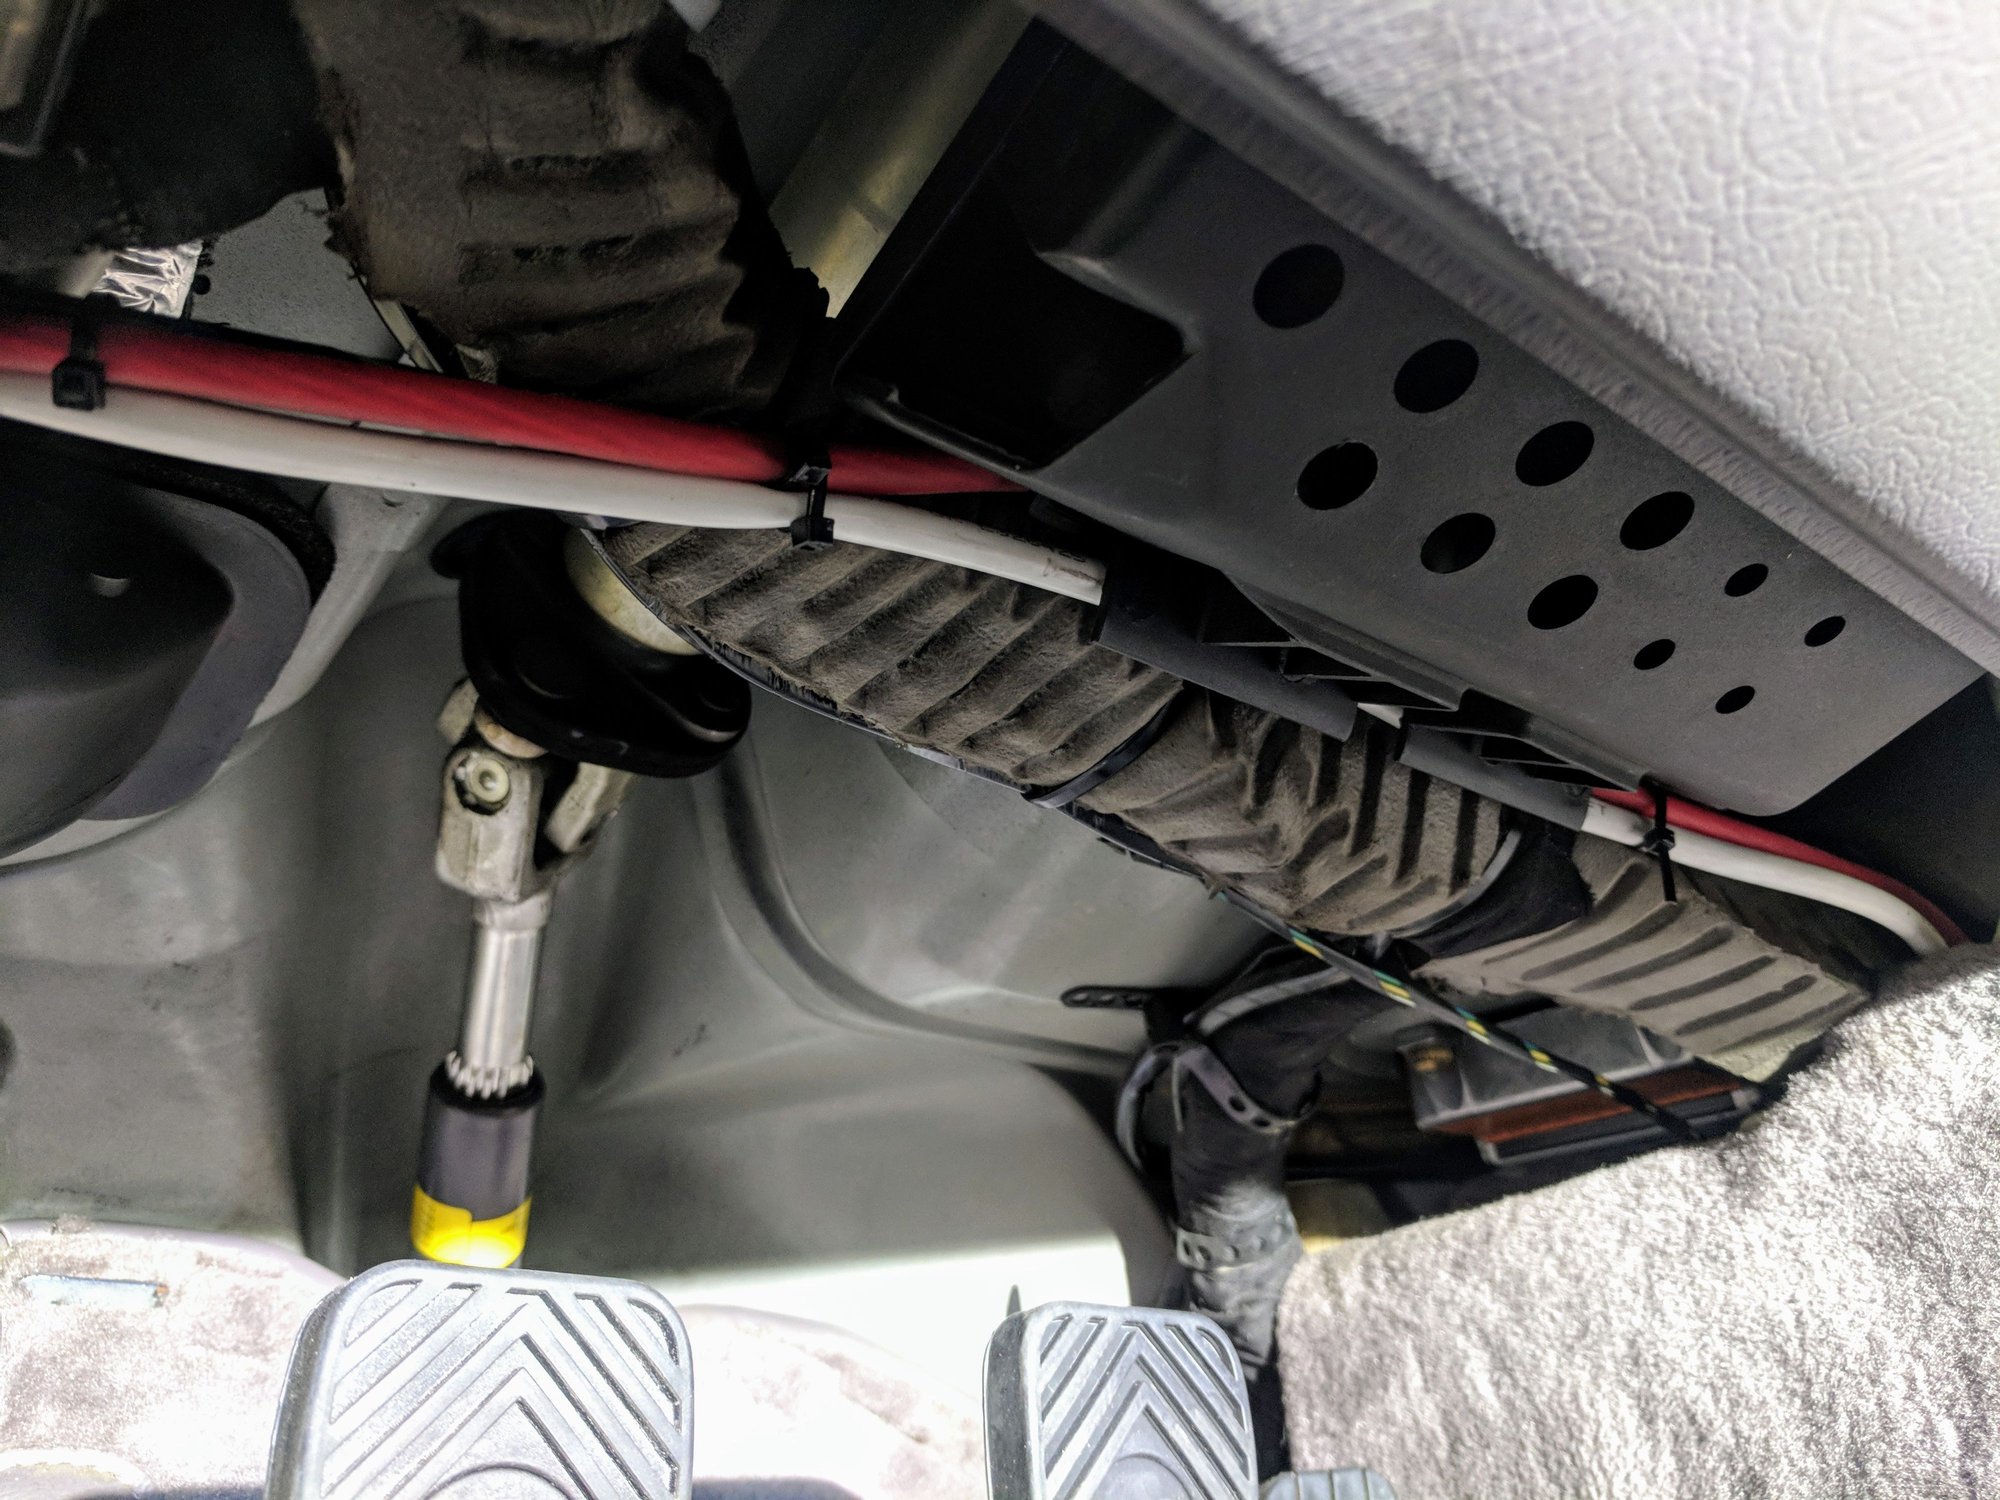
6. Fish the power and speaker wires following the existing wiring harnesses, using zip ties to keep things tidy.
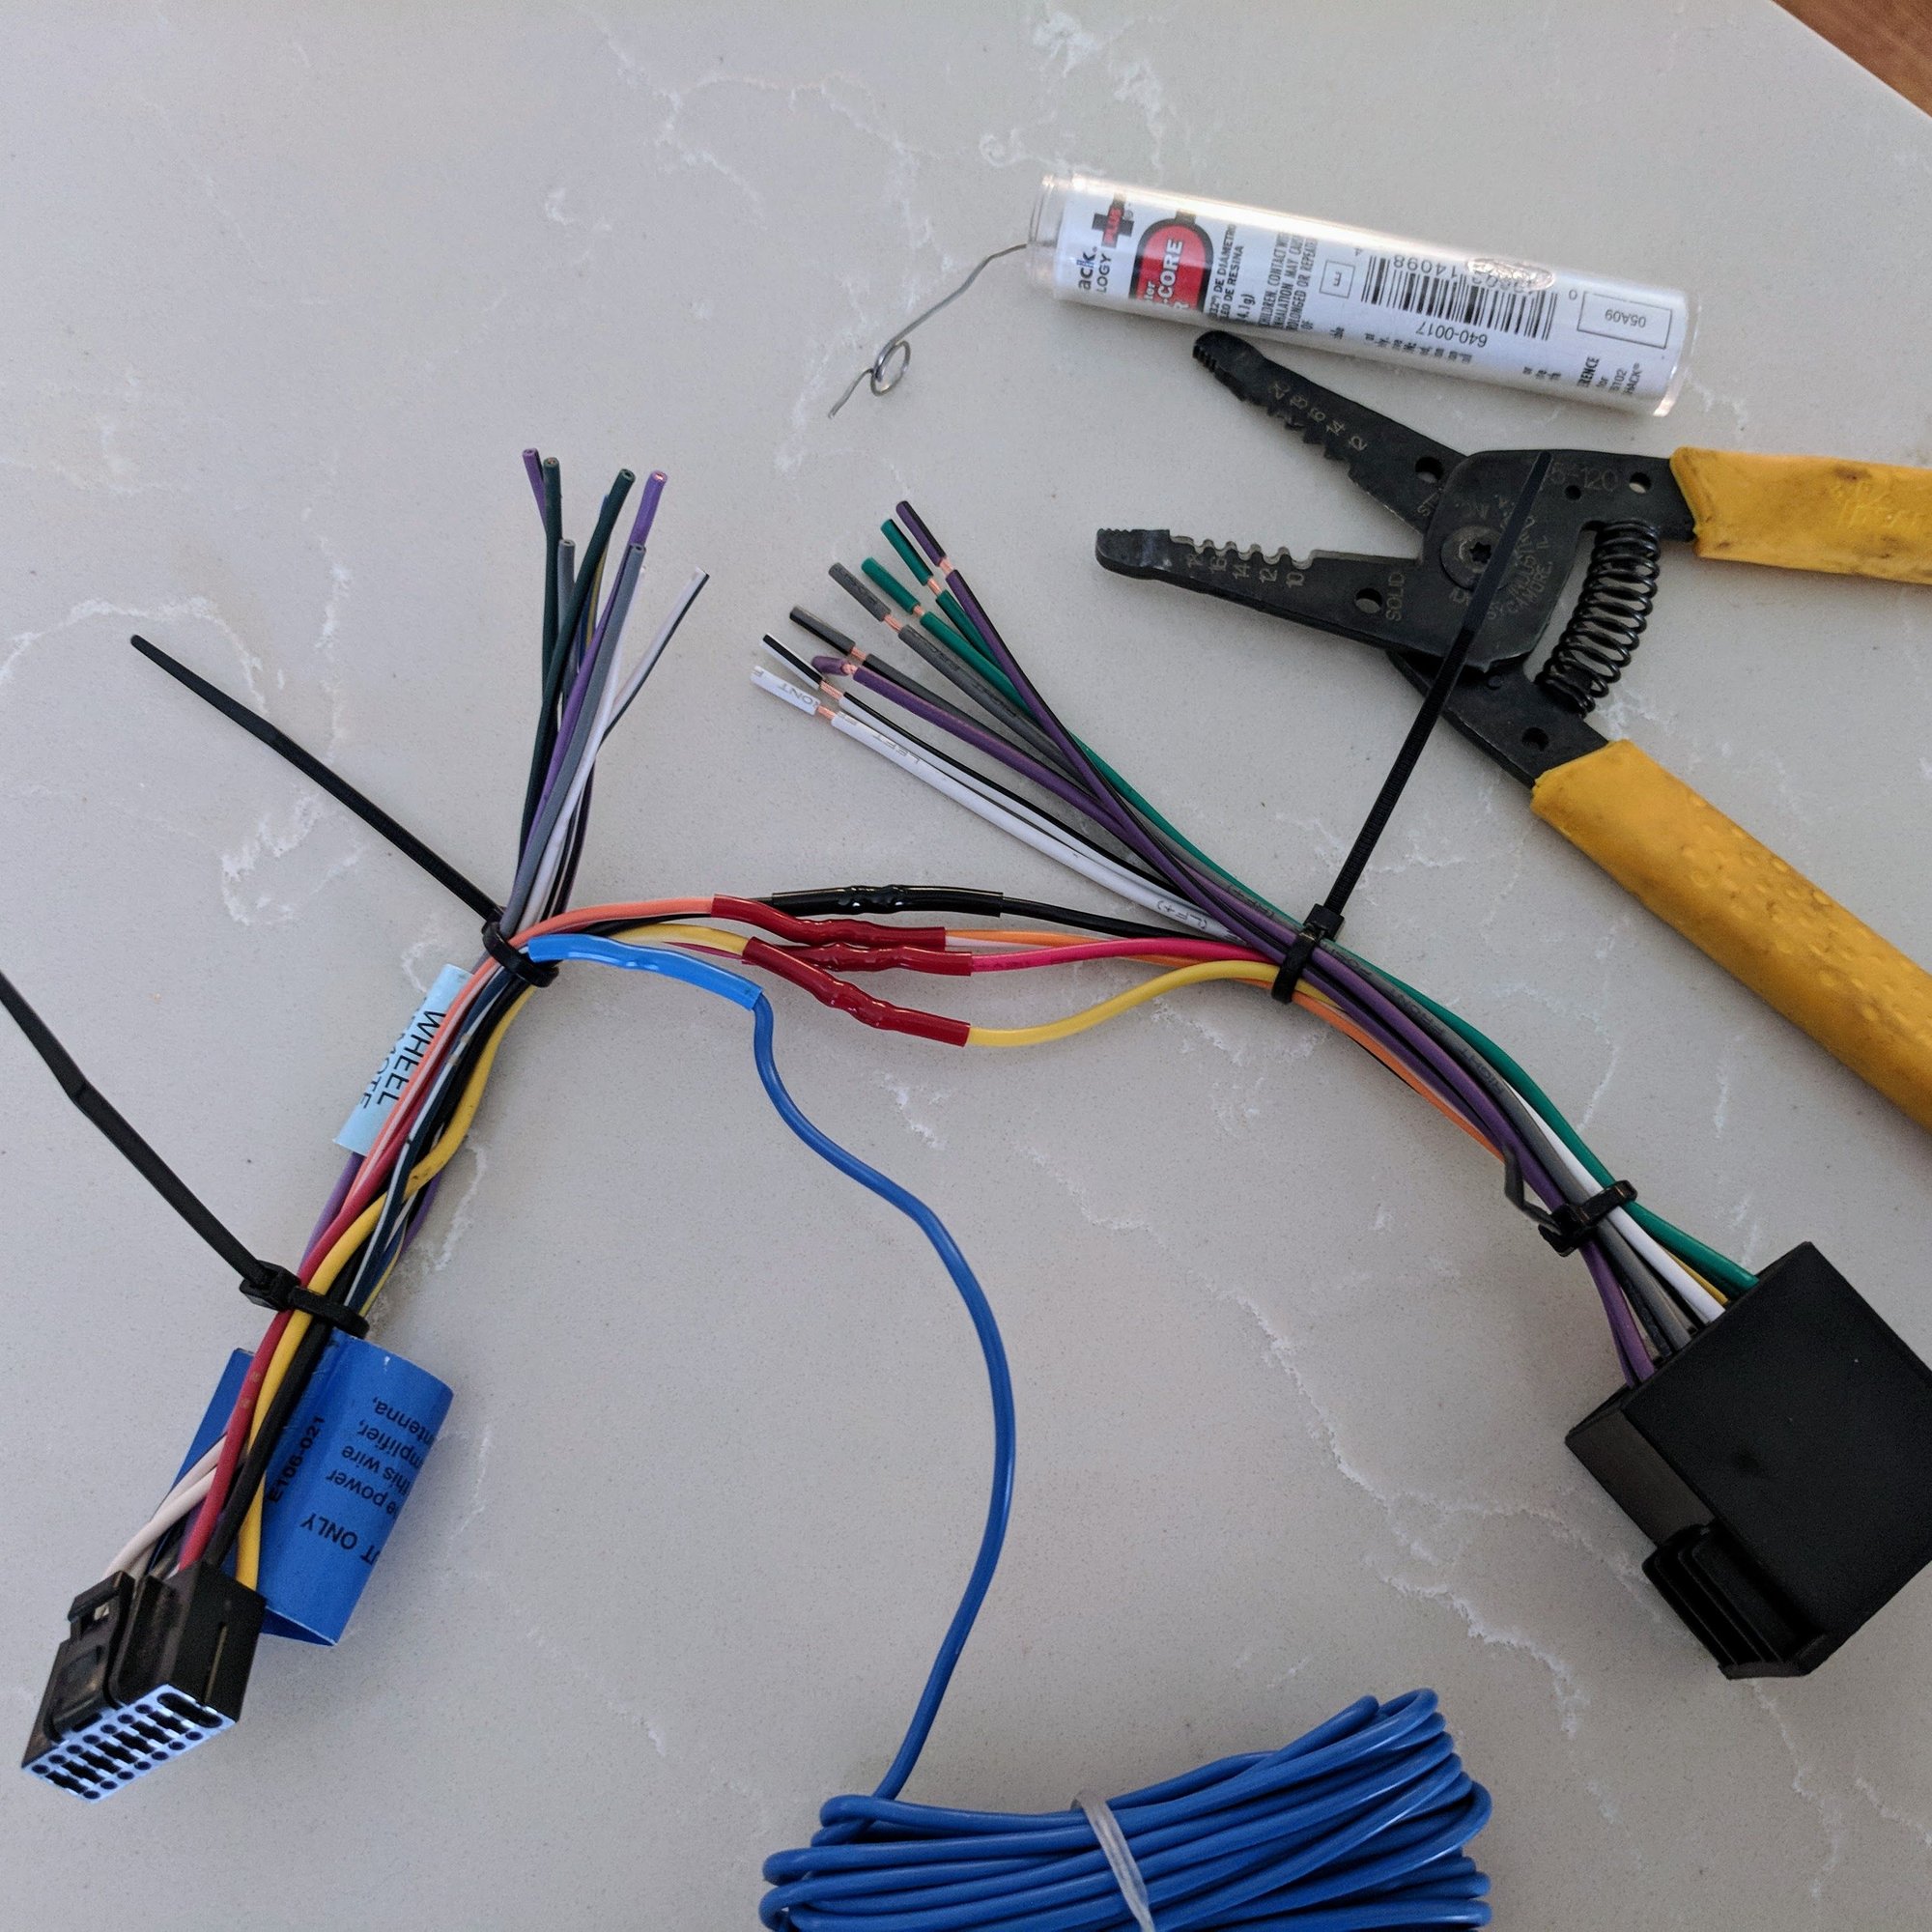
8. Create a wiring harness for the new head unit with the male Euro/Din Metra wiring harness. Again use a soldering iron to make the splices permanent. I am using an external amp so all you need is to splice are a few wires as I will be running RCA line level outputs to the amp.
a. Switched 12V (Yellow)
b. Constant 12V (Red)
c. Ground (Black)
d. Illumination control (Orange)
e. Amp turn on (Blue)
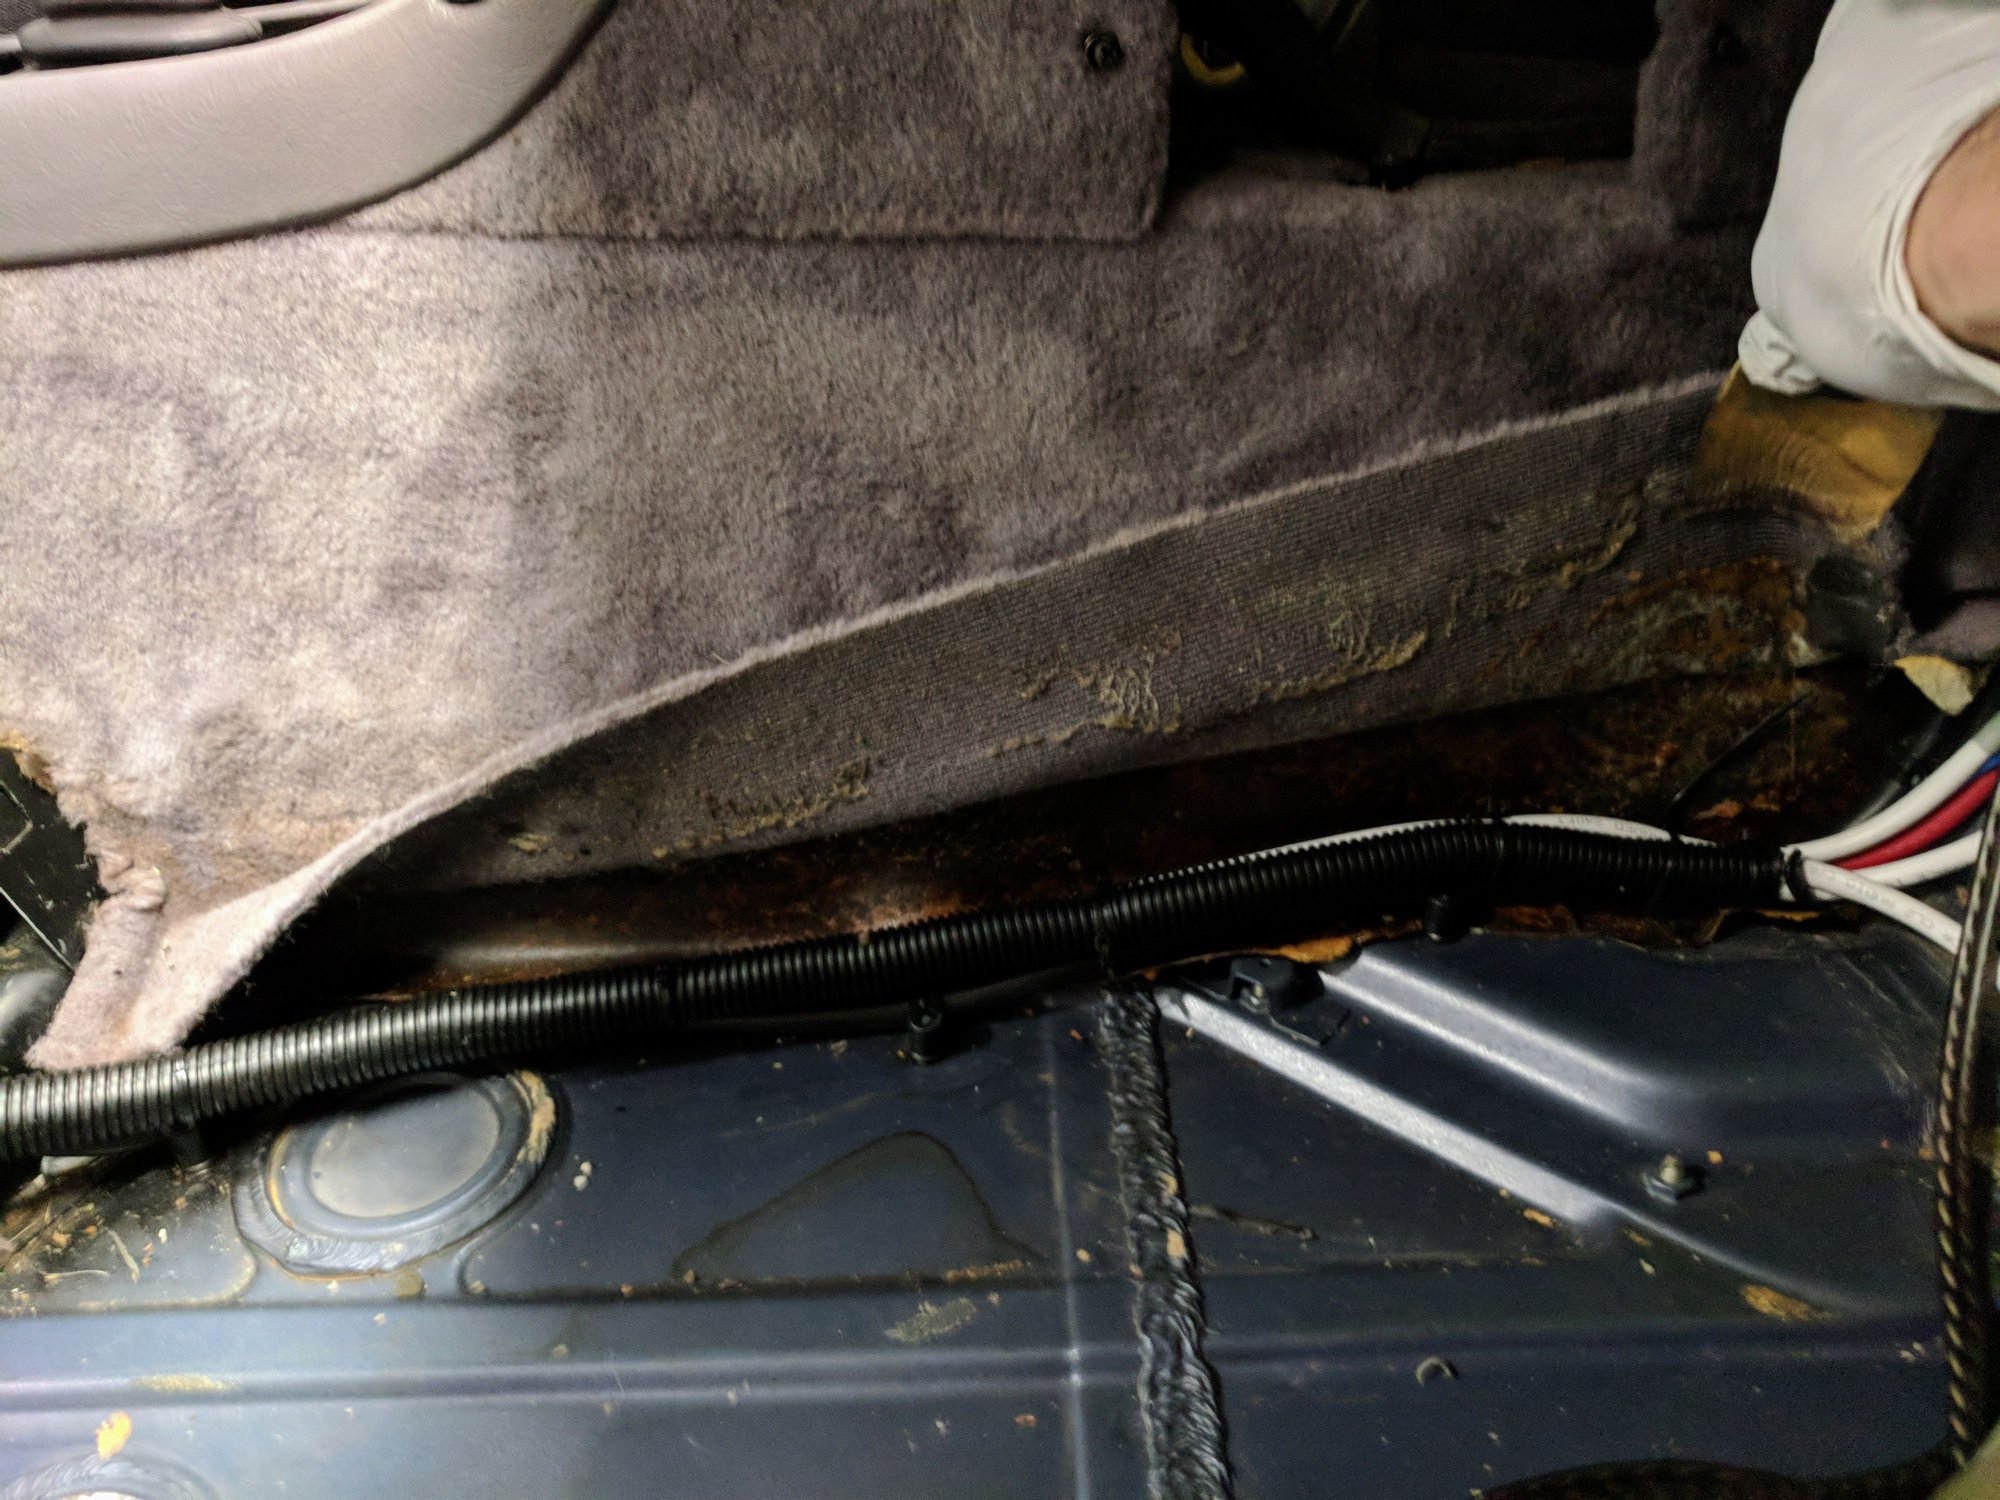
9. Fish the RCA line level outputs, amp turn on wire, power wire, and left/right/subwoofer speaker wire near the tunnel and under the the passenger side floor insulation/mat. Use a wire loom to keep the wires tidy and protected.
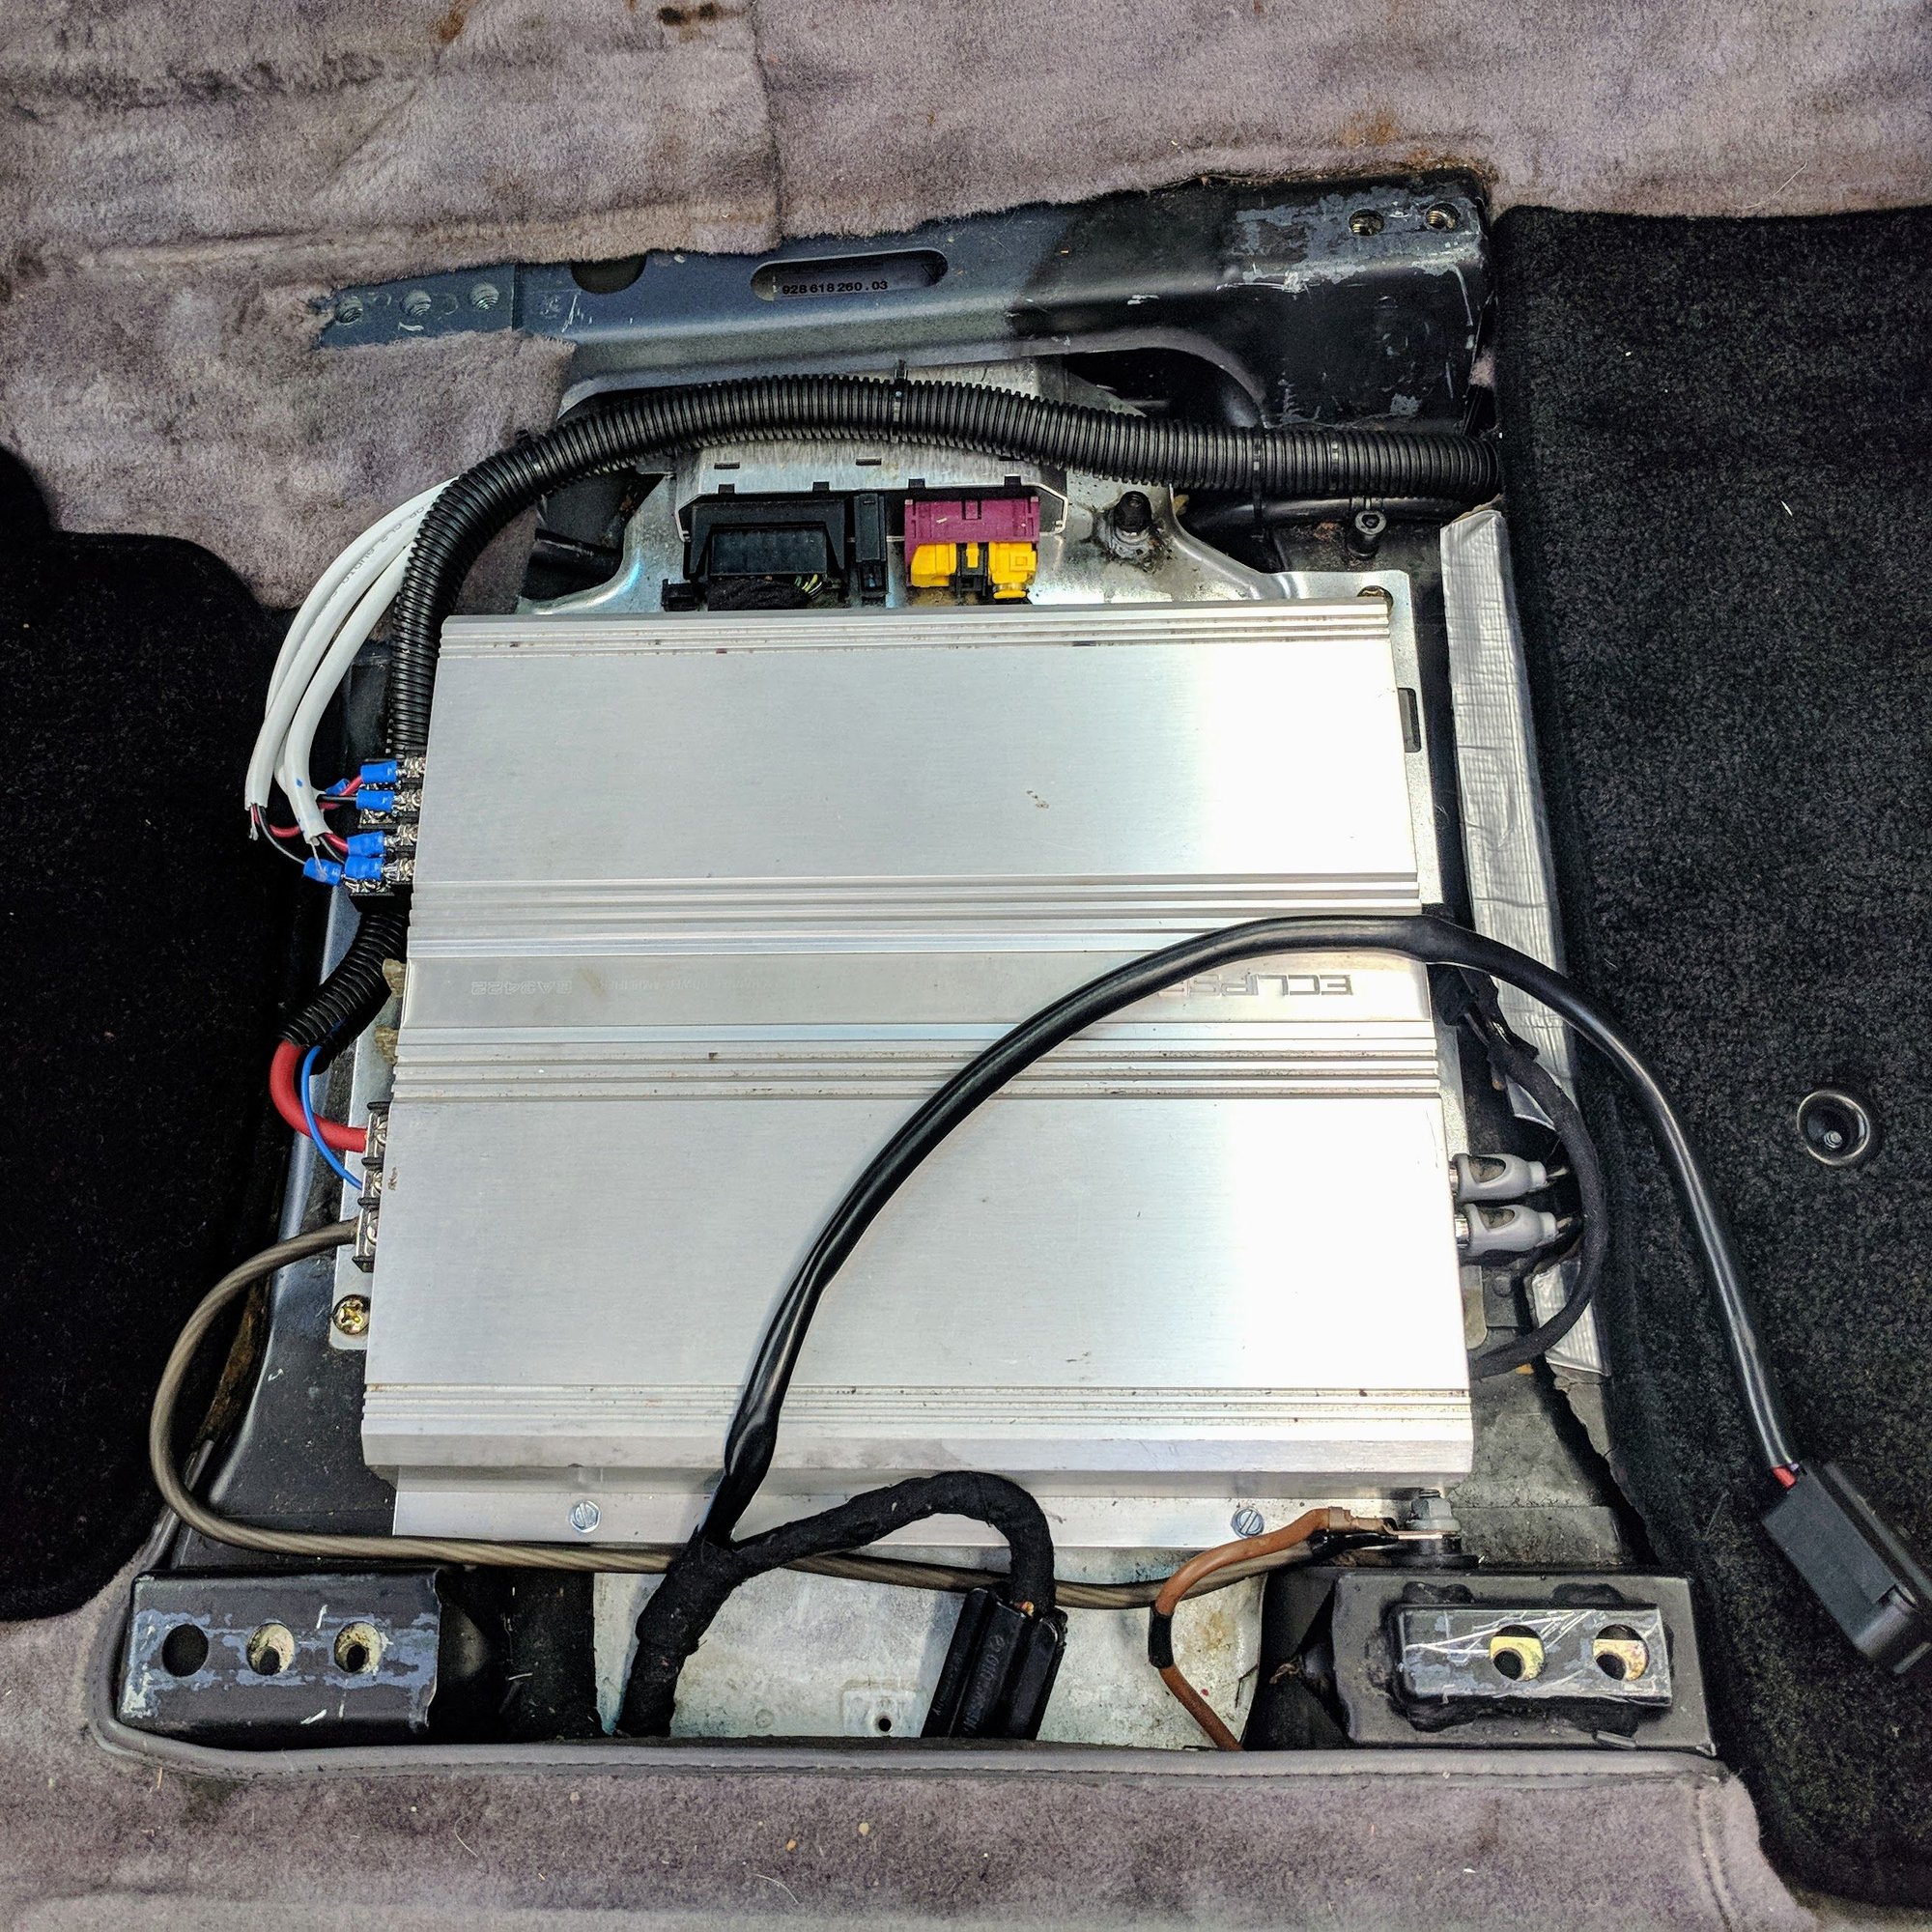
10. Install the amp under the passenger side seat area. The amp I got is an old school Class A Fujitsu Ten/Eclipse amp. Don't make them like this any more as it is a tank and has very clean power. Only draw back is the size. I will use this for now and may switch to a small Class D later. For now I had to move the immobilizer and remove the cruise control unit to make room.
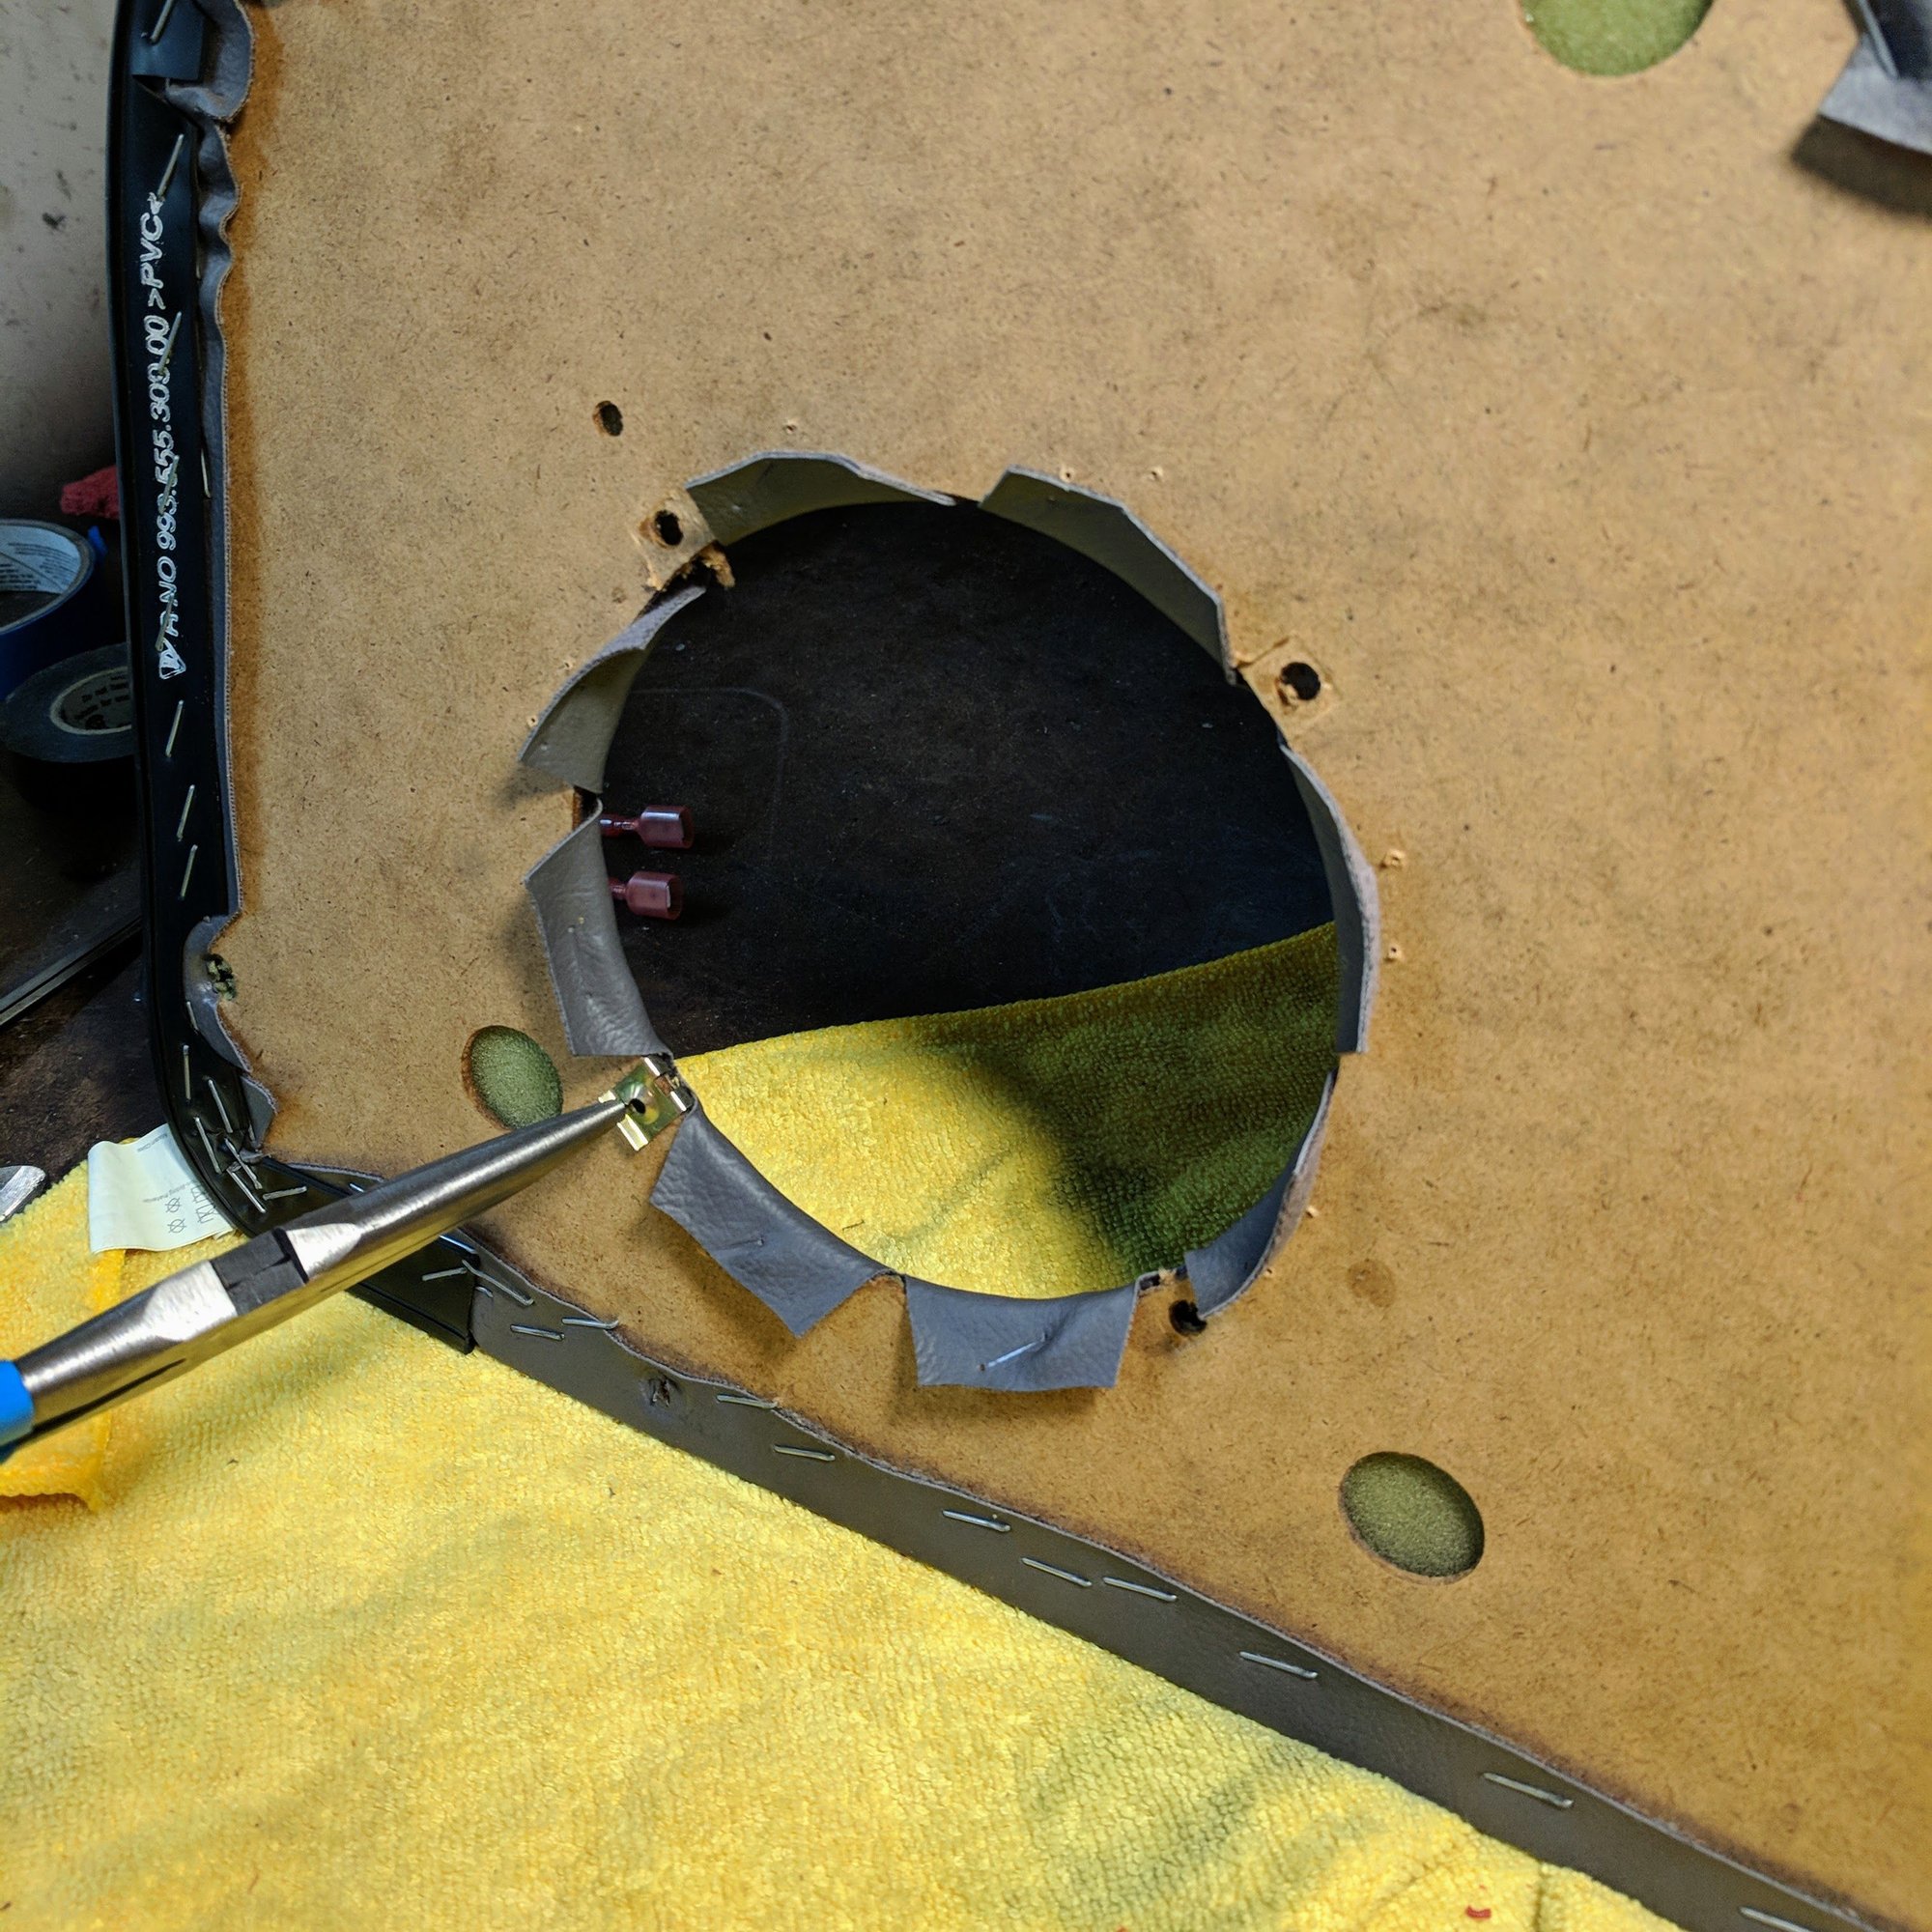
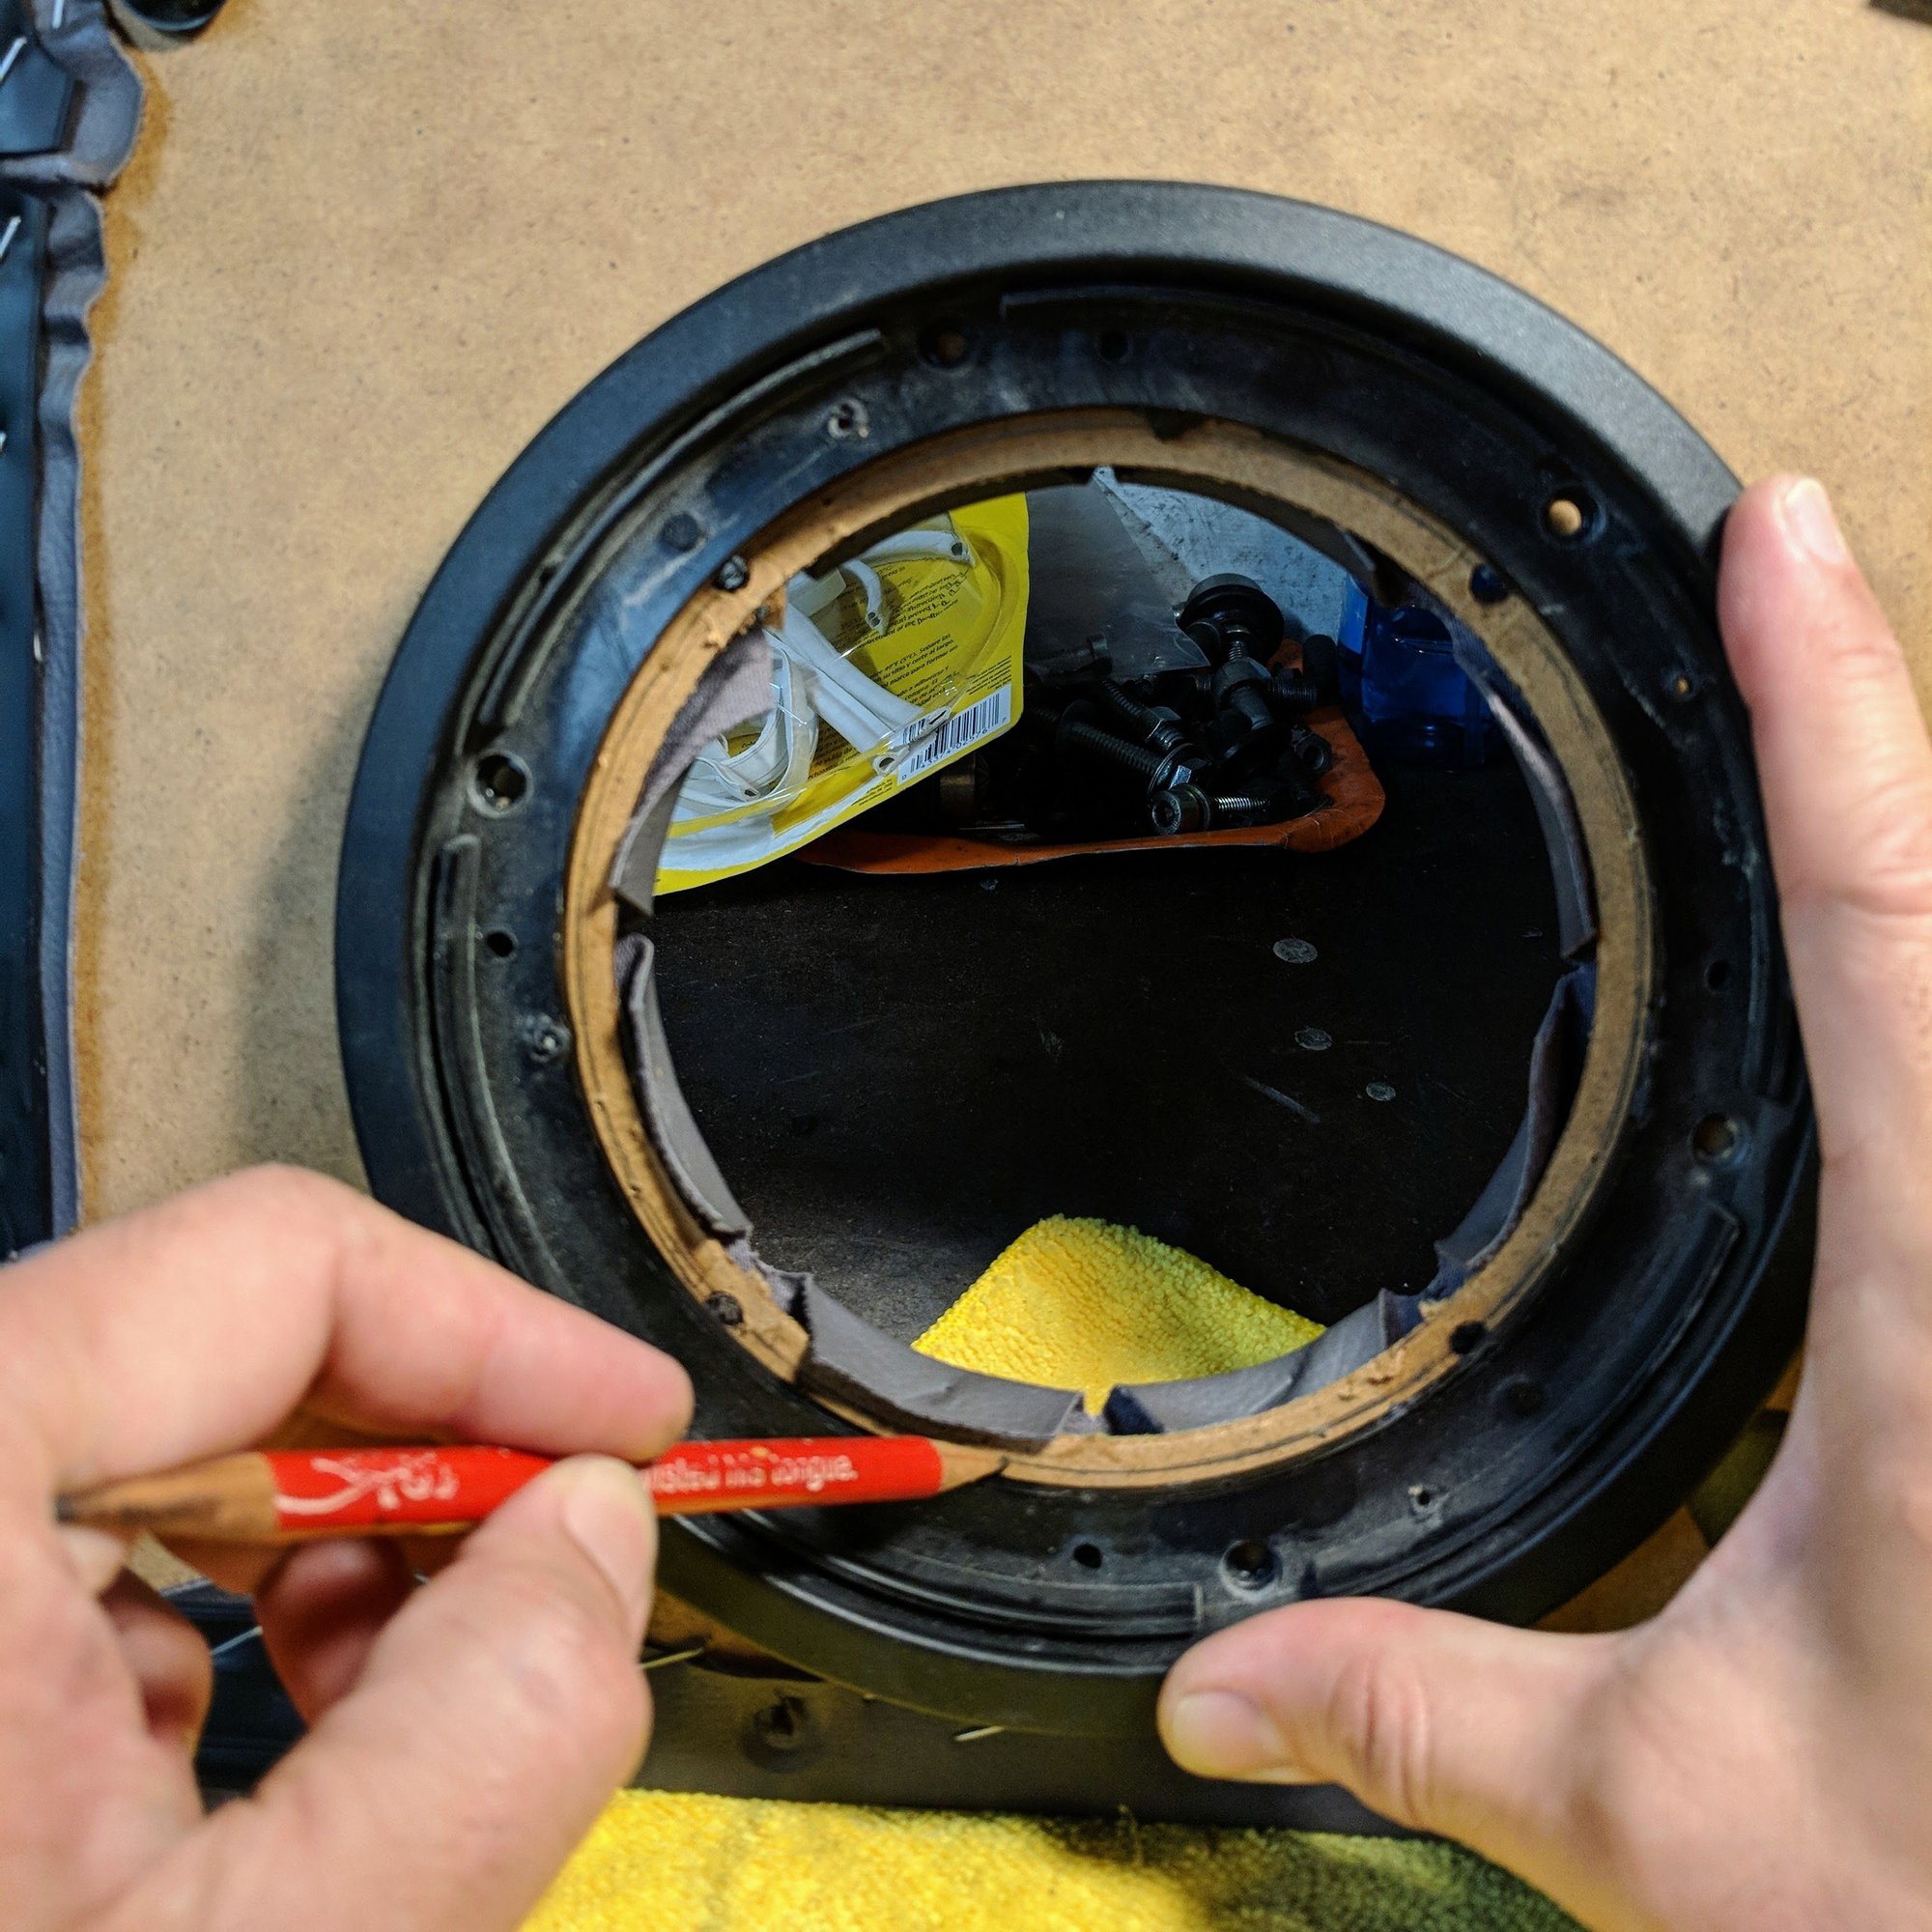
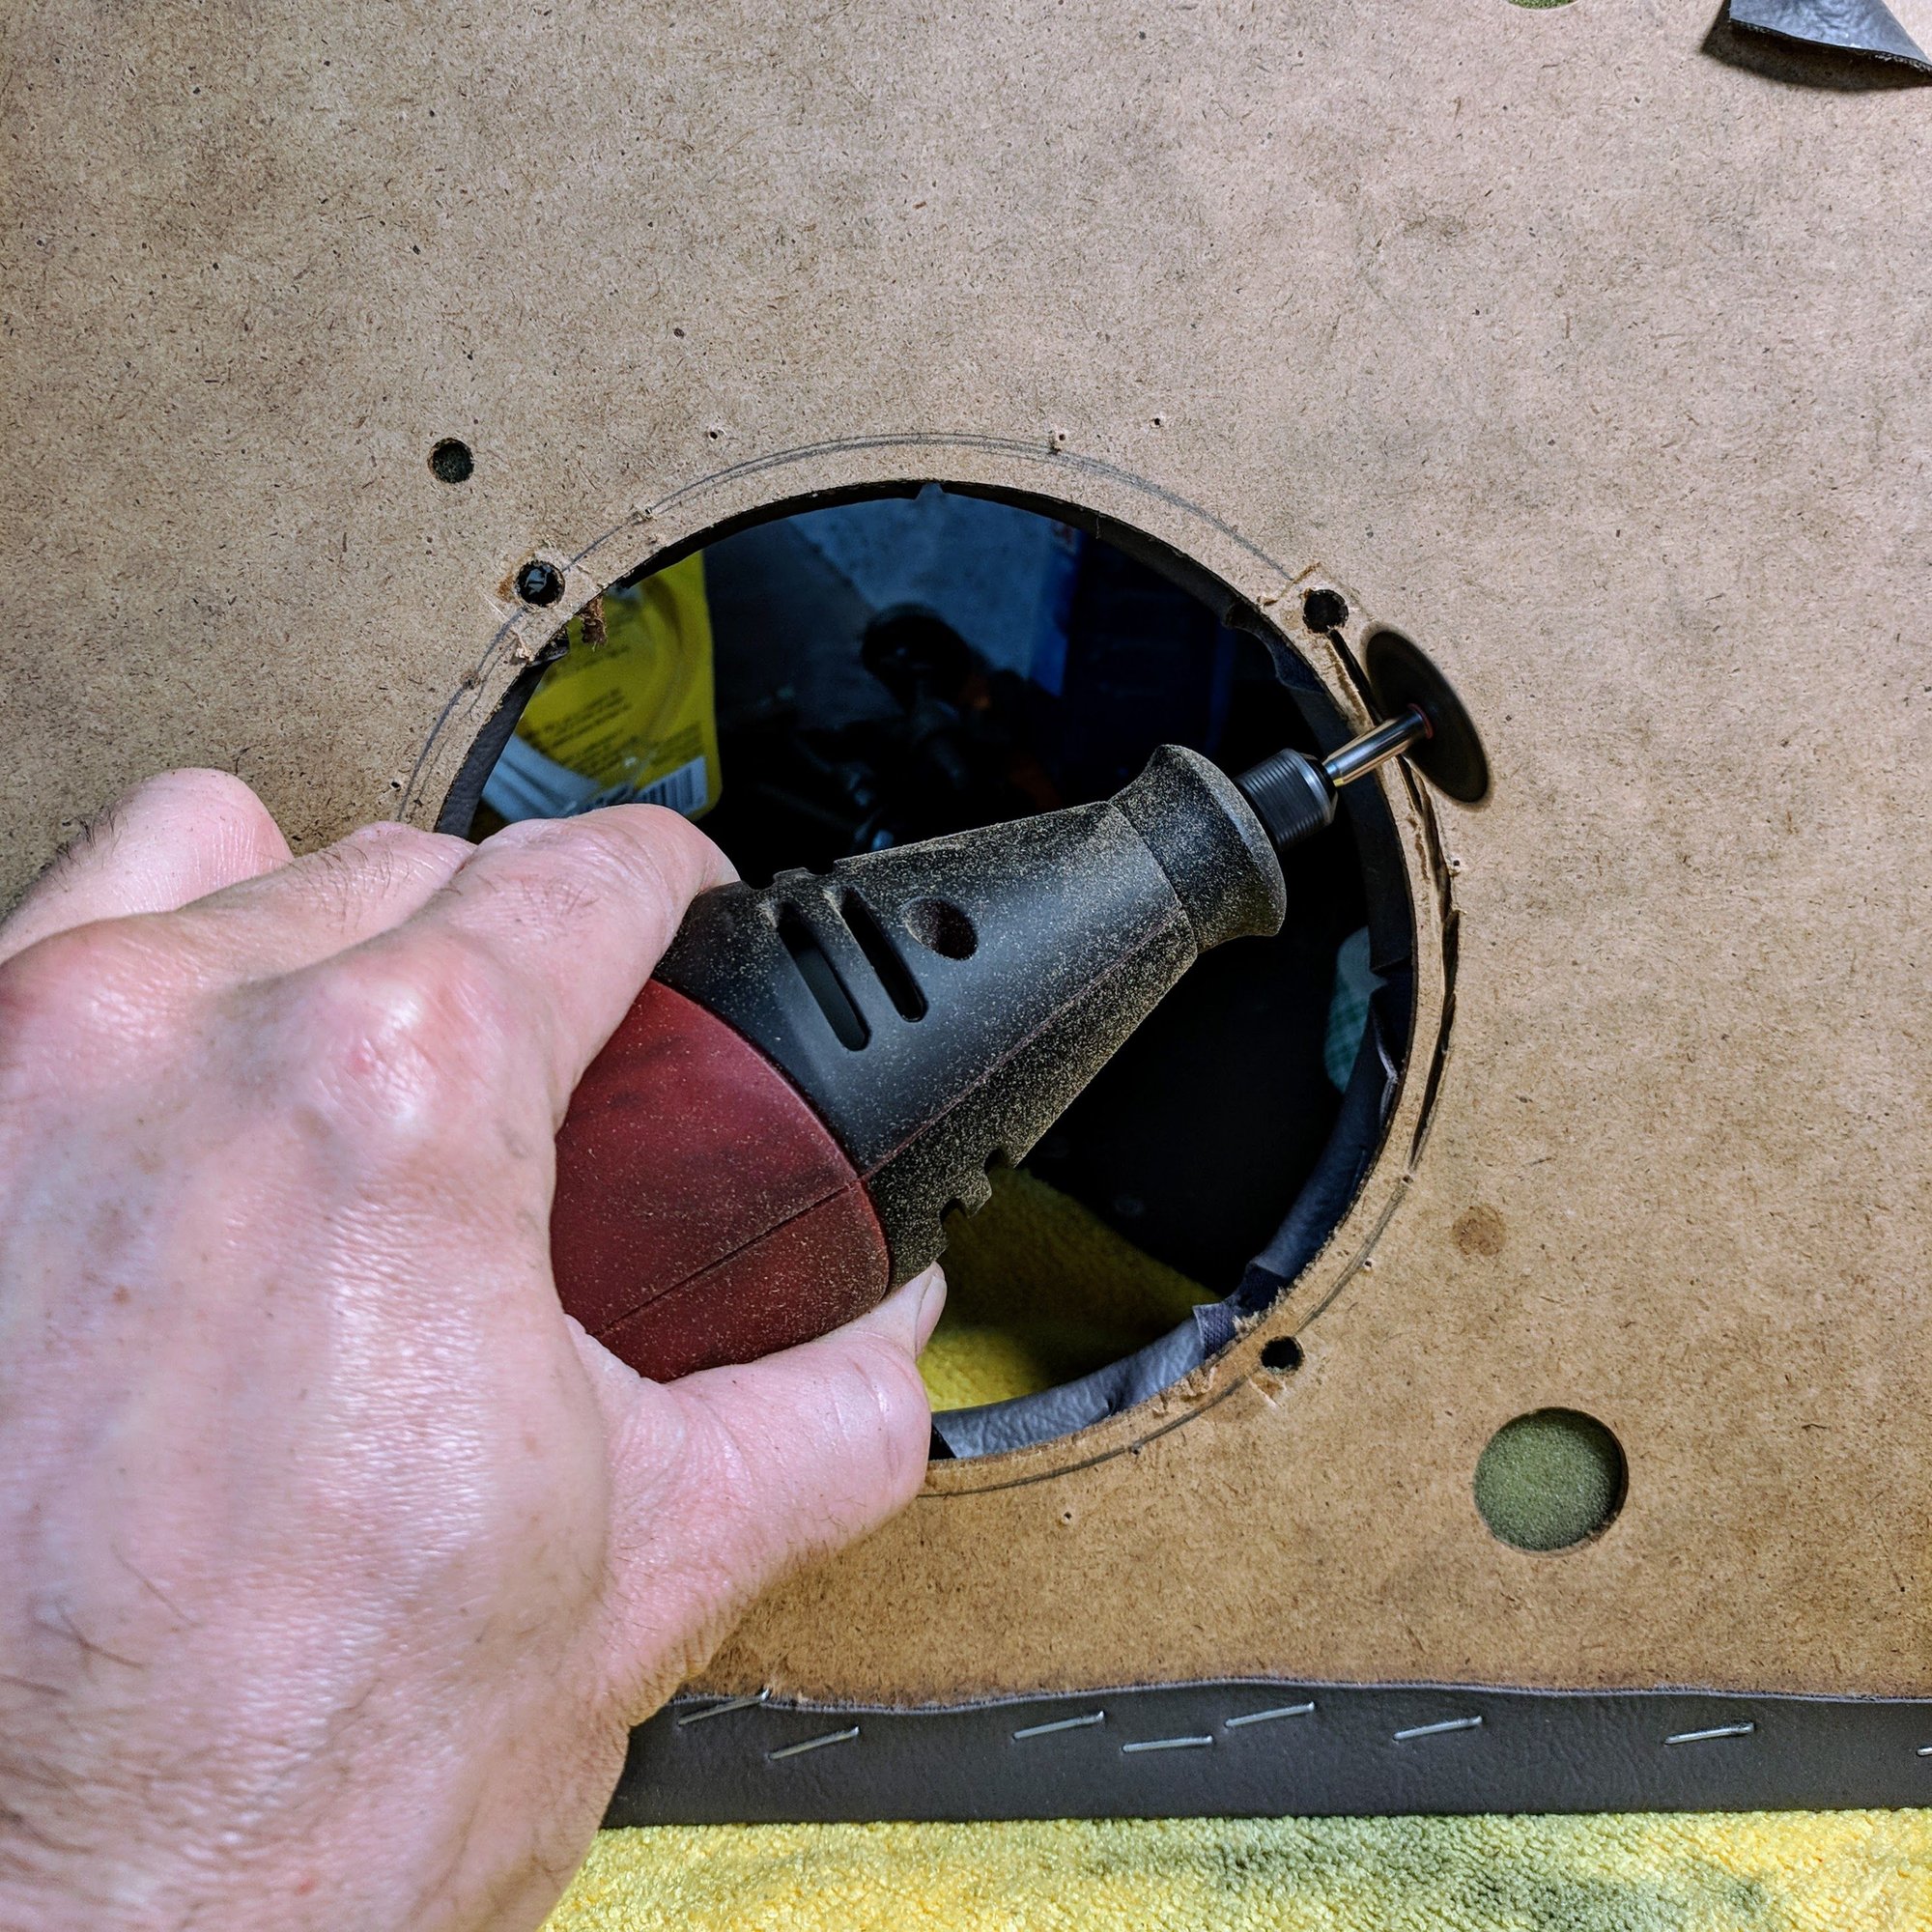
11. I am upgrading to 6.5" components which is larger than the factory 5.25" components. The set I got are old school Made in Germany MB Quarts. To make the mid-bass speaker fit you will need to slightly enlarge the speaker hole. To do this remove the staples/clips, use a stencil for the larger opening, and then cut it out with a dremel cutting wheel.
Installed...
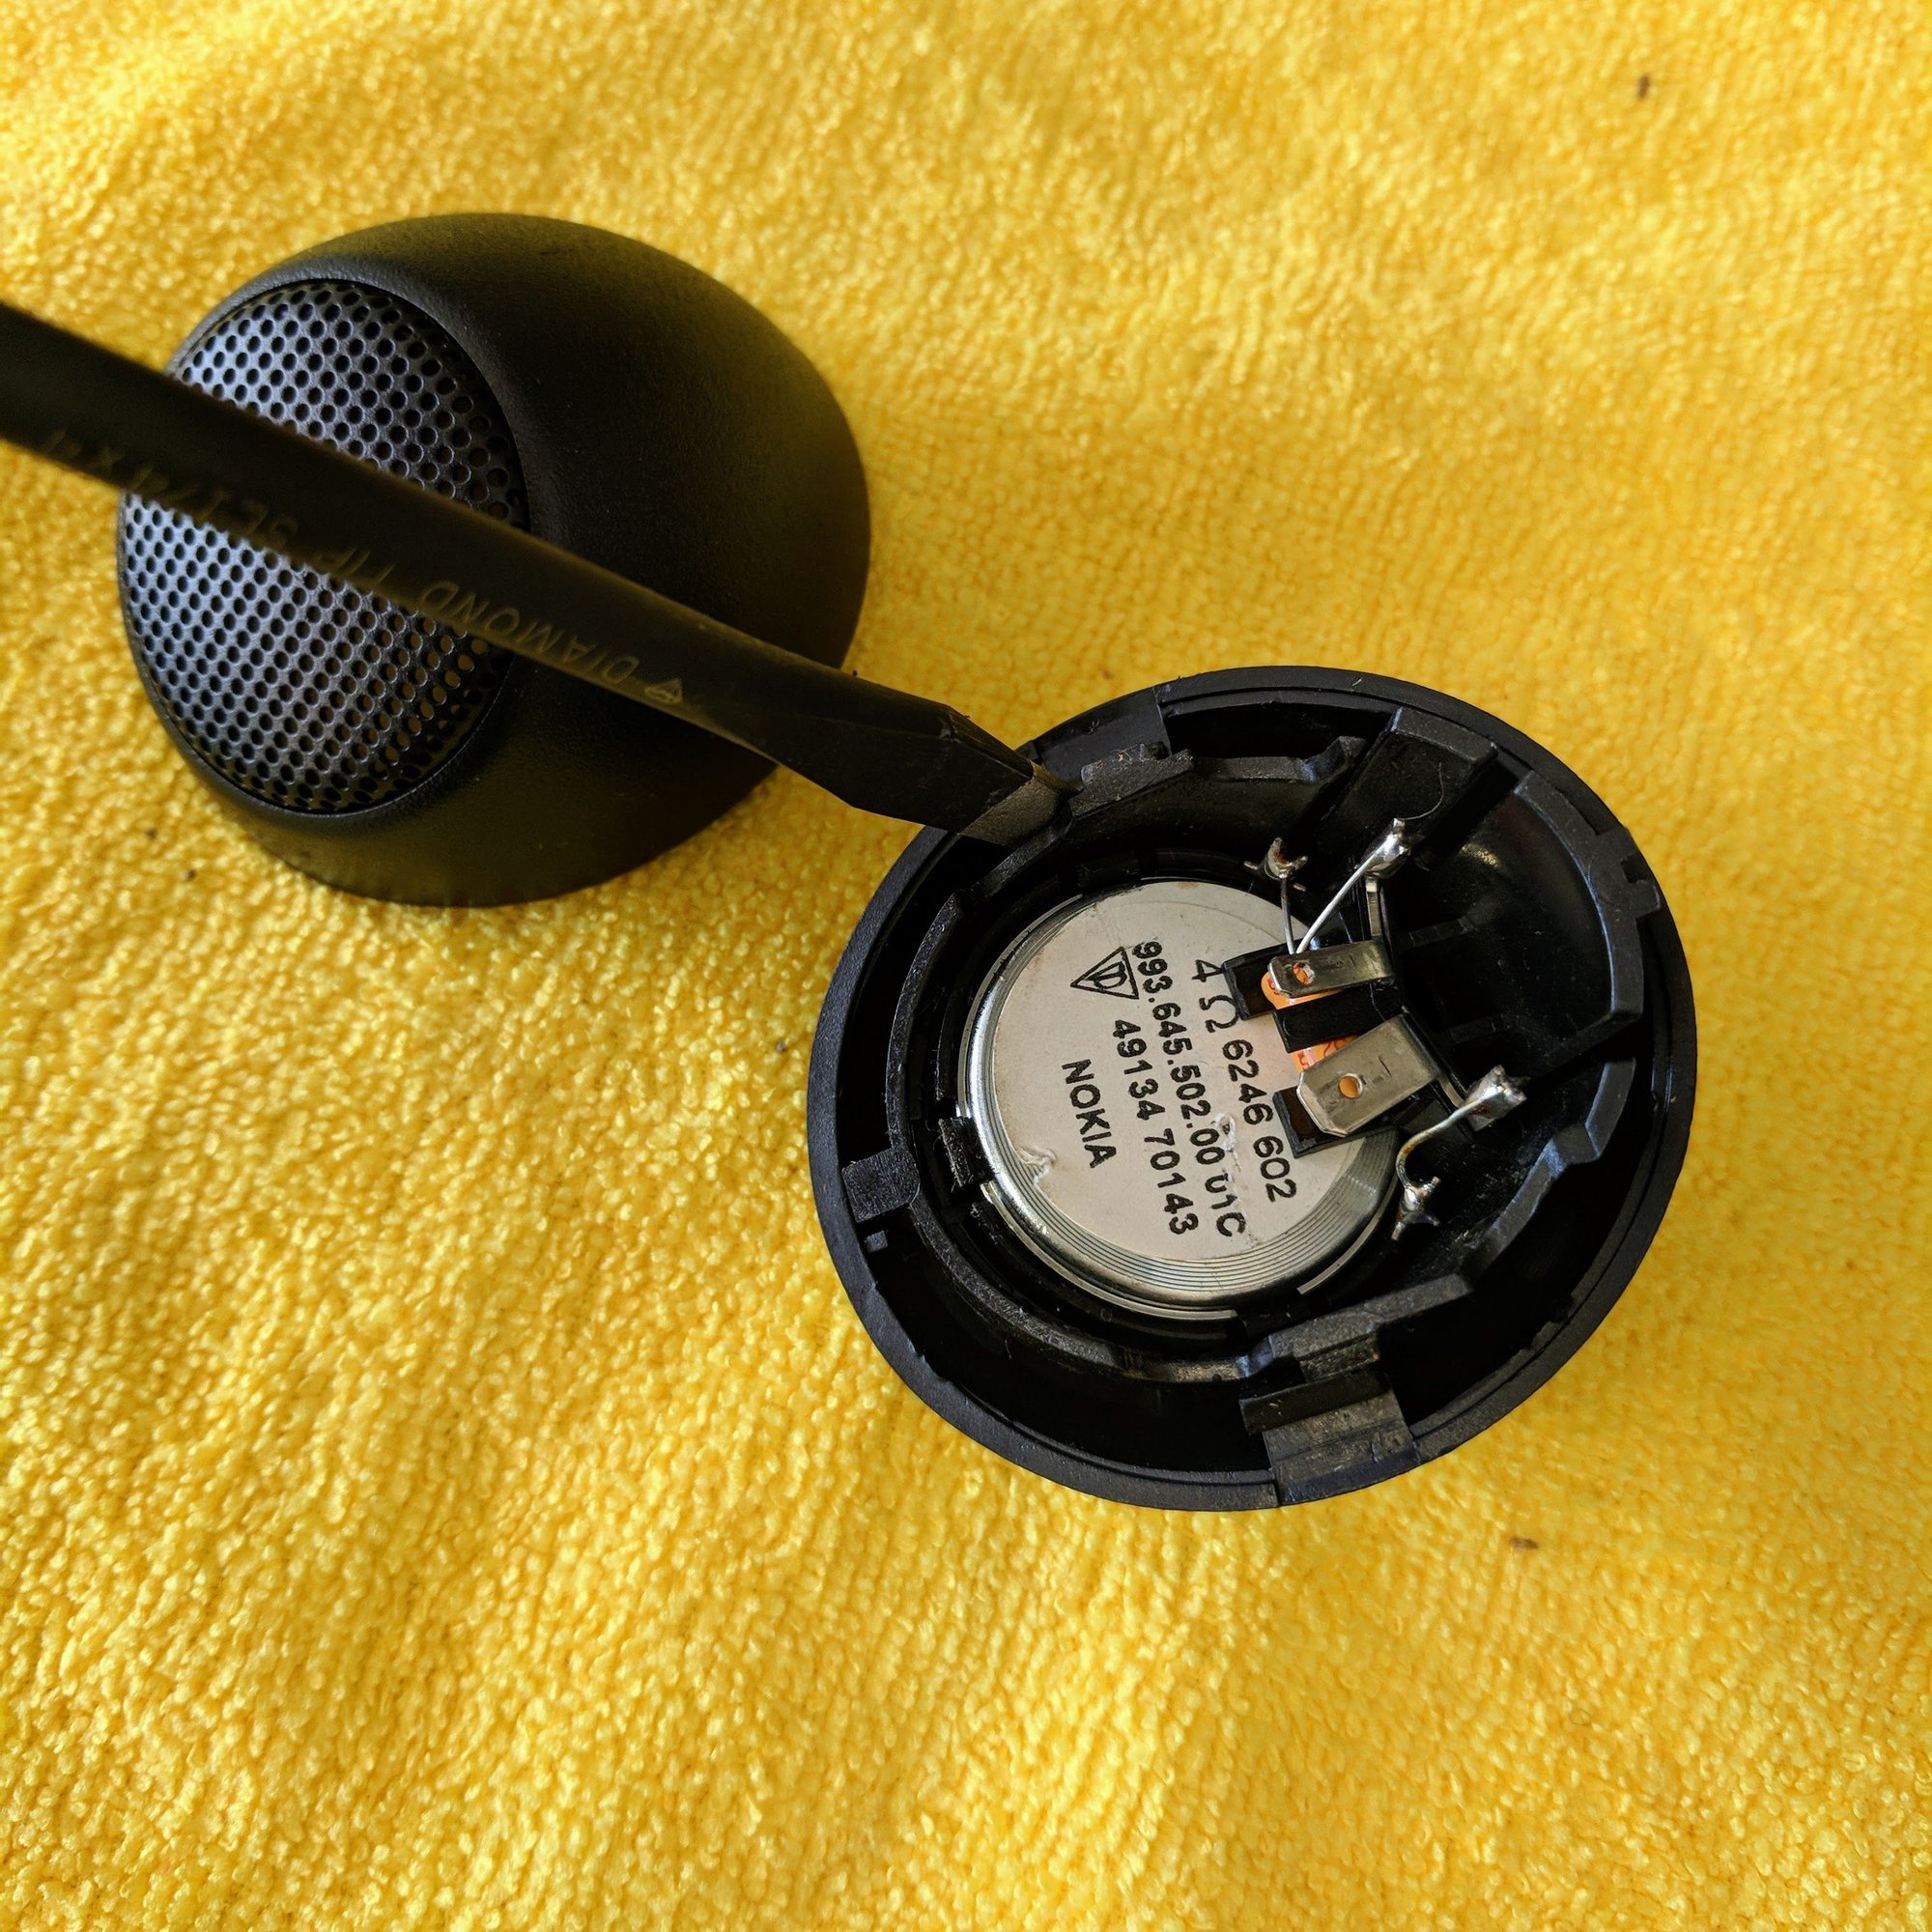
12. Remove the old tweeter from the housing using a screw driver.
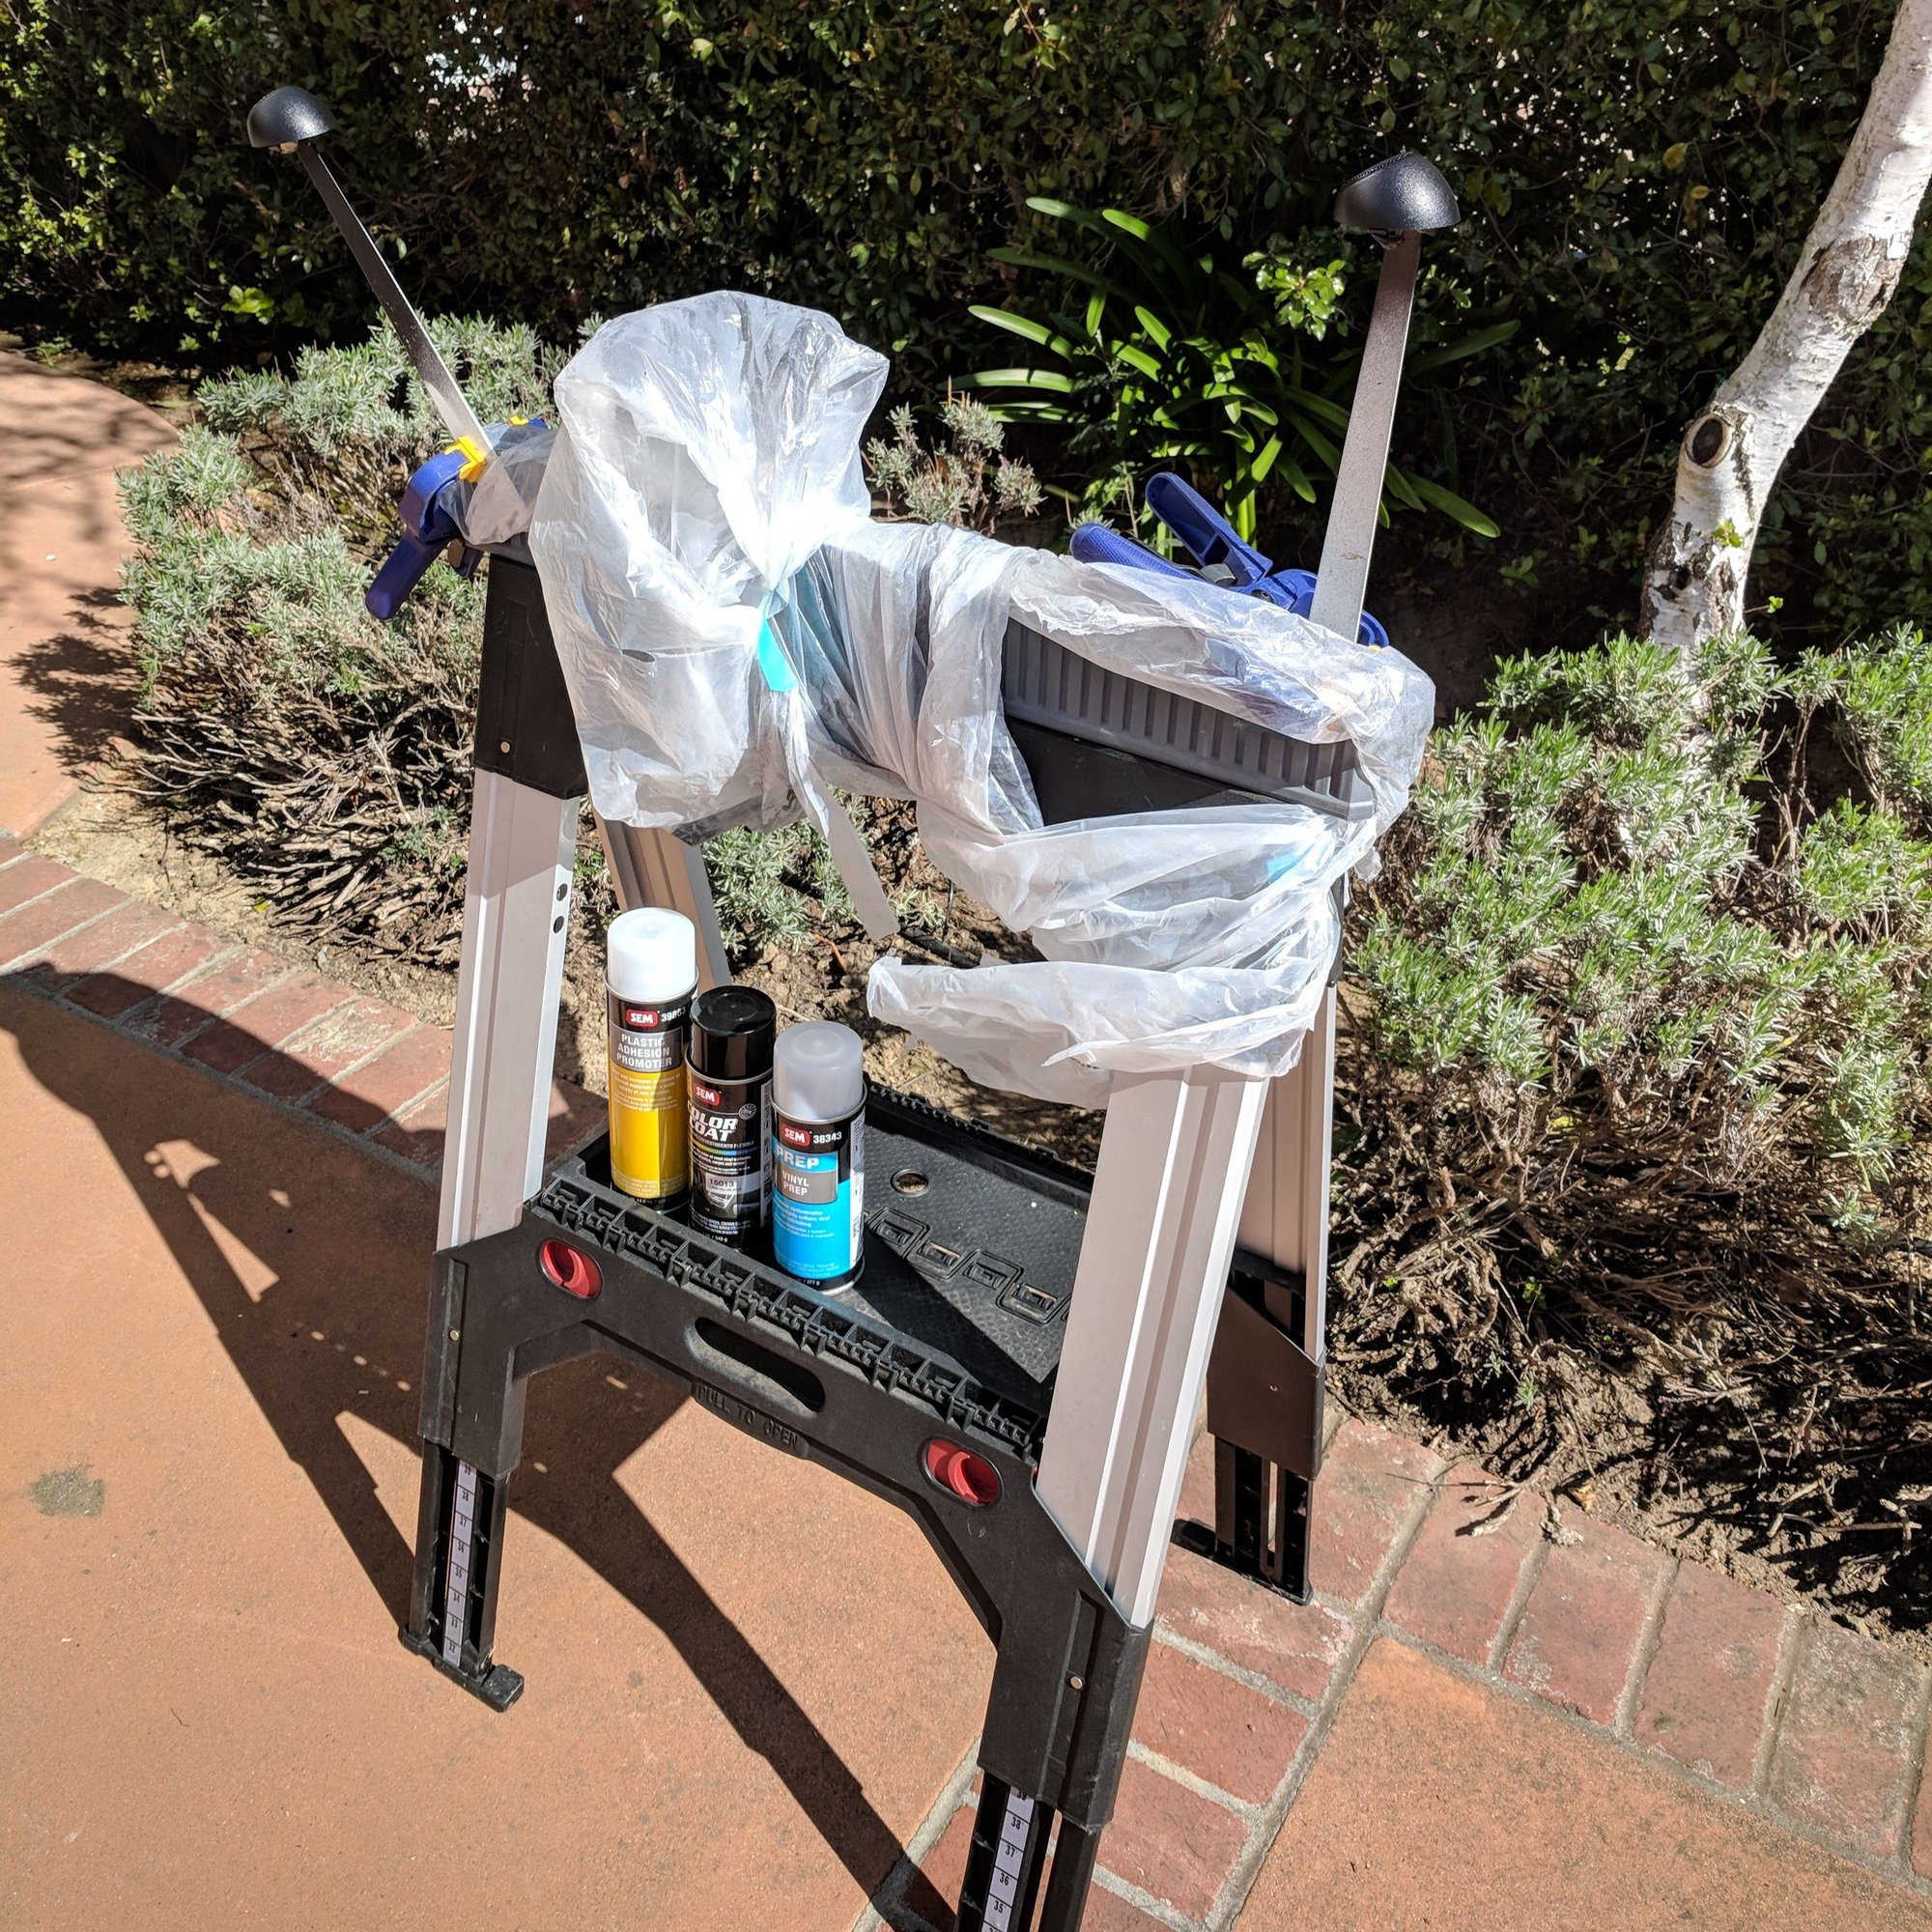
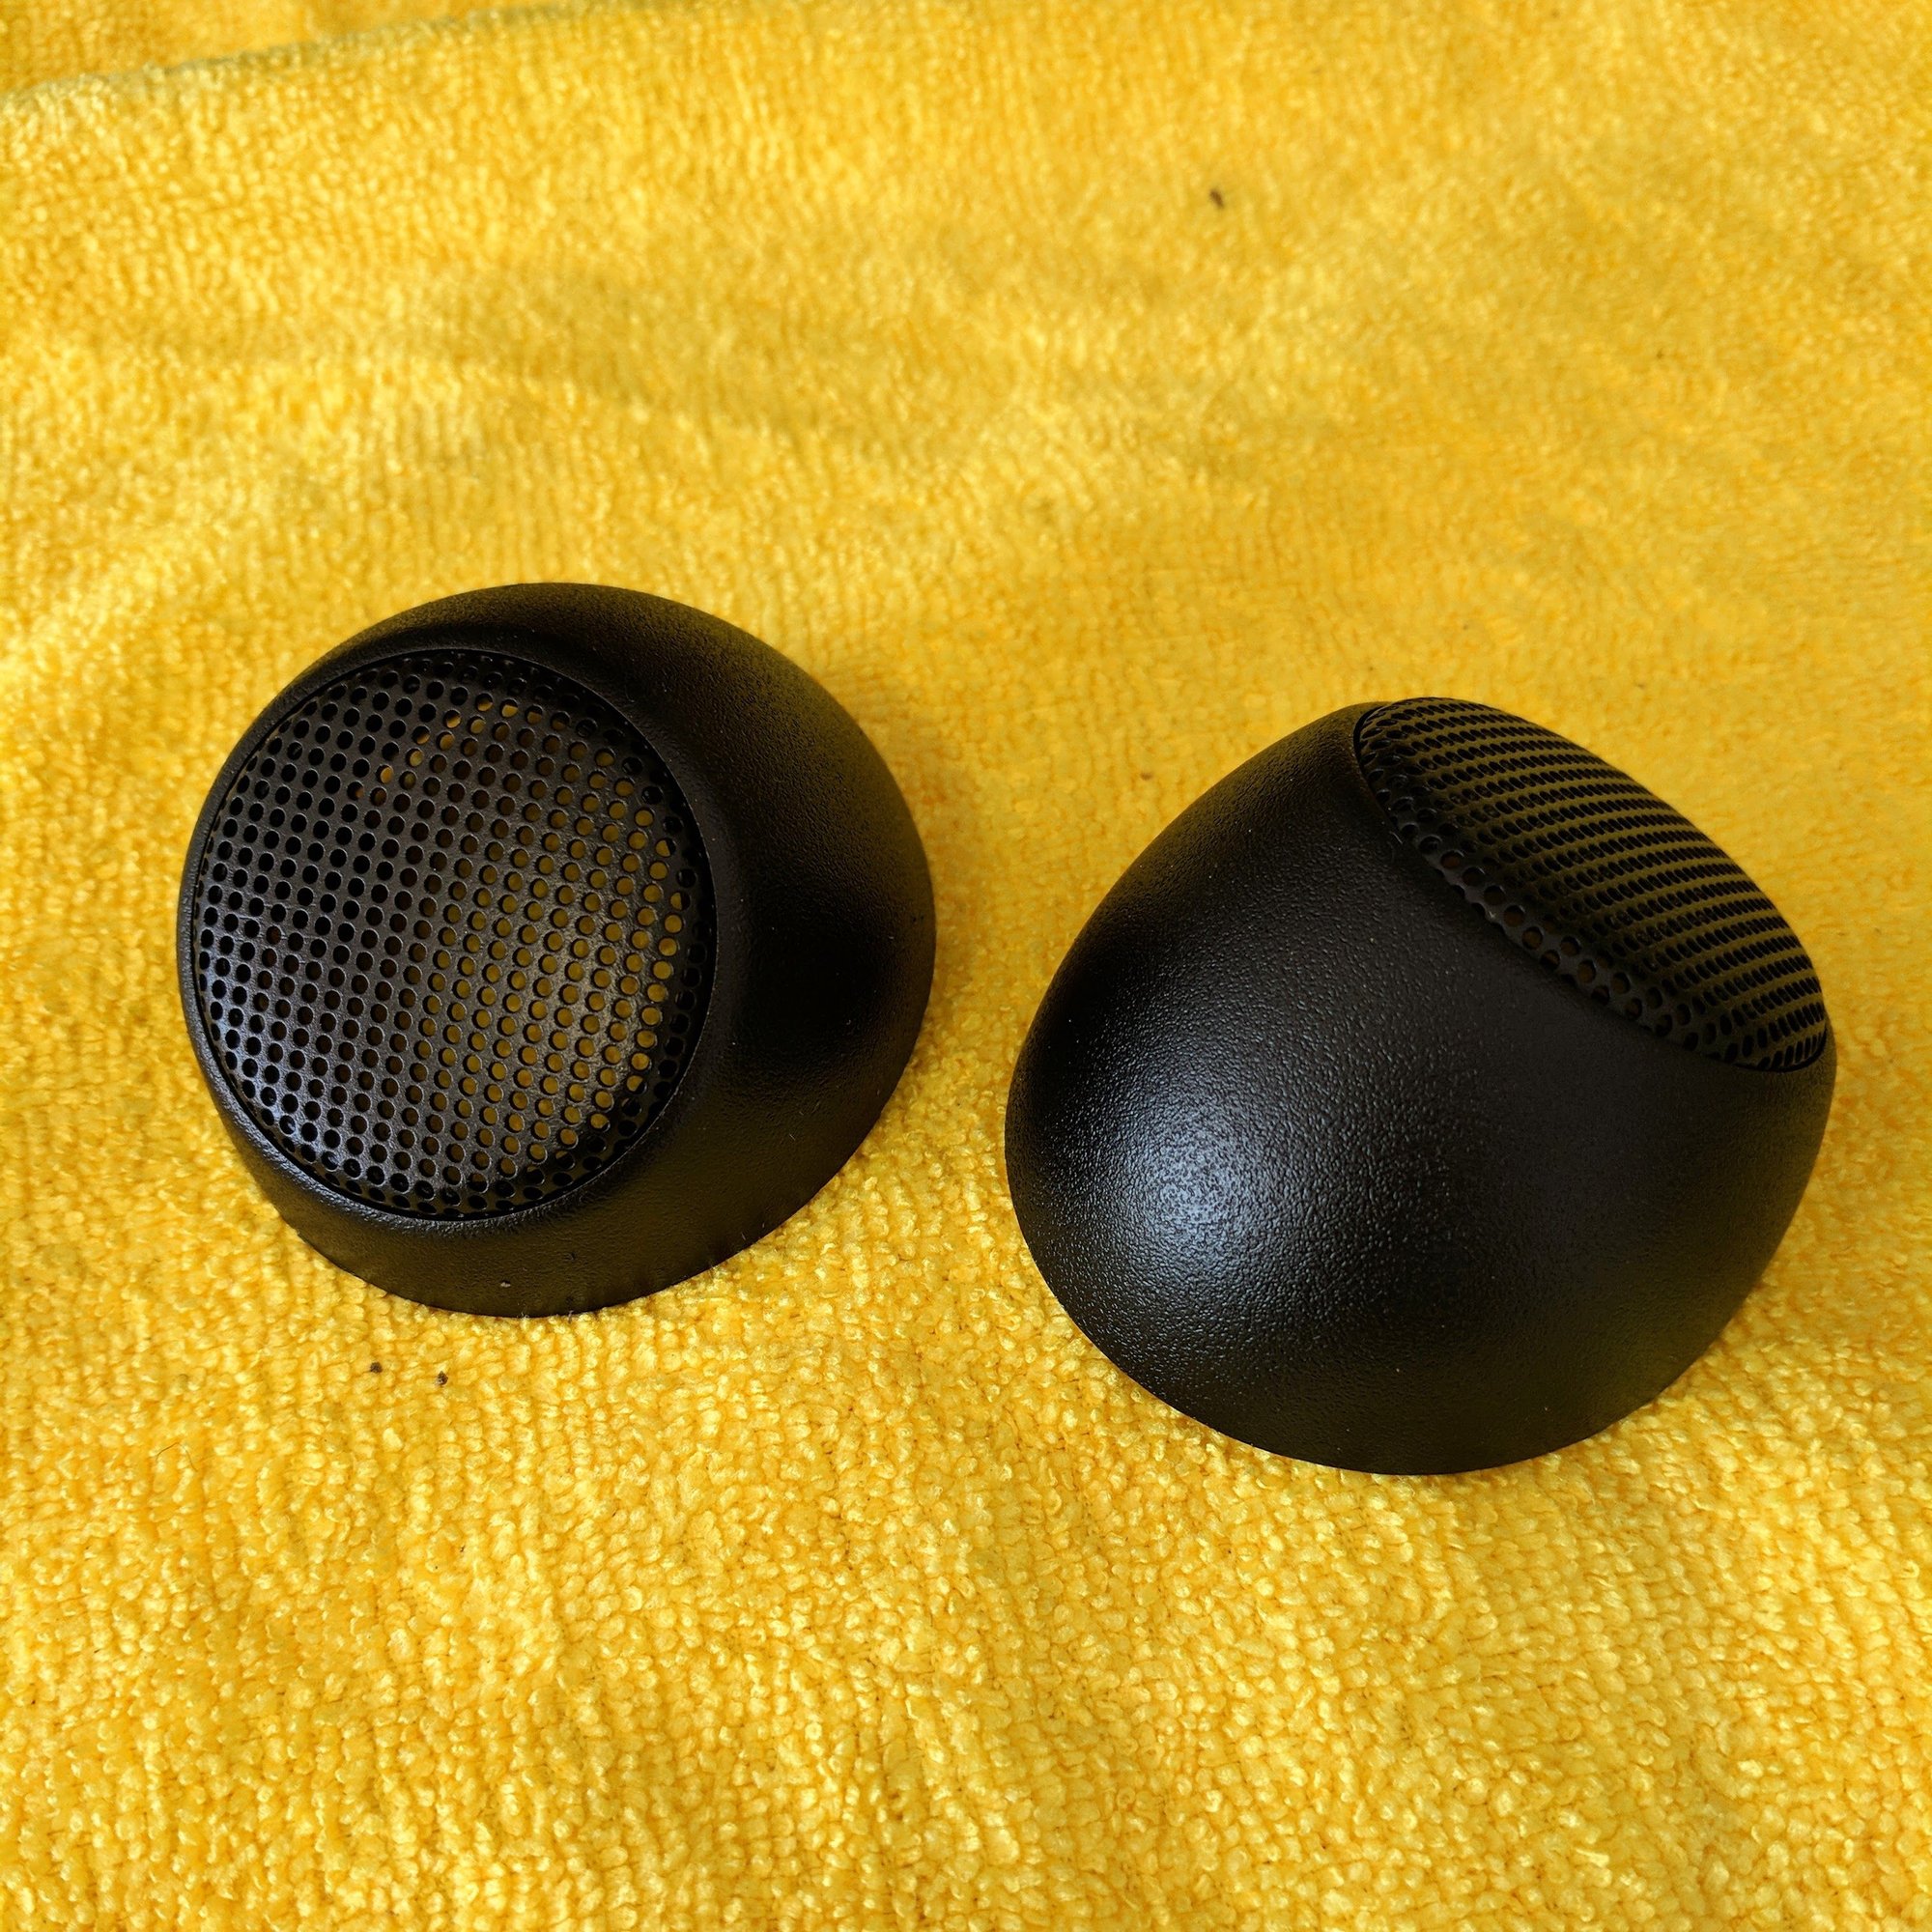
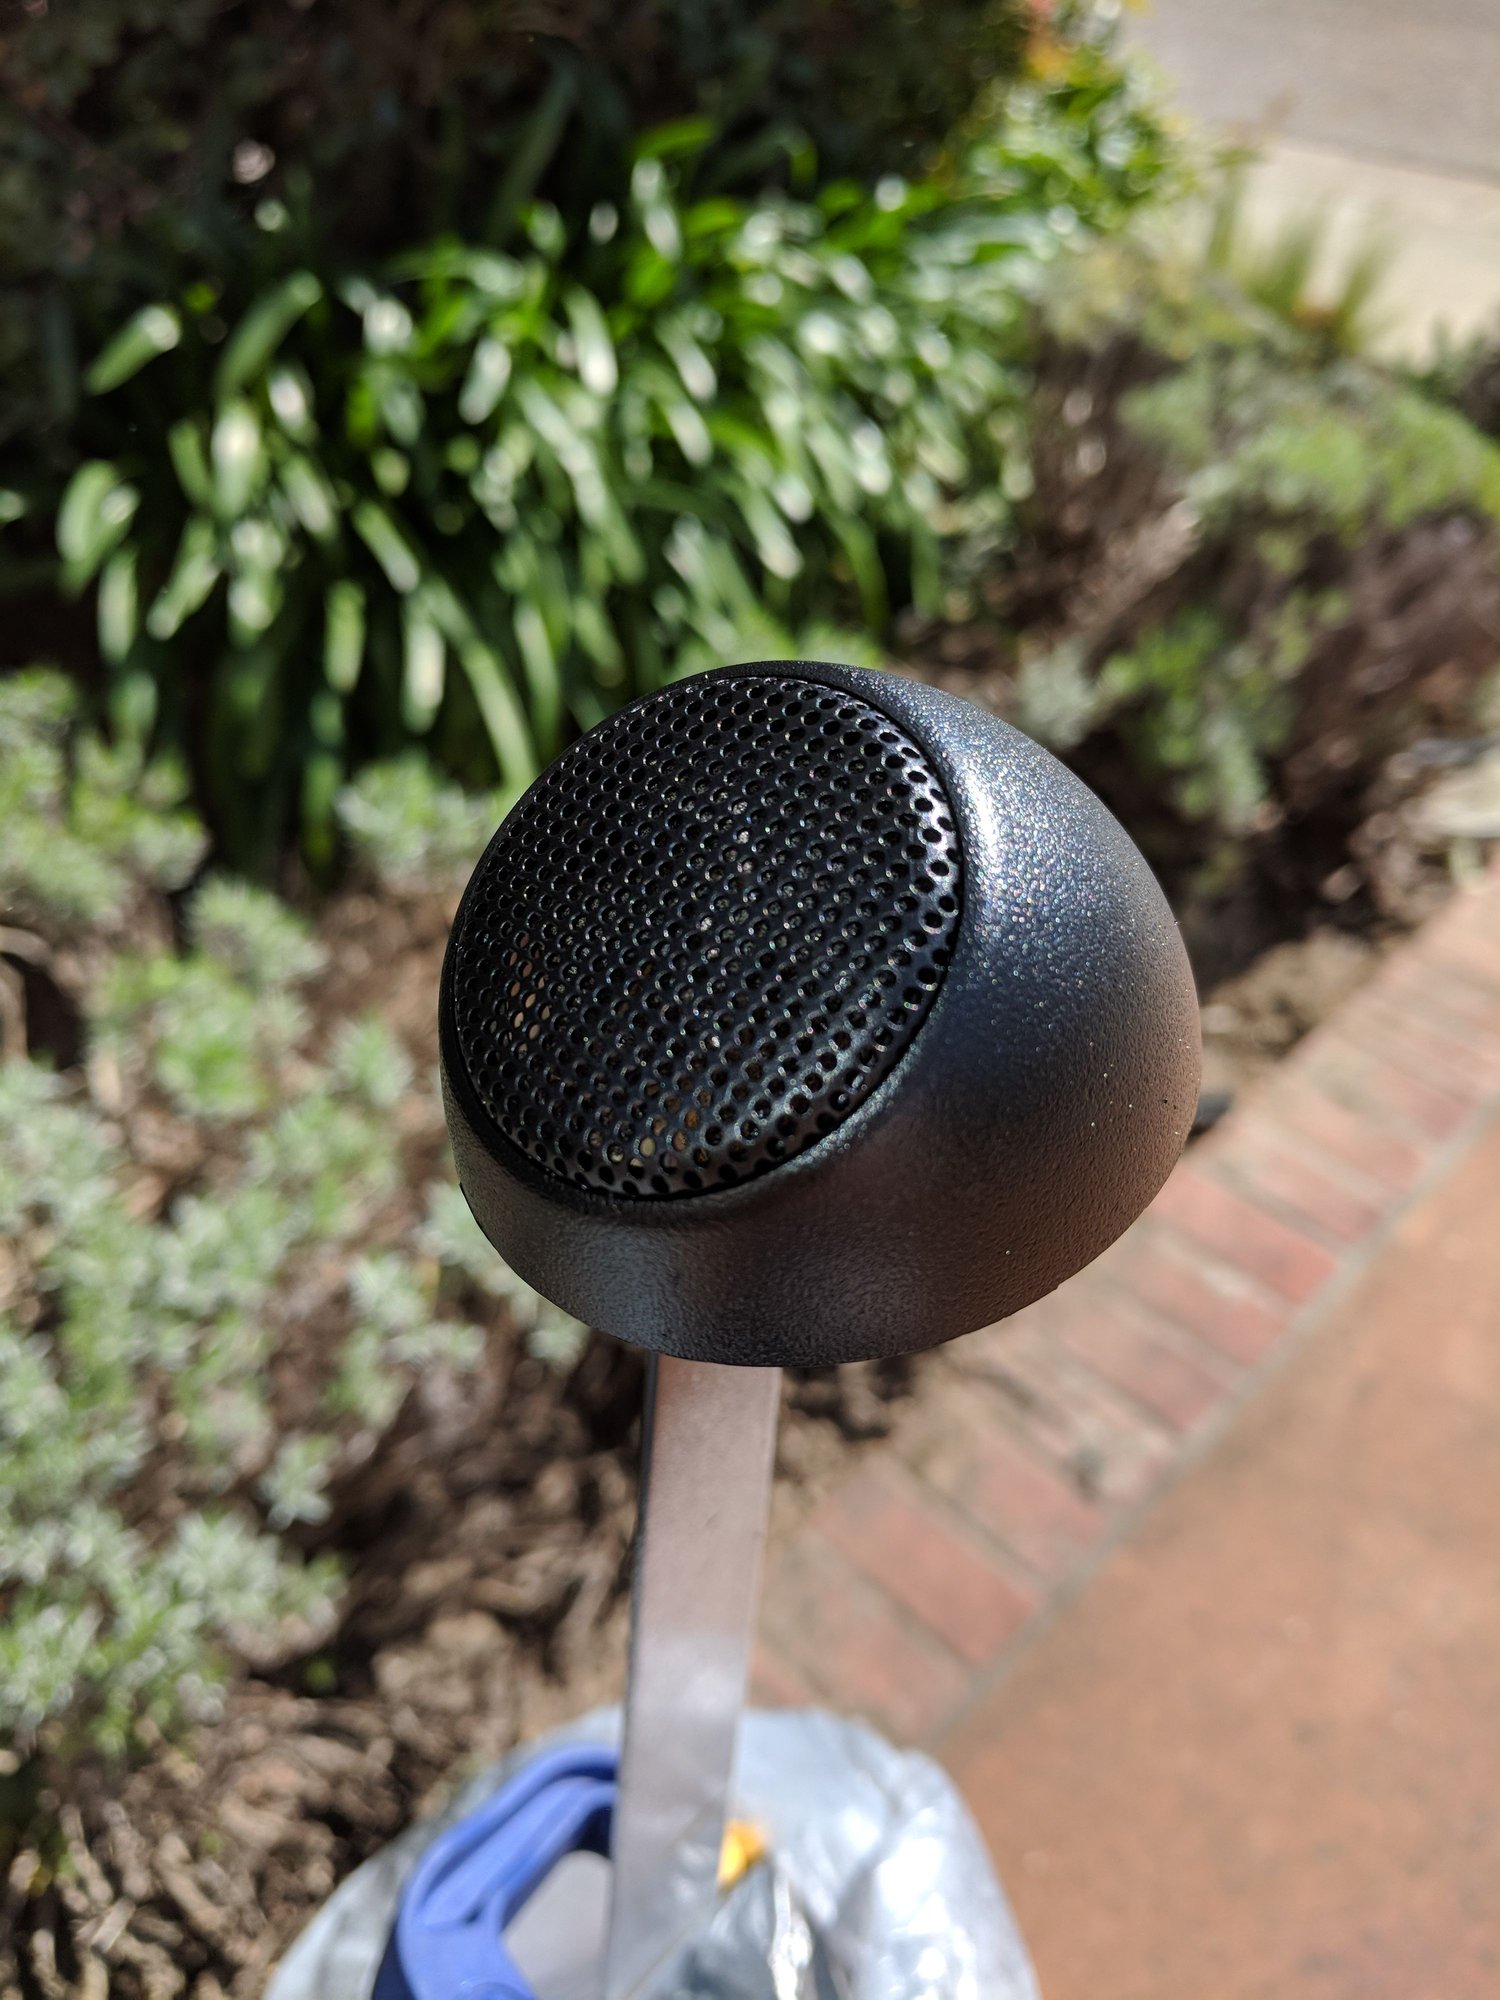
13. My tweeter speaker grills and housings looked faded and scratched. To get them back to their factory glory I shot them with some SEM Landau black. Prepped the surface with a solvent to clean it and and a plastic adhesion promoter. Very pleased with the results. \
14. Hot glue the tweeters into the tweeter housing. I like hot glue as it is very tacky but is not permanent. Three hot glue spots will keep the new tweeter secured.
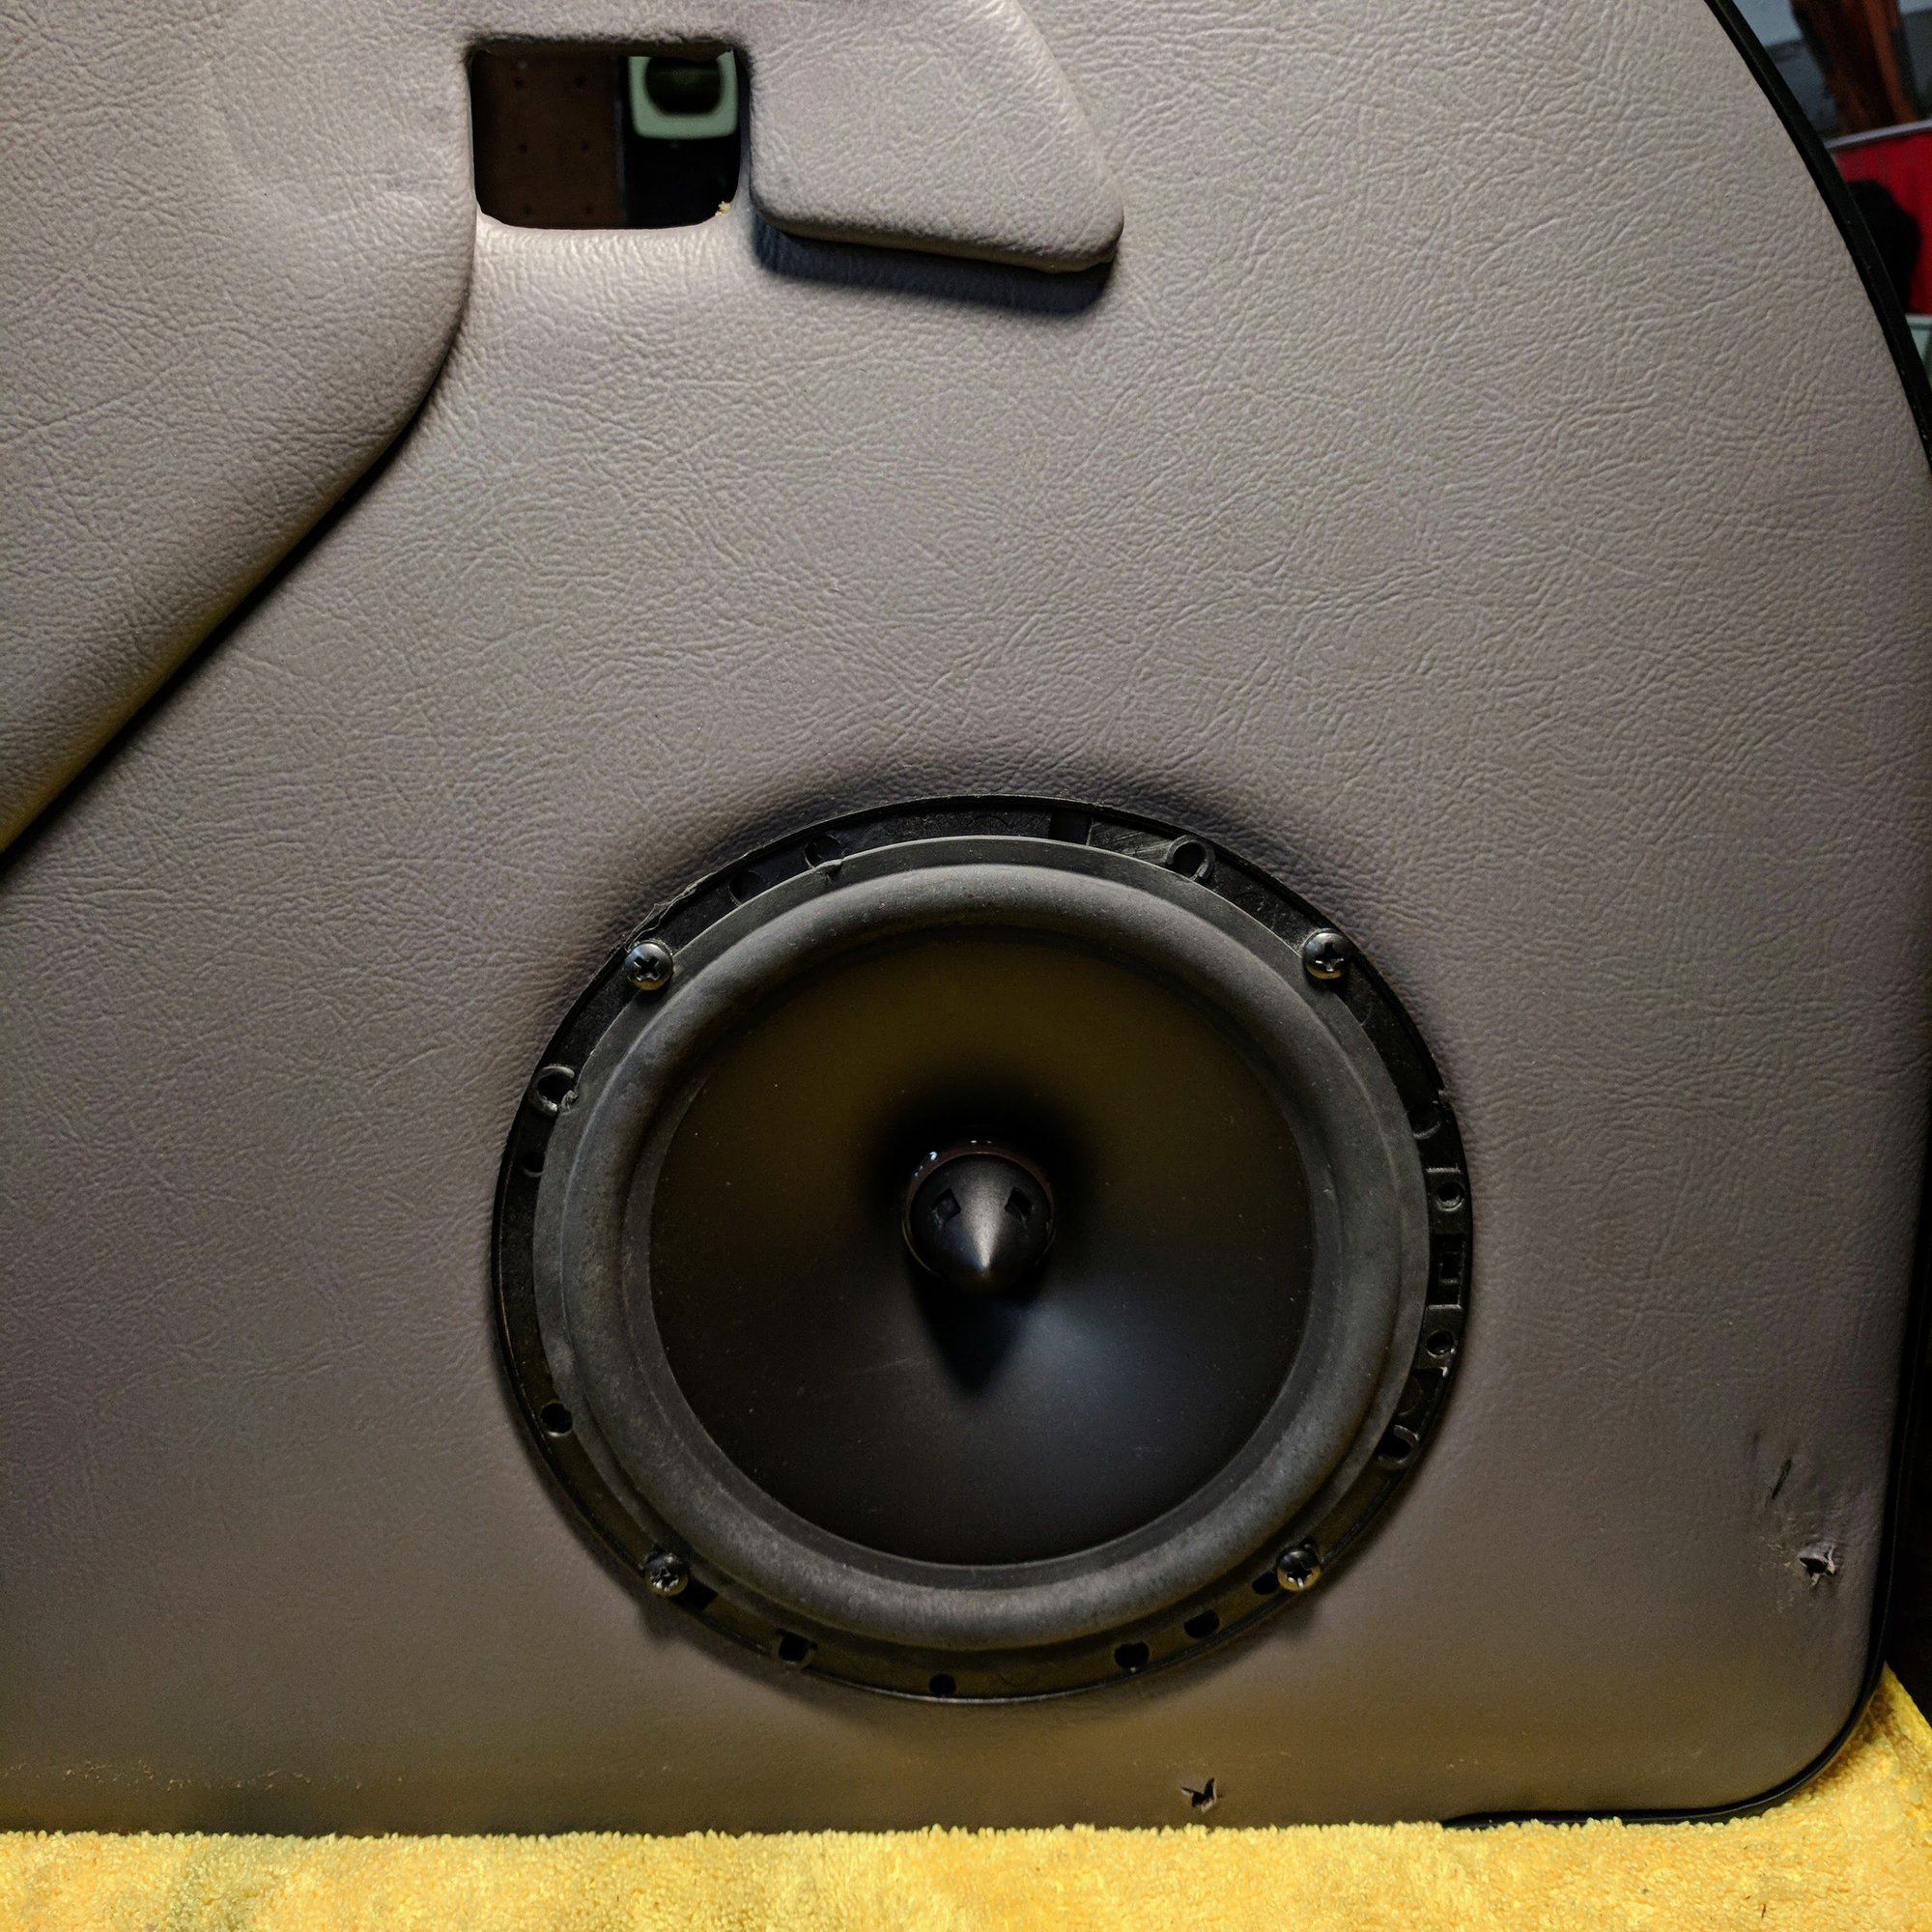
15. Reinstall the door card and connect the mid base and tweeter in the door card. Don't be cheap and splice directly to the tweeter. Use some connectors so in the event you need to take the door card off again you can.
16. Connect the sub woofer. This is a custom fiberglass housing with an 8" JL sub. Temporarily I wired the sub directly to the amp. I will get a quick disconnect plugs so I can remove the sub for AX/track days. with just removing the pillar screws and connection.
where did you relocate the immobilizer and cruise control unit to?
I asked the same question to @foxman and followed his advice on the following...
I moved and mounted the immobilizer a inch closer toward the center tunnel. I also uninstalled the cruise control unit as there is no room since the amp is so big. Looked into a new x series alpine class D four channel amp and looks like I can fit that with the cruise control and immobilizer back into their original places. I will wait and see if I miss the cruise control. For now I don't use it so not a big deal for me to spend the extra money to replace a perfectly good old school amp.
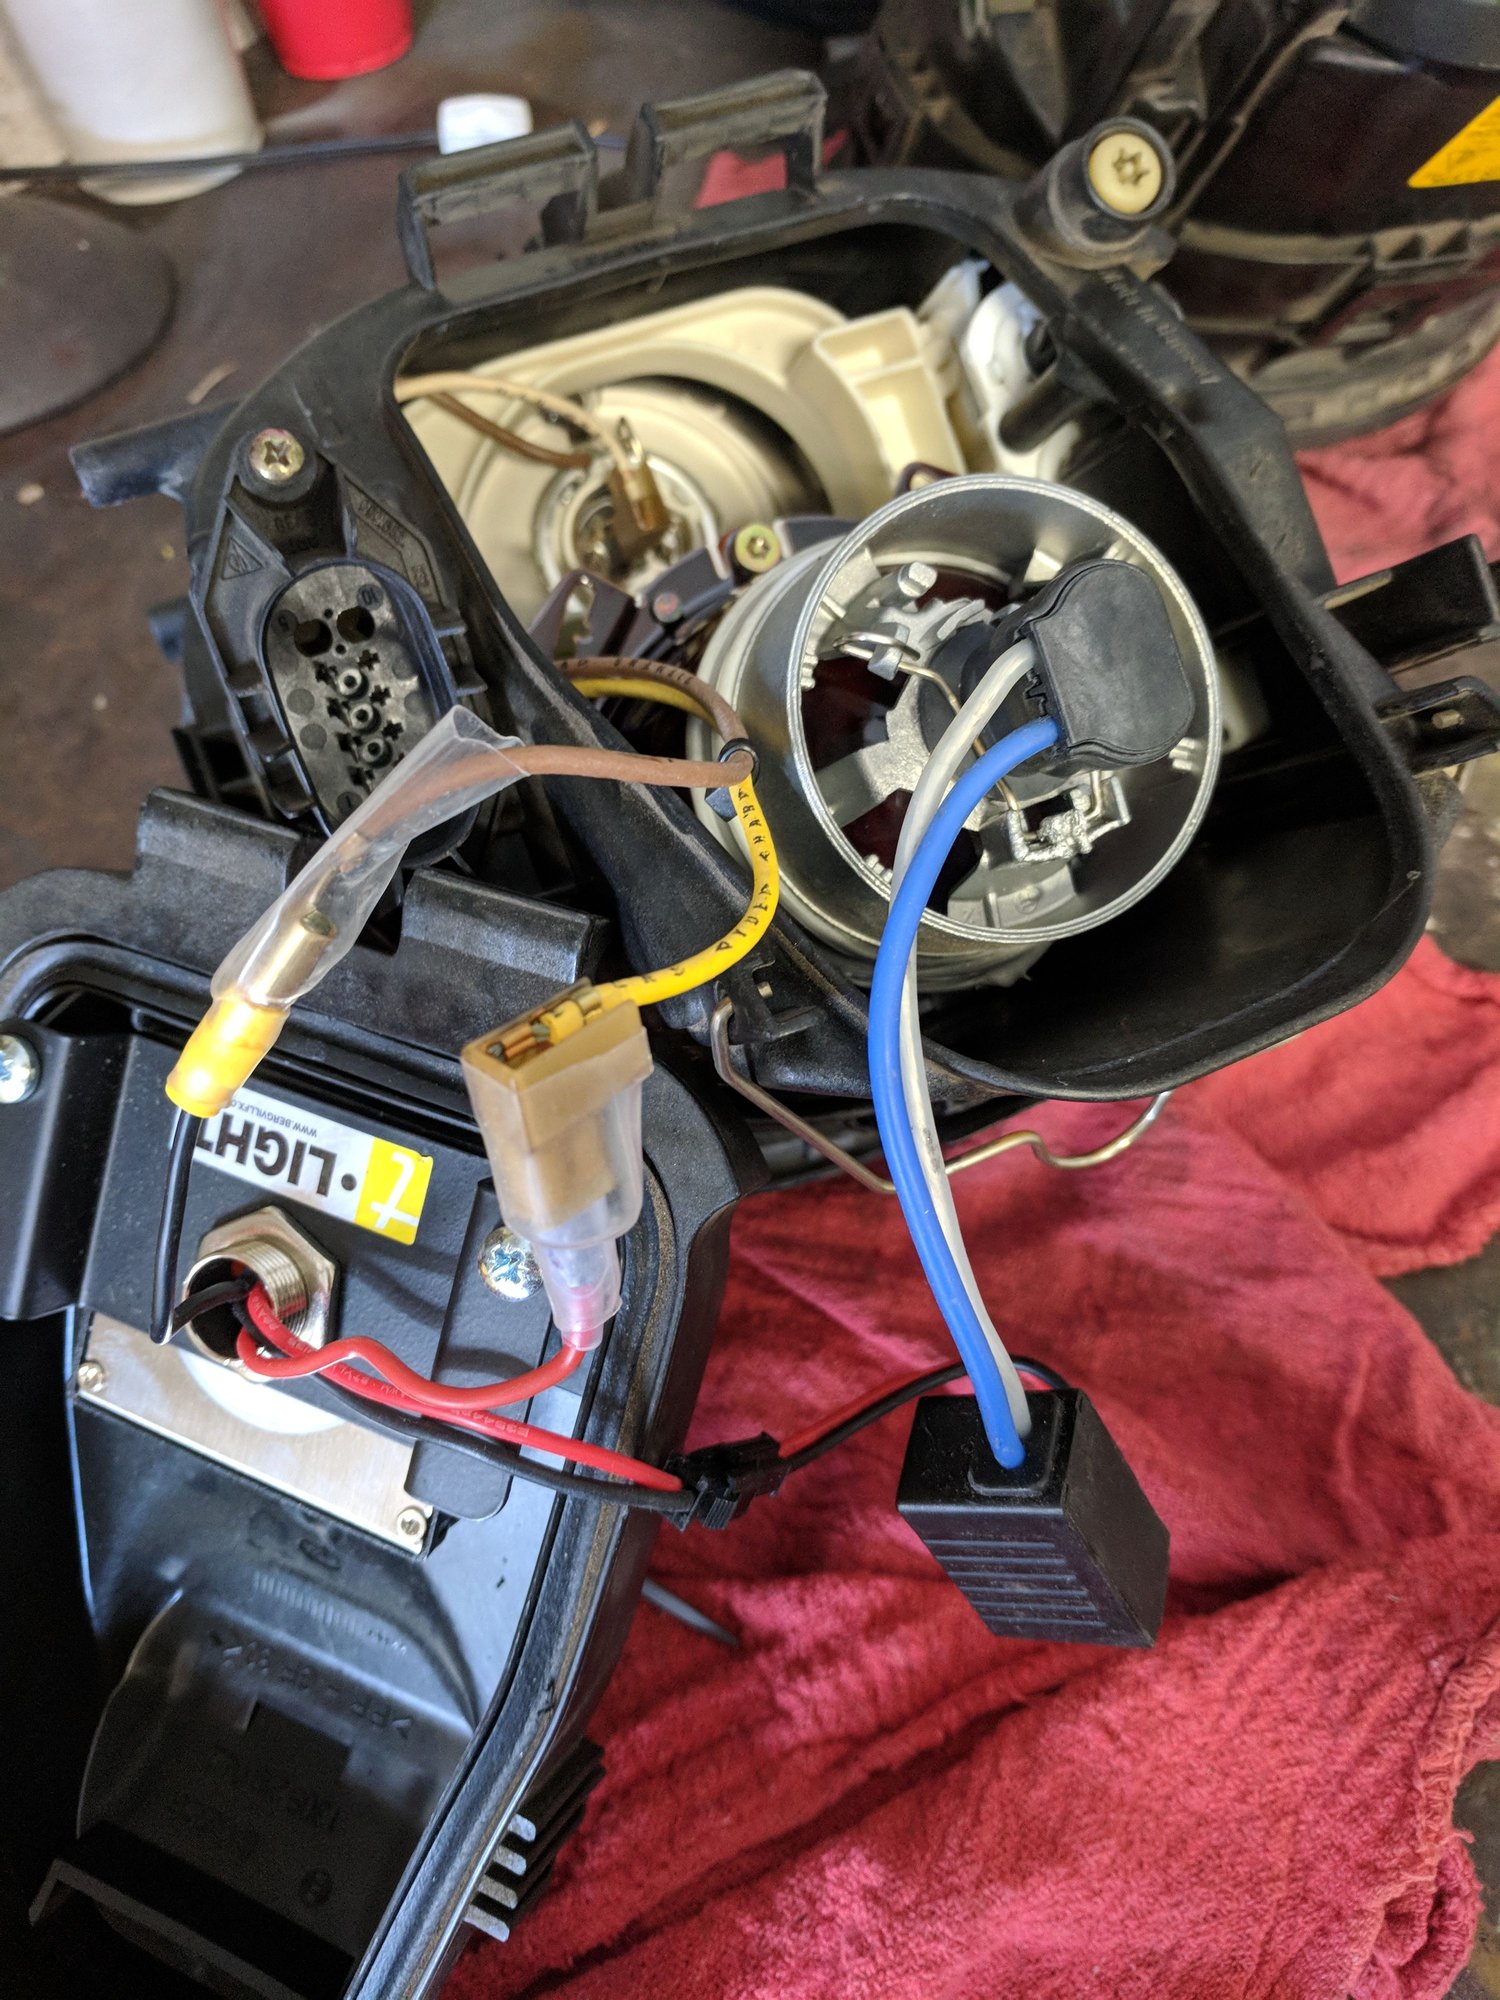
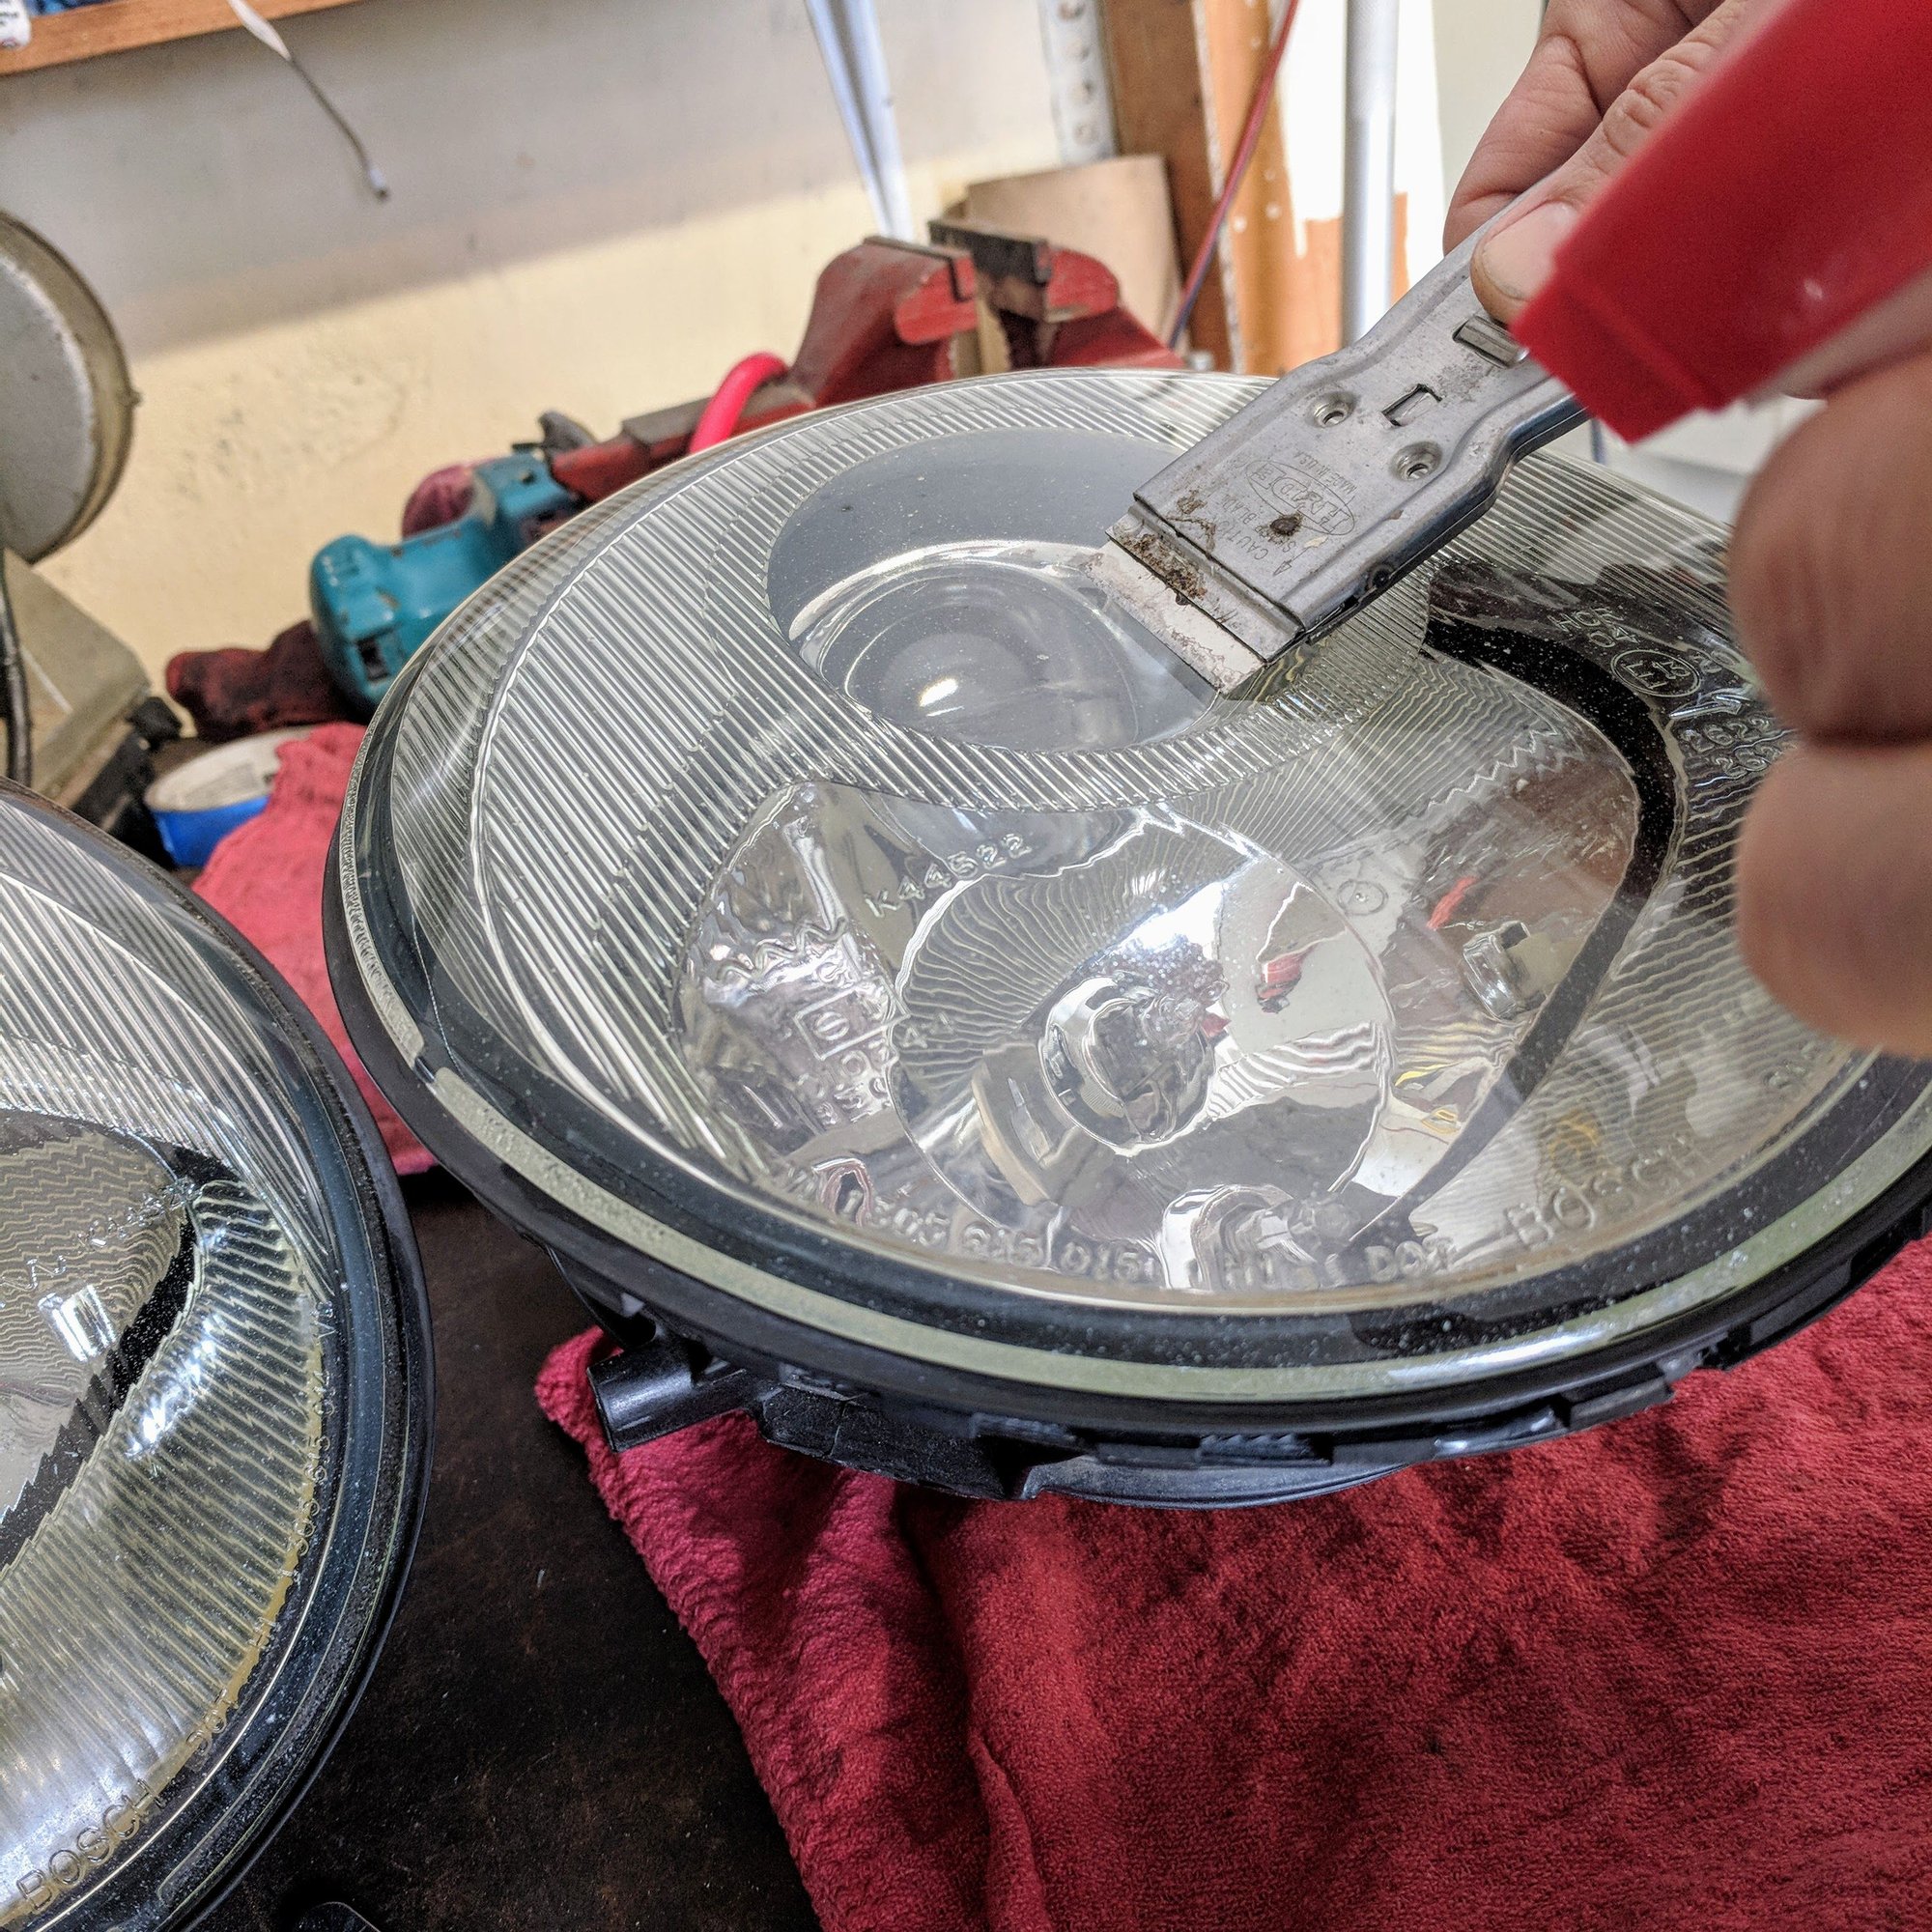
The Tore low beam HID lights are a great upgrade as all of you suggested.
This past winter, driving at night after work or early morning runs for my weekend drives I could easily notice the OEM lights were underwhelming at best. This thread here pushed me to pull the trigger to do something about it... https://rennlist.com/forums/993-foru...d-upgrade.html While my primary objective was to upgrade the low beams, I decided to upgrade my running/turn lights to LED too.
The Tore instructions are great. Here are a few other things I found that helped my situation.
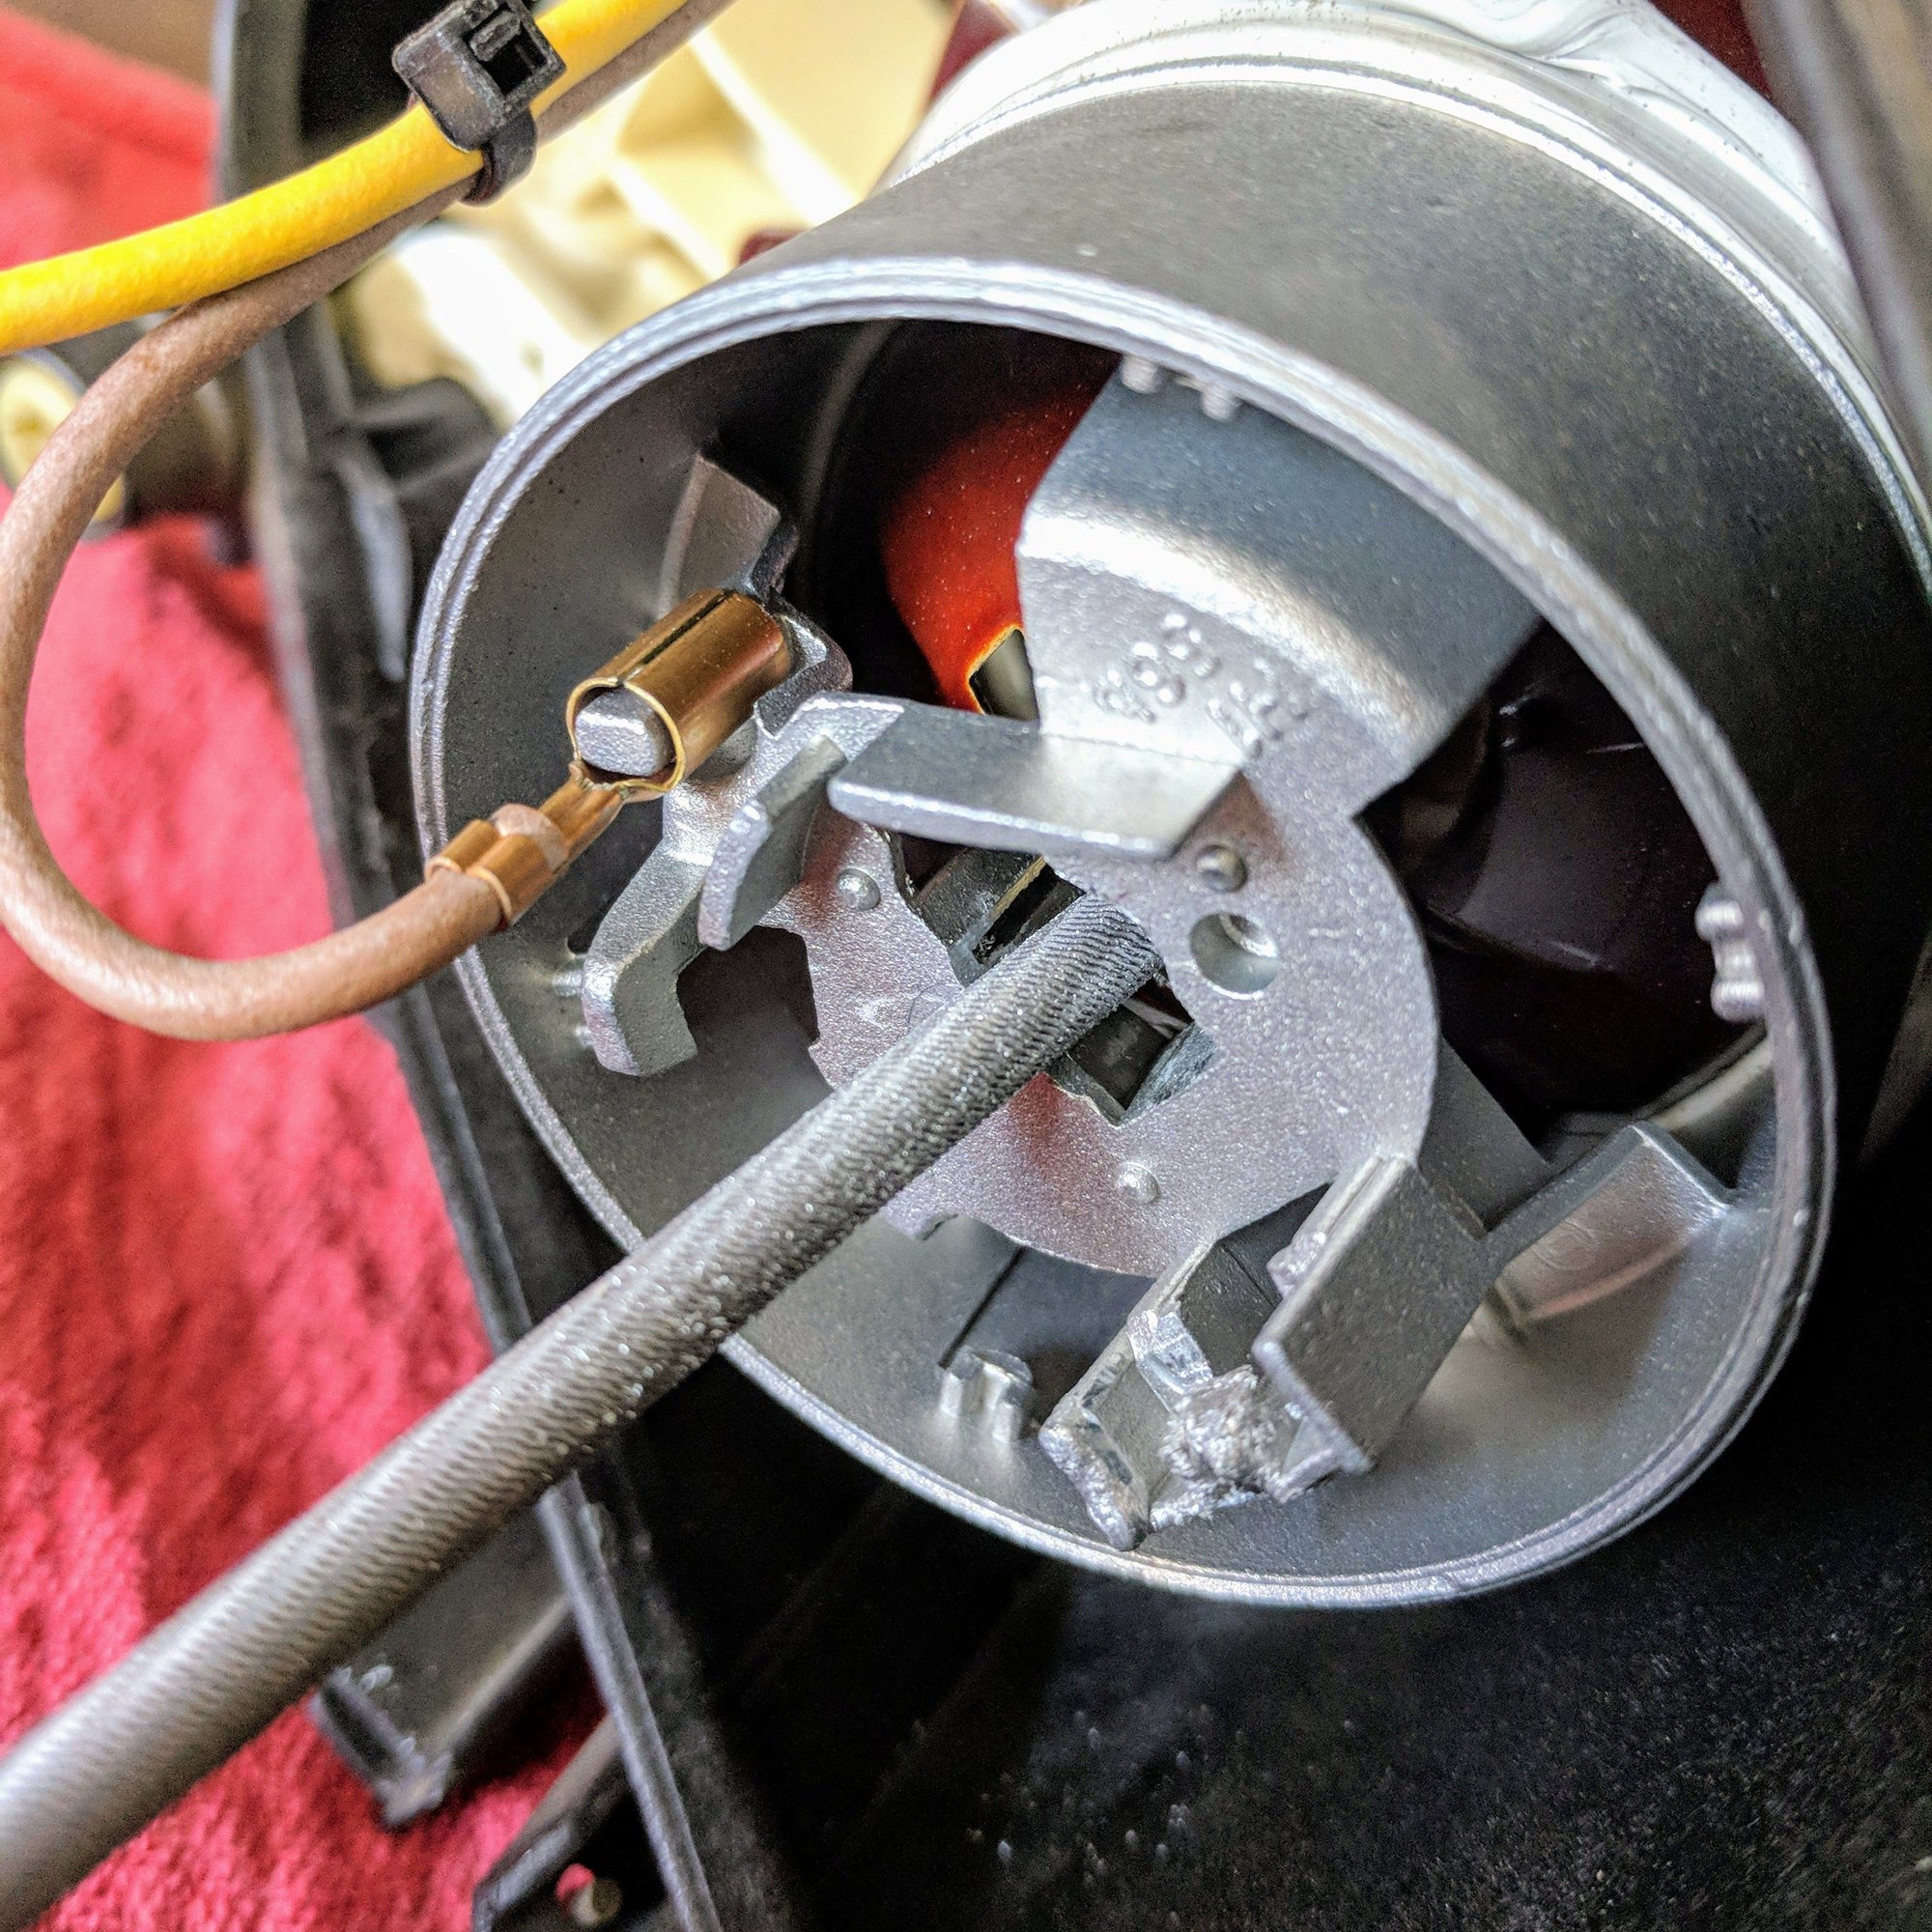
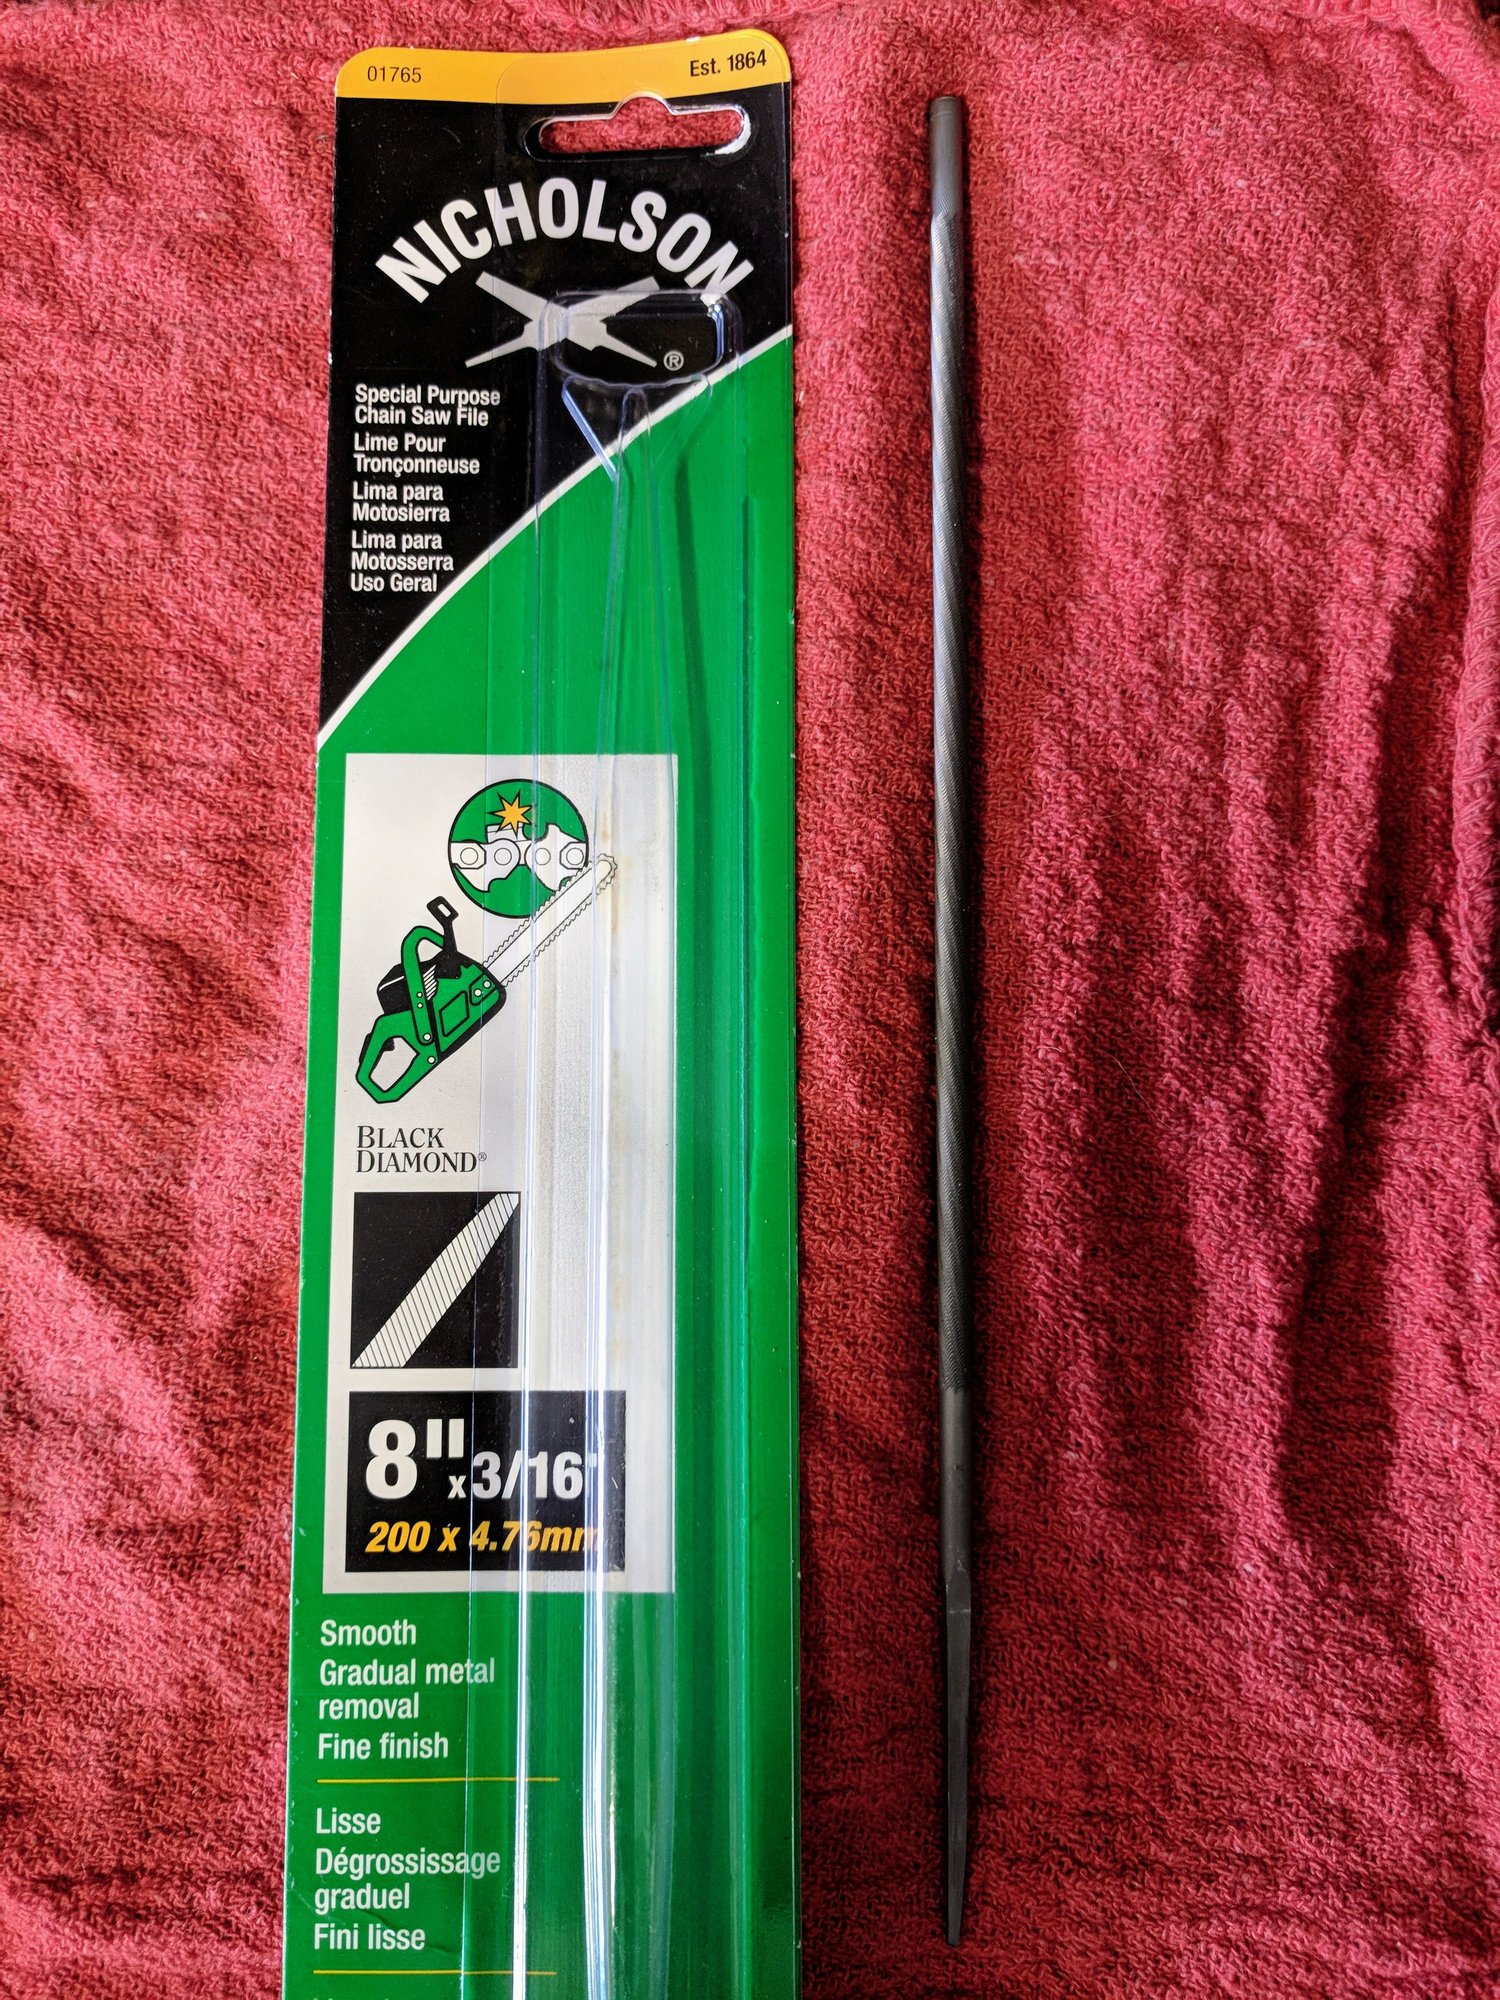
1. The instructions call out to use a file to enlarge the low beam bulb holder to accommodate the larger HID bulb. I didn't have a small enough one so I initially used a dremel and some random metal burr bits and it was useless. Finally went to the local Ace Hardware and found a chainsaw file which worked perfectly.
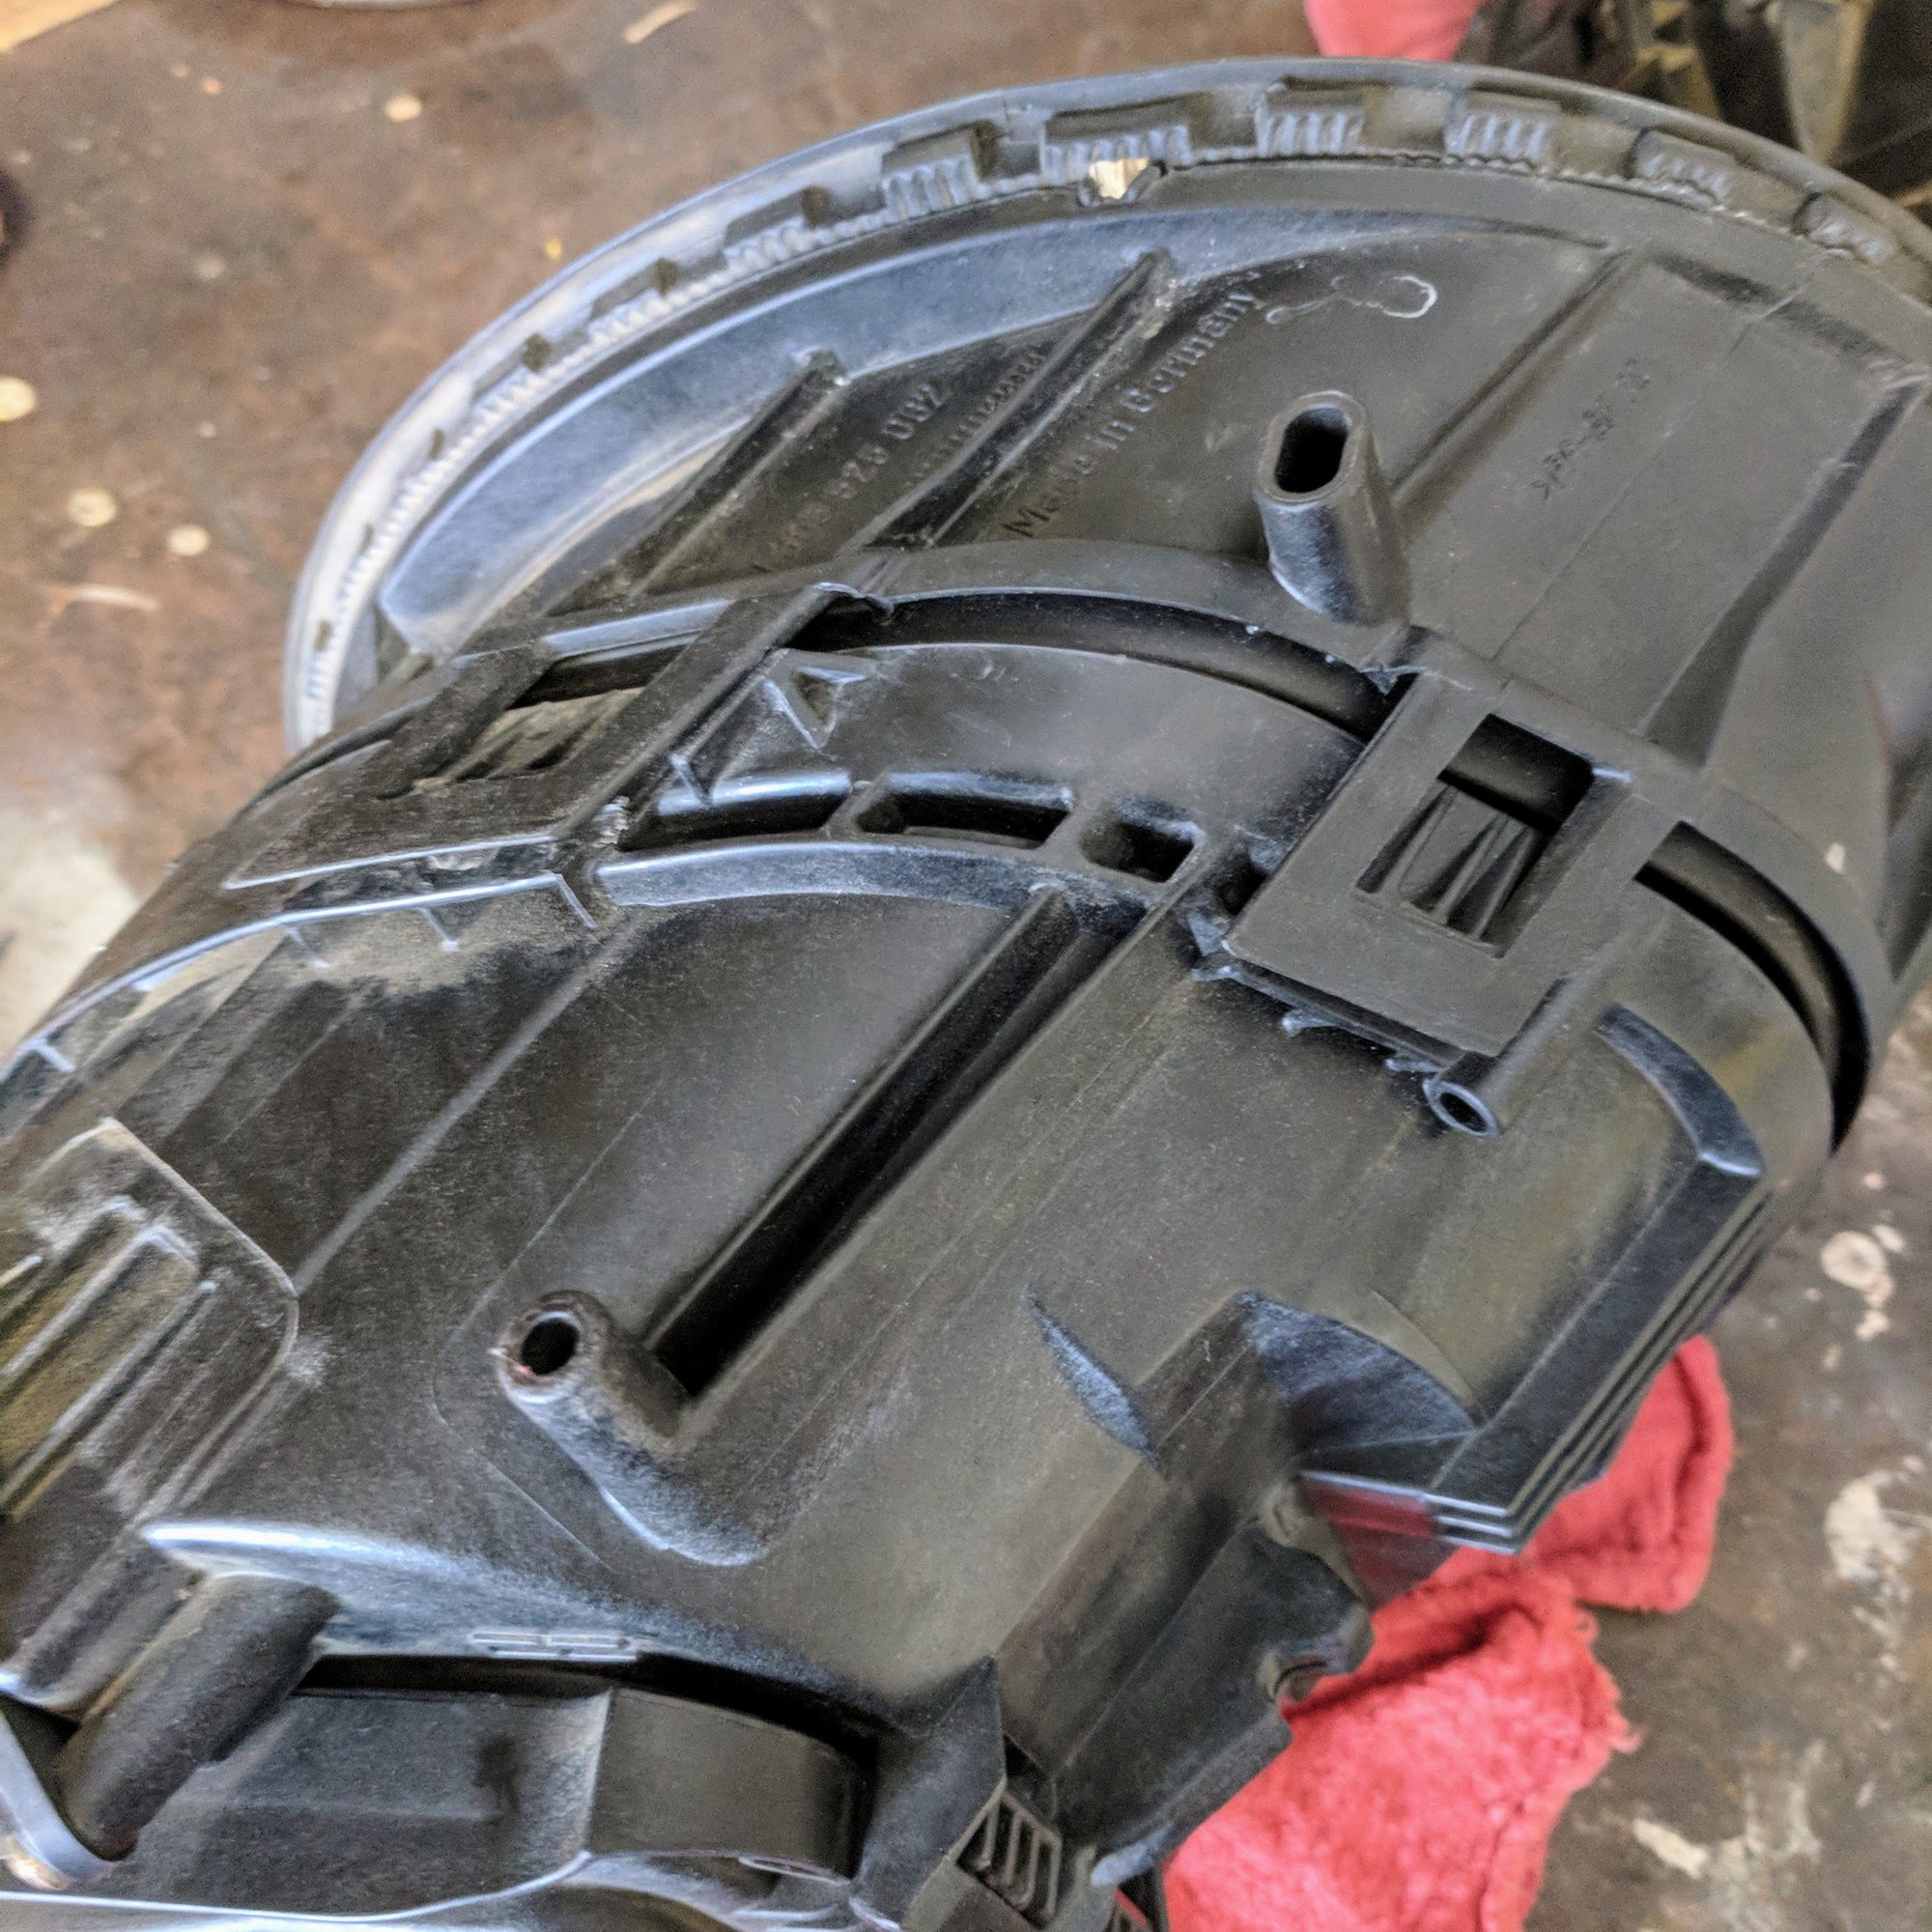
2. File it a few times and eventually you can slide in the HID bulb without any friction. Once in then lock it in with the metal hook and secure the ballast. There is no need to file upside down per the instructions. If you remove the lens you can remove all of the metal particles with compressed air.
3. Once you got it assembled then remove the lens so you can clean the insides as well as blast out any of the metal material you filed off with some compressed air. To remove the lens use a stiff putty knife to gently lift the tabs. The lens easily slides off once you disengage all of the tabs.
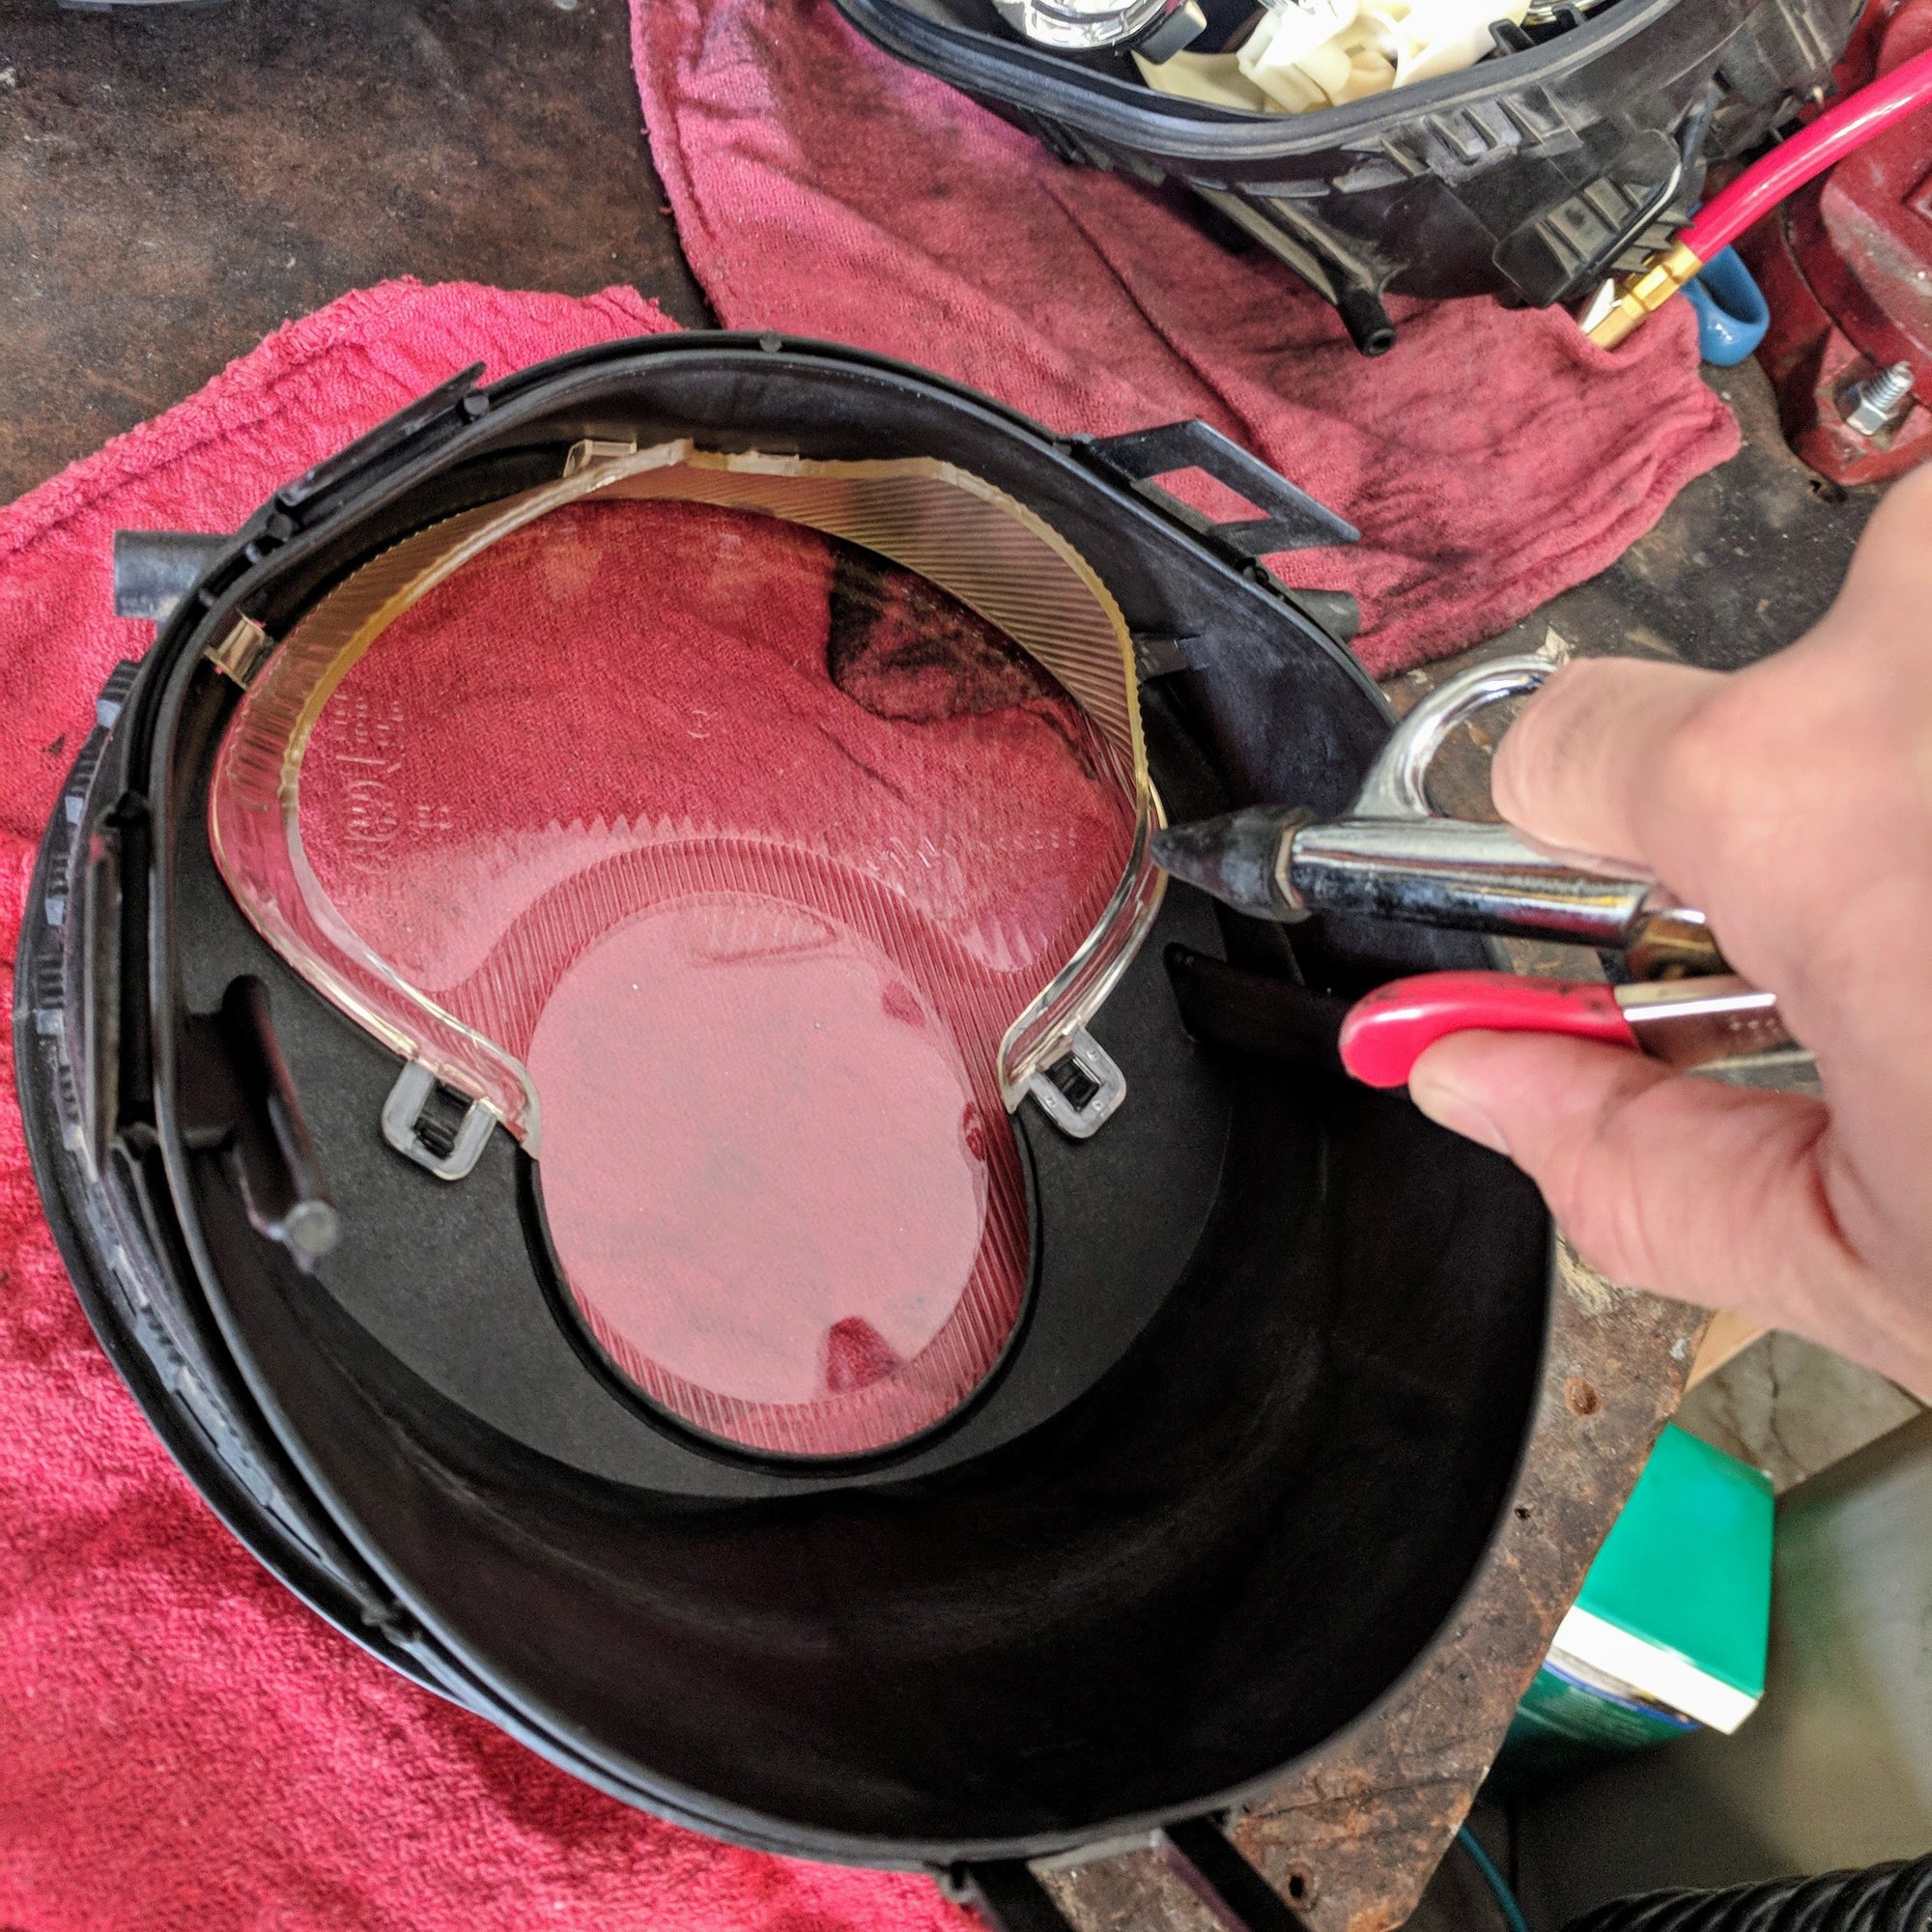
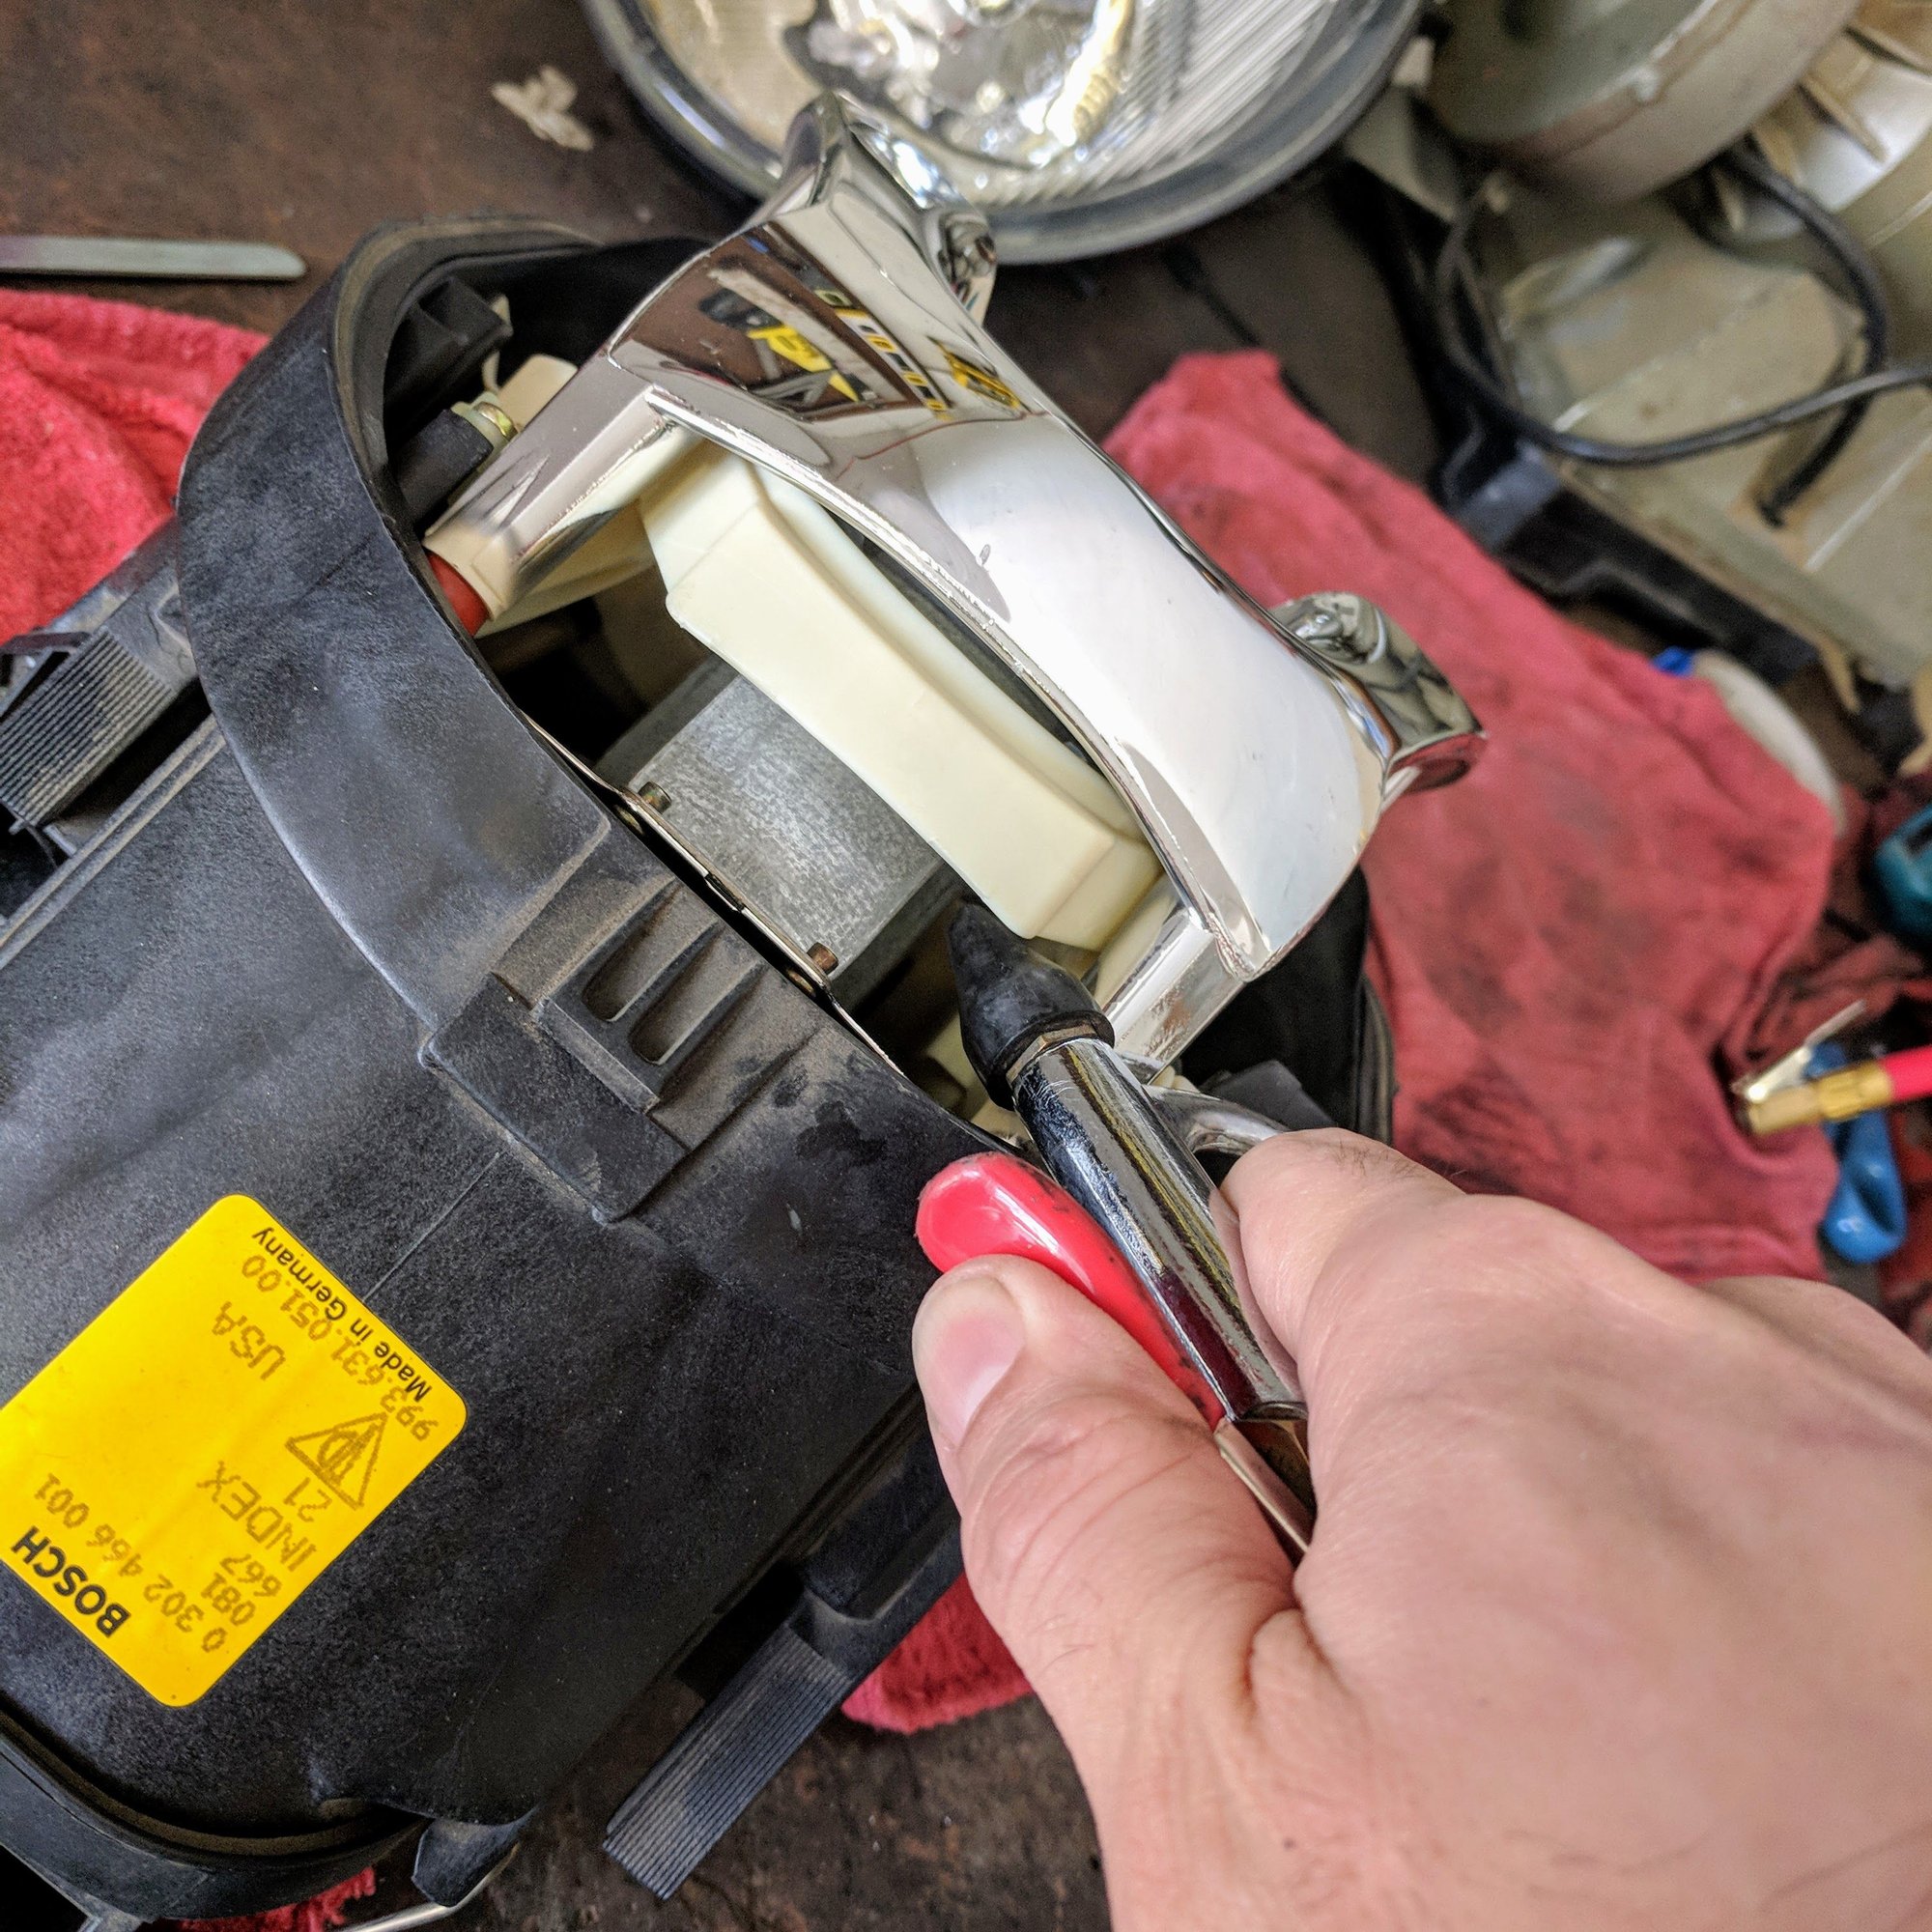
Once off, wipe the lens and reflectors with a clean lint free cloth and blast any debris with some compressed air.
4. Add the lens back on. Once on then clean the glass lens. Mine are original 110K ones, so there are pits. I have no time right now to polish them down, so I used a technique Ammo NYC (He has a 964 that is a beauty) shared here
to clean the glass with some cleaner and a box knife razor. As he shared, it did remove minor crap off the lens that the cleaner by itself did not.
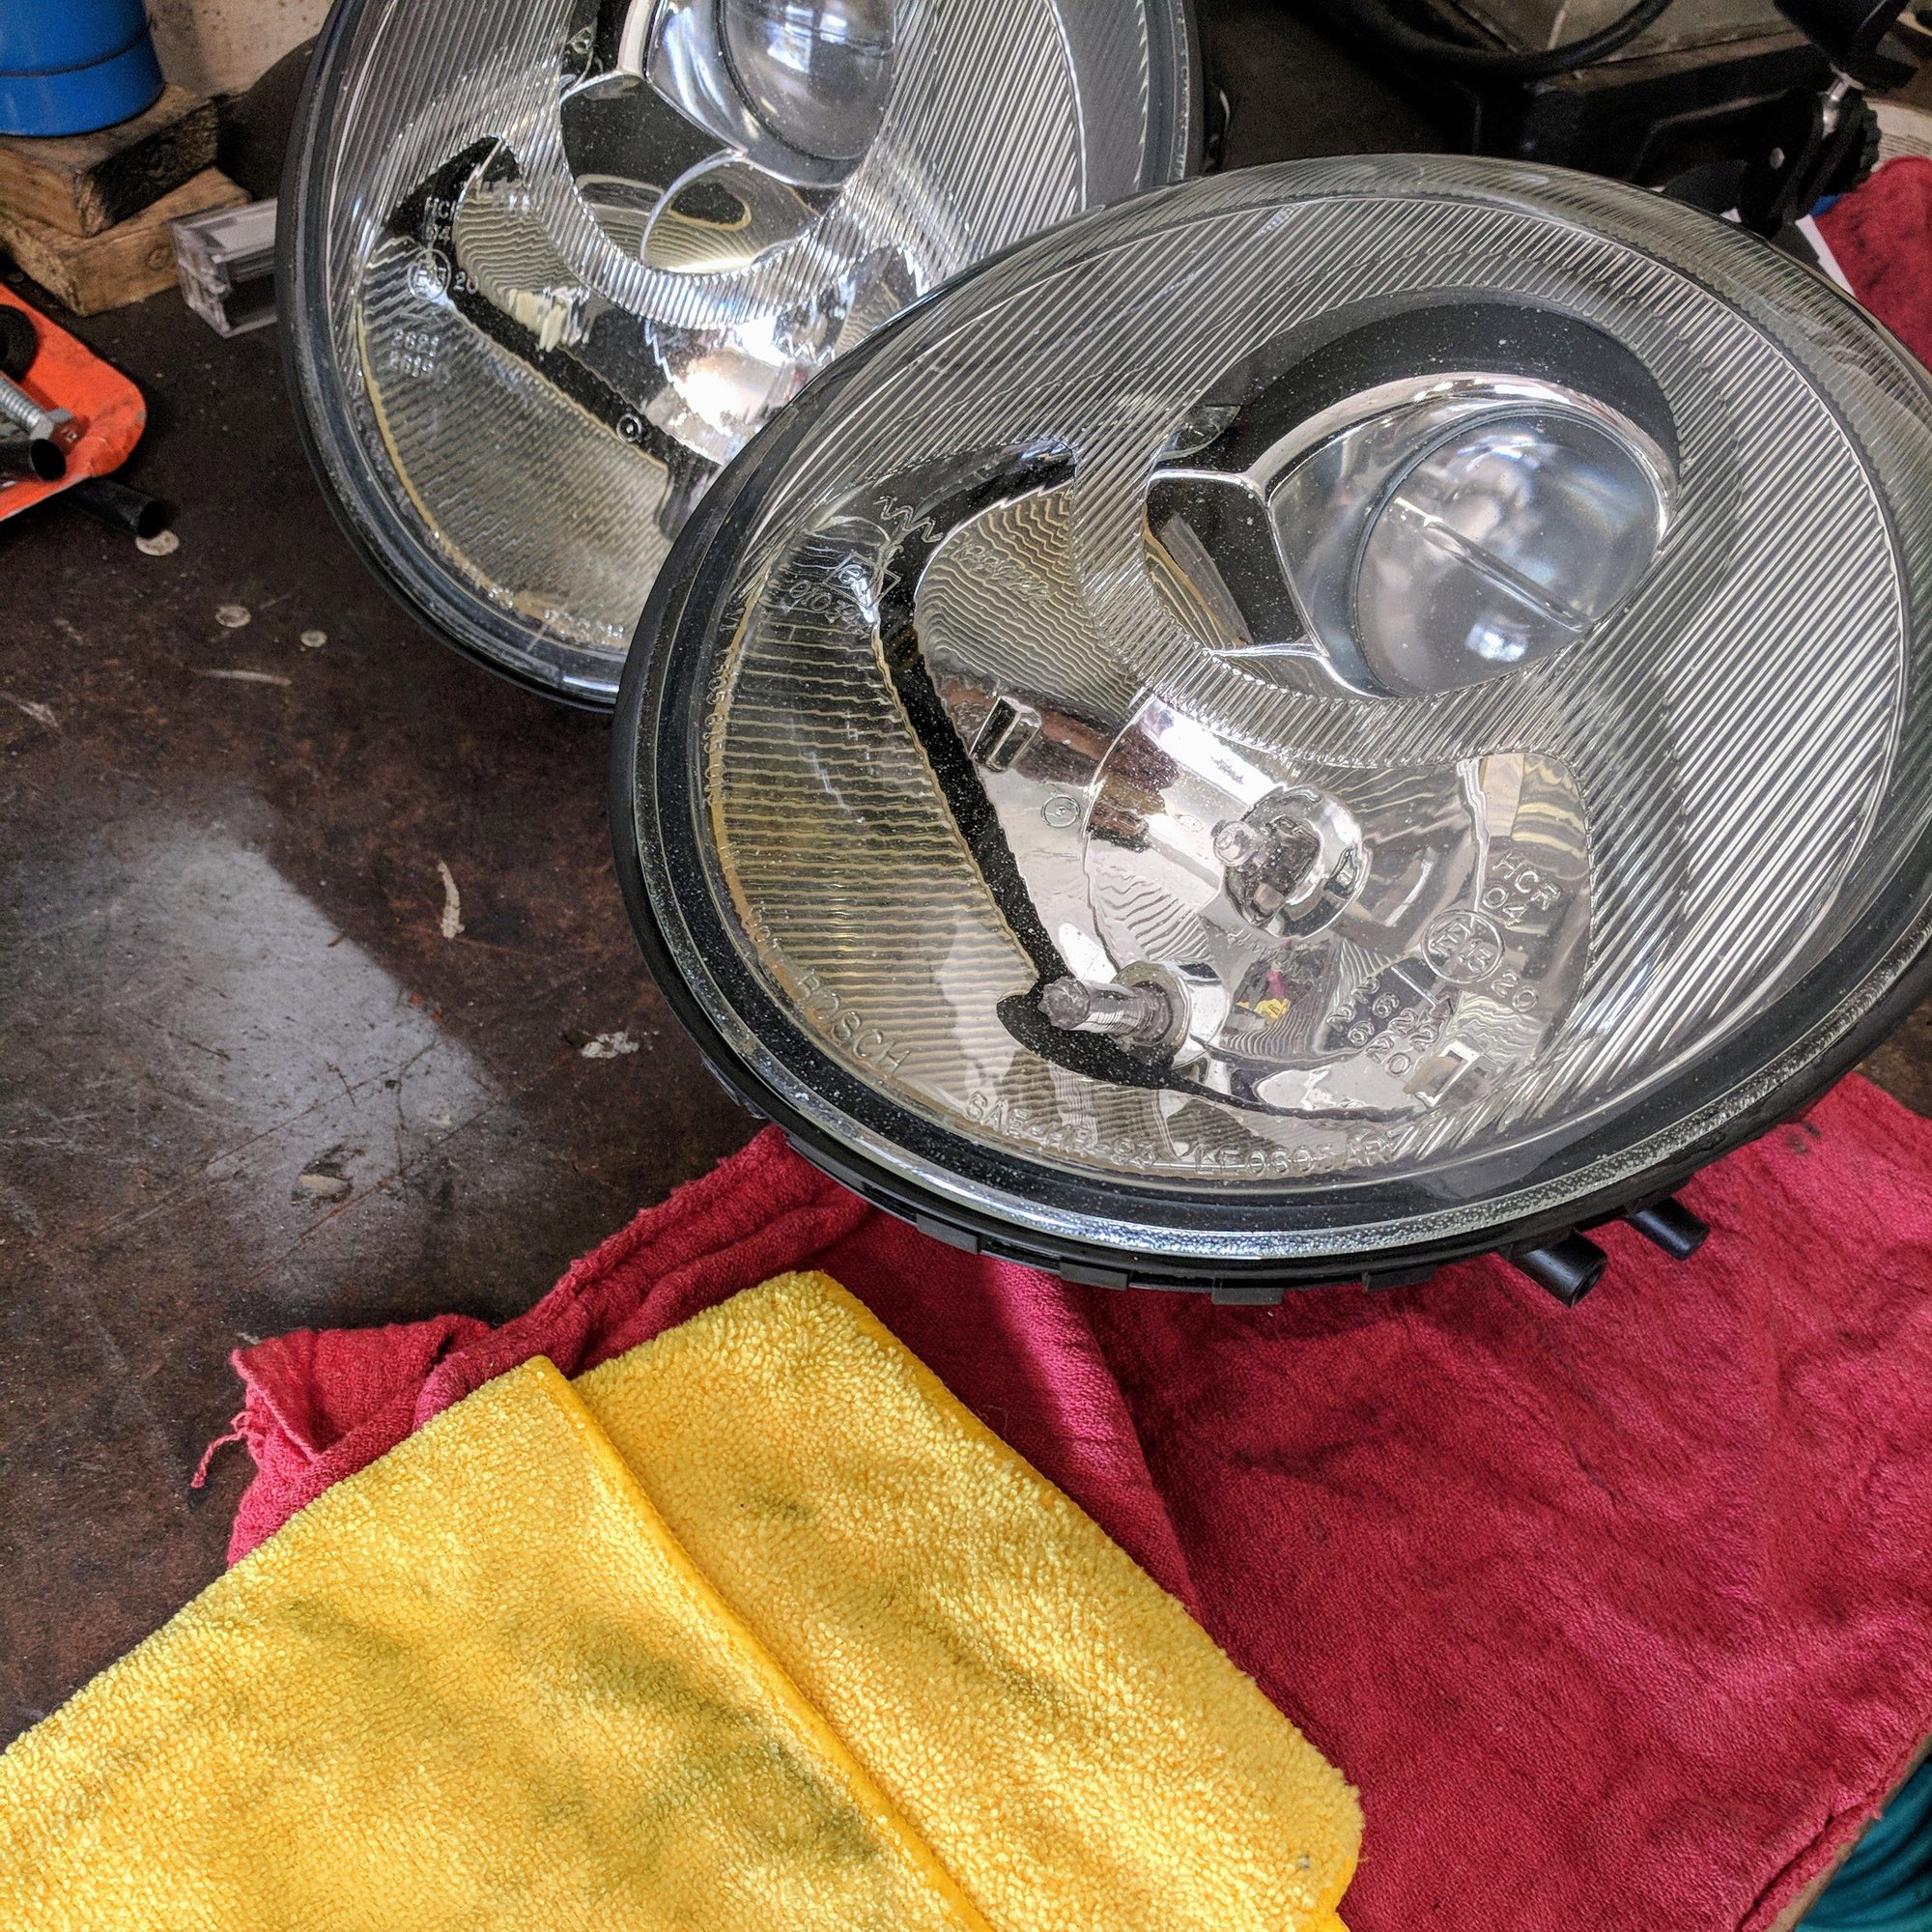
Done!
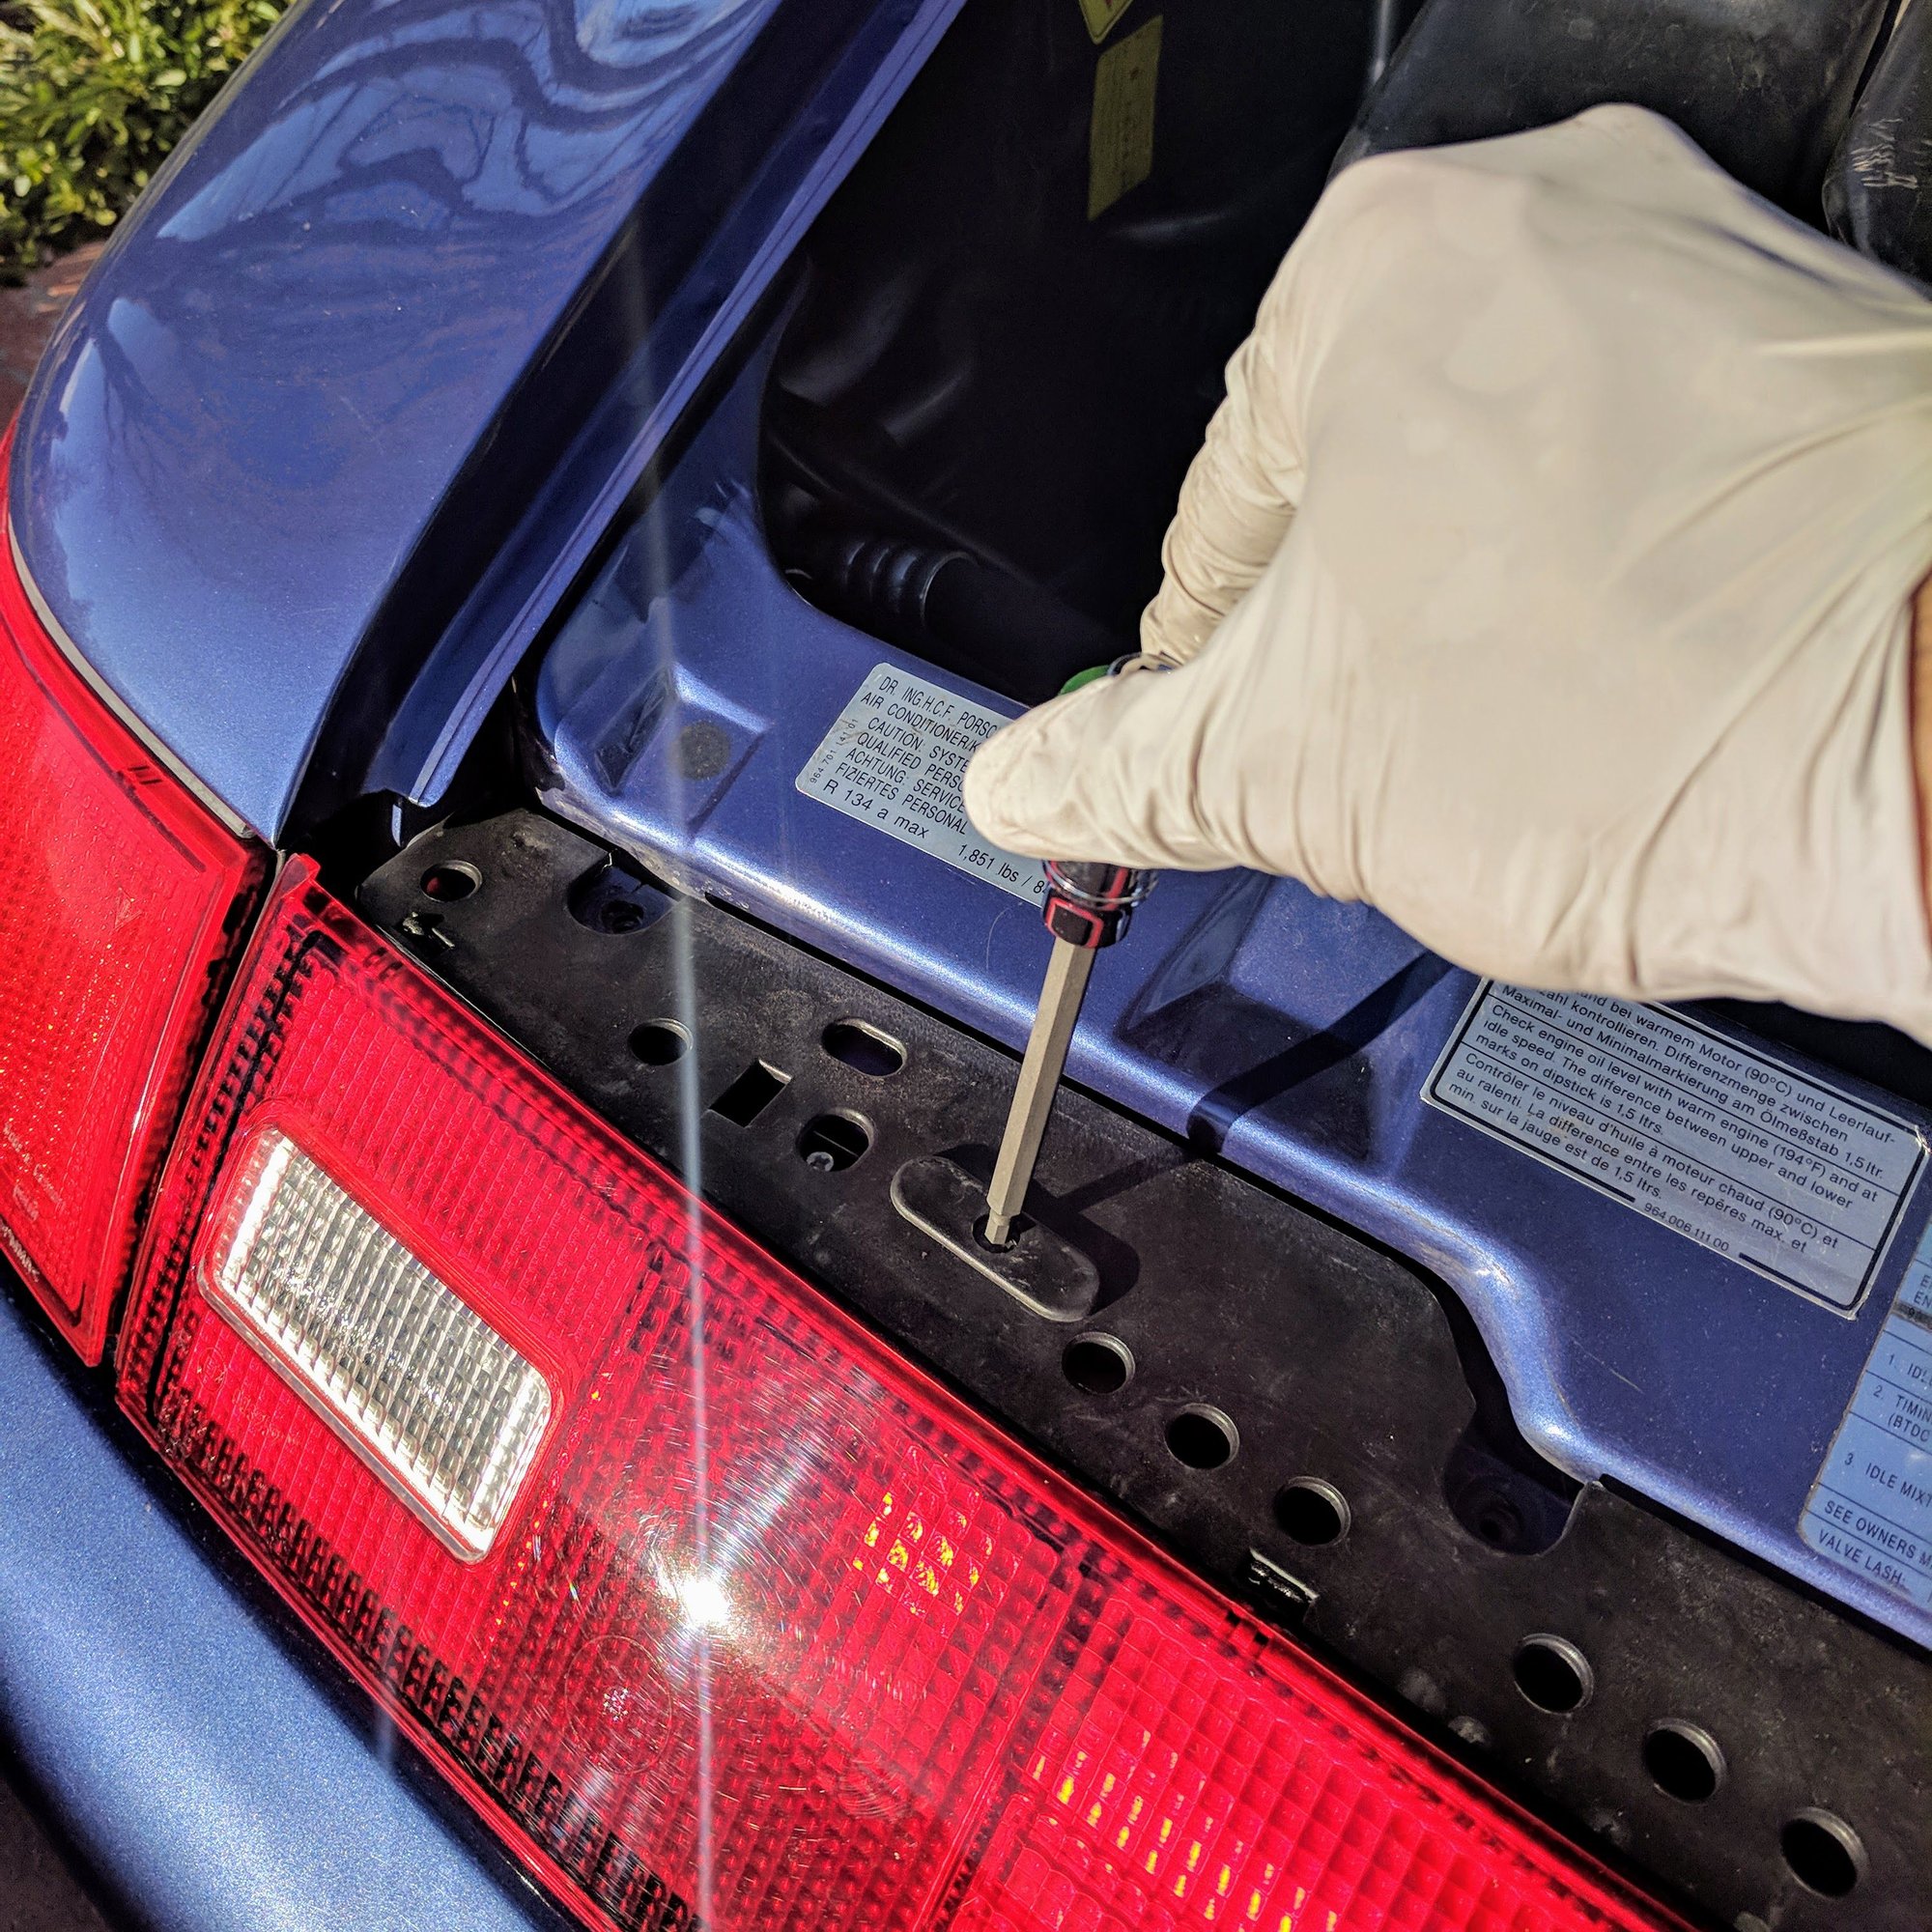
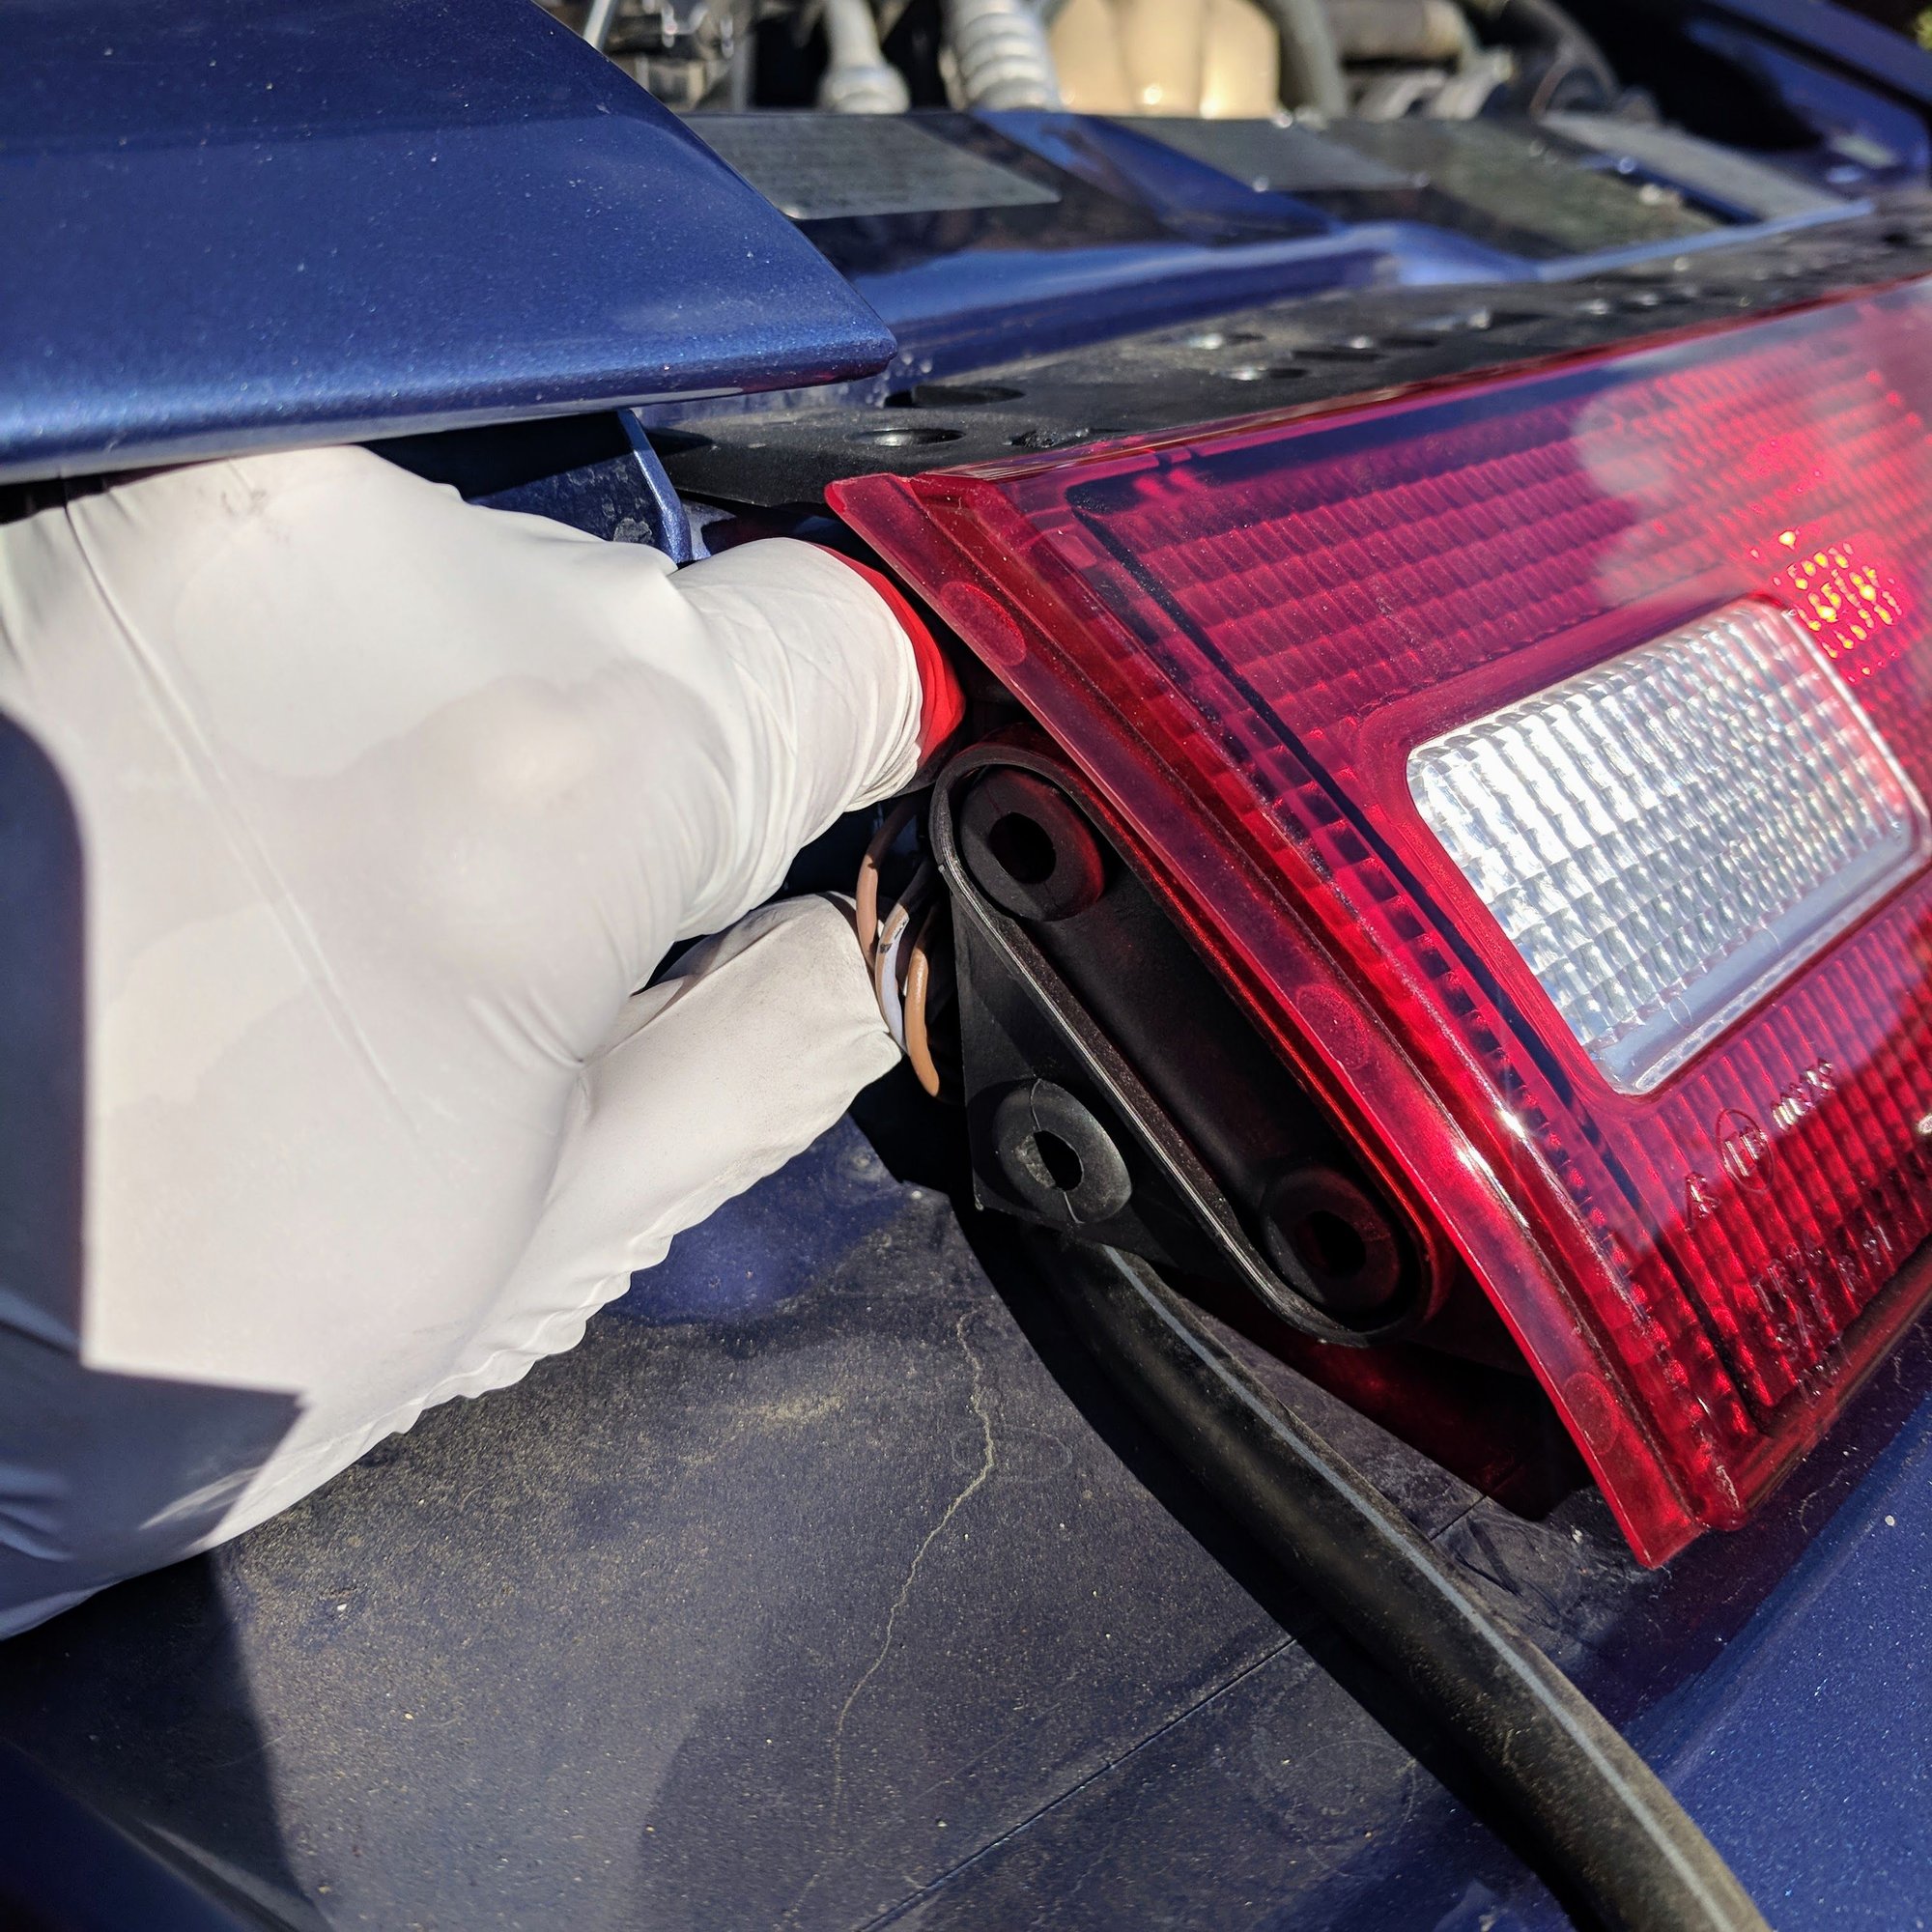
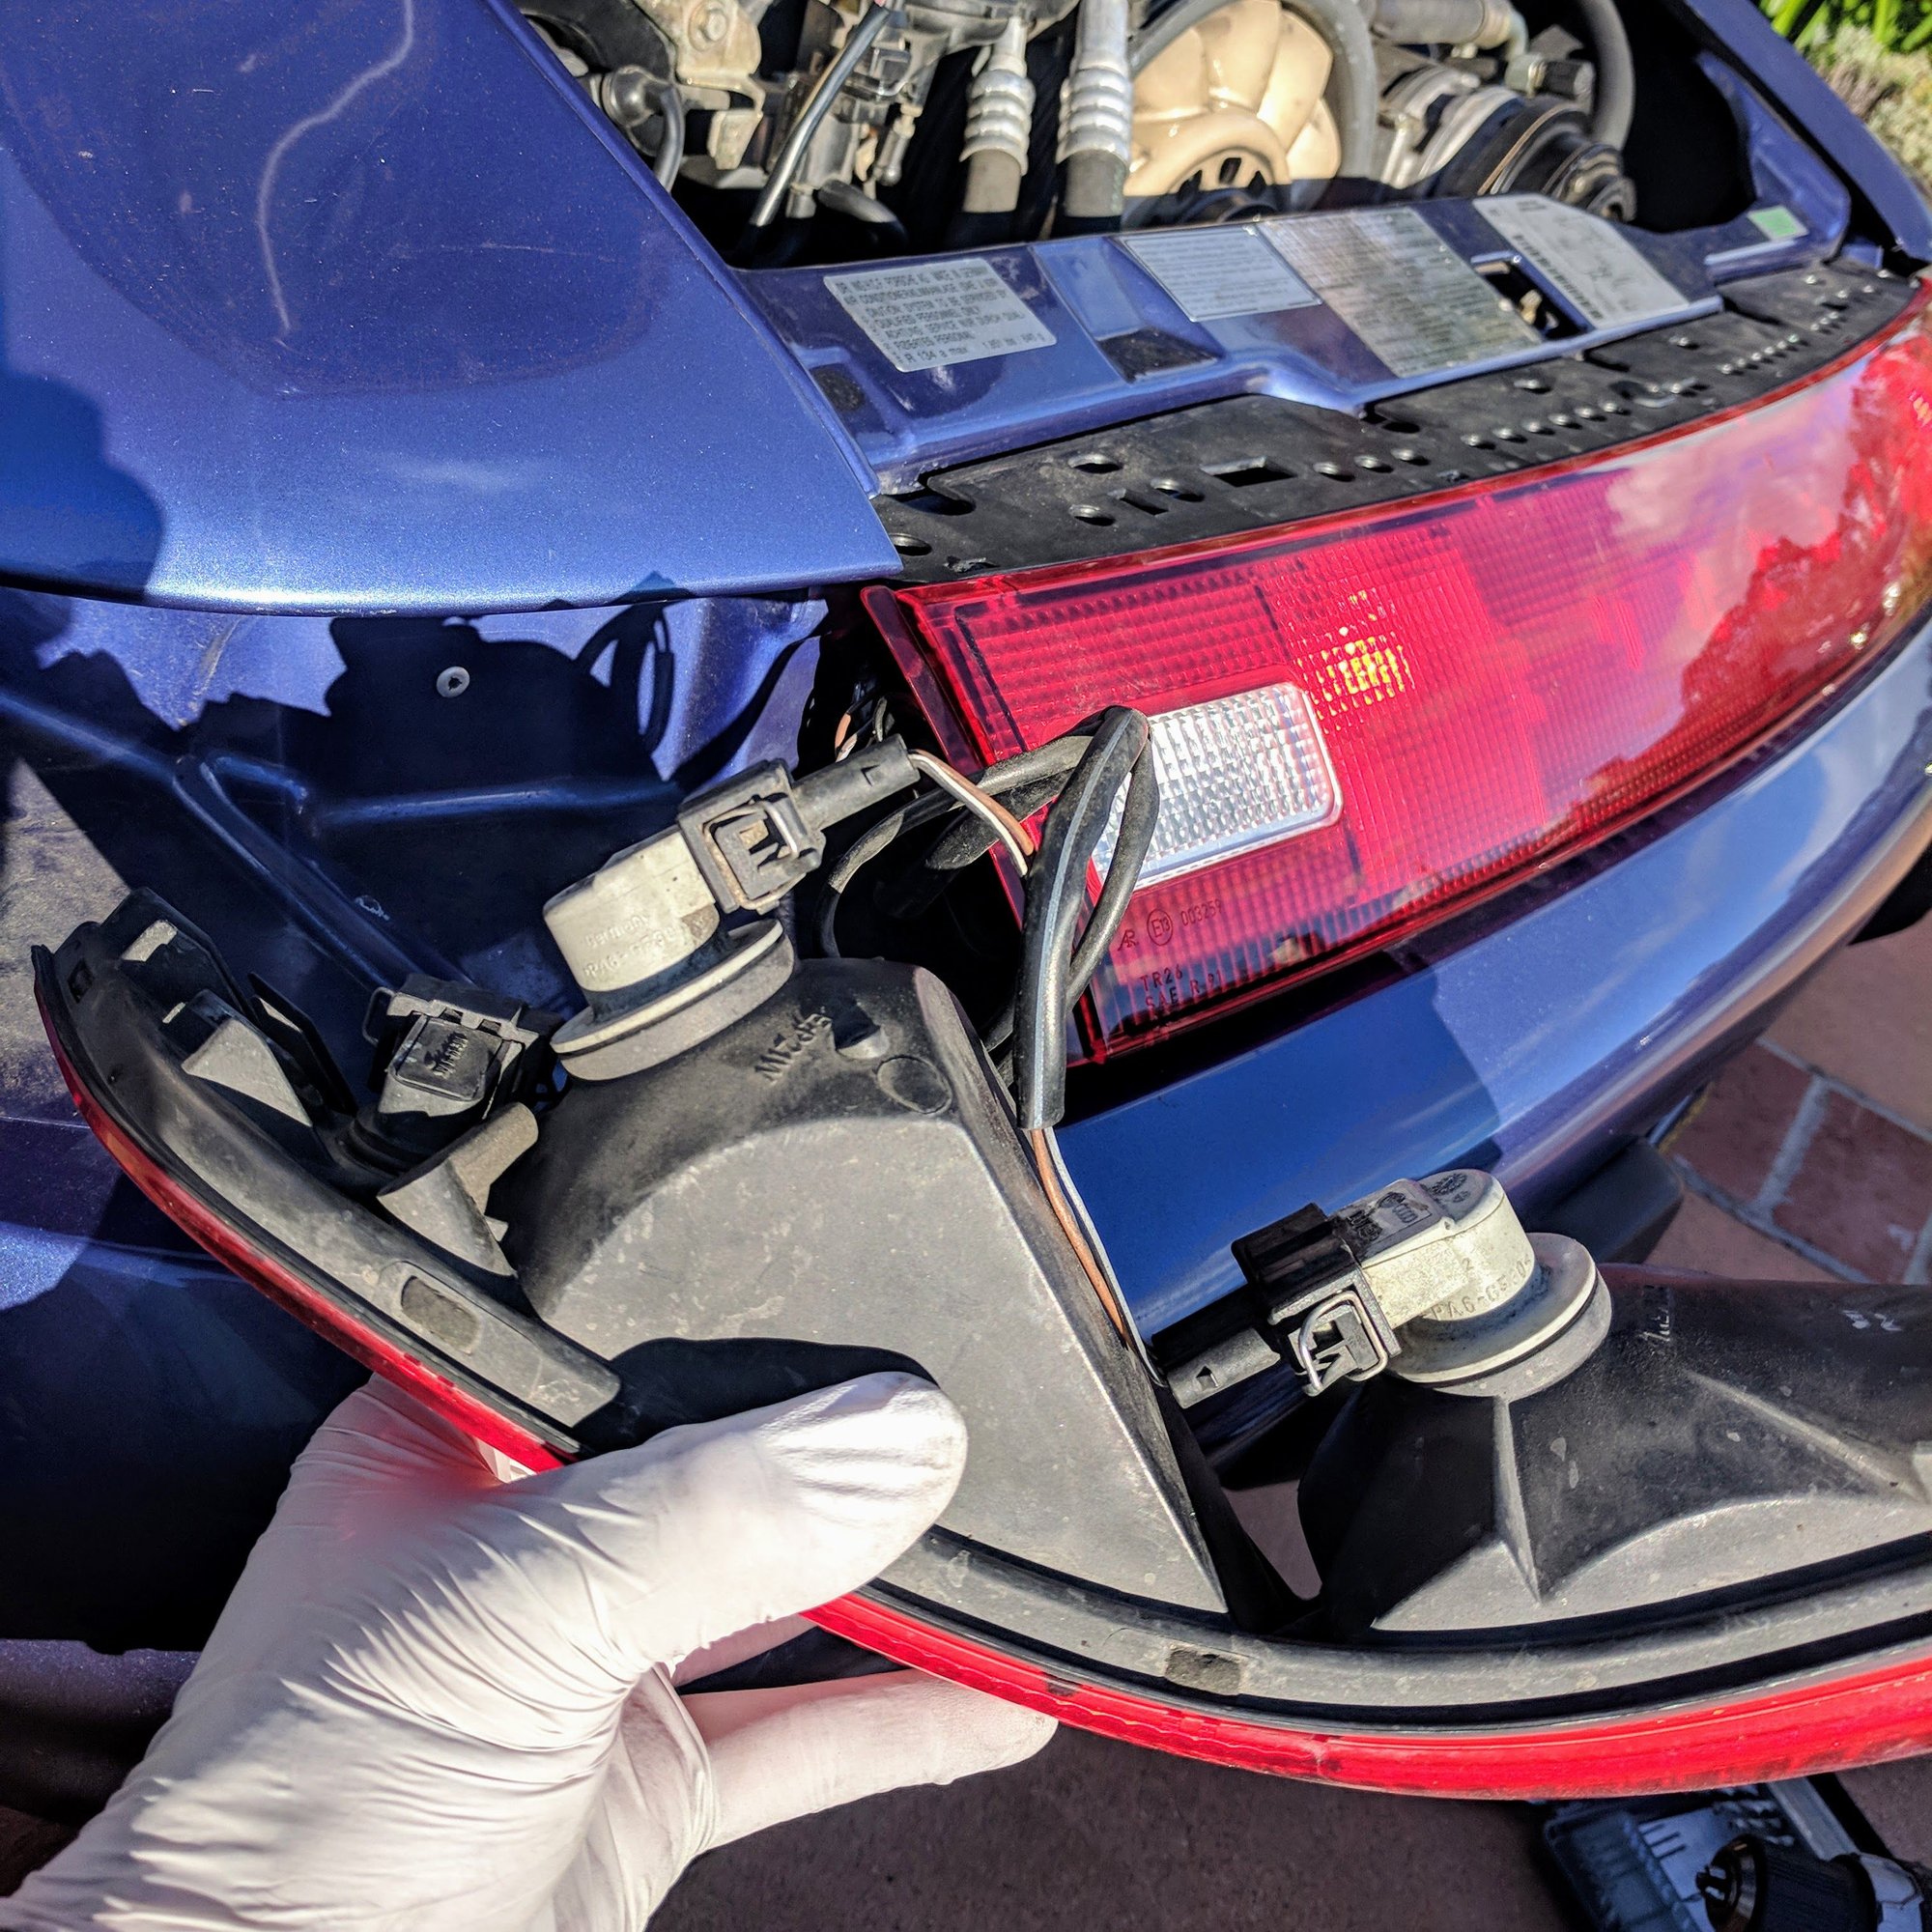
Next let move on to the LED upgrade. The front is straight forward. The rear you need to do the following:
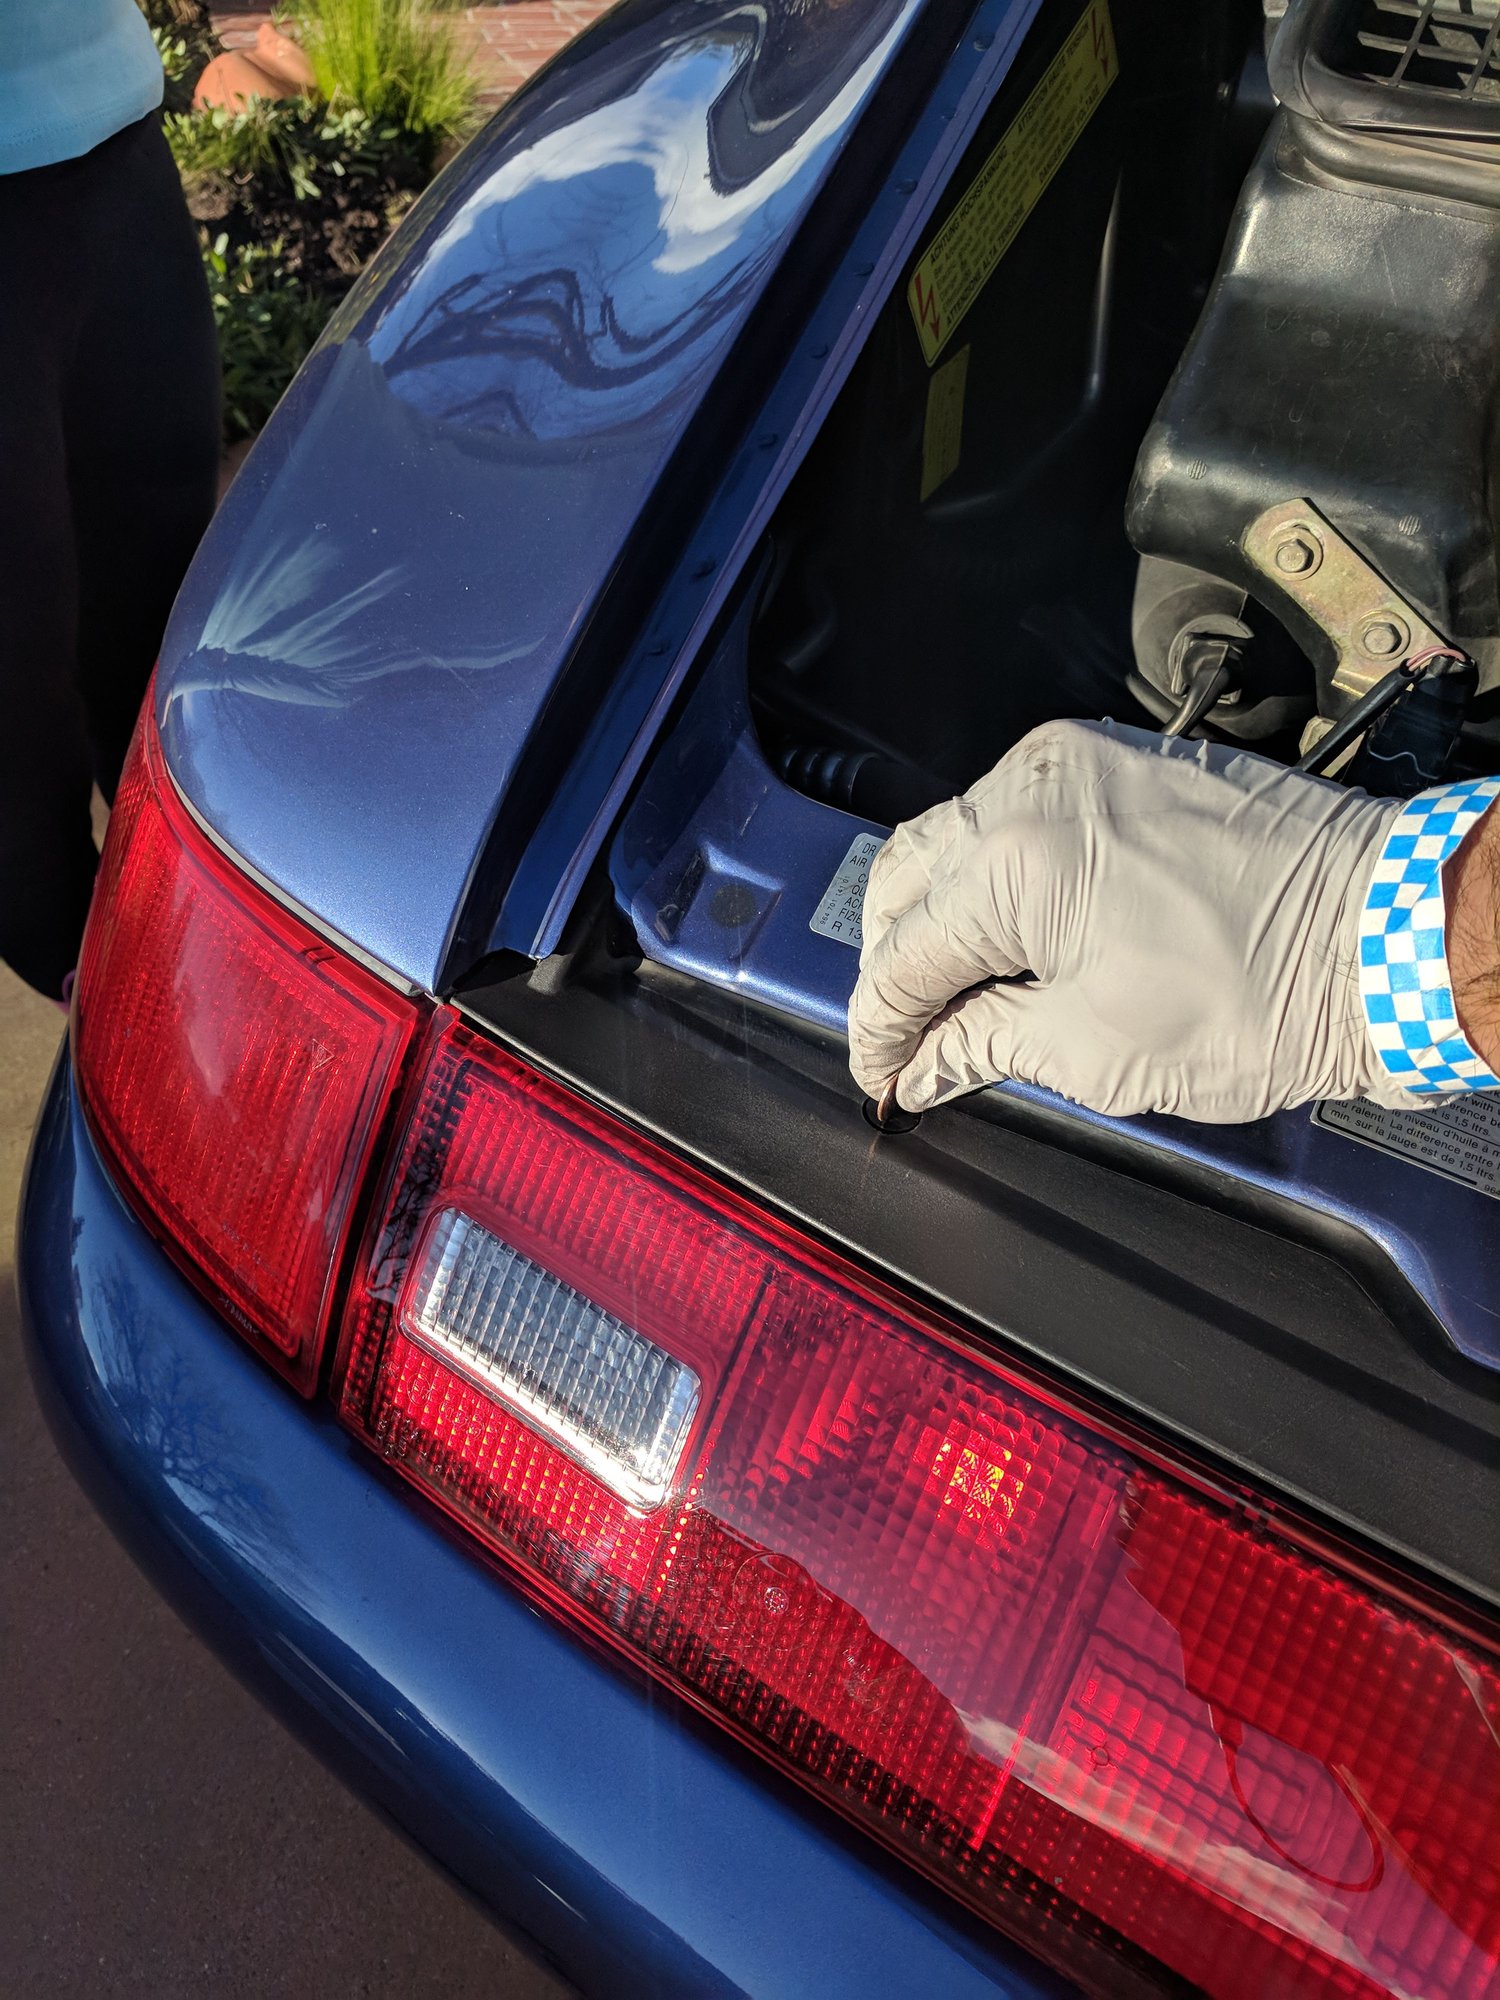
1. Remove the trim panel with a penny and hex socket to get access to the reverse lights.
2. Then remove the corner lens. Replace it with new LEDs. Move the center lens to remove the reverse light and replace it with a LED.
3. Button the rear lenses up. On the front just remove the corner lens and the fog light to replace the bulbs to LED.
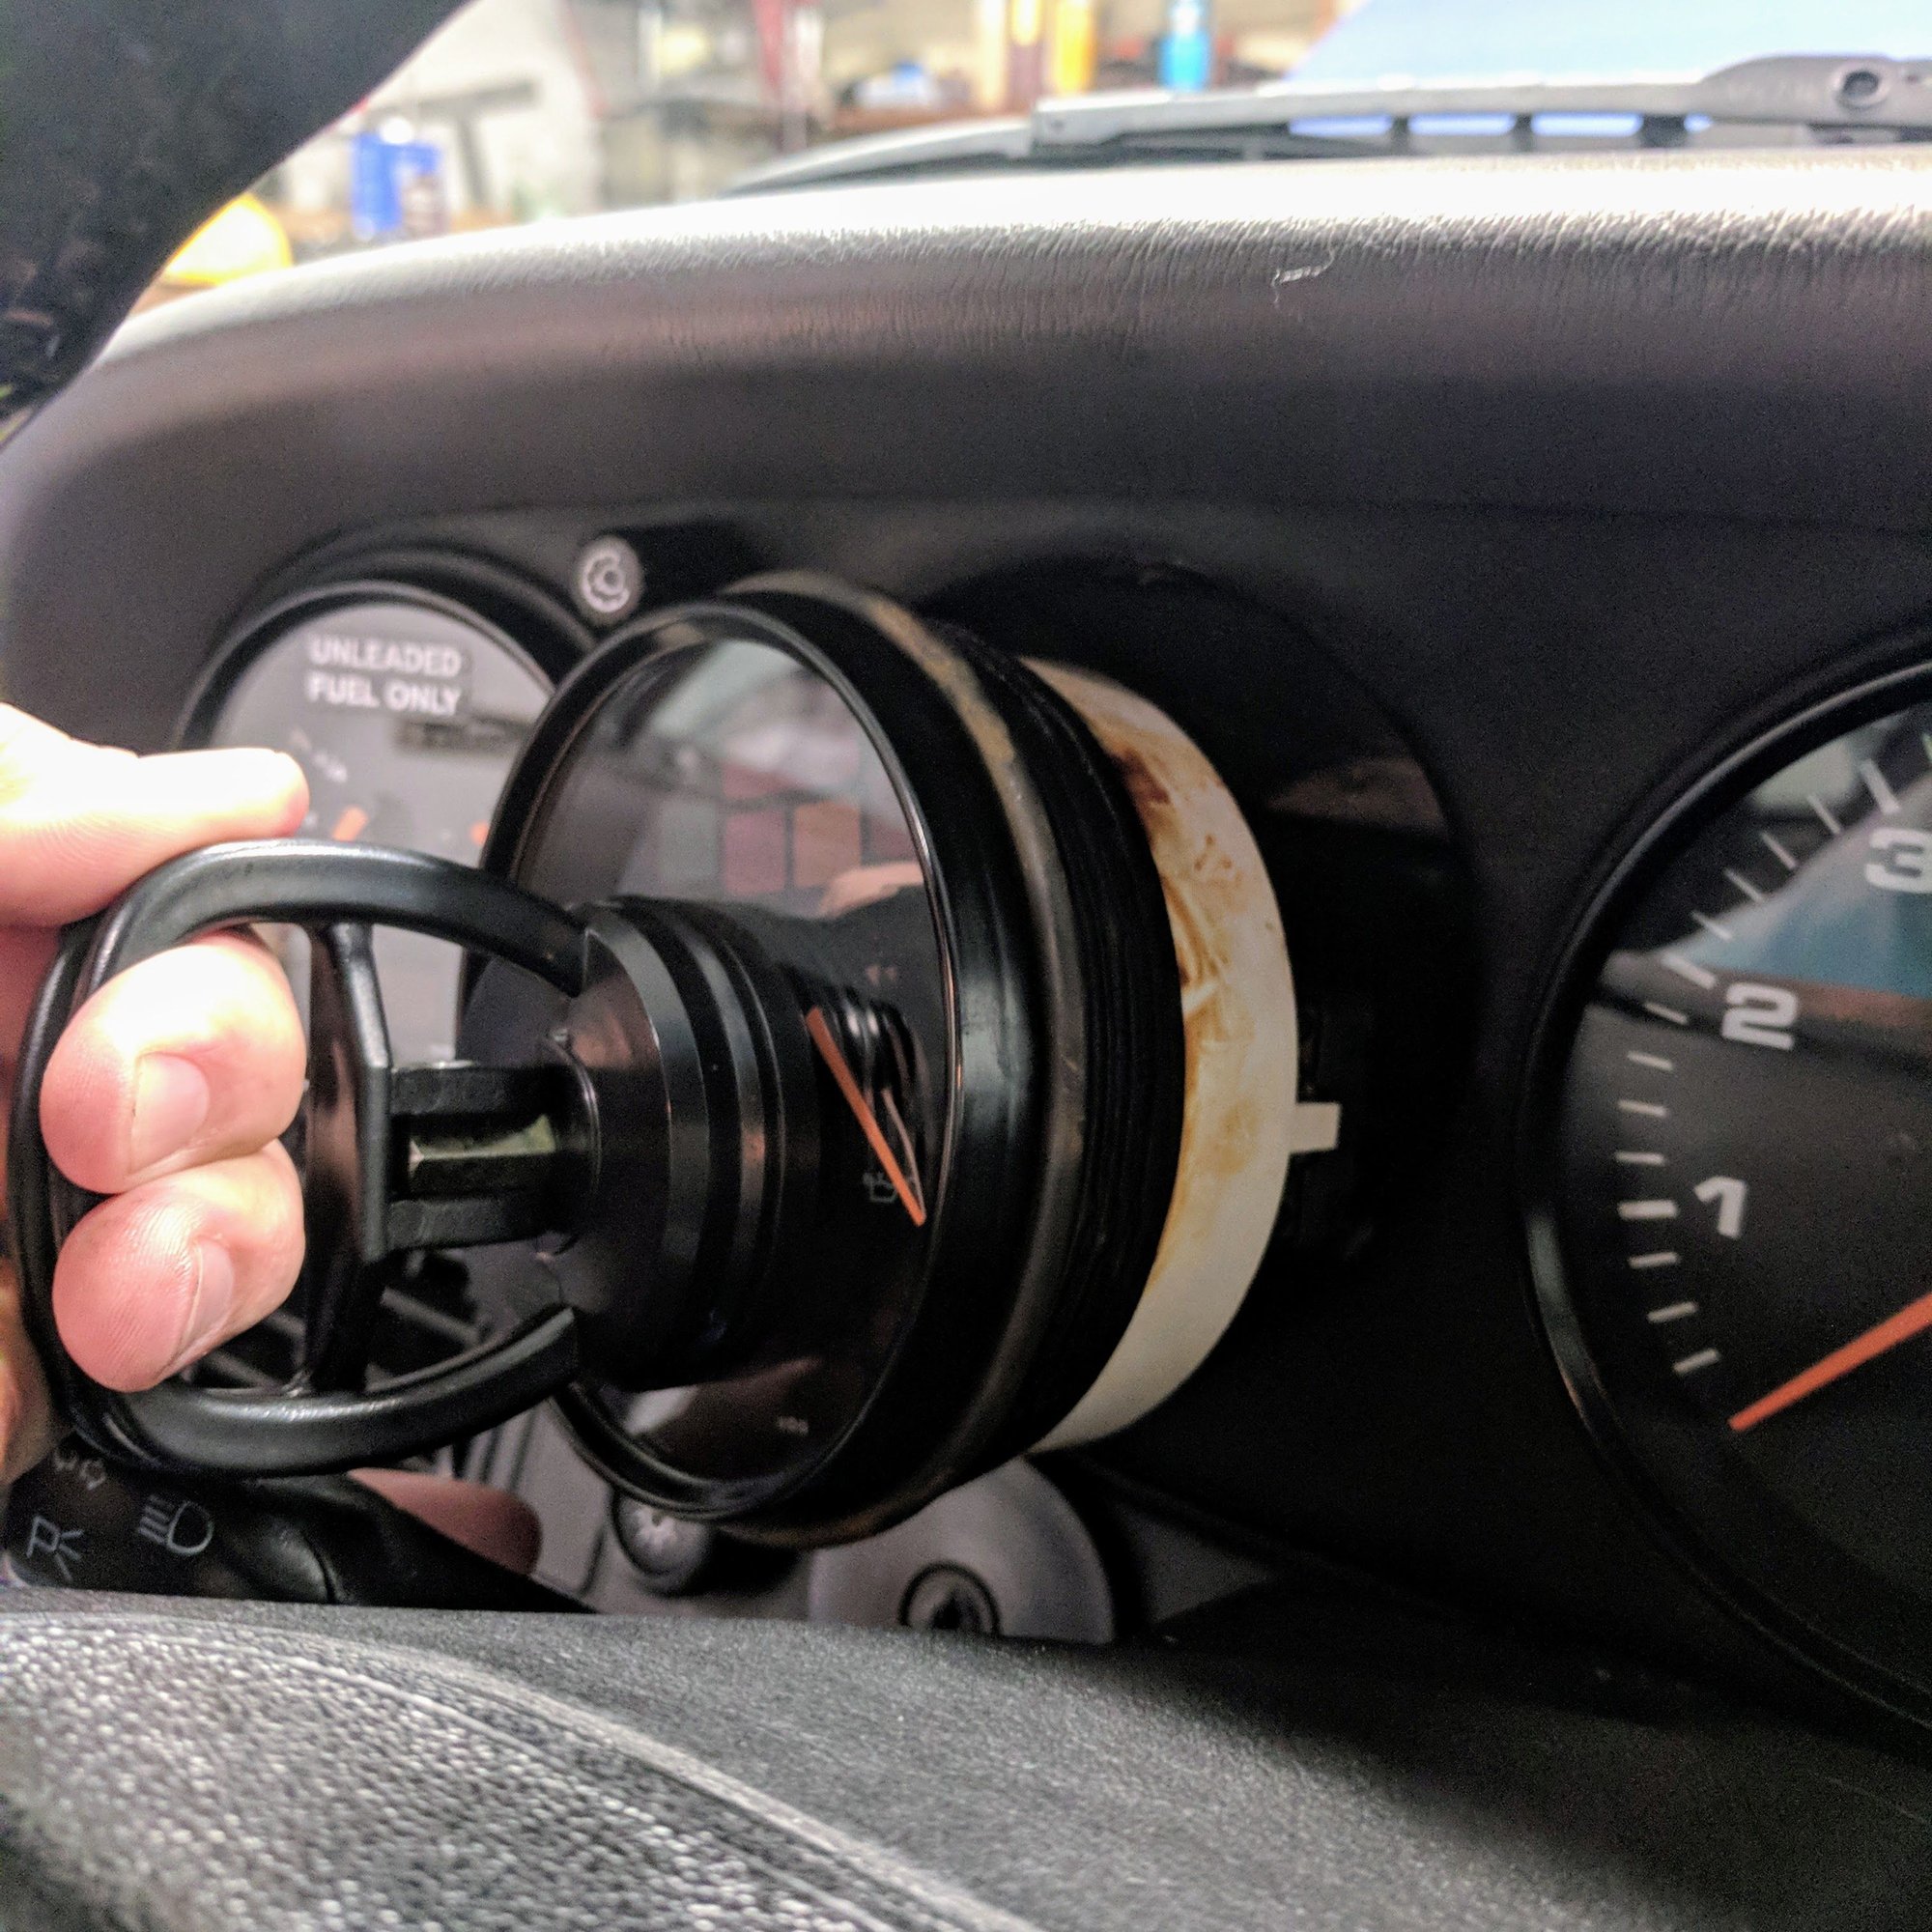
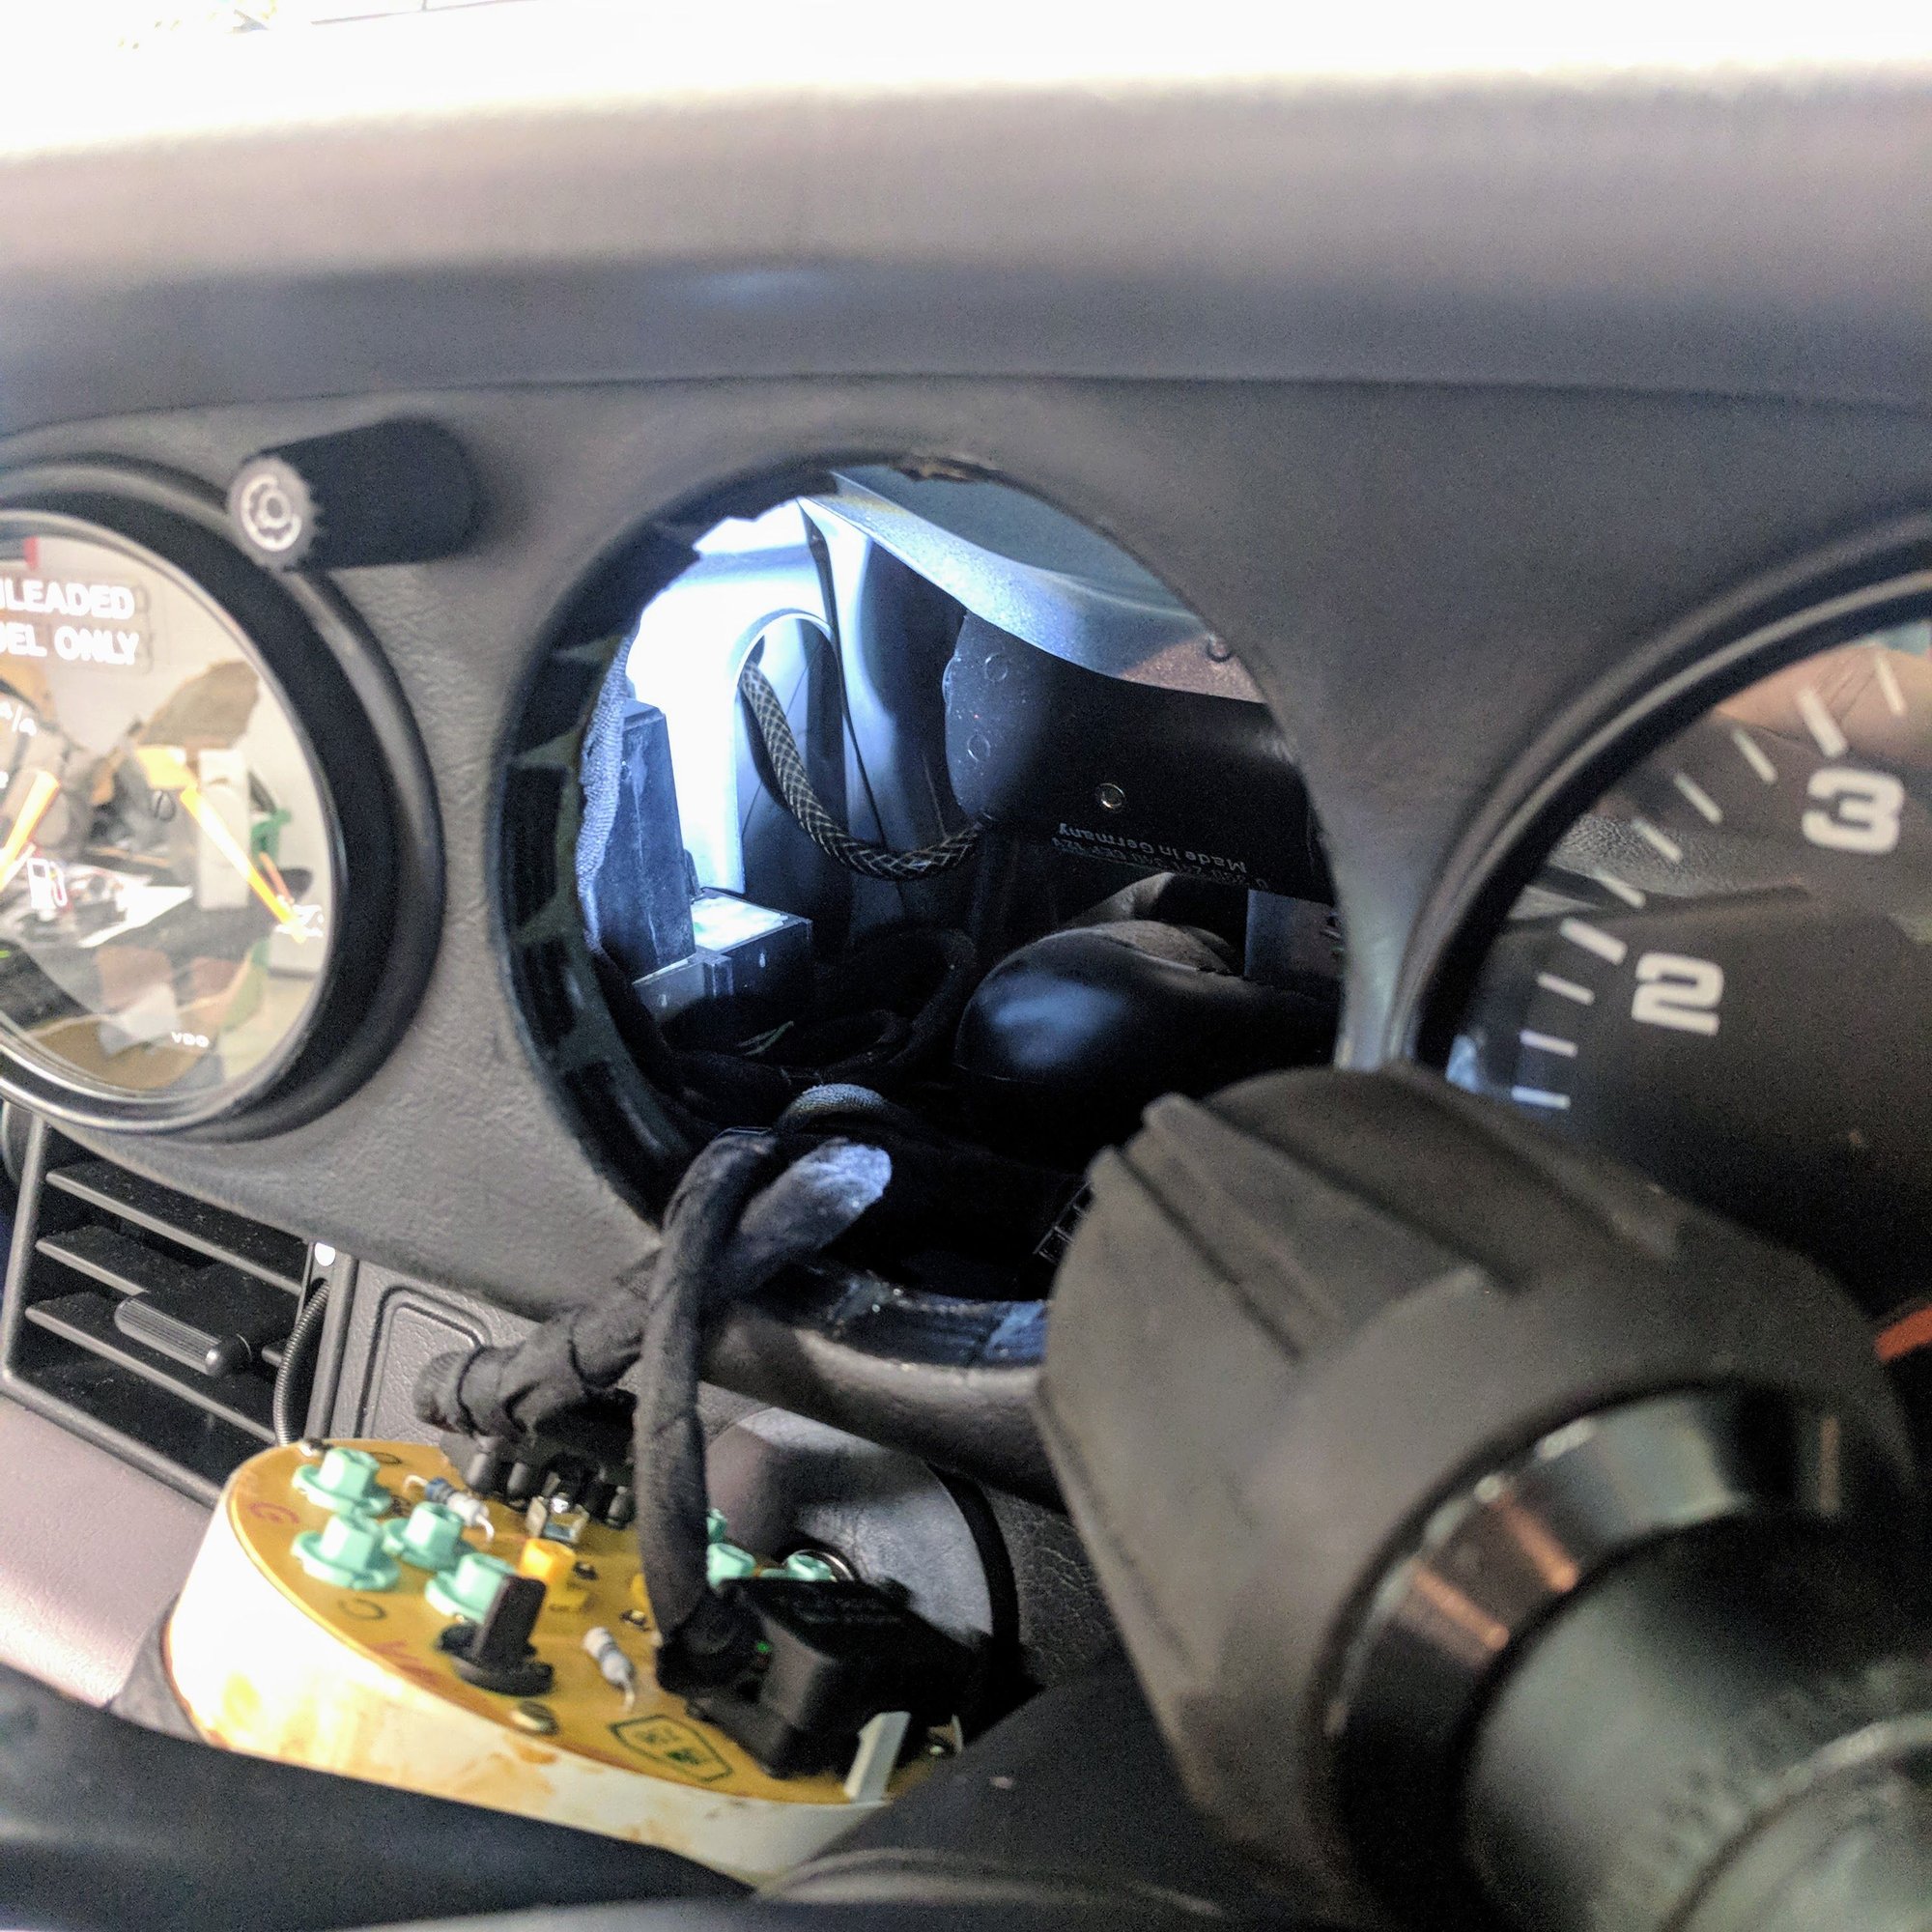
4. Remove the oil pressure gauge with a dent/glass puller. You can get them for a couple bucks from Harbor Freight.
Shine a flash light in, put our key in your ignition, and then engage your turn signal. You will hear and then identify the turn signal relay to replace with the LED bulb compliant one. Turn off the turn signal, remove the key and then replace the relay. The flashlight below is shining on the relay that needs to be replaced. Put your hand in the console pull it out gently...
Excellent idea using those little suction cup things to remove the gauges! I have a whole pile of those left over from ifixit kits over the years. Now why didn't I think of that?
Excellent idea using those little suction cup things to remove the gauges! I have a whole pile of those left over from ifixit kits over the years. Now why didn't I think of that?
Agreed... i used my fingers to pry that sucker out. I think they're still sore years later...
Yeah. I couldn't pull out the gauge by the bezel with my fingers too. I just replaced my SSD on my imac and got the idea from that as you need those suction cups to pull a heavy lcd panel from the frame. The guages easily separated from the dashboard. Used it to tilt my tachometer too.


 02-13-2018, 02:31 AM