When you click on links to various merchants on this site and make a purchase, this can result in this site earning a commission. Affiliate programs and affiliations include, but are not limited to, the eBay Partner Network.
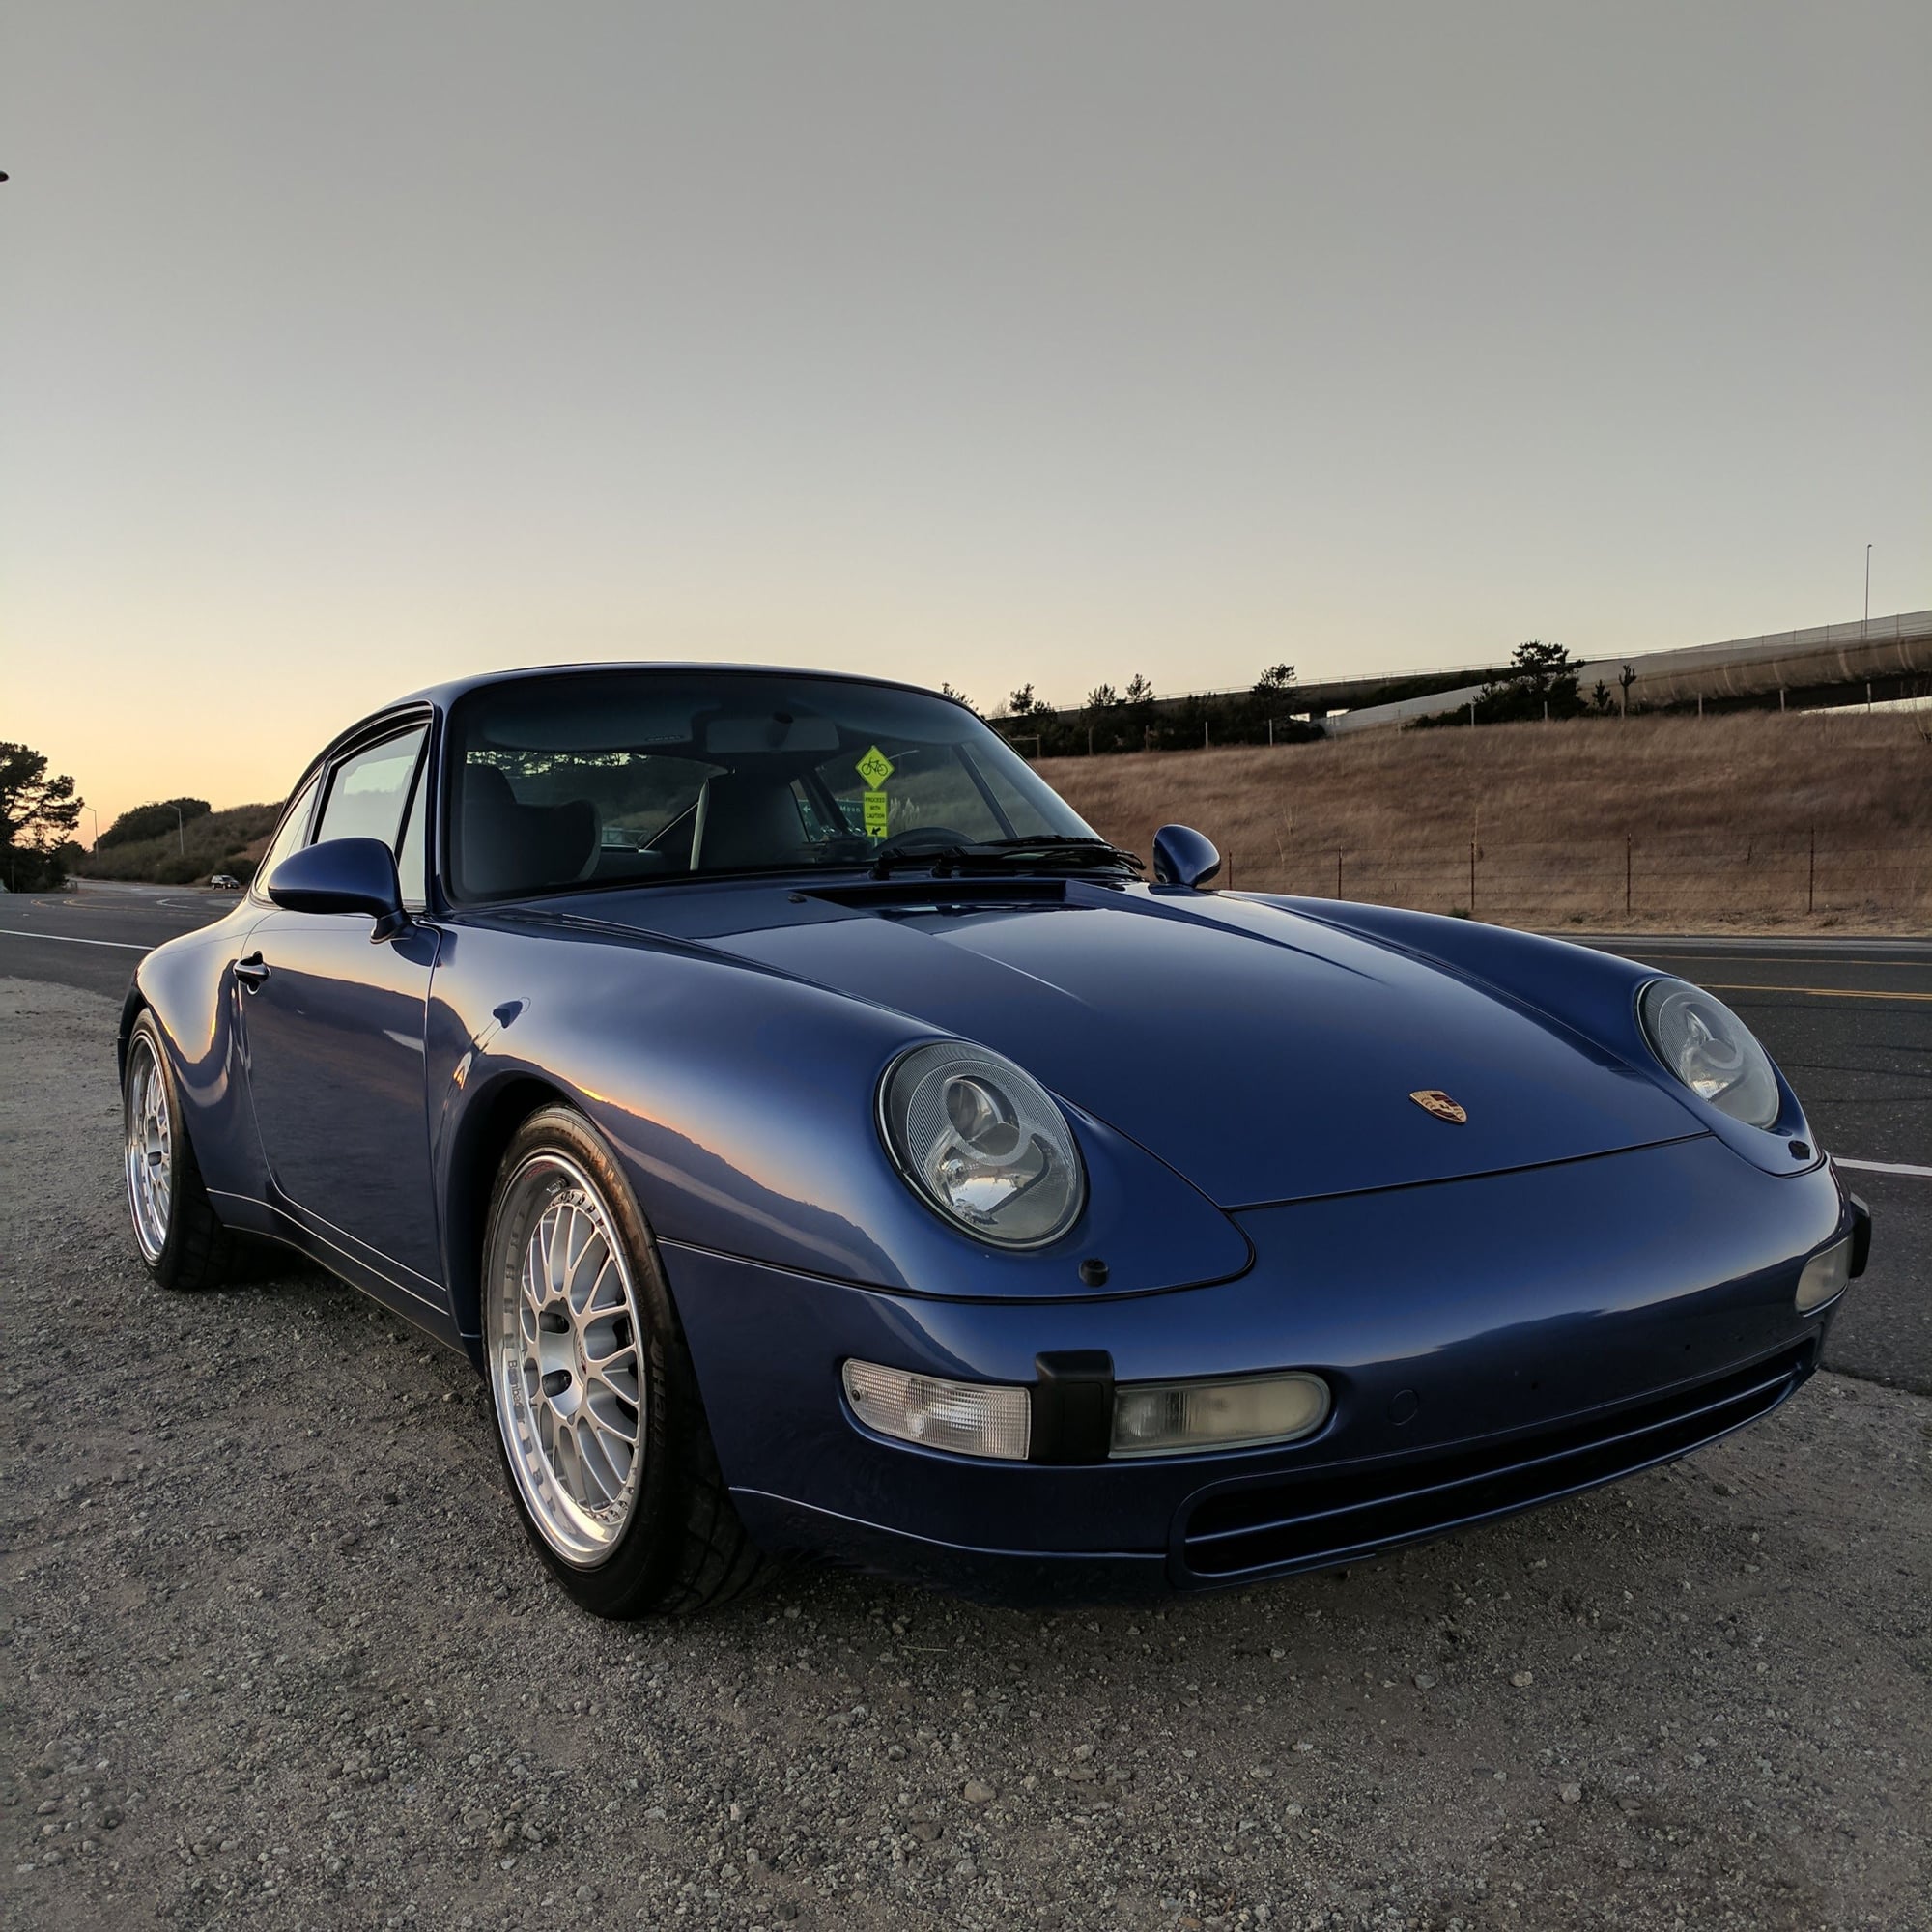
Fender height is not a perfect way to measure, but for what you are doing now (pre corner-balance) its probably good enough. 25.5" is right in the correct range between RoW Sport and RS, and you do have a bit of rake. If you were perfectly level you're front fender measurement would be larger than your rear. Just looking at the pictures, and the fact it is driving well, I can tell you are pretty close to right.
The squeaking is most likely from your sway bushings. I coated the inside with Triflow teflon and haven't gotten any squeaks since I put it together. To be on the safe side, also check your shock mount nuts for torque to make sure none of them have loosened. If your top mount were loose you'd probably get a clunk, but a squeak isn't out of the question.
Regarding tire pressures, I run 29/30 cold which gets me in the range of 35/37 hot. If I were running 35/37 cold, I'd be well over 40 in the rear when hot and that would result in a reduction of traction. You have different tires than me, but its worth experimenting with lower pressures, as you may be surprised at how much better it feels.
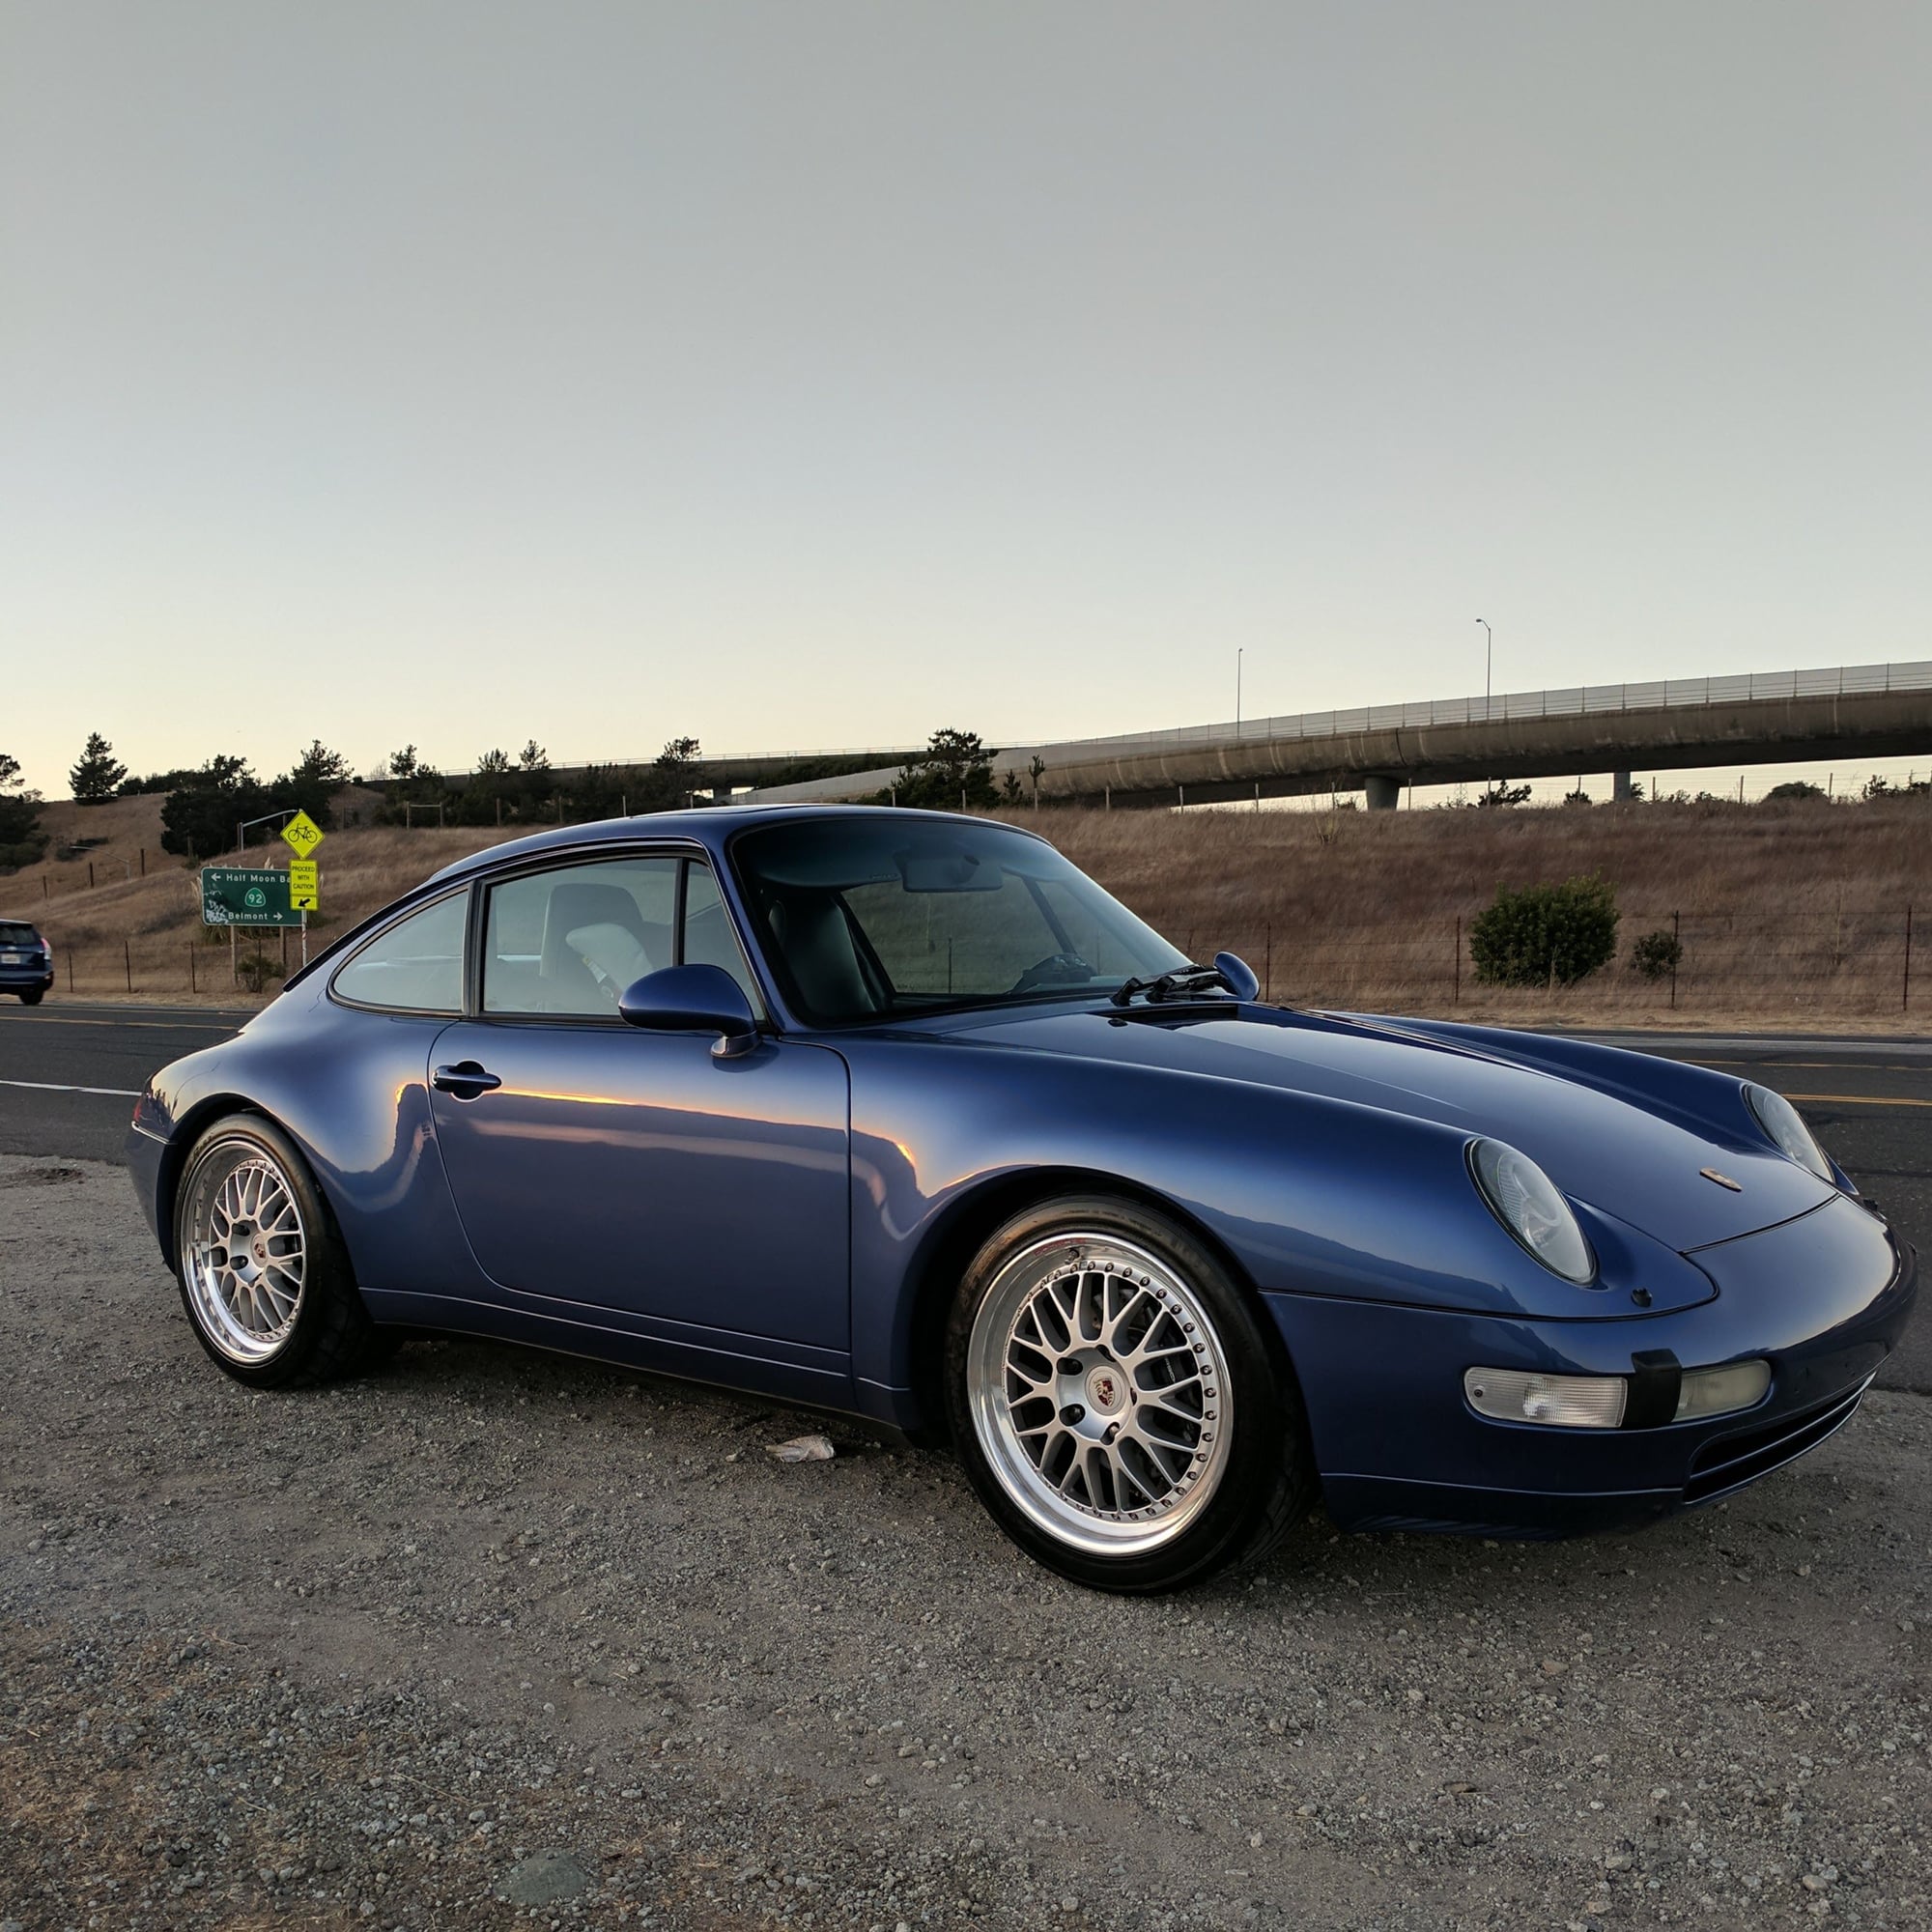
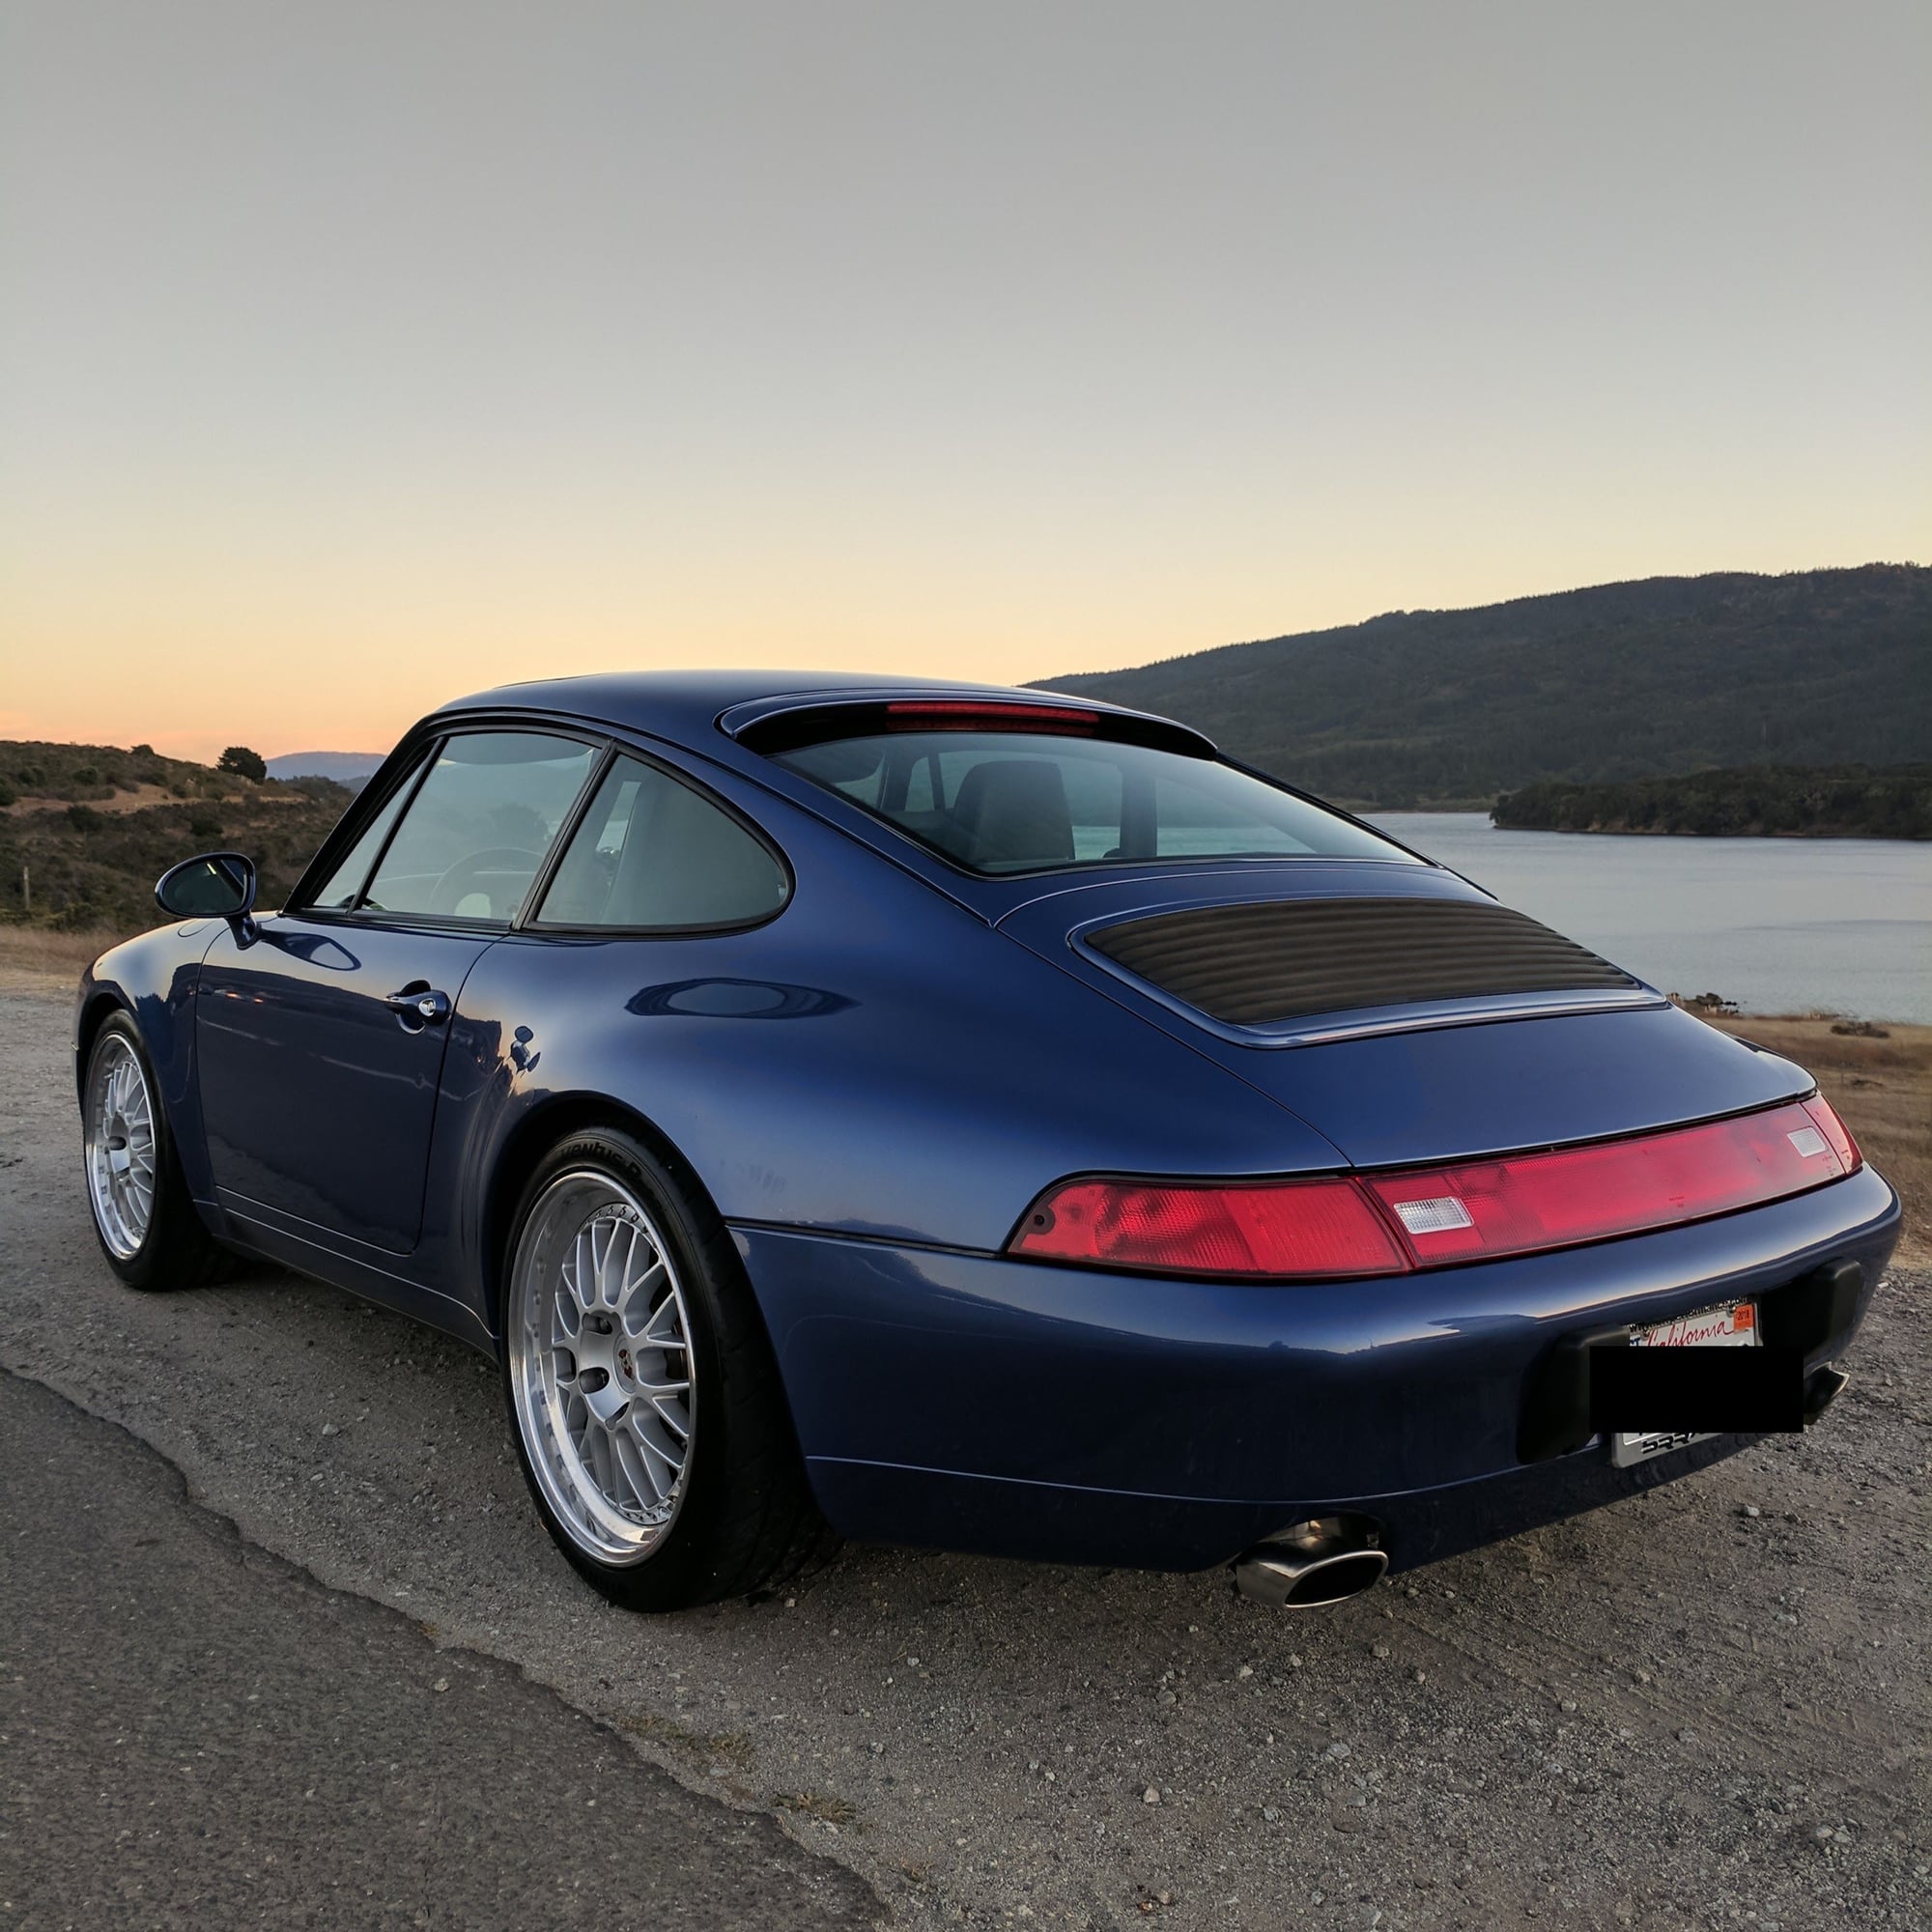
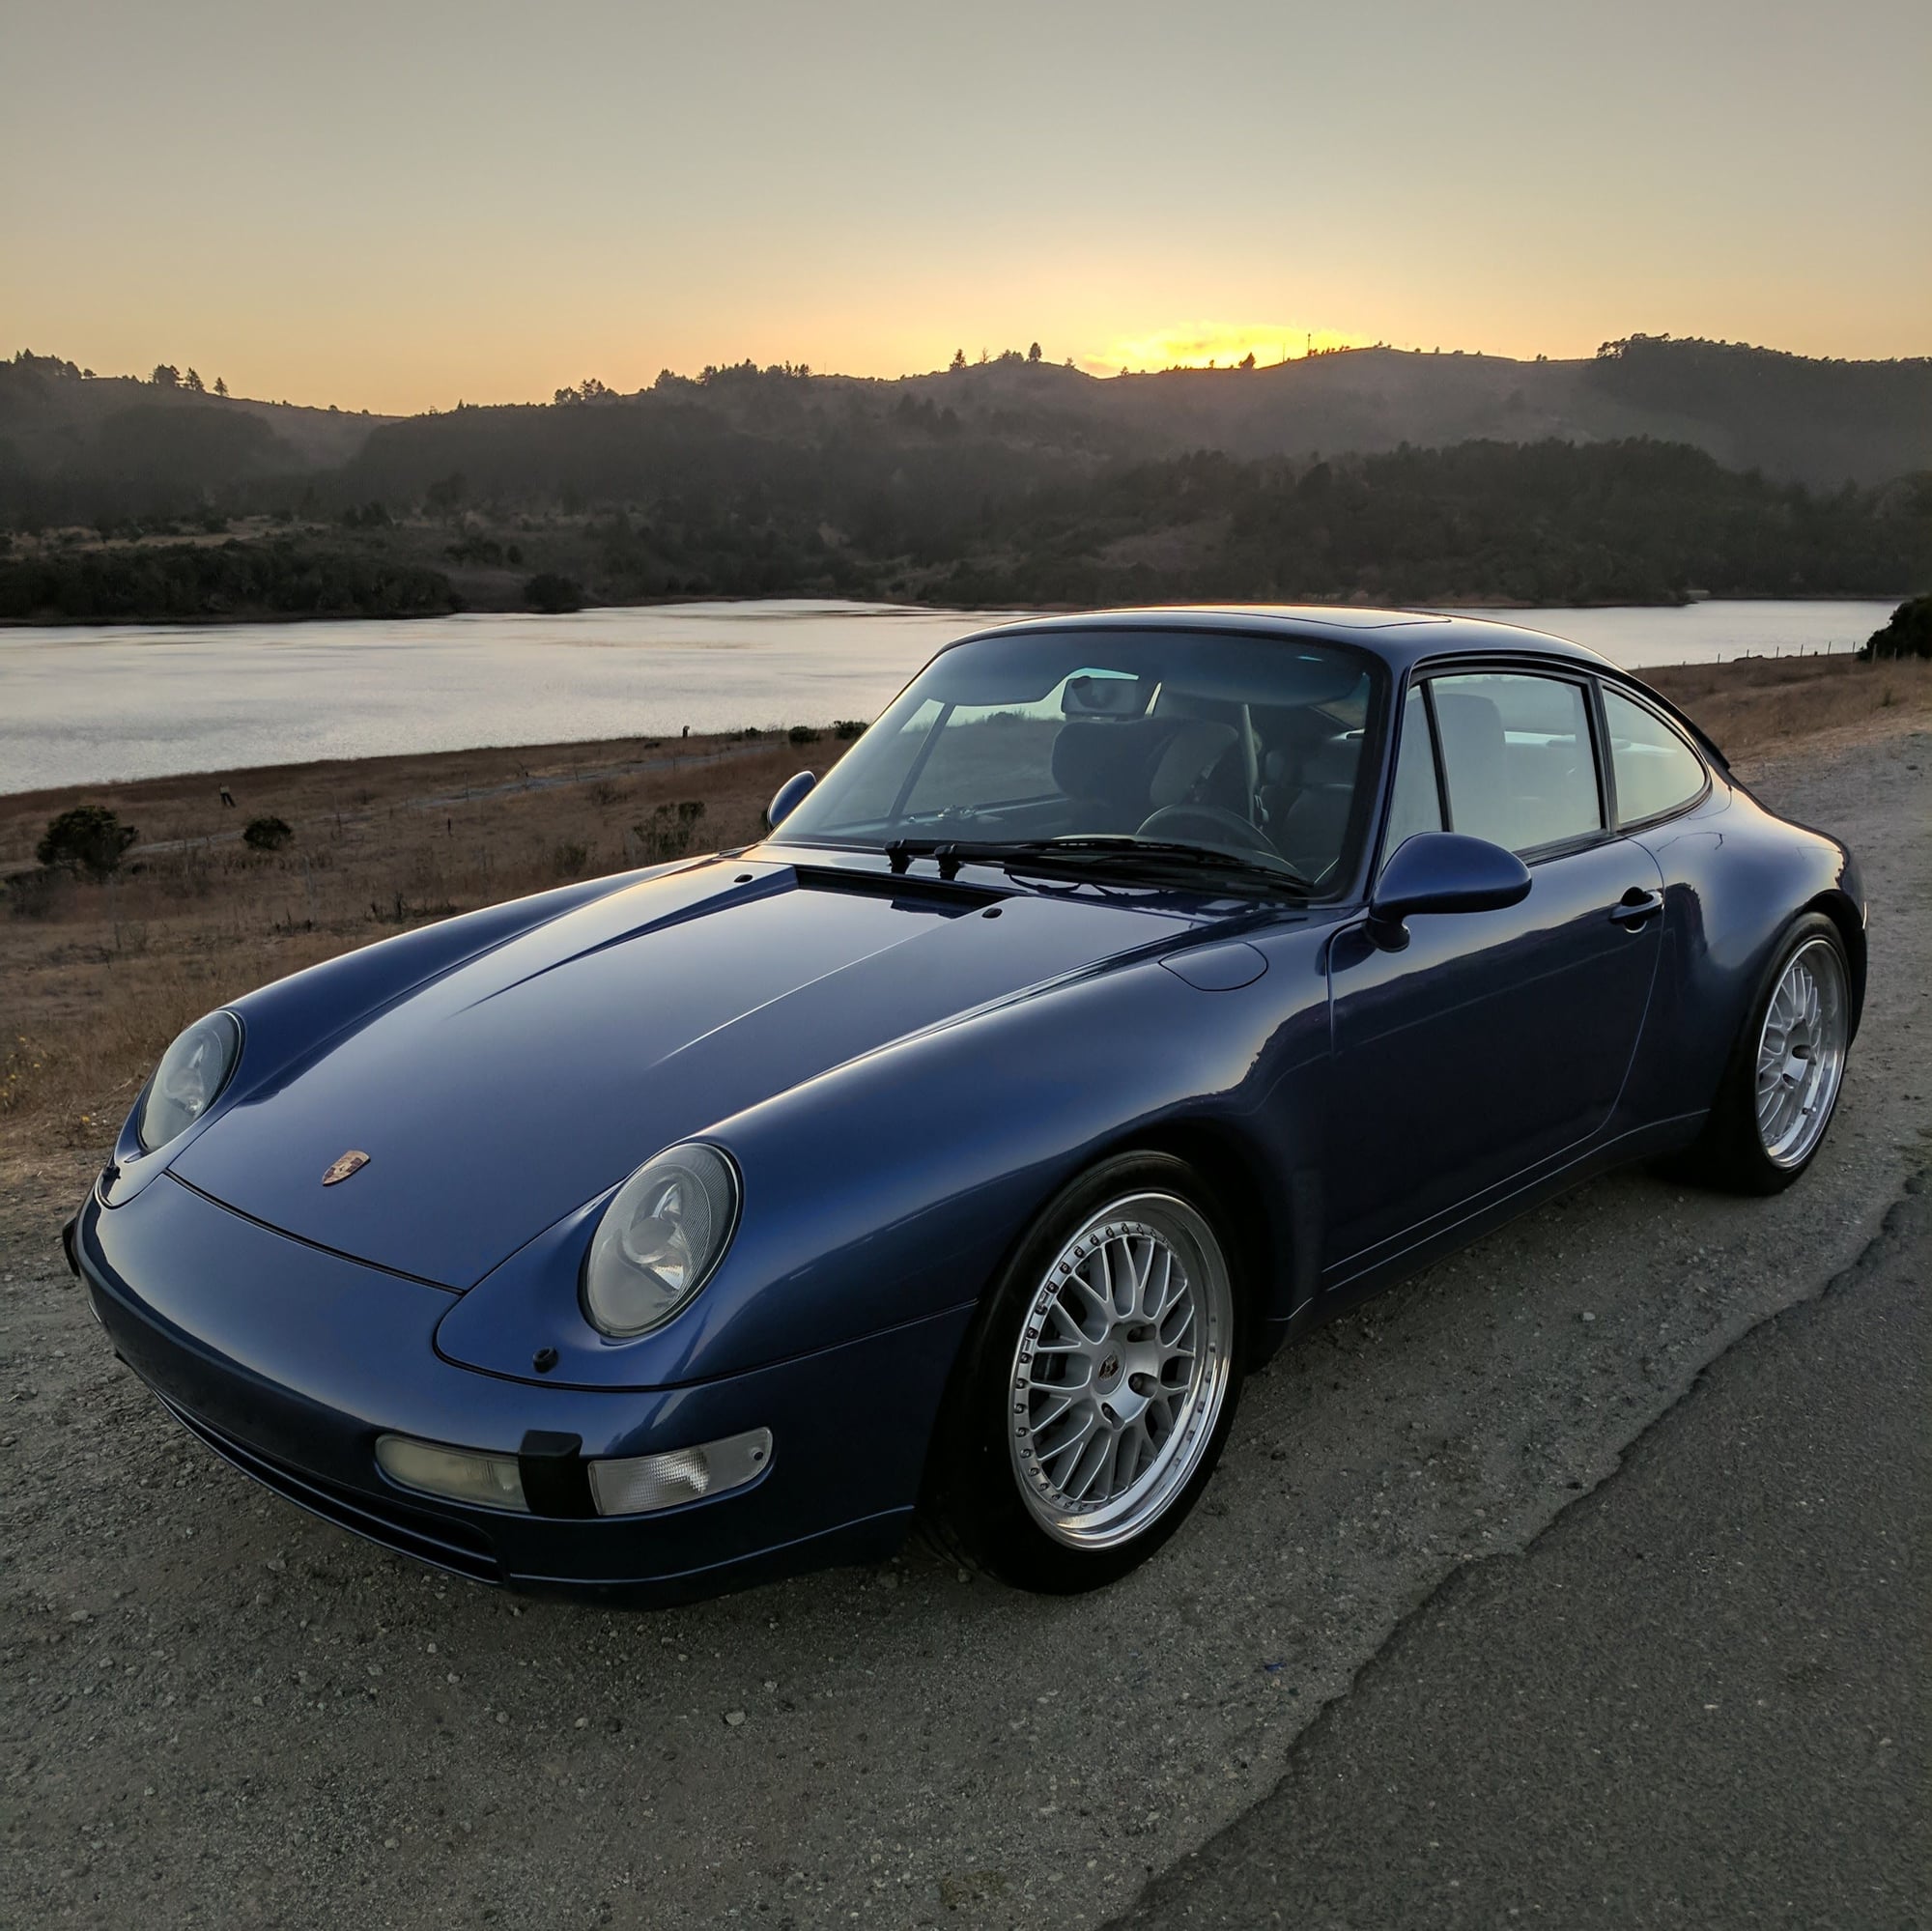
Here she is all cleaned up a few days later. The suspension settled significantly. Right after the install the space between the tire and the wheel well was about three fingers. It is now about one.
She has not been aligned nor corner balanced yet as Roger Krause Racing (local shop that has the kinematic toe tool) is busy. They told me to drive her for a while to let the new bushings and struts settle before an appointment which works out. I know that having her too low to RS height will cause bump steer so will eventually tinker with her until I get it to between RS and ROW.
Driving her on some of the canyon roads near my house has been fun. Cornering is night and day. I can just lay on the throttle around a corner and she just tracks so easily around. My old M3 would start to understeer when I would do the same so very different feel with a 993... for the better. On the straights the steering is a bit loose and fast, with bumps causing the steering to be twitchy. Will start to play with the tire pressure and height to see what happens. I know she will just get better with a proper alignment and balance. For now going for a drive tomorrow morning with my buddies somewhere in the Santa Cruz mountains!
Shout out to @Tlaloc75 and @Overboosted28. Your tips and tricks through this was very helpful. Thank you!
Thanks for selling me these wheels. They fit perfectly and get many complements on them. Eventually when I replace the tires I want to tear them down to the barrels and strip down the lips back to their factory glory... so many things to do
Your car looks fantastic! Great Job!!
My only other comment after lubing front bushings re squeek and maybe I missed it is did you change the Rear Sway Bushings?
Your car looks fantastic! Great Job!! Love those wheels!
TJ
Toronto
Your car looks fantastic! Great Job!!
My only other comment after lubing front bushings re squeek and maybe I missed it is did you change the Rear Sway Bushings?
Your car looks fantastic! Great Job!! Love those wheels!
TJ
Toronto
Thanks TJ.
Yes I did replace both sets of ARB bushings as I upgraded to M030 ARBs which are larger diameter bushings than the ones for the stock ARBs. Initially I just used soapy water to get the bushings installed. They were squeaky so later I put some spray silicone lubricant which was safe with rubber and that made the ARBs quiet and move more smoothly.
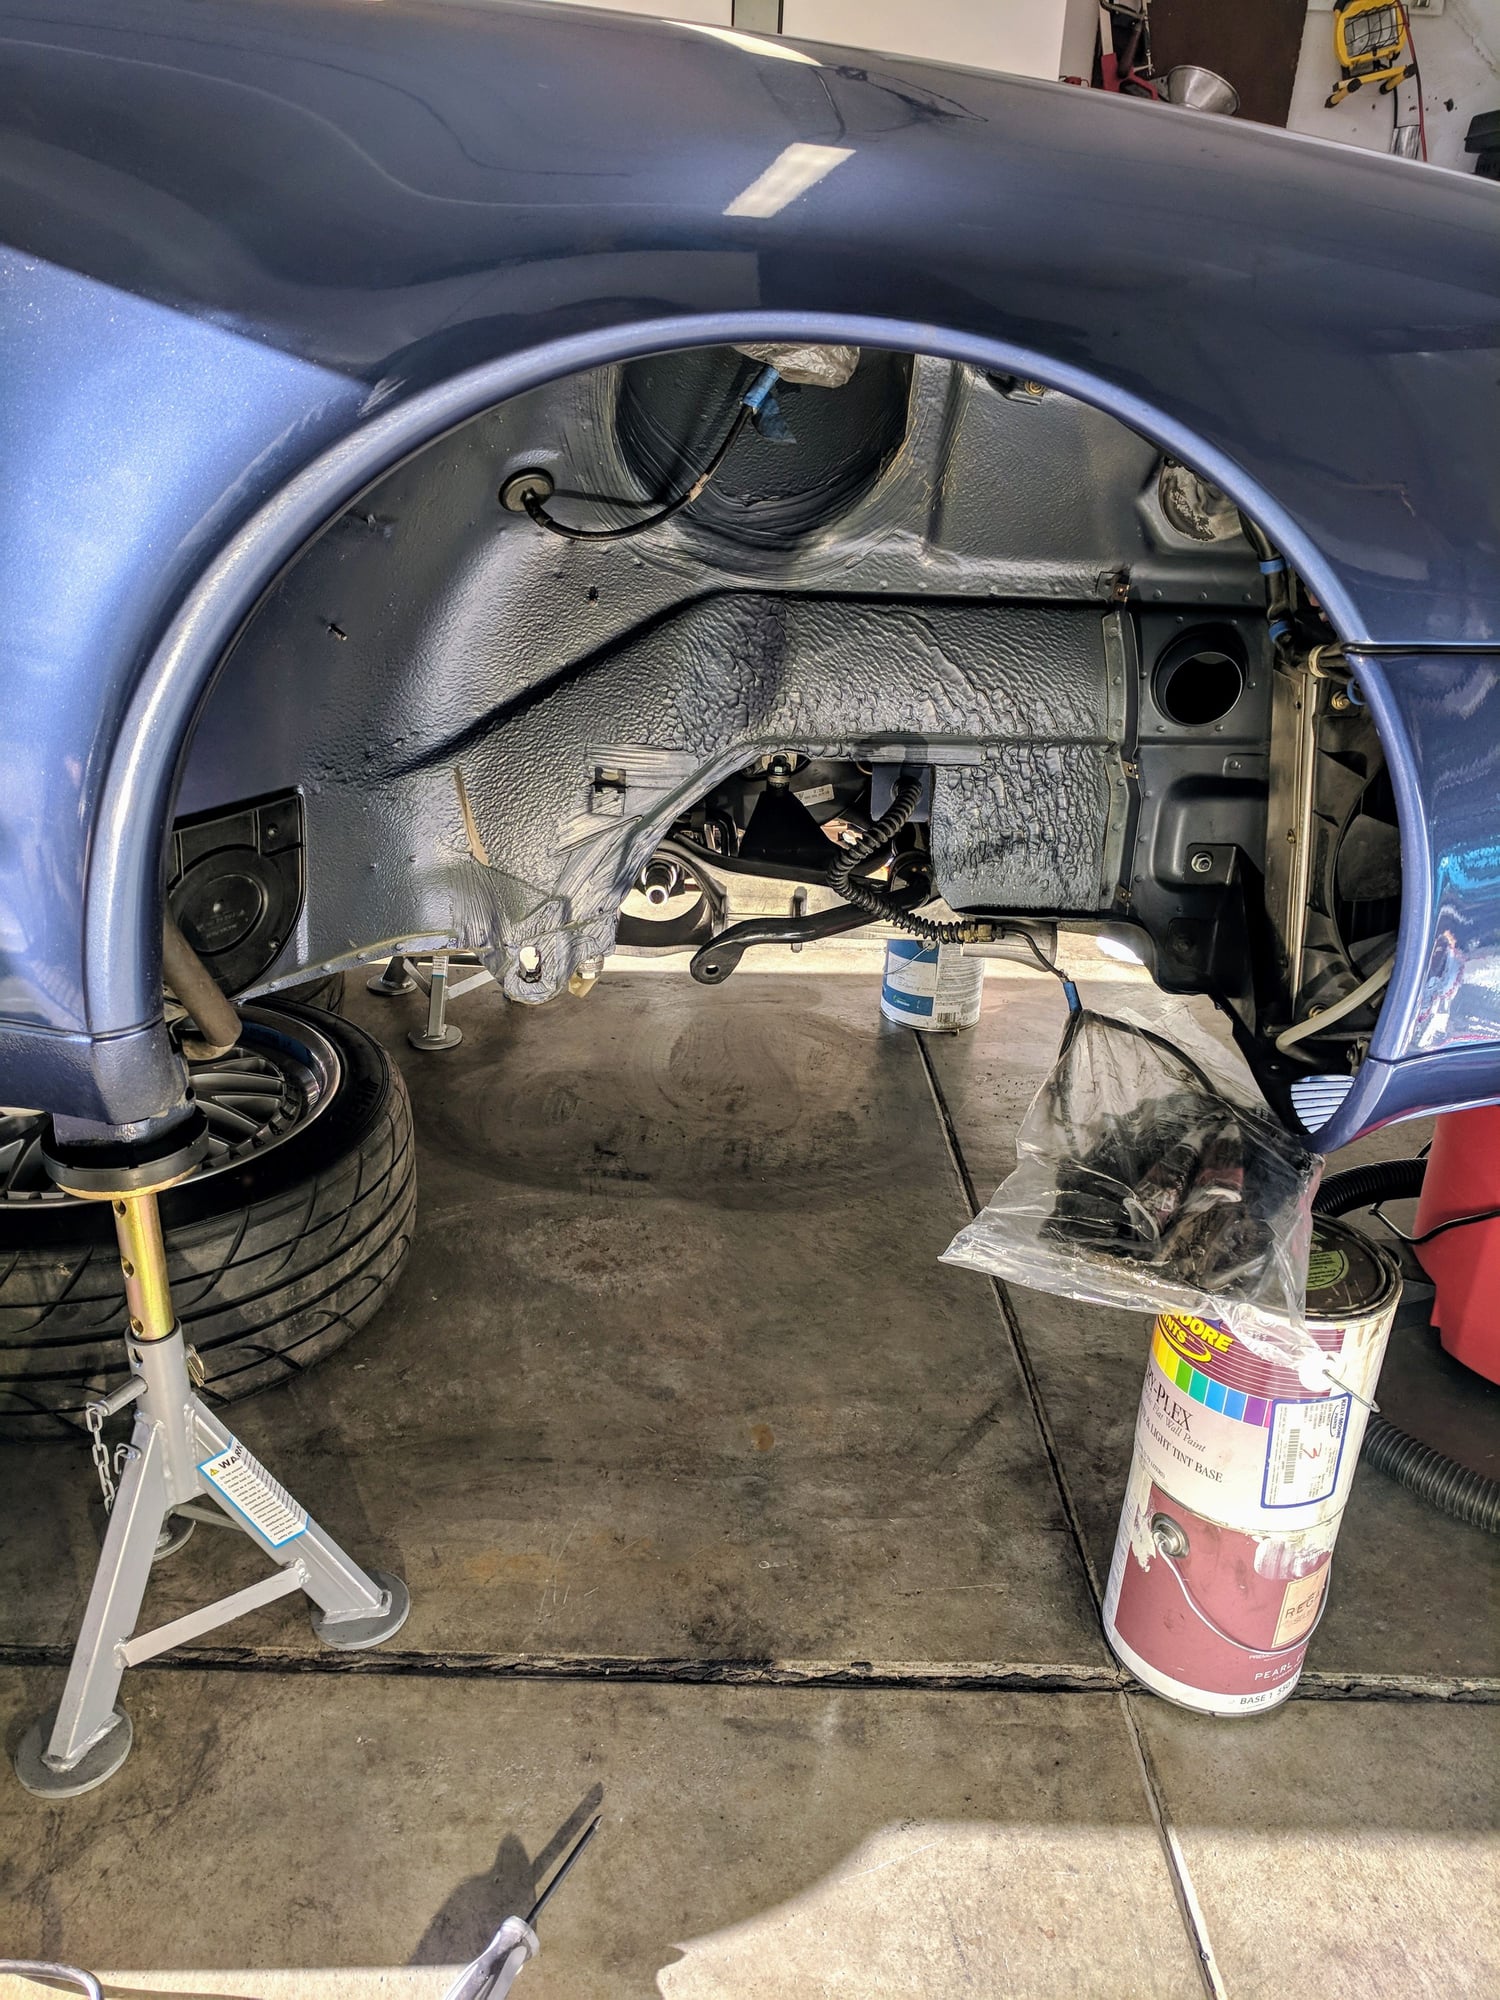
I knew immediately something was seriously wrong. Thanks to a few of you on this board, you helped me isolate the problem. @95_993 nailed it and identified the root cause of the problem. I was an unlucky where one of the bolts that secures the power steering (PS) belt cover got loose, fell into the area under the airbox. Eventually that bolt made its way through the engine bay rubber gasket, fell into PS belt housing through the PS belt cover opening on the side of the engine, and chewed up my PS belt just like the 964 owner that @95_993 shared... Why it got loose is beyond me other than the mechanic who touched it last didn�t tighten it enough. Those that are paranoid about this it is simple if you just remove the airbox cover and check these bolts...
Luckily the damage was to the PS belt and minor scratches to the lower PS belt cog. Not enough to warrant replacement as that would have meant an engine out procedure.
The Bentley service manual has an excellent overview of the procedure with the engine out to give you an idea of the process. Here is the procedure to do it with the engine in�
1. Remove all of the components that block direct access to the PS belt cover.
Passenger rear wheel
Passenger rear wheel fender liners
Passenger side muffler
Rear ARB
Aluminum tube that connects the airbox to the engine
Airbox
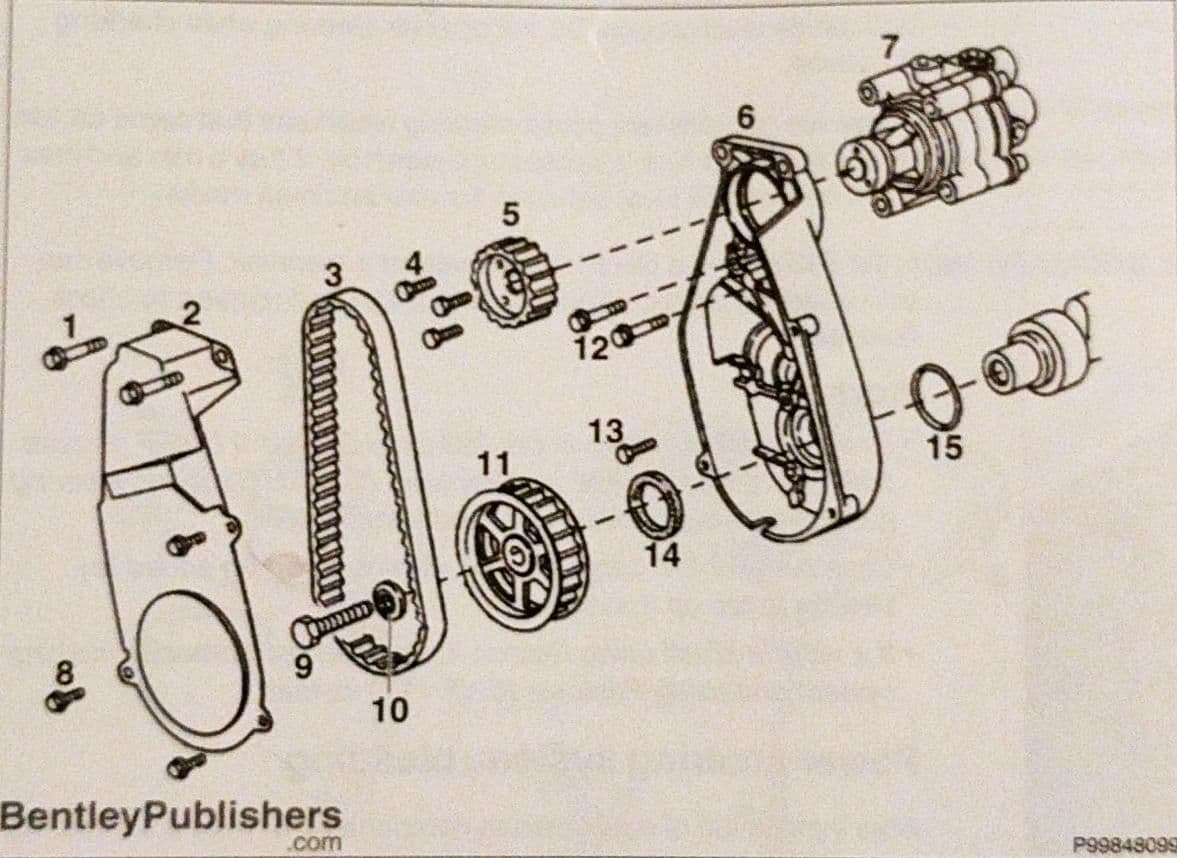
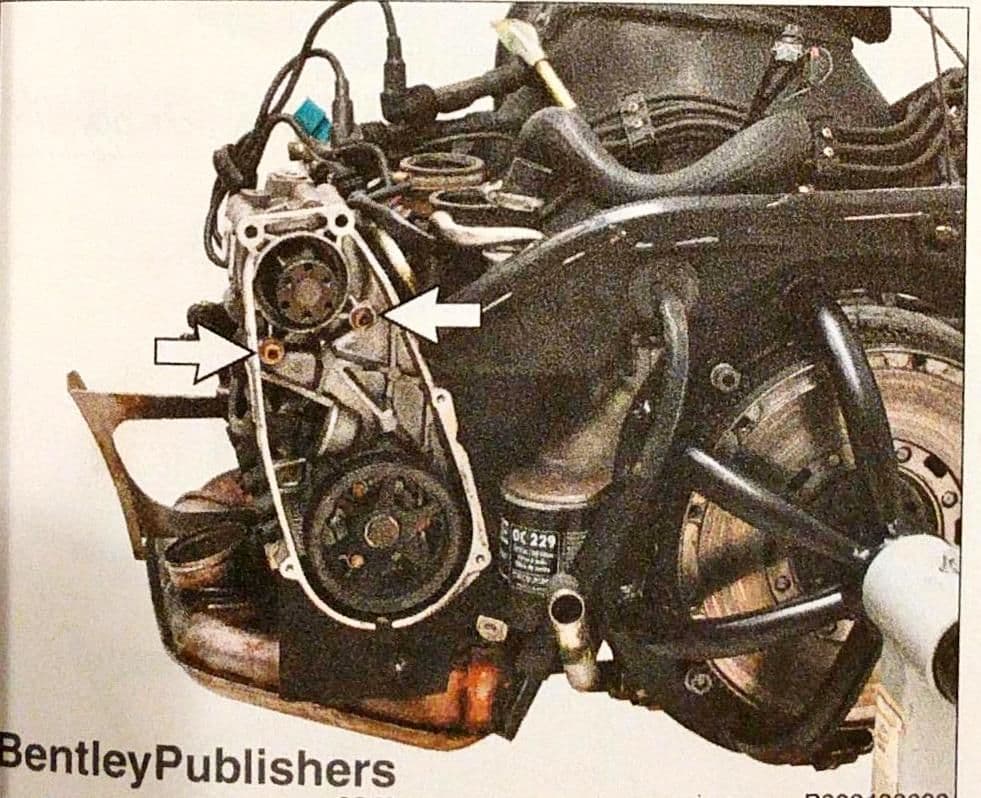
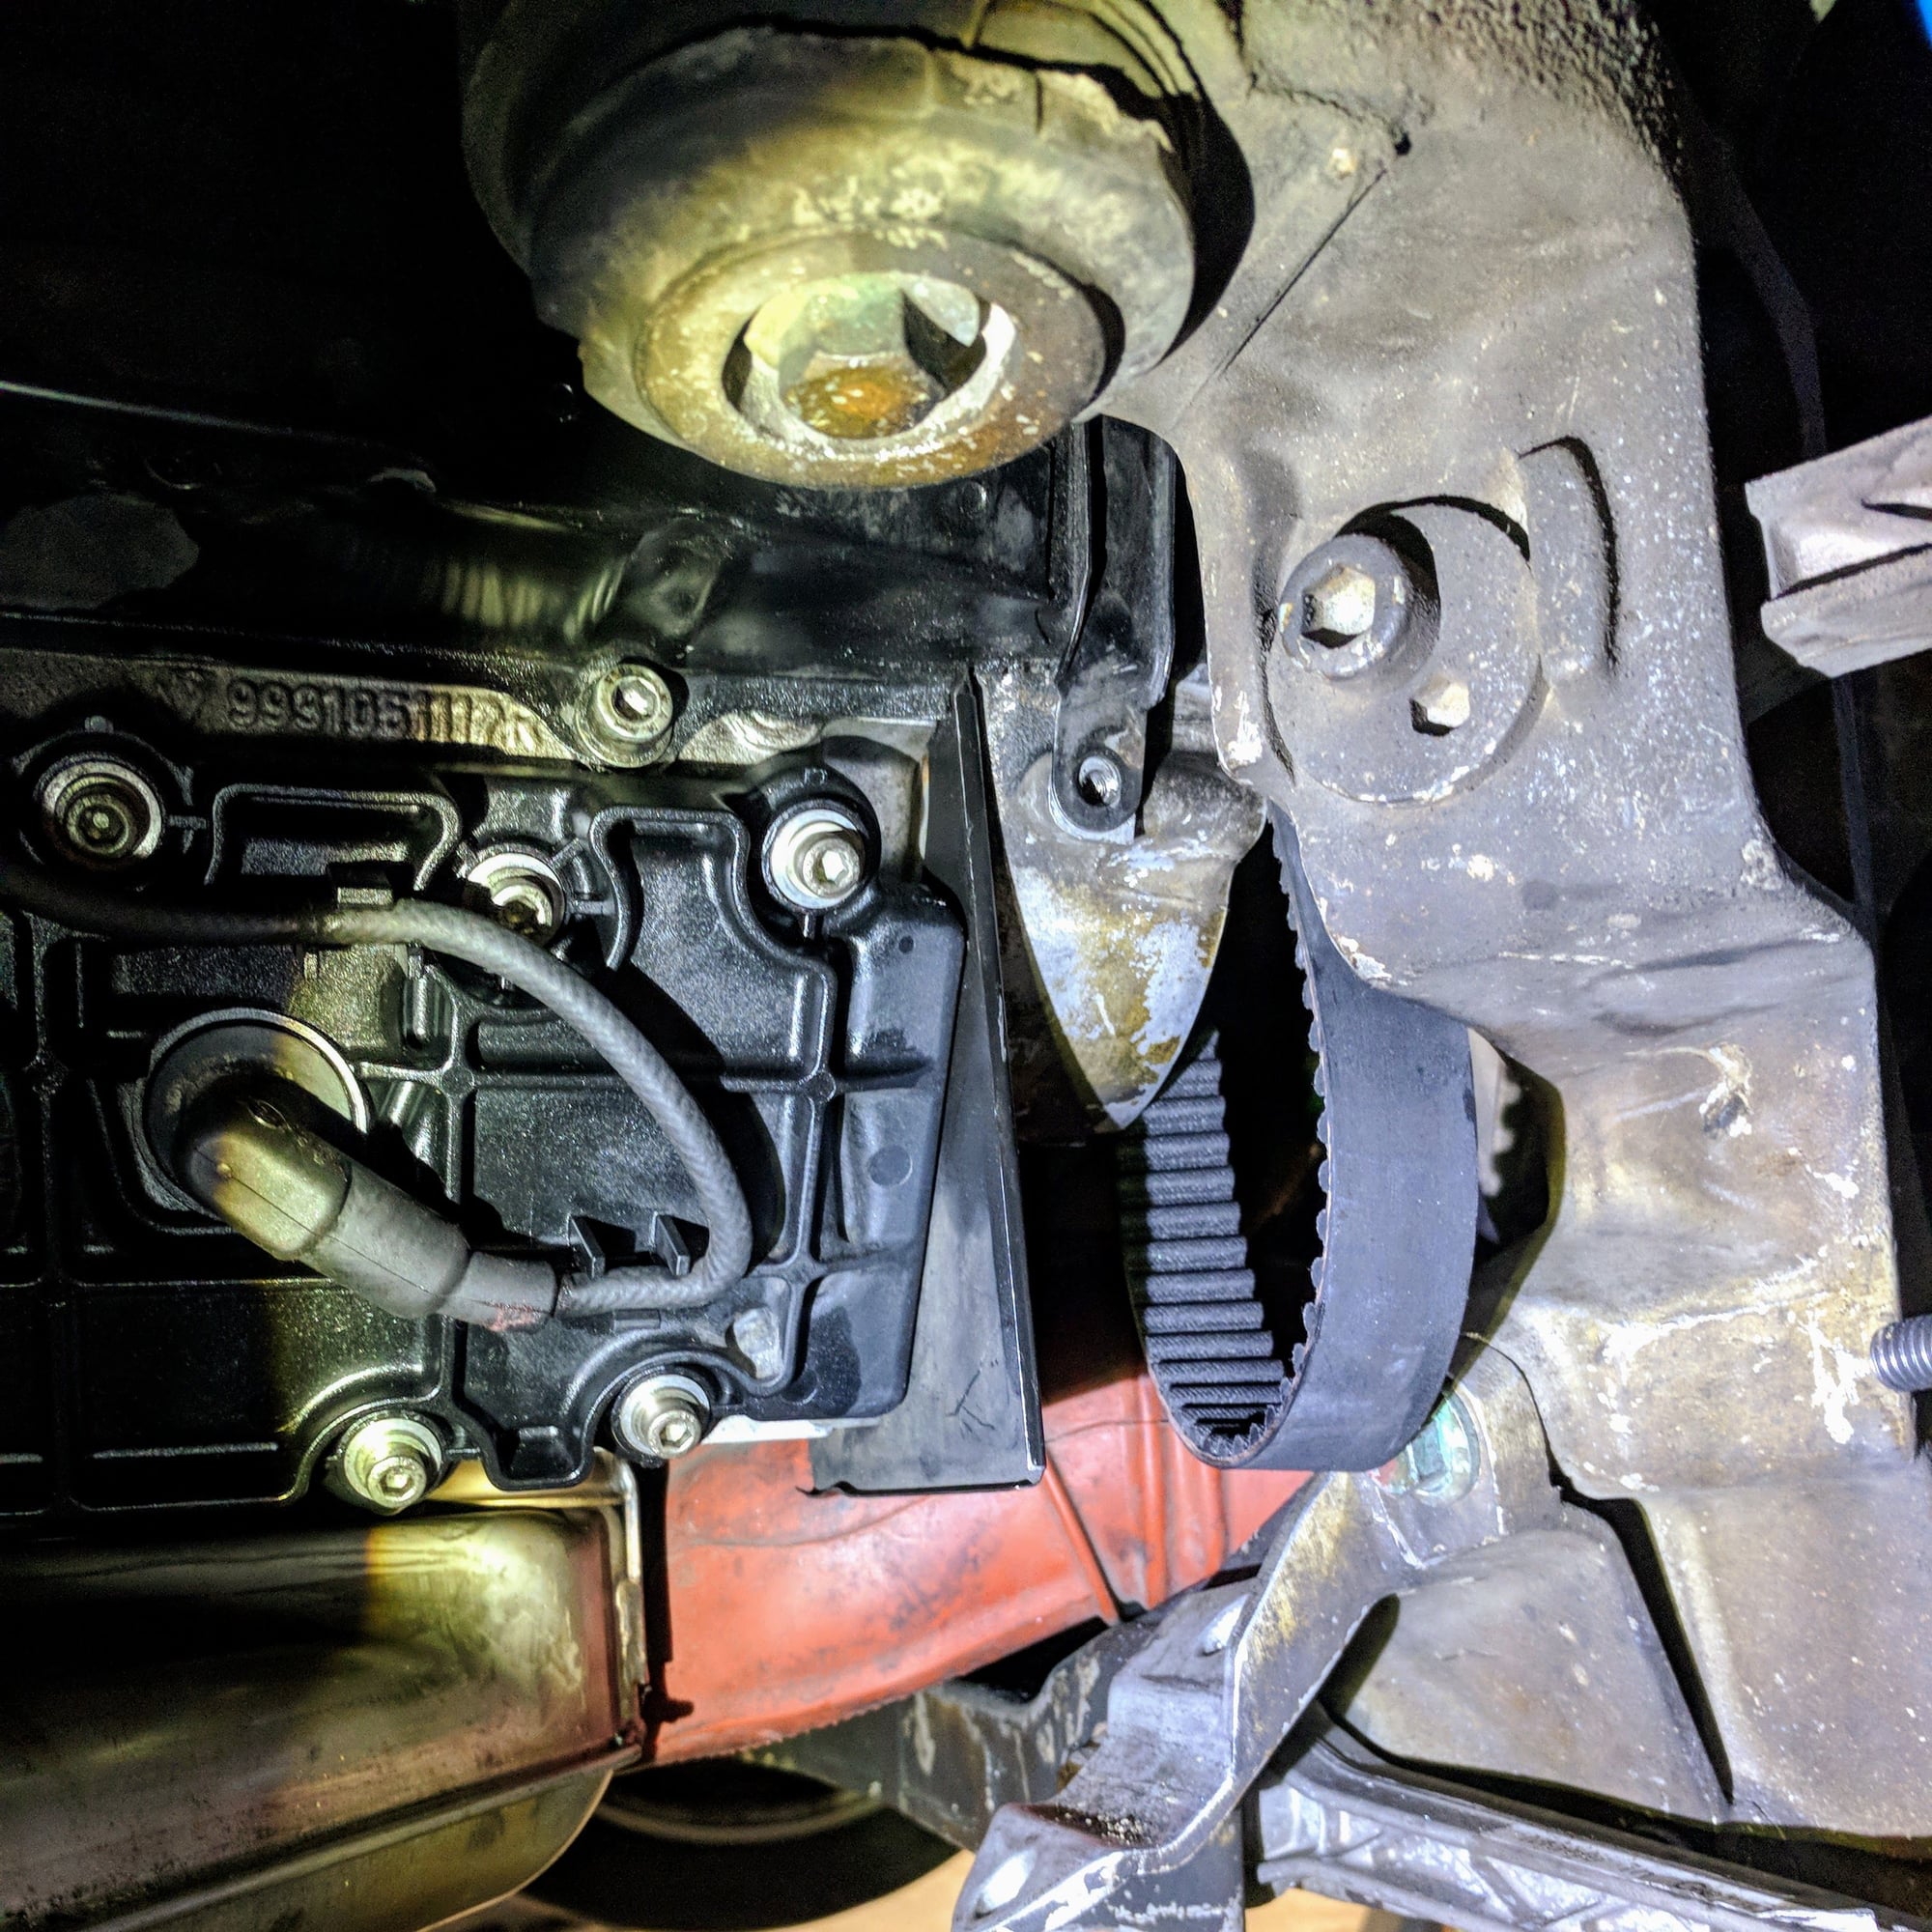
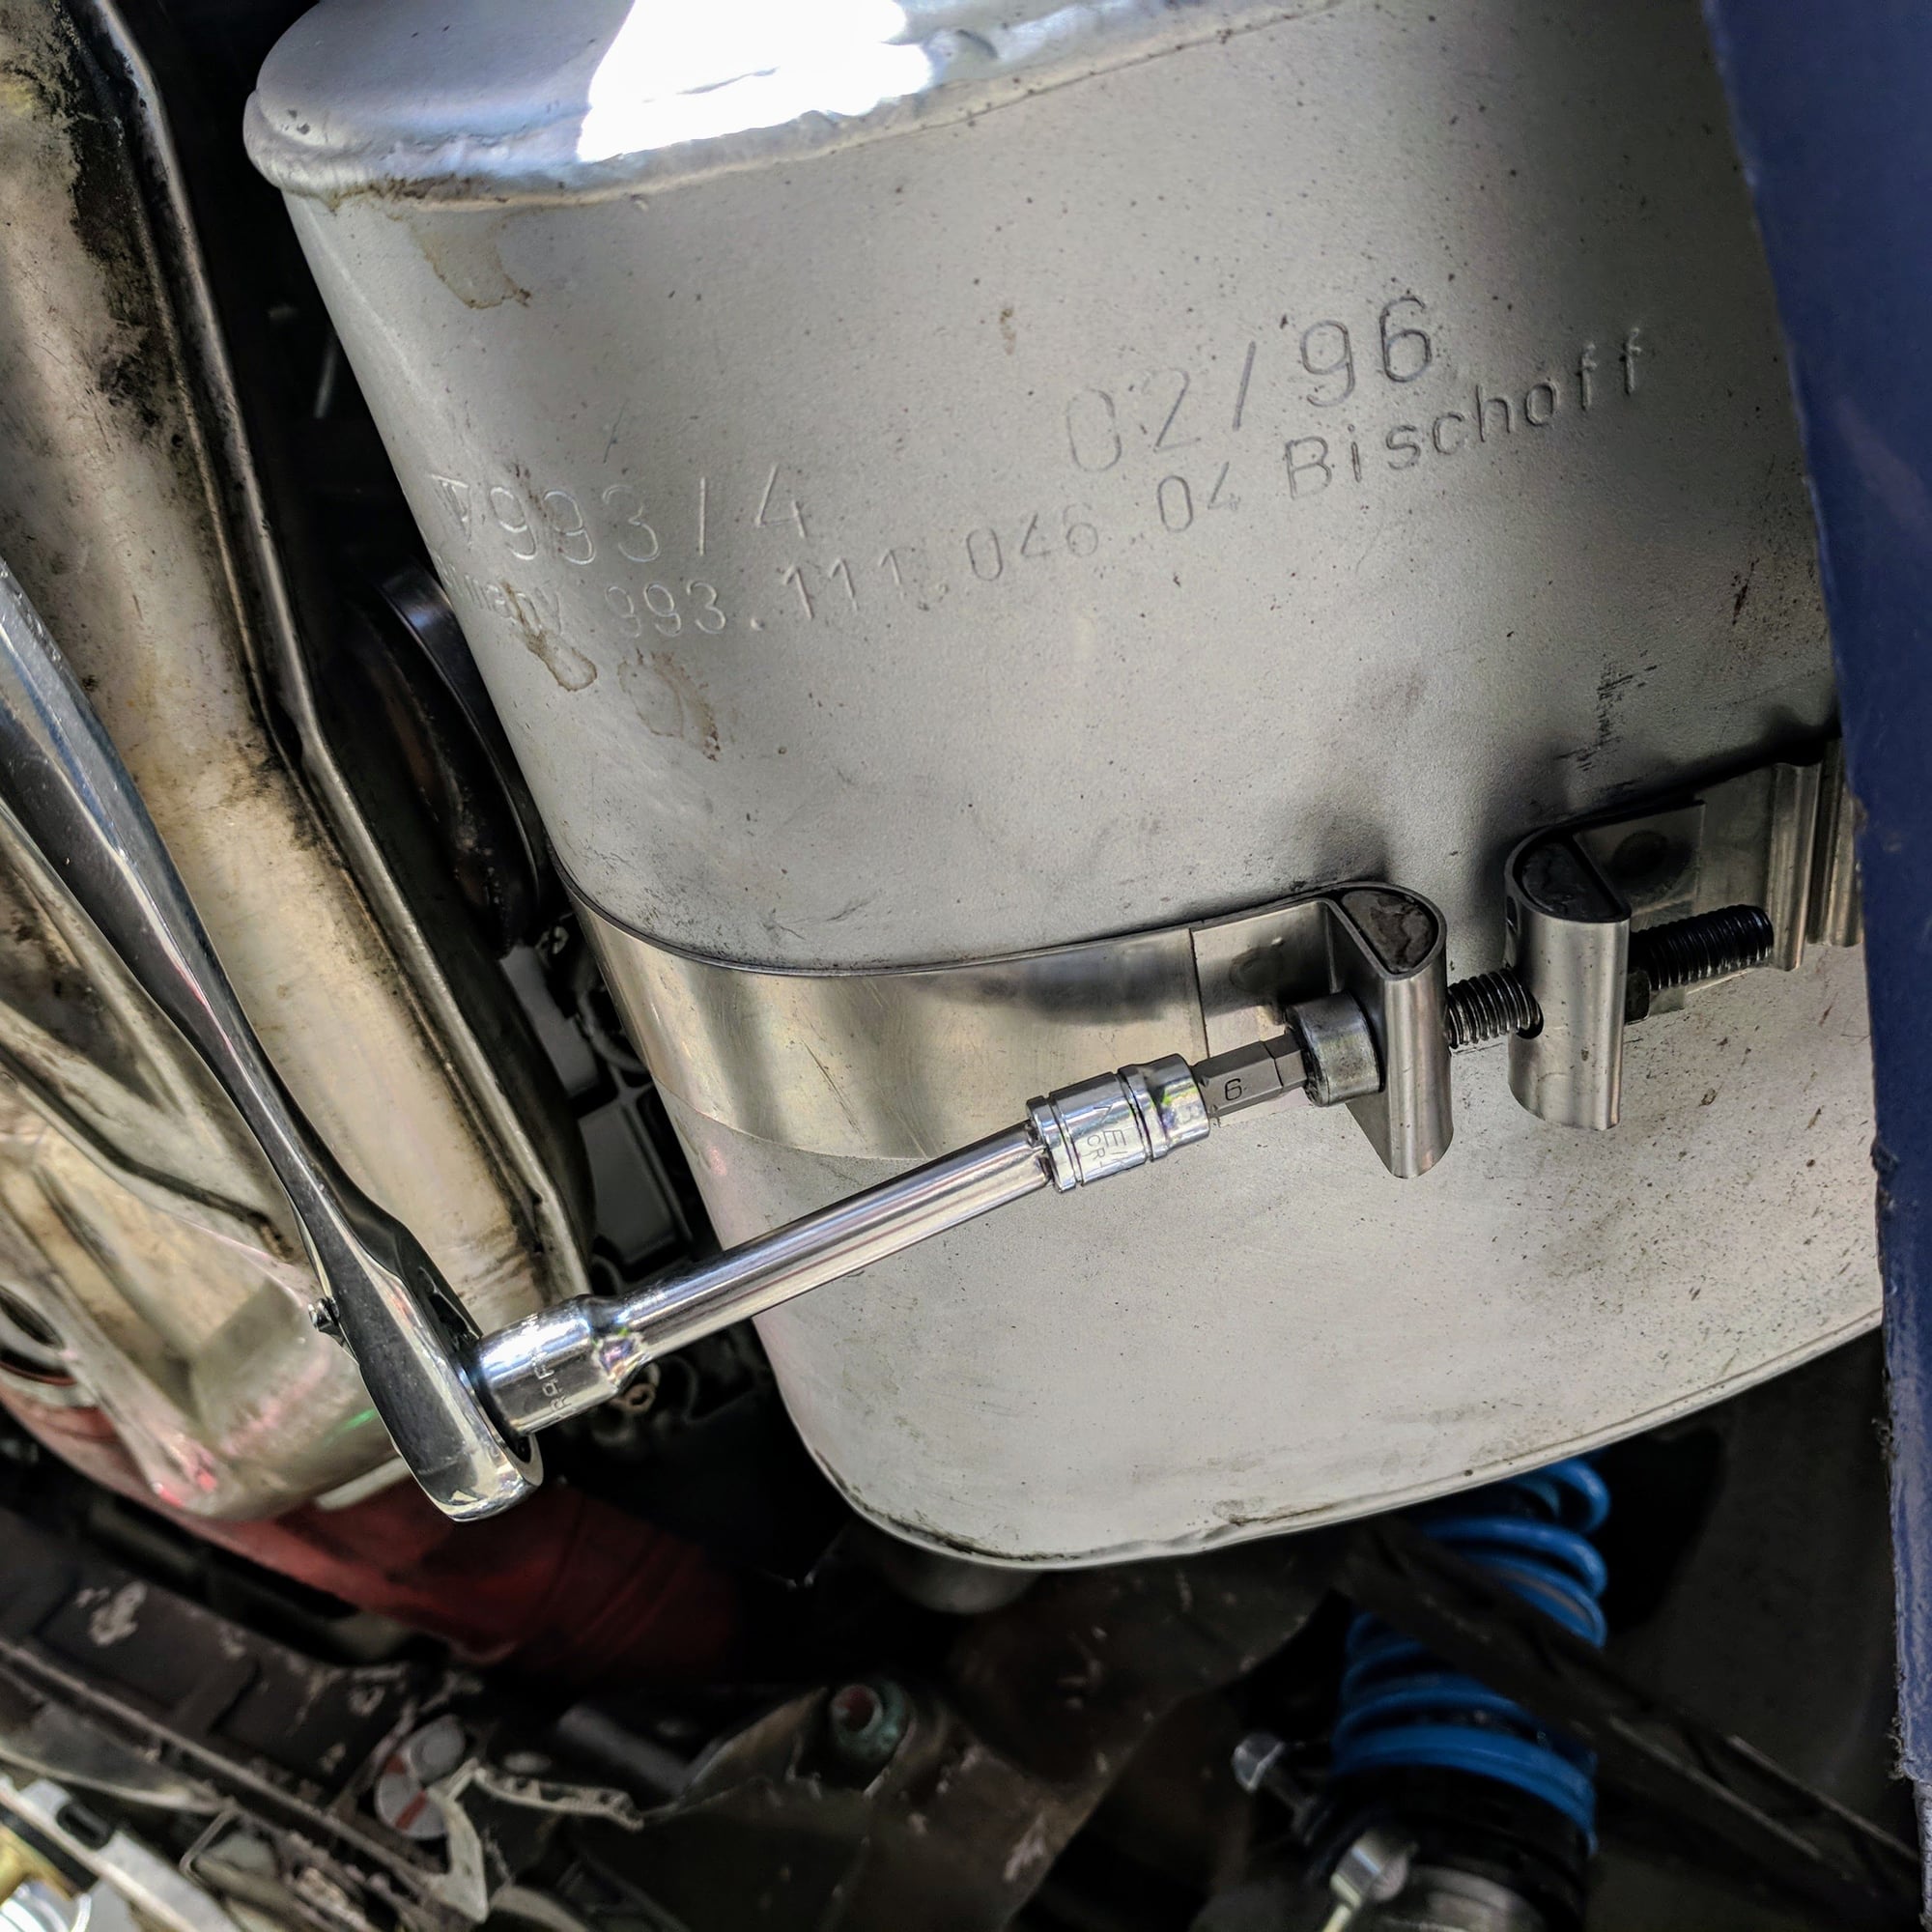
2. Once everything is out of the way then remove the bolts that secure the PS belt cover from the PS belt housing. There are two on top (#1) and three on the bottom (#8).
#1 bolts
#8 bolts
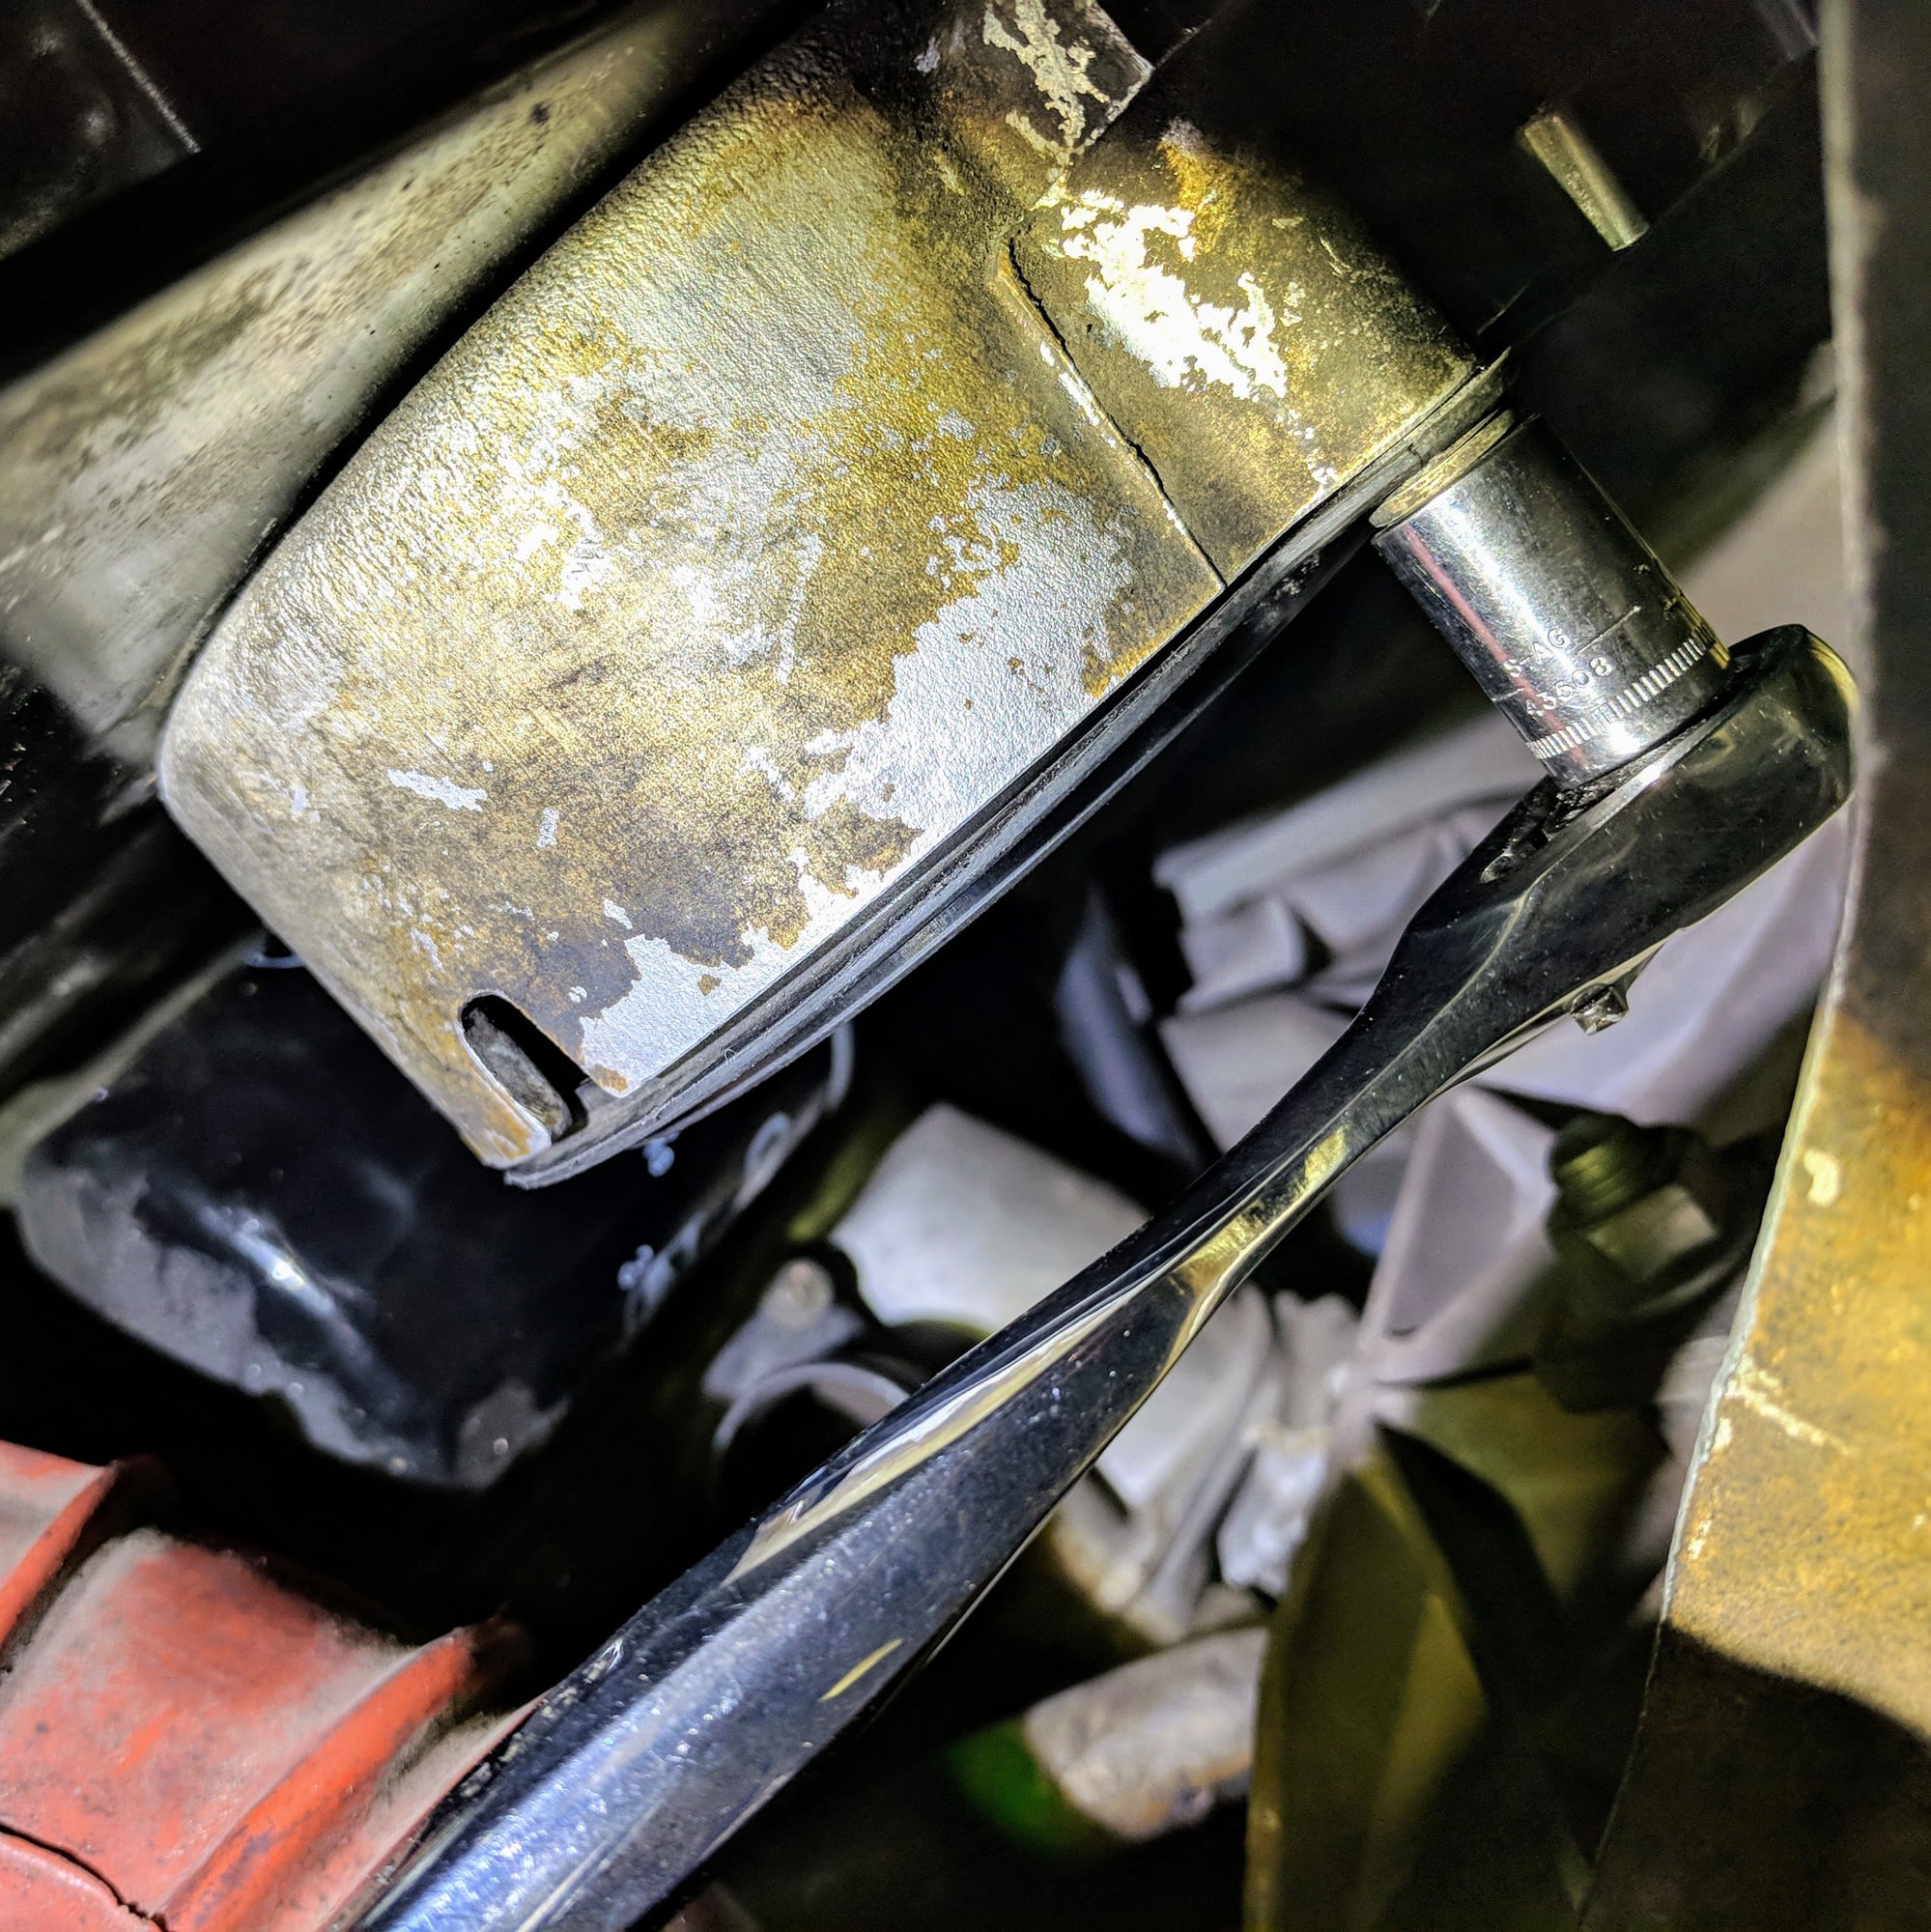
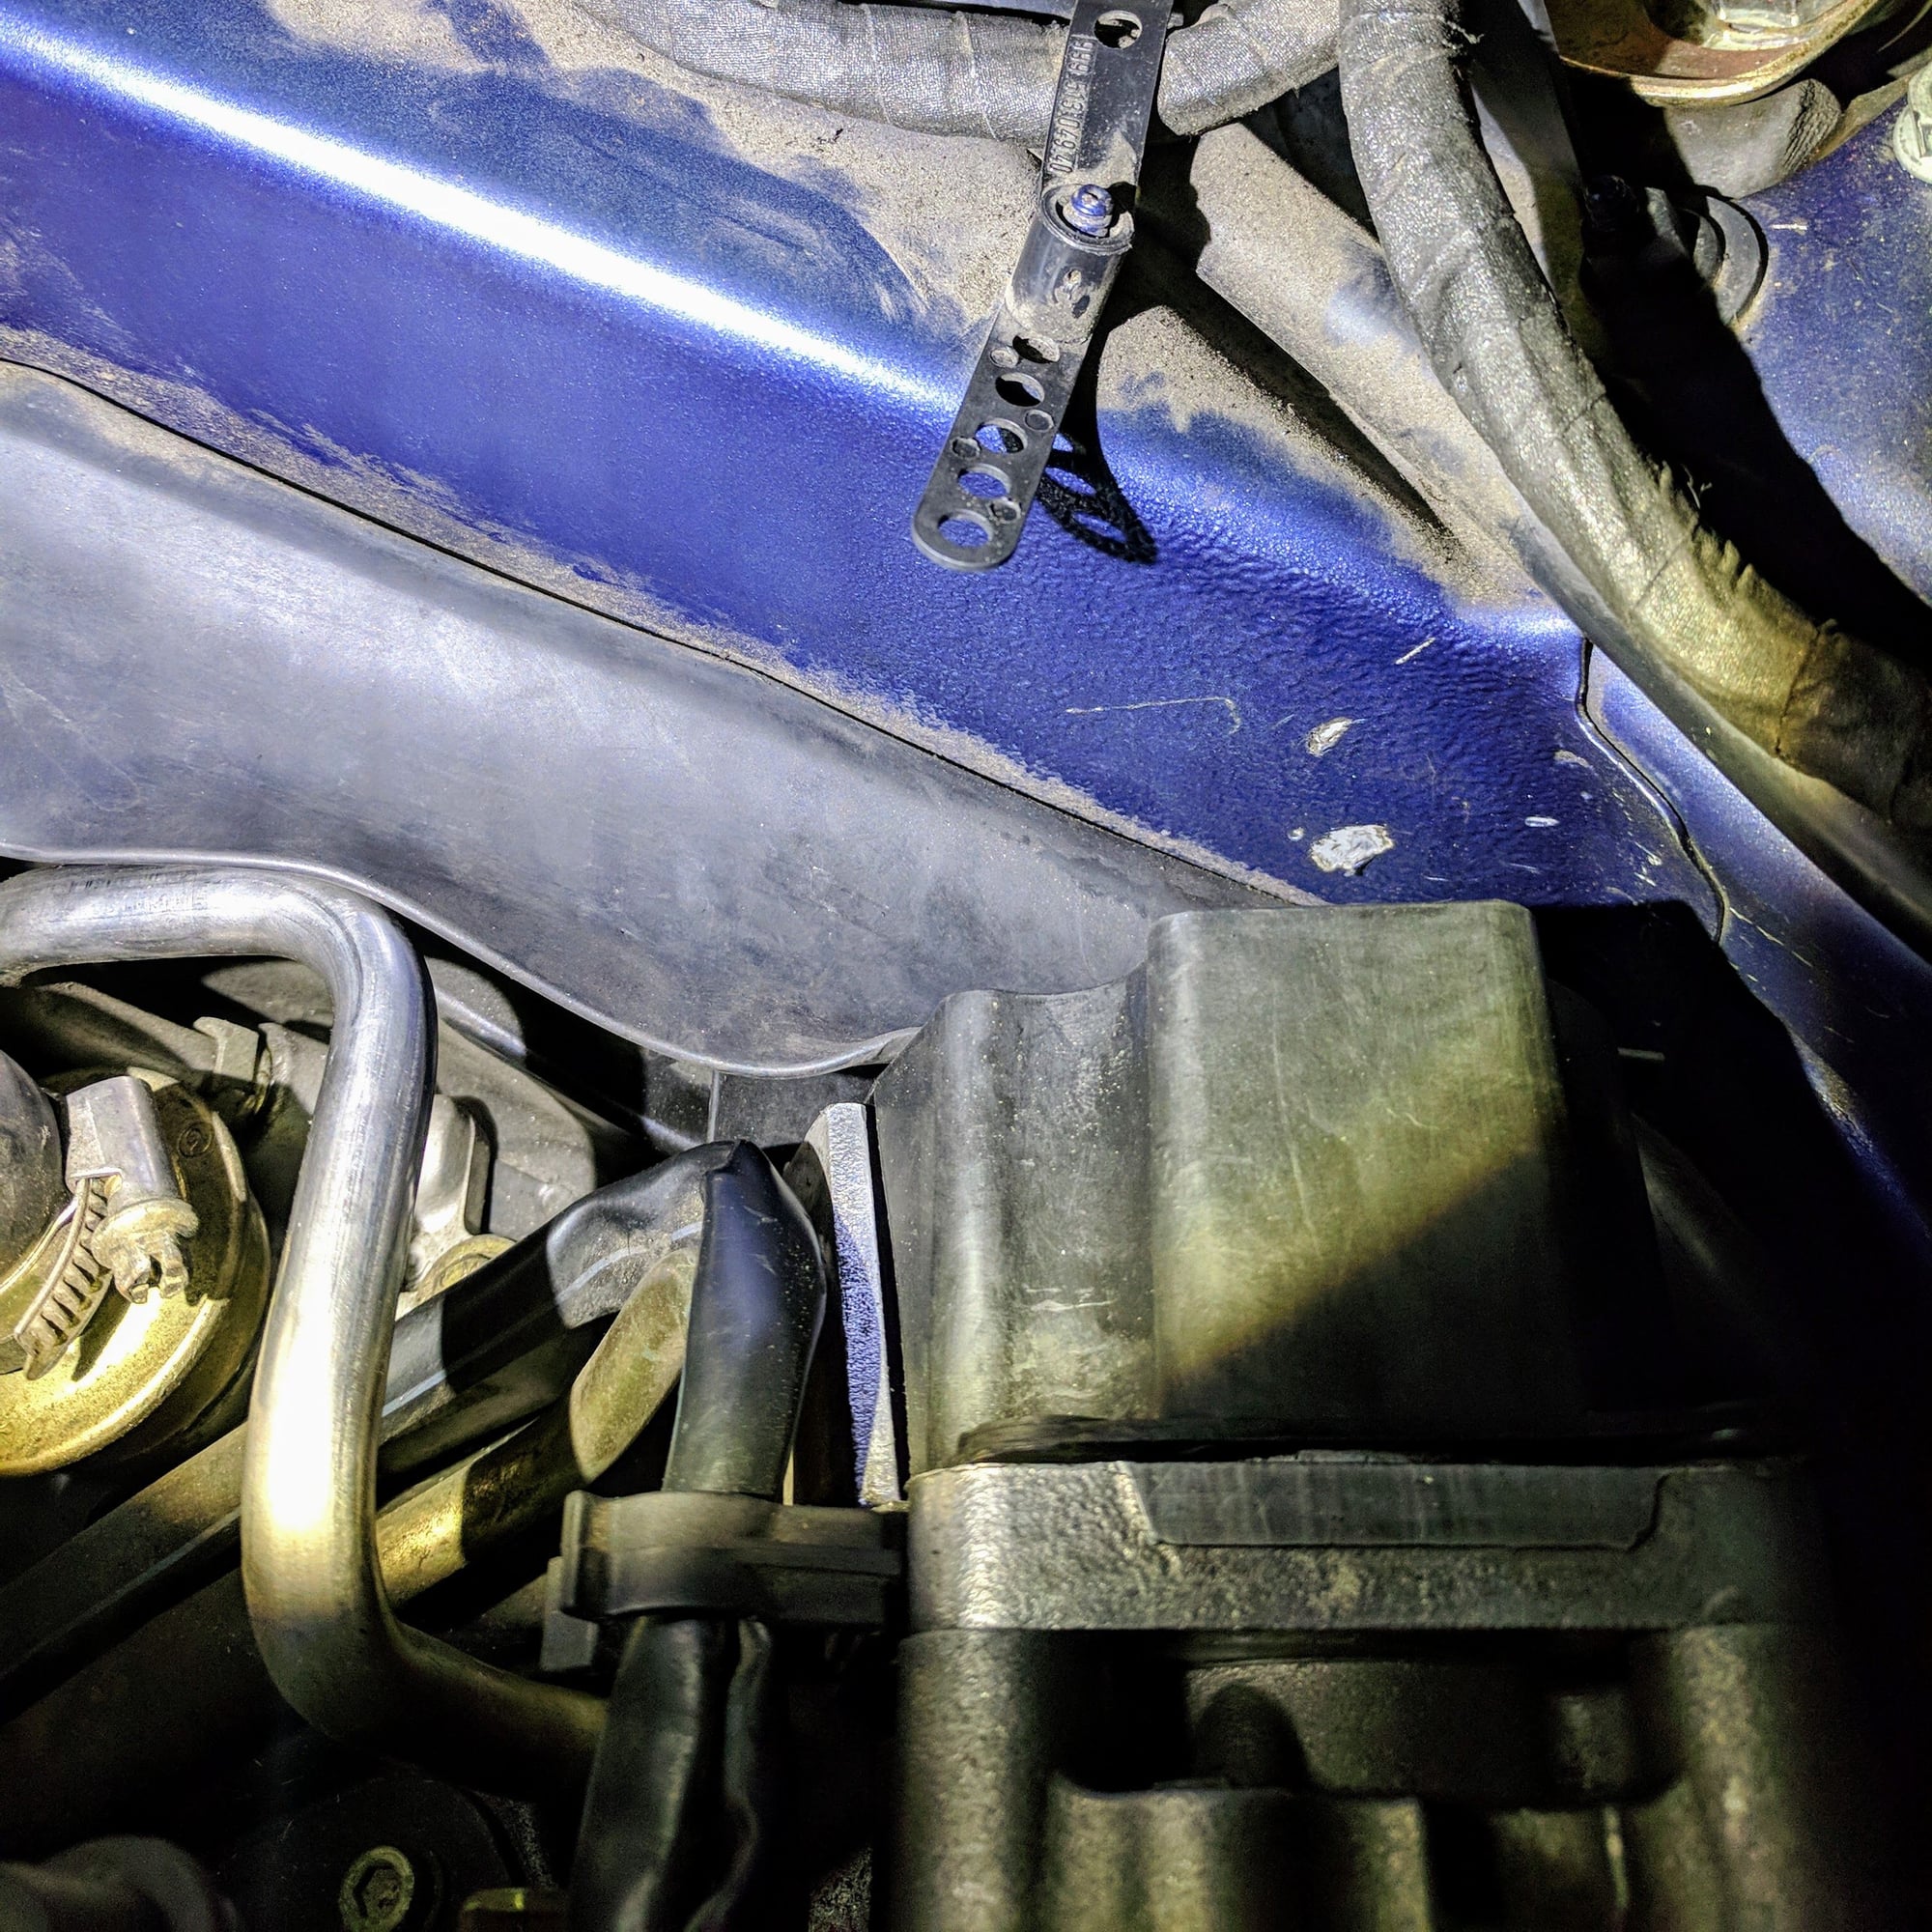
There is a heavy rubber flap that seals the engine bay and lays on top of a lip of the PS belt cover. If you flip it up you can easily pull the PS belt cover out from the engine bay.
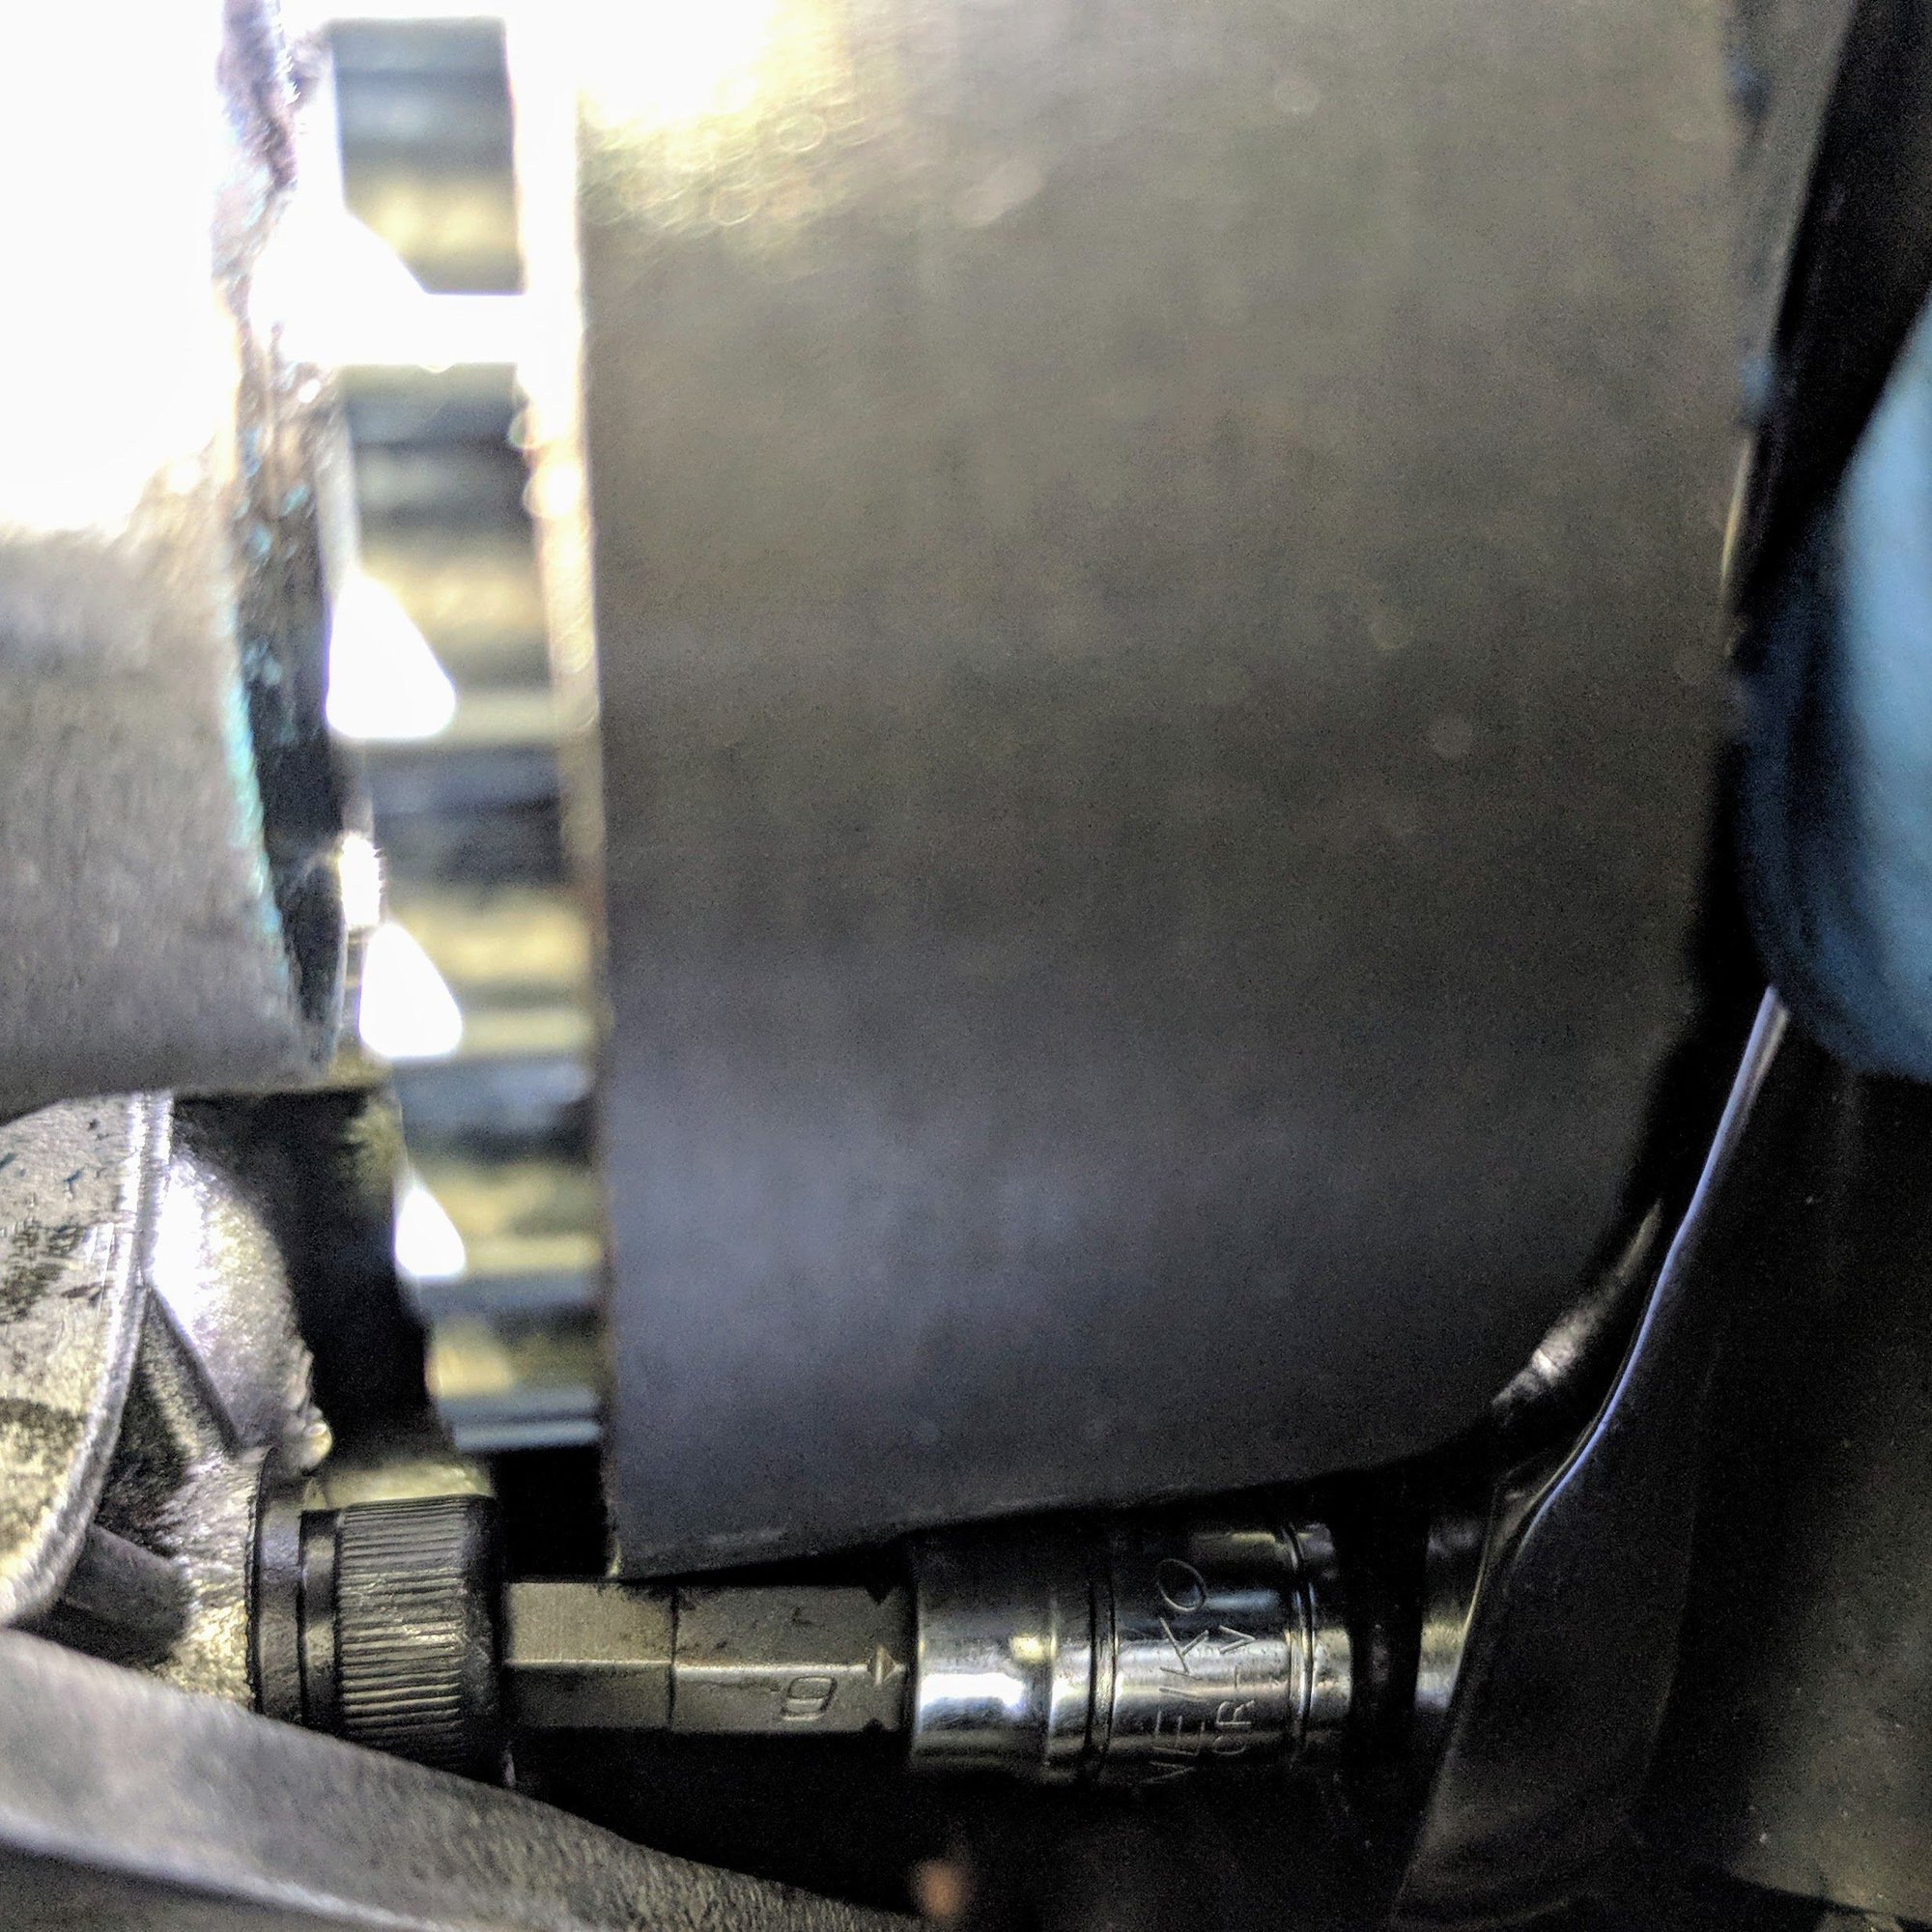
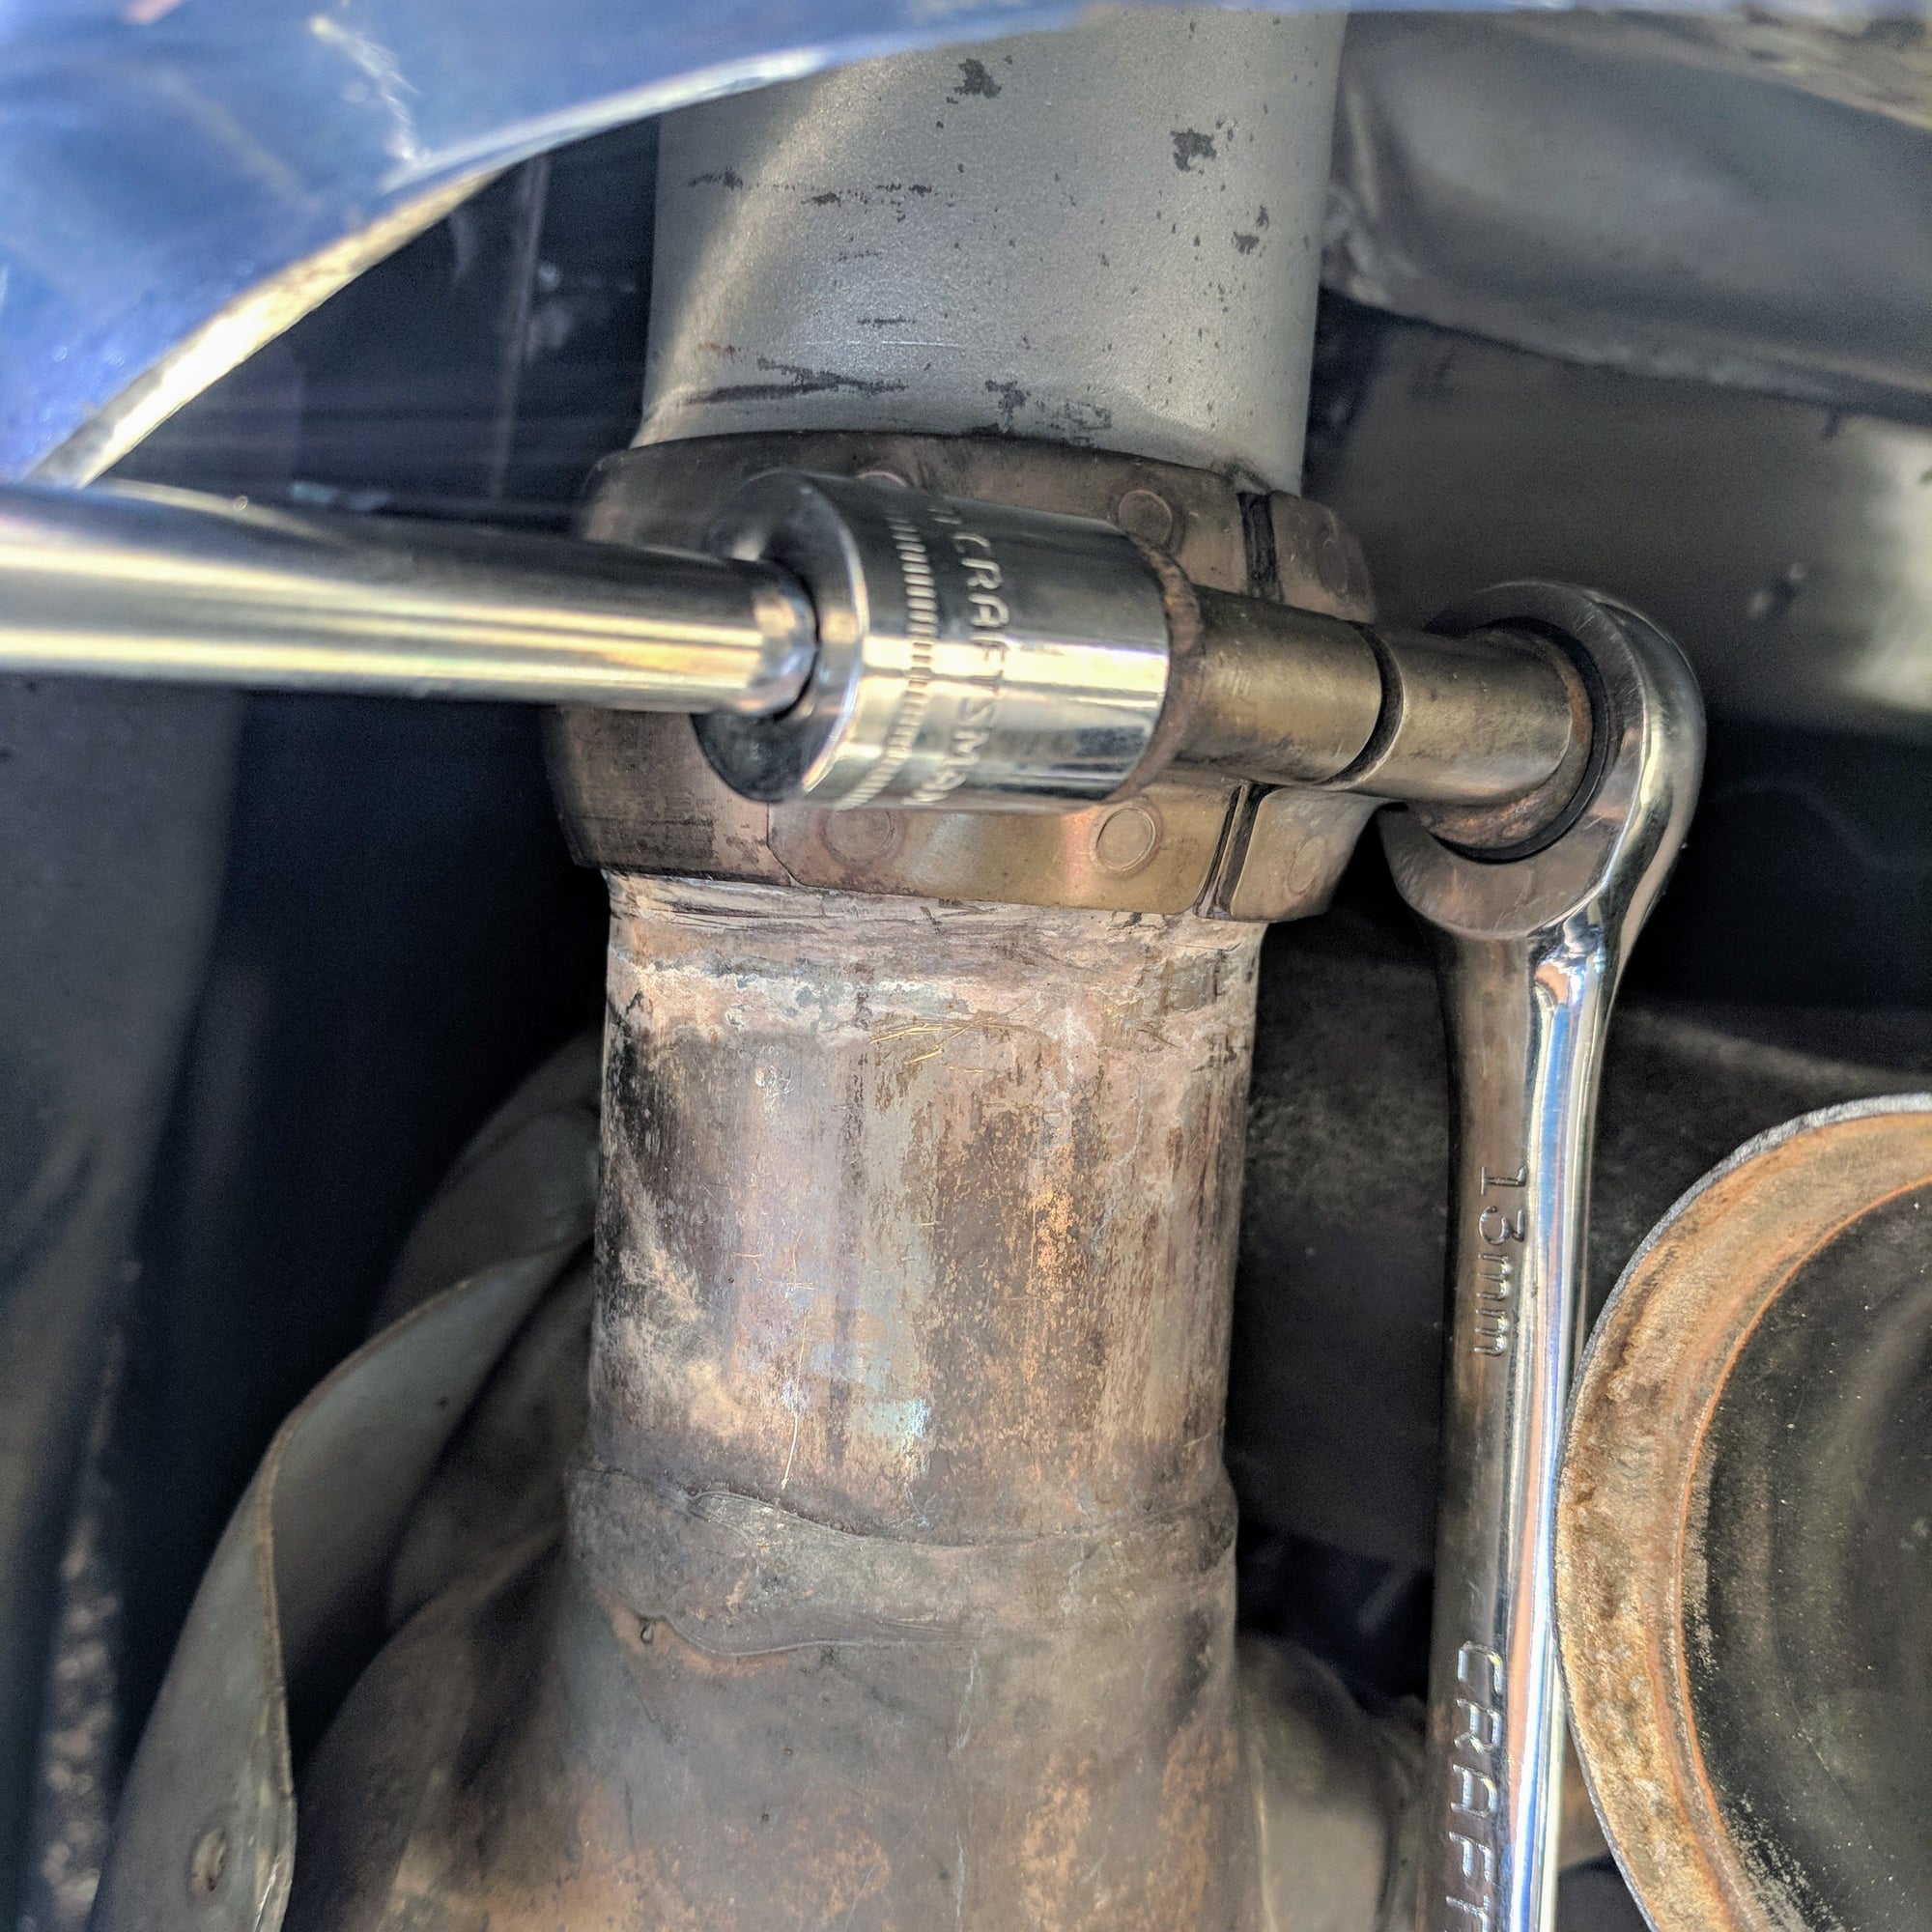
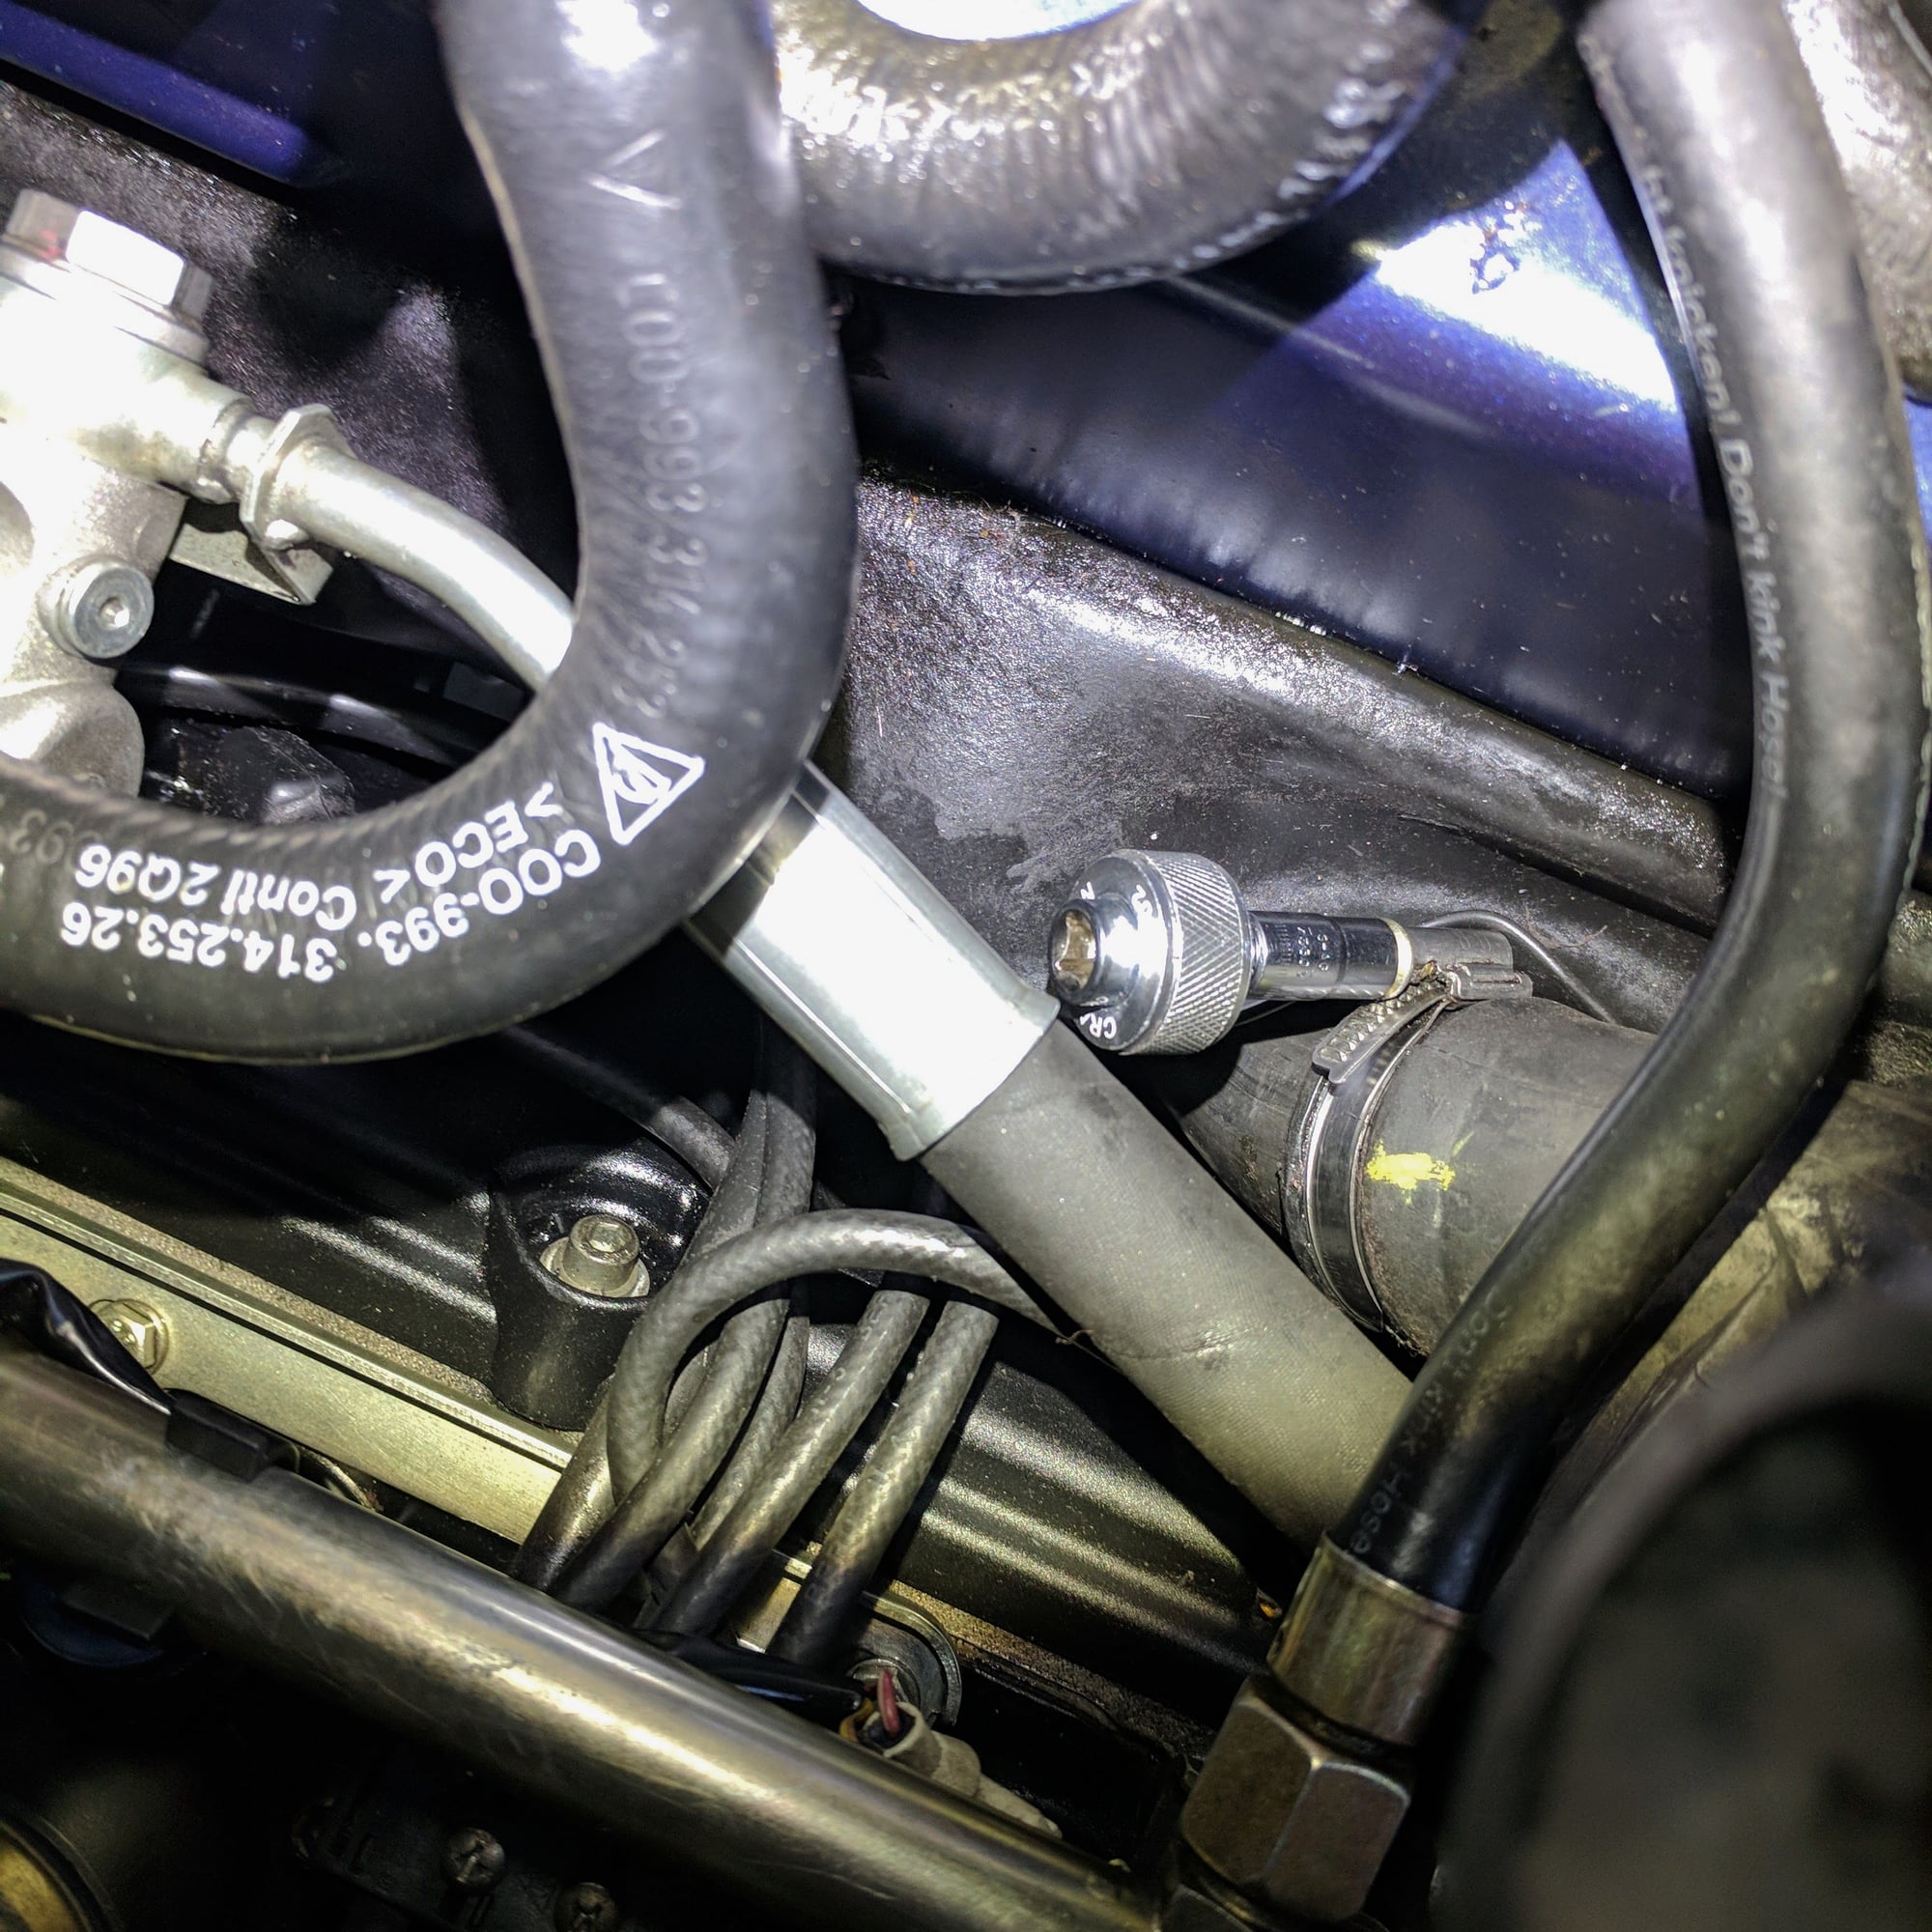
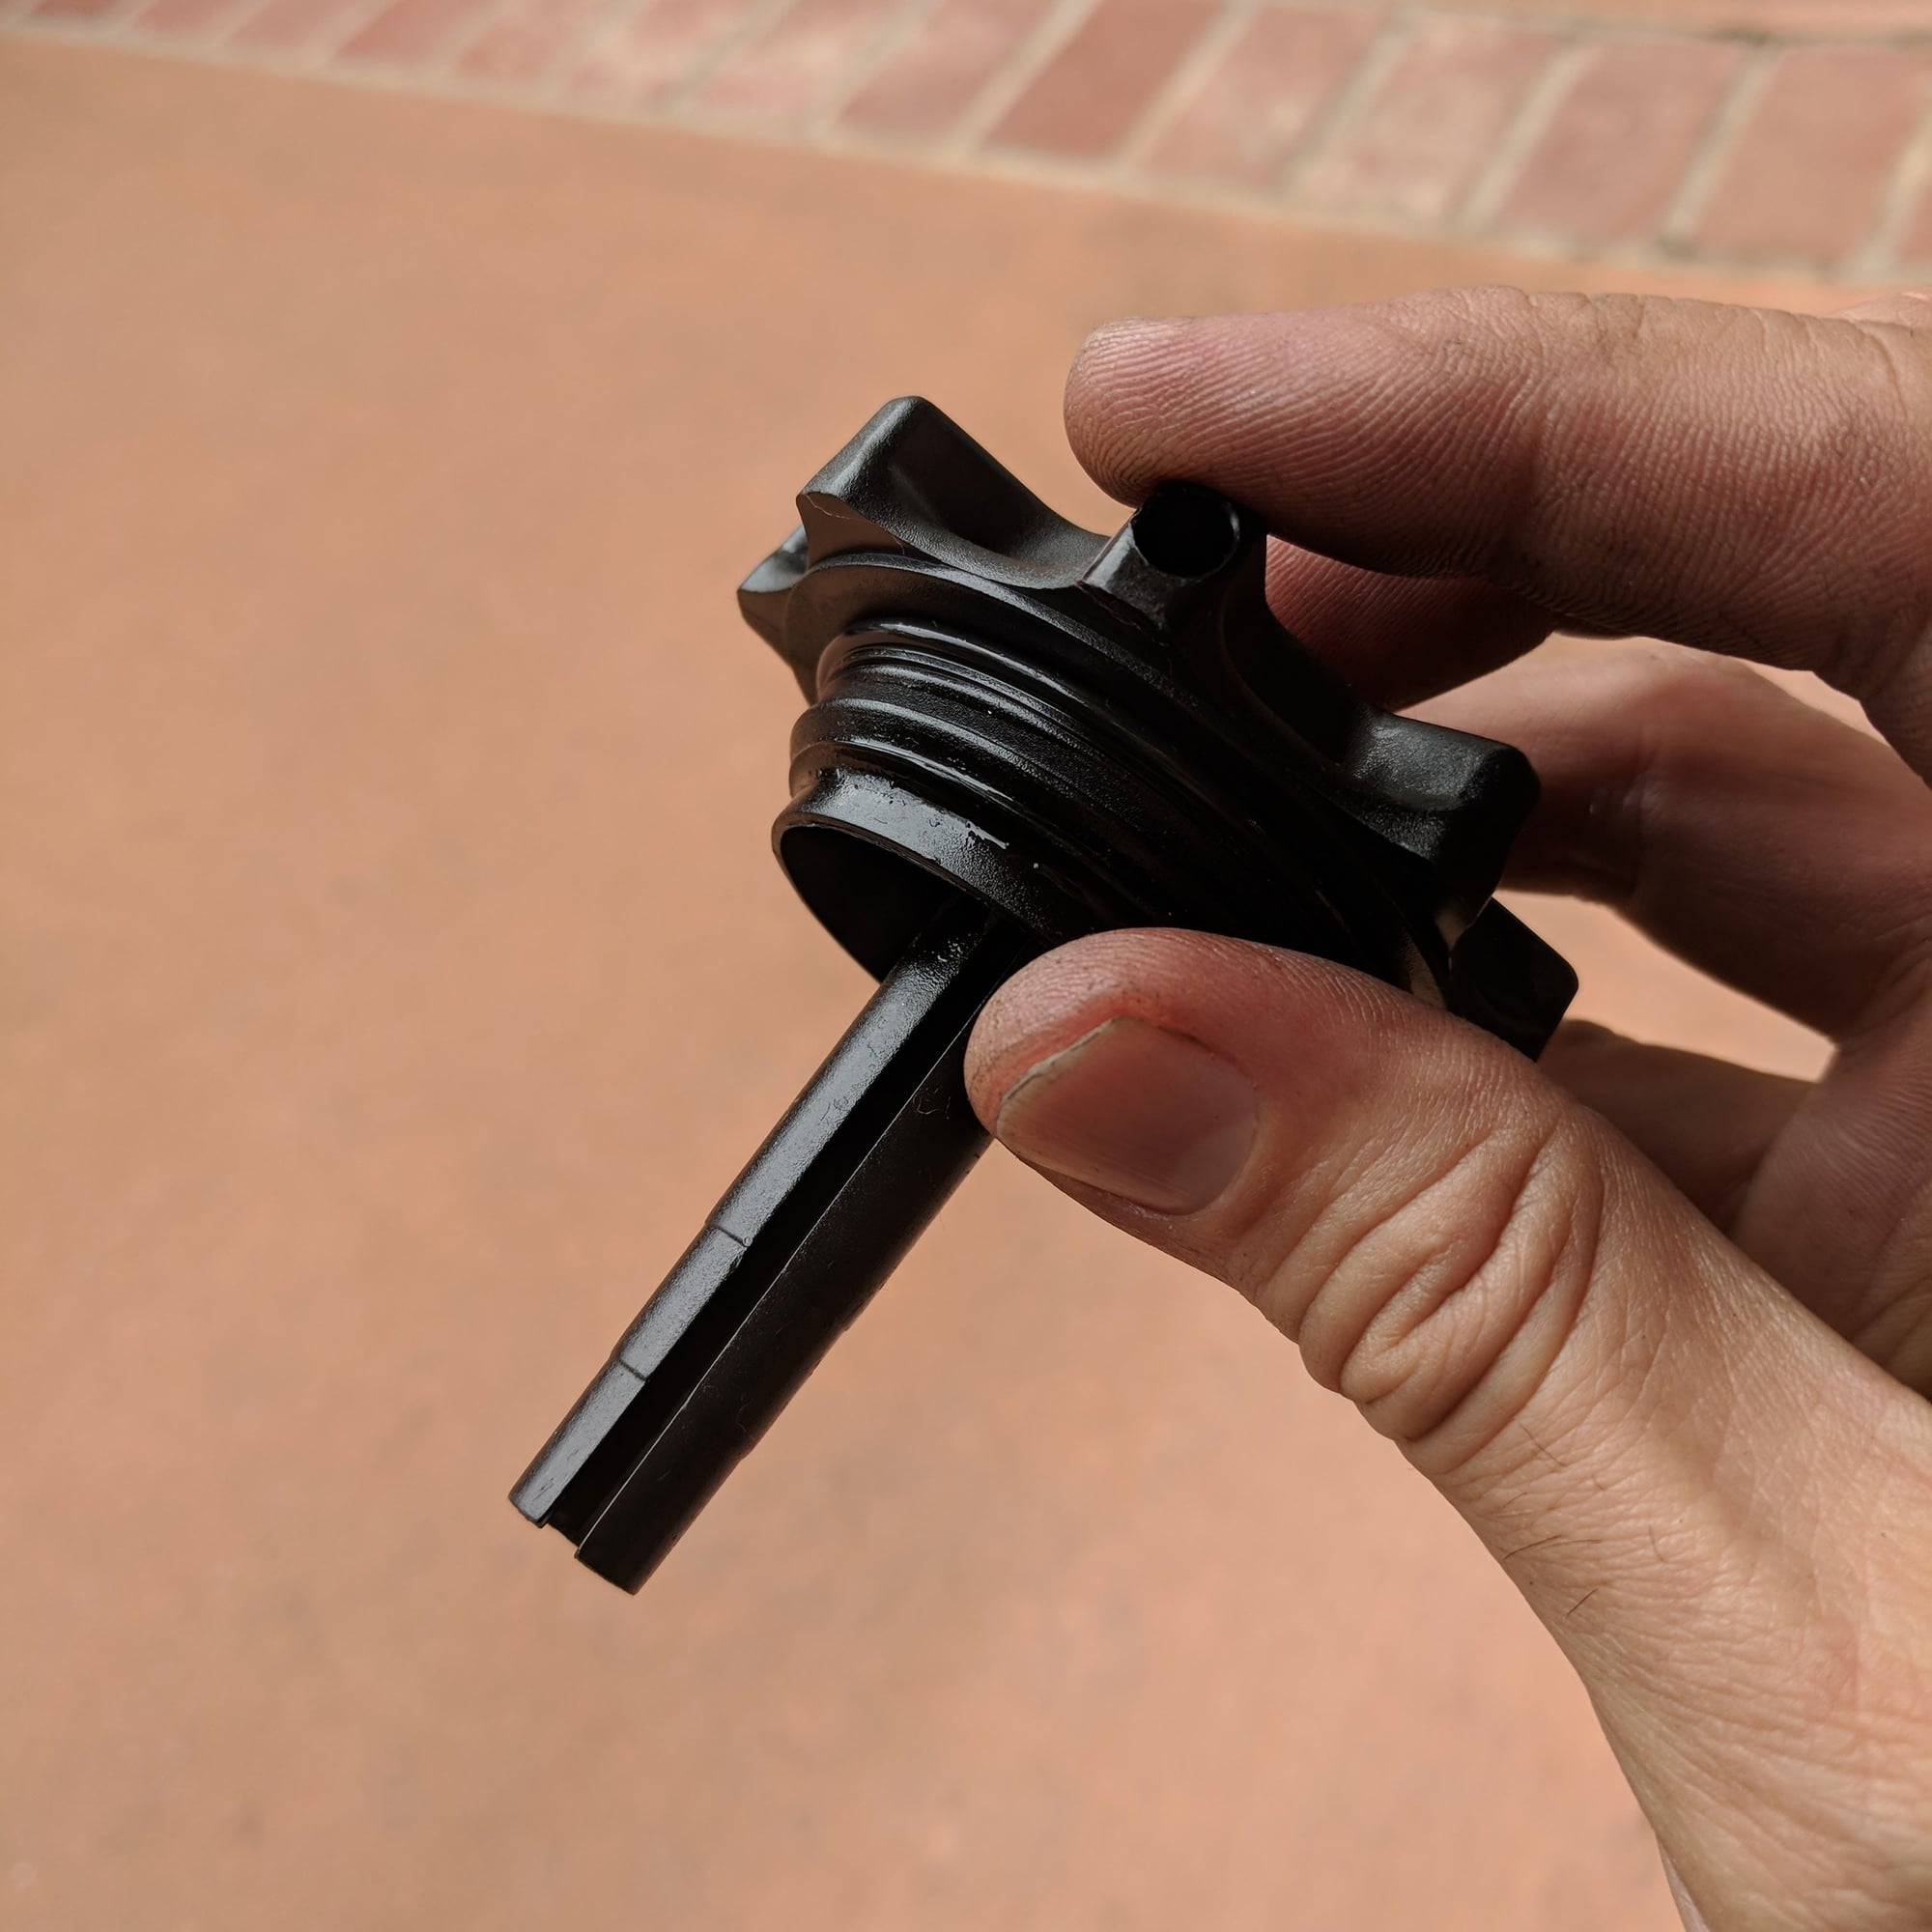
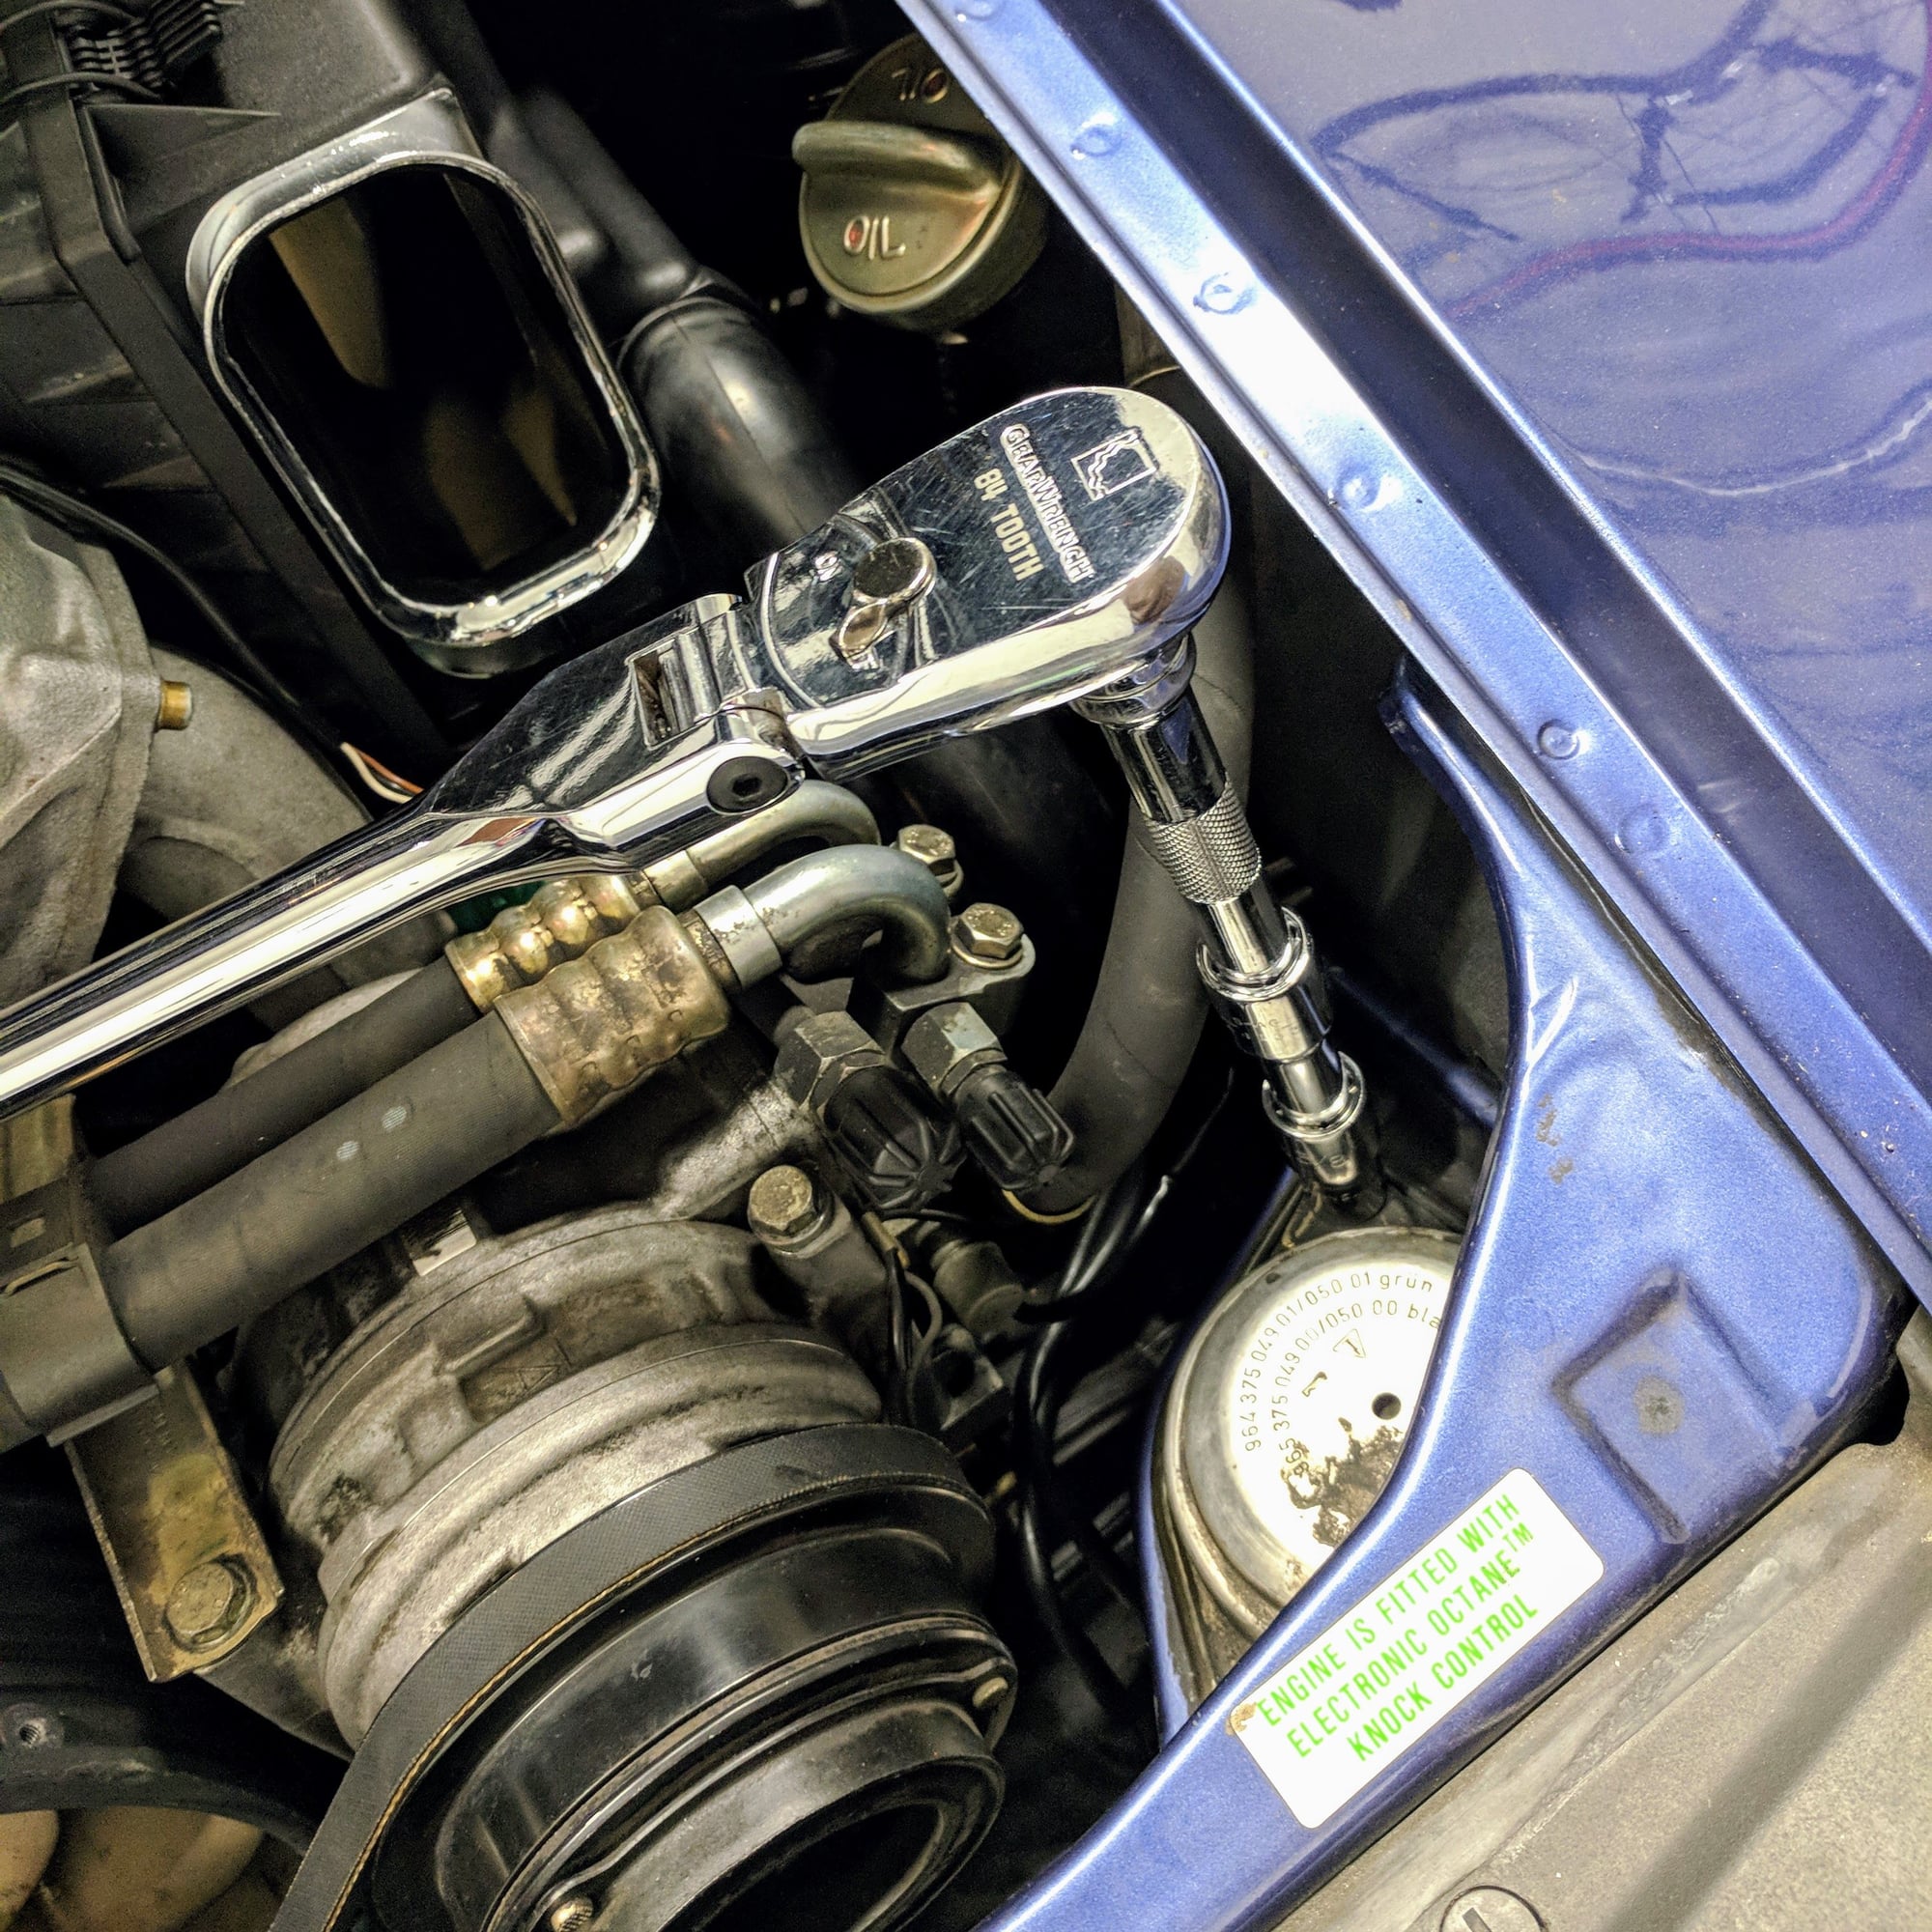
3. Once the PS belt cover is out then there are three 6MM hex bolts you need to remove to loosen the PS pump from the housing. One of them is attached to the back of the pump and two are buried deep in the belt housing out of sight in the front of the pump. There is no need to remove the small hex bolts that secure the upper cog to the PS pump as the Bentley manual suggests below.
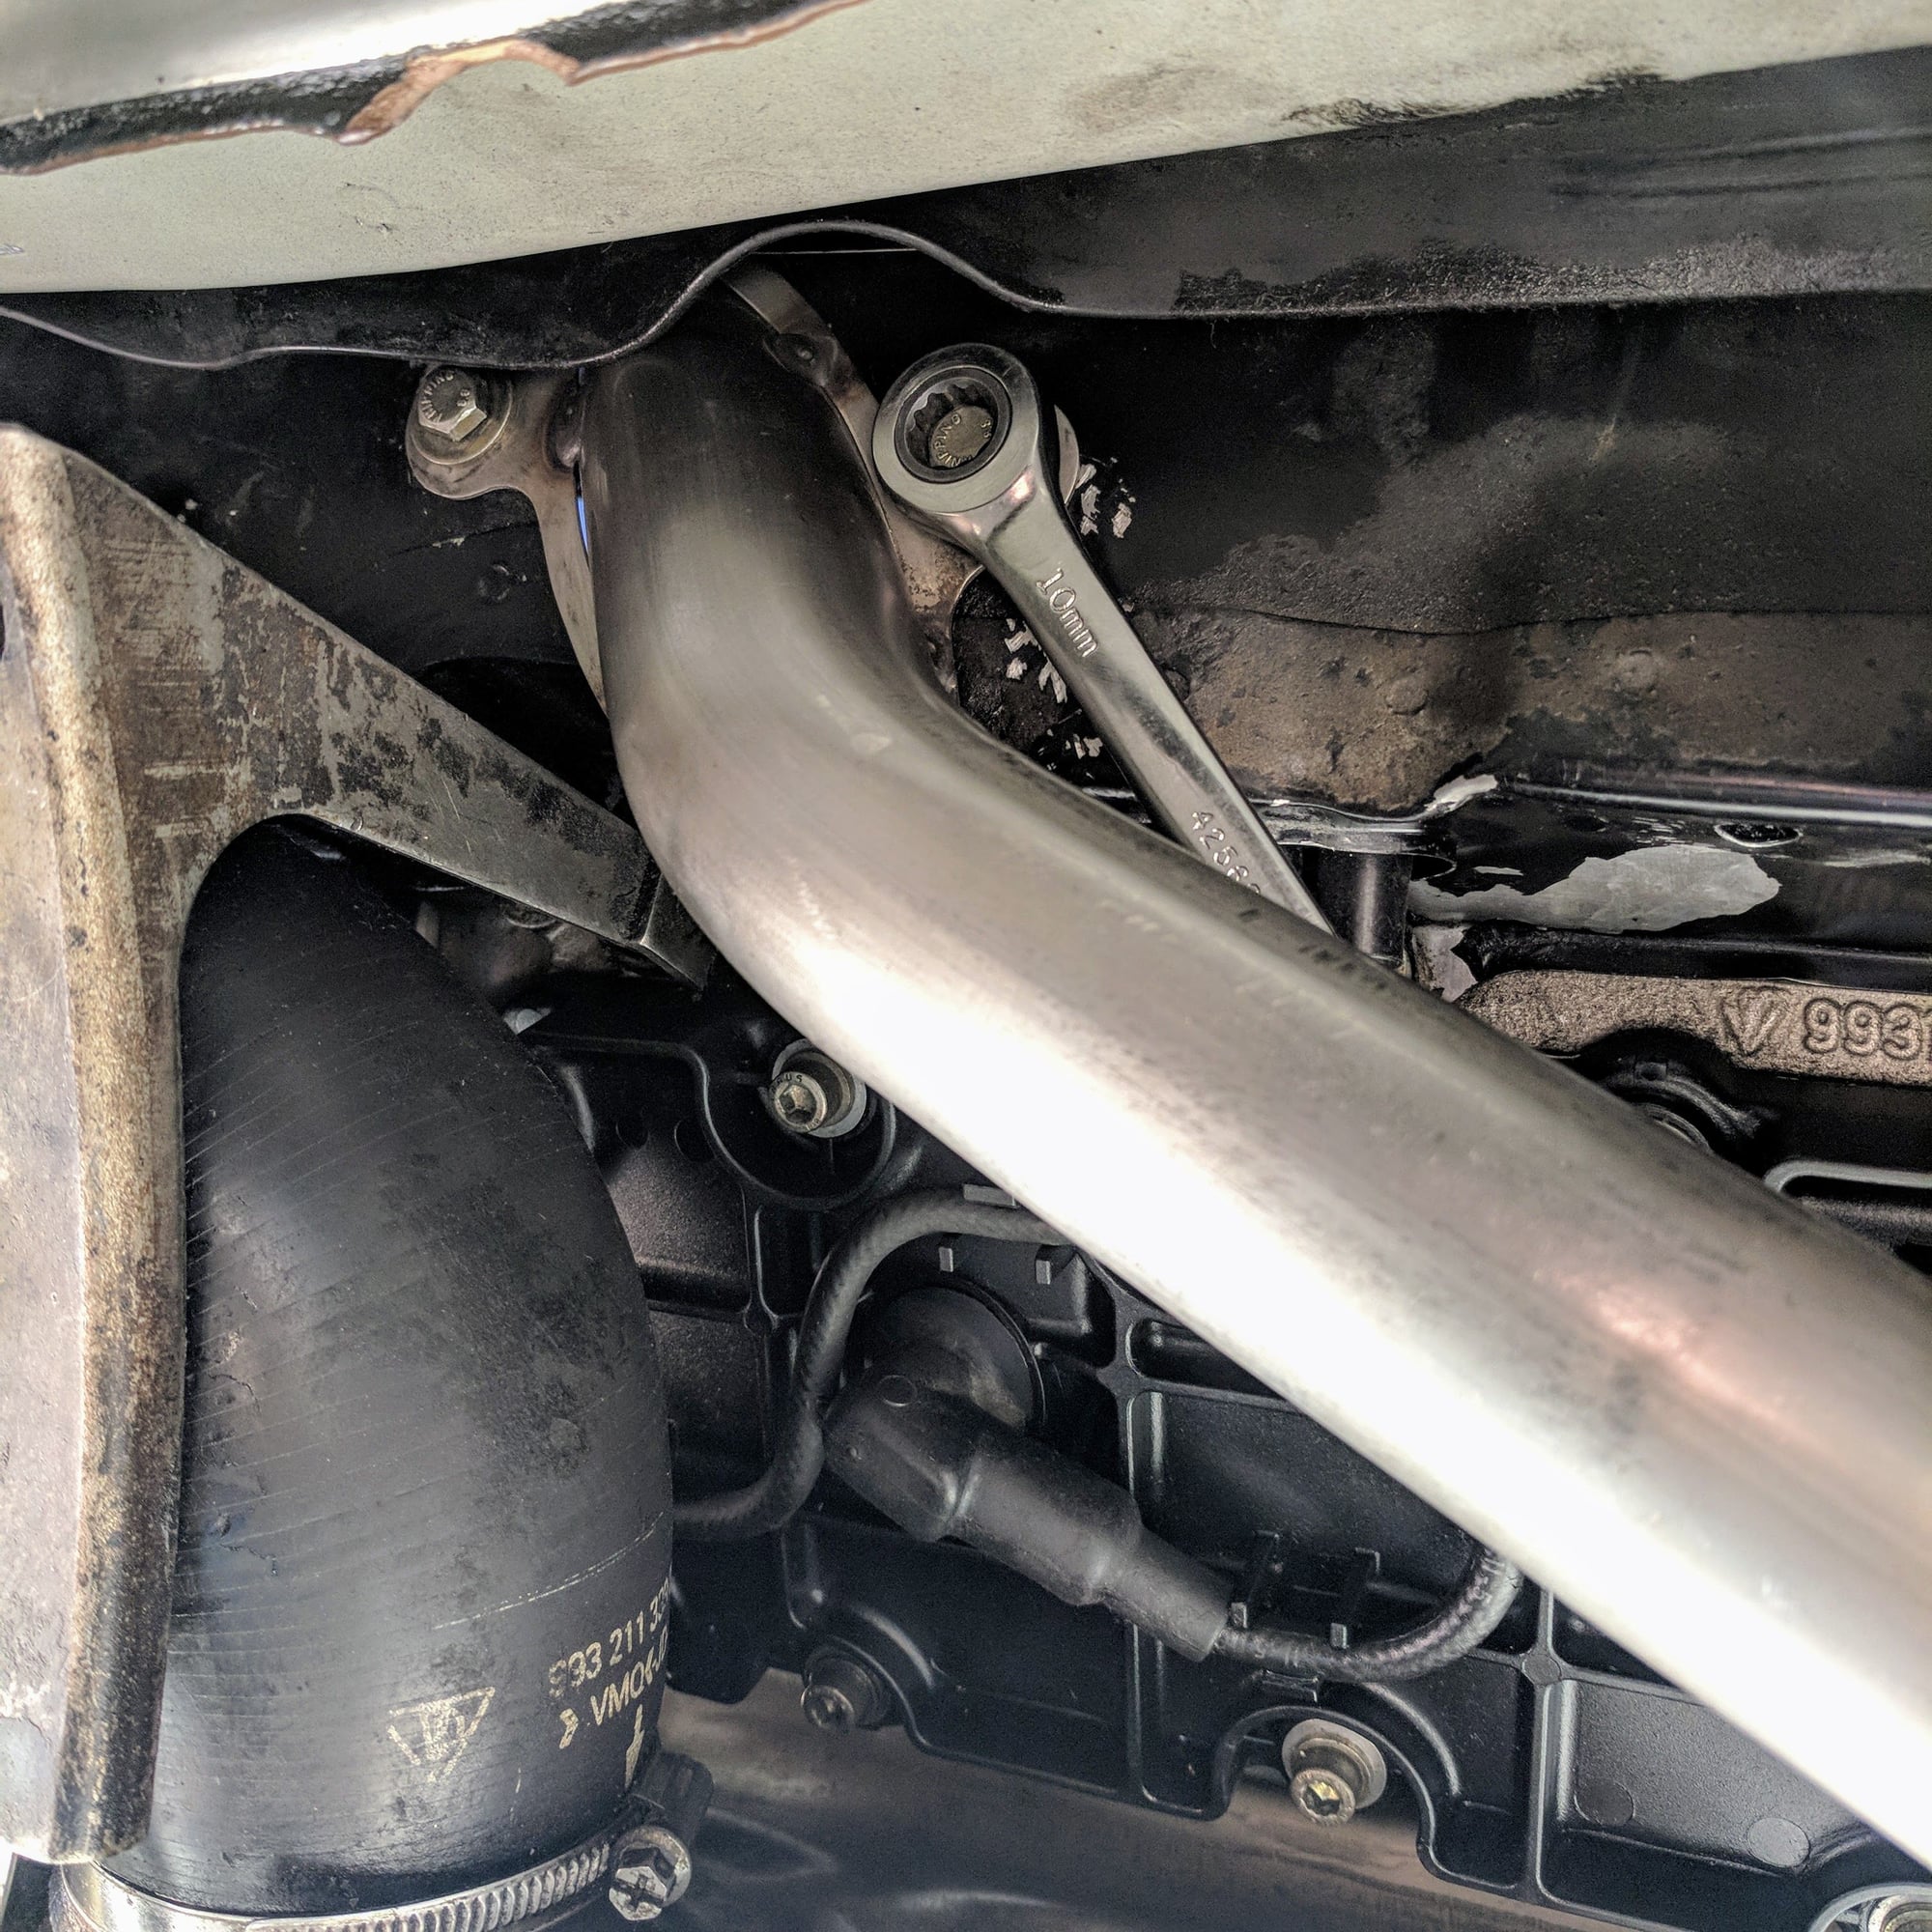
This is where you will need the right tool to get the job done and I think where most fail to get the job done. I used this 1/4" drive Craftsman ratchet from my wrench set and a 6MM hex head socket from a set I ordered from Amazon
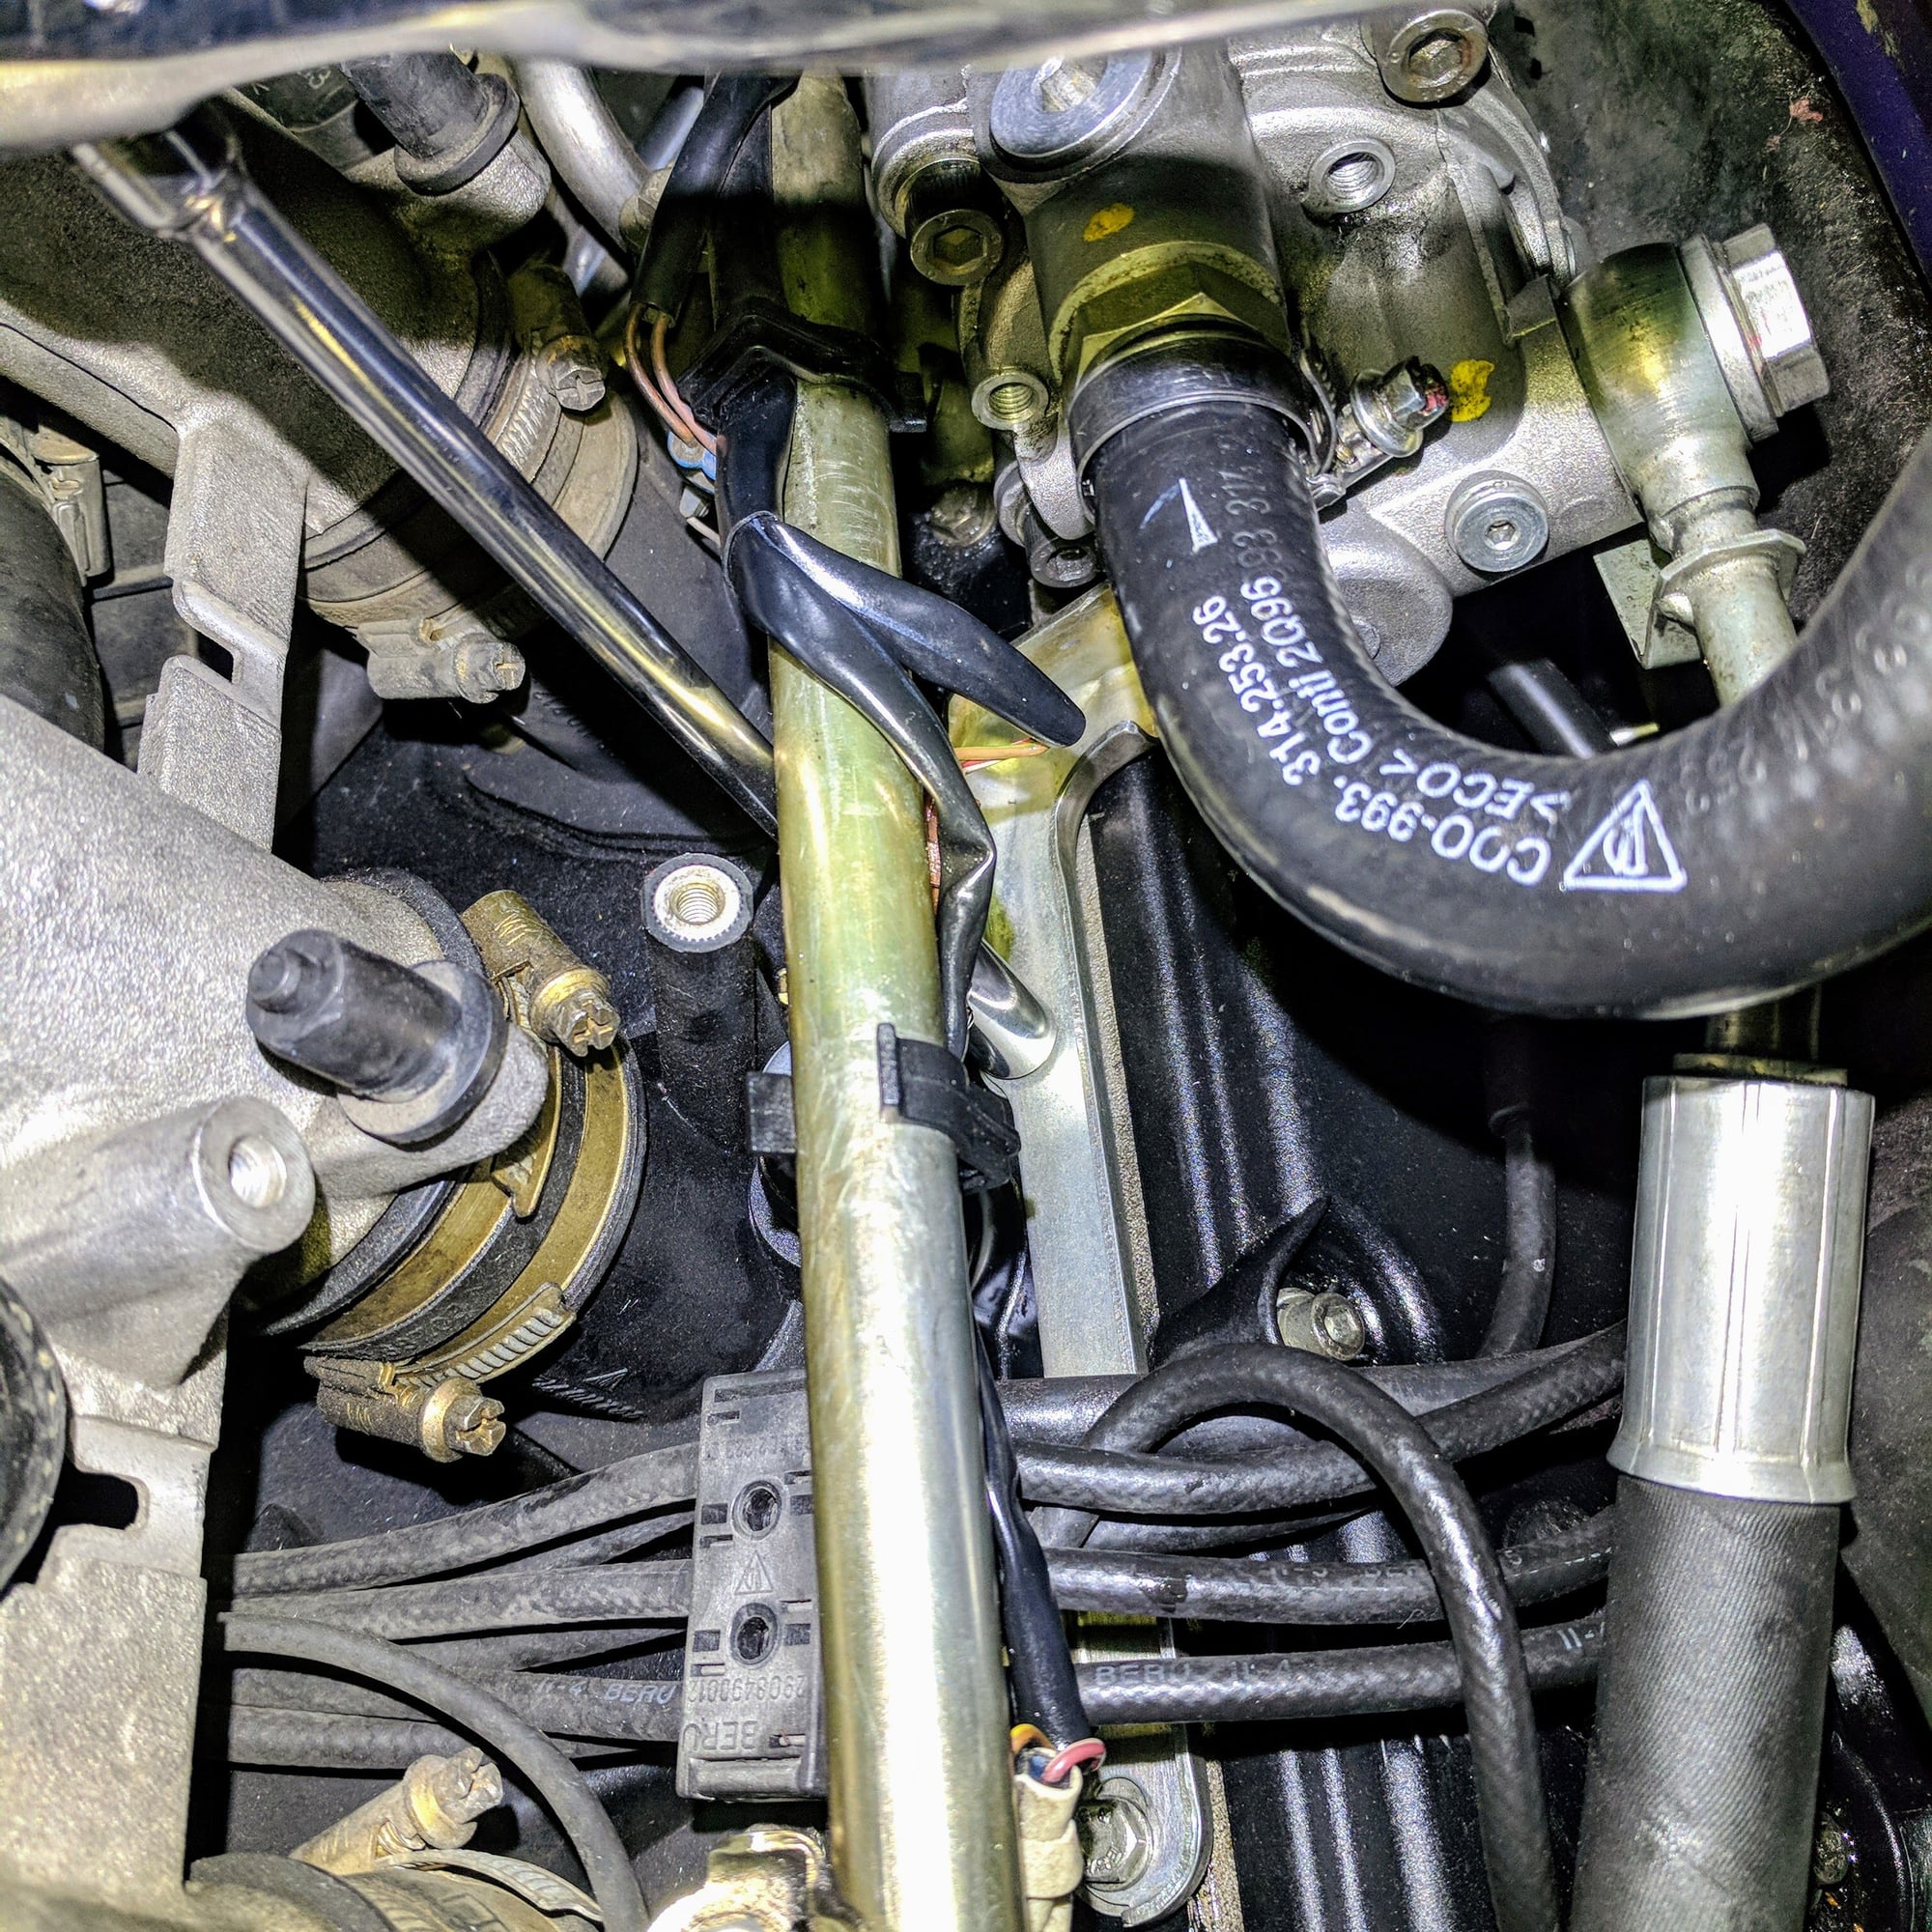
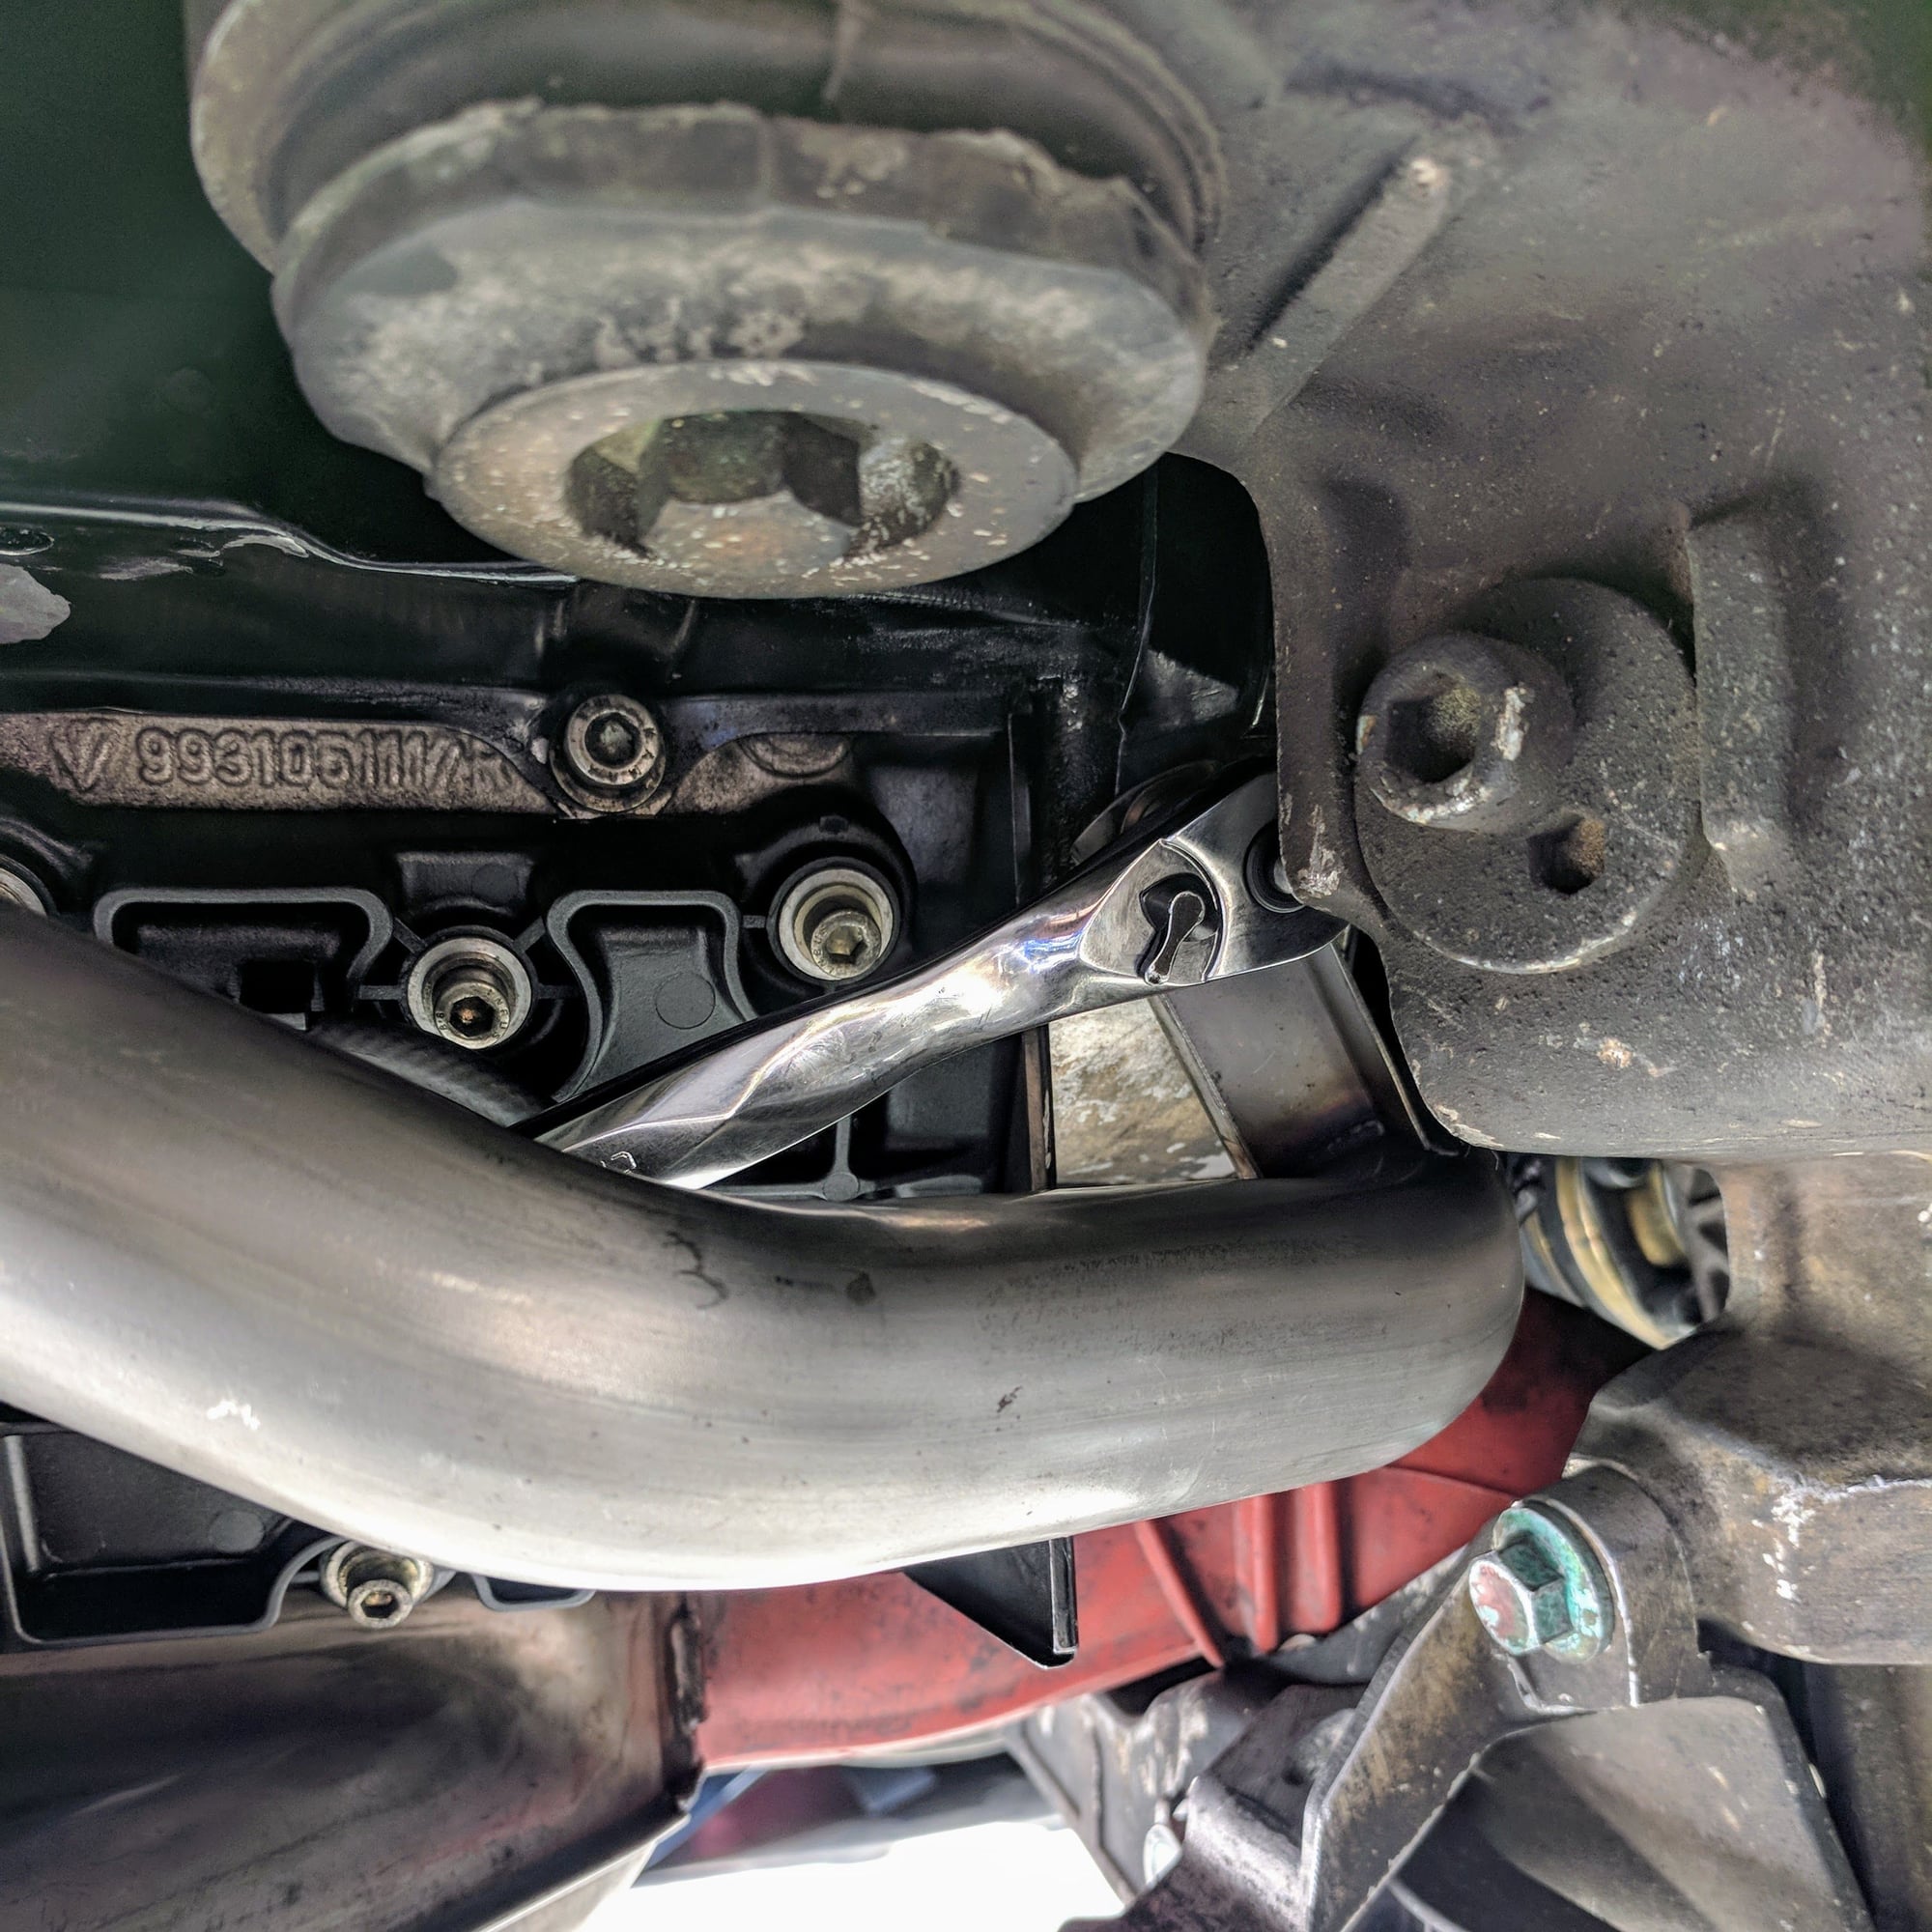
Start with removing the rear brace from the pump. To do that you need to move the attachment that secures the spark plug wires
The remove the bolts that attach the brace to the engine. There are two of them.
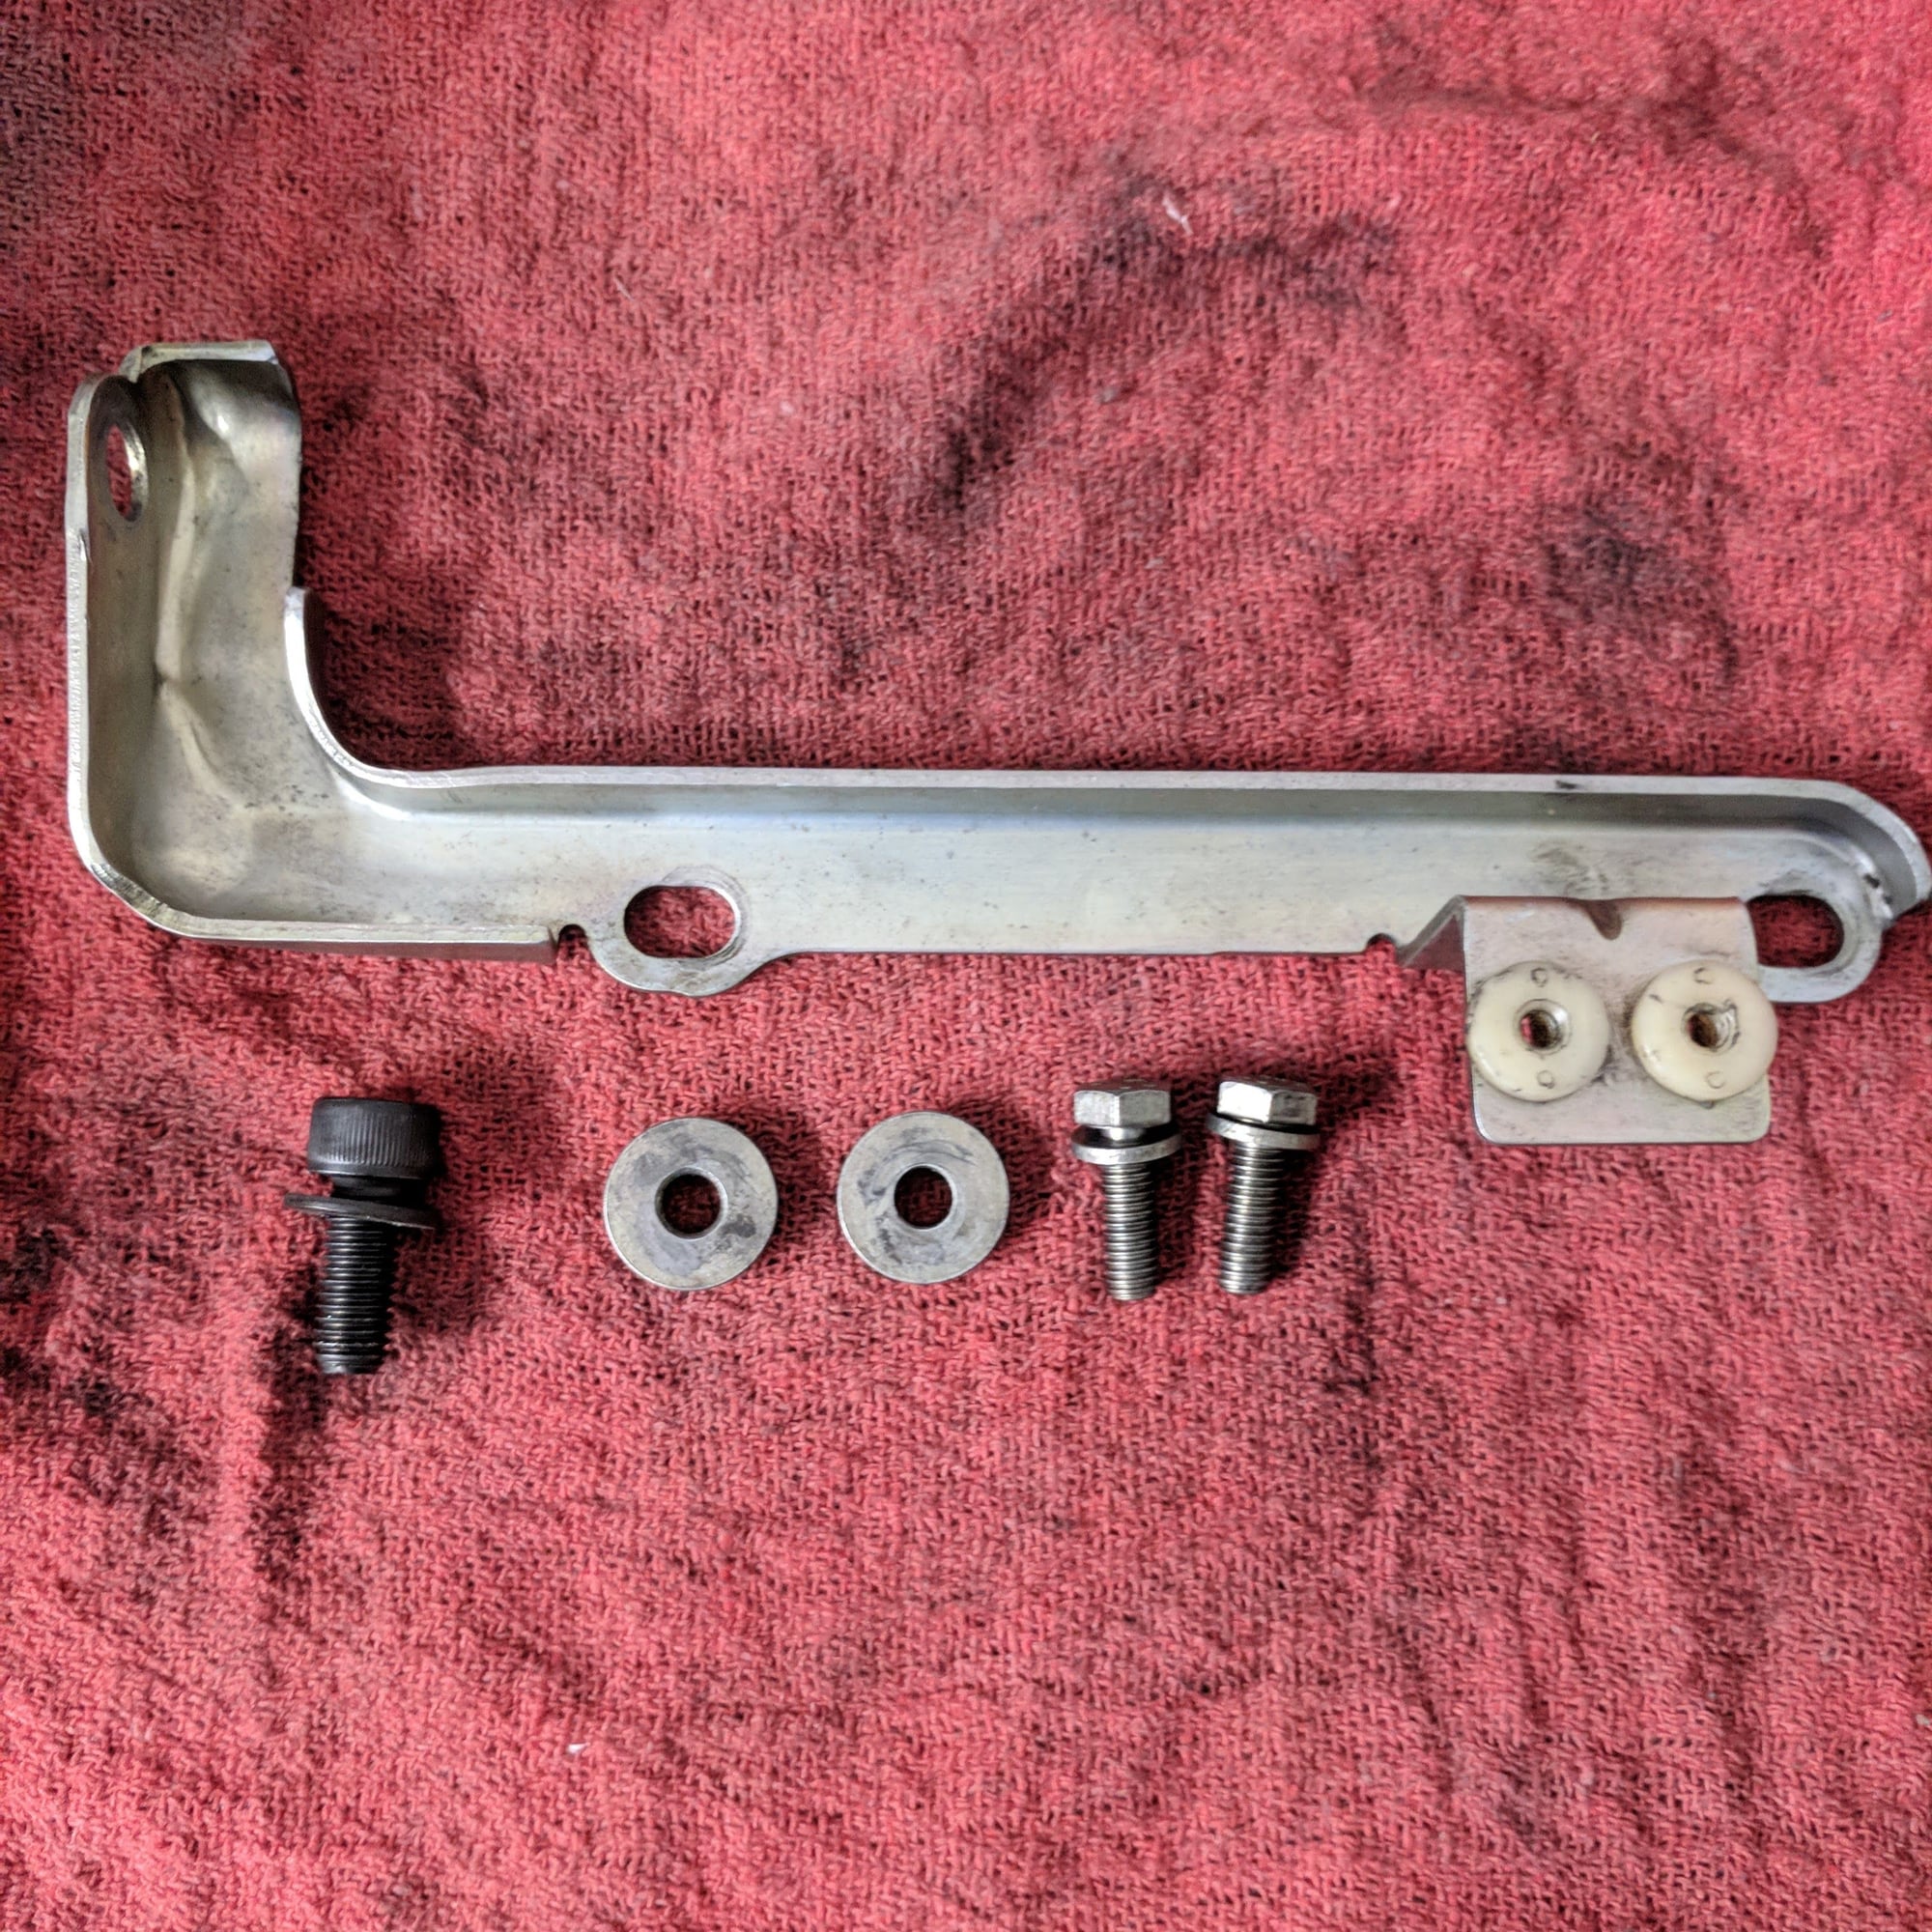
Here is the brace removed from the engine bay.
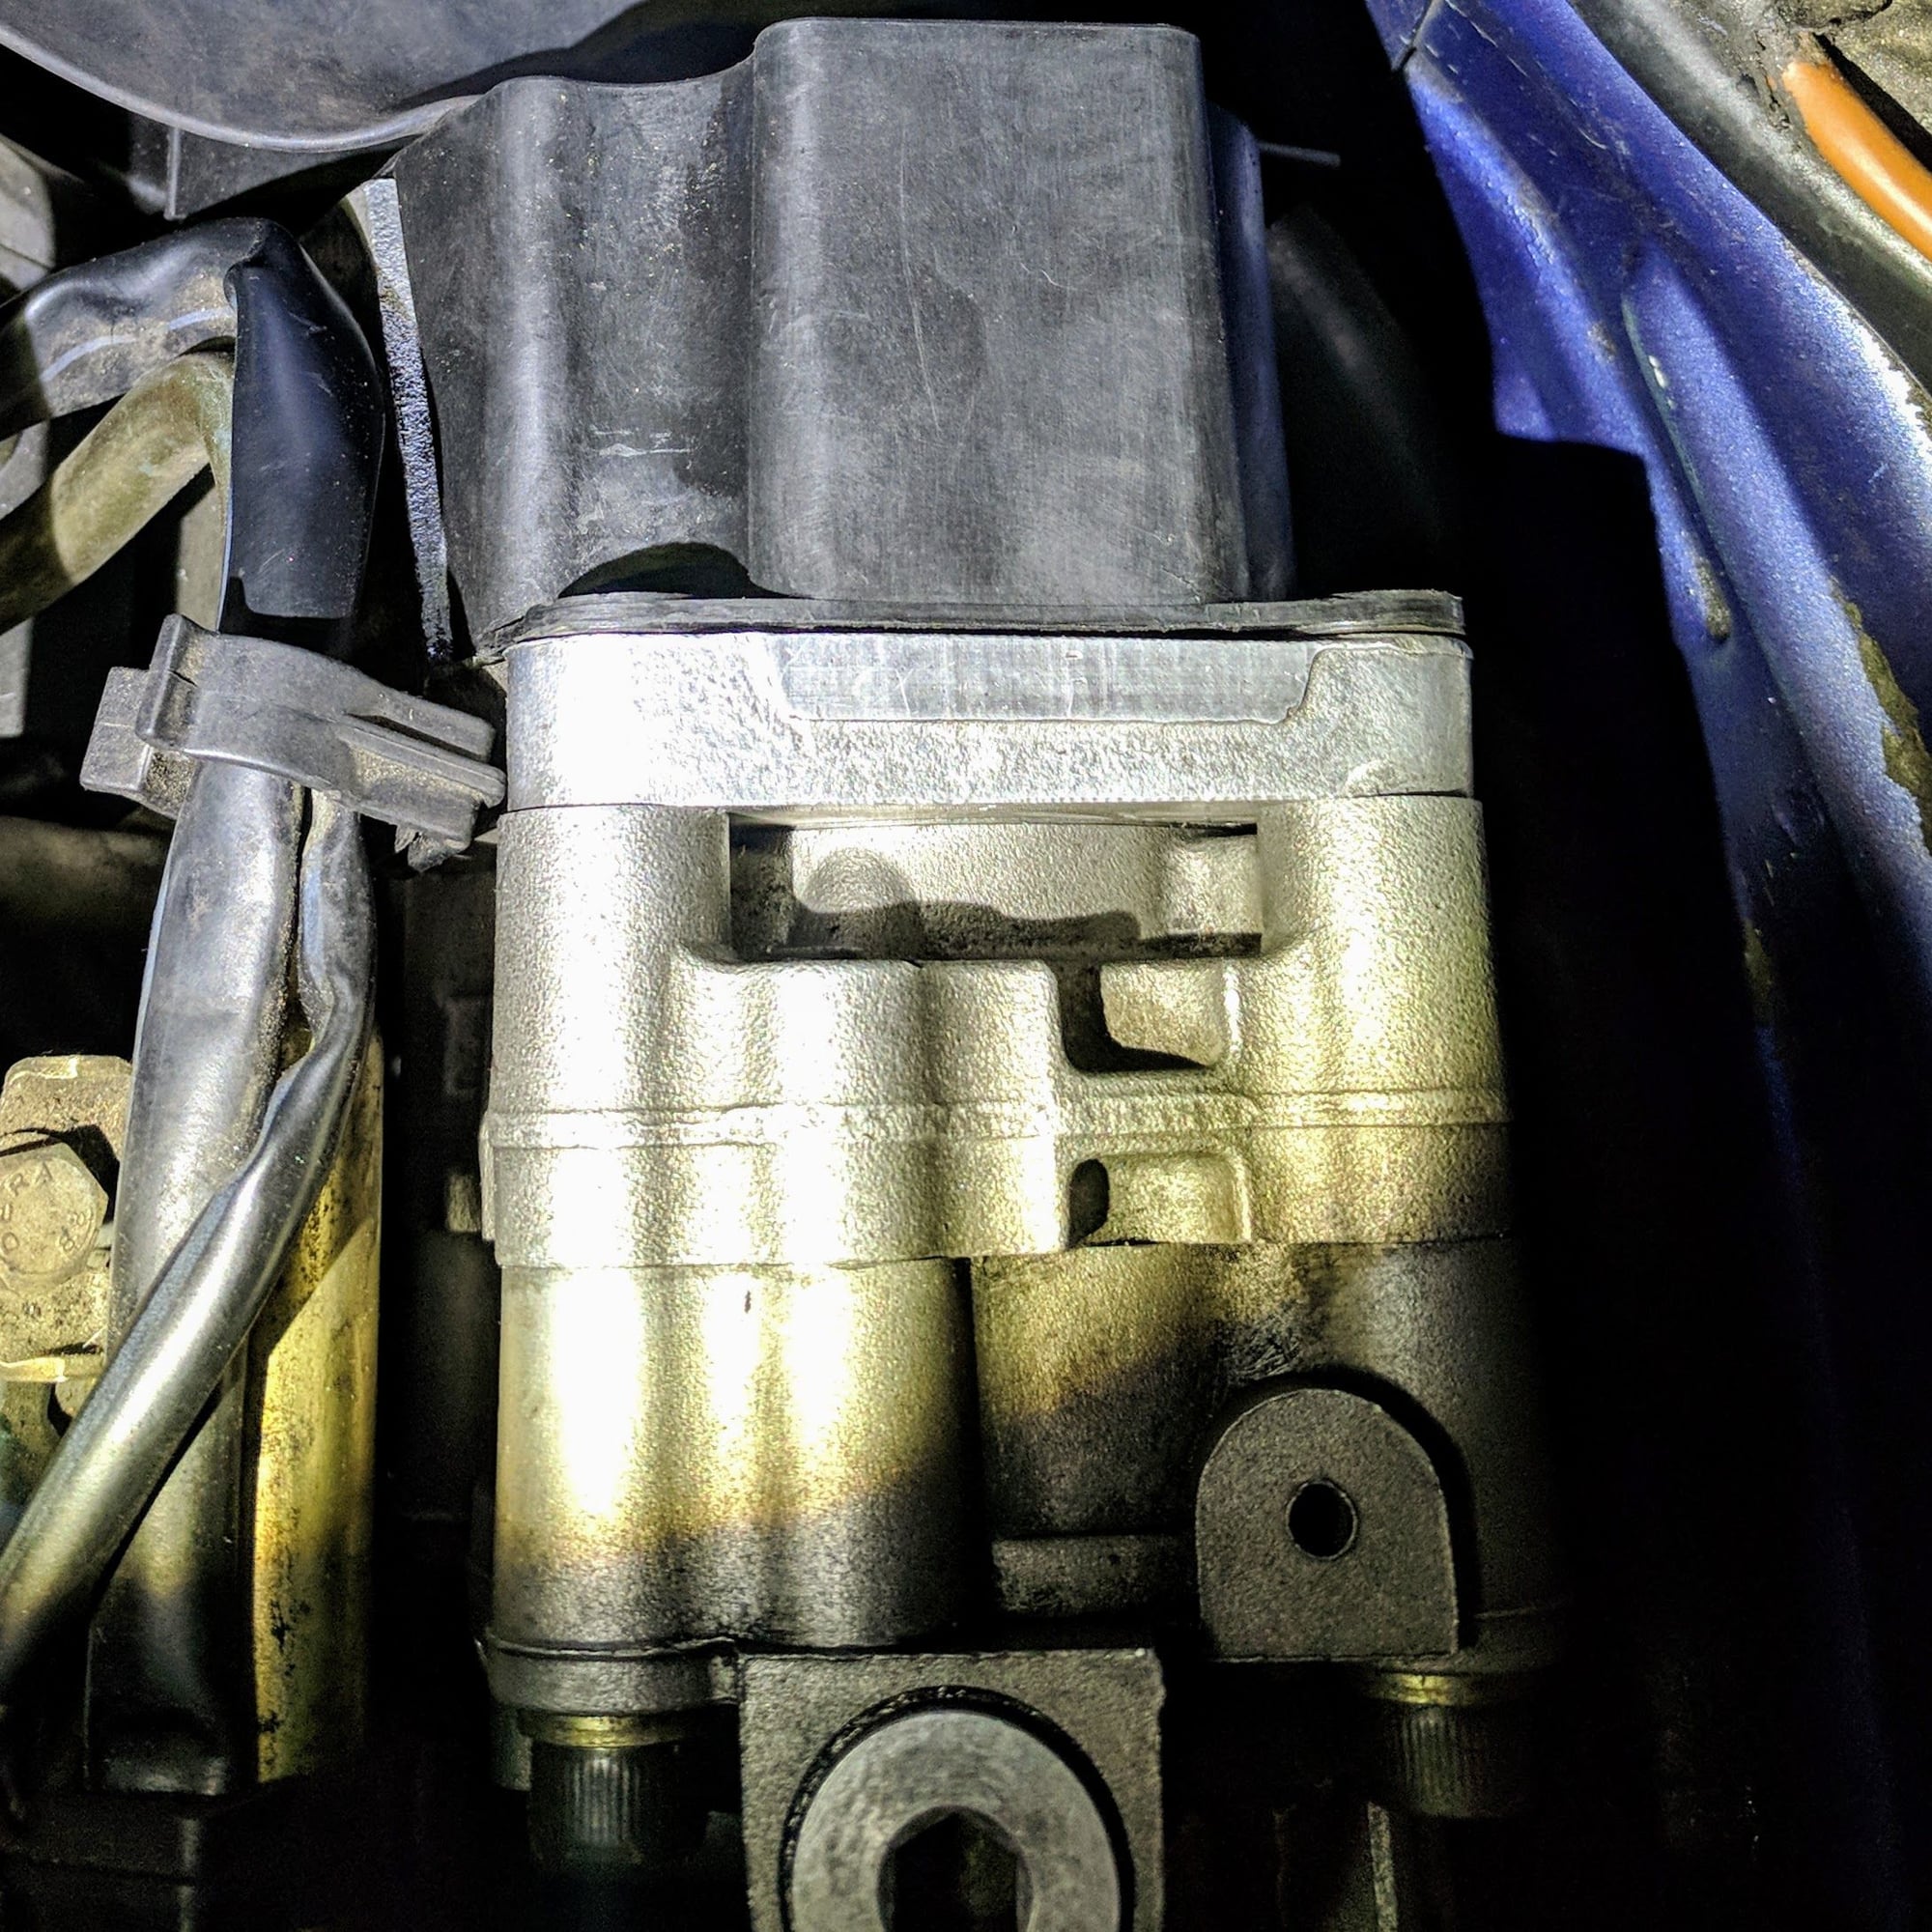
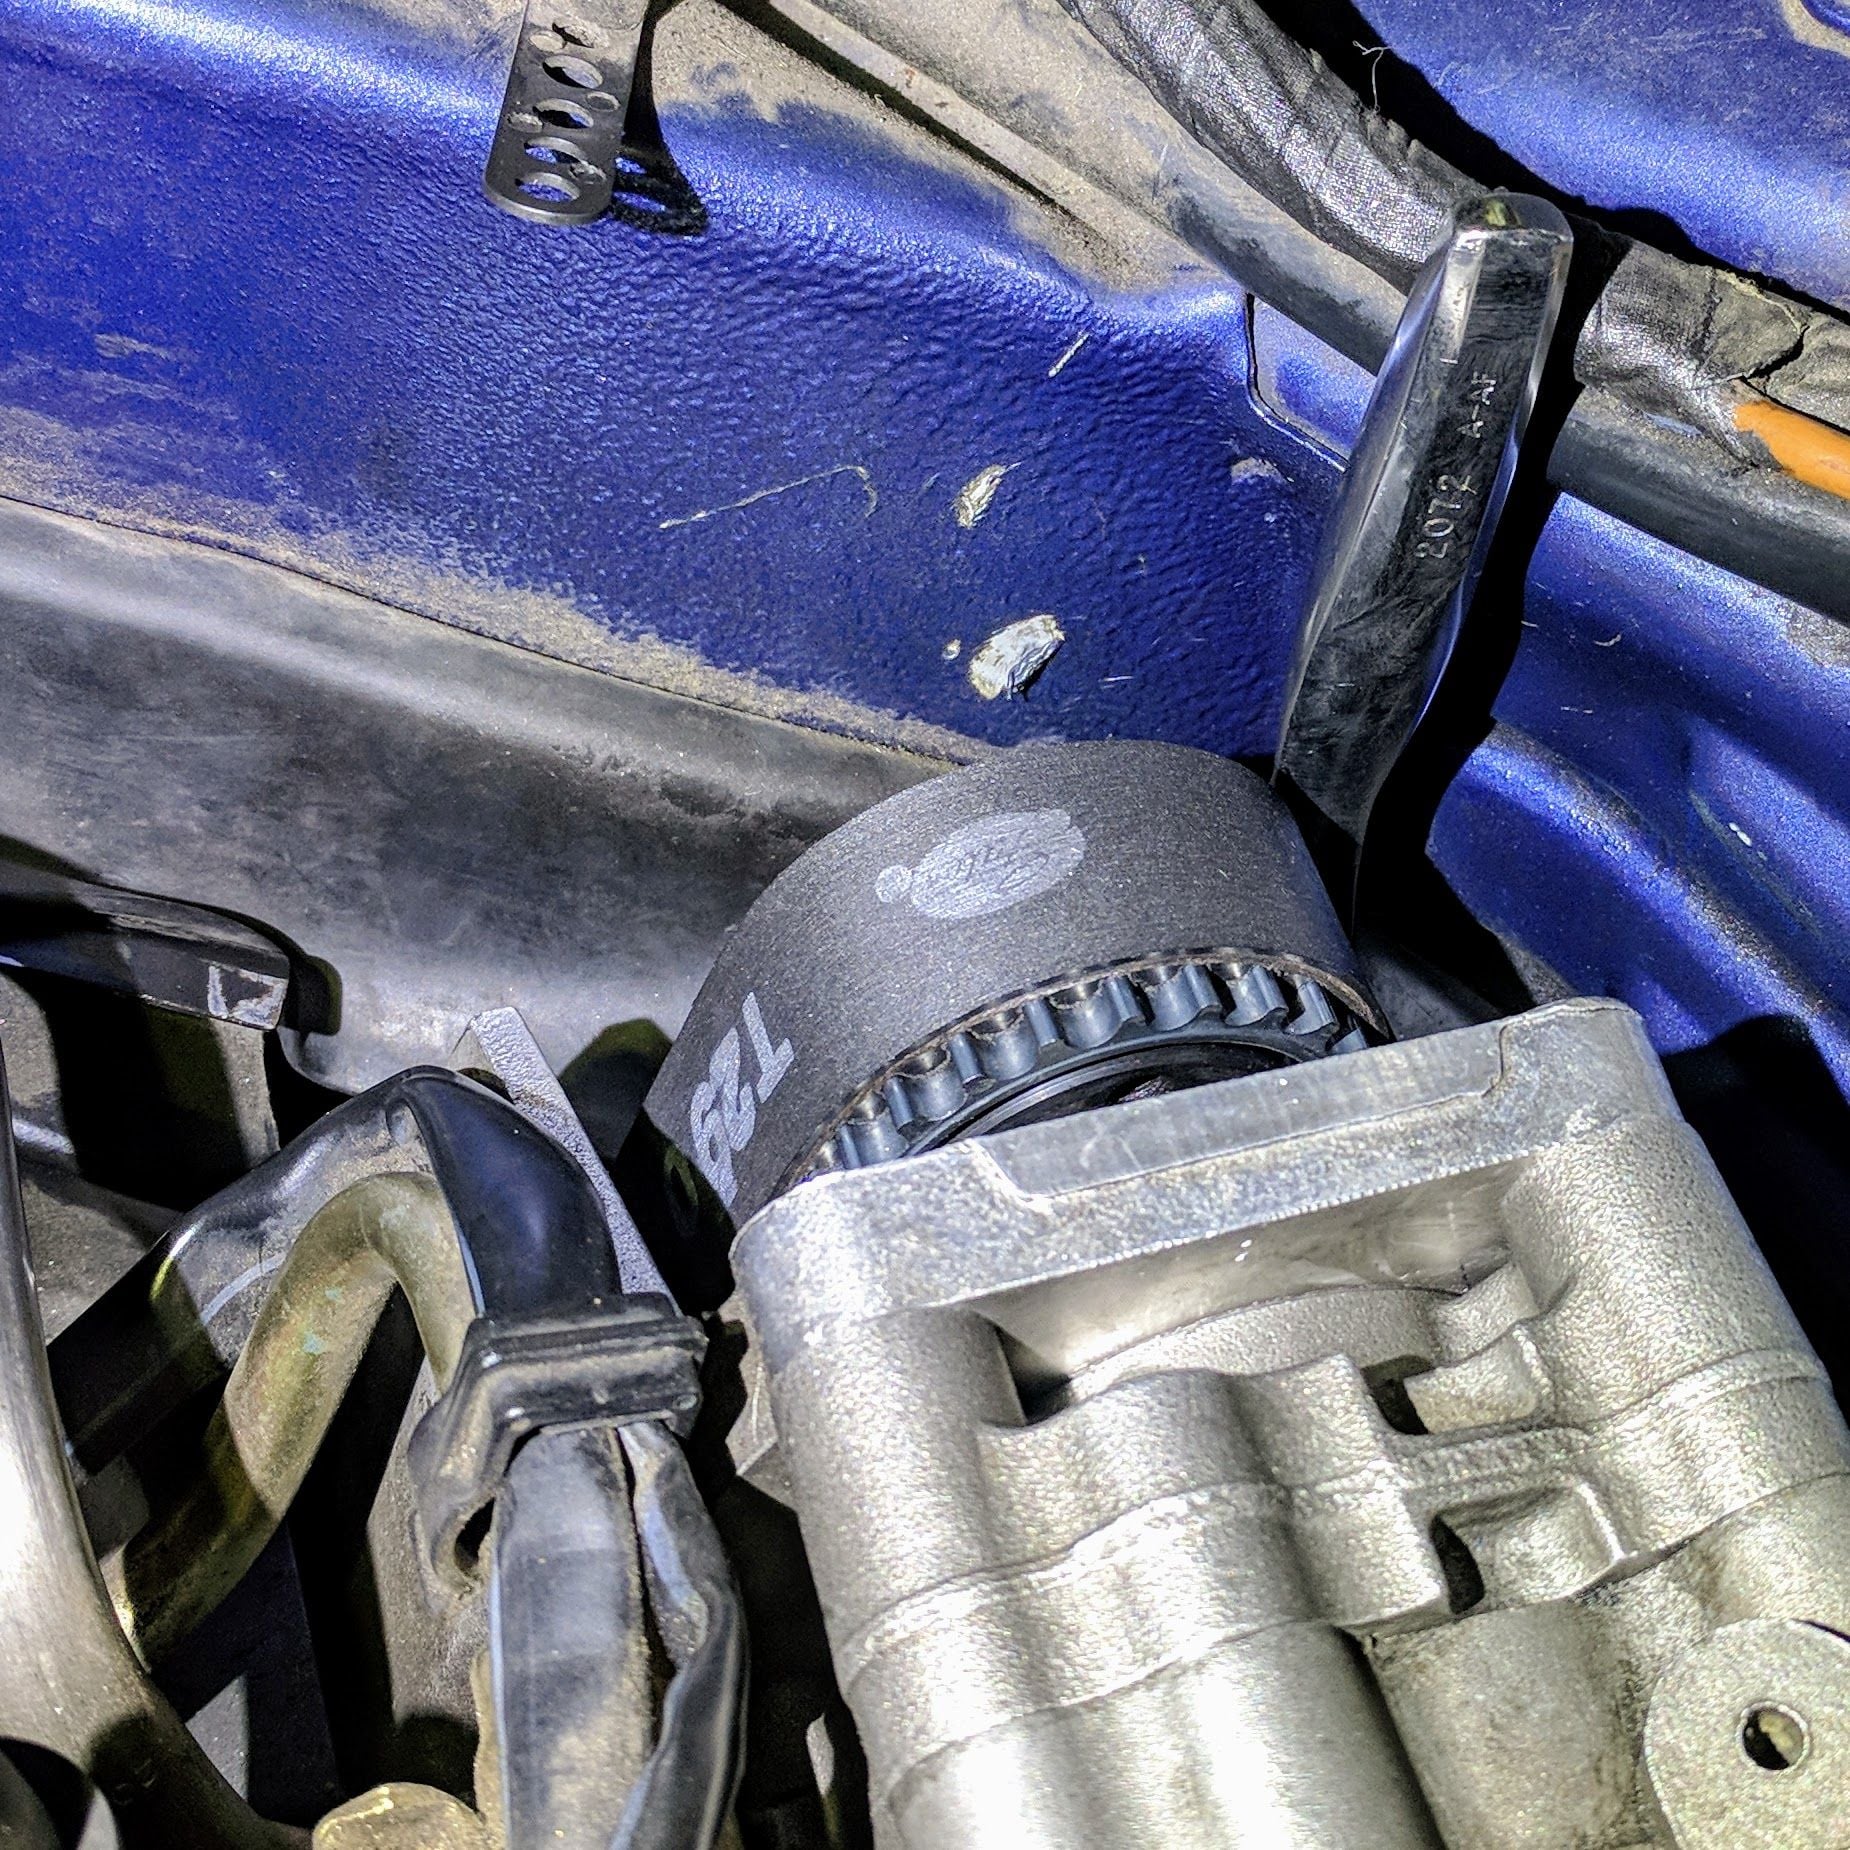
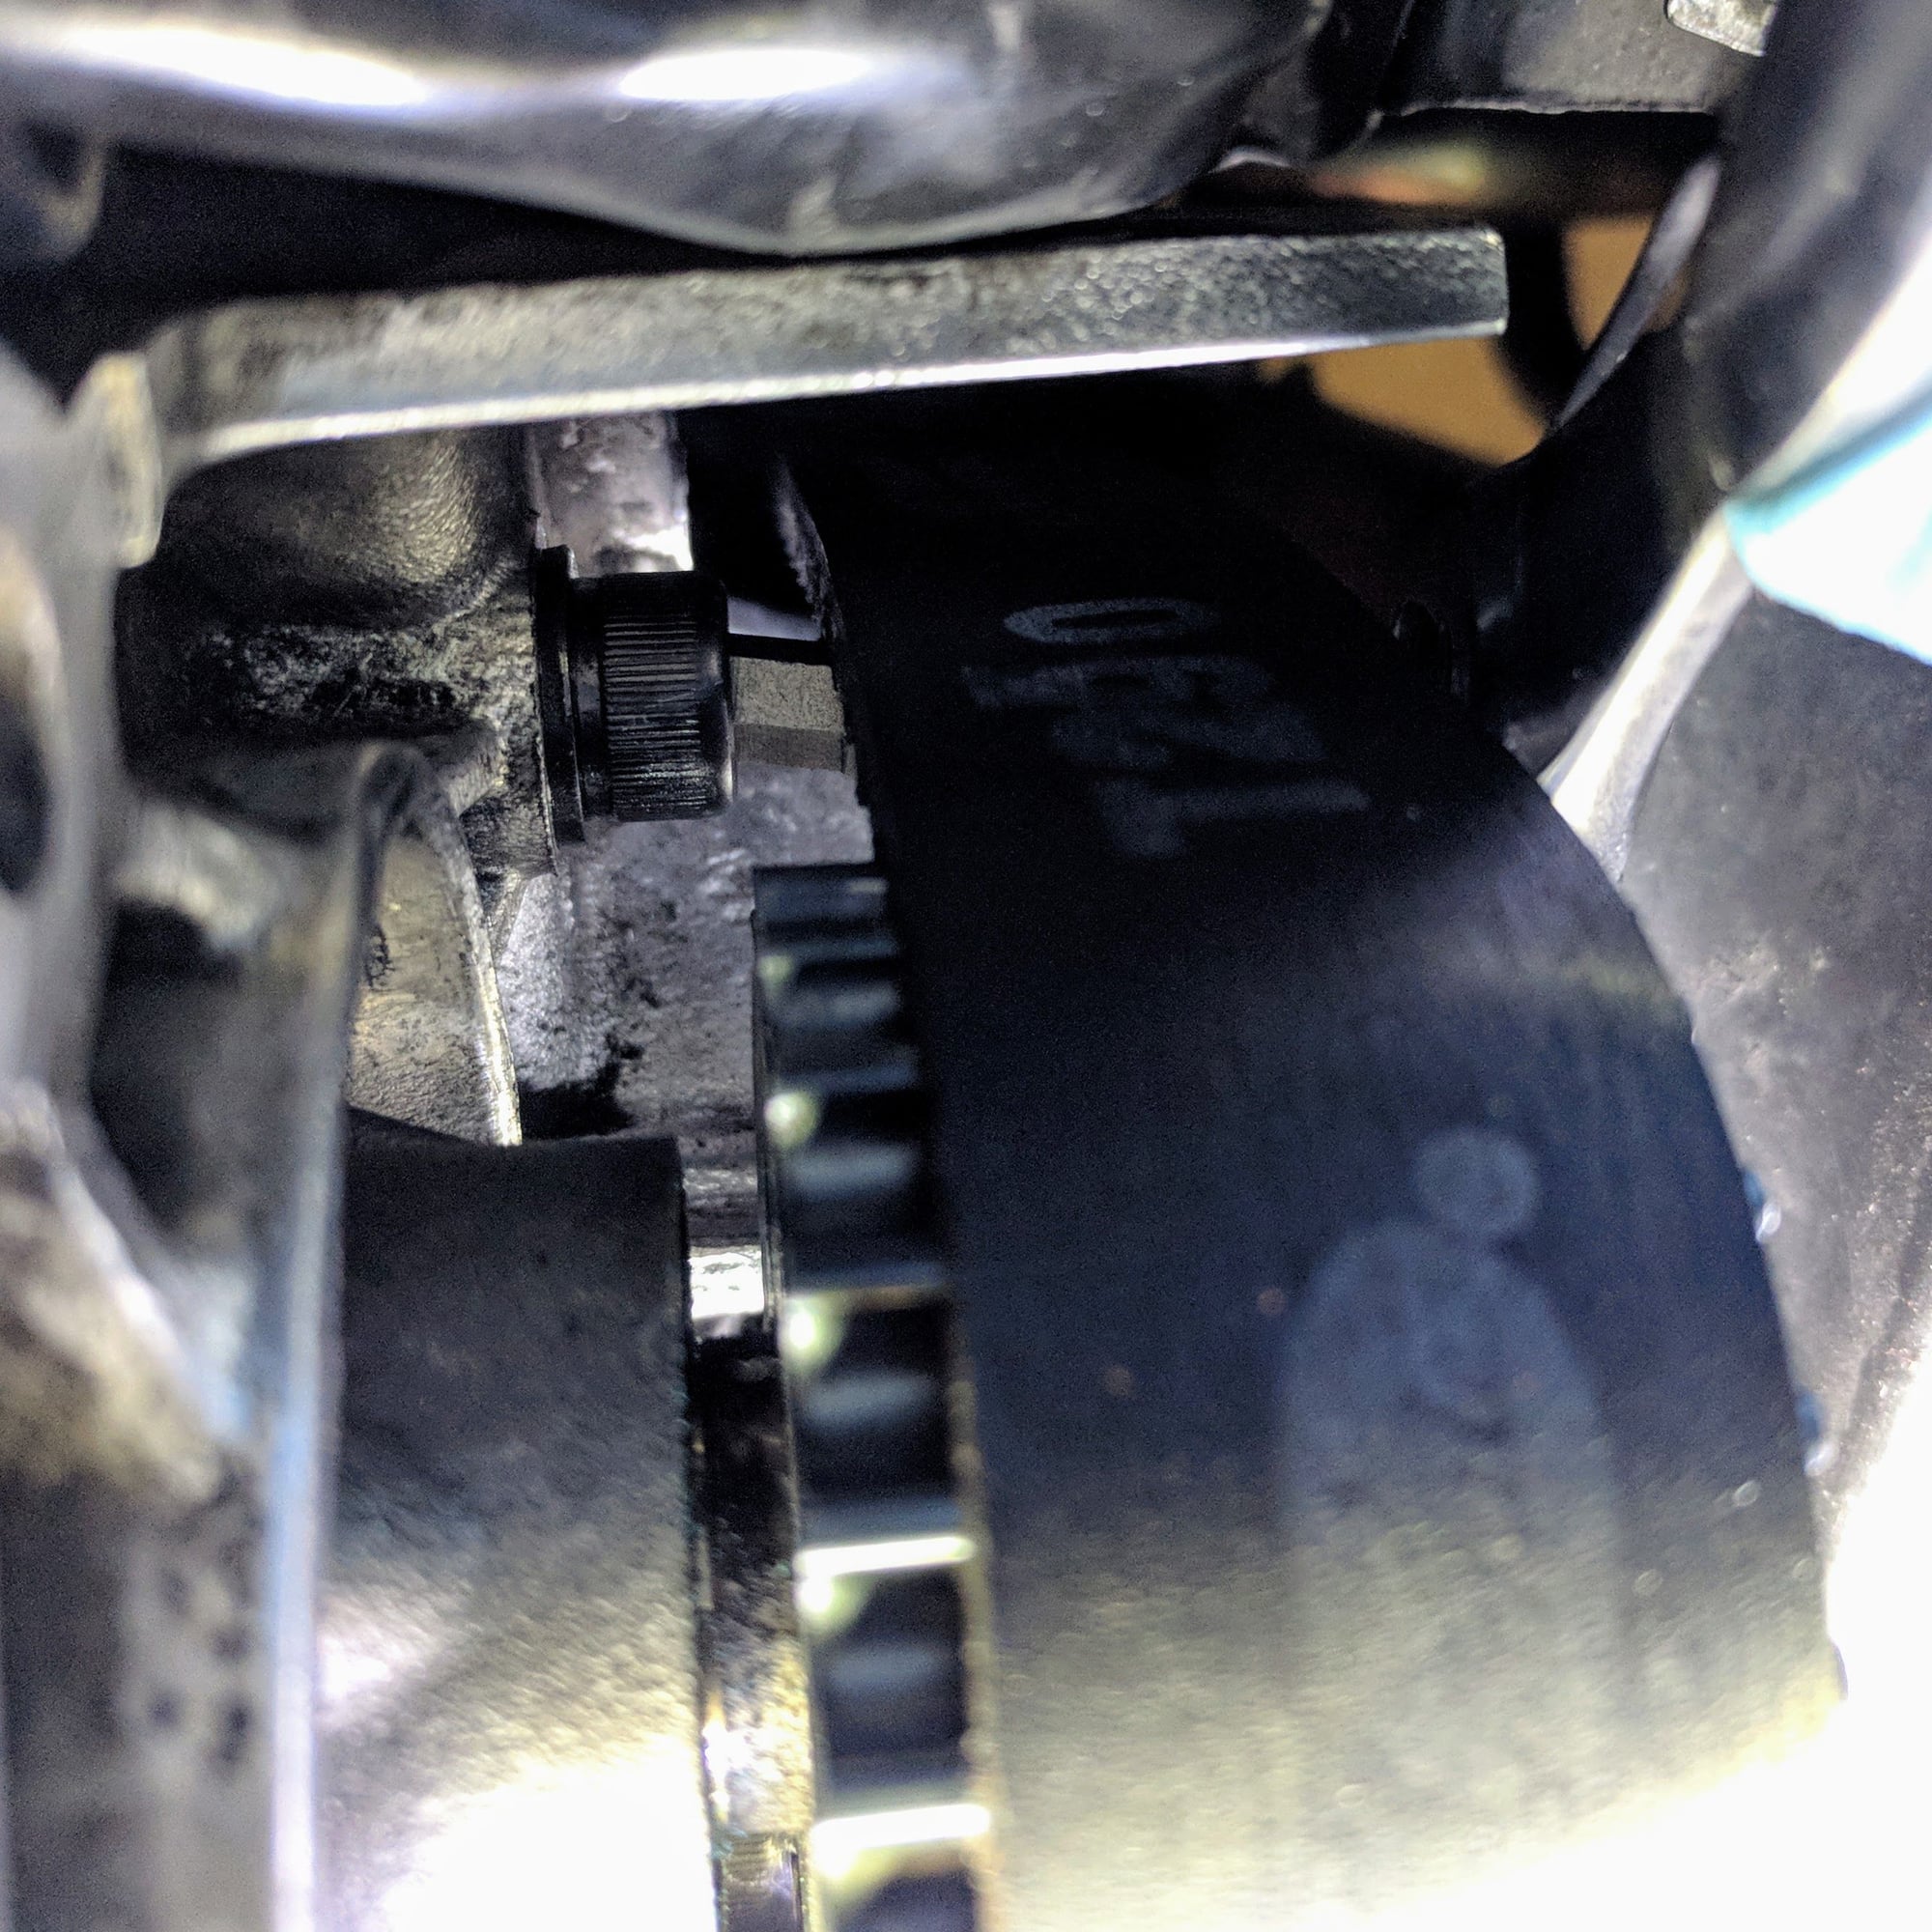
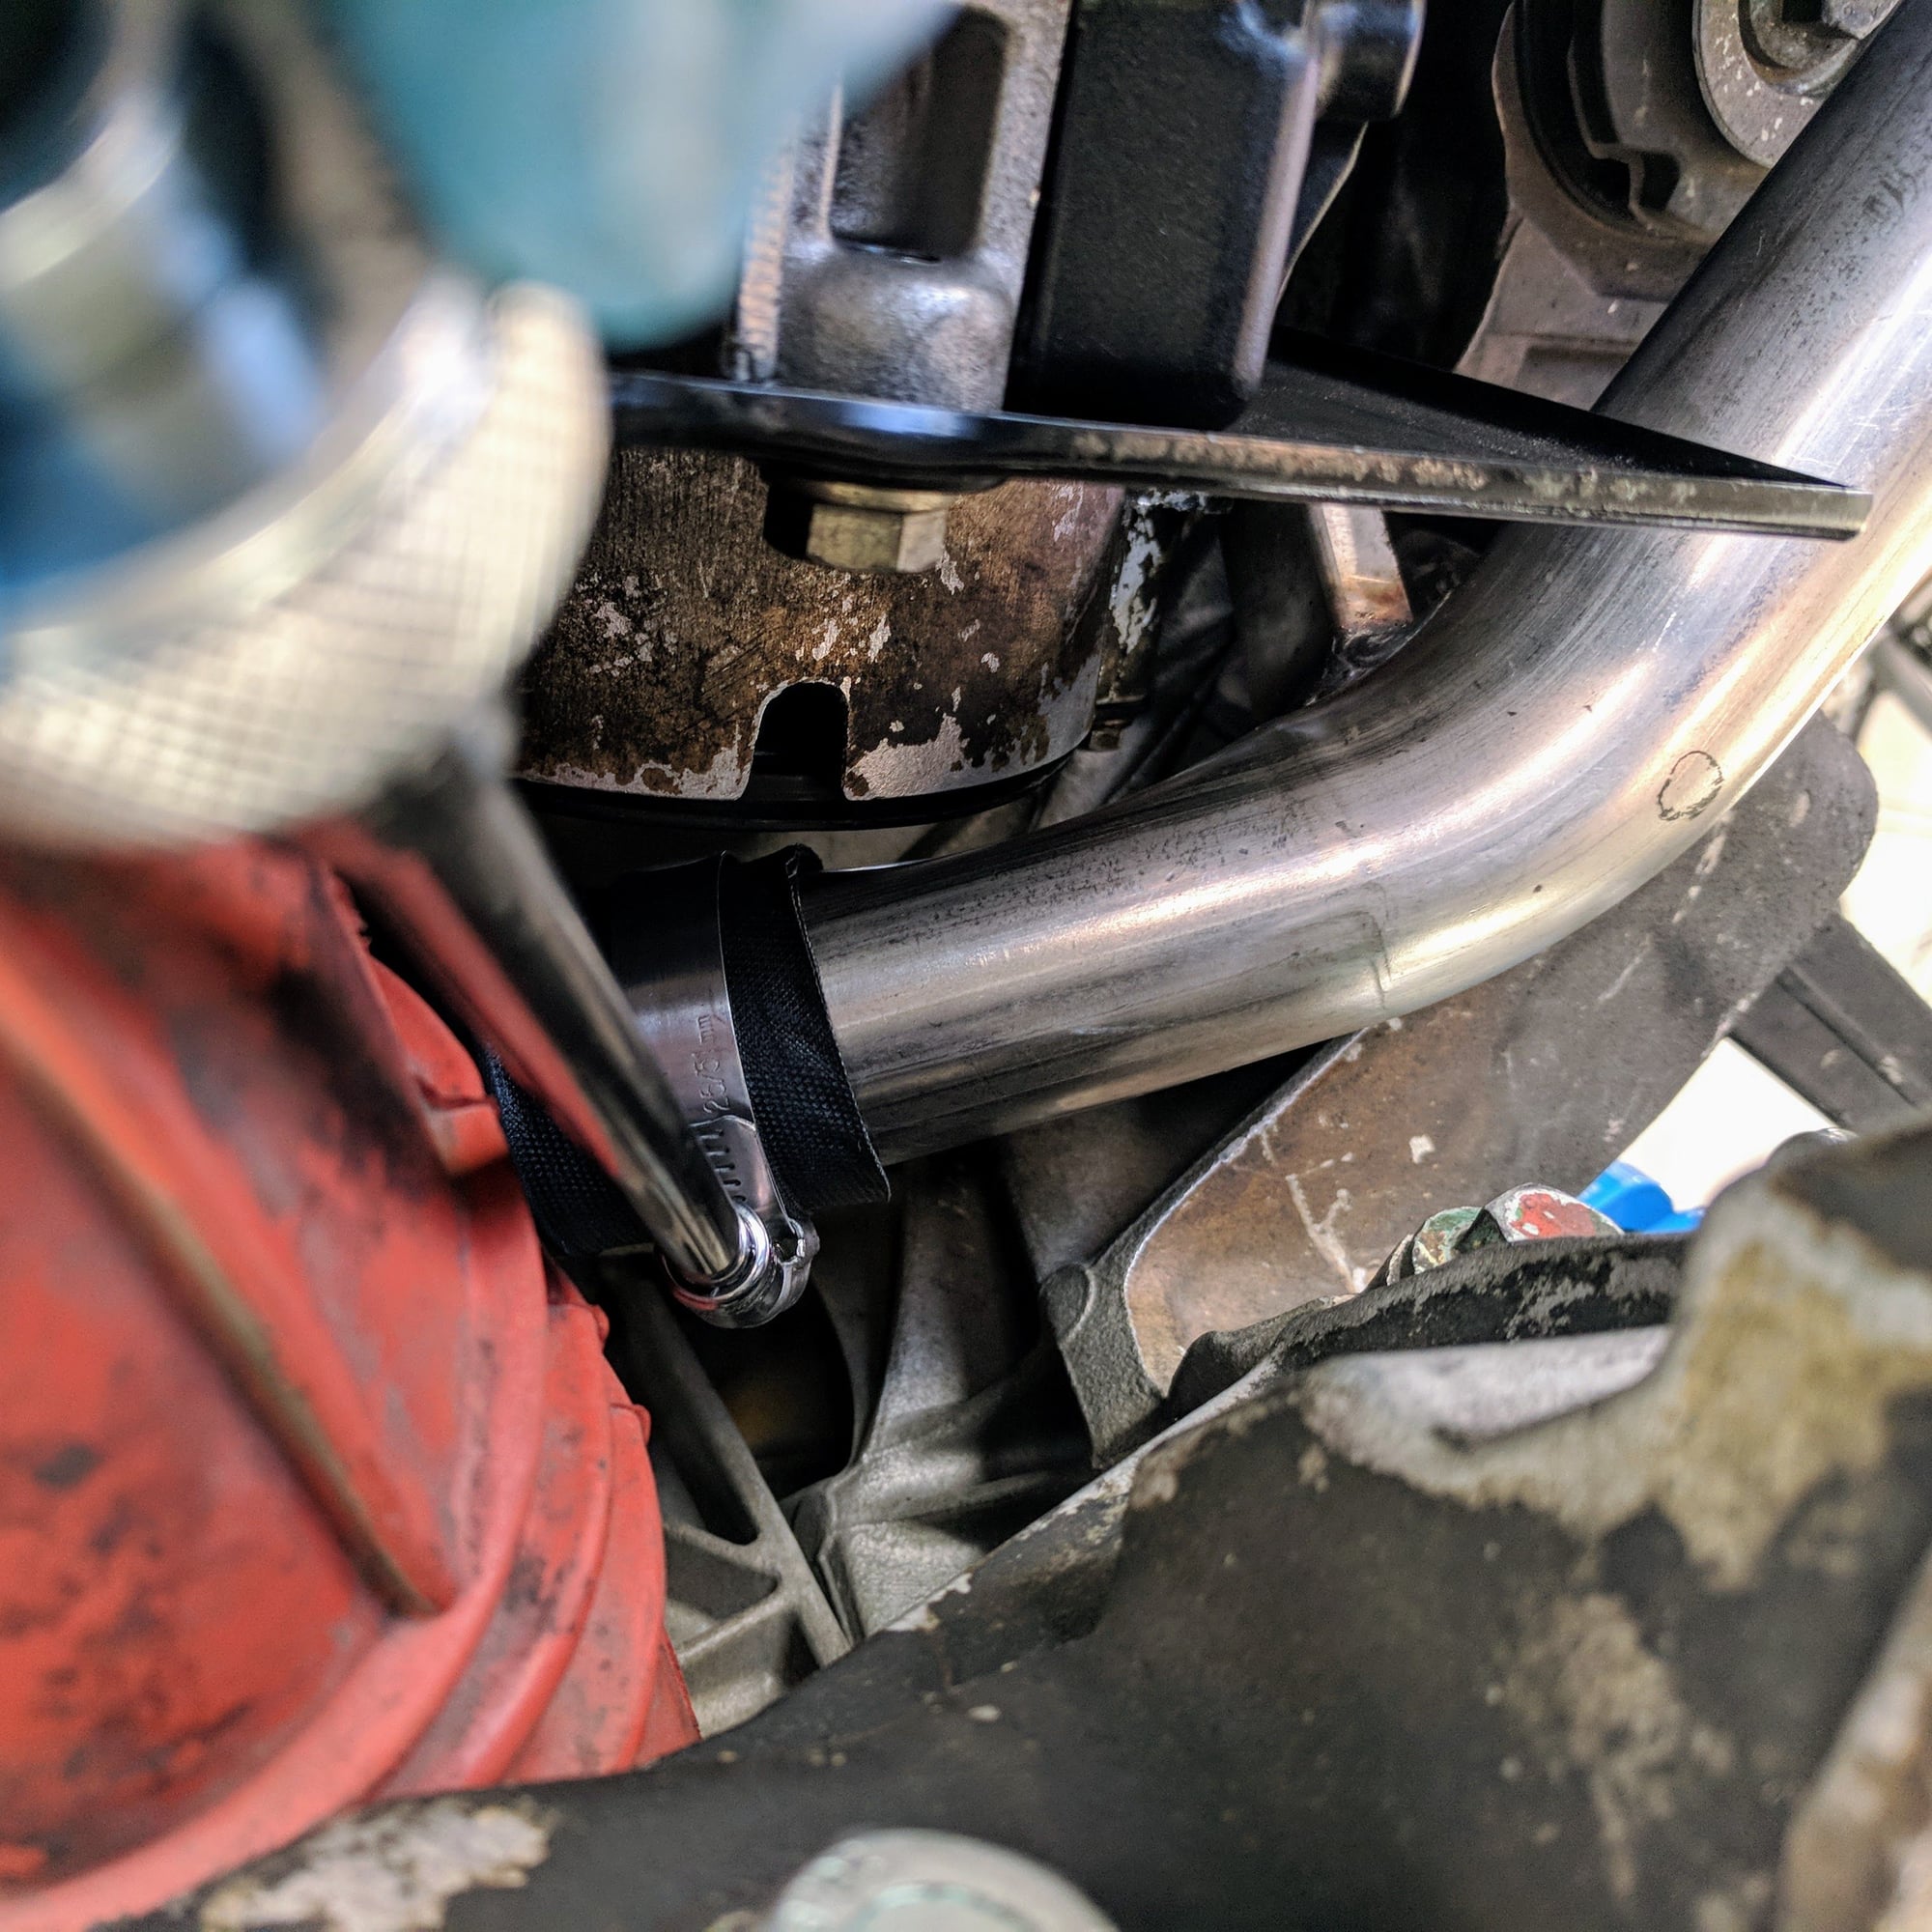
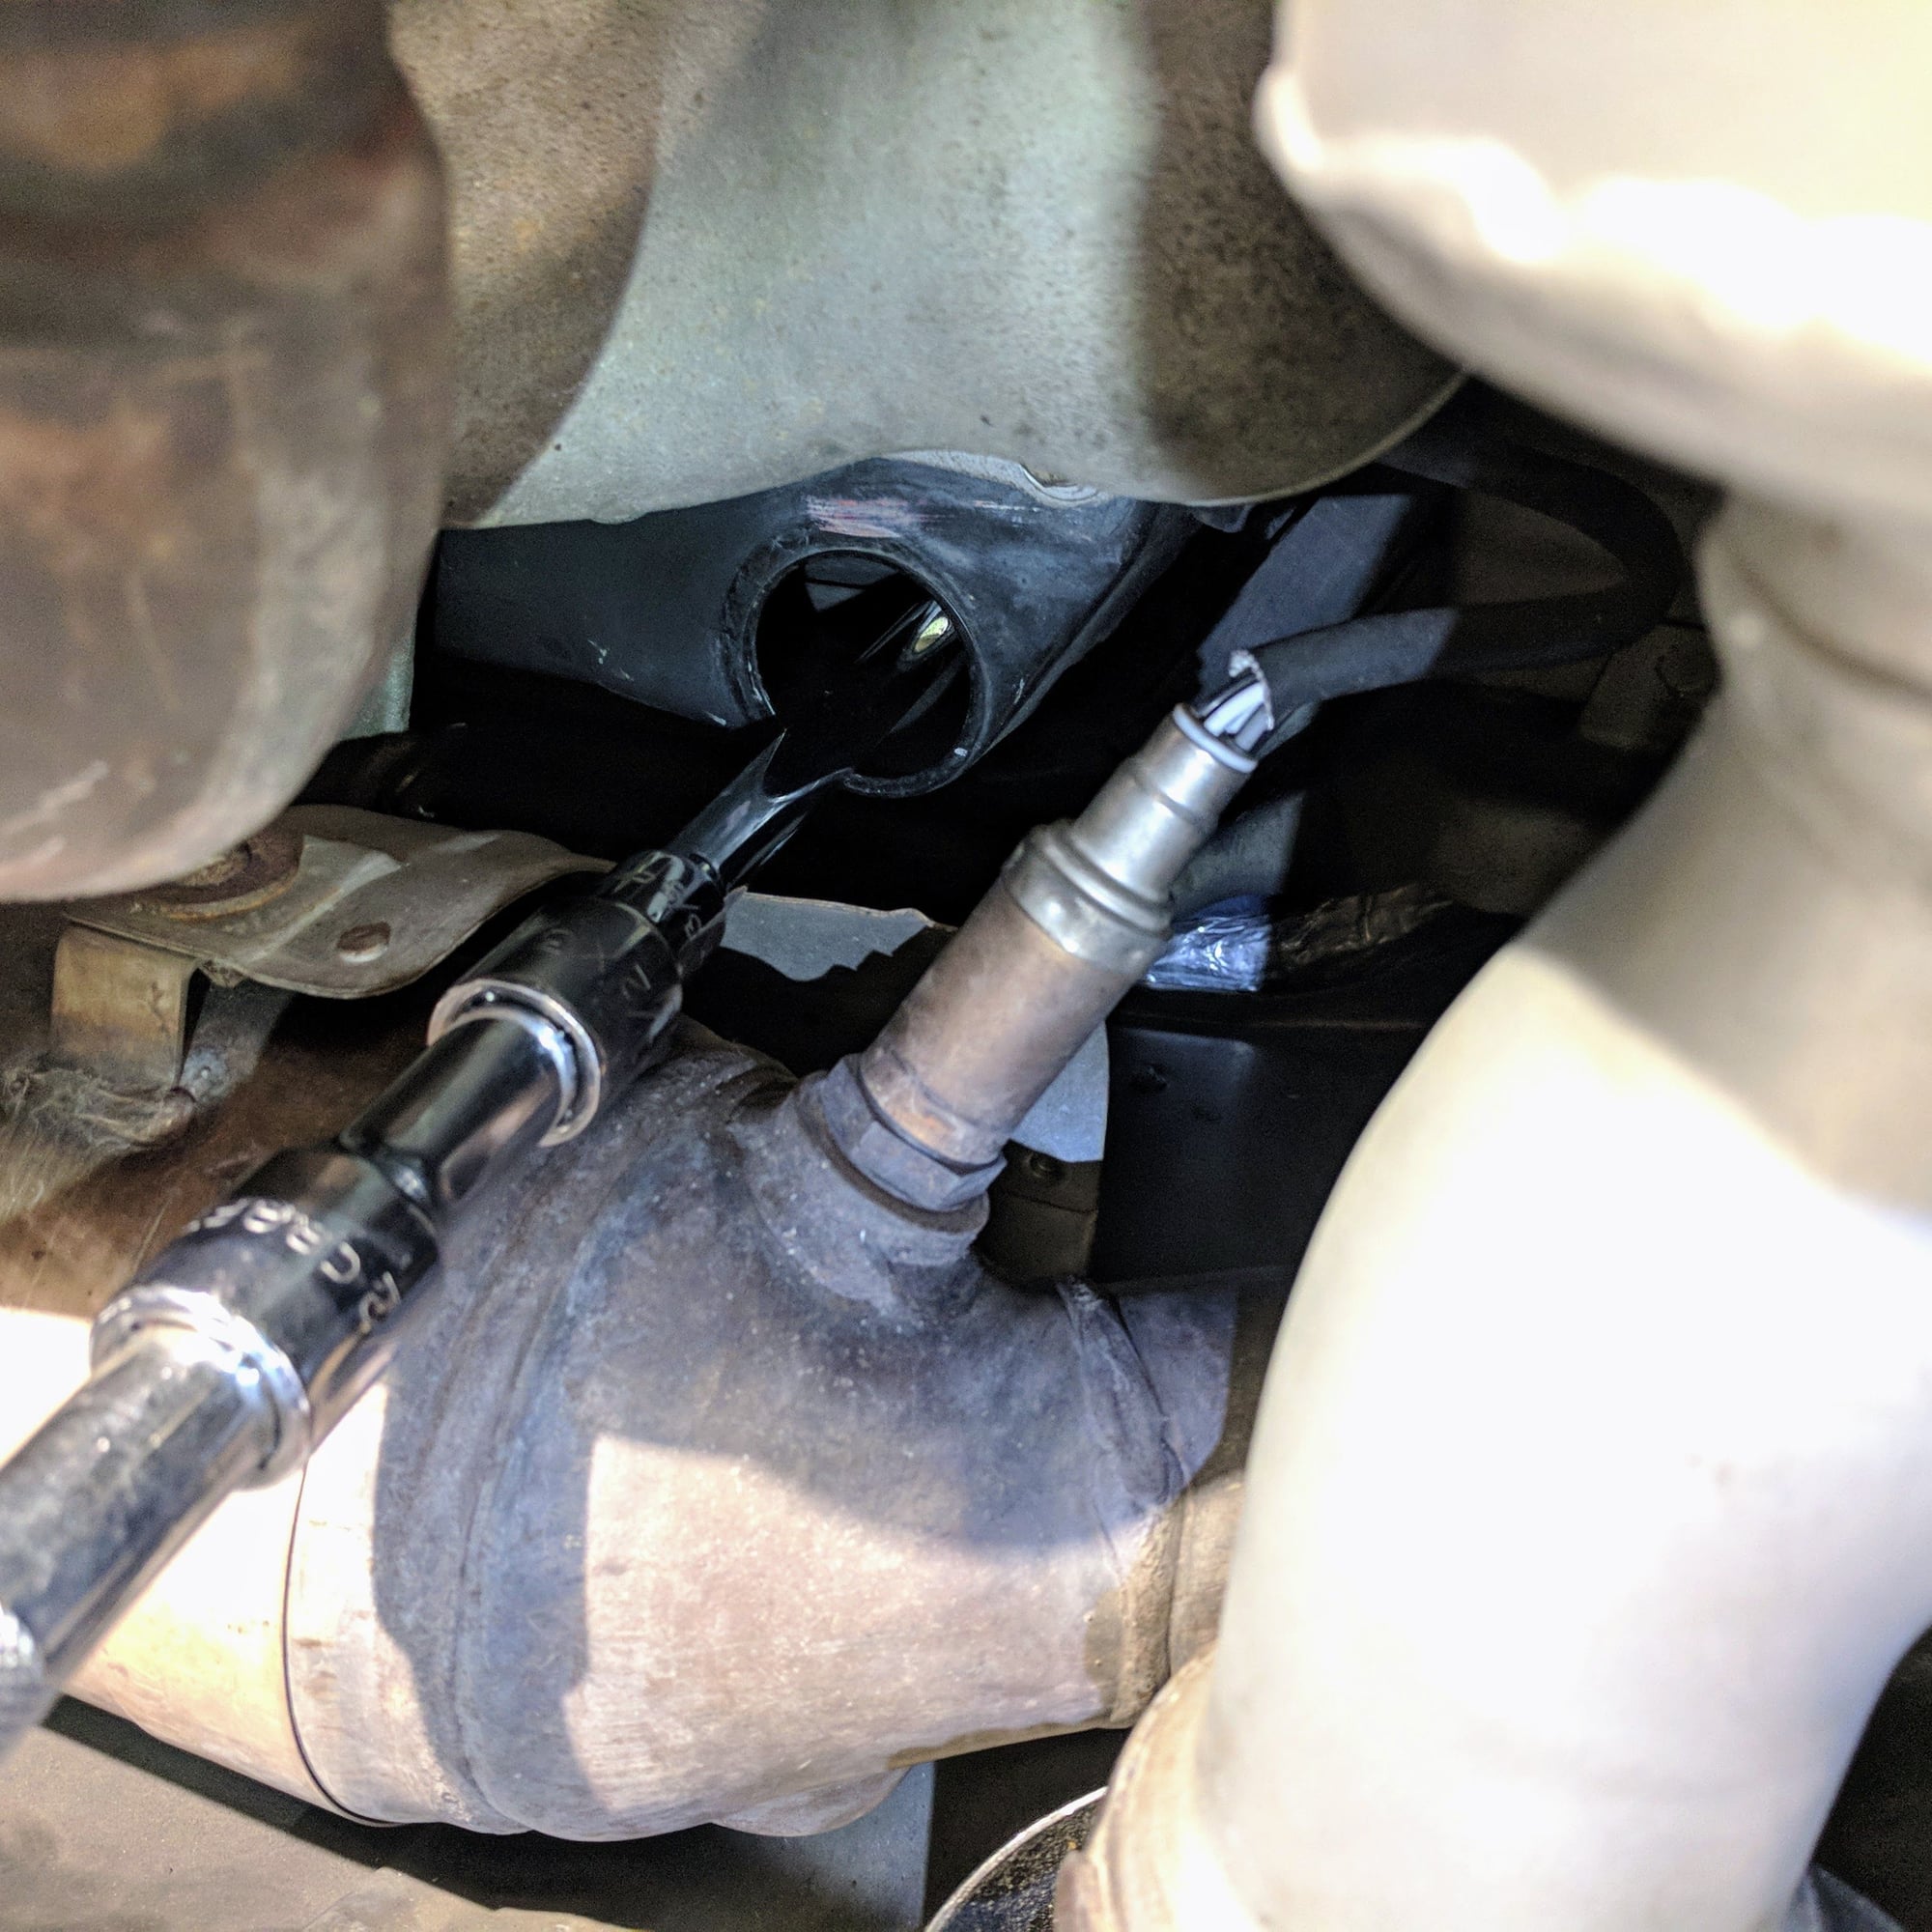
Then remove the two hex bolts buried in the PS belt housing. This is where "touch" will come into play where you slide in the ratchet with your index and middle fingers you can feel the socket to engage in the bolt and once it does, it loosens easily. This pic is taken out of sequence where the new belt is already in
Once you remove the three bolts, the entire pump slides out. You can then cut the belt or remove the intact belt from under the engine bay/bottom of the car.
4. Installation of the belt is the reverse. First feed the belt from under the engine bay/bottom of the car so the belt appears in the engine bay where the PS pump has been removed. Loop the belt around the lower cog. Then slide in the PS pump back into the housing. Twist the upper cog to line up the belt teeth and the PS pump will easily set into the housing.
5. Like you did to remove the two 6MM hex bolts that attach the PS pump to the PS pump housing, use your �touch� to hand thread them in. I started with the right one (bolt toward the outside of the car) and then the left one (bolt toward the center of the car).
Then reinstall the PS pump brace.
6. Then flip up the heavy rubber flap that seals the engine bay and you can easily slide in the PS belt cover to install the remaining bolts to secure the cover.
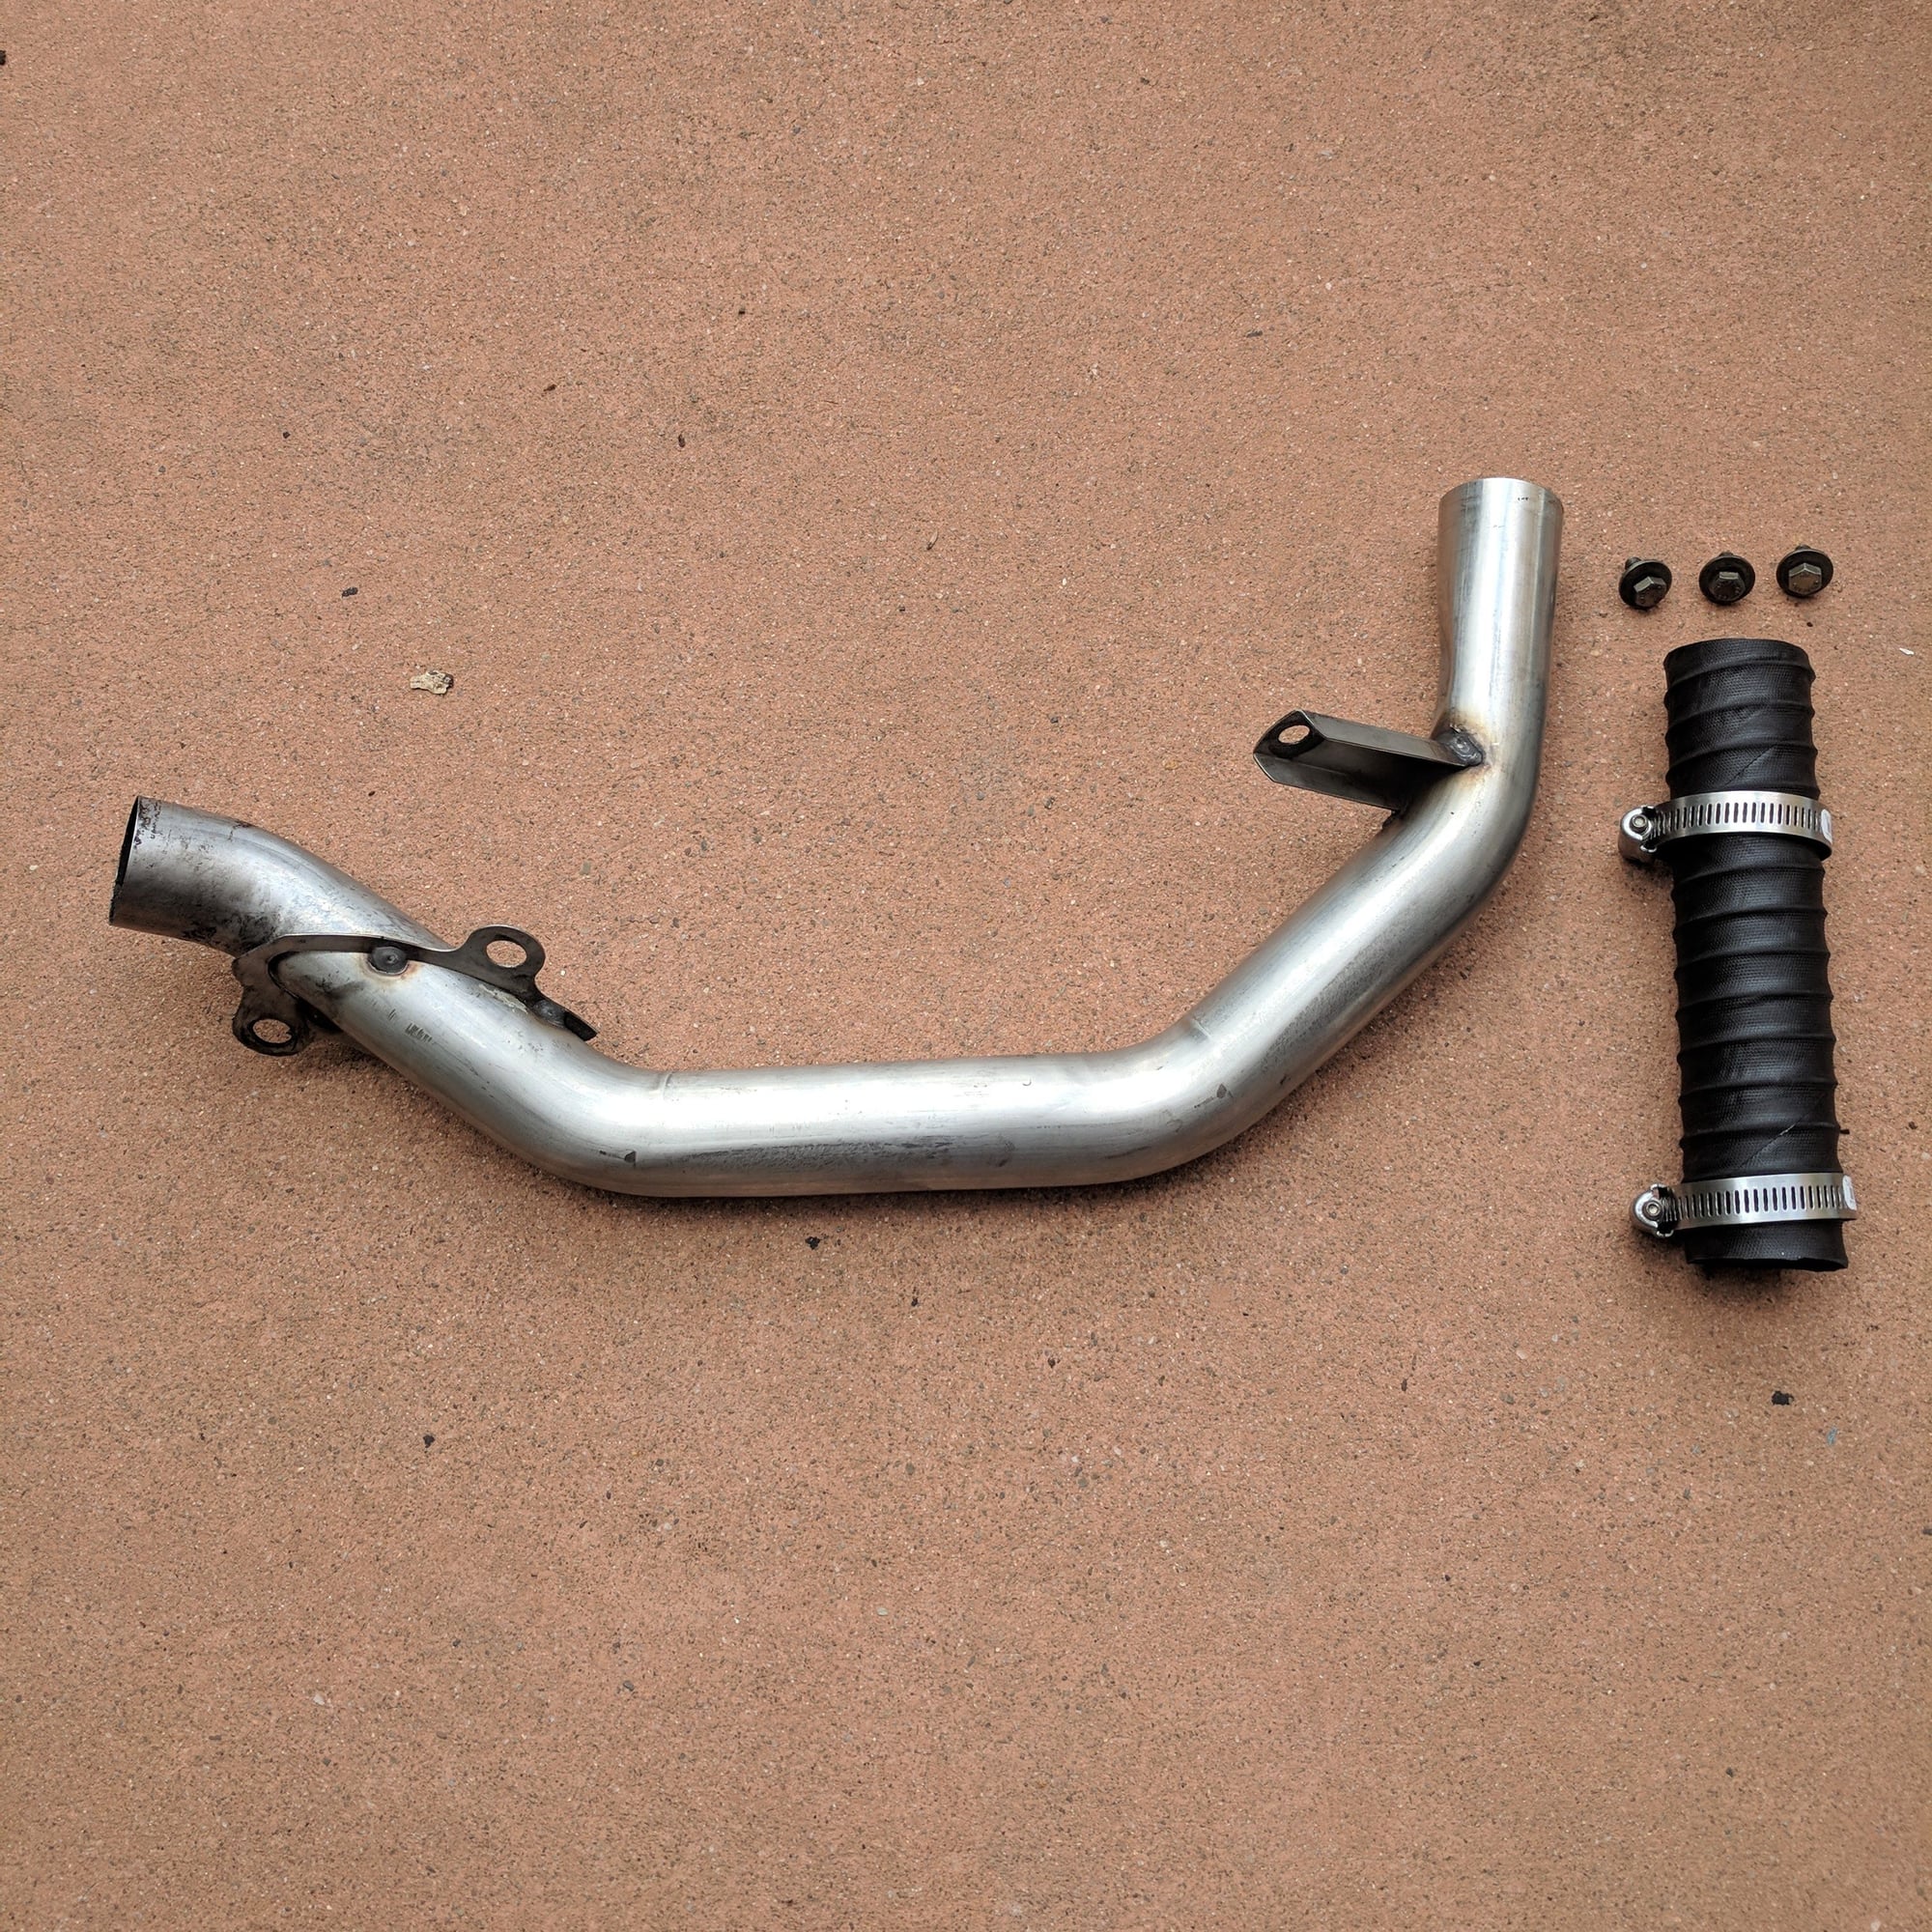
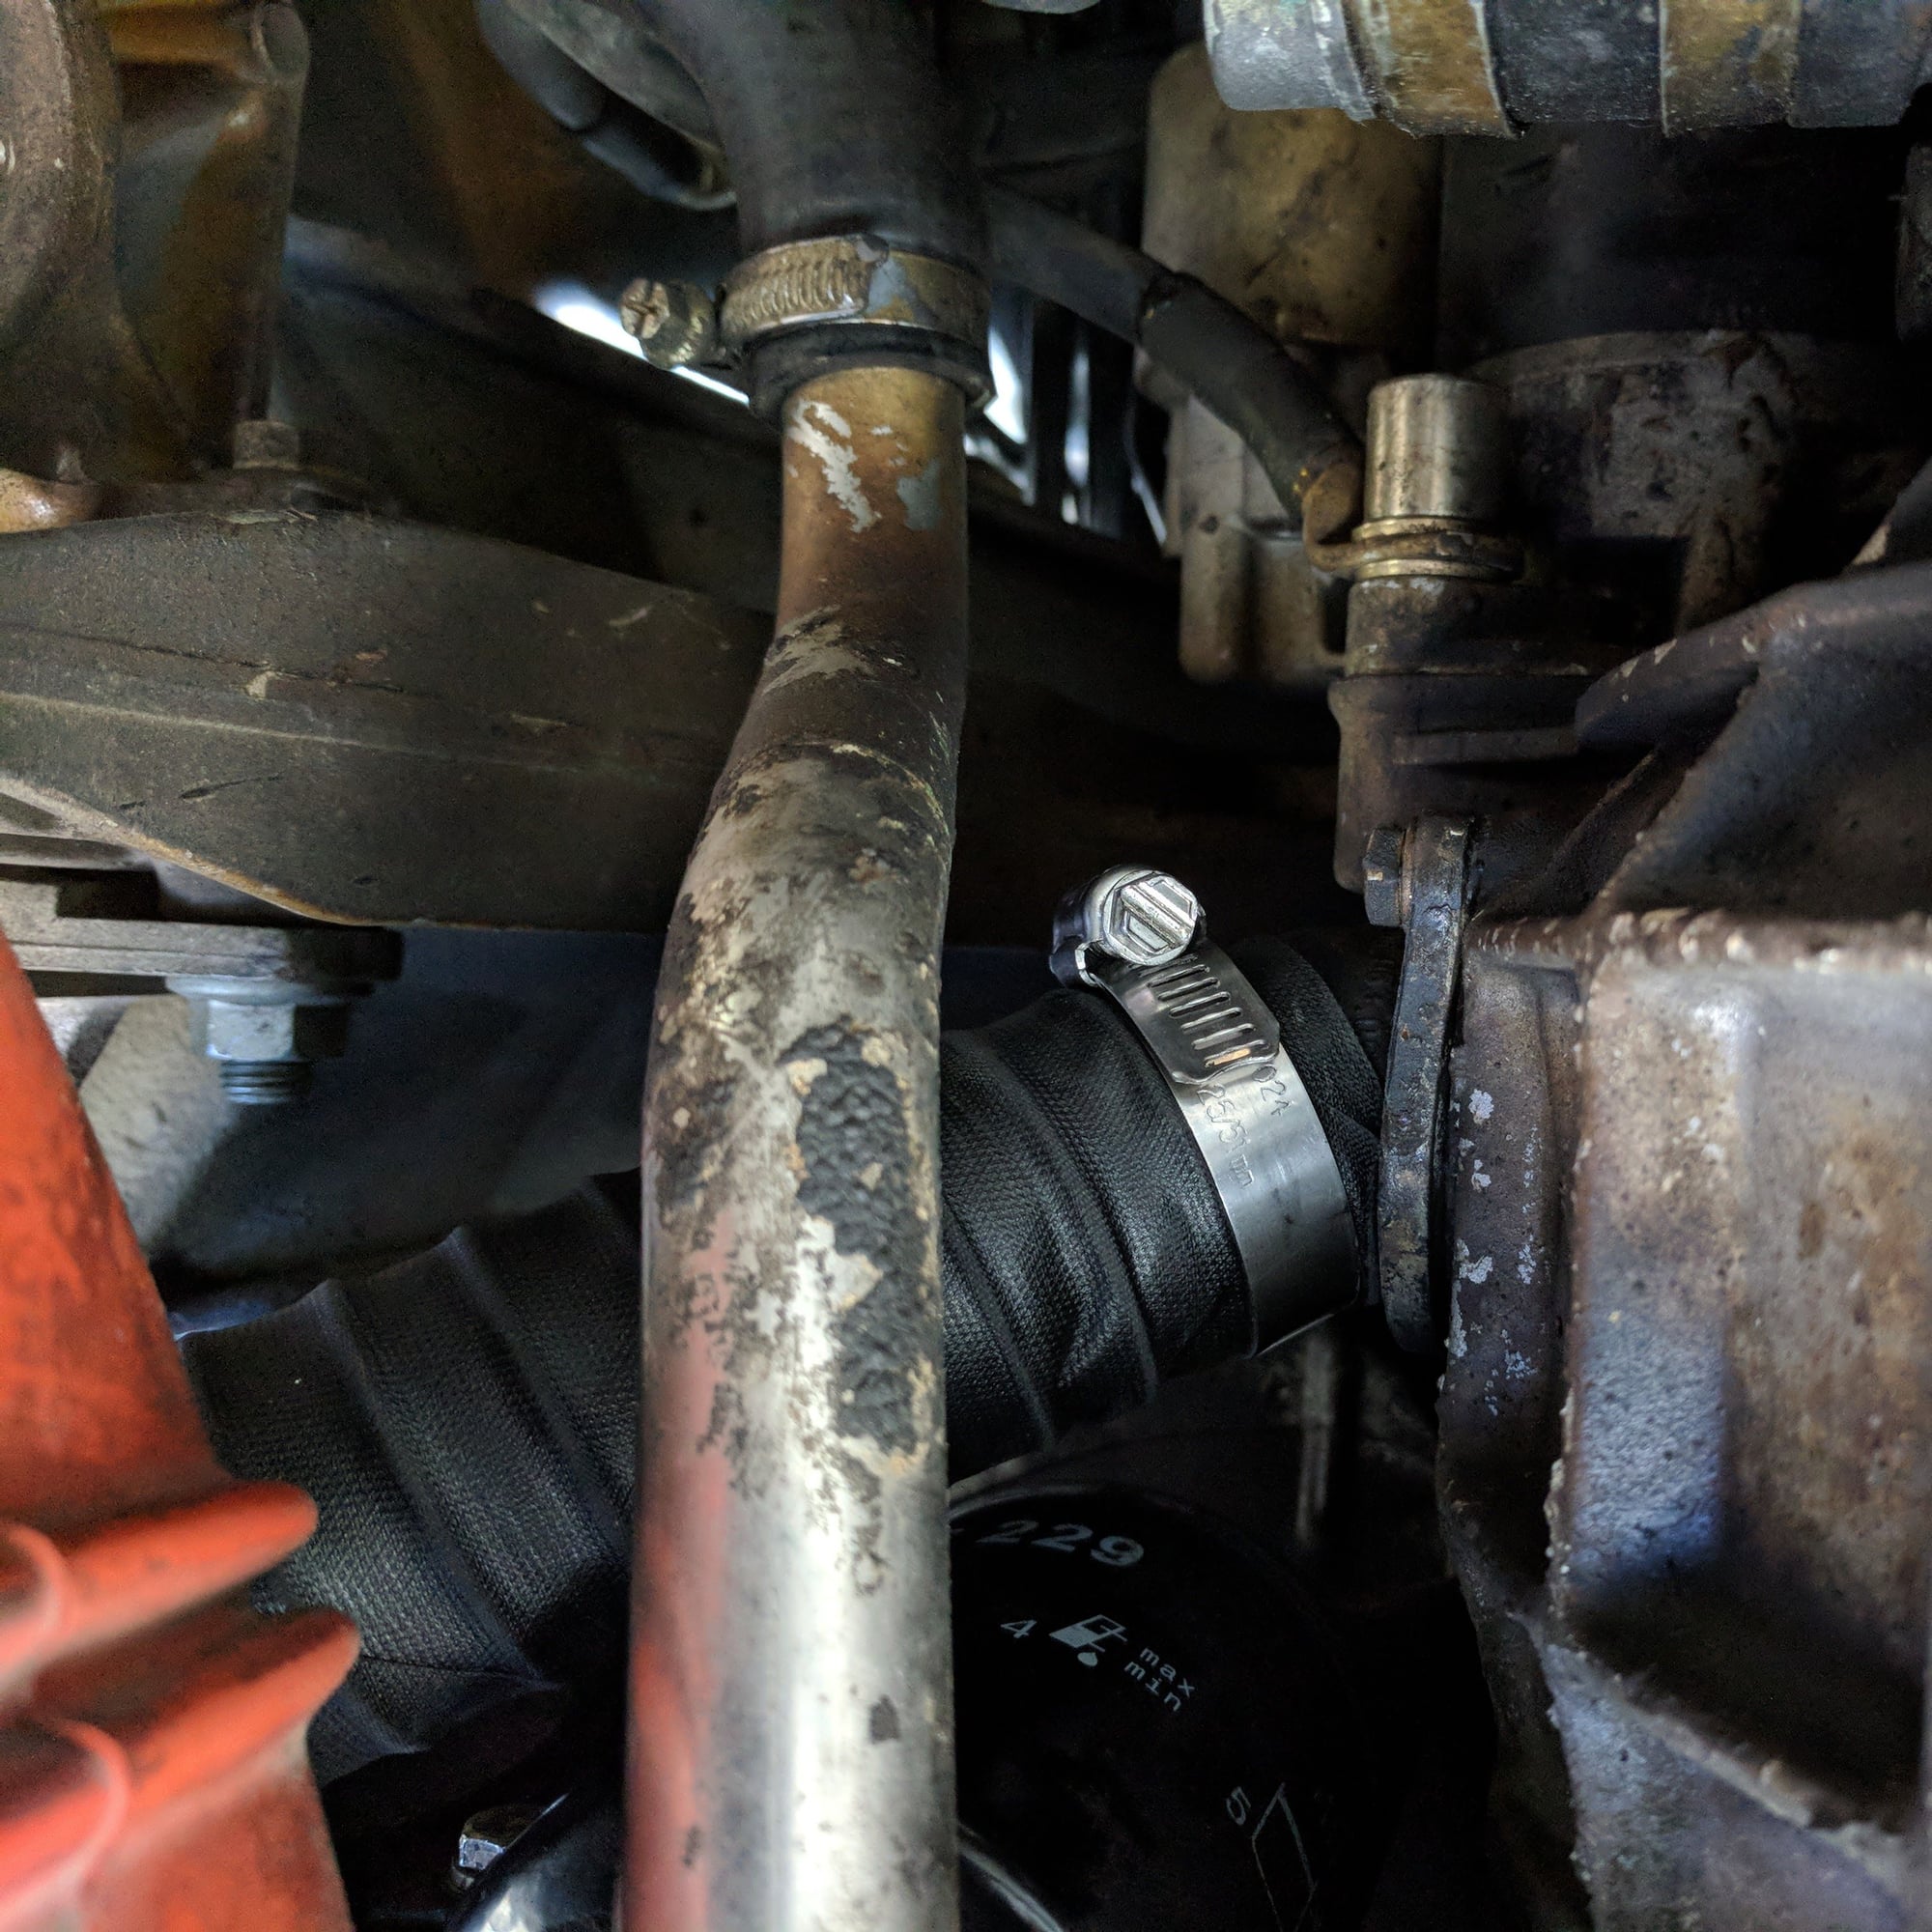
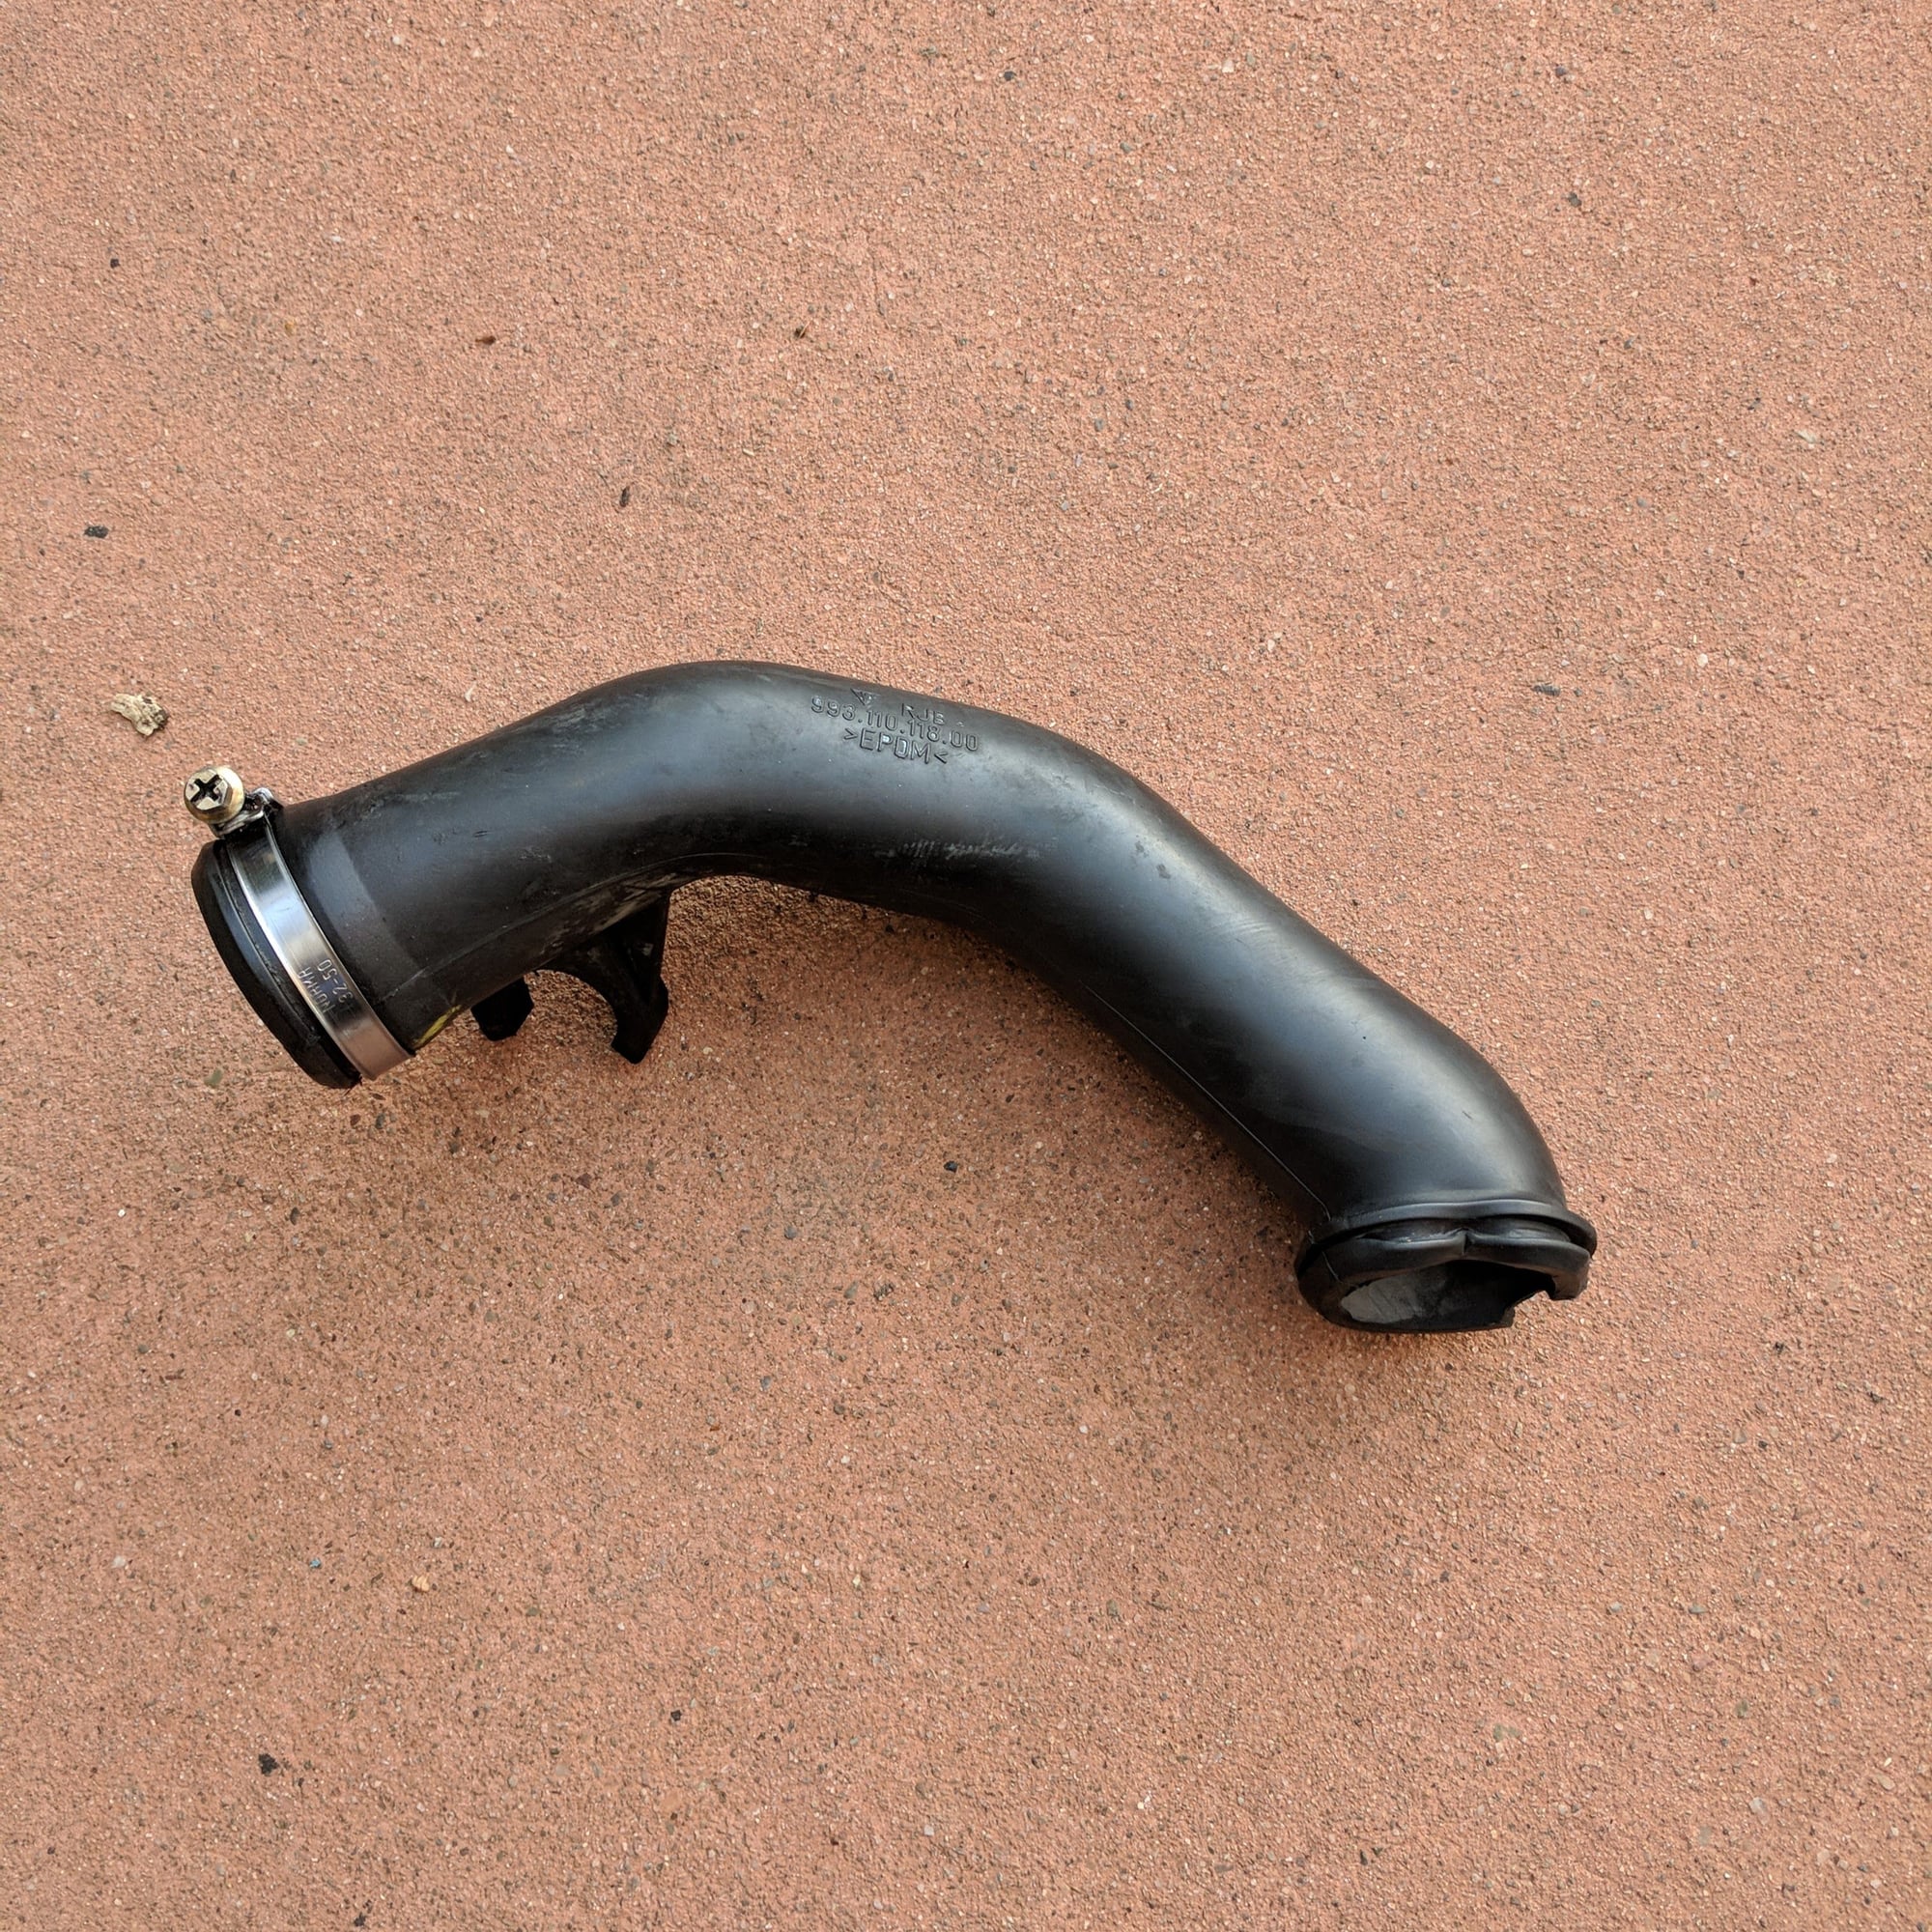
7. Now you are on the home stretch to put all of the things you removed to access the PS belt cover. If you have a driver like mine it is likely that the original 20 year old fiberglass based coated hose for the aluminum tube that connects the airbox to the engine is disintegrating. Replaced it with a new one as well as some stainless hose clamps to make it easier than the plier based clamps used which are to secure. As you can see the new one is close to twice as long as my sad and tired original hose.
8. Secure the aluminum tube.
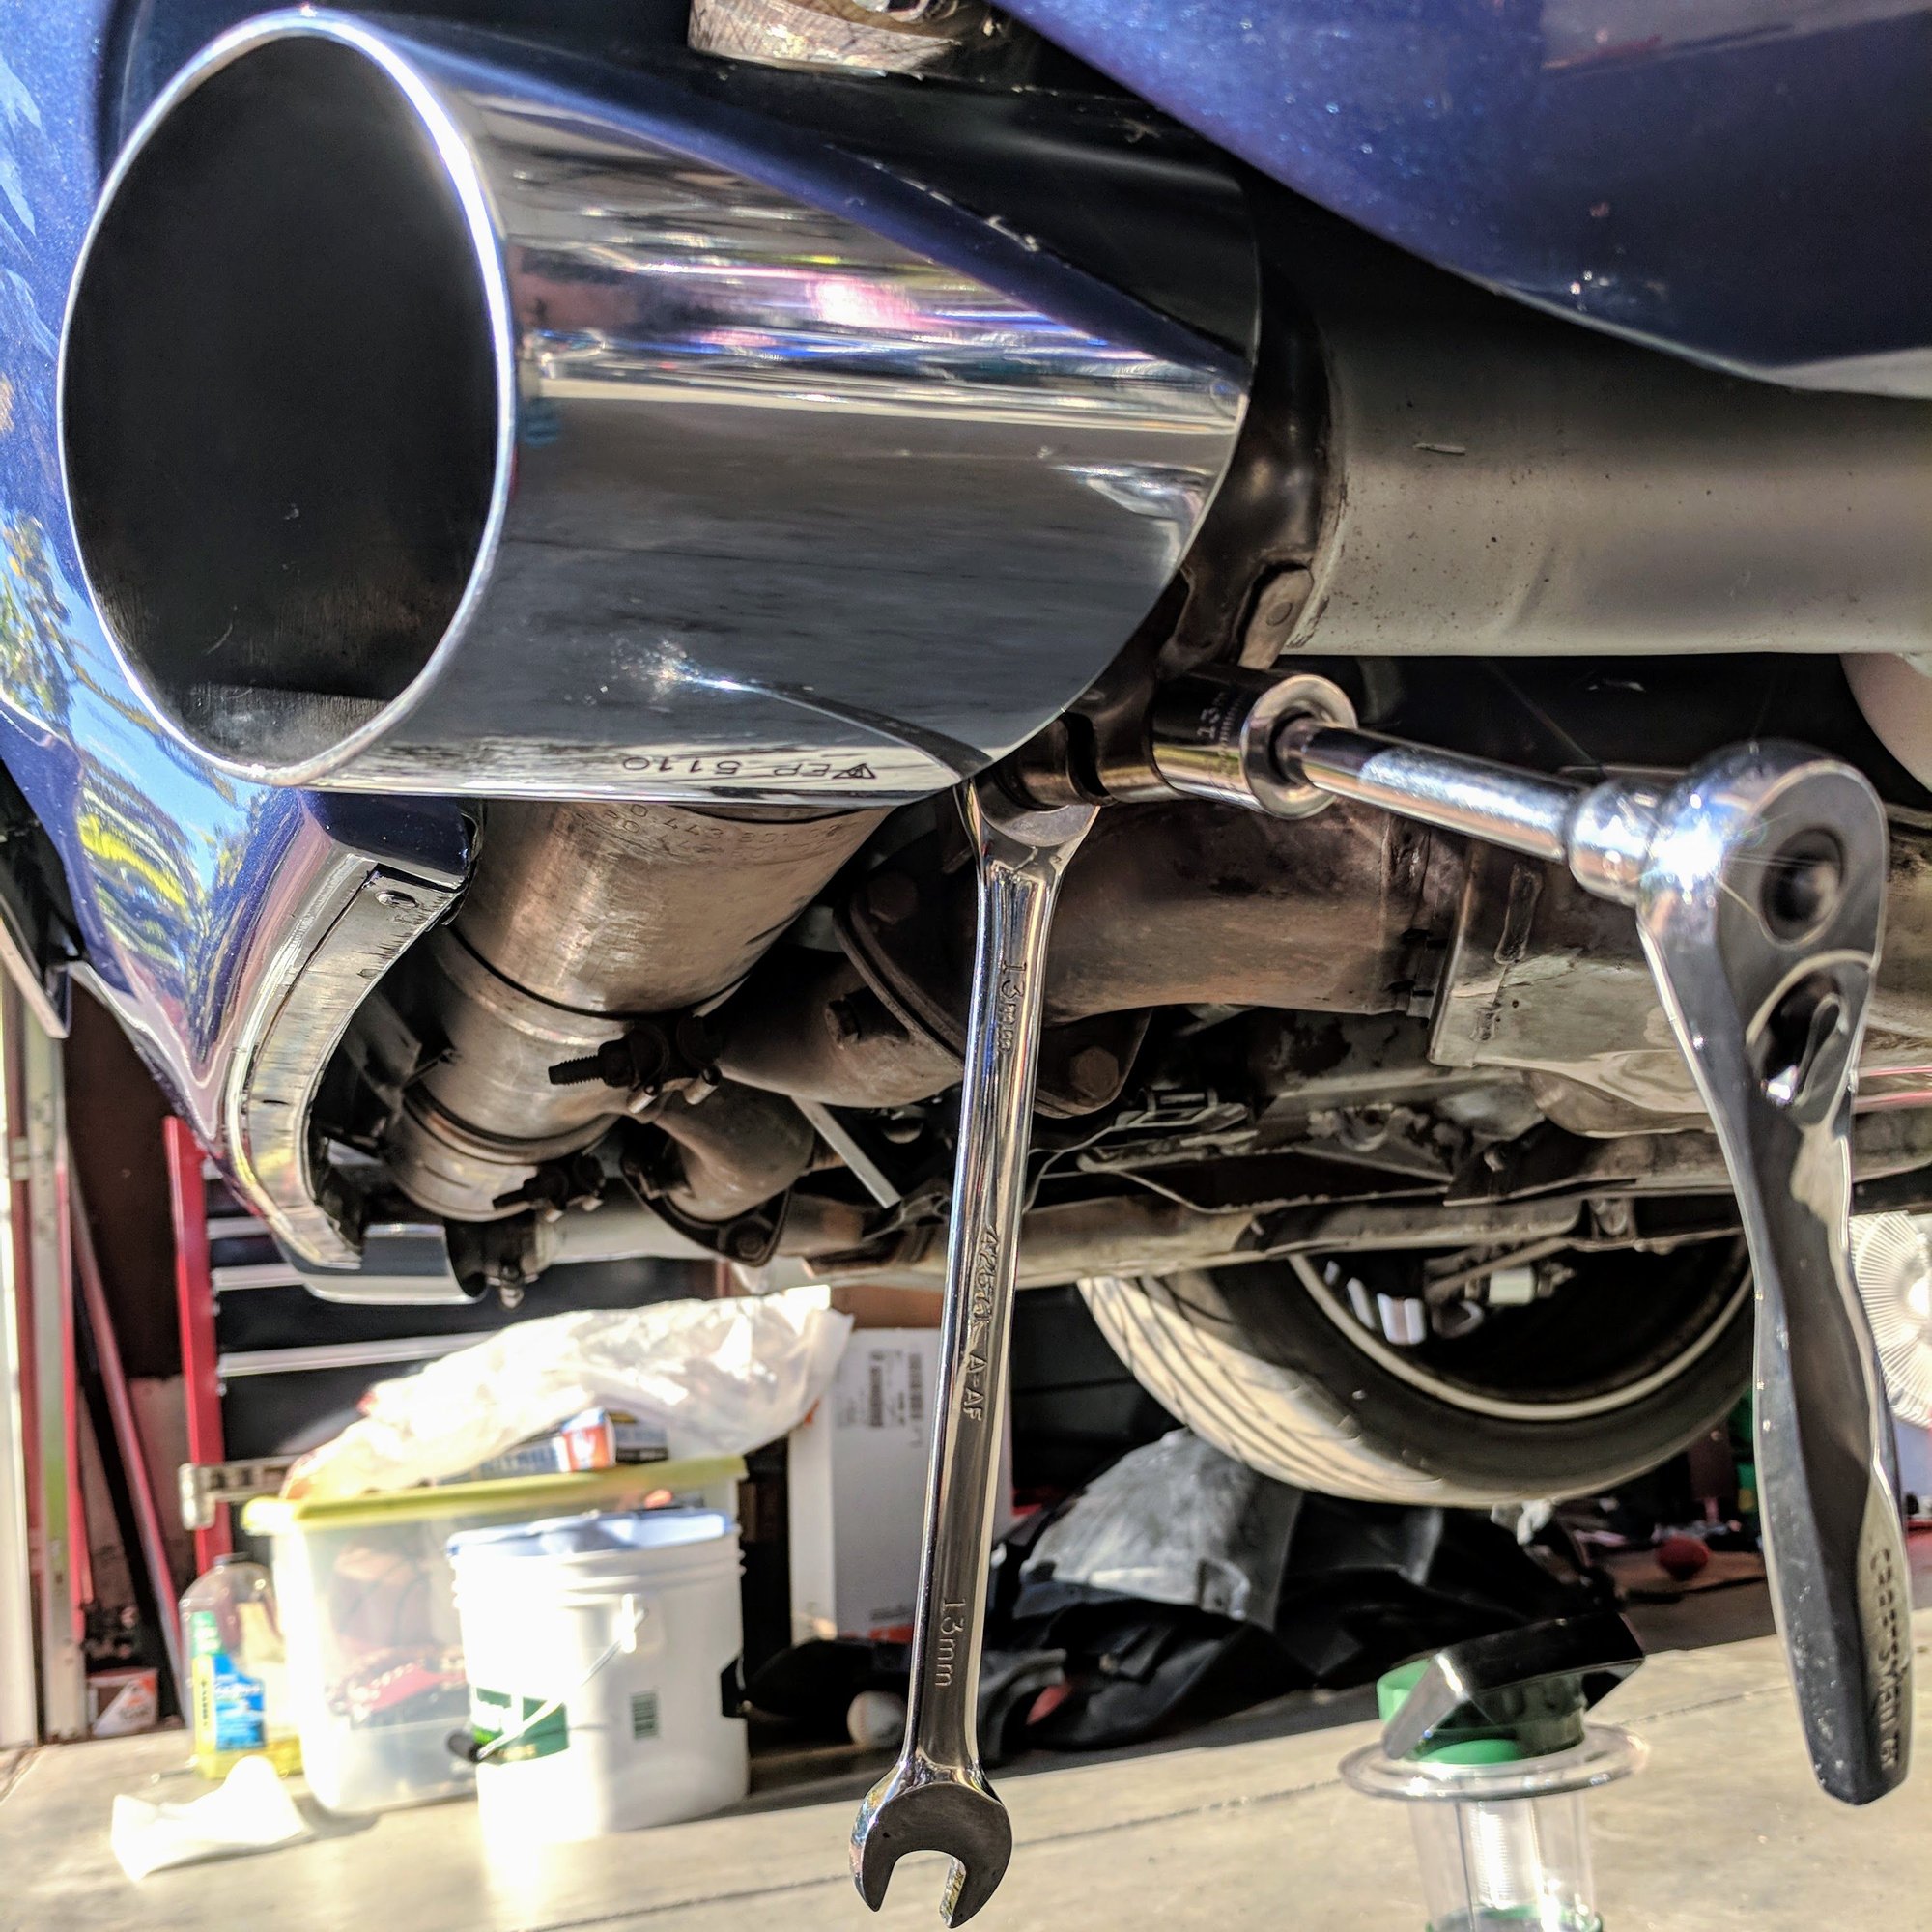
9. Reinstall the muffler and tip.
10. Reinstall the rubber hose that connects the airbox with the aluminum tube that connects to the engine.
Done!
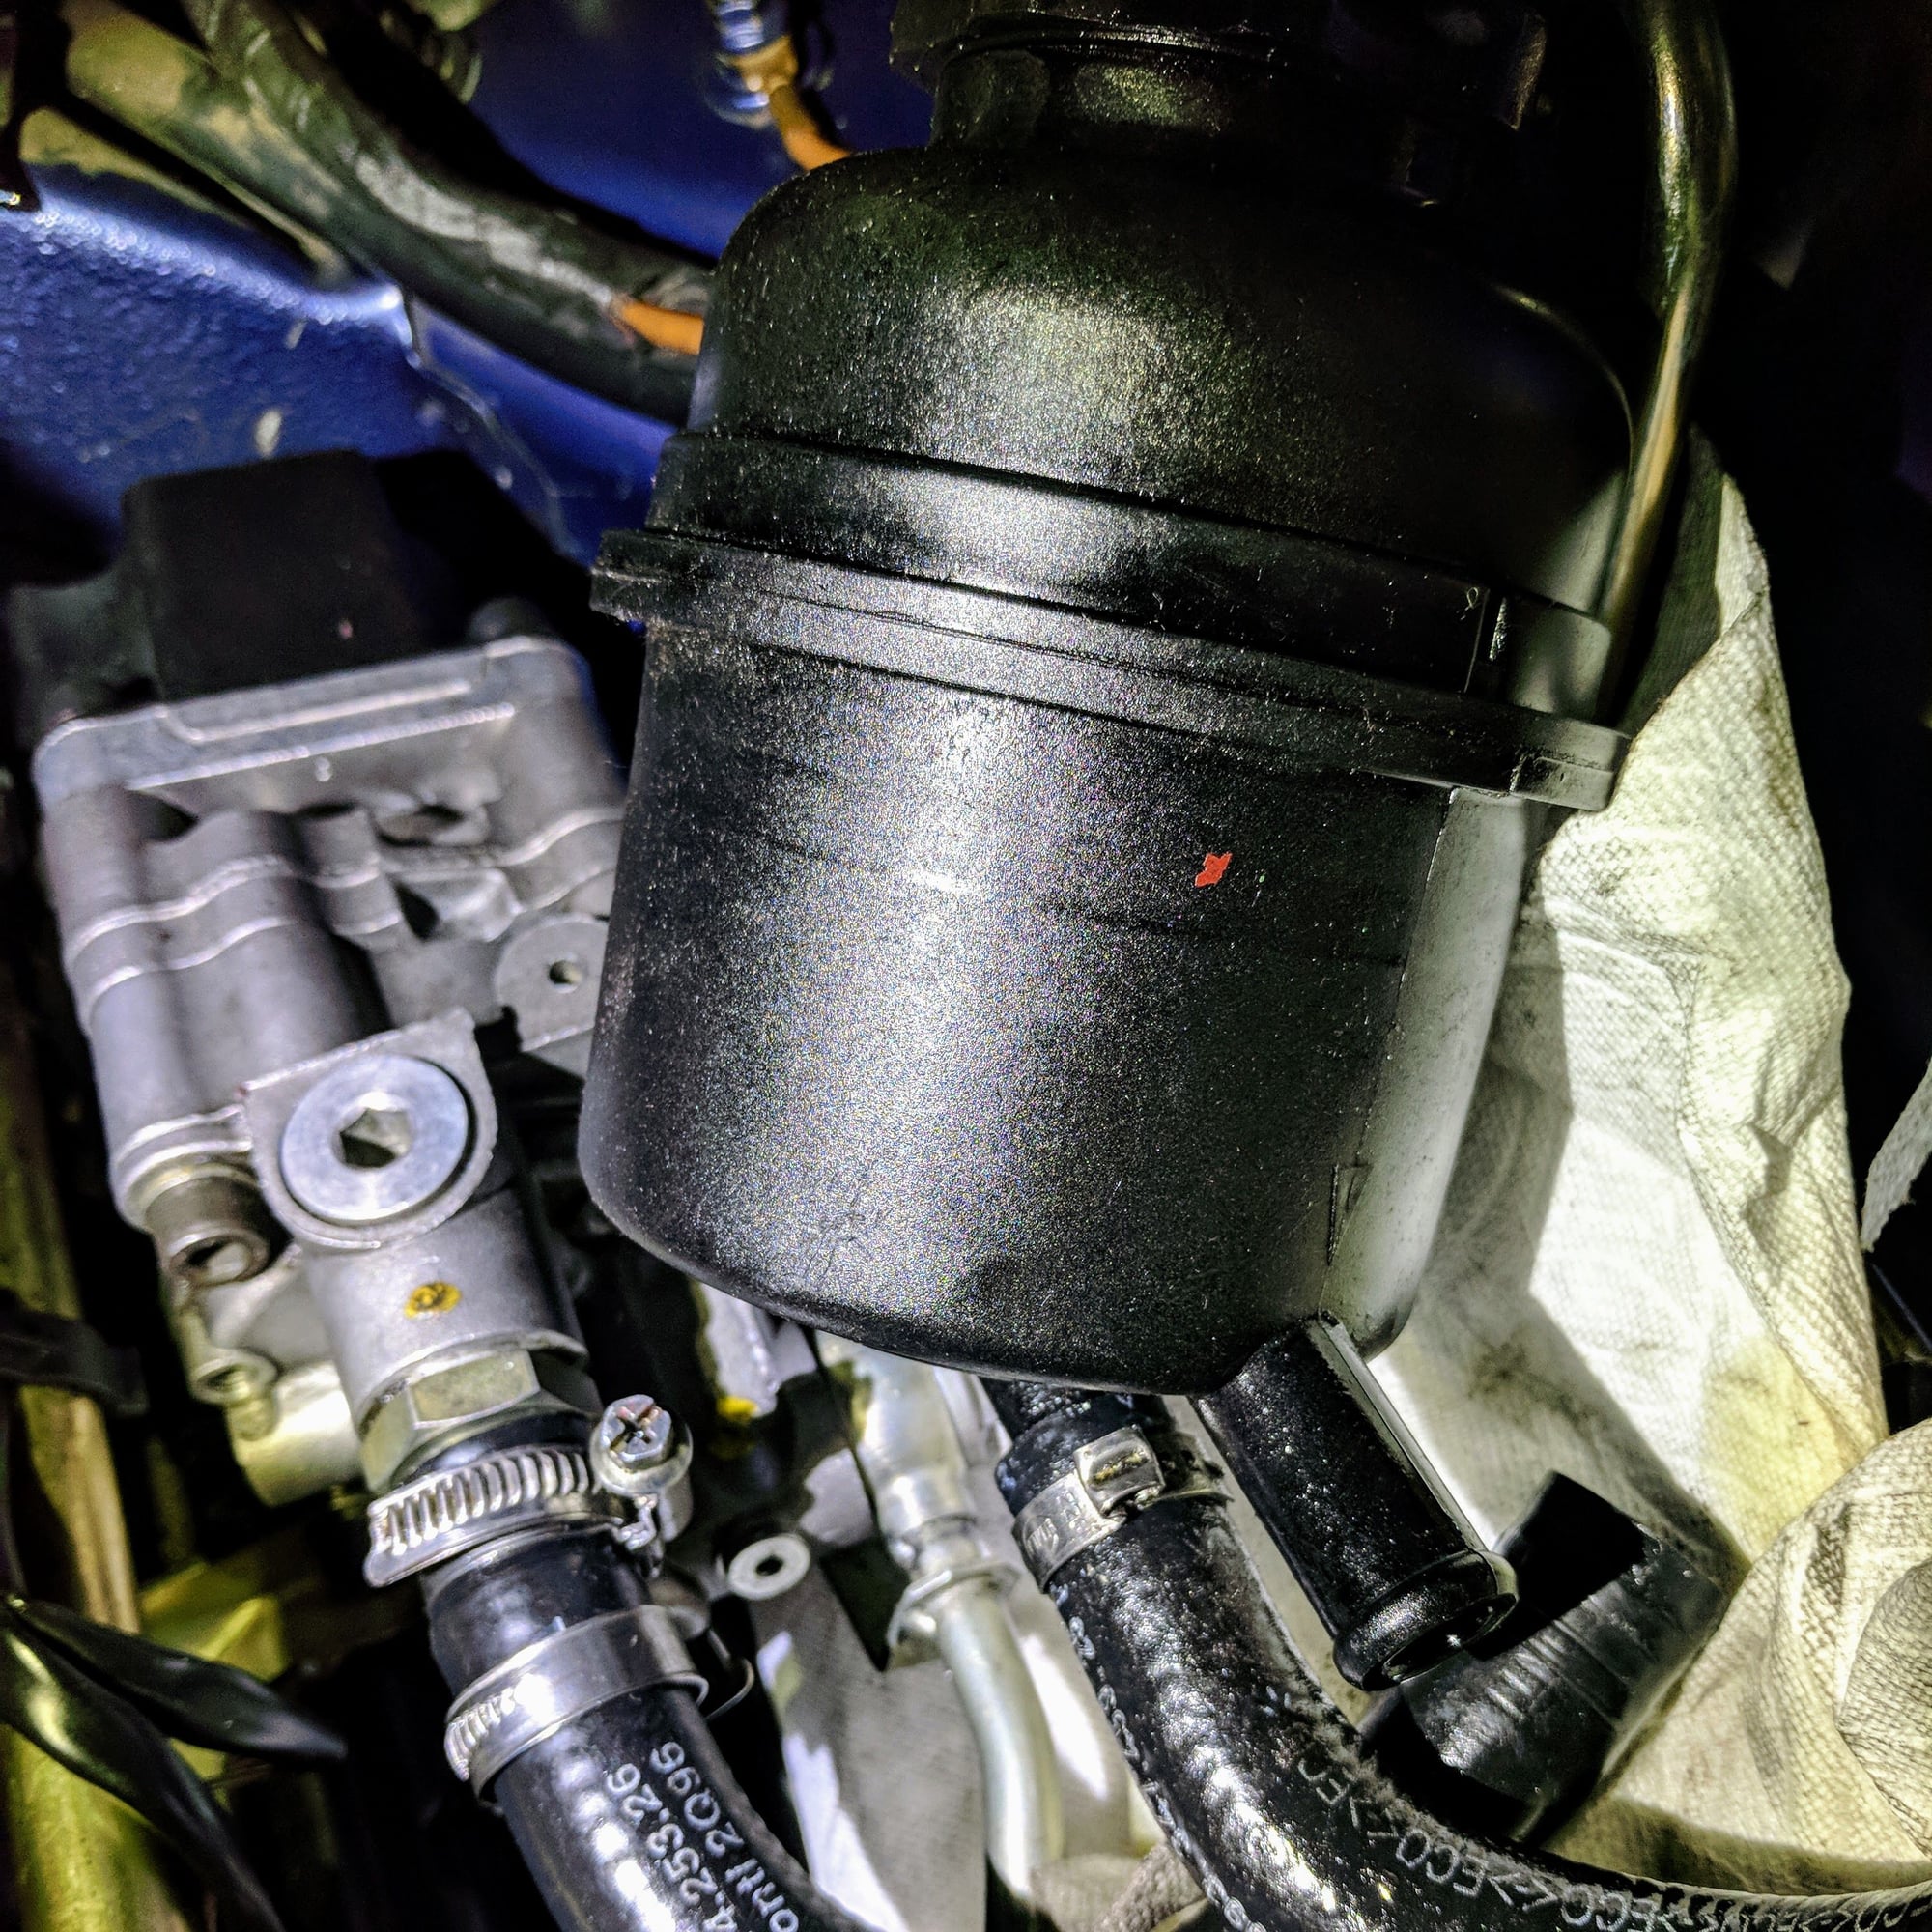
Next up PS reservoir replacement. Given I had the airbox removed, I decided to replace the PS fluid reservoir since all you have to do is remove the PS fluid via a syringe. @pp000830 AKA Andy recommended this as preventiative maintenance to replace the PS fluid filter which is servicable only through replacing the resevoir. I know in 20 years I have no records of this being replaced so a simple slippery slope item...
1. Remove the PS fluid.
Initially I used a cheap turkey baster to get the fluid out. It didn't work too well as it didn't have enough suction to hold the fluid in so made a drippy mess.
2. Remove the hose clamps that attach the reservoir to the body and the PS system. Put some rags under the reservoir as there is residual PS fluid in the tubes.
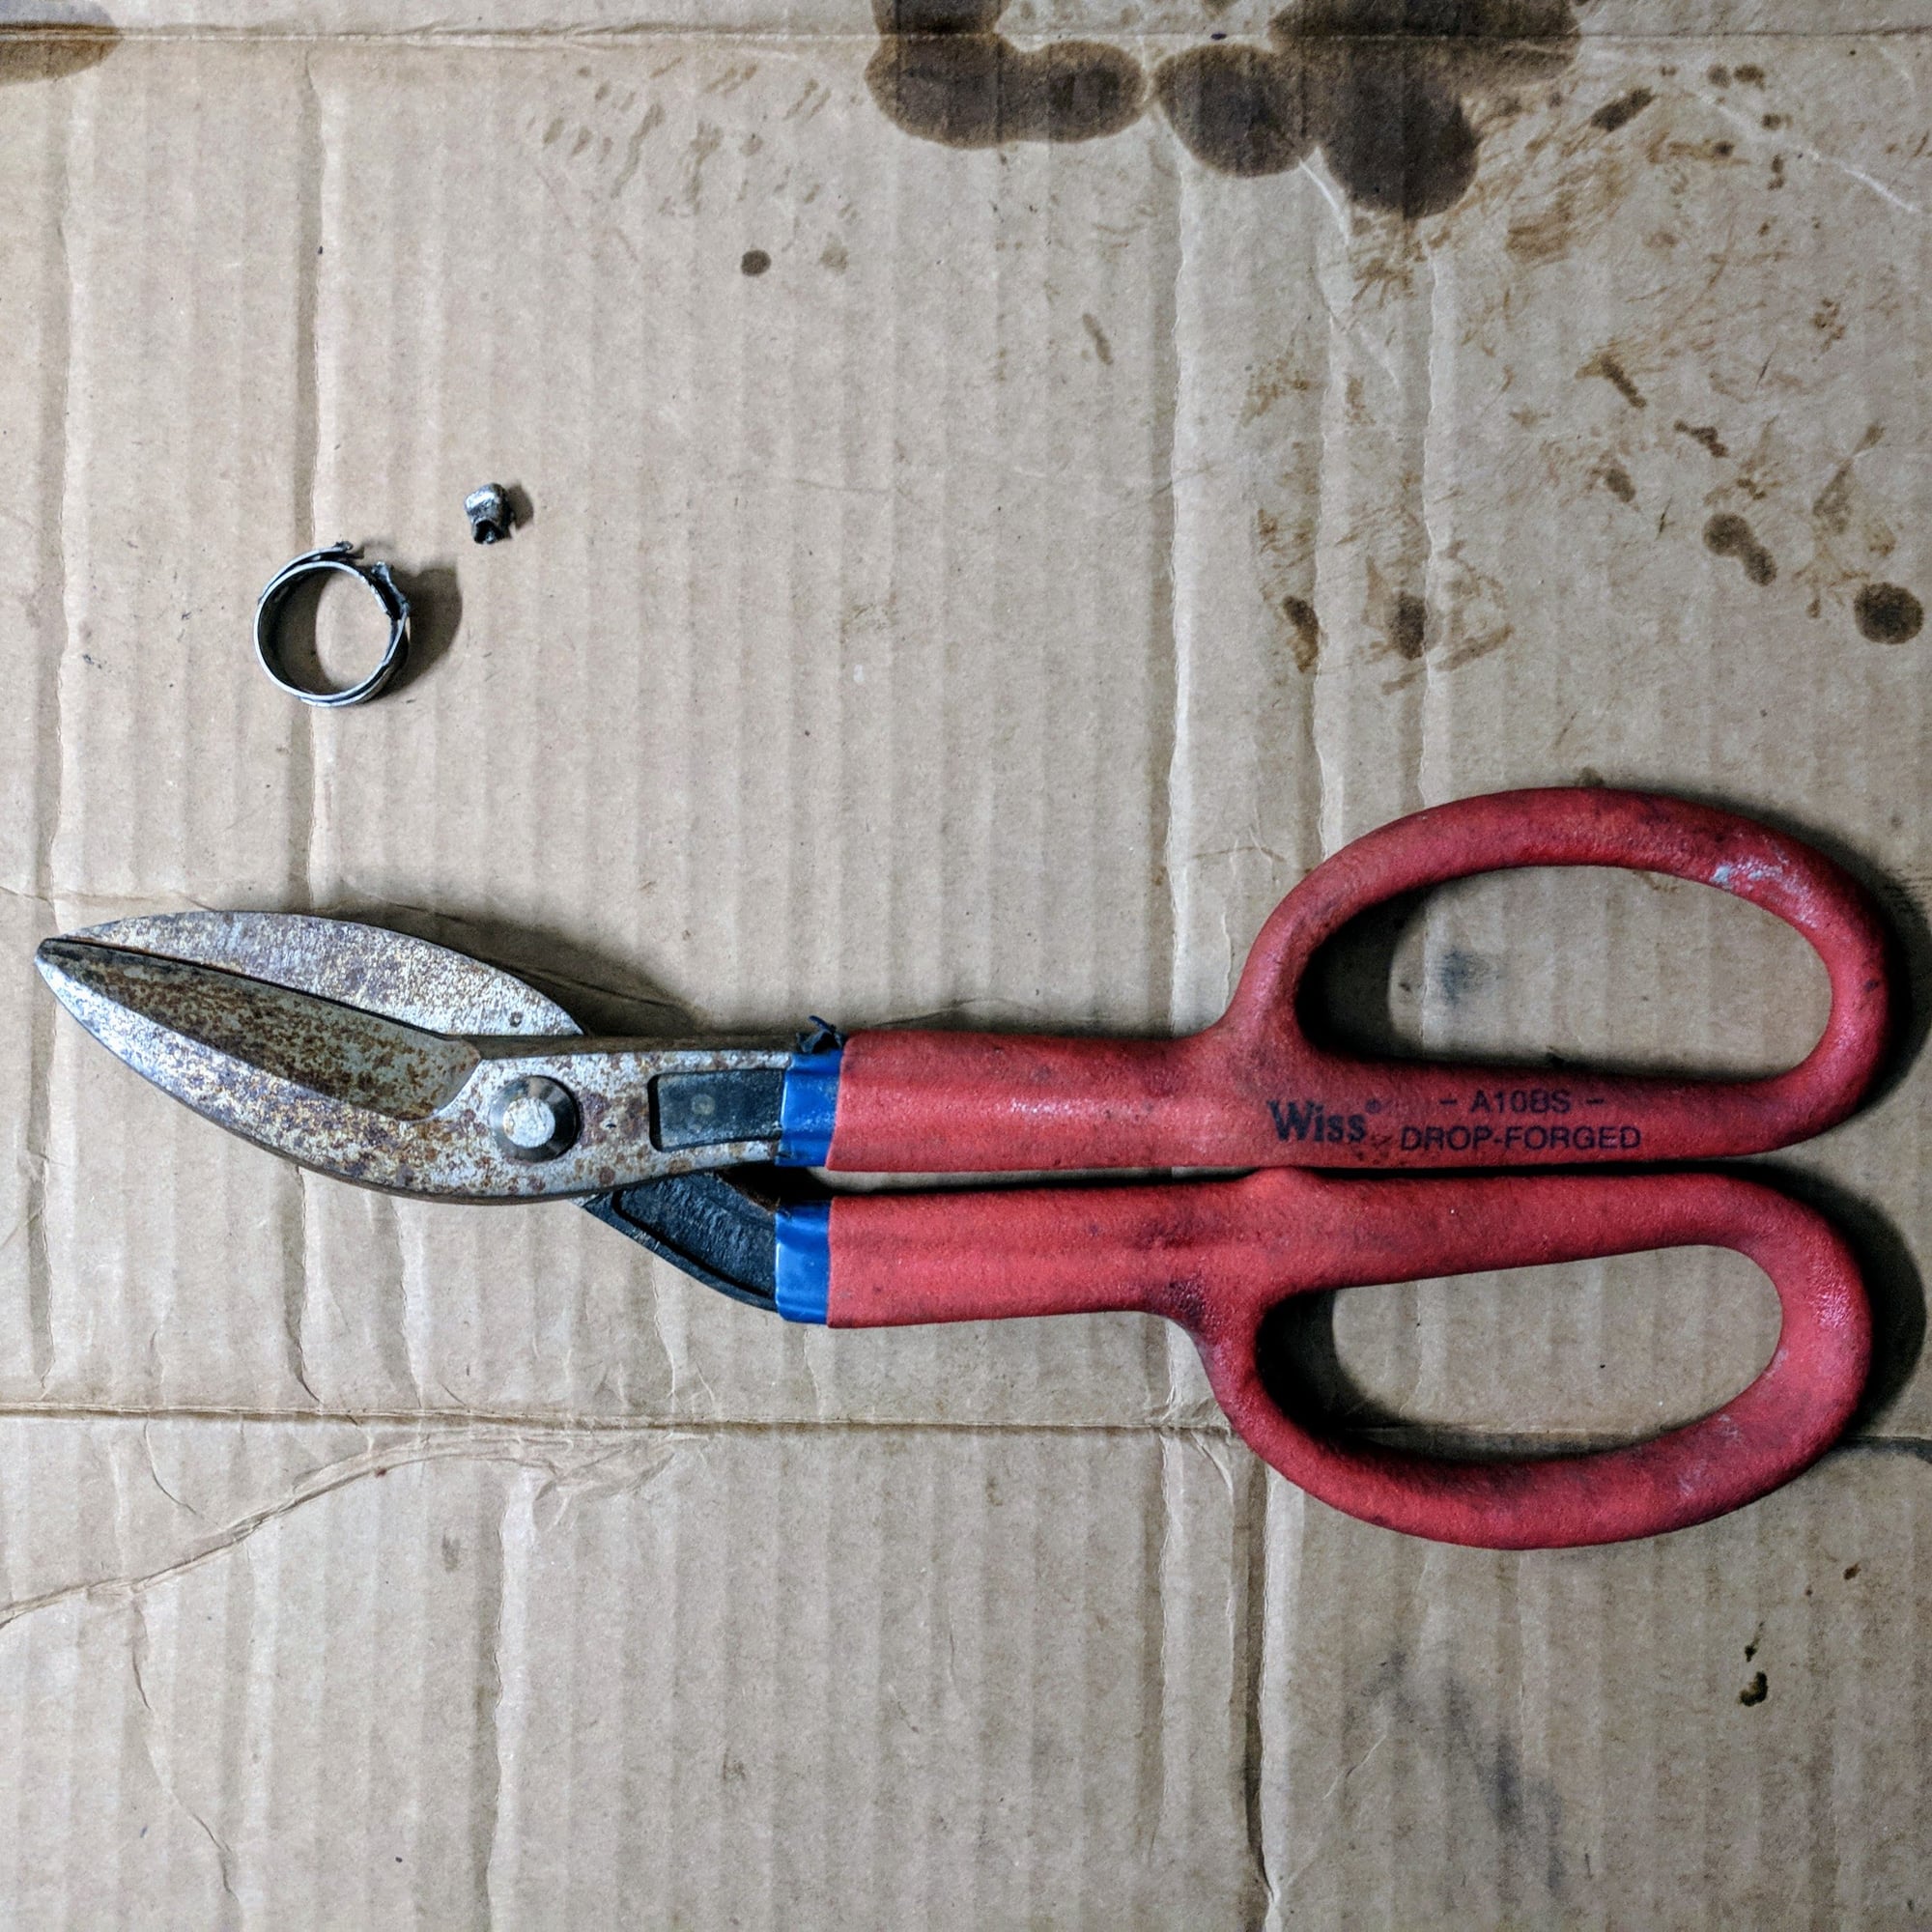
One of the hose clamps I had to attack with my tin snips to cut it off...
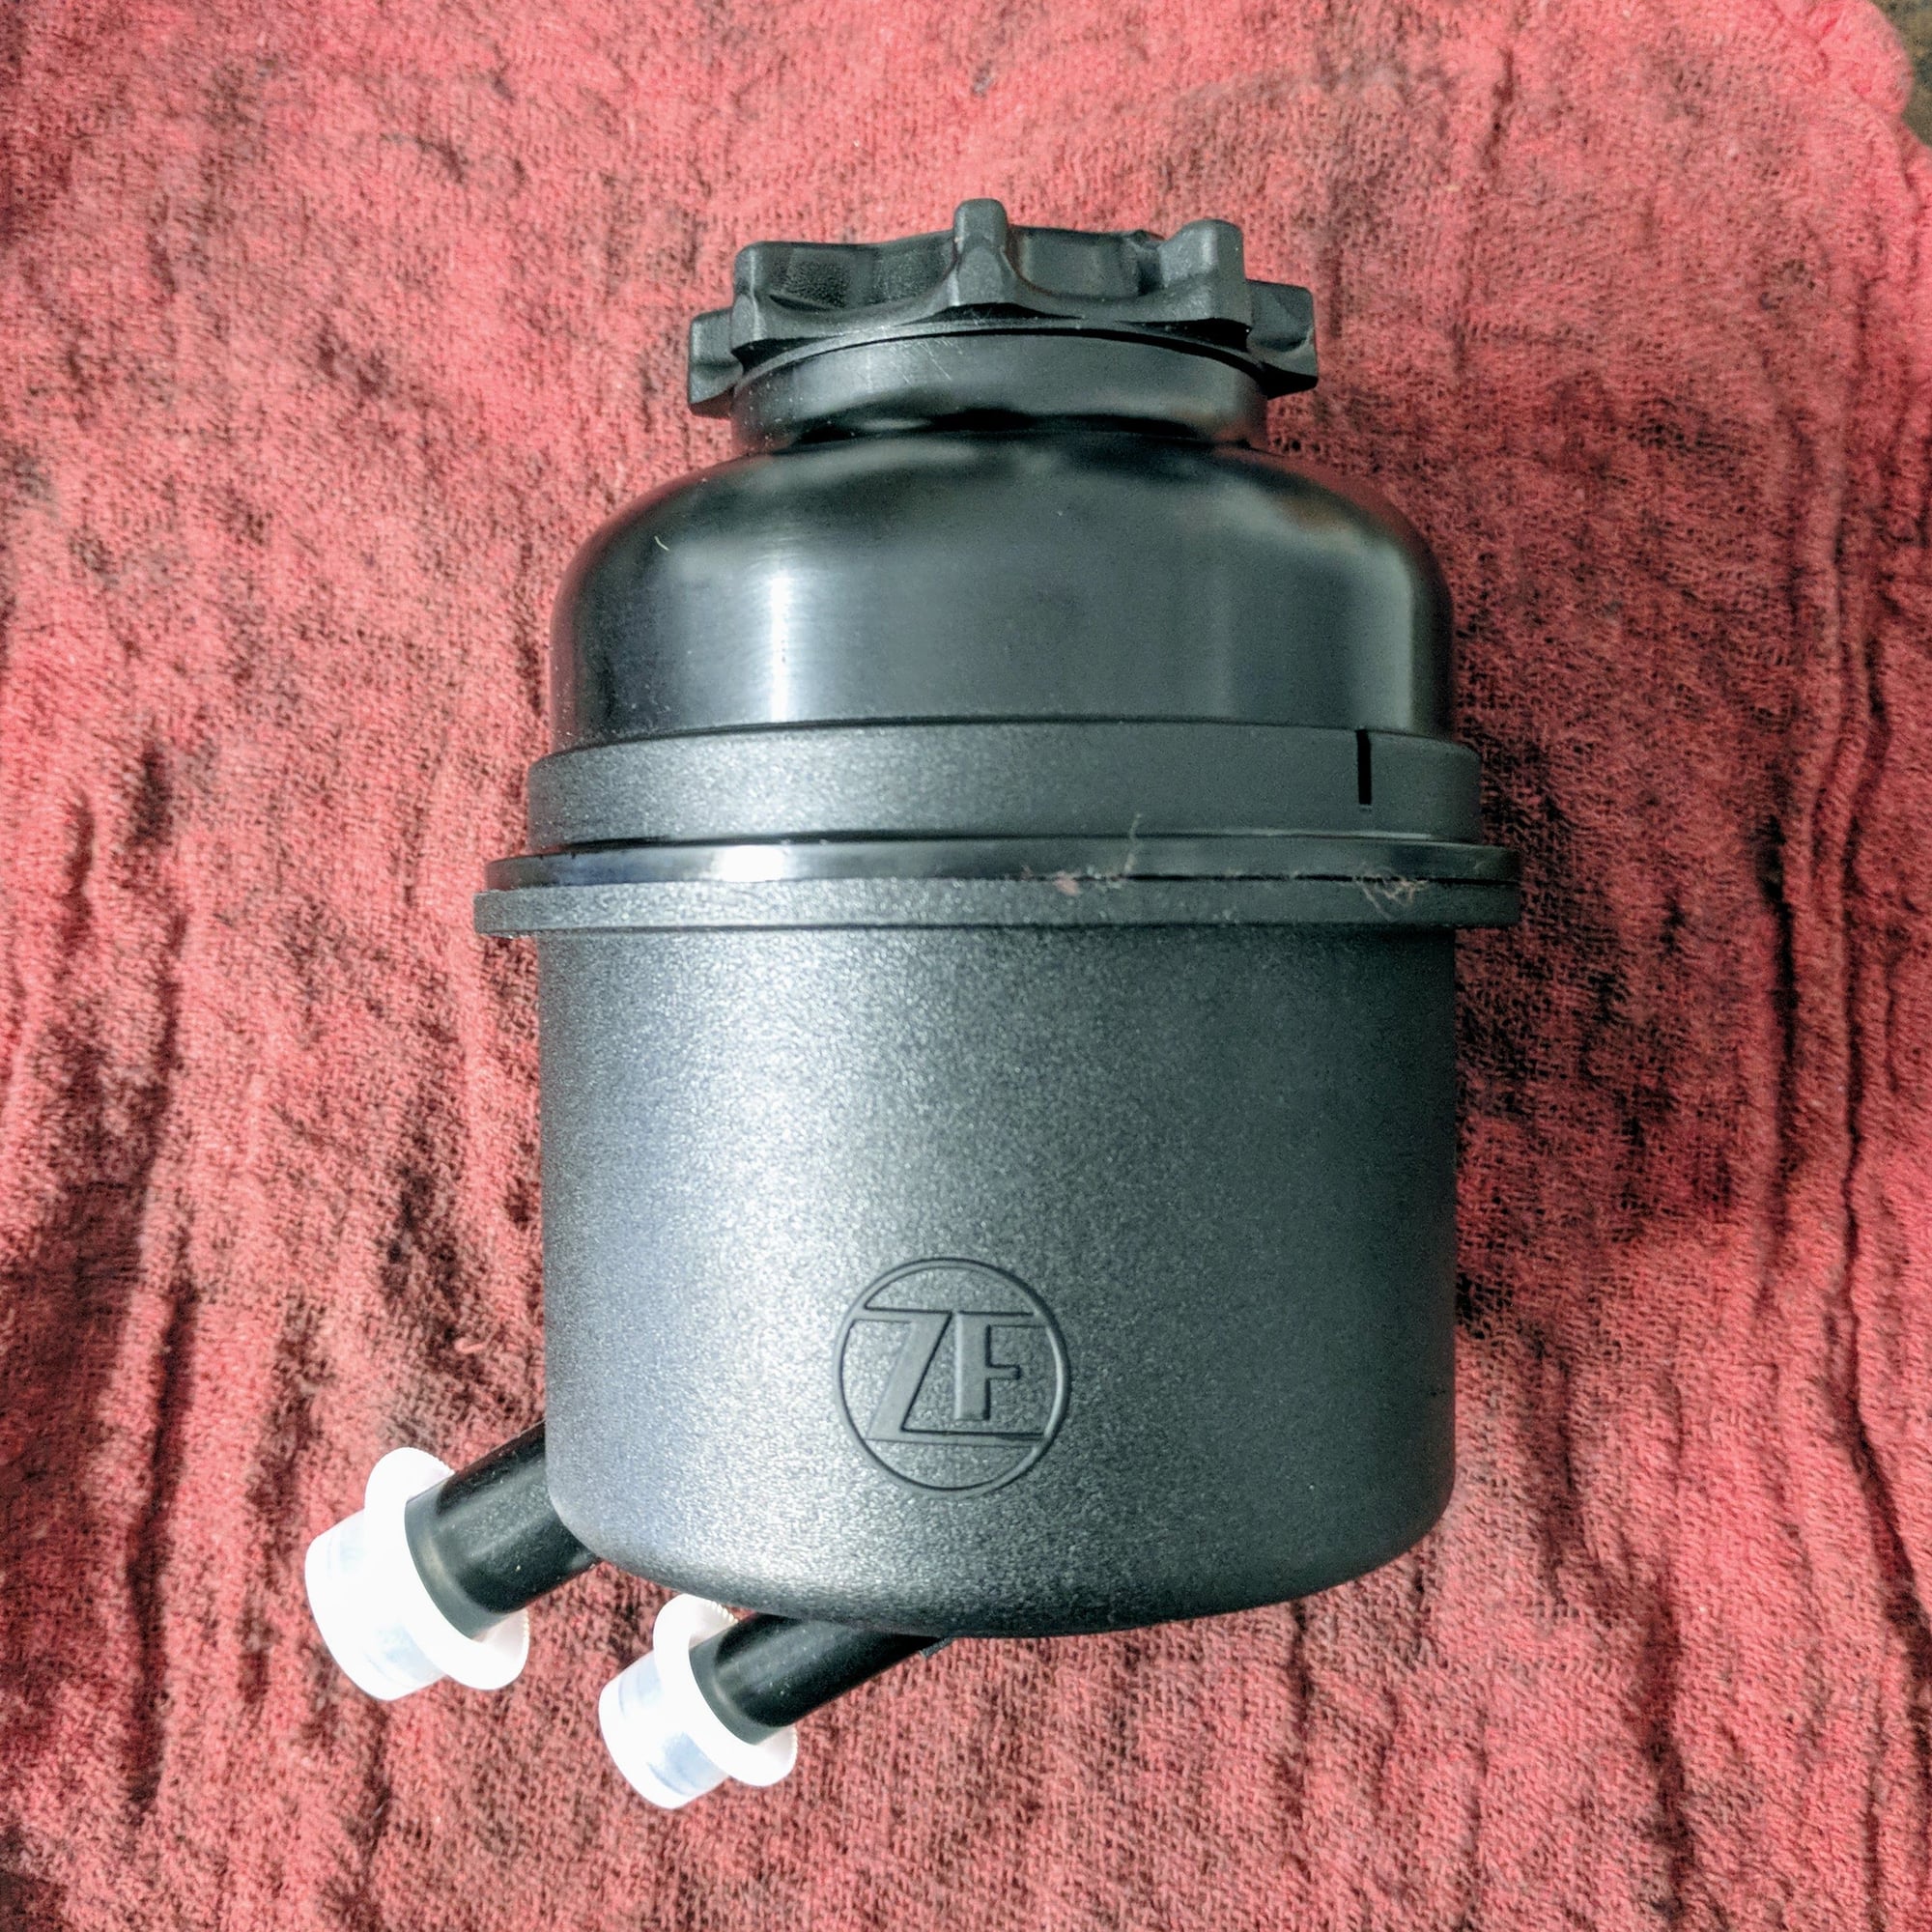
3. Install the new reservoir.
The new reservoir has a better dip stick to make it easy to see the PS fluid level.
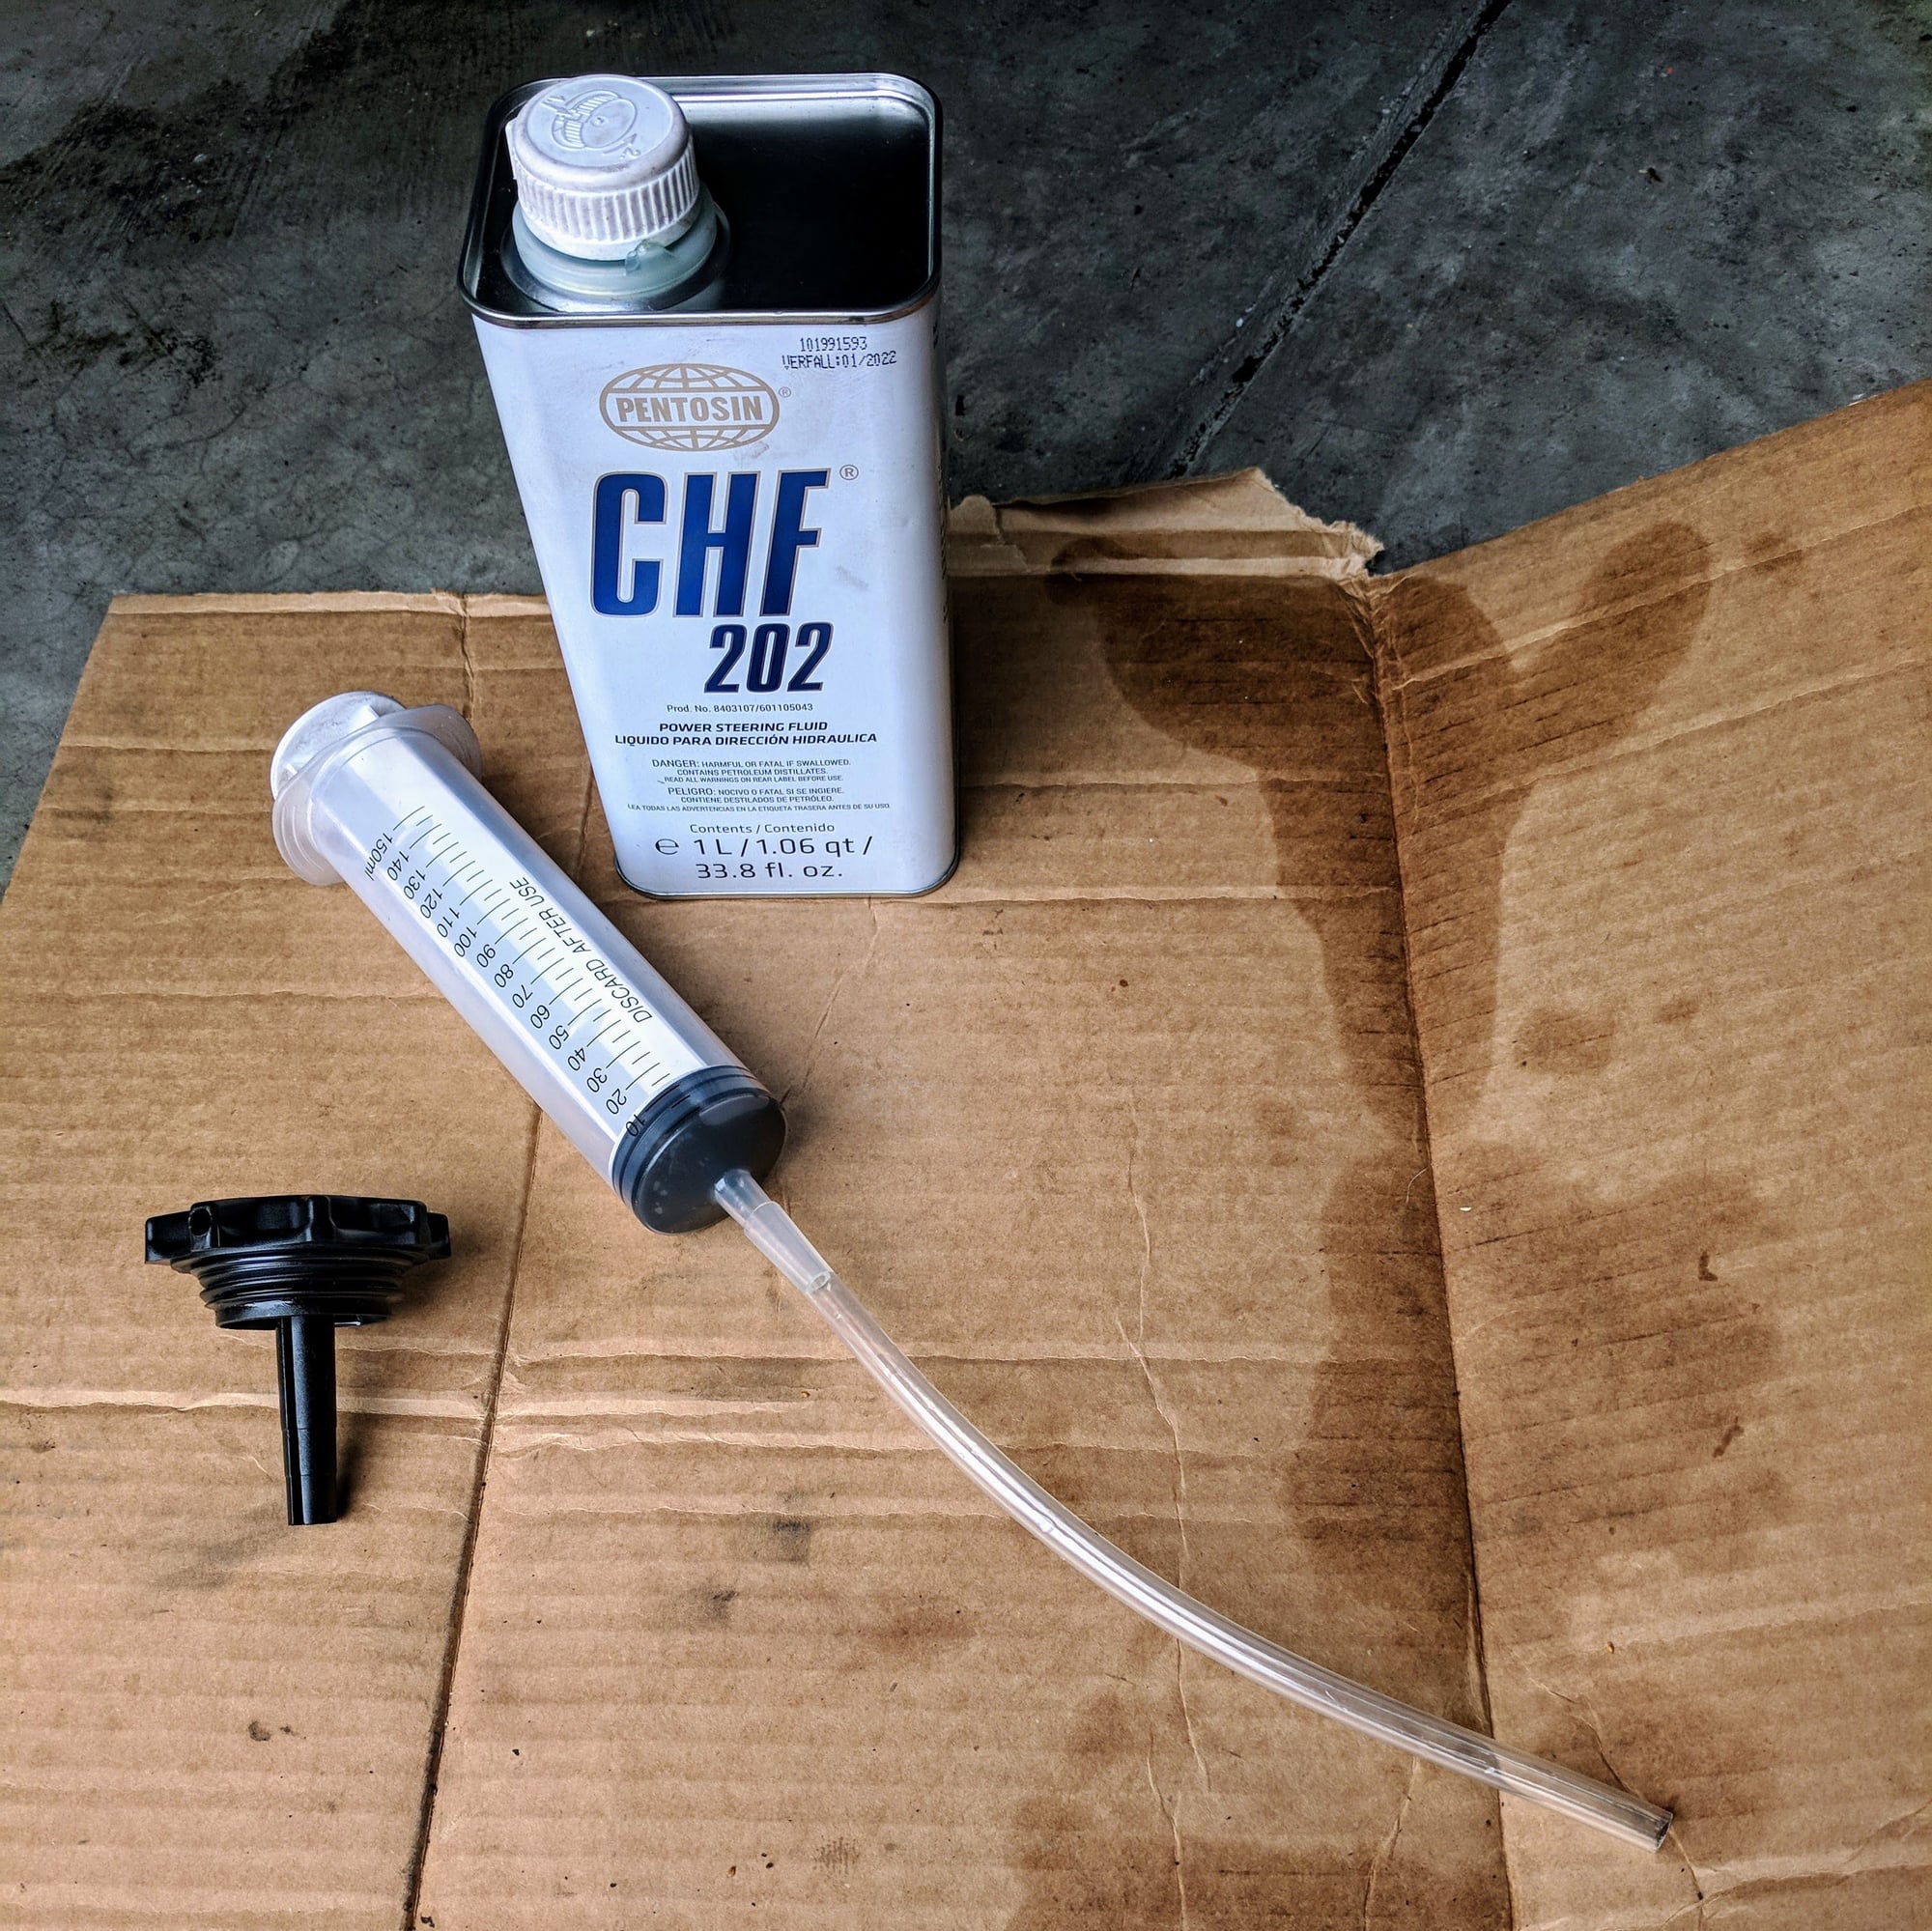
4. Fill up the reservoir with new PS fluid.
On Amazon found some cheap 150ml syringes with medical grade tubing. It worked great.
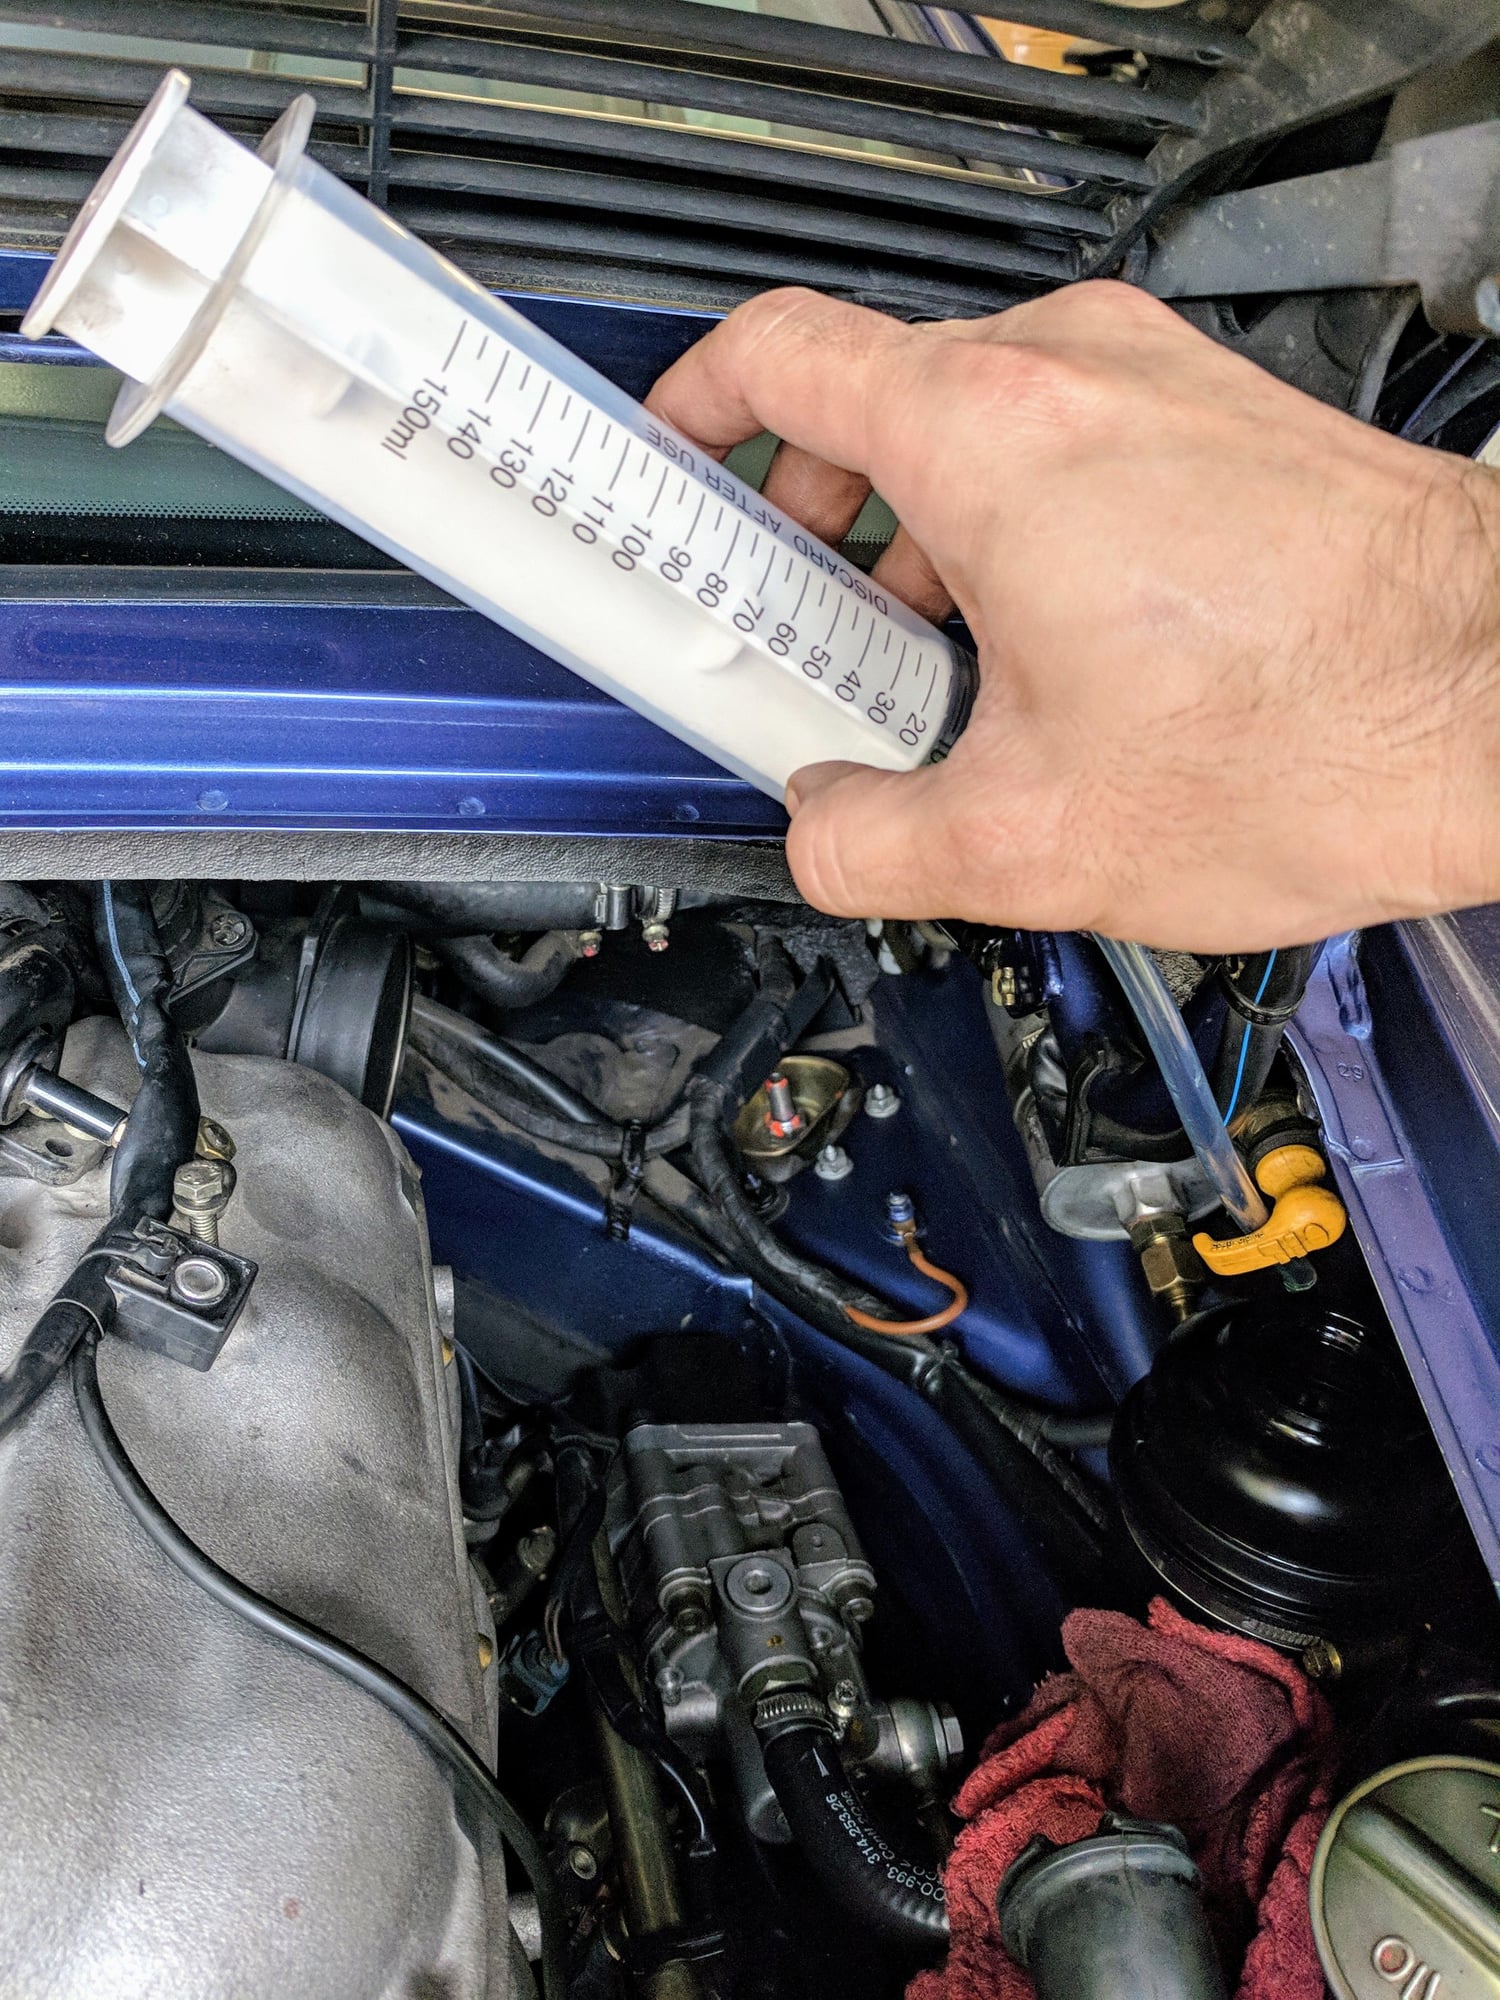
I initially filled about 300ml which was about two full shots of the syringe.
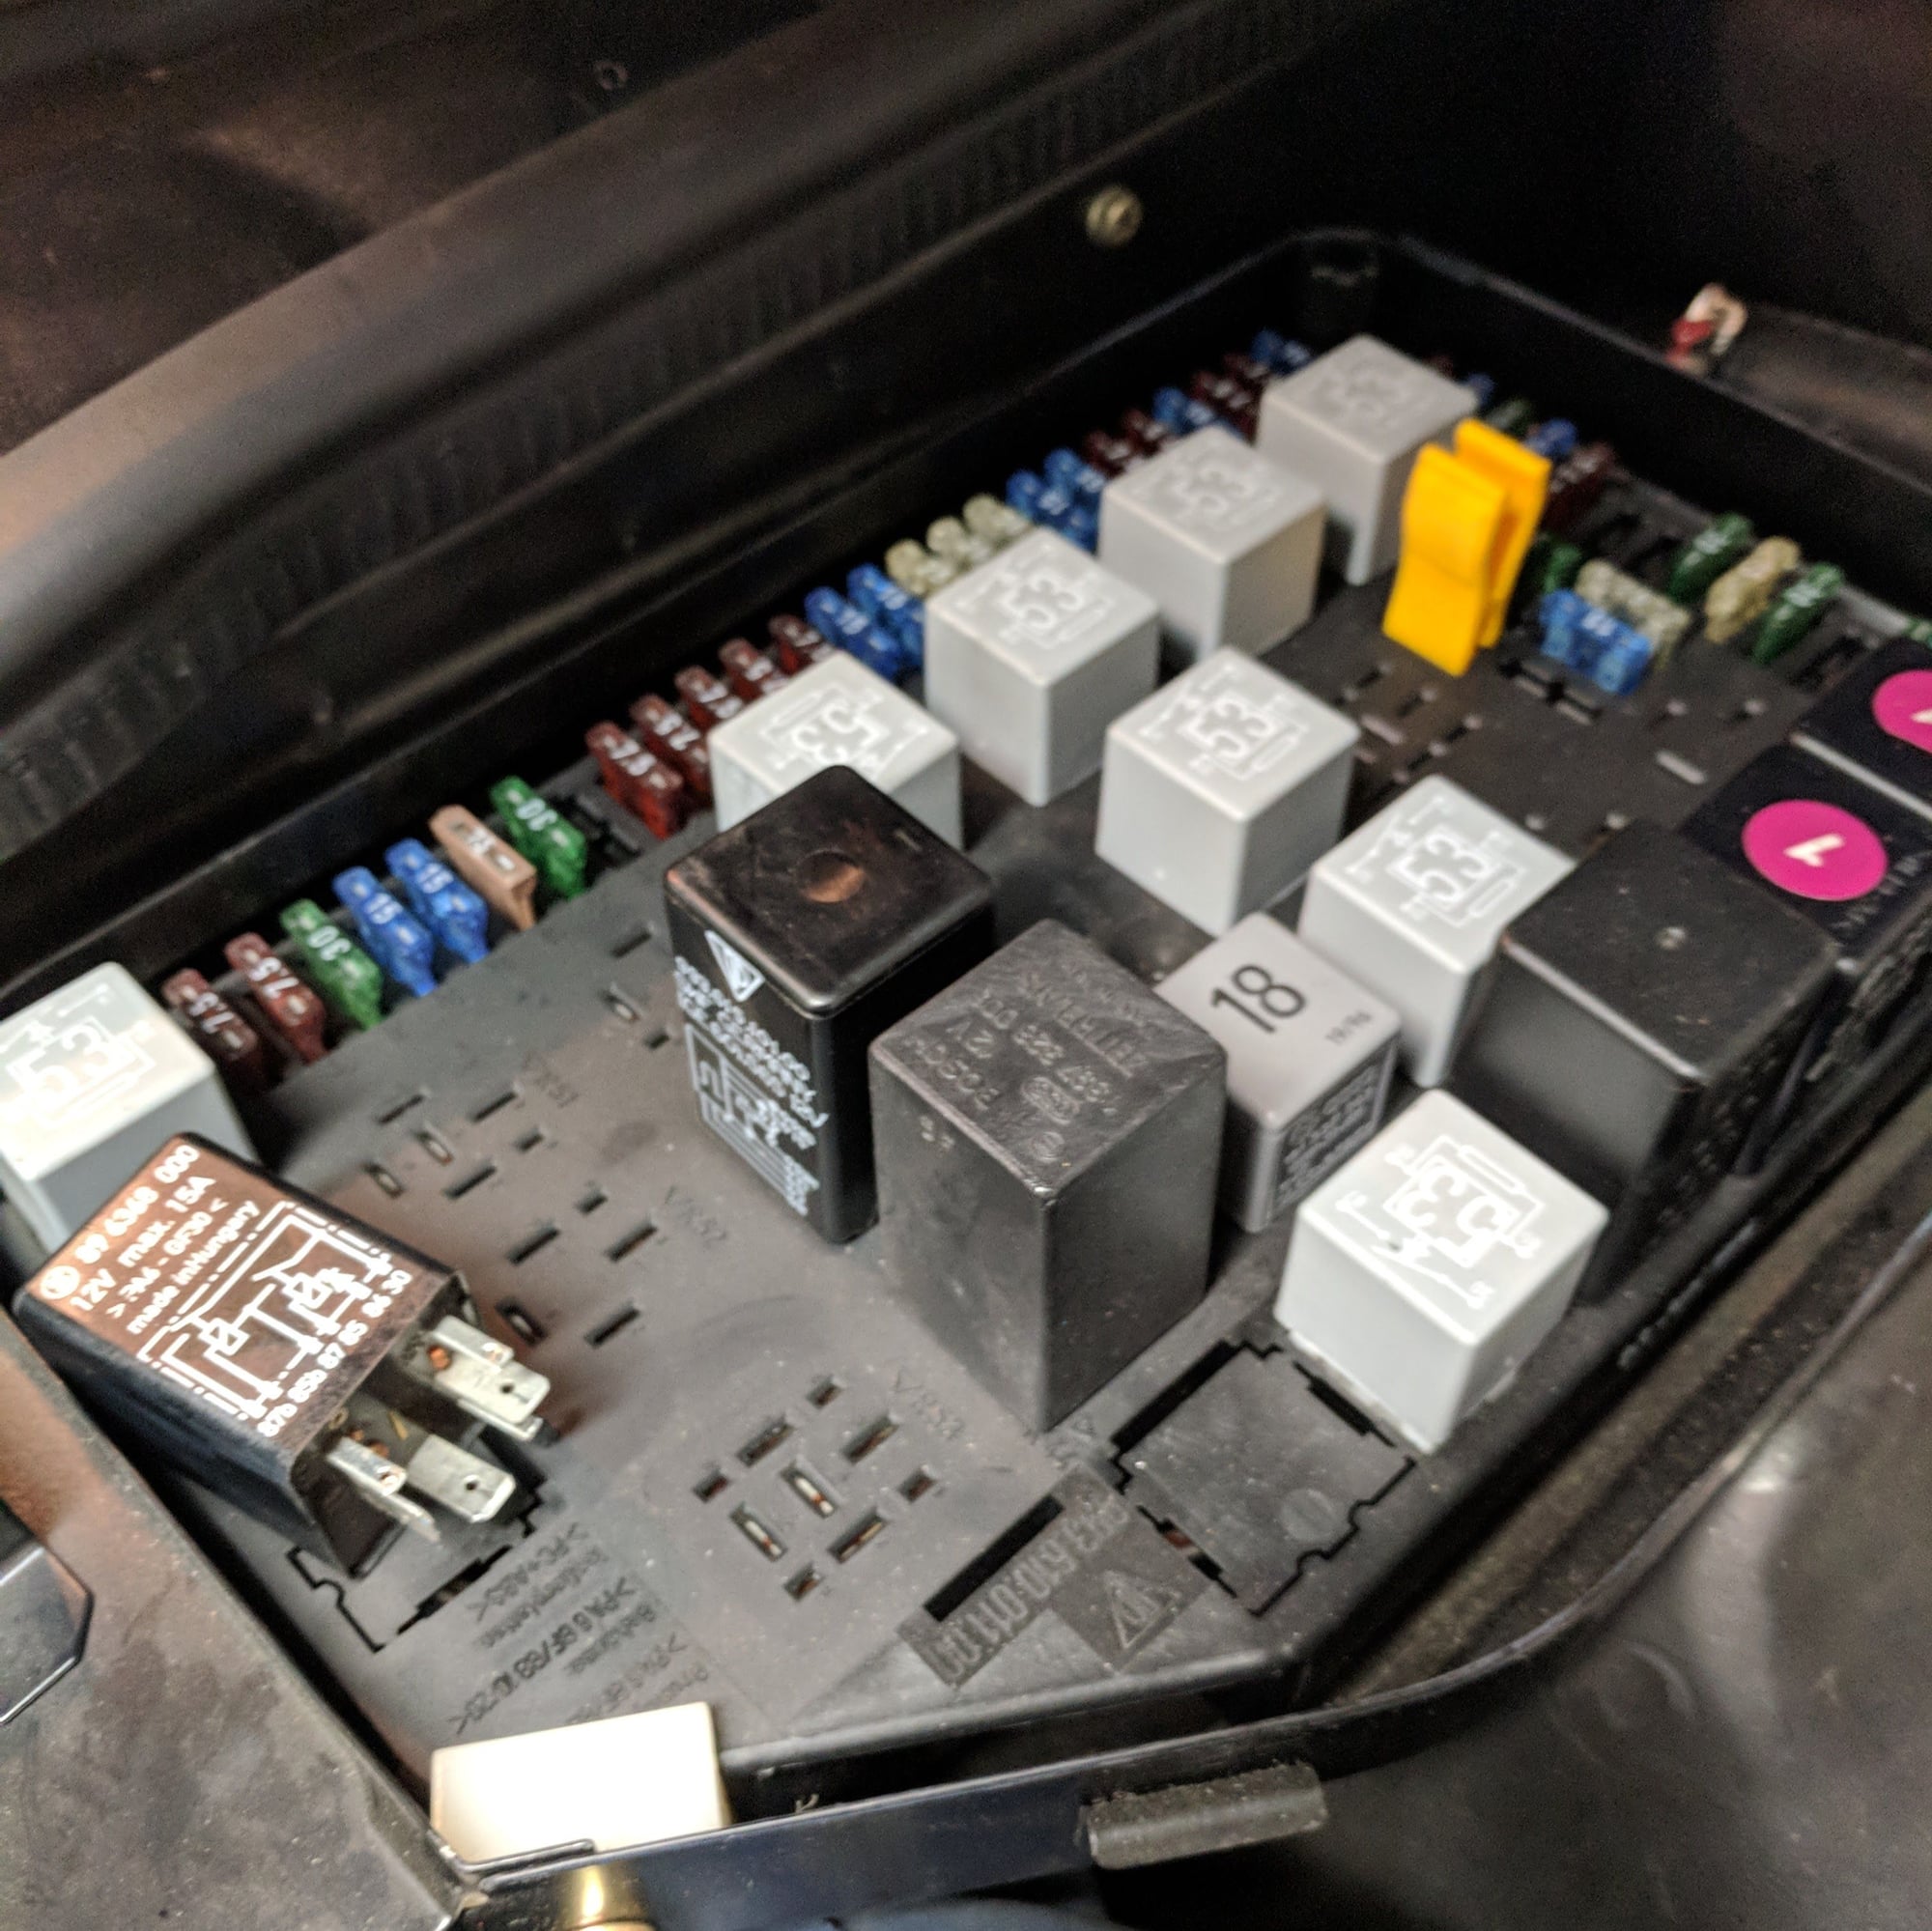
5. Crank the engine over a few seconds so the PS pump can suck in the fluid into the PS system to bleed out the air. I took out the DME relay to prevent the engine from starting.
6. Check the PS fluid level. It's likely to be lower so fill it up. I did this about 125ml a time. Crank the engine. Check the level. Repeat until the fluid level doesn't change.
7. Put the DME relay back in and fire her up. Turn the steering wheel lock to lock a few times. Check the level and fill as necessary. You are done when the fluid level stabilizes and there is no groaning noises coming from the steering when you turn the steering wheel.
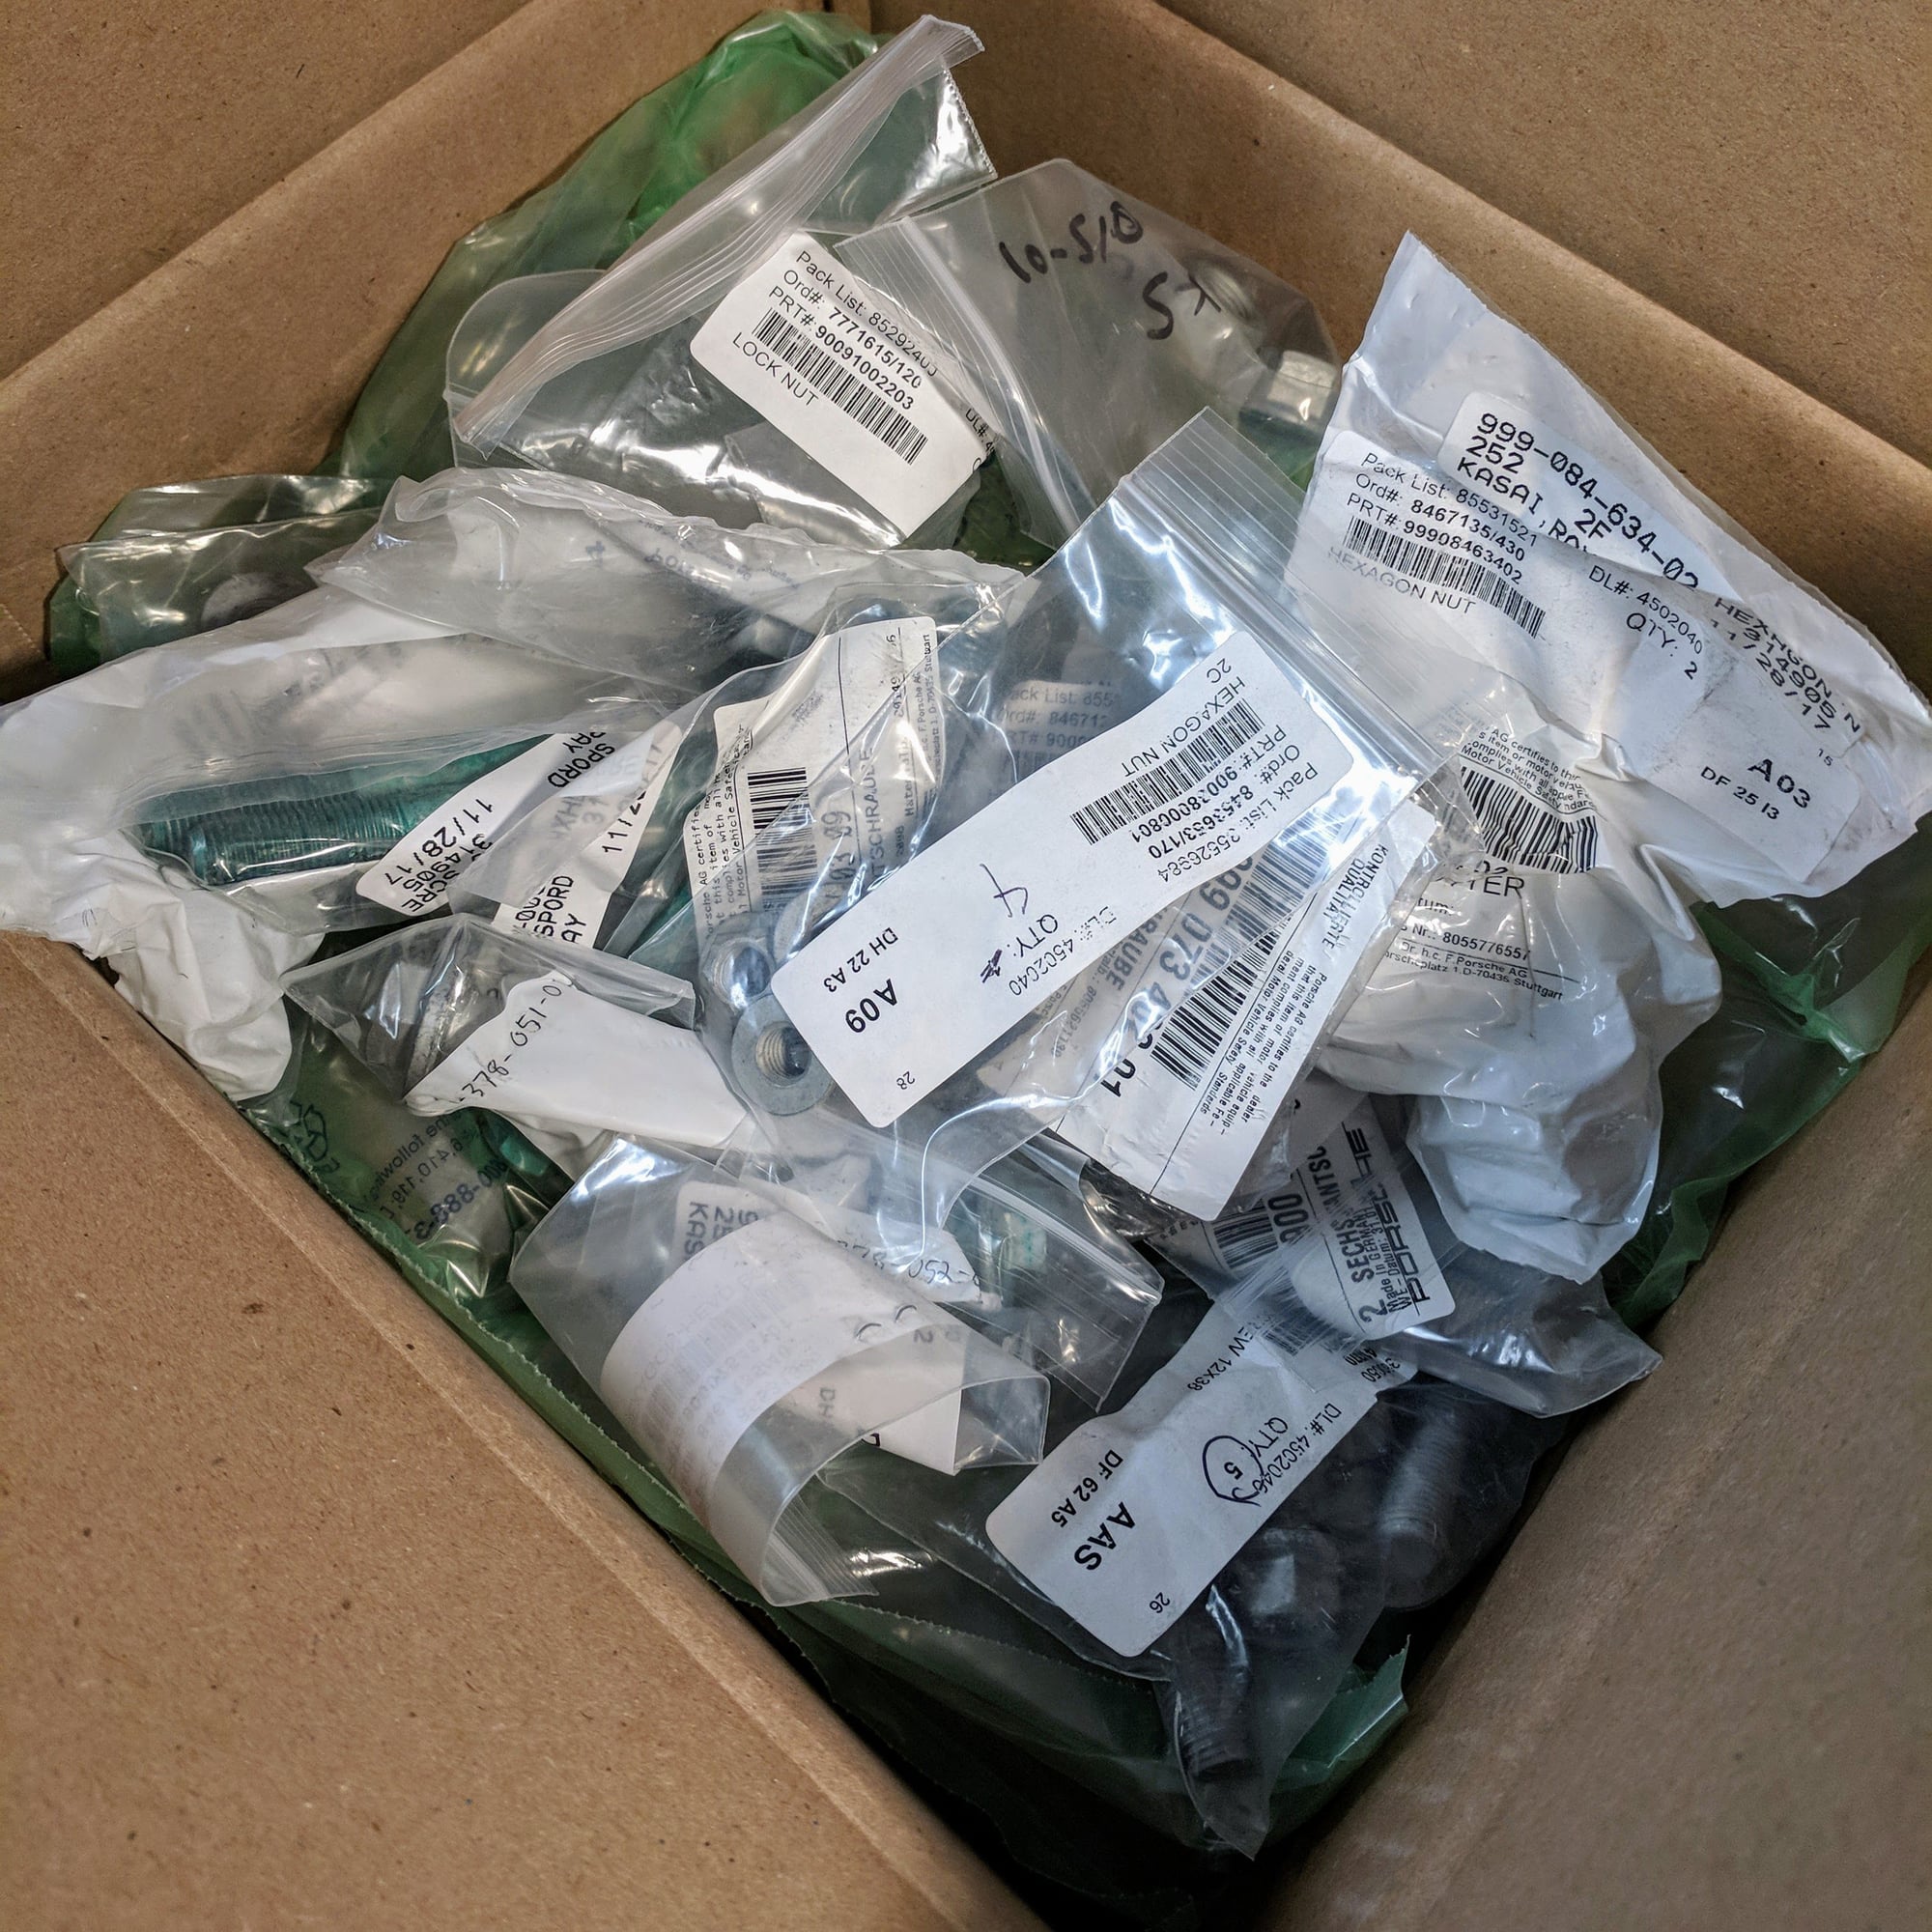
Guys and gals, been heads down trying to finish a few projects at once and finally finished buttoning up her up last night after my garage being a workshop for over a month. Knocked out the following updates to bring my car closer to RS spec as I replace the 20 year old rubber components in the suspension, steering, and shifter.
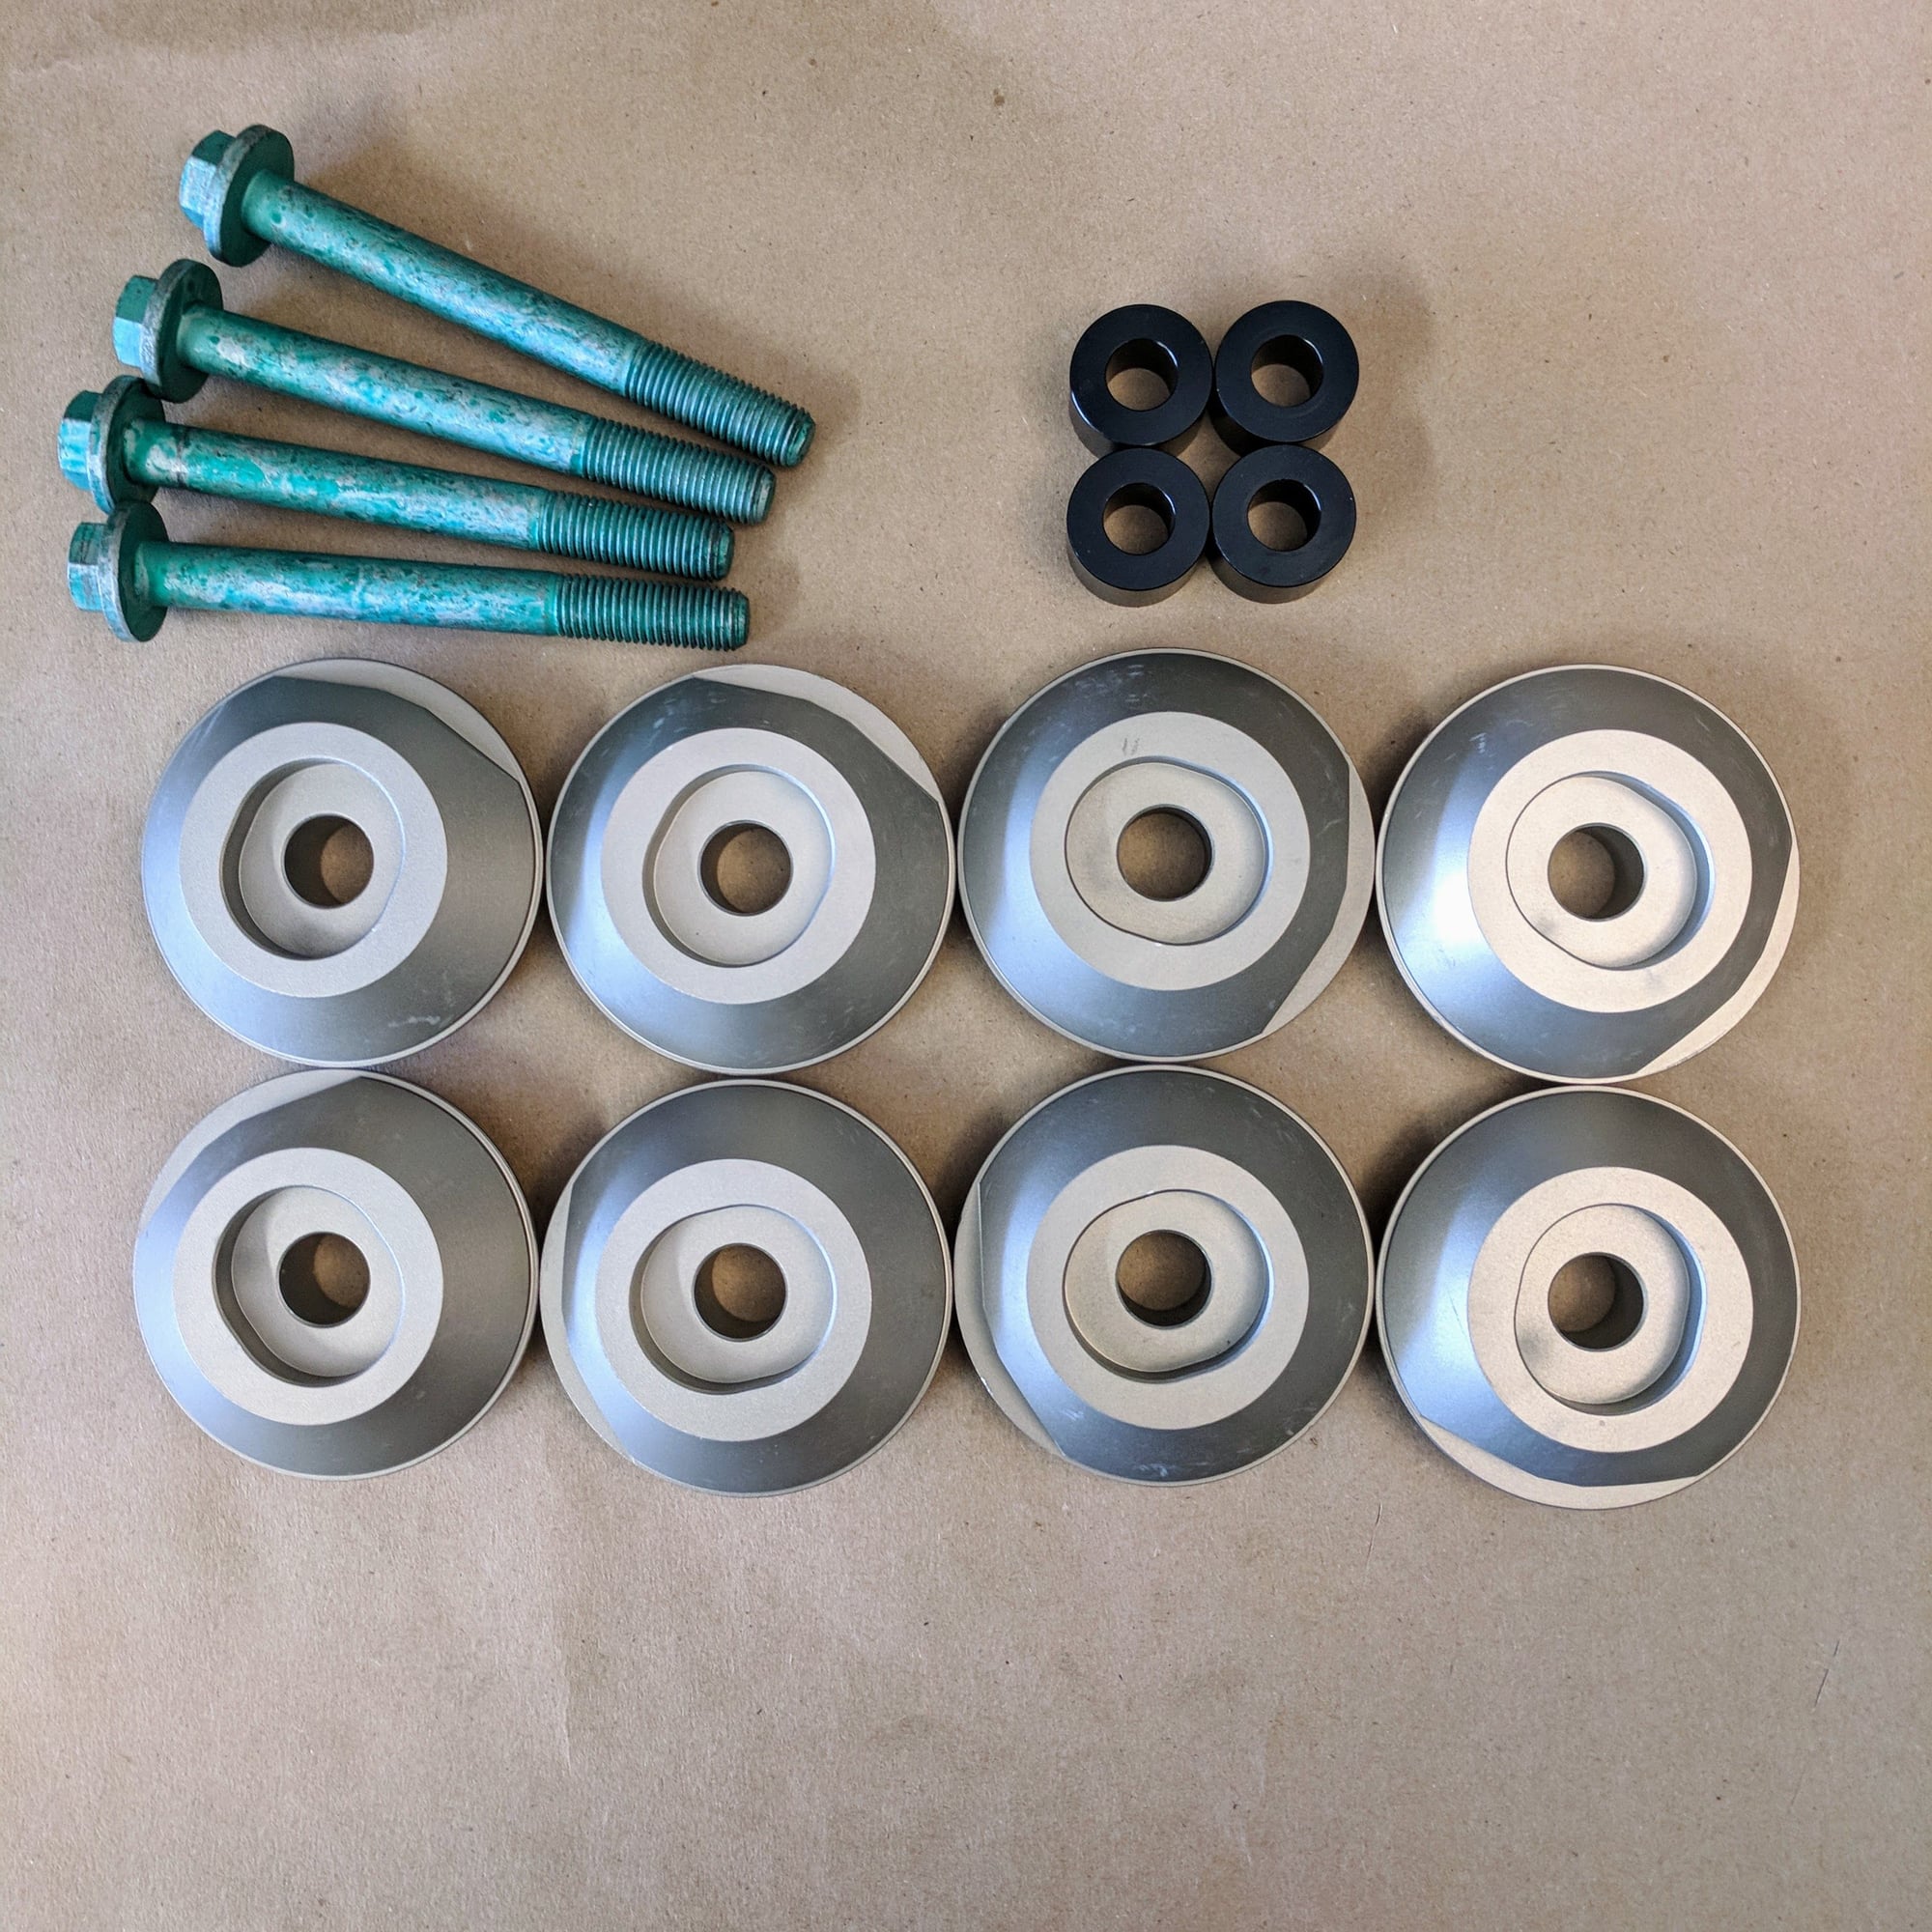
Box full of new hardware so lets GSD (get stuff done)!
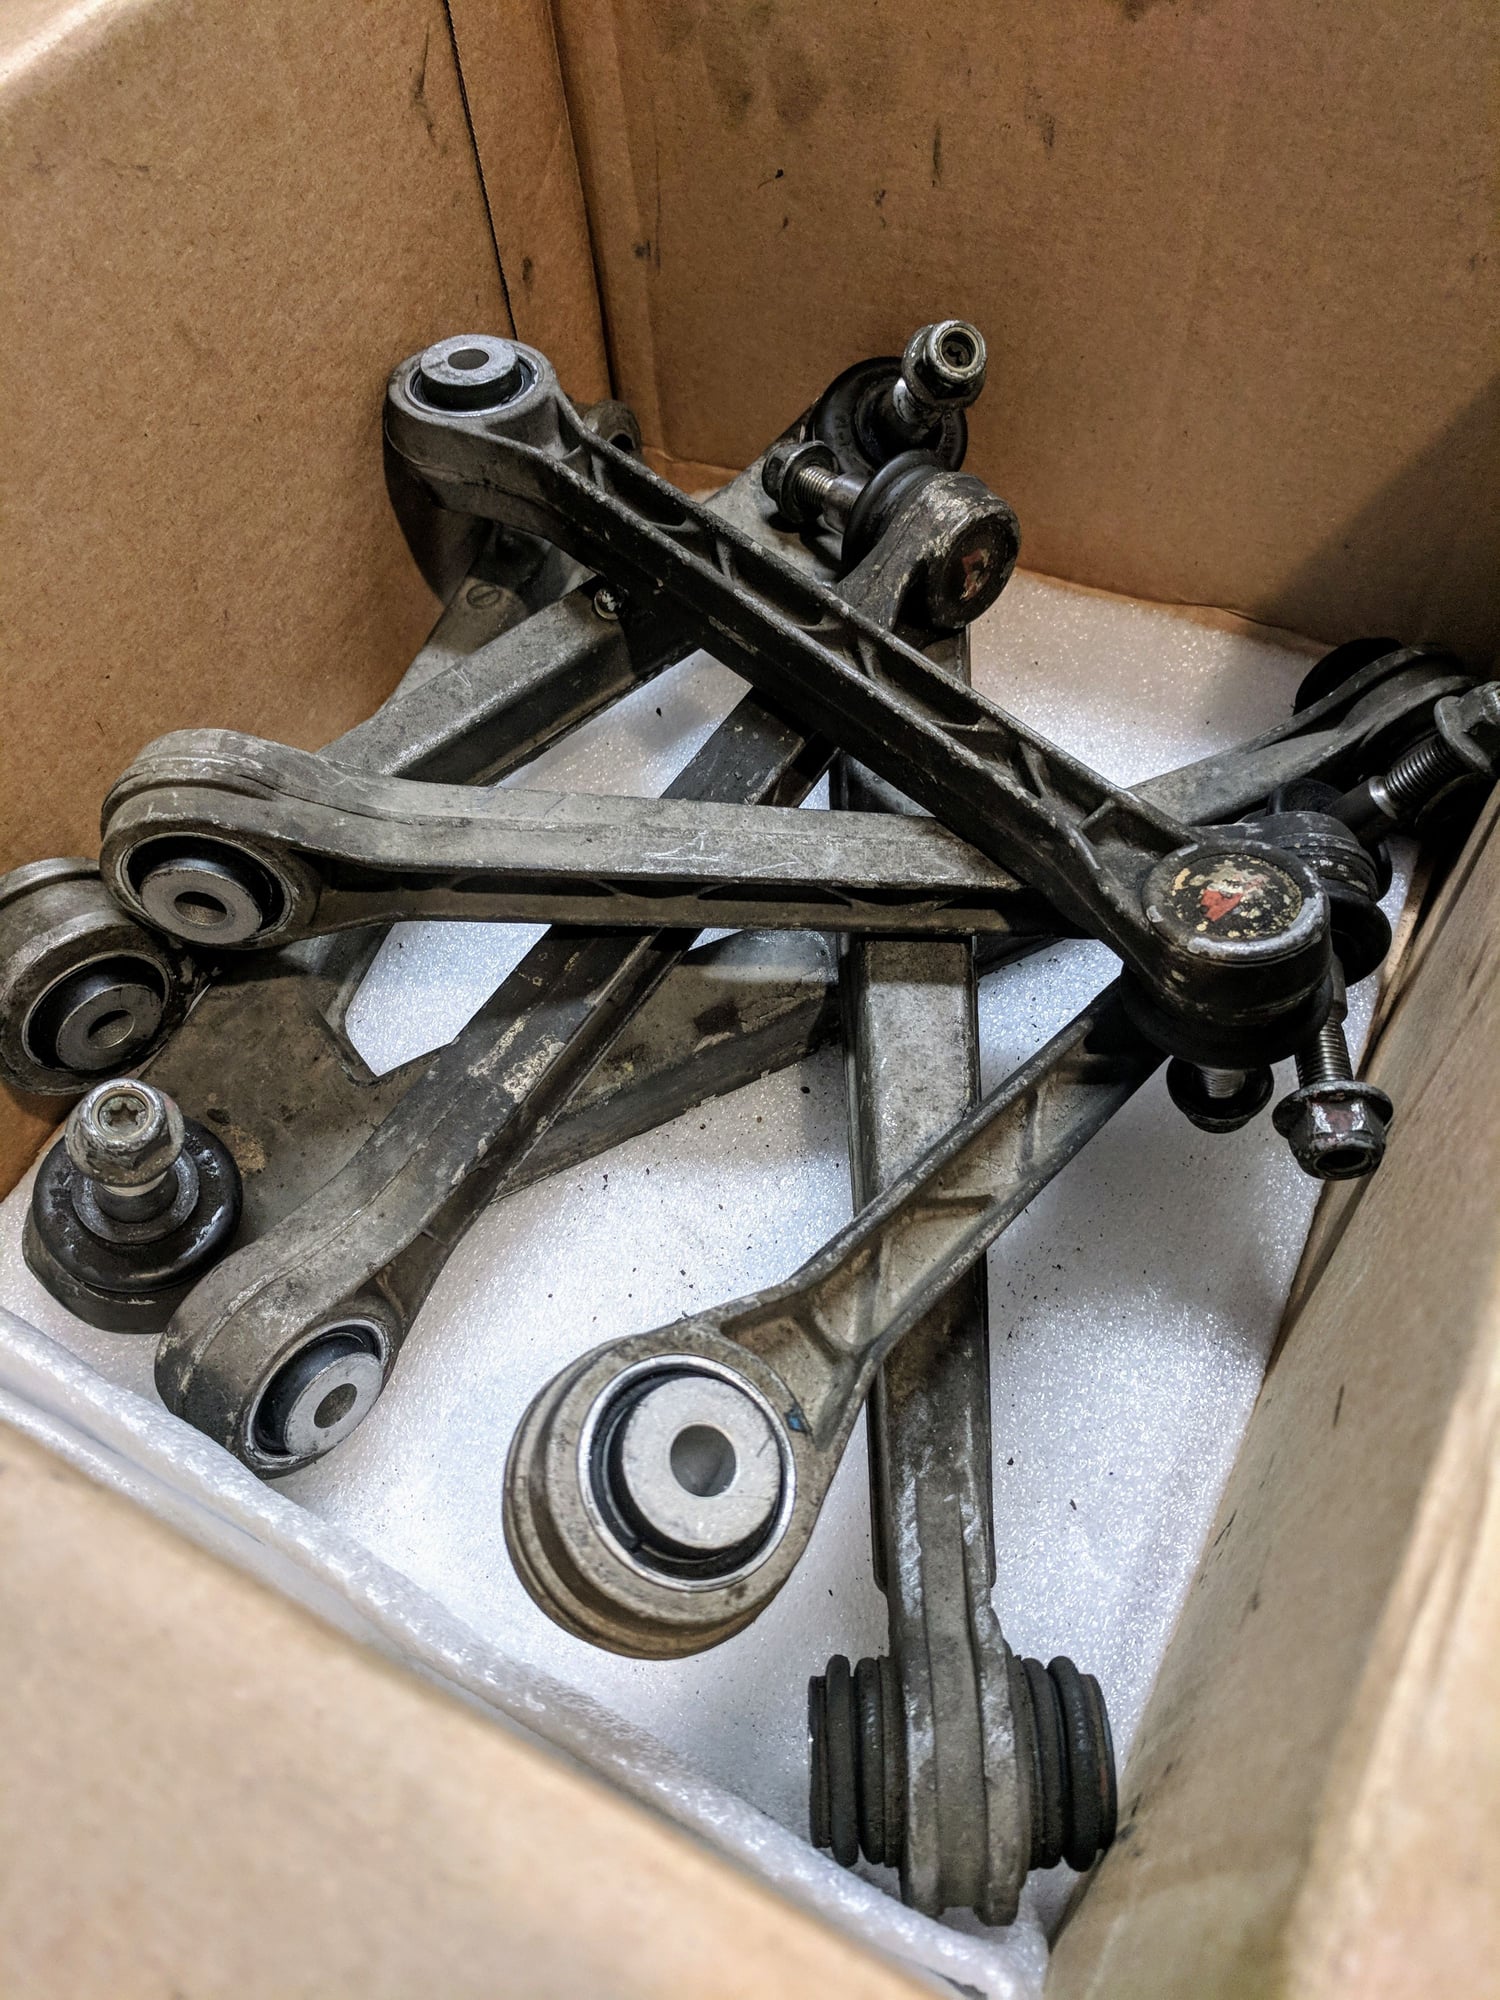
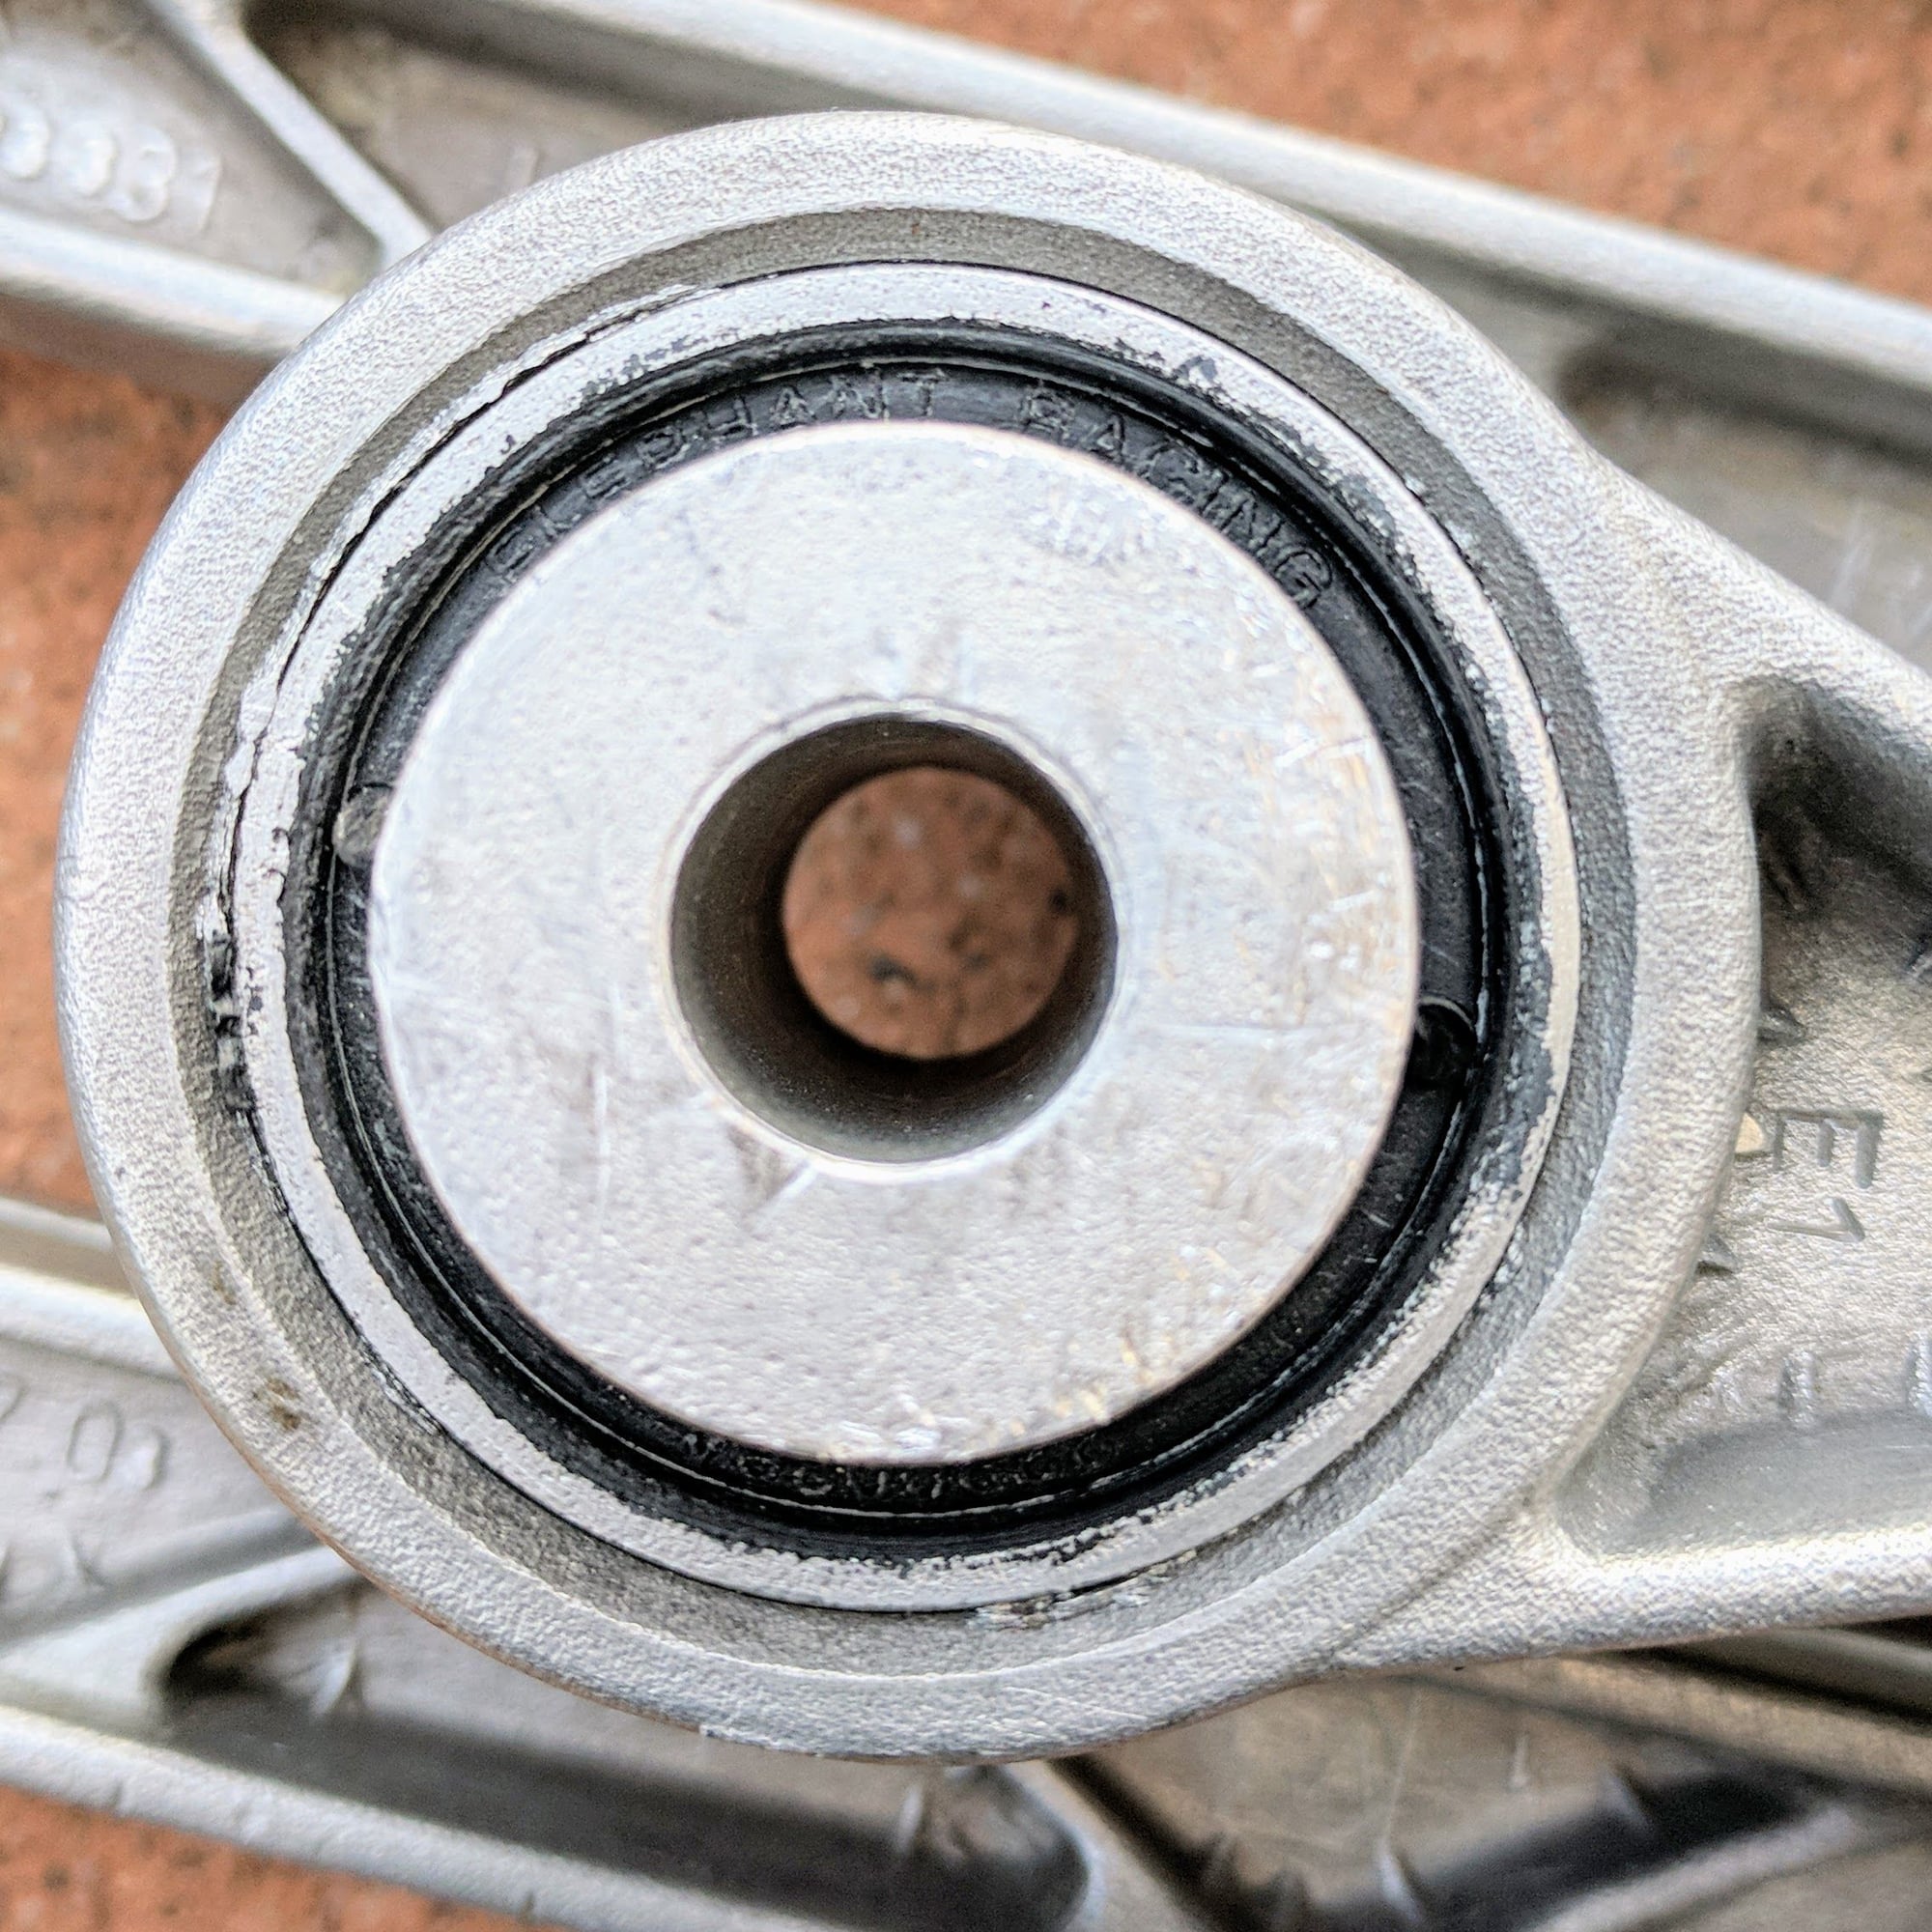
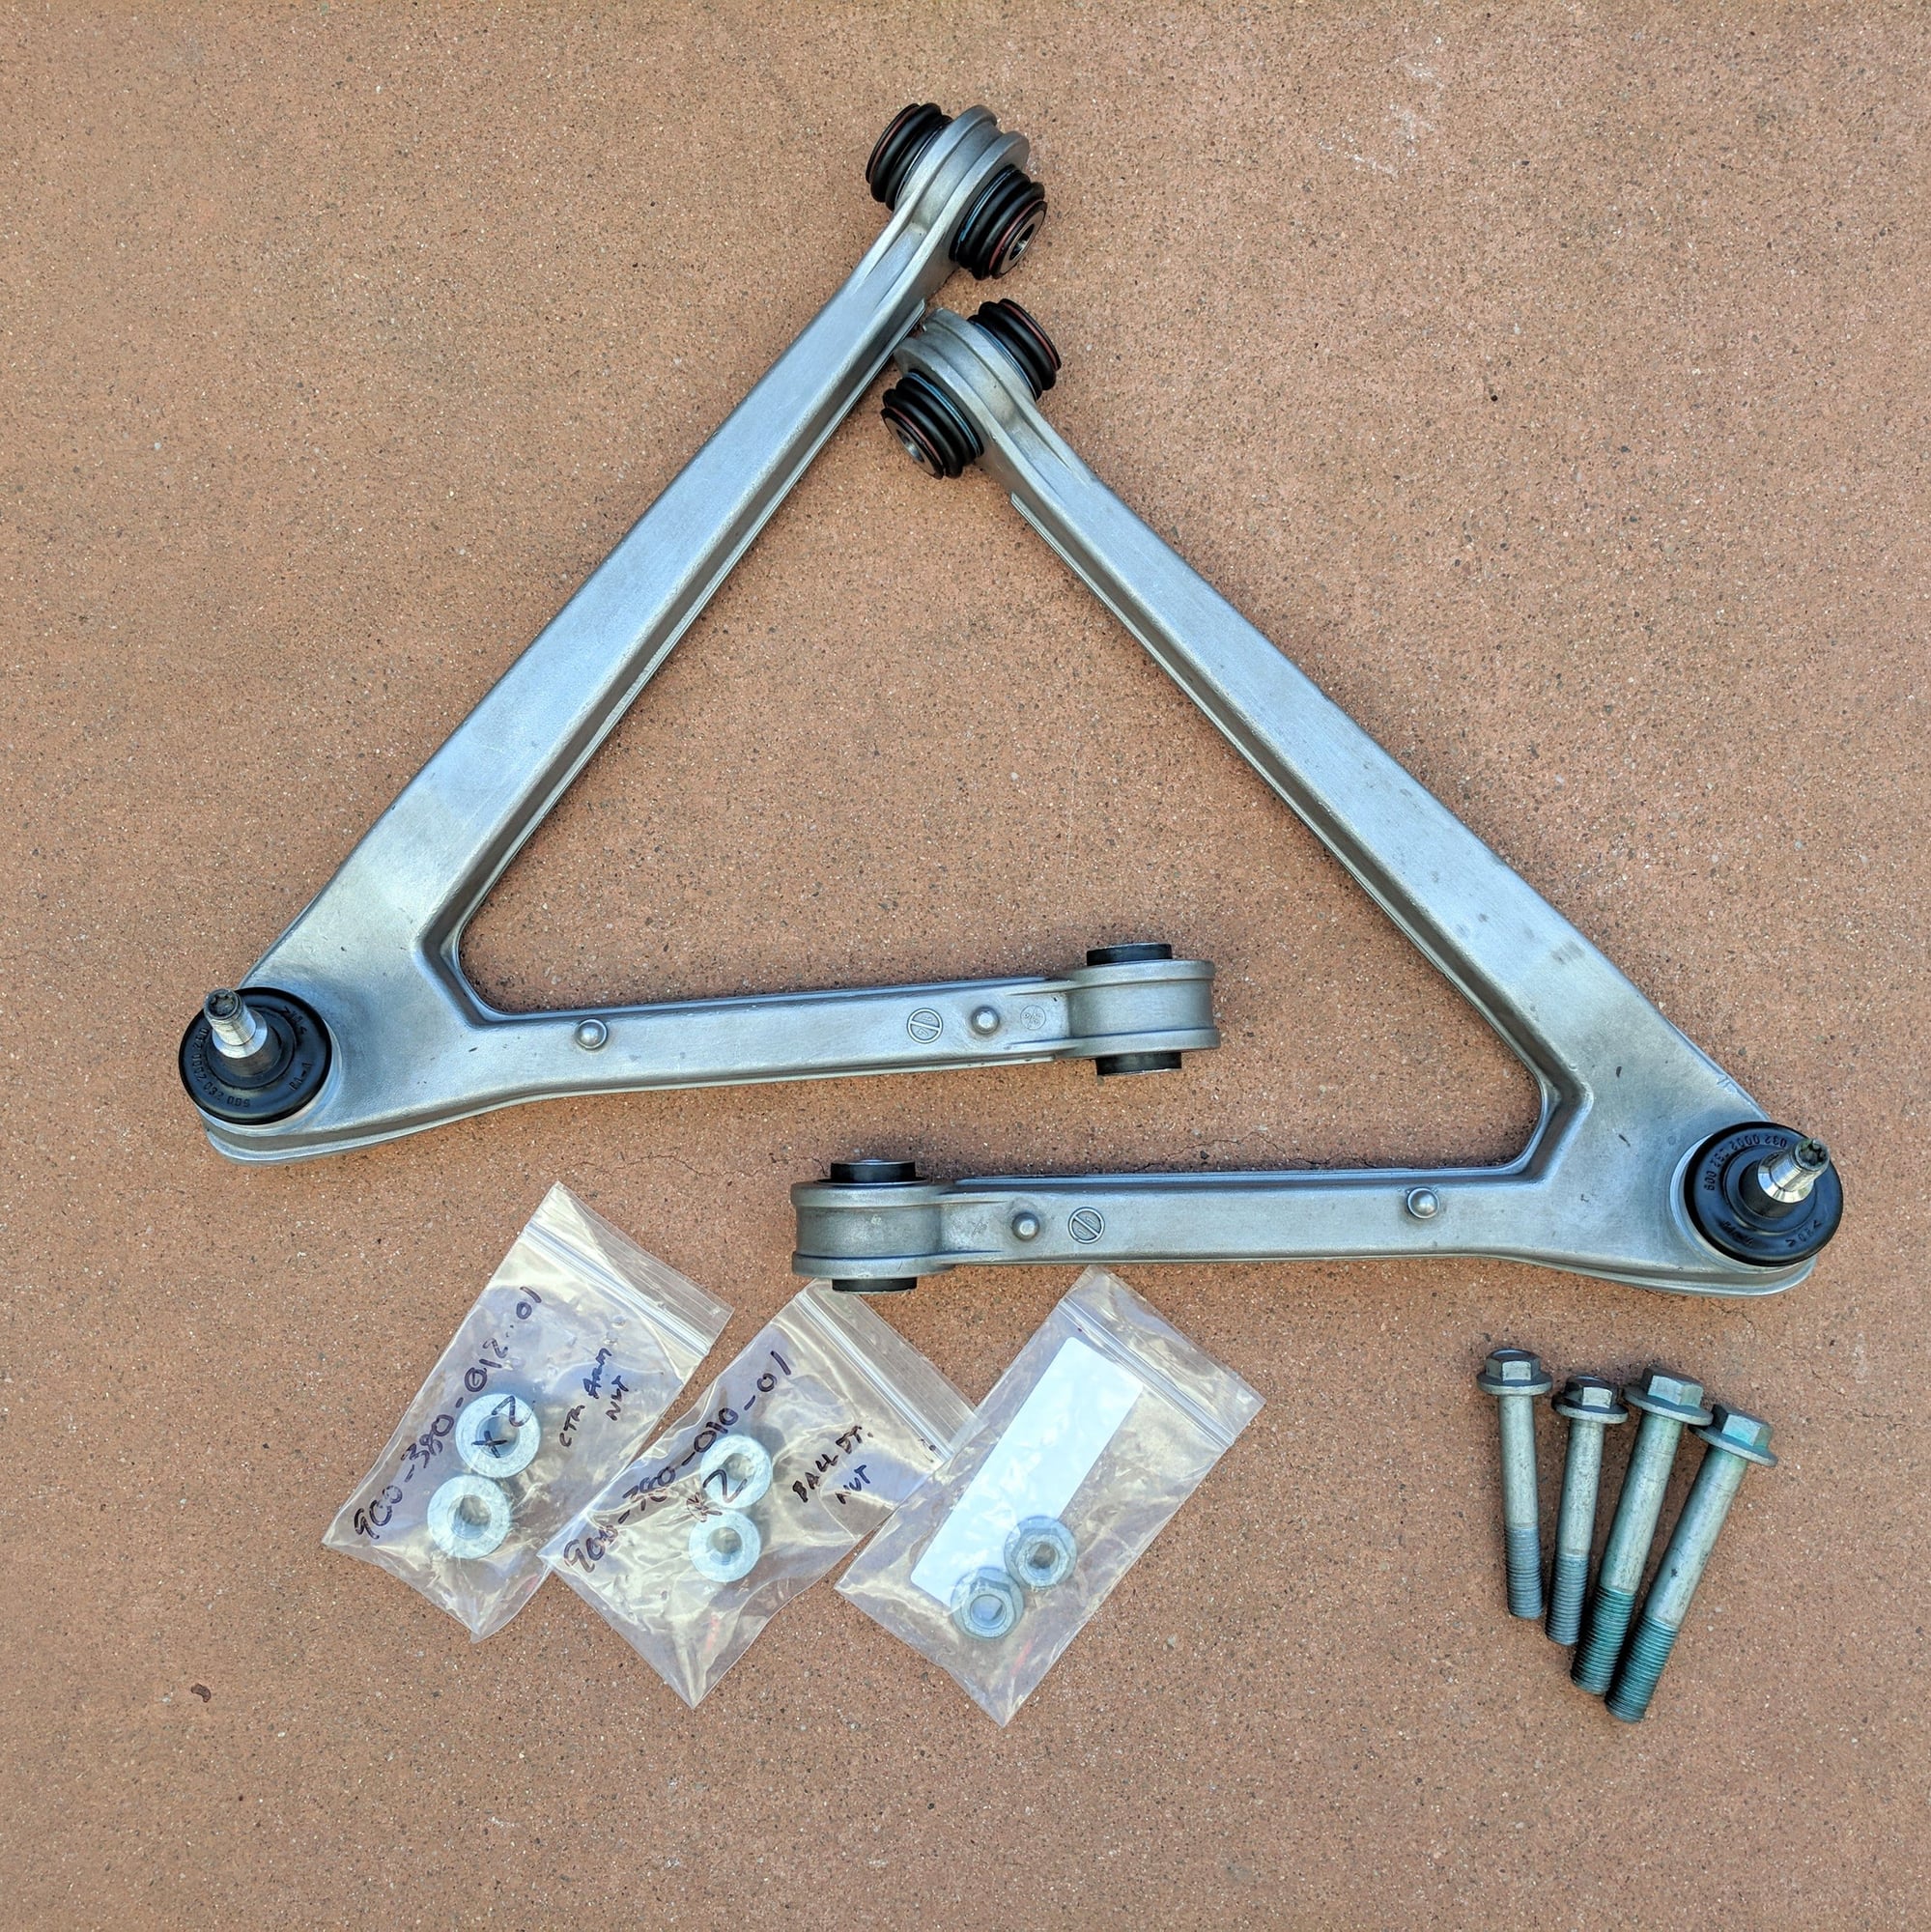
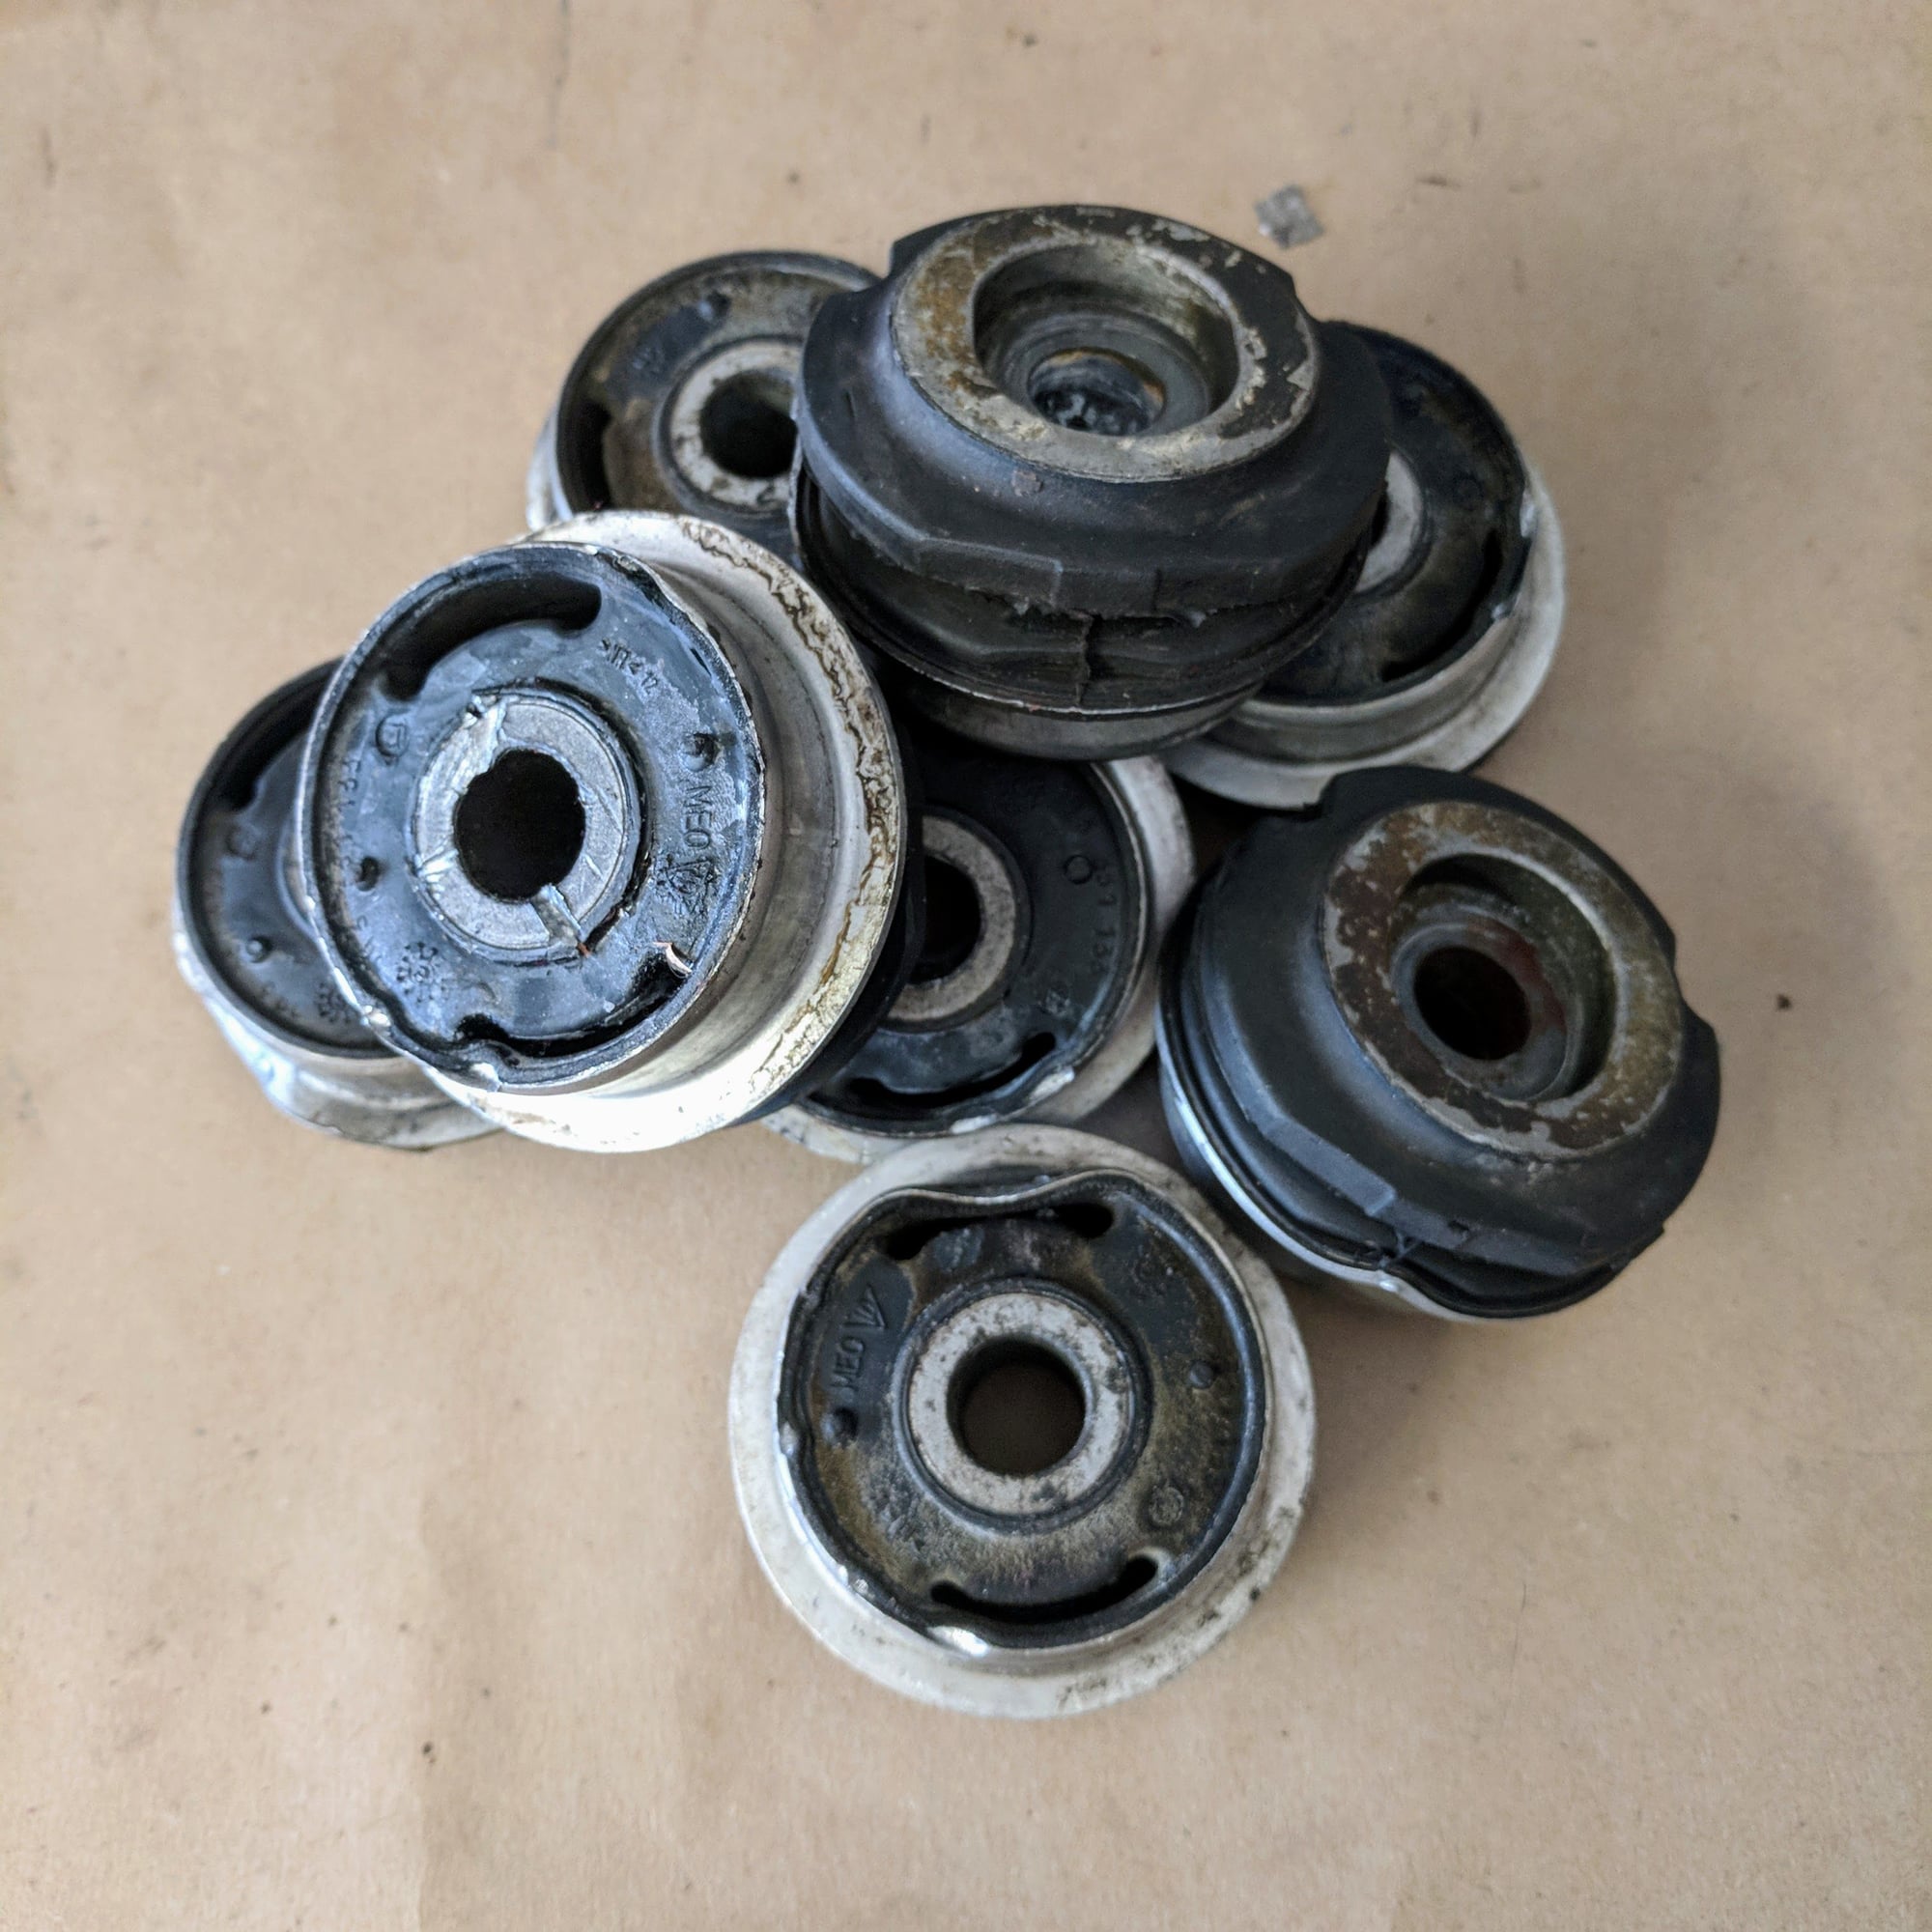
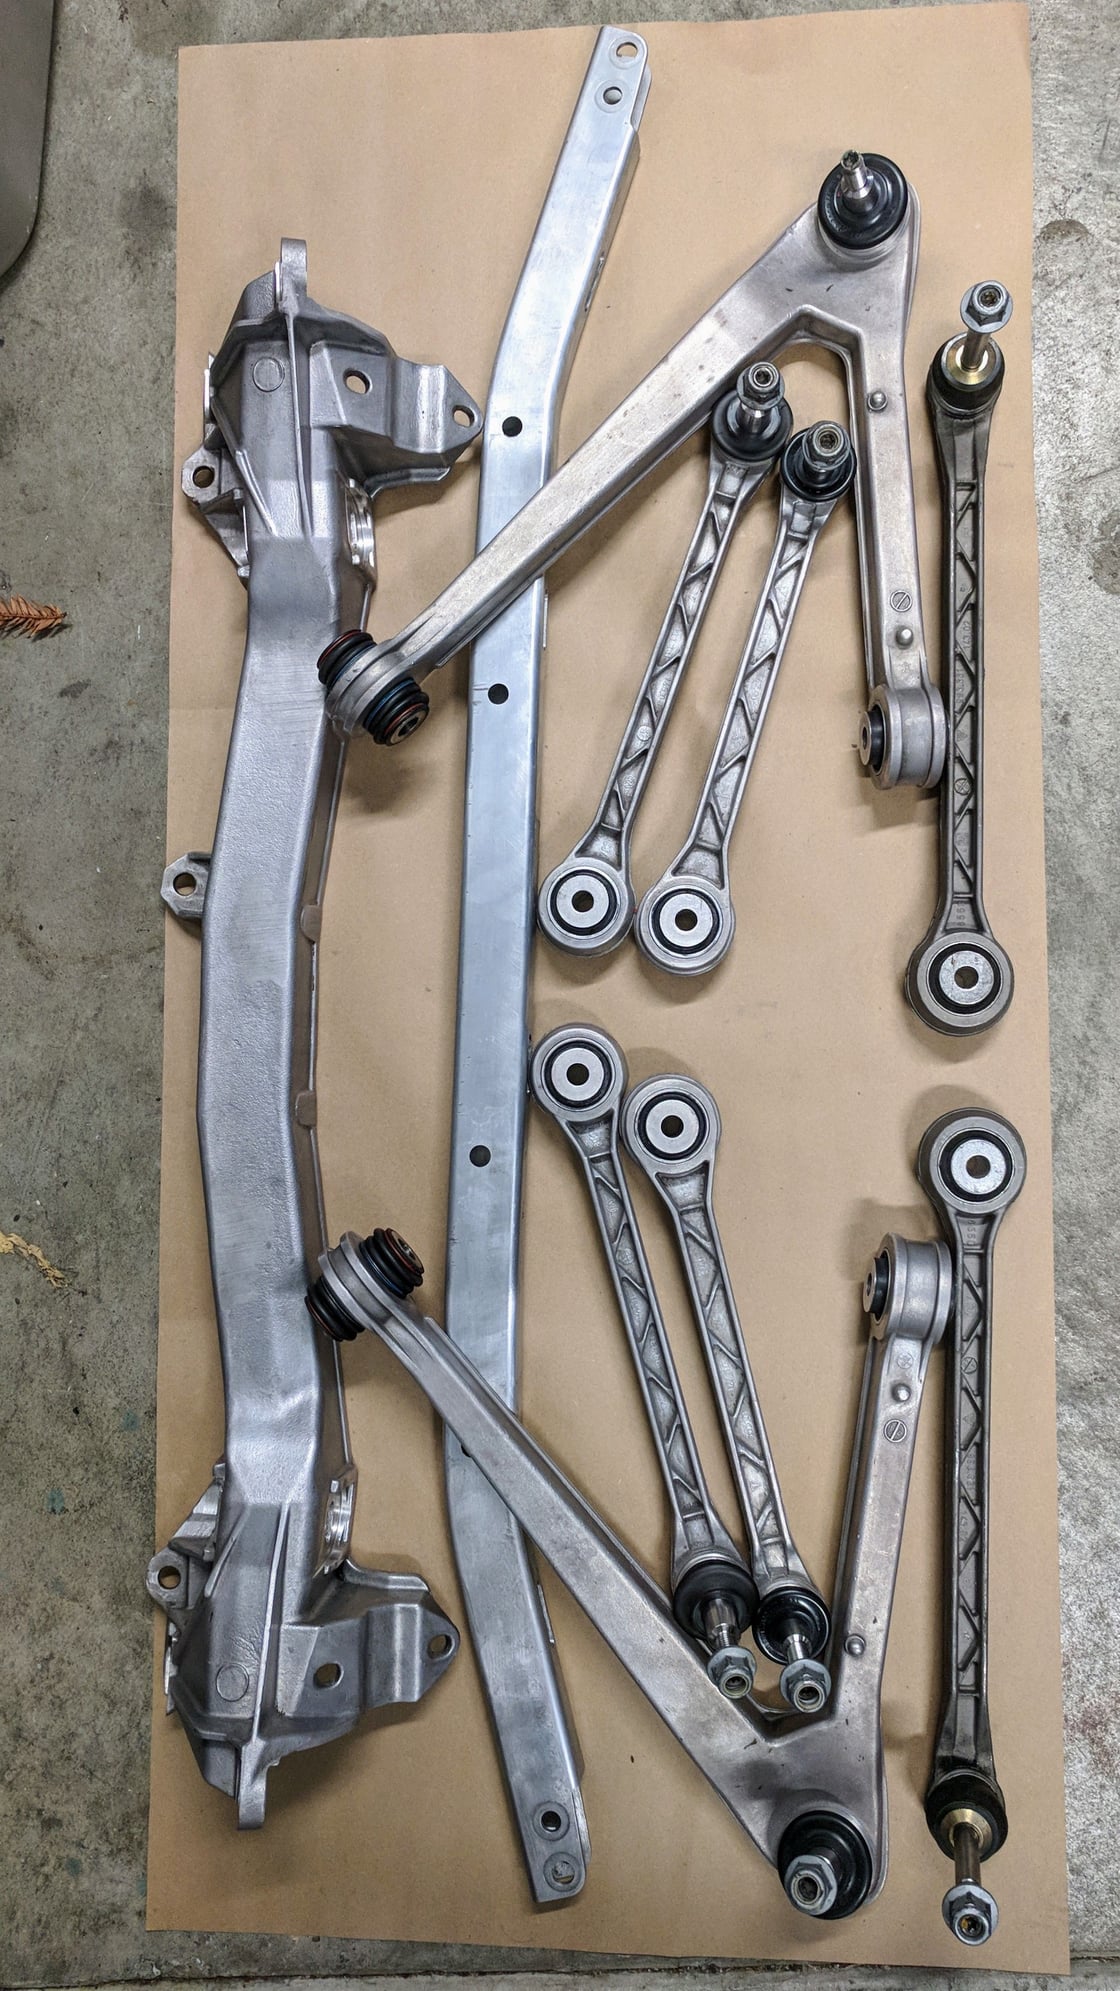
Elephant is local to me so I brought my control arms down to them and had them inspect the control arm ball joints and monoball. They found them to be all in very good shape, which saved me a lot by only having to replace the rubber bushings to new sport/RS ones.
New sport/RS bushings. Didn't want to waste time again to hack out six bushings so had Elephant remove the old ones and press in new ones, while I waited at their warehouse.
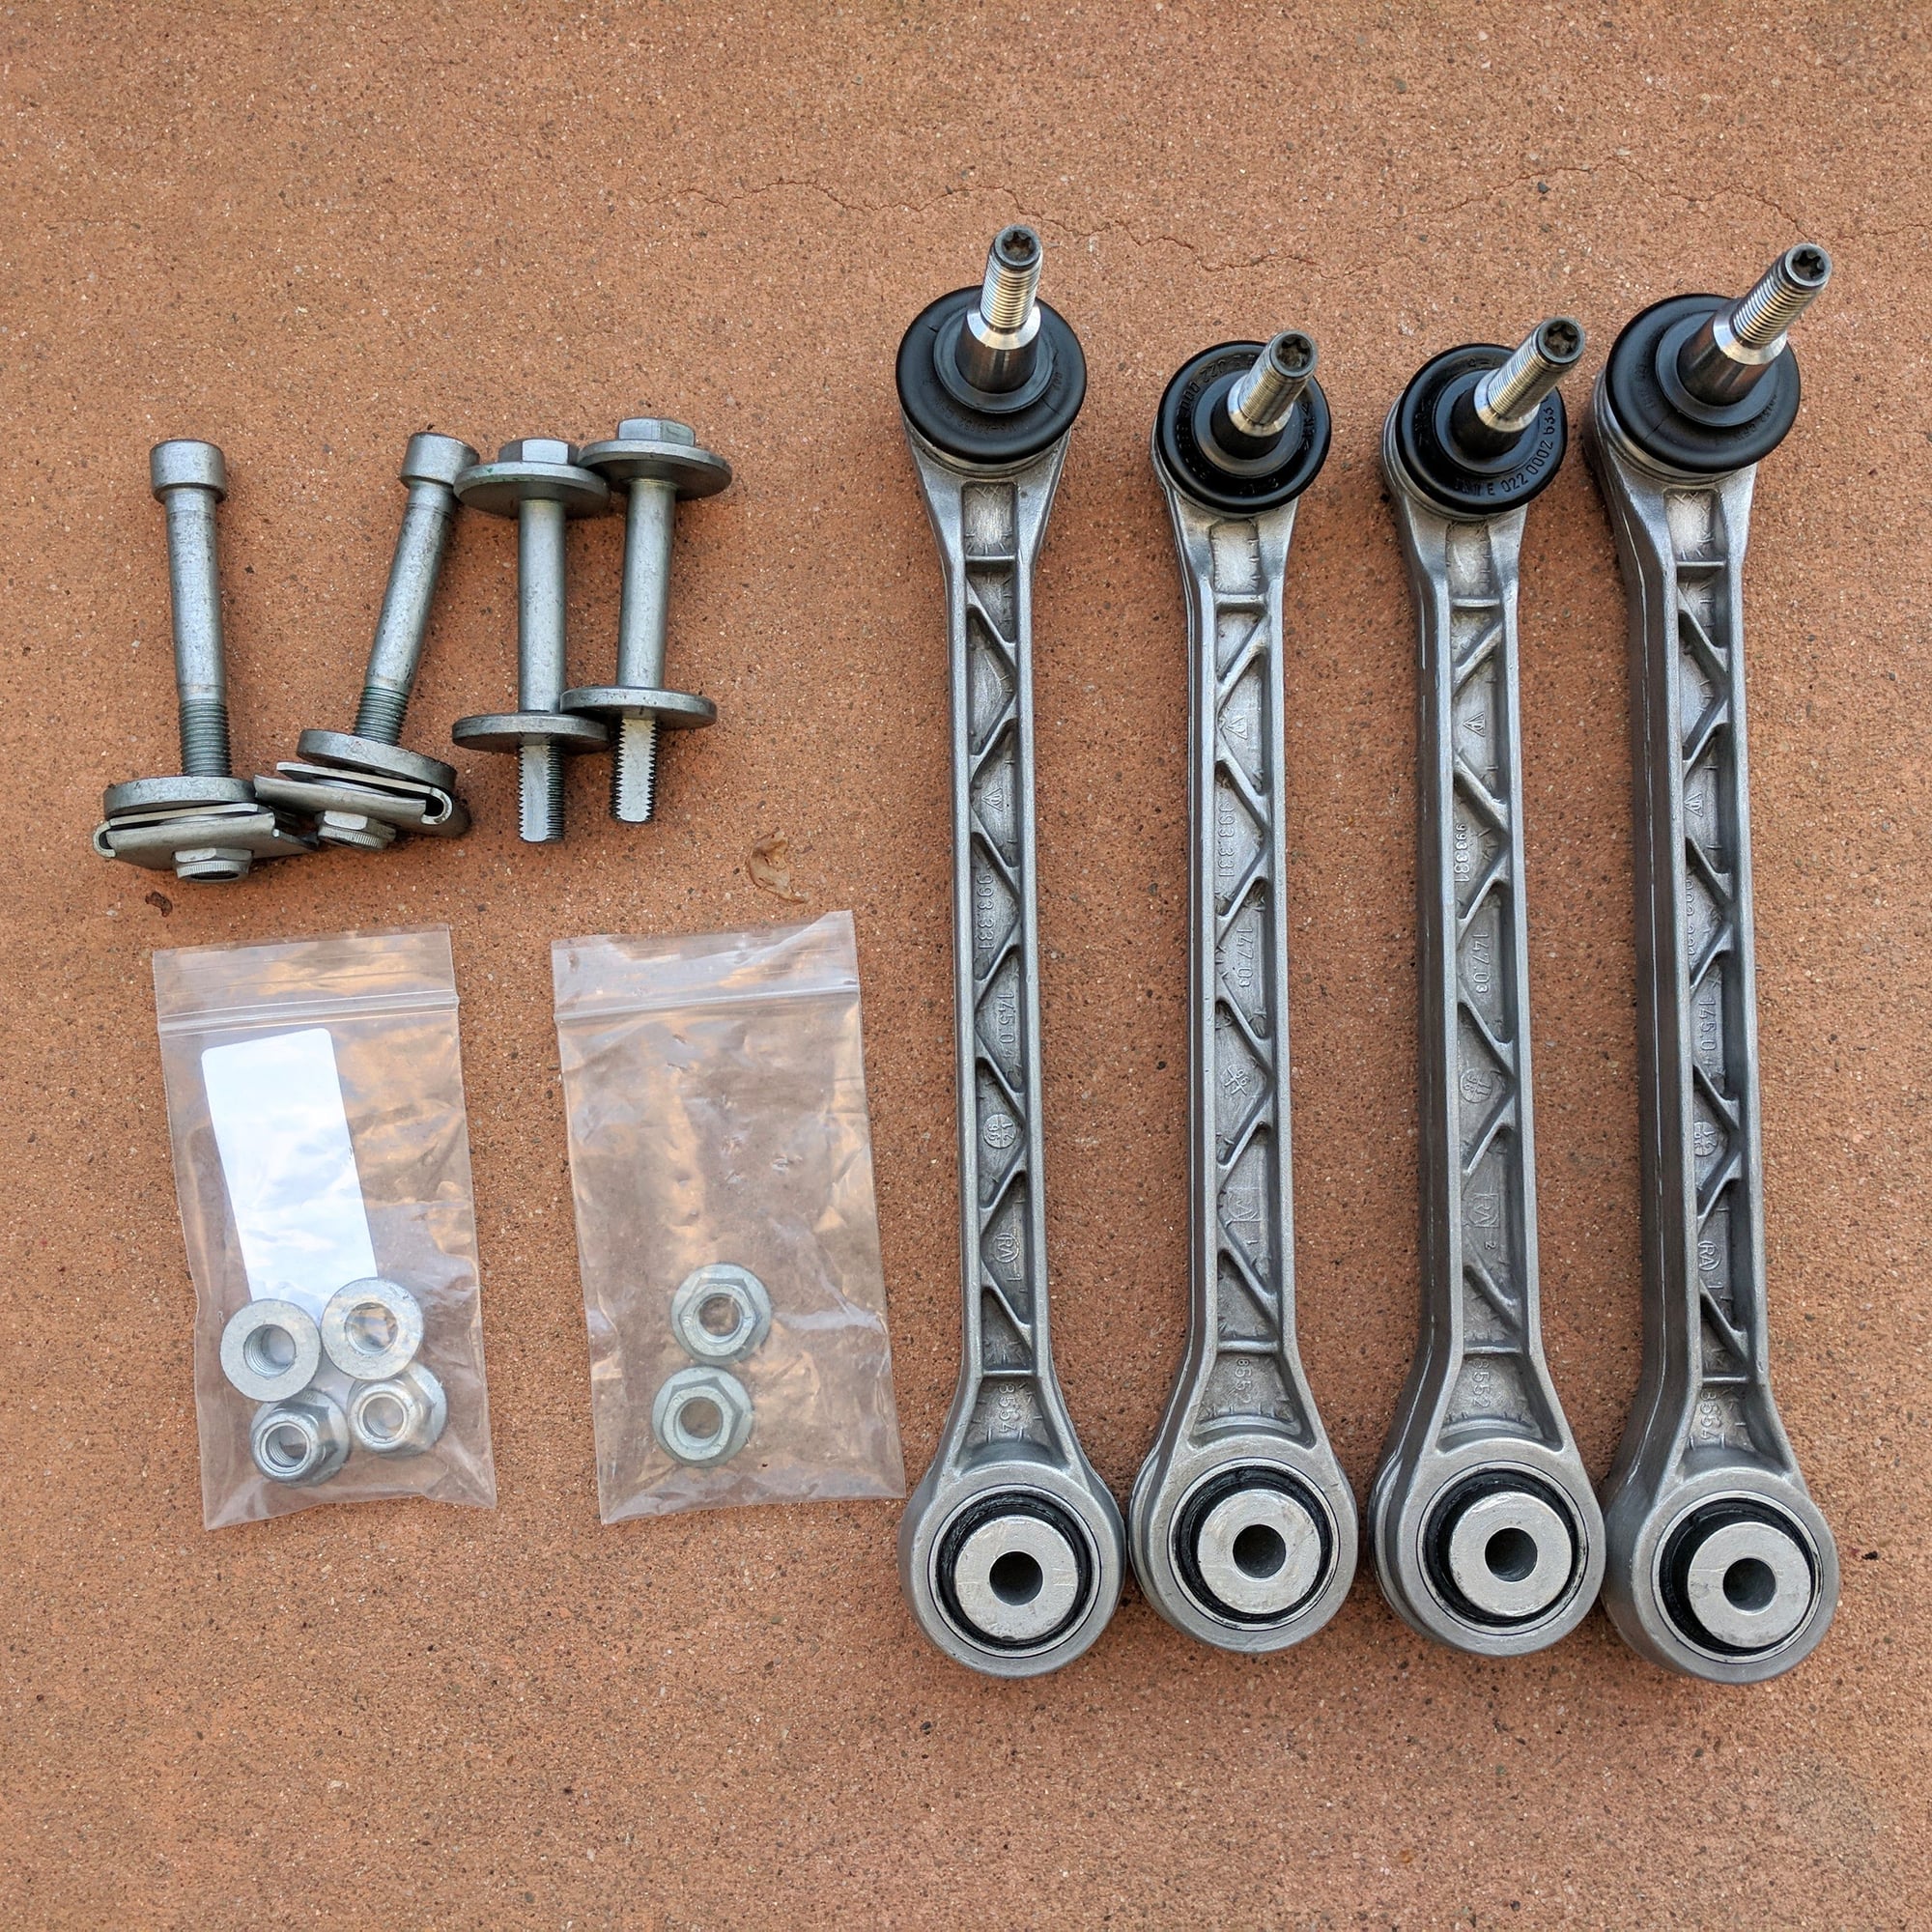
Reconditioned KT, camber, and lower control arms. I cleaned them up myself... getting the cosmoline out of those ridges took forever. All of the control arm bolts were in good shape too. I replaced the tension torque nuts with new ones as that is what is called out in the WSM (work shop manual).
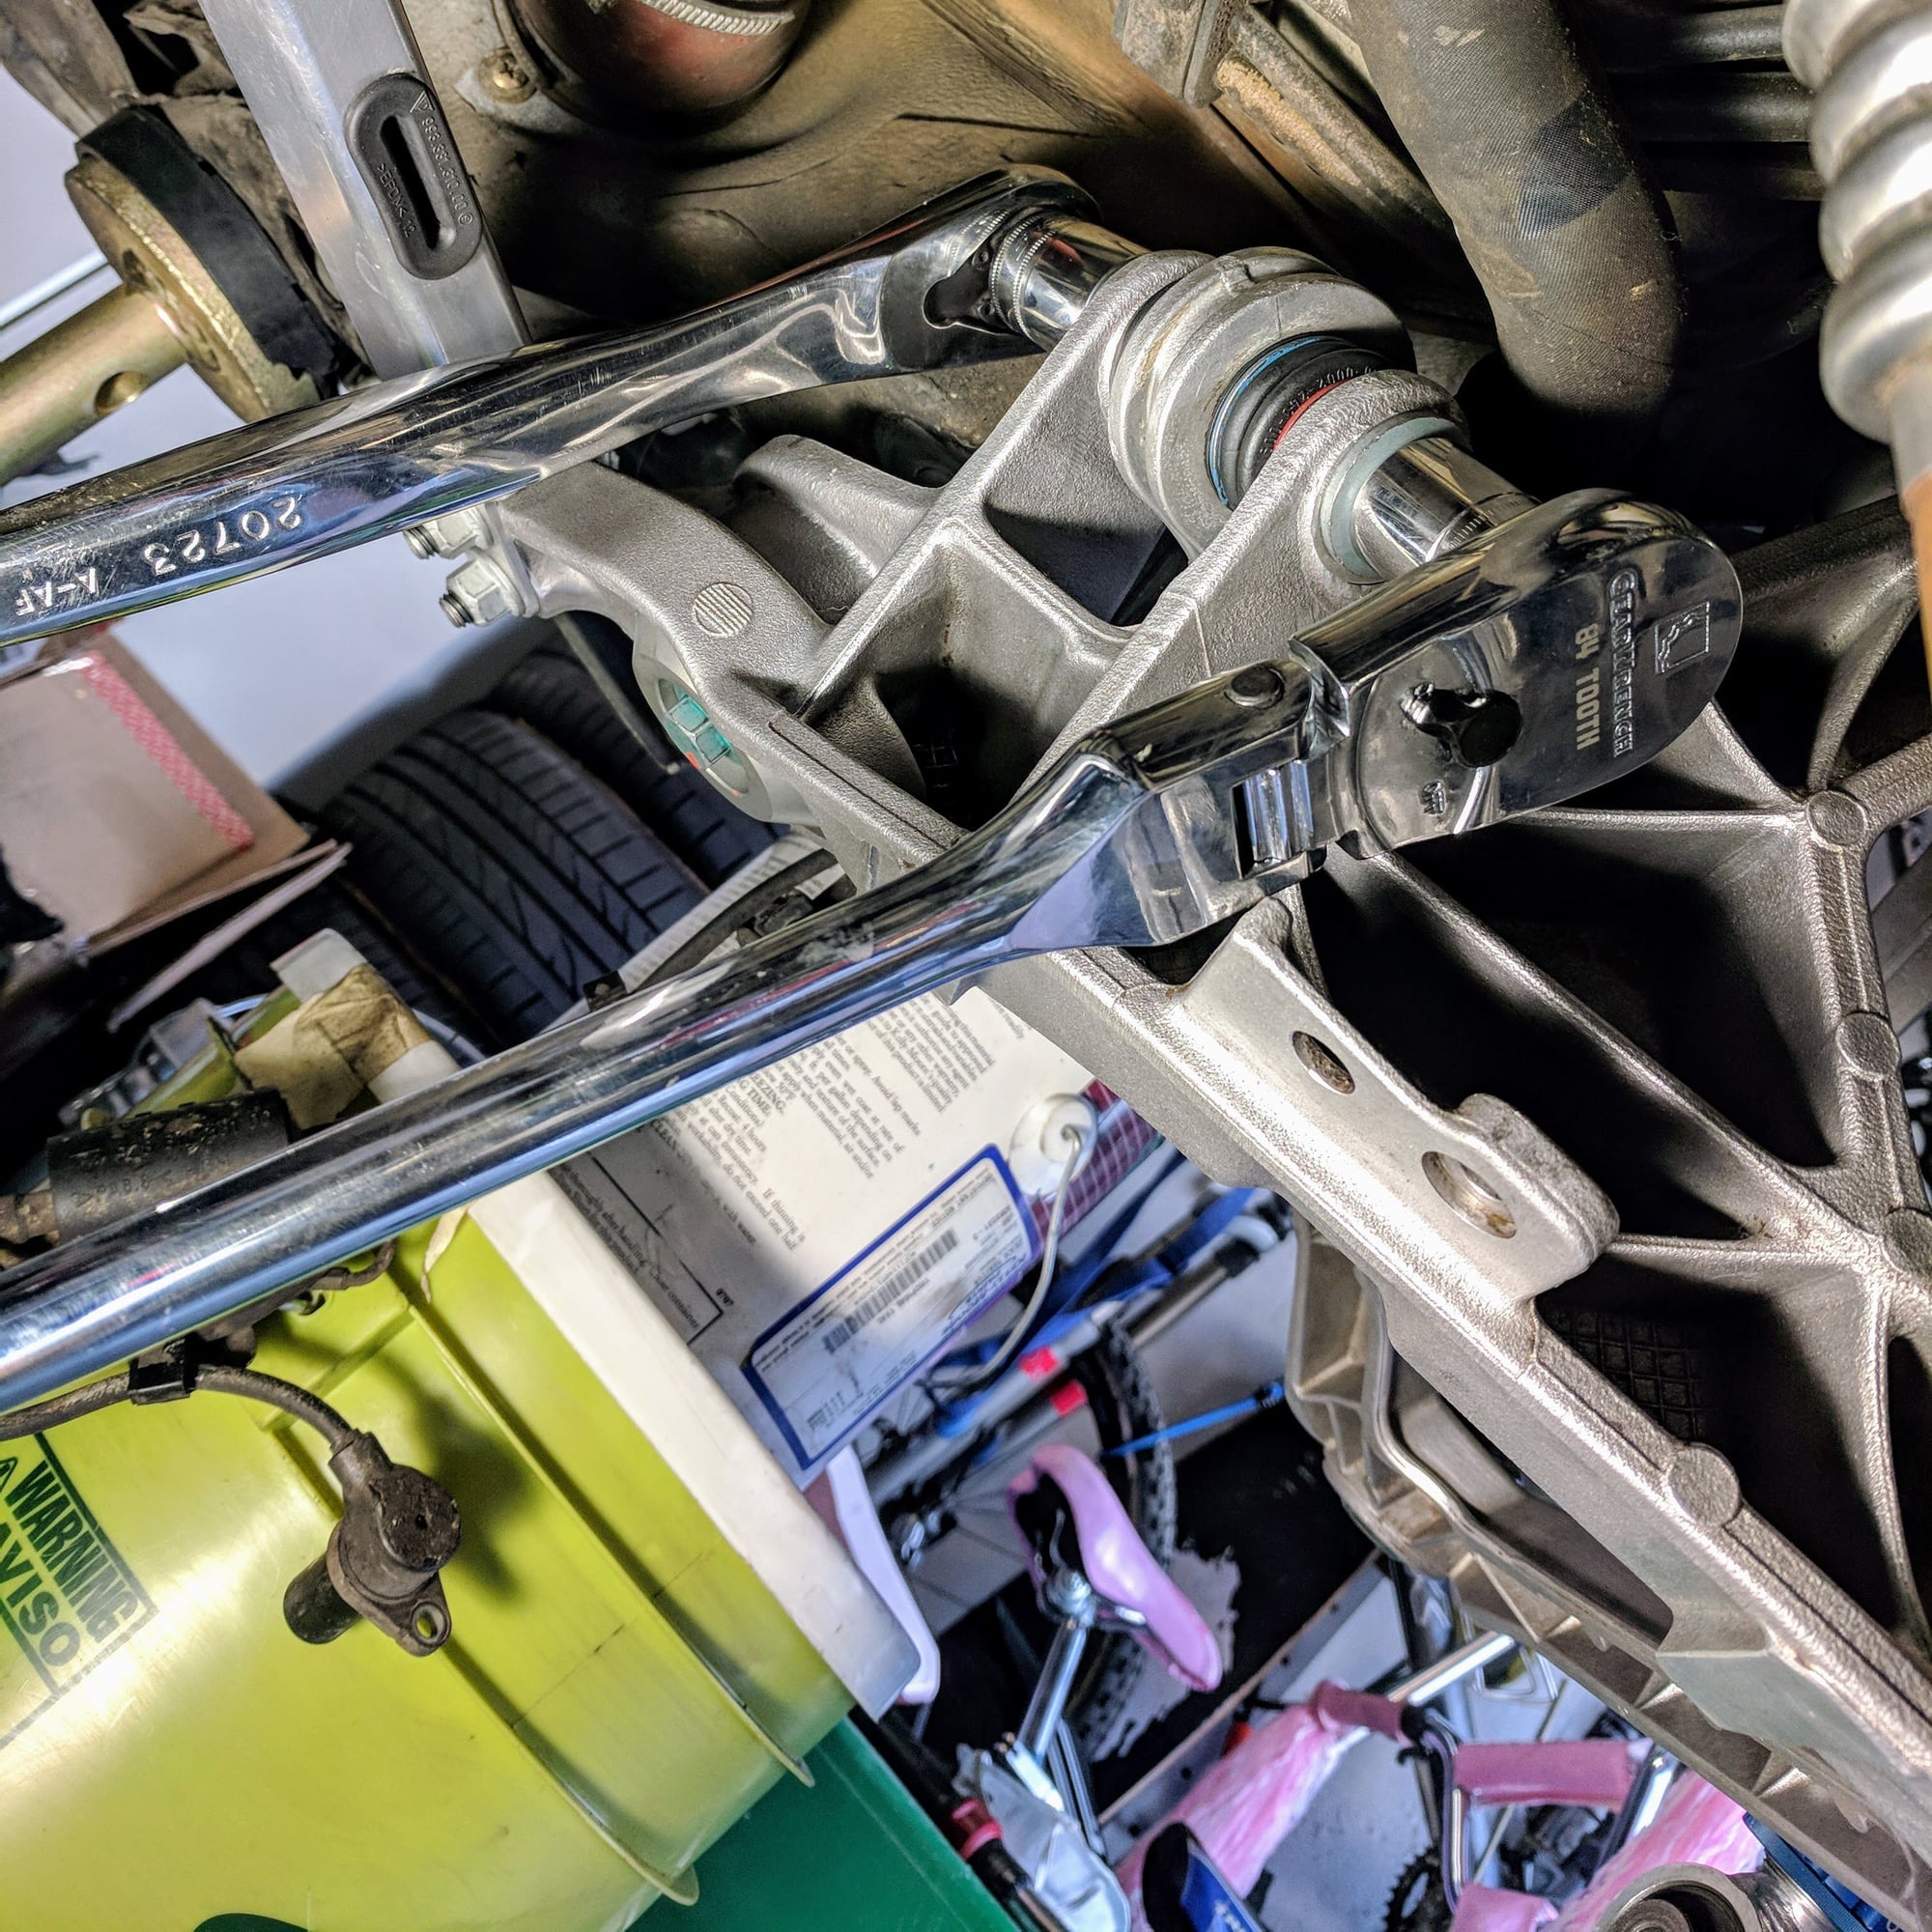
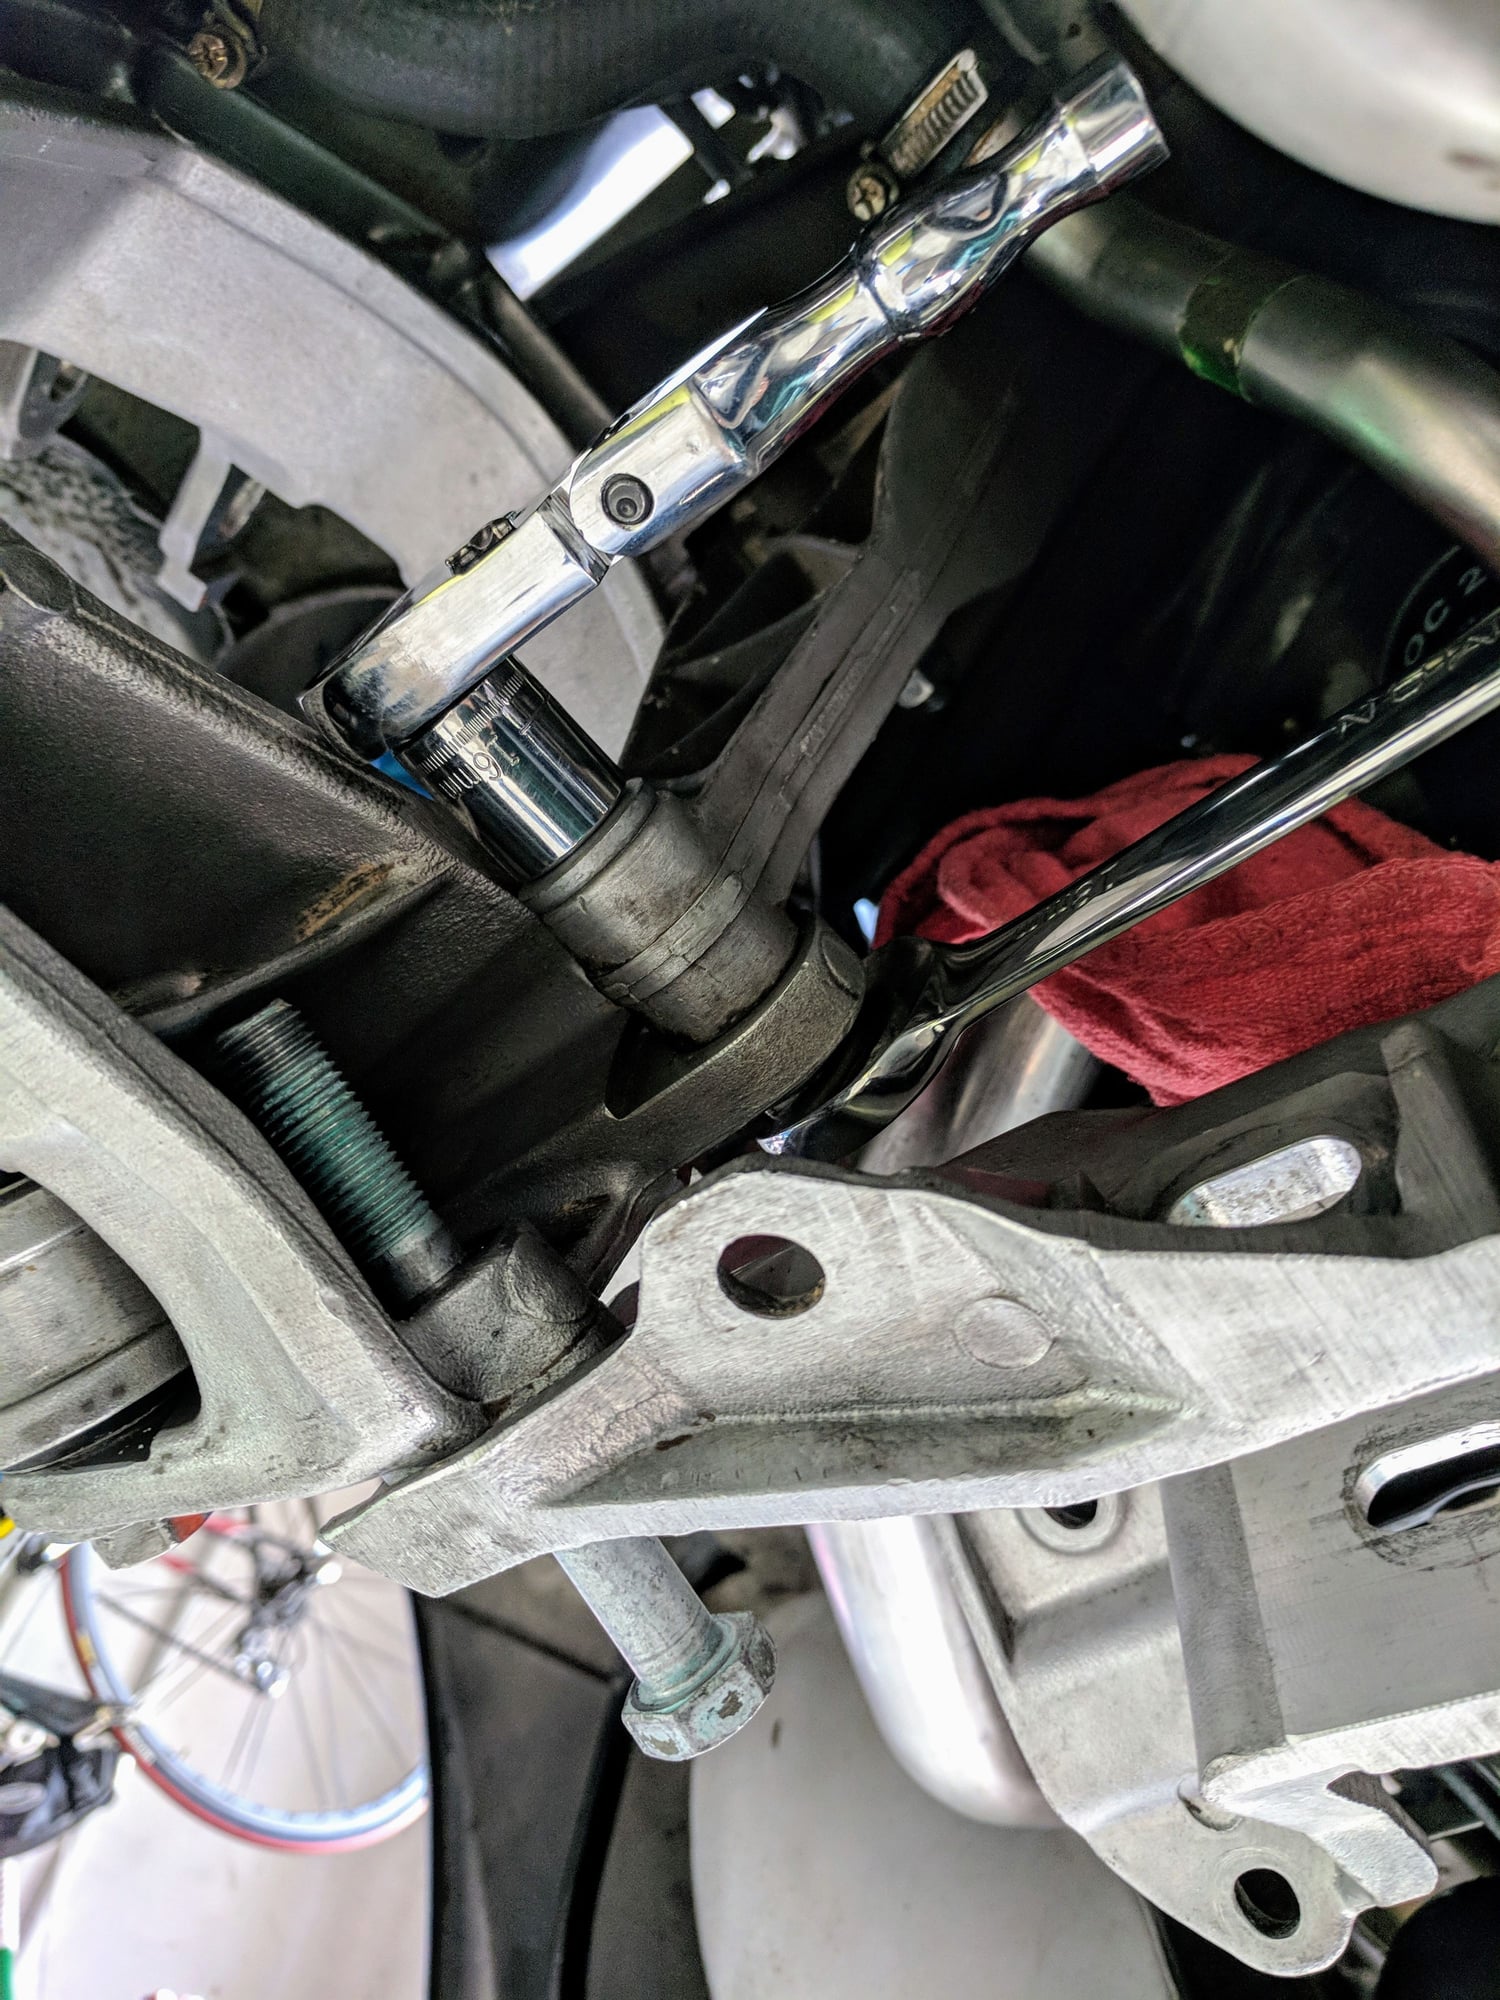
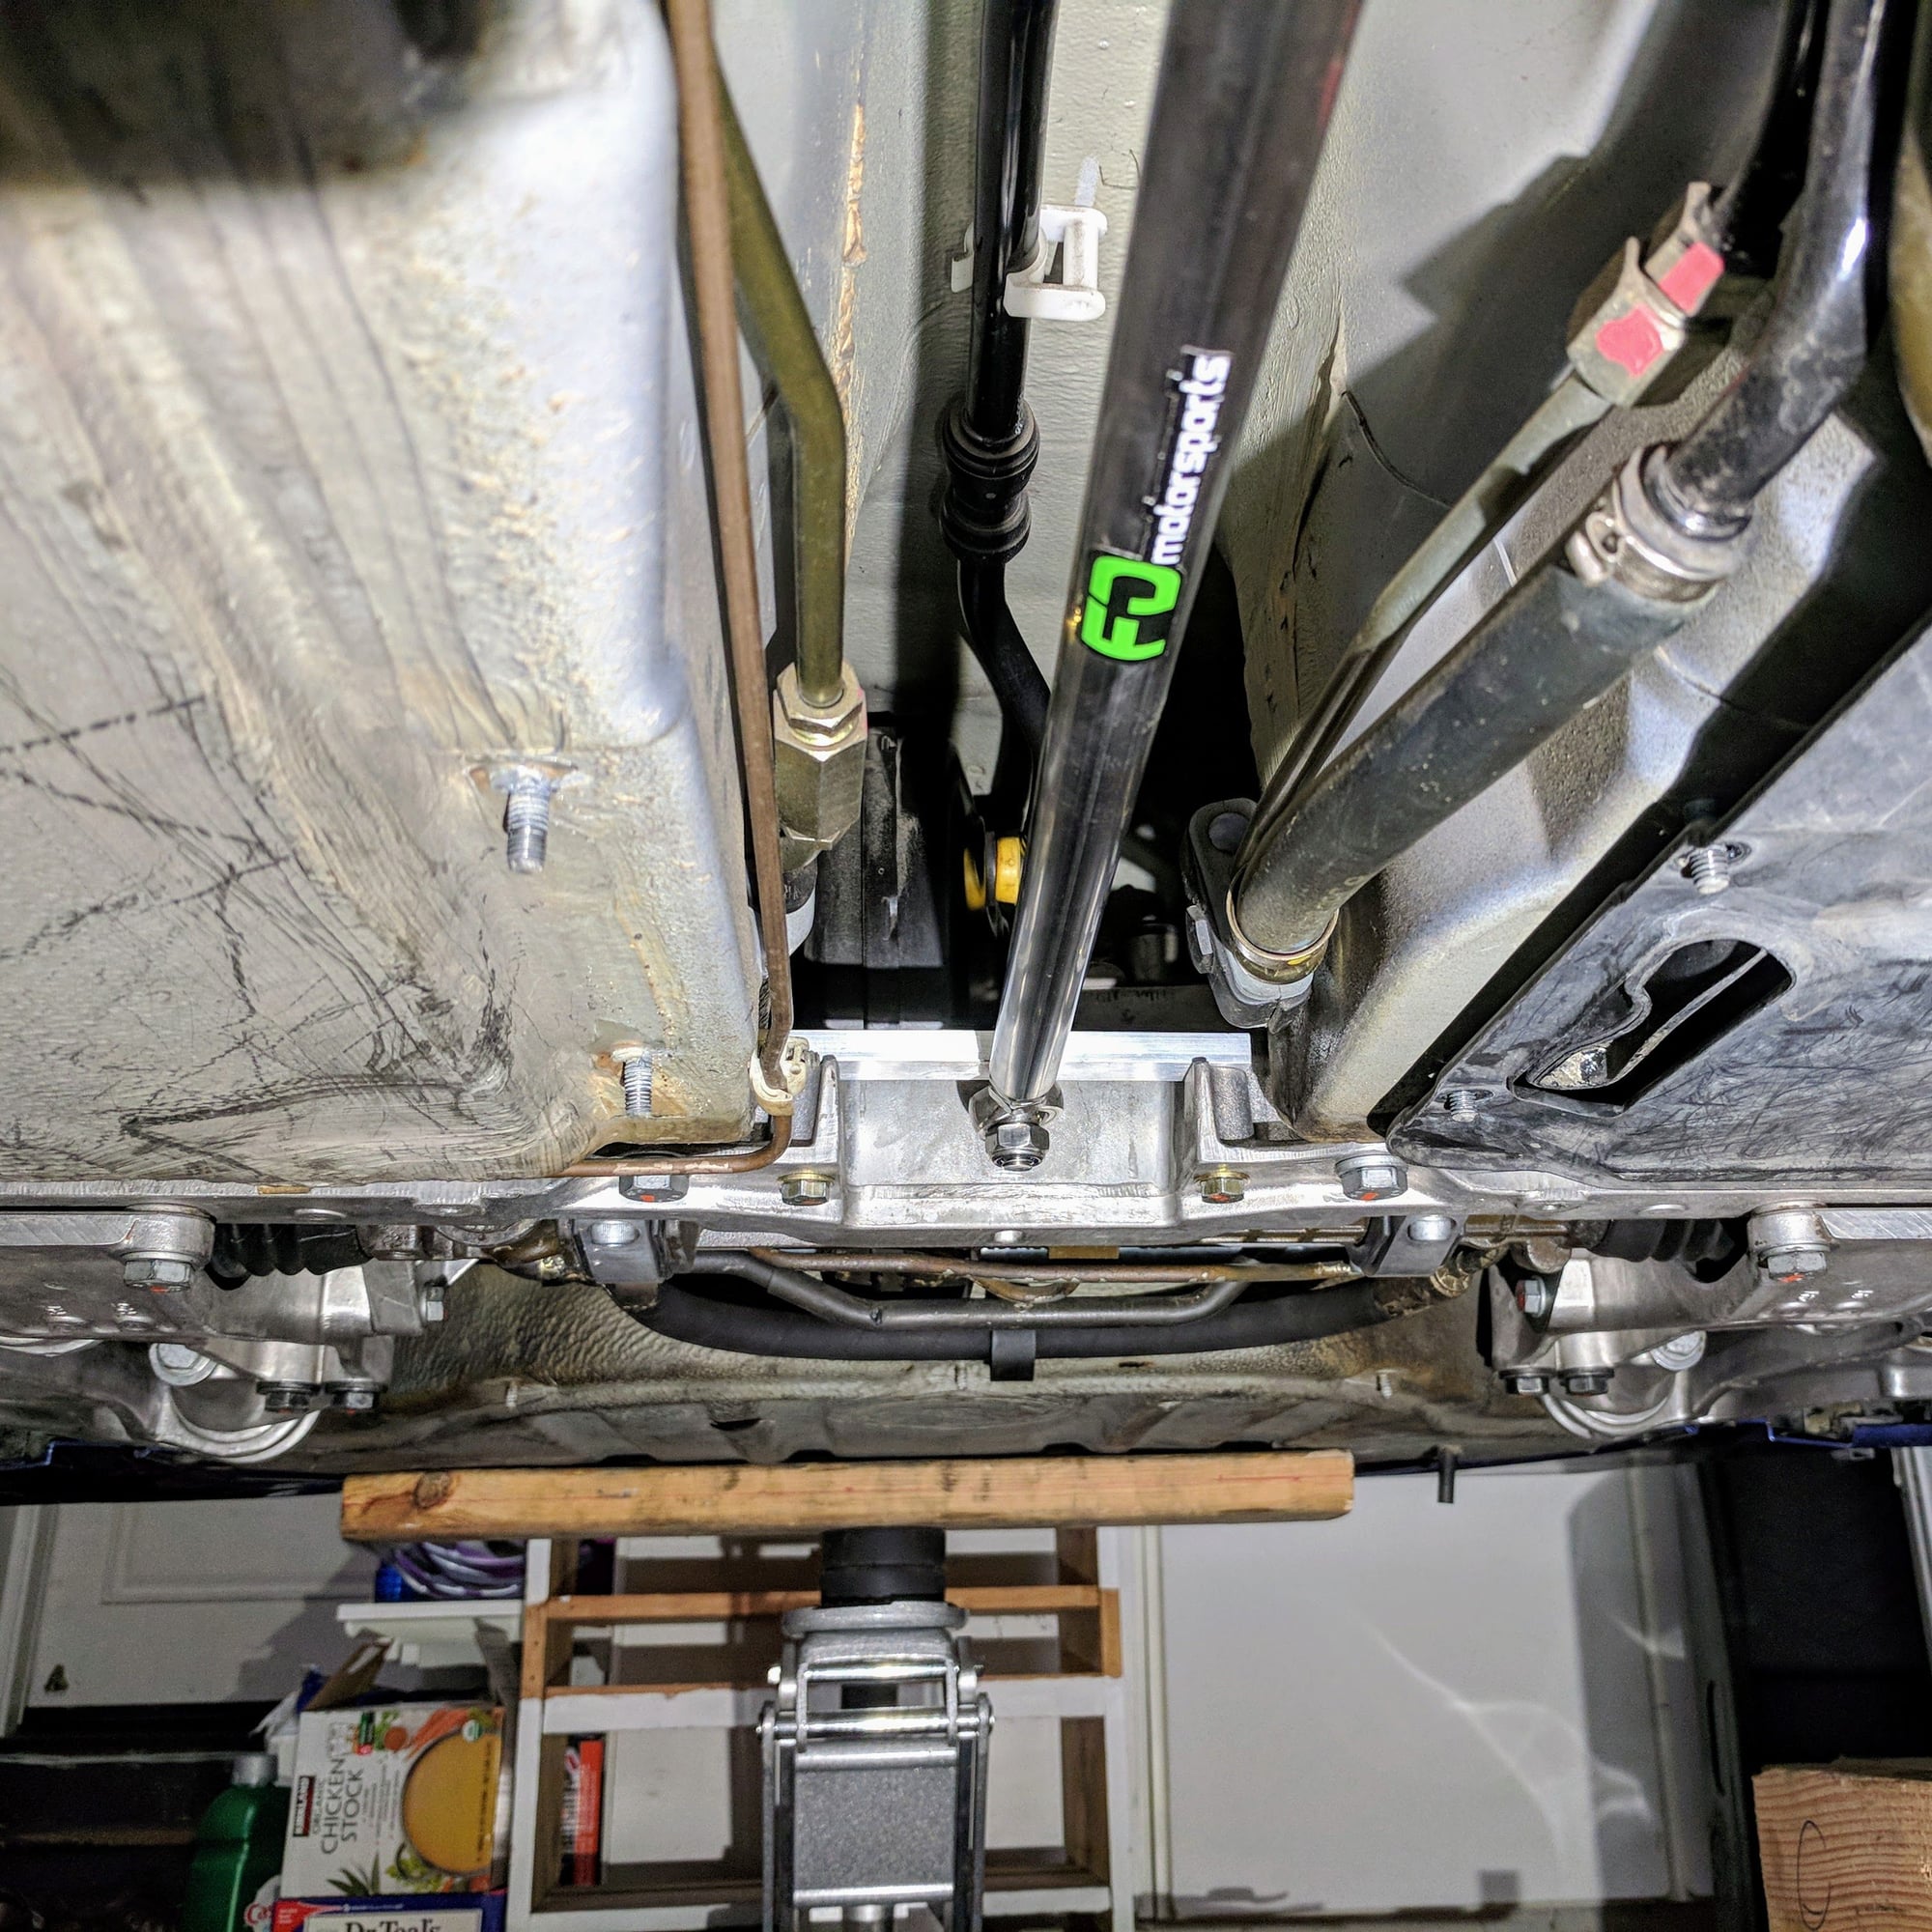
The forward monoball of the lower control arm was a real PIA to torque at ~150 ft/lbs when you are under the car on your back. It was like I was at the gym benching a few plates and was pretty sore the next day after this project.
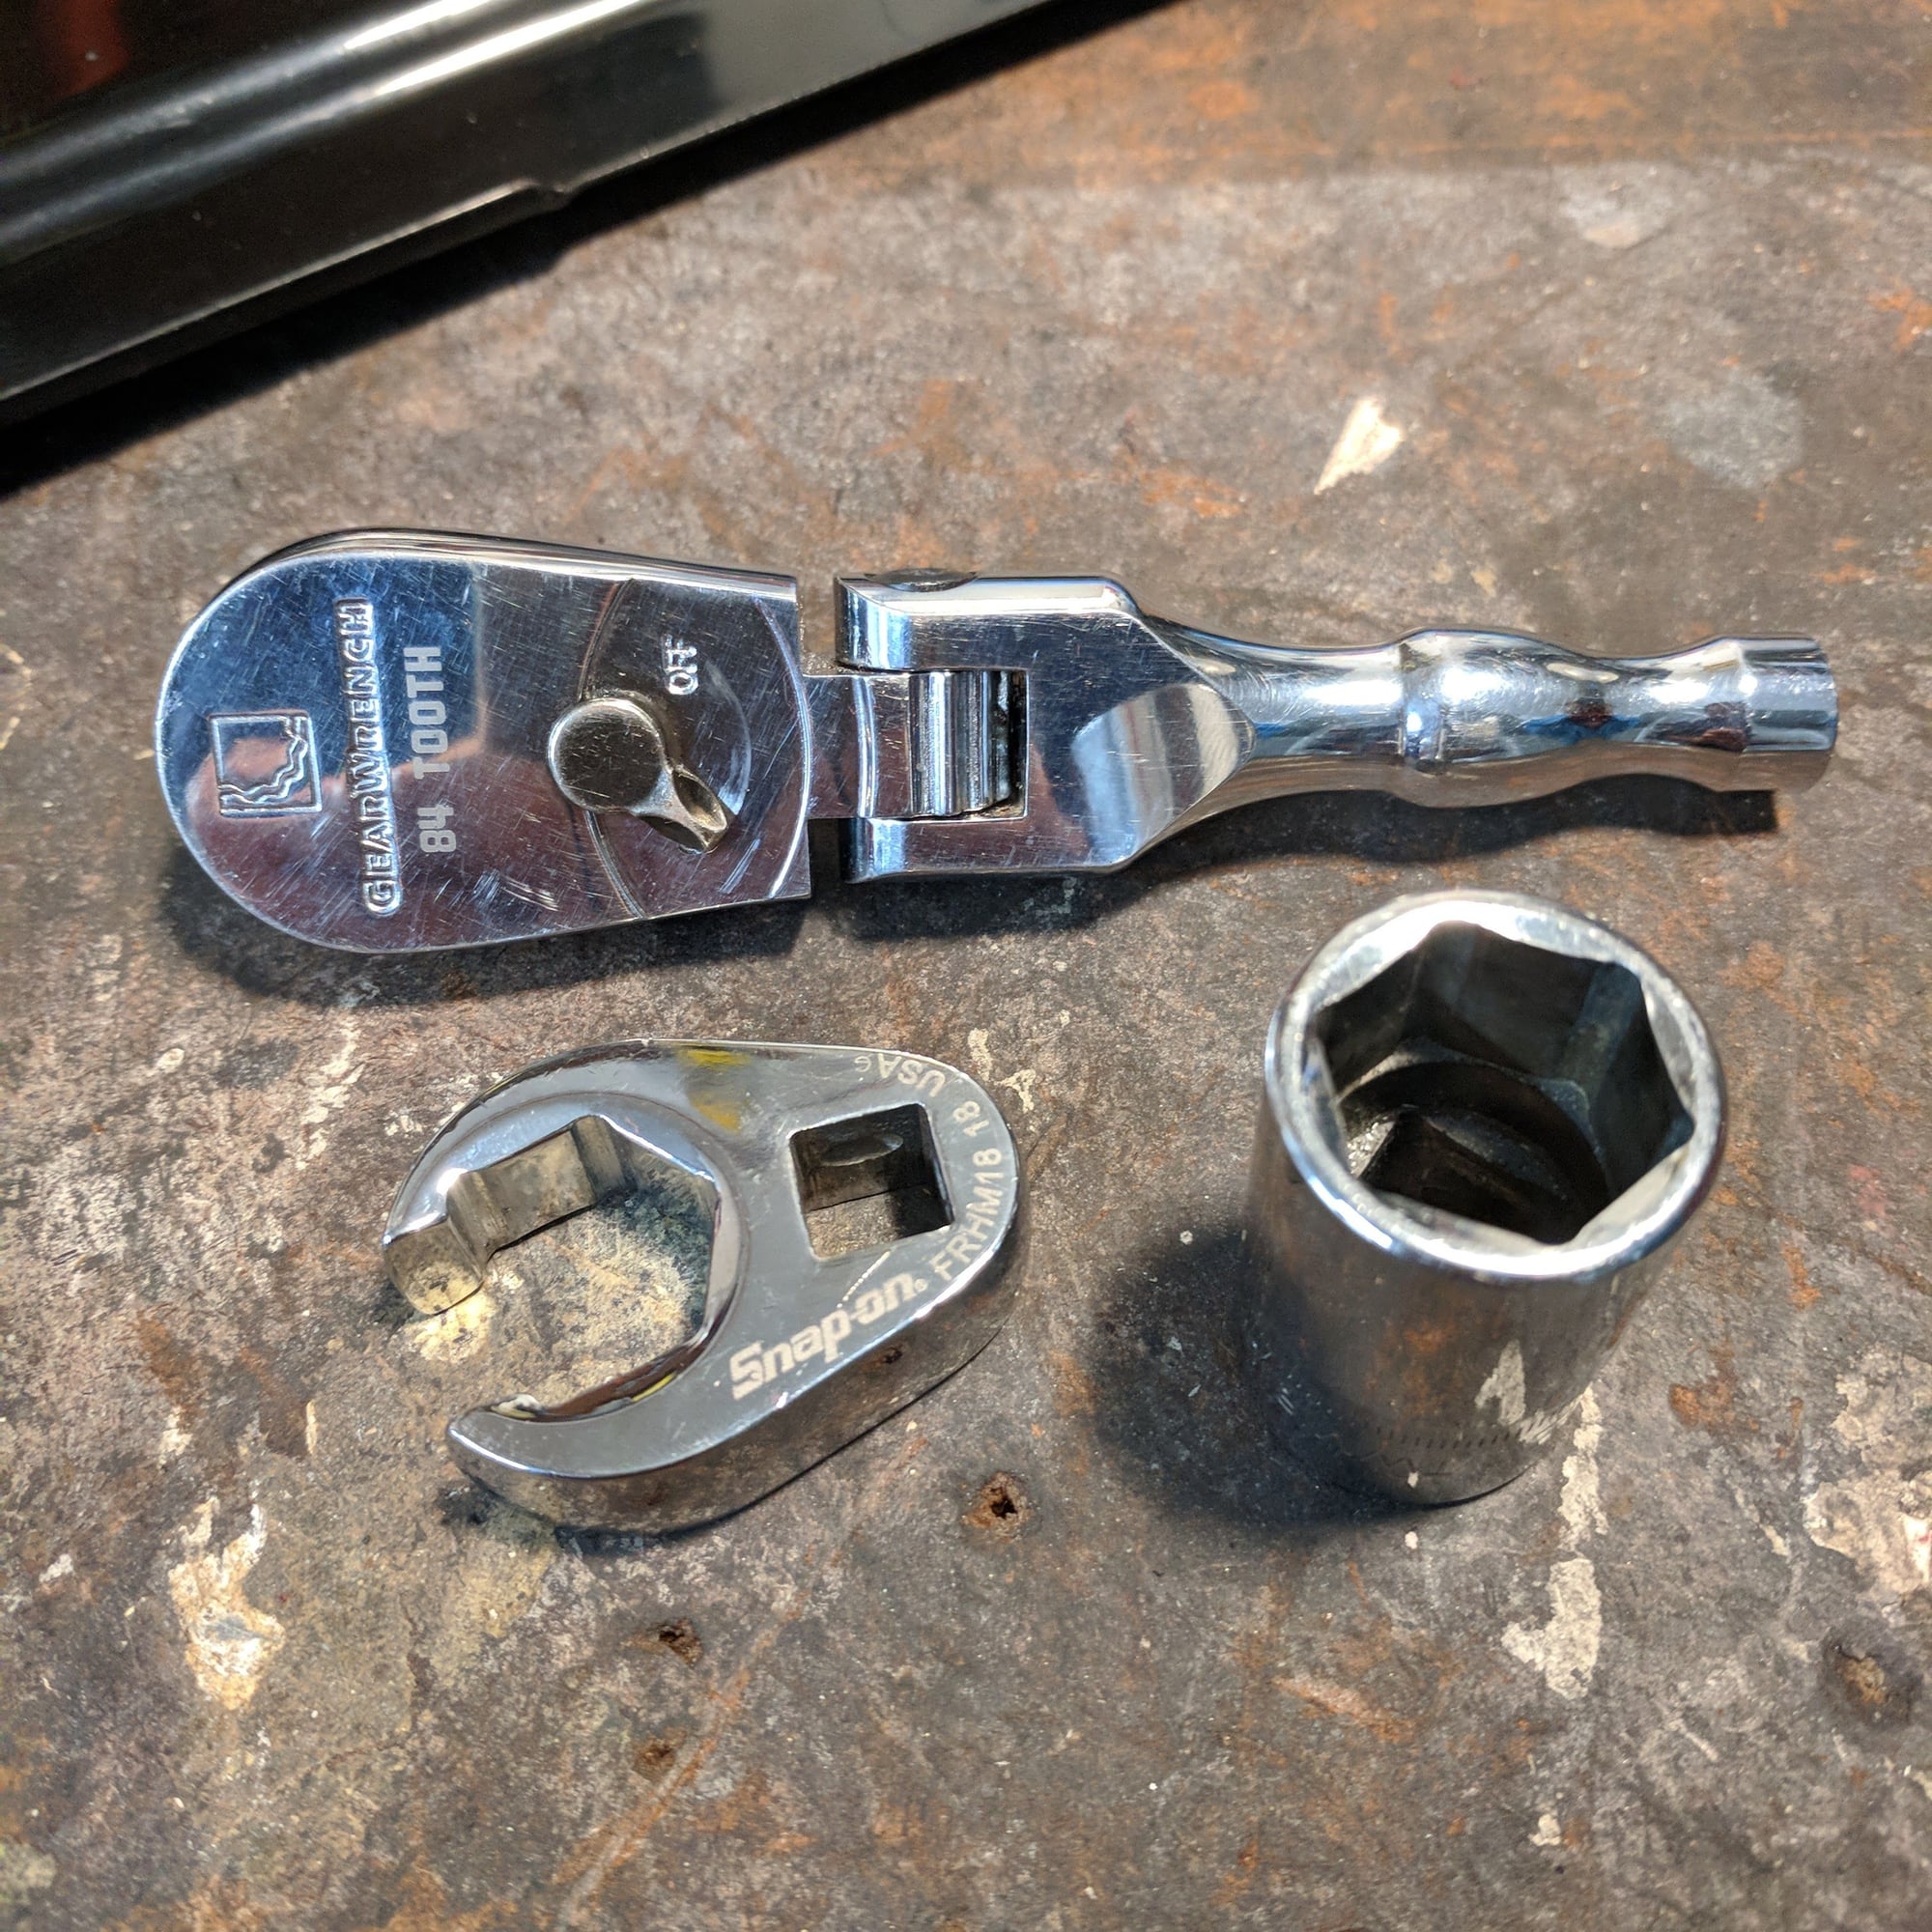
I didn't appreciate quality tools until I tackled this project. I also upgraded my toolbox with a 18mm Snap-On Crowfoot, Snap-on 1/2" 6pt socket set, hex/torx head sockets, and Flex-head ratchets by Gear Wrench made the entire install easy. Wish I had these earlier when I did the front.
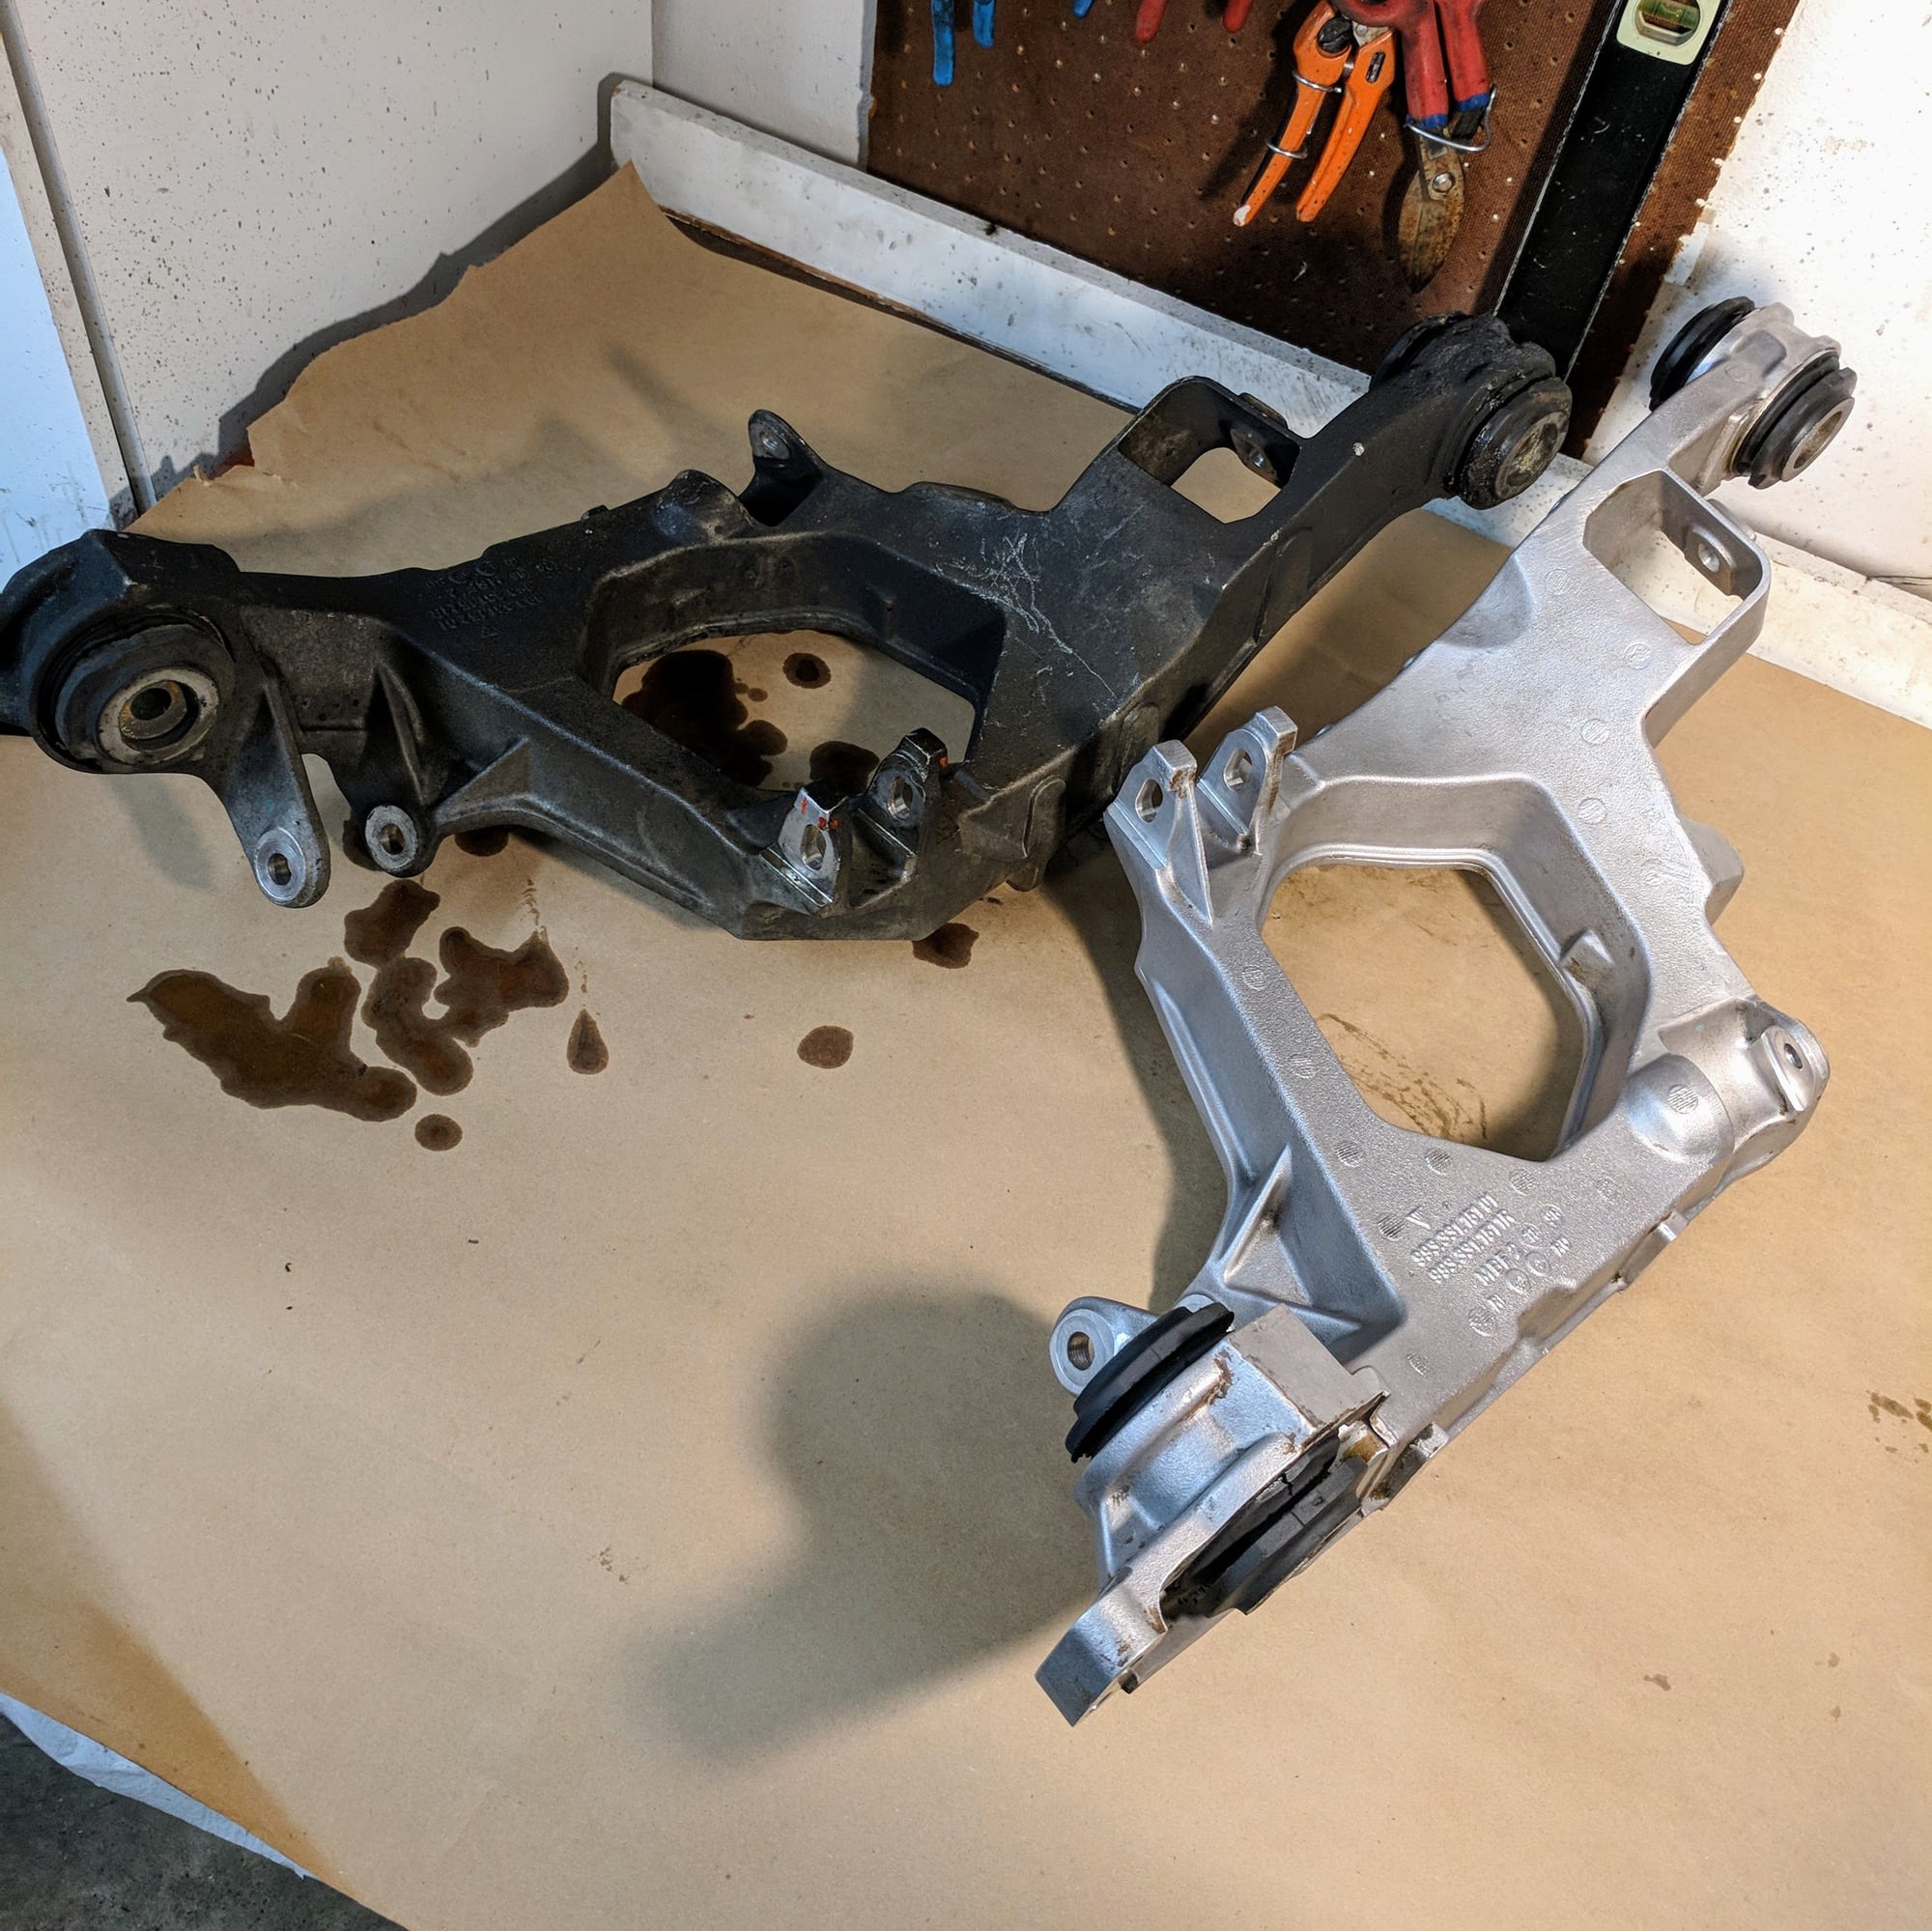
Since the control arms were removed, it was not much additional effort to drop the subframe as well to replace the subframe bushings. If I were to do the job again, I would remove the axles from the transmission first with the control arms on. Reason is that the parking brake makes it easy to lock the diff and without the control arms you can't use the parking brake, as well as doesn't keep the axles from flopping around making it harder to loosen the axle bolts.
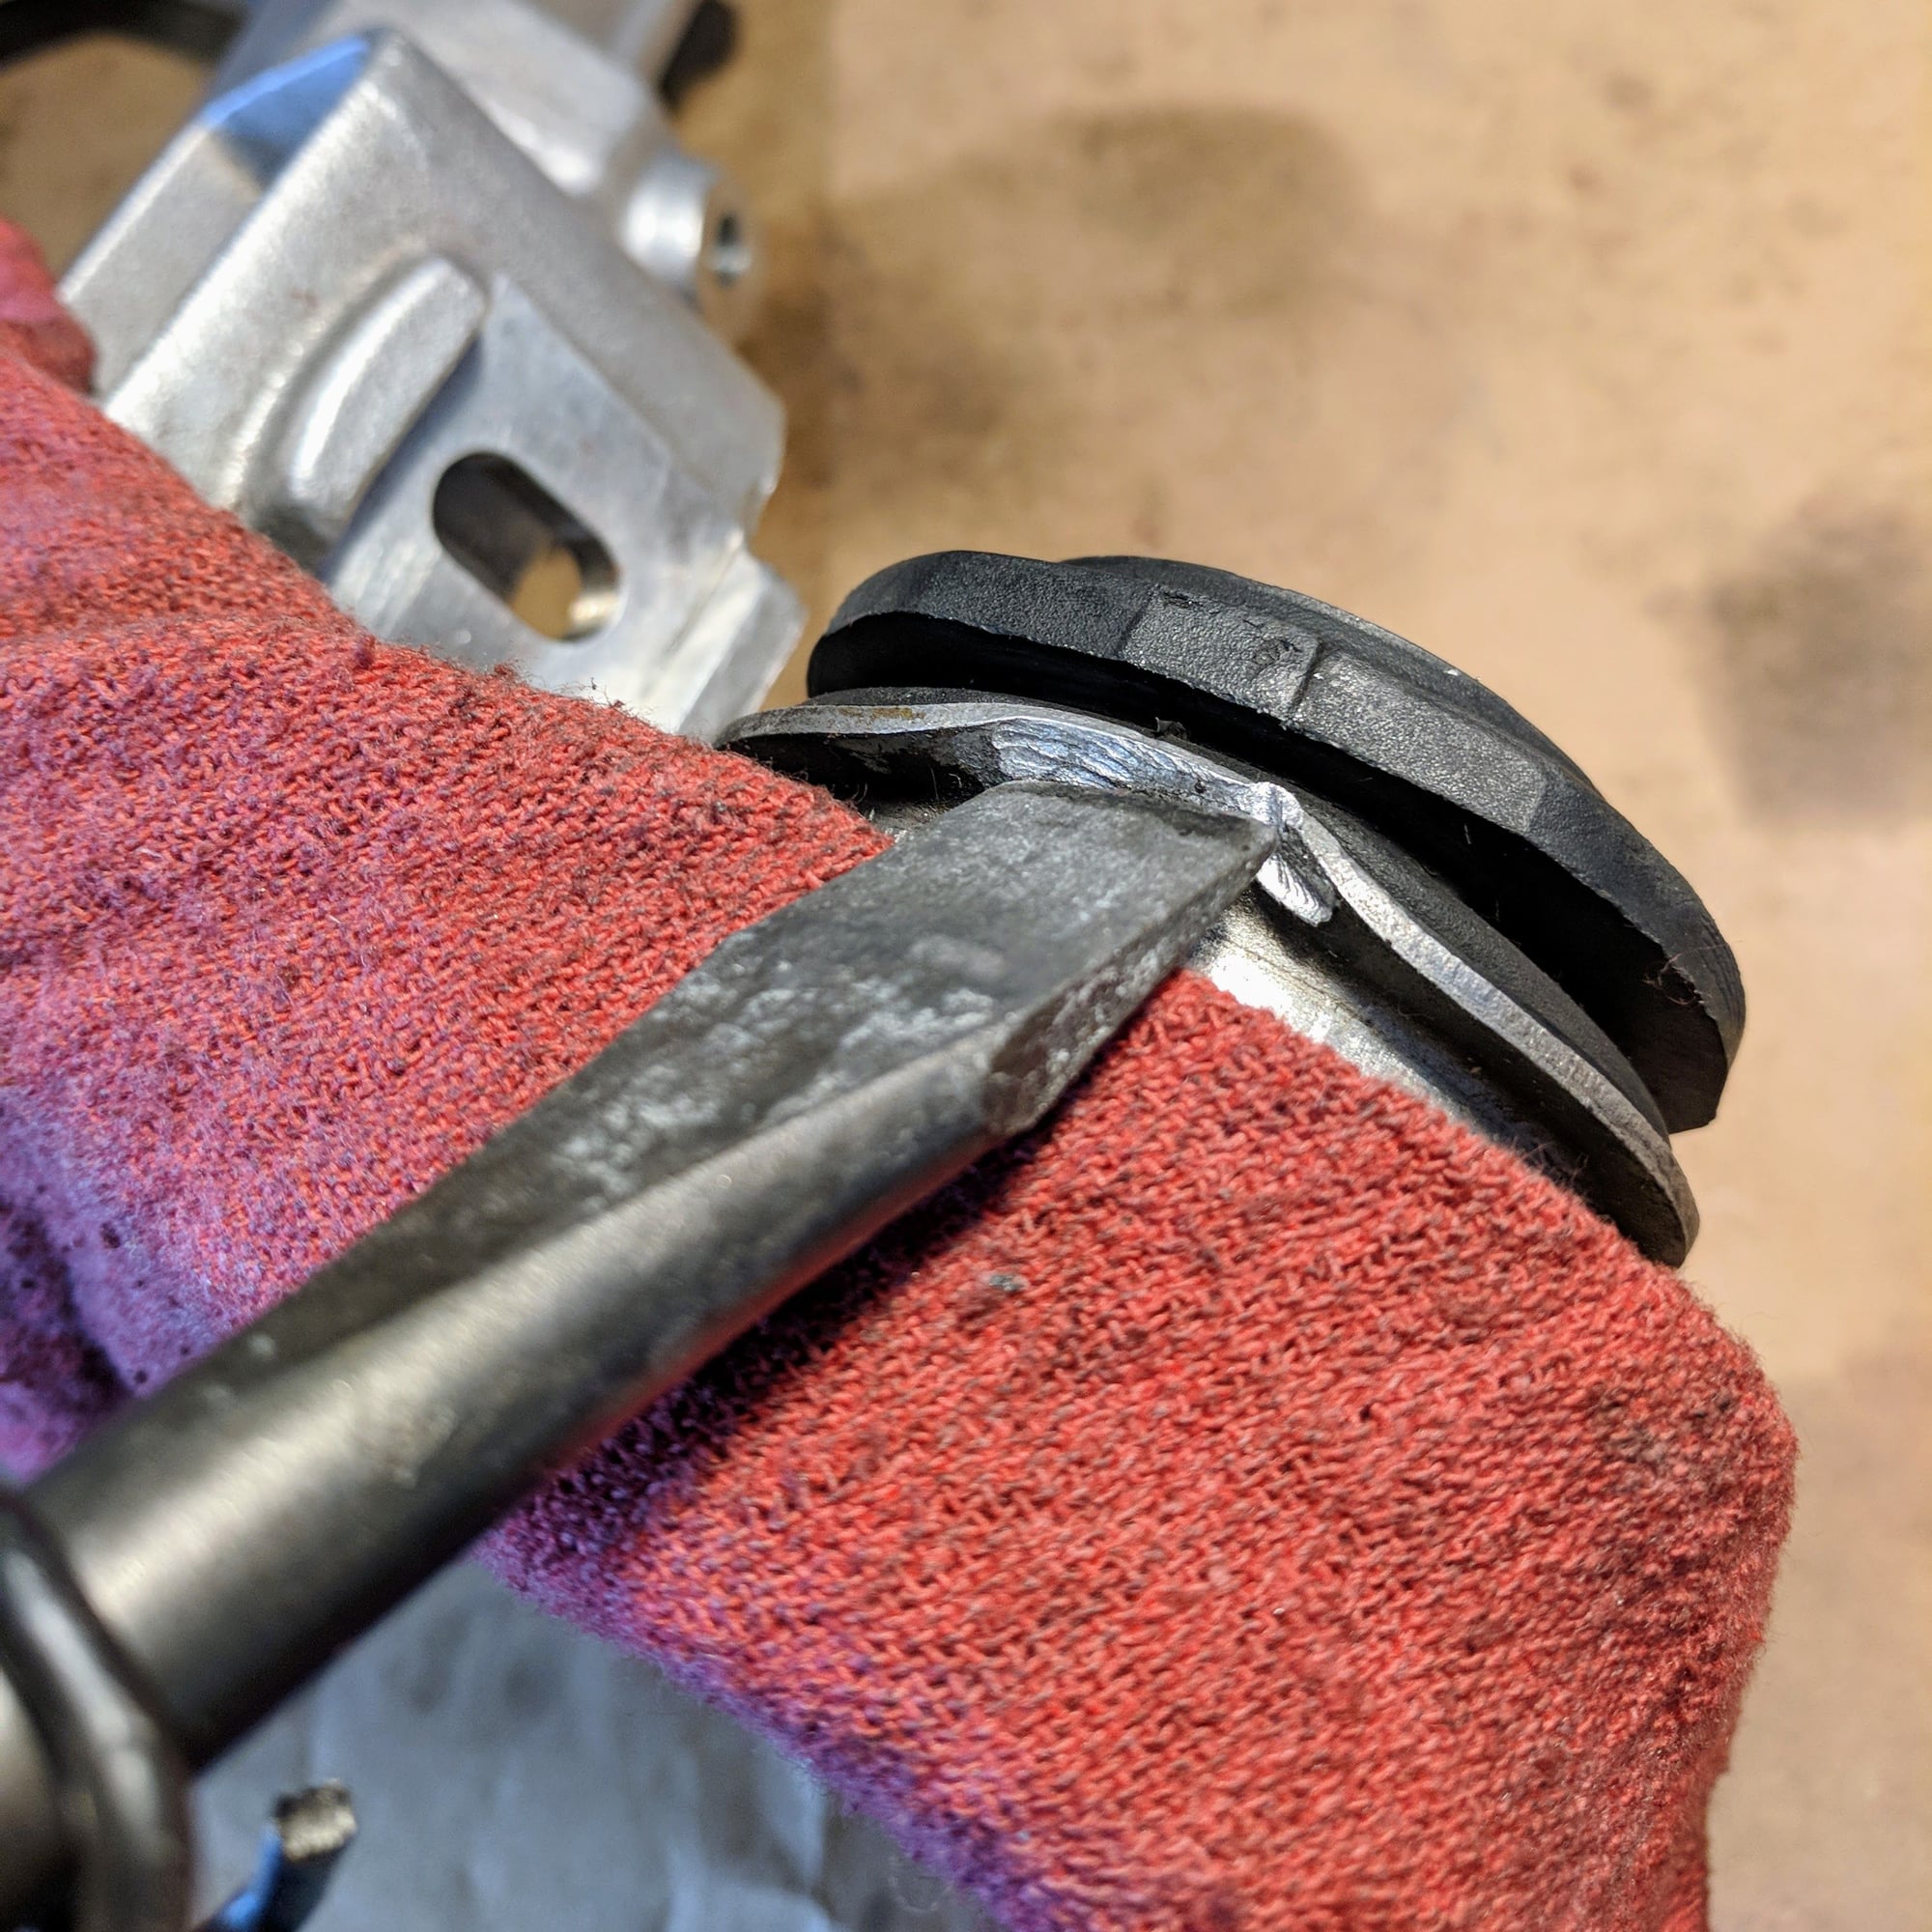
Once the subframes were off the car the air chisel worked like magic here...
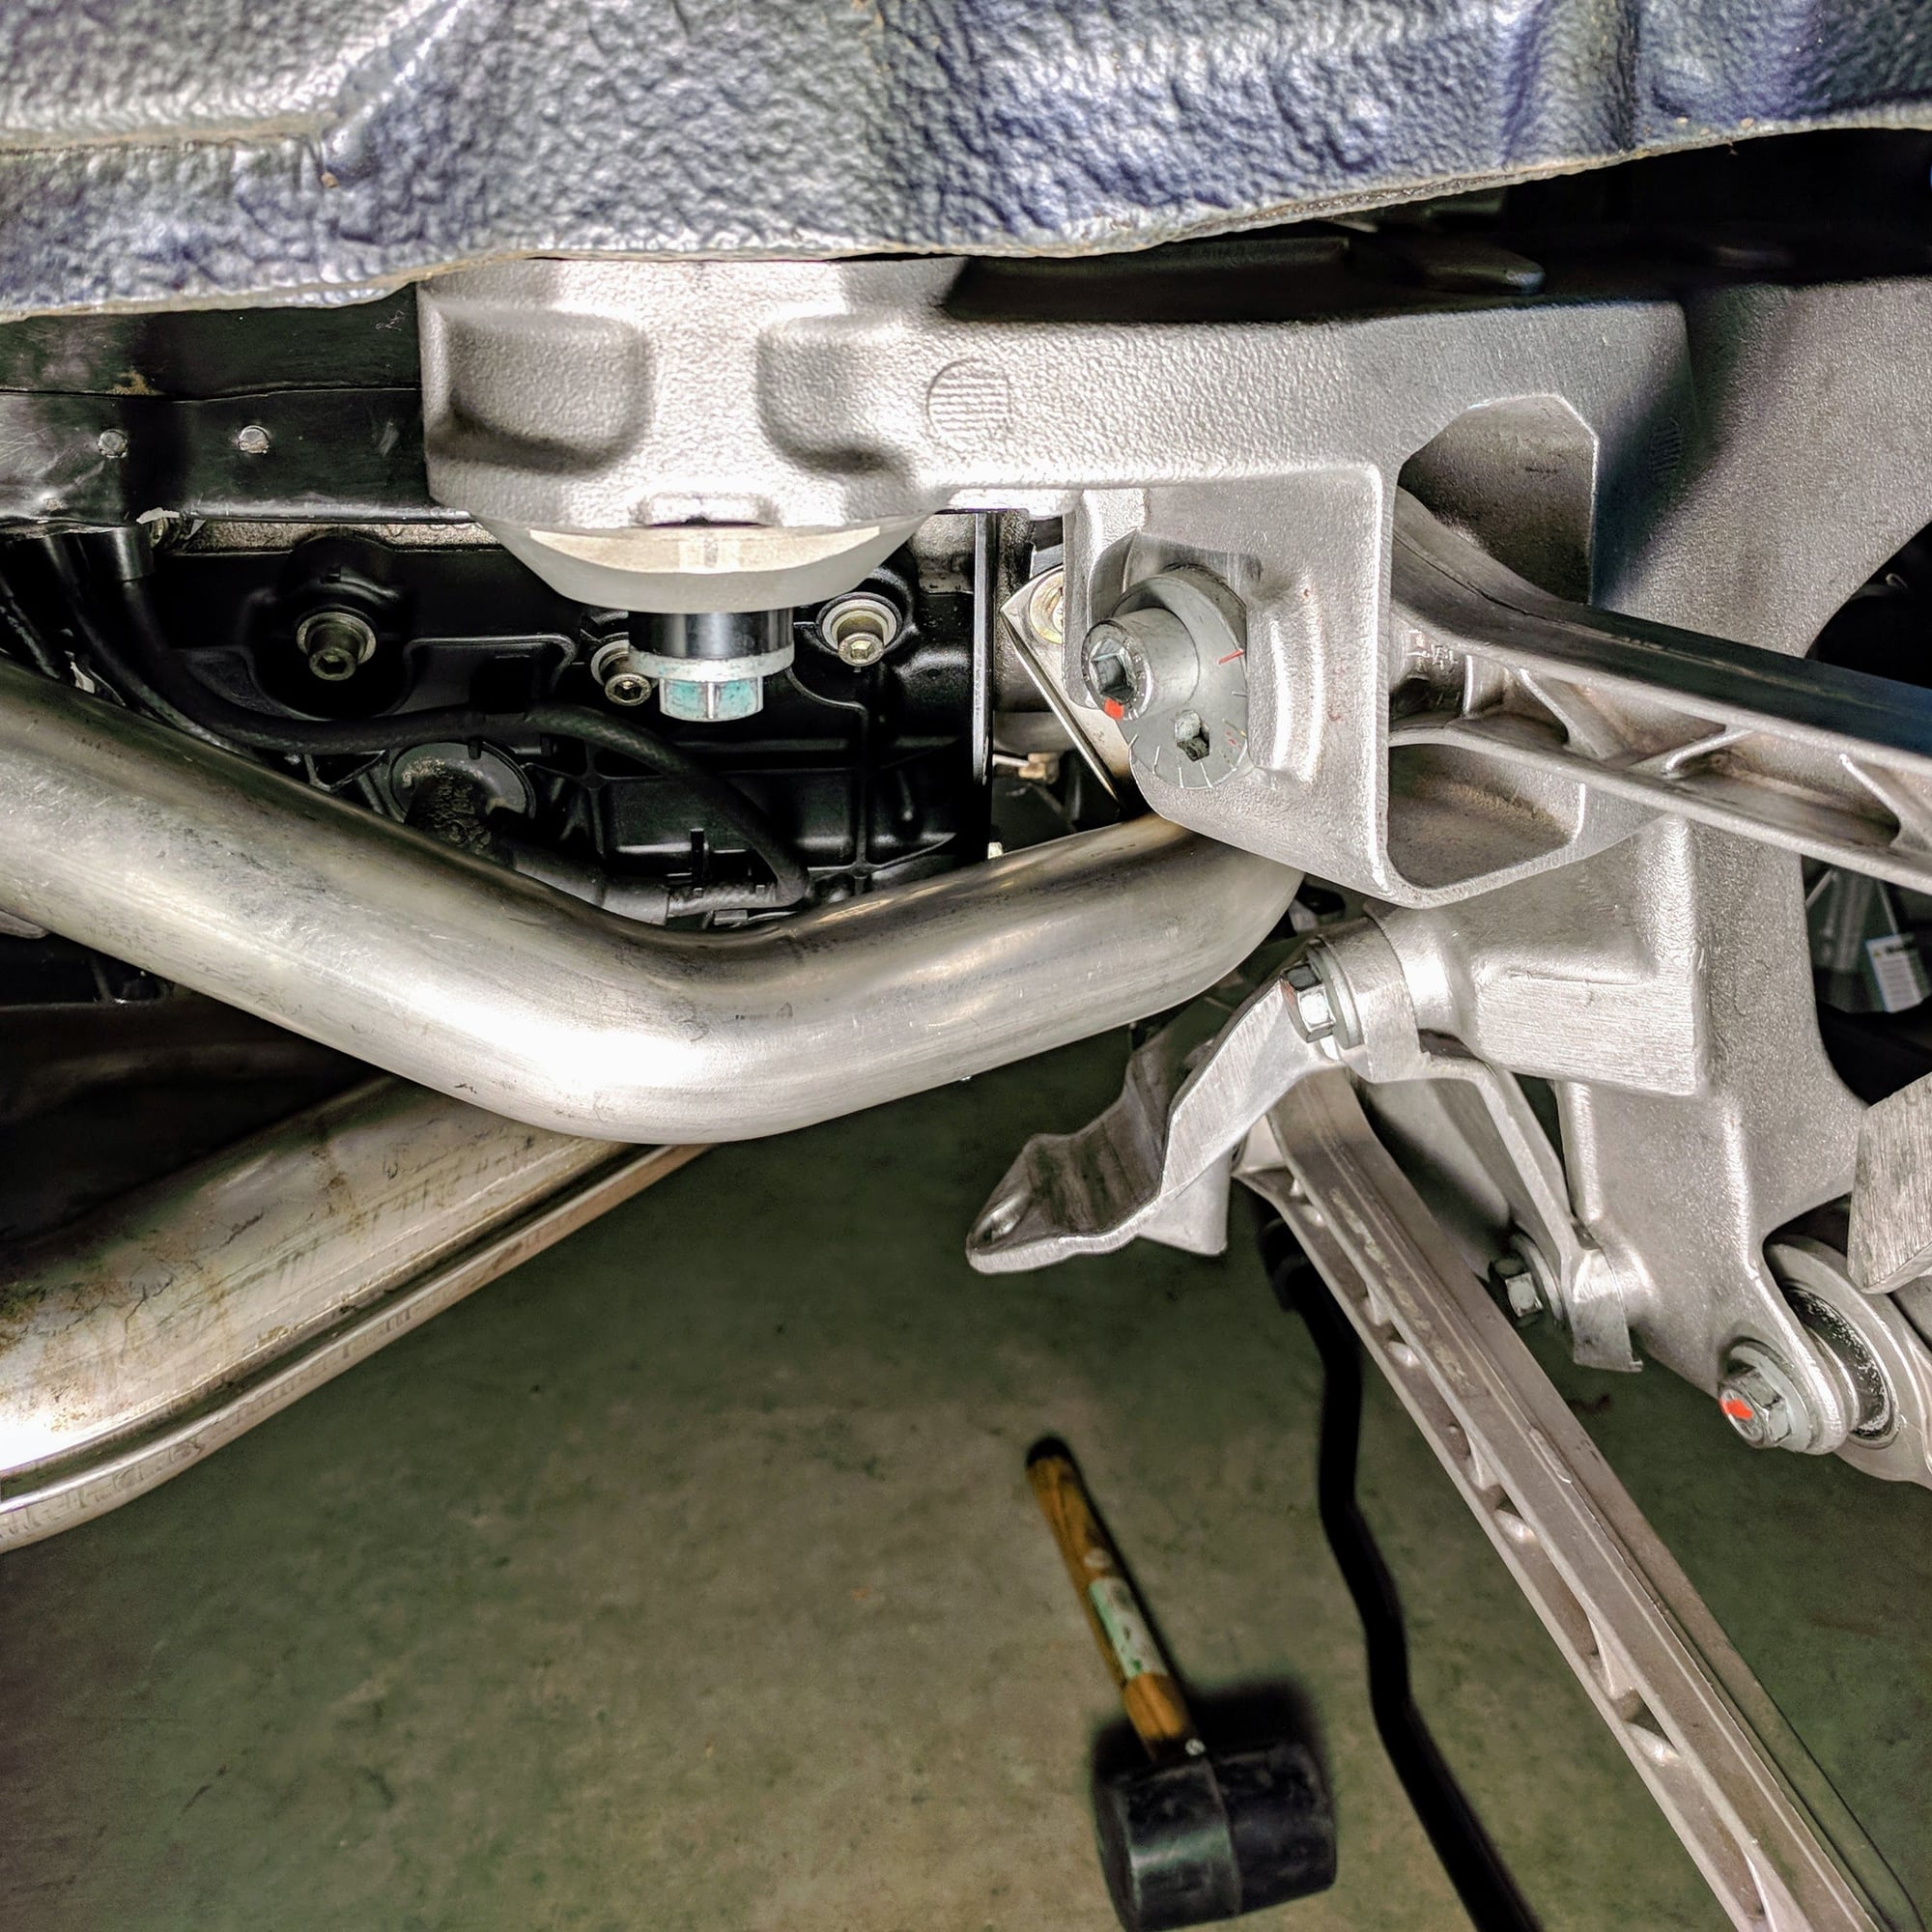
I hand tightened all of the nuts and bolts to assemble the subframe on the car before final torque as there is some play in the mounting holes to align the holes nice and square. Aligning the lower cross member was the hardest part. Some old control arm bolts worked perfectly to set them.
The Elephant solid subframe bushings are similar to the OEM ones in shape as they have "divot". I used a picture of the old rubber subframe bushing positions for the front and rear/upper and lower and used a sharpie to mark where the "divot" should align to make it easy to spin them into position.
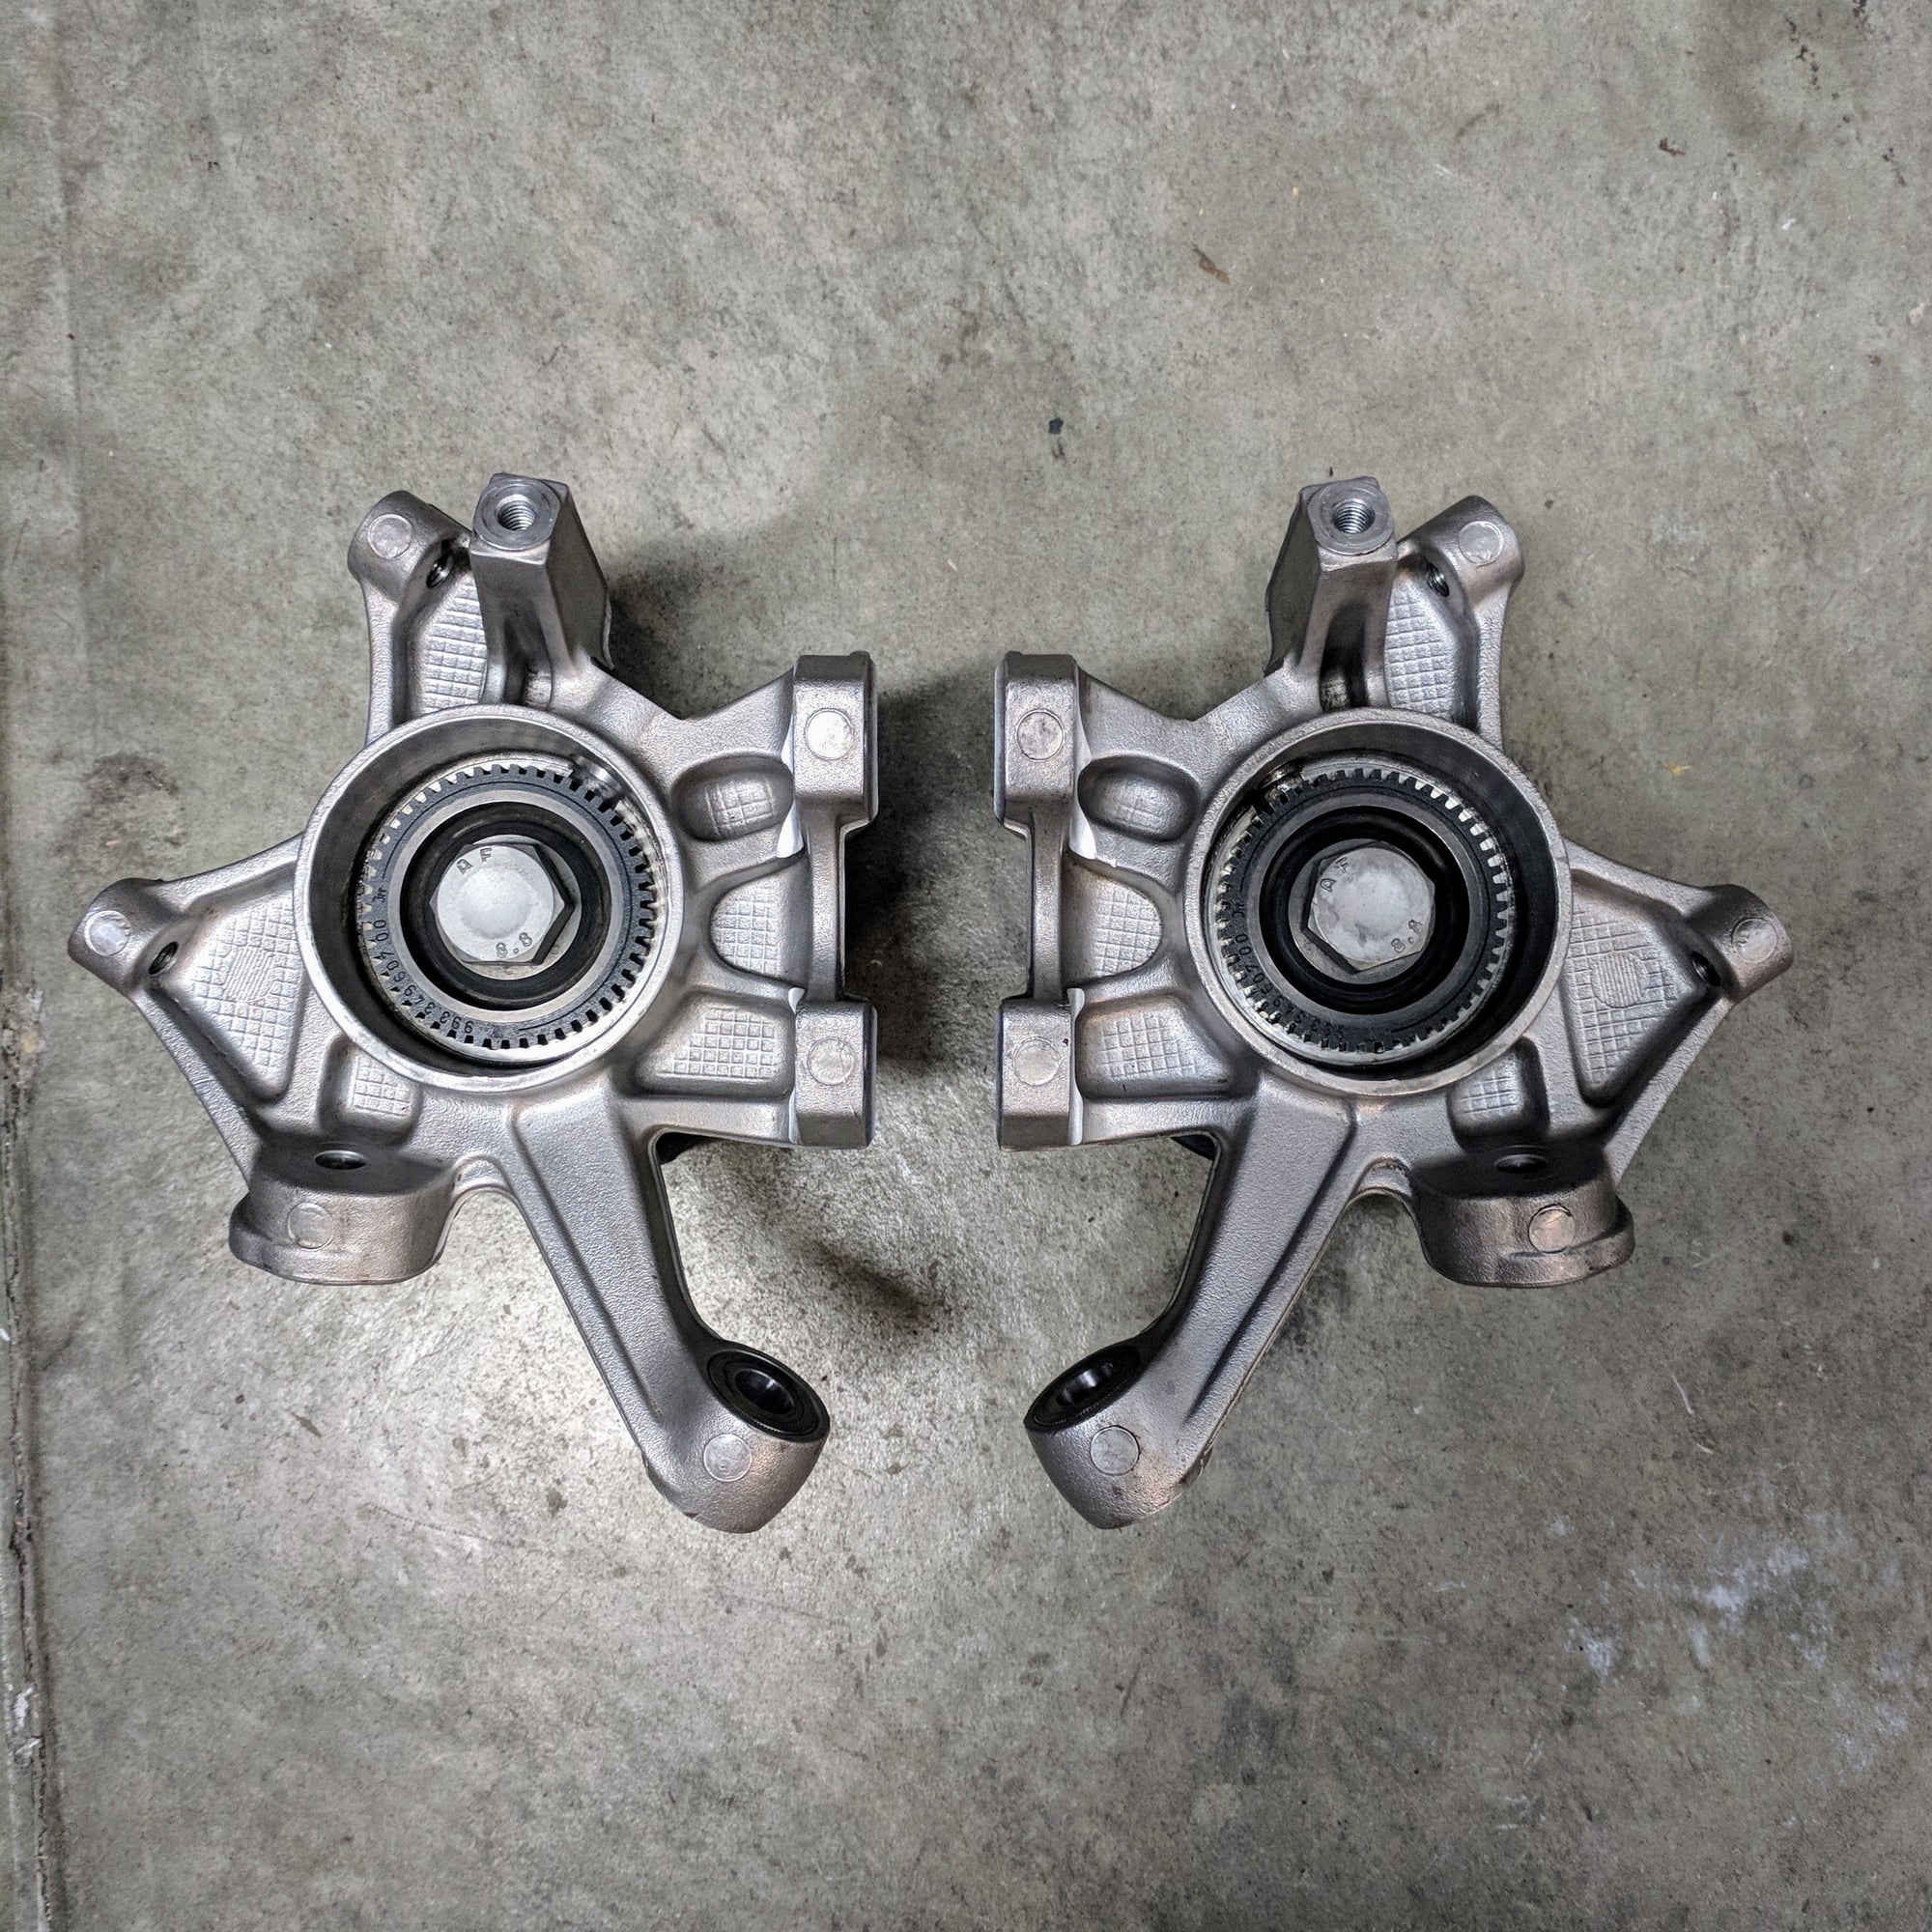
Rear suspension bushing overhaul and clean up done!
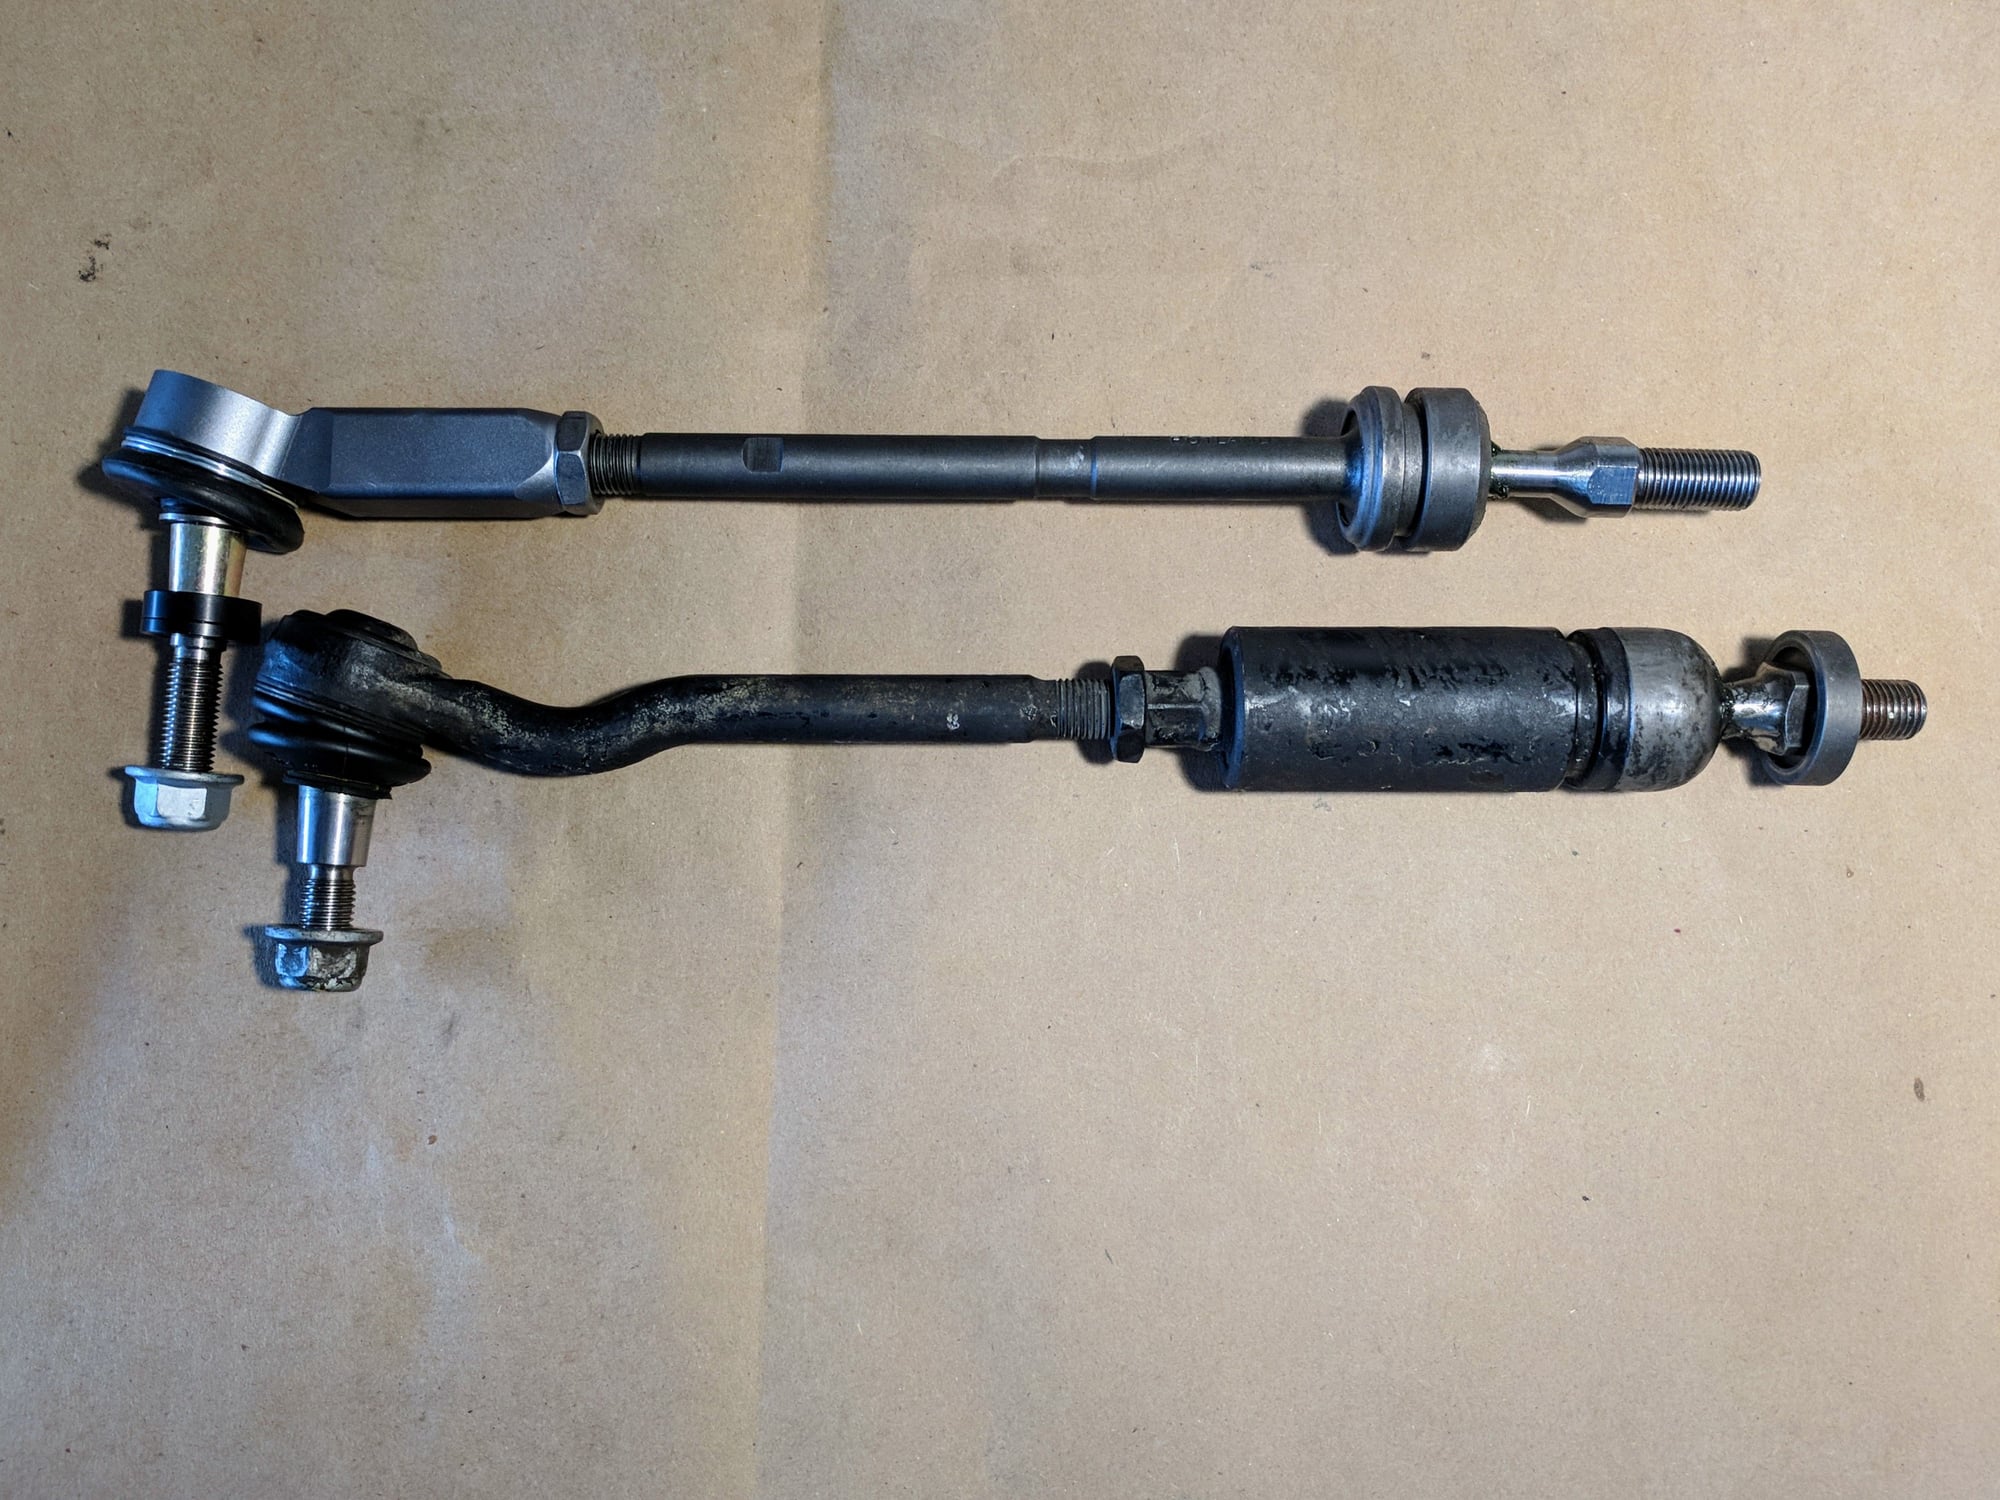
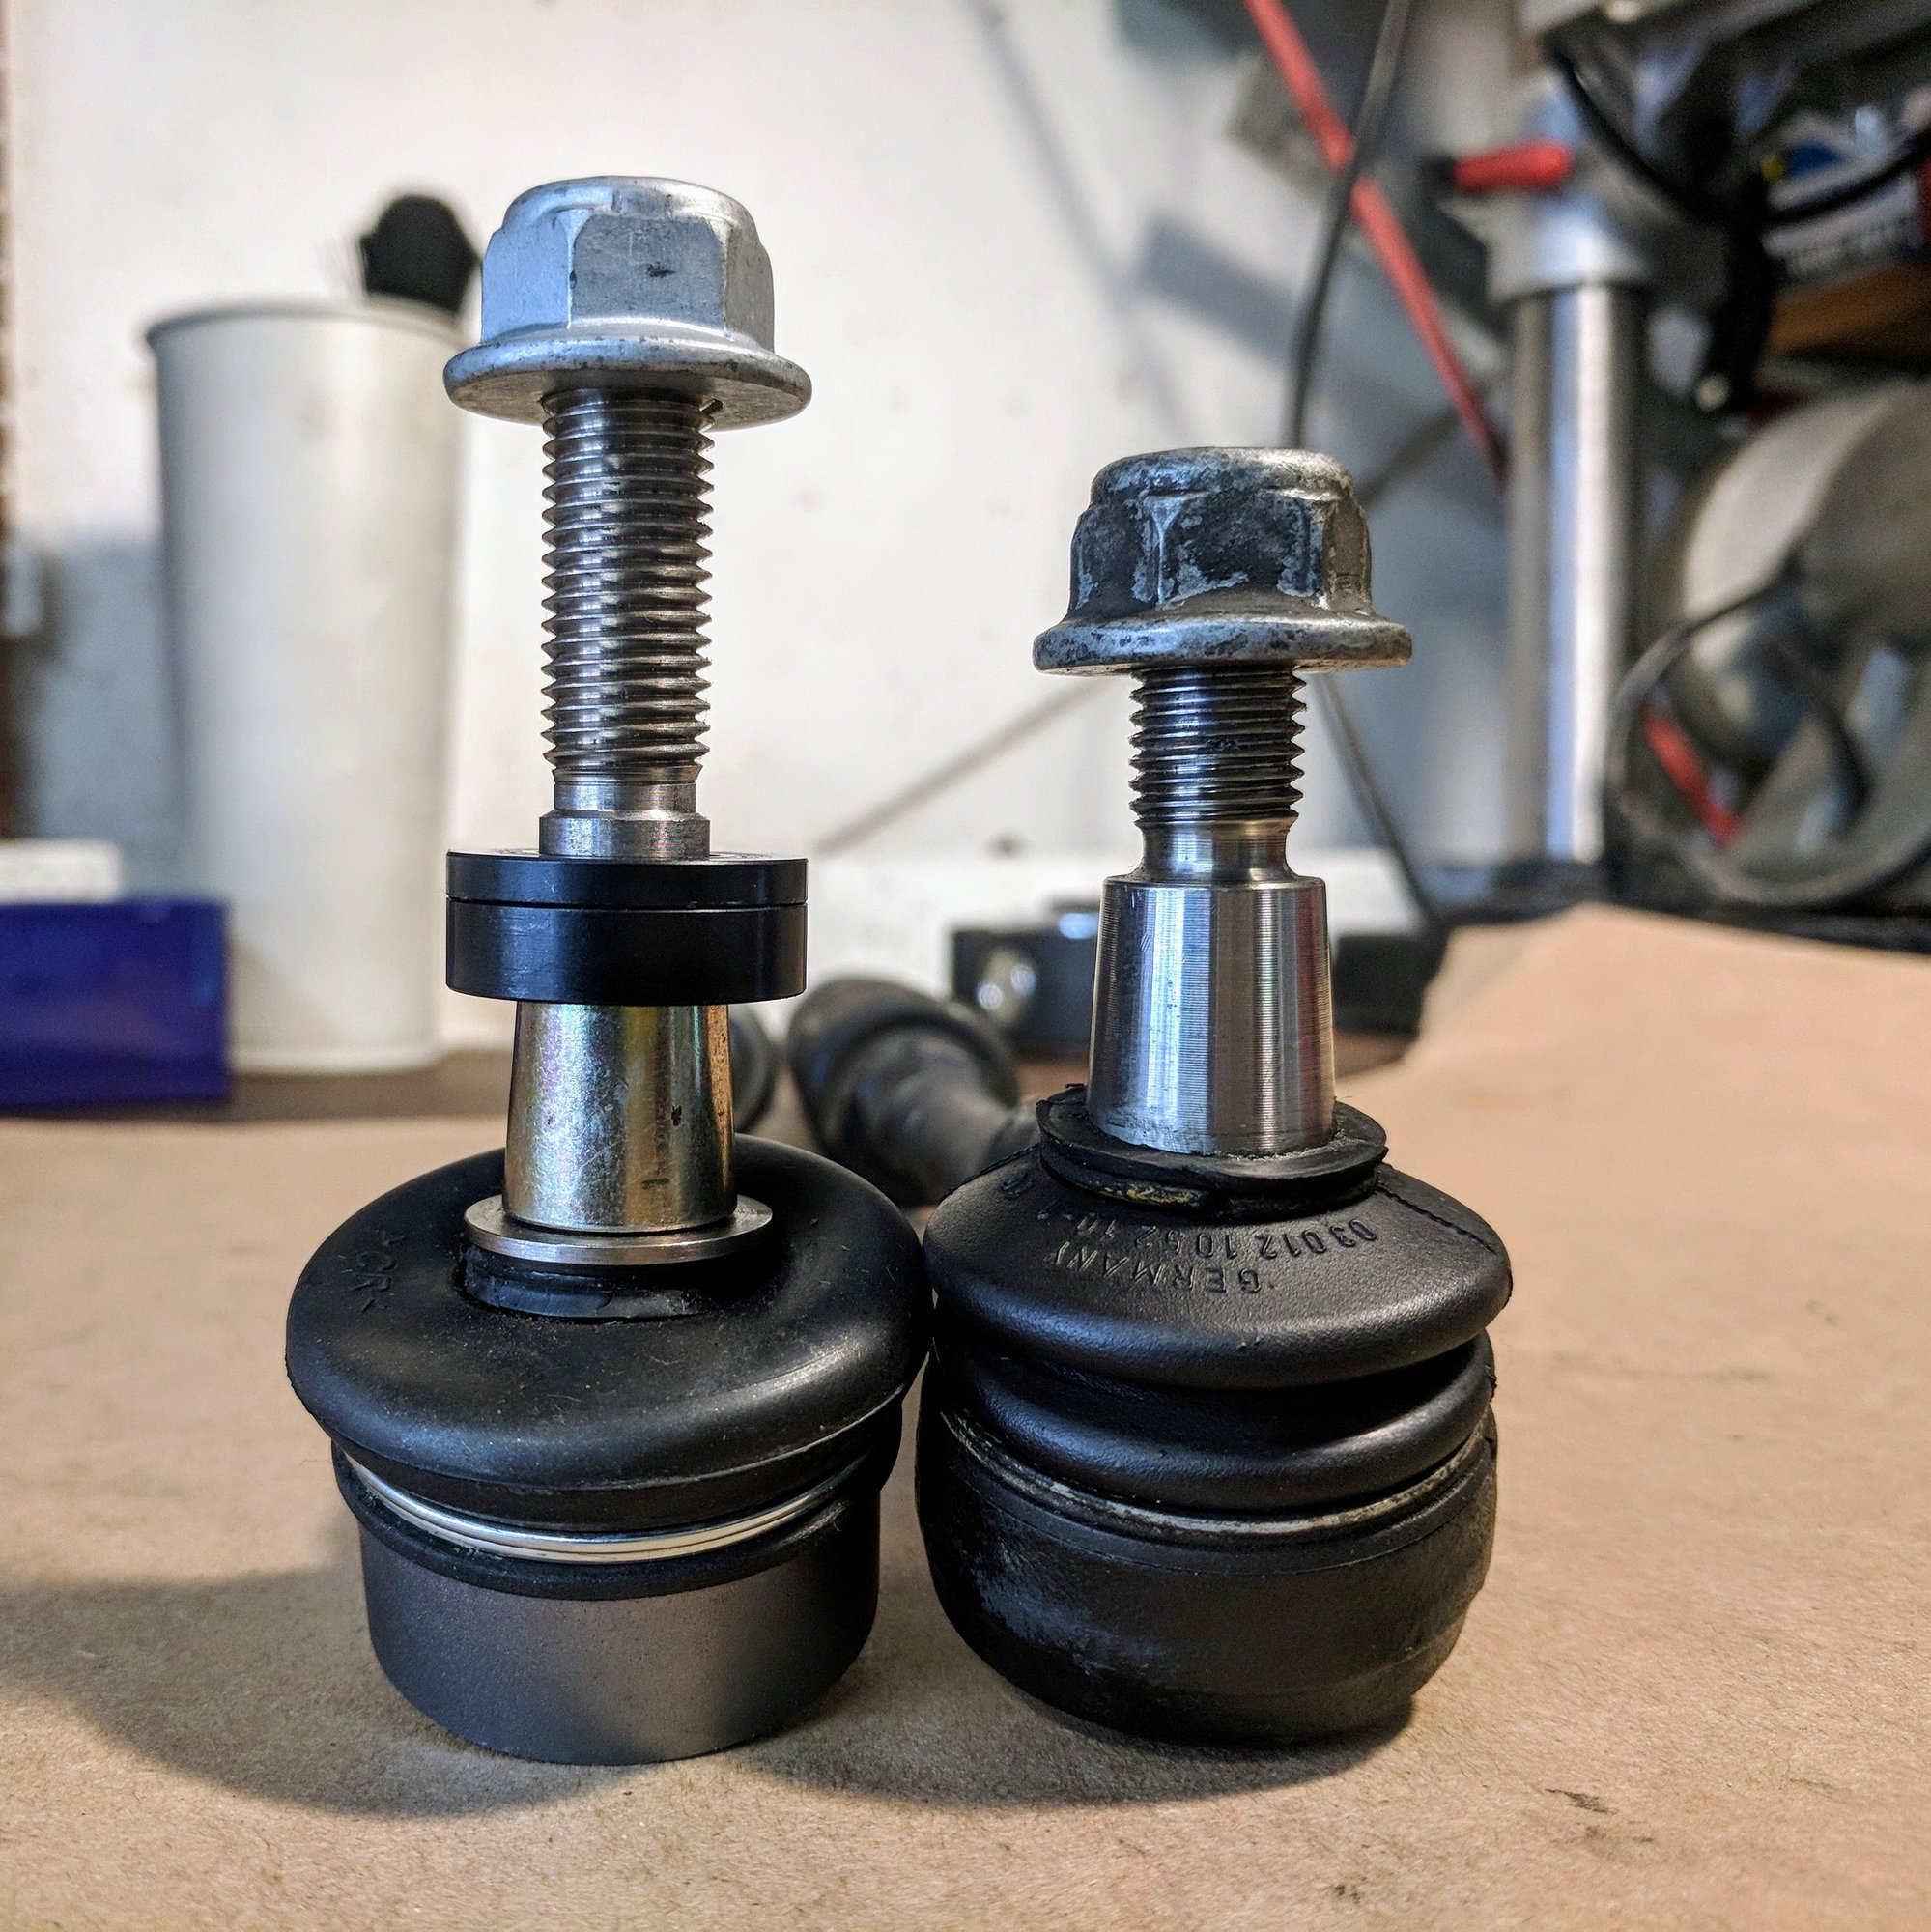
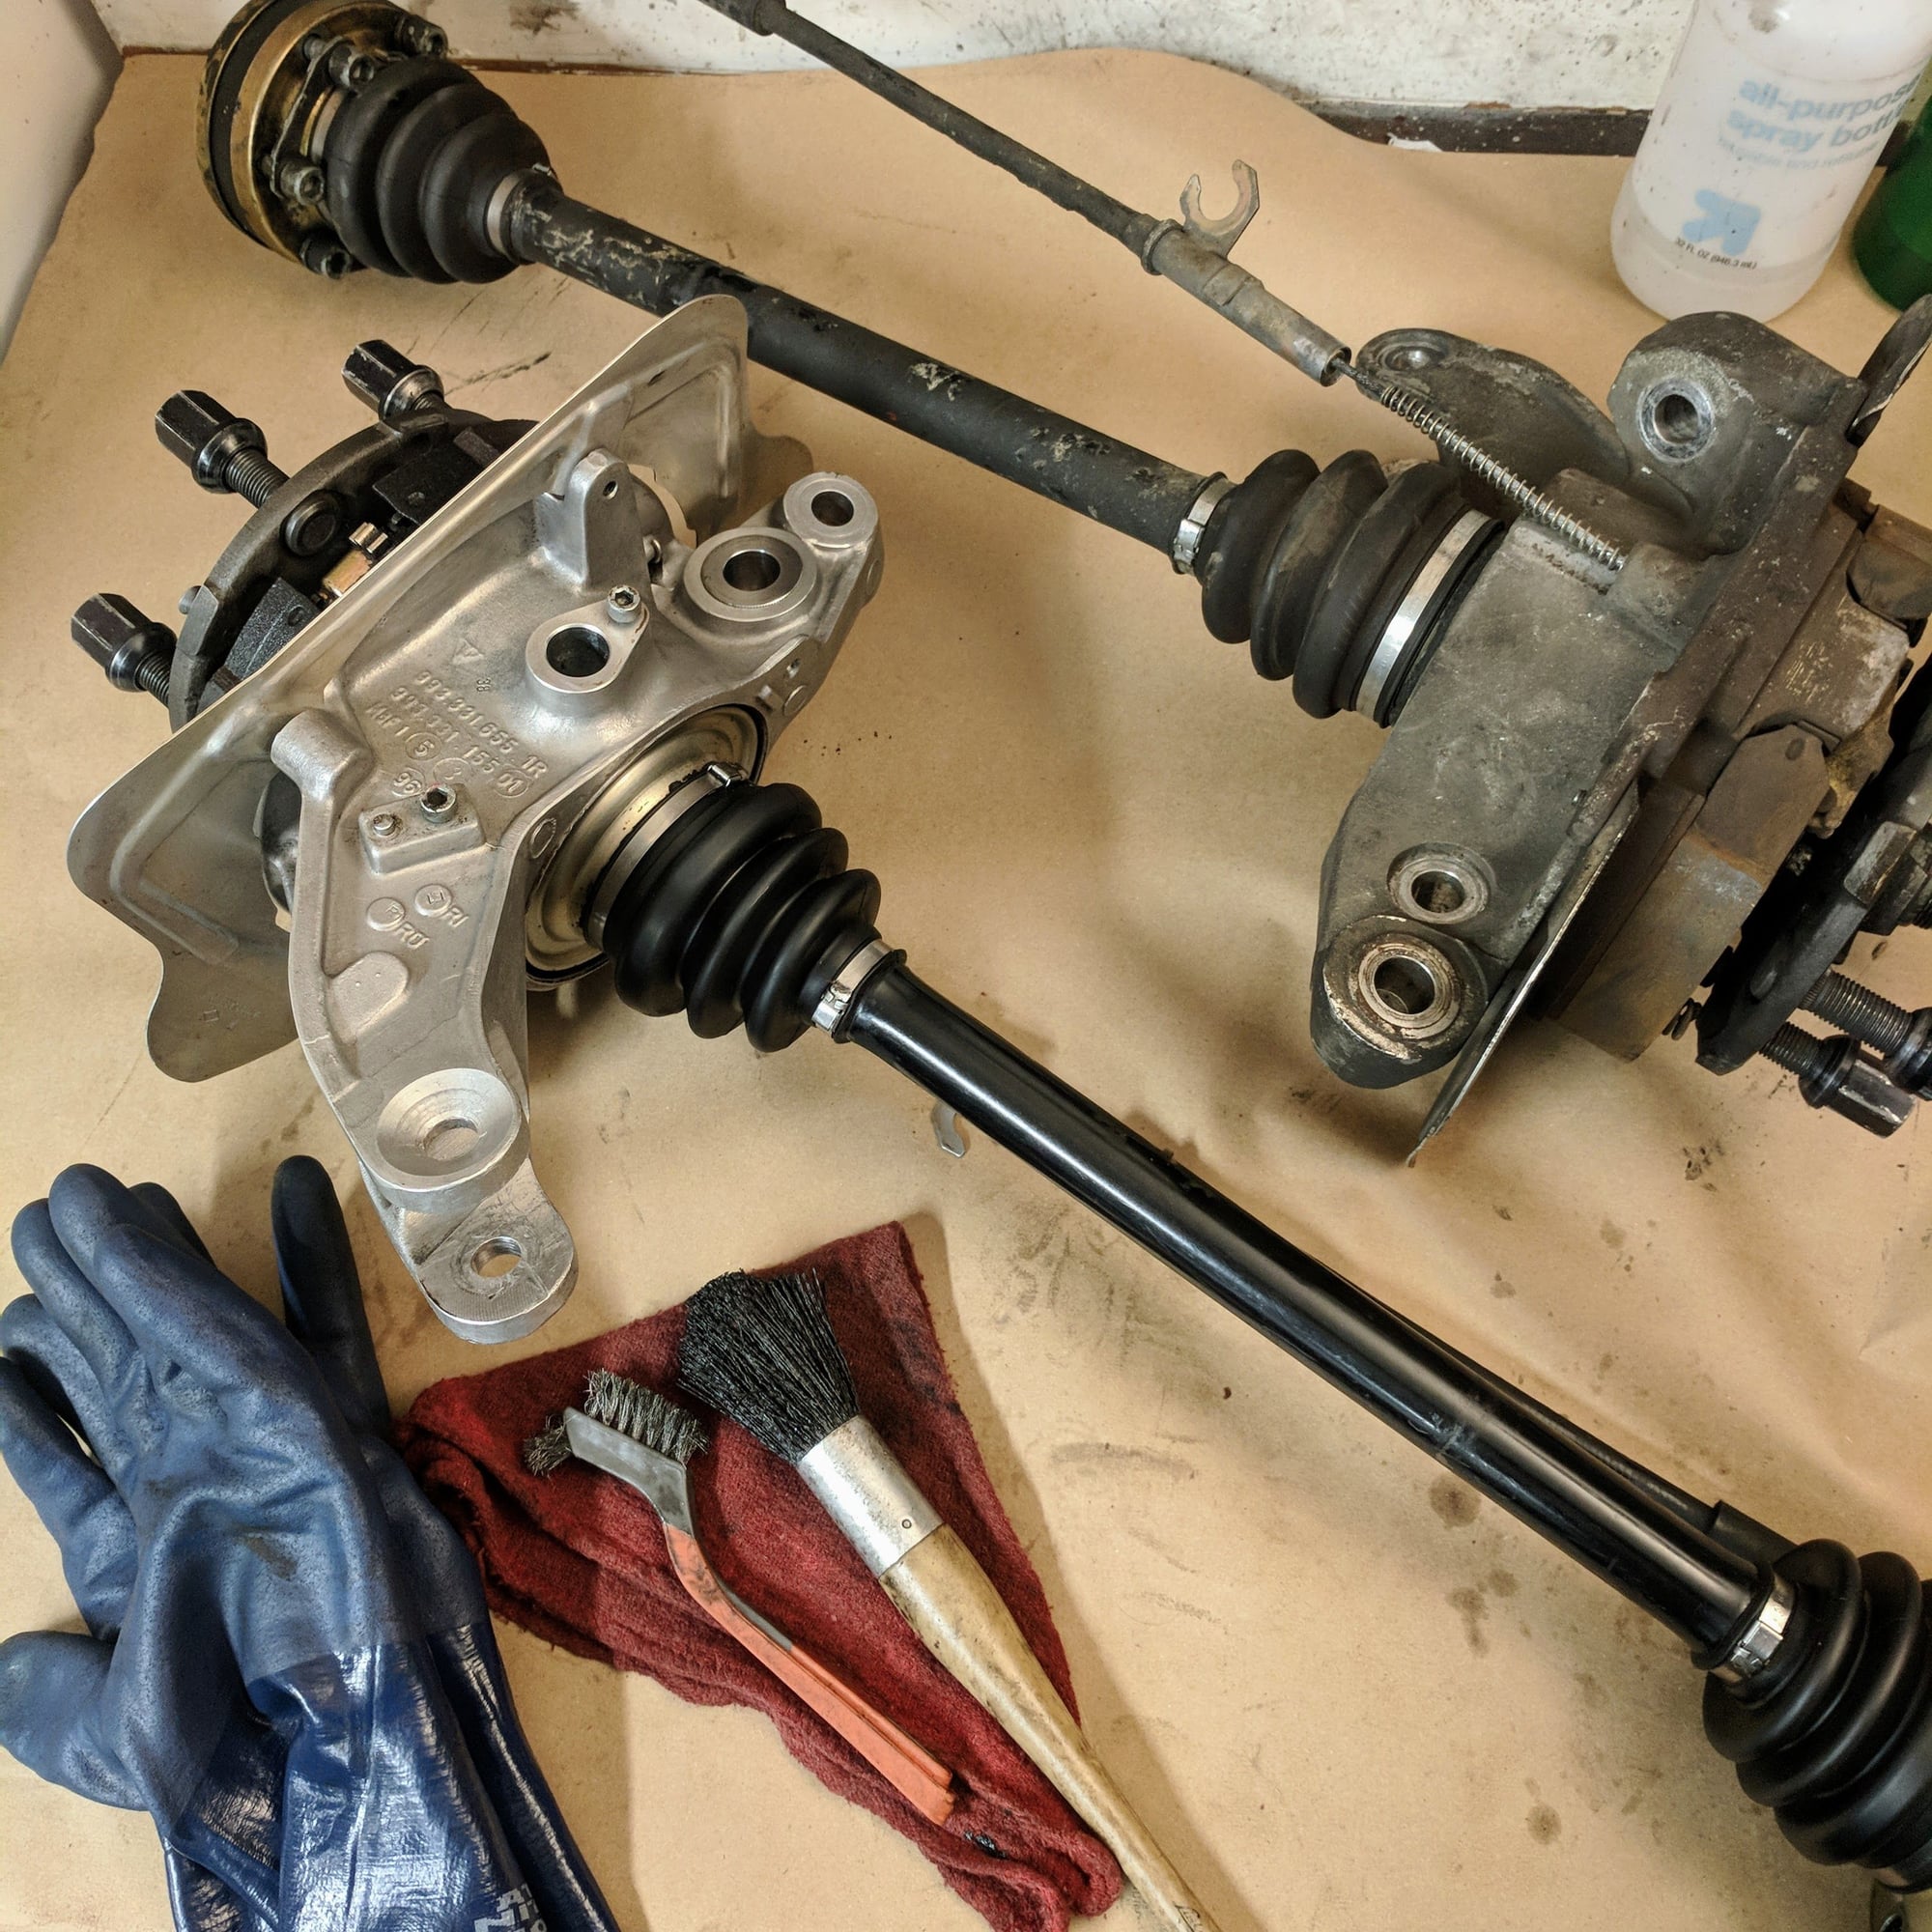
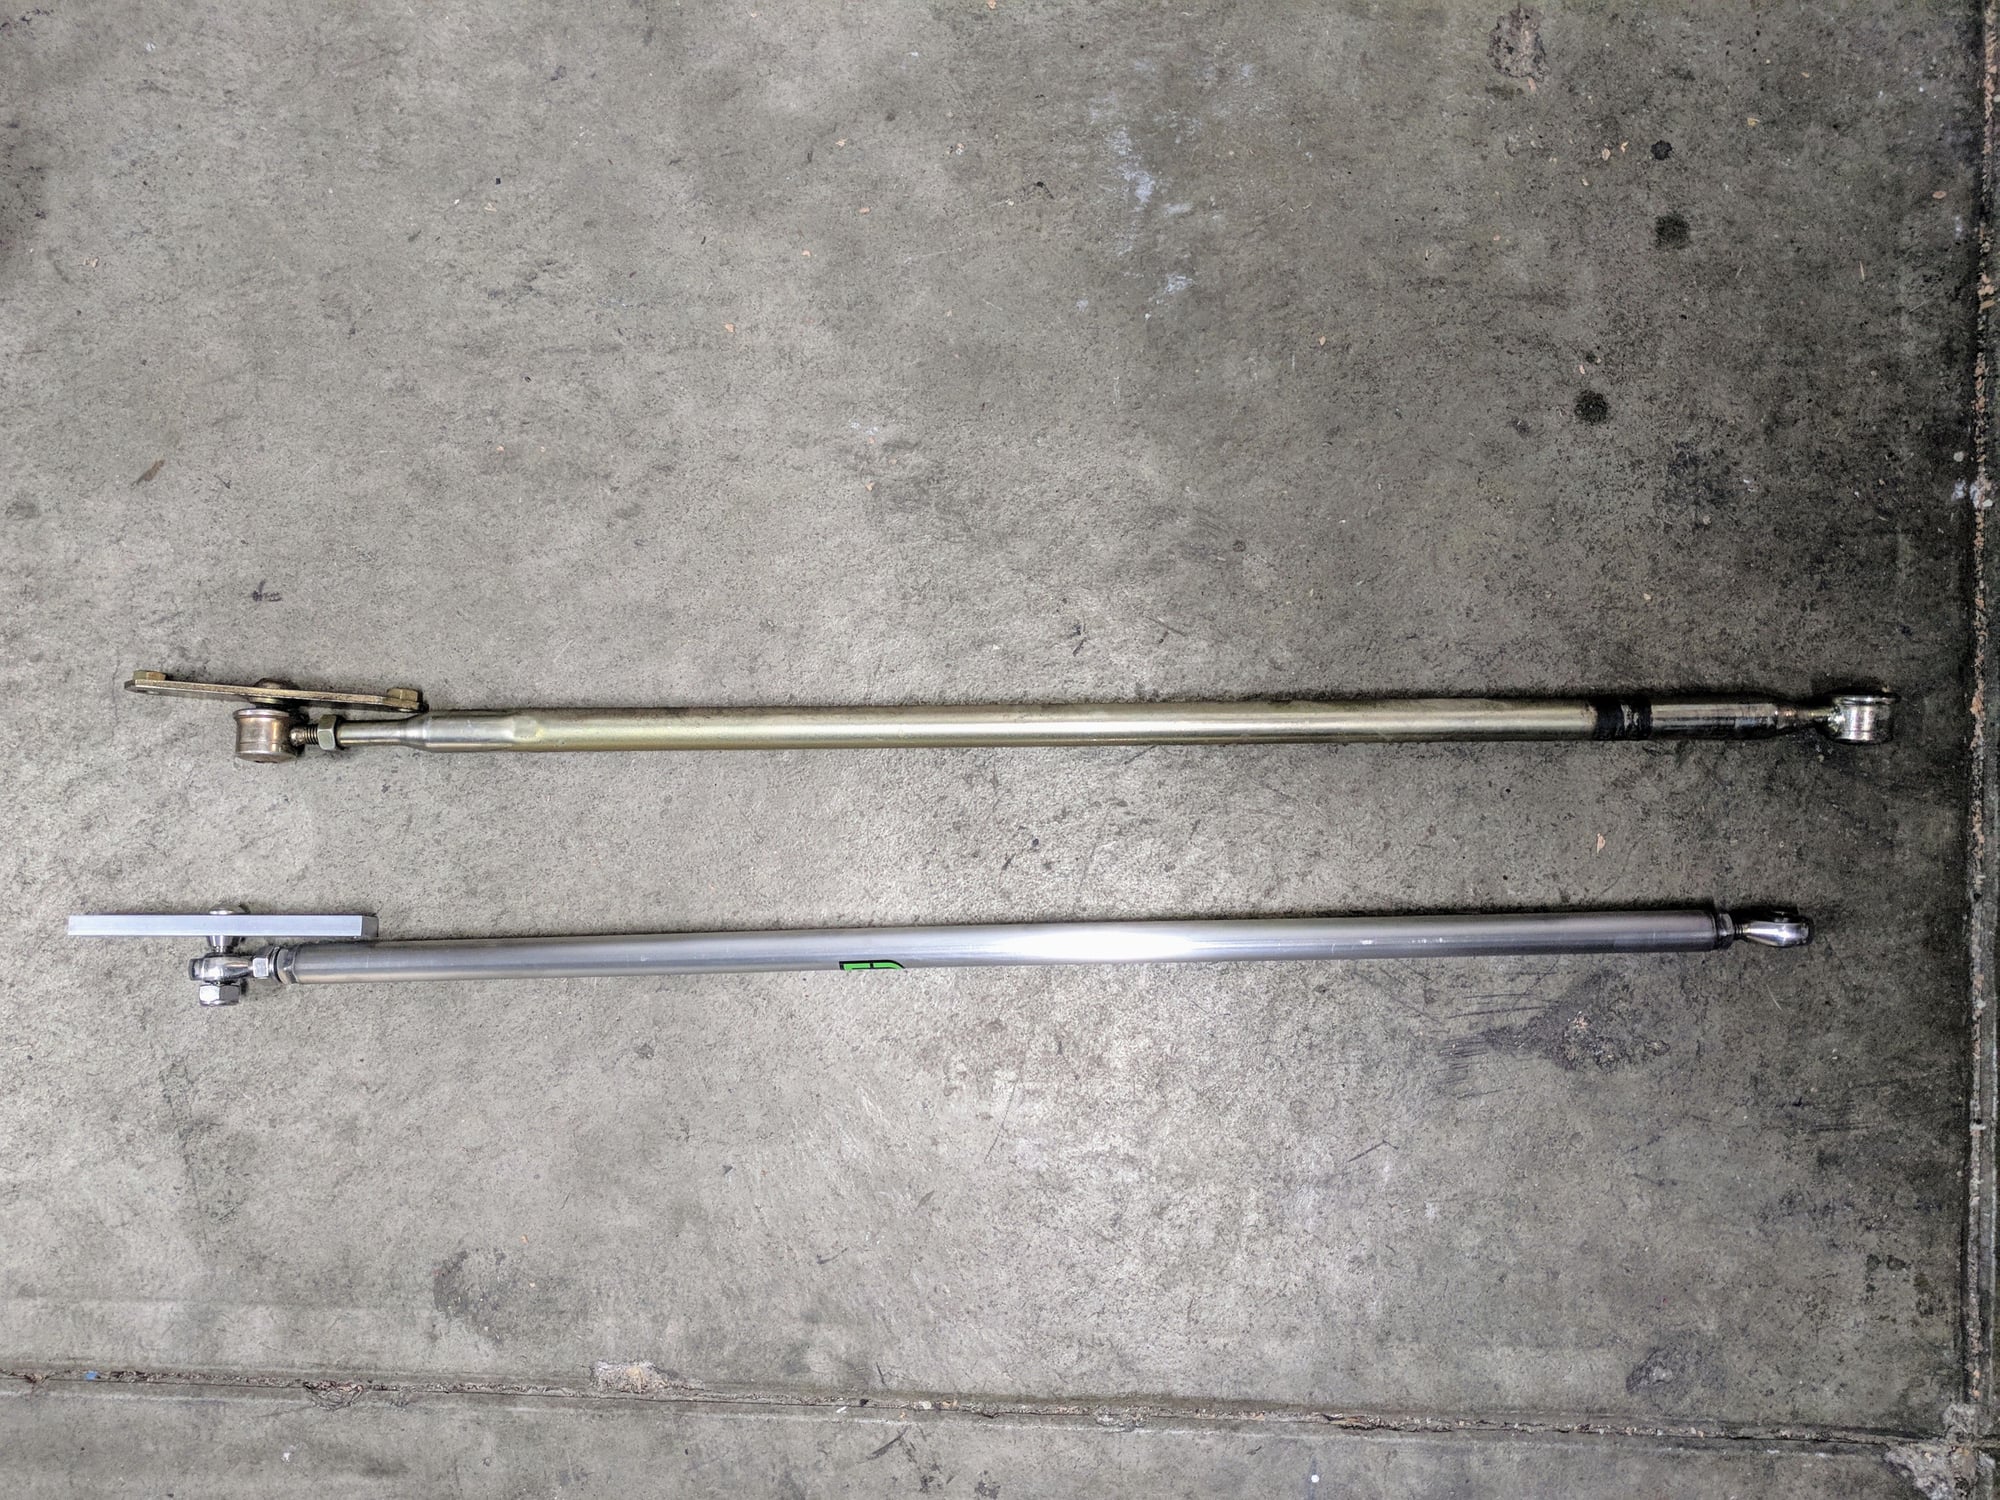
New solid tie rods from Elephant. Notice the inner is a ball joint similar to the RS ones with no rubber.
The Elephant tie rods also are lower in height so allows you to get it closer to the carrier which helps correct bump steer. Notice the OEM one on the right and how much higher it is. I am running RS +10 ride height so anything helps here to reduce bump steer with the stock carriers at lower ride height.
While I like my Craftsman ratchet set, the Gear Wrench ones are easier on your palms. Had to pick up a new 22mm wrench to complete the job here.
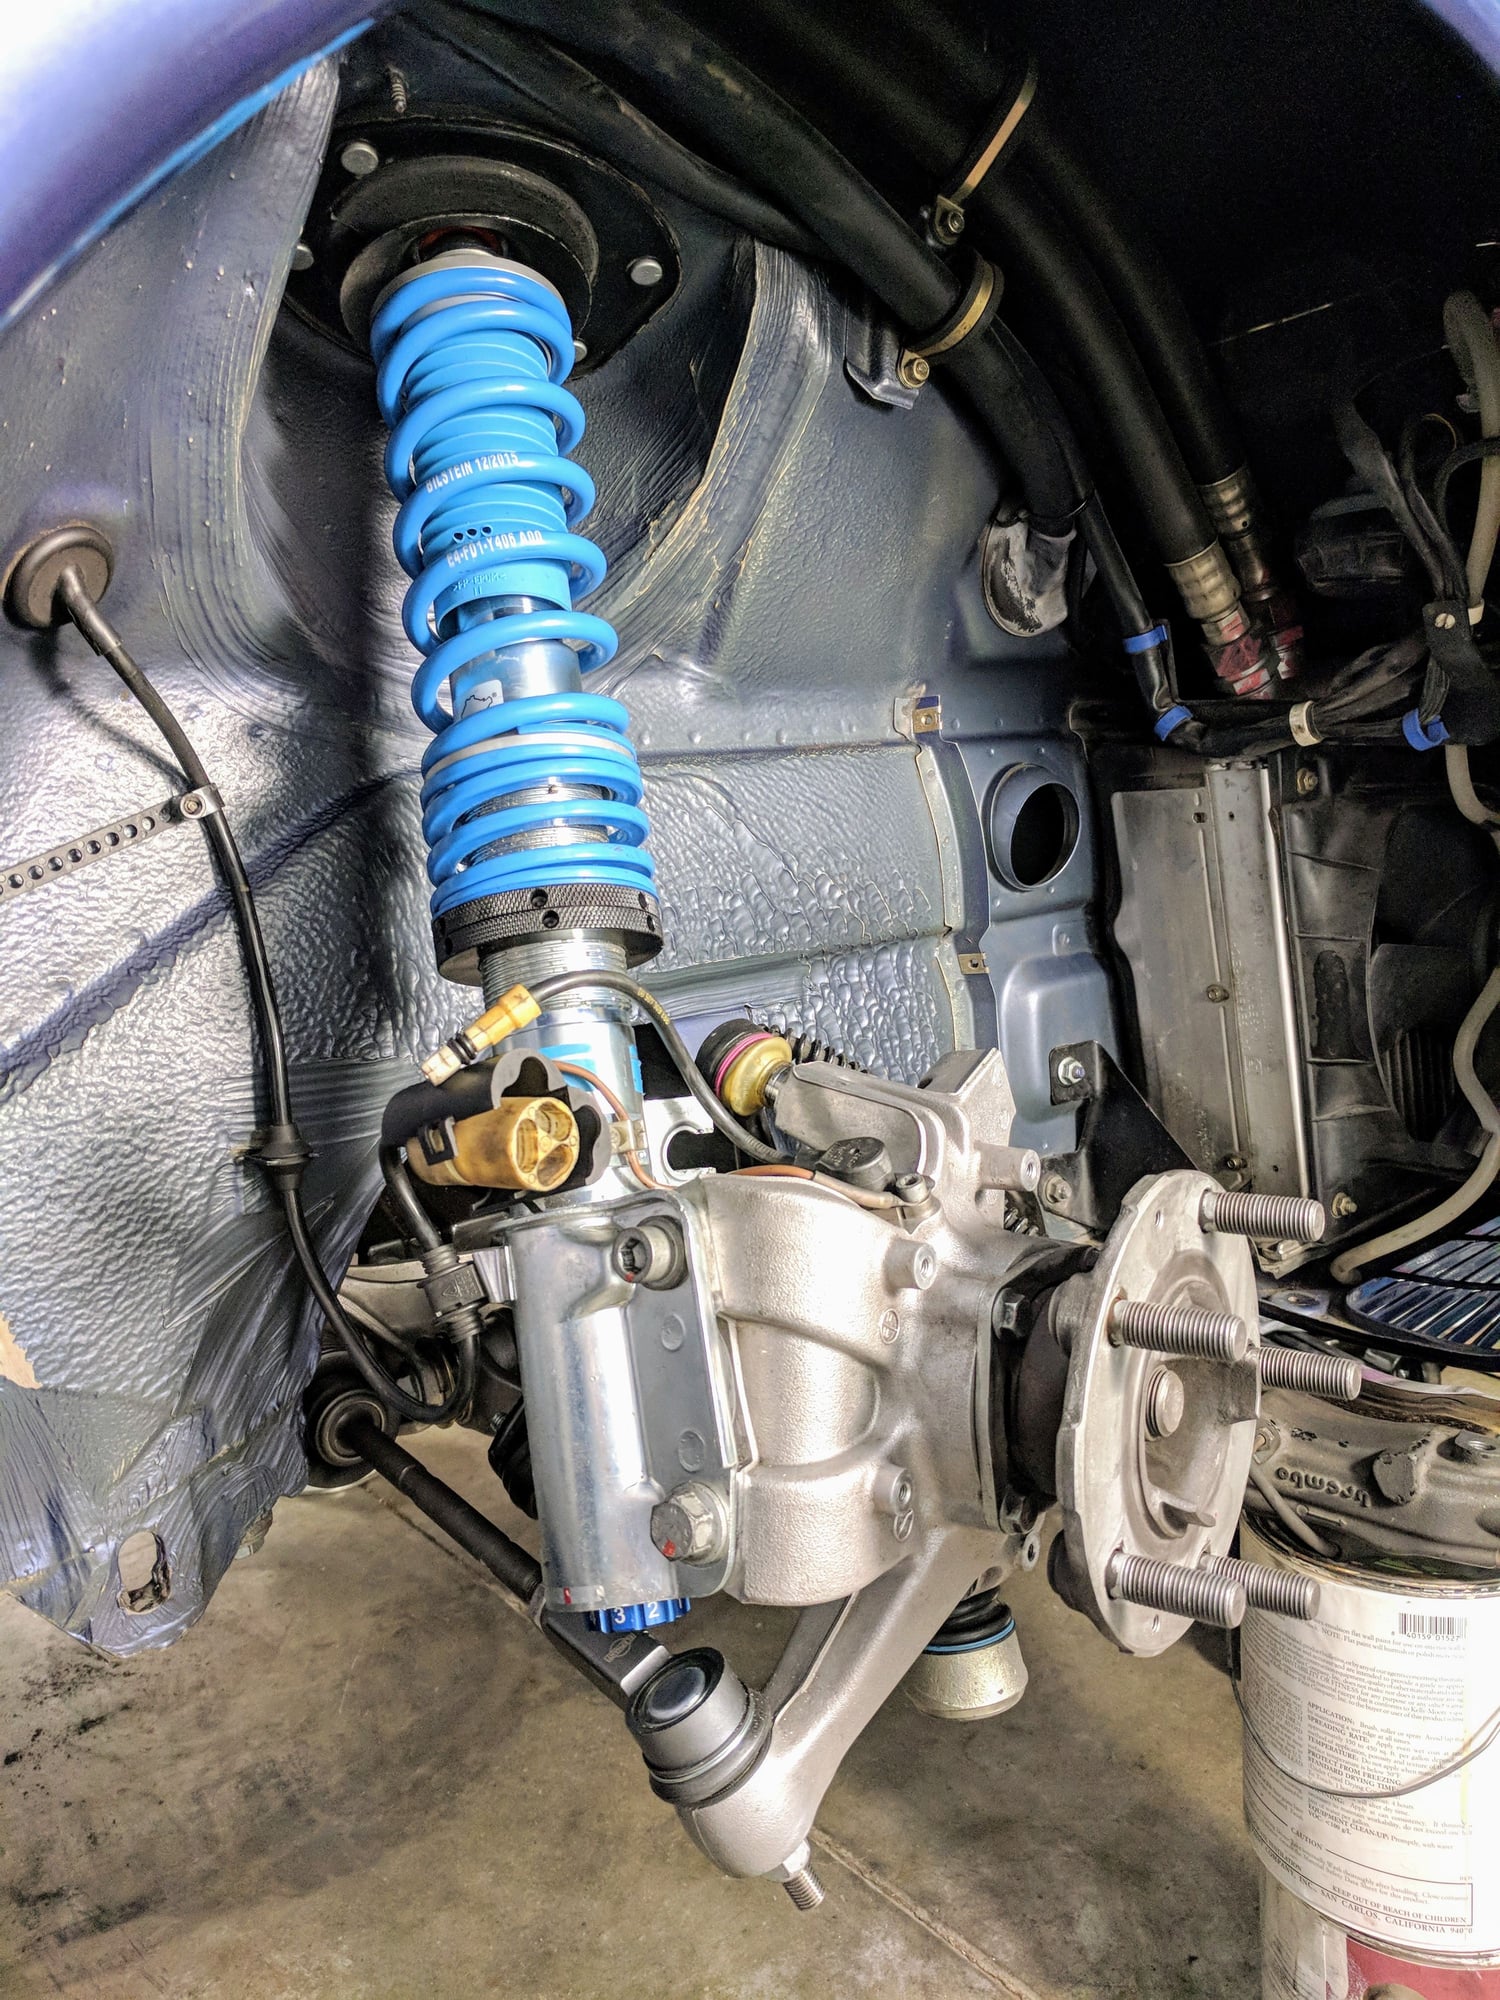
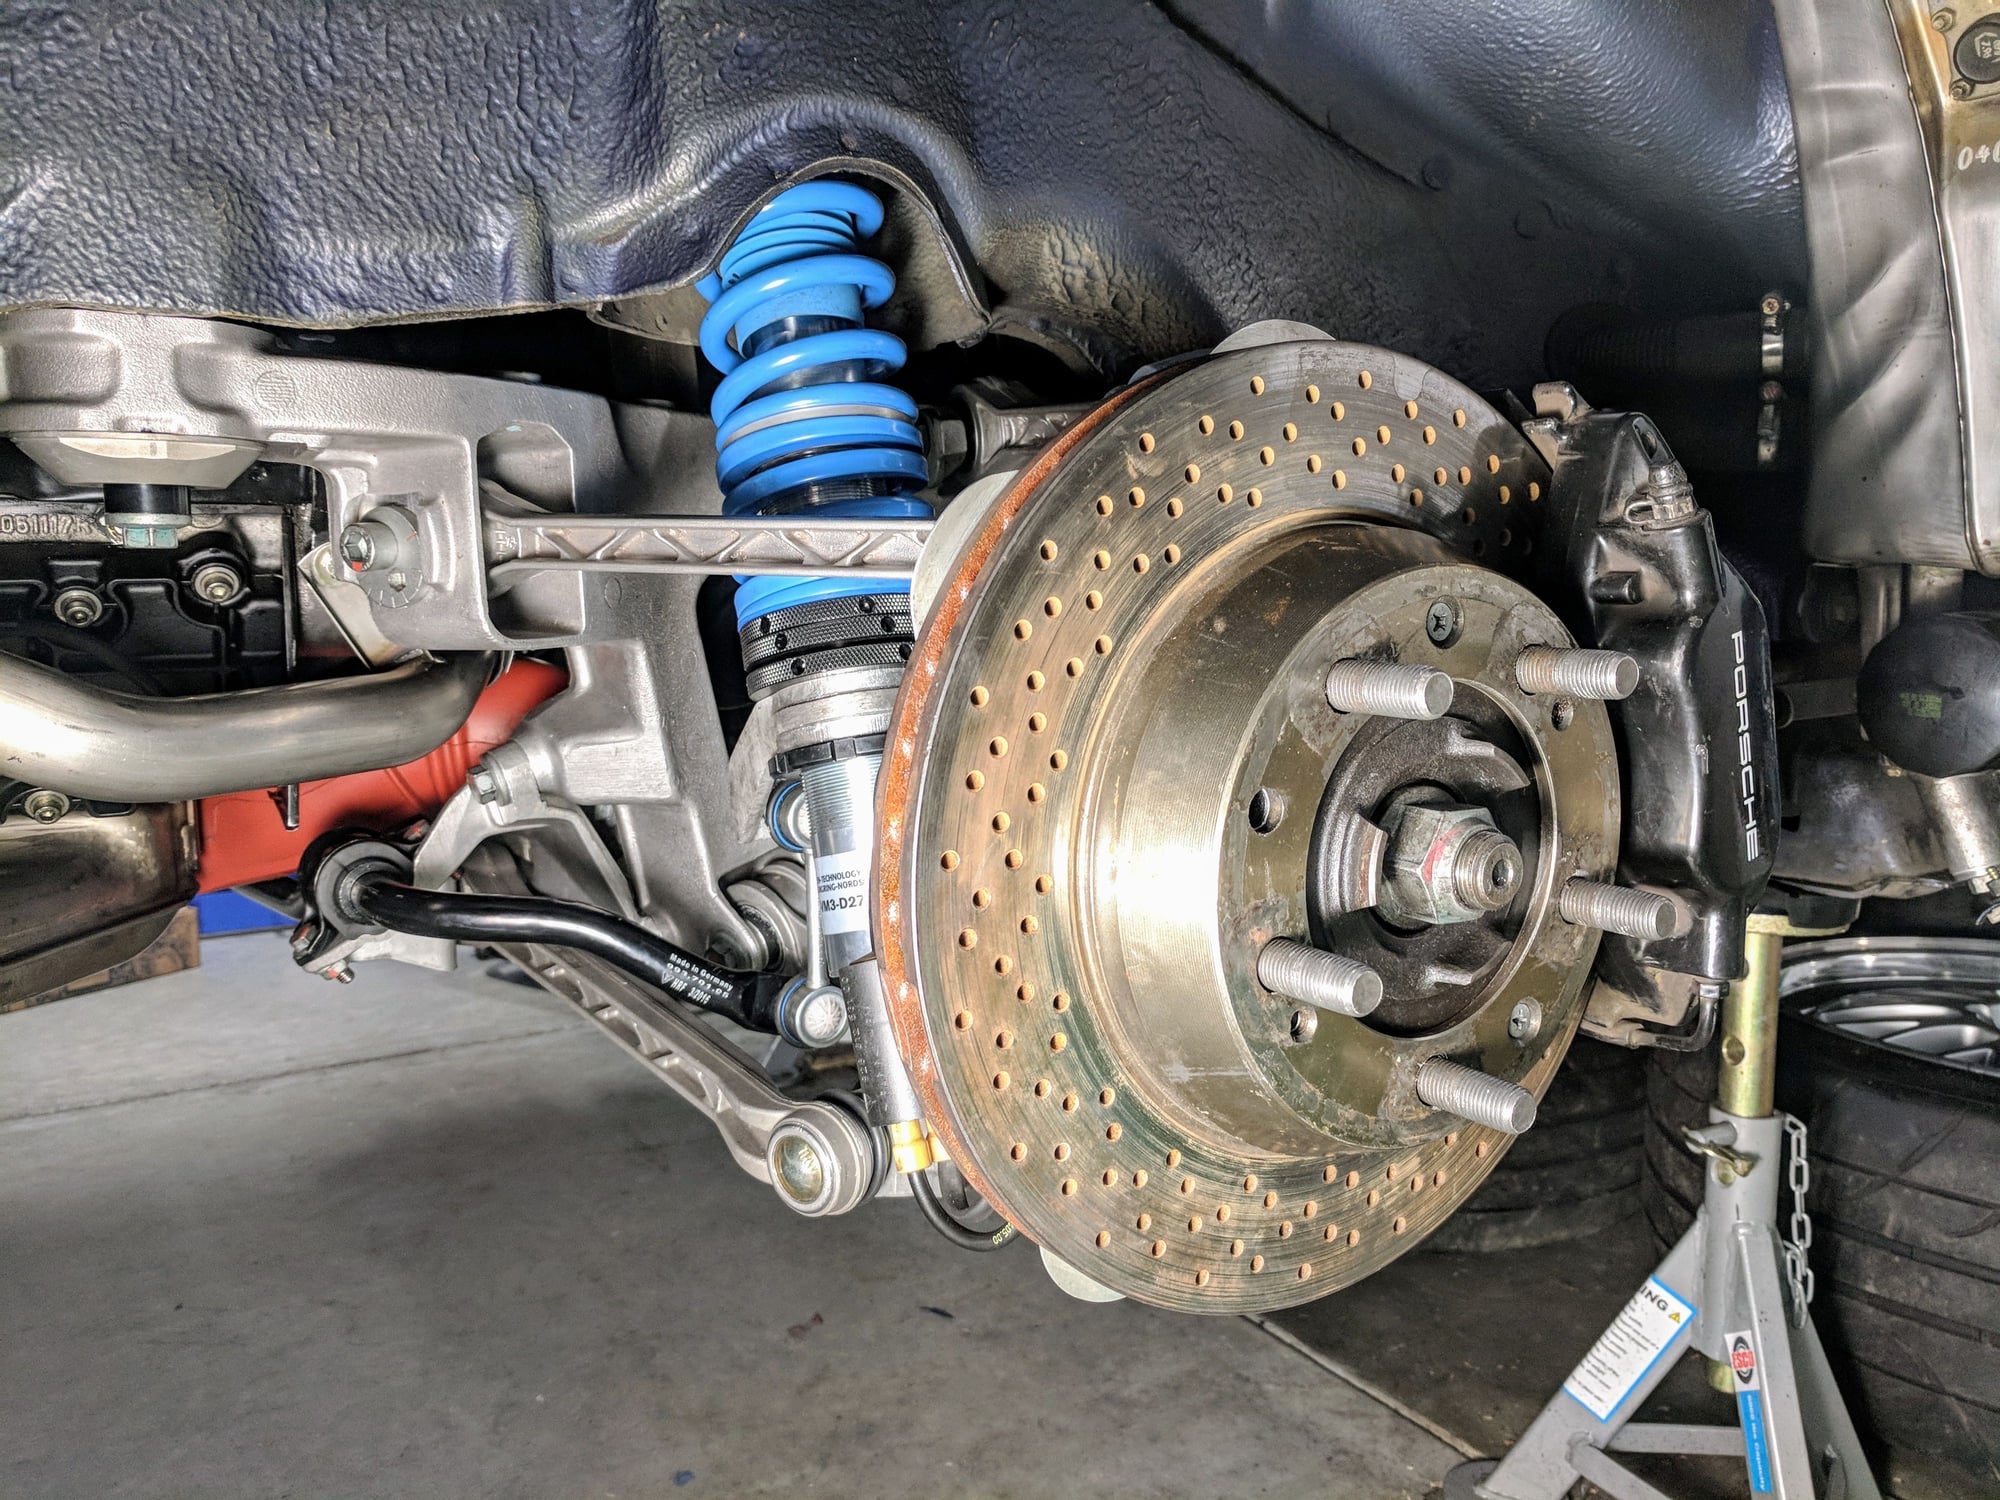
I have PSS10s so had to remove the strut from the carrier to install the new tie rods.
Elephant tie rod install done!
4. Replace steering rack bushings
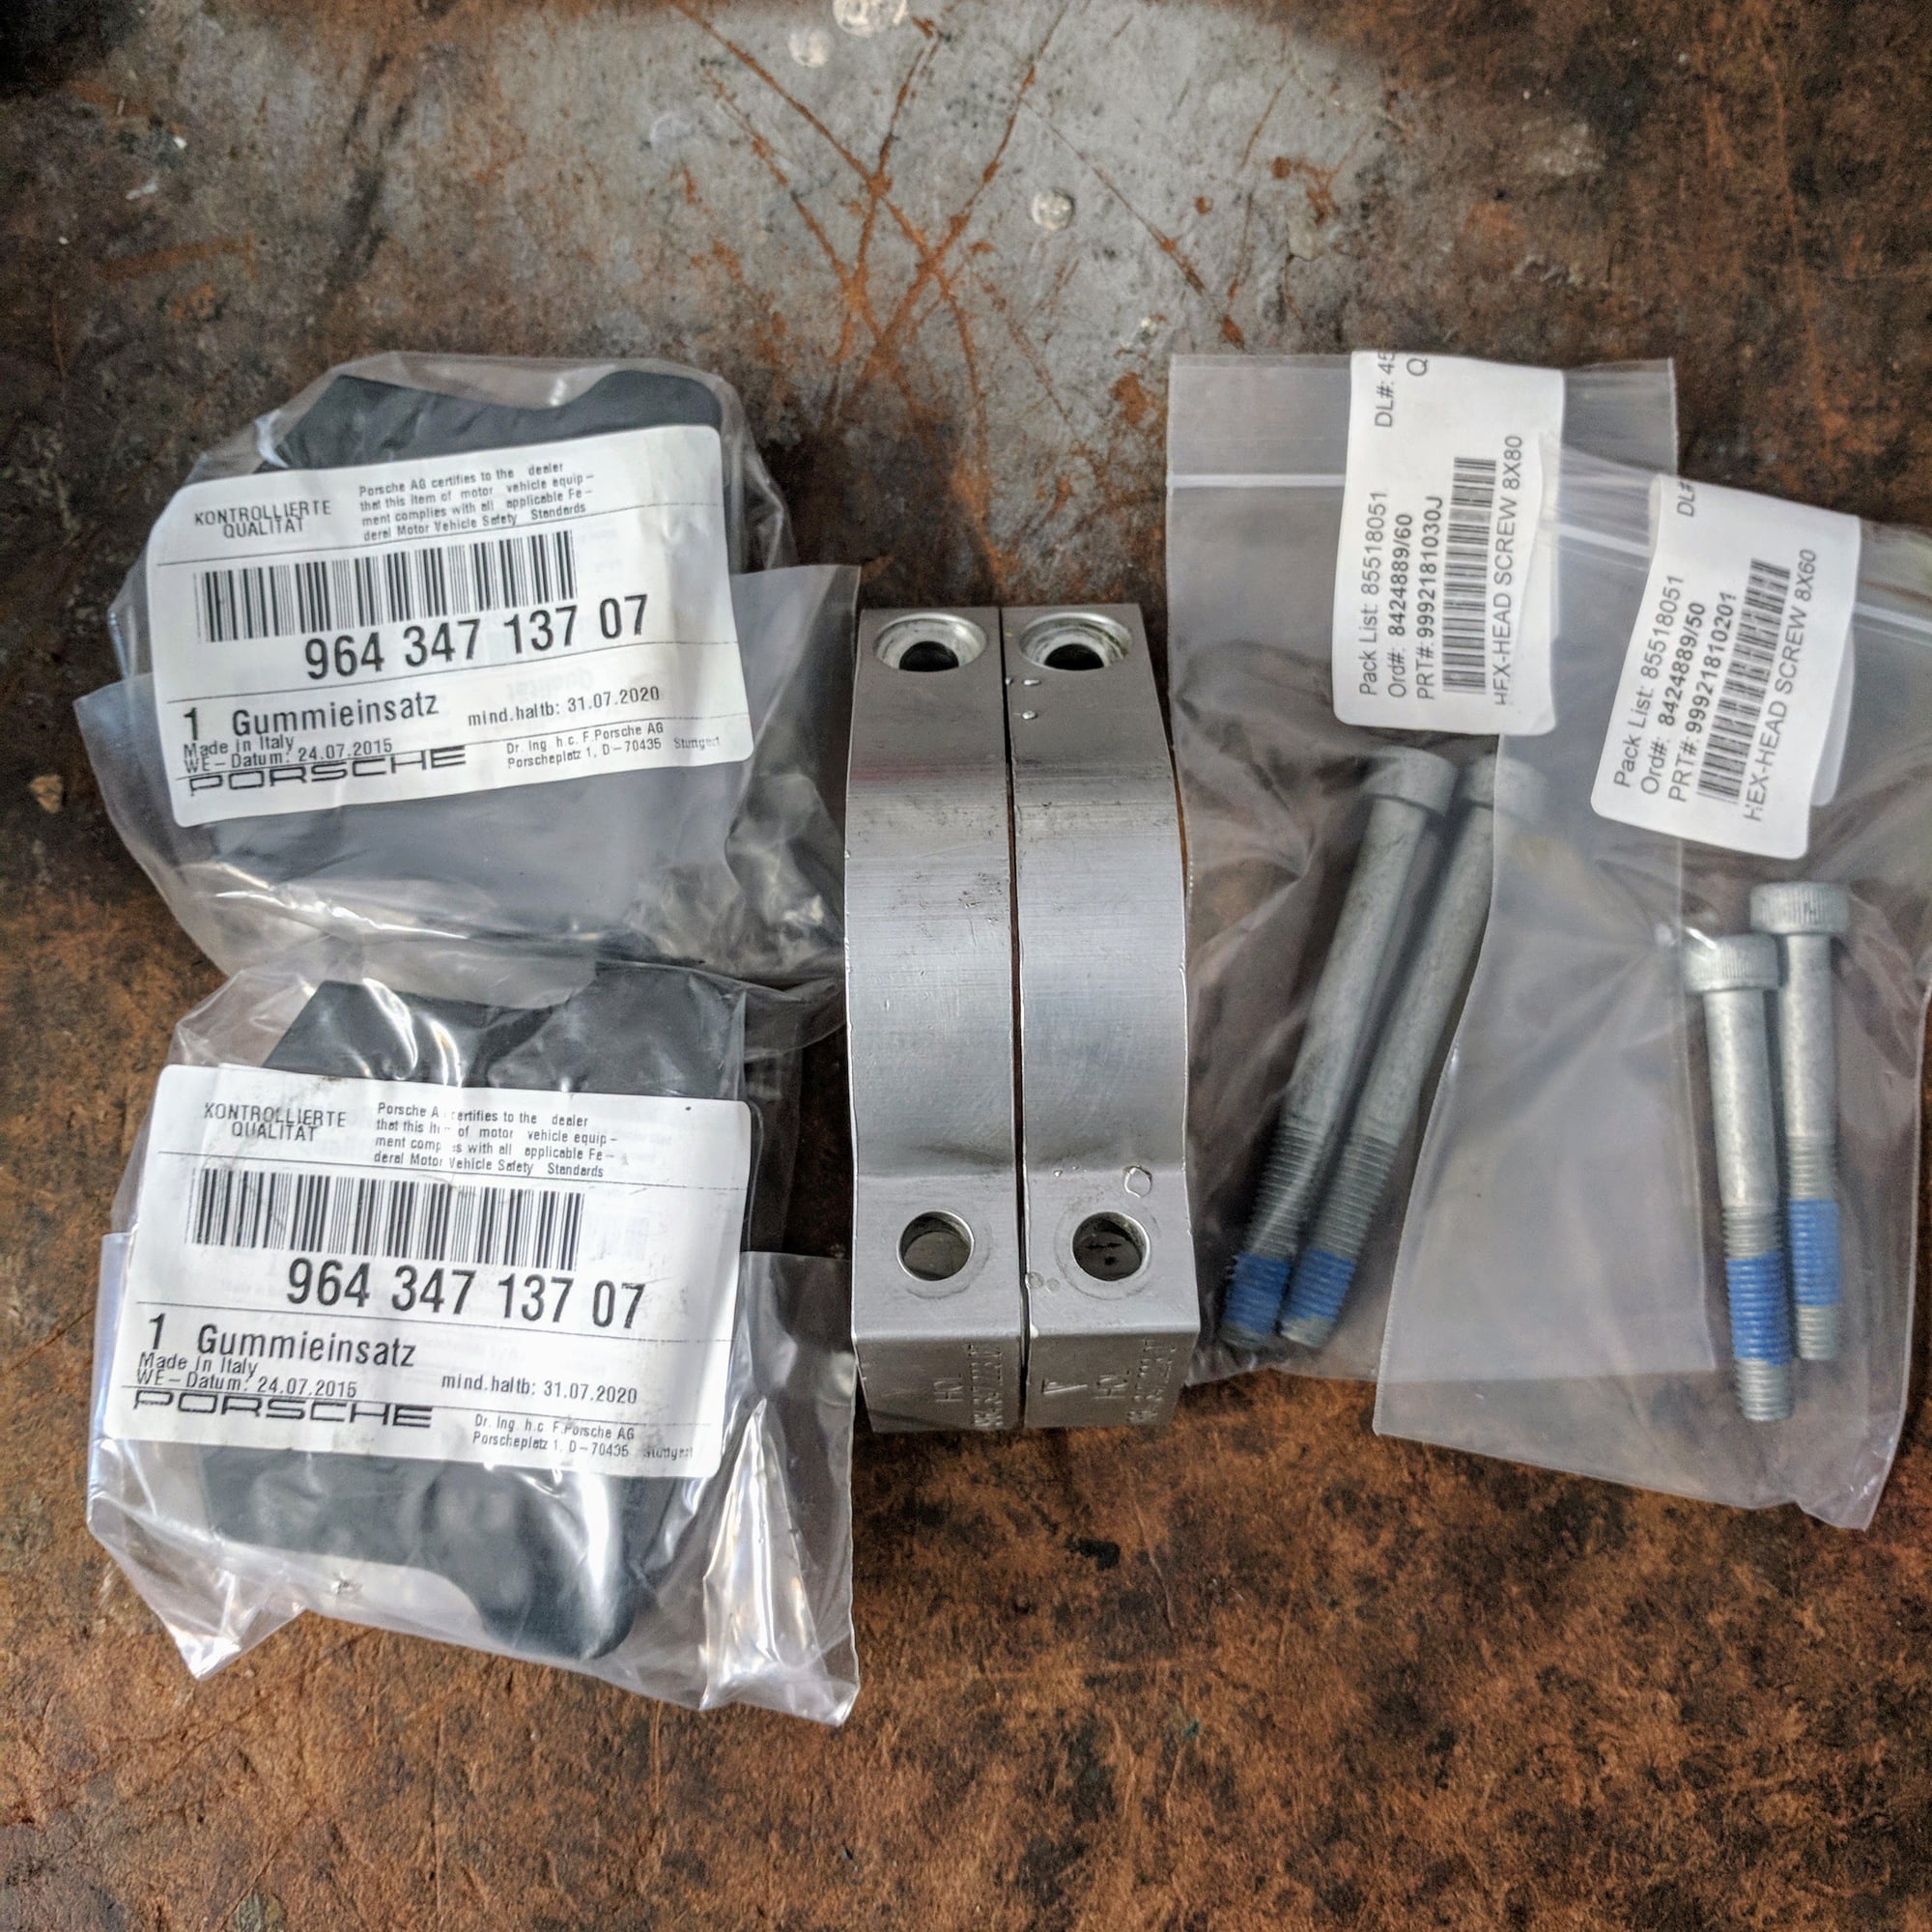
New bushings and hardware... the hex bolts have a special thread locker material on them. The WSM calls out you replace with new when you remove them from the cross member.
Old ones on the left. The rubber is in good shape. Replaced them anyways.
Made a DIY tap with an old steering rack bolt to clean out the old thread locker in the cross member before installing the new bolts. If you don't do this you have a chance to strip the threads when you put the new bolts as the bolt may seize due to unnecessary friction.
Steering rack bushings install done!
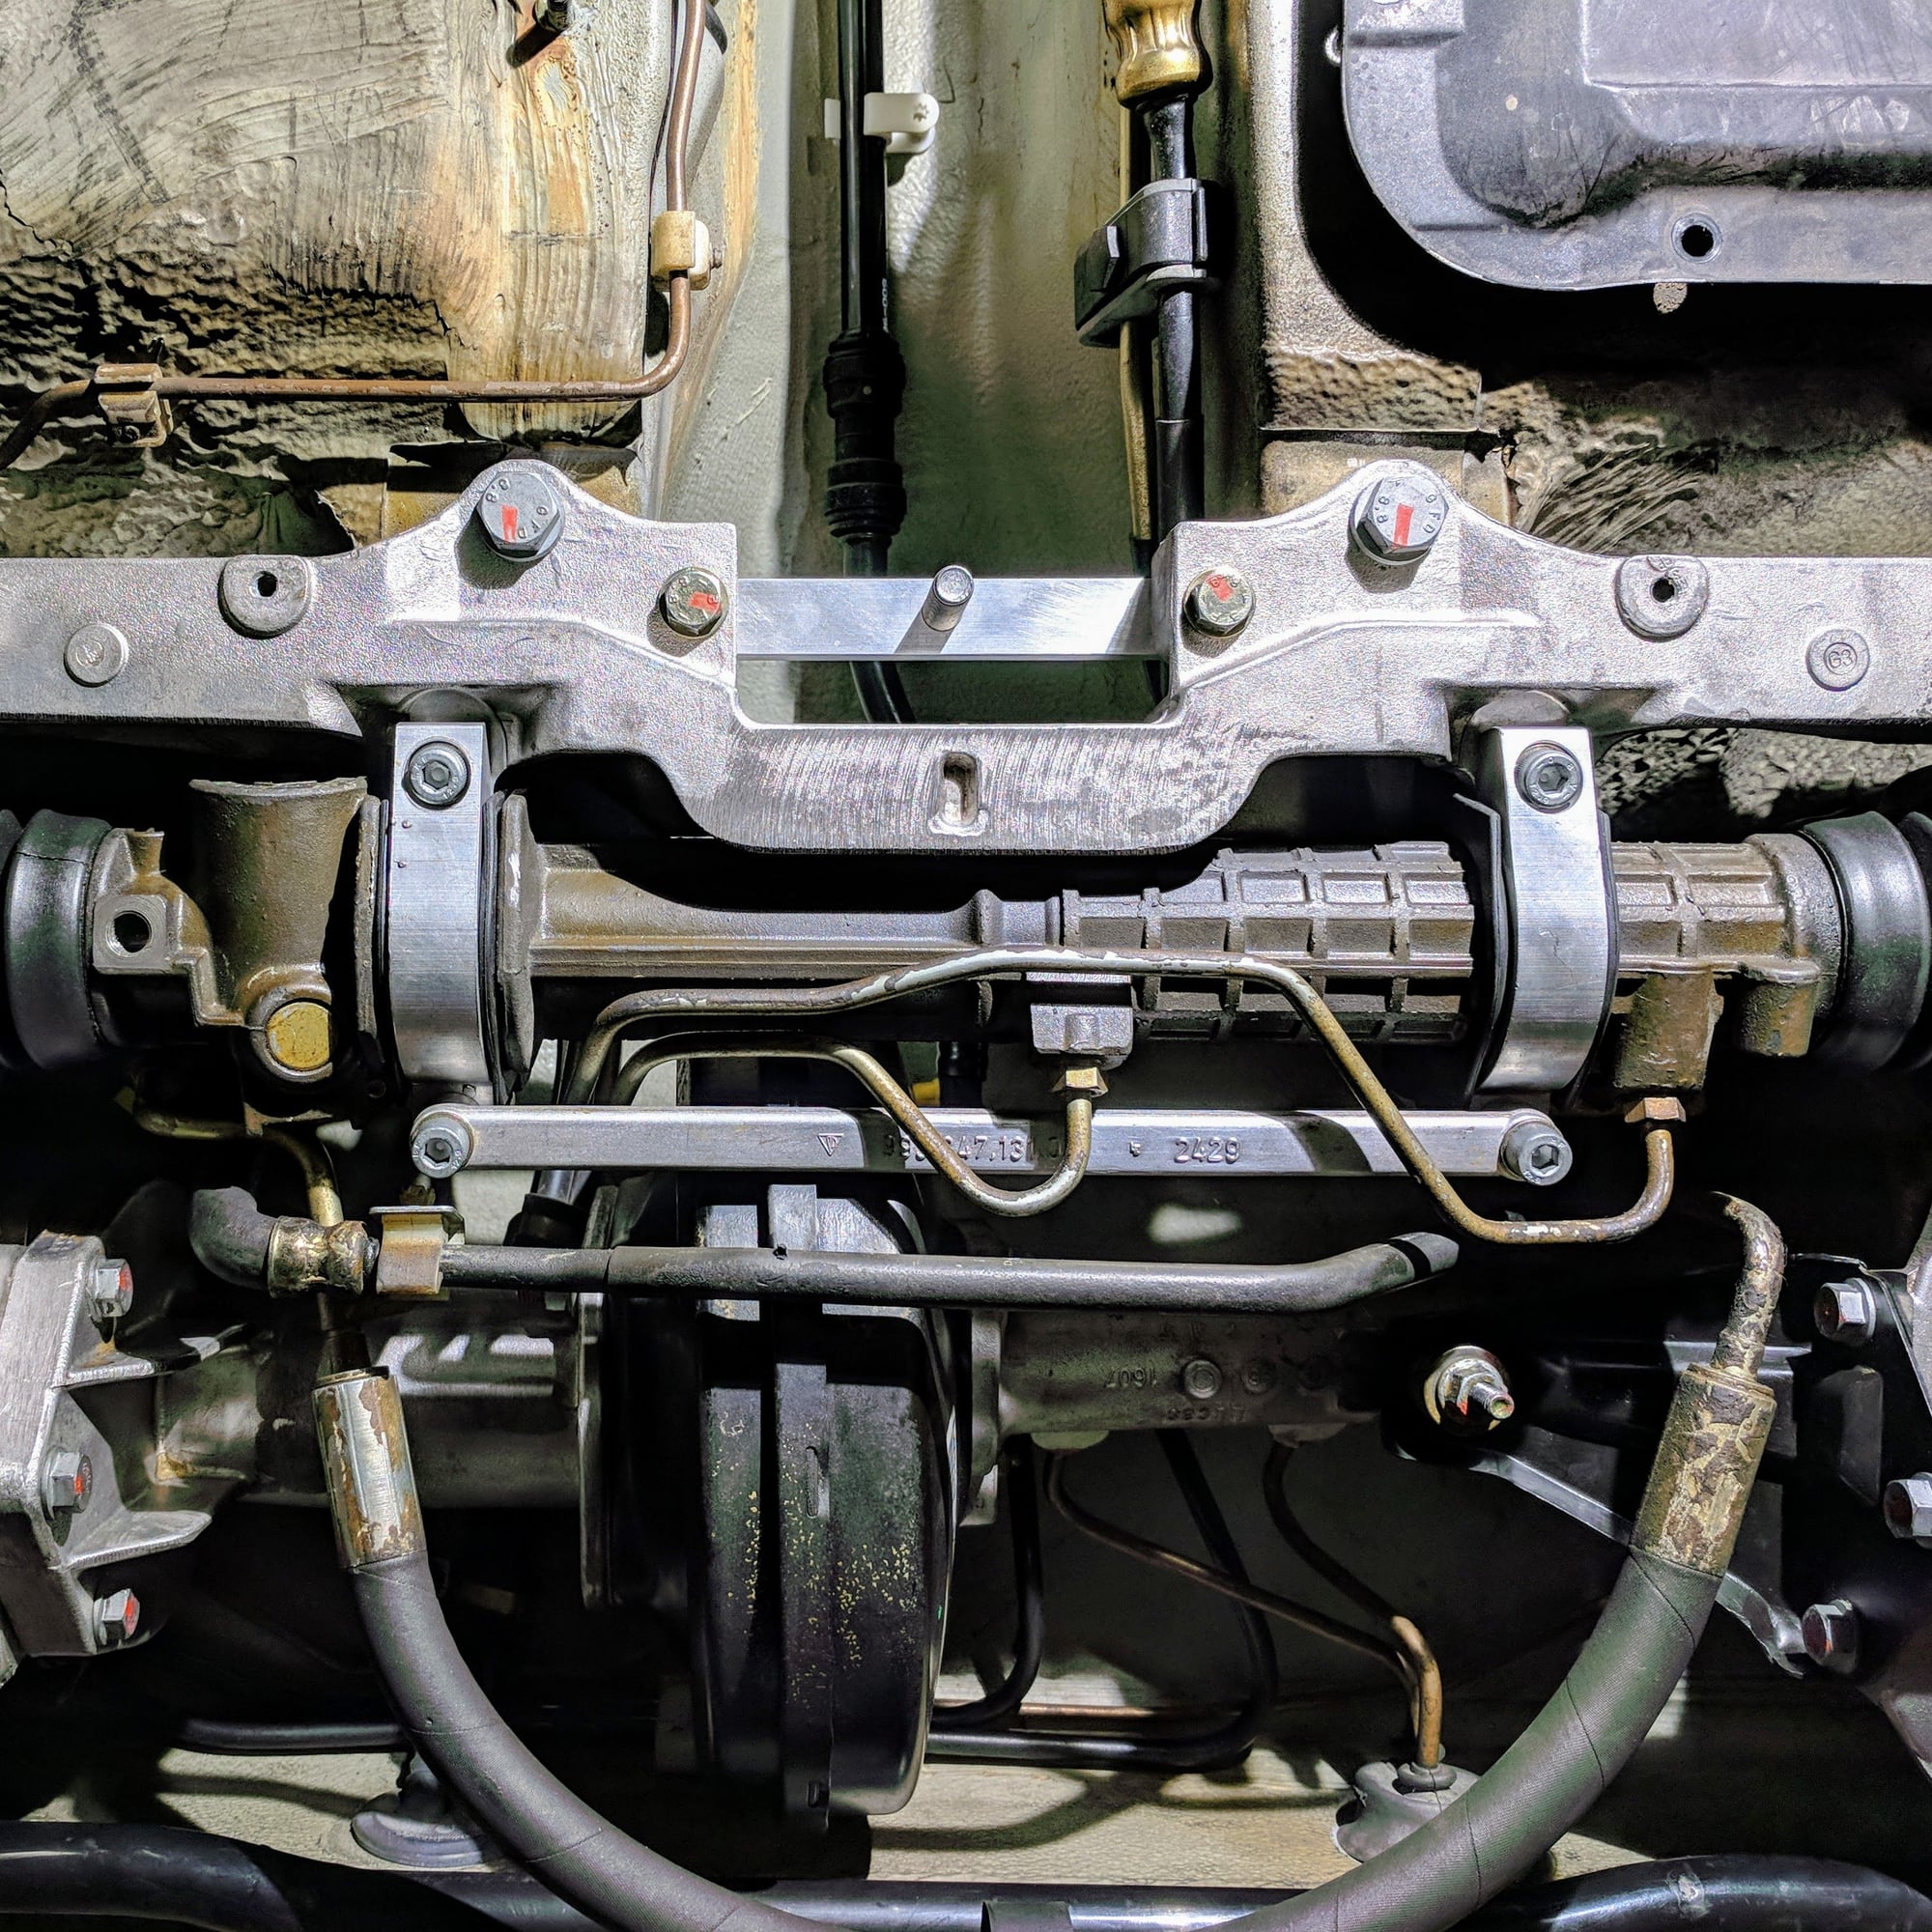
5. Upgraded motor mounts with RS ones
The passenger side was easy...
I got a breaker bar and a wobble/extension set a while back. Needed every one to get to the nuts that held the motor mounts on the backside. They are very tight at 115 ft/lbs and mine were slightly seized so the breaker bar made it easy to remove them.
Motor mount out...
Passenger side done!
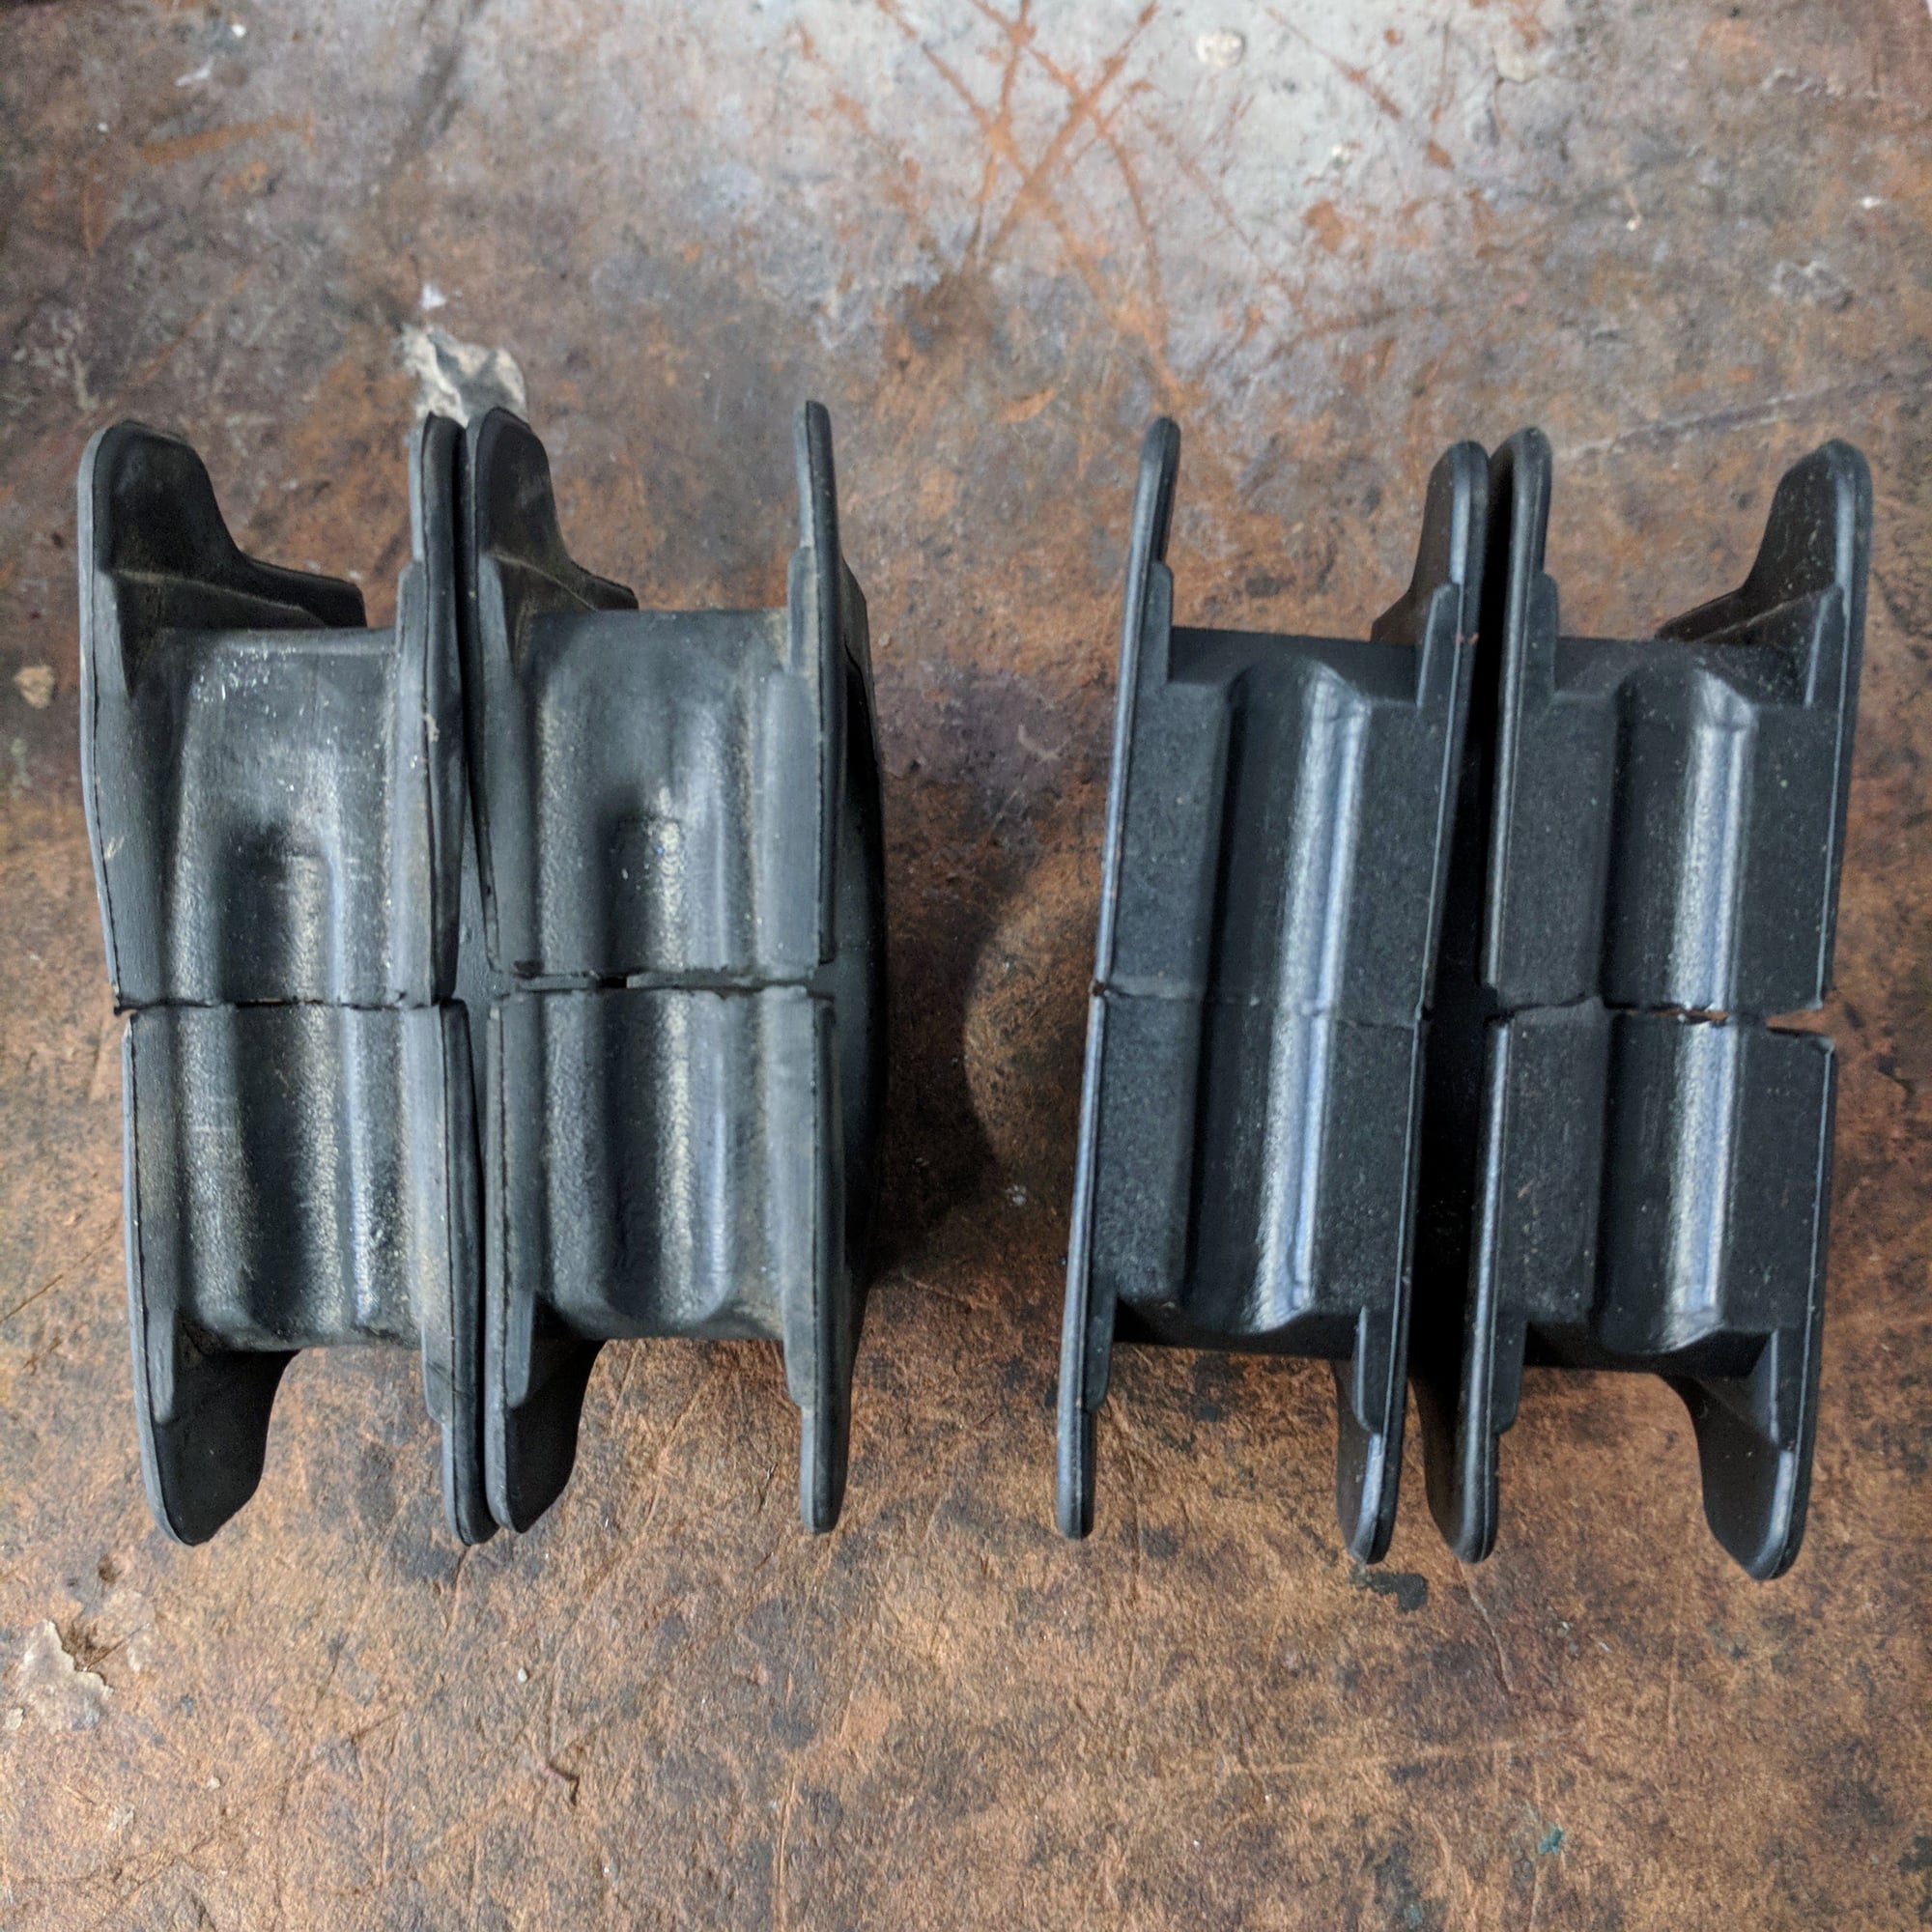
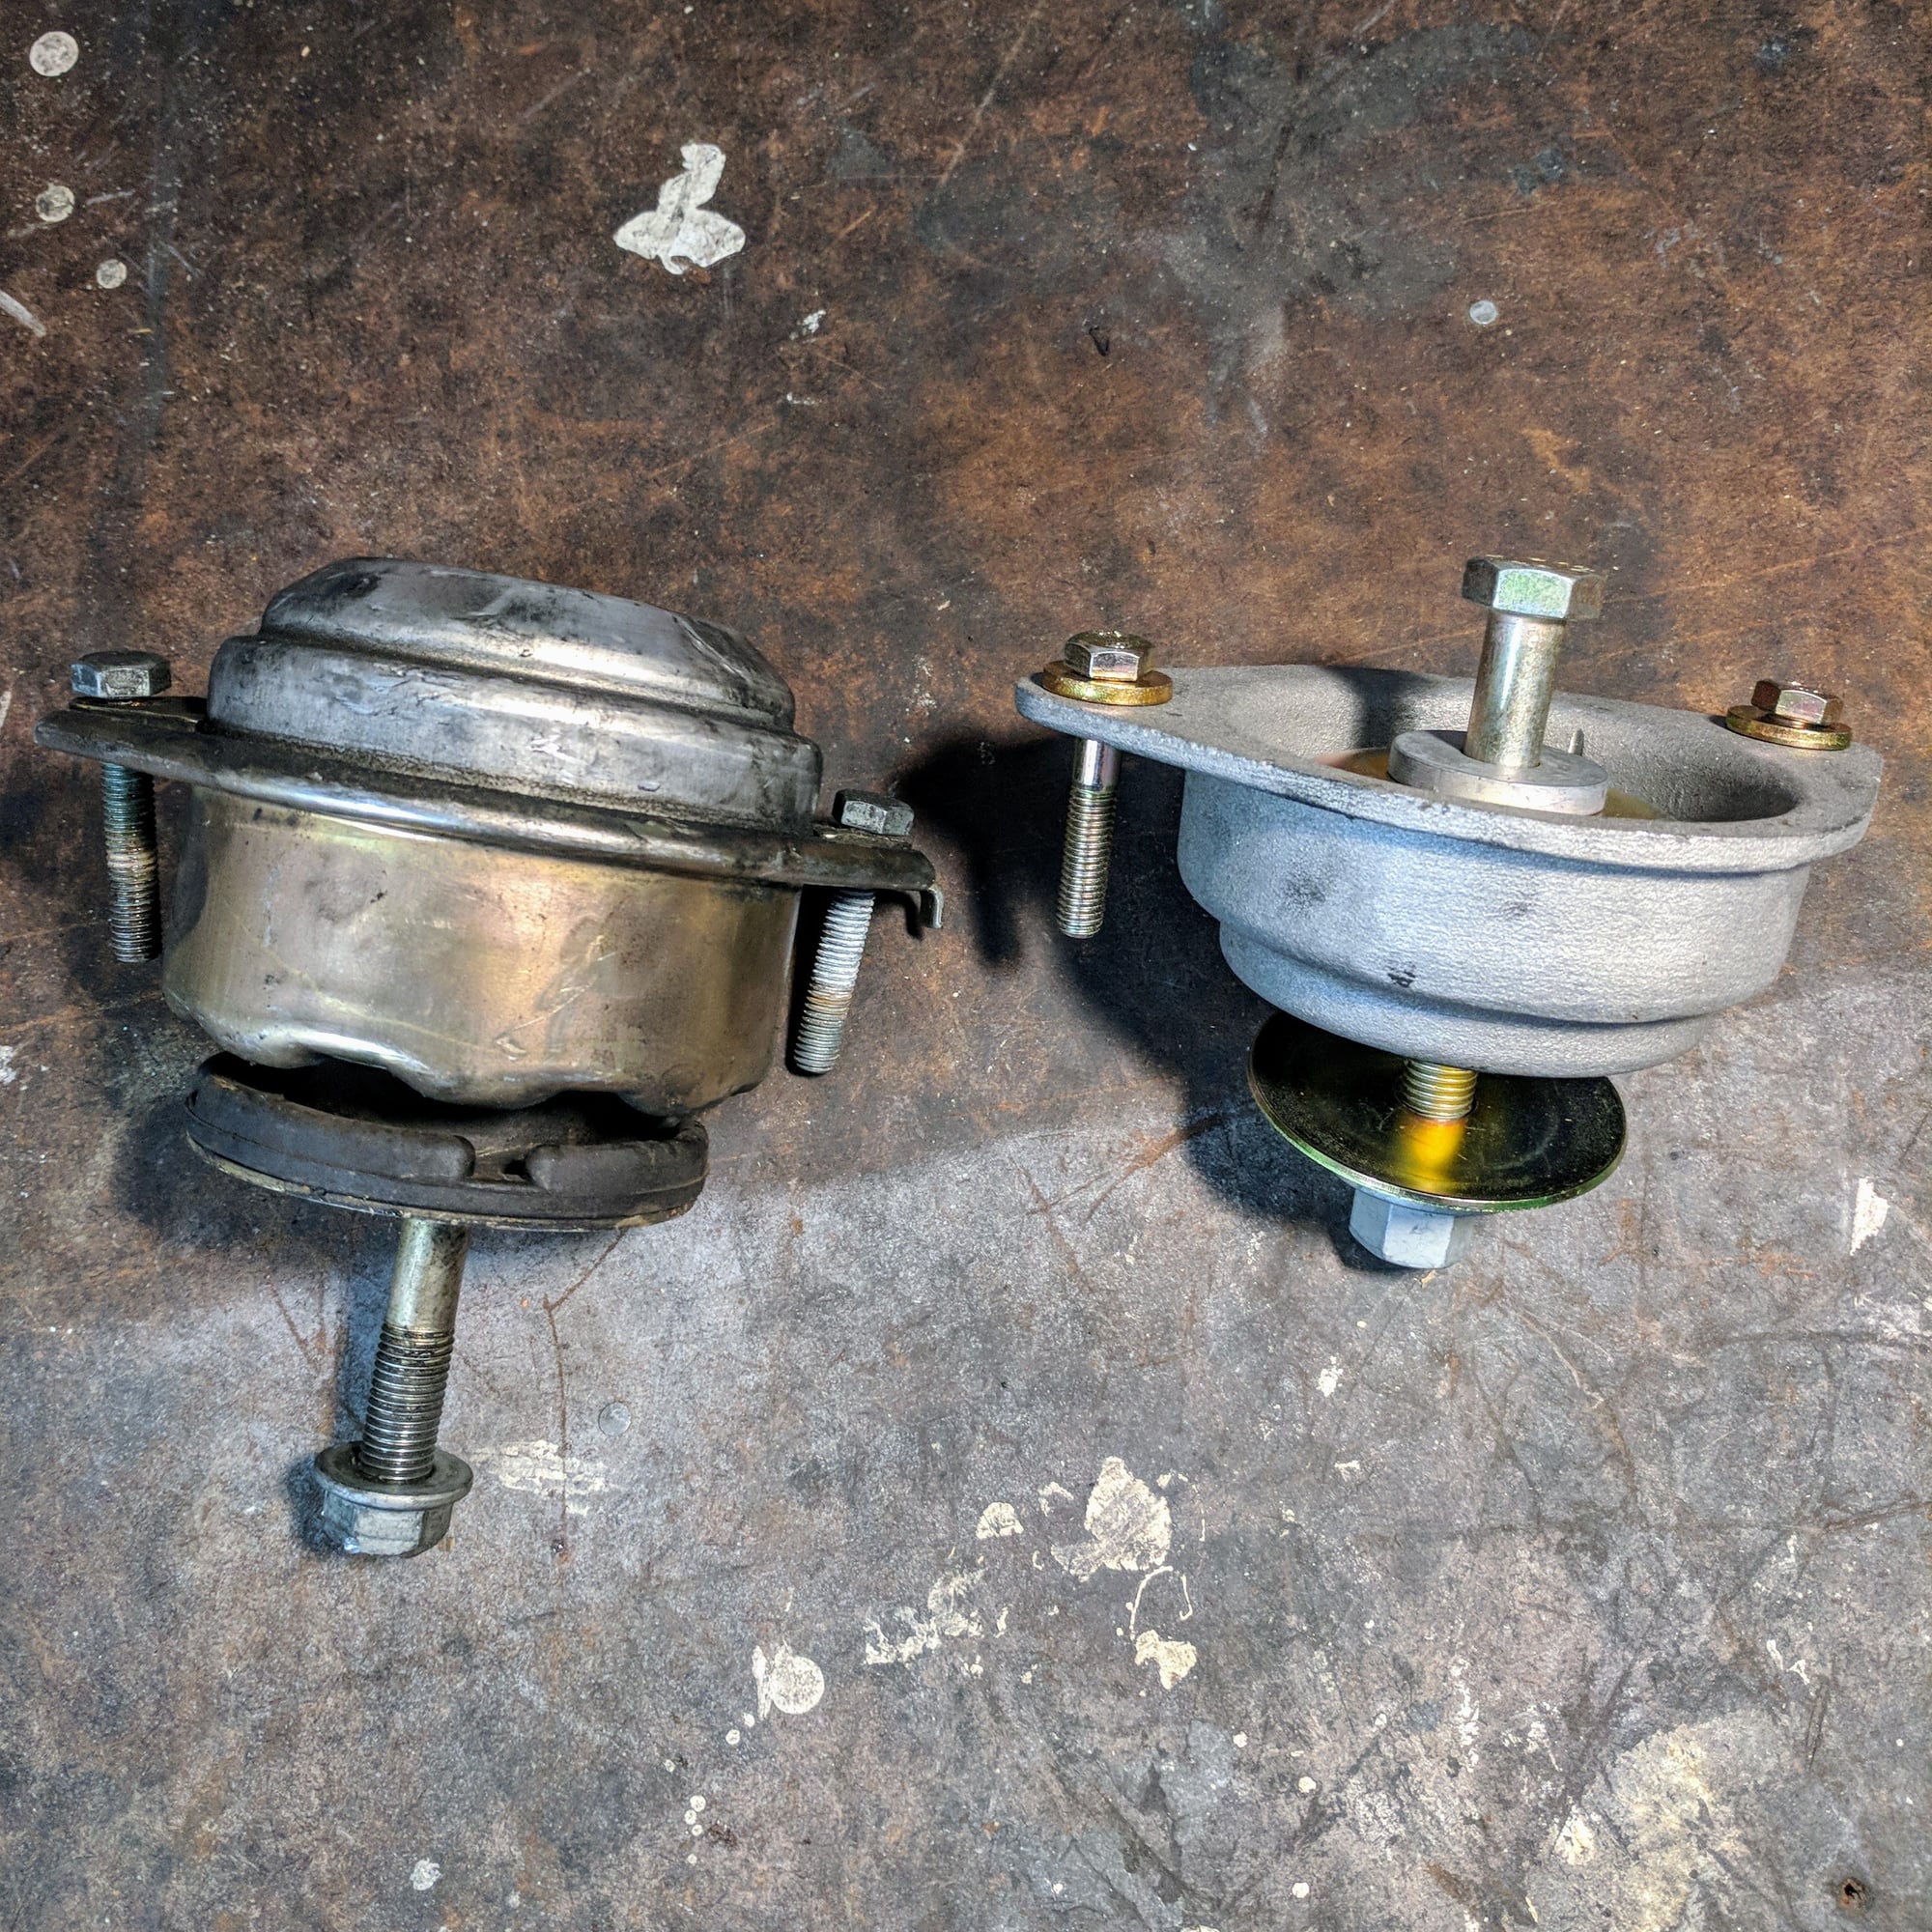
Old stock hydraulic based mount on the left. New RS based one on the right.
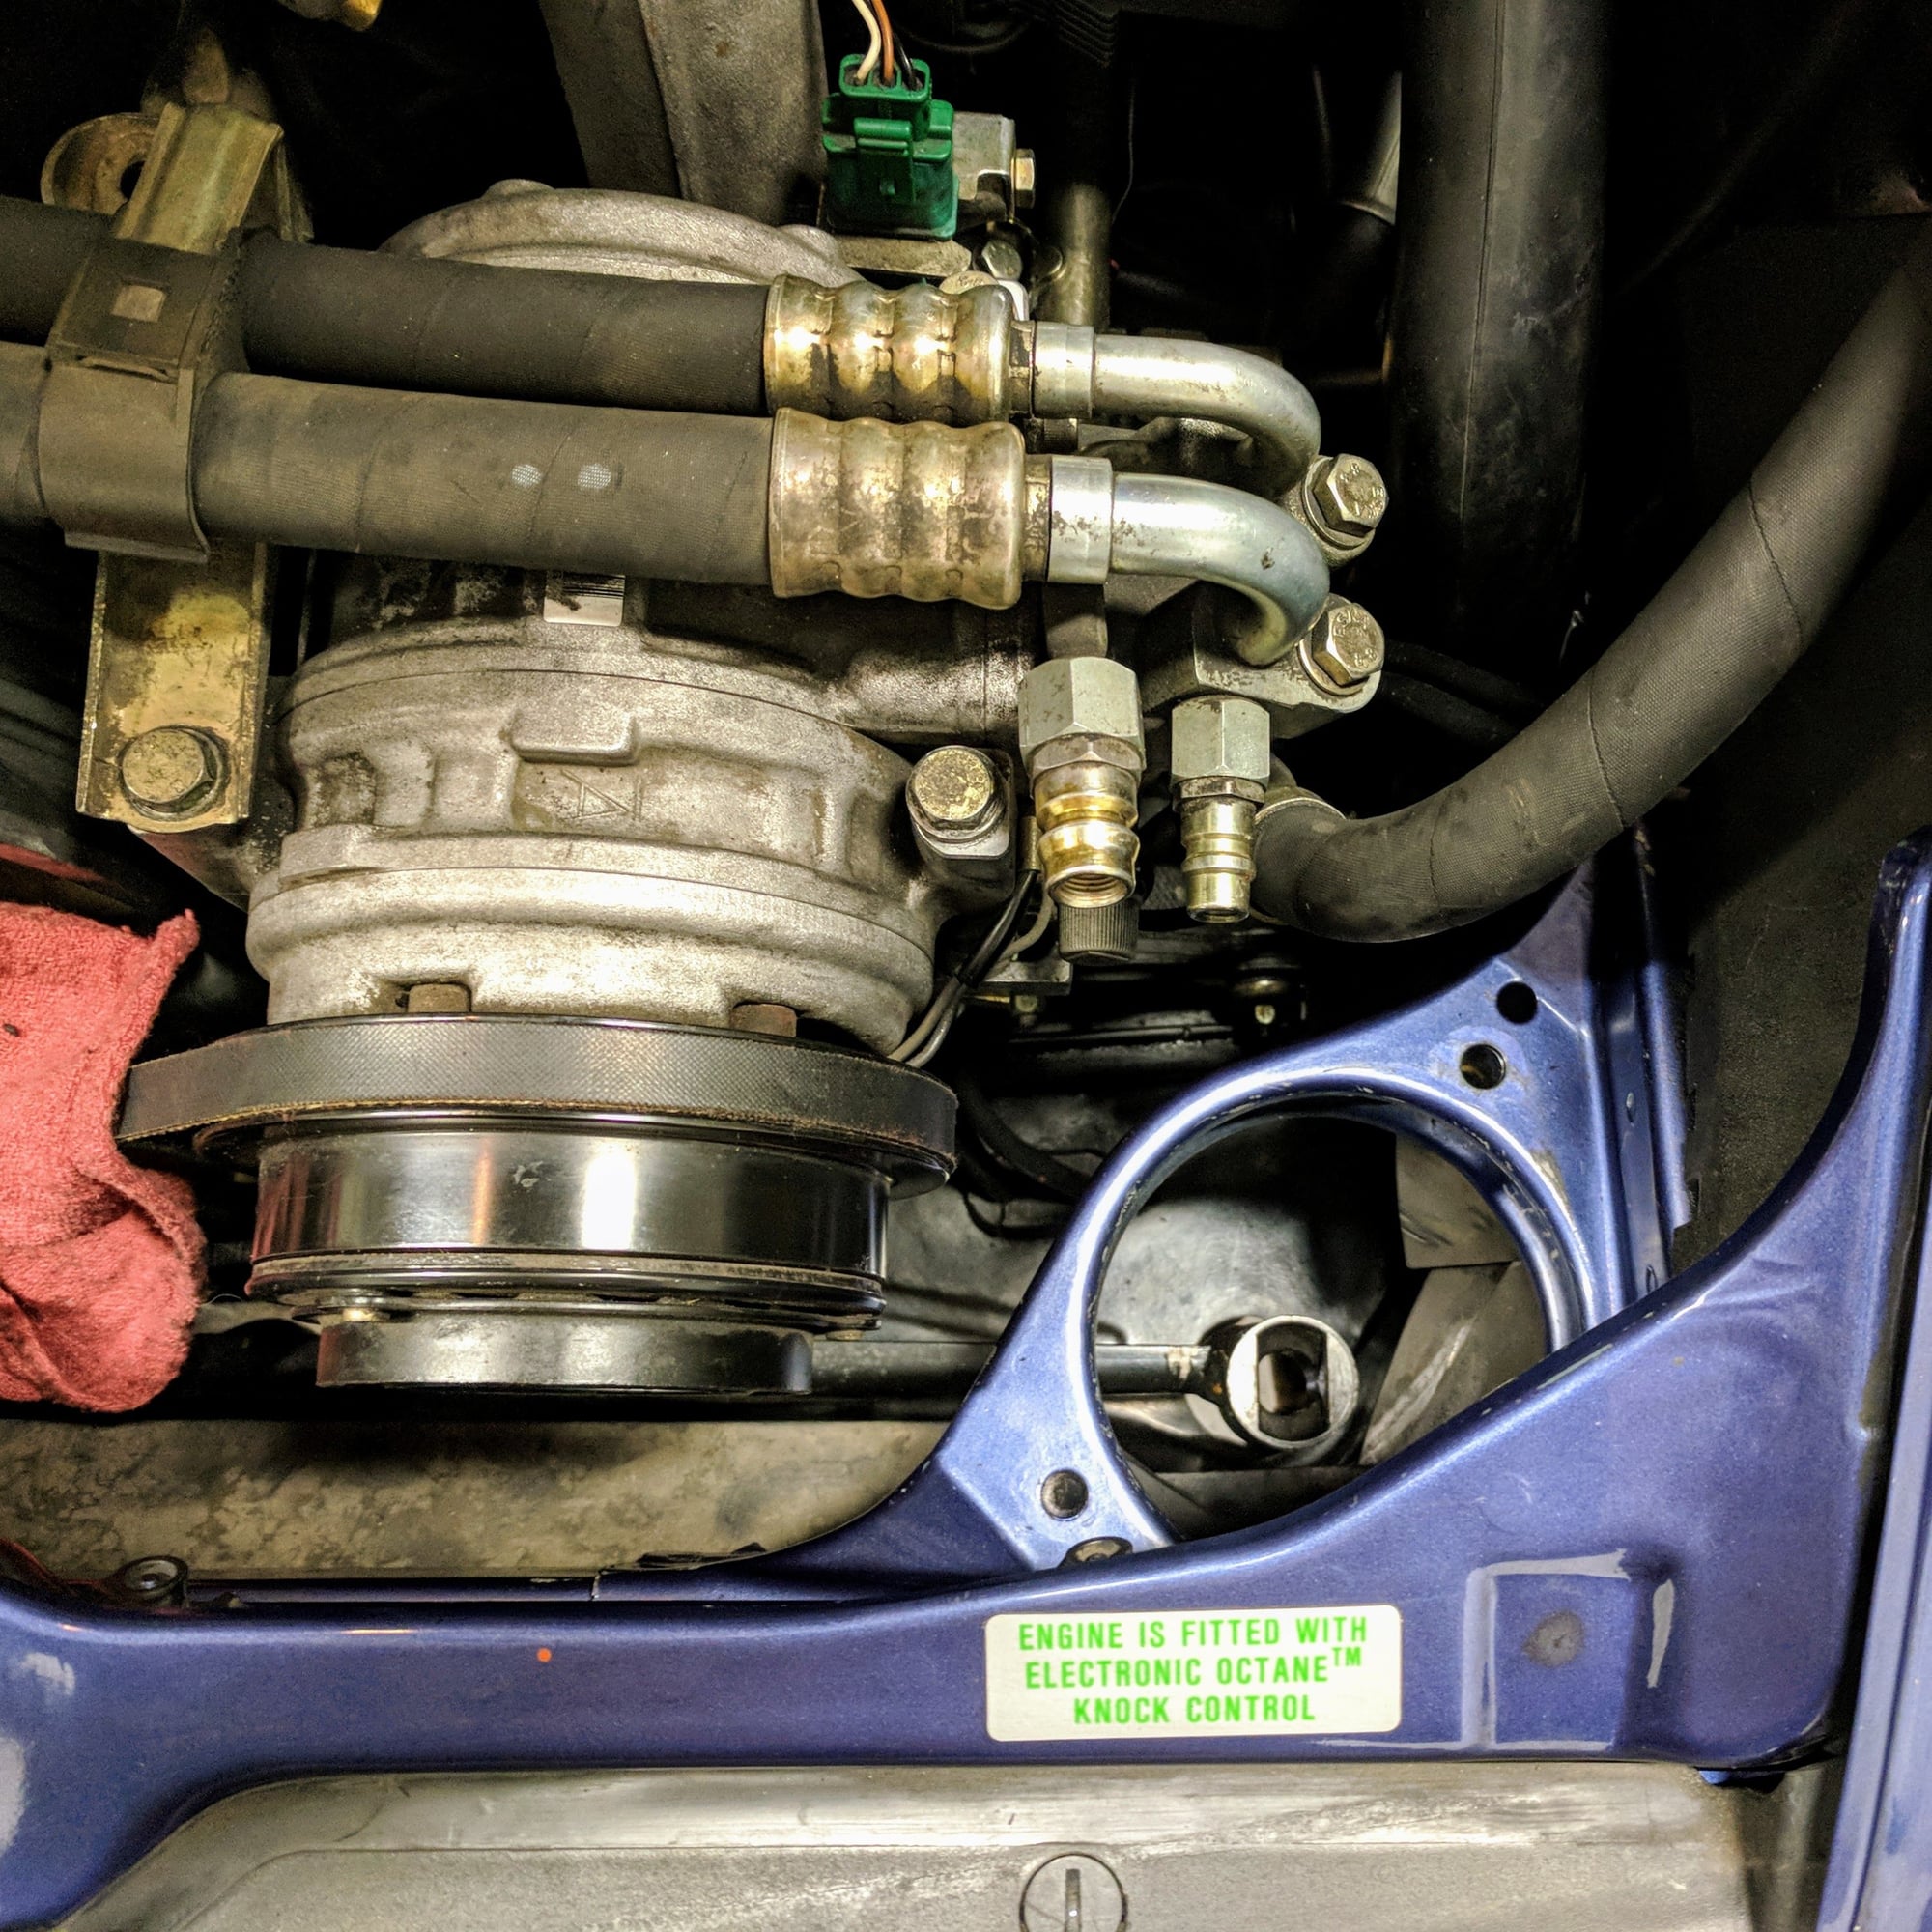
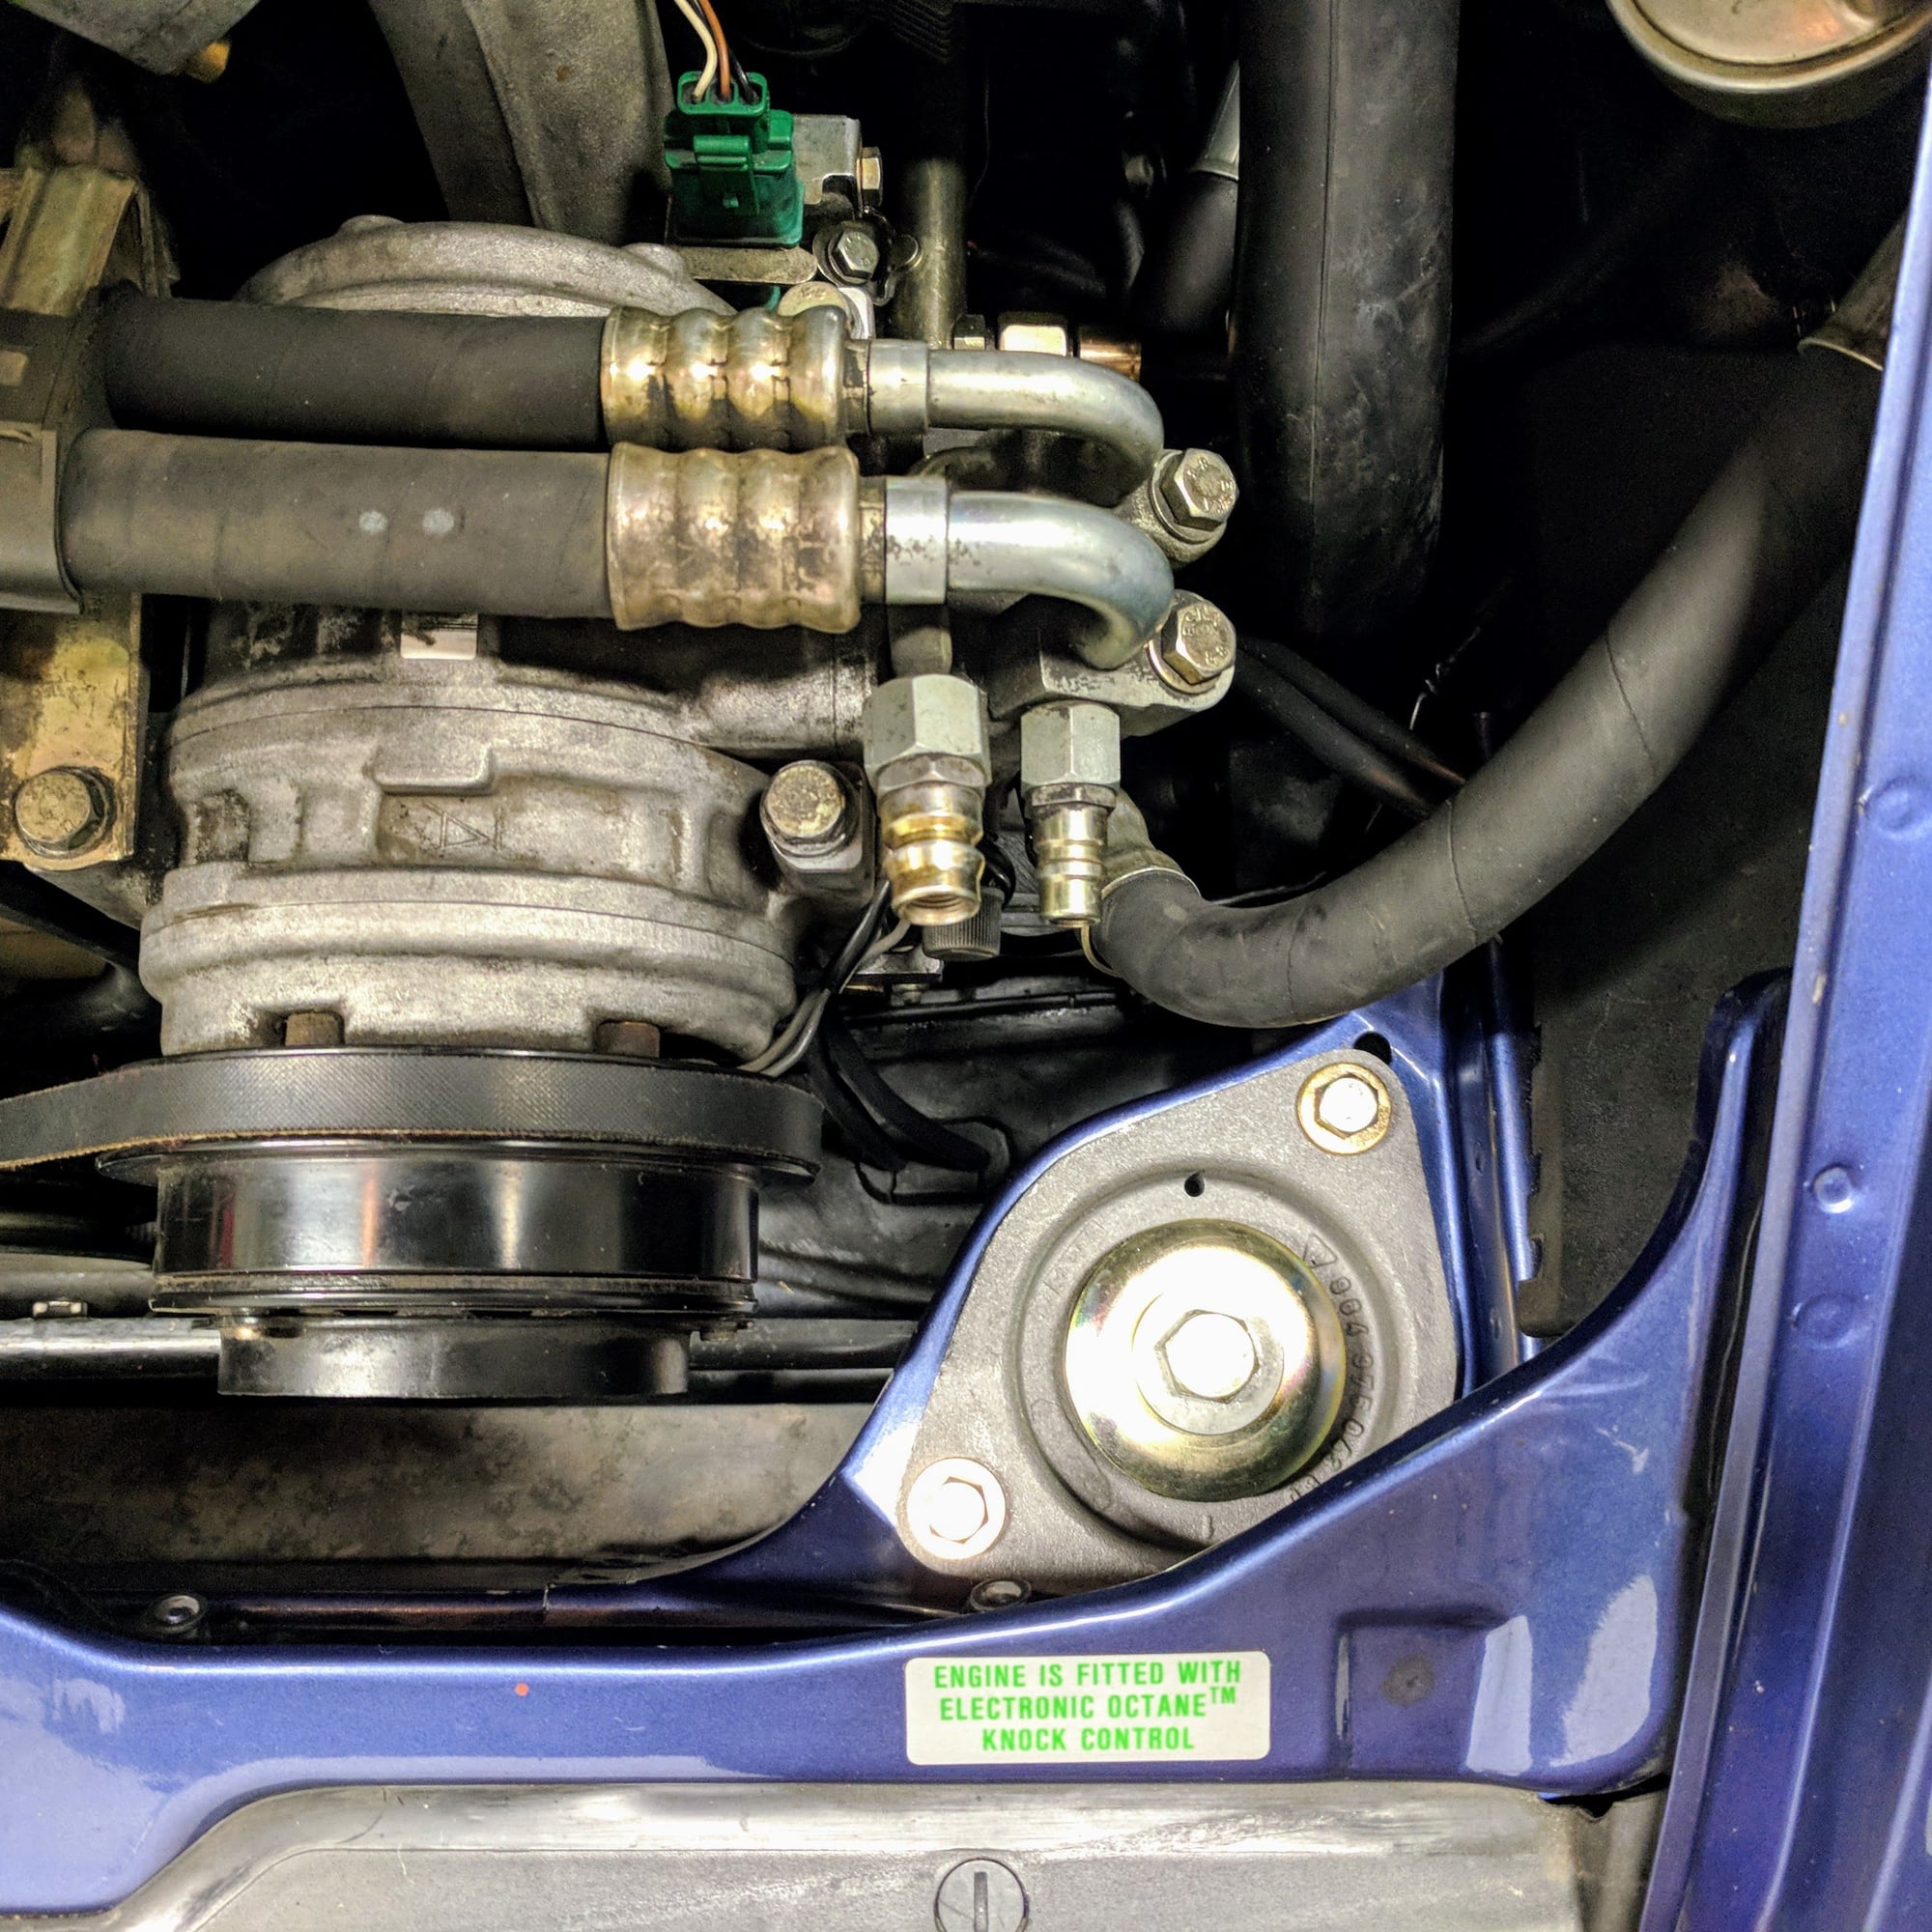
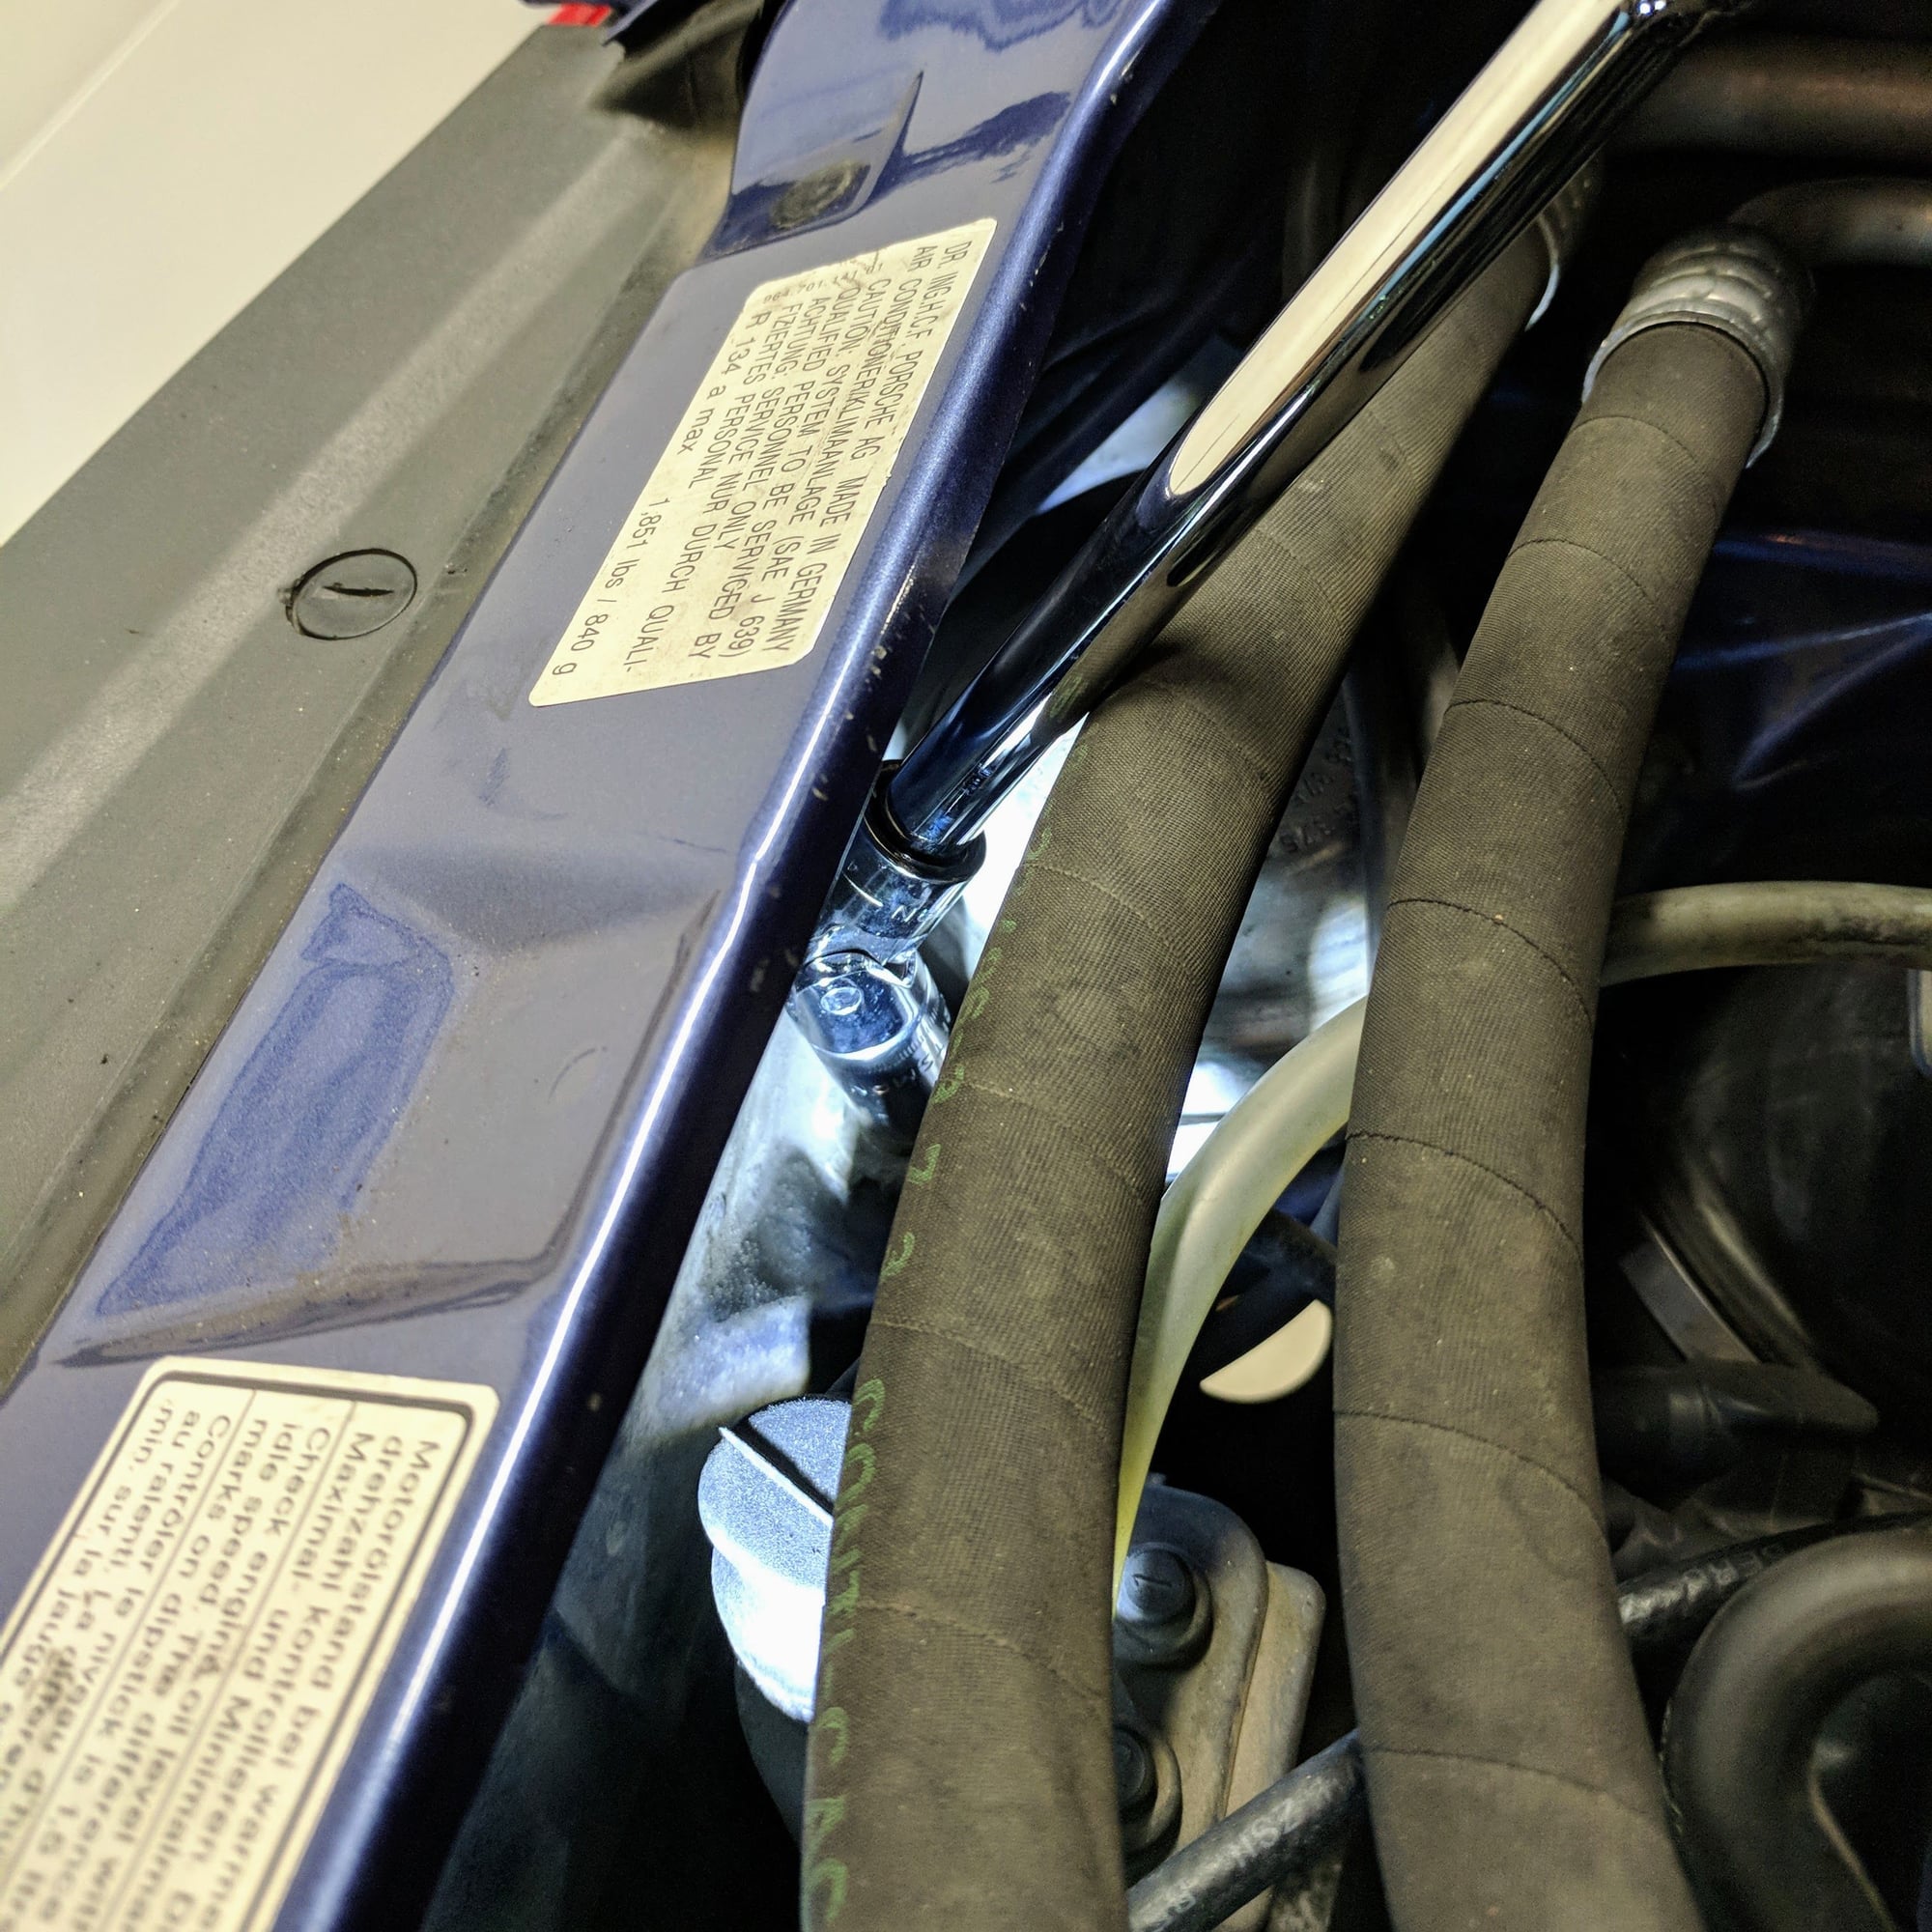
The driver side mount is a real PIA to remove. The universal joint socket and wobble joints worked perfectly and would have been impossible to remove the mounts without them. My car also had a the metal engine compartment lid wire tube in the way. I can imagine these hand made chassis there was some variability in manufacturing. I had to loosen the wire, bend and move the tube into a better position and then reset the wire. Once that was done then getting the motor mount out came out like described on Jackyl's garage. The pic shows below where the u-joint socket joint is hitting the tube making it a really tight spot.
Driver side mount done!
Notice all of the AC lines and wires above it as well as the small blue tube which I had to reshape to get the old mount out and new one in.
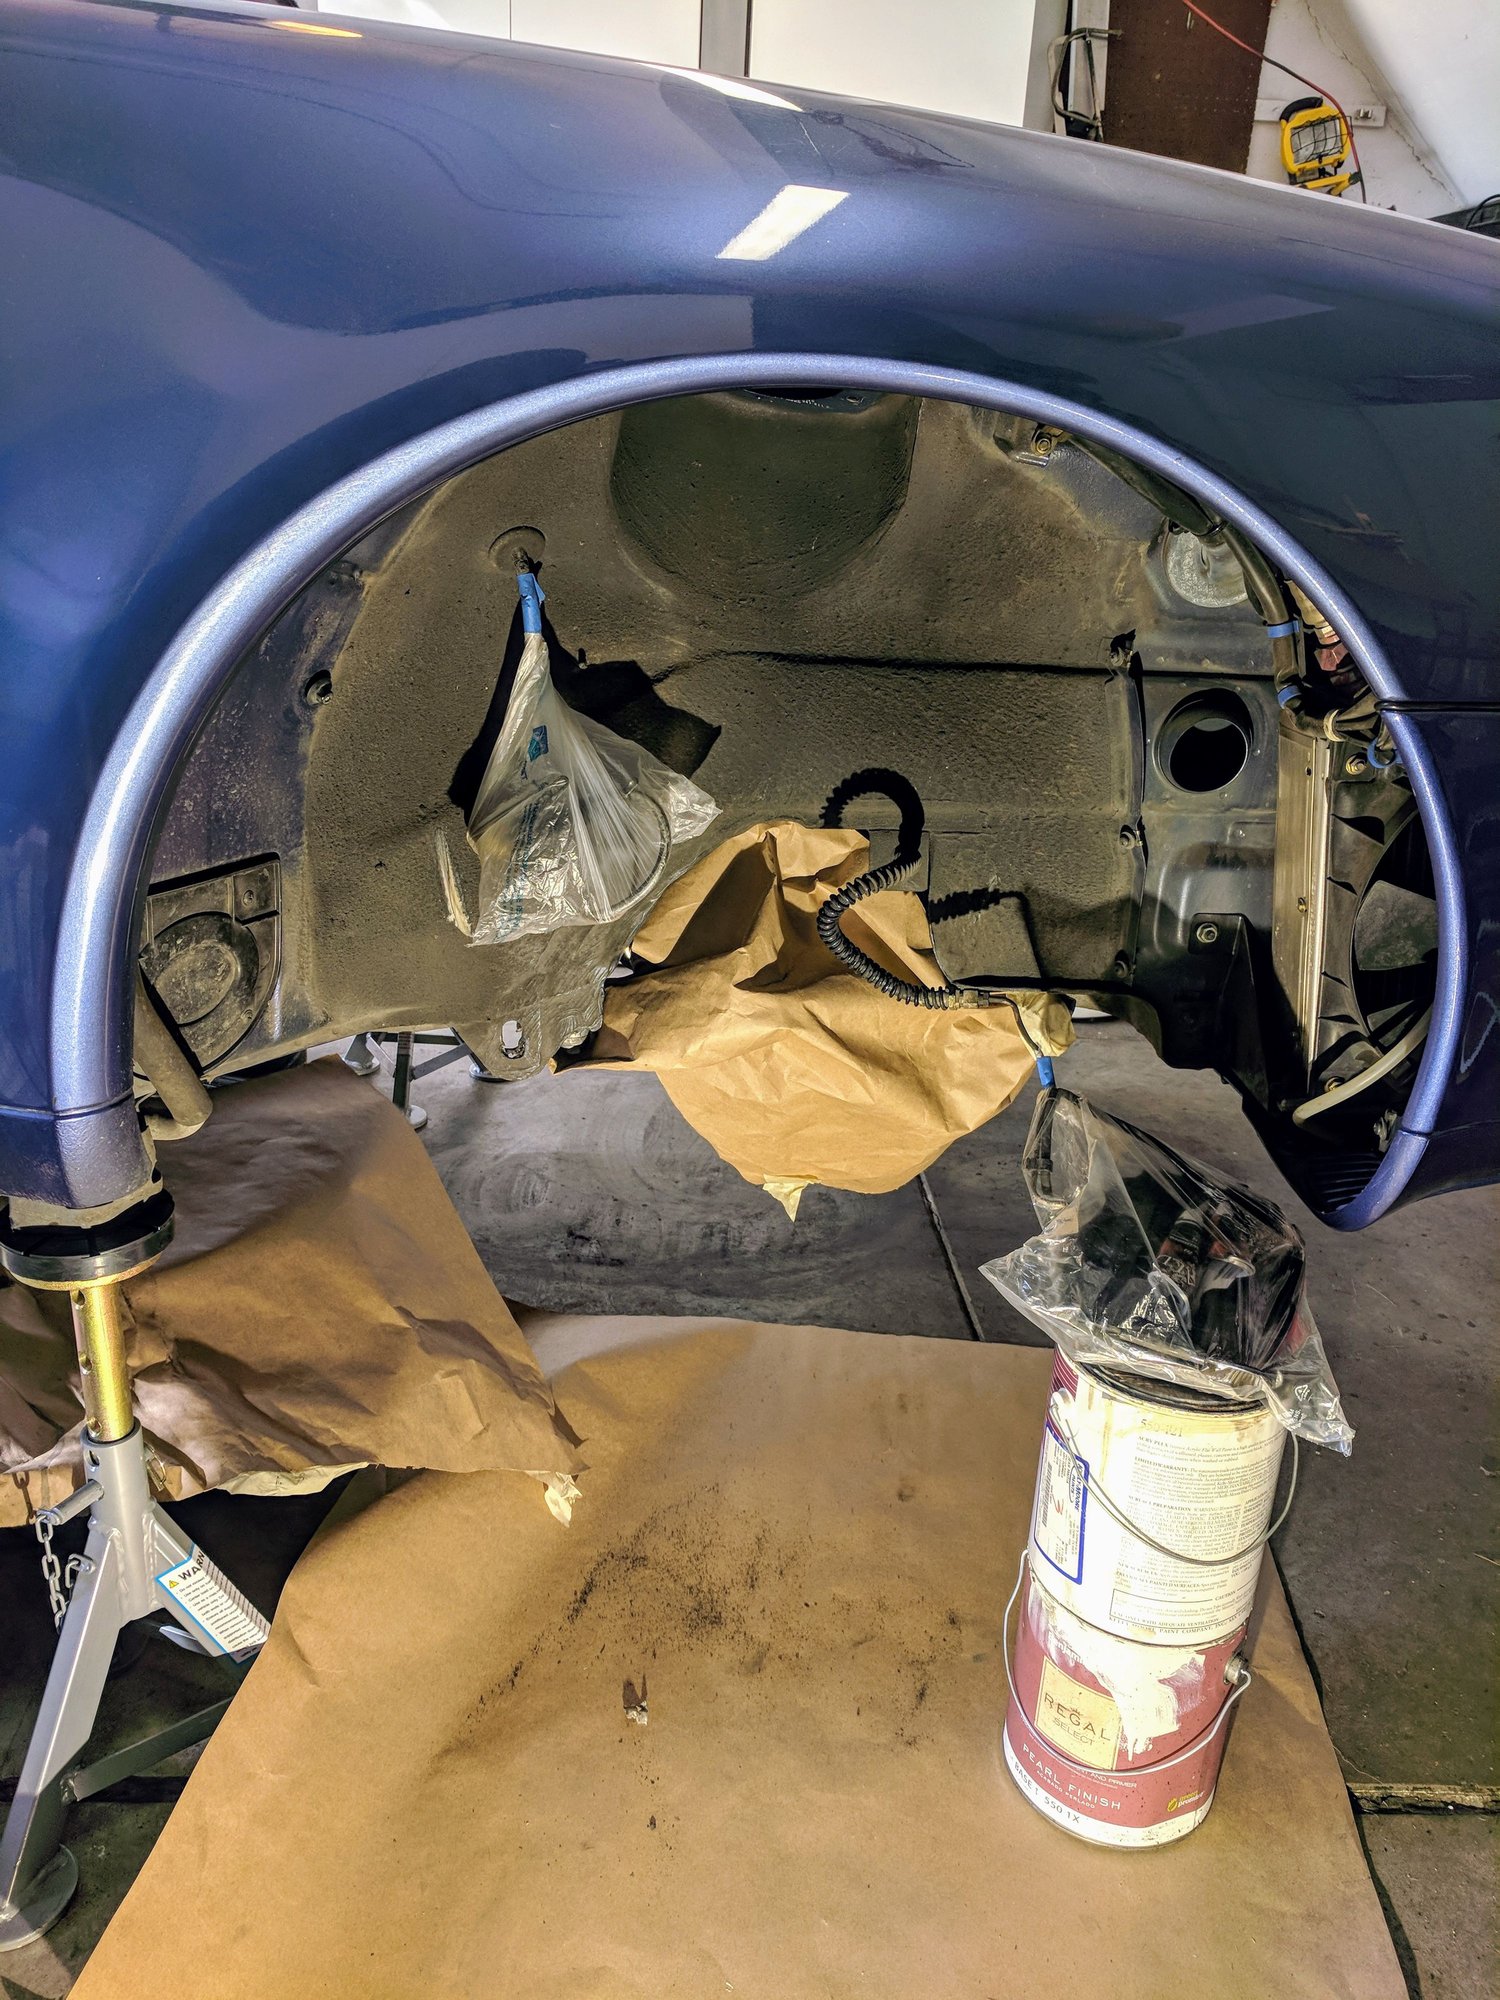
6. Removed cosmoline from subframes, wheel wells, and suspension components. This was the most time consuming and tedious part of the project. I knew if I didn't do it now I would never have the time to do it...
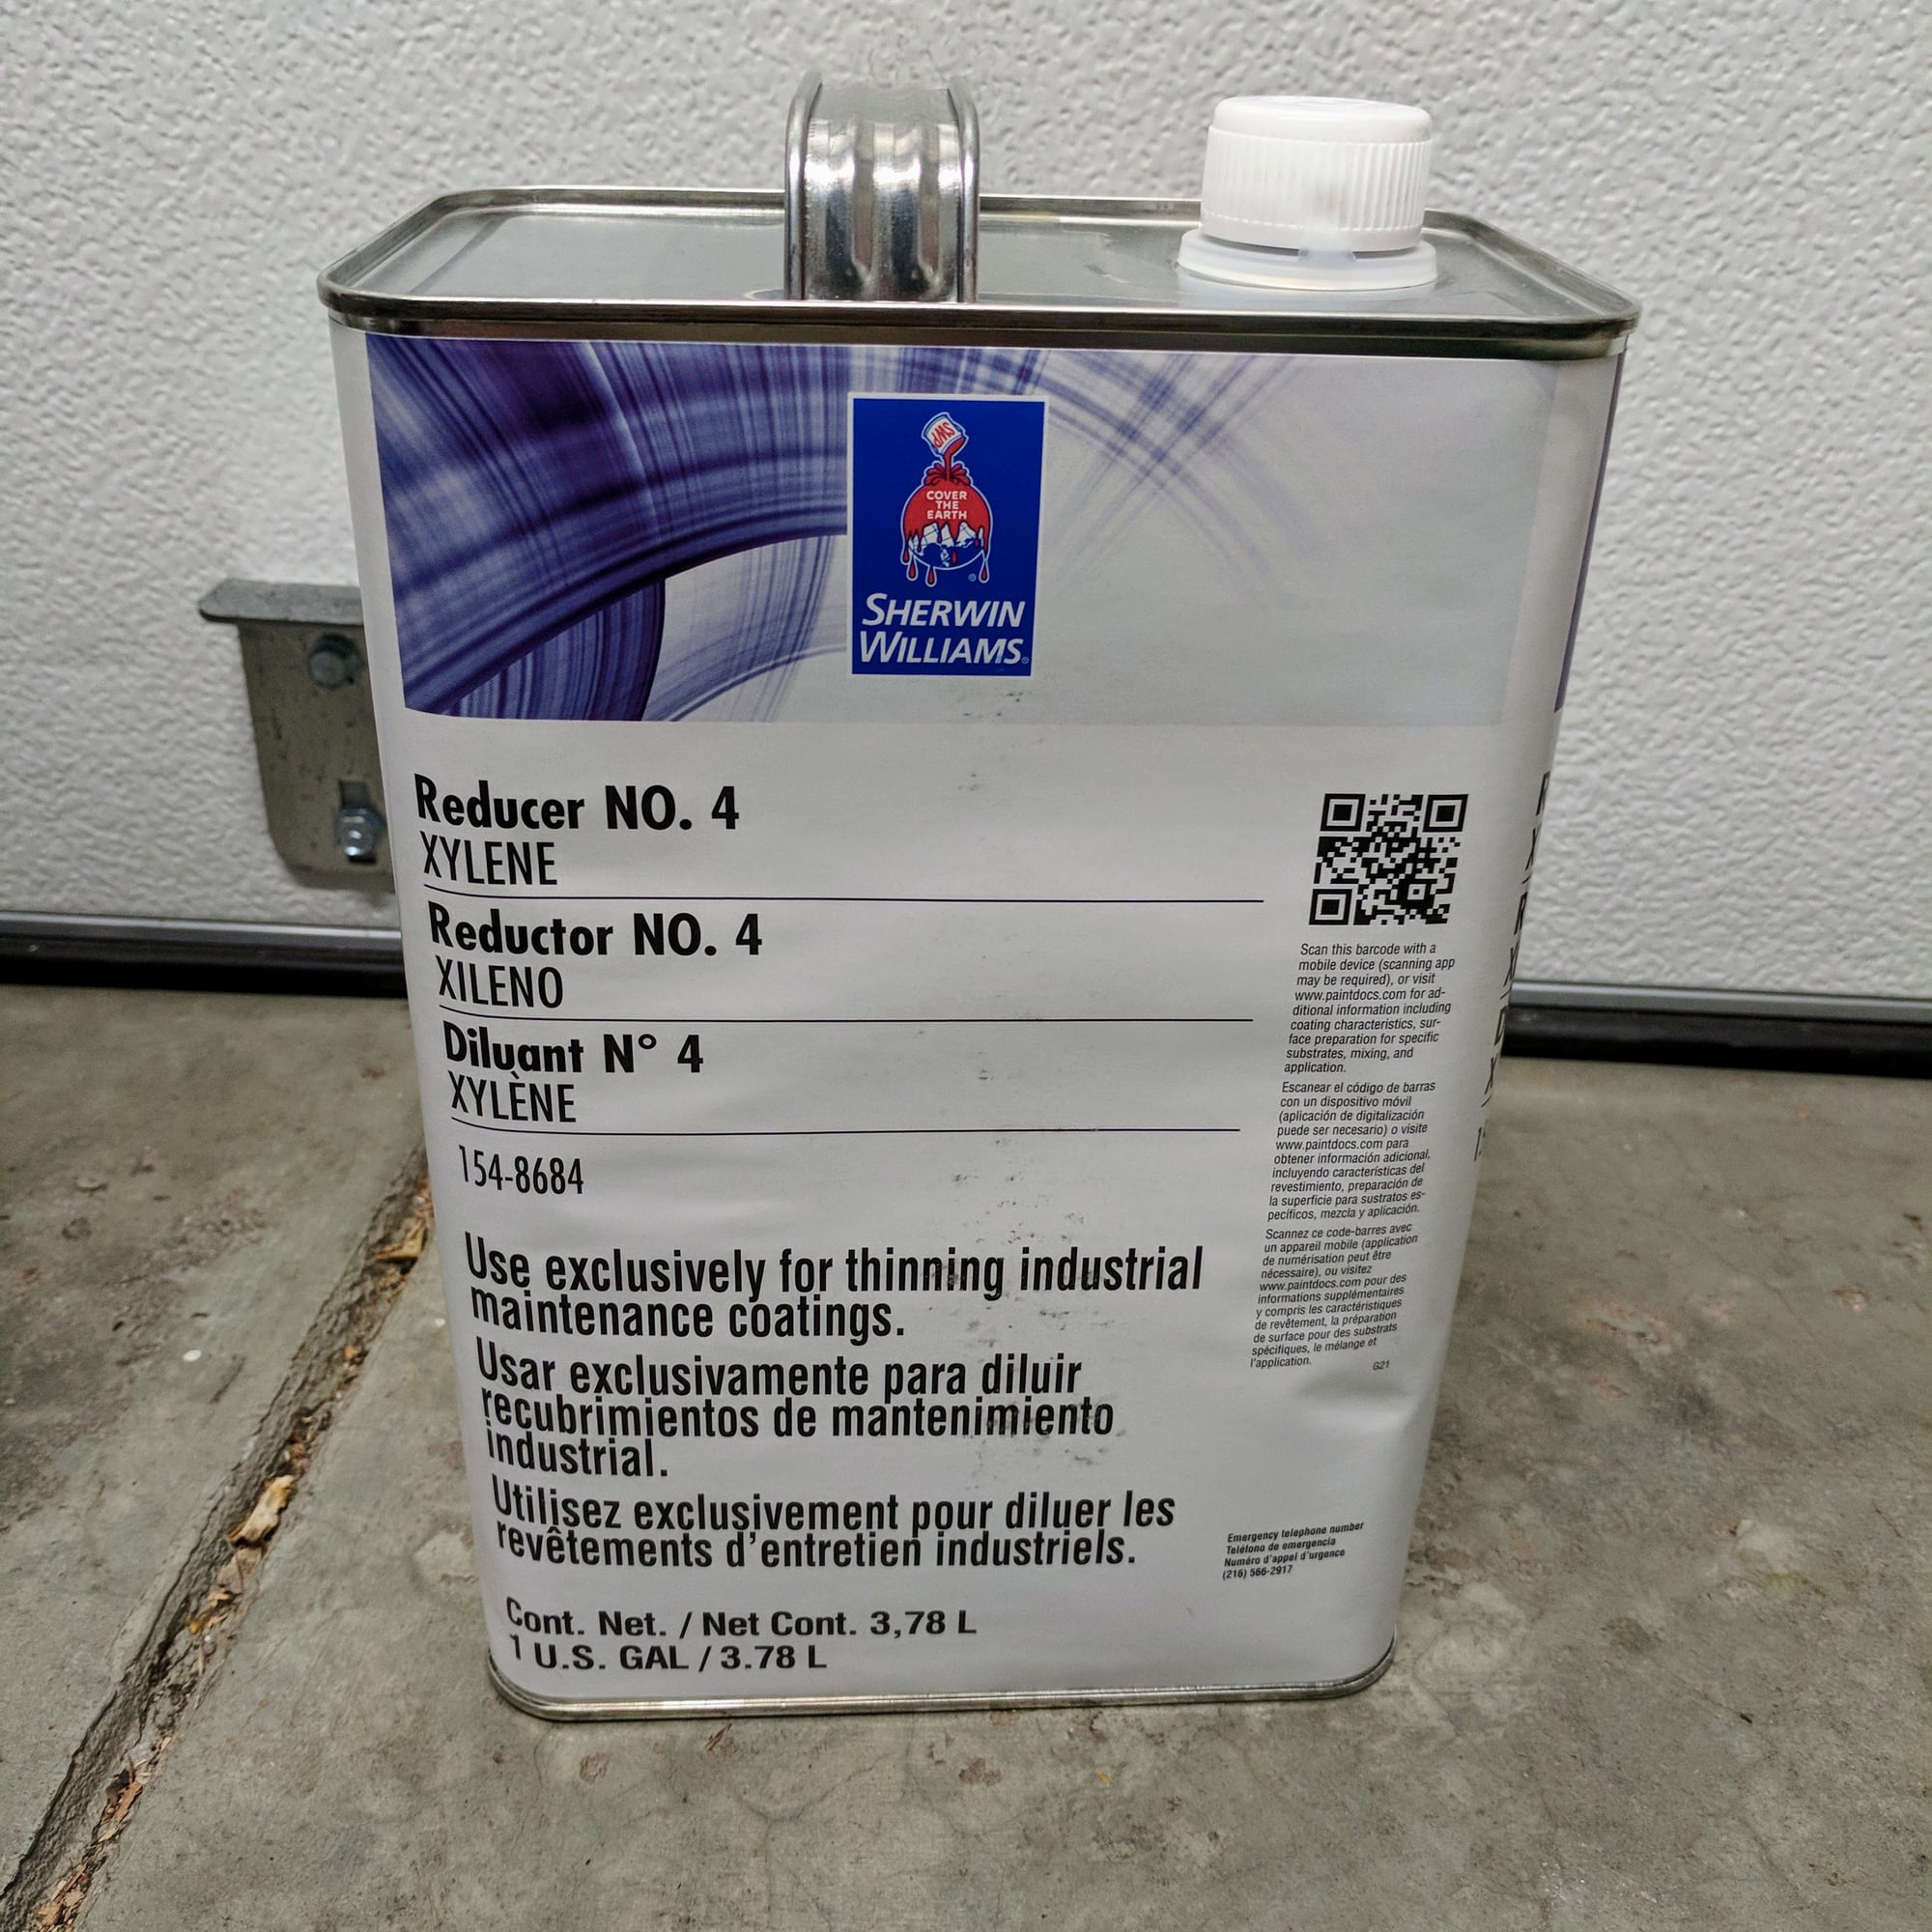
While WD-40 works, Xylene melts the cosmoline like butter and saved me a lot of time...
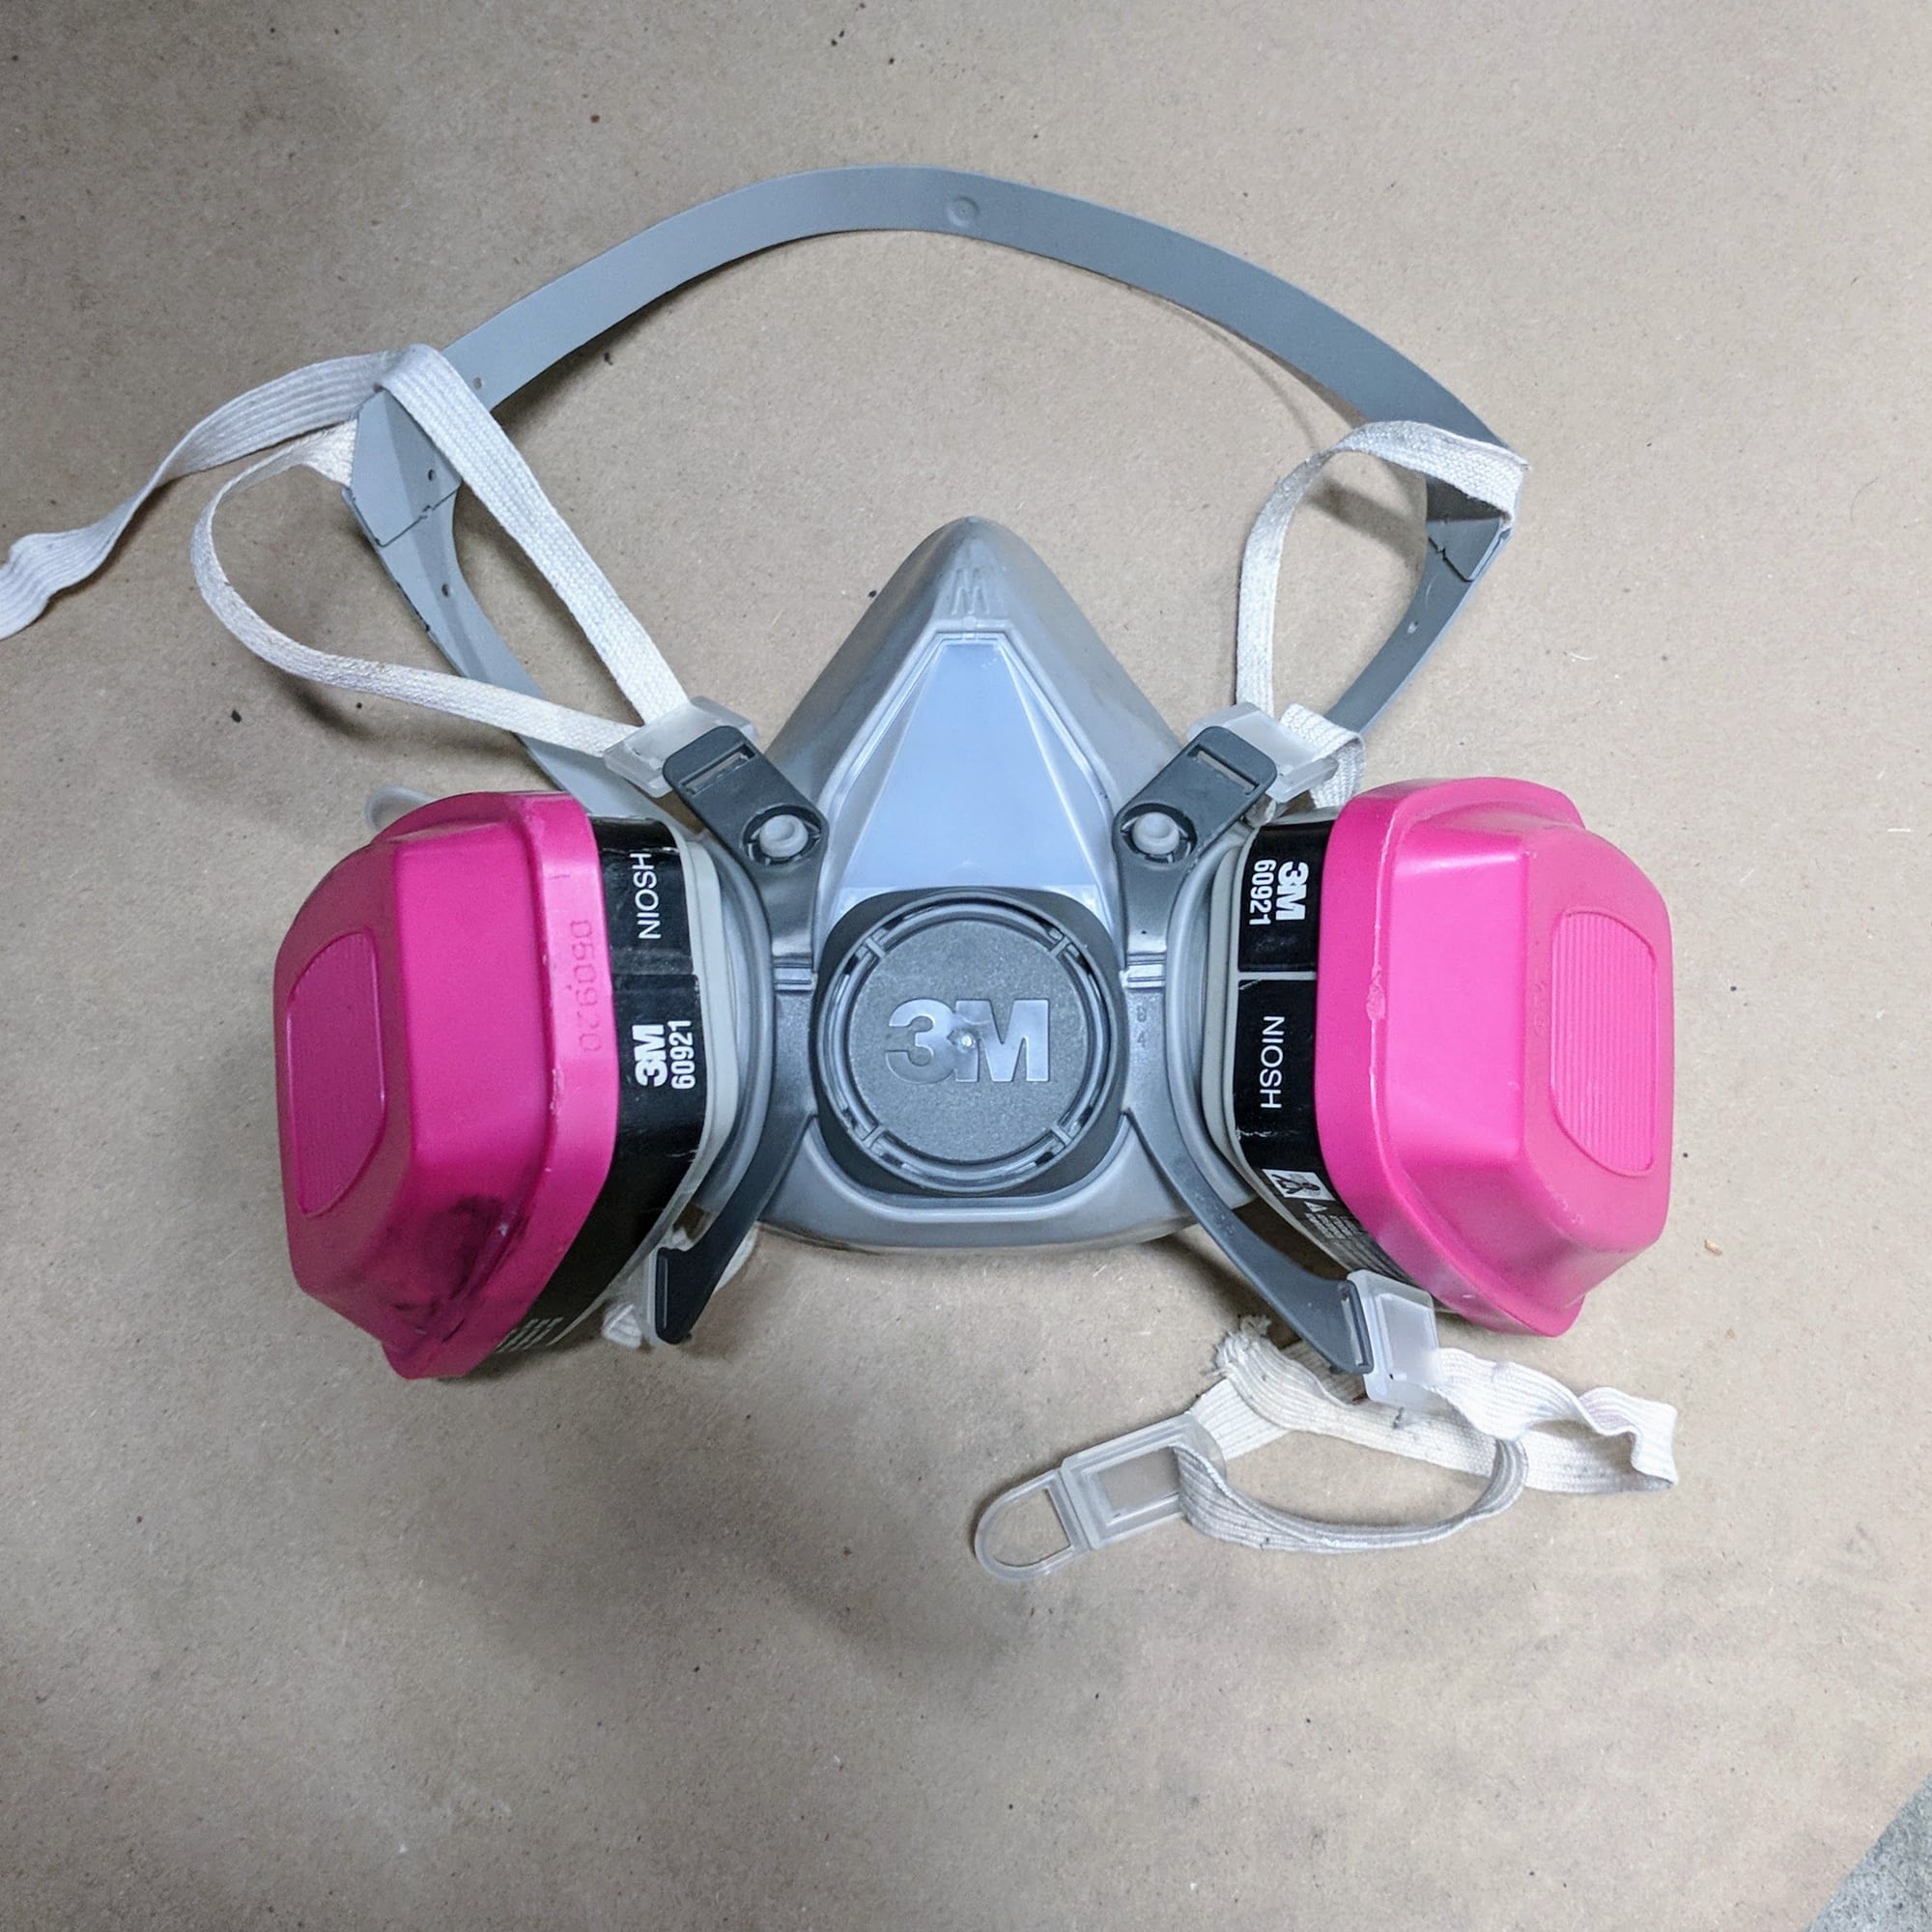
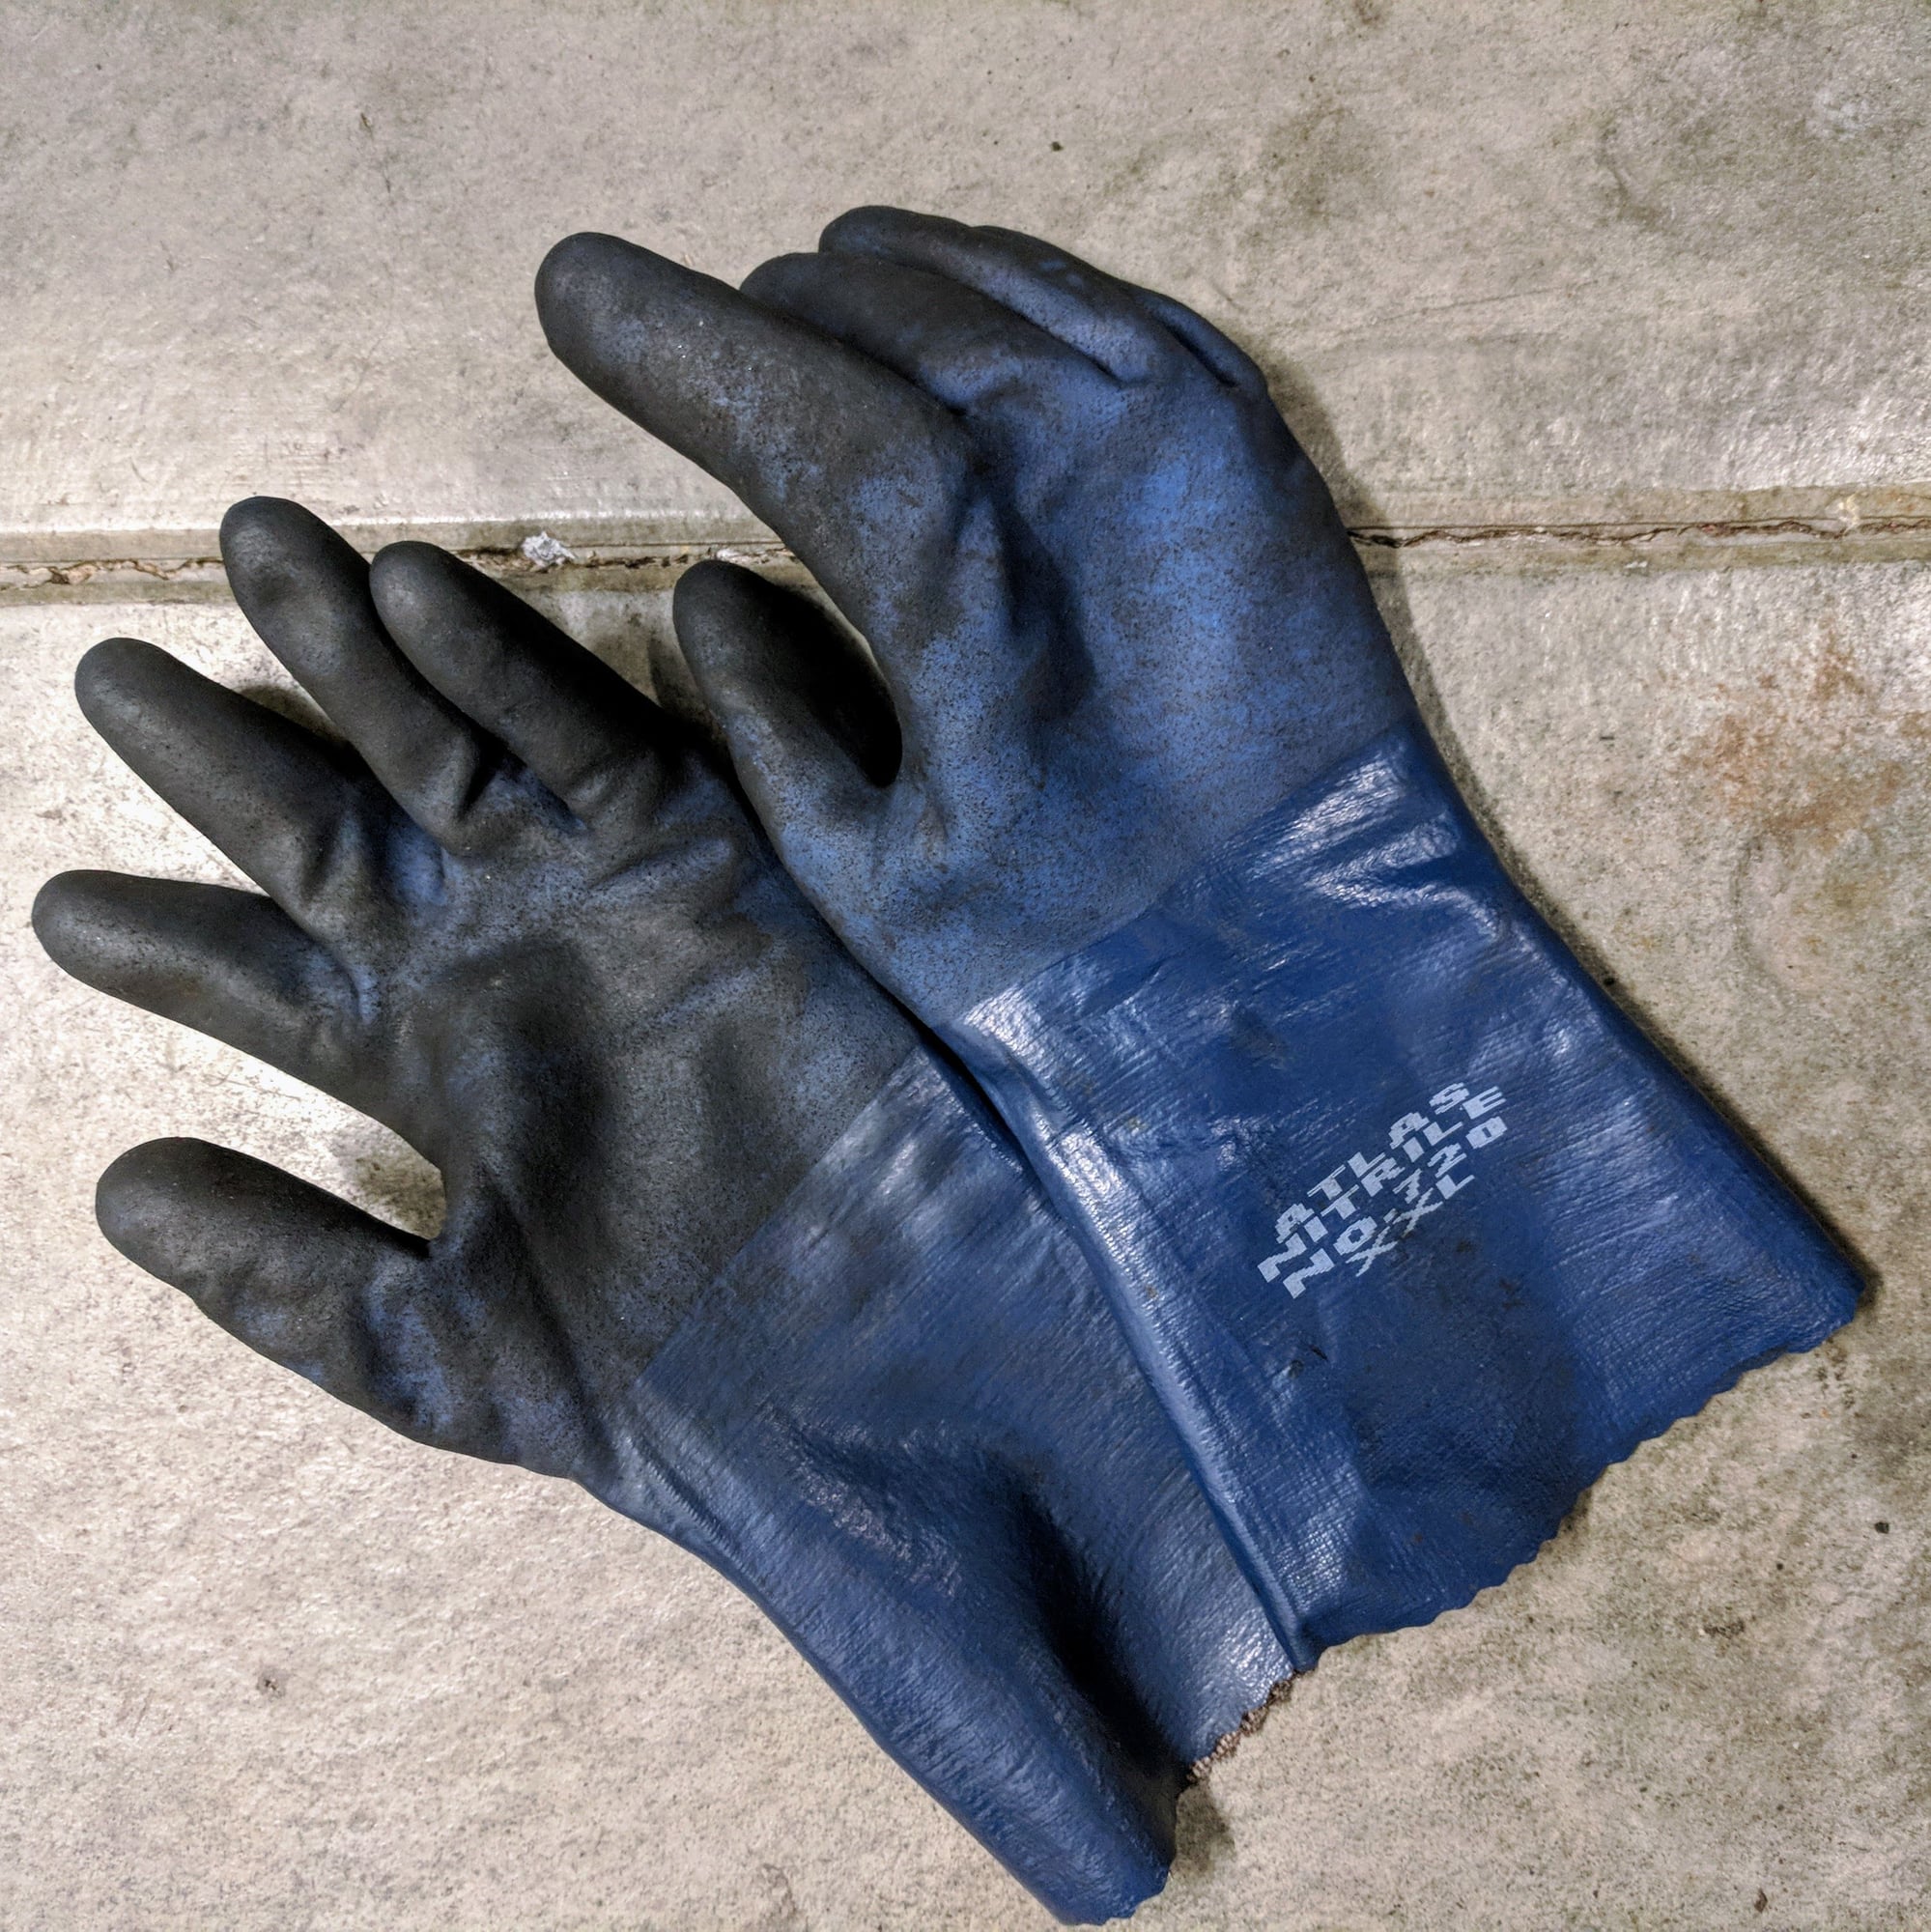
But make sure you use some protection as Xylene odors are terrible. I have an organic solvent rated respirator for spray painting that worked great...
Xylene Magic...
All four wheel wells, suspension components, and other nic nacks stripped of the 20 year old cosmoline done!
This was a slippery slope item since my car was already high on my Esco jack stands getting under the middle of the car to do the install made it easy to knock out this one quickly. The DIY guides that FDM are great.
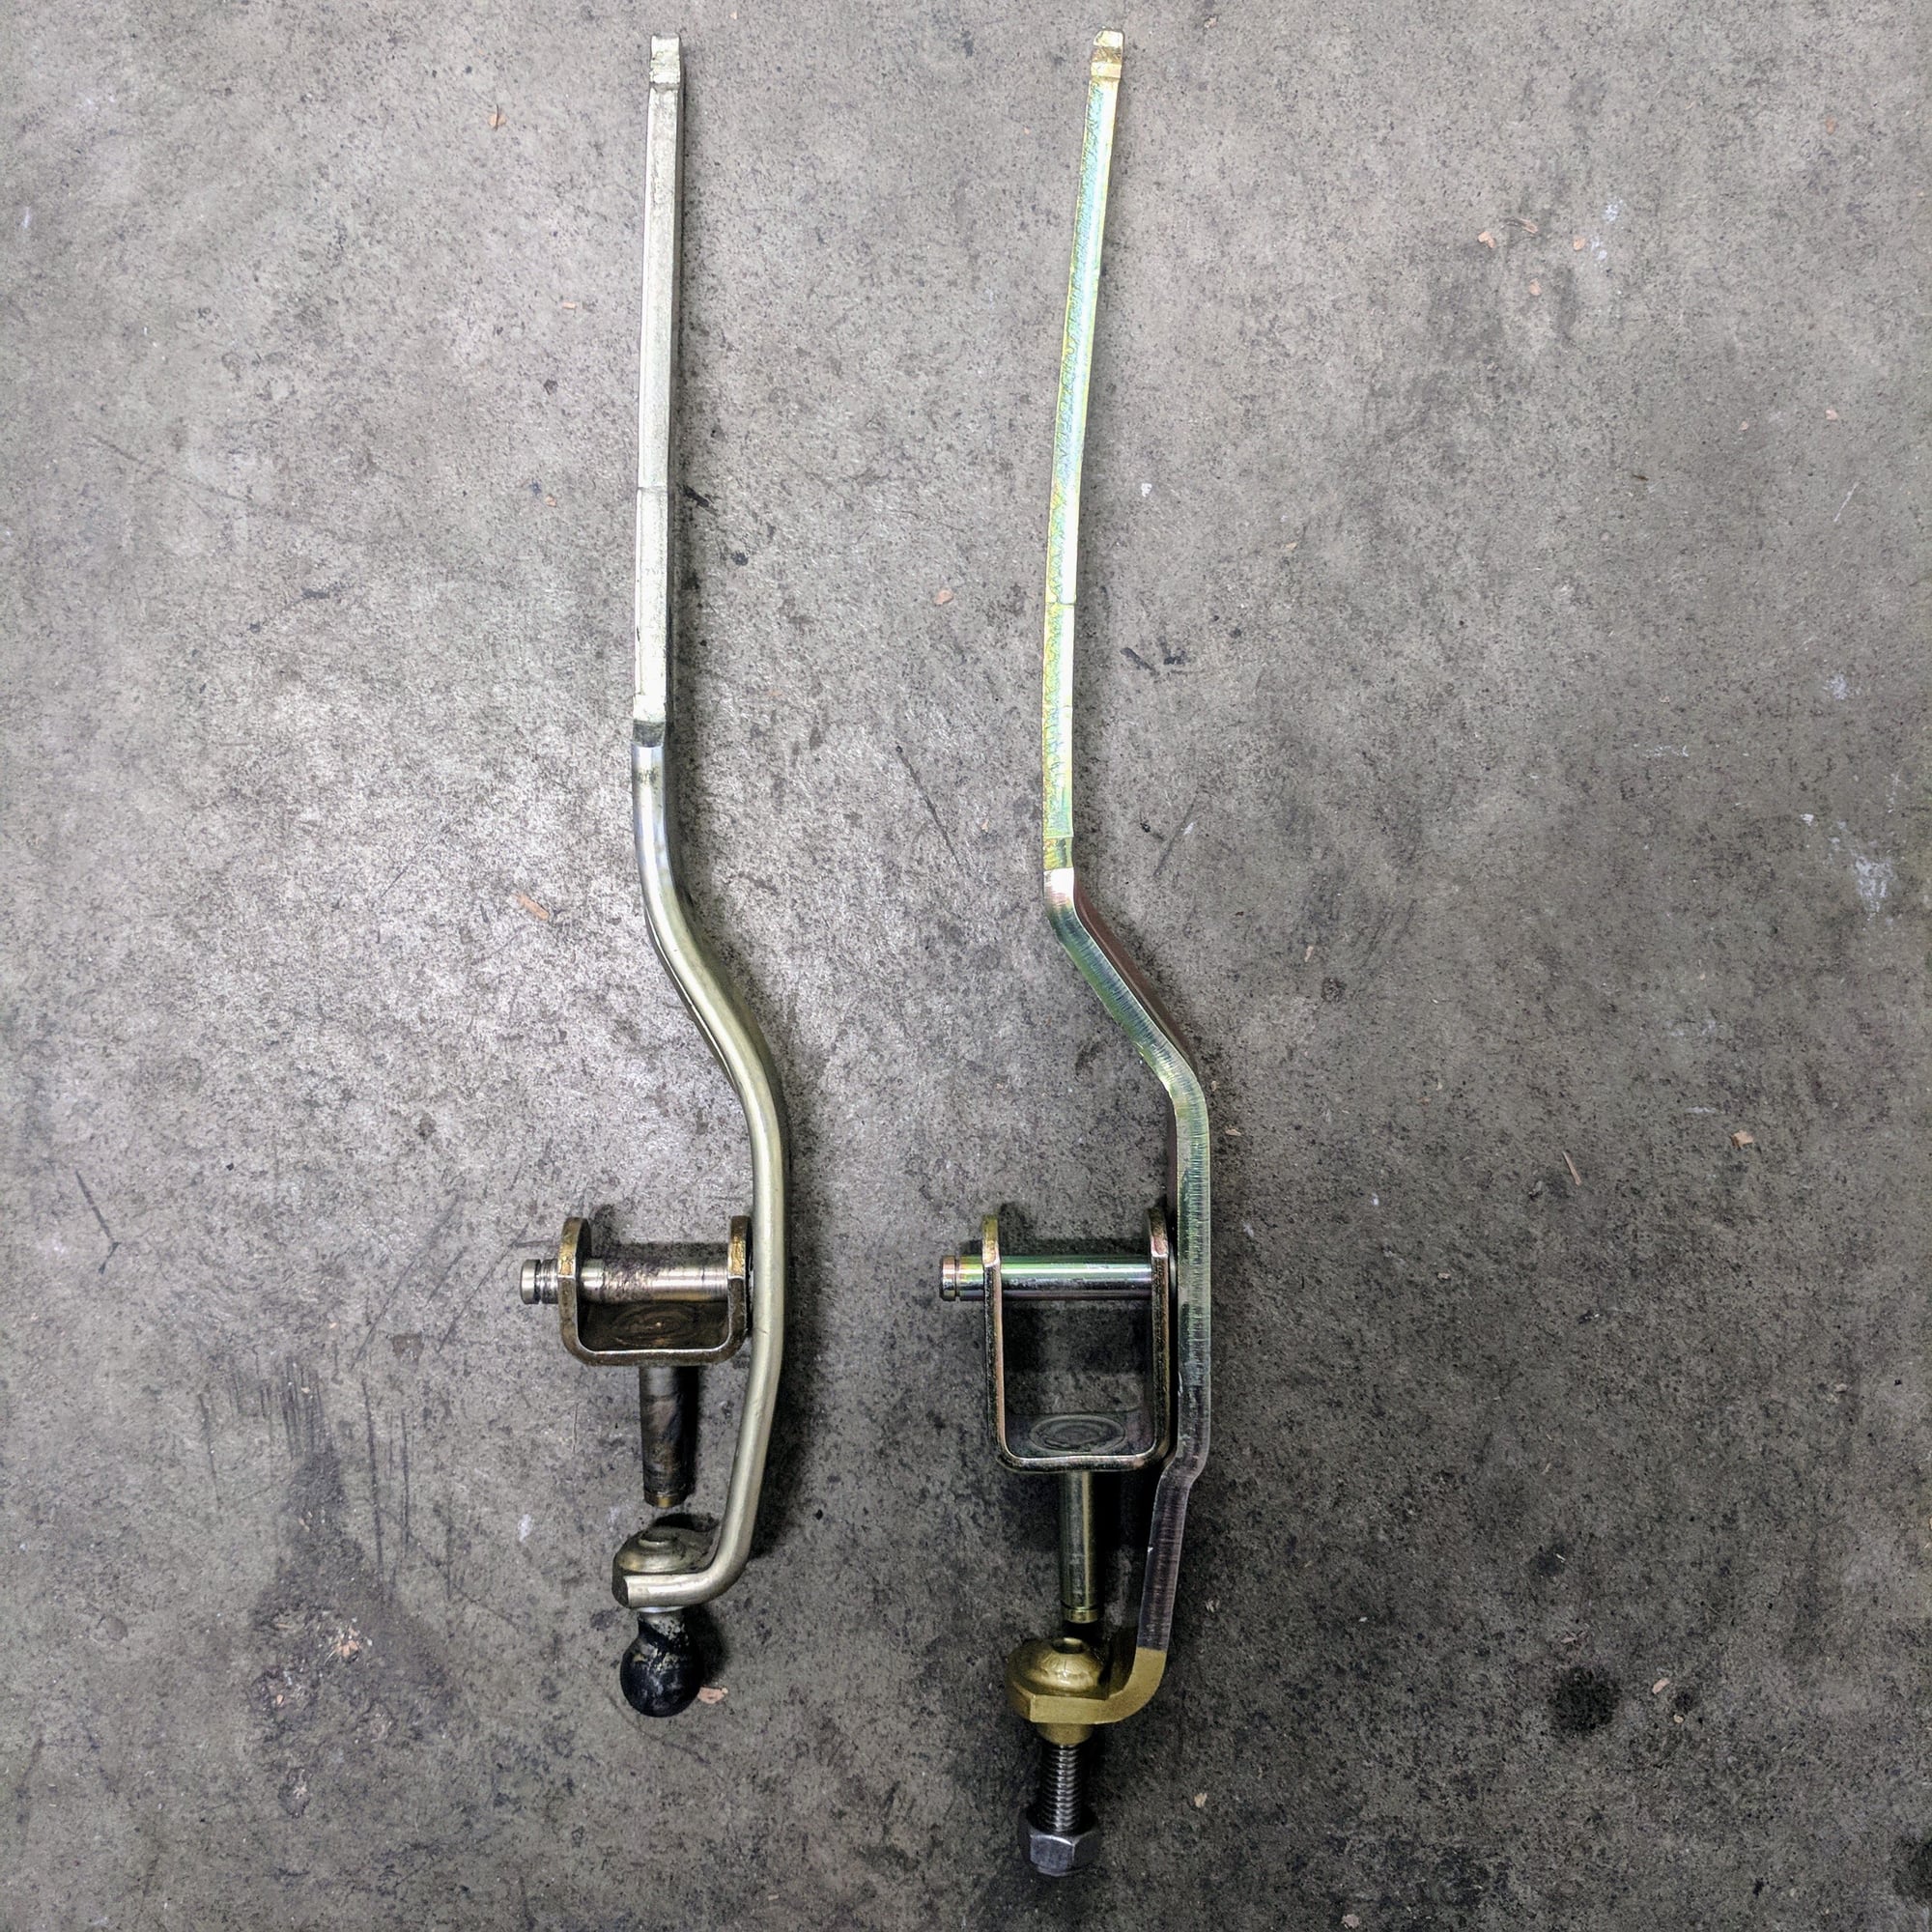
RS modified shifter on right. Notice that the lever is longer making the shift throws shorter.
Forward arm with solid heim joints on bottom. The OEM one has plastic bushings in the cups. Mine were crumbling so this upgrade was good timing as I could have been stranded eventually.
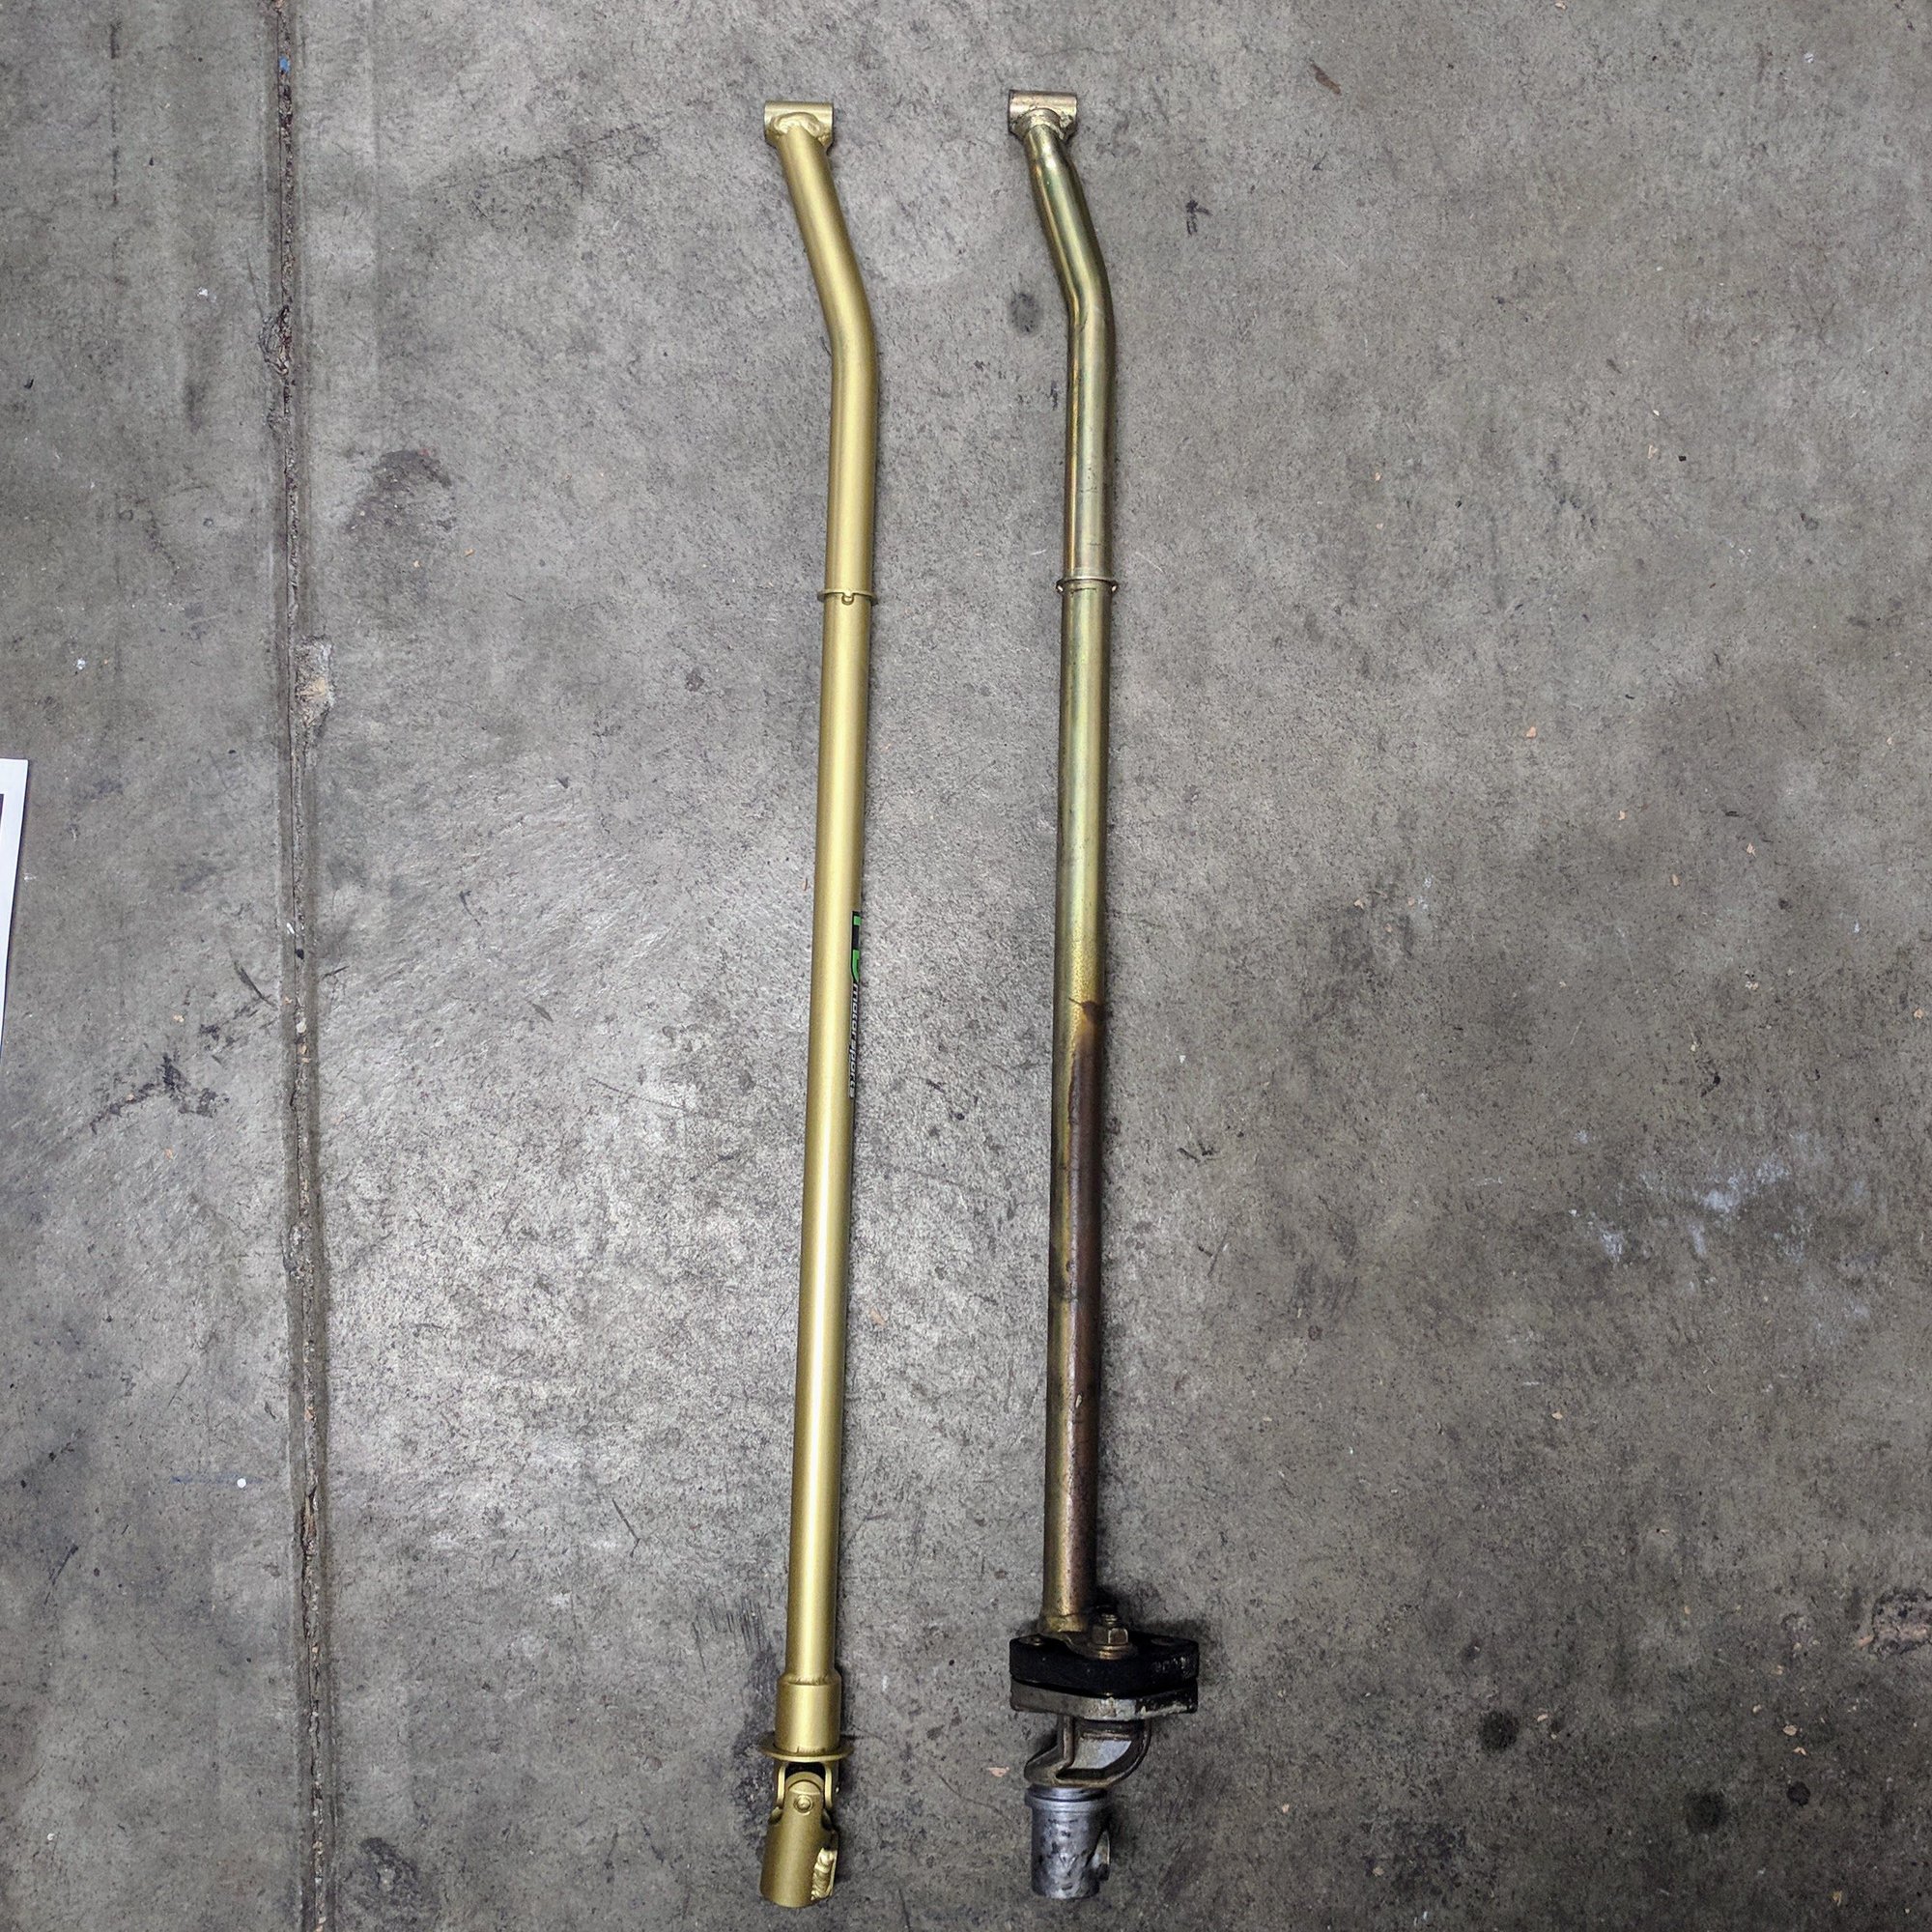
Golden Rod on left with solid u-joint instead of OEM rubber joint.
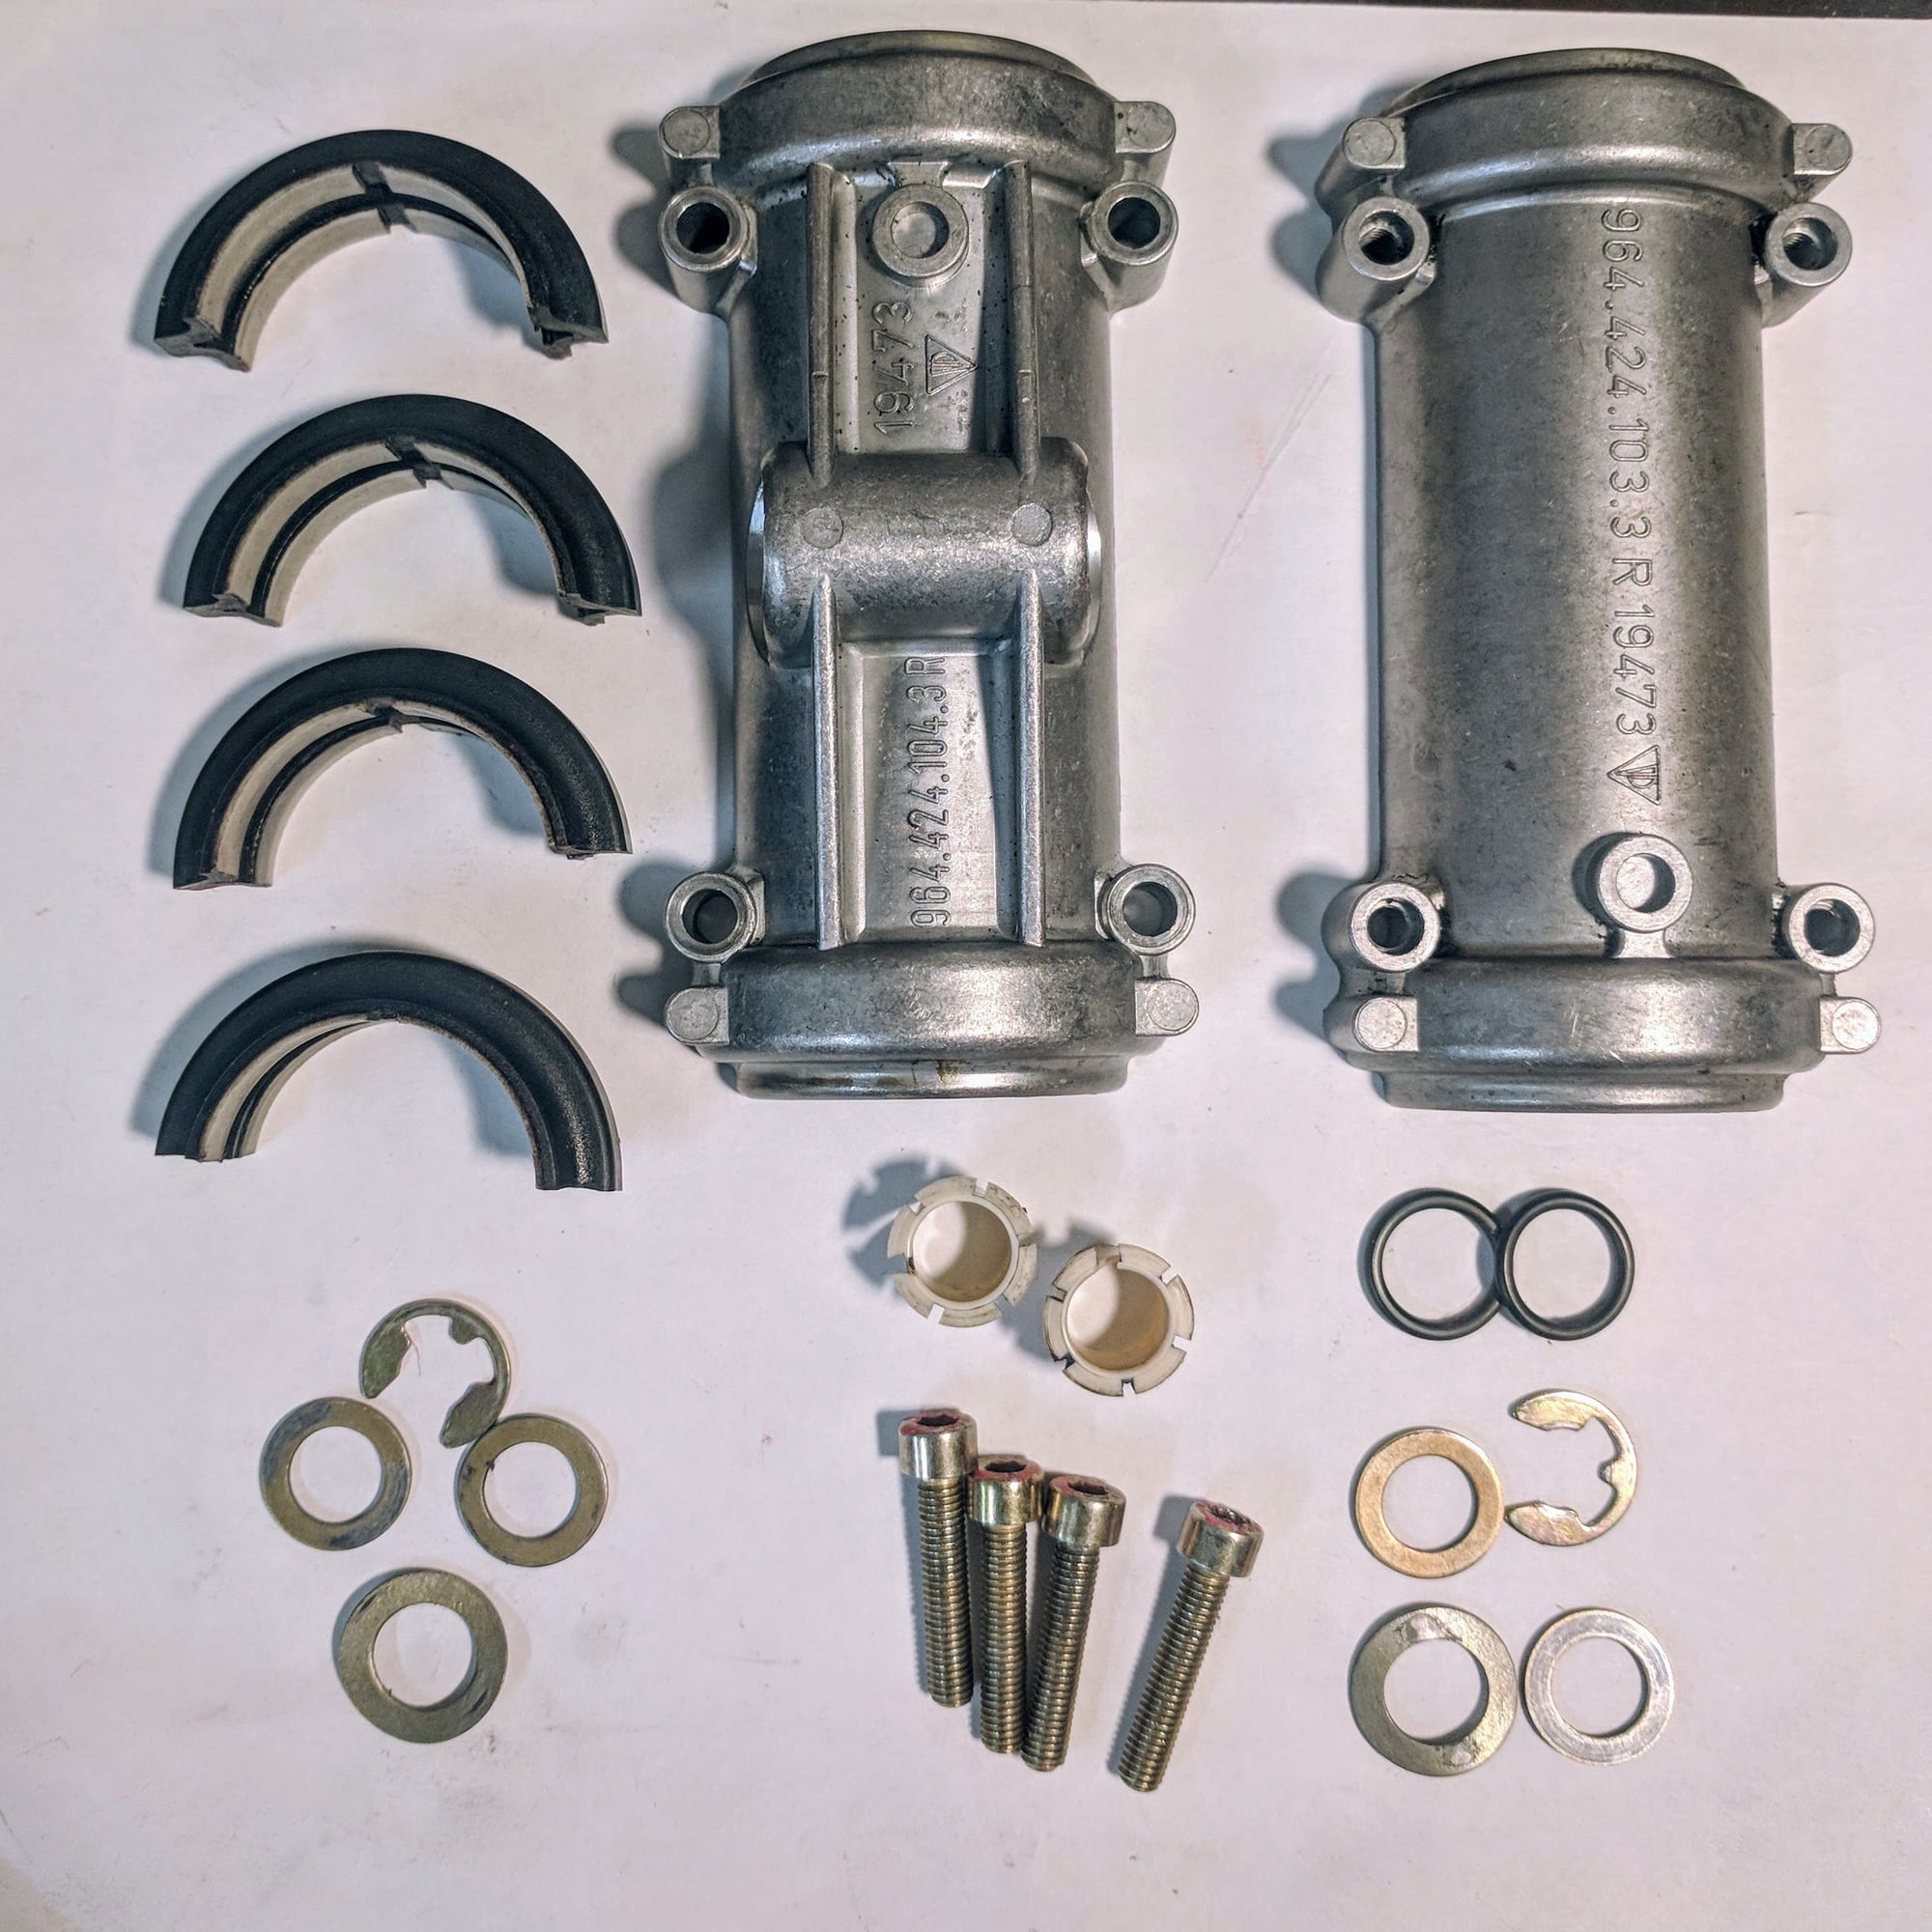
Cleaning the old bushings and other bits is the longest part of the install. These are the shifter components cleaned and ready for assembly on the SSK.
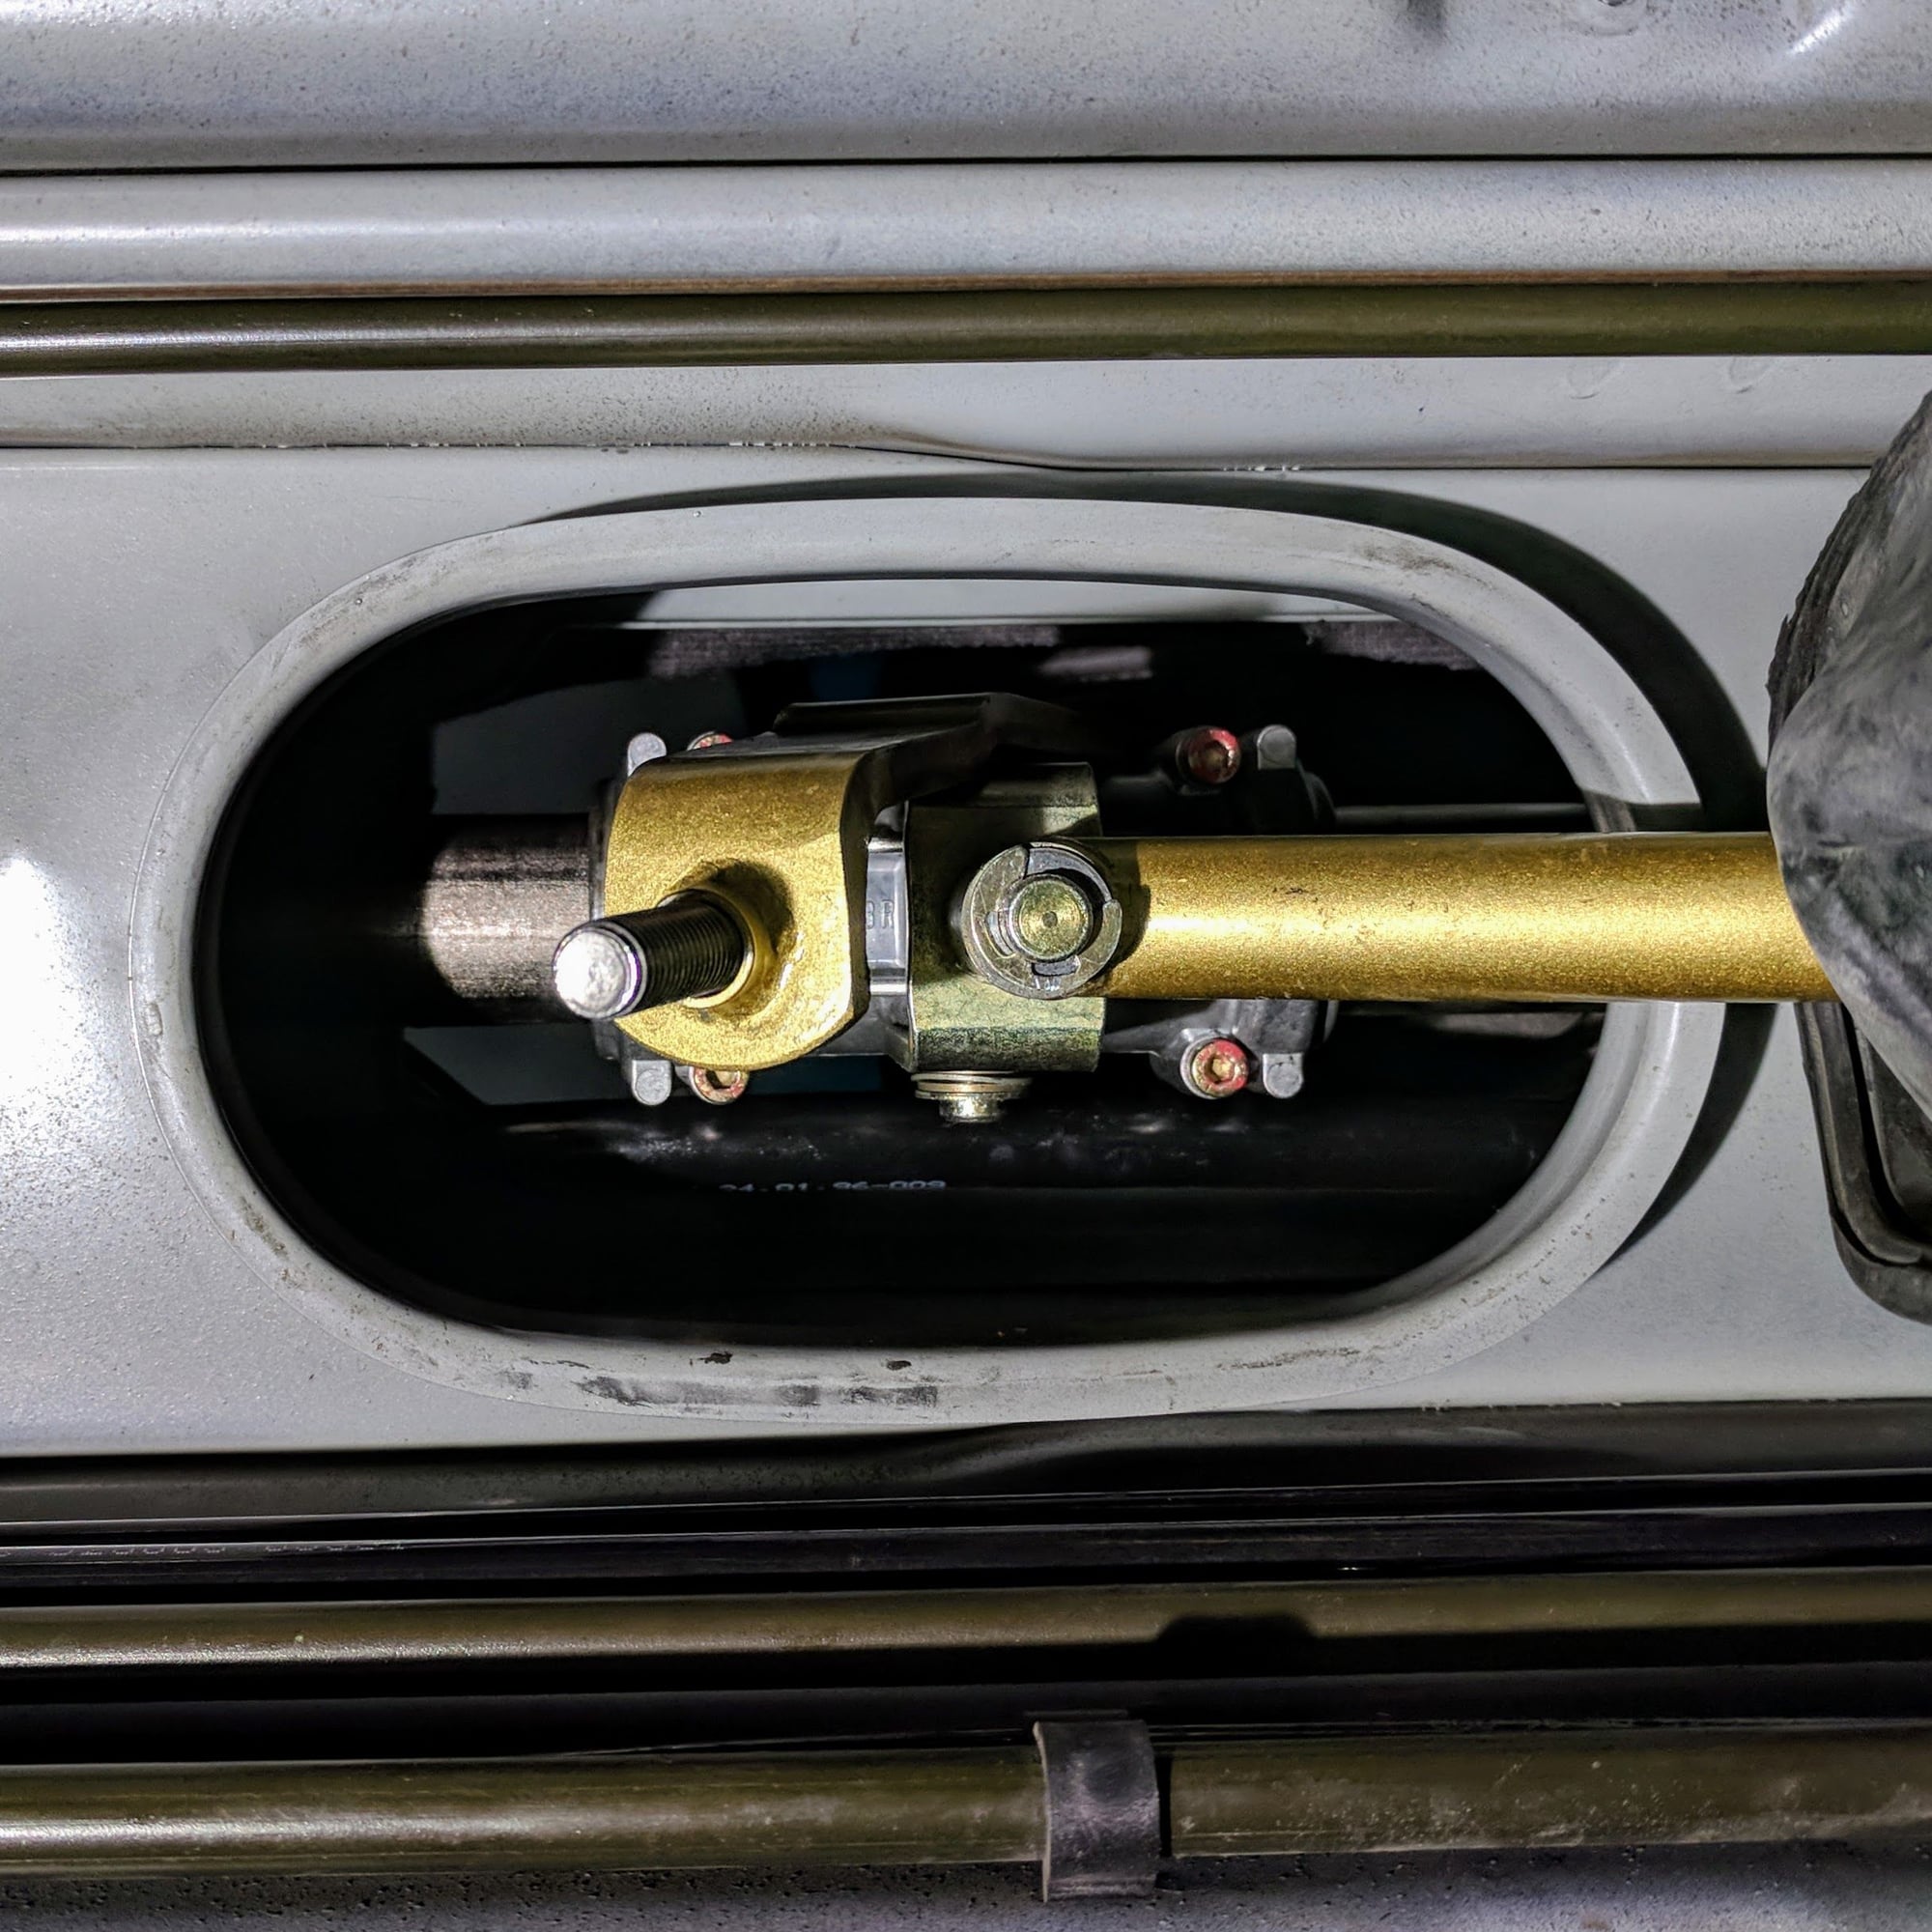
Installing the SSK takes some patience. The hardest part is trying to get the e-clip to attach the Golden Rod to the shifter while you are on your back under the car. Took me a few times to get it to set correctly. Each failed attempt the clips and washers all fell on my face which wasn't fun. Luckily I didn't have a flying e-clip incident where you miscalculate pinching your pliers and the e-clip goes flying somewhere (fun memories of my RC car building days as a kid trying to install and find tiny little e-clips).
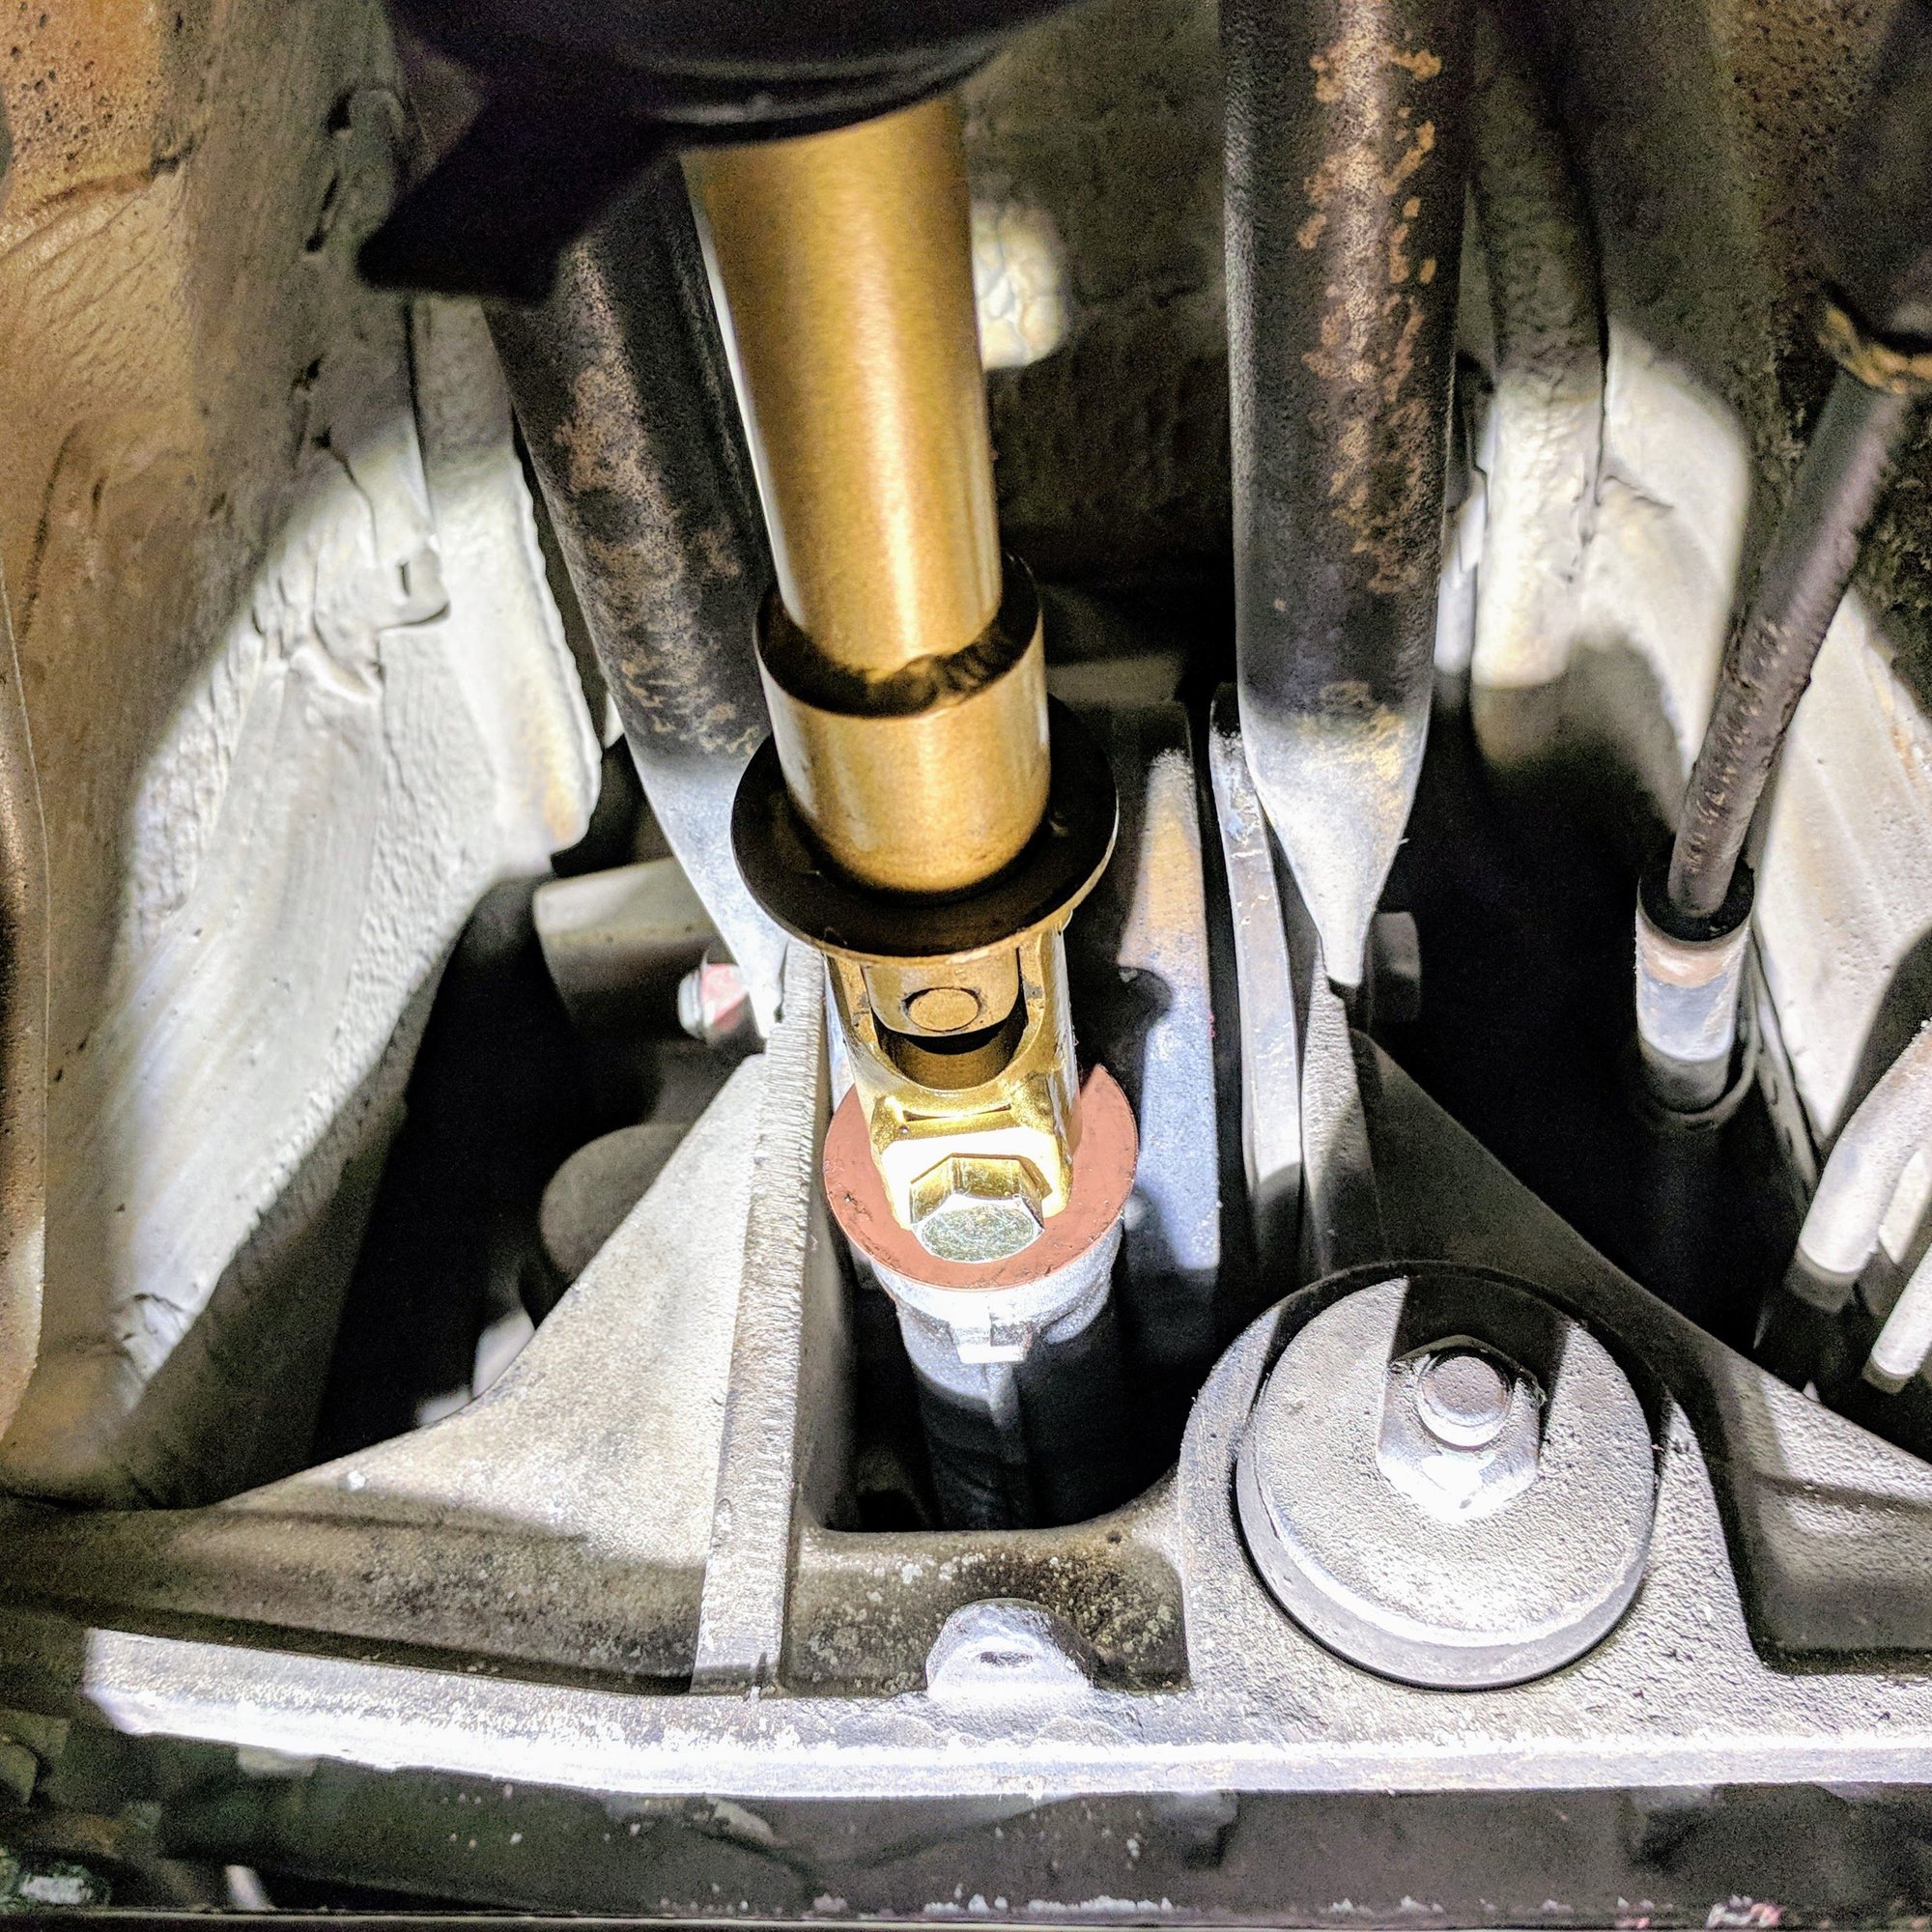
Connected the Golden Rod to the transmission. Notice the solid u-joint which replaces a fat rubber piece on the OEM. This small modification completely removed mushy shifting I was not fond of.
Connected the forward rod to the cross member. The black metal cover had some blemishes so spent some time with my orbital buffer and fine clean cut cleaner to clean it up before I put it on. Nice and shiny again like from the factory.
FDM SSK and Golden Rod shifter upgrade done!
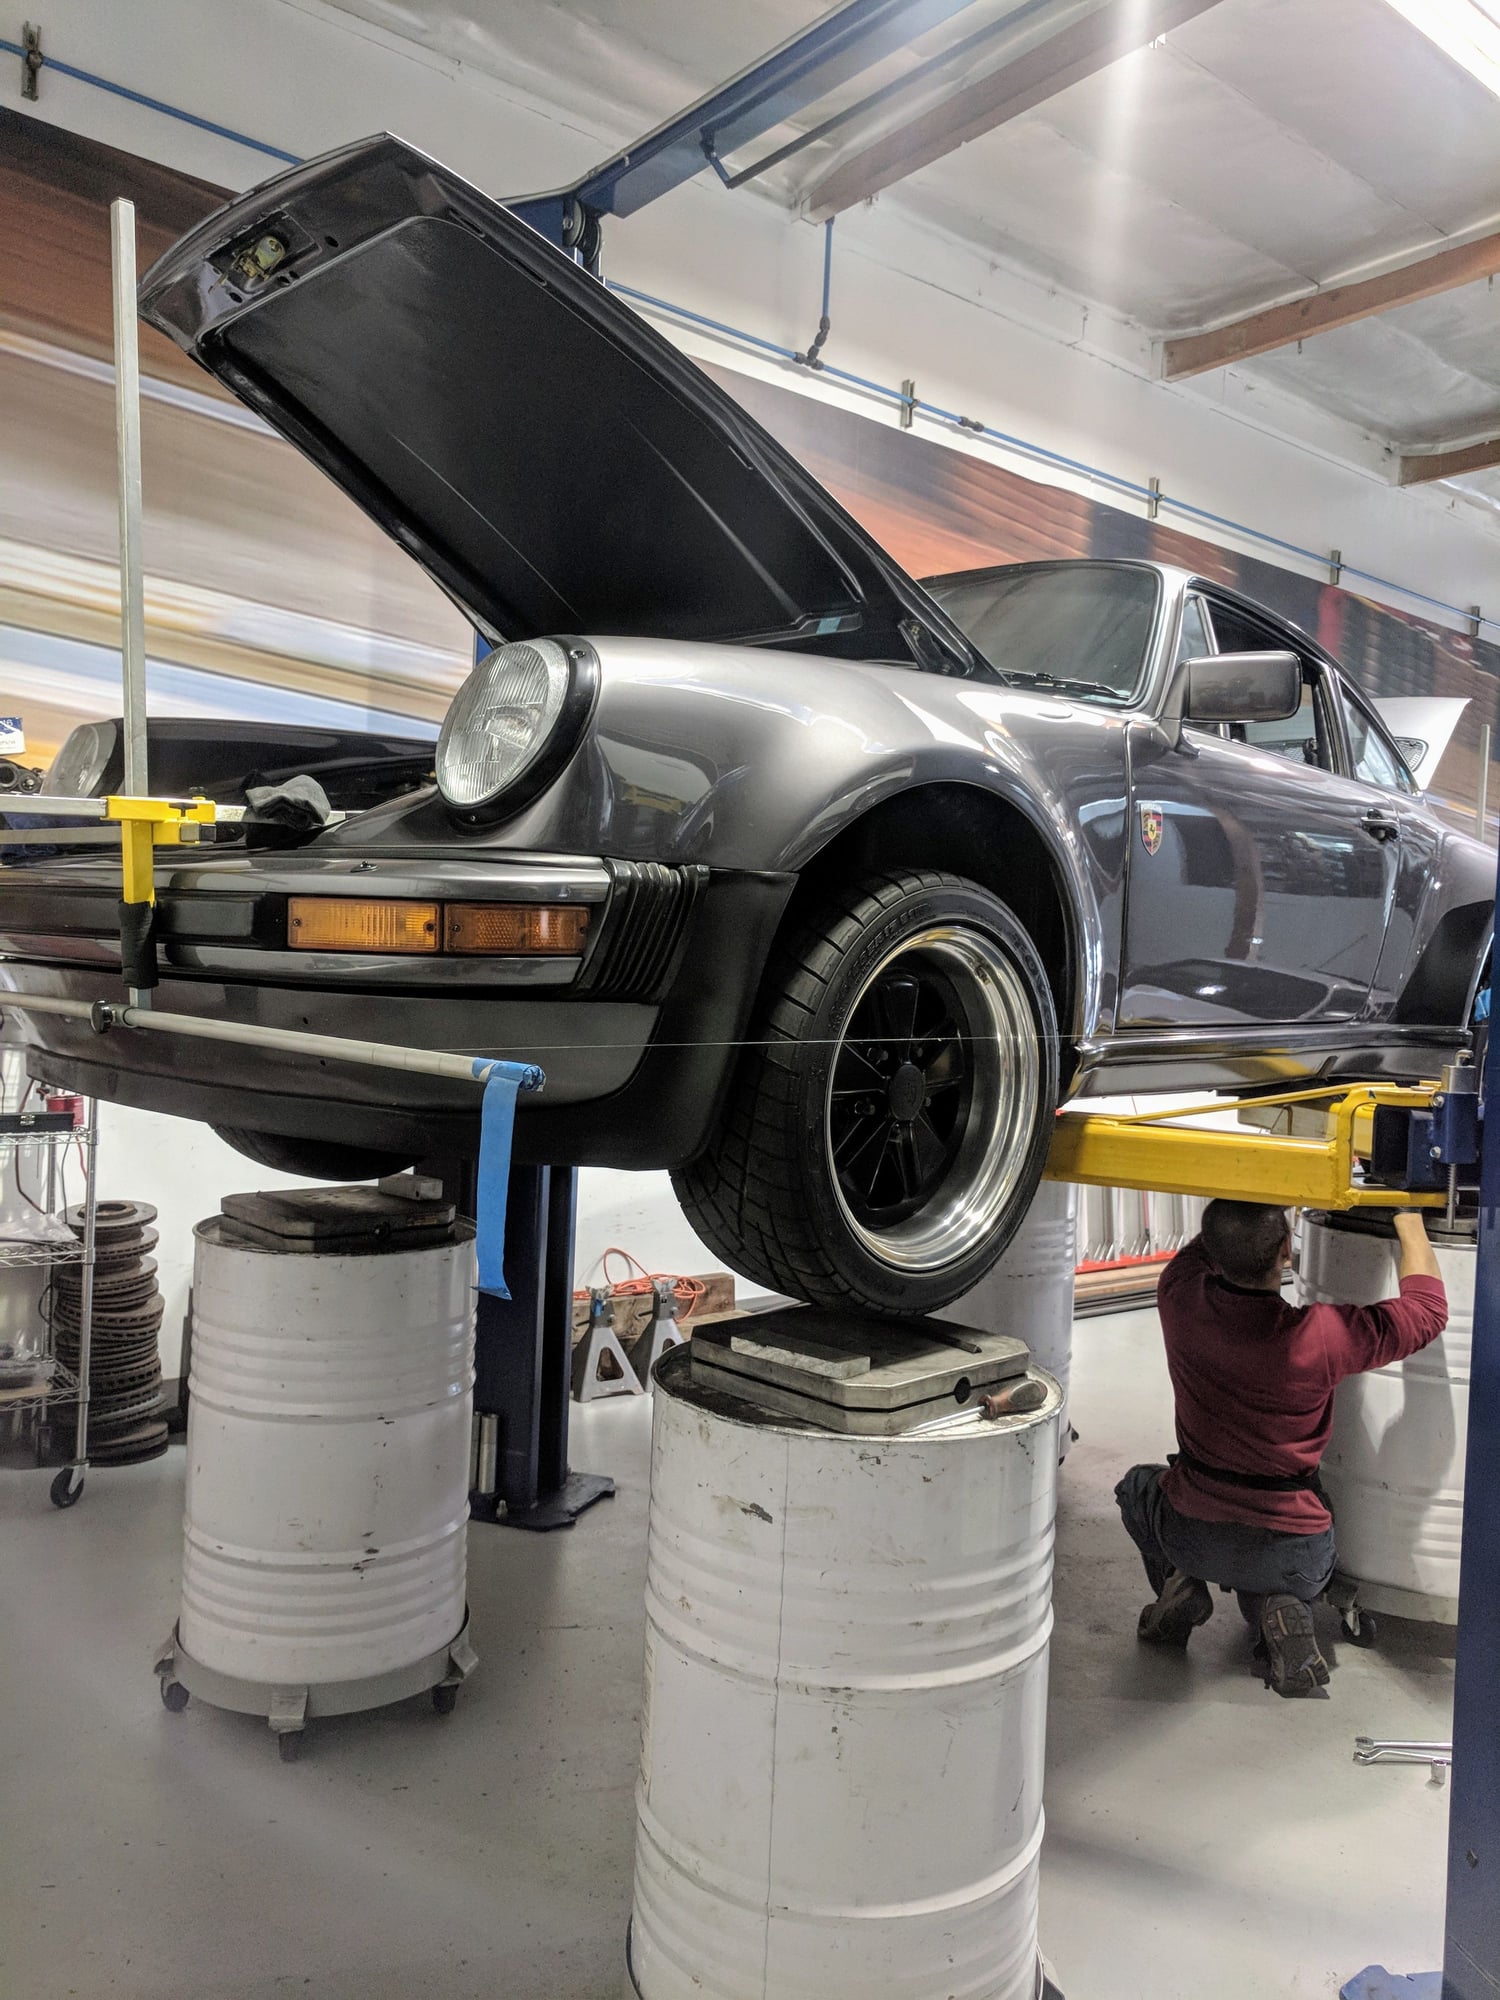
8. DIY toe, caster, camber alignment to get my car road ready to drive to Roger Krause Racing for a final alignment and corner balance (My arms are still sore jacking my car up and down to make adjustments as I don't have a lift)
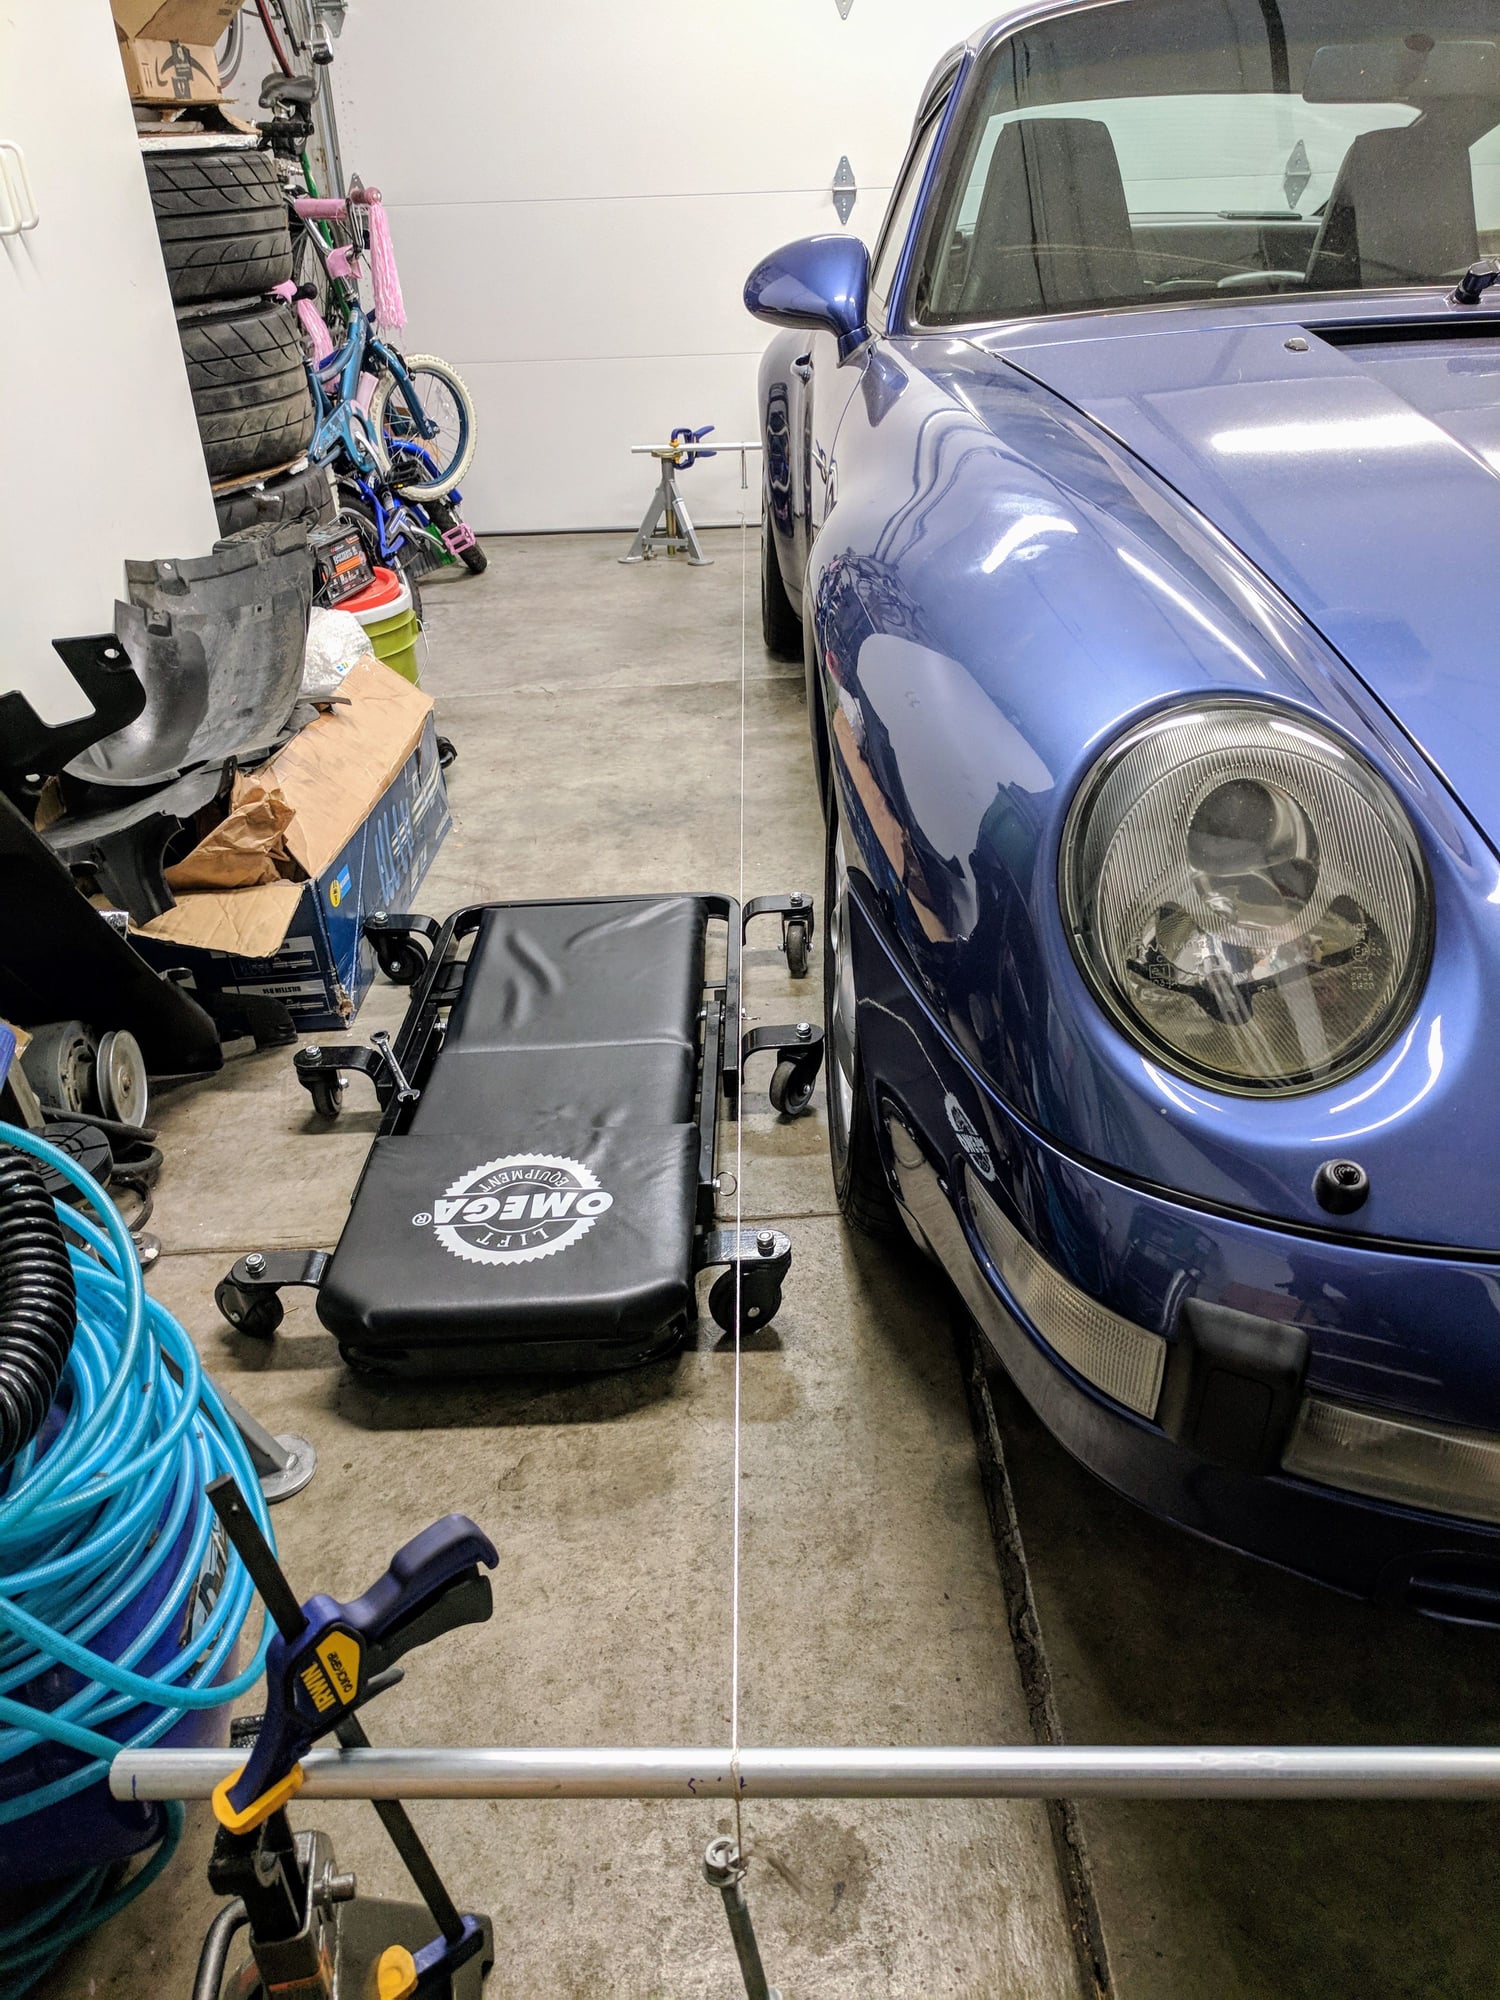
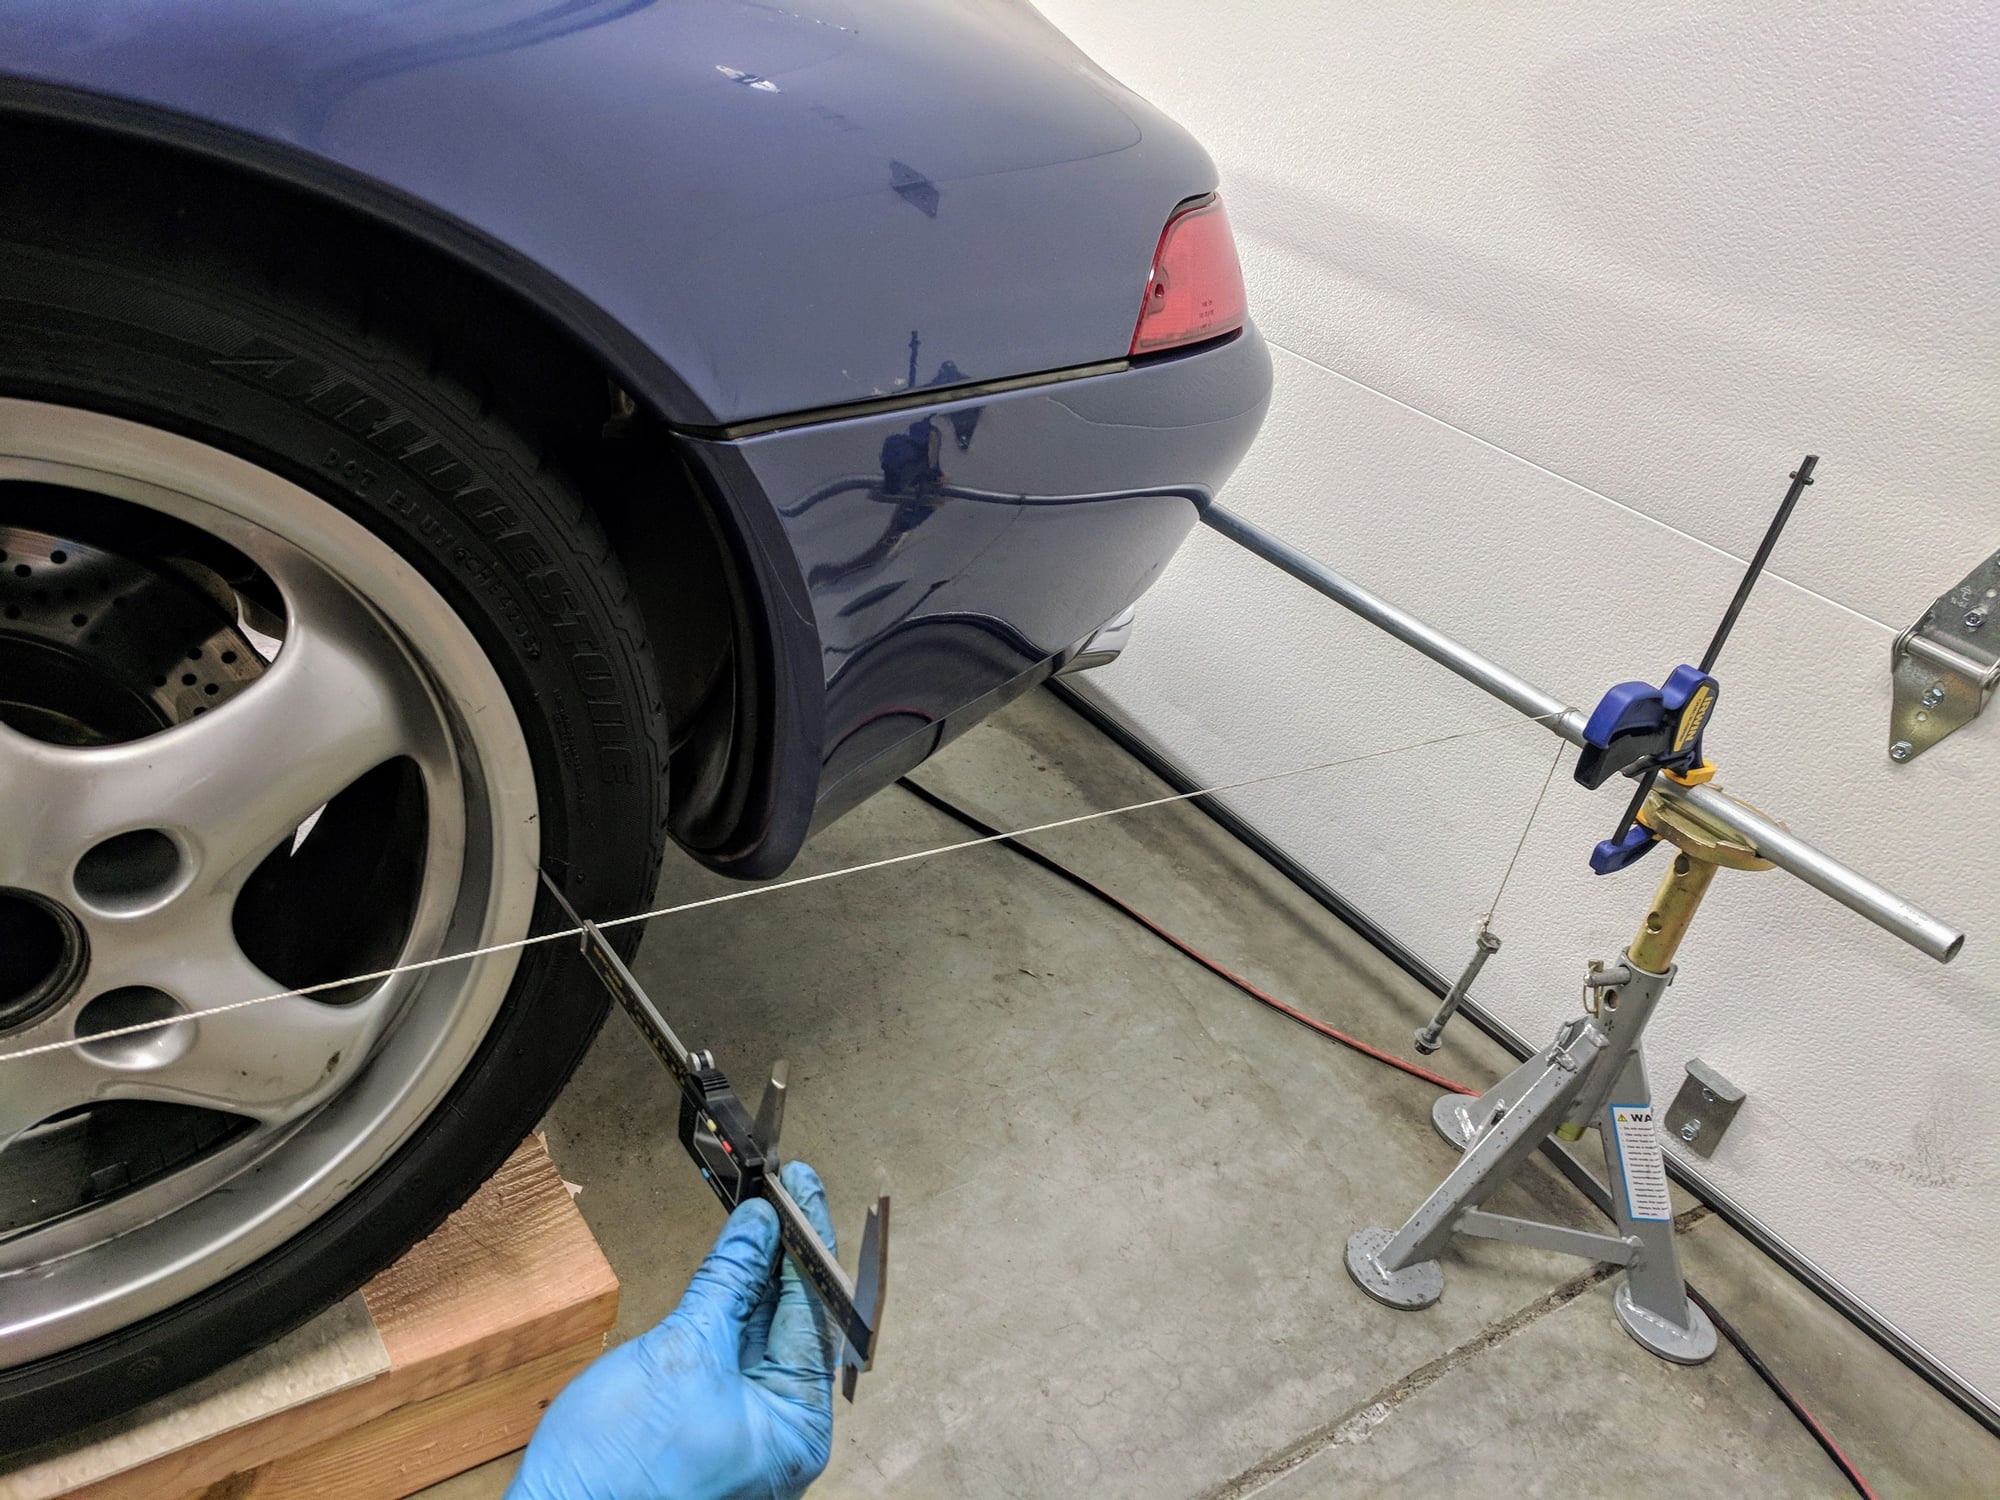
When I was at Elephant waiting to get my control arms rebushed, they were doing a string alignment on a new suspension system they just installed and showed me how to do an alignment for our 911s in my garage with a few simple materials from Home Depot...
Two steel conduit pipes, vise grips, esco stands, old control arm bolts as weights, and nylon string... I bought some PVC to make a bracket to attach to the car similar to a Smart String jig. Didn't want to waste time doing that now so went with a floor based approach.
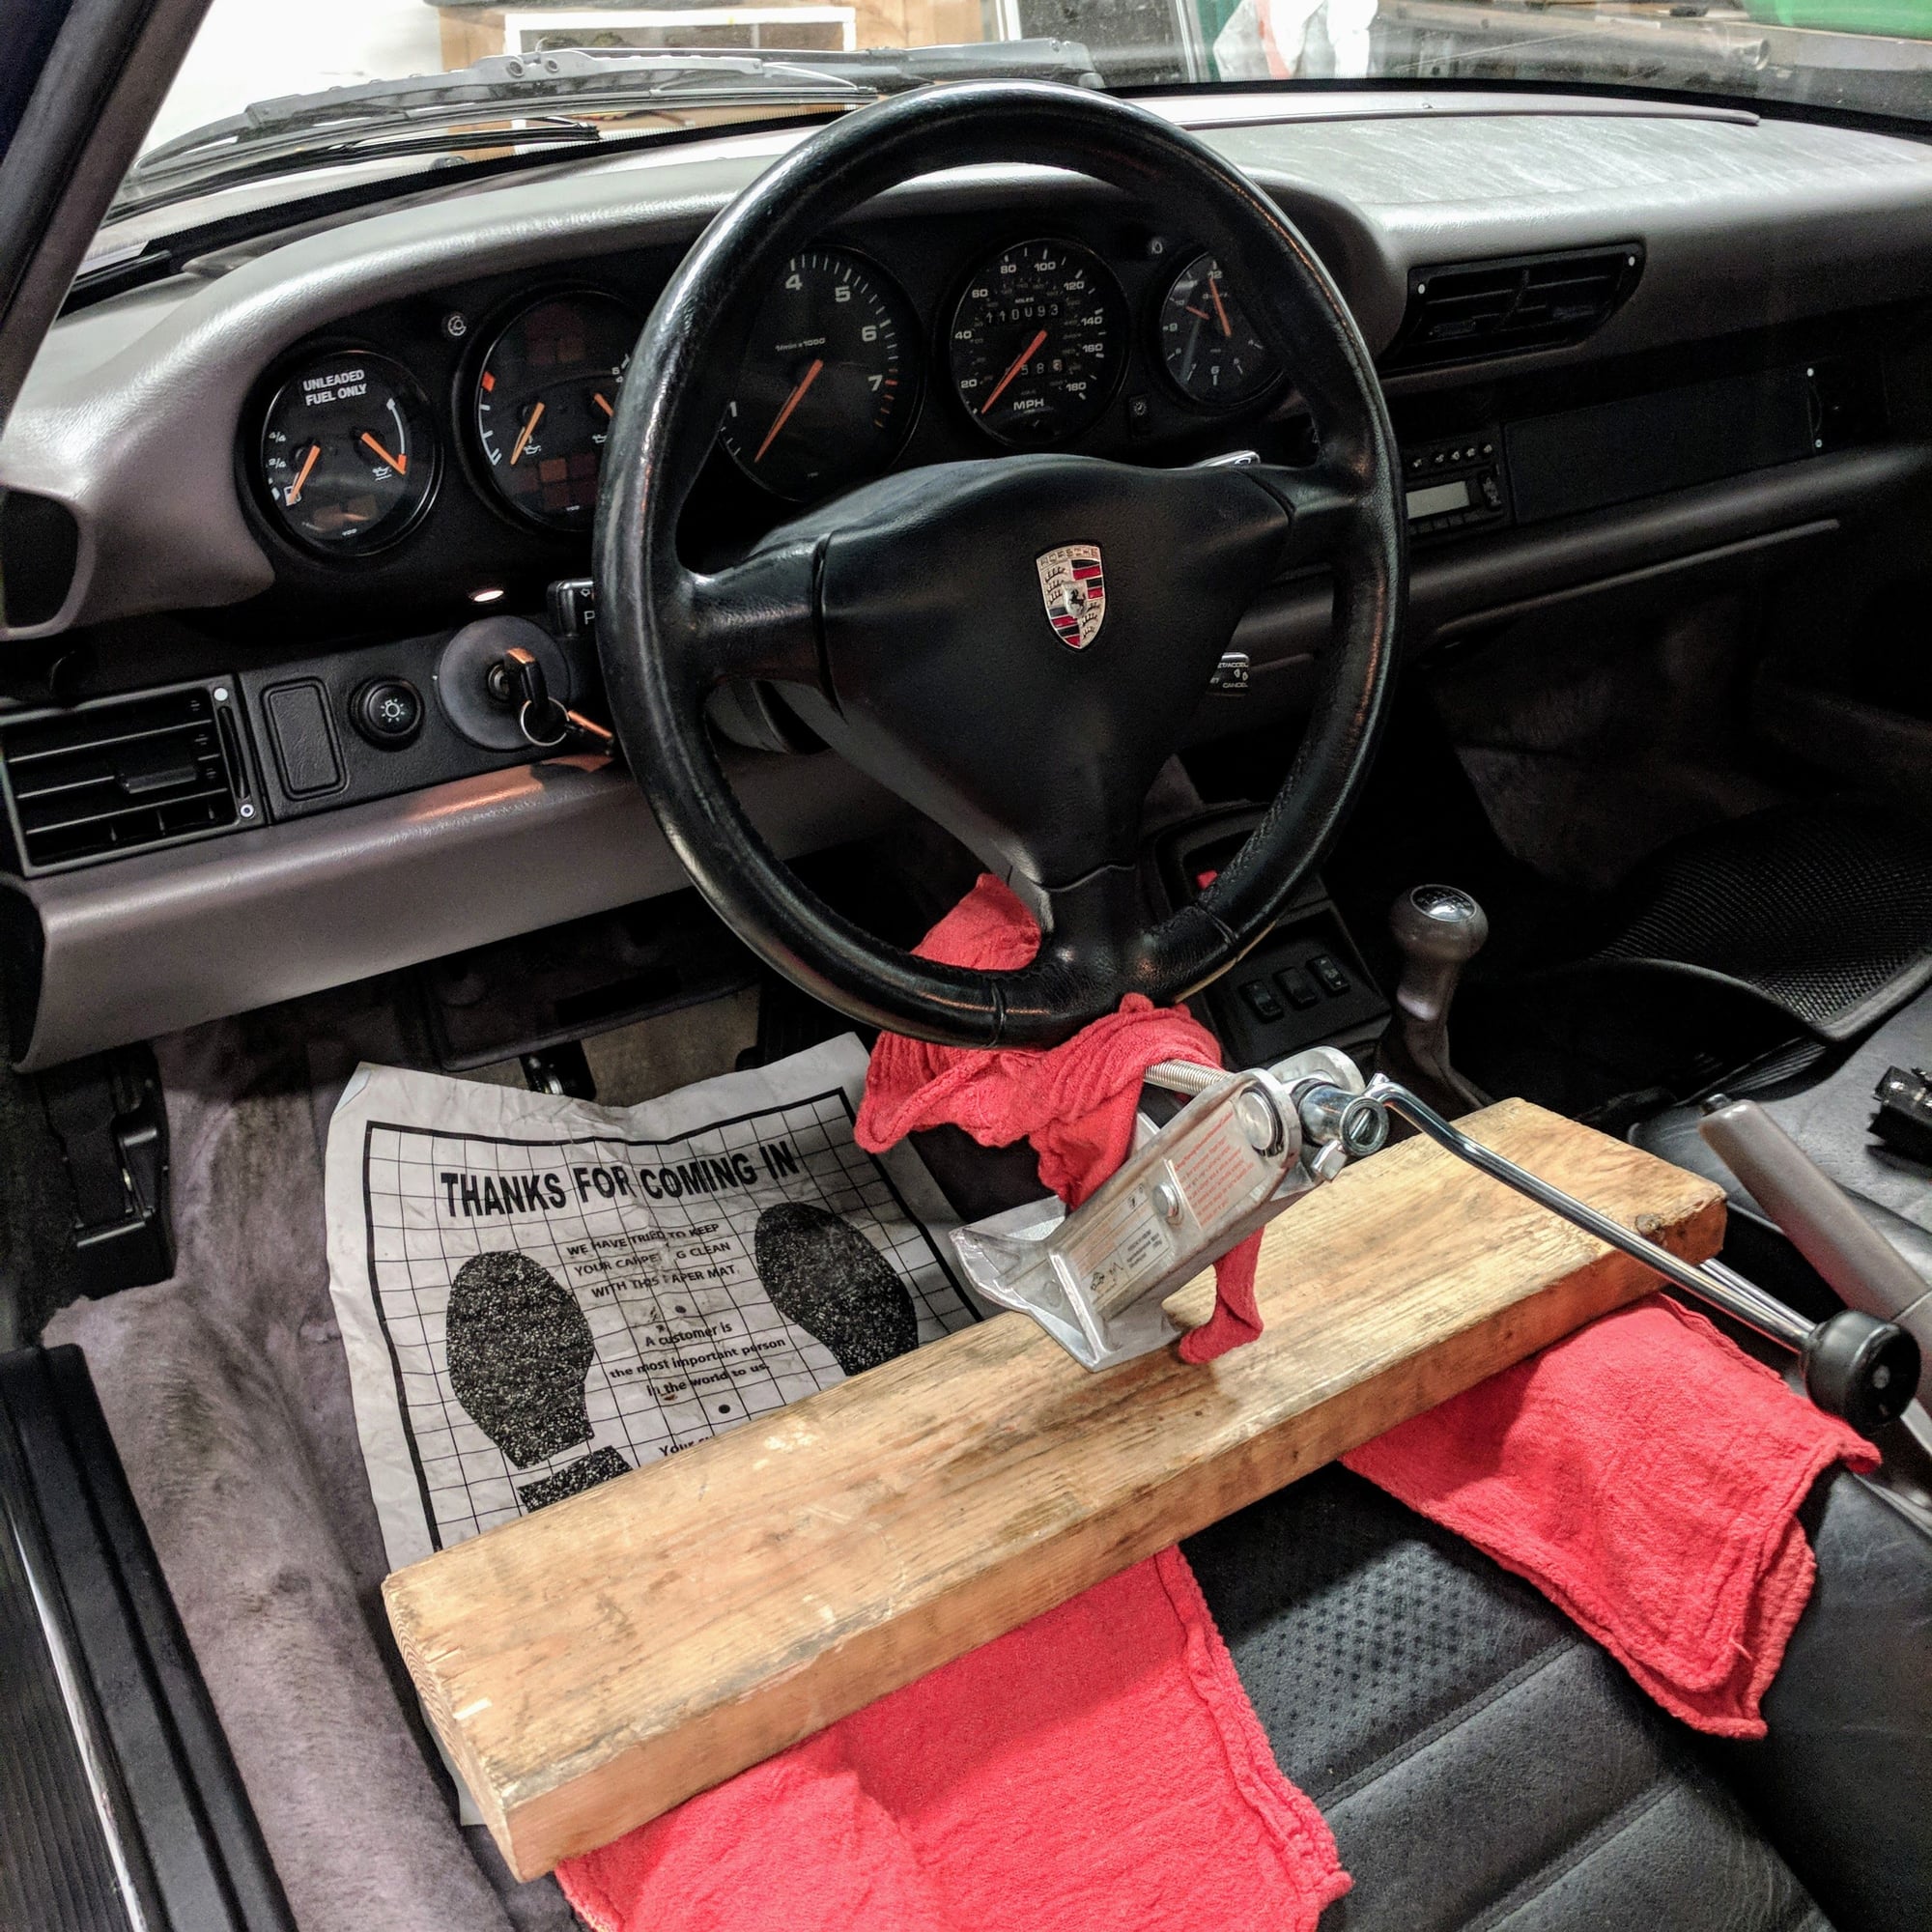
Important you lock the steering wheel for both toe and camber for dead center. For the later as you turn the wheel it will change your camber (which is how you measure caster BTW).
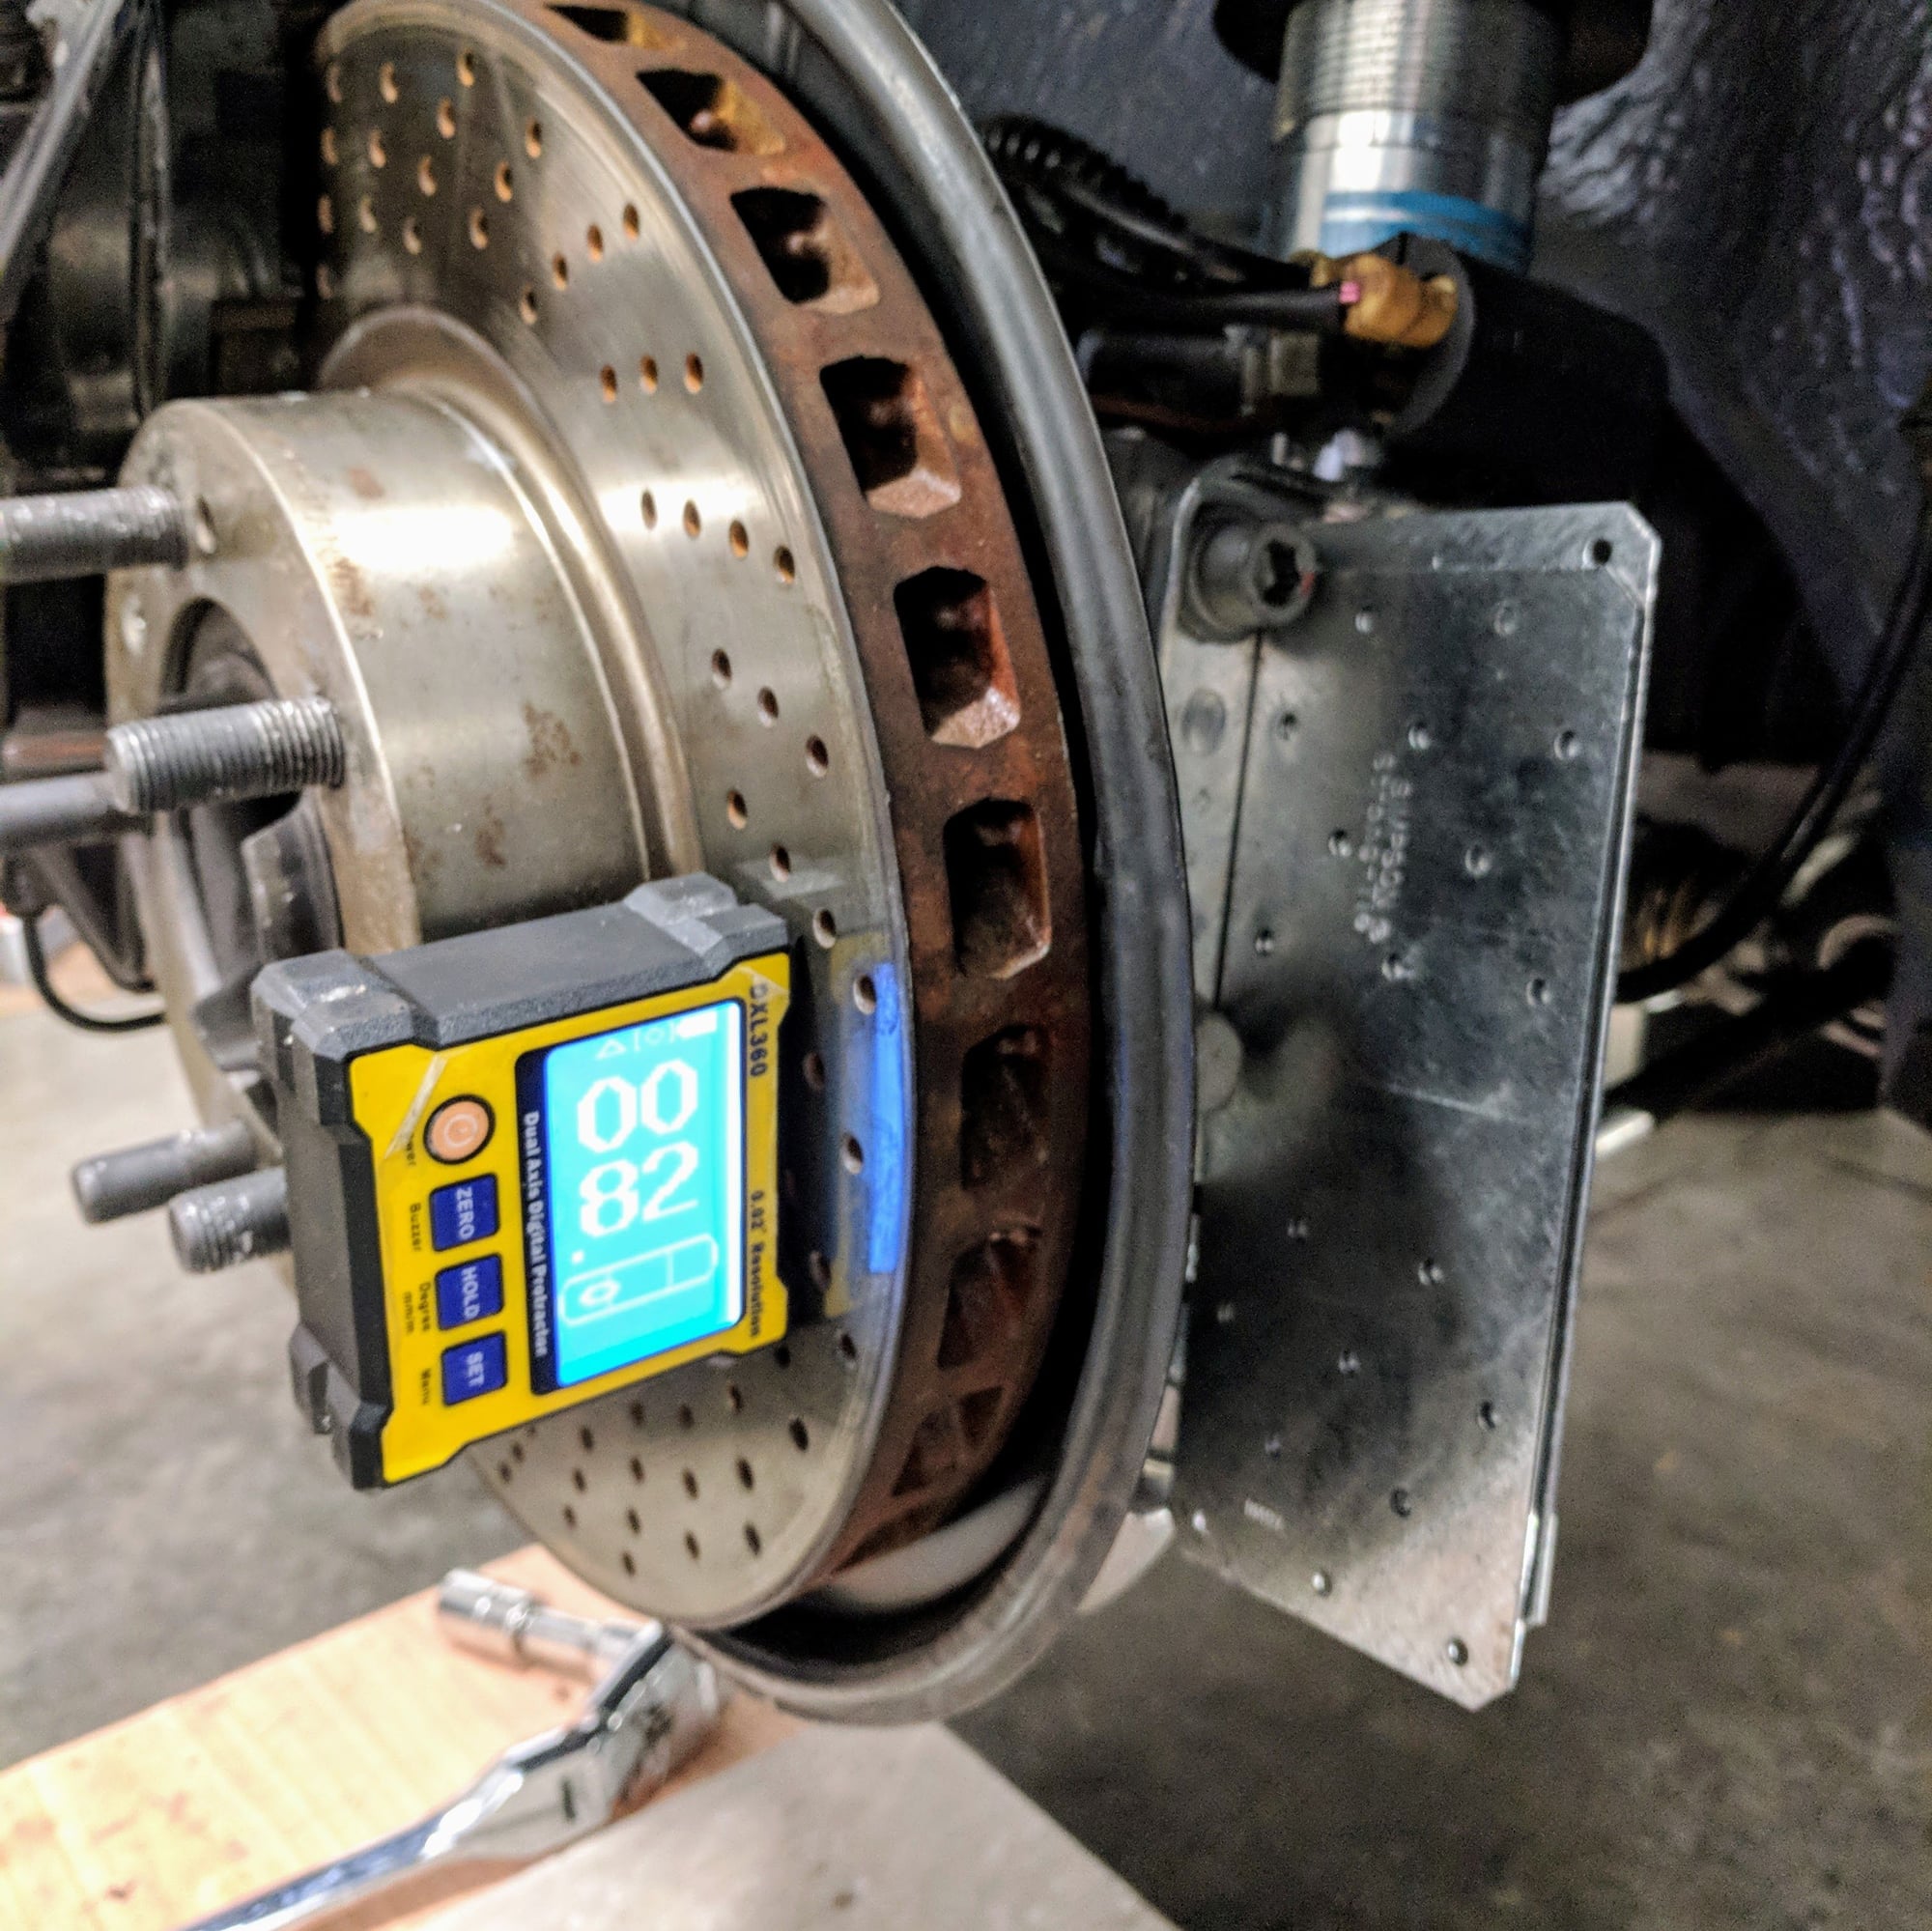
I didn't have the front eccentric adjuster so used some wood straps as shims and my digital inclinometer to dial in camber.
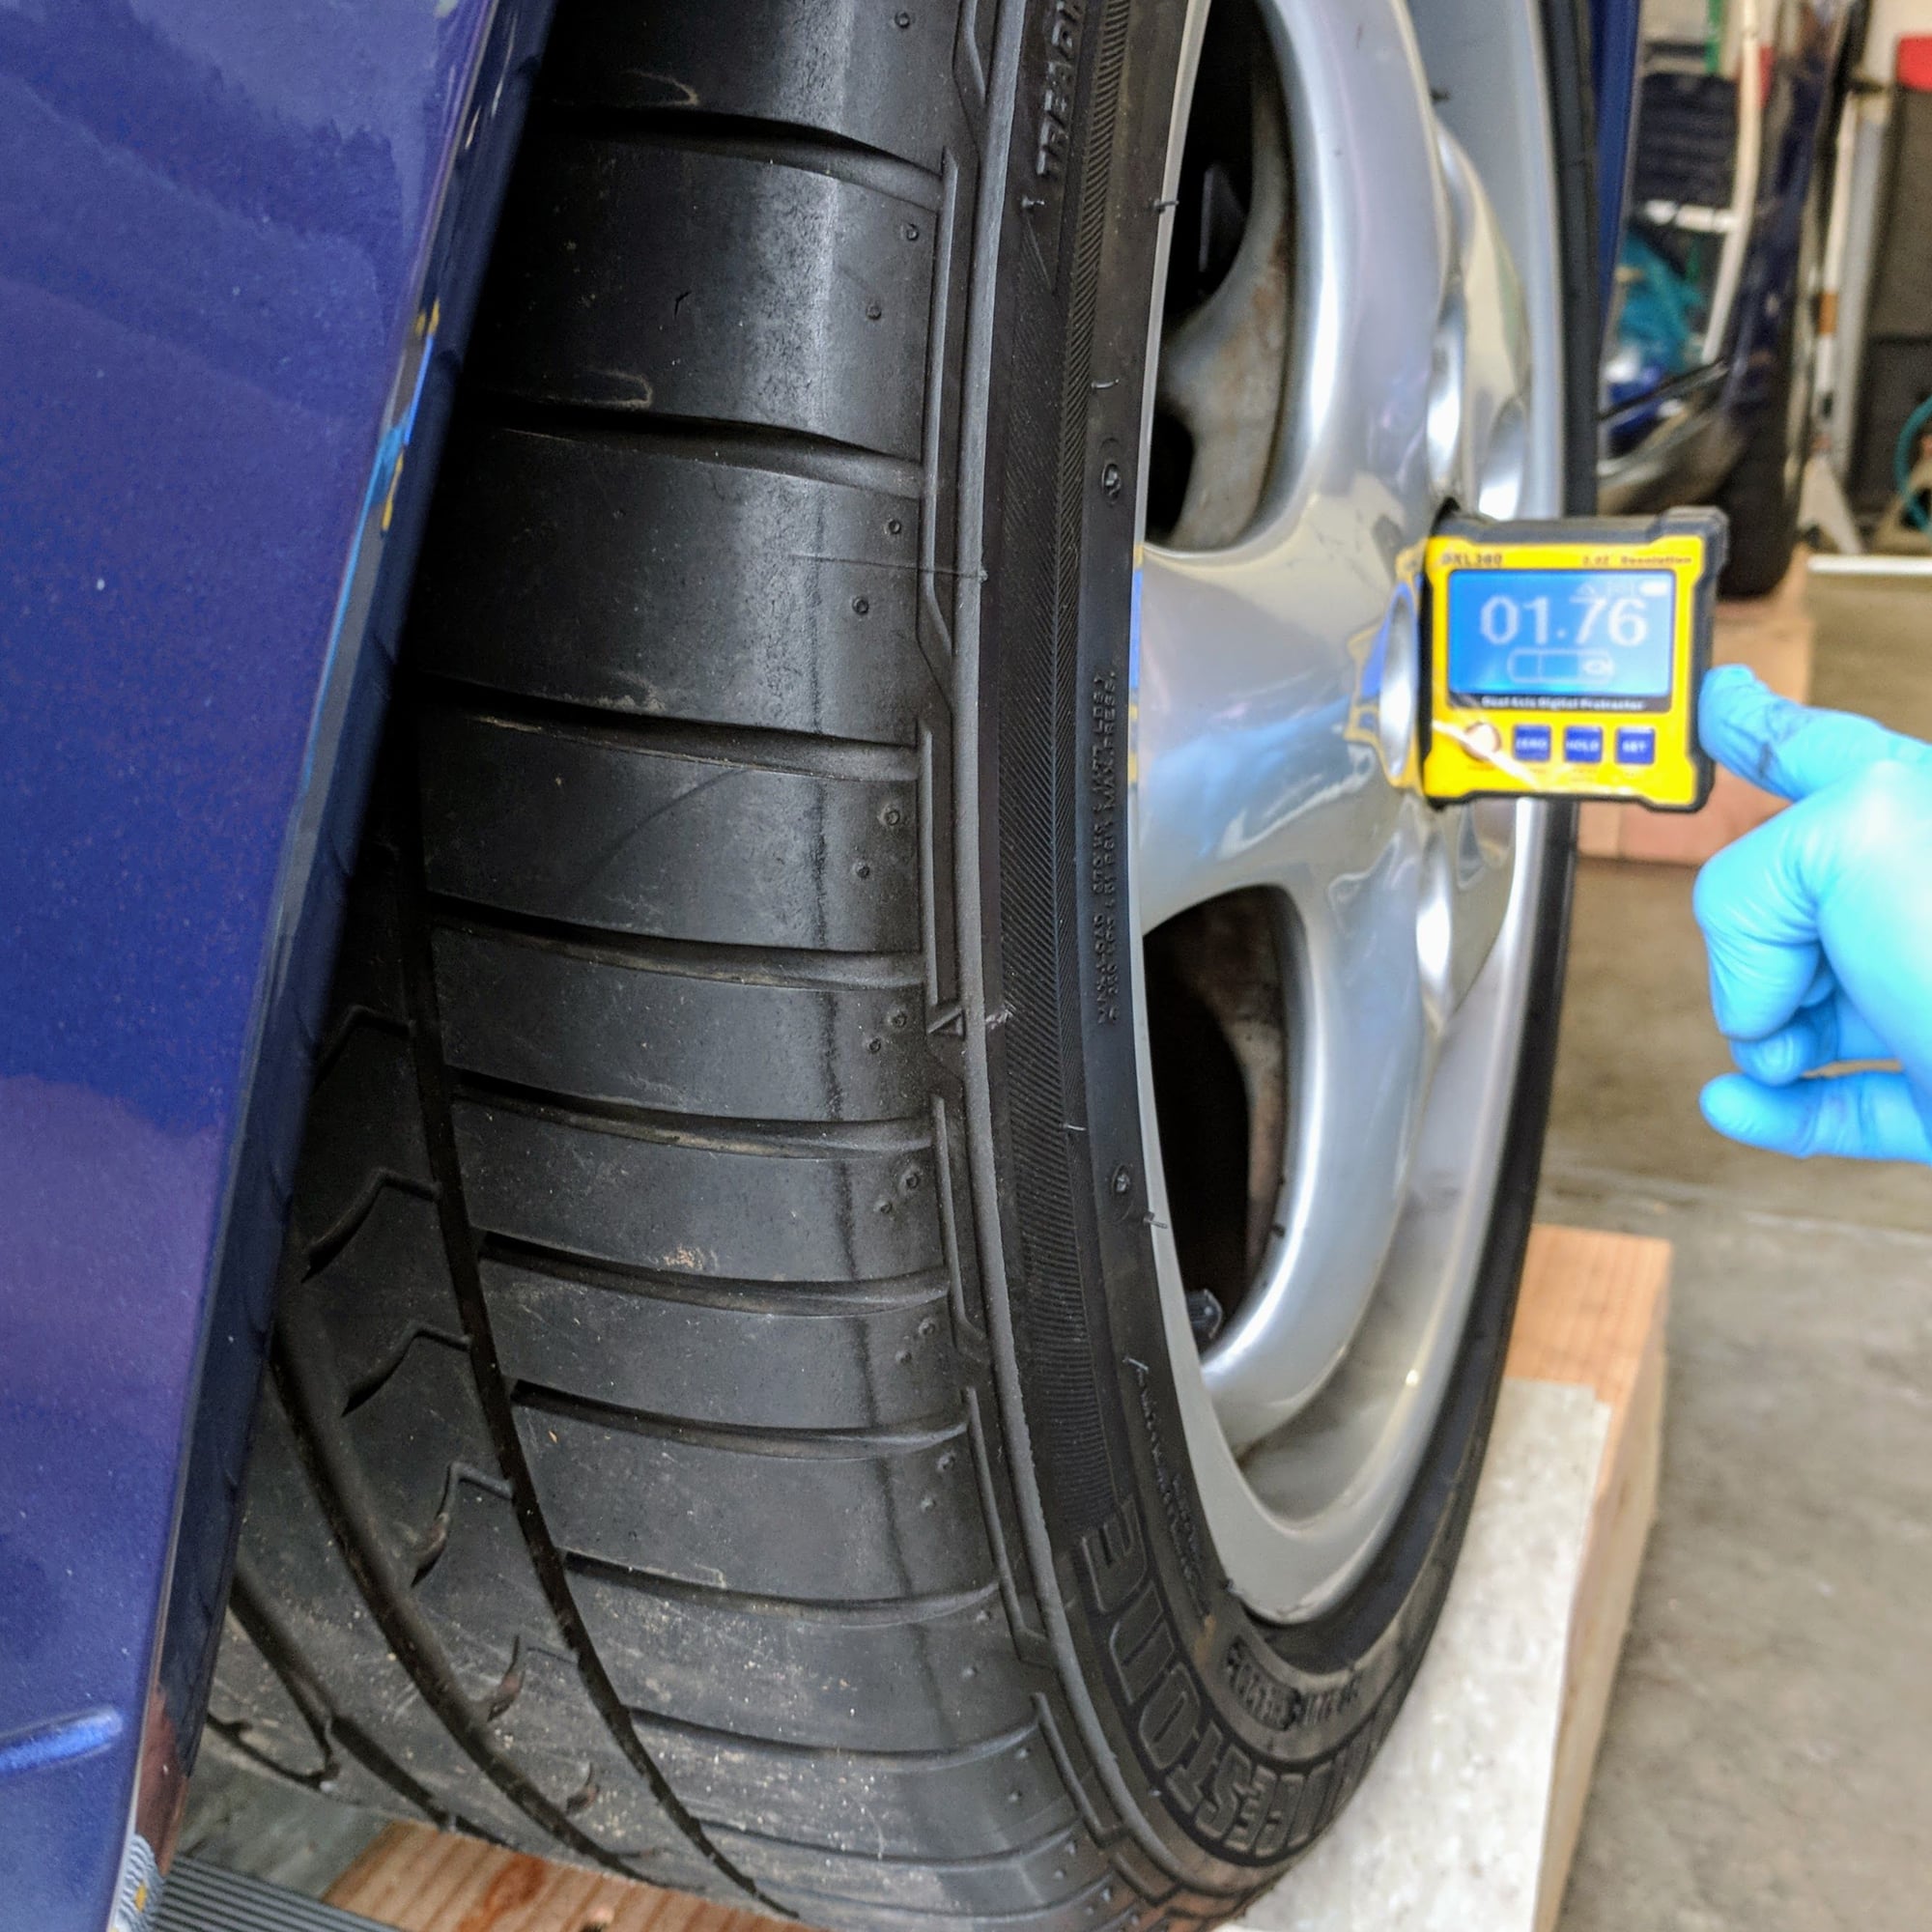
Per RS spec it is 1.7 for the rears
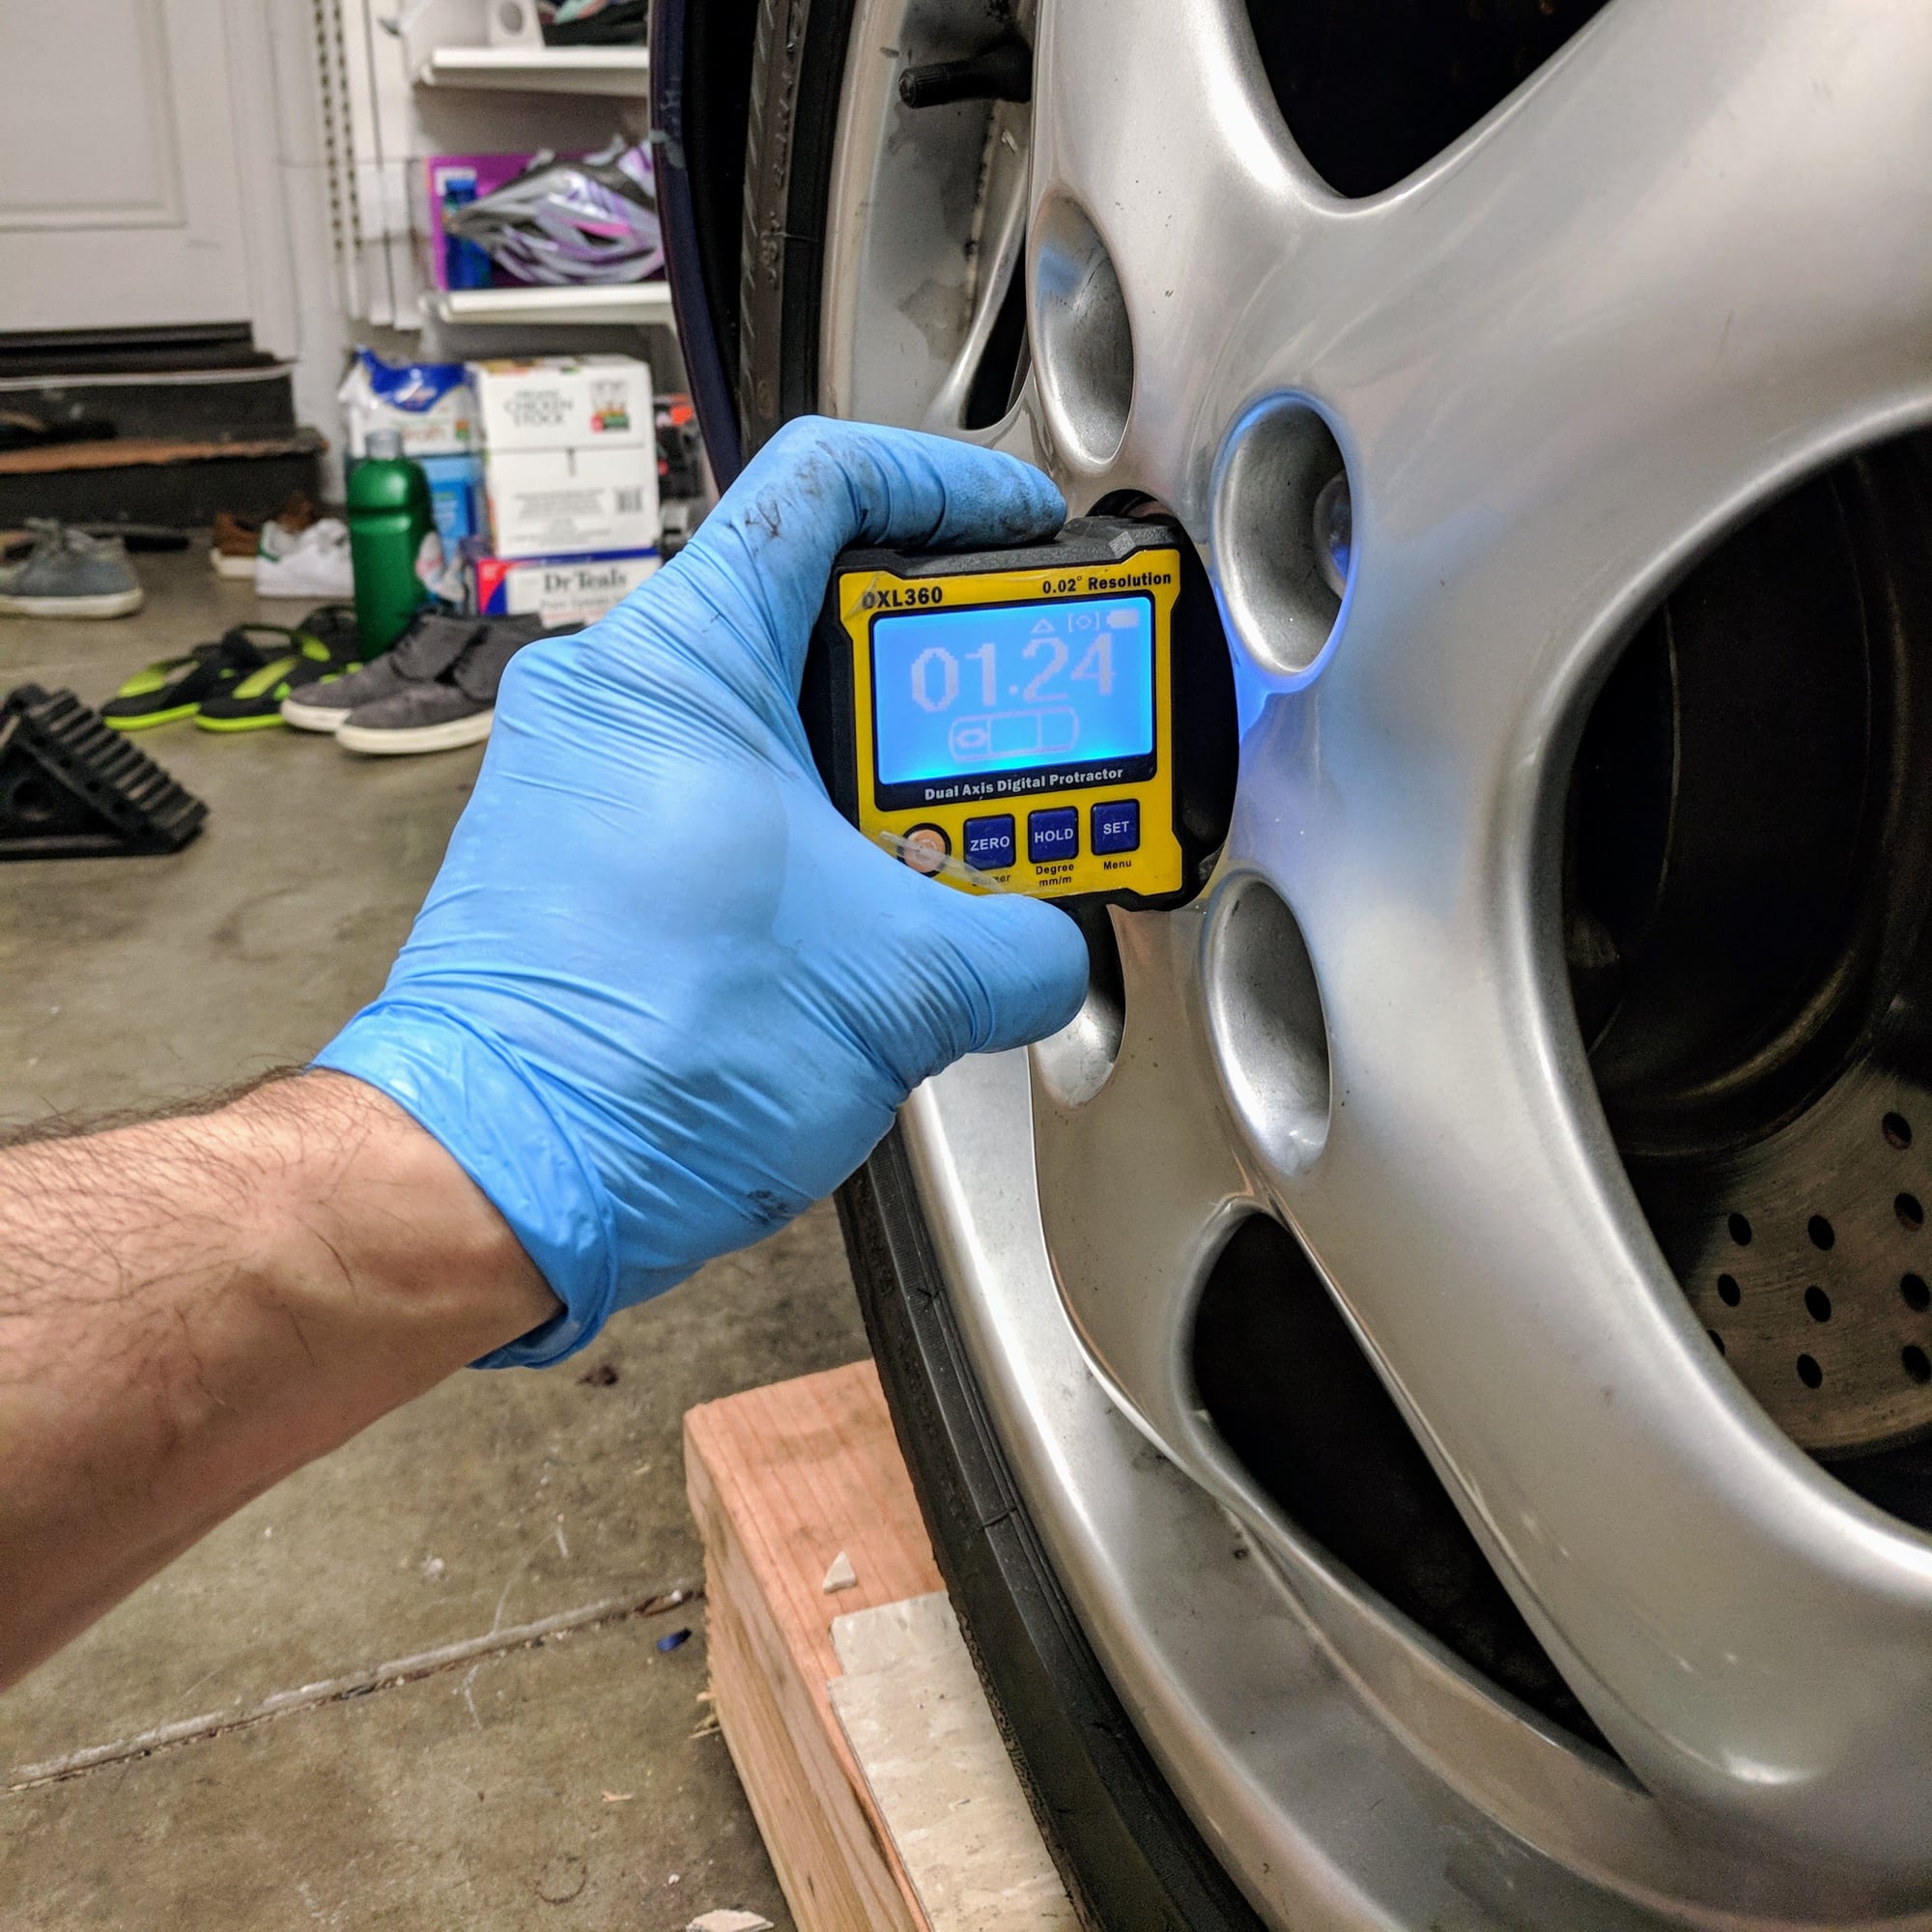
Per RS spec it is 1.2 for the fronts
I got the toe in to about 1mm which is about 10' or 1/16" for both the fronts and rears. I decided to keep the caster dead center and let Roger Krause dial that in as I didn't want to spend any more time doing this.
After all of these mods the car feels awesome! Suspension, steering, and shifting all felt precise and tight, but soft enough to not rattle my fillings out of my teeth out.
Generally, total project time was much longer than I originally planned. I spent most of my time cleaning parts and surrounding components back to what they were in their original new state, before reinstalling reconditioned/new parts, which I under estimated its real effort as it is very tedious and time consuming if you want to rid of the grit, dirt, and cosmoline. The actual removal and installation of parts and components was a fraction of the total project time.
Learned an incredible amount doing these project as I spent so much time under the car and now know everything that is under every panel now.
Last edited by samurai_k; 05-18-2018 at 04:25 AM.
Reason: More pics...
What a great set of projects - your car is now very close to mine in spec - you are going to love it! I find the handling absolutely captivating, such an improvement from what it was before and far better than even what I remember these cars feeling like brand new.
Looking forward to hearing more driving impressions once you get the corner balance and full alignment done.
What tires are you running?
How did you set your PSS10? How many clicks front and rear?


 10-09-2017, 10:45 AM