When you click on links to various merchants on this site and make a purchase, this can result in this site earning a commission. Affiliate programs and affiliations include, but are not limited to, the eBay Partner Network.
I started my rear suspension DIY overhaul with re-bushed control arms from Elephant, as well as solid subframe bushings from Elephant.
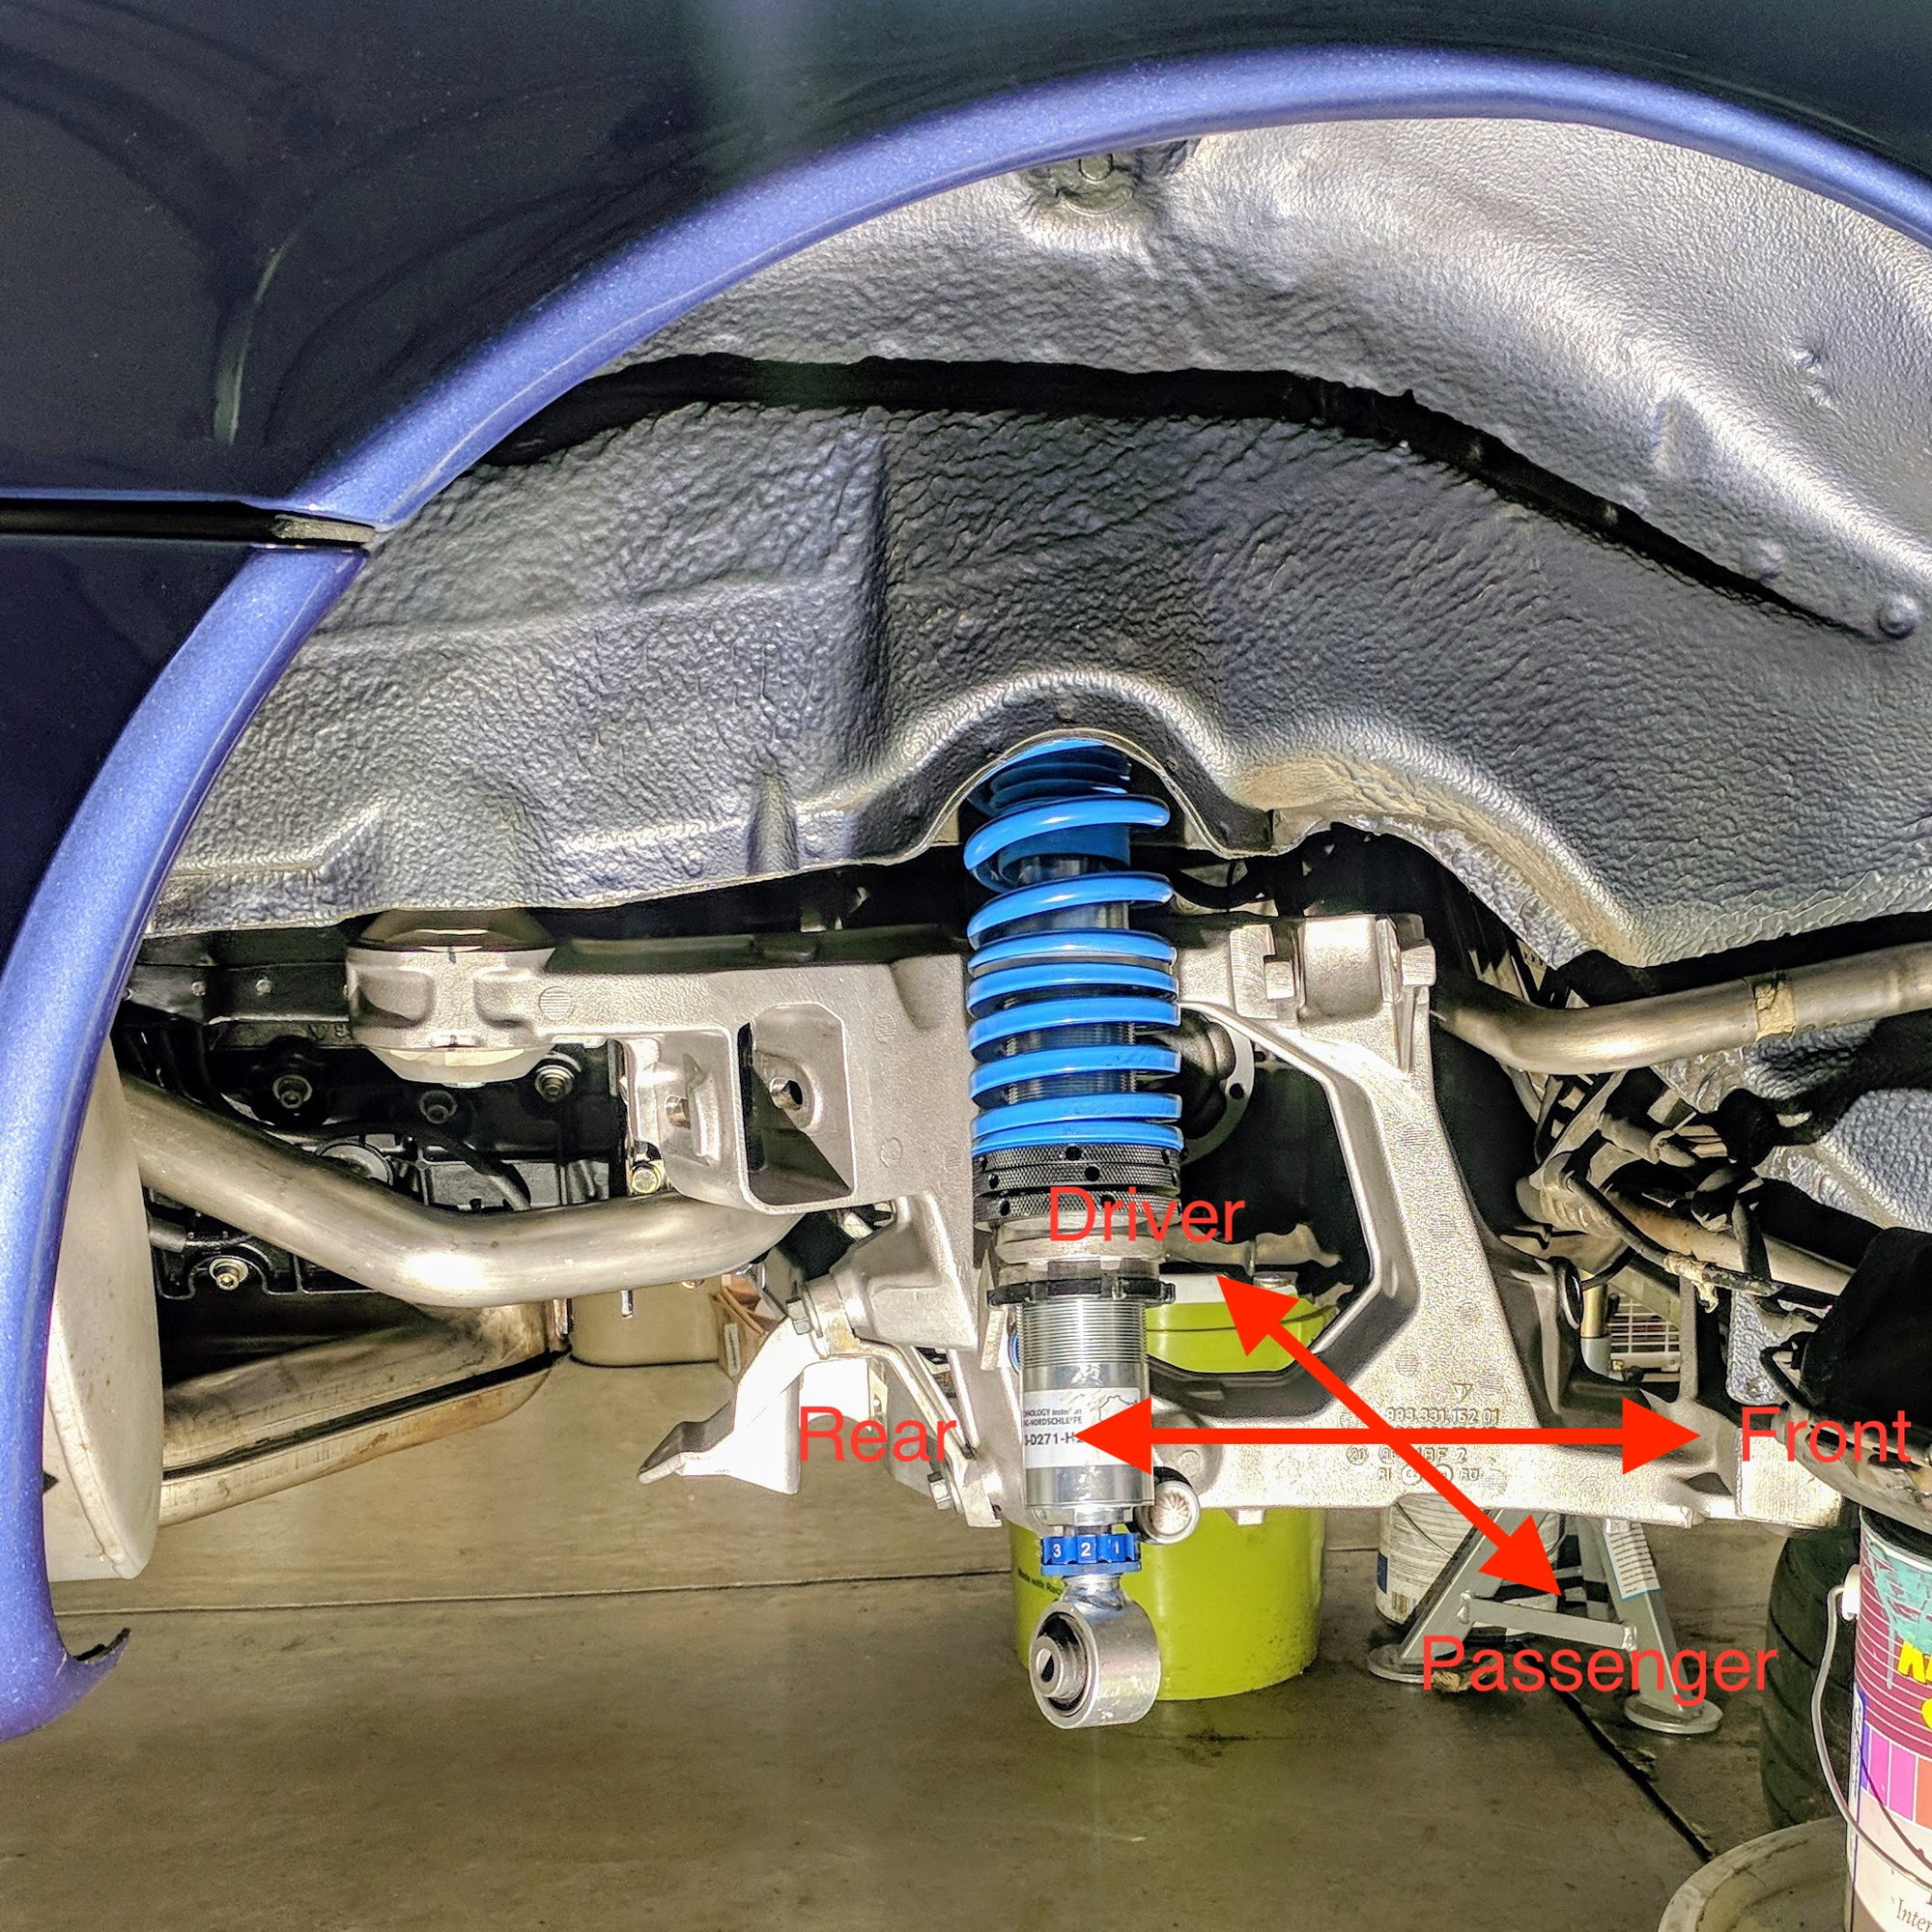
I dropped the entire rear subframe assembly (front cross member, sides, and lower rear cross member) so I can easily remove the old rubber bushings from the sides. I have the subframe assembly reassembled and temporarily hand tightened back on the car.
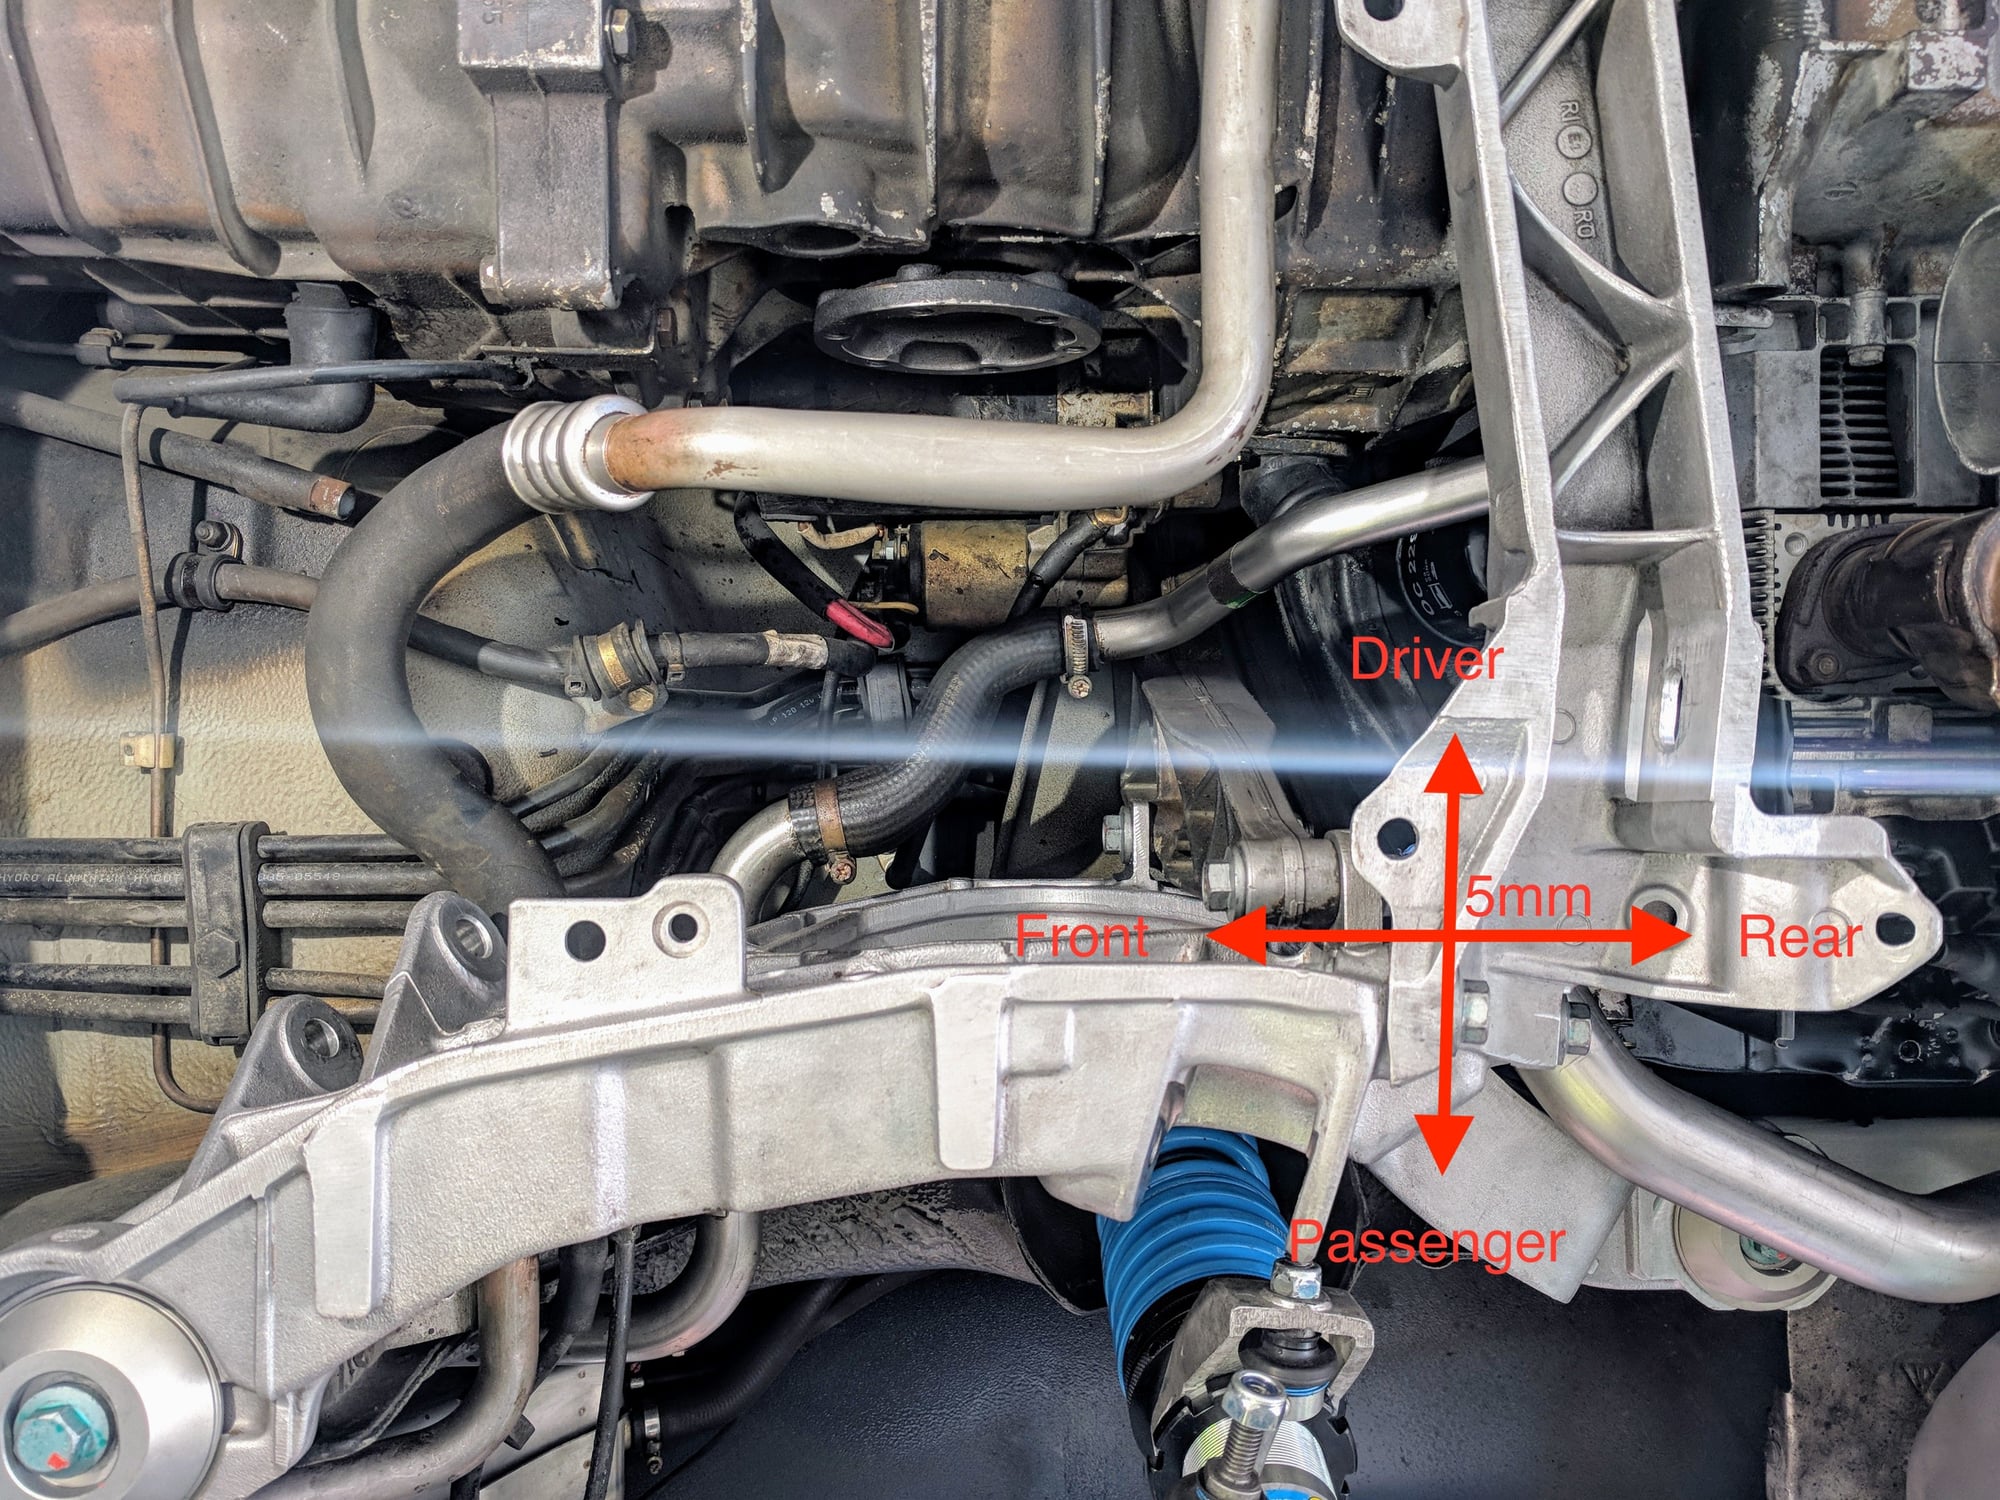
I notice that there is about 5mm of "play" where I can move the entire rear subframe front to back and side to side. Chuck @ Elephant told me this is typical to get the rear suspension perfectly balanced/aligned to correct any differences in wheel base between the passenger and driver side.
Any advice before I torque things down and install the rest of the suspension bits before sending her to a proper alignment?
Thanks and I hope all of you have a happy new year!
I would just try and center them all, and torque to spec. In the event, your alignment guy can't reach spec, they MAY need to make adjustments on the subframe. Shouldn't really need to, but if it's close to limit, that "5mm" MAY be enough to get you there.
I would just try and center them all, and torque to spec. In the event, your alignment guy can't reach spec, they MAY need to make adjustments on the subframe. Shouldn't really need to, but if it's close to limit, that "5mm" MAY be enough to get you there.
Once you get all the crossmembers back in I think you�ll find that the play is gone. Meaning you will suck it all up just getting things to bolt back together again. I was thankful for the little bit of adjustability in the subframes, otherwise I wouldn�t have been able to get all the bolt holes to align.
Good job doing a test fit before snugging any bolts down.
@tosi when you say center the subframe assembly side to side what did you use as a reference point to measure from dead center of the car? Is it the transmission case seam?
As Tialoc said I found all the tolerances taken up . Certainlty there was no problem when the geo was done. Do be careful with those subframe to chasis bolts I only just got away with cross threading one.
As Tialoc said I found all the tolerances taken up . Certainlty there was no problem when the geo was done. Do be careful with those subframe to chasis bolts I only just got away with cross threading one.
I still have PTSD from my subframe bolt experience.
As for geometry, mine came out perfectly too. Car handles amazingly well now.
<div style="text-align:left;">Once you get all the crossmembers back in I think you�ll find that the play is gone. Meaning you will suck it all up just getting things to bolt back together again. I was thankful for the little bit of adjustability in the subframes, otherwise I wouldn�t have been able to get all the bolt holes to align.
Good job doing a test fit before snugging any bolts down.
Yea. The lower rear cross member took some work to get it to align perfectly. Had to align the holes for the lower bolts and then temporarily tighten the upper cross member bolts above it to square up the sides with the cross members, then move on to the lower cross member for final fitment.
I did this because the lower bolt holes for the lower cross member are the only ones not "slotted". I used some old front control arm bolts that worked perfectly as they have a long enough sleeve to put the bolt through the cross member into the side with a tight and square fit.
Once I tightened all of the subframe assembly bolts (front cross, upper rear cross, lower rear cross) the 5mm play for the bolts for the sides into the unibody reduced to a negligible amount.
I still have PTSD from my subframe bolt experience.
As for geometry, mine came out perfectly too. Car handles amazingly well now.
Originally Posted by Endoman
As Tialoc said I found all the tolerances taken up . Certainlty there was no problem when the geo was done. Do be careful with those subframe to chasis bolts I only just got away with cross threading one.
I saw that thread. Sucks that bolt snapped. I blasted the threads with compressed air, used some new bolts, and hand threaded them all the way in to make sure it was threaded correctly.
I saw that thread. Sucks that bolt snapped. I blasted the threads with compressed air, used some new bolts, and hand threaded them all the way in to make sure it was threaded correctly.
Good job. My mistake was to torque that bolt to spec before the full test fit. Didn�t notice the built in play till it was too late.
Mine all tightened up in the end as others have said. That said, I haven't done alignment yet.
Interested to know if you had to get shorter bolts? I specifically asked if the original bolts would work and told they would. Only the find out I needed 10mm shorter. I ended up using M12 x 1.5 x 100 rather than M12 x 1.5 x 110. Luckily one of the front suspension bolts is the correct size and I could test fit. Part number 900 082 137 01 is what I used.
My solid bushings came with spacers. The installation sequence is subframe bolt -> spacer -> solid bushing -> subframe -> solid bushing -> unibody... See the black cylinders. I used the standard subframe bolts.
Might be able to answer my own question. Just looked at the instructions again and they mention the parts list. The bushings and four M12 x 17mm spacers. Seems like I didn't get everything... I guess it will be another week delay while I wait for them.
Don't want to hijack this thread, however, I'm not impressed with Elephant Racing at the moment.
I used the Rennline kit which came with the shorter bolts (a VW part iirc) ER didn't do them at the time but all the suspension bushes are ER and on the 944, excellent kit. You are so lucky to have such great suppliers in the States and the tools!
 12-30-2017, 04:20 AM