Notices
991 2012-2019
Sponsored by:
Sponsored by:

Interior upgrade project

Thread Tools
 
Search this Thread
 
Old 05-25-2020, 11:32 PM
  #121  
DanQ
Pro
Thread Starter
 
DanQ's Avatar
 
Join Date: Sep 2009
Location: Lake Zurich, IL
Posts: 540
Received 157 Likes on 69 Posts
Default

Originally Posted by Bob Z.
You can actually get a fabric paint pen and do it yourself, which is rather easy actually and it wipes right off the leather. Google it and you'll see what I mean. I was going to get one in Miami Blue but if I did the boot I would have to do everything else such as the seats, steering wheel, dash, etc., and no one makes a fabric paint pen in Miami Blue.
I didn't know you could do this, so I did some research. It seems doable if you have light colored stitching to start with. Changing black to red seemed to give spotty results. I decided against it, but I do appreciate the suggestion. I learned something new.

Last edited by DanQ; 05-26-2020 at 10:53 AM.
Old 05-26-2020, 12:06 AM
  #122  
DanQ
Pro
Thread Starter
 
DanQ's Avatar
 
Join Date: Sep 2009
Location: Lake Zurich, IL
Posts: 540
Received 157 Likes on 69 Posts
Default Phase 9 - Shift boot deviated stitching DIY

Originally Posted by alex_c
You can EASILY re-stitch your leather boot using the existing holes where it was originally stitched with red thread. I did this myself in less than an hour:
I gave alex_c's suggestion a try. I already had red thread from my failed armrest experiment. I'm not sure I would call it easy, since it took me more than 3 hours to do it. I couldn't find any other "how to" instructions so this is what I did.

First decide what kind of stitching you want to replace the factory black thread. I found two kinds of saddle stitching that seemed reasonable.
Single needle or double needle stitching.
Watch some other videos (jhleather saddle stitch) to learn how to thread the needle by piercing the thread in an "s" shape and using beeswax on thread.

​​​​​​Removing the shifter and boot is easy. Release the boot by pulling up on the front. See the clips in the photos.
...edit..
Here is a link on shift **** removal
Shift **** swap

BEFORE you remove the **** from the boot, practice re-installing the **** on the shifter to learn the procedure of turning the **** vs turning the black collar in the boot. Trust me, you'll be glad you did.
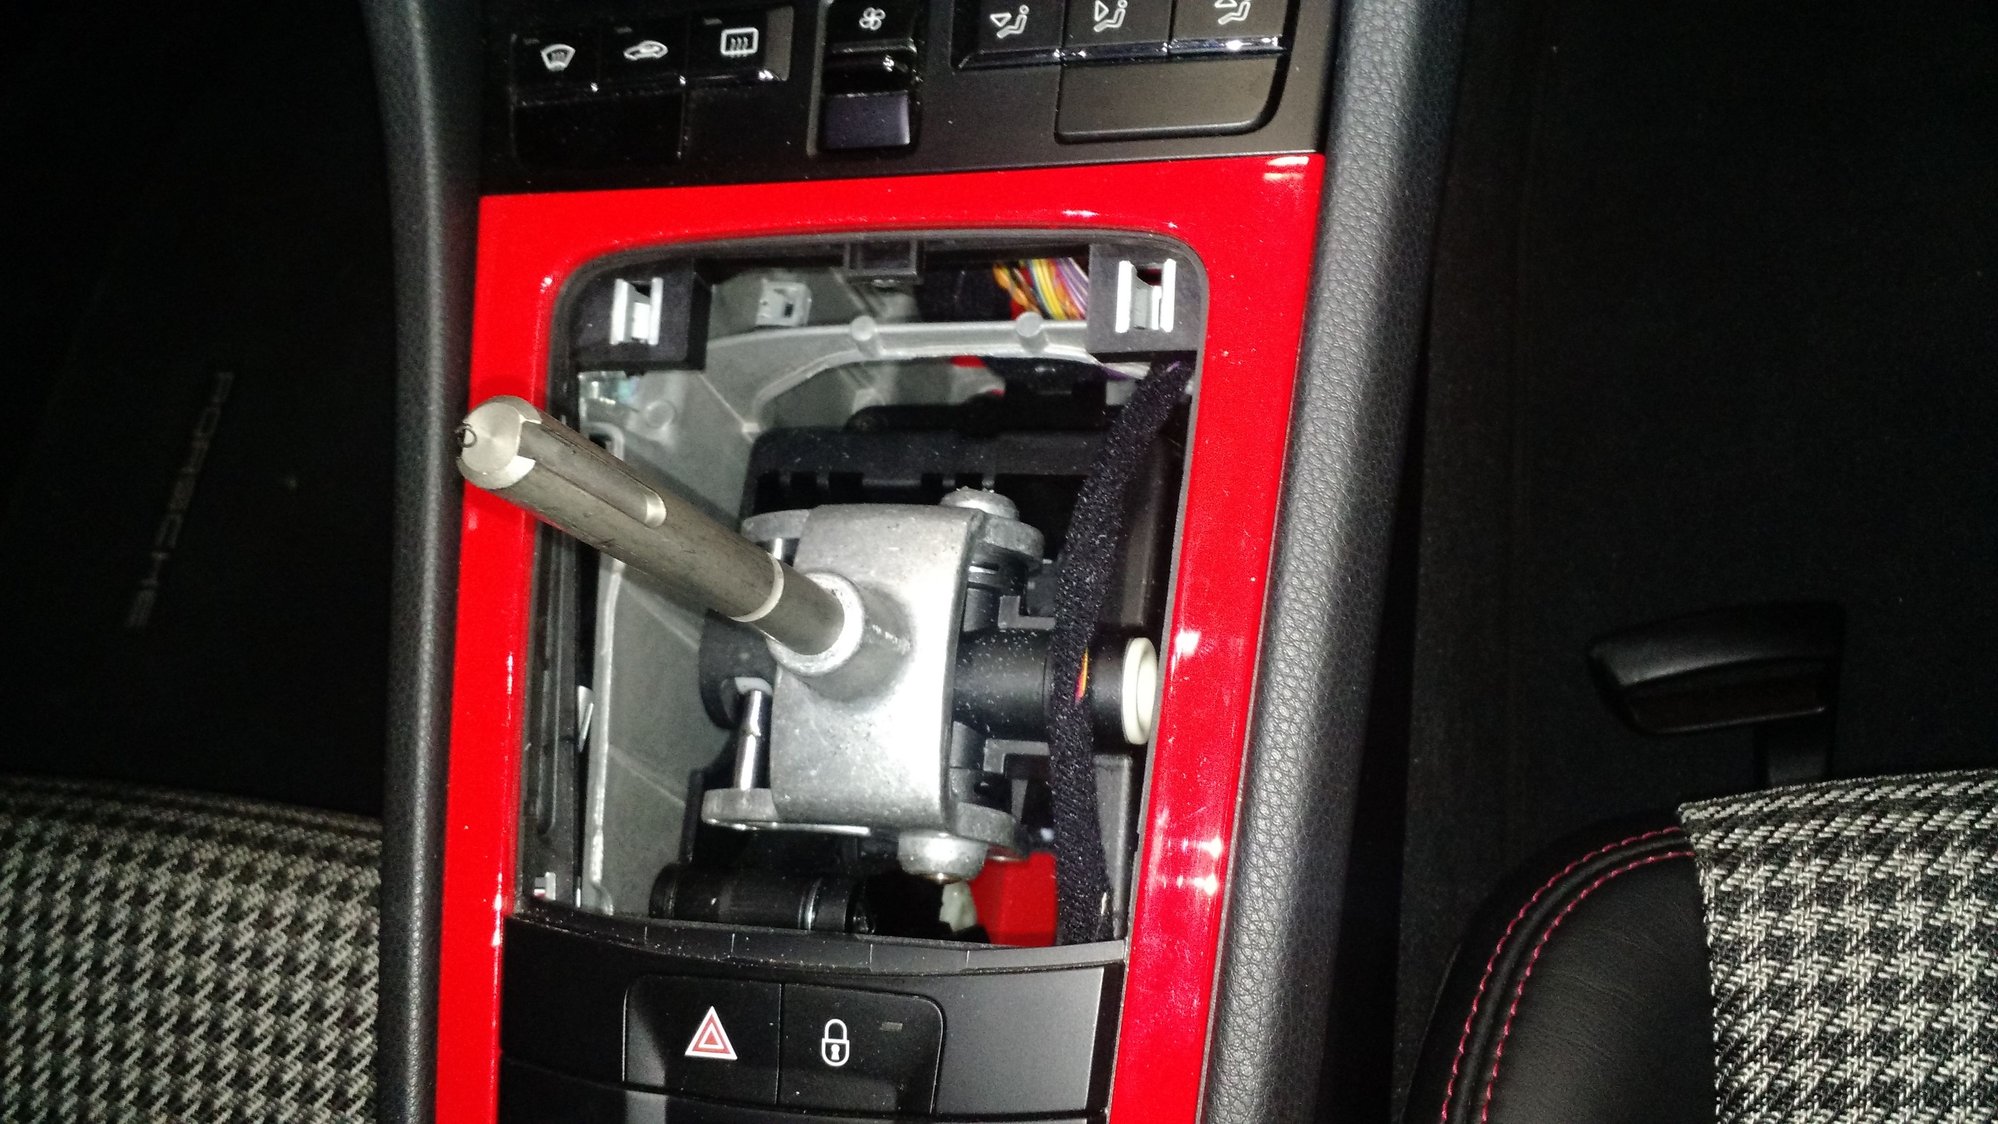
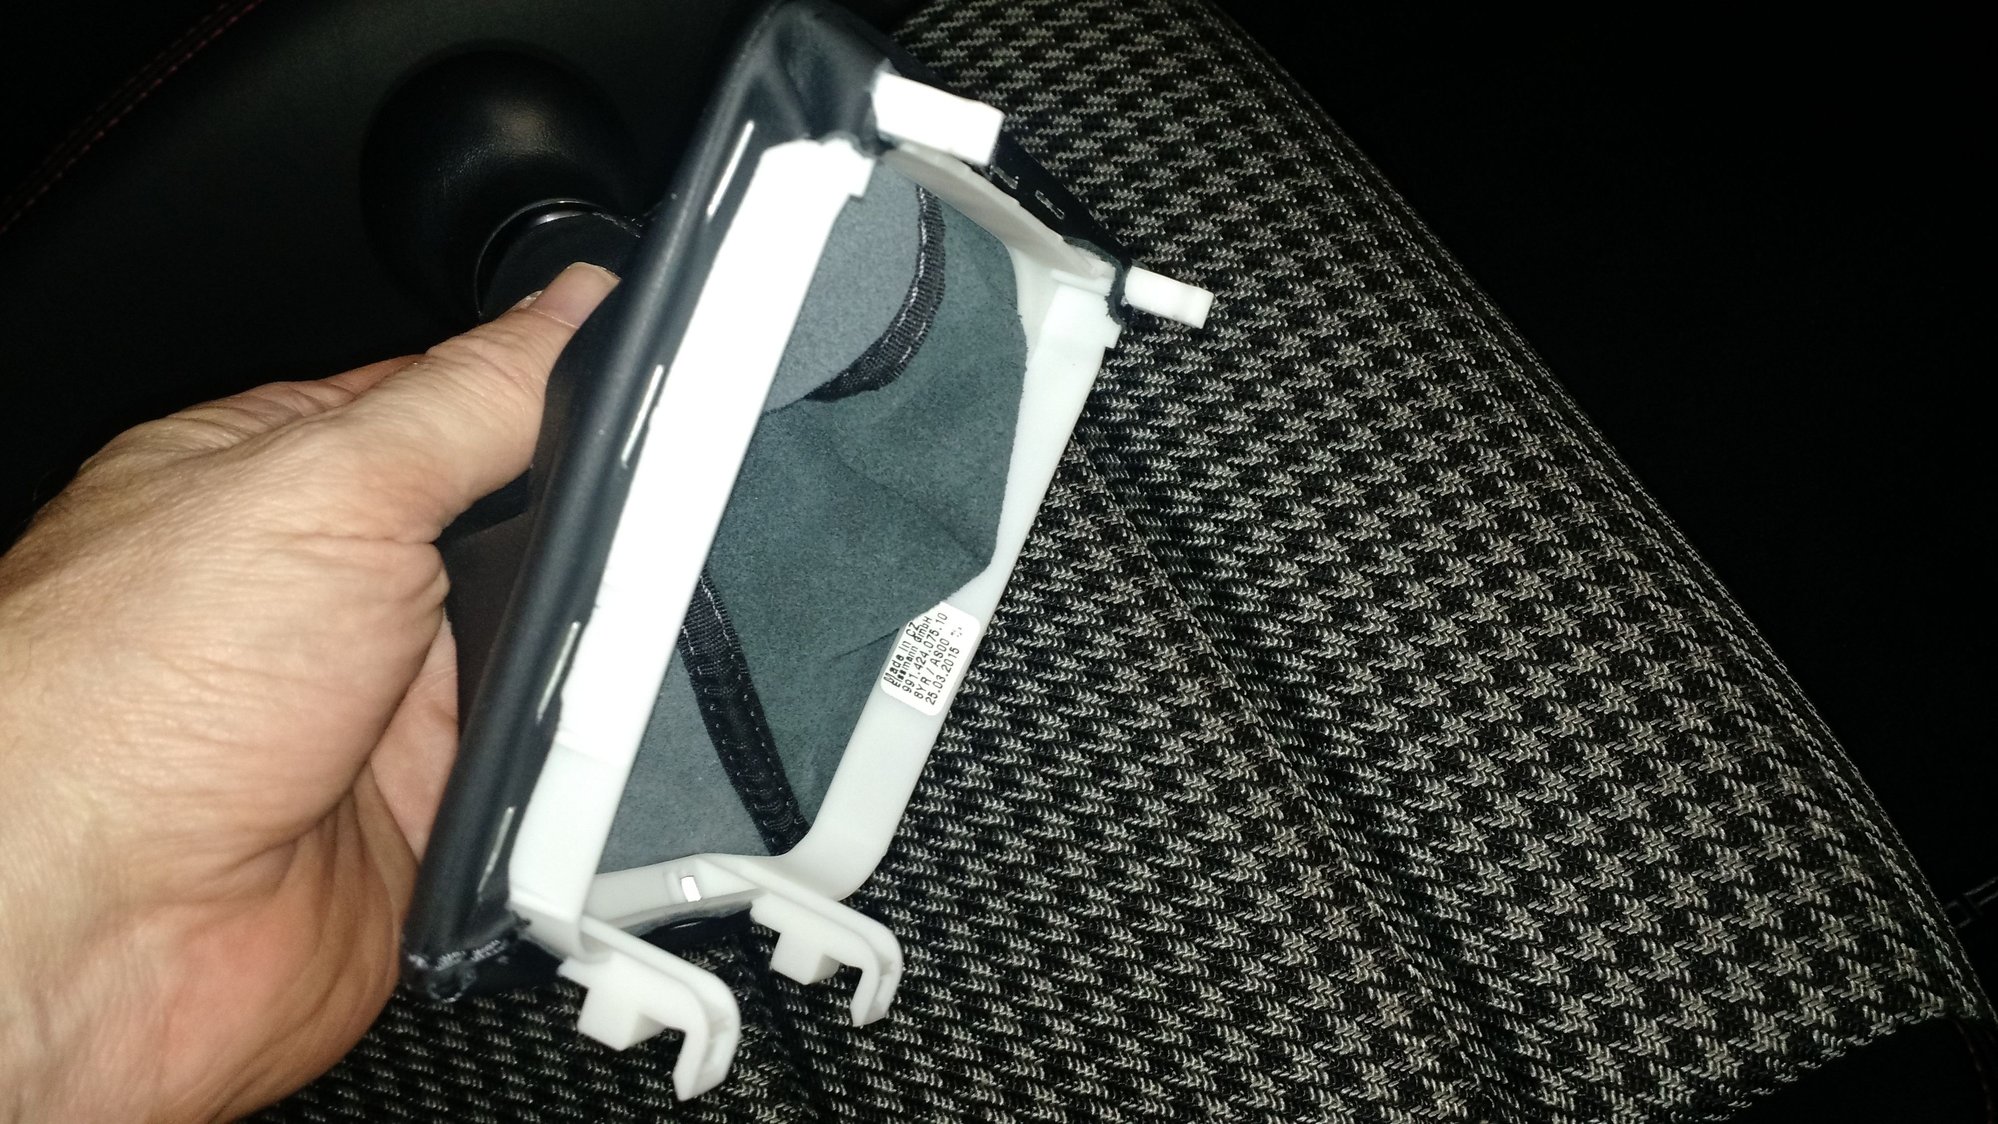

In order to get to all the stitches, I pulled the staples. I also removed the black plastic collar by twisting, releasing the **** from the boot. It popped apart on me and I didn't see how the white plastic collar held the leather.
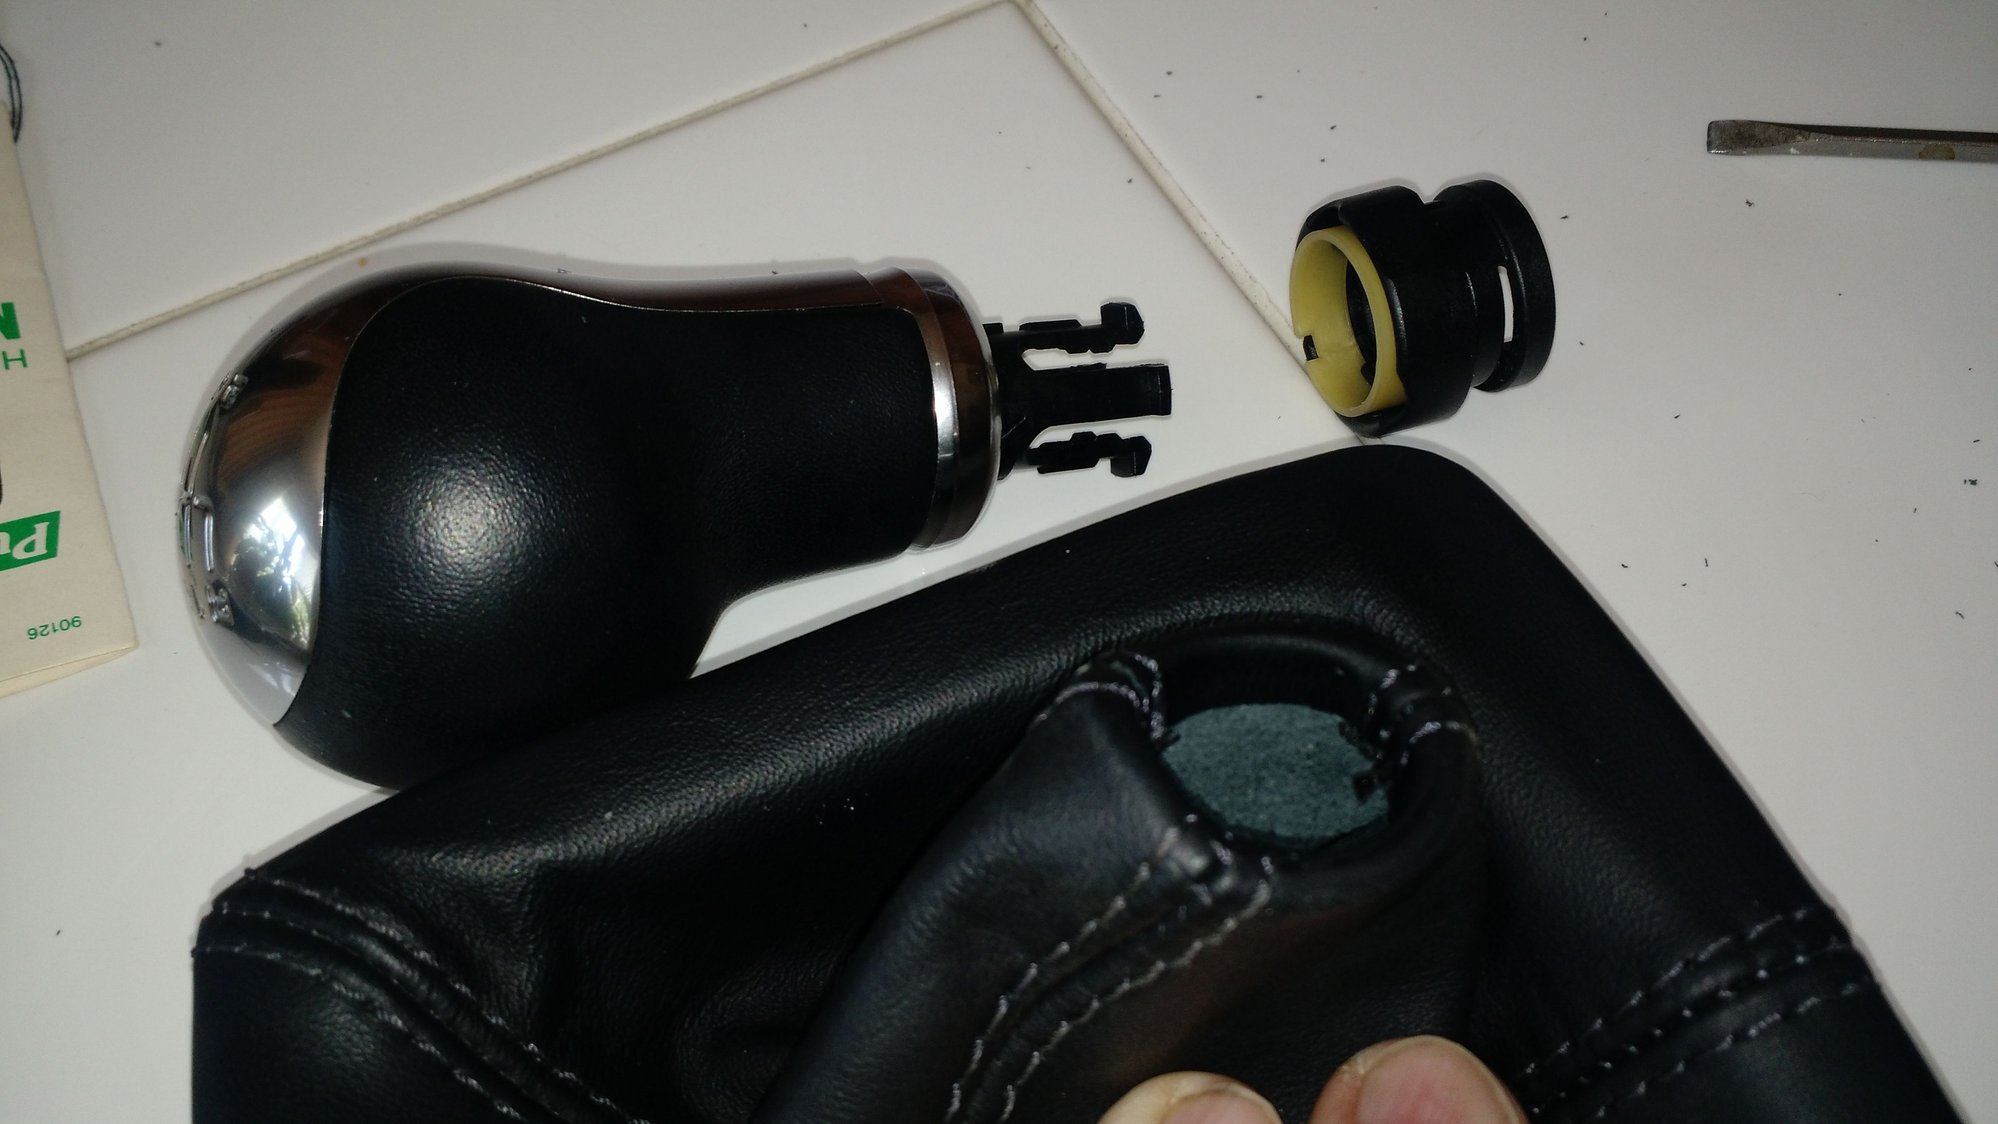
I started with the double needle method on the front single seam. Using a seam ripper, pull a few stitches at a time to make sure the backing stays aligned. Don't allow the stitching to get thick at the top or it will never fit back in the black collar. Try not to stretch the neck of the boot for the same reason.
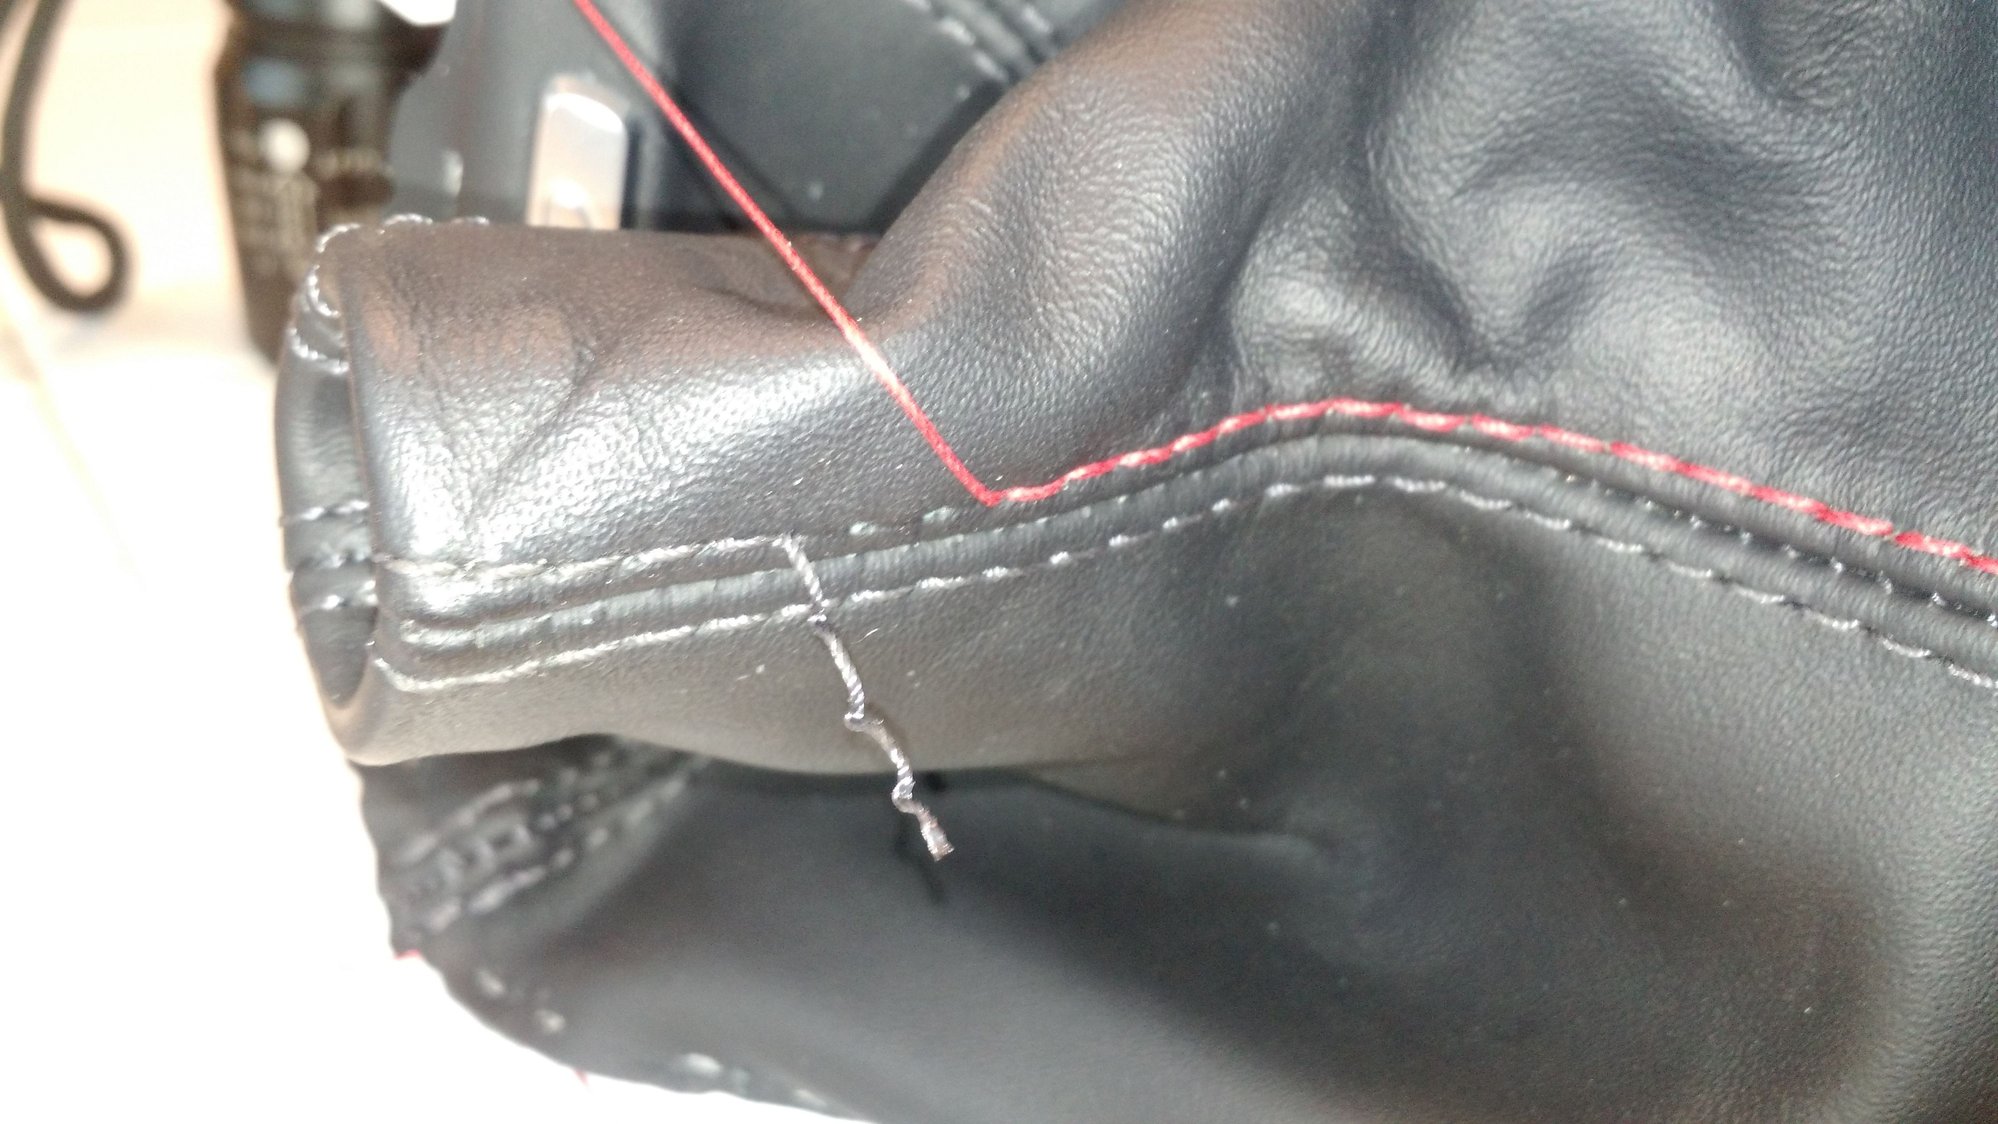
It looks nice but is very tedious.
I used the single needle method on the rear two seams.
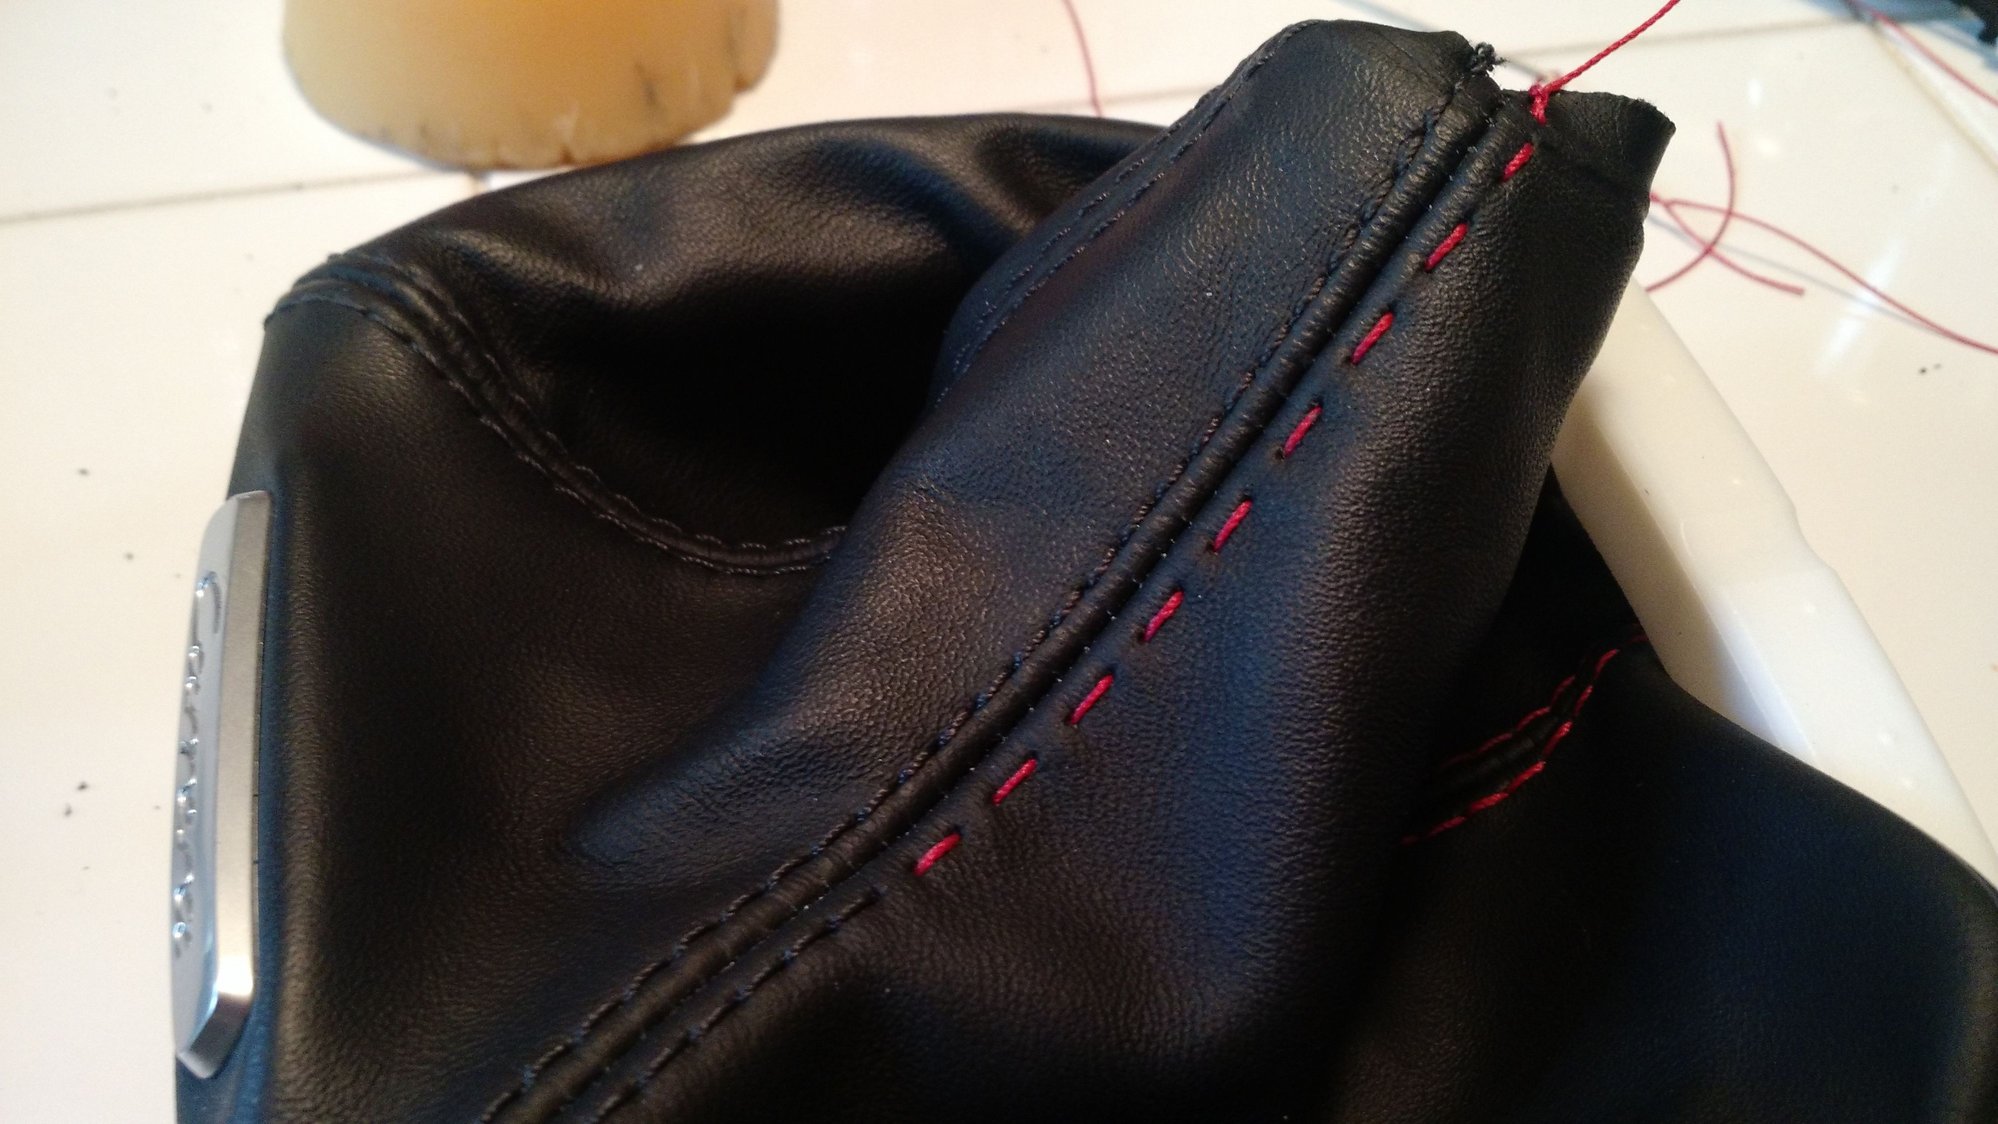
After all the stitching was done I couldn't remember how the black and white collars went back on the boot. You can see a 1/4" of the leather boot is turned down from the top.
I turned the boot inside out, and slid the white collar on the inside (against finished side of leather. Then I carefully pushed the black collar on, trapping the leather between the black and white collars. I needed a tiny screwdriver to tuck in the leather. This is the hardest part of the project.
​​Notice, the black collar has three allowances for the double thickness seams. Shaped like a peace sign. Align the allowances and the seams.

Turn it right side out and it looks like this. I don't know if the white collar notch is in the right place, but I got the **** back on.
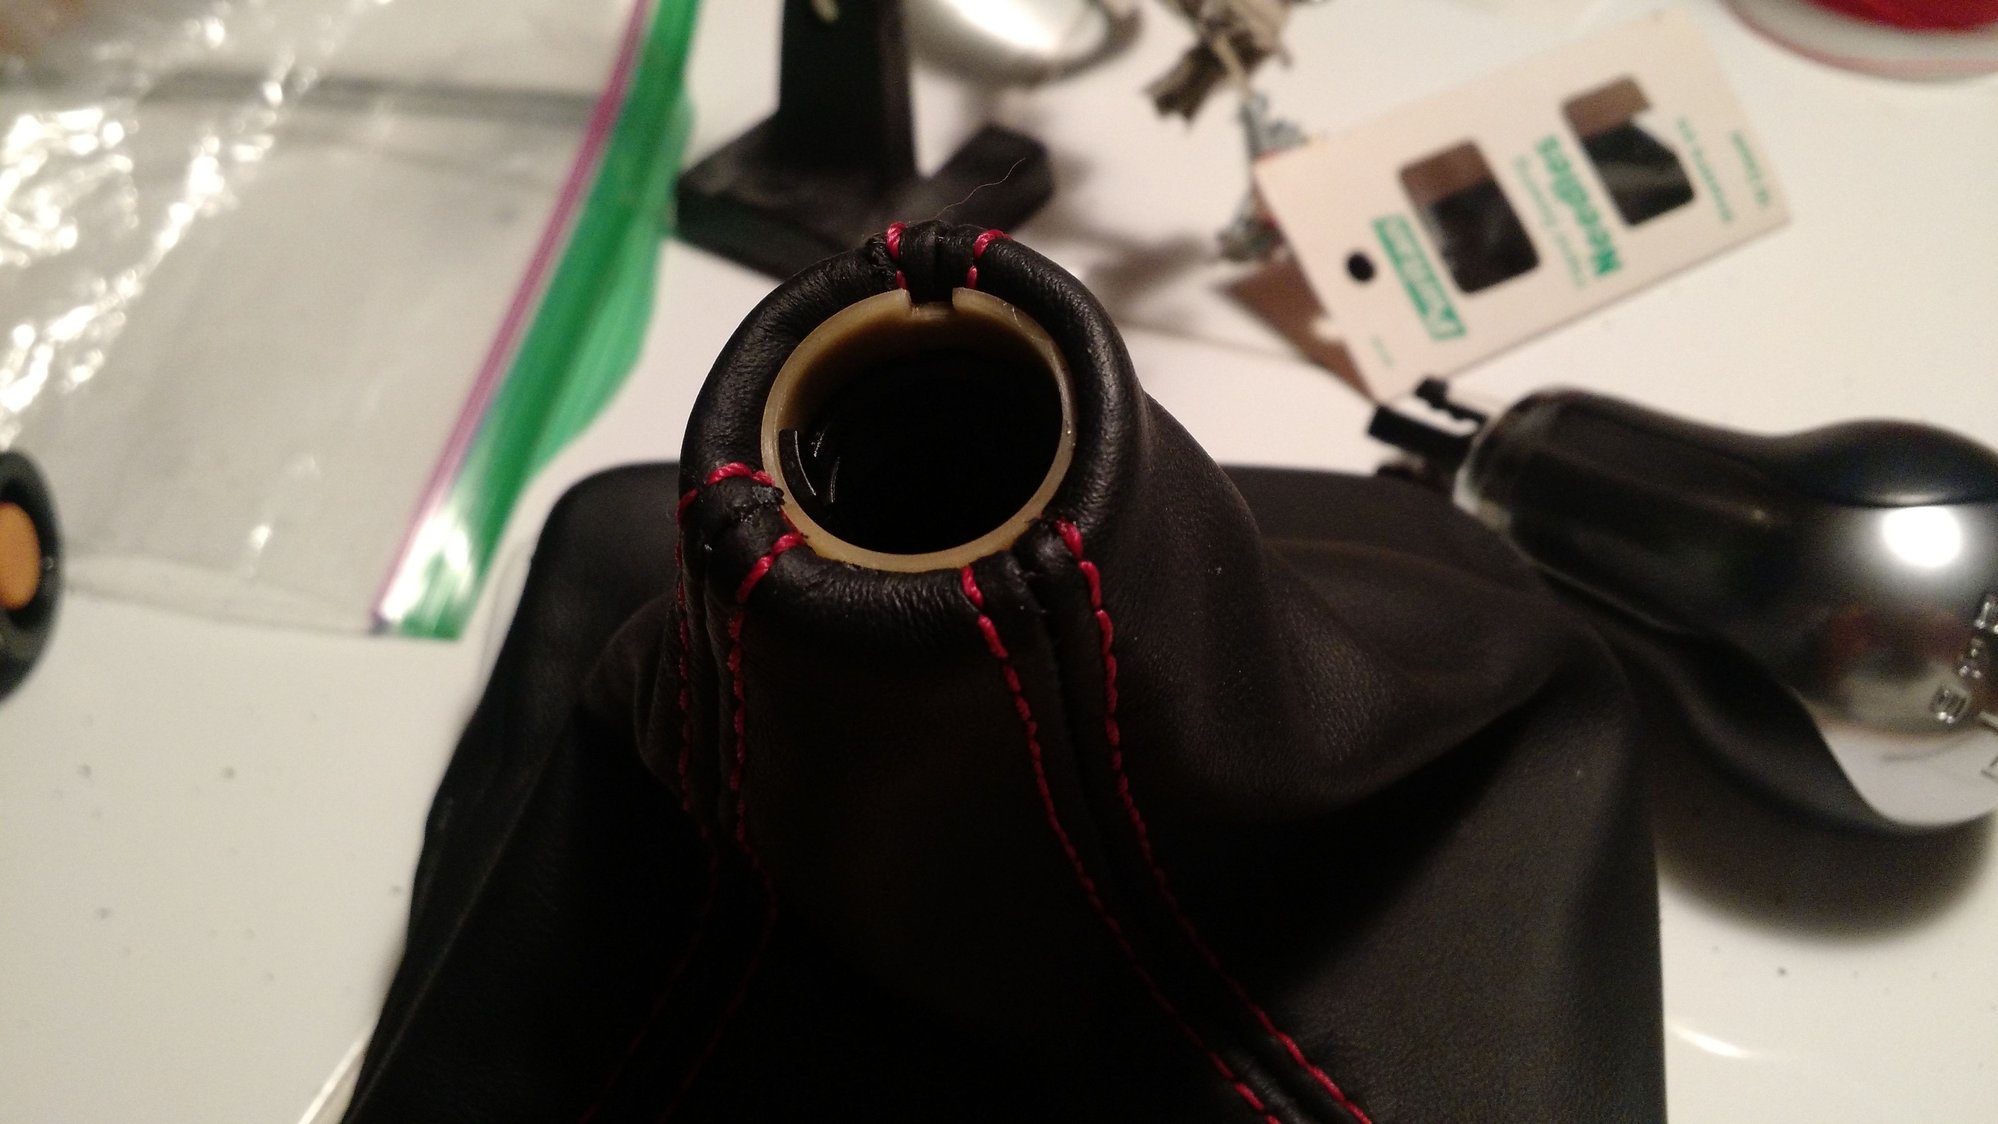
Used my trusty contact cement to glue the leather back to the frame. I didn't have any tiny staples.Reinstall the shift ****. See linked thread above.

You practiced re-installing the **** BEFORE you took it apart to fully learn the quarter turn locking system?
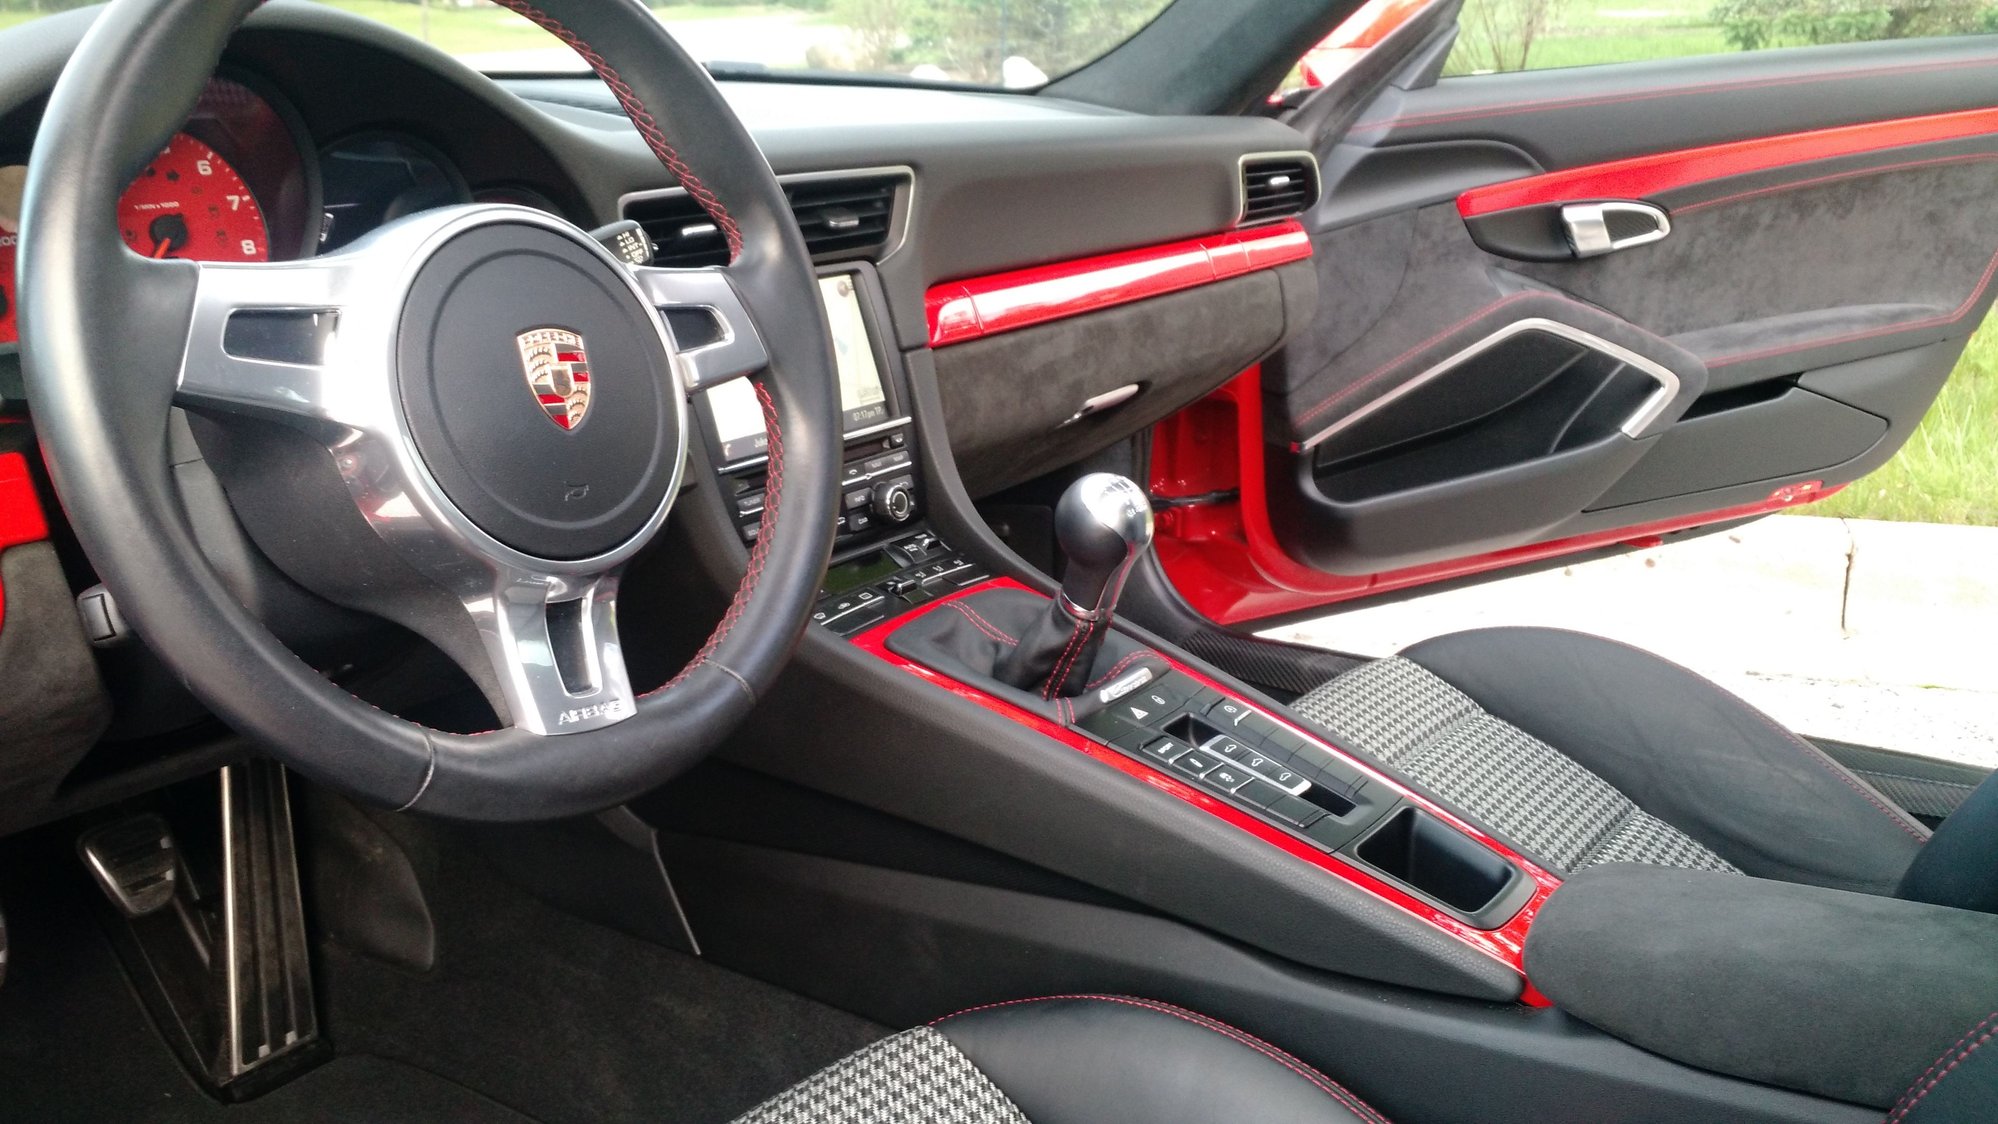
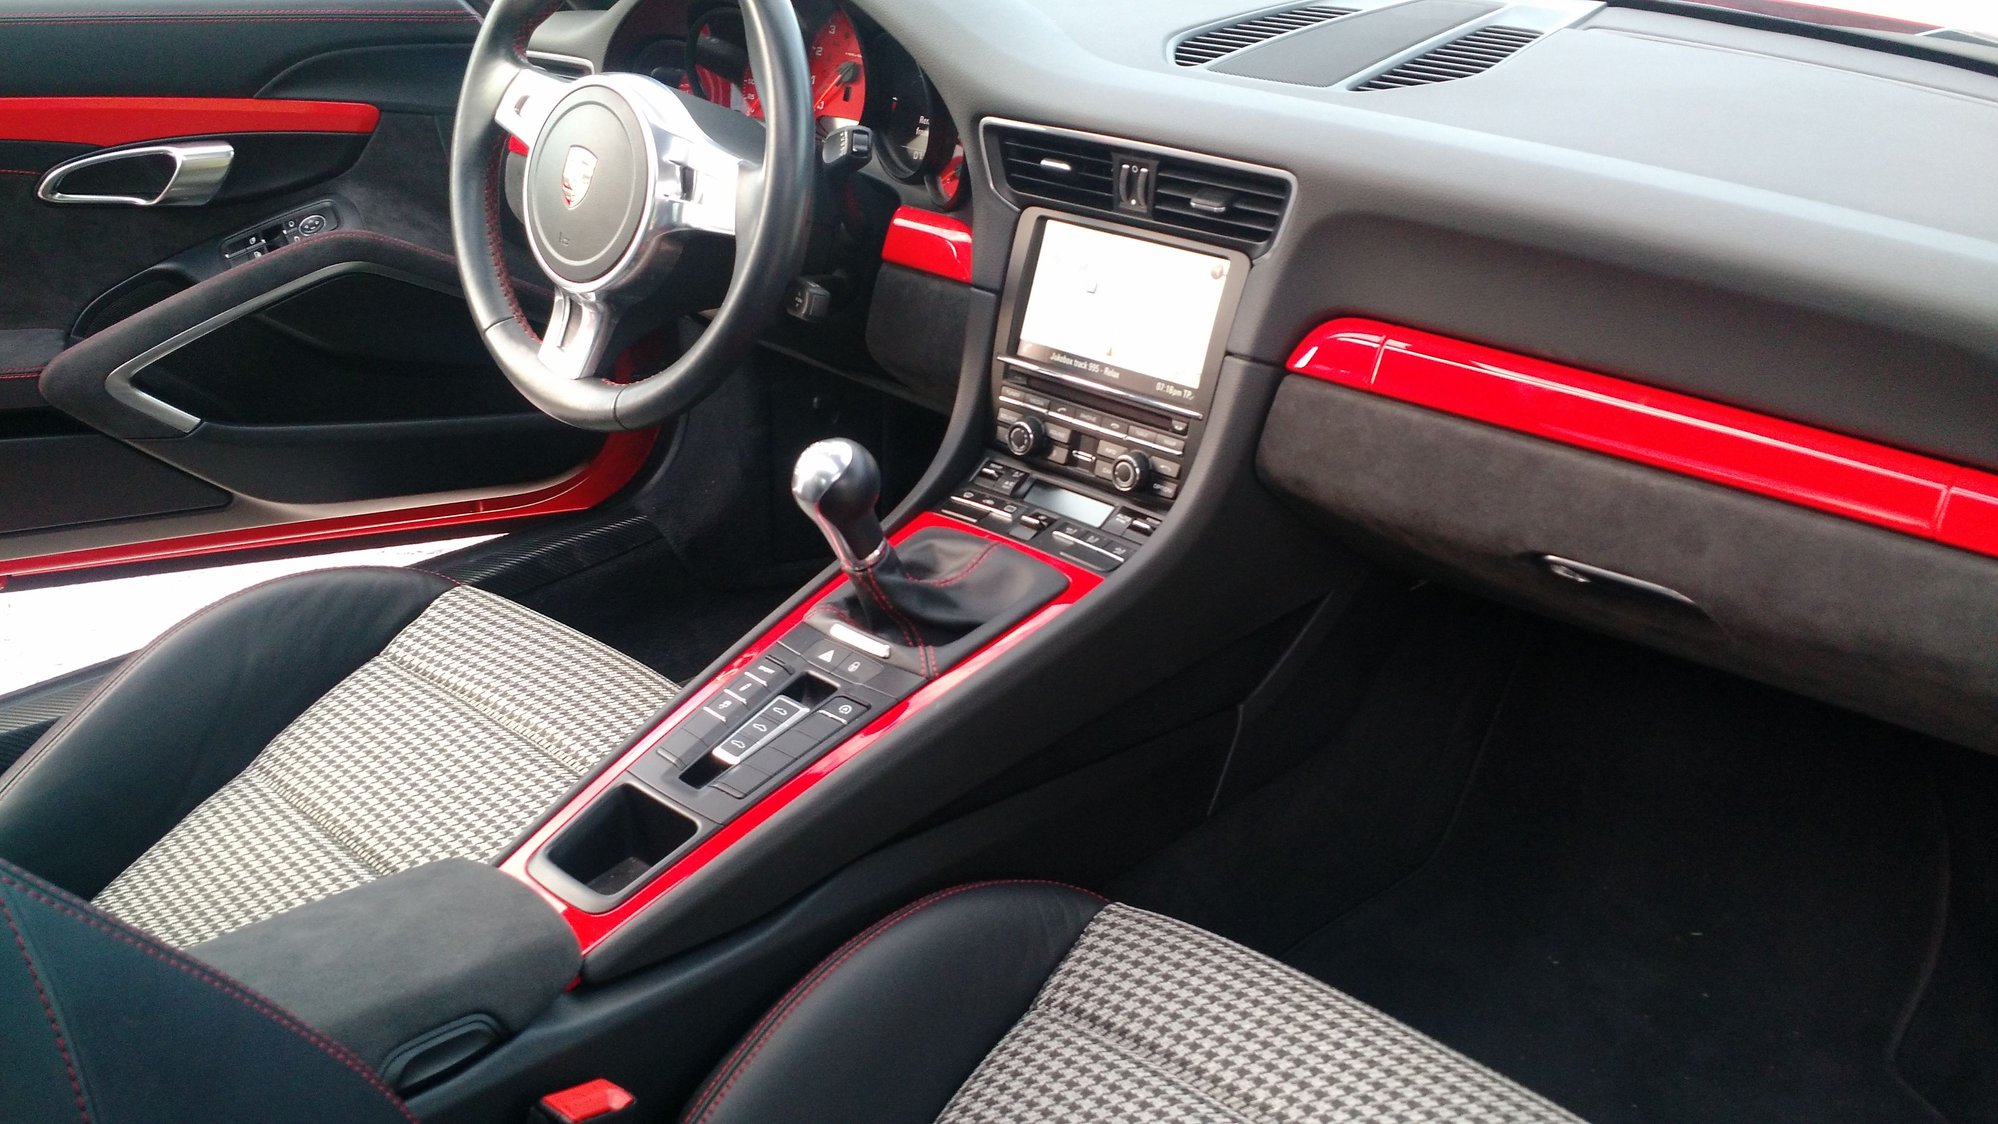
All done! Looks good and matches the steering wheel.

Last edited by DanQ; 12-29-2020 at 05:16 PM.
The following 4 users liked this post by DanQ:
malahhaor (05-27-2020), polobai (05-26-2020), Porsche_nuts (05-26-2020), wdr911 (05-26-2020)
Old 05-26-2020, 10:15 AM
  #123  
Porsche_nuts
Nordschleife Master
 
Porsche_nuts's Avatar
 
Join Date: Jan 2010
Location: New York
Posts: 5,449
Received 1,200 Likes on 723 Posts
Default

Thanks DanQ. I am going to give this a try. Better than spending $300+ on a boot with red stitching form Suncoast.
Old 05-26-2020, 11:13 AM
  #124  
DanQ
Pro
Thread Starter
 
DanQ's Avatar
 
Join Date: Sep 2009
Location: Lake Zurich, IL
Posts: 540
Received 157 Likes on 69 Posts
Default

Originally Posted by Porsche_nuts
Thanks DanQ. I am going to give this a try. Better than spending $300+ on a boot with red stitching form Suncoast.
Don't buy the one from Suncoast, you'll have the do the difficult boot change yourself.

After doing this upgrade, I can see why Exclusive Option wants $300 and your **** and boot. The labor to reinstall the boot on the collar is a pain. Better to buy the **** boot combination as it's a snap to install.

There is more to it than just the leather boot cost.

Last edited by DanQ; 05-28-2020 at 11:49 AM.
Old 05-26-2020, 11:32 AM
  #125  
Bob Z.
Rennlist Member
 
Bob Z.'s Avatar
 
Join Date: Jul 2001
Location: Marineland FL
Posts: 12,528
Likes: 0
Received 3,455 Likes on 2,359 Posts
Default

Nice job, but if it were me it would be well worth $300 to have someone else do it!
Old 05-27-2020, 02:18 PM
  #126  
DanQ
Pro
Thread Starter
 
DanQ's Avatar
 
Join Date: Sep 2009
Location: Lake Zurich, IL
Posts: 540
Received 157 Likes on 69 Posts
Default Free Red Thread Available

If any rennlist folks want to try hand stitching your shift boot, let me know, and I can send you some free waxed red thread. Send a message with info.

Last edited by DanQ; 06-05-2020 at 02:57 PM.
Old 05-28-2020, 11:52 AM
  #127  
DanQ
Pro
Thread Starter
 
DanQ's Avatar
 
Join Date: Sep 2009
Location: Lake Zurich, IL
Posts: 540
Received 157 Likes on 69 Posts
Default

Originally Posted by DanQ
Don't buy the one from Suncoast, you'll have the do the difficult boot change yourself.
I made a mistake on this comment. If the Suncoast boot/**** combination only needs a change from 6 speed **** to 7 speed ****, it is pretty easy. Just don't dislodge the black and white collars. Twist off the old ****, twist on the new one.
Old 05-30-2020, 06:09 PM
  #128  
Jeff Gilliam
Intermediate
 
Jeff Gilliam's Avatar
 
Join Date: Mar 2019
Location: So Cal
Posts: 44
Received 60 Likes on 13 Posts
Default

This information is amazing. I want to do the same thing with my front seats. My question is how much material should I order?
Old 05-31-2020, 05:36 PM
  #129  
DanQ
Pro
Thread Starter
 
DanQ's Avatar
 
Join Date: Sep 2009
Location: Lake Zurich, IL
Posts: 540
Received 157 Likes on 69 Posts
Default

Originally Posted by Jeff Gilliam
This information is amazing. I want to do the same thing with my front seats. My question is how much material should I order?
Thanks, you should ask your trimmer if you are just doing the front seats. 1m (x 56" wide ) may not be enough. 2m is enough to do front and rear assuming no mistakes, but I have no experience with just the fronts. Sorry.
Old 06-03-2020, 08:41 PM
  #130  
Joec500
Rennlist Member
 
Joec500's Avatar
 
Join Date: May 2014
Location: Los Angeles
Posts: 3,016
Received 1,021 Likes on 607 Posts
Default

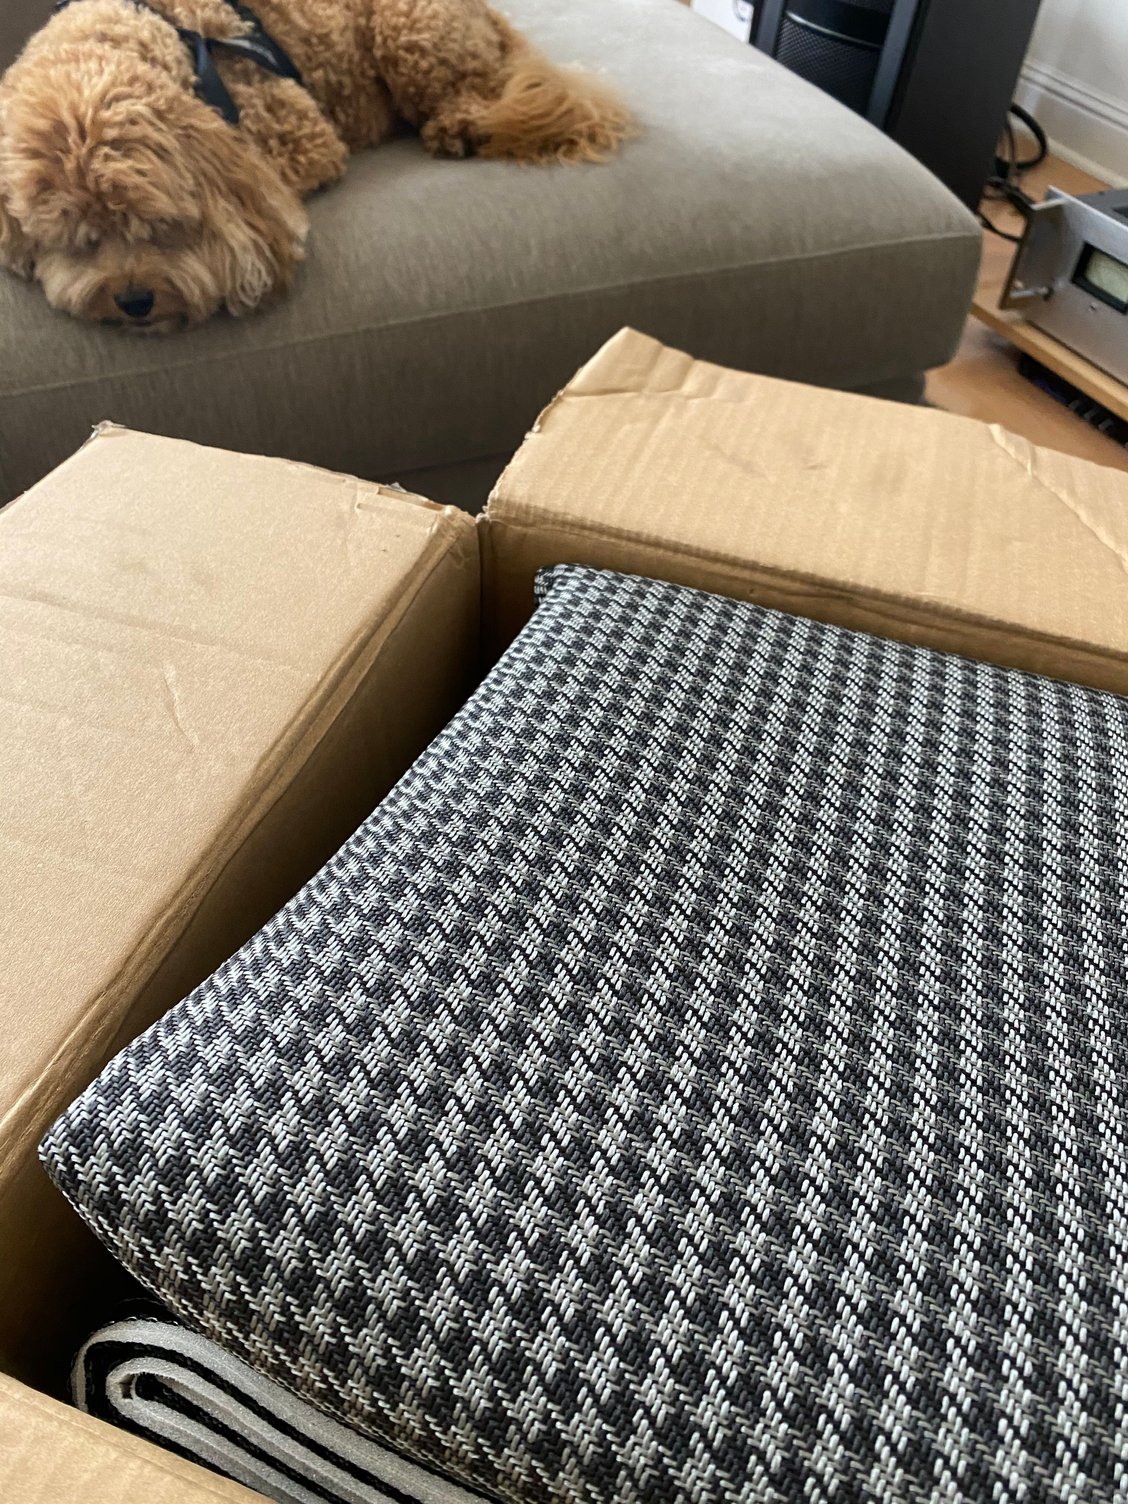
and it arrived!!! I can't wait.


The following users liked this post:
ZerOG (06-03-2020)
Old 06-03-2020, 09:59 PM
  #131  
ZerOG
Racer
 
ZerOG's Avatar
 
Join Date: Oct 2018
Posts: 444
Received 109 Likes on 76 Posts
Default

Originally Posted by Joec500
and it arrived!!! I can't wait.

Very nice. Who is the supplier?

I’m looking for something similar but not identical.
Old 06-03-2020, 10:55 PM
  #132  
titleistaddict87
Three Wheelin'
 
titleistaddict87's Avatar
 
Join Date: Sep 2015
Location: SF Bay Area
Posts: 1,704
Received 126 Likes on 104 Posts
Default

Originally Posted by Joec500
and it arrived!!! I can't wait.

nice joe! Who’s doing the upholstery work?
Old 06-04-2020, 02:05 PM
  #133  
Joec500
Rennlist Member
 
Joec500's Avatar
 
Join Date: May 2014
Location: Los Angeles
Posts: 3,016
Received 1,021 Likes on 607 Posts
Default

Originally Posted by titleistaddict87
nice joe! Who’s doing the upholstery work?
Val's on Van Ness....He has great reviews and has done several Porsche projects like this including a recent Boxster Spyder.
Old 06-04-2020, 02:14 PM
  #134  
SF Neunelfer
Instructor
 
SF Neunelfer's Avatar
 
Join Date: Apr 2019
Location: San Francisco,ca
Posts: 154
Received 92 Likes on 34 Posts
Default

I didnt even know that we could take the center section out of these seats.. I thought it was only the GTS seats that you could change.

Good to know. Im also in SF, will have to check out Vals.

-R
Old 06-04-2020, 02:33 PM
  #135  
Joec500
Rennlist Member
 
Joec500's Avatar
 
Join Date: May 2014
Location: Los Angeles
Posts: 3,016
Received 1,021 Likes on 607 Posts
Default

Originally Posted by SF Neunelfer
I didnt even know that we could take the center section out of these seats.. I thought it was only the GTS seats that you could change.

Good to know. Im also in SF, will have to check out Vals.

-R
Technically you can't remove the center sections, he will need to unstitch all the center sections, so the labor is quite intensive.


Quick Reply: Interior upgrade project


All times are GMT -3. The time now is 02:00 PM.