When you click on links to various merchants on this site and make a purchase, this can result in this site earning a commission. Affiliate programs and affiliations include, but are not limited to, the eBay Partner Network.
Great write up! I have a blendmount on my GT4 but love your idea of the high windshield mount. I�ll be looking to do this on my next car. Would you mind posting the links to the mirror tap and the windshield mount you used? Thanks!
As a Michigan grad, I was a bit tormented inside with the thought of following an Illini fan's instructions, but I swallowed my school pride and forged on.
go.illini's instructions were perfect.
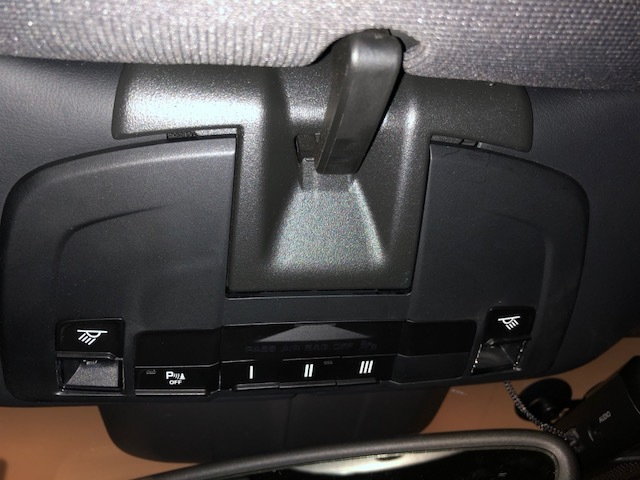
Only difference, mine is a targa, and with that comes a bump in the headliner where the targa top anchoring mechanism is housed, which made it a little challenging to get the credit card to slide in flat to release the spring hooks. Also different from your picks above, my middle section of the light housing is the anchor that the targa top latches down into. That said, all I did was to partially drop the top enough to get the bump out of the way, and was able to tackle it just like the instructions after that. Even with the middle section of the light housing cut out, the spring hooks were in the same place as your pics above.
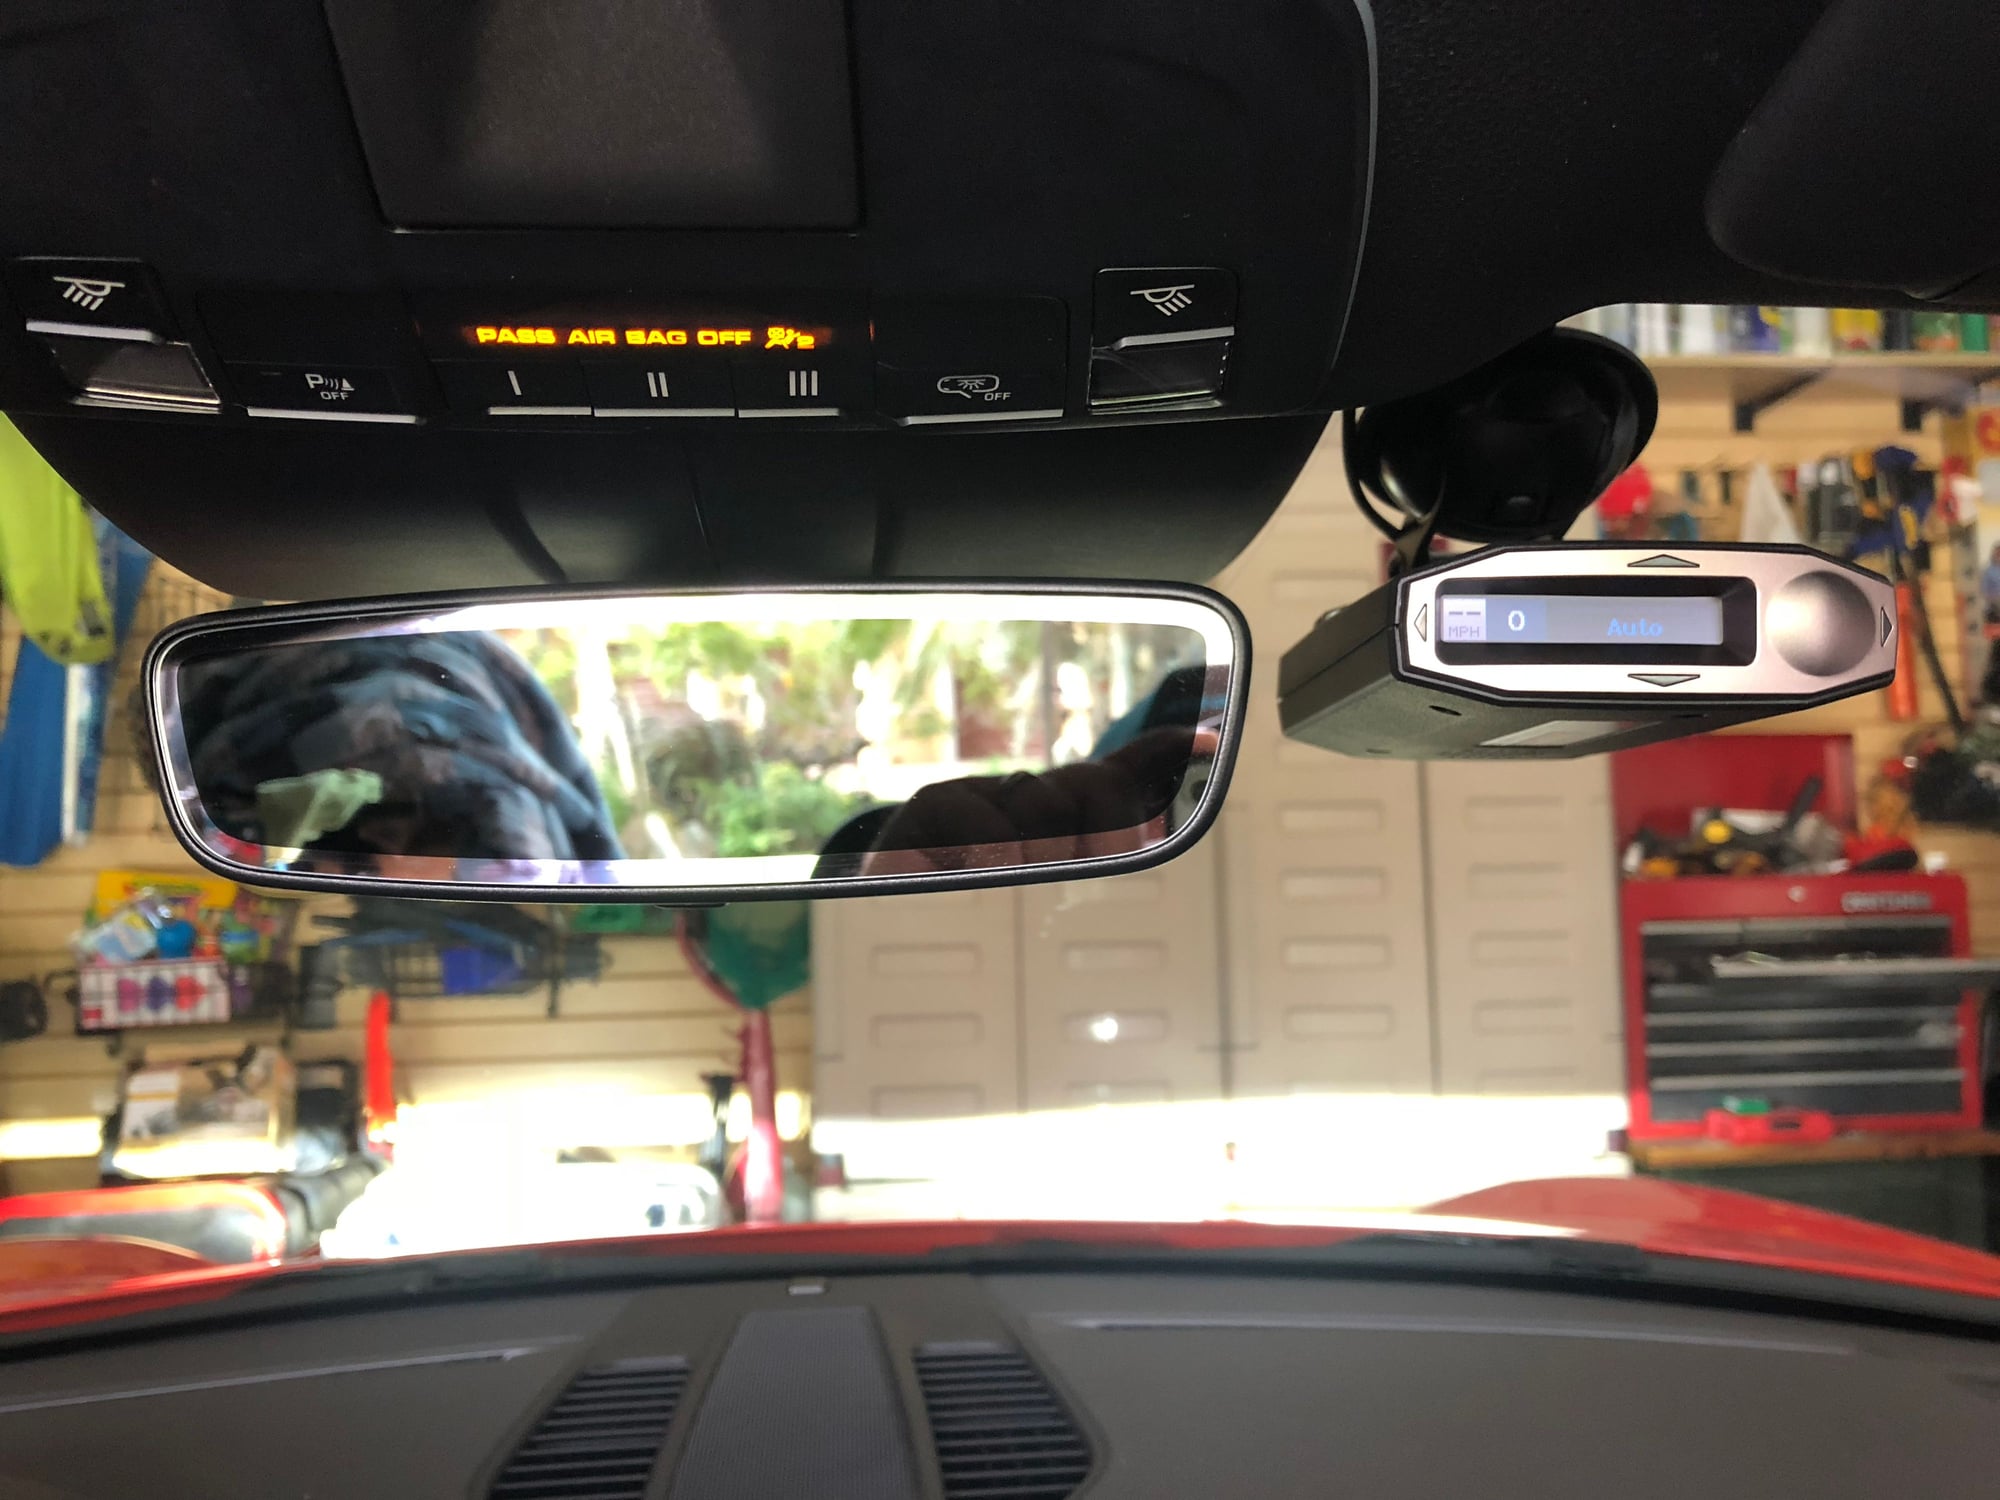
I currently have mine mounted in basically the same spot as yours, but using the double suction cup mount as my 3M adhesive mount has not yet arrived. That will be the last step, but very happy with the install in that location.
Has anyone attempted to modify a BlendMount BMX-2021 designed for an Escort Max to accommodate a Uniden R3? I don't mind the acquisition cost of a R3 design specific device it's the installation hassle I dread?
Has anyone attempted to modify a BlendMount BMX-2021 designed for an Escort Max to accommodate a Uniden R3? I don't mind the acquisition cost of a R3 design specific device it's the installation hassle I dread?
If you aren't successful modifying it, you can get the blendmount folks to send you just the lower-most piece of the mount versus paying for an entire new one. I know that's one some of the guys on the bimmer forums have done when upgrading their detectors.
As a Michigan grad, I was a bit tormented inside with the thought of following an Illini fan's instructions, but I swallowed my school pride and forged on.
go.illini's instructions were perfect.
Only difference, mine is a targa, and with that comes a bump in the headliner where the targa top anchoring mechanism is housed, which made it a little challenging to get the credit card to slide in flat to release the spring hooks. Also different from your picks above, my middle section of the light housing is the anchor that the targa top latches down into. That said, all I did was to partially drop the top enough to get the bump out of the way, and was able to tackle it just like the instructions after that. Even with the middle section of the light housing cut out, the spring hooks were in the same place as your pics above.
I currently have mine mounted in basically the same spot as yours, but using the double suction cup mount as my 3M adhesive mount has not yet arrived. That will be the last step, but very happy with the install in that location.
Thanks for the great instructions.
Go Blue!!!
Glad to hear it worked for you. I'll just leave this...
Awesome instructions. Did mine today, agree need the 15�
I would add for older eyes and fat fingers:
1) High lumen flashlight you can position to shine directly into the work area
2) Reading glasses 2x your normal magnification
3) Hemostat forcep or similar very thin precise needlenose to grasp wires and cable ties being fed through various small openings
4) Use the CC to compress the springs clips to reinstall the mirror cover per the removal process
Just joined the forum and I wanted to give you a big thanks. Mirror tapped my detector (360c) today and it worked perfect. The second to smallest size worked perfectly in my situation, the smallest was a little too loose for my liking. Followed your instructions step by step. My cabriolet has the roof attachment point in the middle similar to the targa and only difference was my plug I tapped was blue and not yellow. It seems you figured out what appears others were having issues with for getting the power properly.
So fresh and so clean!
Theon Goes Full Carbon Fiber With Stunning New Build
Slideshow: Built around a carbon-bodied 964 and a naturally aspirated 4.0-liter flat-six, this bespoke commission highlights how far the restomod formula has evolved.
Tuner Is Converting Porsche 911s Into Shooting Brakes
Slideshow: A Polish Porsche specialist is moving ahead with one of the most unusual 911 conversions in recent memory: a shooting brake version of the 991-generation sports car.
This Coachbuilt Creation Is A Modern Take on the Legendary Porsche 917
Slideshow: A Porsche Carrera GT has been transformed into a one-off coachbuilt machine that blends analog supercar engineering with styling inspired by the legendary 917 race cars.
Is This Convertible Cayenne A Steal, Or A Returnless Investment?
Slideshow: A heavily modified Porsche Cayenne convertible with faux wood trim and a long list of flaws recently sold at auction for surprisingly little money.
Porsche's Top 5 Most Questionable Naming Decisions
Slideshow: For a company obsessed with engineering precision, Porsche has occasionally named its cars in ways that left even loyal enthusiasts scratching their heads.
Pogea Racing's 964 Porsche 911 Reimagination Stands Out in a Crowded Field
Slideshow: Pogea Racing's latest Porsche 964 project blends carbon-fiber construction, modern chassis upgrades, and up to 500 horsepower while keeping the air-cooled 911 experience firmly analog.


 Hahaha, well said indeed..


 I dread?


")