When you click on links to various merchants on this site and make a purchase, this can result in this site earning a commission. Affiliate programs and affiliations include, but are not limited to, the eBay Partner Network.
PS. I think some Tesa tape around that wire would improve the look. Or maybe even better, one of those rubber 'concertina' tubes (similar to the OEM one in your photo).
Thanks for directing me to this thread, ZedZed. As you suggested in the Isudar thread, I'll install the aftermarket head unit and store the working factory PCM in case an eventual new owner of my GTS would want to put it back to stock.
Greatly improves the appearance while protecting the wires.
I should be done this evening and will build on the excellent comments from my predecessors with anything I think can help.
bought two JoyeAuto units. The first I installed in my 991 and everything went great. The second was for Cayenne and has a glitchy display but its mostly blank/black. Contacted them via Aliexpress and WhatsApp. They haven�t been great and are super slow at responding and over a week ago said they shipped a replacement, only to now find out they didn�t ship anything yet.
My input is that it�s great when the units work but their support/customer service isn�t great at all.
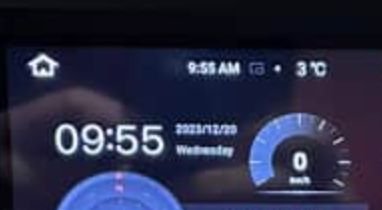
Ok I am stumped on coupe of configuration items on the Android HU. First on the standard launcher there is a temperature display and I cannot figure out how to be in Fahrenheit. I got the speed to b in MPH but going through the GPS settings, I set everything I could find to Imperial versus metric.
Second issue is the volume for any Carplay alerts such as messages or turn by turn directions, etc.... I had the same issue for Apple Music but found a solution where yo disable Sound Check under the Music App configuration.
Normally you control Siri's volume by adjusting when she talks, this is how it works on my GMC Truck. This change does not affect radio volume. If you try and do the same thing with the Android HU then you crank up the volume on everything. So when you set the volume louder to hear Siri the radio blows you out. Having the issue with Google Maps, Waze, messages, etc...
I have reached out to the seller about being able to customize the colors on the HU panel and they are researching.
There is a menu somewhere where you can set the individual levels for different sound sources. It's time for bed here now, but I will check our Cayman unit tomorrow and tell you where you need to look. That might be the solution to this issue.
I finished the installation of the new HU, rear, and front cameras. First, let me thank again everybody in this thread and ZedZed in particular for all the pioneering work and the sharing of information. I was able to complete the rear and front cameras and HU installation in about 8 hours spread into two days. This was in big part possible because the information I gathered from this thread.
I was prepared and ordered the GPS and radio antennas adapters that others have described, and I also had Tesa tapes, gromets, connectors and wire left over from other projects.
I basically did the same work that Mamik did and I’m not going to bore you by repeating the excellent description he made of the installation process but provide some additional information that may be helpful.
Regarding the rear camera, I went with the taillight passage for the wiring. You can find great pictures and info here:
It’s not the easiest way to go and it still not as clean as I would like but decided to do it this way to try to stay away as much as possible from the engine compartment. Nothing wrong with other options, just personal choice.
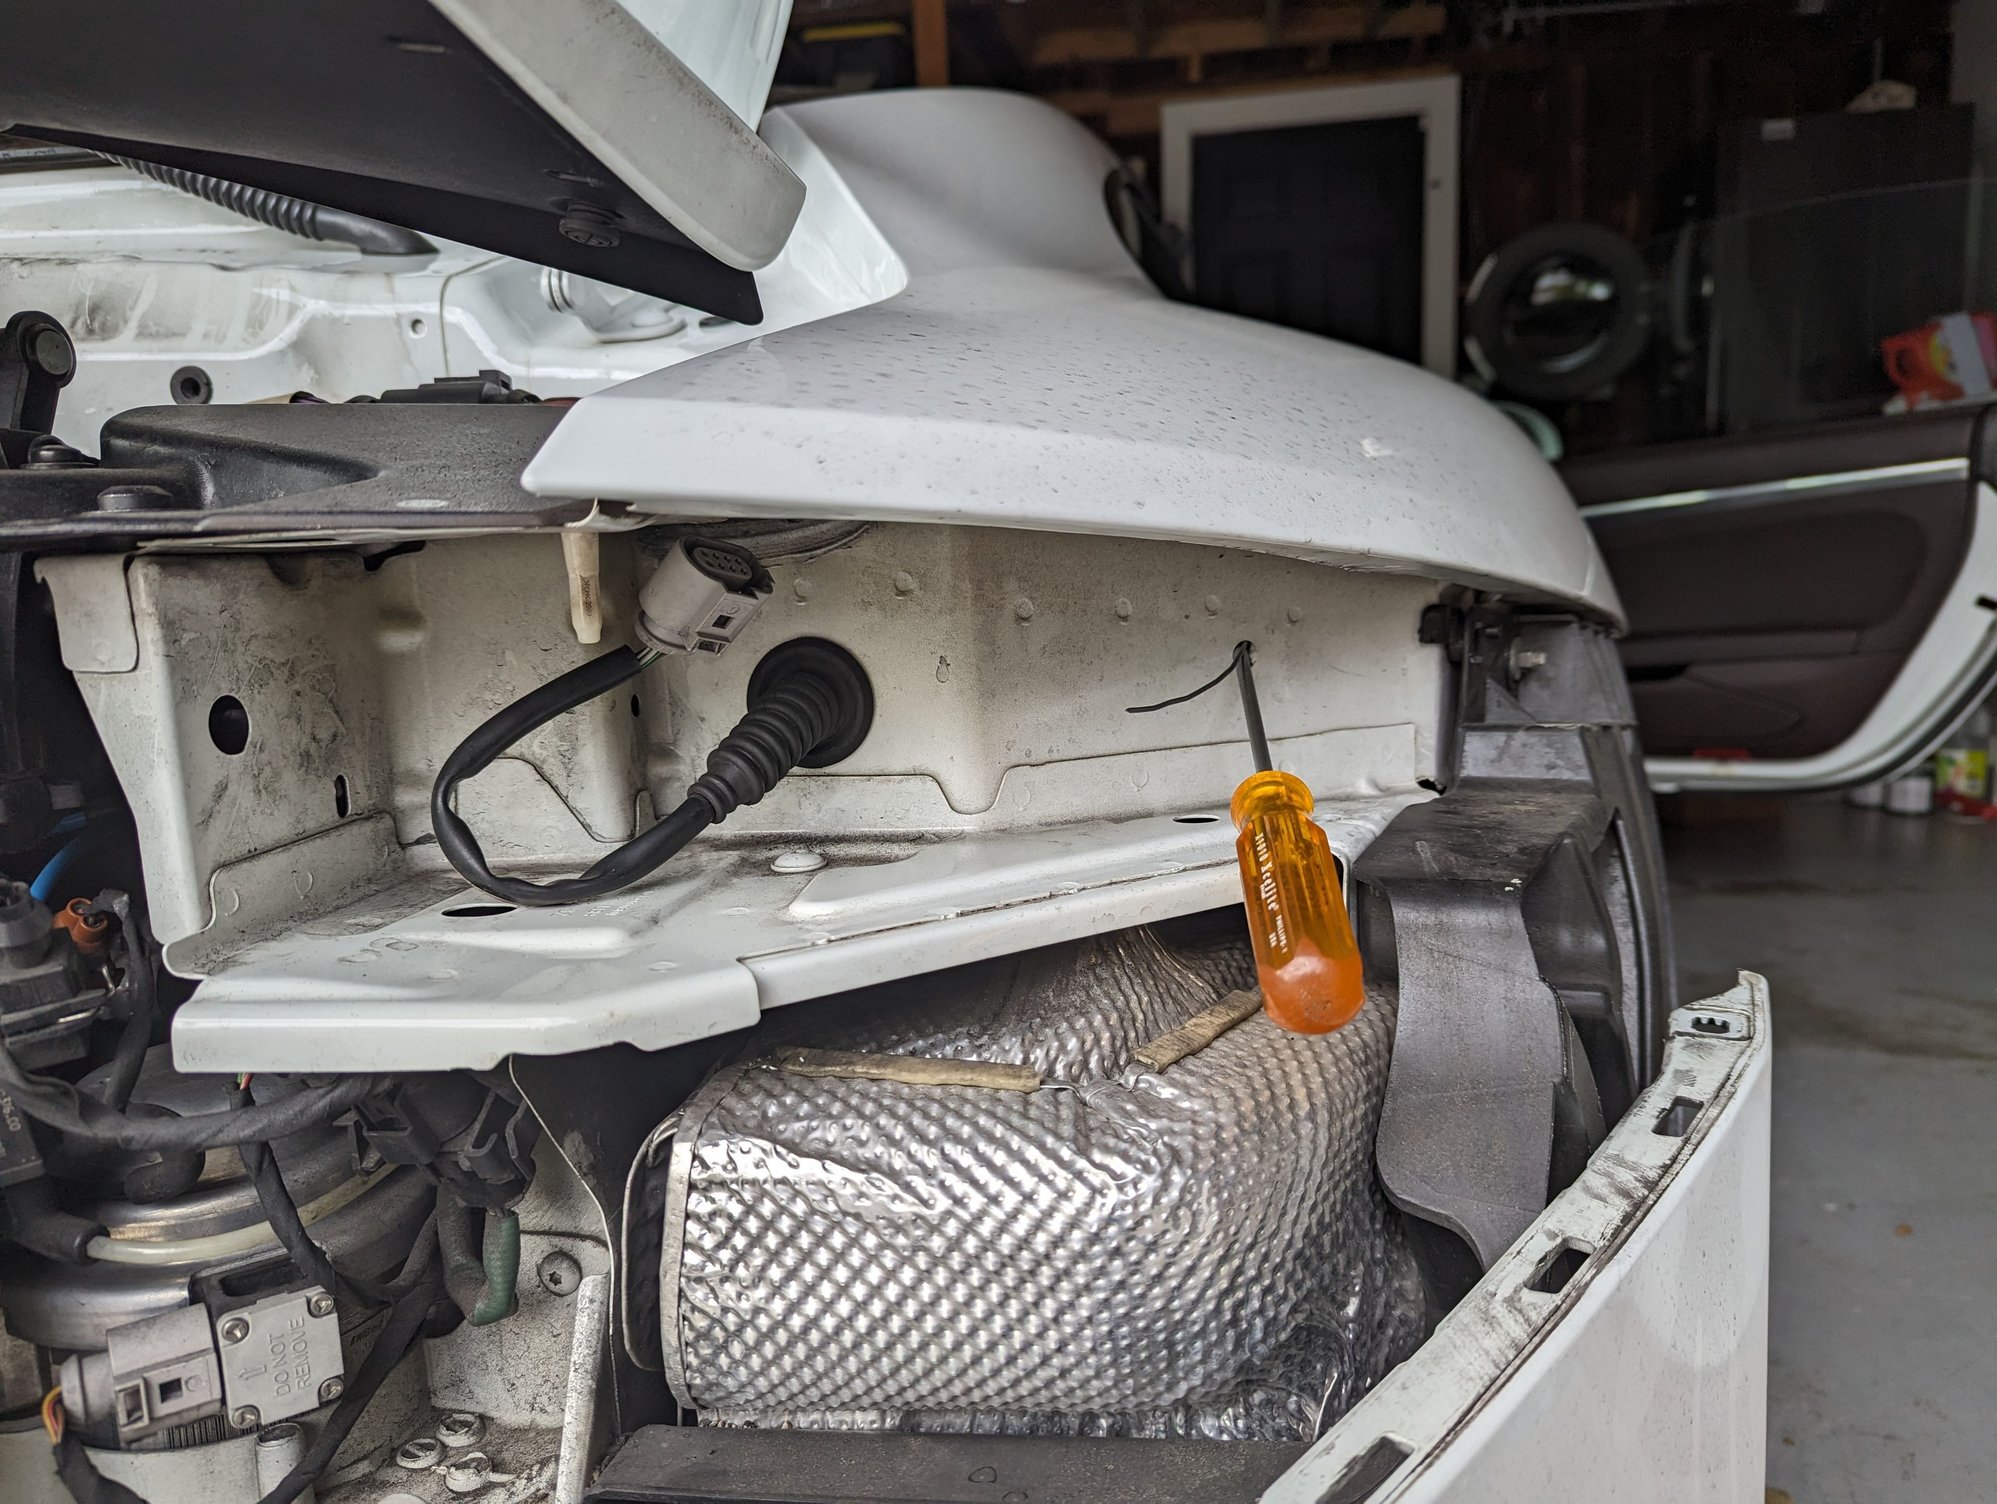
Access is very tight from the interior so, unlike what is described in the thread I pointed to, I opened the existing plug to pass the camera cable from the outside. As you can see in the picture below, I used a very long Phillips screwdriver through the existing hole in the taillight cavity and sensed when the screwdriver was against the plug. Then, just slowly pushed while rotating the screwdriver. I didn’t need to push much as the plug is soft plastic. The picture gives you a sense of the direction to orient the screwdriver and at which angle but you will have to do a little of pocking around. Pushing the plug from the taillight cavity. And yes, the car needs a good cleaning but that's after the install as it is raining for a few days here.
Once the plug is opened, it’s pretty easy to push a metal wire through the holes and into the cabin. And catch the wire behind the interior panel and attach the camera wire and pull it to the taillight cavity. I had the entire camera wire wrapped with the exterior Tesa tape for the part outside the cabin and the interior Tesa tape for the part inside the cabin. I also put a gromet into the hole in the taillight cavity to make it look cleaner. BTW: while the bumper is out, great time to check/replace the air filters. I had a pair ready, so I replaced the old ones even if they old ones were not too bad.
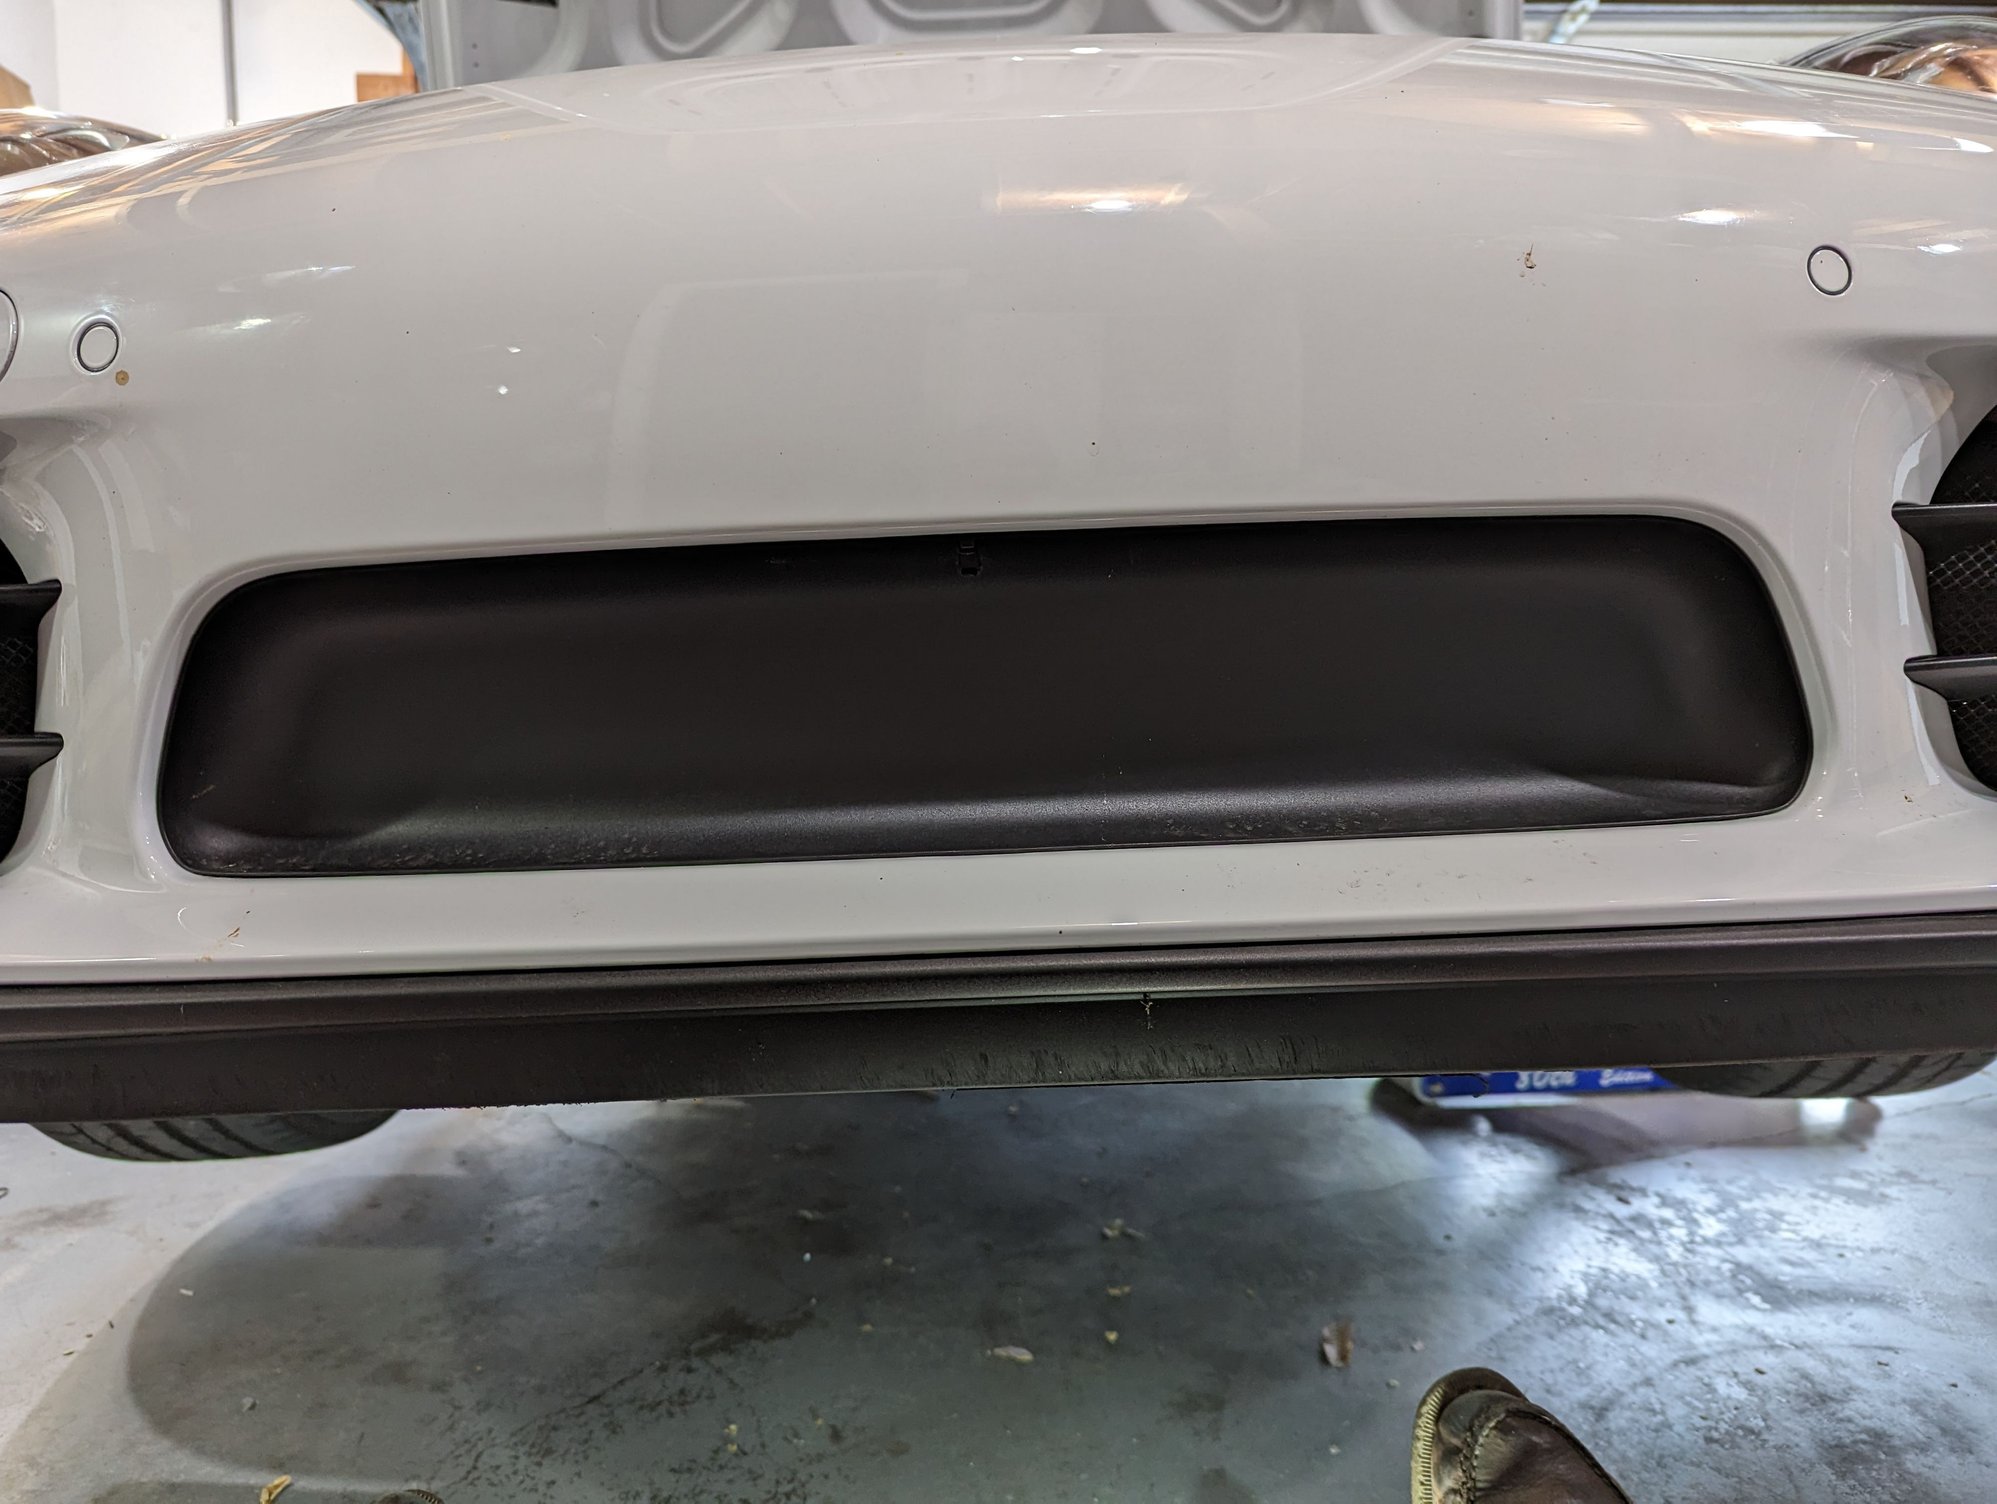
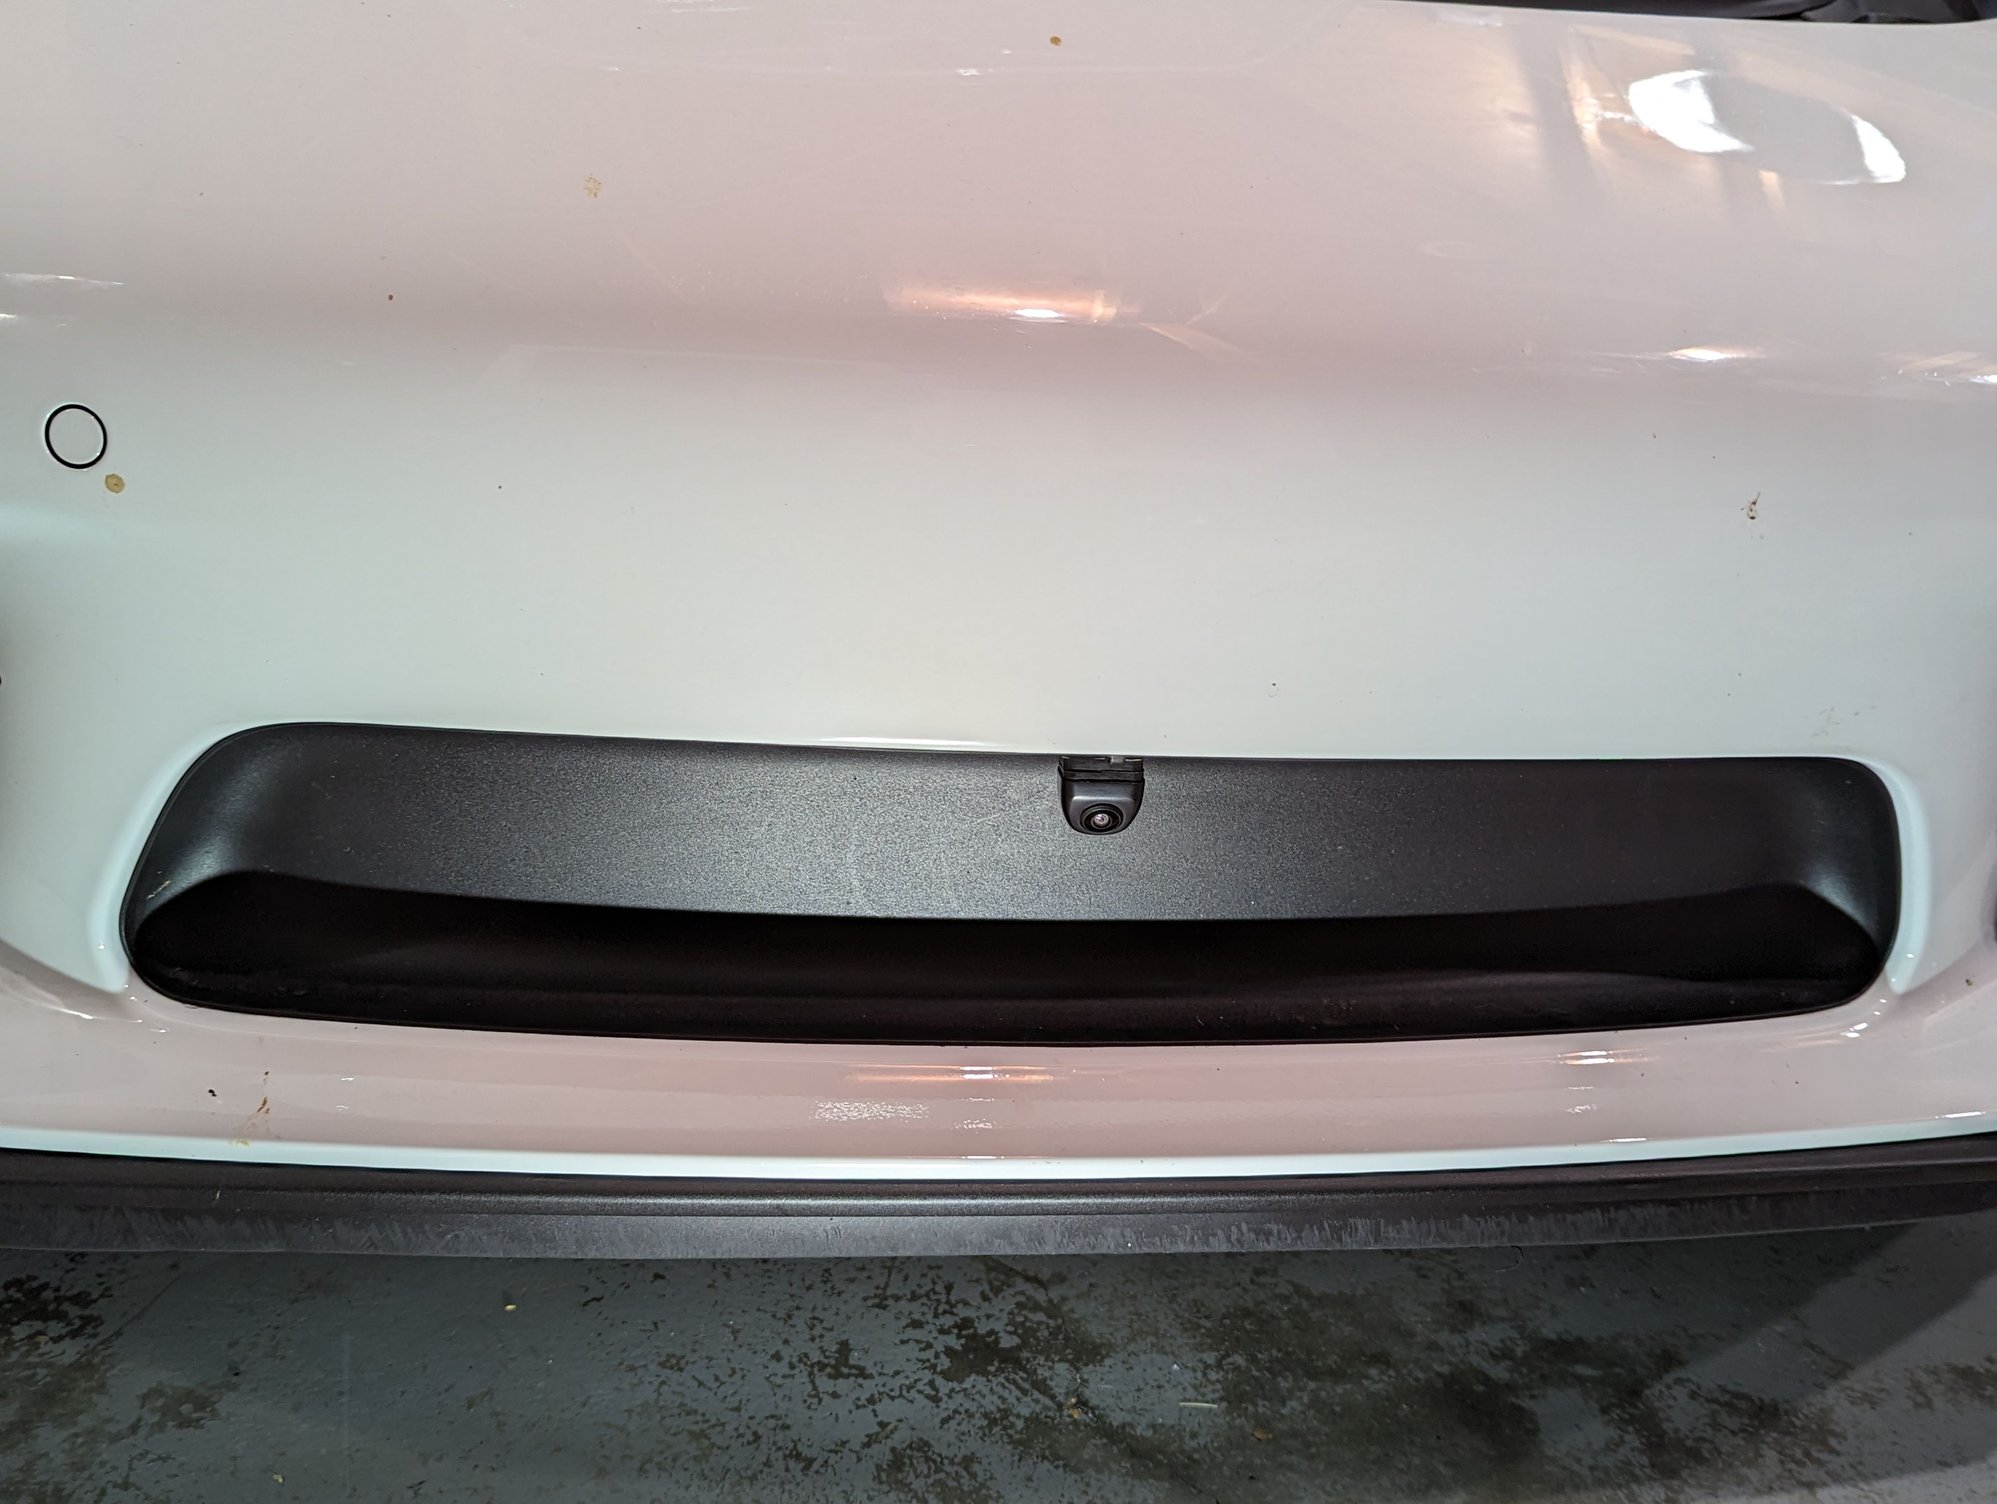
For the front camera, the good news is that there is no need to remove the front bumper as I first assumed. Just had to remove the plastic cover around the frunk opening lock, the driver side plastic cover running against the fender inside the frunk and then remove the 4 screws holding the front bumper to the frame under the front of the car. I decided to mount the camera at the top of the black cover. If one day I decide to remove the camera, I can just replace the cover. Pictures below.
Raising the car makes it more easy to unfasten the bumper screws under the car.
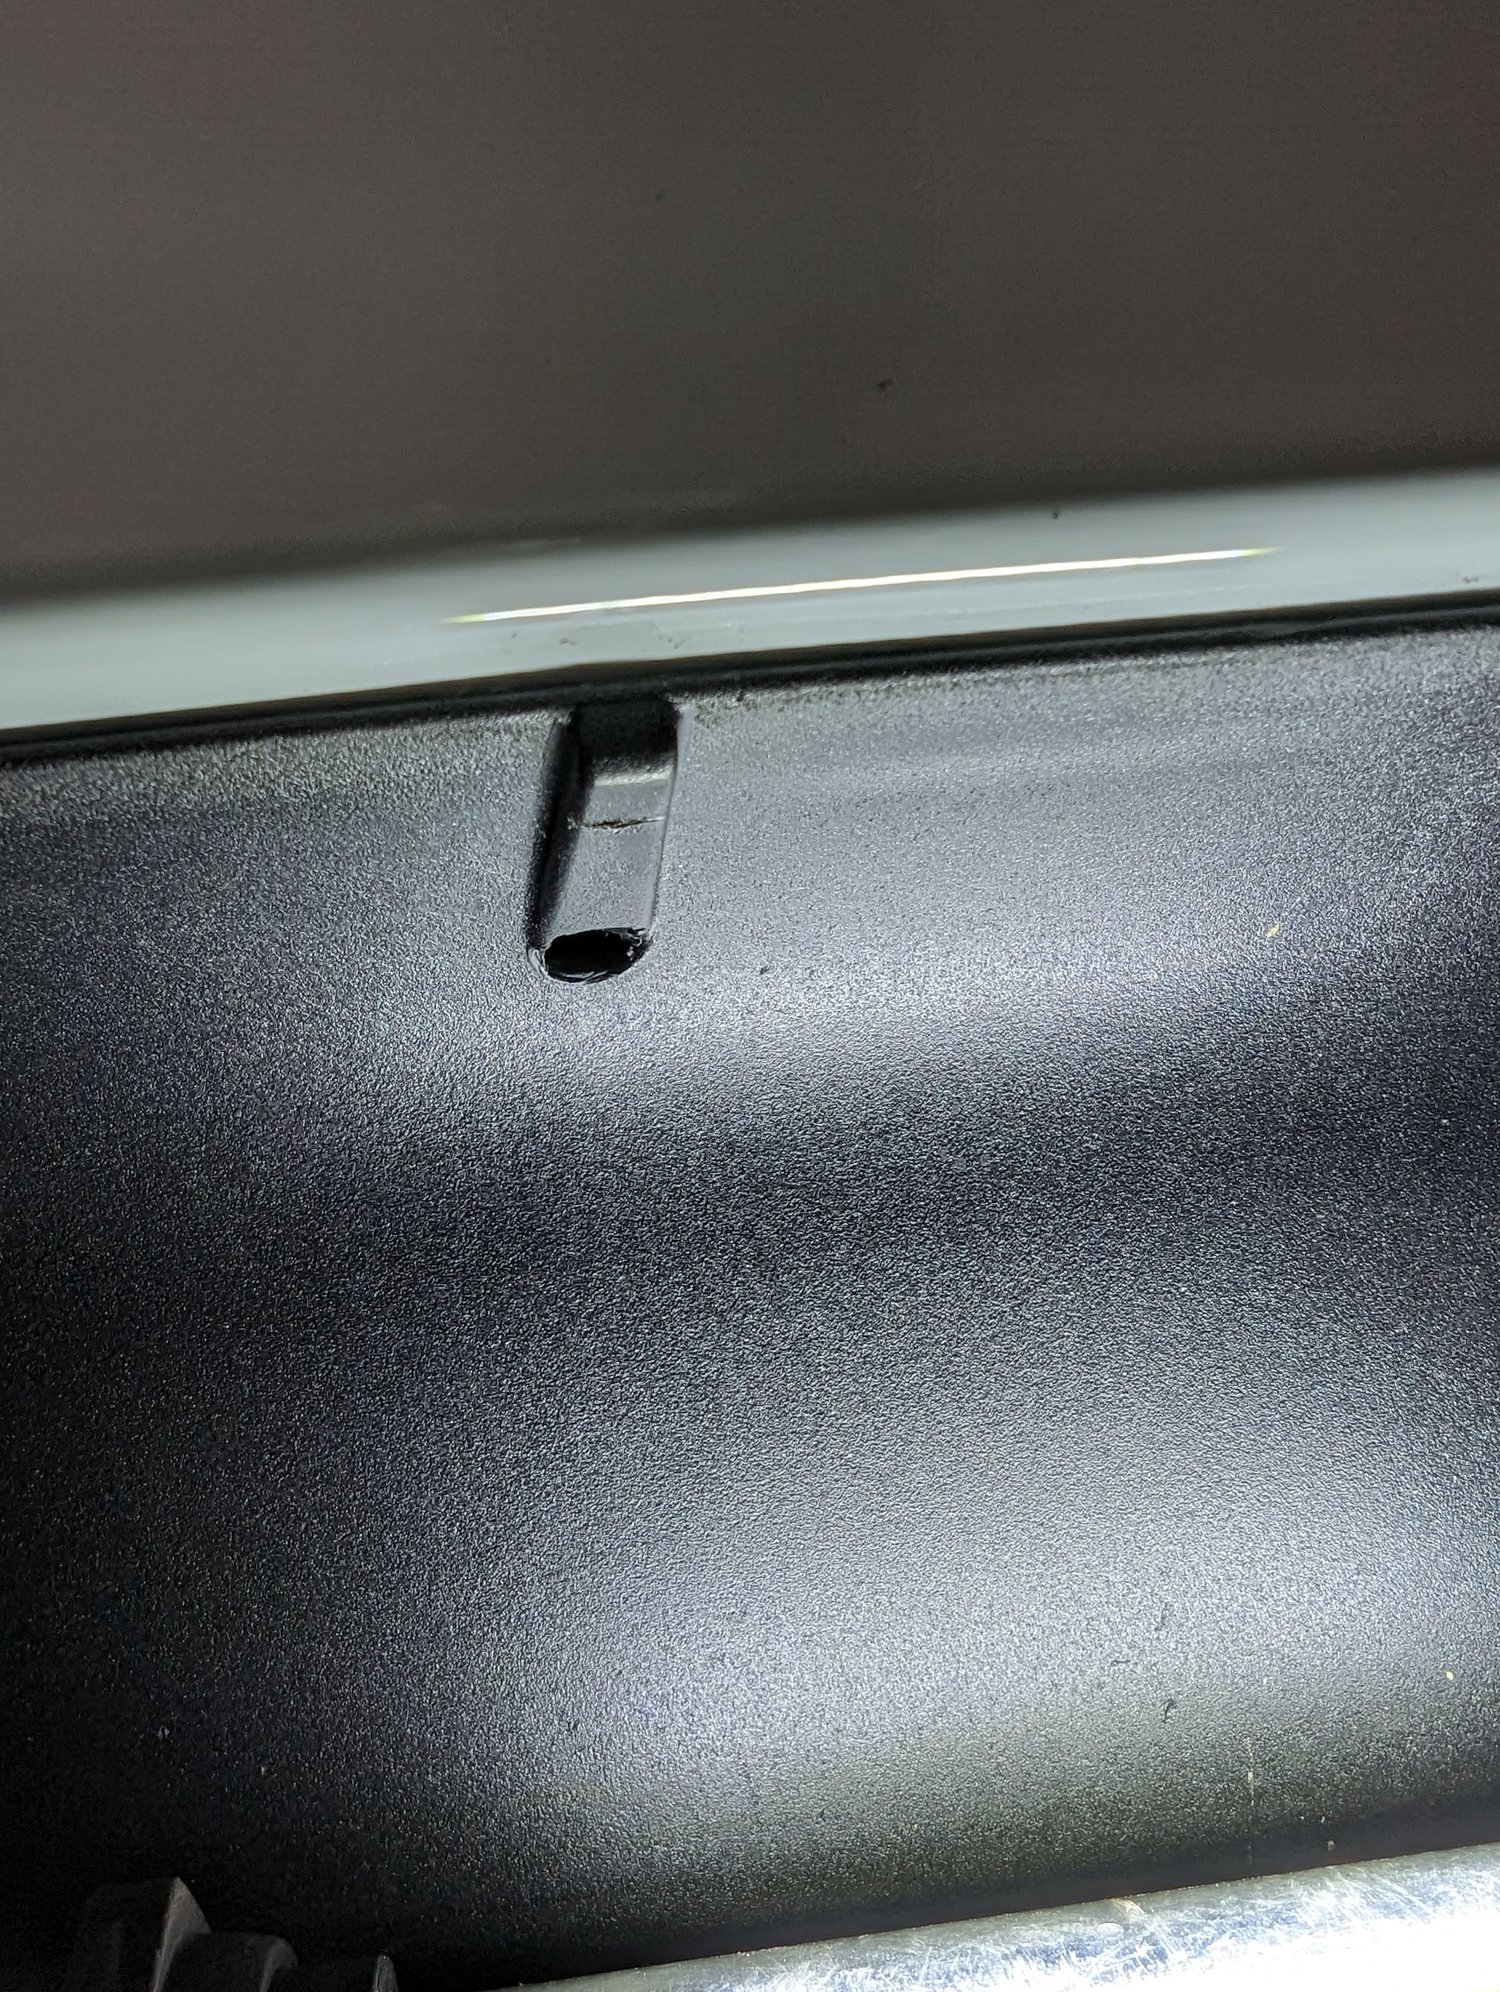
There is a small ridge with a hole on the panel that is at the exact center of the cover, and I just drilled the hole larger and cut the ridge with a Dremel and cuter to allow the camera to sit flat against the cover. The mark in the ridge is where to cut to fit the camera. I used the three gaskets provided with the camera to point the camera towards the floor as my target is to see when the bumper lip is close to sidewalks and other obstacle. You can see the result in this picture.
Easy to enlarge the existing hole and cut the ridge with a cuter or/and Dremel to make a flat seat for the camera.
With the three gaskets, the edge of the bumper is just visible. Excuse the mess.
You can put the camera screw to lock it by pulling the bottom of the bumper with one hand and sliding your other harm between the bumper and the car’s frame. Expect scratches in your arm but saves you from removing the bumper. Here again, I wrapped the entire camera cable with exterior tape.
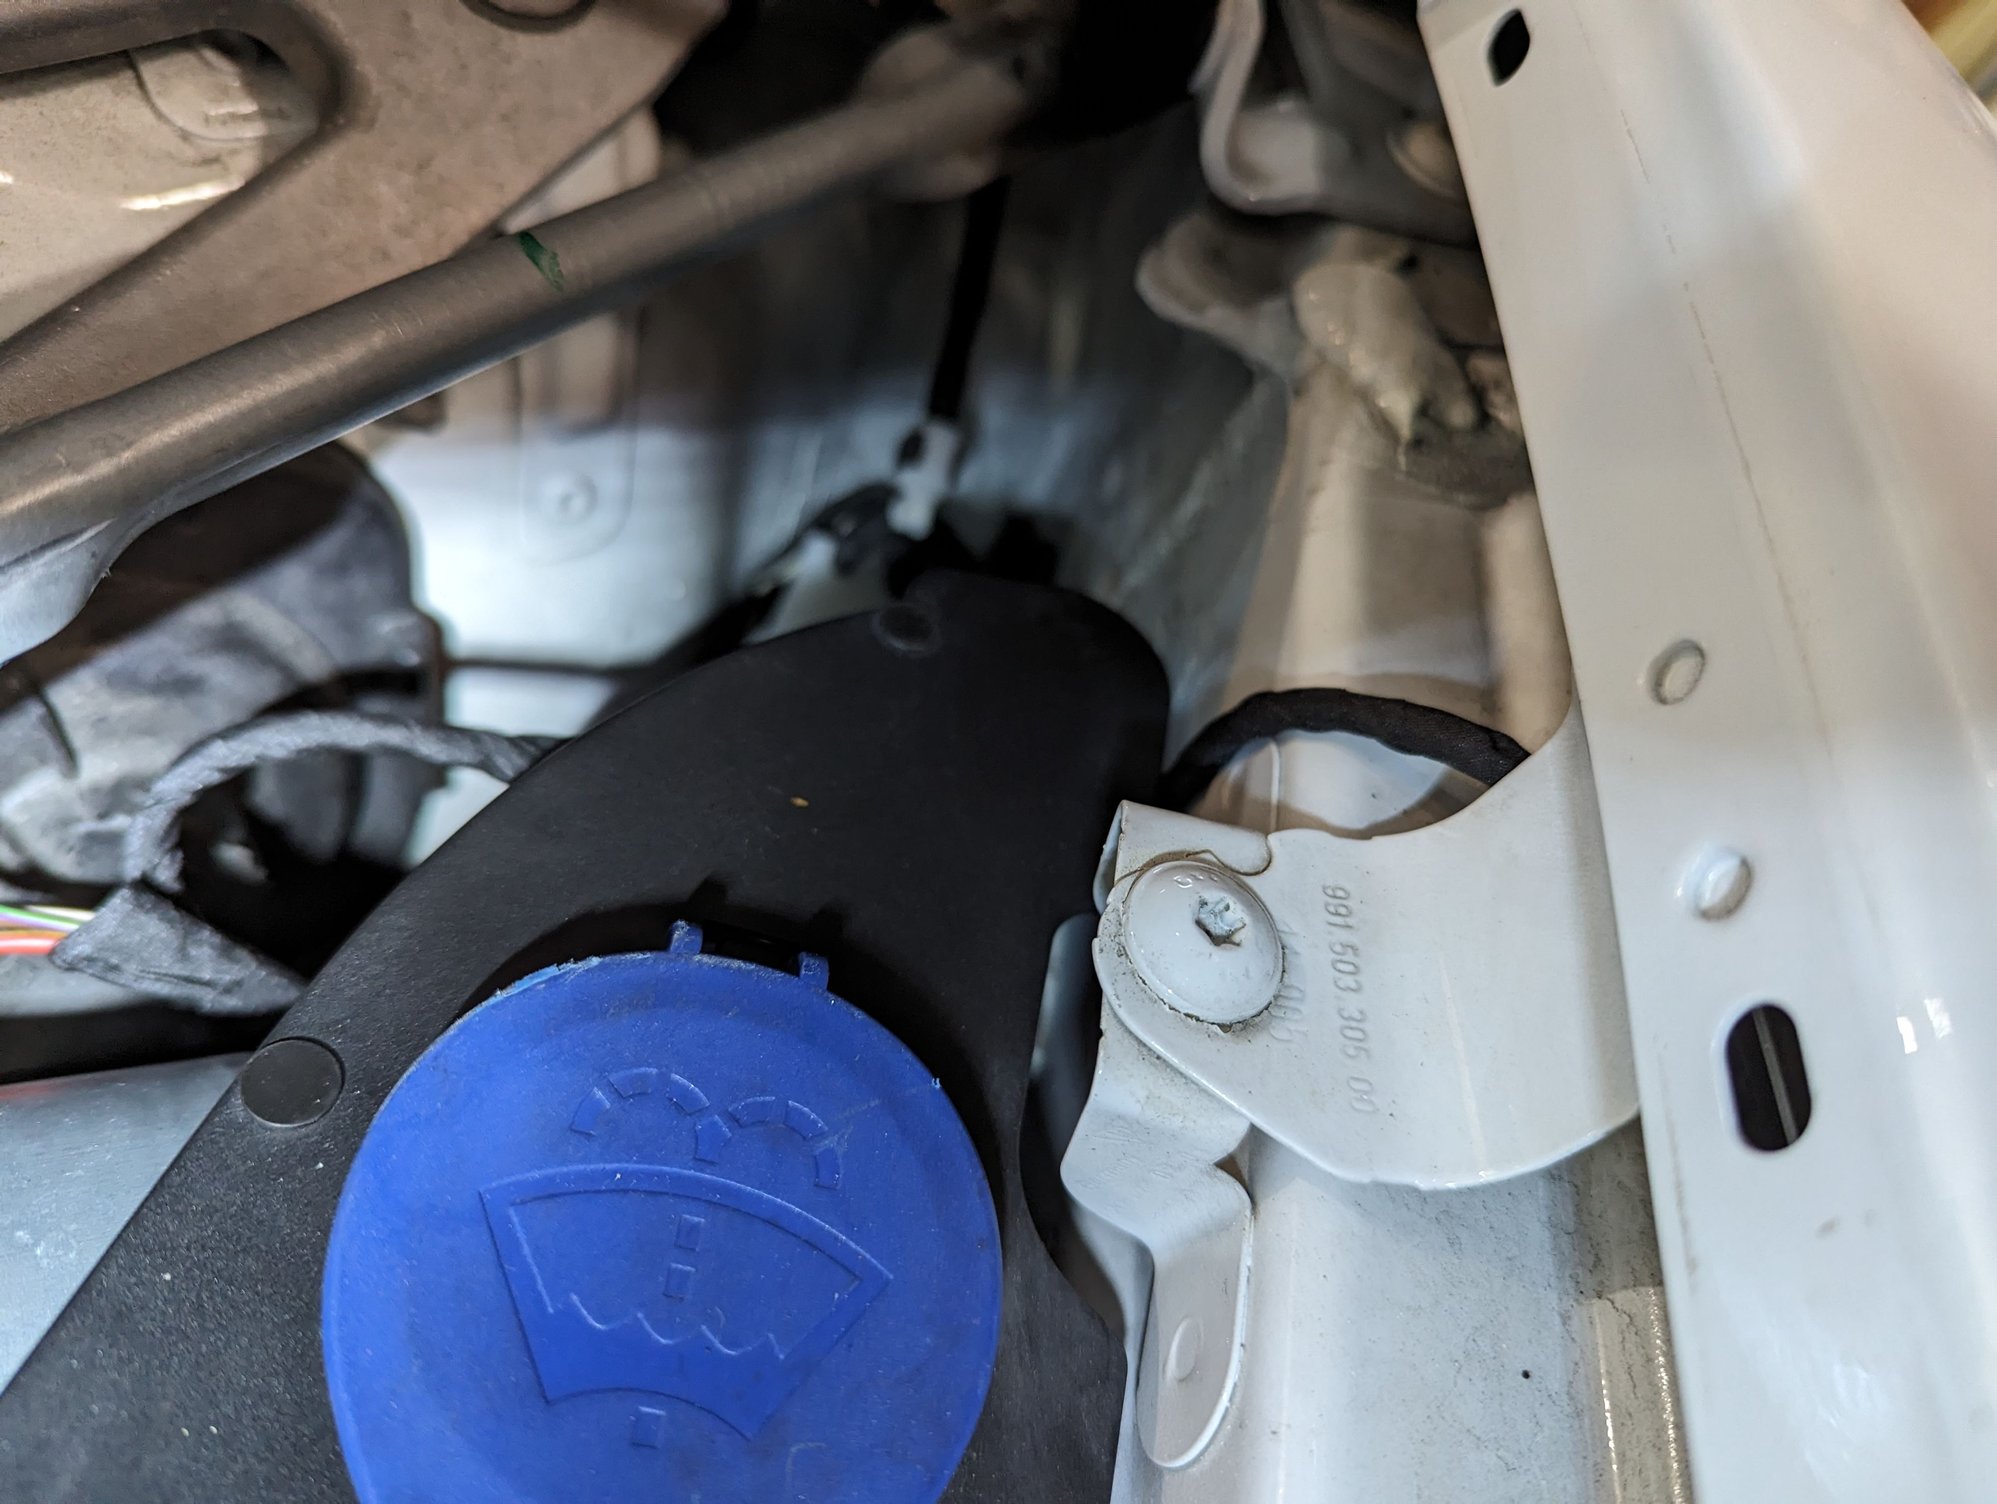
The camera cable can be easily fished from the top front where the frunk lock panel was removed and run behind the fender brackets to the cabin firewall. Picture below.
Running the cable along the fender to the firewall
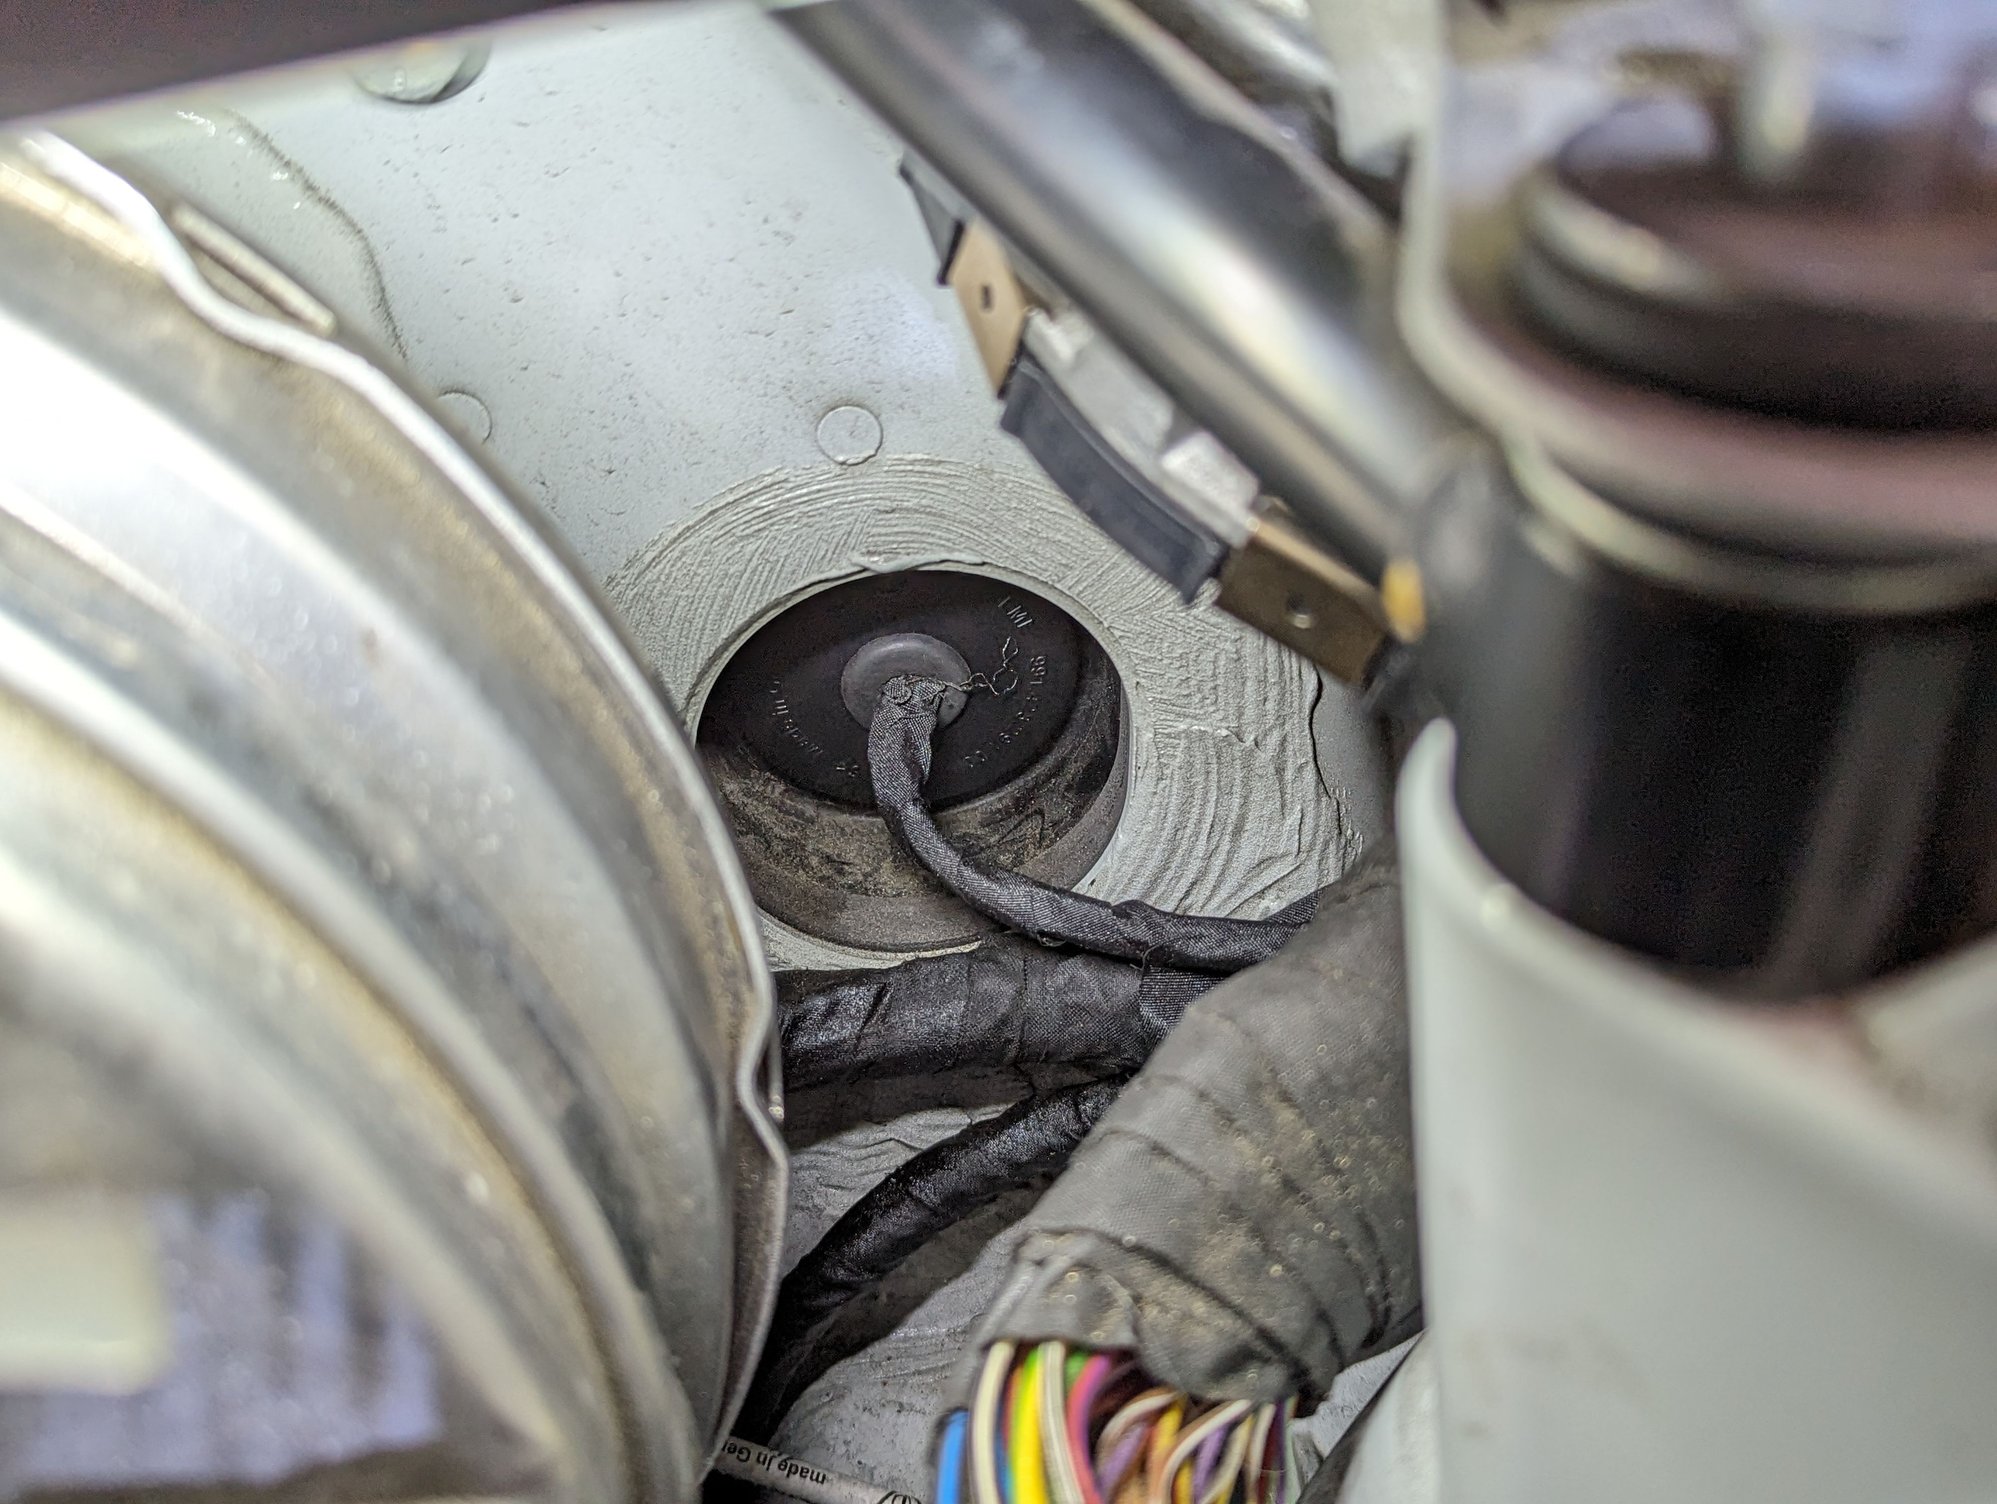
To go through the front firewall, I chouse to drill the plastic cover for the clutch pedal opening as my car is a PDK. It’s easy to remove the cover from inside by just pushing it with a screwdriver. That is if you put something to avoid the cover to fall to the bottom of the car. Then you need to remove the panel under the car to recover it. You guessed right that I didn’t catch the cover. Once the cover is out, I just drilled a hole and installed a rubber gromet. I also attached the camera wire to existing electrical harness with Tesa tape to look cleaner. Once the camera cable is in the cabin, very simple to route it under the carpet under the pedals and into the center console.
Traversing the firewall through the clutch pedal cap. End result.
As described by others, installing the HU is simple if you know what to connect to what and you have all the adapters. Thanks to ZedZed and others, I had all what I needed. I did use the HU Bat +, GND and ACC wires to power the cameras and the MOST box. Avoiding connecting to the original car wires for the same reasons than others. Also, the pigtail from the new HU is short so I did all the connections (cameras, MOST) with the pigtail first and then just plugged it to the HU.
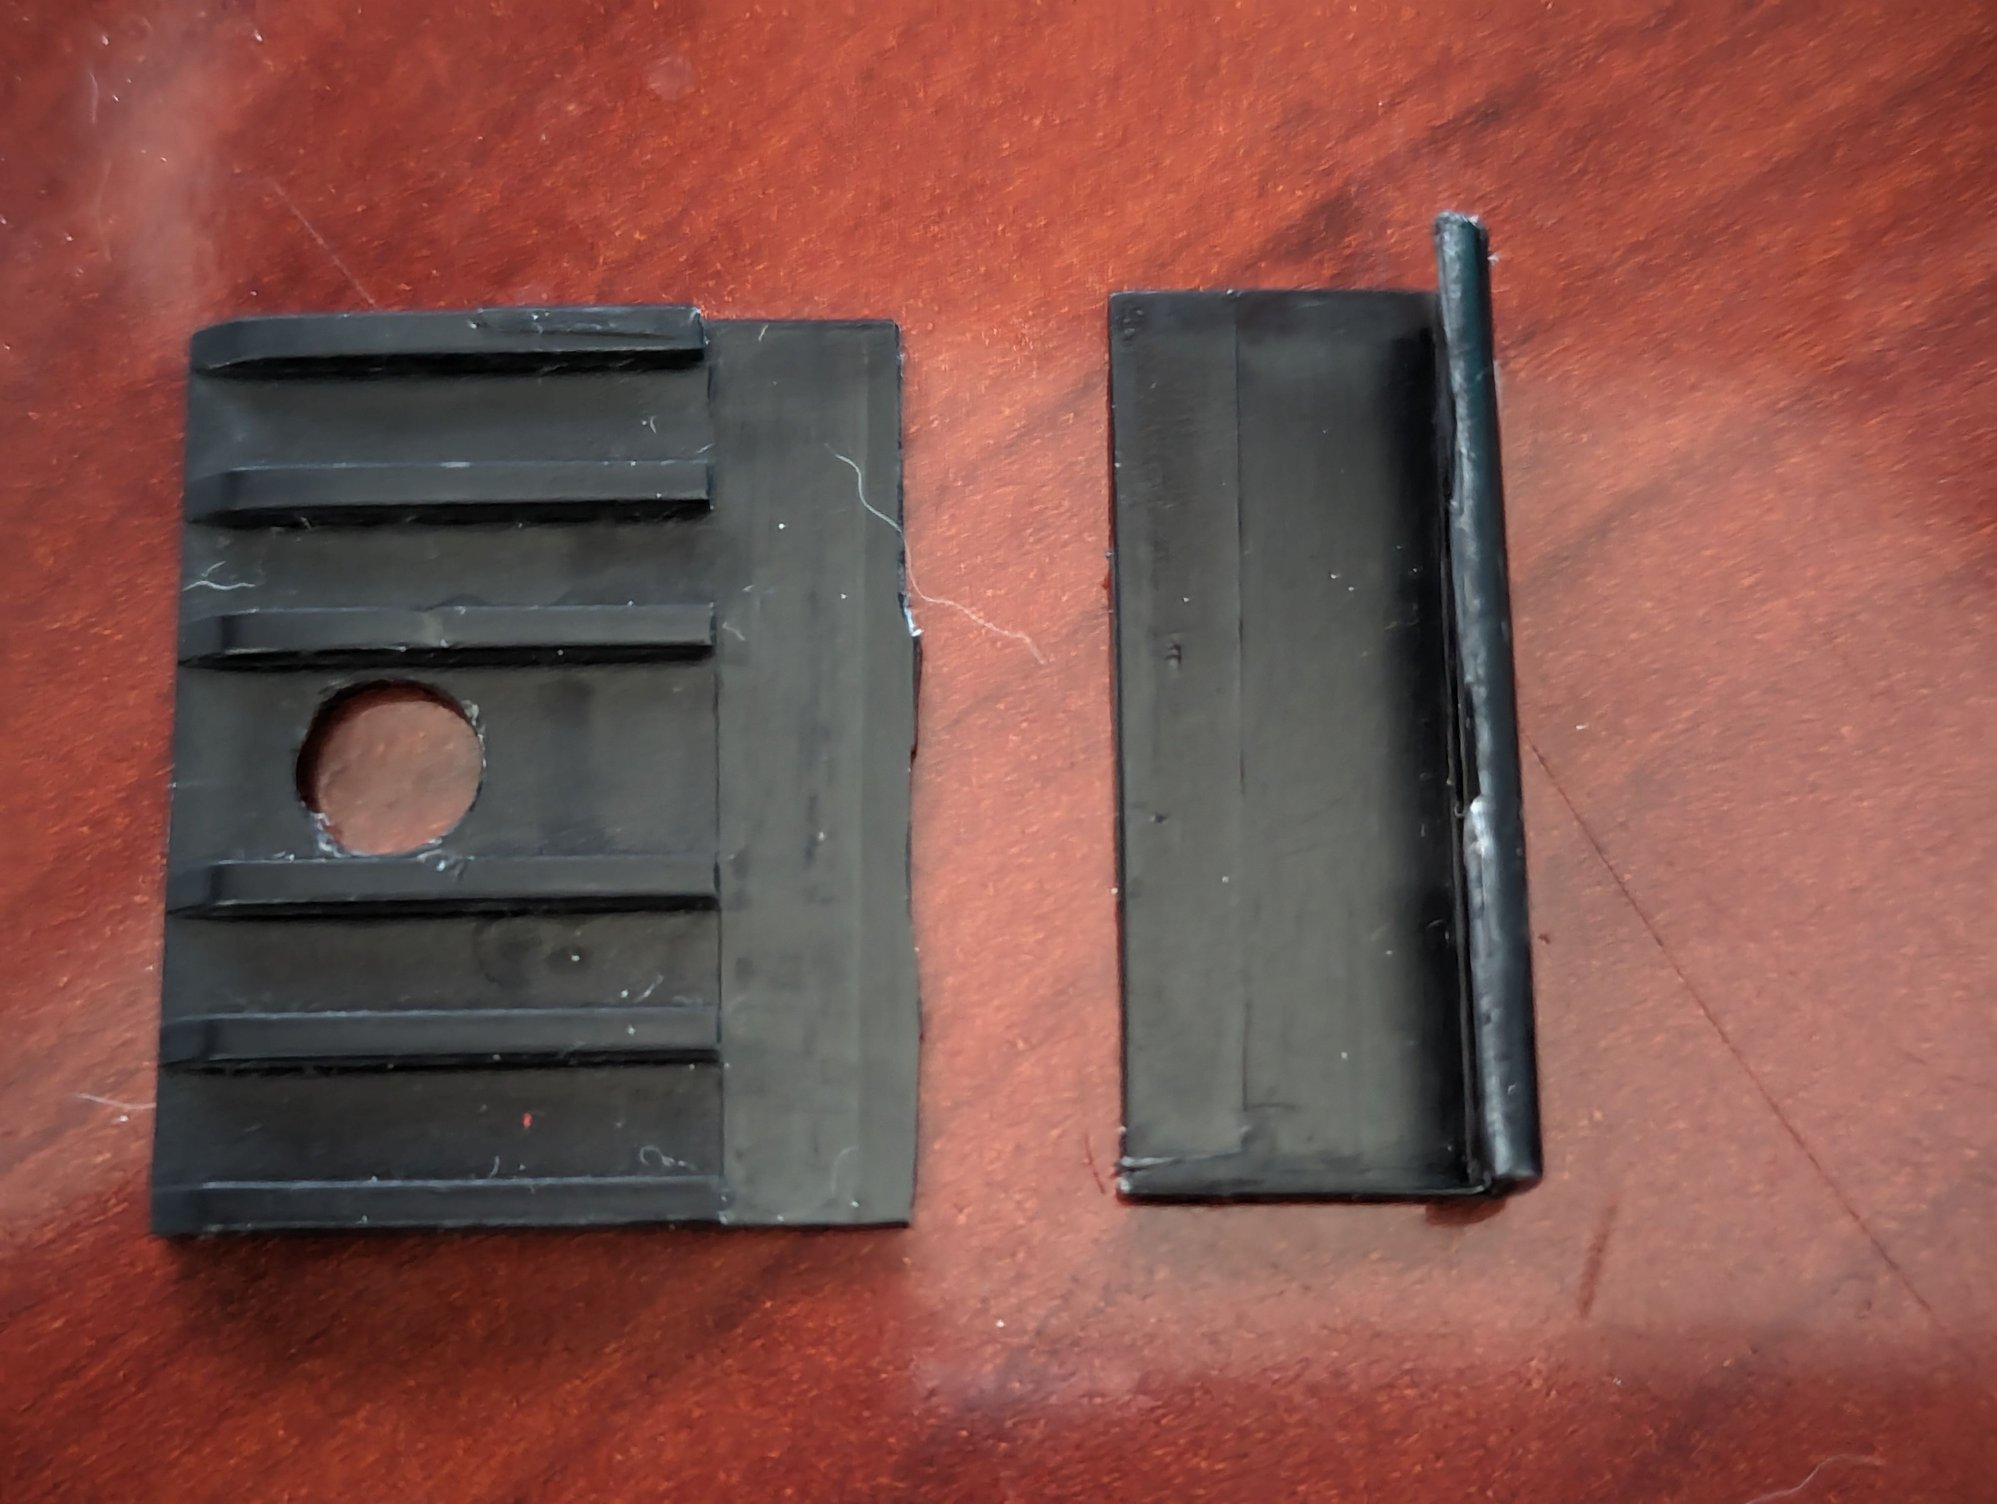
One of the small plastic pieces that goes into the center console side panels was partially broken so ordering a replacement one. Picture below. Part number 991.553.823.00 if you need one. Costs around $7.
Easy to break but cheap.
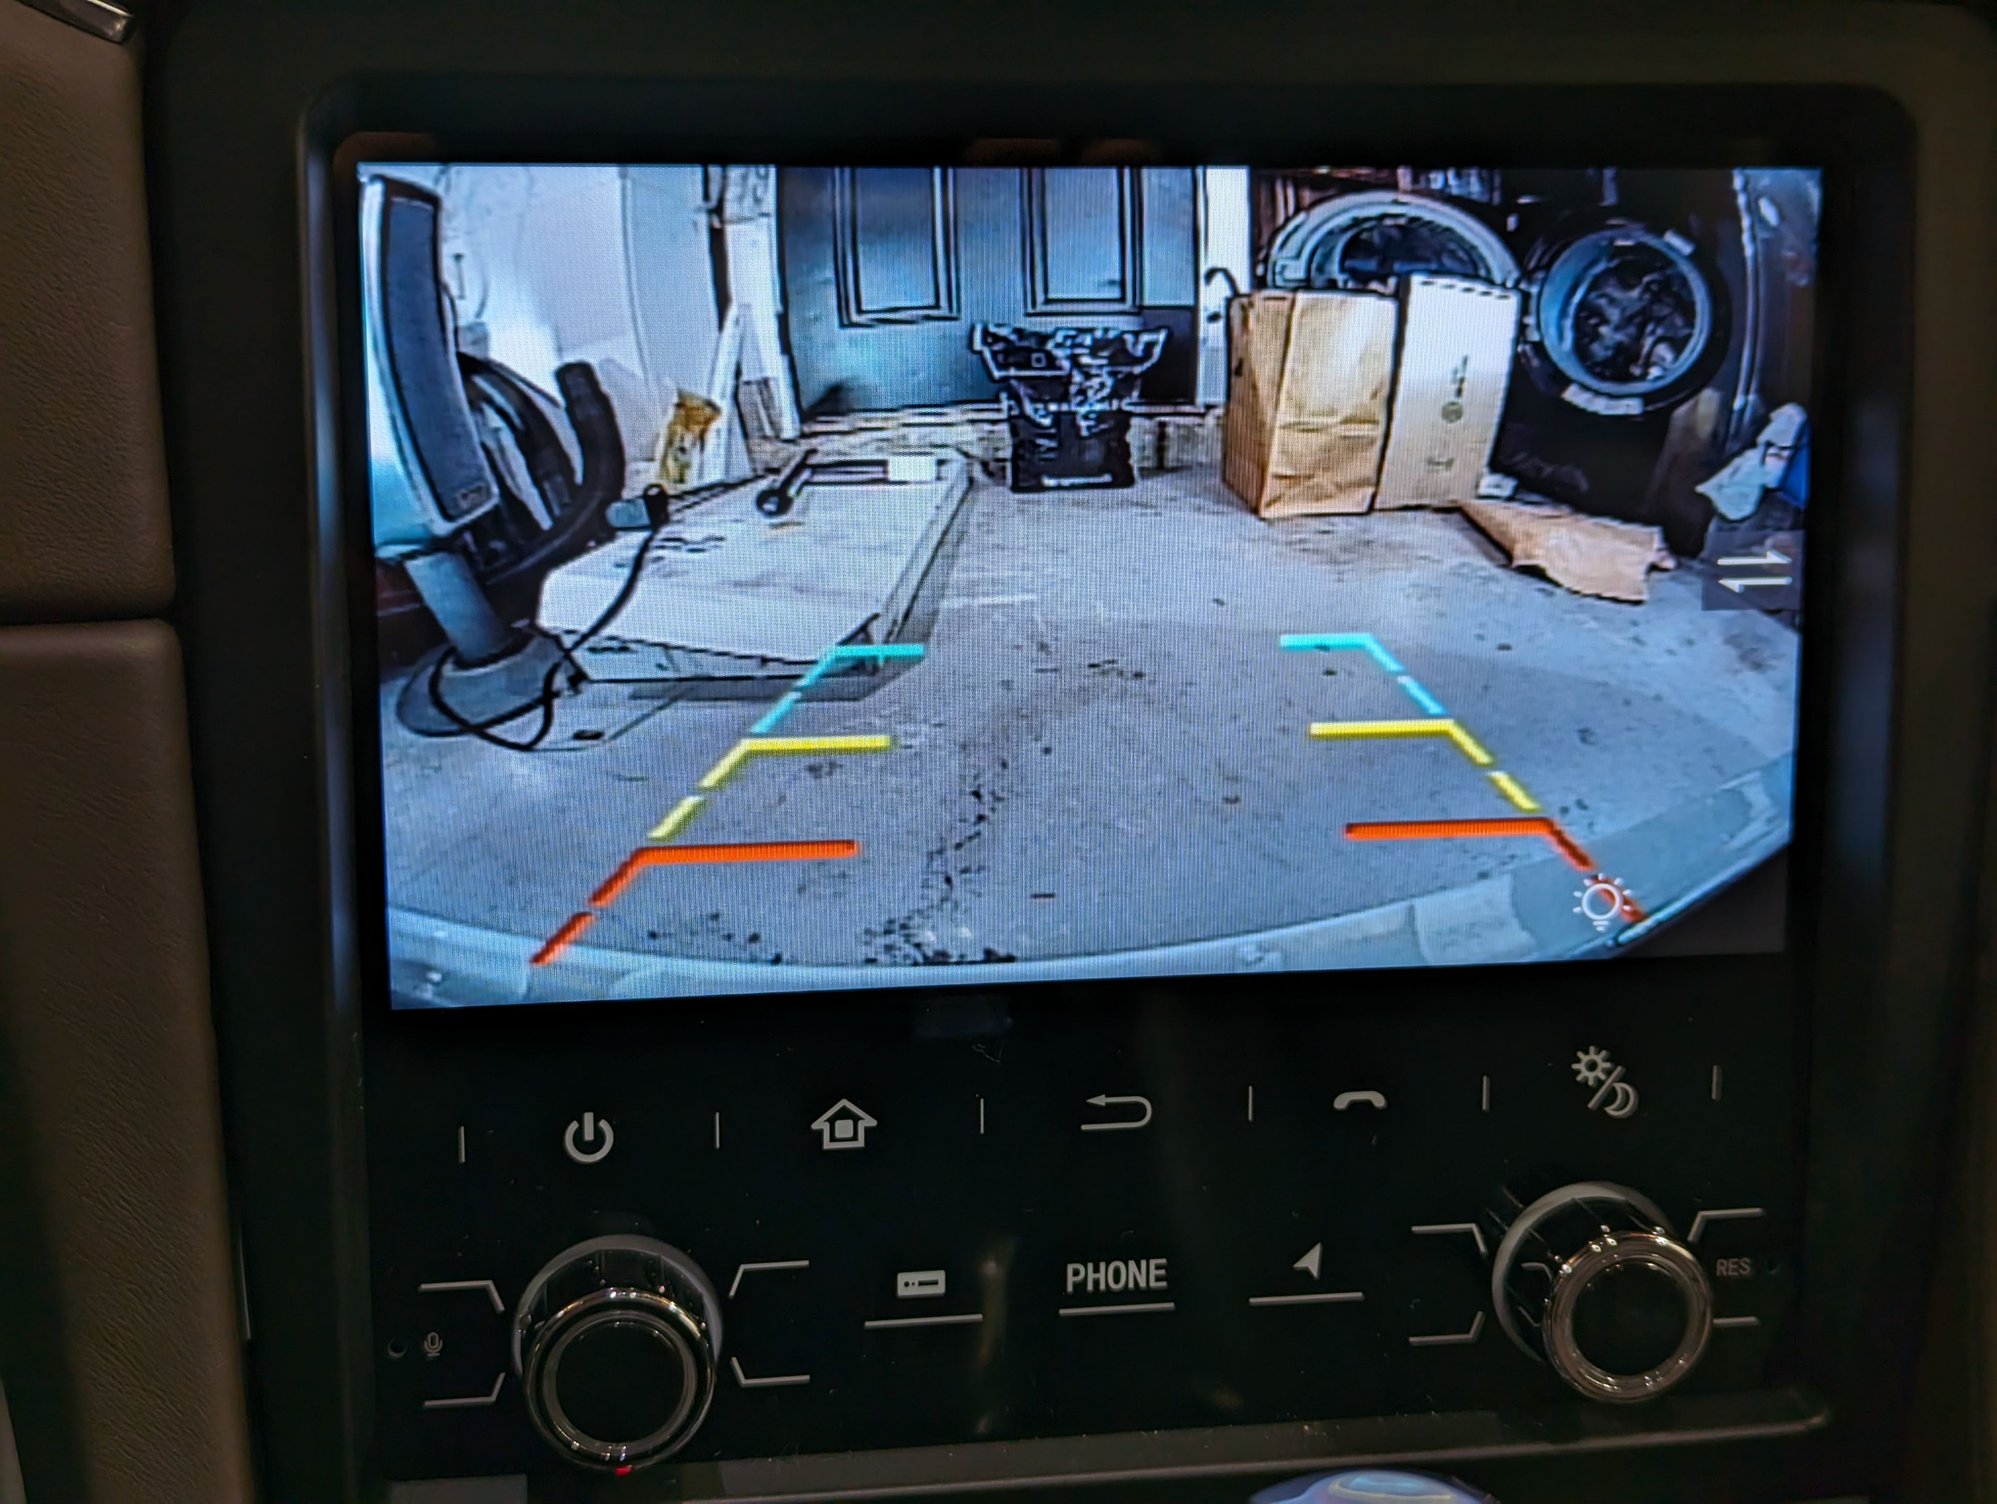
I’m very happy so far of the result, the new HU looks at home with the rest of the center console and the two cameras is something I was looking for long time. I only had limited time to play with it, but AA works flawlessly with both wired and wireless, and the sound is pretty good.
Next step now is security. Setting up the separate google account, installing launcher with password protect and the firewall to check that the box is not calling home. After all, we just gave access to our CAN bus and networks to a Chinese manufacturer non vetted by the cars manufacturer, what can go wrong…
I finished the installation of the new HU, rear, and front cameras. First, let me thank again everybody in this thread and ZedZed in particular for all the pioneering work and the sharing of information. I was able to complete the rear and front cameras and HU installation in about 8 hours spread into two days. This was in big part possible because the information I gathered from this thread.
Another totally awesome post! This thread is becoming the definitive resource for these aftermarket HUs. Thanks for the detailed installation pics for the front camera. I am intending to do this in my wife's car, and although she has a Cayman, the general principles you used will be the same or similar. Your pics and description will make this much easier for me.
Ok I am stumped on coupe of configuration items on the Android HU. First on the standard launcher there is a temperature display and I cannot figure out how to be in Fahrenheit. I got the speed to b in MPH but going through the GPS settings, I set everything I could find to Imperial versus metric.
This is probably a launcher configuration rather than a HU configuration. I am using a different launcher and in the settings for the launcher there are options for degrees F or C, mph/kph etc. If you switch to a different launcher at some point, I suspect this issue will go away for you. I use CarWebGuru - Agama is also nice. But see below.
Originally Posted by mamick
Second issue is the volume for any Carplay alerts such as messages or turn by turn directions, etc.... I had the same issue for Apple Music but found a solution where yo disable Sound Check under the Music App configuration.
Normally you control Siri's volume by adjusting when she talks, this is how it works on my GMC Truck. This change does not affect radio volume. If you try and do the same thing with the Android HU then you crank up the volume on everything. So when you set the volume louder to hear Siri the radio blows you out. Having the issue with Google Maps, Waze, messages, etc...
I have reached out to the seller about being able to customize the colors on the HU panel and they are researching.
First off, I don't use any Apple products so have no knowledge of how Siri works, but I am guessing it is similar to Google's Assistant ("Hey Google"). Here is a list of all the sound options in the HU menus. In the Base Settings menu, there is an option for Navi Prompt Mode, which most people will want to set to Mix. Below that is a slider for Navigation Mix Ratio. This is where you set the relative levels of the nav instructions and the media. (EDIT: I mean the relative adjustment in media level when a satnav instruction is played - you can set the media to mute, to be the same level as the satnav or anything in between, or even louder if you prefer).
For all other sound settings, you will have to go into the Factory special menu. The code is 3368. Once there you will also see a setting called Out Temperature Fahrenheit - you may want to select this, although IDK what it does. I am guessing it allows you to set the Outside Temperature to read in F instead of the (default) C.
The sound settings in the Factory menu are covered in the DSP sub-menu, and here you have Audio Gain Settings. There are sliders to adjust the levels for ALL, AUX, DVD, Bluetooth, TV, and Radio. Juggle these sliders until the sound levels of the different sources are all equal for any given setting of the master volume control.
Still in the Factory menu, scroll down to Audio Gain Settings sub-menu. Here you have another set of sliders for Radio, DVD, GPS, TV, AUX and Car Audio. (On our HU I left all these to 0 since I don't know what they are supposed to do, and seem to duplicate the others referred to above).
My wife has no issues with the Google Assistant sound being too loud or too soft relative to the other sounds - this may be due to how I futzed with the sliders in the DSP sub-menu, or it may have something to do with how Google Assistant works. I do recall having to spend a bit of time getting the relative levels right, but can no longer, unfortunately, recall the precise way I did this. So much with these units is trial and error.
I hope the above gives you some pointers and that you resolve the issue.
Thanks ZedZed for the info regarding the volume controls. I started configuring my new HU and the main challenge is the lack of documentation together with the huge number of settings. I'm sure it's very powerful but the learning curve without factory documentation is huge. I suspect that this thread is going to be instrumental on figuring out all these settings and share them.
Here are a couple of things I still trying to figure out:
1. Is there a way to change the shortcuts in the home taskbar with the factory launcher? The issue I'm facing is that the icon that launch the front camera doesn't look like it's from a standard Android app but directly implemented at the OS level. I can move the icon from screen to screen but I have not figured out how to bring it to the home screen. Ideally in the taskbar. Target is to be able to turn the camera on without having to navigate the screen.
2. Related to point "1", because the front camera support seems to be implemented in a proprietary way, there is no app listed for it in the Android menus managing apps. At least that I can see. This is an issue because if I use a launcher like CarWebGuru, I cannot map the front camera to a shortcut. I tried with Agama and Vivid but they can also not "see" the front camera as they can only access standard Android apps. I sent an email to Erisin who seems to be the manufacturer of our HU (ES8559C) but no answer so far. If anybody has been successful getting support, would appreciate he contact info.
3. I still experimenting with microphones. If I do not plug in the HU the external mike provided with the HU, it seems that the built-in mike in the HU is used. This is the small hole marked "Mic" in the front of the unit on the left below the volume ****. Very poor voice quality. If I plug-in the external mike, the quality is better but still very metallic sounding. I know that the HU is using the external mike because if I tap the mike with my finger, I can hear it. So, it's not that the built-in mike still active.
I suspect that there is a setting for the external mike to set gain/volume/etc..., but I have not found it yet. Would also like to try with the car's original mikes but need to find the setting that selects which mike to use. That's assuming that there is such setting.
On the positive side, I still very happy in general with the new HU. It's fast, great screen, AA is working great, the sound is all good for my taste and it really merges well with the look of the rest of the dashboard. As expected, some more fine tuning needed but overall, I still thinking that this new HU is a great addition to the car.
Thanks ZedZed for the info regarding the volume controls. I started configuring my new HU and the main challenge is the lack of documentation together with the huge number of settings. I'm sure it's very powerful but the learning curve without factory documentation is huge. I suspect that this thread is going to be instrumental on figuring out all these settings and share them.
Hi Chuck. Yes, there is no significant documentation for these units - much of the configuration is by trial and error, unfortunately. It can be a drawn-out process.
Originally Posted by Chuck245
Here are a couple of things I still trying to figure out:
1. Is there a way to change the shortcuts in the home taskbar with the factory launcher? The issue I'm facing is that the icon that launch the front camera doesn't look like it's from a standard Android app but directly implemented at the OS level. I can move the icon from screen to screen but I have not figured out how to bring it to the home screen. Ideally in the taskbar. Target is to be able to turn the camera on without having to navigate the screen.
If there is a way to change the Home screen shortcuts on this unit, I haven't been able to find it. What's more, depending on the seller, the launchers seem to vary from one to another, so my launcher is probably not the same as yours anyway. I always recommend switching to CarWebGuru or Agama which are nicer to look at and way more flexible for setup. Then you can configure the home screen pretty much how you want it.
Originally Posted by Chuck245
2. Related to point "1", because the front camera support seems to be implemented in a proprietary way, there is no app listed for it in the Android menus managing apps. At least that I can see. This is an issue because if I use a launcher like CarWebGuru, I cannot map the front camera to a shortcut. I tried with Agama and Vivid but they can also not "see" the front camera as they can only access standard Android apps. I sent an email to Erisin who seems to be the manufacturer of our HU (ES8559C) but no answer so far. If anybody has been successful getting support, would appreciate he contact info.
Try using the app called AUX. IIRC, the front camera uses the AUX input on the unit. Using the app called AUX should switch to that input and thus show the front camera image. I currently have not installed a front camera on my wife's Cayman but from memory, the AUX app should operate it. There may also be settings in the settings menu or the factory menu (code 3368).
Originally Posted by Chuck245
3. I still experimenting with microphones. If I do not plug in the HU the external mike provided with the HU, it seems that the built-in mike in the HU is used. This is the small hole marked "Mic" in the front of the unit on the left below the volume ****. Very poor voice quality. If I plug-in the external mike, the quality is better but still very metallic sounding. I know that the HU is using the external mike because if I tap the mike with my finger, I can hear it. So, it's not that the built-in mike still active.
I suspect that there is a setting for the external mike to set gain/volume/etc..., but I have not found it yet. Would also like to try with the car's original mikes but need to find the setting that selects which mike to use. That's assuming that there is such setting.
I am using the supplied mic (installed at the top corner of the windscreen, driver side) In our installation this is working well and gives good audio quality for phone calls and also for Google Assistant commands. The mic supplied with your HU may well be different to the one supplied with mine of course. The small hole mic is worse than useless. I have read that some people have found it necessary to block the small mic hole to prevent both HU mics working at the same time, causing issues. In our unit, I have not done this and am just using the supplied external mic.
In this HU there is no setting to enable use of the OEM mic (there is in my Panamera HU). I cannot recall any mic gain settings in the HU menus, and my wife is away today with her car so I can't check (but will do so tomorrow - if I forget, remind me). 'Vanilla' Android does not have a setting for mic gain, but the hacked versions found in Chinese HUs often do. On the Panamera HU I have a lot of additional settings, including mic gain - if these are present in your HU they may be in the Factory Menu somewhere, but I can't recall having seen any. If the mic quality is poor for your unit, you could source an alternative mic on eBay. The supplied mic probably costs less than a dollar, and there are better mics out there for a reasonable price.
Alternatively, there are apps on the Play Store designed to boost mic volume. Some of these may work with your unit. This one has over a million downloads, for example:
Finally, you may find additional settings open up if you set Android in your HU to use Developer Mode. To do this, go to the settings menu, car settings, scroll down the Android settings to find 'About', scroll down to the bottom and tap on 'BuildNumber' several times until you see 'Developer Mode enabled' on the screen. Then go back to the previous menu and select System, then find Deeloper Mode, tap it and enable it. Don't mess with any settings in there - just enable it. Now go back to the HU menus, go into Factory (3368) and see if this has enabled any new options. It may or may not. You can also enable Developer Settings in AA from the Settings menu for Android Auto, then tap the three dots and enable it - but this won't enable any mic settings AFAIK.
Originally Posted by Chuck245
On the positive side, I still very happy in general with the new HU. It's fast, great screen, AA is working great, the sound is all good for my taste and it really merges well with the look of the rest of the dashboard. As expected, some more fine tuning needed but overall, I still thinking that this new HU is a great addition to the car.
It does take some time to figure out all the options etc. When I first installed the Panamera unit, it took me weeks to explore all the menus, but there are a ton more options with that HU than the HU in the Cayman. Try the suggestions above and see if anything helps. Good luck!
@mamick Did you get Carplay working with a cable? Apologies if this was already covered earlier, but are you sure you are using a suitable cable? I recall you saying you had tried more than one cable, but you will only get wired Carplay working if a) you are using the car's OEM USB port and b) you are using a high-speed cable capable of data transfer as well as charging. You may have already got this covered, but I think Apple only recently went to USB C so the user base might not be aware that not all USB cables are the same.
@ZedZed So the iPhone 13 (which I have) and the iPhone 14 (wife's) both are still USB to lightening adapter. So I am using the same cable that works fine in my 2016 GMC Yukon with stock radio and Carplay. I don't believe it is the cable. I found a setting under the Factory Settings where it say Carply port and it was set for 1, I changed to 2 and that was no good as then wireless Carplay would not work. Has anyone ben able to make Carplay work with this HU over USB.
I have played around with lots of the factory settings in the DSP and Audio Gain tabs and have the wireless audio 'better' but not what I would call good.
For Google Maps if I set the app on loud under notifications it is now usable., but of course when I then use it in my truck it blows my ears off.
For Waze I found a setting in the app to increase volume and it made it better not as good as Google Maps but better.
As for things like test message playback, etc the audio is pretty much useless. You have to cranks it so loud to hear that when the radio comes back on it blows your ears out.
I think they have some set wrong on the Bluetooth audio for Carplay, I keep sending them messages and videos hoping they can fix it. It would be nice if Carplay worked wired then I could troubleshoot this even further to see if the low audio exist wired as well.
As for the radio custom color on the panel I also communicating with them to see if they can fix that as well.
If and when I get anything helpful I will post for everyone to see.
Just so everyone knows I am still happy with the HU, but while the cables are pretty much plug and play, be prepared to spend some time with customizing the experience.
I know nothing at all about Apple gear, but I saw a YT video the other day that said it was important to switch off 'Sound Check'. If you have sound check ON, then give it a try. Apparently, Sound Check limits the maximum volume your iPhone can deliver. By disabling it, you make the Apple volume louder, which means you can then turn down the overall volume which should help normalise the different levels between sources. Worth a try as it is easy and free.
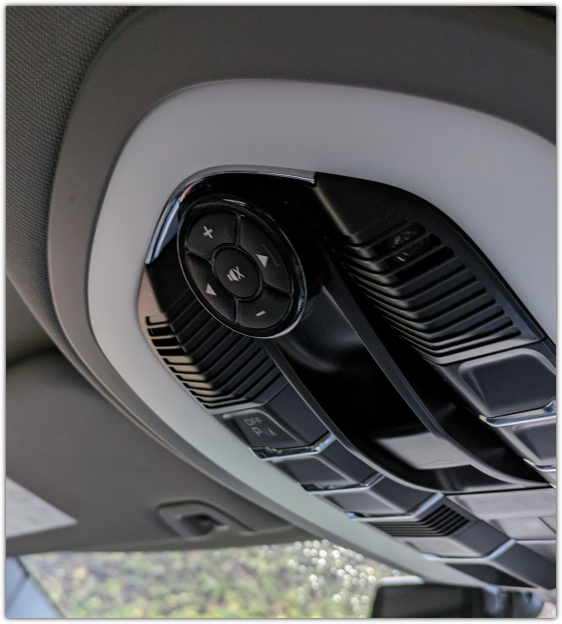
Readers with long memories may recall that my widescreen head unit in my Panamera does not have a physical volume control, and nor does my Sport steering wheel have steering wheel controls. I kind of remedied this by buying this set of aftermarket controls from Ali Express, for under 10 bucks:
These worked brilliantly and took only a few minutes to install and set up. My problem then was where to mount the controls. They would have looked fugly mounted on my very nice steering wheel, and every other potential location looked decidedly aftermarket. But today I found what I think is a neat solution - I installed the volume control unit (I don't need the phone etc controls as I manage these via the screen in Android Auto) on the overhead console, which is a feature of my Panamera model.
Located here, the unit is very unobtrusive, yet also very easy to access and operate. Result!


 12-20-2023, 02:59 PM