When you click on links to various merchants on this site and make a purchase, this can result in this site earning a commission. Affiliate programs and affiliations include, but are not limited to, the eBay Partner Network.
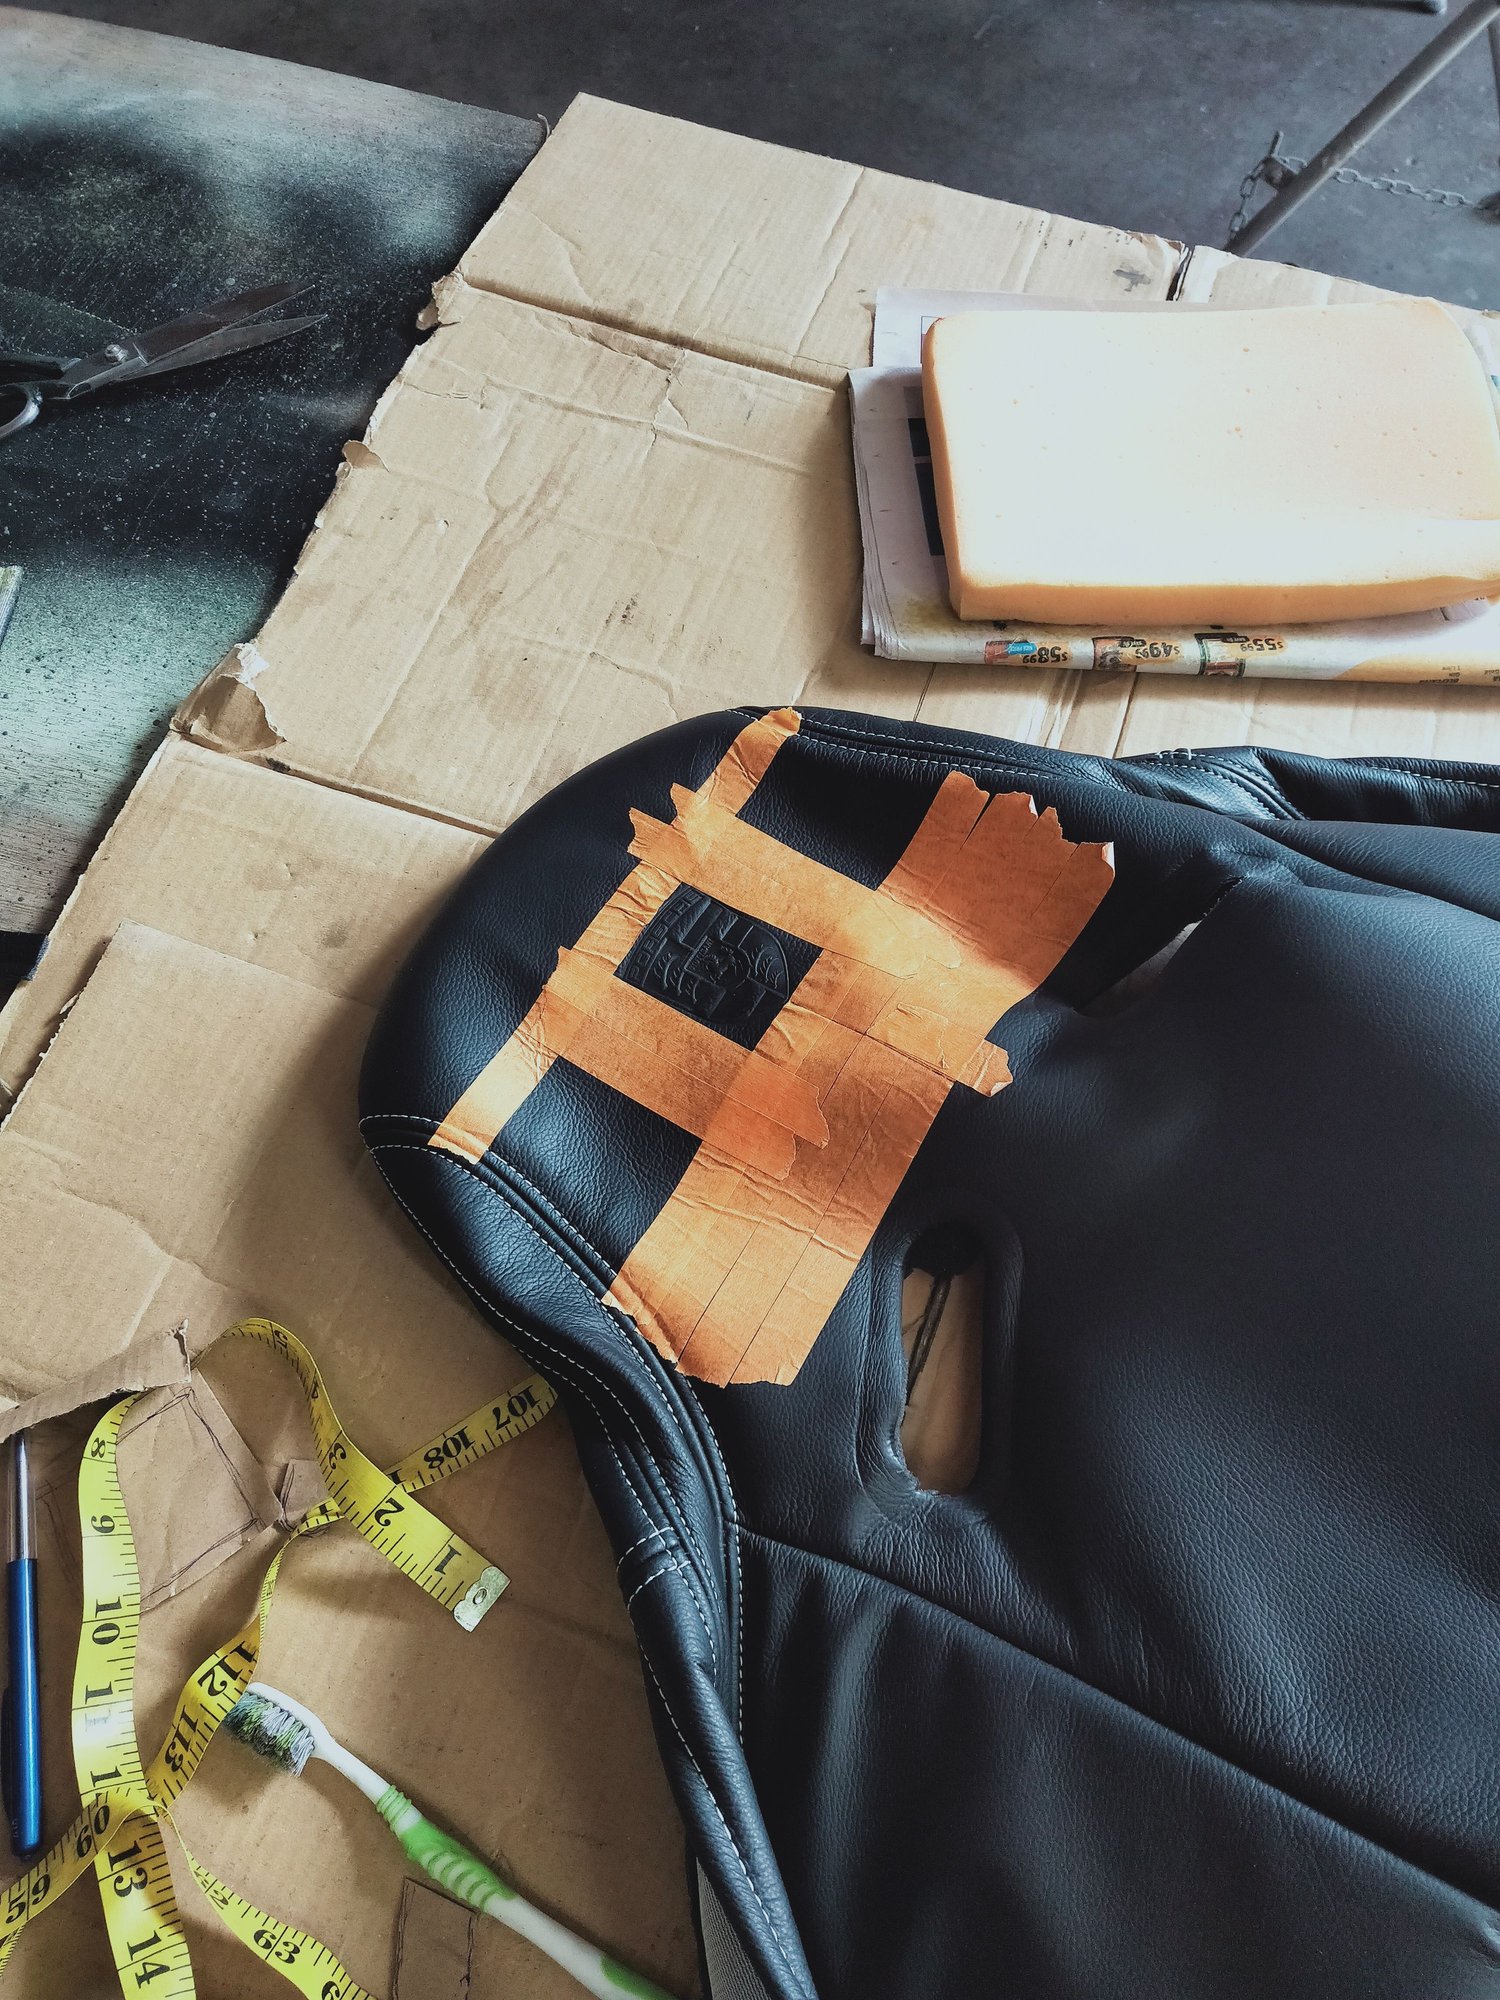
Yet another change of attack, seats this week. The car is getting a pair of carbon buckets custom upholstered in leather with white French seam and black suede inserts. That was all fine and dandy till I decided that I wanted to change the inserts to MK7 Golf GTD tartan, brought the material back with me from England way back in 2018-2019 and has been sitting around ever since. With any upholstery I'm not confident to try I give it to Ian Goodwin car upholstery whom I've been using for 20 years or more and he's always managed to do what I'm after which isn't always easy. At some point I also decided I wanted an embossed Porsche crest in the headrest so I had an embossing tool made, talk about adding complication. Tool duly arrived and since I don't have a heat press another way had to be found. Did a bunch of trial and error on scrap bits of leather, cold pressing, wet leather cold press, heating the stamp with a torch etc. Nothing really worked fabulously until I glued a piece of leather on the back, heated the tool to 80deg c and pressed it. That was the result I was after. Messing around with scrap leather is one thing but on the seat cover I have one shot, that's it. If it gets messed up the entire panel has to be un picked and replaced. To say I'm nervous about doing it is putting it mildly. Started off measuring to find the middle of the head rest but of course with anything hand made its more a case of putting it where it looks right rather than relying on measurements alone. Fairly happy with where it was I used masking tape to mark the place where the stamp needs to go once heated. Well, unfortunately my one attempt turned in to a disaster, uneven press, not deep enough etc. Basically the worst case scenario. Lots of oh sh.. oh sh.. and furious pacing around in a mild panic as to how I'm going to fix this mess. Started to look at how the panel could be replaced but soon realized that pretty much the entire cover would need to be taken apart to repair / replace that one piece. It's done now and no good so no matter what I do it can't really get much worse. Carefully taking my time lined up the stamp again in the same place and re pressed it, still not really what I was after but it improved it. Put the cover back on thinking I'd leave it at that but no, I can't accept it. More thinking and pacing around, the cover came off again and I think I know why it came out how it did. The leather cover has scrim foam sewn on the back of it taking up a lot of the compression. I decided to remove the foam (to be glued back later) then try again. This time in the vise, piece of steel either side and clamped that for a good few hours. Thankfully the center marks I'd made making it fairly easy to line up the stamp again. That seems to have done the trick for now but we'll see how it fairs over time, I certainly won't be doing the other seat before I'm confident this is the way to go. Tartan inserts in this does look the way I'd envisaged it to be but was it worth the stress....
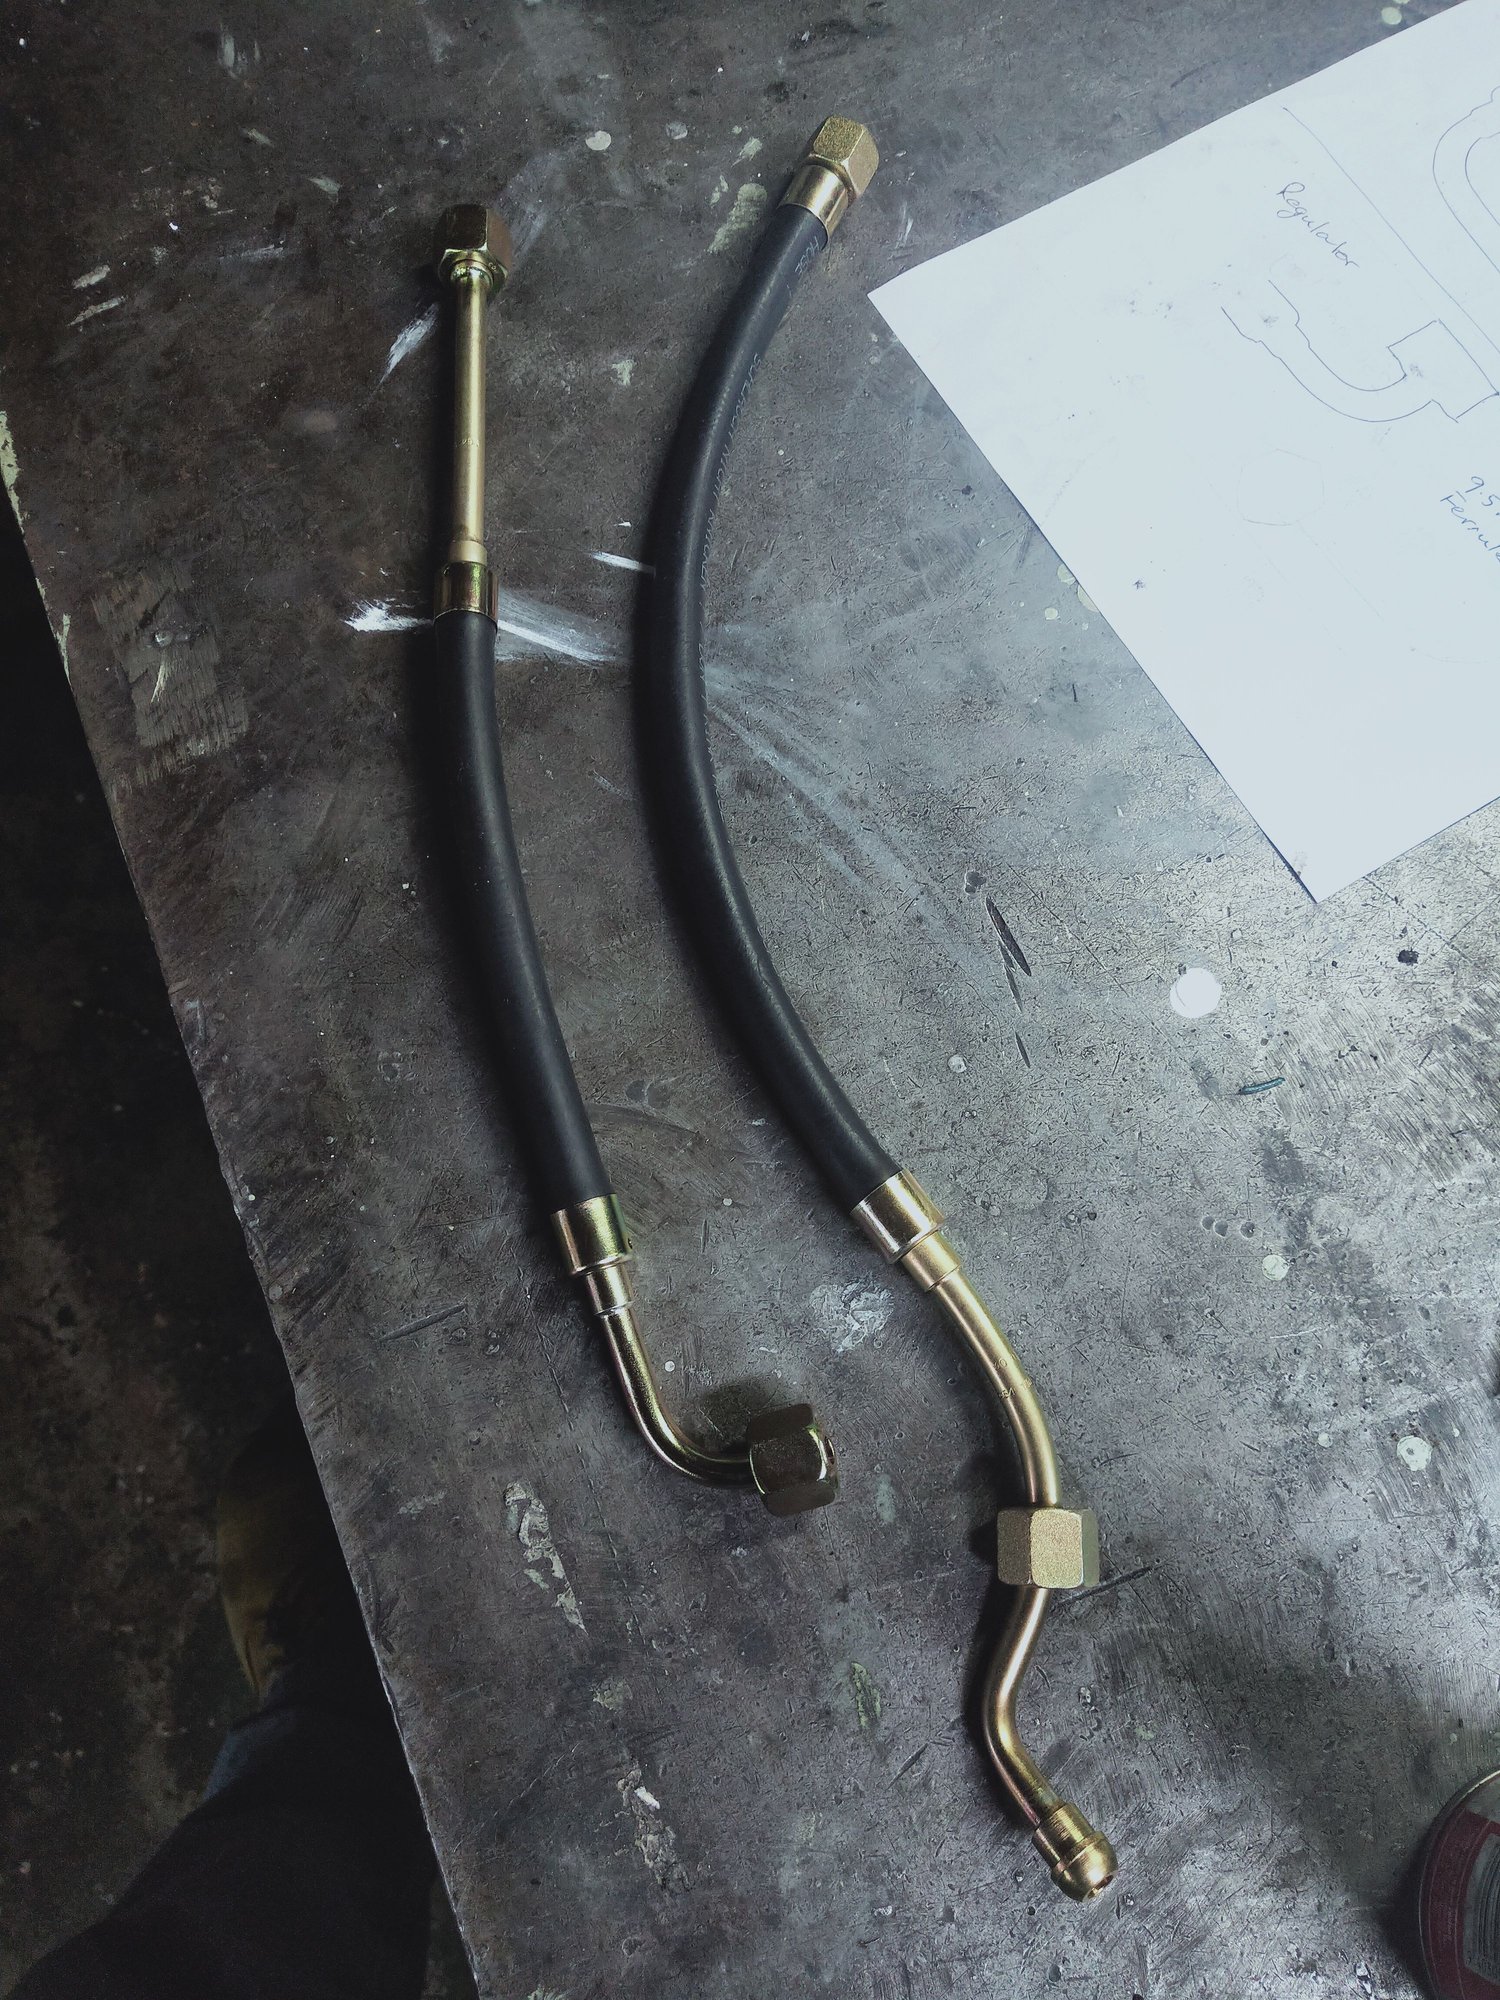
Back on board, not much progress but I've picked up some parts from the painter so there's those to admire till the body comes back. Yesterday my friend David from David Gouk Race engines came over to test fit the custom billet valve covers he's designed and made right here in New Zealand, the last component I'm waiting on to close the engine up so that I can start on making the headers. He designed these to work with VW / Audi coil on plug coils and we decided to use R8 coils on my engine and the others he's building so I ended up ordering 60 coils from Rock Auto some time back. Perfect fit of course, the only thing left to do is laser etch Porsche script in to the top covers that will be visible in the engine bay. The last item left on my bench of problems are the fuel hoses for the engine bay, still in ok condition but hard as a rock. Various ways of dealing with these and a few companies offer bolt on solutions but I was pretty keen to have a go myself. Did a bunch of research and ended up coming across a guy right here in NZ that had done the same thing. The hose is plastic lined and getting that over the fittings is the issue. First off I needed to get the old hose off, you could cut the sleeve and then cut the hose off but I really wanted to save the fittings if possible so instead I used a propane torch to burn the hose off saving all of the fittings and sleeves. Made a diagram of what goes where and belongs to what with each hose measured and recorded. Sent the fittings off to be re zinc plated to return them to as new condition. With those away being done I set about ordering the hose, the exact same hose Porsche used is available from Cohpro in the UK, Cohline hose was used by several manufacturers then including vw and audi. Bought enough hose to do the engine as well as the rest of the lines up front those duly arrived. Craig had done his before and had actually purchased a tool to press the hose on which he graciously let me borrow, he's actually also a VW Corrado owner so we have plenty in common. Fittings back from plating, hose arrived and armed with Craigs press I set about re making my hoses to OEM specs. The tool consists of two mini vices, one holds the fitting at one end and the other holds the hose. The vices are linked together by a screw thread that you simply wind together to force the hose over the fitting. Ive said it many times, quality tools make jobs like this a cake walk. Really marvelled at just how easy this was. Thank you Craig, truly appreciate you loaning this to me.
The tool has a bunch of different size inserts to cater for many different sizes of fittings and hose, really well thought out piece of kit, I love it. It was mainly a case of carefully measure, cut the hose, look at the pictures of the old hose, compare to my drawing and finally install the fittings. Pretty easy to get it wrong if you don't pay attention so what I ended up doing was once a hose was done I'd cross out the drawing and delete the photo of the old hose. Seemed to work pretty well. Two fittings left to do but first need to install the hose on the engine in order to clock the fitting the right way. Once these are on they are not coming off again and you can't even really turn them once installed.
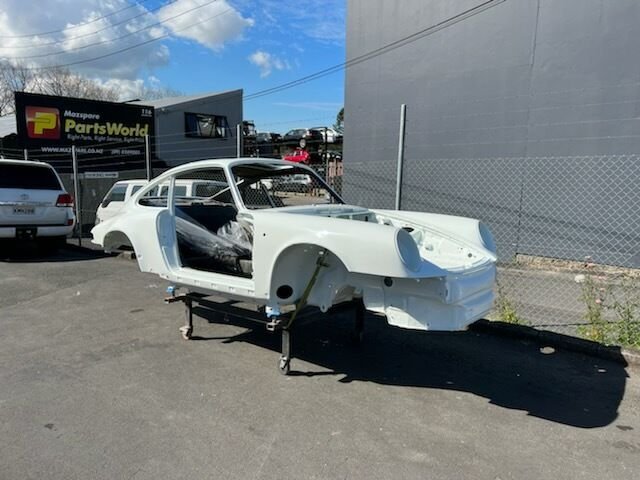
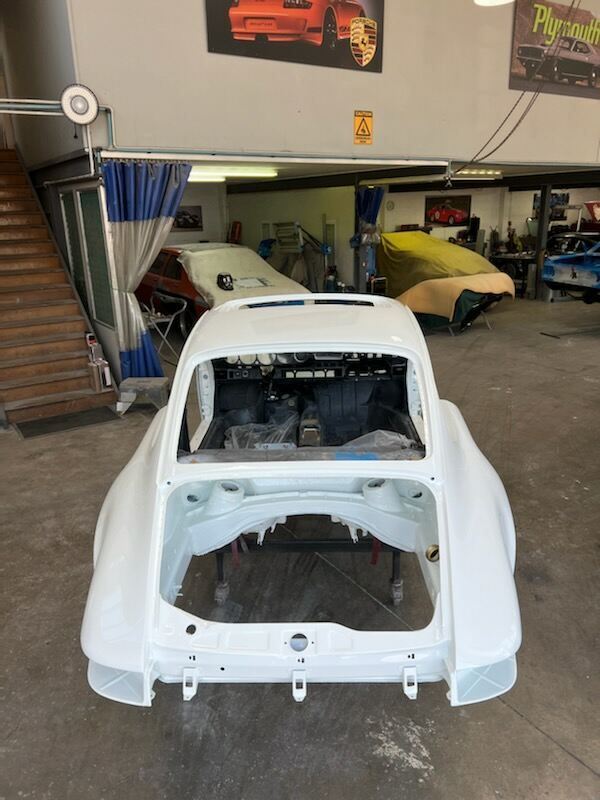
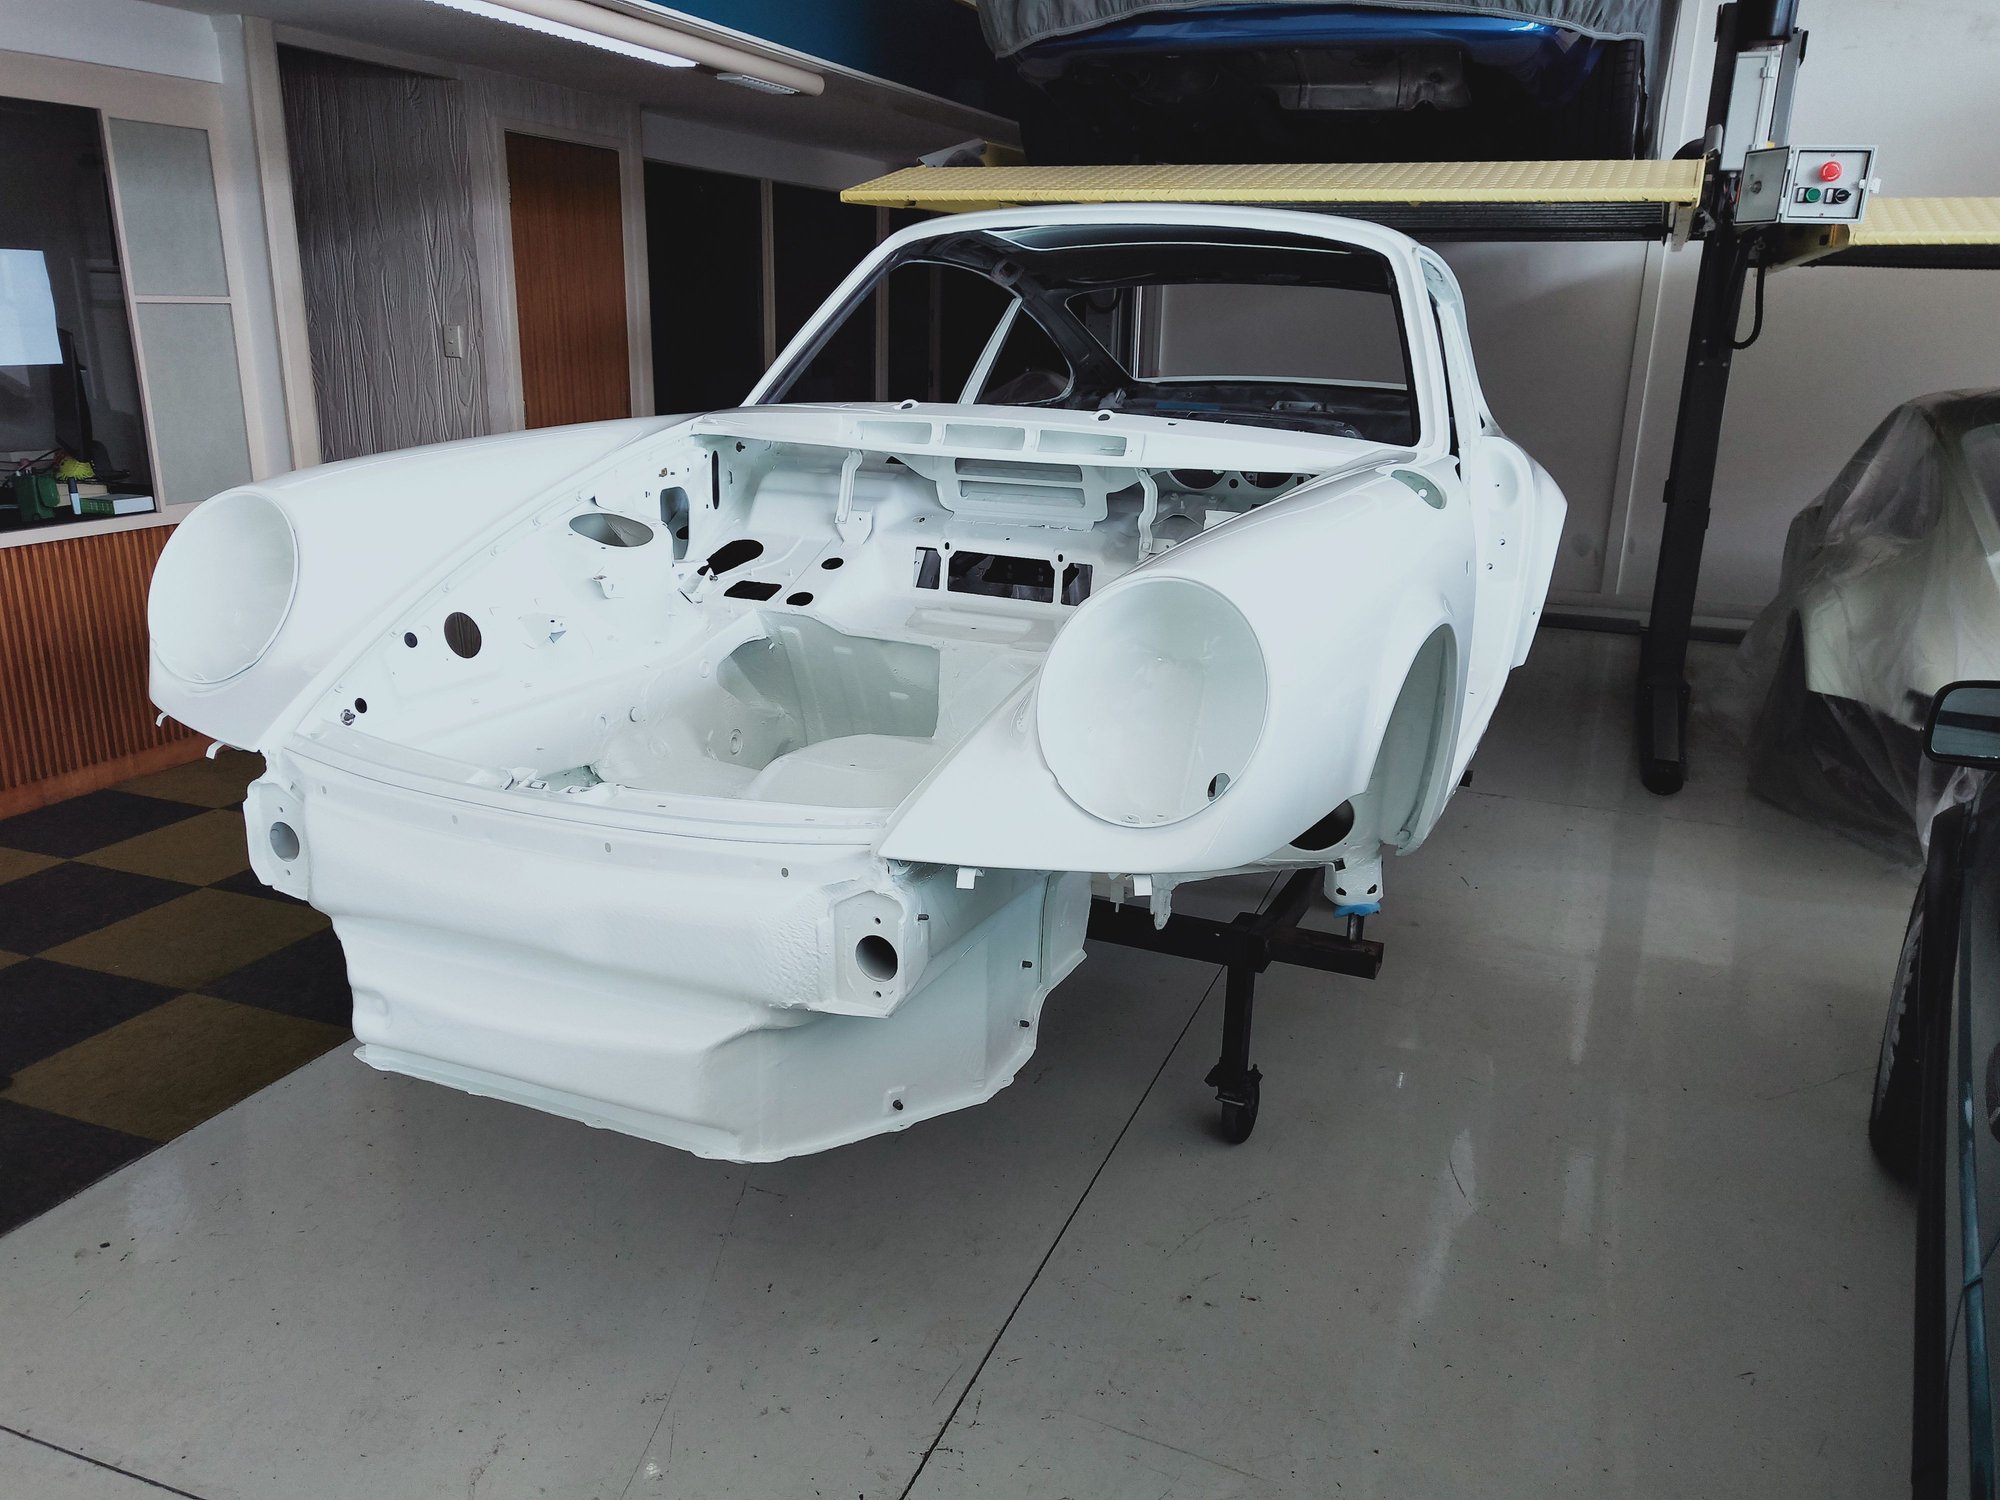
Well, I was never a fan of the marine blue metallic originally on the car so here it is in its new colour. Settled on Grand Prix white after flip flopping between this and slate grey. In the end I decided that with the level of detail I'm going for underneath white pops much more and shows a lot more detail. Rubystone was also a brief consideration but future value wise white is just a lot more neutral. Greig and the guys at Profile Autobody did an outstanding job, the paint almost looks liquid like its just been poured on. The level of detail they went to is simply outstanding. Super happy. As always Avon towing doing what they do best, damage free towing. Two icons together from the same era, the 1990 964 C4 and the 1991 Golf MK2 GTI. Love them both for different reasons.
Love this build! So much interesting engineering in it. Also interested in your mk2, got a build thread for that? I've had mine for 18 years now, but haven't driven it for six or seven. Typical OEM+ build, with Recaros, an ABF, Passat underpinnings, you know the drill...
Love this build! So much interesting engineering in it. Also interested in your mk2, got a build thread for that? I've had mine for 18 years now, but haven't driven it for six or seven. Typical OEM+ build, with Recaros, an ABF, Passat underpinnings, you know the drill...
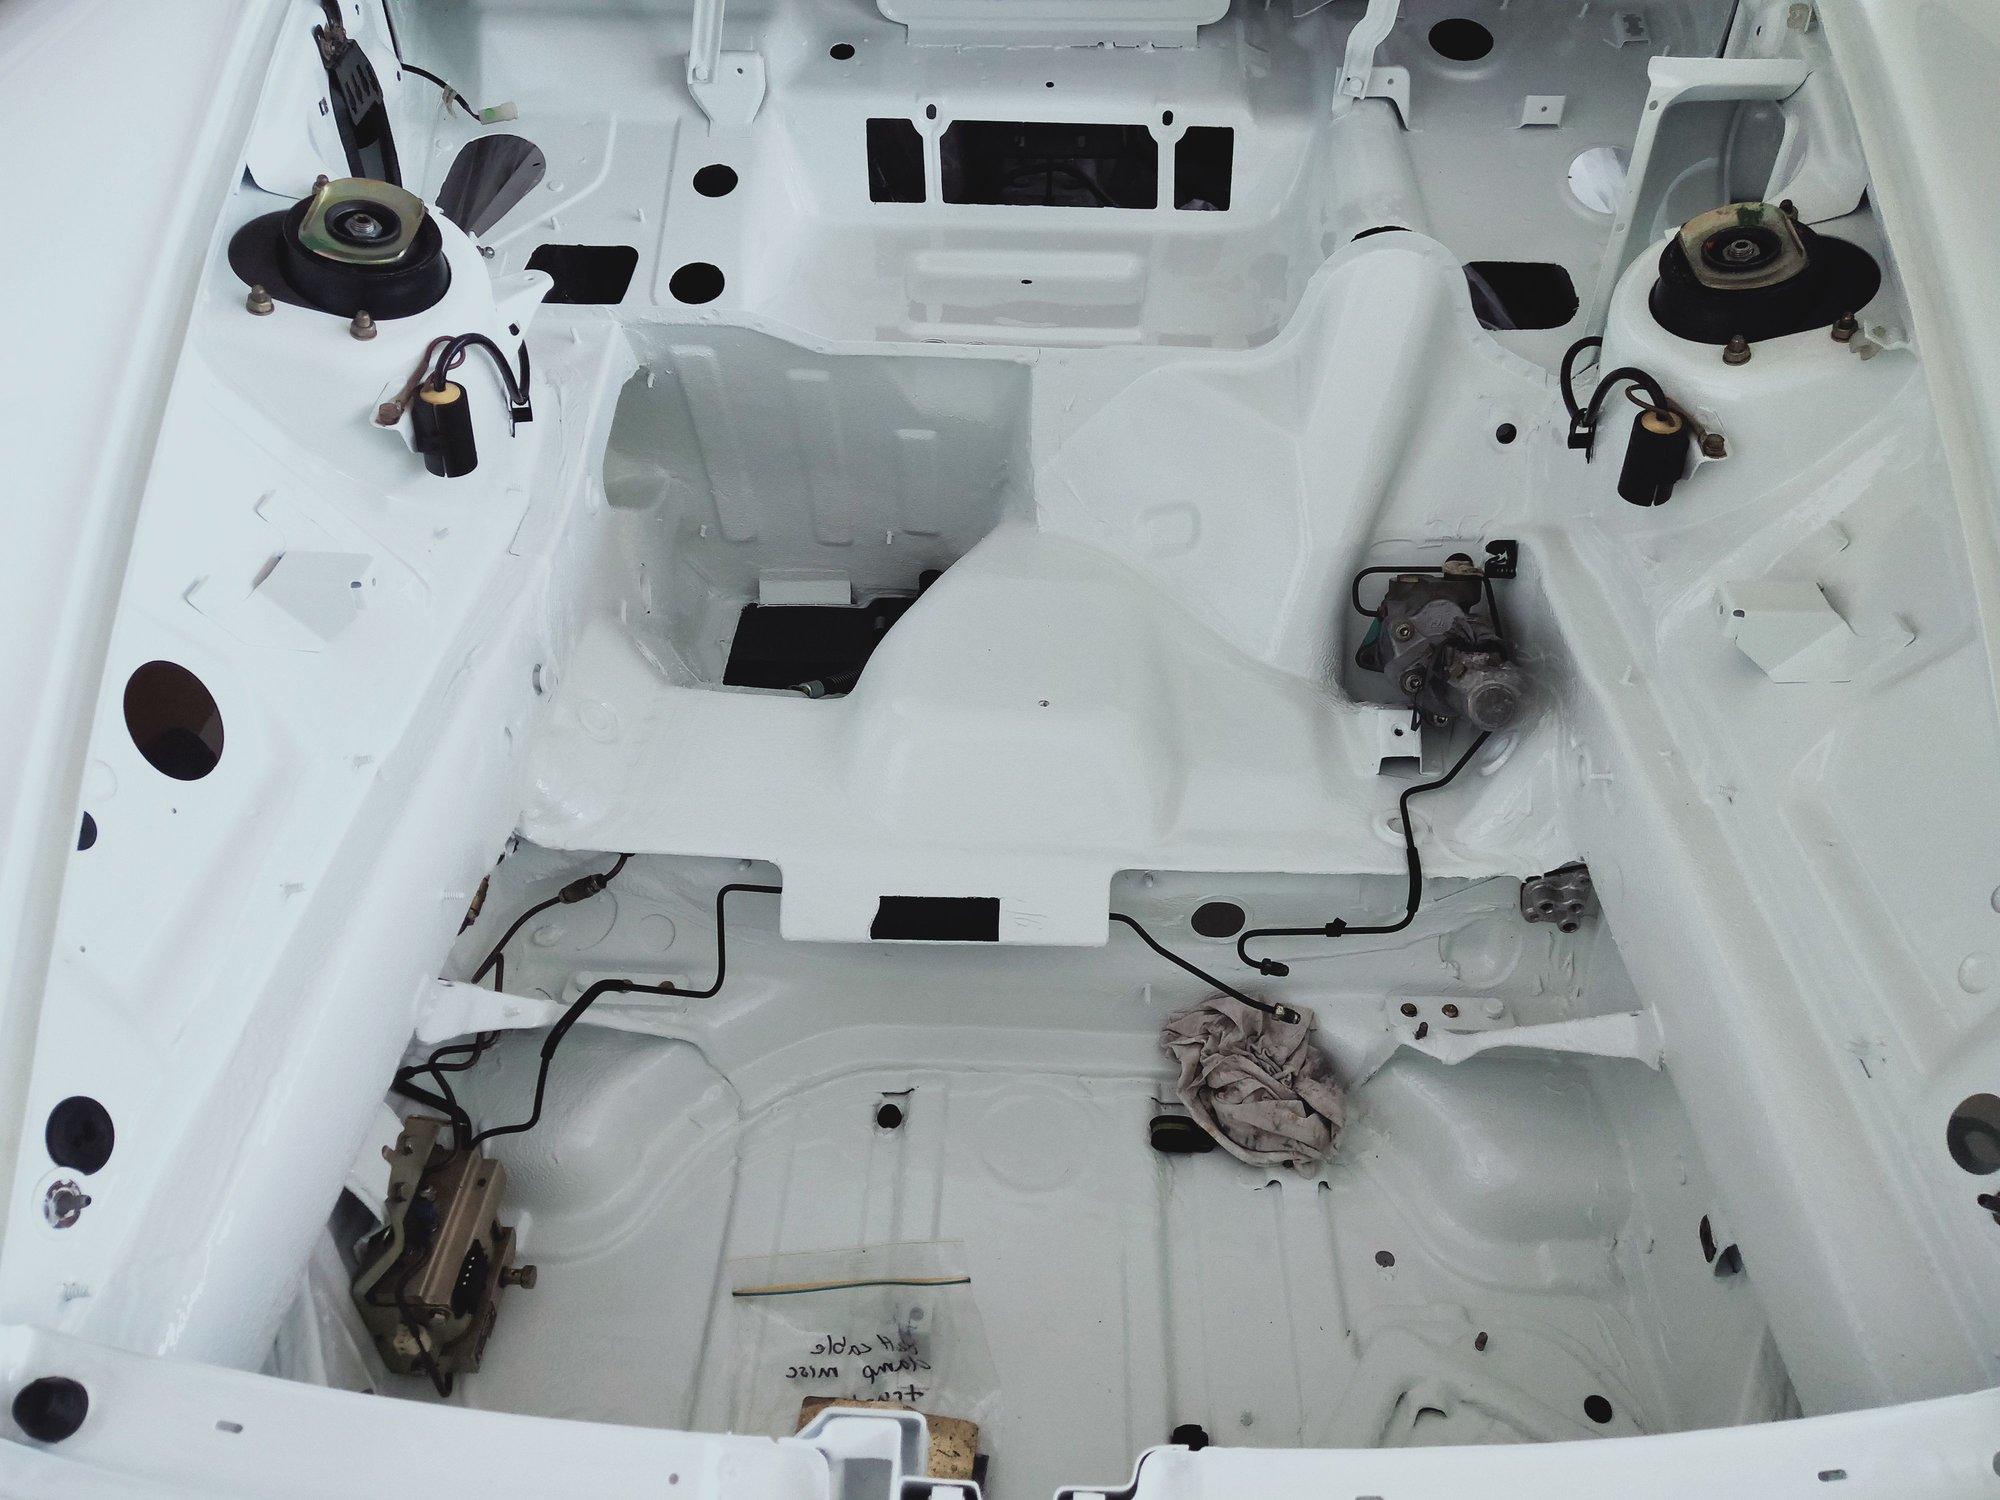
It's Sunday and Y'all know what that means. Time for the big jig saw puzzle to start going back together. Main focus is going to be to get the suspension and under body assembly completed so that it can come off the cart its sitting on and go back on its wheels. Seems the most logical place to start would be the lines in the transmission tunnel, fuel, vacuum, brakes and clutch. I'm deleting the power steering ones as I'll be going electric. First job is to clean everything, it feels like you spend your life just cleaning but needs must. The fuel lines all looked fine but when I'd placed an order with Cohline for the engine lines I also ordered hose and ferrules to replace the hoses on the hard lines. Cut the ferrules off and while twisting the hose off it just snapped off!! Anyone with 30yo fuel hoses should take note. While mine looked absolutely fine they were hard as a rock, thus brittle also. With new hose cut to length and installed with new ferrules I just went next door to my old business to use their hydraulic crimper for pressure washer hose to swage the new fitting on. Simple as that. I did add a spring to the fuel pump end of the hose to stop it collapsing as it does quite a tight 180 before attaching to the pump.
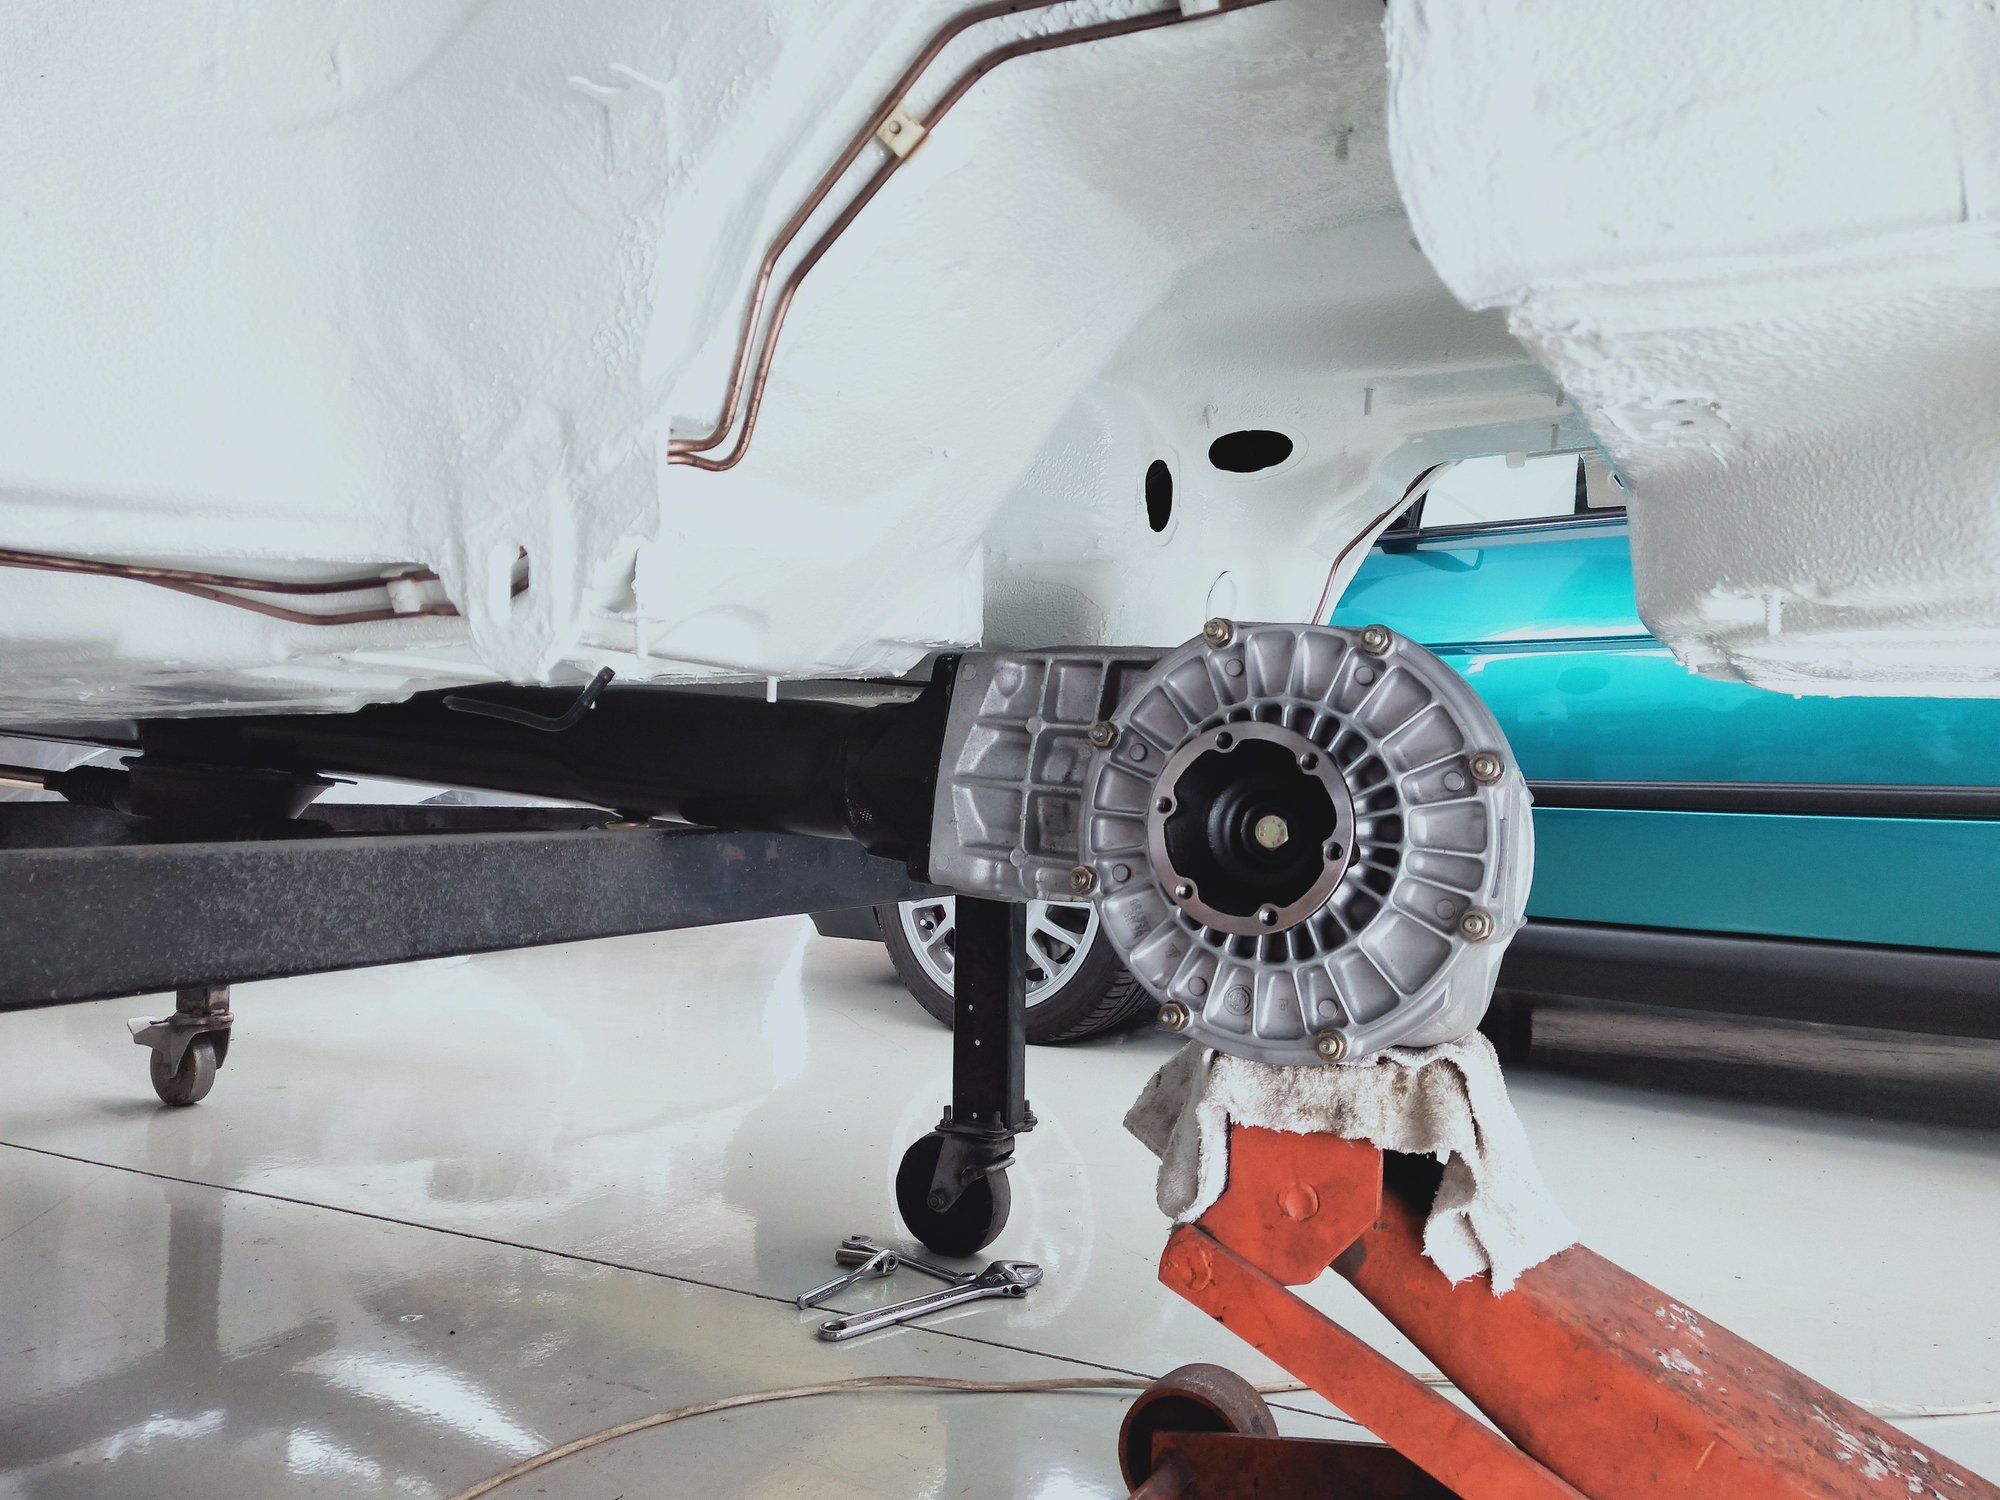
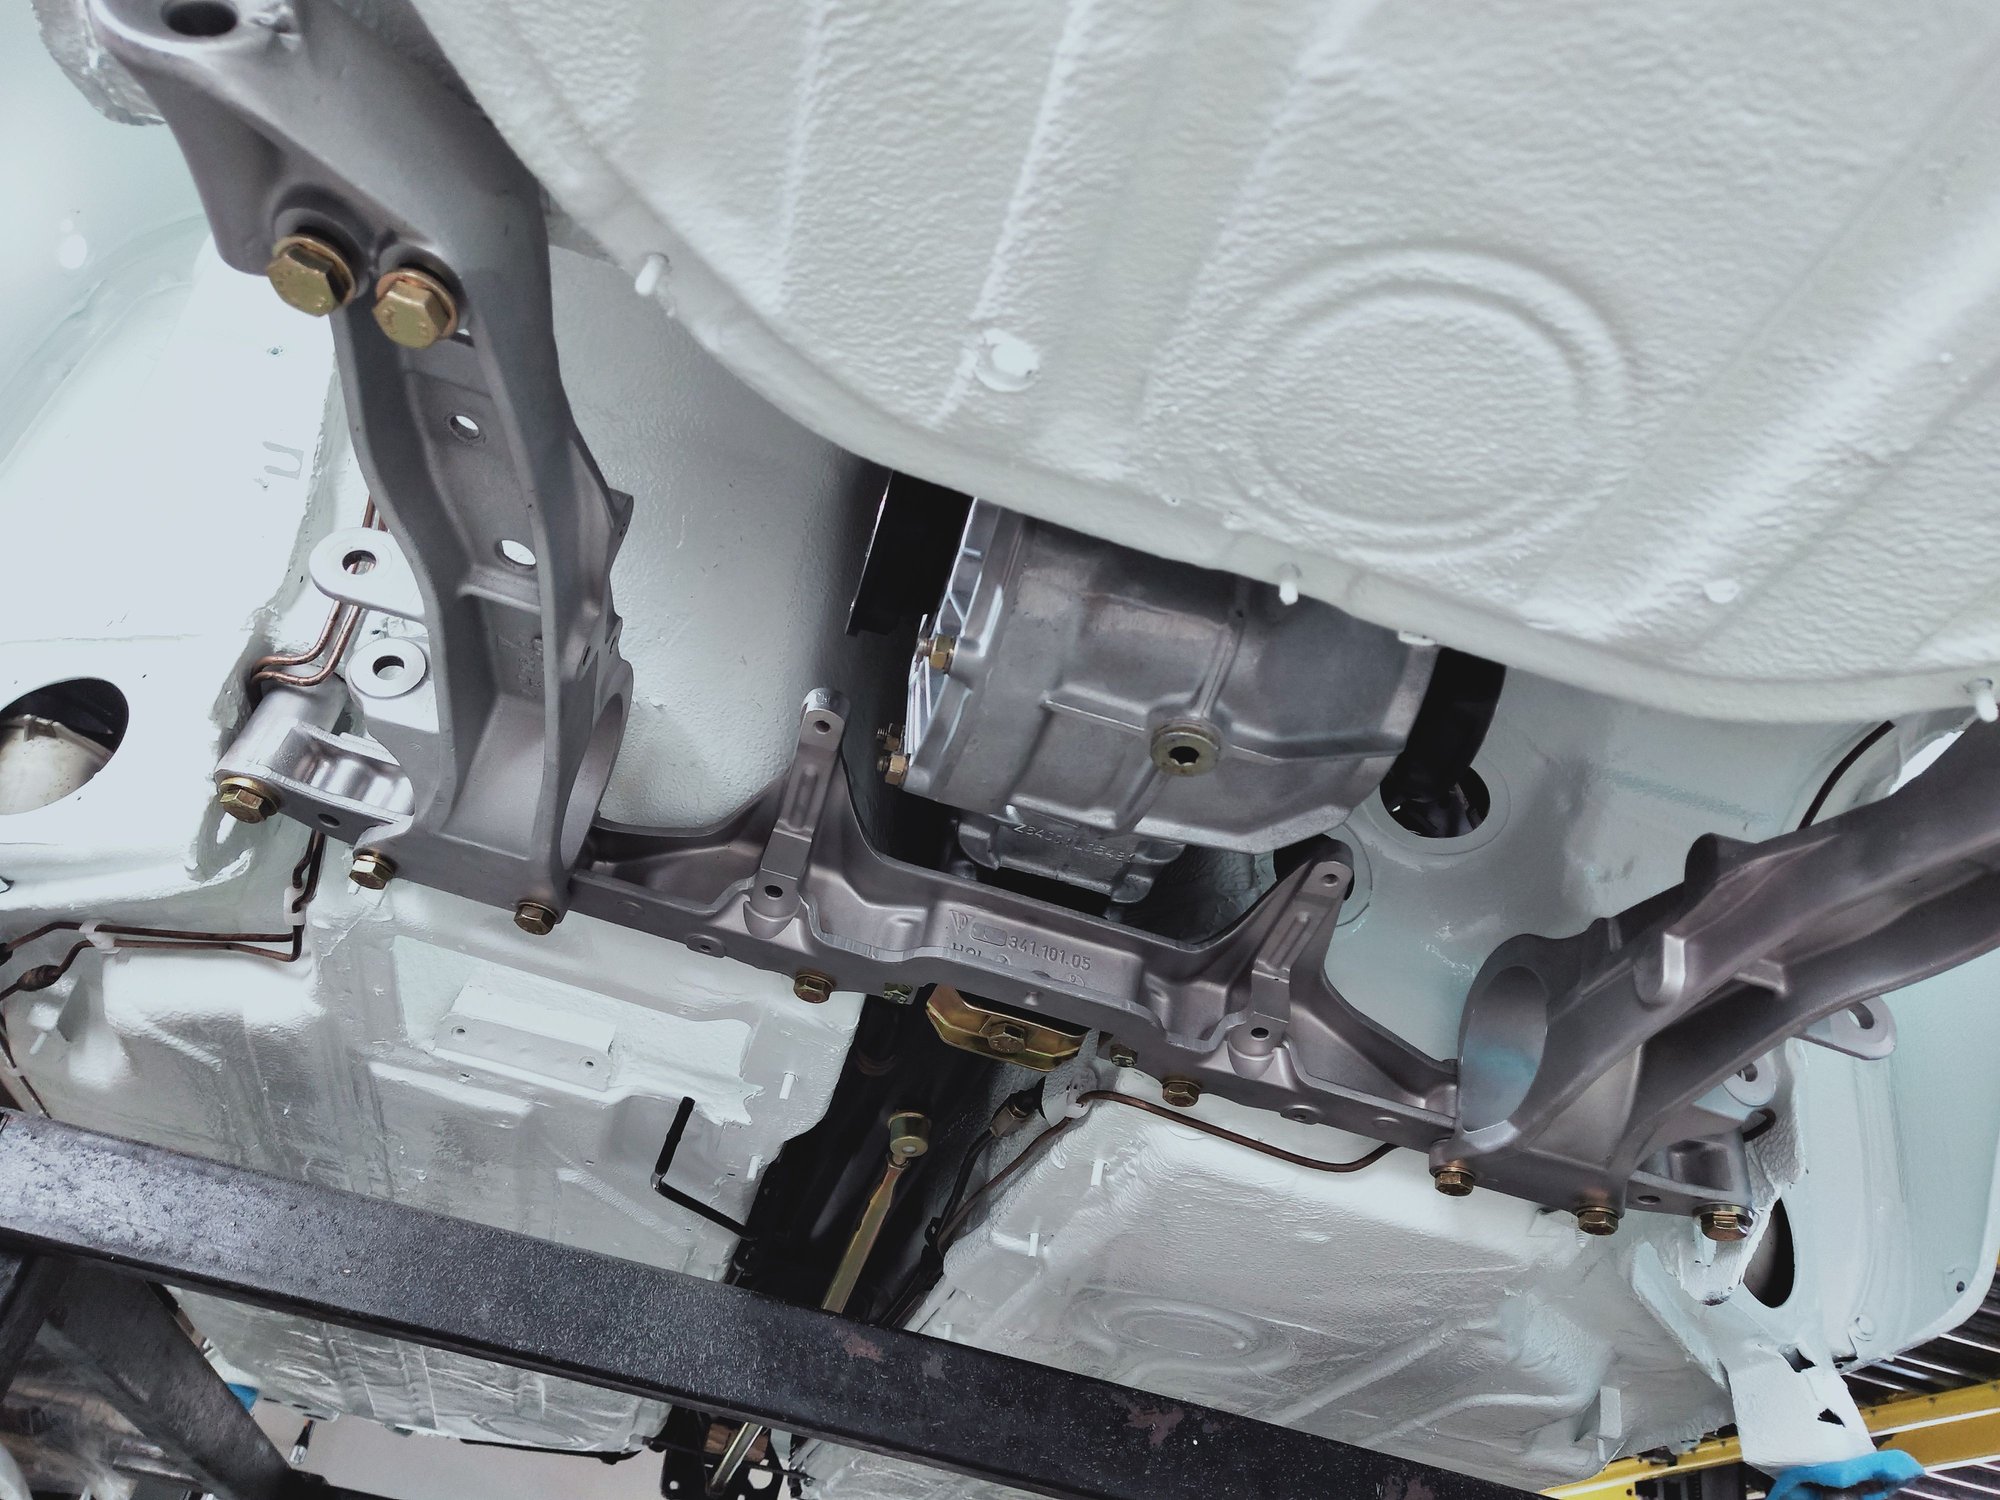
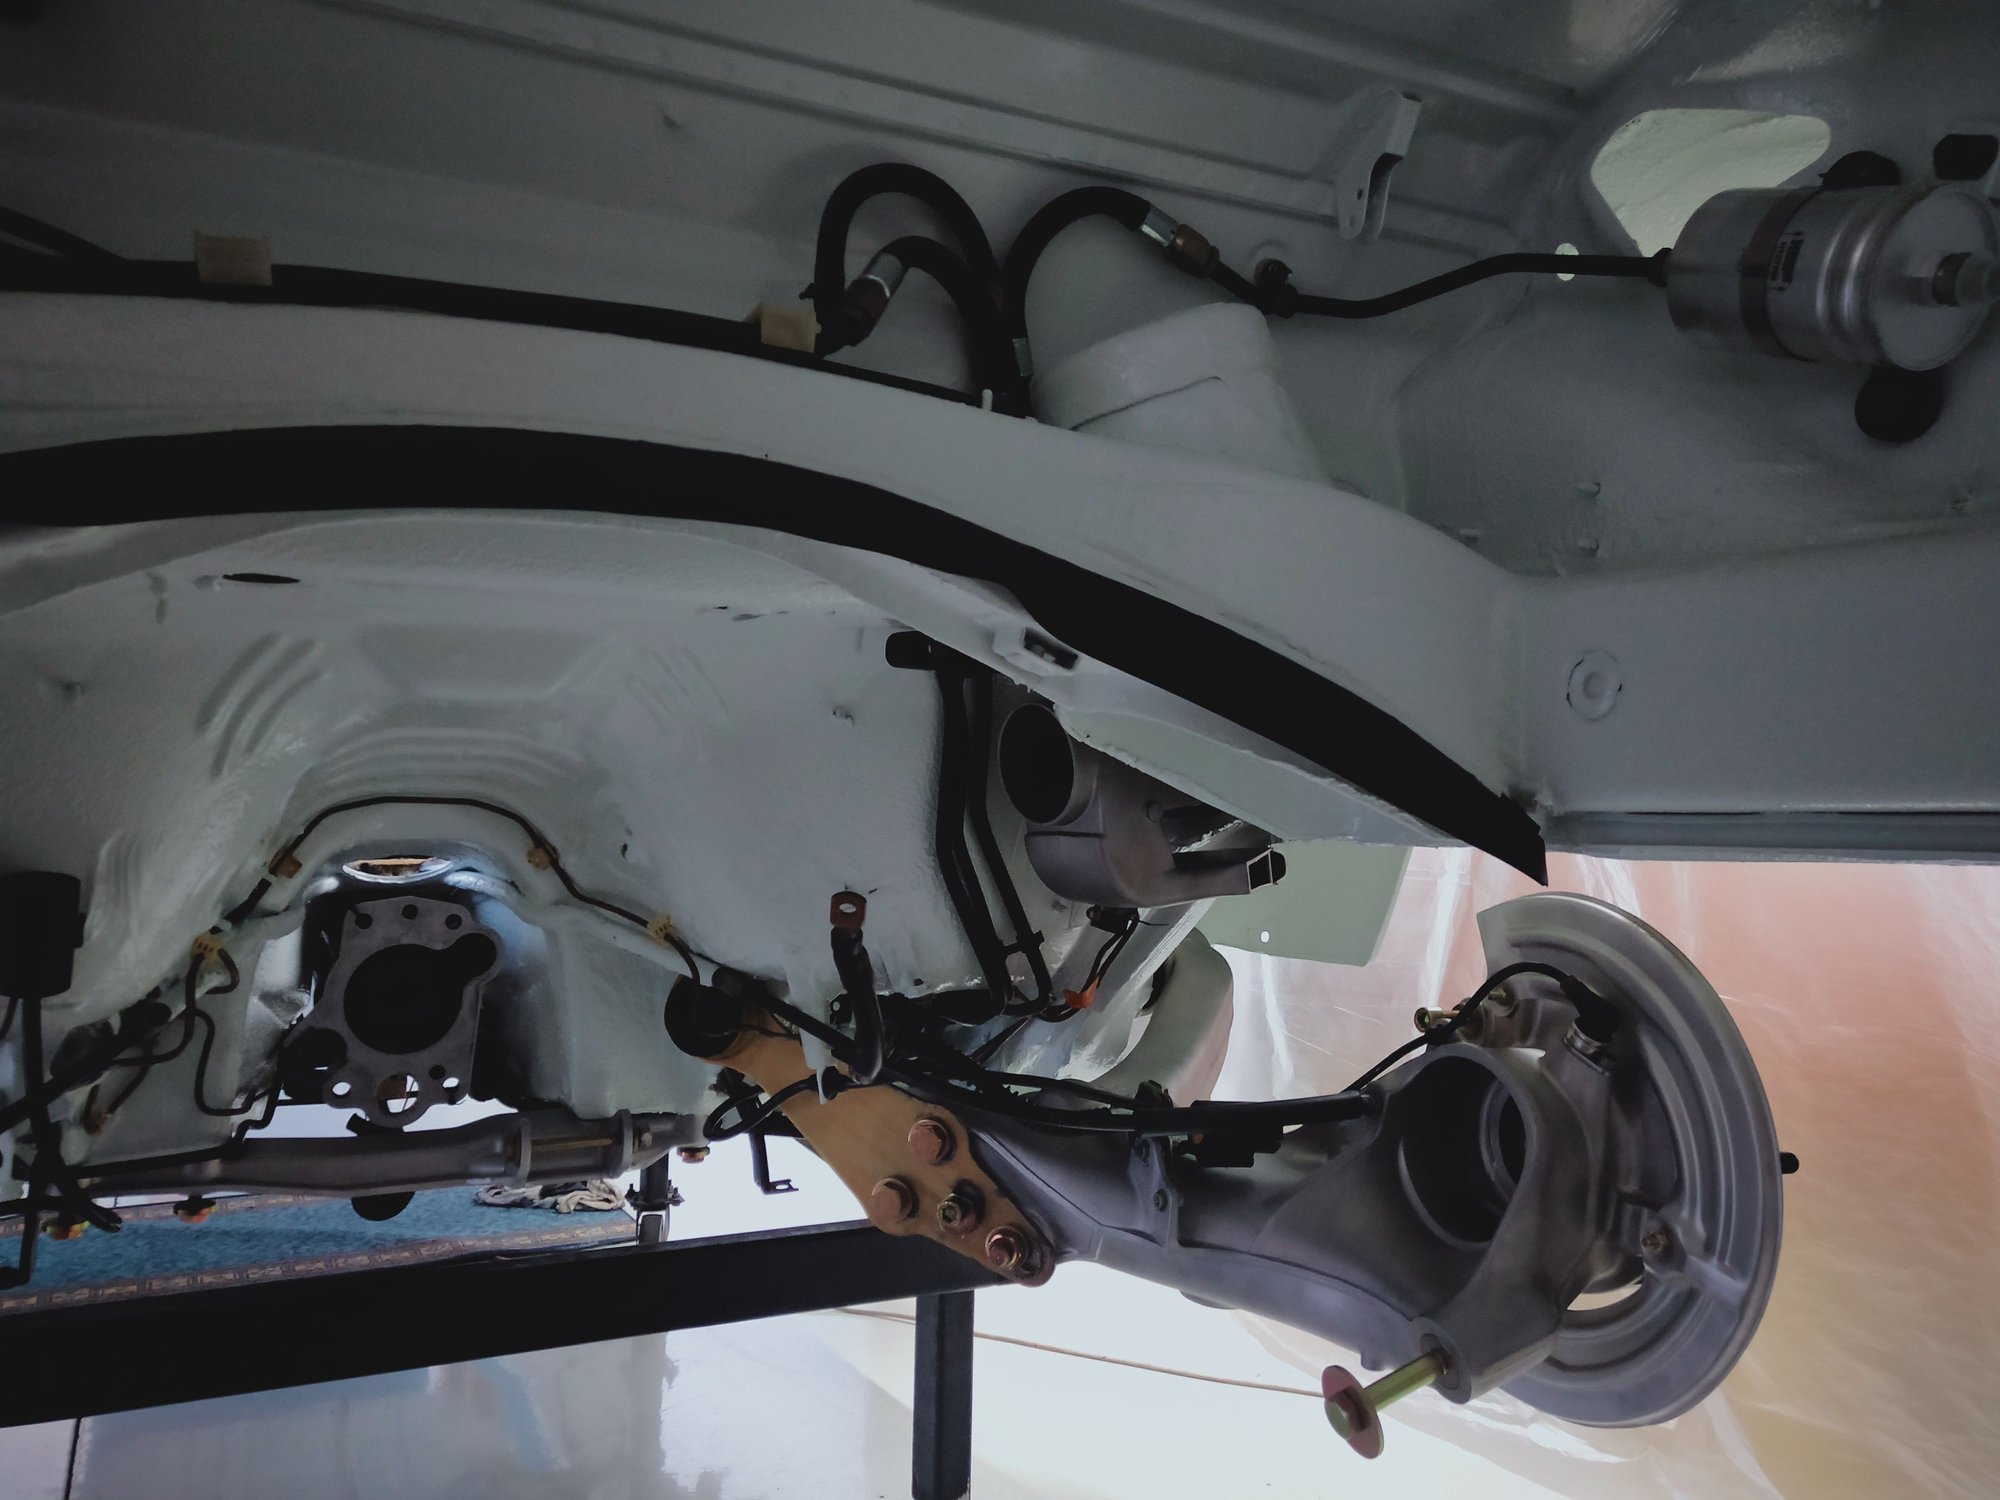
With those installed the torque tube and front diff are next, these were dropped out as one unit but I realised pretty quickly it was going to be a headache to install them as the cross bars of the body cart are in the way. In the end I had to manoeuvre the torque tube in first which only just fit and then attach the front diff in situ. Once that was bolted together the whole unit could be lifted and the cross member installed with a new diff mount. Rebuilt steering rack next, spent over an hour looking for the bolts only to come up empty. I'll have to buy some temporary ones during the week. Installed new control arm bushes, put the arm brackets on the car only to realise the steering rack wont go in afterwards. Decided that was enough for the day, an entire day of cleaning and working to seemingly achieve very little but certainly rewarding looking at the results.
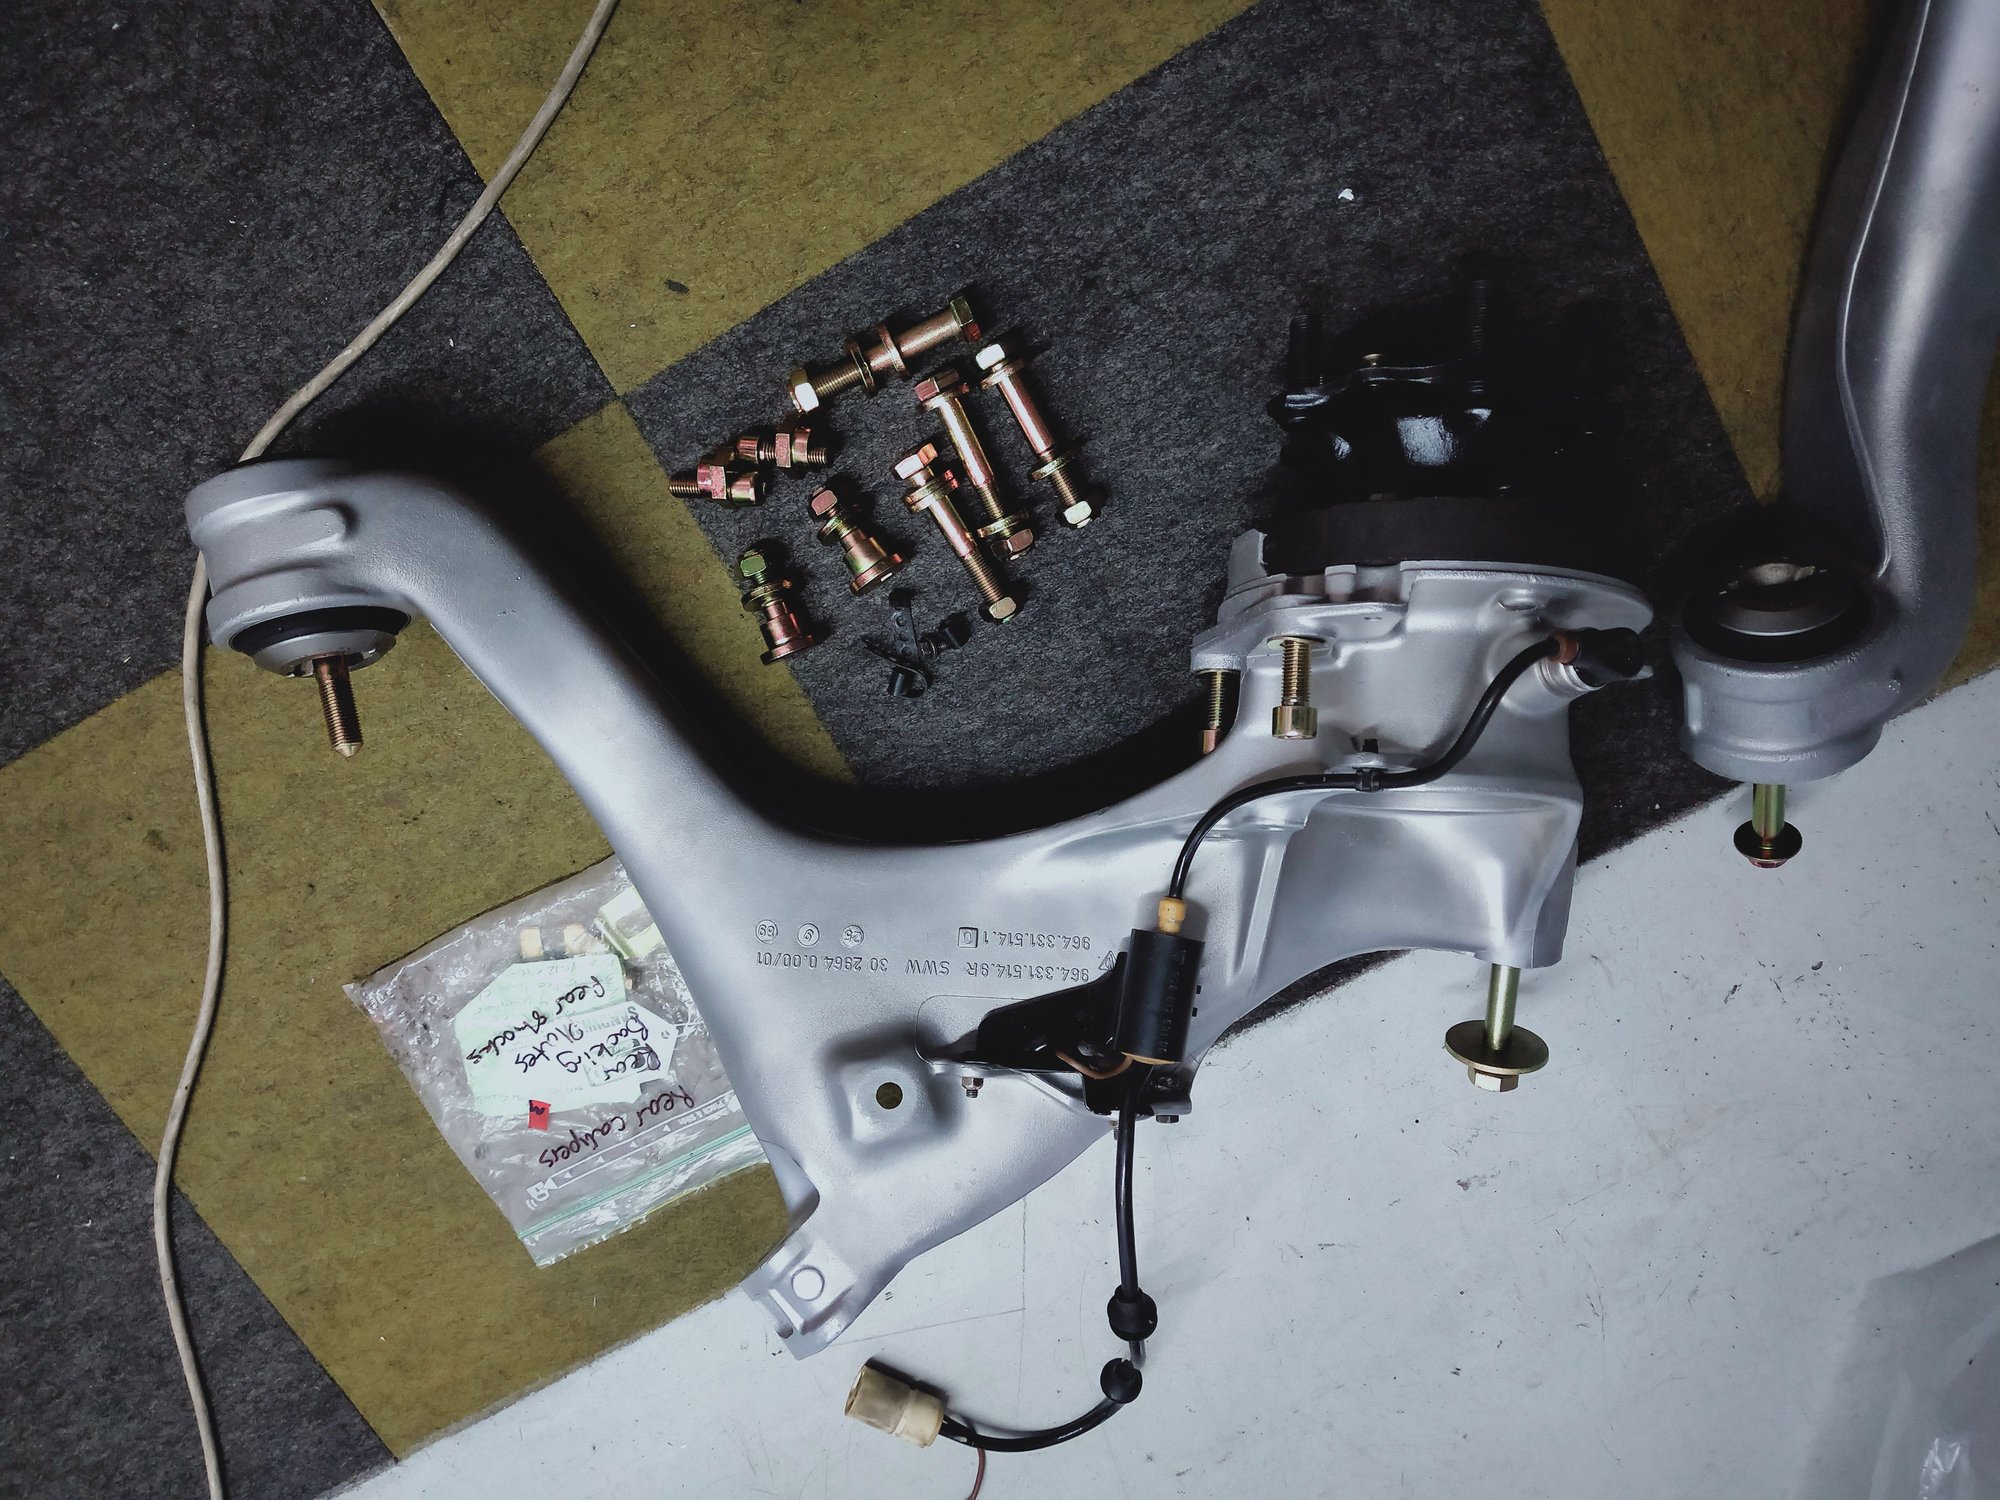
Big pieces always go together pretty quickly, some of the sub assemblies were already together and gone through such as the front uprights, blasted, painted and assembled with new wheel bearings. Shocks taken apart, cleaned thoroughly, inspected and put back together. In the front it's getting all new suspension bushes, new steering rack rack bushes, brake hoses and anti roll bar bushes. Nothing is left to chance here. Got some temporary steering rack bolts as I still haven't found those. With the rack in the whole front sub frame can be completed, I'm using anti seize on everything as the zinc plating process strips absolutely every scrap of rust, grease or oils off the bolts. Next up is the front control arms, I'm using Powerflex here only as I want to retain some compliance in the suspension. Still not convinced its the right move but we'll see. The lower ball joints were still very tight and look to have been replaced at some point so I'm cleaning and re using them. Made new gaskets for the strut mount to body and installed the uprights and shocks. Cleaning cleaning cleaning is the order of the day. Wiring and ABS sensors mounted, getting closer to having the front end together. The rear arms vapour blasted, new wheel bearings and ABS sensors installed these are next in line. The rubber grommets on the wiring are perished and just crumbles apart so I'm going to have to find a solution to fix that. Quite amazing to look at the engineering that went in to these cars for the time, to cram in air conditioning, all wheel drive, dry sump lubrication, ABS etc in that little body its easy to see why the 911 got larger. Everything has it's place but can make it challenging to work on Can't help but think these would have been time consuming to put together back then judging by the sheer volume of parts used.
Beautiful to watch. Ref the wiring grommets, have a look at Kroon. https://www.kroonwireharnesses.com They have a bunch of the oddball grommets listed, for example the ABS wiring reels.
Beautiful to watch. Ref the wiring grommets, have a look at Kroon. https://www.kroonwireharnesses.com They have a bunch of the oddball grommets listed, for example the ABS wiring reels.
Thank you, I did find those too. Para rubber to the rescue for now but I'd like to get the correct ones eventually.
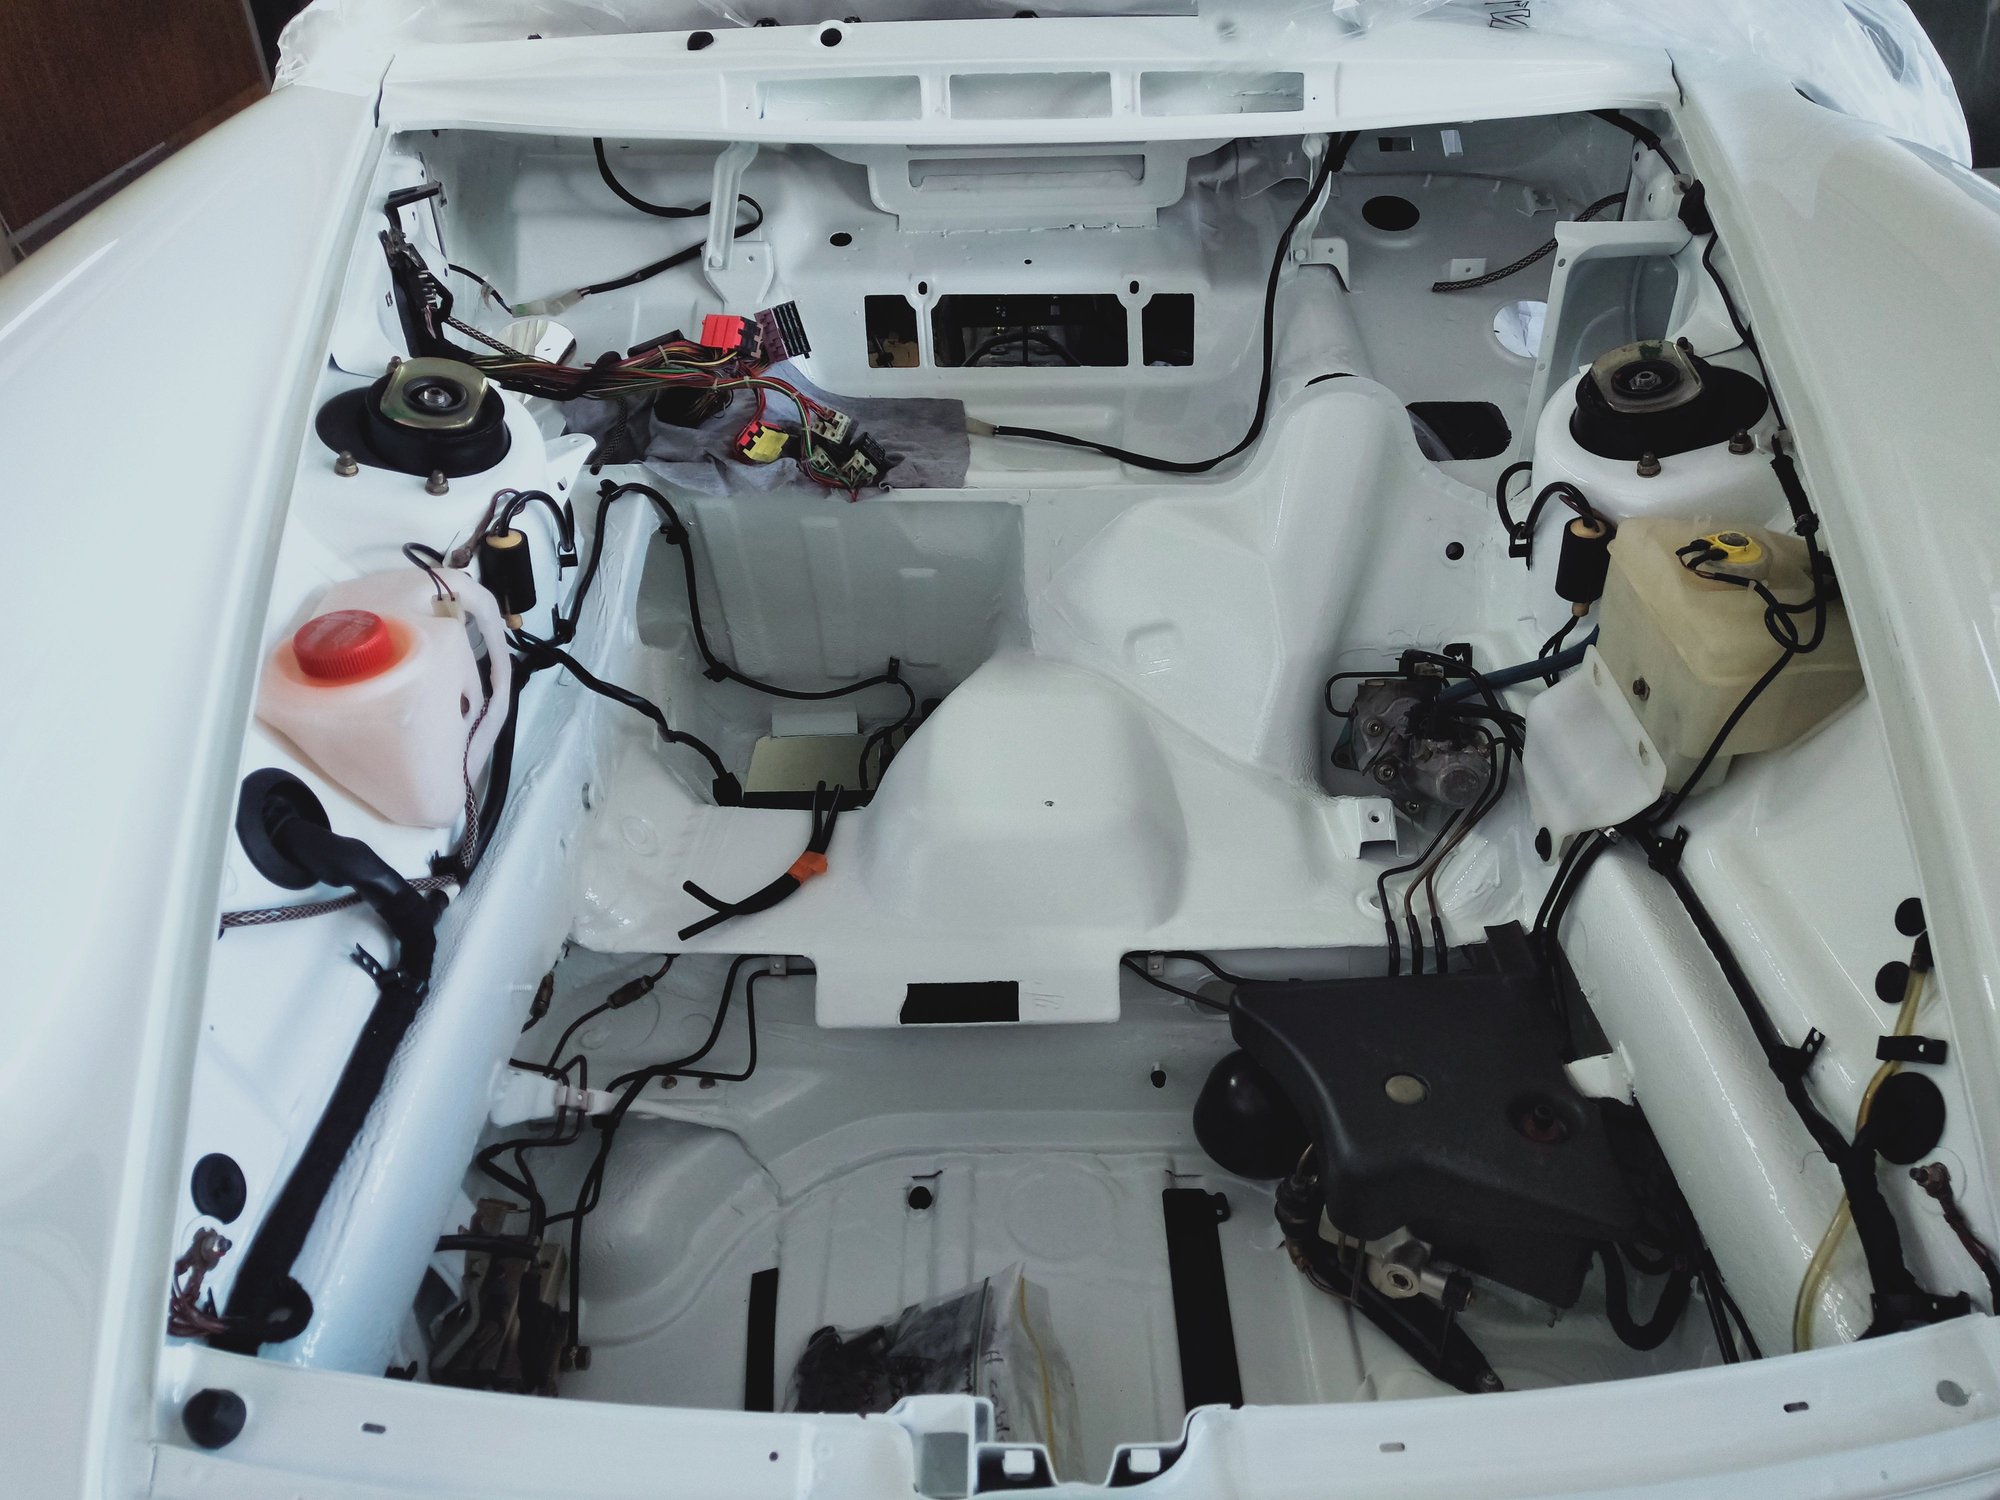
The big pieces always go together quite quickly, as I like to say the first 90% takes 10% of the time. One rear arm on, still waiting on a couple of parts for the other one and I'm having my rear shocks re plated as the zinc on them look a bit corroded. I'm not actually crazy far away from being able to set it back on wheels but instead I've decided to keep it on the dolly in the short term as its just such an ideal height to work under it and inside it. I'll just put jack stands under the dolly to take the weight off the casters as these really aren't rated for this weight. At this stage of assembly I do find that you end up working on something, get stuck till you have parts or what ever so you just pick another area of the car to carry on with. As is the case here, waiting on parts for the rear so I moved to the frunk. Fitting the master cylinder, brake lines, ABS, wiring etc etc etc. The sheer volume of components, fasteners, pipes, hoses and wiring in this still amazes me. They must have been a very time consuming vehicle to put together back in the day and certainly completely different to modern day assembly techniques. Not chipping paint is the hardest part, having to slow down and not let frustration set in can be challenging so I try not to set goals to achieve this or that on given days. It just goes together when it goes together. One certainly gets tired of cleaning but thankfully most components just need a good clean, wiring is all still in great condition so all of it can be re used again. Anything questionable I set aside to either repair it or find a nicer used one, Mike at Autobahn has been fantastic in that regard. The parts he sends me have been nothing short of flawless, great guy to deal with. Actually starting to look like something, bunch of brackets and fasteners that require plating so that means moving on to something else again. Mirrors, took these completely apart to paint them. Made a tool to collapse the spring to enable them to be taken apart so it was just a case of doing this again to put them together. Of course fresh paint making that job just that bit more difficult. Do love aero style mirrors, just suits the shape of the car soo much better.
Engine bay starting to come together as well, still waiting on one of the spring plate boots and my rear shocks to come back from plating. Found my other fuel lines to the filter to complete that side of it as well as the return side that needed new hose crimped on. Again, these looked fine but twist them they just break in half. So glad I changed these. Lots of small brackets for a variety of things in the rear I've sent out for powder coat as they are not nice enough to go back on as is. Replacing all of the diff lock and clutch hoses so had to order those from the US, also decided to replace the fuel pump at the same time. My one was working fine but with lots of $$ invested in a new engine the last thing I need is lean issues due to a tired 30yo pump so new it is. The oil tank, man oh man what a saga. I'd plugged all the holes and had it media blasted / powder coated so it needed a thorough wash to ensure there was no media in the tank. Bought every single piece of rubber hose new and once I knew what went where the tank could go in with new rubber mounts. That was the easy part, next all the hoses, thermostat, vent hoses to the engine bay, dip stick tube etc. Doesn't sound like a lot but when every single thing fights you it becomes all consuming. Got everything in where I wanted it after hours and hours of work and cursing, happy days again but not for long. Was looking at the thermostat and realized there was another open port, uhh.... Located the hose that needs to go up to the filter housing and thought ok yeah I'll get that in there...wrong. Goes behind the tank, of course!!! Had to take everything back apart again to install that one hose so by now I was pretty wild, Should have walked away right then and there but didn't want nearly a whole day of struggle to turn in to achieving nothing as well so apart it came. Several hours later I could finally stand back and look at my full days work, install the oil tank. Didn't fill me with satisfaction really. The standing back view is pretty darn good though, no denying that. A pile of bits becoming an awesome Porsche again.