When you click on links to various merchants on this site and make a purchase, this can result in this site earning a commission. Affiliate programs and affiliations include, but are not limited to, the eBay Partner Network.
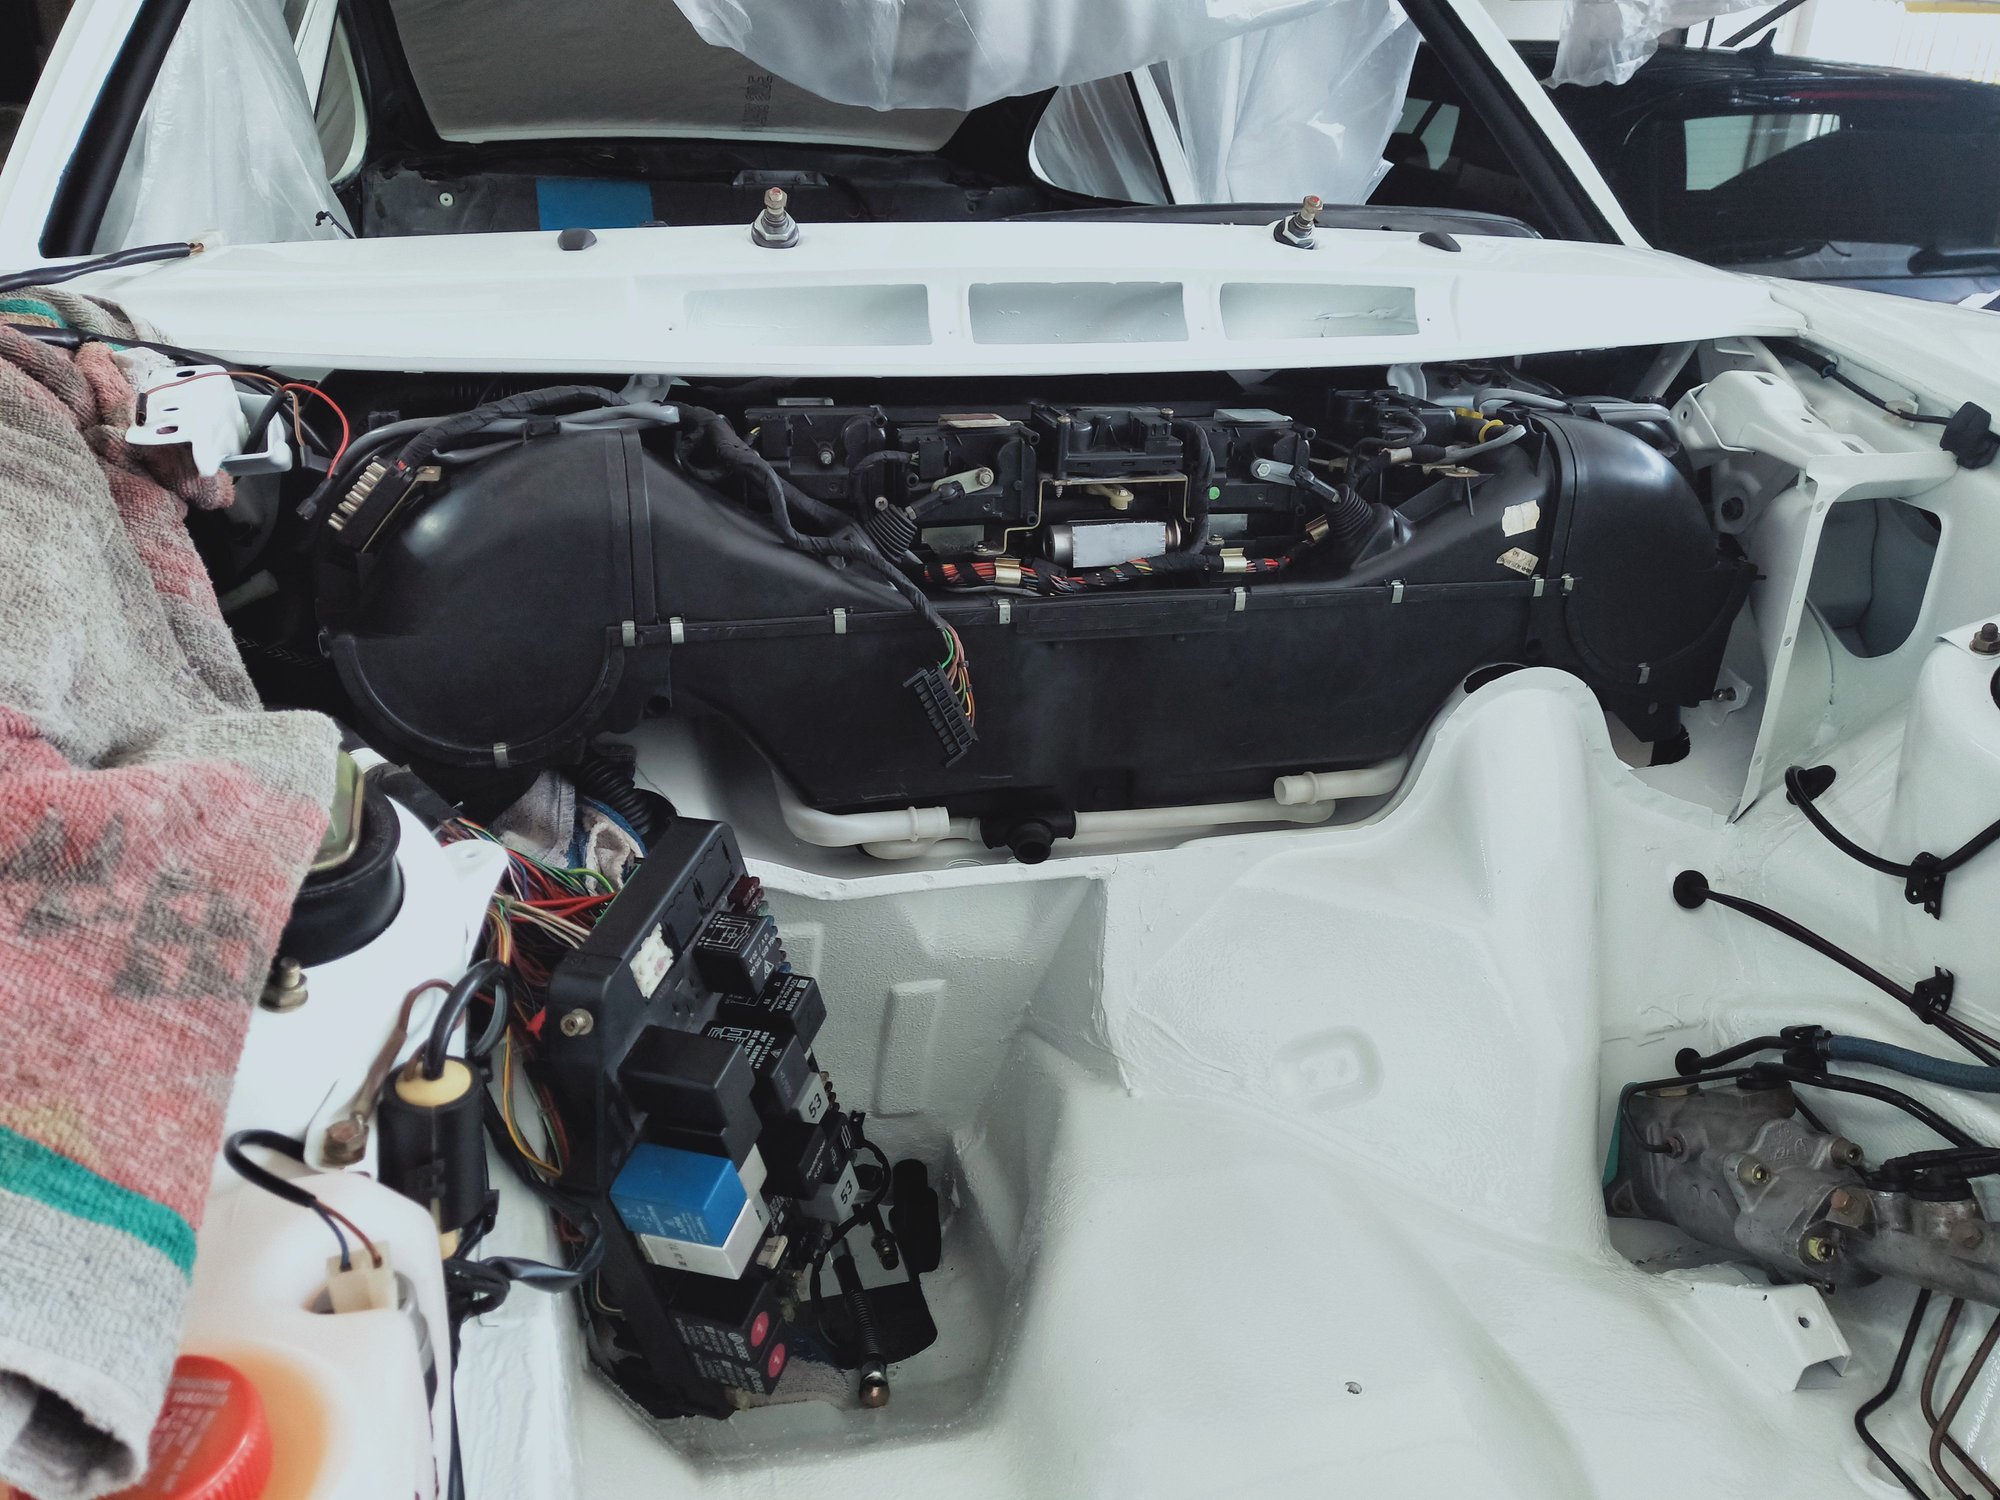
When I bought this car it had an aftermarket GRP bumper on it, then came the whole backdate idea I was going with and finally coming to my senses to stay with a 964 inspired build keeping it a 964 C4. That meant the rear wing and front bumper had to go. Bit difficult to find a stock 964 bumper in NZ so on one of my trips to the US several years ago I landed up at Autobahn in San Diego and met Mike there. As many of you will know they end up with a lot of the parts Singer do not want. He took me to their other lot in their golf cart where the keep the bumpers, fenders, doors etc. He showed me an area outside where he had 30-35 front bumpers laid out and said just pick the one you want. Kind of mind blowing to see the volume of parts they had and he's been a great source for awesome quality parts since. Anyway, ended up with a complete bumper with grill, under panels, fog lights and bumperettes in awesome shape, happy days. Fast forward to paint stage, with the bumper completely stripped and painted I had sourced all new clear lights, replacement fog light lens as one was broken and also the needed pieces to delete the US spec bumperettes. Thought it prudent to trial fit those to see if everything needed was there, glad I'm staying with a stock ish looking build. Picked another random thing to work on, the pedal box. Should clean it first I thought.....and that's how things go with me, escalating very quickly to stripping the entire assembly apart to go through it all. Clean it, inspect it, re lube everything and reassemble. Added new pedal pads to my ever growing order list but its one of those items that just needs to be replaced. Assembly back together and back where it belongs, by now there's quite a few parts I'm waiting on to complete various things. One downside of living at the bottom of the world. Since the whole global issues of the past several years shipping stuff in has become vastly more expensive also.
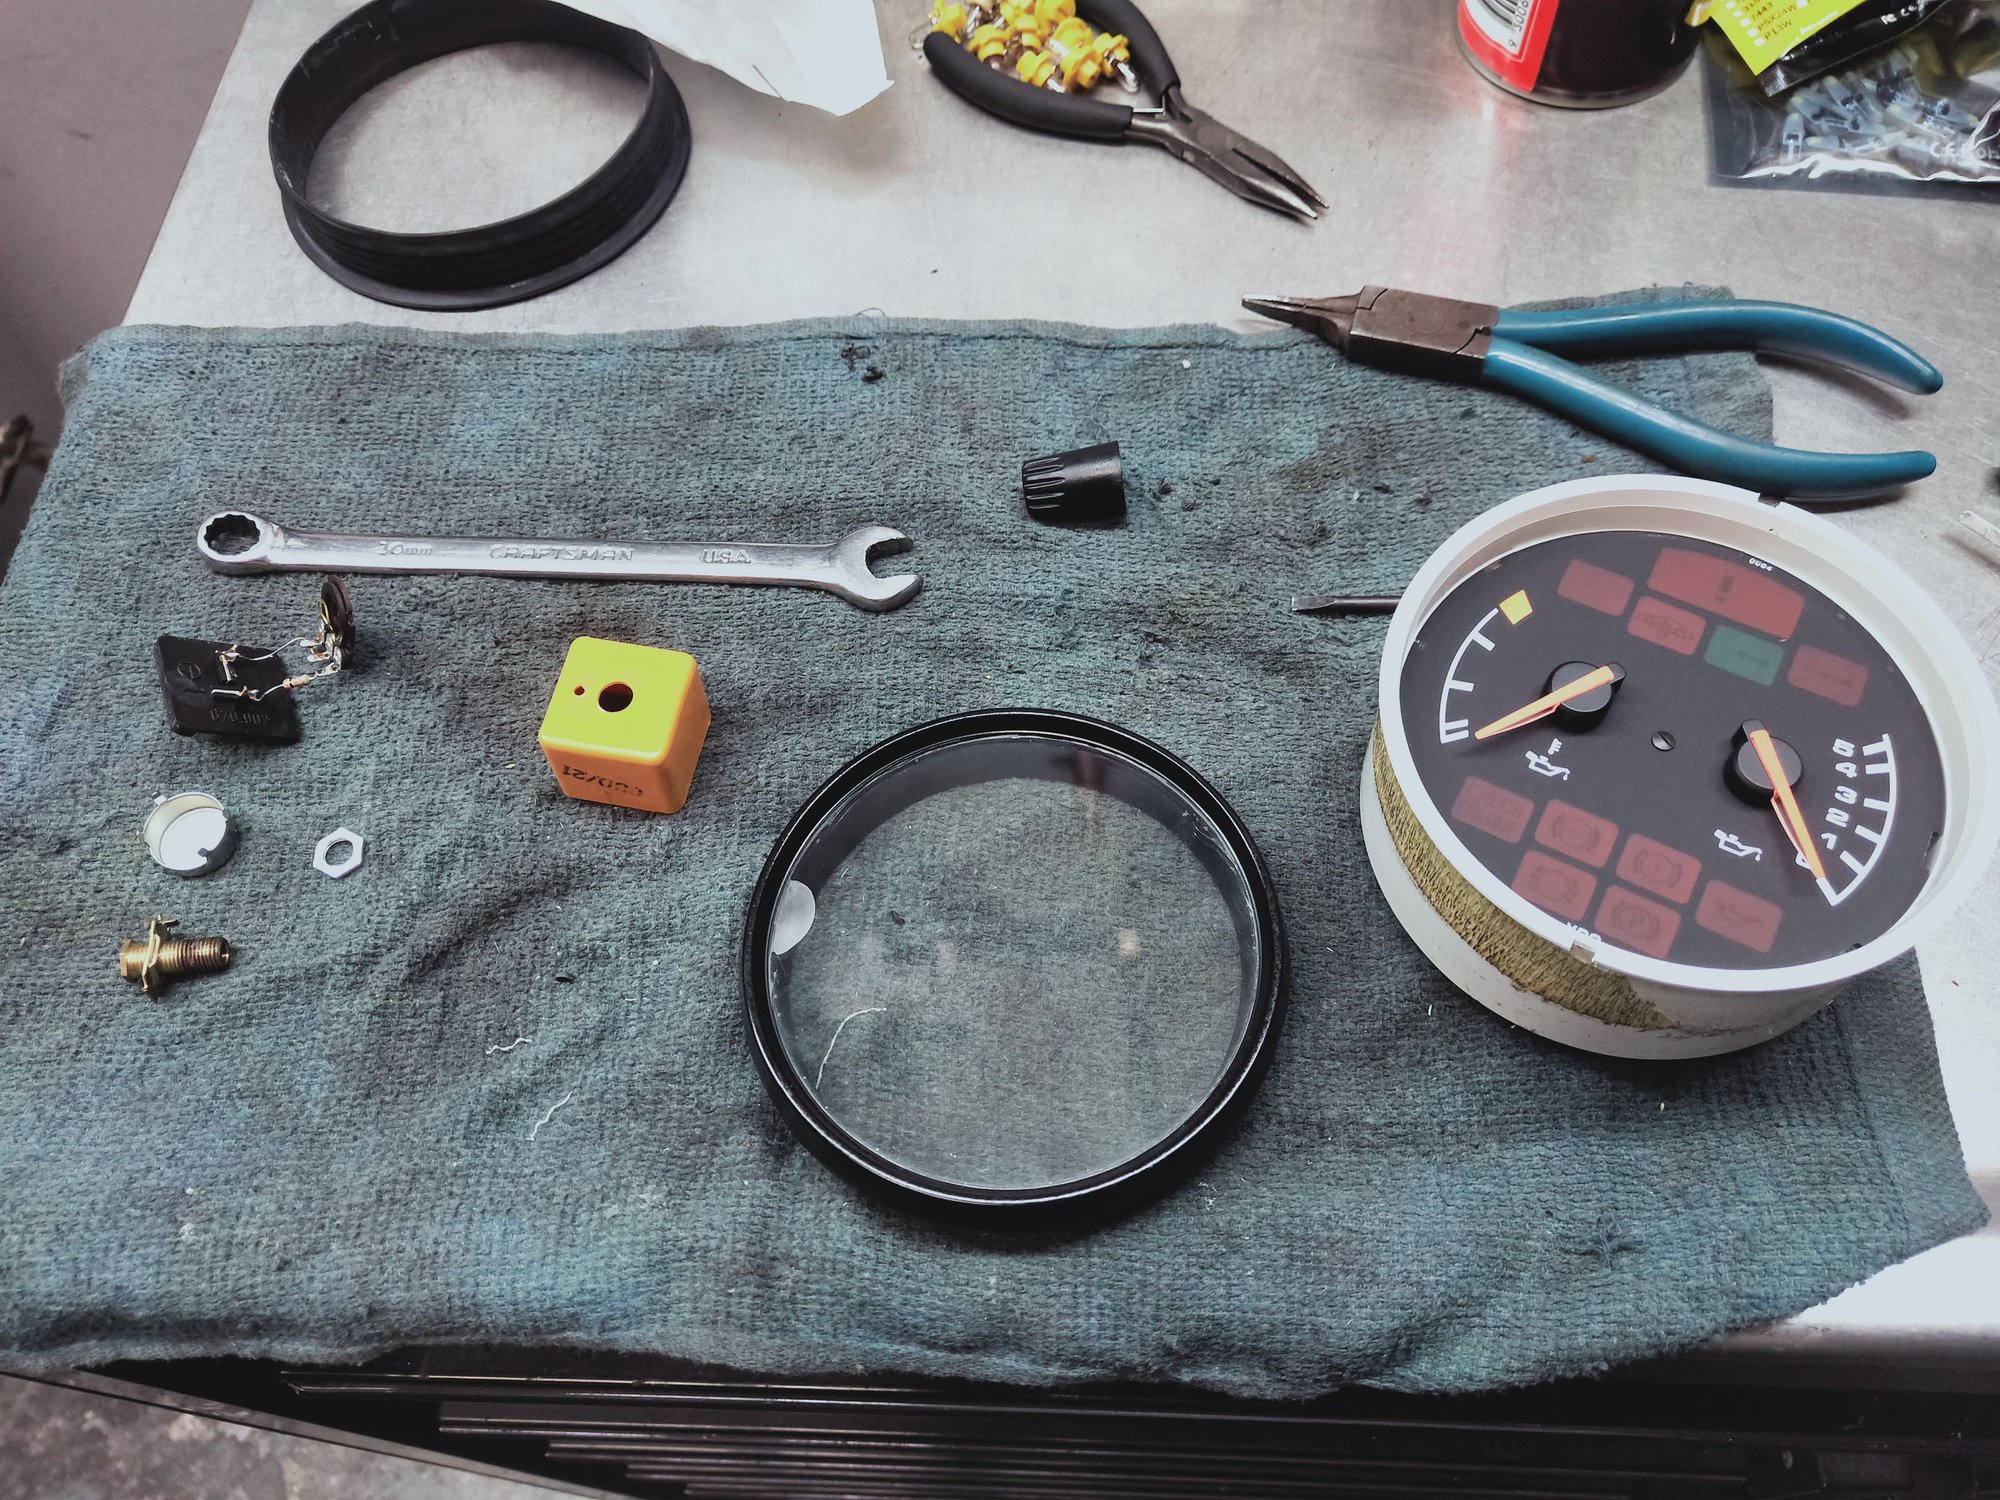
Changing tack once more, dash work. Dug out the gauges as I remember a couple were pretty average looking, turns out one of them the lens was all crazy cracked and the other the clear film was delaminating and crazy cracked. At the same time I'd planned a LED conversion and had ordered LED's and the correct fittings (or so I thought) from Aliexpress. Mostly turned in to a day of fail but started with removing the bezel carefully to get the lens off. Had some clear polycarbonate laying around that was very close in thickness to the original so used that. Using the old one as a template started cutting, finishing the shape with coarse sandpaper on a block and finishing the edges with 400 grit but more on that next week.
Back on to the dash, using the old leather as a rough guide I cut out a new piece to be trimmed to fit. This leather seems a little thicker than the original but is all I have so it will have to do. The extra thickness did cause me some grief later on when fitting the gauges but it was too late by then, just have to deal with it and carry on. The aerosol can contact glue is hopeless in my opinion so I use an old paint gun with commercial contact glue, mainly what I use for doing foam headliners but also great for this. Spray the back of the leather and brush the glue on the metal dash, let it flash a little and stick it on. Leather doesn't really like to stretch very well which is probably why they used a thinner leather here, especially on the underside of the gauge area. Came out great, nothing too much wrong with the old leather but I wanted everything fresh and new so this was well worth doing. trimmed the holes and edges next ready to accept the gauges.
Back to the gauges for now, I had ordered LED's and holders from Aliexpress and proceeded to fit these to the clock which was the first gauge I tackled. That was all fine and dandy, no real issues. Gave it a clean and installed it, very tight fit due to the extra leather thickness but got it there. Rheostat for the wiper speed next, all good. As I worked my way through the rest of the gauges swapping out bulbs I realized that some gauges have the contact ring for the bulb on the outside of the board and some are on the inside of the board so you actually need dual prong bulb holders which mine were not.....No way to make them work unfortunately. Quick google online, fortunately a local Jaycar outlet had the correct ones in white. ok, Best I go get some. This is where the day started to go pear shaped, back with LED's I didn't want to have colour differences so the clock needed to come back out for those to be swapped out. It was sooo tight and sooo difficult to remove and in doing that my hand slipped and broke the **** off the wiper rheostat. Great!! No replacement around I also took that apart to see if it could be repaired. (off on the left in the next pic) New lens made for the oil pressure gauge, rheostat apart and attempted to repair that. The solution in the end was drilling a small hole in each end of the plastic shaft and insert a piece of mig welding wire with epoxy. seems to have done the job for now, hopefully it lasts. Two gauges I made new lenses for, all new LED's and a good clean they can all go back in a freshly trimmed dash where they belong.
Nice work on that dashboard, Sir. I feel your pain on the rheostat, I snapped one in half cleaning the car once. It was shot.
The peddle cluster can be a high moisture area, and it looks like there was some rust in your peddle assembly. I had the same. Good time to knock it down and have the assembly powder coated.
Keep up the great work!
The welding wire / epoxy repair seems to be good. For now.
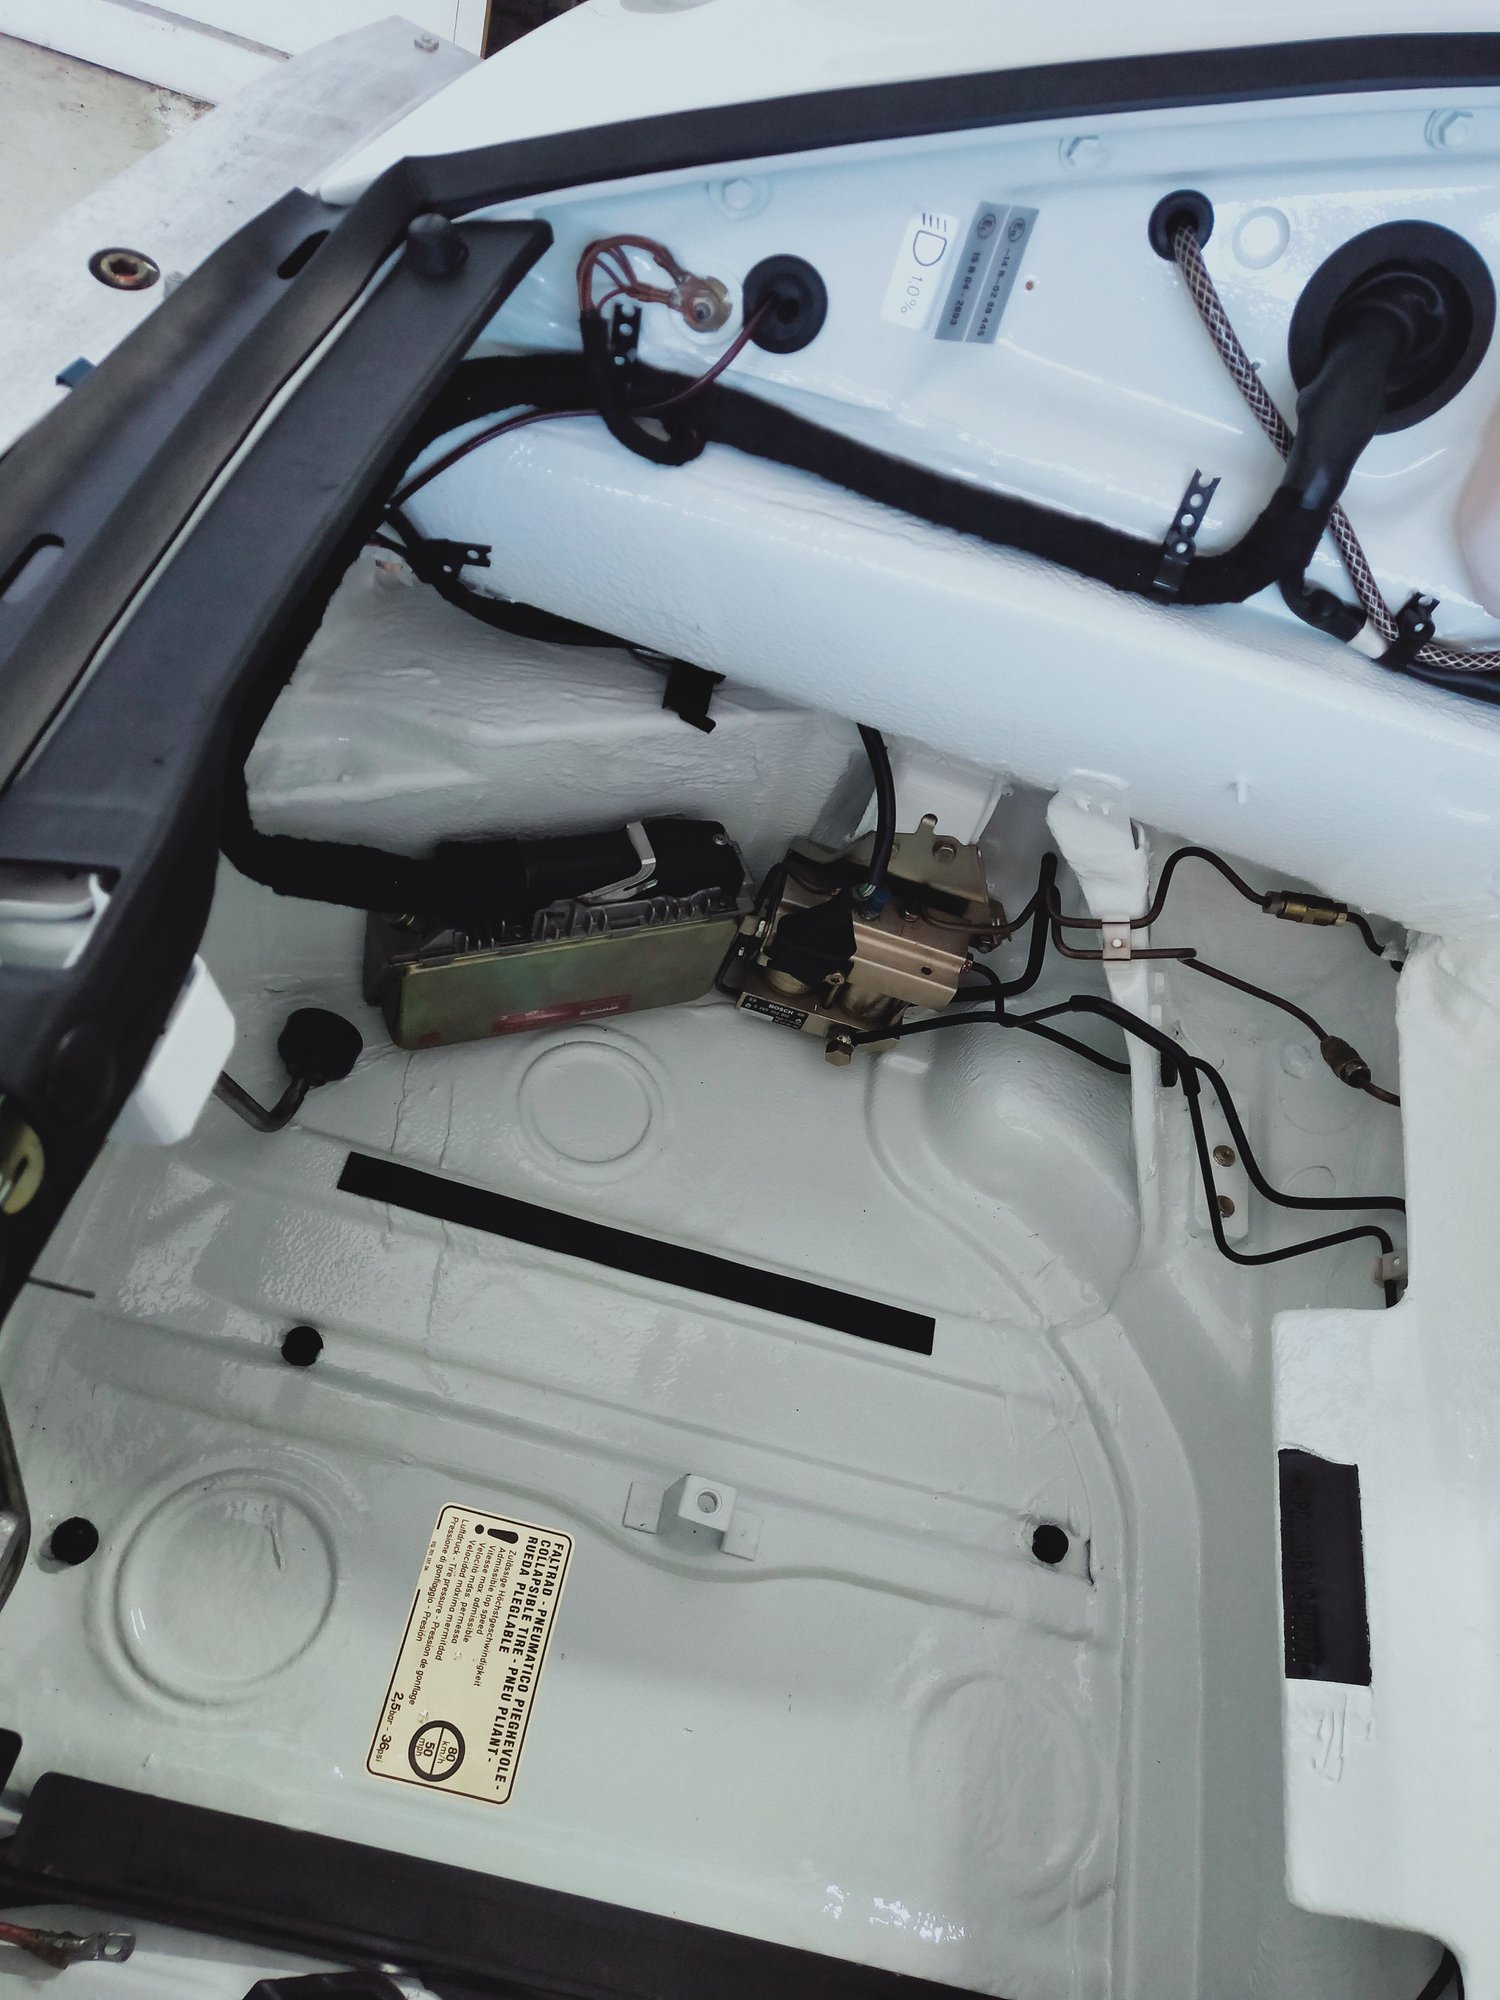
The pedal box was completely stripped and cleaned, turned out to be in remarkable shape but glad I gave it the once over.
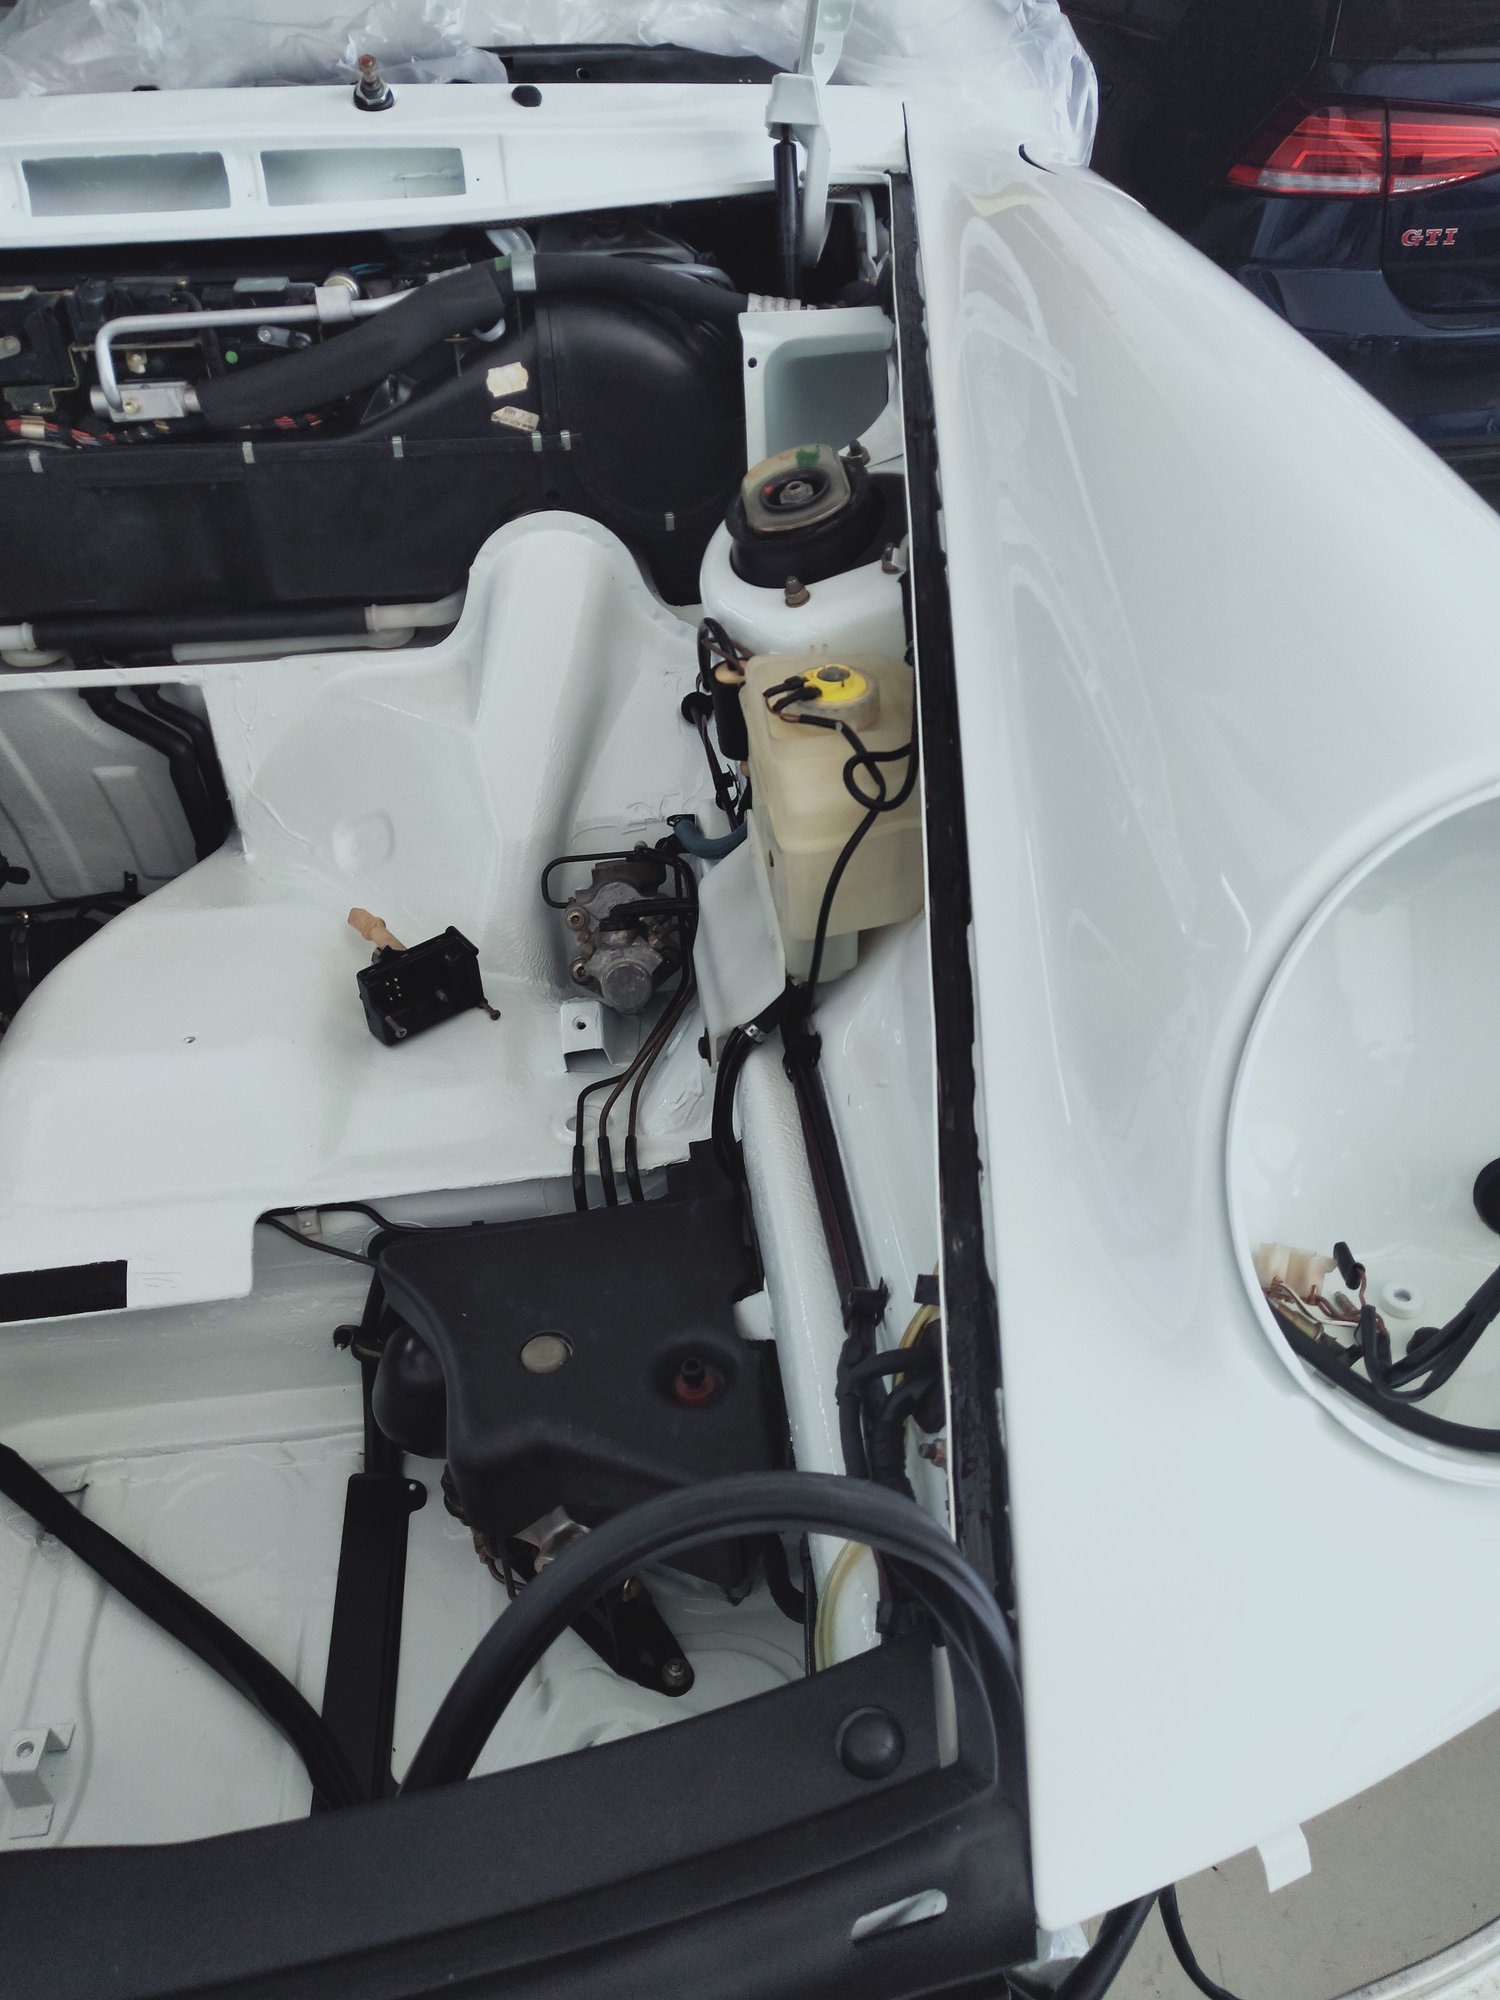
Yet again change tack to work on something else, got the A/C pipes in along with a new drier and all new o'rings of course. Cleaned the old corroded aluminium ac pipes as best I could with some soap and steel wool, don't know why really as you'll never see them again but seemed like the right thing to do. With those in place the fuel door assembly is next, this never fitted well since I got the car and after disassembling it to clean it I realized that the unit is infinitely adjustable to position the door in the fender precisely. Great for OCD people. Everything cleaned assembly is pretty straight forward. Installing the fuel door I remembered at this point that when I took it apart originally the stud for the latch broke off, forgot to repair it prior to paint. Looking at the plastic latch its pretty thick through the mounting stud area so I put it in the mill and milled the slot a little deeper so that a nut can grab hold of the remaining stud on the fuel door. Solved. The old original fuel bib was pretty scungy so I figured I'd make a new one from some scrap leather, traced it out using the old one as a pattern and made two of these to be glued back to back to give it some structure. I don't have a heat press for the logo stamp but a propane torch to heat the stamp and then clamping it in the vice seems to work, not ideal but got to work with what you have.
The rear shocks were in great condition mechanically but the plating on them was pretty poor, the fronts cleaned up really well to a point I was ok with just re fitting them. Just couldn't fit them as is and it seemed stupid to buy new ones just to have them looking nice. Looked on line at possibly rebuilding them and having the bodies re plated but then thought they are pressurized so why not just plate them as is? Gas pressure will stop and chemicals getting in and I already know that rubber in unaffected by the chemicals so what could go horribly wrong? Well, nothing as it turns out, came out like new. Set of new Bilstein decals to finish off and back on the car. Next up, the suitcase. Not an entirely pleasant thing to fit. Very awkward and tight fit. I'd rebuilt this whole thing on the bench with a new evaporator as I never want to touch this thing ever again, slow and steady was the plan. Towels on the paint taking my time getting it back in there. As it turns out there were a couple retaining screws on the inside I'd put back in their locations when I removed it and clean forgot about these so I ended up having to remove the whole thing again to be able to get to them. Second time round it all sat where it was supposed to. My top vent rubber bellows locating tabs are all broken off so that needs to be ordered, I just hope I can get that in there without having to remove this thing again. Asked a friend to measure his rear badge to make sure this goes back in the correct spot, new badge of course as you do. Measured and triple checked everything before plonking the badge down. Has it's identity back again now.
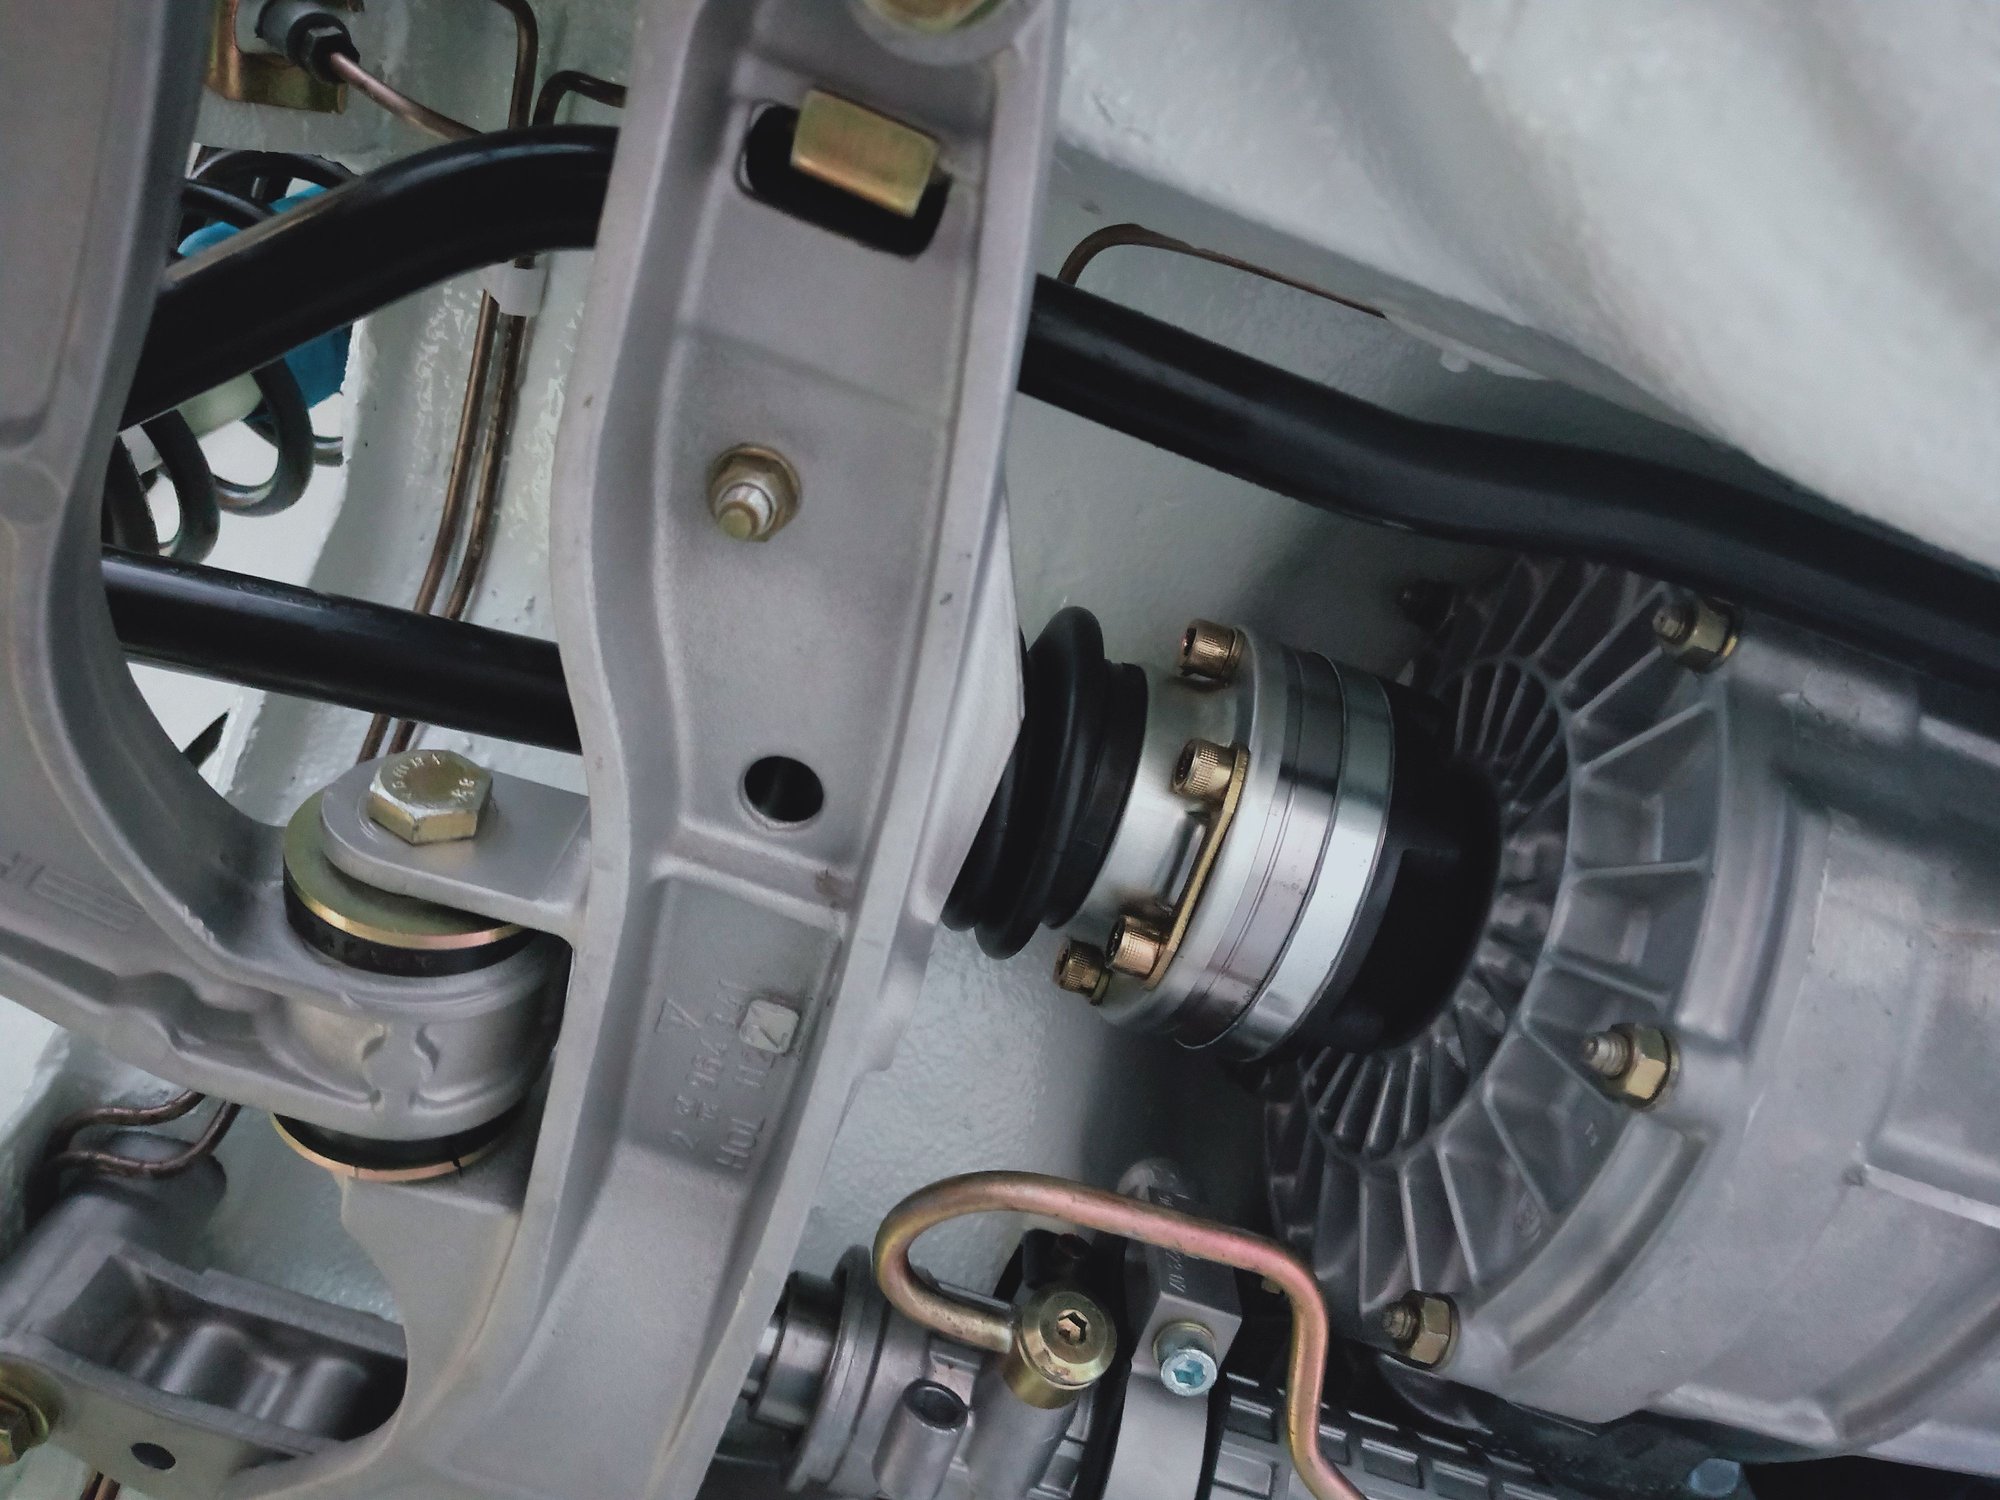
Drive shafts, all needed to come apart and be cleaned. Not a job I wanted to do but needs must and as it turned out that week I'd done new wheel bearings on a customers 930 Turbo and all CV boots on a MK1 Golf so to get to Saturday and do 8 CV joints and boots on my own wasn't very pleasant spending most of the week with grease on my hands and tools. Really dislike that horrible black cv joint grease. All the joints looked ok, grease a bit liquid so best to change it. The boots were all still intact but noticeably harder and time for new. The new boot kits are cheap as, Lobro brand same as the original CV joint fitted by Porsche. New grease, clamps and newly plated hardware to finish off a cleaned axle, one done three more to go. sigh...Nearly a whole day of axle rebuilding. Bit of time left at the end to install one side, need to start thinking about getting the car off this cart as I'm really adding a lot of weight now. The cart was only ever for getting it to the painter and back but has been super handy for assembling the underside. Installed the hood seal during the week, not had great success with ordinary contact glue on these types of seals so I really wanted some 3M weatherstrip adhesive but being in New Zealand where nothing is available or its prohibitably expensive it looked like I'd have to order it from overseas but then found a seller importing gaskets and seals for old US Fords and also stocked the 3M glue. Ordered that and with a new seal from Porsche I'd be guaranteed of a perfect fit, glue sections at a time to make sure the seal sirs how it should. Another job done. I'd decided it would be smart to order a new fuel pump some time ago even though the original was working fine still, a brand new modified engine and a 30yo fuel pump didn't seem smart hence the new Bosch pump. Wasn't even expensive surprisingly, new hoses crimped on to my OE hard lines and plated hardware the pump goes in. I'll have to drop it down again in order to install the fuel tank when the time comes.
Starting to really add weight to the body now and have been thinking about getting it off the cart for some time, but its just been so handy working underneath being that bit higher up in the air. Anyway time to get this thing rolling. My old Azev type A rollers on the process is fairly simple, raise the car on jack stands so that it clears the pins on the cart, pull the cart out from under it and start dropping the front / rear bit by bit. Still a bit nerve wracking dealing with something that is fairly pristine but all went well I'm happy to say. Car back on the ground I can start concentrating on the interior and getting the doors on and built out, first job will be the headliner.
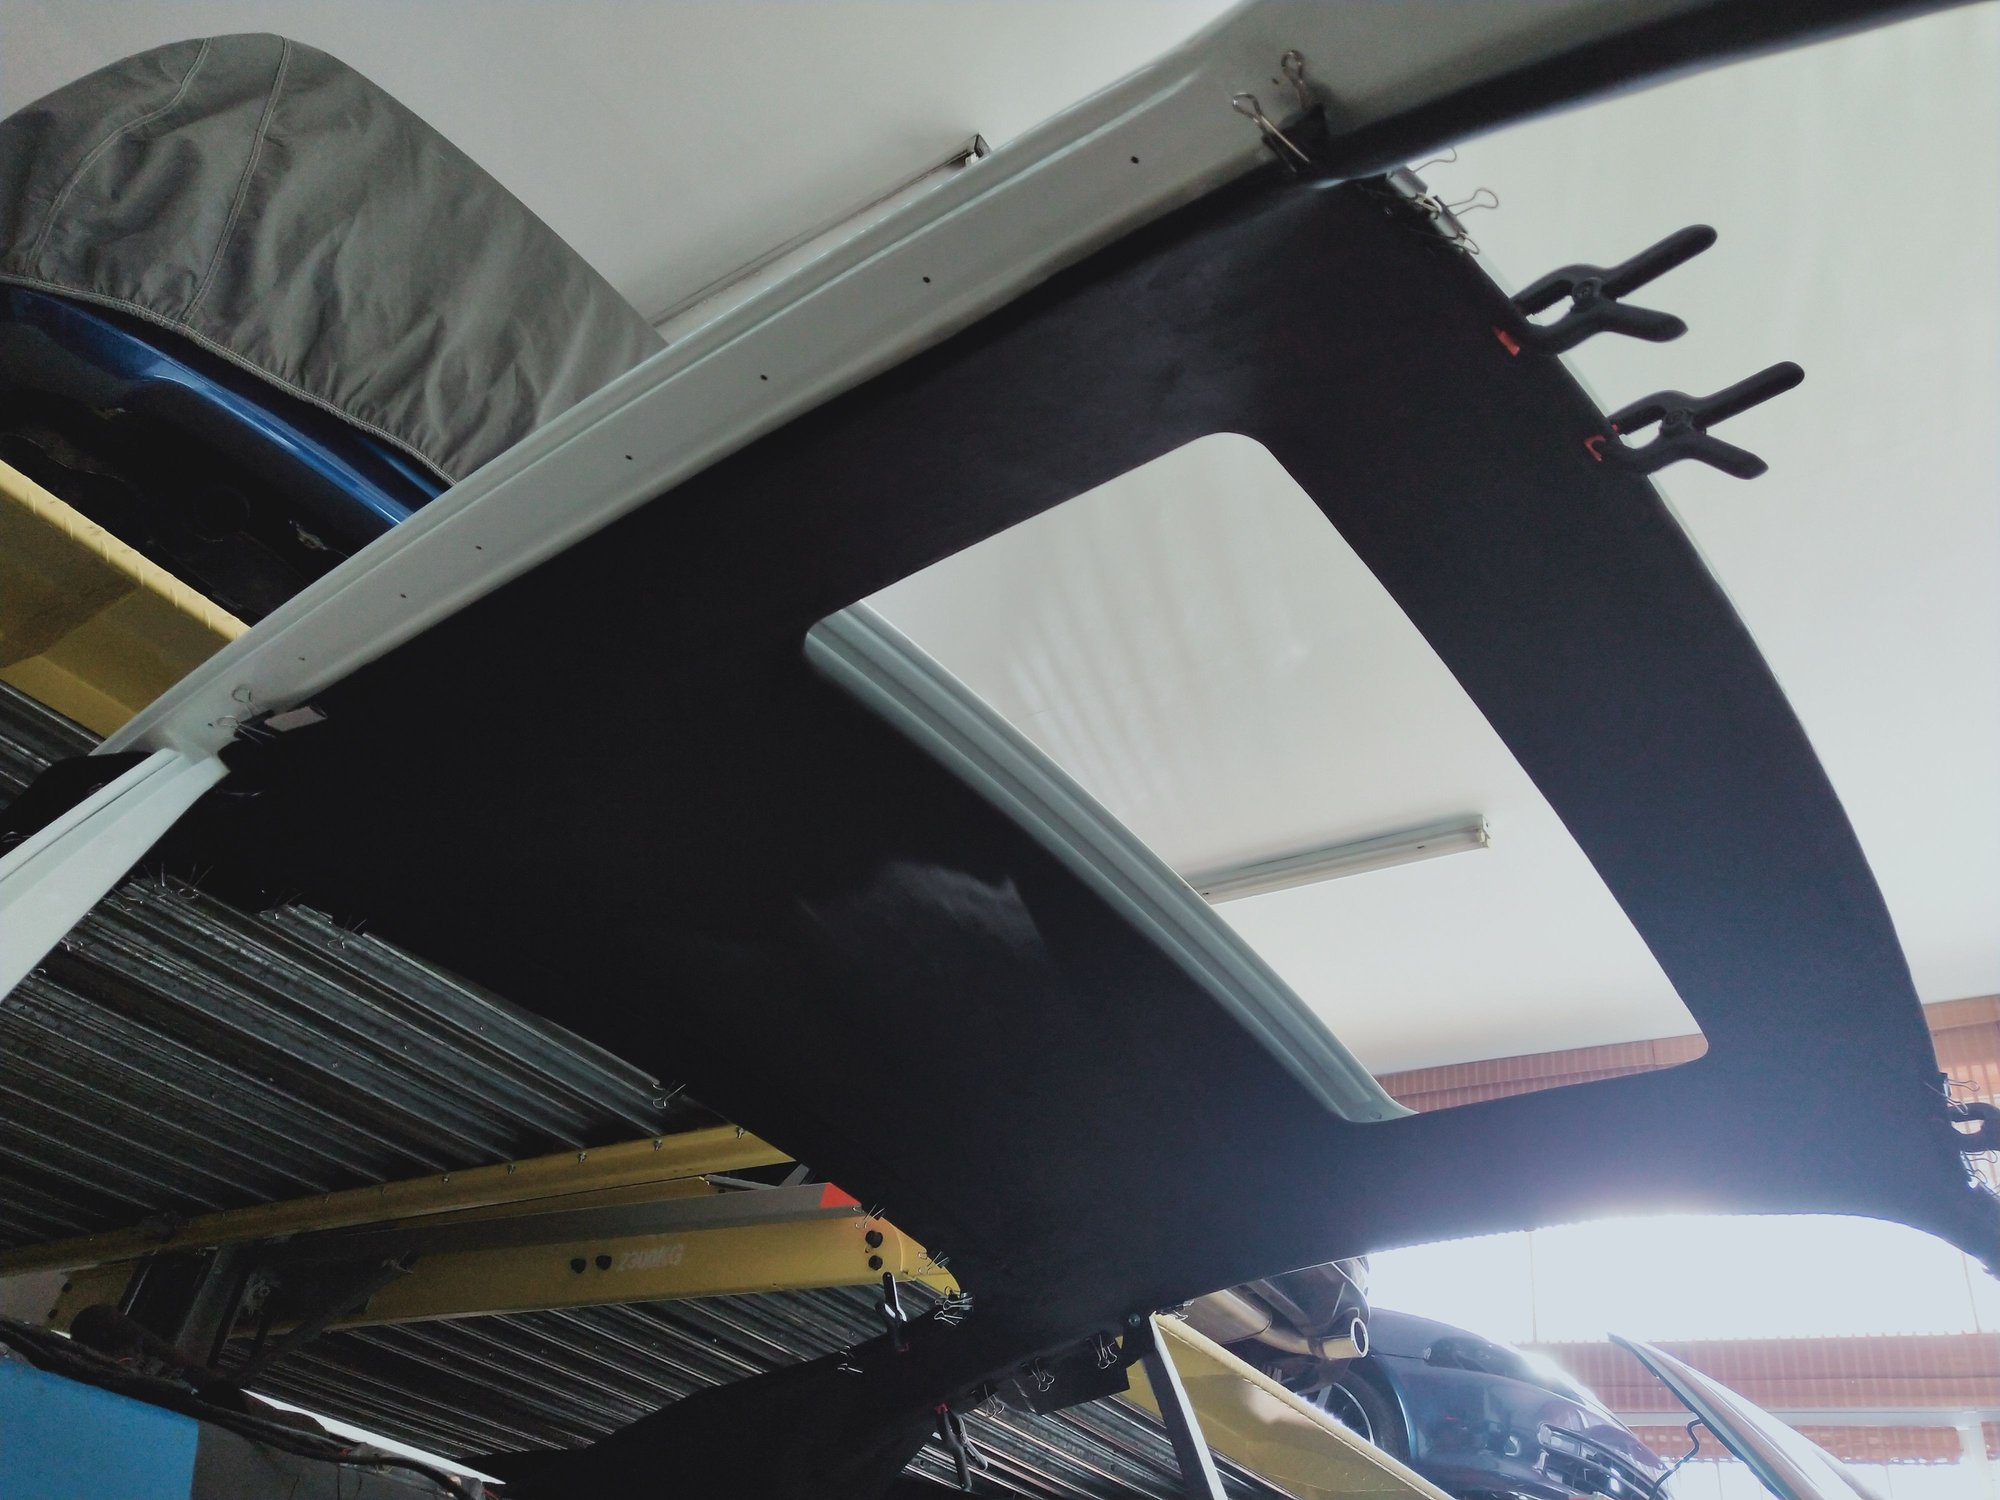
I had been looking for all new decals for the trunk area for a while but either the shipping was ridiculous or the price of the decal was crazy, I mean 20-30 euros to ship a couple stickers is madness. When I restored my MK2 Golf I got all new decals from OEM car stickers who was awesome to deal with at the time so I contacted him to see what he could offer. He said send me images and sizes and I'll just make them for you. We ended up doing a bit of a colab and he now has a full set of 964 decals including the engine bay ones so if anyone needs decals at a much more reasonable price contact OEM car stickers on Instagram or Facebook. Cannot recommend them highly enough. Even if you need something in particular that isn't available he'll make what you need. Car on the ground its headliner time, decided I wanted Alcantara so bought the material and made one. Fairly simple, no bows on a sunroof car to worry about. The tricky parts will be the pillars, need these to look right and wrinkle free, Alcantara also isn't stretchy like vinyl. Just have to deal with the zip in the rear for sunroof motor access, my original one was blue perforated vinyl and luckily the colour of the zip was so close to the charcoal Alcantara that I was able to unpick it to be re used. Had my upholsterer sew that in for me. First measured the center of the zip and using the old headliner as a reference I got the headliner positioned in the car with bulldog clips, moving it around so that the zip in the back was sitting exactly as original. Double, triple check we're on center and the zip is straight started pulling things tighter using the clips to hold it front to back. Next up will be to start gluing it in place bit by bit.
The headliner install continues along with new back leather on the A and B pillars at the same time. Headliner positioned where I wanted it after a few adjustments and measurements. Time to start gluing it bit by bit, started at the center of the front screen and then doing the same at the rear to keep things straight and tight before moving on to the sides, working towards the pillars. Just used bulldog clips to keep it in place as I went along.
Material isn't too bad to work with, not stretchy like vinyl so its important to keep it tight and wrinkle free. The pillars were probably the hardest to do and have them look right, pretty much tried to copy the factory blue pieces I took off. Once the whole headliner was installed I could think about cutting the hole for the sunroof. As soon as you cut the hole out the material of course looses its tightness so I used a wax pencil to draw around the sunroof opening so that once the glue was applied I could pull it back to that line and fold it over, gluing it to the roof. Again the corners are the tricky part, for me anyways as I'm no upholsterer but its coming out good. Sunroof opening completed, just the rear window corners left to go now. I'm leaving the C pillars at this stage as I'm still toying with installing electric operated rear pop out windows so I'll need access to that area if that plan goes ahead. I have the windows from an early car as well as made the slots in the B post for the hinges but that's as far as I got.
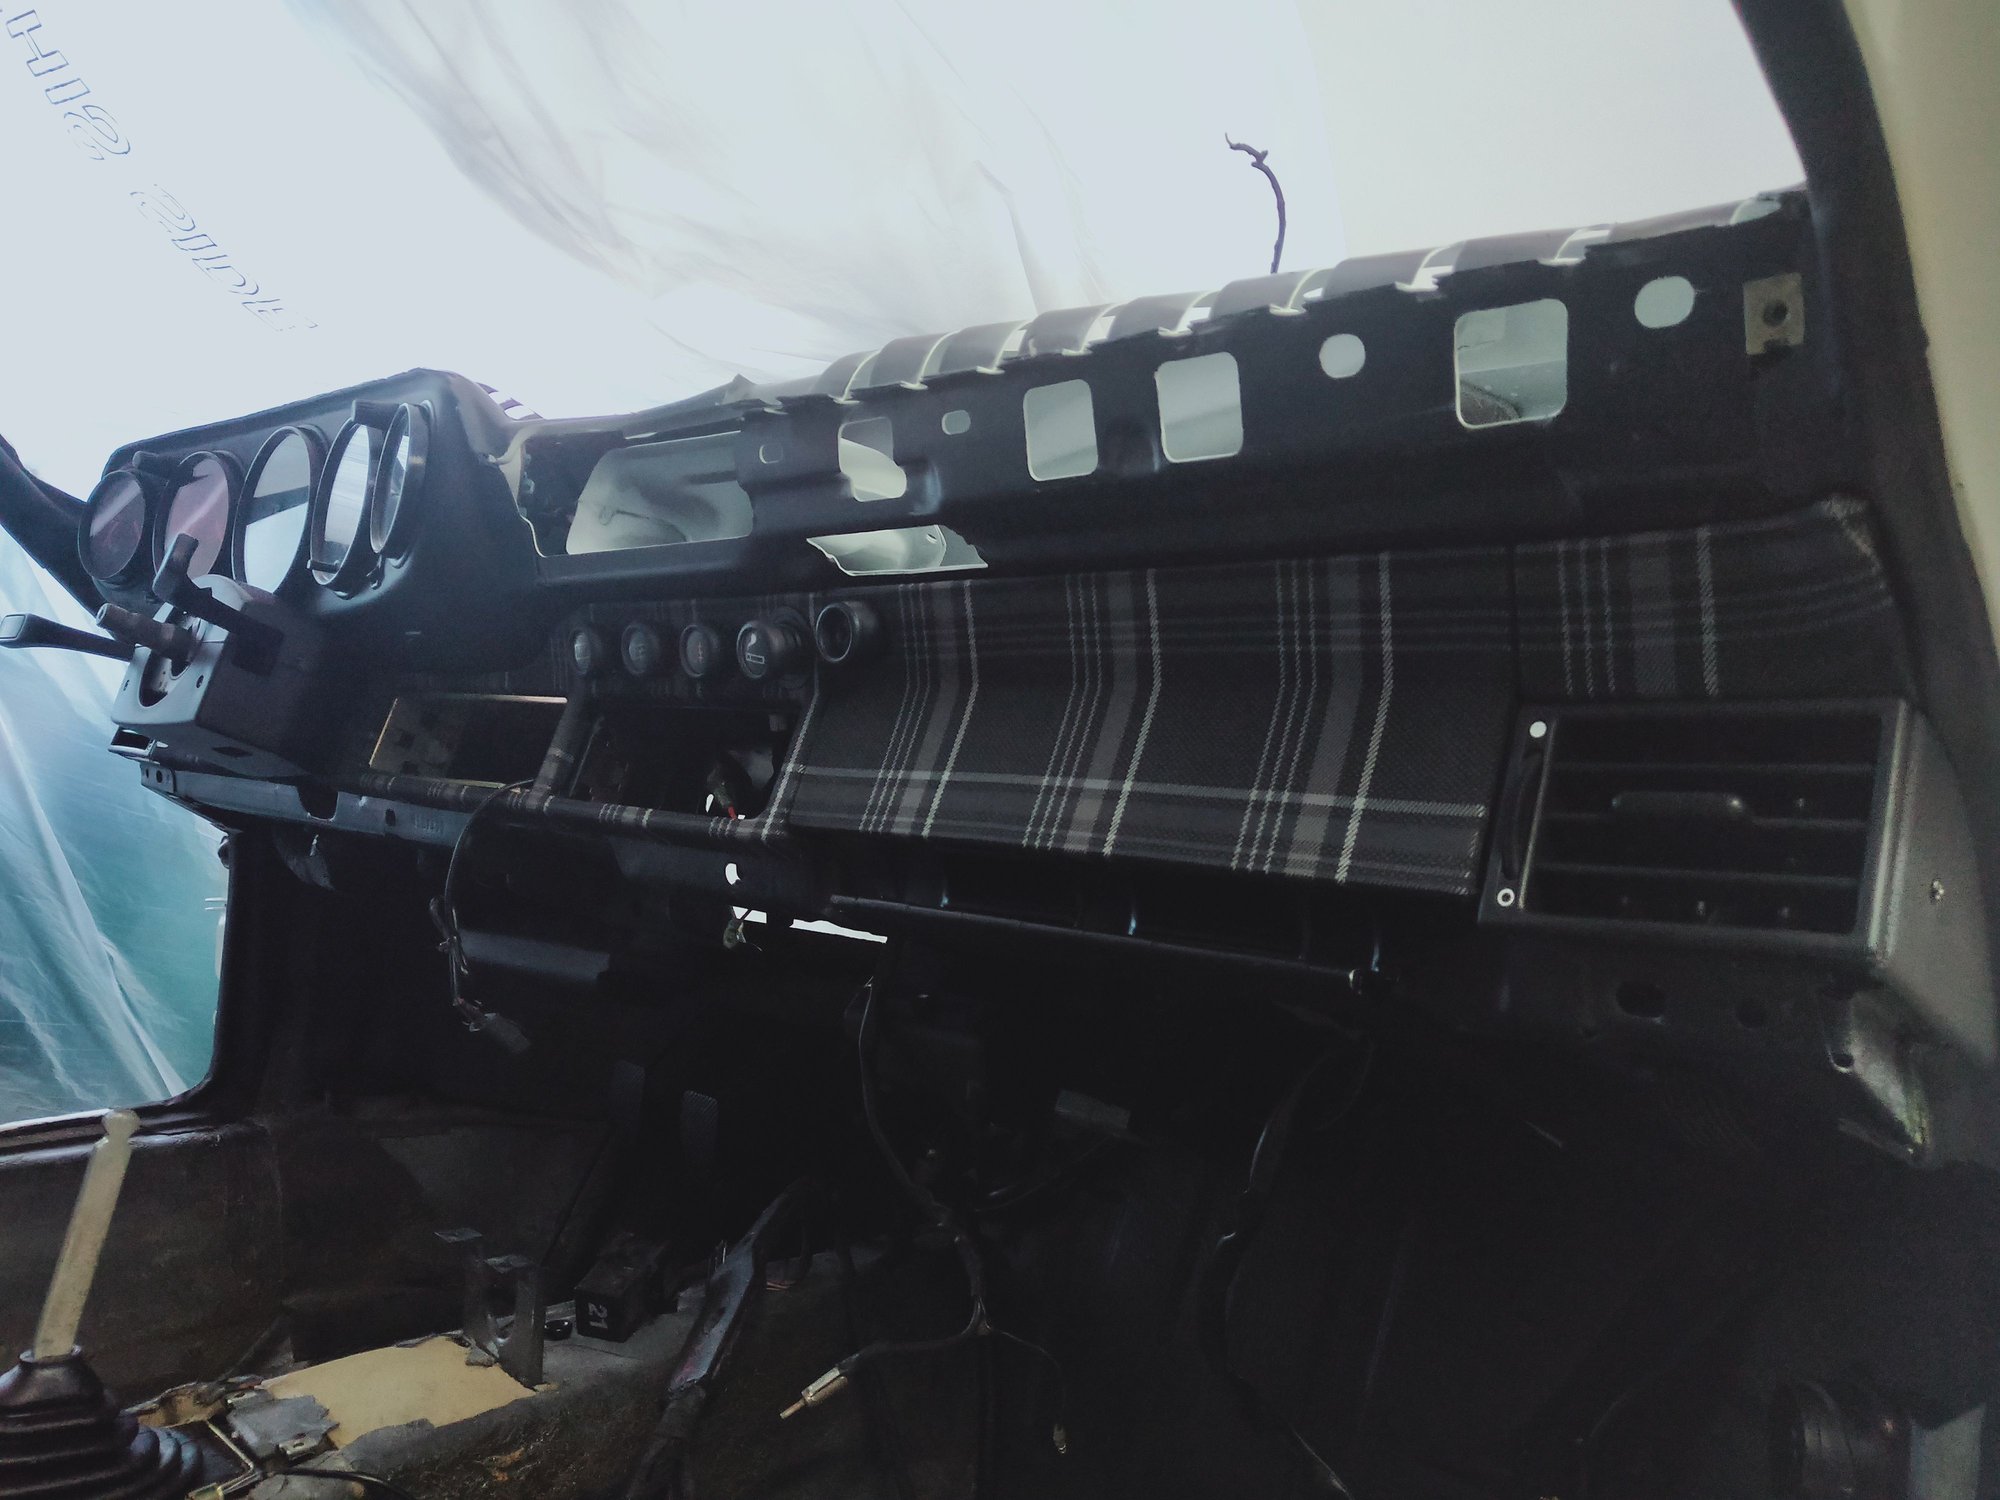
Decided to do something different for the dash inserts, rather than blue / black I wanted to tie in some of the plaid material from the seats. Been thinking about this idea for a while but wasn't sure if it would be too much so the only way to see how it would look is to do it, started with the small piece on the drivers side first. Quite tricky lining everything up and making sure the lines are straight. Switches in temporarily to hold it in place I really like the look of it, planning to do a carbon fiber knee pad to tie it all together. I'll also be using some plaid accents in the doors, most likely a continuation of the dash strip in to the door. Center piece next, this material doesn't stretch at all making this panel quite difficult in the corners but luckily this is all hidden by the radio and climate control unit. All the switches in just holding it in place for now, still have to remove this again to add some glue to stick it down permanently. Other pieces done and installed I felt the glove box door needed something extra to break up the plaid so after a lot of searching I found a really nice 3D Porsche badge in silver / black that should be ideal for that once it arrives. The dash pad itself was blue originally but this will be going black leather with a white French seam over the gauge pod to match the stitching in the carbon seats i'm using. The flat part of the dash nearer the windscreen will be alcantara. I'm going to leave this part to a pro upholsterer as I have no desire to waste materials trying to do it myself. Getting that French seam to look right will be pretty challenging. Over all I like where its going, progress is slow but it's moving along.
Your whole build is amazing! I especially like all the leather and tartan parts you are adding. That center piece is something I have though about doing something similar to and match the pockets on the door. (Just to add continuity)
Porsche 911 GT3 Artisan Edition Pays Homage to Japanese Culture
Slideshow: Porsche has created a Japan-only 911 GT3 Artisan Edition that blends track-ready hardware with design cues inspired by traditional Japanese craftsmanship.
Porsche Reveals Coupe Variant of the Electric Cayenne With a Fresh Look
Slideshow: Porsche's latest electric Cayenne Coupe blends dramatic styling with supercar acceleration, turning the brand's midsize SUV into a 1,139-horsepower flagship.