When you click on links to various merchants on this site and make a purchase, this can result in this site earning a commission. Affiliate programs and affiliations include, but are not limited to, the eBay Partner Network.
I have a C4 with 17 inch rims, but the original space saver spare wheel which is 165/15. Does anyone know what the circumference of the inflated spare is? I want to know so I can check if it's within the C4 tolerance.
I have Cup 1's (17 inch) on my C4 and have had to use the spare tire a few times. Its worked well. The spare inflates to what seems like the same diameter as the normal wheel/tires. I never took the time to measure it.
Oh, thanks very much for this. It gives me some hope that when I refurbished the pedal cluster I just reassembled it with the screw at the wrong adjustment.
I'm just about to do a brake overhaul and plan on pulling the calipers off for a repaint whilst I do the rest of the work. How are you guys blocking off the brake lines whilst the calipers are off the car to stop the fluid seeping out. Last time I ended up with a small plastic balloon full of fluid on each corner when I used cling wrap and tape. 😒
I use extra bleed nipples. Just screw them into the soft line...
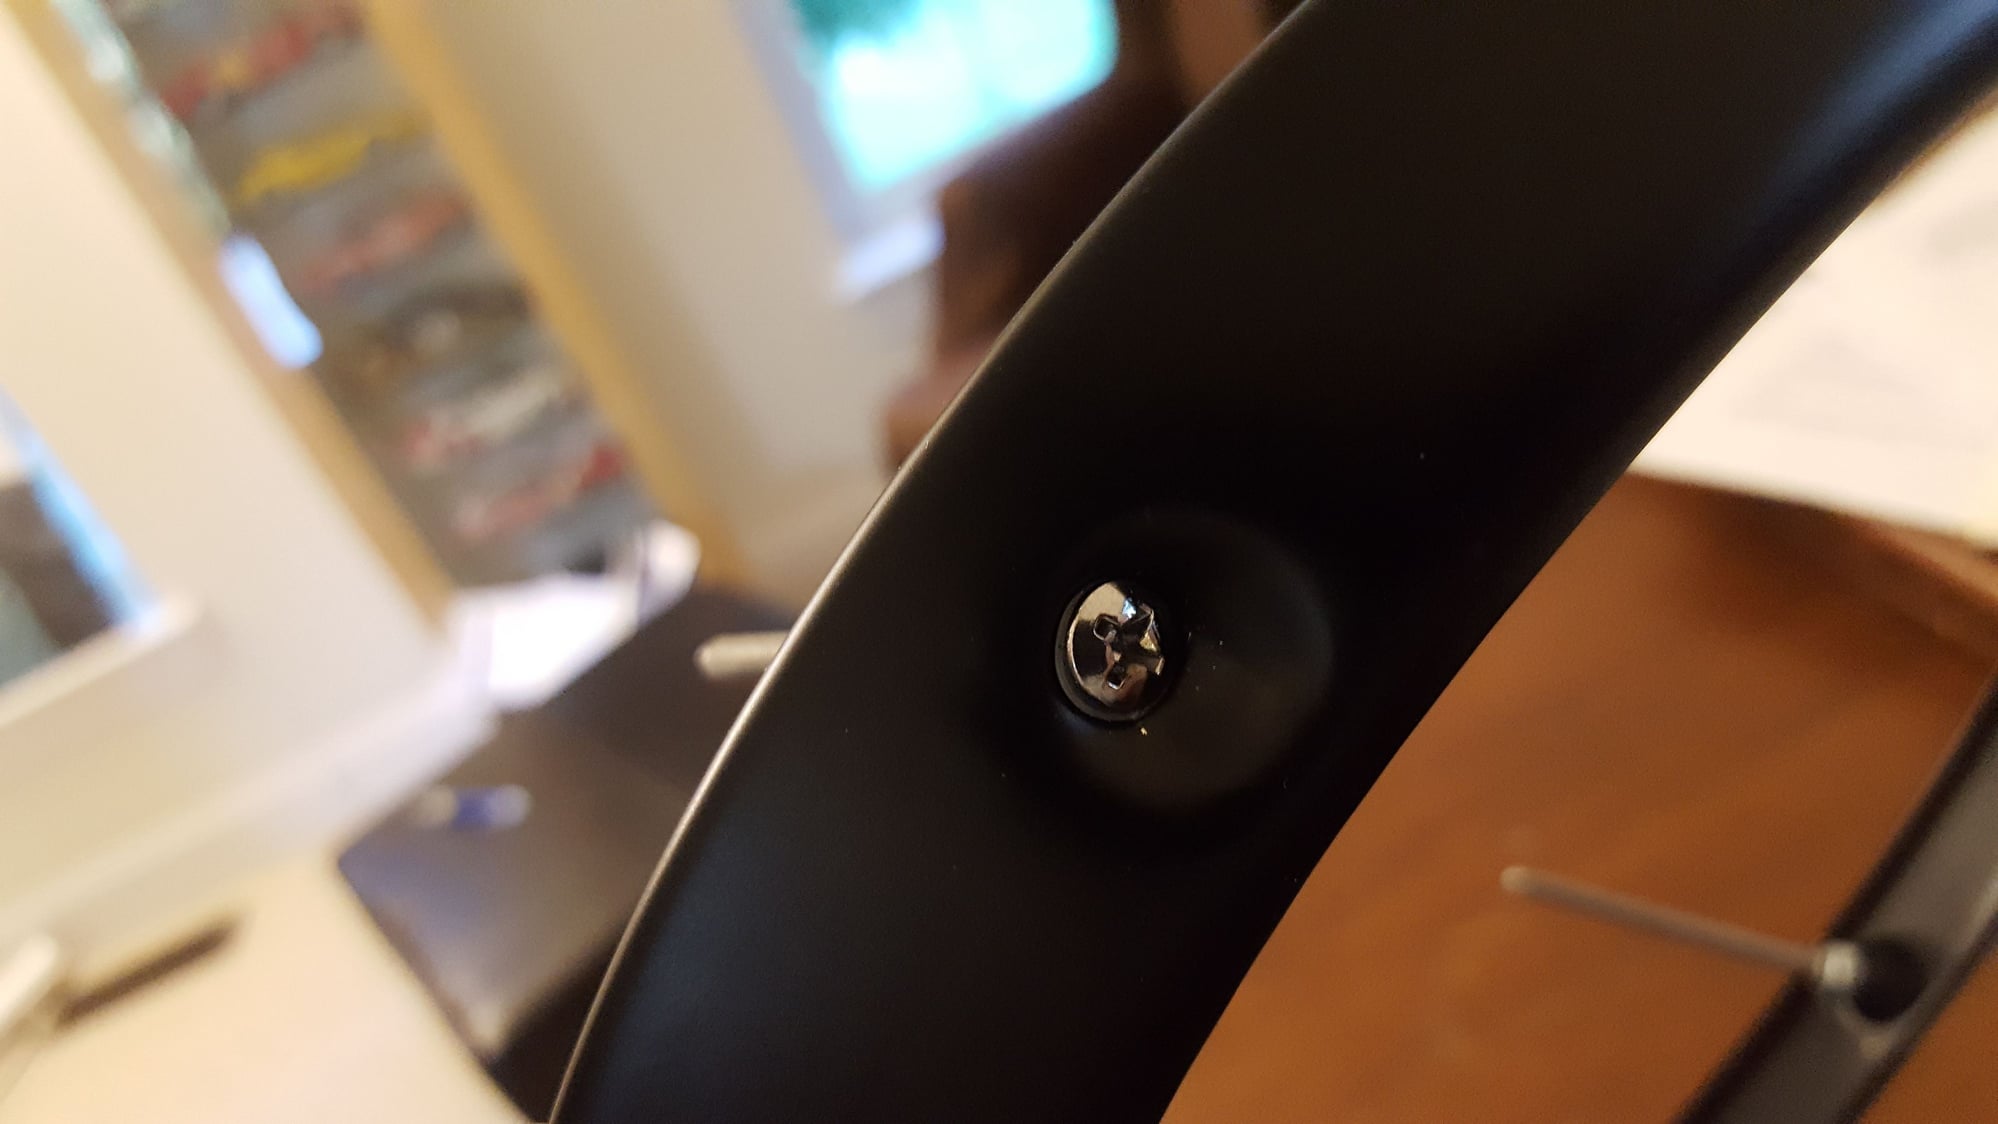
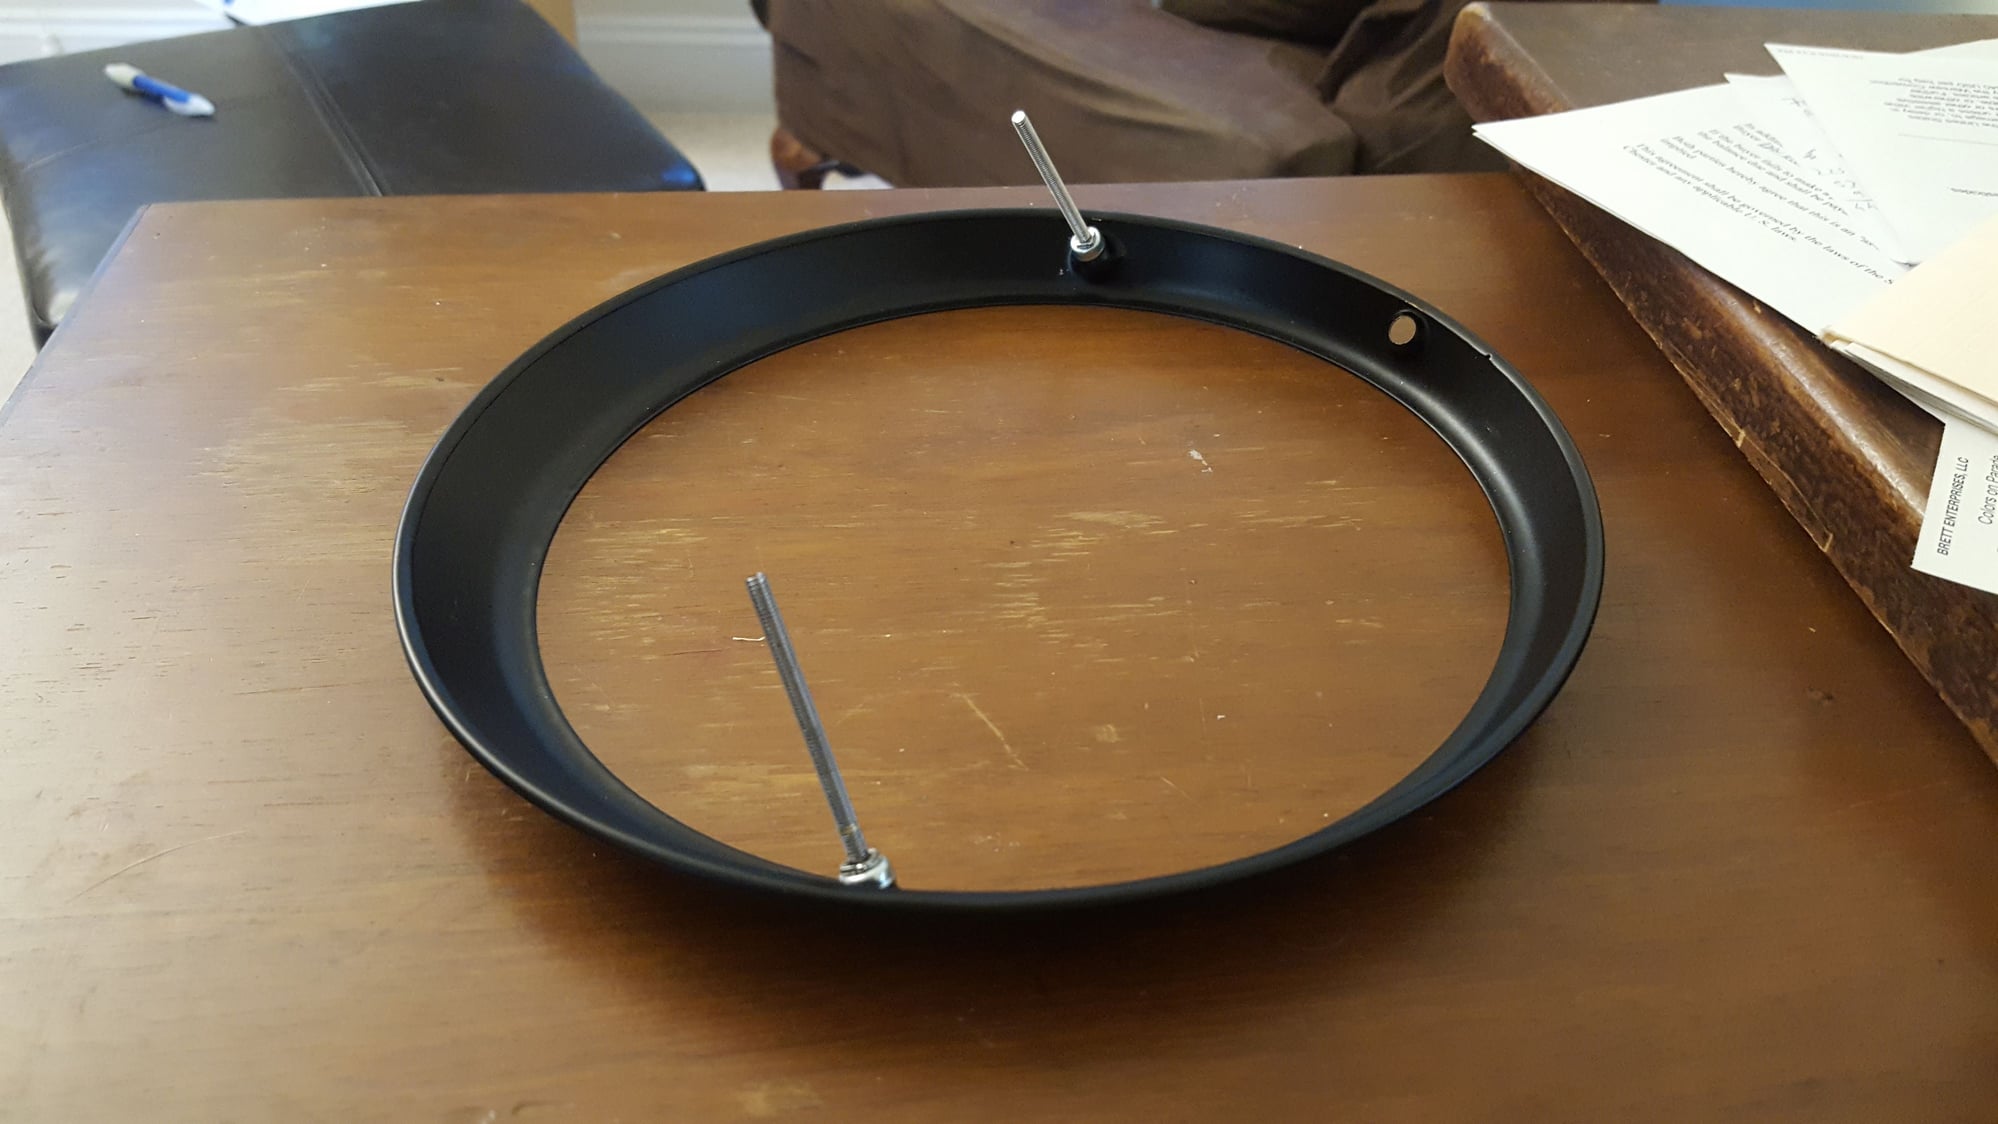
Does anyone know if we can purchase the H4 Headlight Ring, the one with the adjustment screws, separately? (Not the cover ring). Had some neighbor being stupid next to car in garage and dinged it, I see it in part diagram, but since its the USA one it omits the info on the H4, and just gives H5.
Does anyone know if we can purchase the H4 Headlight Ring, the one with the adjustment screws, separately? (Not the cover ring). Had some neighbor being stupid next to car in garage and dinged it, I see it in part diagram, but since its the USA one it omits the info on the H4, and just gives H5.
If you're looking to paint them it might be easier to tape them. Otherwise you need to carefully pinch the crimp ring on the back side so you can unscrew it. It is not all that easy to do. If you don't care about originality just pry the crimp ring off and use tape or something else to hold the screw from backing out when you turn it.
No. I have seen people fit 19's only to waffle them almost every time they took the car out not to mention the ridiculously harsh ride. These cars work best with the proper 25" dia tire unlike the newer cars today which use 26" or more.
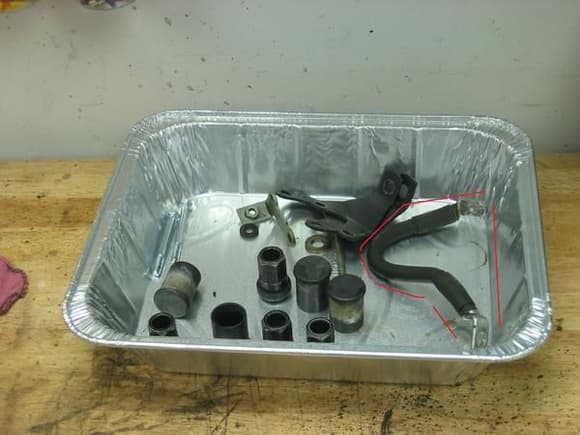
Can someone tell me where in this ground strap is on the car? I cannot locate it to save my life. A picture of it on the car would be incredibly helpful.
Listed on Illustration 302-05 in the E_964_Katalog
There are two high-current grounds and numerous smaller grounds. The two high current grounds are at the battery and the starter. Do you have the Bently 964 companion book? If memory serves, it has a listing of all of the ground points.
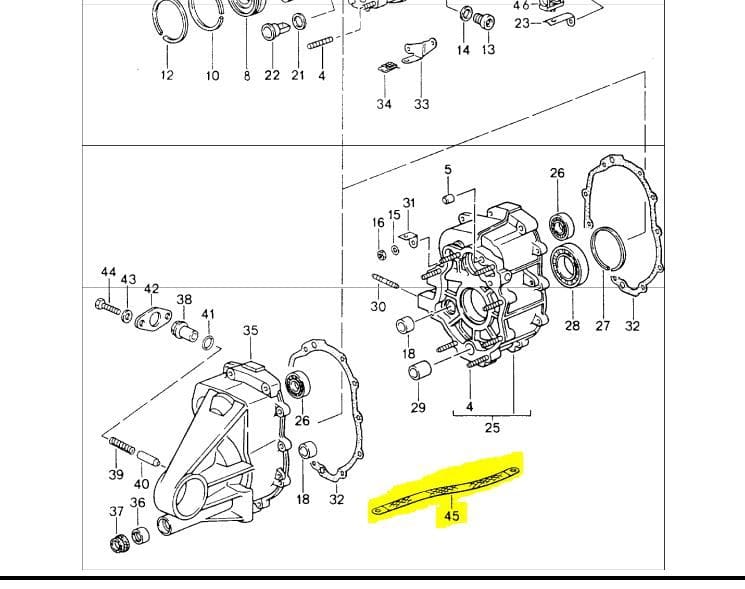
The starter ground strap is circled in the parts tray below. I had removed my engine for the first time and when I finished I had some left over parts. The starter ground strap is #18 on PET 902-05 and the battery ground is #5 on the same drawing.
If you're looking to paint them it might be easier to tape them. Otherwise you need to carefully pinch the crimp ring on the back side so you can unscrew it. It is not all that easy to do. If you don't care about originality just pry the crimp ring off and use tape or something else to hold the screw from backing out when you turn it.
It worked, not the easiest thing in the world to do, thanks for the tip!
There are two high-current grounds and numerous smaller grounds. The two high current grounds are at the battery and the starter. Do you have the Bently 964 companion book? If memory serves, it has a listing of all of the ground points.
The starter ground strap is circled in the parts tray below. I had removed my engine for the first time and when I finished I had some left over parts. The starter ground strap is #18 on PET 902-05 and the battery ground is #5 on the same drawing.
I've replaced the starter and battery ground, wondering why the parts katalog shows this tranny ground ? Doesnt seem to exist.


 10-07-2016 | 09:05 AM