

Another photo journal, lots of misc. projects I completed over the past few months.
 10-30-2012, 10:55 PM
#1
Nordschleife Master
Thread Starter

Alright guys, lots to cover, lots of random projects performed during one big downtime for the car.
During the last little update on the car, I told you all I went racing every weekend in May.
See some in-car vids and pics regarding that in this thread **HERE**
A couple more pics from those weekends
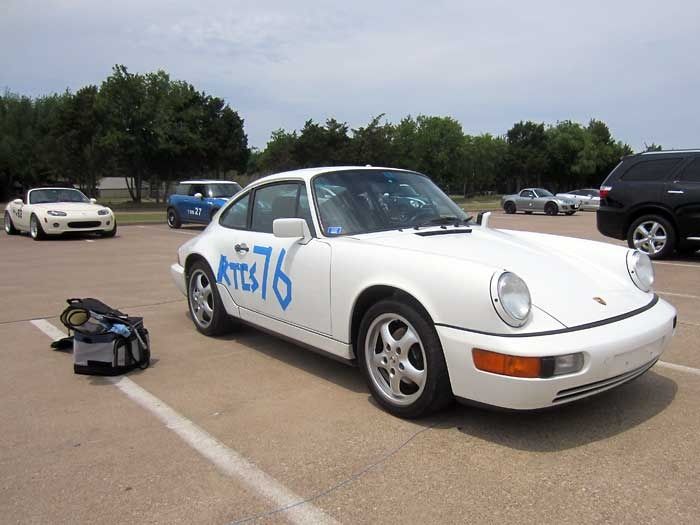
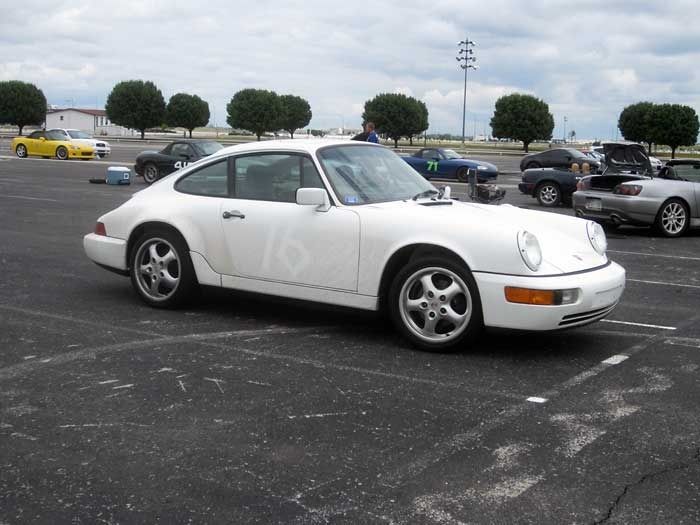
Doing it in the rain, make it nasty.
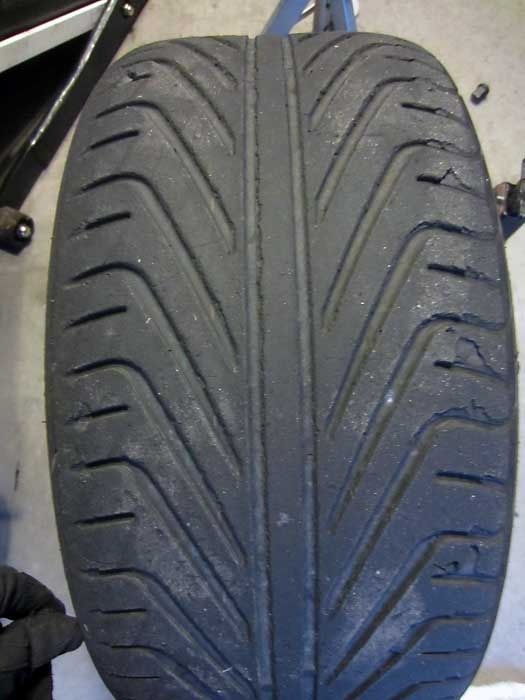
Old WWII asphalt + a$$-happy C2, tearing up my old PS2s.
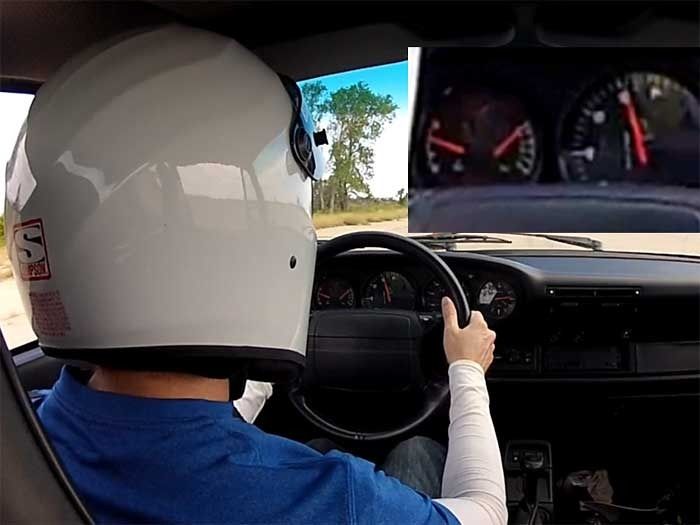
If you look at my in-car vids closely, you can see a problem. 10 o’clock, 248F, oil temps during Time Trial sessions.
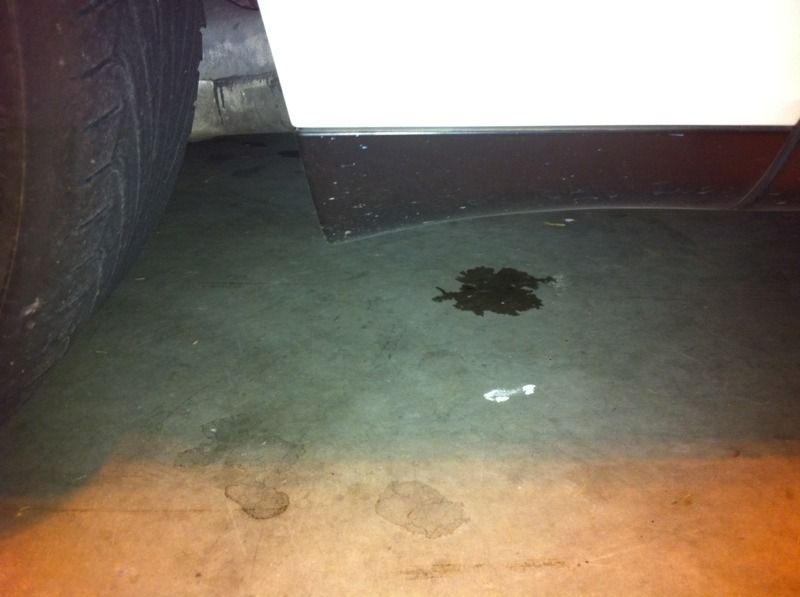
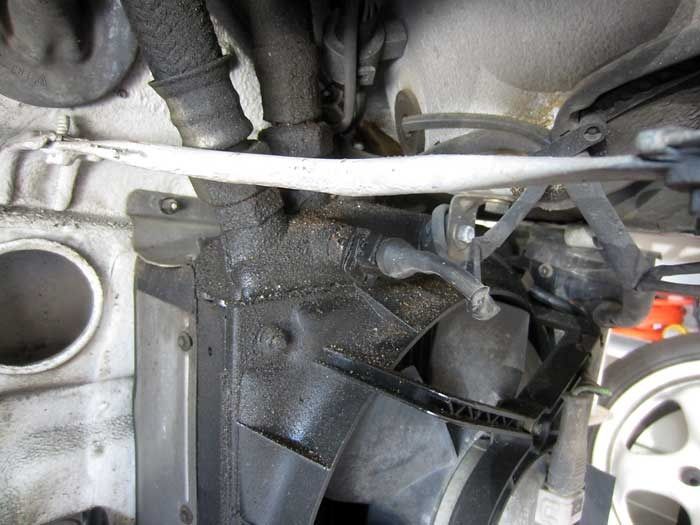
Then when I got home and parked it, I noticed this too.
So I removed the shark fin and did some degreasing of the thermostat area.
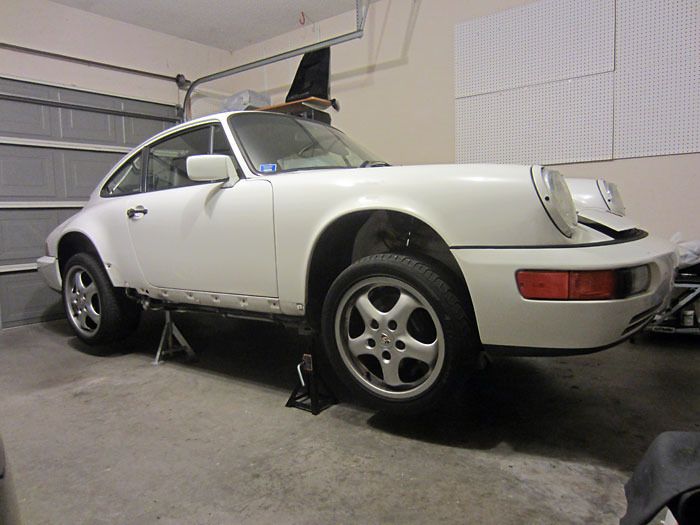
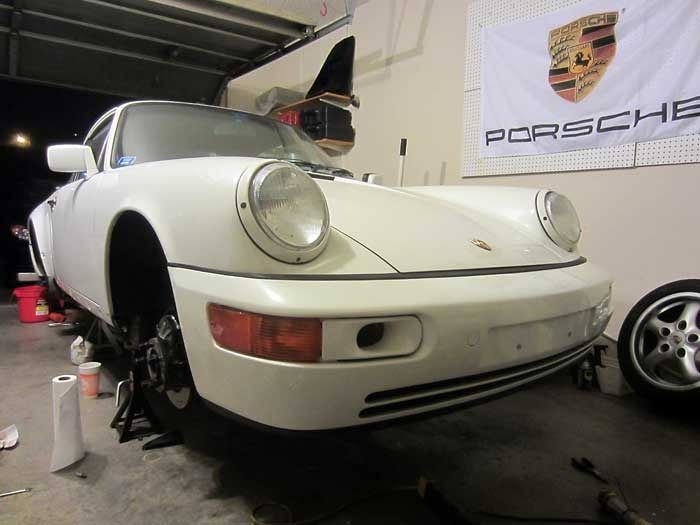
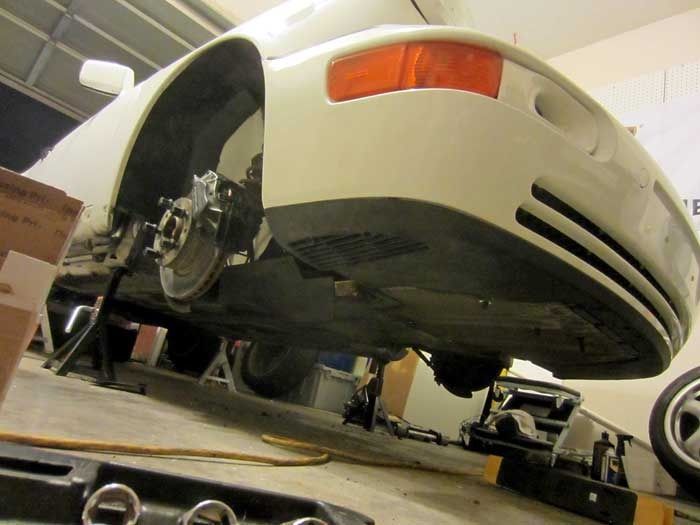
Put the car in the air for the Dakar Rally suspension droop.
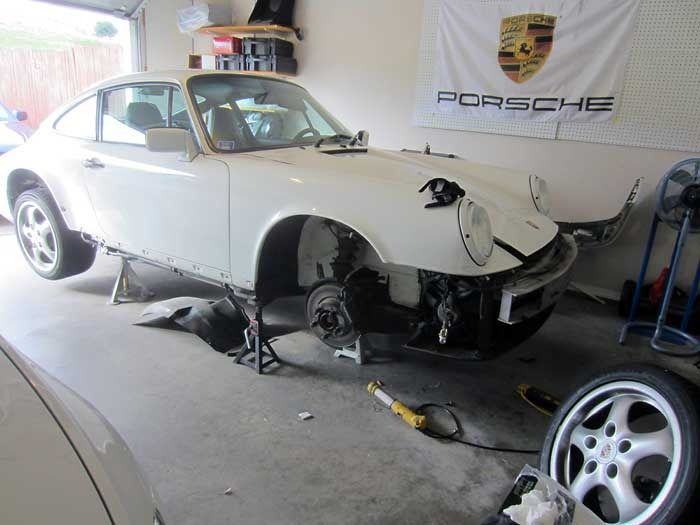
Front bumper off the car. Thanks for the flag Gus!
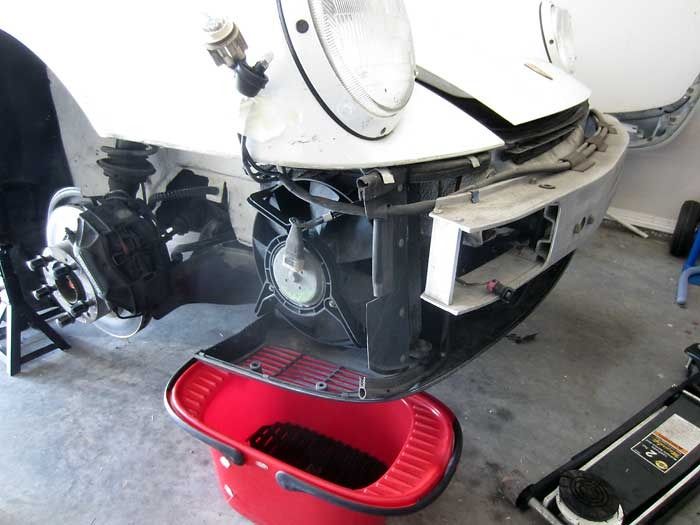
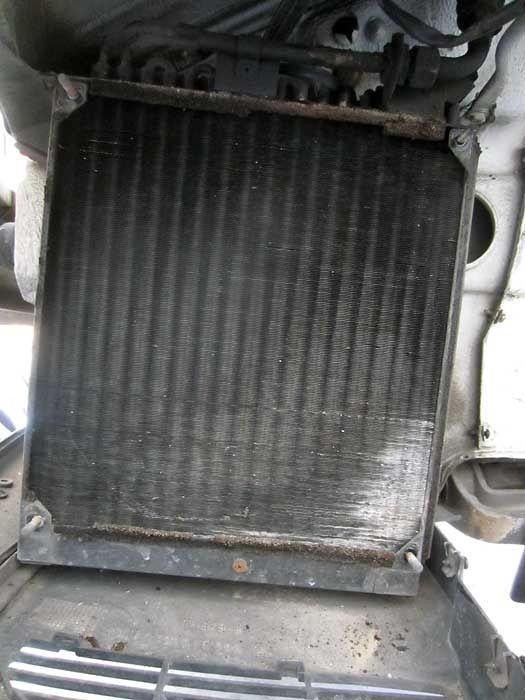
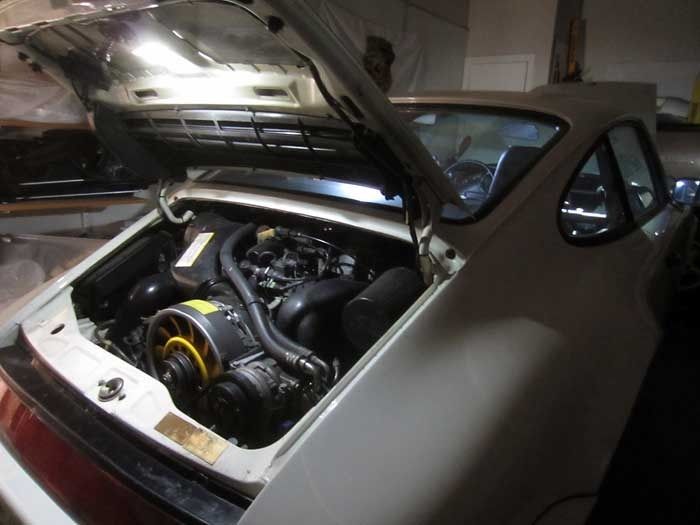
Gonna start degreasing the oil cooler.
Some wetness, nothing too horrible.
Fan removed to facilitate degreasing. I used degreaser, water, and compressed air to make sure the fins were clear of debris.
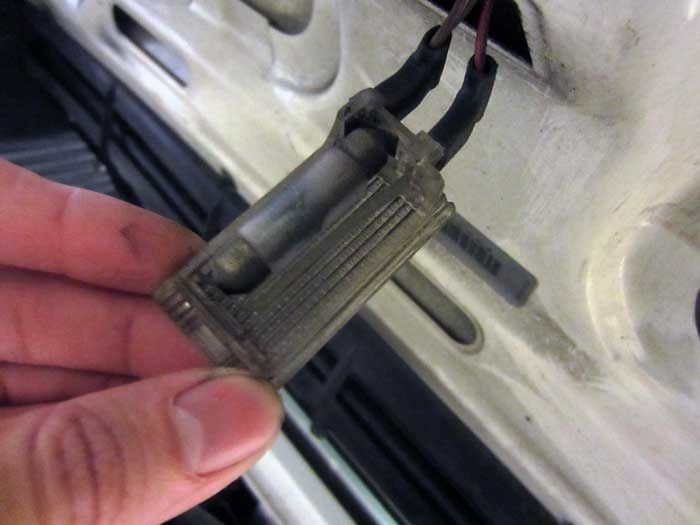
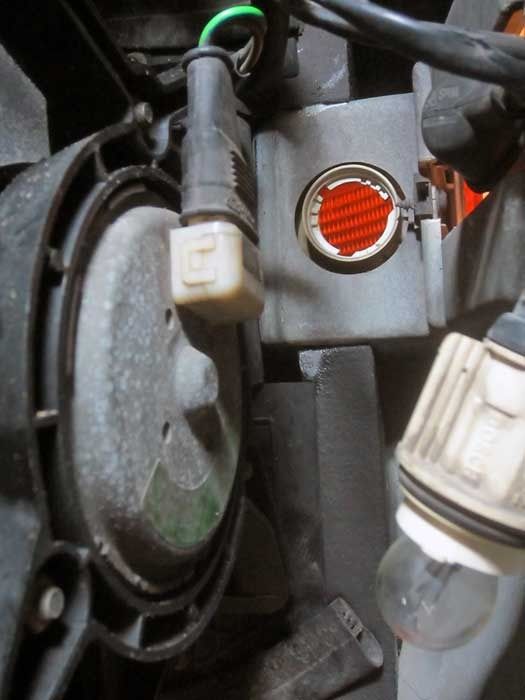
Next order of business, switch out the ballast resistor that controls the fan functionality.
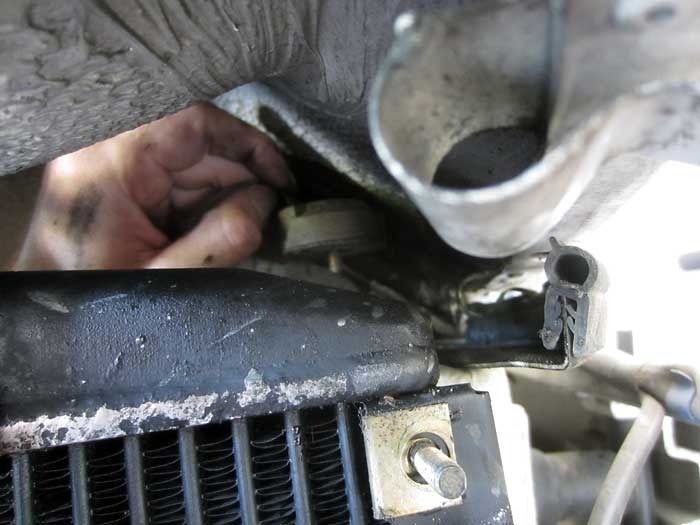
Small hands paying dividend.
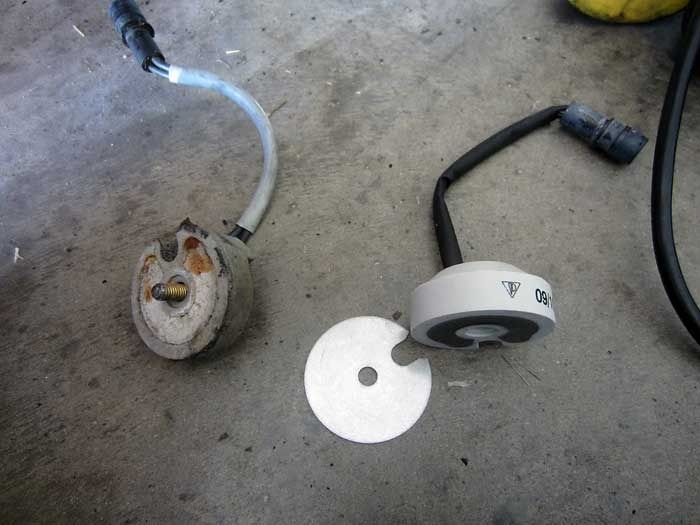
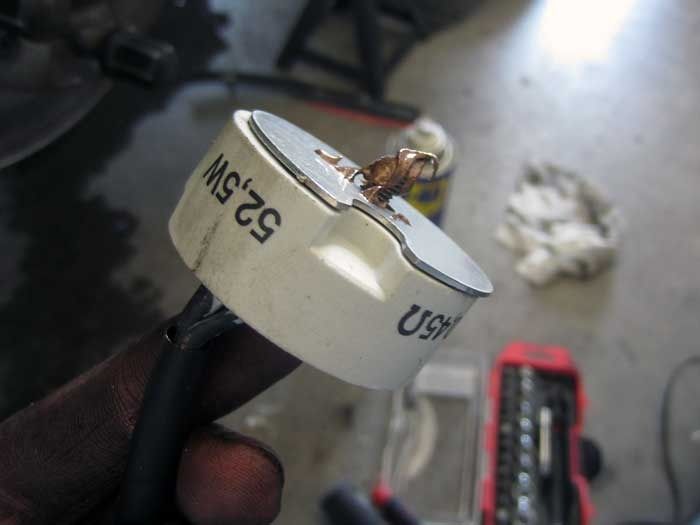
Old resistor wasn’t too bad, but I replaced it anyway.
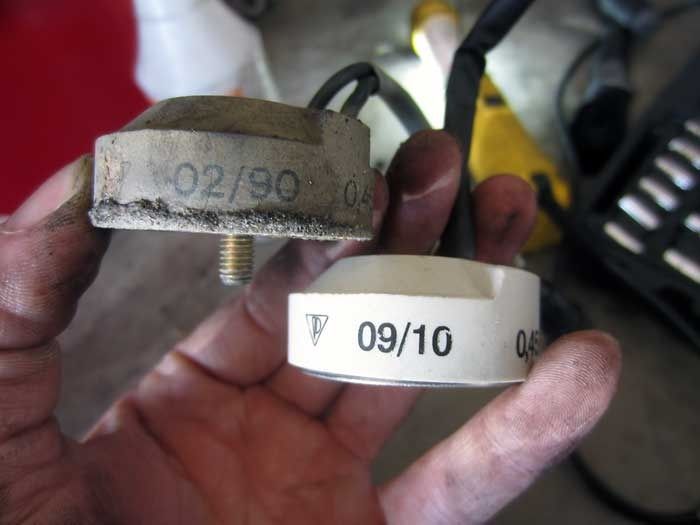
Manufacture dates 20 yrs apart.
A/C condenser
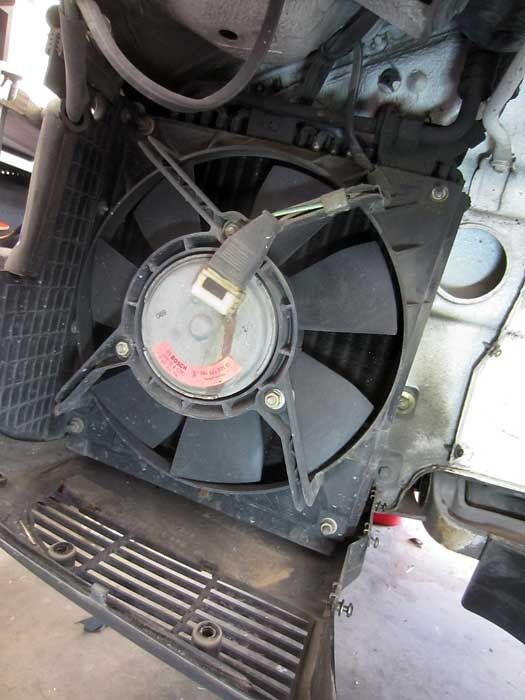
Removed the fan to facilitate cleaning. I didn’t want to use a degreaser on this end, just water and compressed air.
The a/c side uses the same ballast resistor as the oil cooler, so I will replace that one too.

Out w/ the old.
I reused the bolt, but added a bunch of anti-seize for the next time I need to remove it.
All reinstalled.
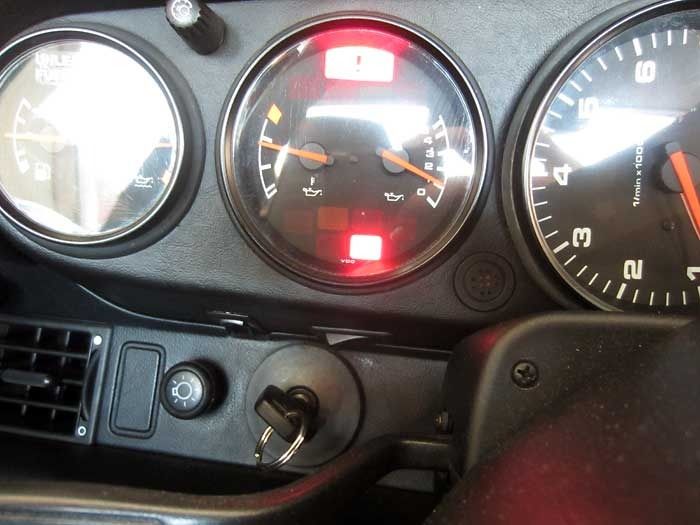
Fire up the car and let it idle in the garage a bit, on jackstands. These are the temps I also encounter this when idling in traffic for too long in Texas heat. This is actually the way Porsche intended for it to work, the fan doesn’t kick on till the temp nearly touches 10 o’clock, then hovers around between 9:30 and 10:00. It’s always a **** feeling when I start seeing those temps climb. I hate it.
Measured at the temp sensor on the oil cooler, point of fan engagement.
Luckily, RL member “rollingjack” figured out how to fix this problem.
https://rennlist.com/forums/964-foru...n-by-212f.html
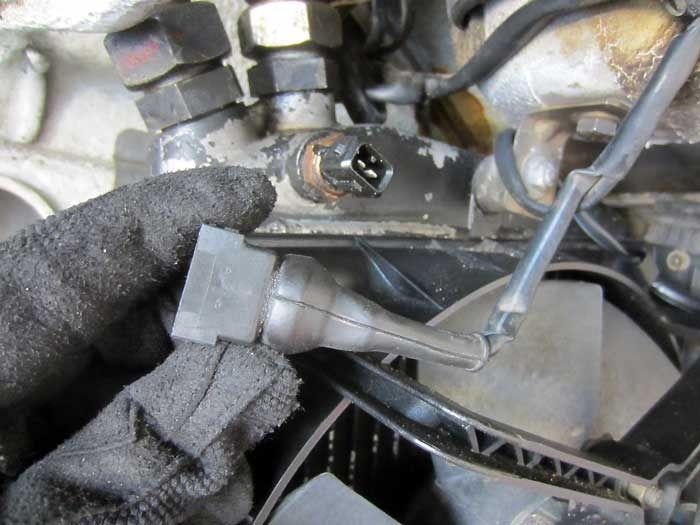
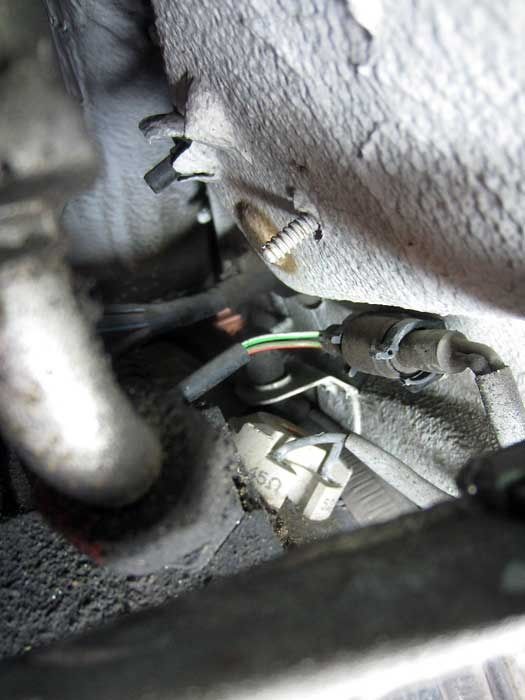
Unplugged the temp sensor
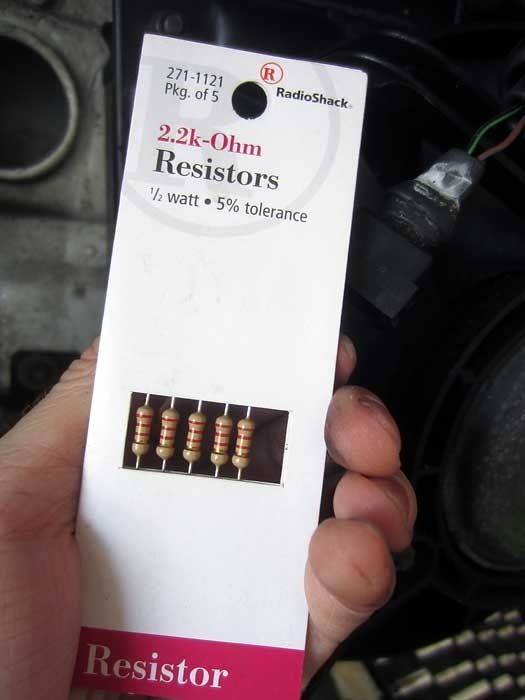
I got my pack of Radio Shack resistors
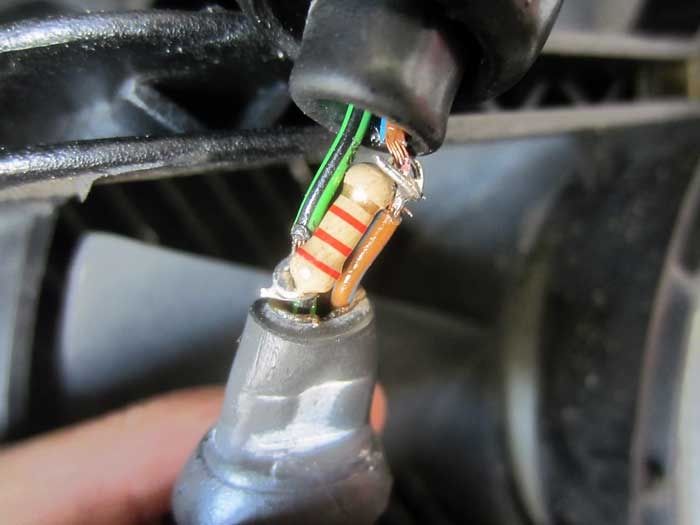
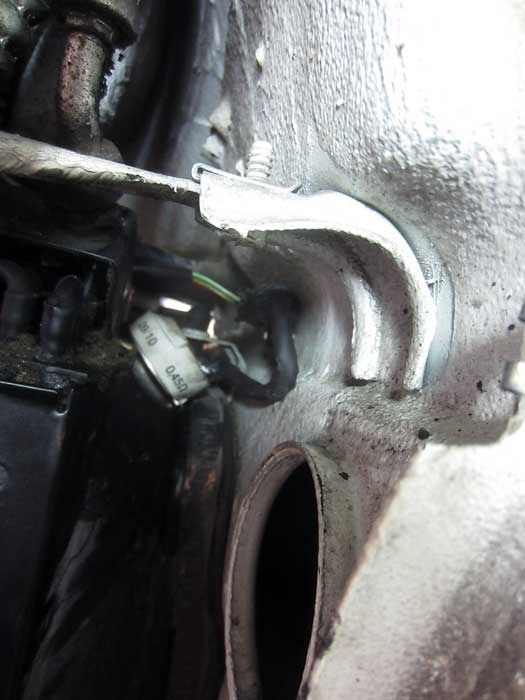
Peeled back the rubber boot on the plug and solder in my resistor.
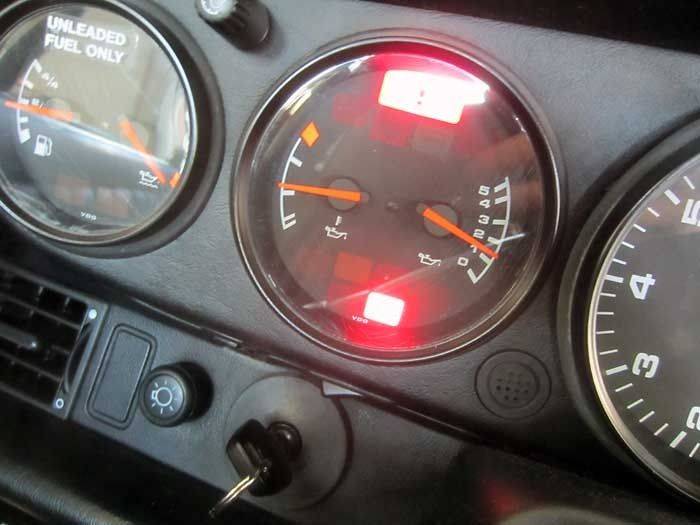
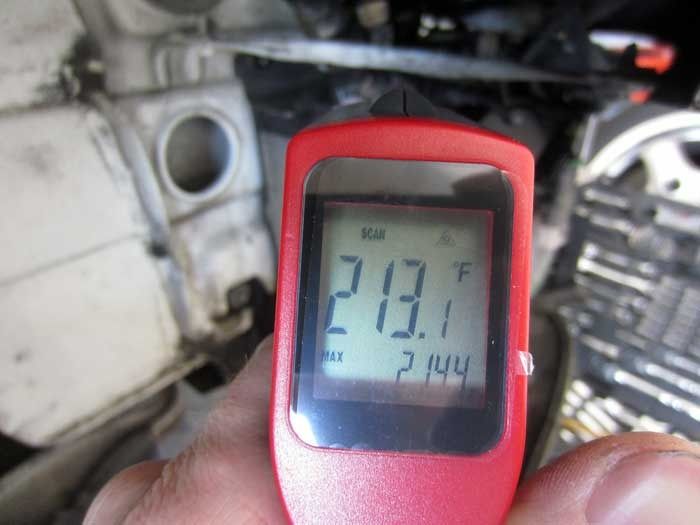
BAM, now the oil cooler fan engages just above 9 o’clock (194F) on the temp.

Temp reading shows the lower engagement point at the cooler.
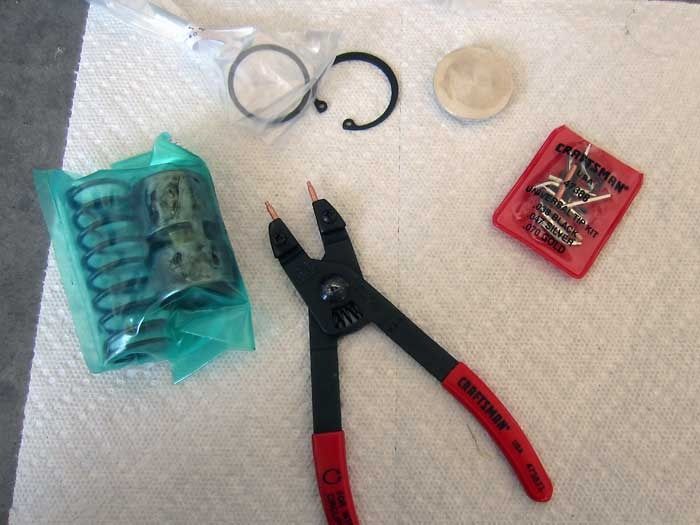
Next step, replace the thermostat guts.
I had seen other threads where people struggled to remove the cap, so I decided to Goop a bolt to the cap to facilitate removal once I removed the clip.
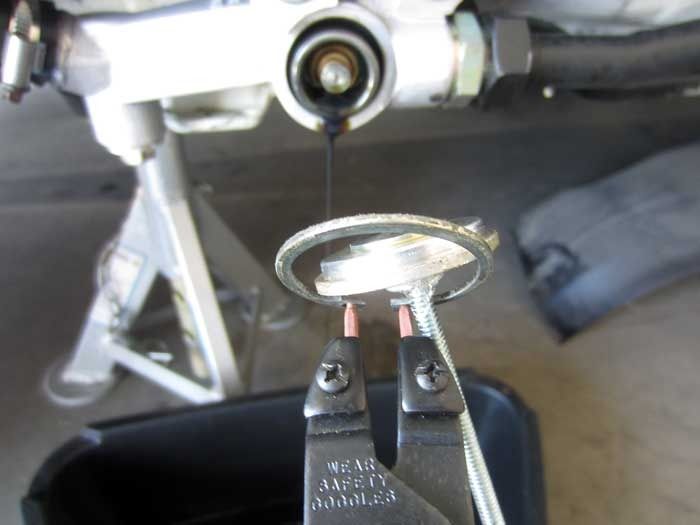
Everything popped out easily once the clip was removed.
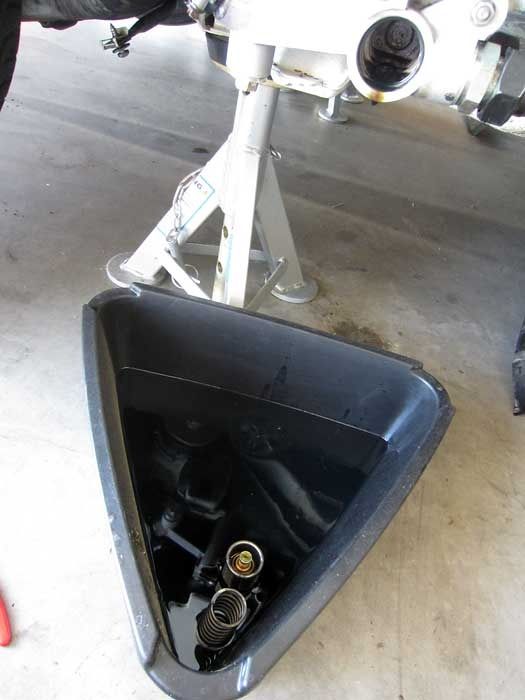
You don’t lose much oil when you do this.
All new thermostat guts.
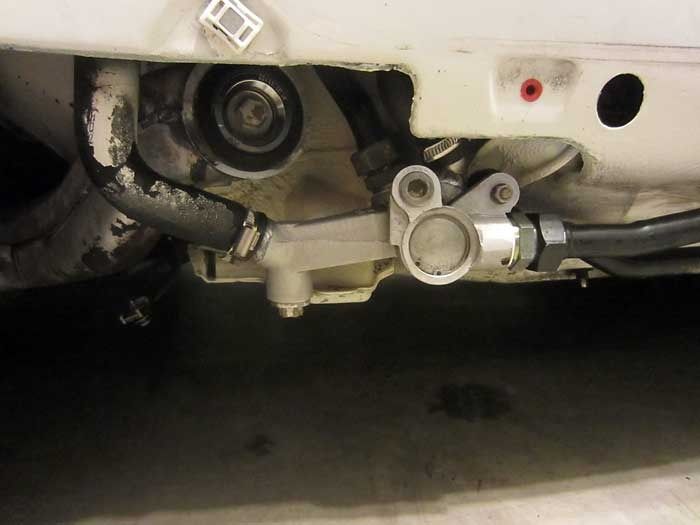
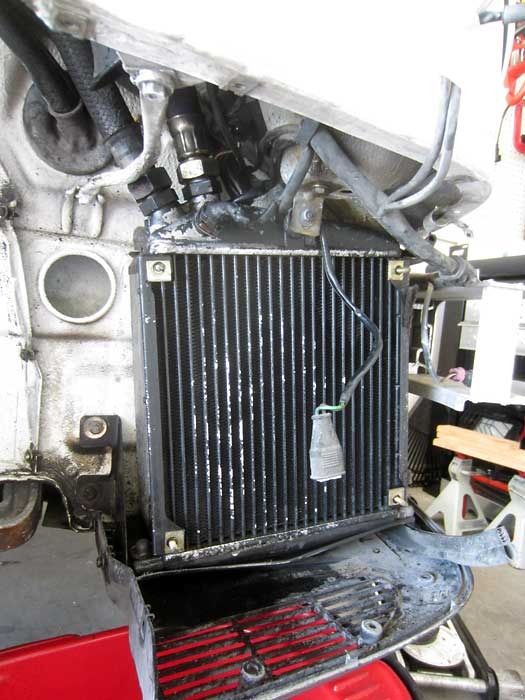
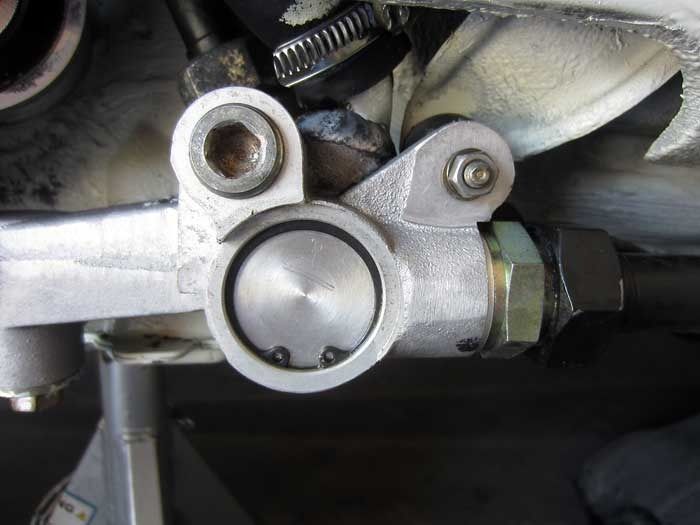
One of the fittings on the oil cooler was weeping a bit, probably why that area was wet.
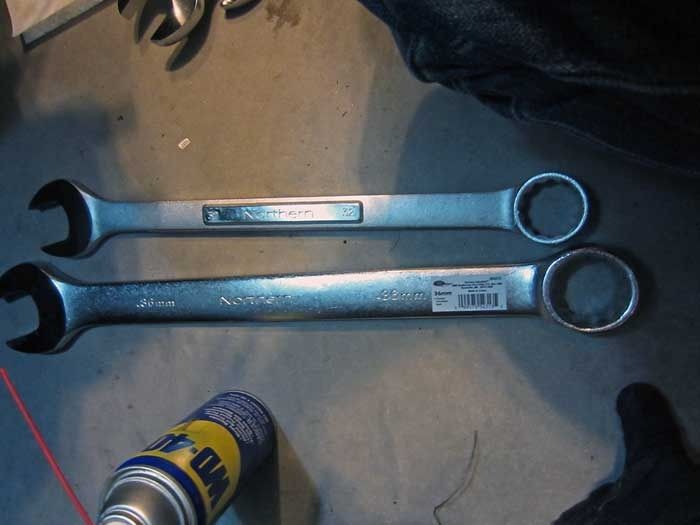
Out come the big wrenches, 36mm and 32mm.
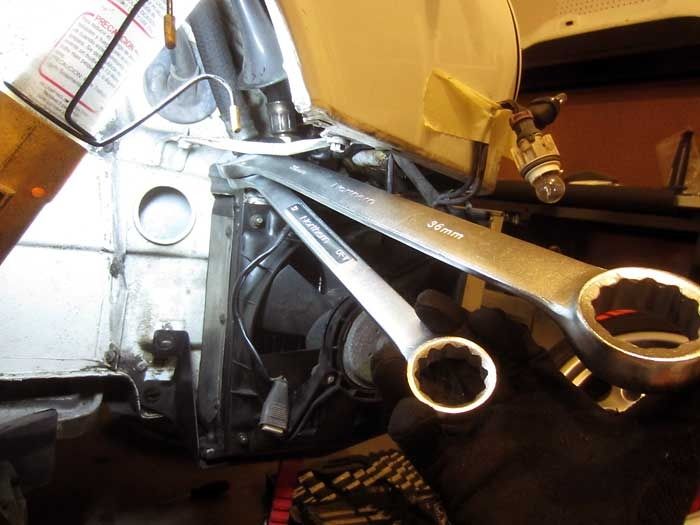
I dropped the cooler a bit to get clearance and snugged up the fittings a bit. I realize that these might also be leaking at the crimp, but I wasn’t going to replace/rebuild these hoses at the moment.
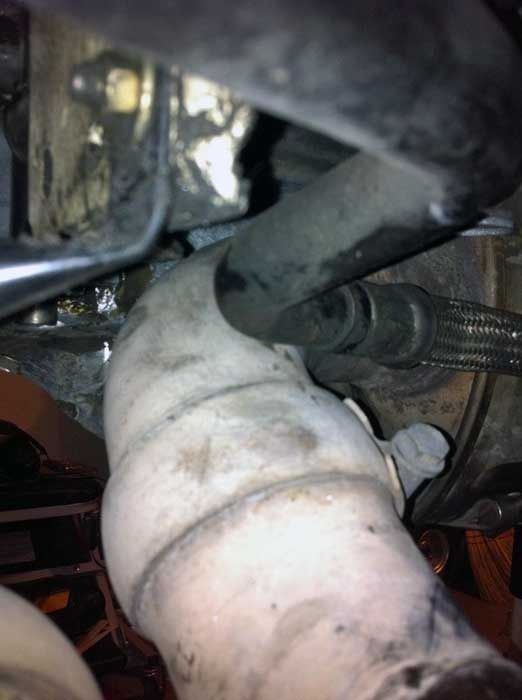
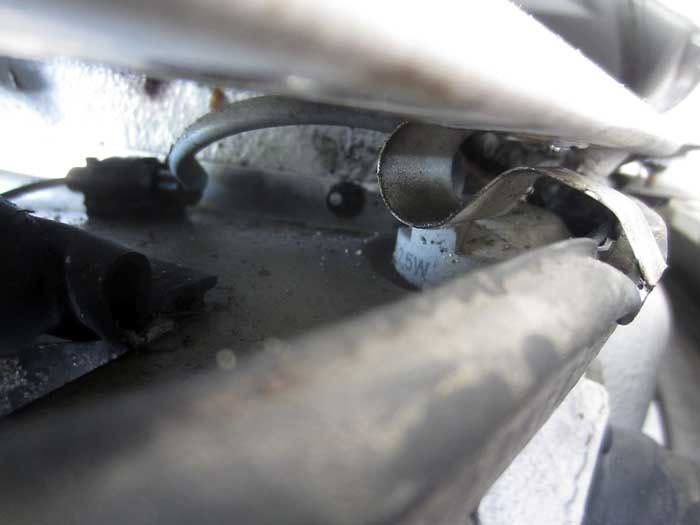
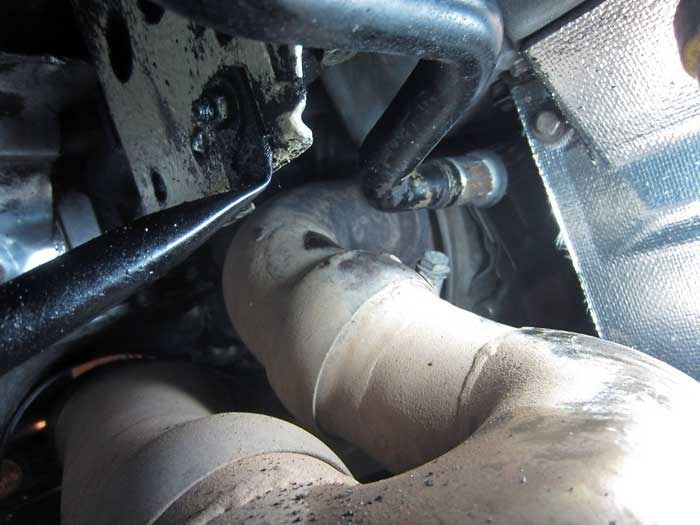
After I tore apart and rebuilt the rear of the car earlier in the year ***THREAD HERE**, I noticed the oil return line was coming in contact w/ the exhaust.
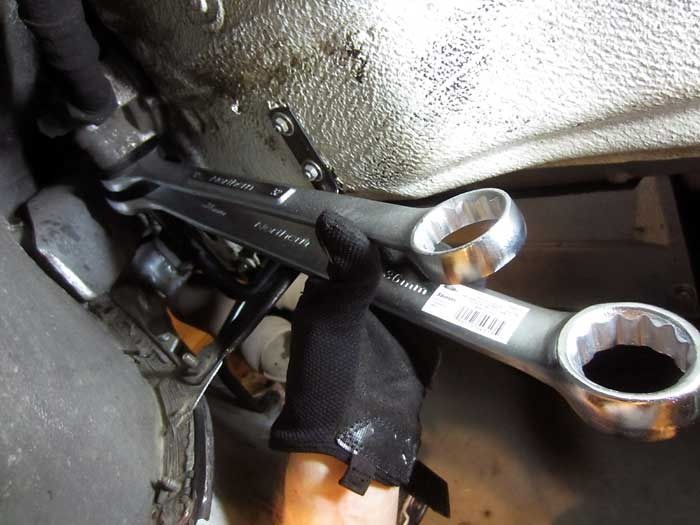
Out come the big wrenches again to loosen this fitting. It was stupid tight. It’s a miracle I got it loose.
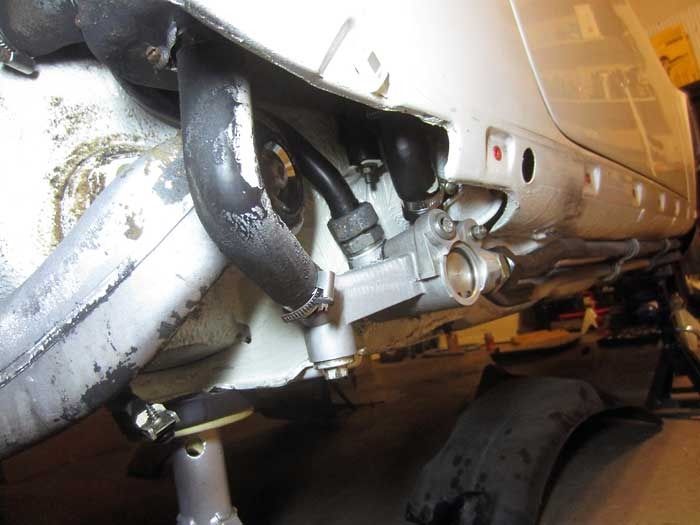
Repositioned and retightened, now I have a bunch of clearance.
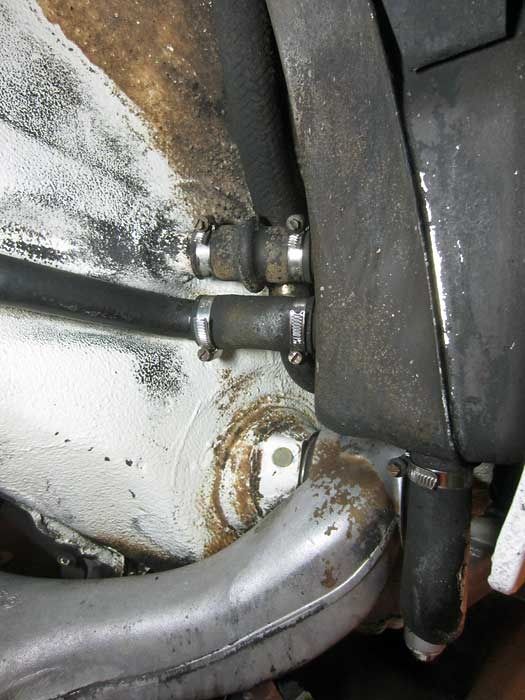
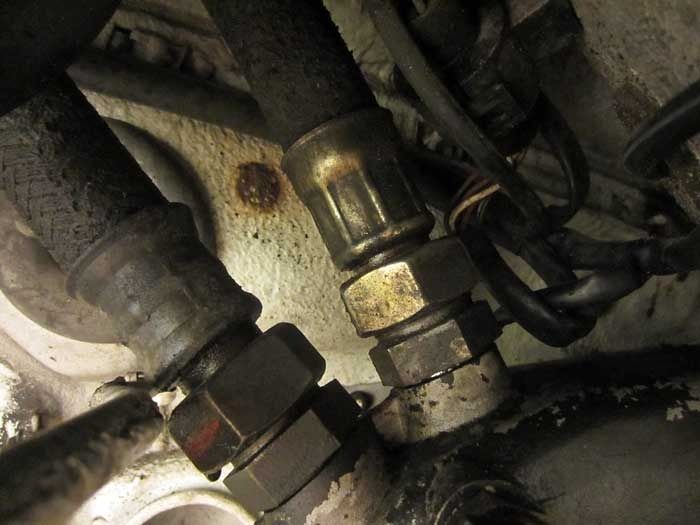
Now I turn my attention to the bunch of hoses around the oil tank.
And leading to the thermostat.
Old worn out oil line clamp.
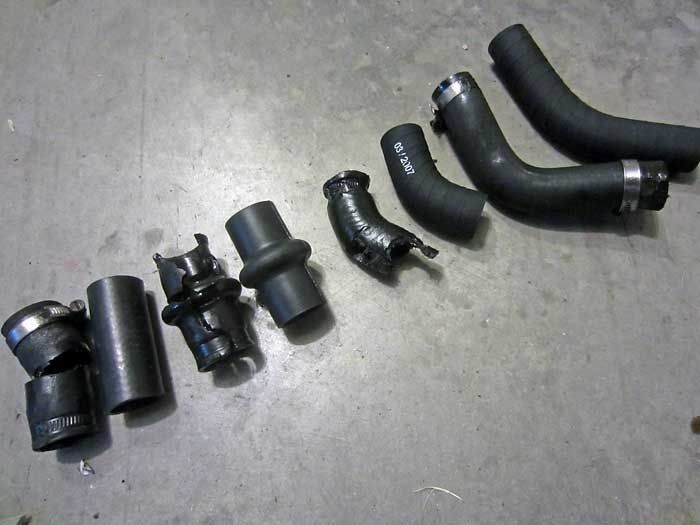
I tried the best I could, but just ended up chopping them all off. Old vs New
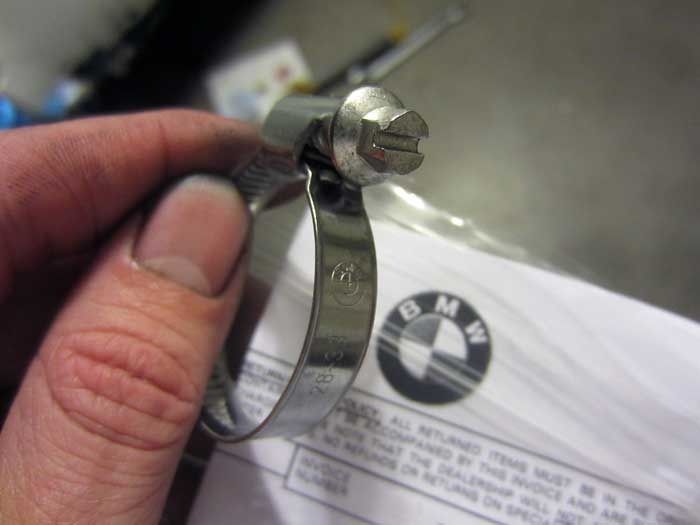
Only the best parts for my car, BMW hose clamps. Part # 07 12 9 952 113. These are less than $1/clamp versus the Porsche part that is a few $/clamp. Thanks for the headsup Silvertarga.
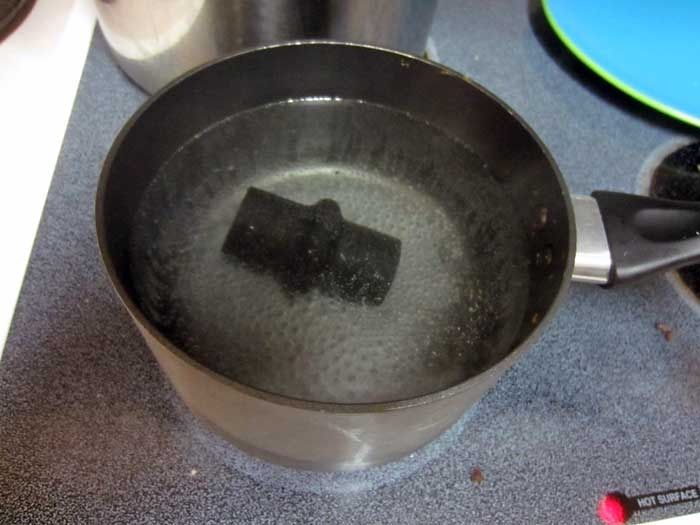
Some boiling water to help get the hoses in place. It’s pretty much impossible to install these w/o first getting the hoses nice and pliable.
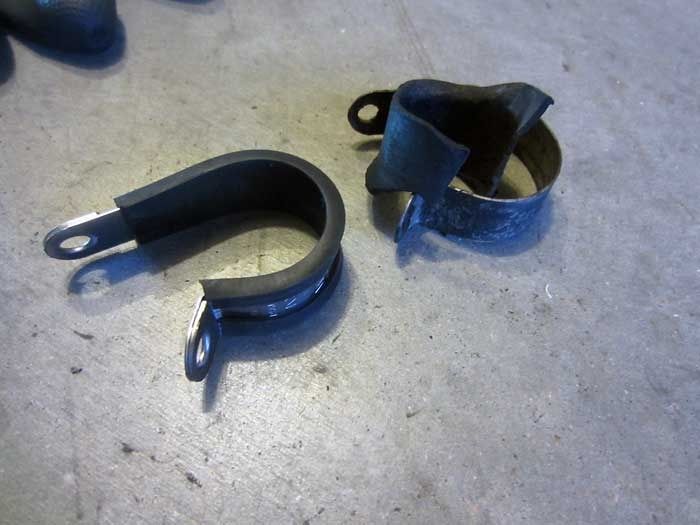
New oil line clamp
All reinstalled.
All reinstalled.
I know some of the leaking may be coming from the big braided hose, but I wasn’t about to drop the oil tank and replace/rebuild it this time around.
During the last little update on the car, I told you all I went racing every weekend in May.
See some in-car vids and pics regarding that in this thread **HERE**
A couple more pics from those weekends
Doing it in the rain, make it nasty.
Old WWII asphalt + a$$-happy C2, tearing up my old PS2s.
If you look at my in-car vids closely, you can see a problem. 10 o’clock, 248F, oil temps during Time Trial sessions.
Then when I got home and parked it, I noticed this too.
So I removed the shark fin and did some degreasing of the thermostat area.
Put the car in the air for the Dakar Rally suspension droop.
Front bumper off the car. Thanks for the flag Gus!
Gonna start degreasing the oil cooler.
Some wetness, nothing too horrible.
Fan removed to facilitate degreasing. I used degreaser, water, and compressed air to make sure the fins were clear of debris.
Next order of business, switch out the ballast resistor that controls the fan functionality.
Small hands paying dividend.
Old resistor wasn’t too bad, but I replaced it anyway.
Manufacture dates 20 yrs apart.
A/C condenser
Removed the fan to facilitate cleaning. I didn’t want to use a degreaser on this end, just water and compressed air.
The a/c side uses the same ballast resistor as the oil cooler, so I will replace that one too.
Out w/ the old.
I reused the bolt, but added a bunch of anti-seize for the next time I need to remove it.
All reinstalled.
Fire up the car and let it idle in the garage a bit, on jackstands. These are the temps I also encounter this when idling in traffic for too long in Texas heat. This is actually the way Porsche intended for it to work, the fan doesn’t kick on till the temp nearly touches 10 o’clock, then hovers around between 9:30 and 10:00. It’s always a **** feeling when I start seeing those temps climb. I hate it.
Measured at the temp sensor on the oil cooler, point of fan engagement.
Luckily, RL member “rollingjack” figured out how to fix this problem.
https://rennlist.com/forums/964-foru...n-by-212f.html
Unplugged the temp sensor
I got my pack of Radio Shack resistors
Peeled back the rubber boot on the plug and solder in my resistor.
BAM, now the oil cooler fan engages just above 9 o’clock (194F) on the temp.
Temp reading shows the lower engagement point at the cooler.
Next step, replace the thermostat guts.
I had seen other threads where people struggled to remove the cap, so I decided to Goop a bolt to the cap to facilitate removal once I removed the clip.
Everything popped out easily once the clip was removed.
You don’t lose much oil when you do this.
All new thermostat guts.
One of the fittings on the oil cooler was weeping a bit, probably why that area was wet.
Out come the big wrenches, 36mm and 32mm.
I dropped the cooler a bit to get clearance and snugged up the fittings a bit. I realize that these might also be leaking at the crimp, but I wasn’t going to replace/rebuild these hoses at the moment.
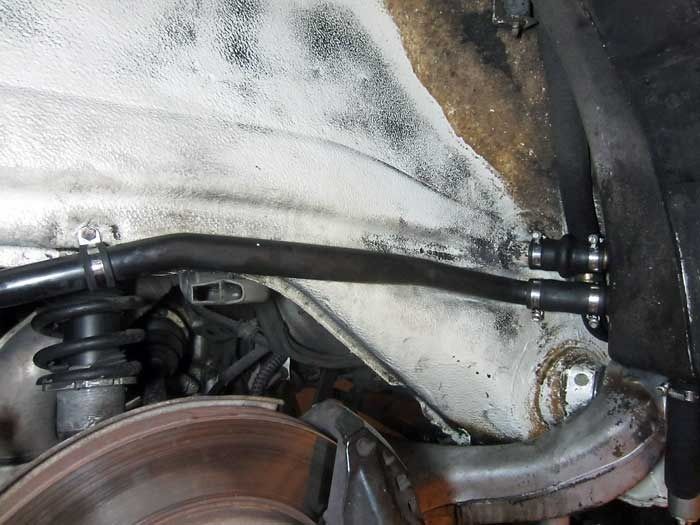
After I tore apart and rebuilt the rear of the car earlier in the year ***THREAD HERE**, I noticed the oil return line was coming in contact w/ the exhaust.
Out come the big wrenches again to loosen this fitting. It was stupid tight. It’s a miracle I got it loose.
Repositioned and retightened, now I have a bunch of clearance.
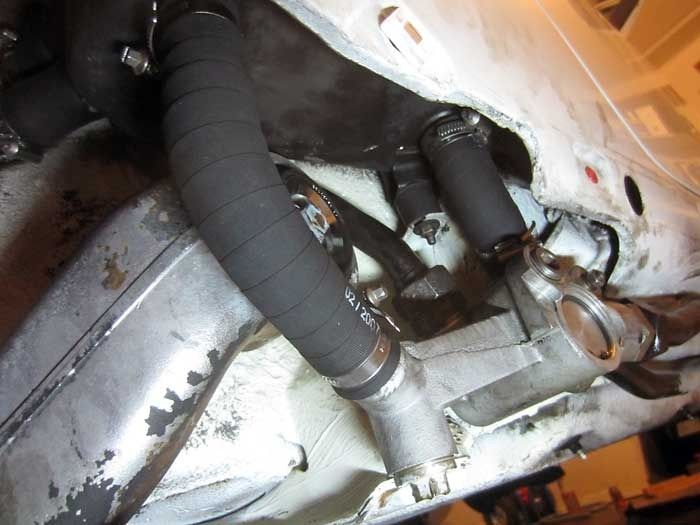
Now I turn my attention to the bunch of hoses around the oil tank.
And leading to the thermostat.
Old worn out oil line clamp.
I tried the best I could, but just ended up chopping them all off. Old vs New
Only the best parts for my car, BMW hose clamps. Part # 07 12 9 952 113. These are less than $1/clamp versus the Porsche part that is a few $/clamp. Thanks for the headsup Silvertarga.
Some boiling water to help get the hoses in place. It’s pretty much impossible to install these w/o first getting the hoses nice and pliable.
New oil line clamp
All reinstalled.
All reinstalled.
I know some of the leaking may be coming from the big braided hose, but I wasn’t about to drop the oil tank and replace/rebuild it this time around.
Last edited by Vandit; 10-31-2012 at 09:58 PM.
 10-30-2012, 10:56 PM
#2
Nordschleife Master
Thread Starter
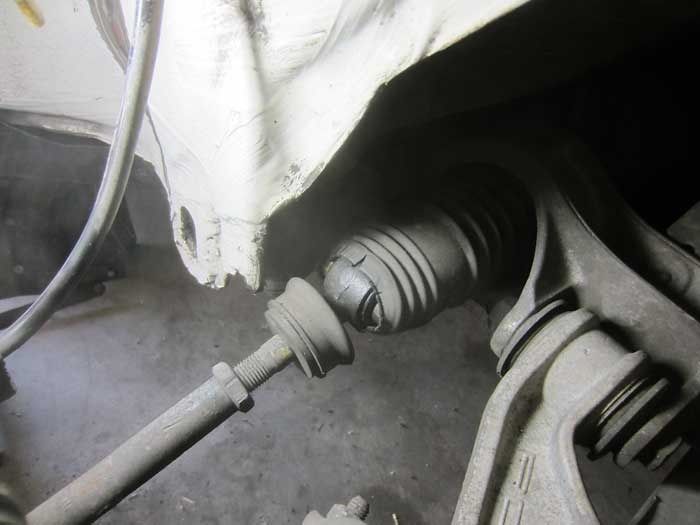
The cool thing about having an old car is that you don’t have to look very far for your next project. I hadn’t even realized my steering rack boots were expired.
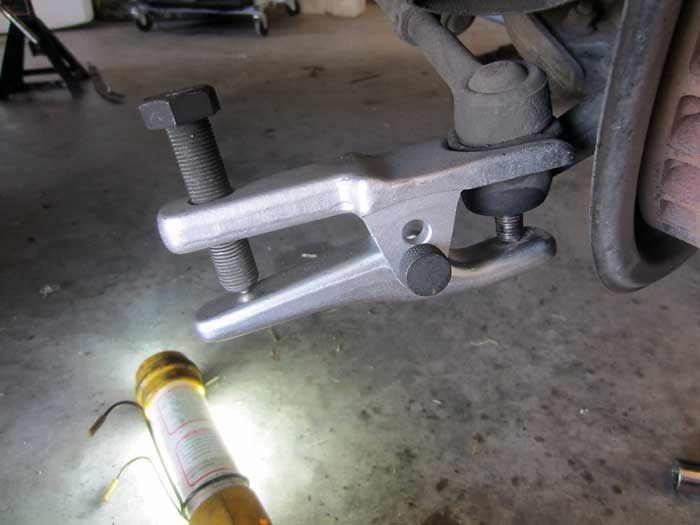
Putting my pretty ball joint removal tool to use.
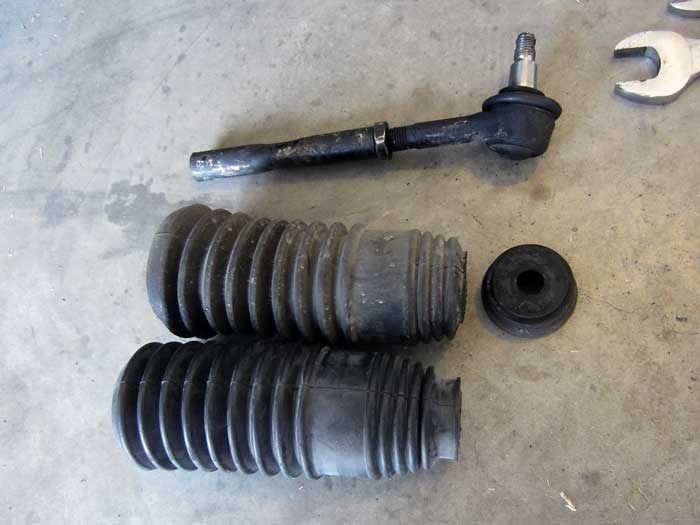
Tie-rod ends removed, old & busted boot versus new boot.
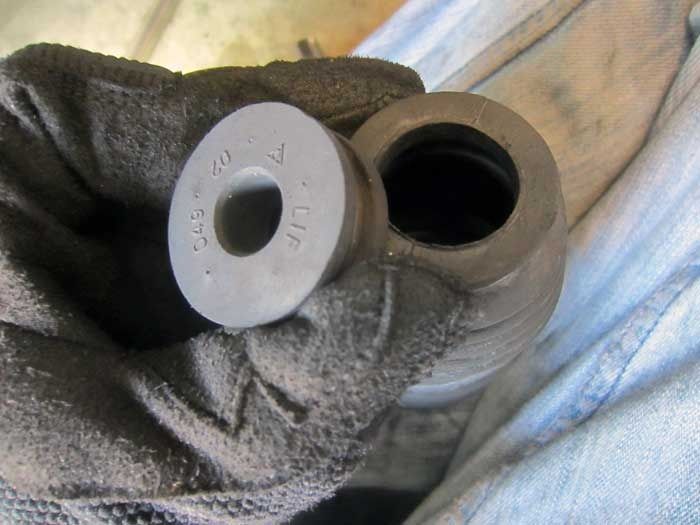
You need to transfer this grommet to the new boots, not an easy task.
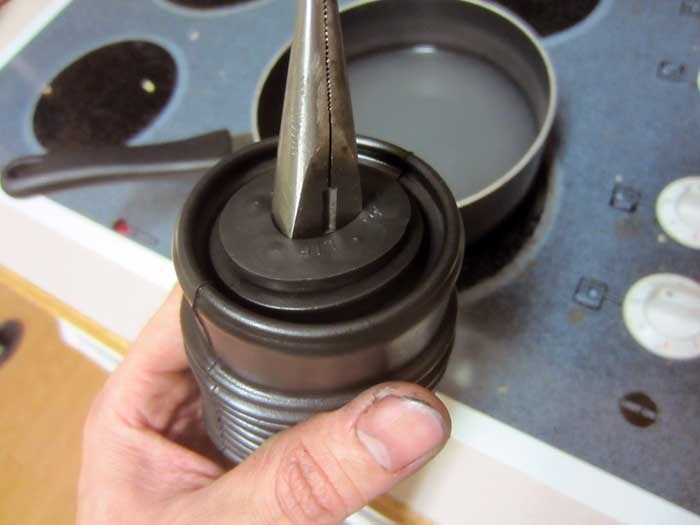
More boiling water and a large set of pliers to hold the grommet while you force over the boot.
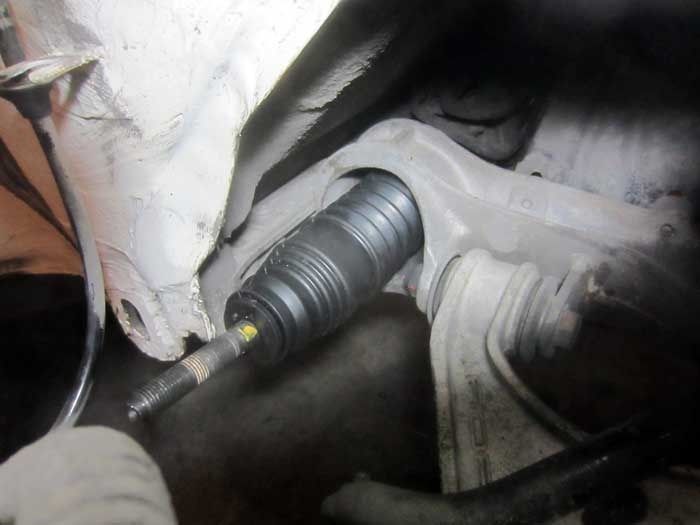
Reinstalled. I used boiling water and dish soap to get the boot back onto the rack. You have to remove the underbody panel to do this.
I replaced the boot on each side, counting the turns when I removed them, and surprisingly, my alignment wasn’t a mess upon reassembly. Victory!
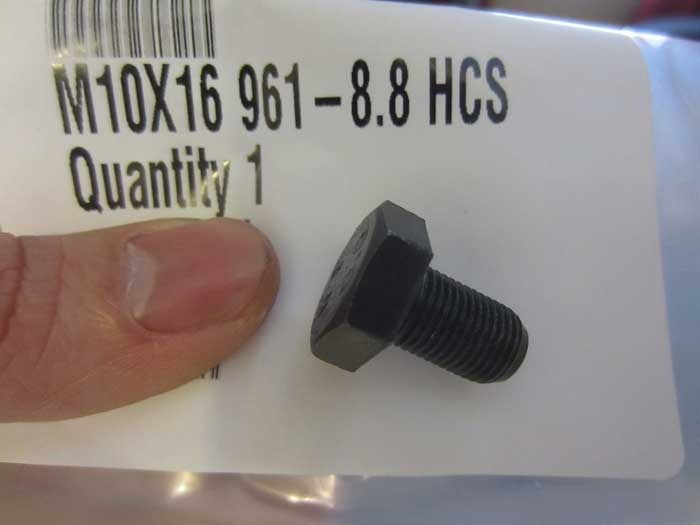
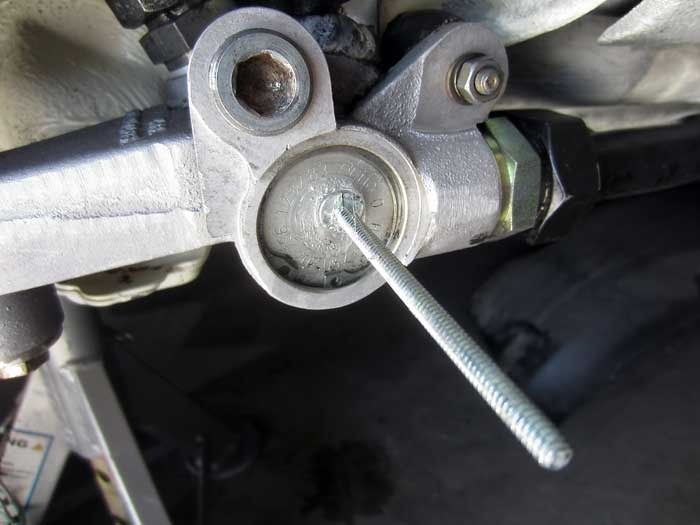
While under the car w/ the underbody panel removed, I messed w/ the rubber plug for the rack centering pin and it fell apart in my hand. So I ordered an extra fine pitch bolt from Fastenal (my local store doesn’t stock extra-fine pitch bolts) to replace it.
M10-1.0 x 16mm DIN 961 Class 8.8 Plain Cap Screw
M10-1.0 DIN 934 Zinc Finish Steel Class 8 Hex Nut
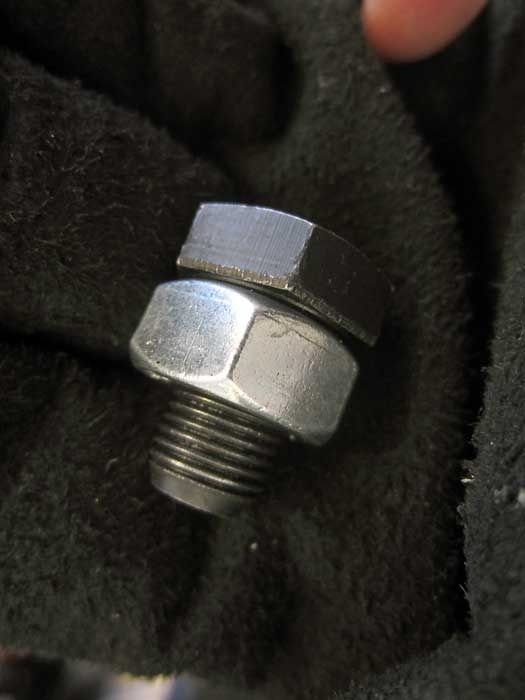
I also ordered a nut to minimize the protrusion into the rack.
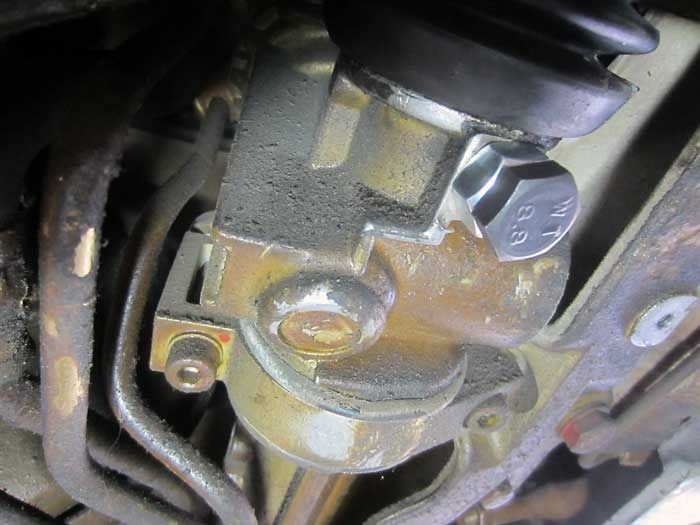
All bolted up.
Next I move on to lighting.

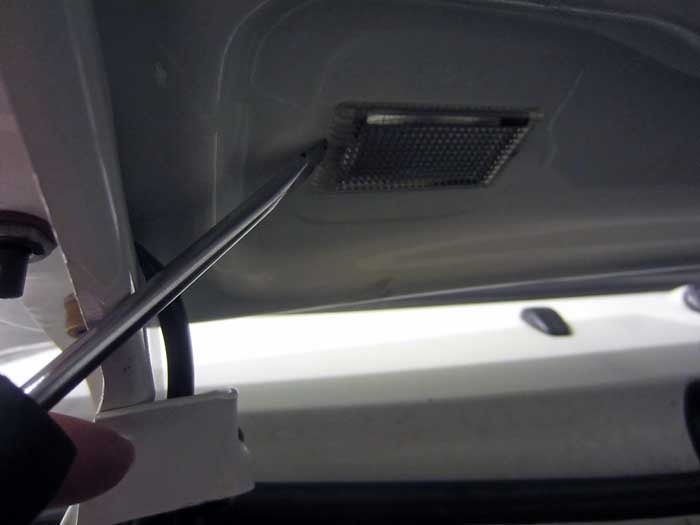
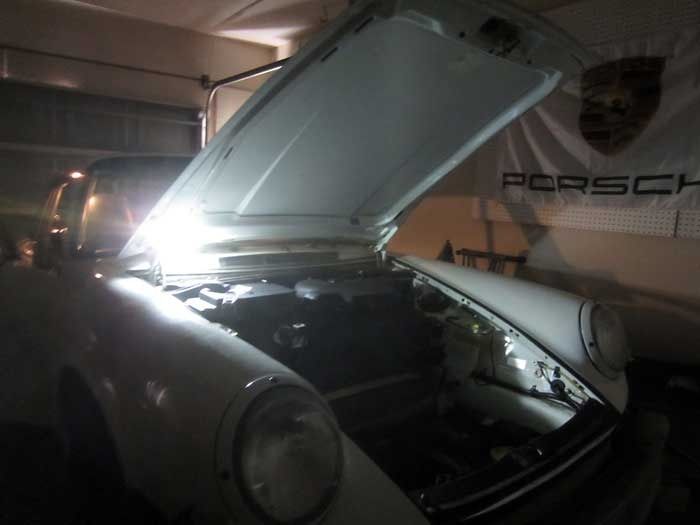
The light fixture under the bonnet pops out w/ a screwdriver on the indented edge.
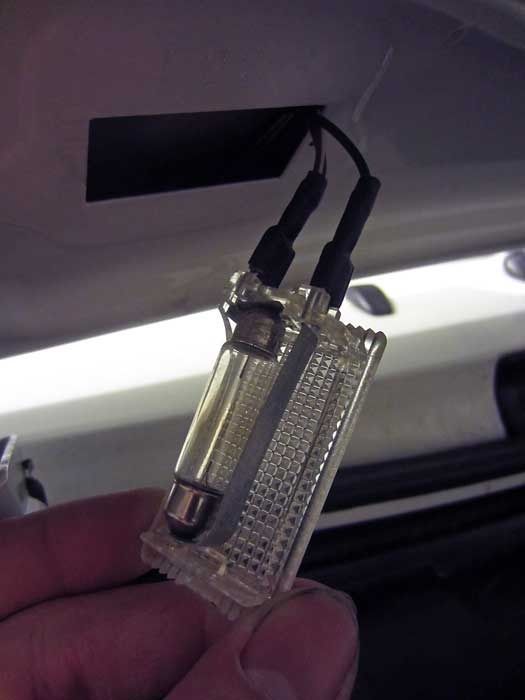
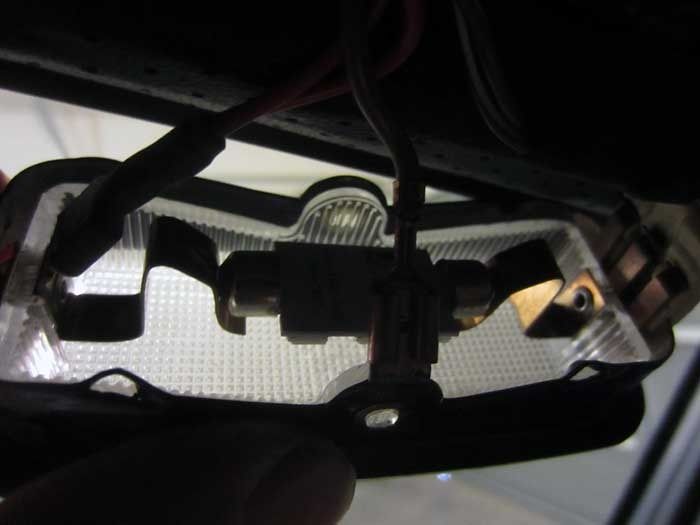
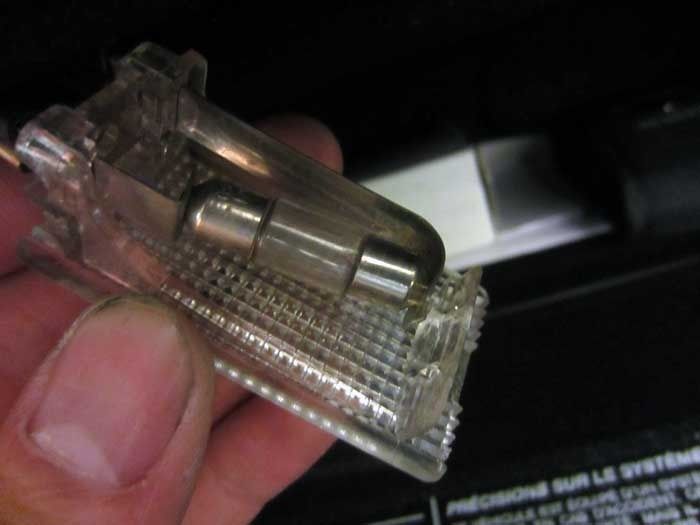
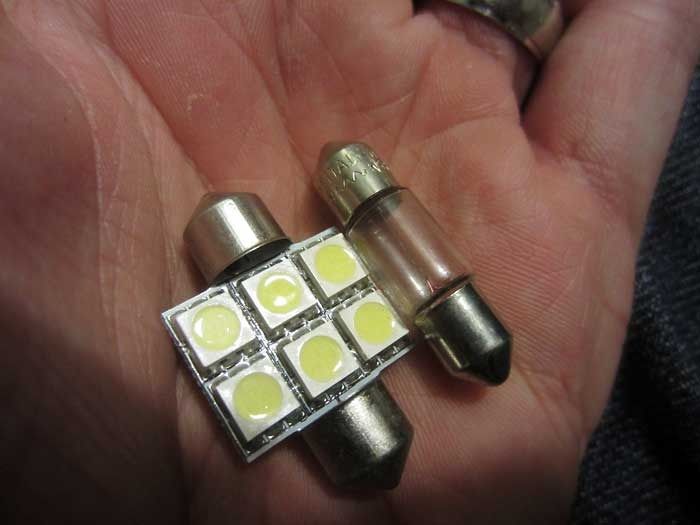
Nice incandescent bulb
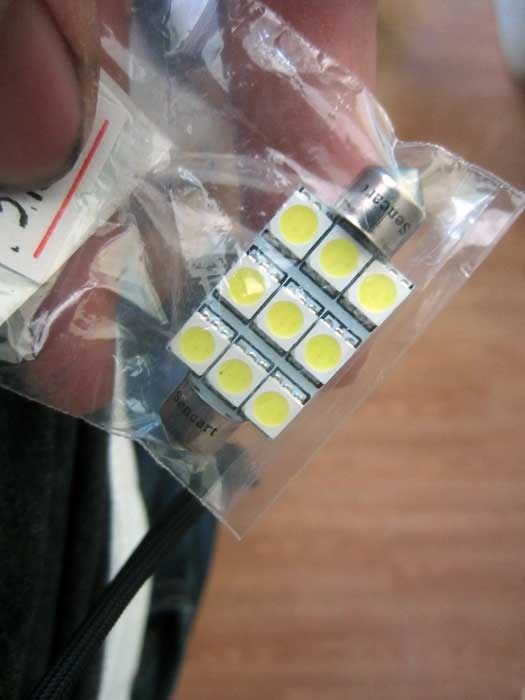
New replacement LED bulb.
42mm 2W 6500K 126-Lumen 9-SMD LED White Light Bulb for Car (DC 12V)
This bulb size works for the bonnet, the engine compartment, interior dome lights, and the license plate lights if you have the rectangular plate lights.
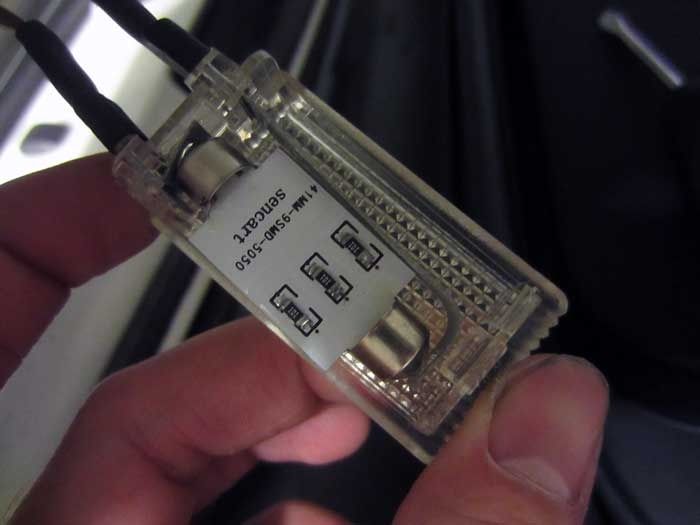
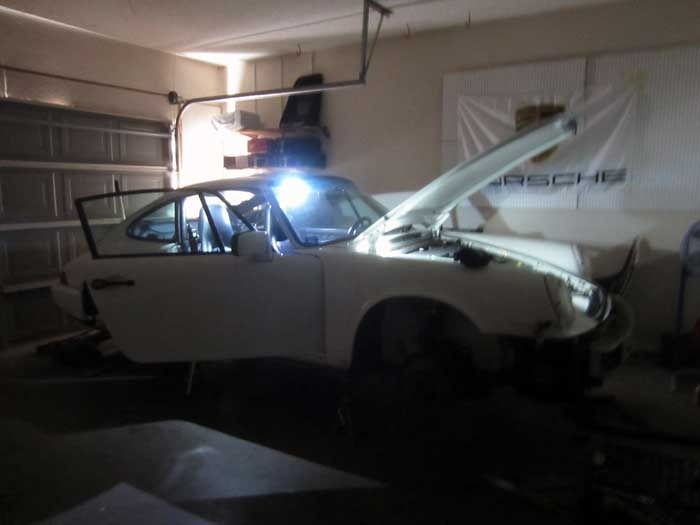
LED in place. Remember, they’re polarity sensitive, so if it doesn’t work, flip it around.
Bright LED light!
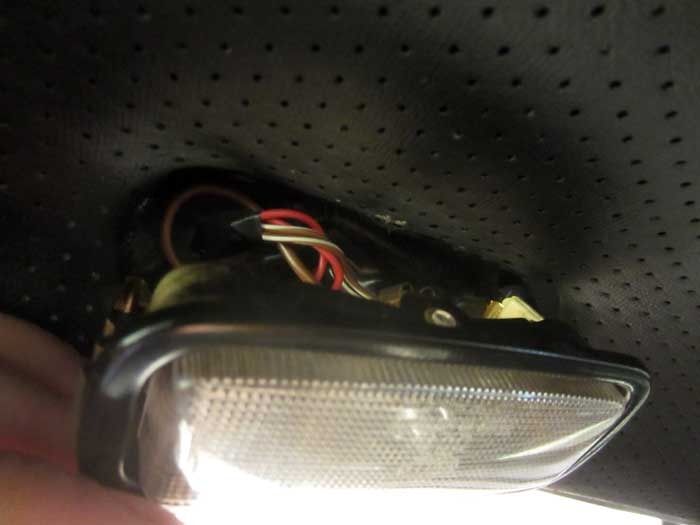
The dome lights come out easily, just work at them slowly.

Old bulb
New LED
Glove compartment.
Glove box old light and new LED light
Car Festoon 2W T10 100-Lumen White 6-LED Vehicle Light Bulb - Stainless Steel (DC 12V)

New LED bulb in place
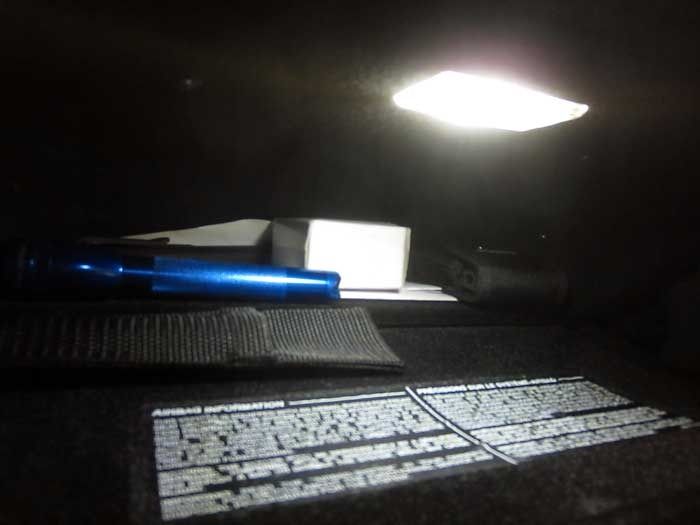
Bright LED light in my glovebox, so I can find my spare DME relay a bit easier.
Interior and bonnet done.
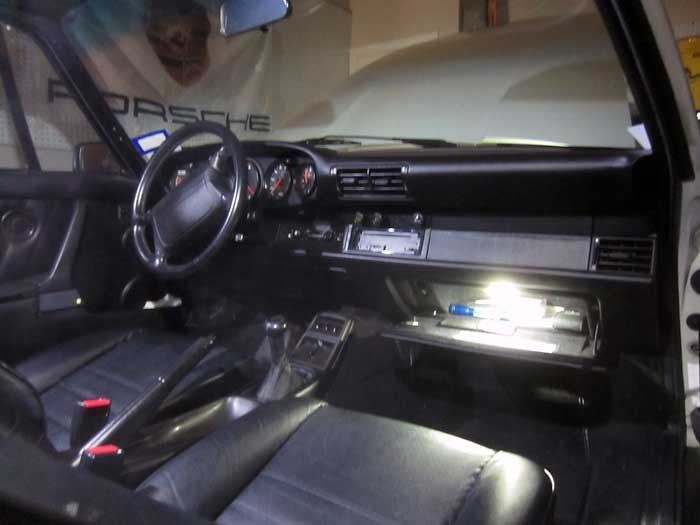
Another angle.
So all this time, I never realized the engine compartment had a light.
Lens cleaned up and new LED light
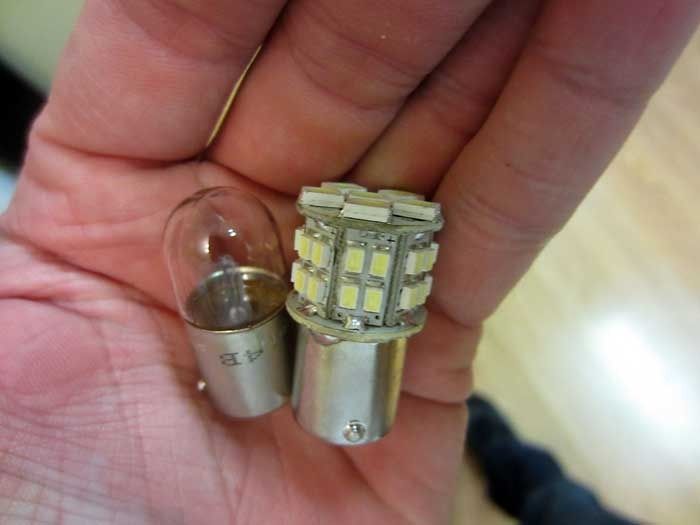
Old vs LED license plate bulb
1156 4.5W 360LM 6x5050 + 28x1206 SMD LED White Light Car Brake / Backup / Signal Lamp (10~15V)
I have the old Carrera style plate lights because I put the RS-style rear center section.
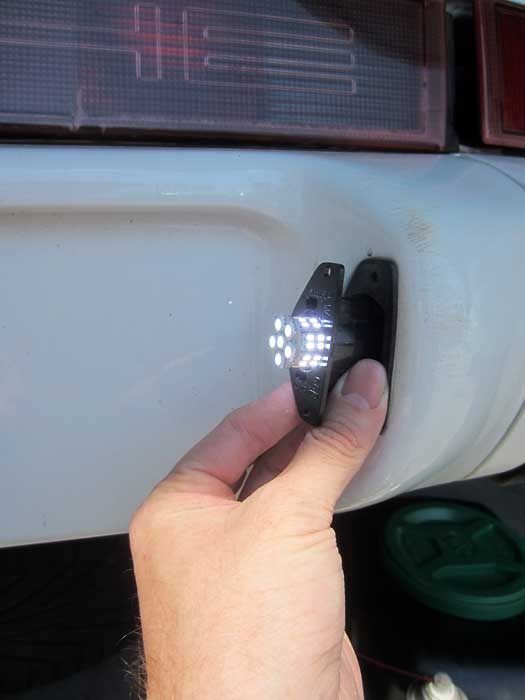
Test fit.
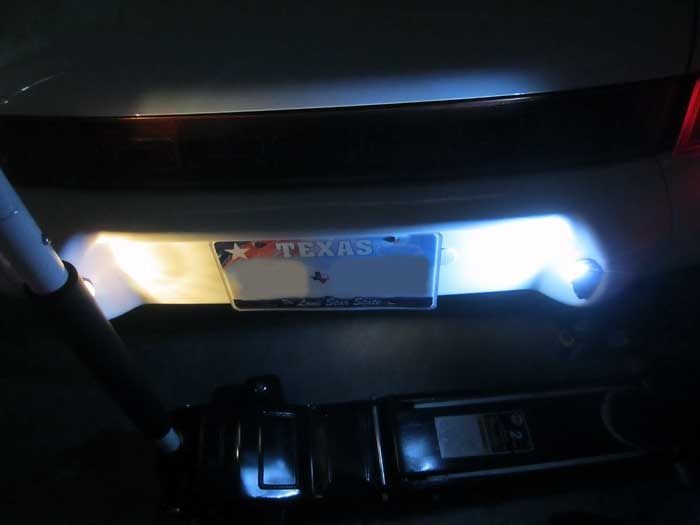
Old vs new
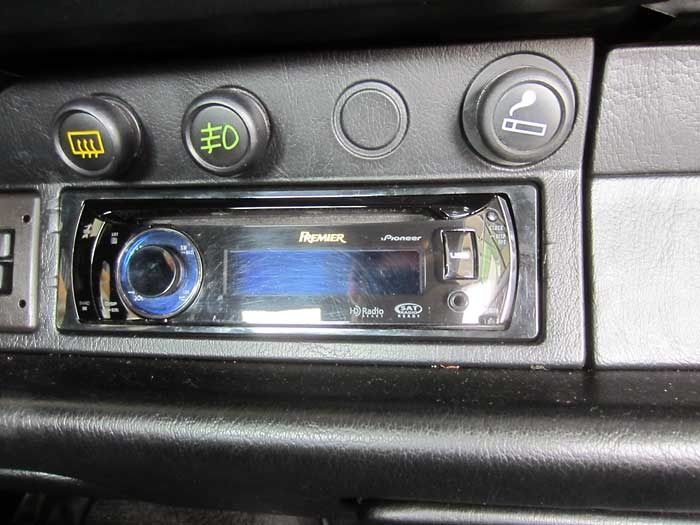
This is my car’s headunit. It came w/ the car. It’s a pretty well featured unit, but I have never been able to listen to it. The car was setup to run an amplifier and the amplifier was not included w/ the car when I bought it.
I have been driving the car in musical silence for the past 18 months. You know what that means? I don’t need this f’n radio chilling in the dash!
After much struggling, pulled it out w/ all the guts behind it.
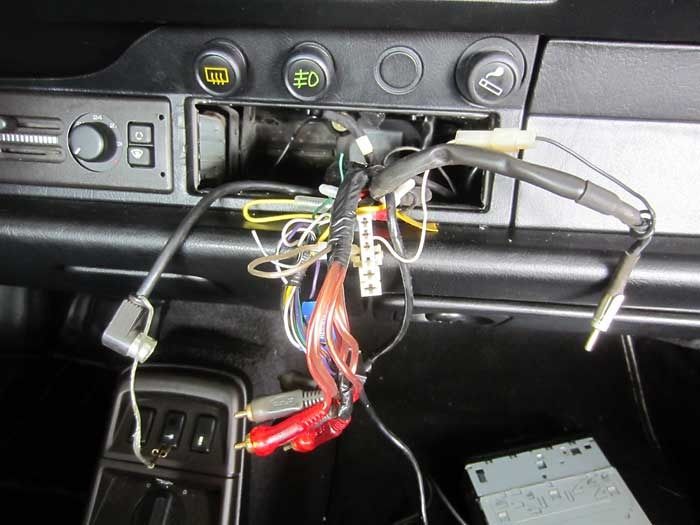
I go look under the bonnet and start removing all this stupid wiring that’s been bothering me since I got the car.
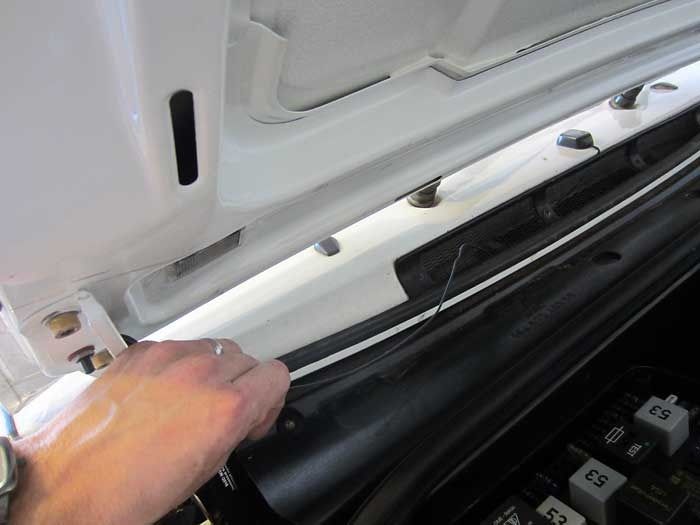
Removing the XM antenna that has been uselessly chilling on the cowl for the past 18 mos.
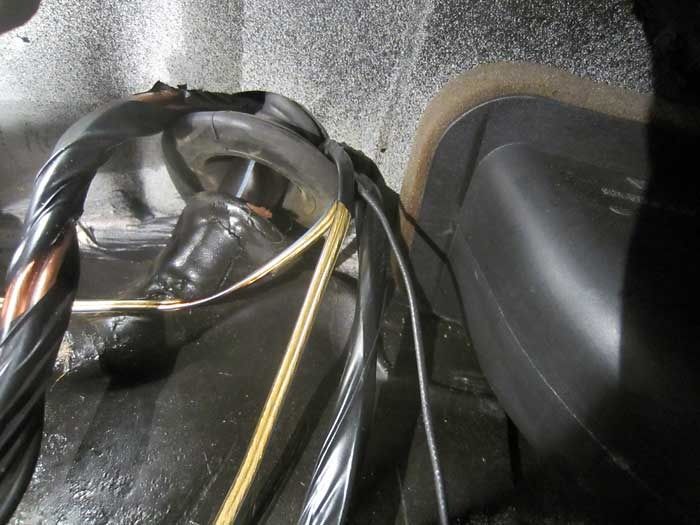
Awesome wire routing through the grommet bro!
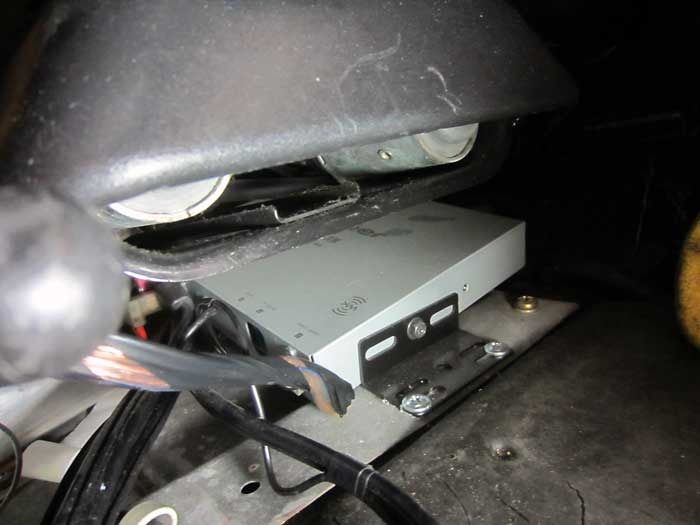
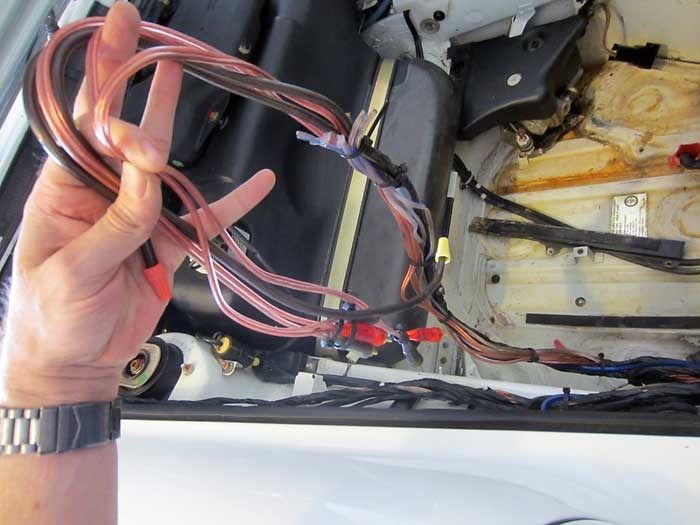
More goodies hiding under the seat, XM module.
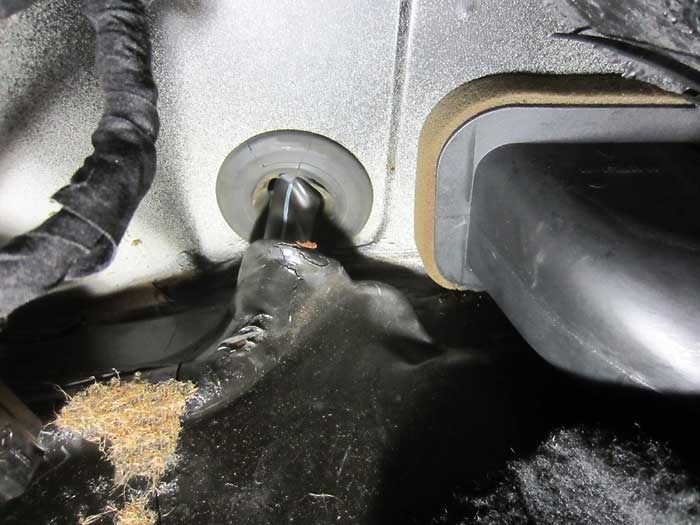
Grommet back in place the way it belongs.
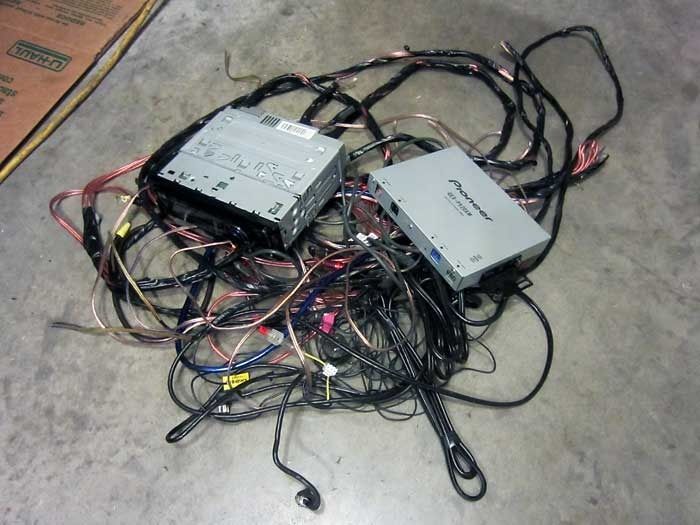
Big mess of wires and hardware now removed from the car.
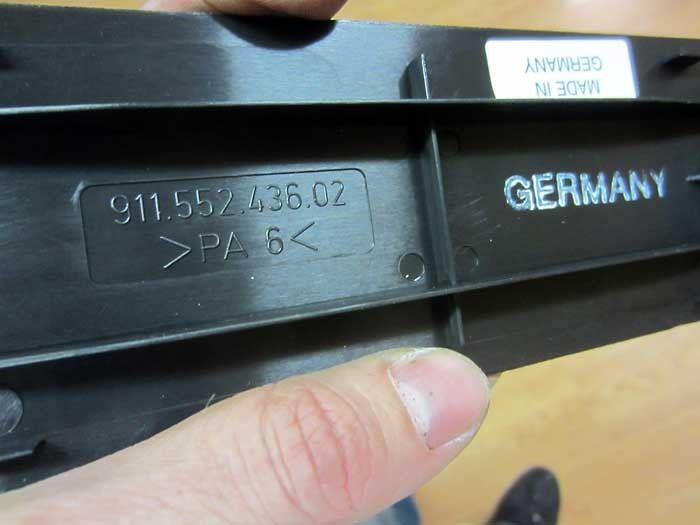
Radio delete plate, straight from the motherland.
The part # printed on the piece is actually a typo, the 6 & 3 are transposed. The correct part # is 911.552.463.02
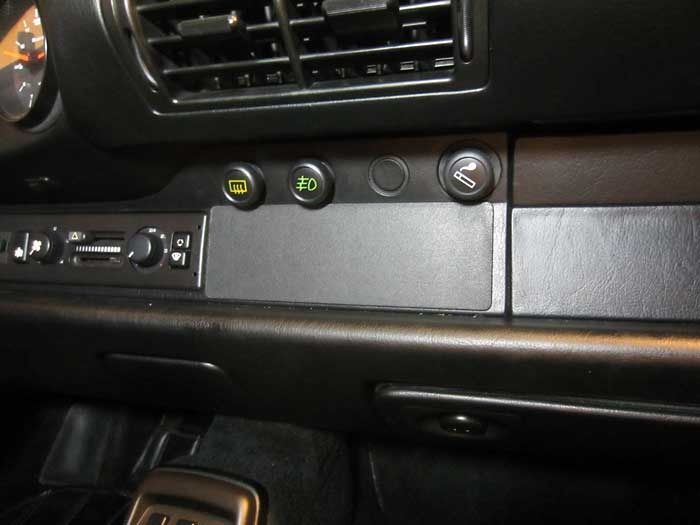
Much better!
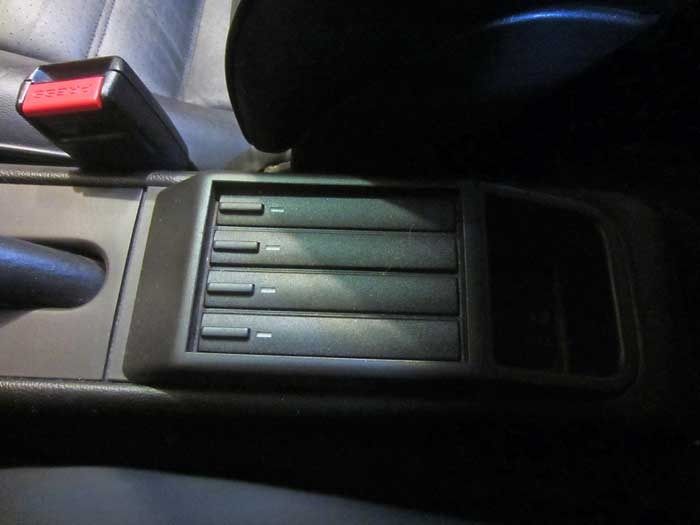
So now this thing is even more useless, since not only does the car not have a cassette player, it now lacks a headunit entirely.
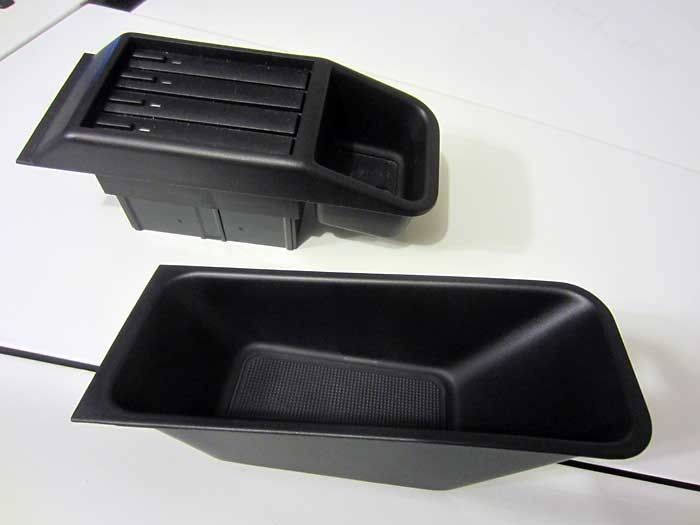
Nice storage cup to replace the cassette holder.
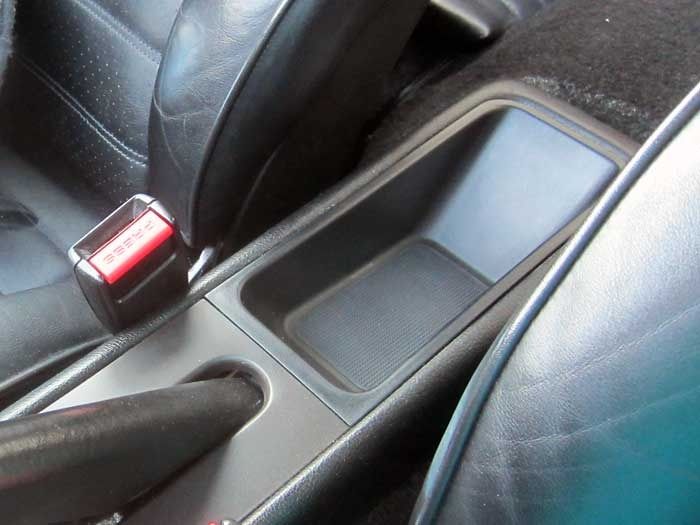
Much better. It accommodates the iPhone4 perfectly.
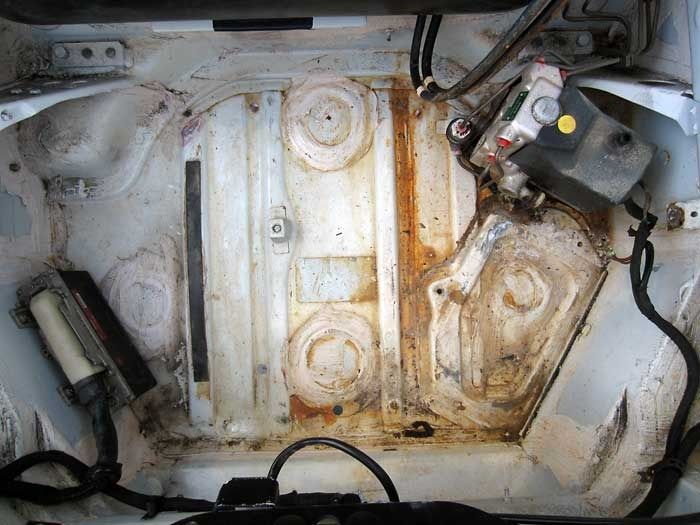
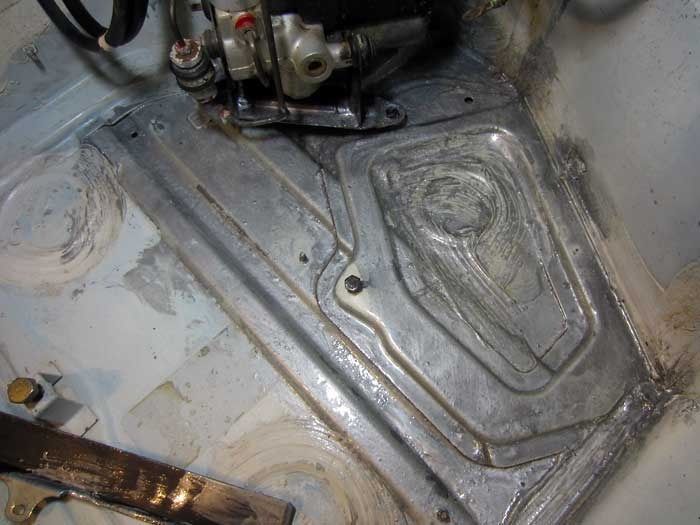
Now focusing attention to my front tub, that seems to have had a disagreement w/ an acid battery at some point.
I uninstalled/unplugged what I could and started wire brushing and vacuuming. I didn’t remove the ABS pump, but I was able to loosen the bracket and lift it enough to be able to work under it. There really wasn’t much heavy rust, just surface rust that brushed off for the most part.
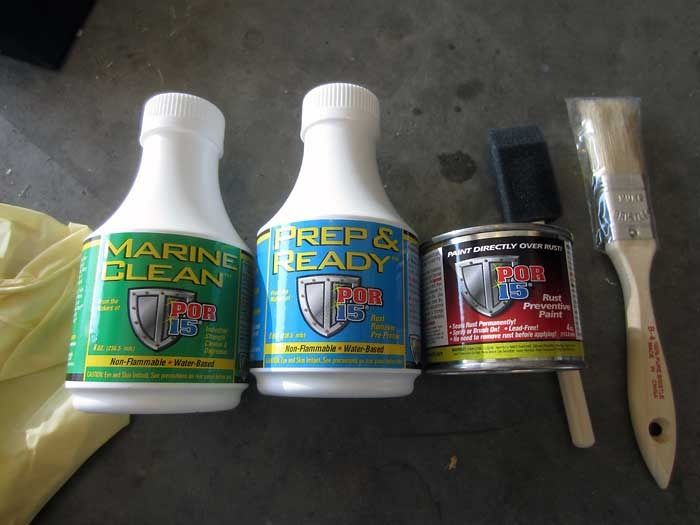
POR15 starter kit.

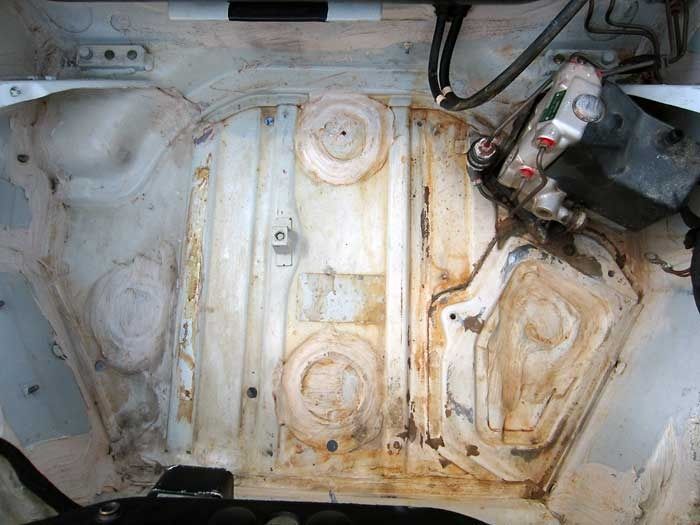
After Marine Clean and Metal Ready
Used the POR15 coating on the affected area.
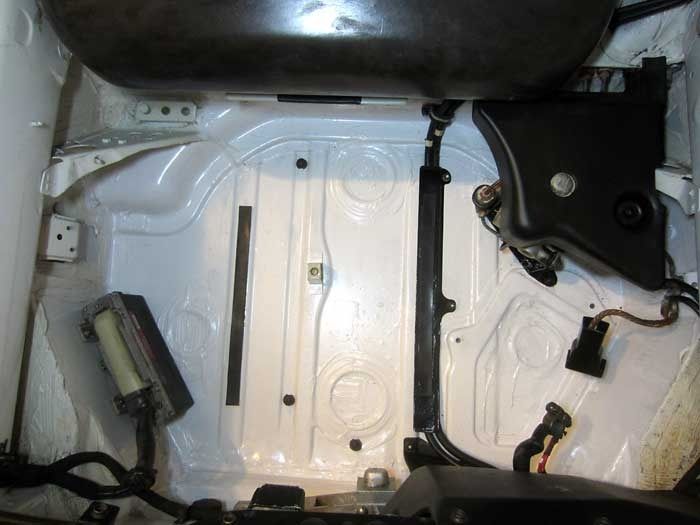
A couple of coats of Rustoleum white paint and I’m back to reassembly.
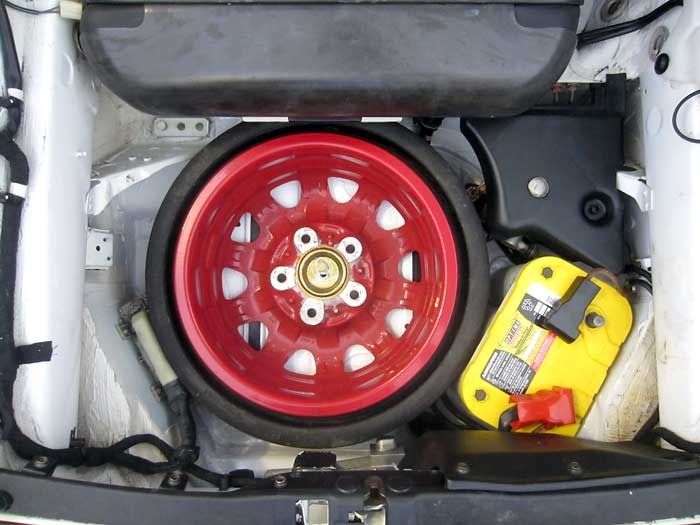
Mostly reassembled, still hadn’t dropped in the air pump and my backpack w/ random tools, quart of oil, etc.
I really hope that’s the last I have to mess w/ that mess. I hope what I did stopped what was brewing in there and the car is no longer running an acid battery.
10-30-2012, 10:57 PM
#3
Nordschleife Master
Thread Starter
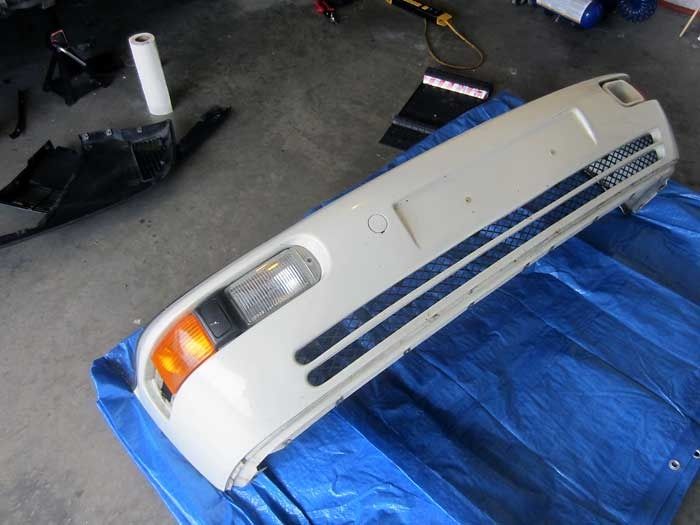
Next I shift my attention to the front bumper.
I’m deleting the fog lights in favor of air ducts, so I need to cut the bumper to make the ducts functional.
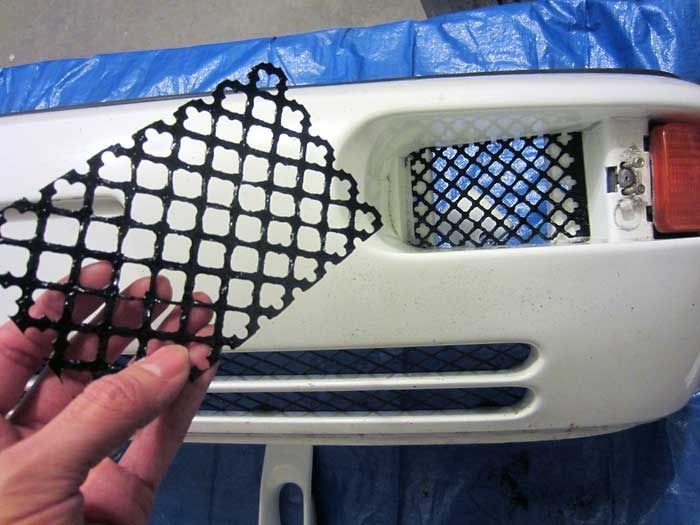
A bit of mesh to make sure my oil cooler and a/c condenser don’t fill up w/ crap.
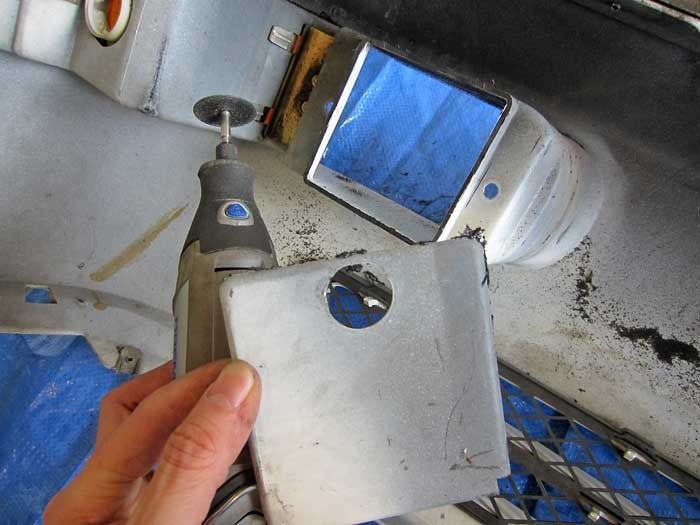
Cut a slot on each side to get the duct to fall into place. I actually bonded them in place using the bolts from the USDM bumpers that I removed w/ the fog lights.
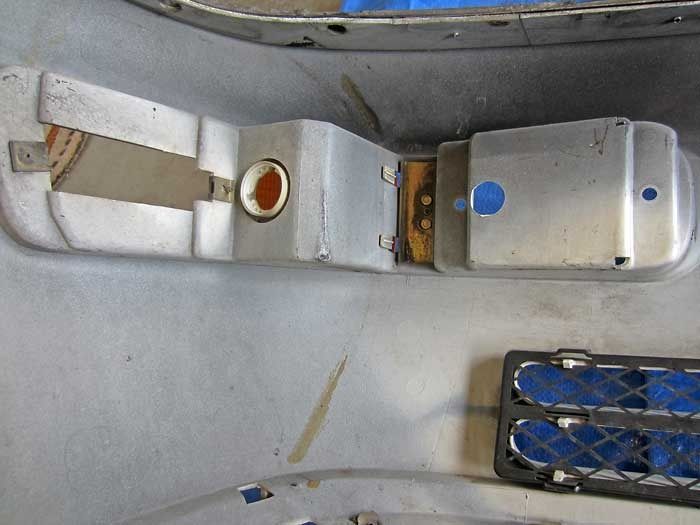
If you look closely, you can see that something was once affixed to the inside of the bumper.
What’s missing here is a sealing wedge or bumper seal pieces. I learned about them reading this thread.
https://rennlist.com/forums/964-foru...il-cooler.html

So you can see it here, they’re just pieces of rubberized foam w/ a beveled edge.
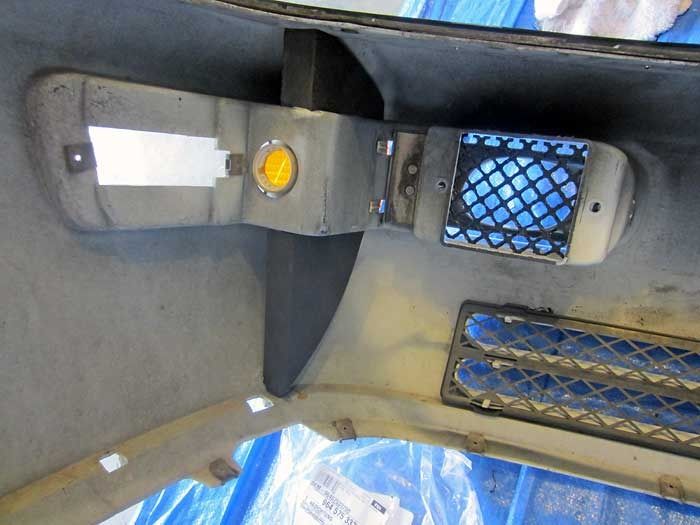
You can see here where I installed them w/ some 3M spray adhesive.
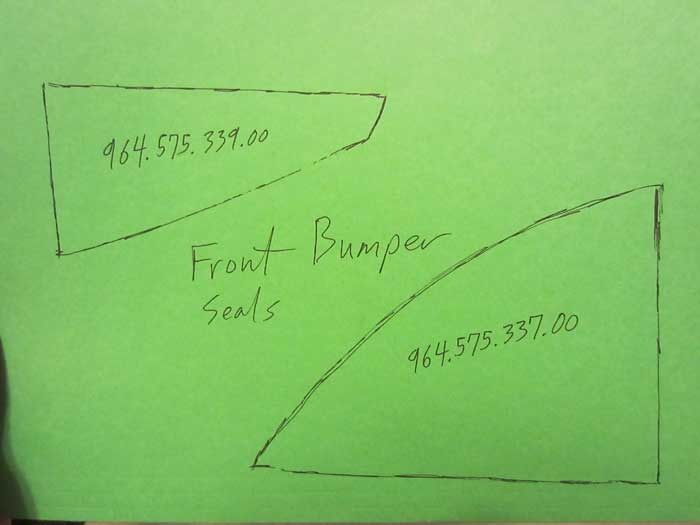
So it’s basically 4 pieces of foam $.10 foam that cost $50. I made myself some patterns for future use as these pieces will likely fail again.
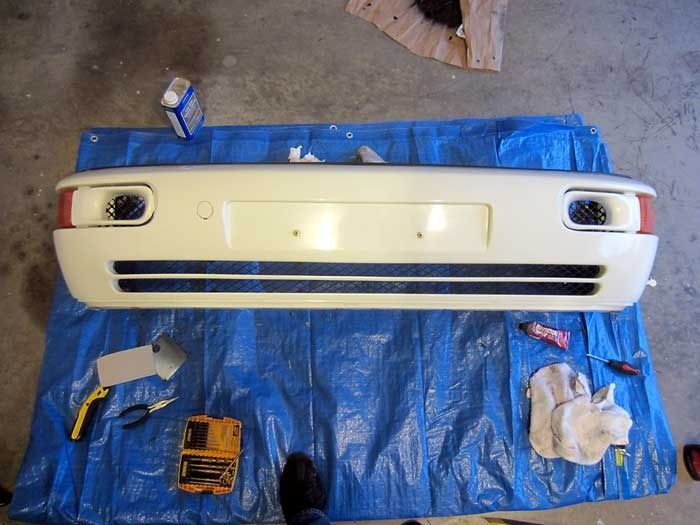
The bumper is ready to go back on the car.
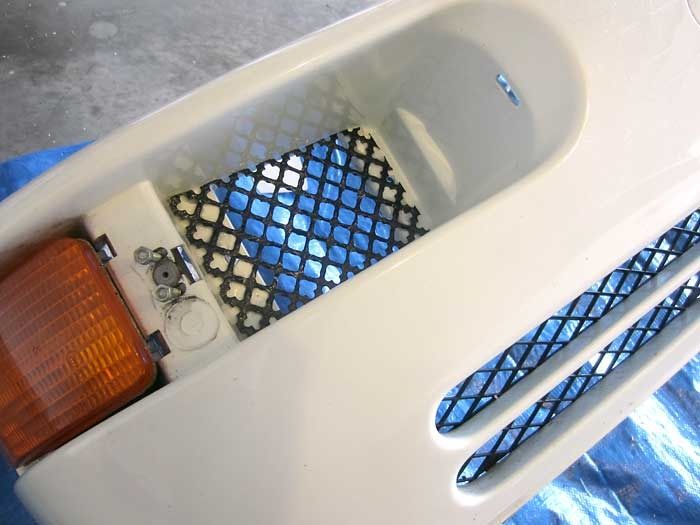
Here you can see how the bumper seals work w/ the existing baffling in the cooler/condenser area. These pieces basically isolate the intake side of the bumper from the exhaust side of the bumper, forcing air through the cooler.
All back together.
All aprons, fender liners, and underbody panels back in place.
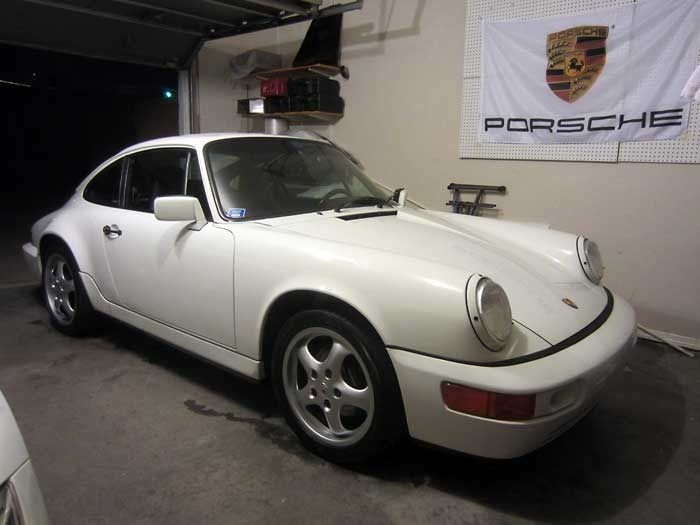
Back to earth, washed.
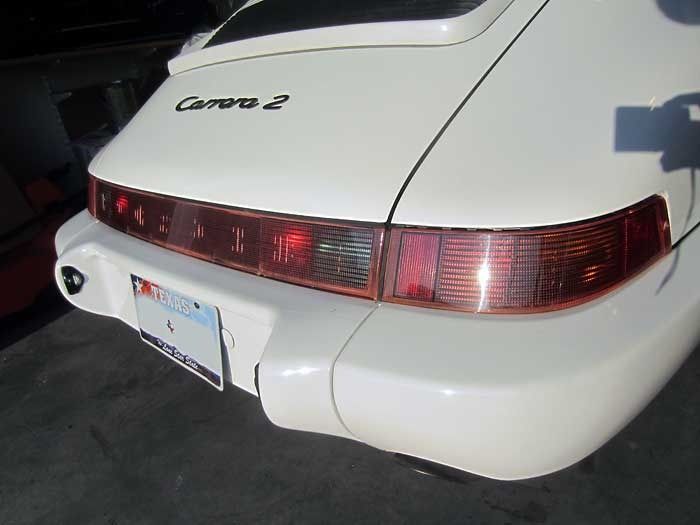
Now my attention shifts to these.
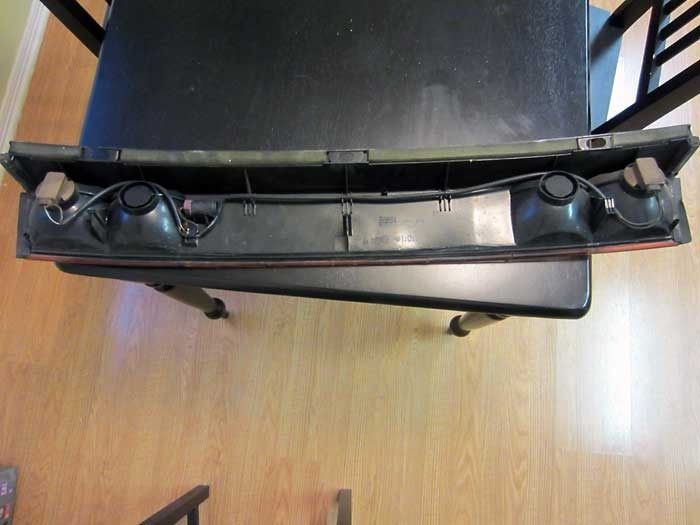
Rear center reflector piece removed. Next step, 5 brake light mod.
https://rennlist.com/forums/964-foru...light-mod.html
I drive the car to work in heavy traffic regularly, so visibility is a big deal for me when I’m trying to come to a stop. Adding two more brake lights will definitely help this issue.
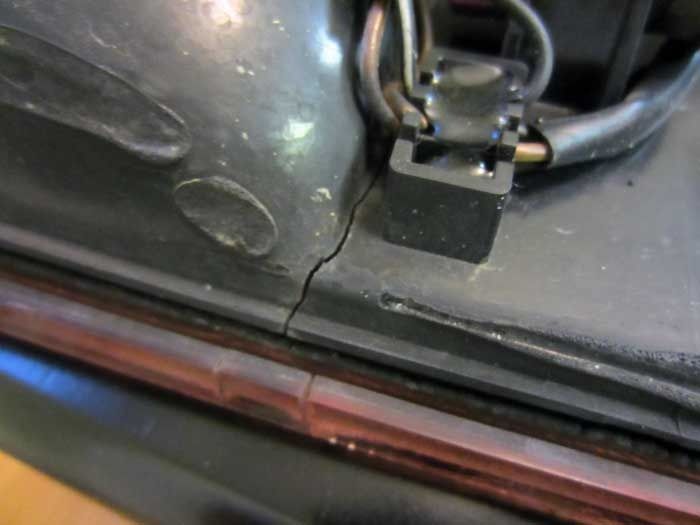
My center section is kind of a mess, even backing is cracked in places.
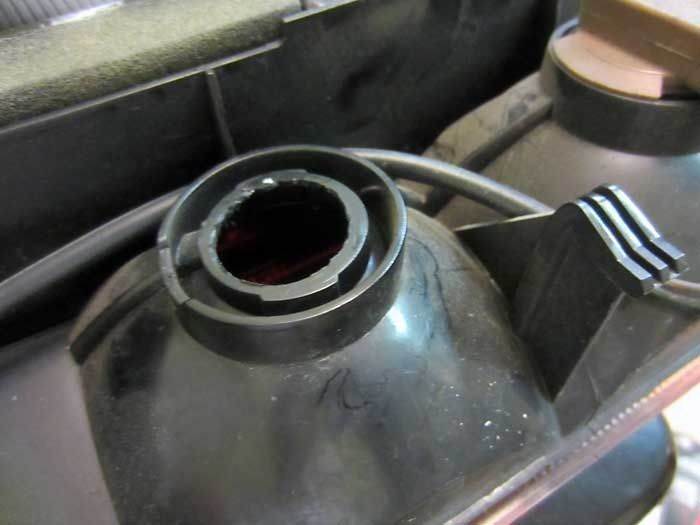
Using a 1” hole saw and a blade, I open up the non-USDM rear foglight buckets.
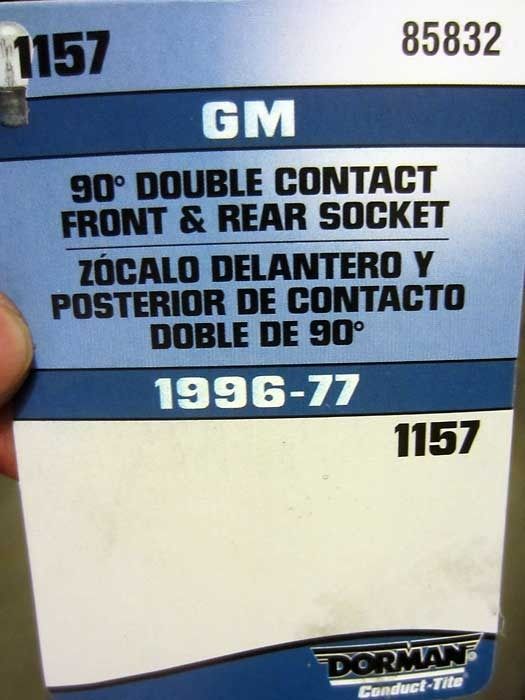
I picked up a couple of these sockets at Autozone.
Test fit in the newly cut holes in the center reflectior.
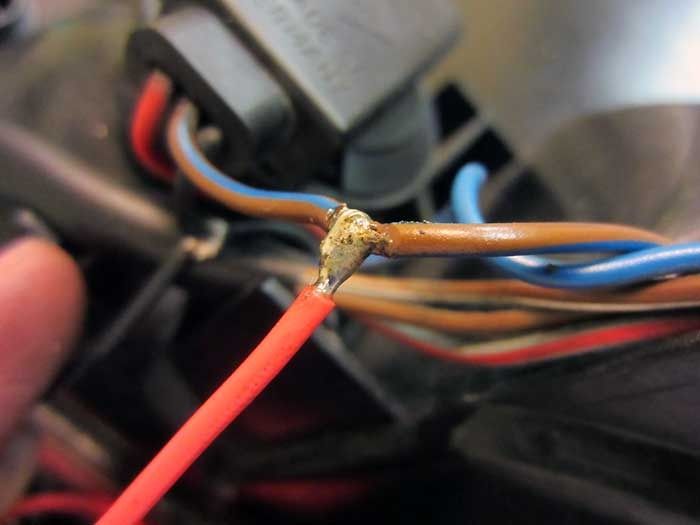
Splicing into the left brake light harness.
In retrospect, I should have soldered the black wire to the brown/blue wire instead since I believe brown = ground on this car. Regardless, it’s a moot point since I can switch it at the connectors anyway.
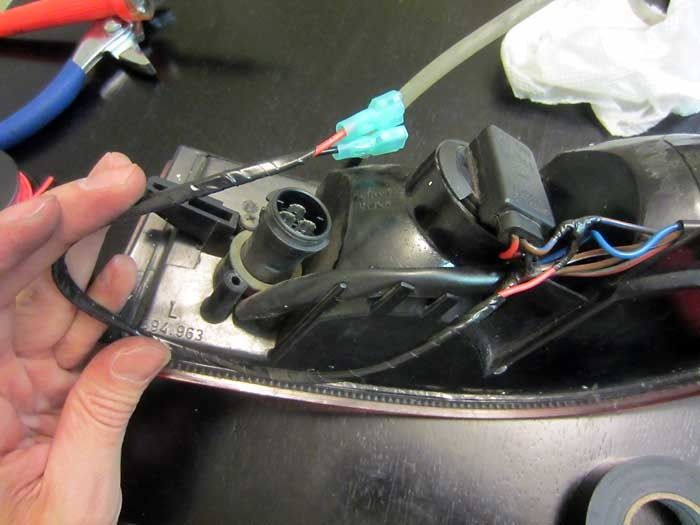
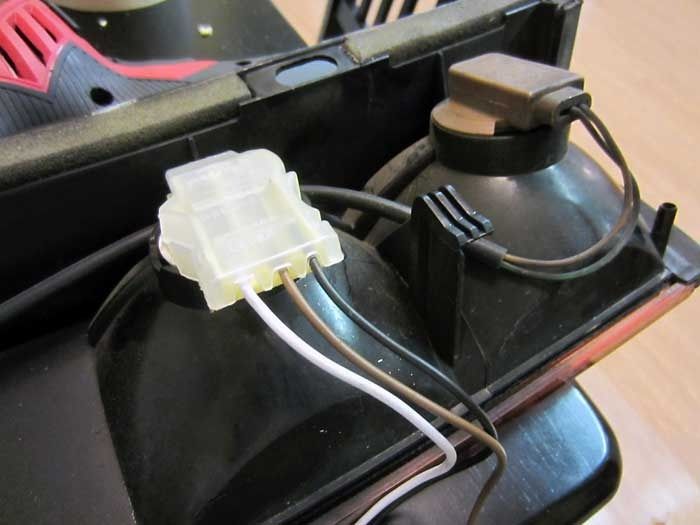
New harness setup on the taillight end.
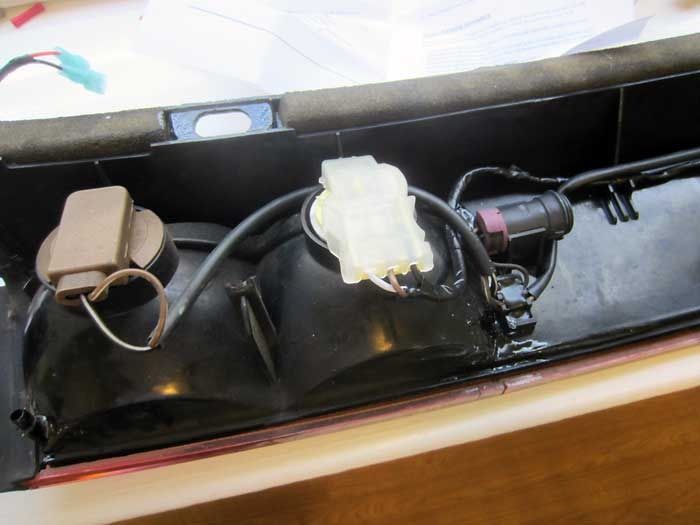
I used Goop on the back of the center reflector to prevent further cracking, water/dirt contamination and/or total failure of the piece.
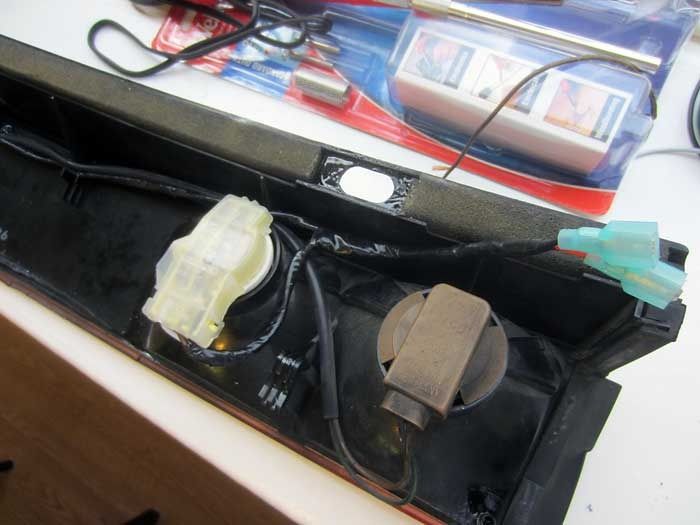
Harness setup on the center reflector end.
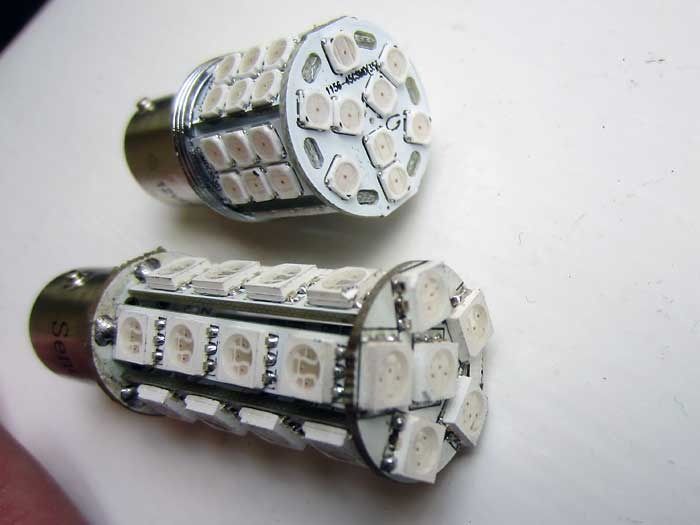
I had originally purchased the bulb at the bottom from dealextreme but found it too long to fit in the center reflector assembly w/ the light sockets I used.
1156 5W 360LM 30x5050 SMD LED Car Brake/Turning Signal Red Light Bulbs (Pair/12V)
– 1156 fitment, fits indicators, reverse lights, 3rd brake light
1157 5W 30x5050 SMD LED Car Brake/Turning Signal Red Light Bulbs (Pair/12V) – 1157 fitment, fits brake lights (however my testing made me feel the difference between the taillight and taillight+brake output was not differentiated enough in brightness.
In the end, I opted for the smaller, but more powerful (and much more expensive, sold individually) bulbs from superbrightleds.com for the brake lights in the center reflector and the 3rd brake light.
Single and Dual Intensity 45 SMD LED Tower bulbs – Remember, w/ LED bulbs, you need to match the color of the LED bulb with the color of the lens for best light output.
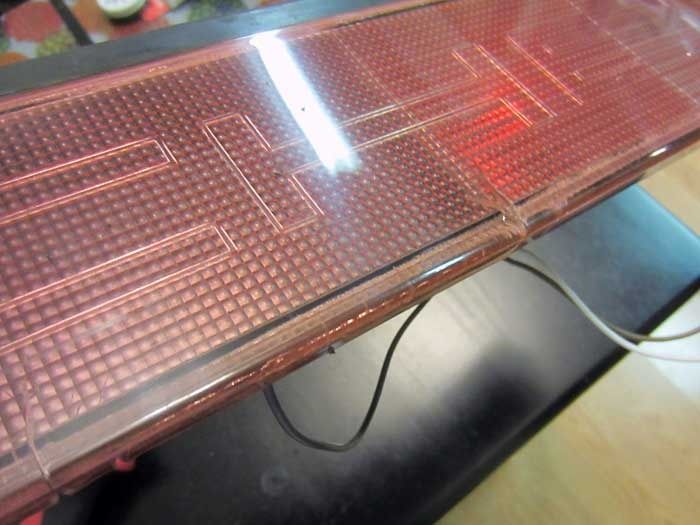
Close up of my taillights show that they’re pretty cracked in places and not perfect.
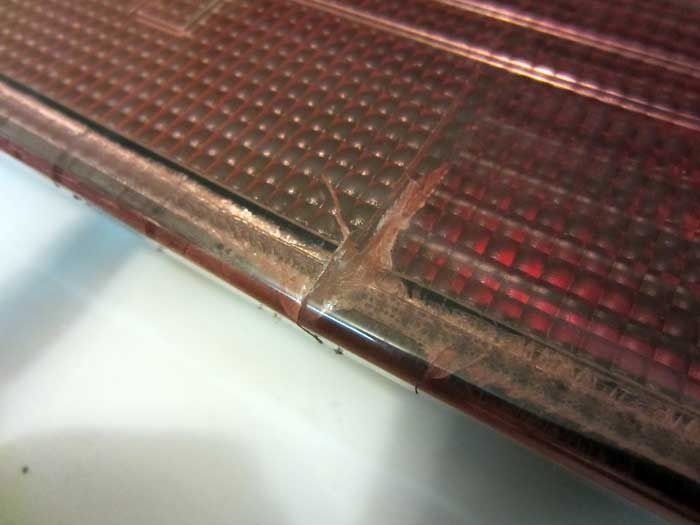
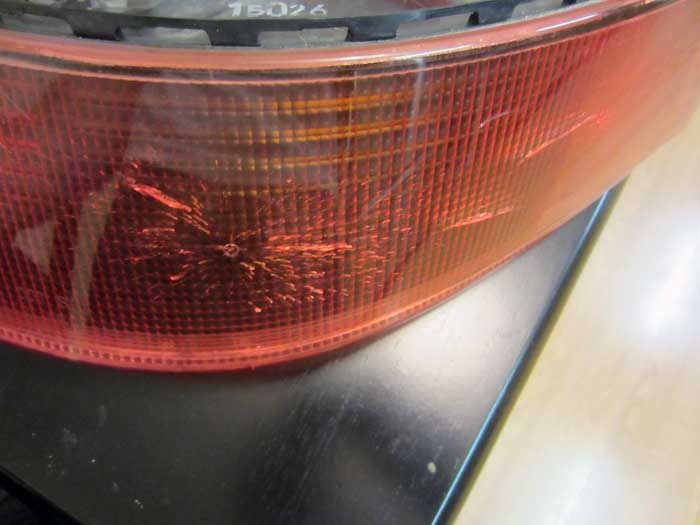

I ended up picking up light tint kit from RL member Gus.
https://rennlist.com/forums/964-foru...stimonial.html
It’s a very complete set for the job. You will need a hair dryer, so make sure you ask your special lady friend to loan you hers.
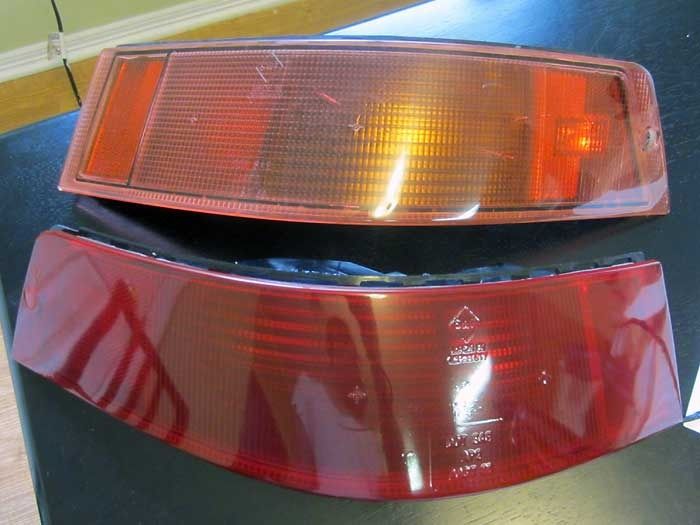
Top stock, bottom vinyl’d. You lose your amber indicator, but I’m in the US and that’s still legal.
When I explained my project to my wife about increasing visibility and safety and what not, then told her I was covering up my reverse lights in the process, she pointed out how dumb that sounded.
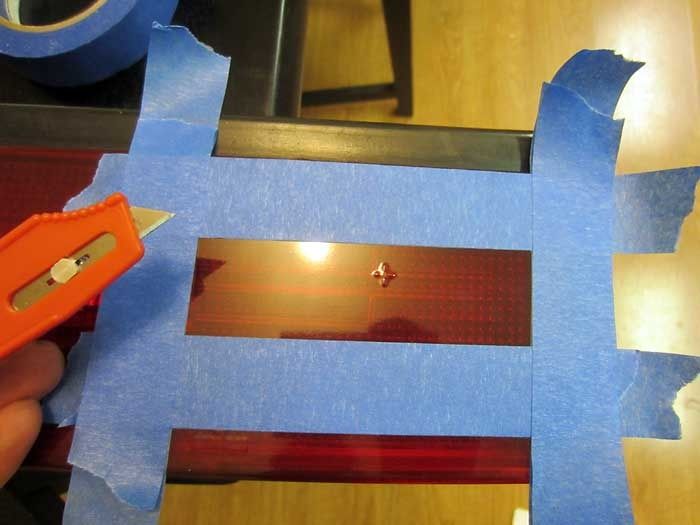
So out came the painters tape and the Xacto blade from Gus’ kit. Reverse lights are now functional again!
You UK guys can probably do this for the amber indicator area too. You don’t need to do the whole area to get amber to shine through, and remember when I said about matching the LED color to the lens, so amber bulb for the amber indicator, then trim out a bit for the indicator to shine through.
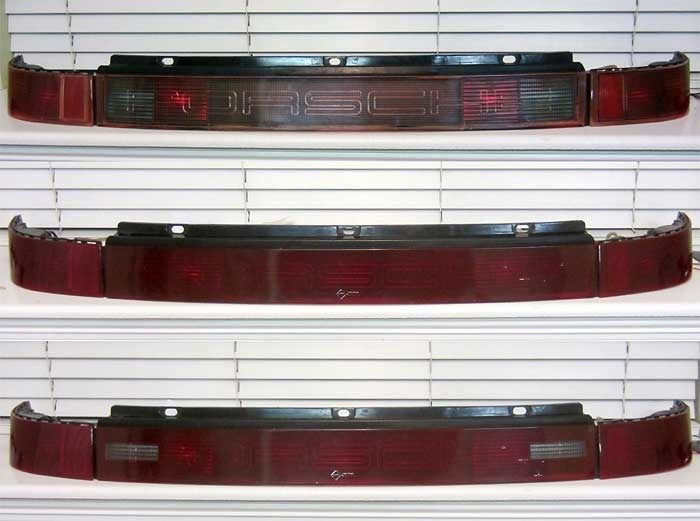
At the bottom you can see the final result.
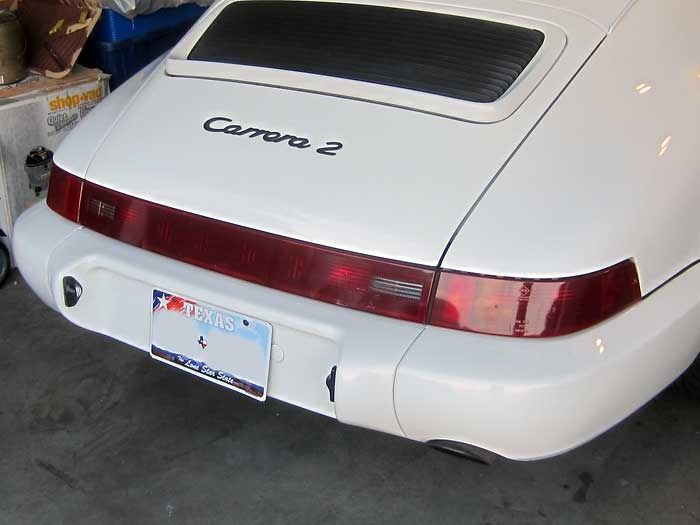
On the car. Not bad.
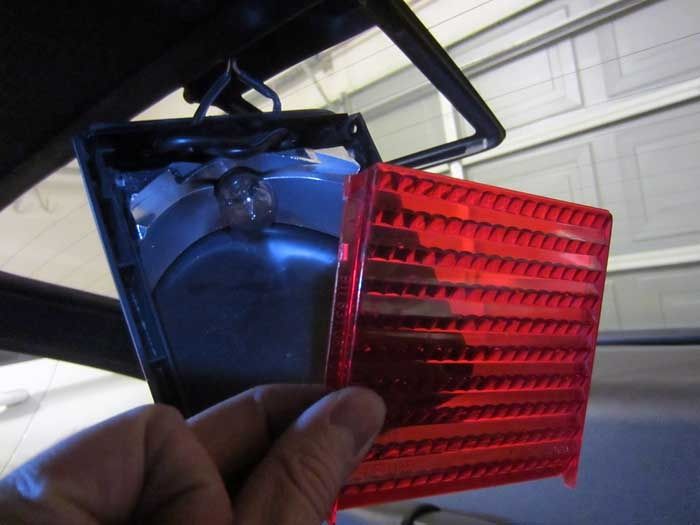
Now my attention shifts to the 3rd brake light assembly.
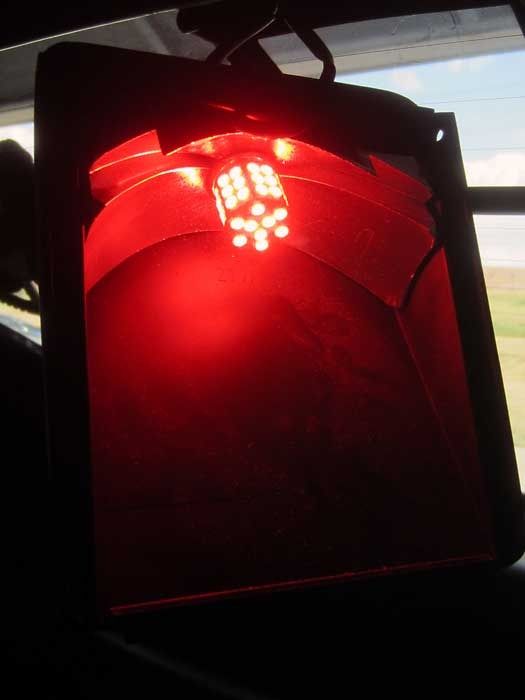
Testing out the superbrightleds.com bulb I linked above.
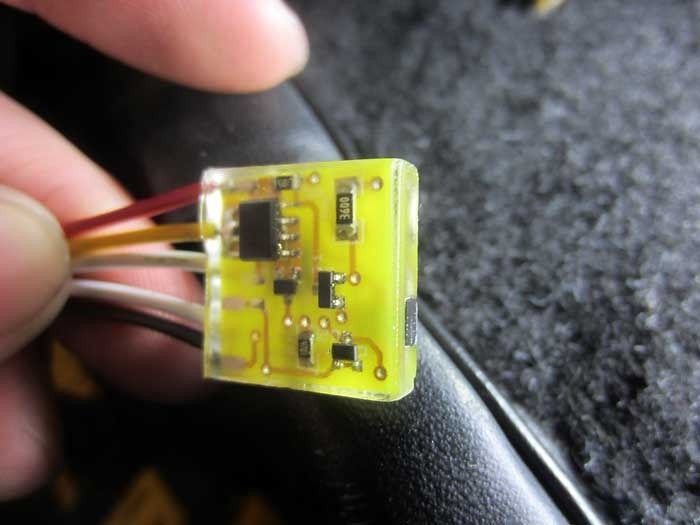
Now here’s a trick little piece I ordered from 3rdbrakeflasher.com
As RL member jtucker unfortunately experienced recently *LINK*, drivers around here are kinda ****, so hopefully a flashing 3rd brake light will keep people’s attention when following me.
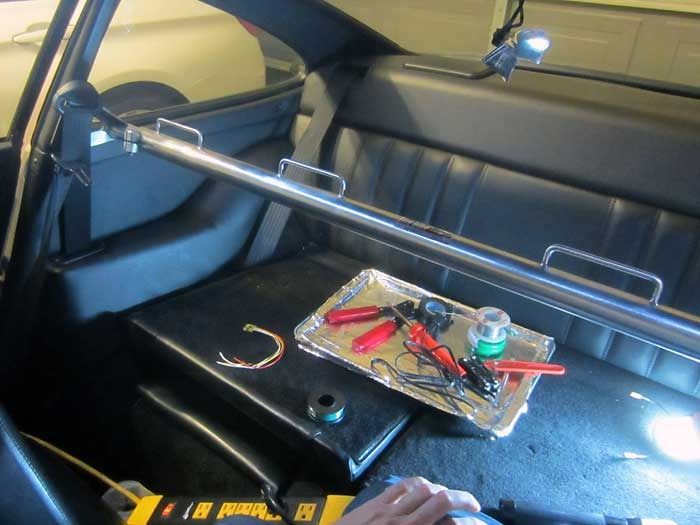
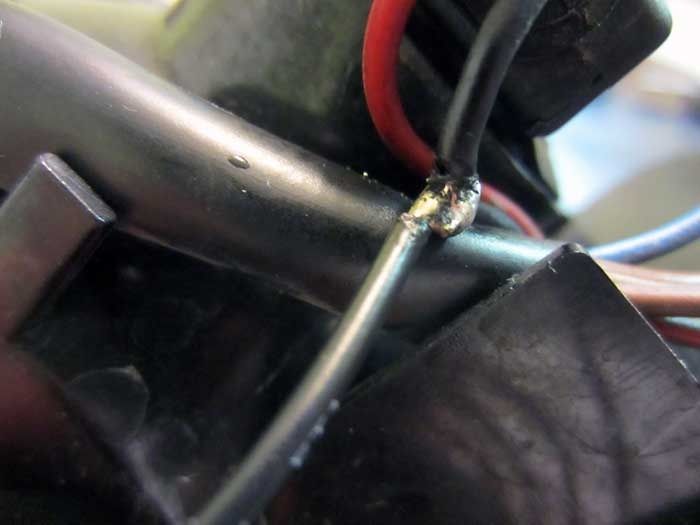
Here’s my cramped soldering work area.

All wired in. I don’t remember what color the wires are, but basically you splice into the wire that goes to the contact at the outside of the bulb (ground) w/ the black wire on the module, then you have to cut the power wire (got to the center contact on the bulb) w/ the red and yellow wires on the module.
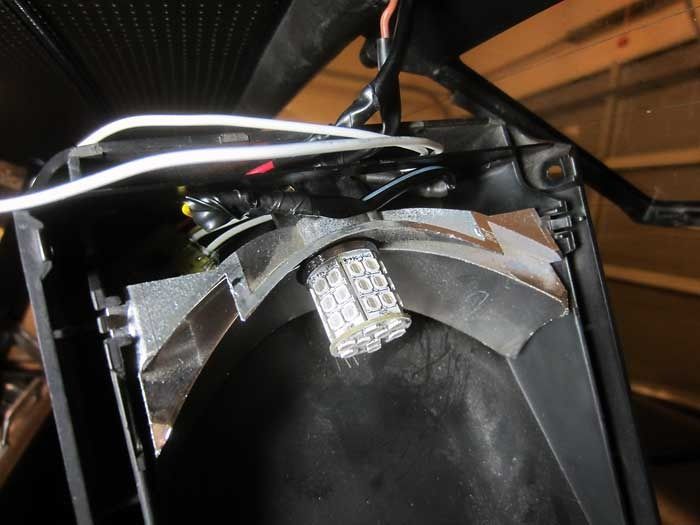
All tucked back in.
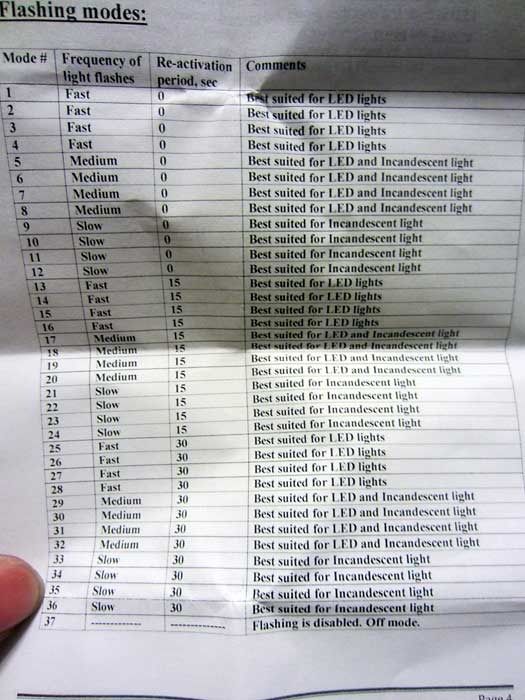
The two white wires on the module are touched together while pressing the brake in order to change the modes. I settled for the somewhat fast flash w/ a 15 sec reset delay, possibly mode #14 or 15.
All done!
Here’s a vid of the taillights in action, before and after.
Remember, the LEDs are instant on and off, so they light up much faster than the incandescent bulbs.
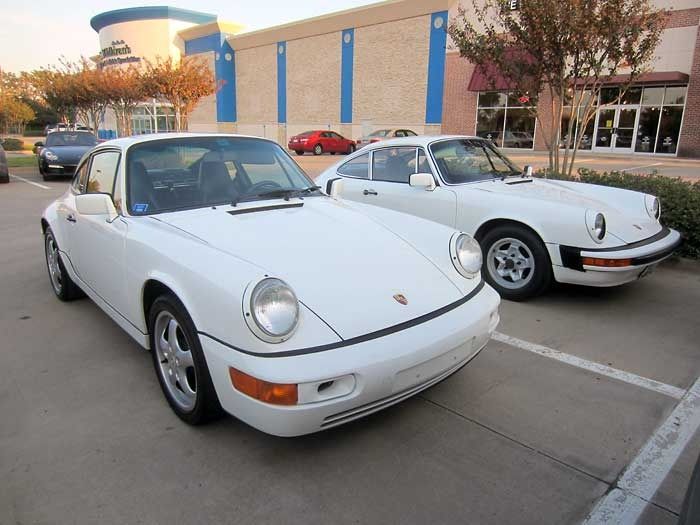
At a PCA happy hour, found another GPW Carrera to park next to.
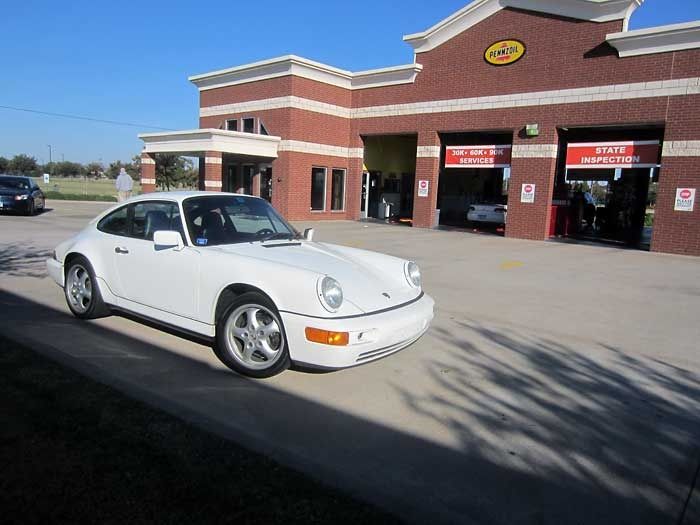
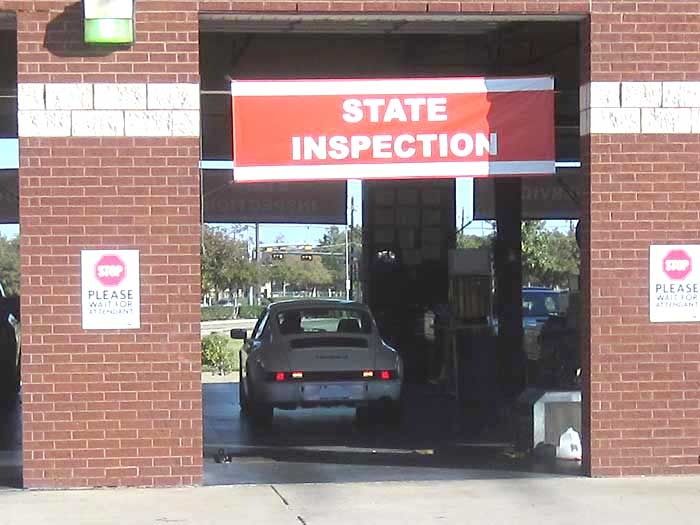
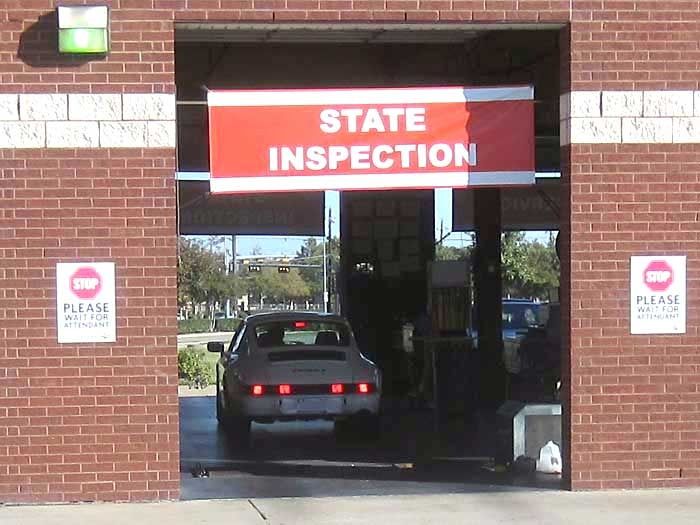
Took the car for the annual state inspection. The exhaust blew clean!
Reverse lights in action.
All my brake lights in action.
Thanks for reading through all this. I hope it helps you guys.
Last edited by Vandit; 03-21-2013 at 12:30 PM.
The following users liked this post:
LOMartin (01-22-2022)
10-30-2012, 11:16 PM
#4
Drifting
Day-um you've been busy, Thanks for the photo essay, great stuff!
Best line:
"The cool thing about having an old car is that you don’t have to look very far for your next project."
Best line:
"The cool thing about having an old car is that you don’t have to look very far for your next project."
 10-31-2012, 12:10 AM
#6
Excellent work Vandit, well done!
This is a valuable DIY piece for the R/L 964 board library.
With that said, might you consider re-titling it, for the benefit of future members and users?
Thanks again -
This is a valuable DIY piece for the R/L 964 board library.
With that said, might you consider re-titling it, for the benefit of future members and users?
Thanks again -

Trending Topics


 .
10-31-2012, 10:20 AM
.
10-31-2012, 10:20 AM
#12
Great write ups, thanks for sharing.
On the LEDs, I assume we don't need the ones with the resistors attached then? I've been looking to do my number plate ones and got stumped on whether our cars had a CAN BUS or not, and therefore whether we needed the resistors or not.
On the LEDs, I assume we don't need the ones with the resistors attached then? I've been looking to do my number plate ones and got stumped on whether our cars had a CAN BUS or not, and therefore whether we needed the resistors or not.
10-31-2012, 10:31 AM
#13
Nordschleife Master
Thread Starter
I believe some cars throw a fit w/ LED bulbs since the current draw is so low, the car acts like the bulb is blown. The resistors fix that issue. I don't think that's a problem w/ our cars, however, I did notice that the 3rd brake light will stay dimly lit if the taillight assemblies are unplugged from the car.
Iif you use the LEDs on the indicator sockets, then you will either need the resistor version or you need to update the flasher module (located on the center tunnel, by the shifter) to an LED-specific module, otherwise the indicators will flash too fast.
Iif you use the LEDs on the indicator sockets, then you will either need the resistor version or you need to update the flasher module (located on the center tunnel, by the shifter) to an LED-specific module, otherwise the indicators will flash too fast.
 10-31-2012, 10:45 AM
#15
Rennlist Member

Just stunning Vandit! Awesome work and great contribution to the forum. Your thread is very inspiring!
My car has been running great all spring and summer without any maintenance, except an oil change. In the back of my mind I've starting thinking it's time to give back to the 964 and do some projects.
Especially since I just signed up for December track day.
Some hightlights for me (too many to mention really):
-I've also replaced the oil thermostat, so I definitely appreciate your "Goop bolt cap" idea! I noticed a slight weep to the oil line as it wraps over the wheel. I need to get back in there to check it out.
-thanks for showing all the oil line detail shots.
-a good reminder to check my steering rack...I can feel a slight "knock" as I turn the wheel off center. Feels like the steering wheel is just a little loose, but it’s not...worn ball joints?
-nice LED upgrade. Thanks for the part #s too.
-I haven't listed to my radio in 5 years. I've removed the CD changer from the frunk and a mile of cabling like yours...but I haven't removed the head unit or speakers. I really like the idea of getting rid of it all.
-love the front bumper mesh idea.
-Ilko will be happy to hear about your 5-brake light mod.
-pink is gone, covered tails!
-brake light flasher?! I like that idea...and 36 modes to choose from.
I’ve very sure I’ll be checking back to this thread for guidance over the next couple months. Thanks again.