When you click on links to various merchants on this site and make a purchase, this can result in this site earning a commission. Affiliate programs and affiliations include, but are not limited to, the eBay Partner Network.
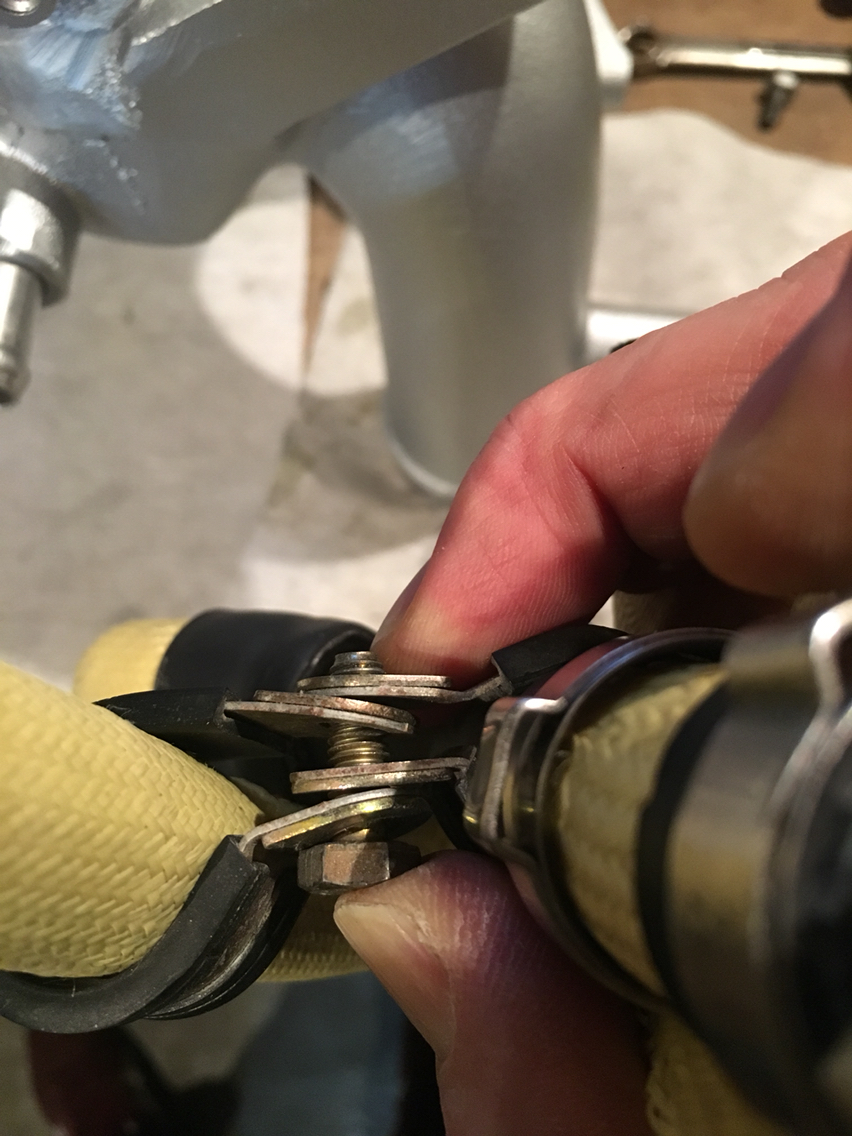
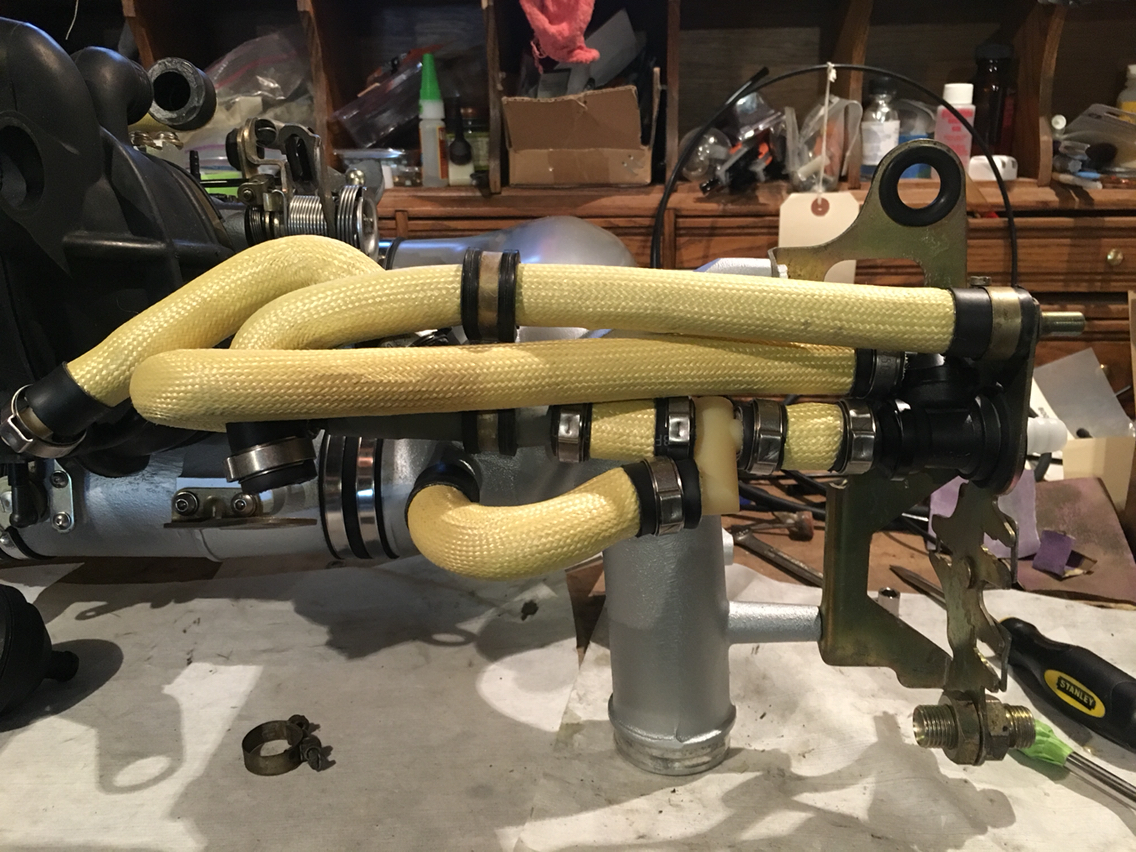
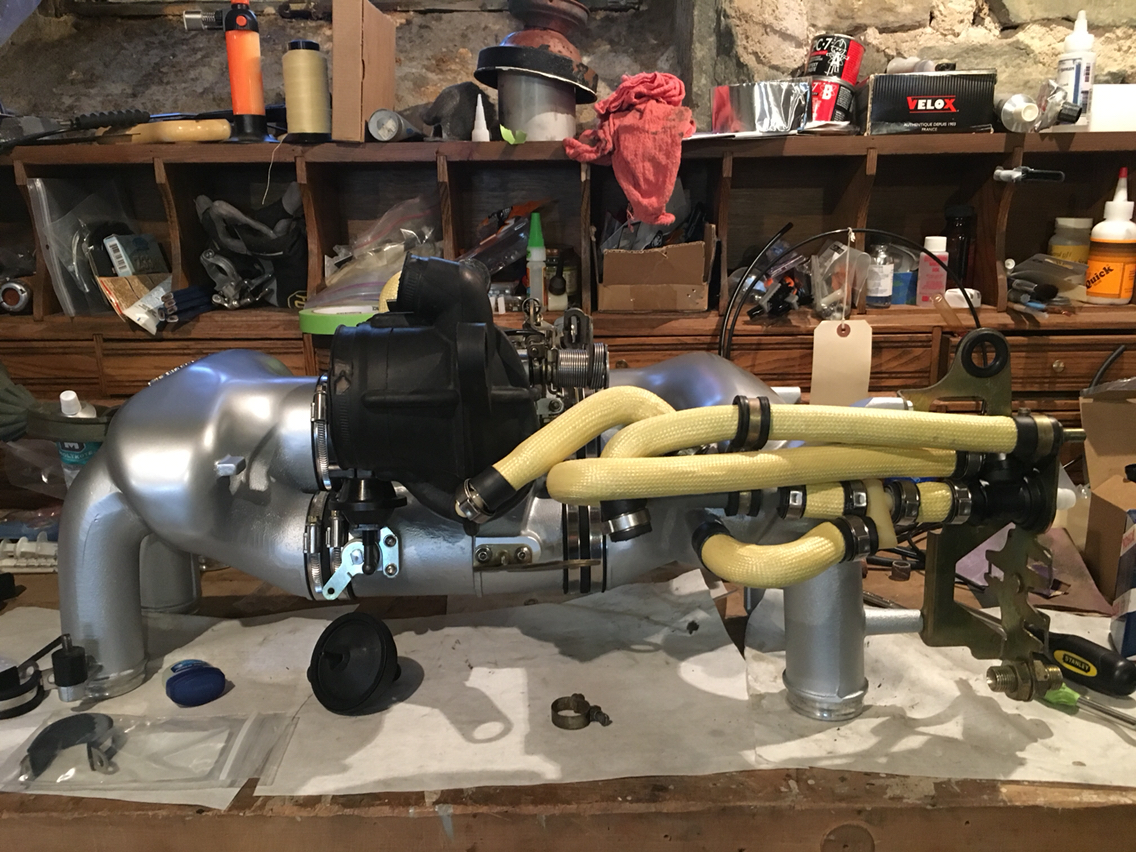
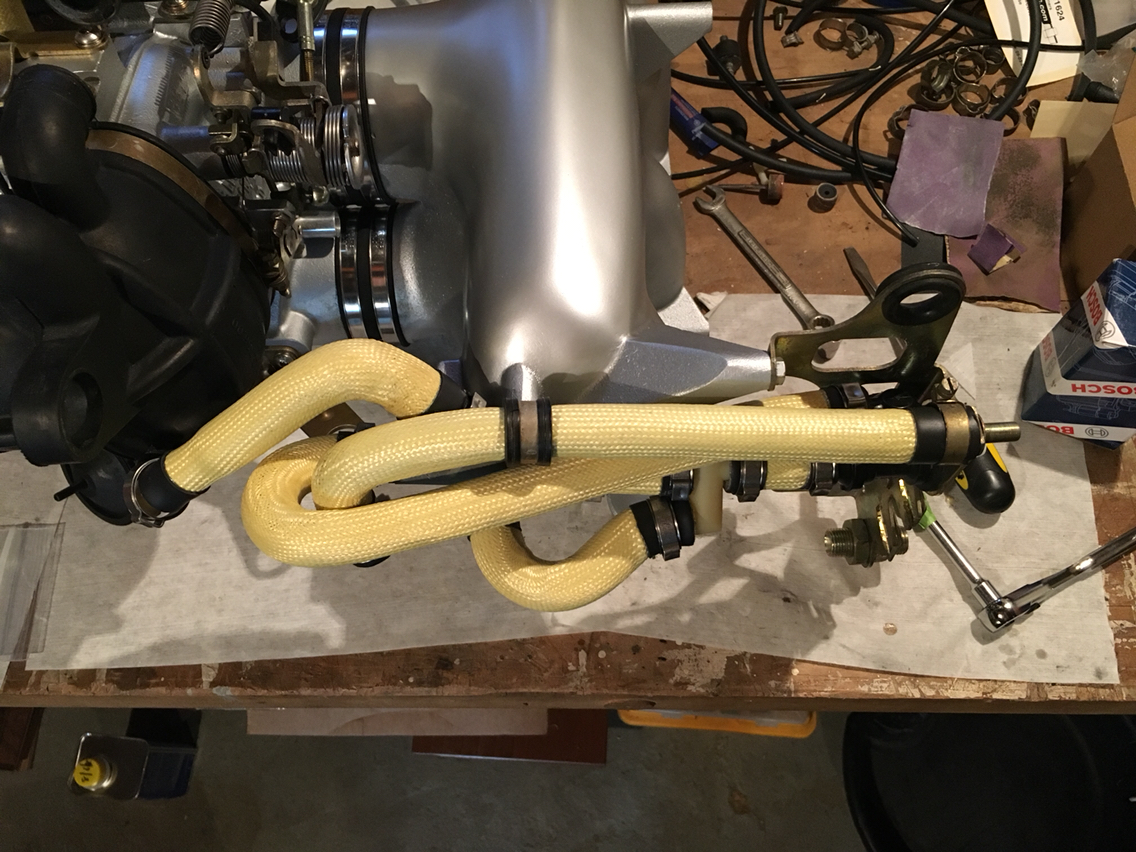
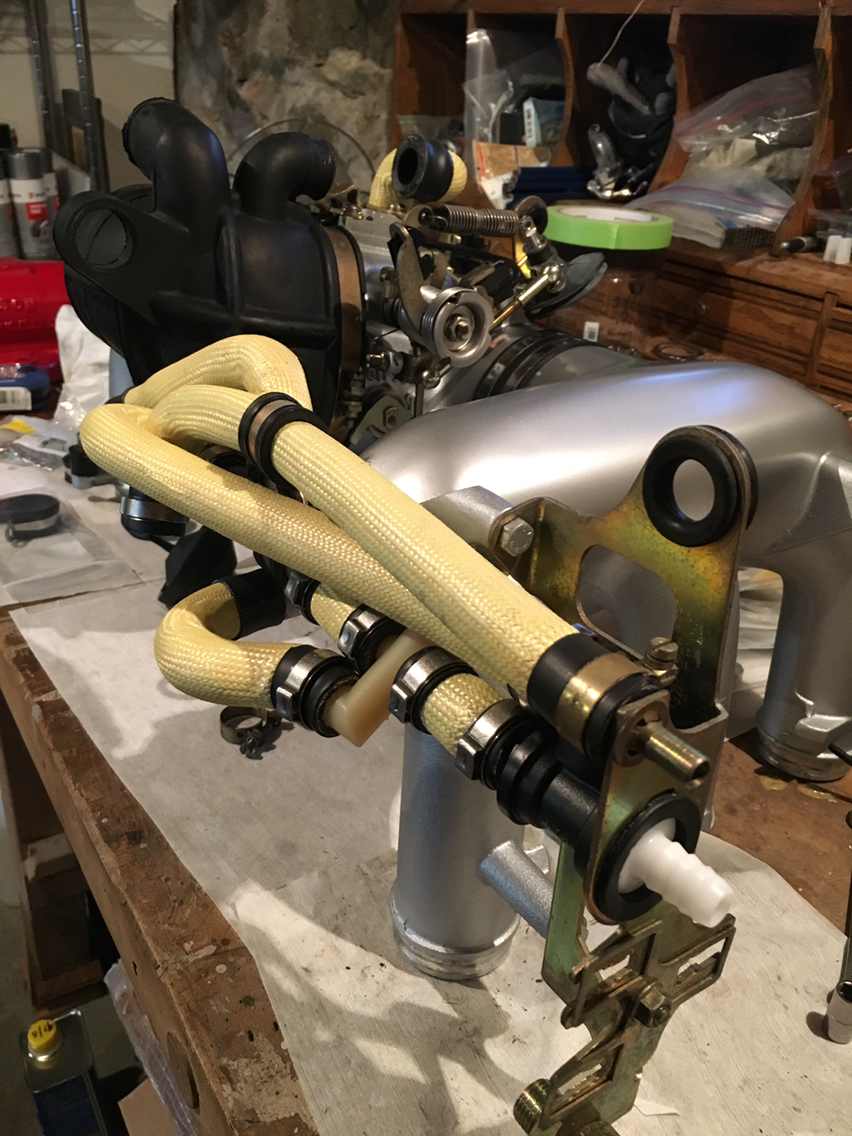
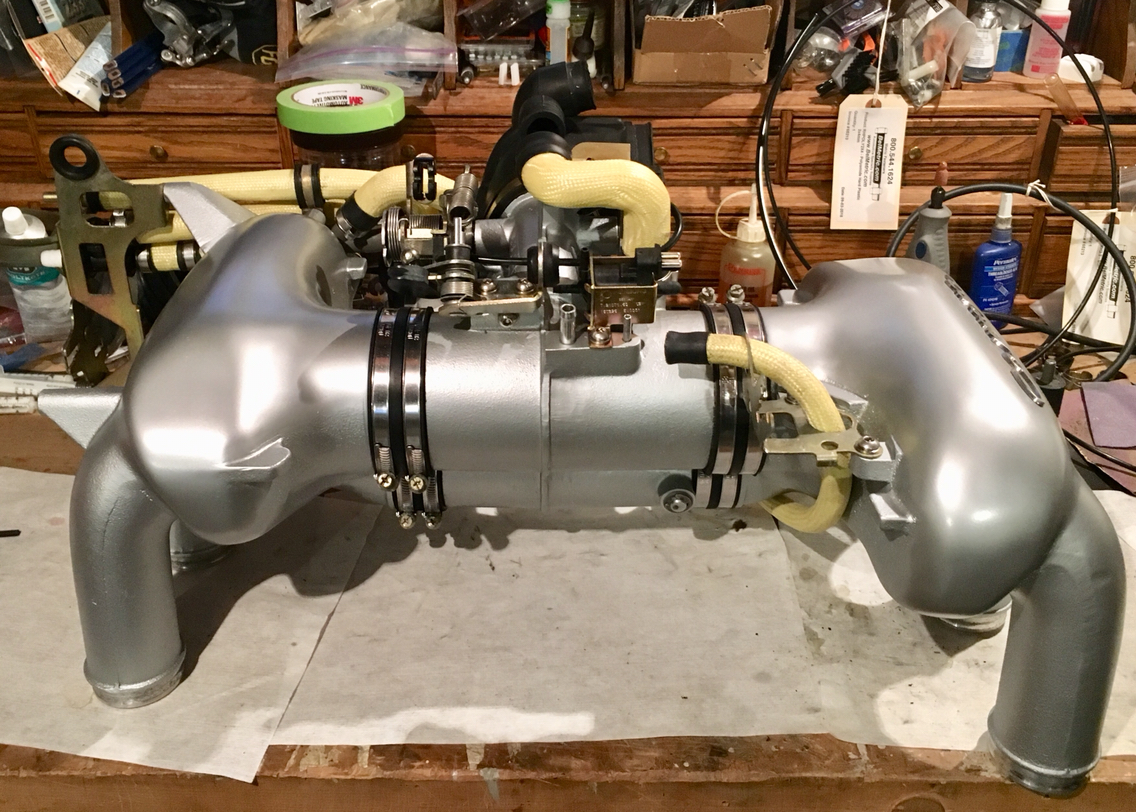
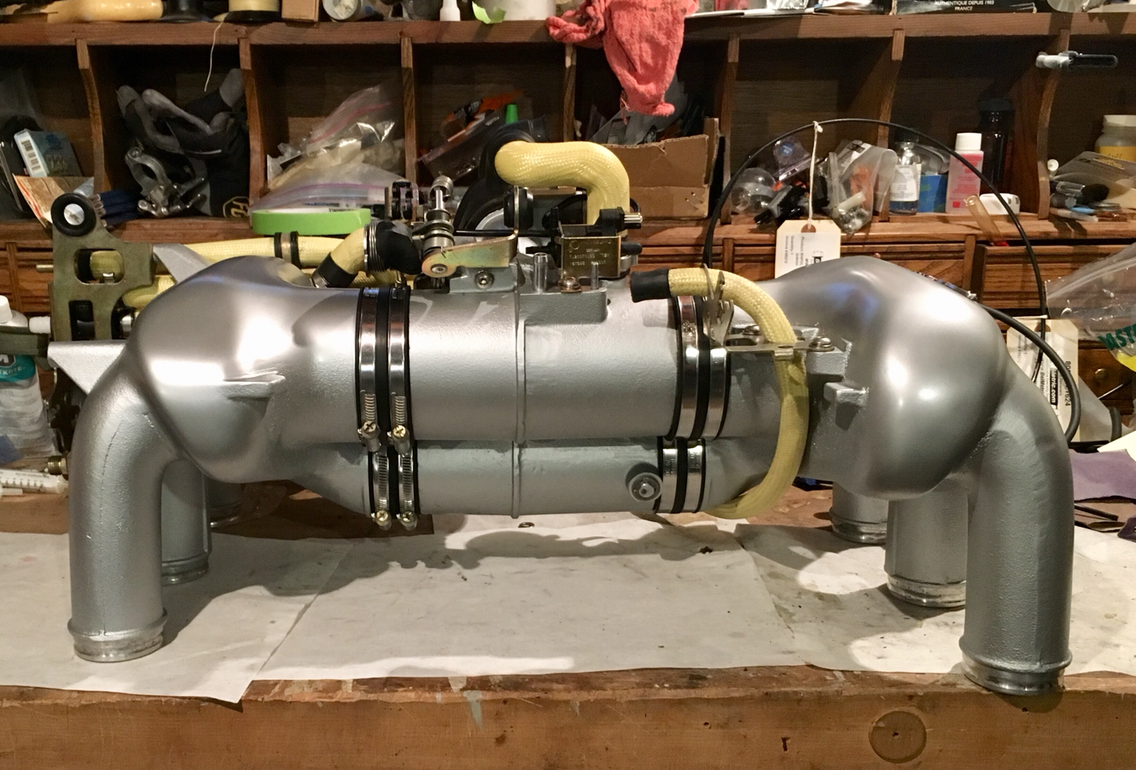
So now the tricky part...the mess of hoses. When i started this project, i couldn't for the life of me figure out why Porsche would design it this way, and honestly, i still kinda don't get it. But, if it's done right, it's a unit on its own. And goes on and comes off as a unit. So for everything that is part of the unit, it's oetiker clamps and then for the extremities, it's hose clamps...because of this, i chose to replace all of the vacuum components, since this will go back together and then likely not come apart again for a loooooooong time.
First off, when fitting this all together, you don't crimp down the oetiker until you figure everything out. The hoses and the clamps all have to clock correctly, and the clamps have to be crimpable by the tool as well. So it's a good idea to dry fit.
Before i begin...make sure you have some type of helper for the hoses, you will need to slip them on and off a bunch....
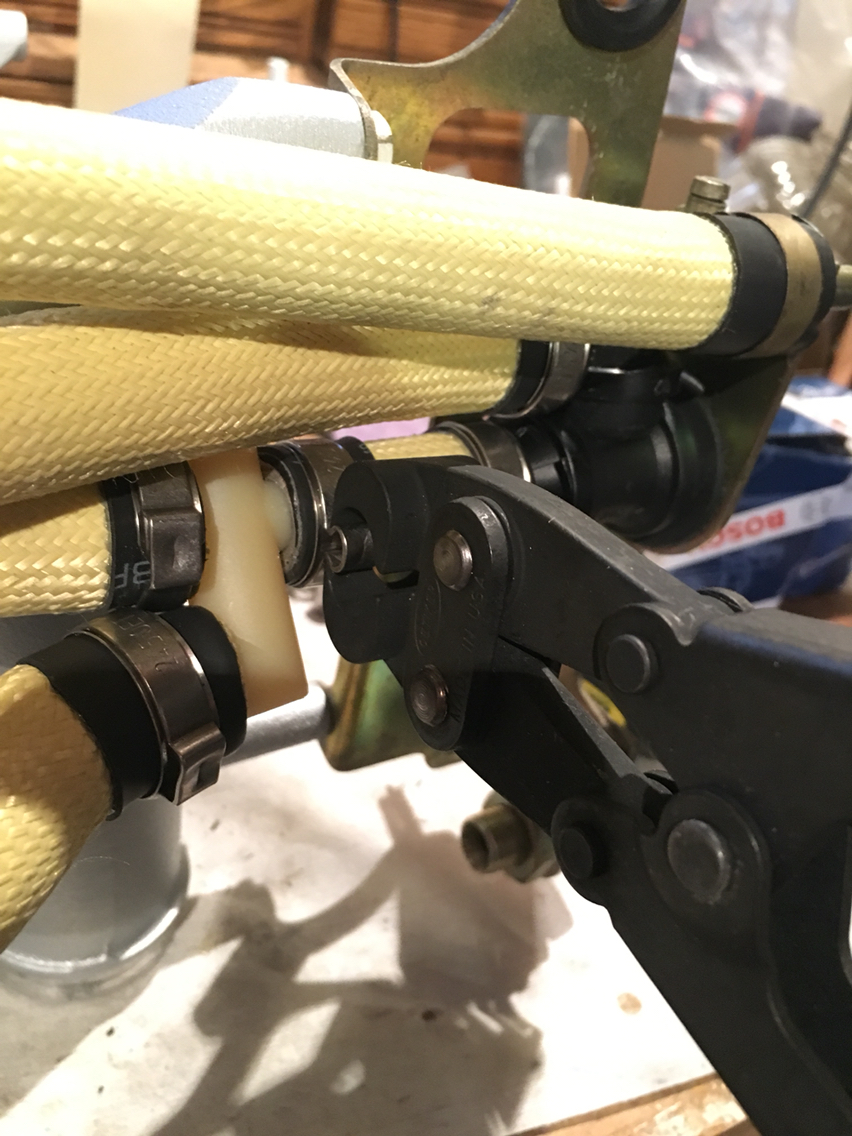
And then there is the double hose cradle clamp thingy...I'm sure there is a name for it. But this one is a pain in the *** and it connects to the manifold to support this whole mess. When you get there, this is the trick to make getting them on there a little easier...
And then start weaving - i followed the pics from disassembly...and worked backward.
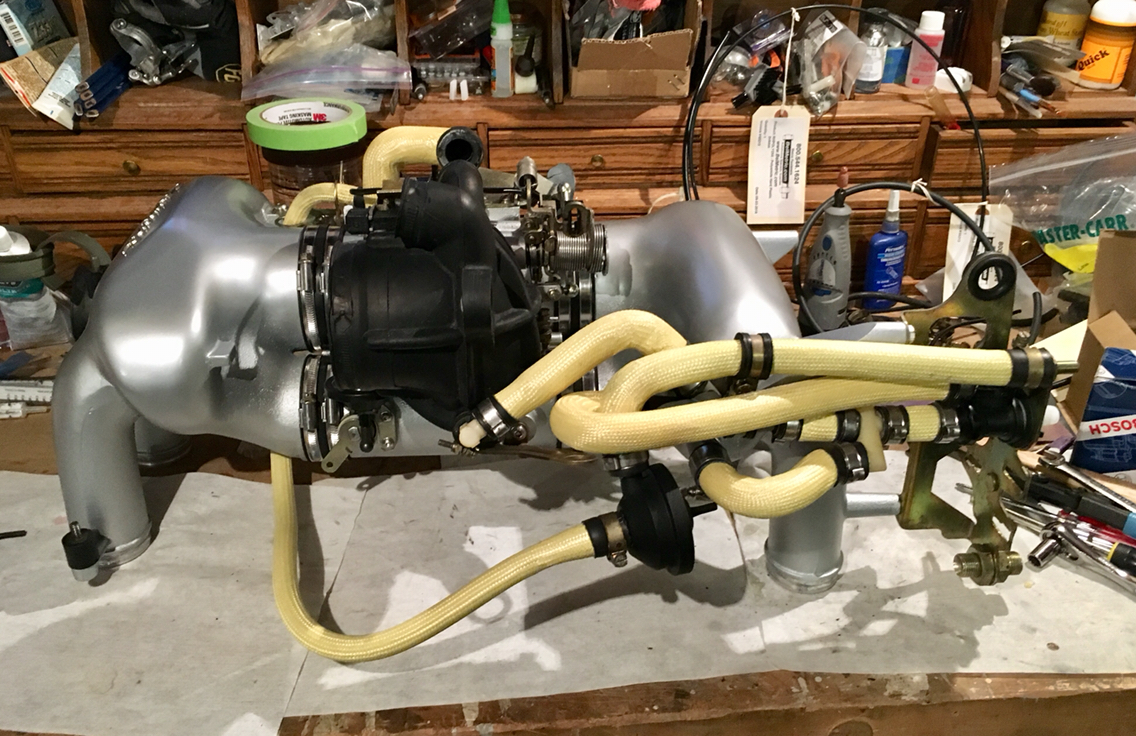
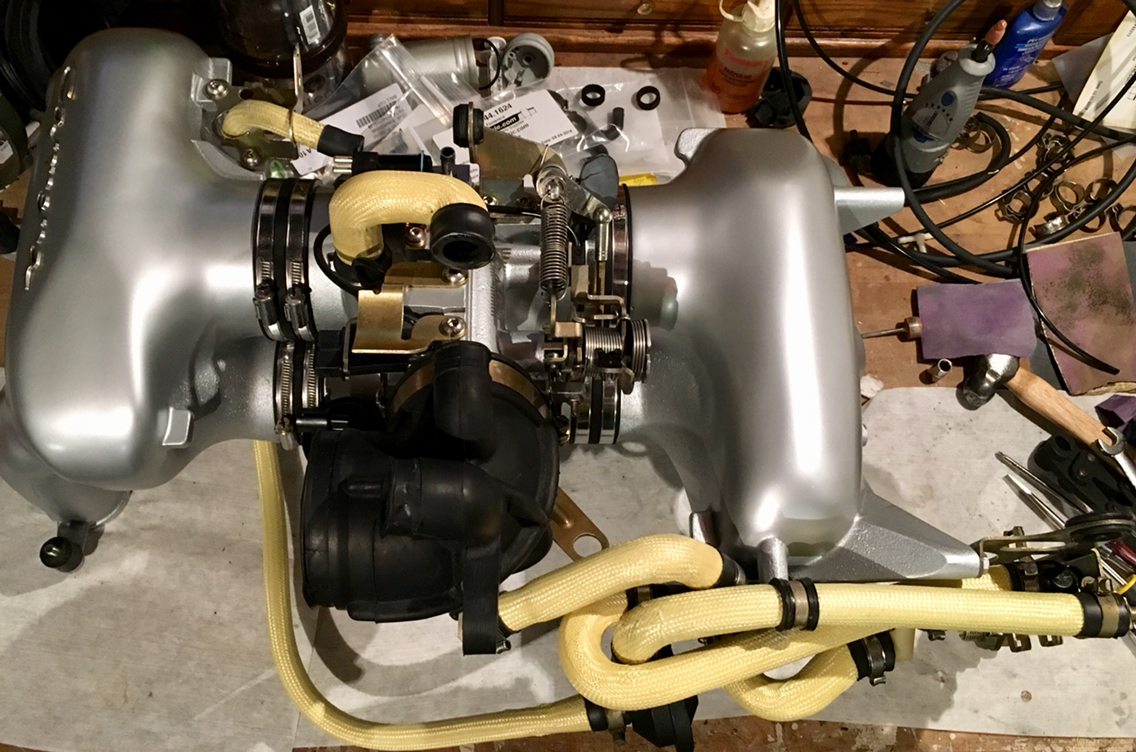
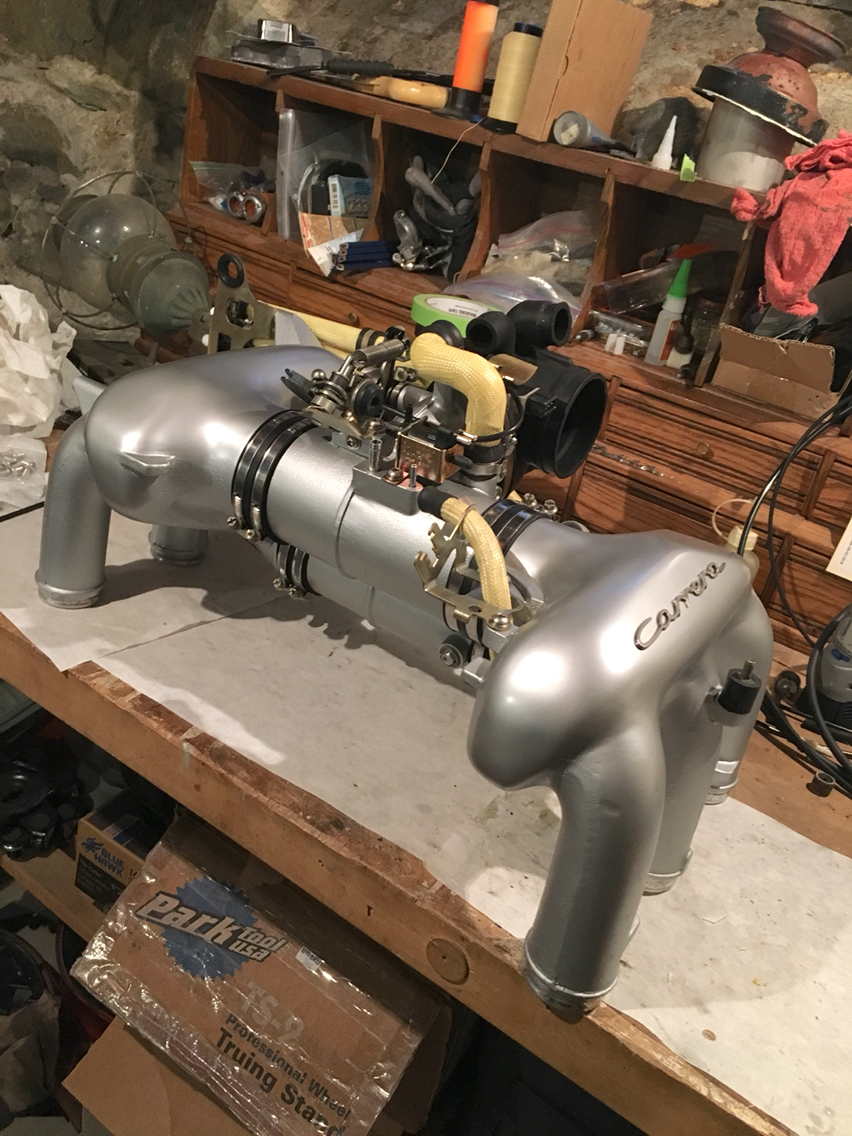
And after everything is clamped down...here we are:
Best comment so far was "that belongs in your livingroom"...so thanks to Dave for that one...
Now, here's something...my wife said, "if someone wants to buy that from you, I'll help you make another"...
So...it's not done yet, but someone has to make me an offer. When it's done. Cuz seeing her sanding intake manifolds and cleaning the caked on crap all over, and watching her pull needle bearings and press new ones...seriously would be priceless.
Happy to send you my 3.8 RS varioram if it will help you and the missus have a little bonding time amazing refinish of the intake, mad skills and attention to details.
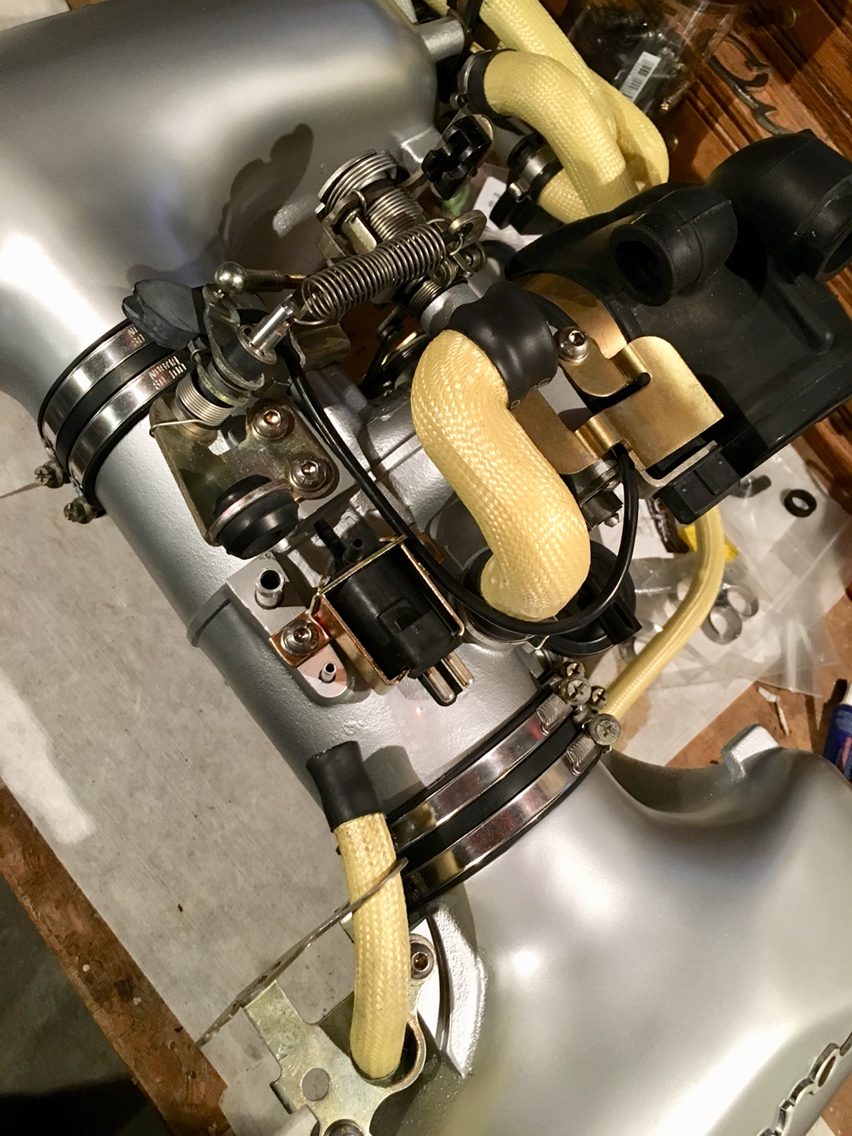
Ok. Can we talk about this thing? Cuz this is a shytty shyt show...
Back in the earlier pages of this thread, you will see that in my bestest and cockiest manner, oh so me typical, i beat the porsche tax and found one for waaaaaaay less than the 208 dollars from sunset....
But i ended up buying the wrong part number. And it seems that all of these that are still in production- ours is not- are 25 dollars, but they function in the opposite manner to ours. Which is to say, ours is open when no power is supplied and close on power. And the rest of the automobile world seems to have gone to closed on no power and open on power. Go figure.
Now- it amazes me that this is not in production, as it was used on a huge array of cars, many of which were big sellers. Vw golf, Passat, Saab 900, a bunch of Citroen, fiat, etc...
So here is the deal. After having an awful lot of fun researching...
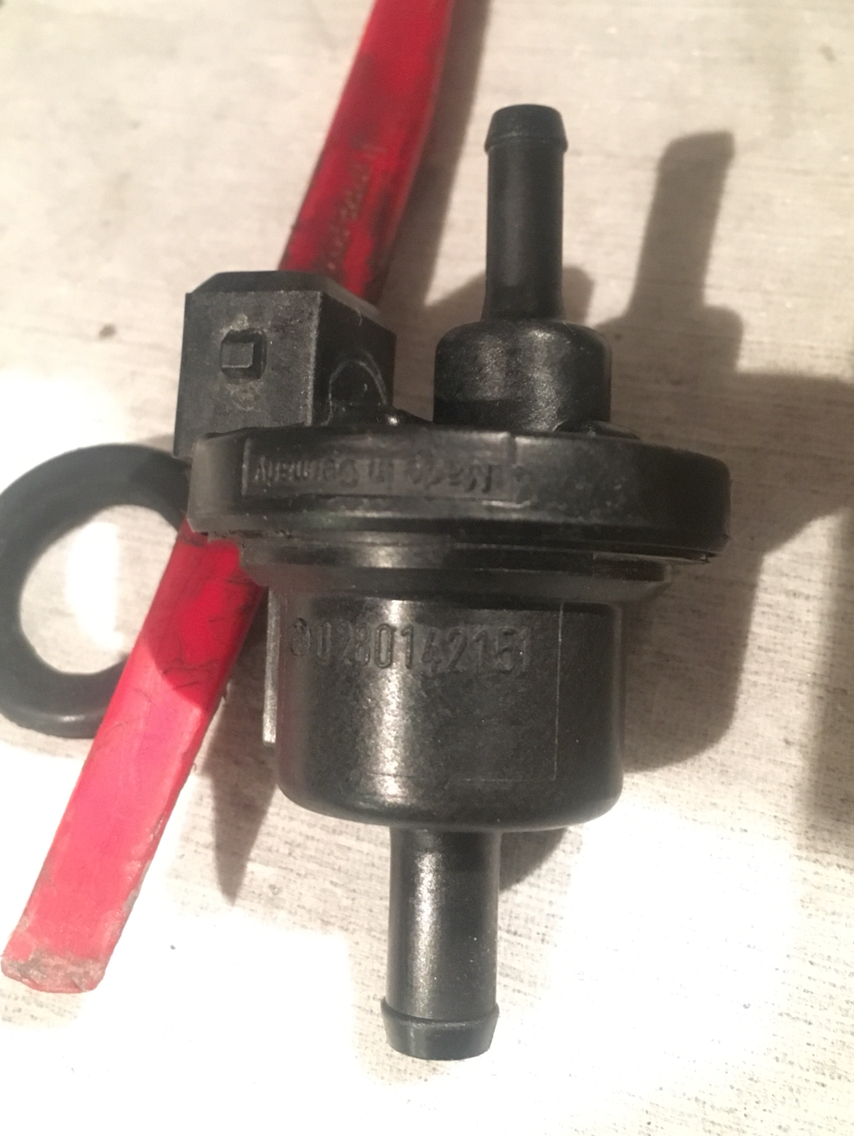
This is part number 0280142151 Bosch purge valve. Saab , for example, used 0280142157...the Passat used 0280142153 or thereabouts...but they are all the same, with the exception that some have a slightly different housing or bracket to be mounted in different ways. The latest part number, and the only one in production is 0280142158, but that one is only available on special request, meaning that if VW or Porsche wanted to make a production run, they would be made. And then massively marked up and sold to slugs like you and me, that feel a need to pay up for a new part...
Unless however, the part is serviceable. Ooooolalaaaaa...let's see...
So firstly- what is this thing? Why is it there and what's its purpose?
It's in clear view when you open the hood, attached to the mess of vacuum hoses. And there is a cable coming off your engine wiring harness that is attached to it.
Long and short is this- fuel vapors get routed and stored in the carbon canister, and then this little guy gets power and allows nothing to suck (something we all need in our lives- aka, flick a switch and nothing sucks!)...but when it's not drawing power, the intake vacuum sucks the vapors in and they get burned up. I haven't looked too closely, but I'm going to assume when the wot switch clicks, the power turns on and the sucking stops.
If i have any of that wrong or backward- please chime in.
Now here is the deal- we really don't need to know any of that. What we need is for this thing to function. Which means air blows through when off and ZERO air blows through when on.
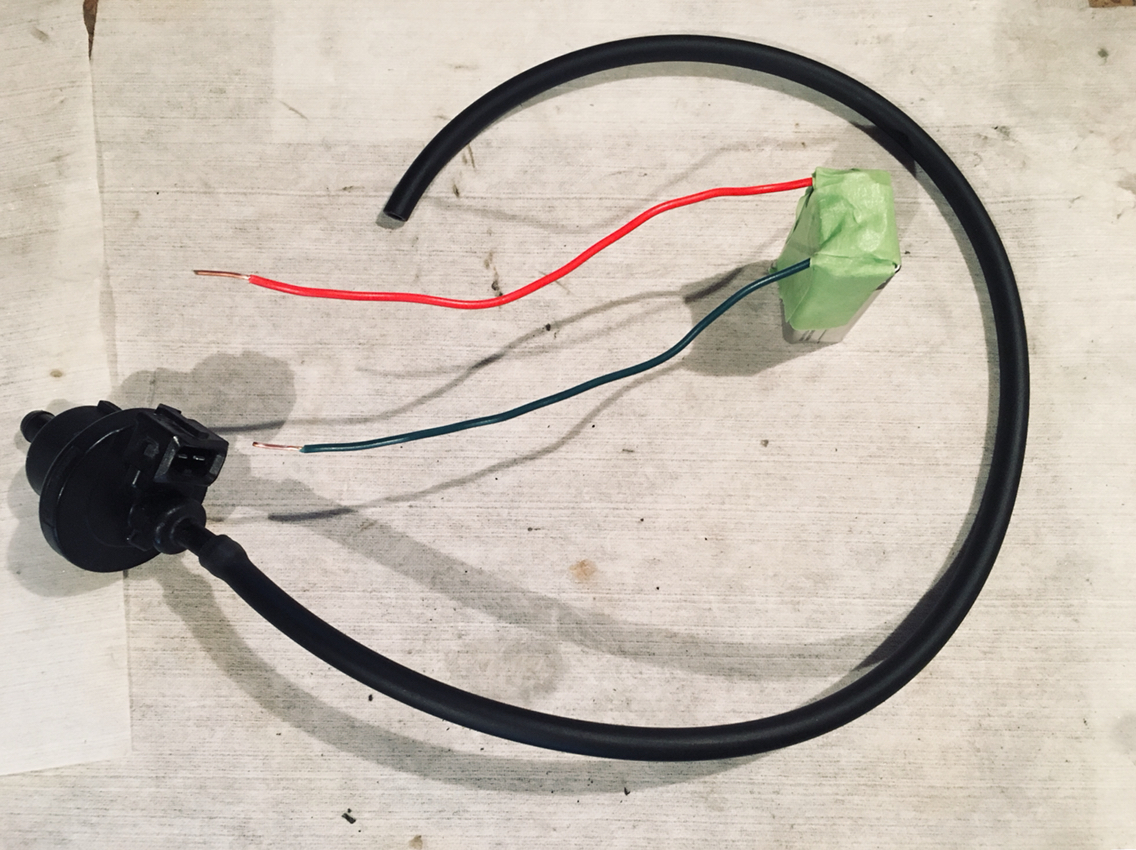
This one? Not so much. I made a little tester...
I attached a hose to the small side to blow through, then a couple wires taped to a 9v battery. Don't cross the streams!
Anyway- i blew through the hose, touched the wires to the terminals- and was blowing less, but air was still moving trough. So clearly we aren't holding vacuum. And i am not paying 208 dollars plus shipping for a part that for everyone else costs 25 dollars. Just on principle i can't.
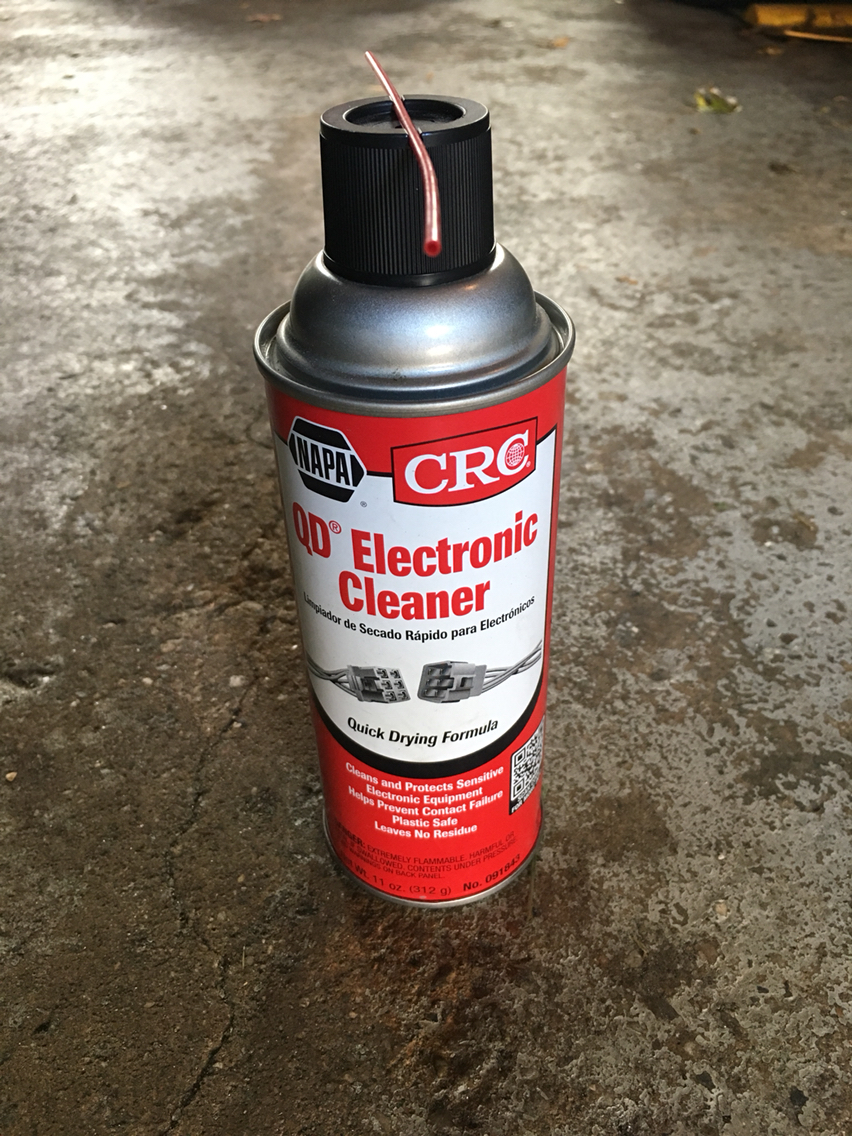
Sooooo...how do we get this gitzermy working? It doesn't come apart. And what I'm thinking is that like everything else in our intake, it gets gummed up with all the nasty evaporate that builds up in the system. And a little electronics cleaner will do the trick...
I go through oooodles of this stuff. It's like the duct tape of fluids. And the rvp is super high...so it evaporates in a few seconds. Which is great.
Anyway...in it went. I covered one side with a finger. Filled it up. Plugged the other side and shook it for a minute or so. Then oddly enough, it took quite a bit of shaking to get the fluid back out. Repeated again. And then tapped and shook and blew through it until dry. Make sure it's all dry, before sparking wires around a tube you are blowing through...we don't need any explosions in the throat...or around the eyeballs.
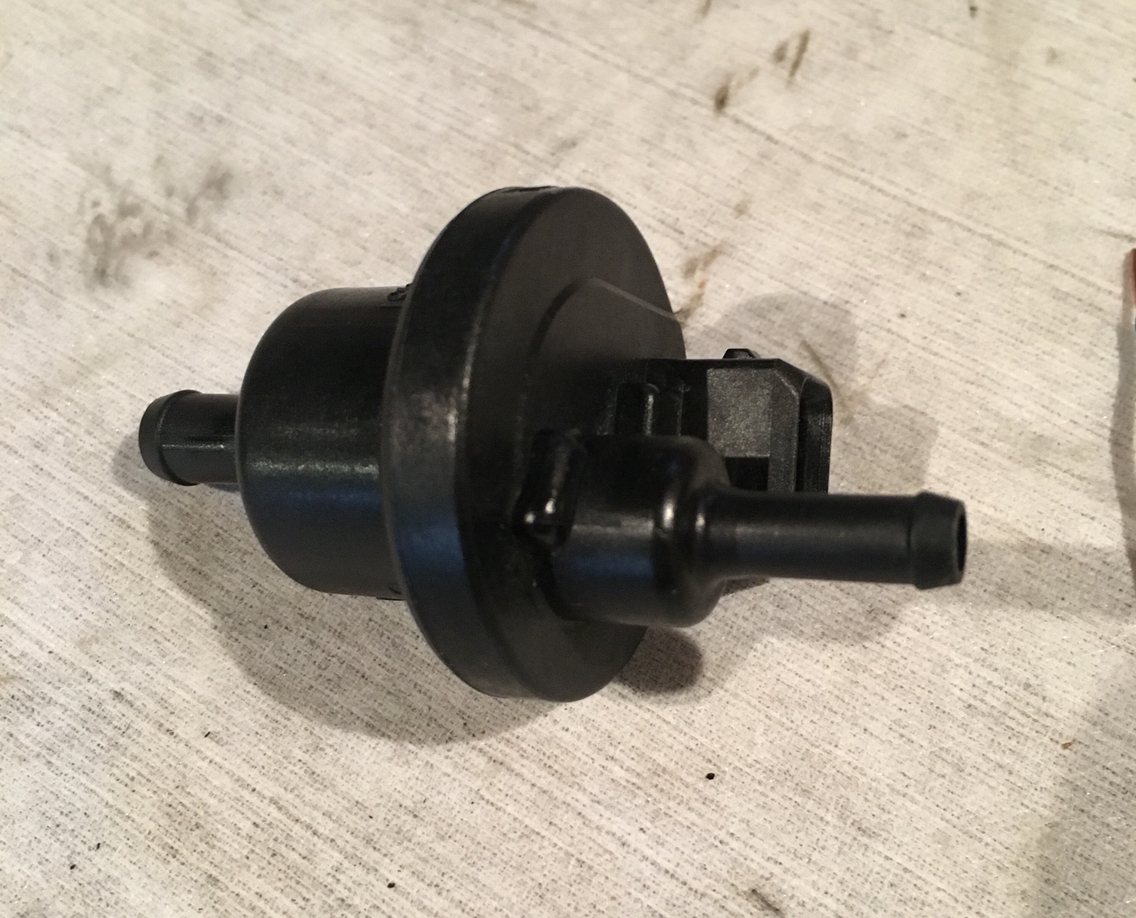
And guess what. Full vacuum. Functions like new. Open on now power, fully blocked on power. Done. No need to spend 200 for a new one.
A lot of us (myself included) are guilty of the "whilst I have it apart" I'll just replace everything with new mentality. We all love our cars and only want them to run like swiss watches. When I tackle this project in the new year, I'll take the time to try and resurrect anything that isn't working before forking out big dollars to Mr Pelican and Mr Porsche.
I hadn't checked in on your progress for a while and I am sorry I missed all the fun.
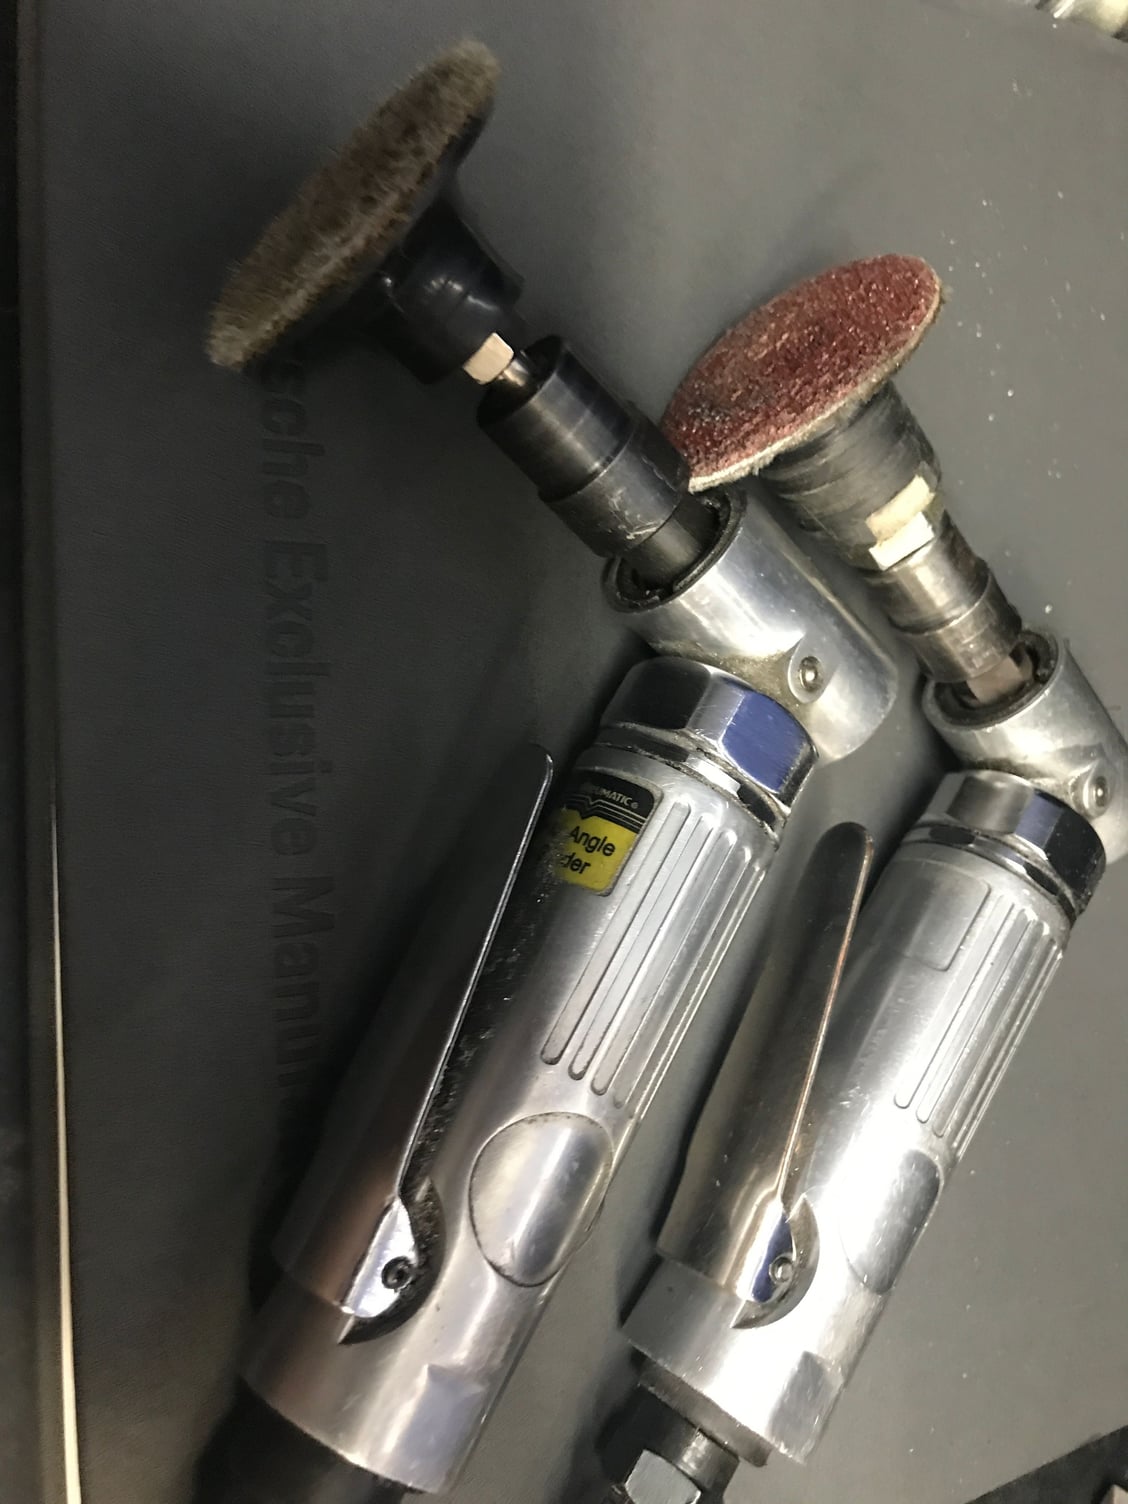
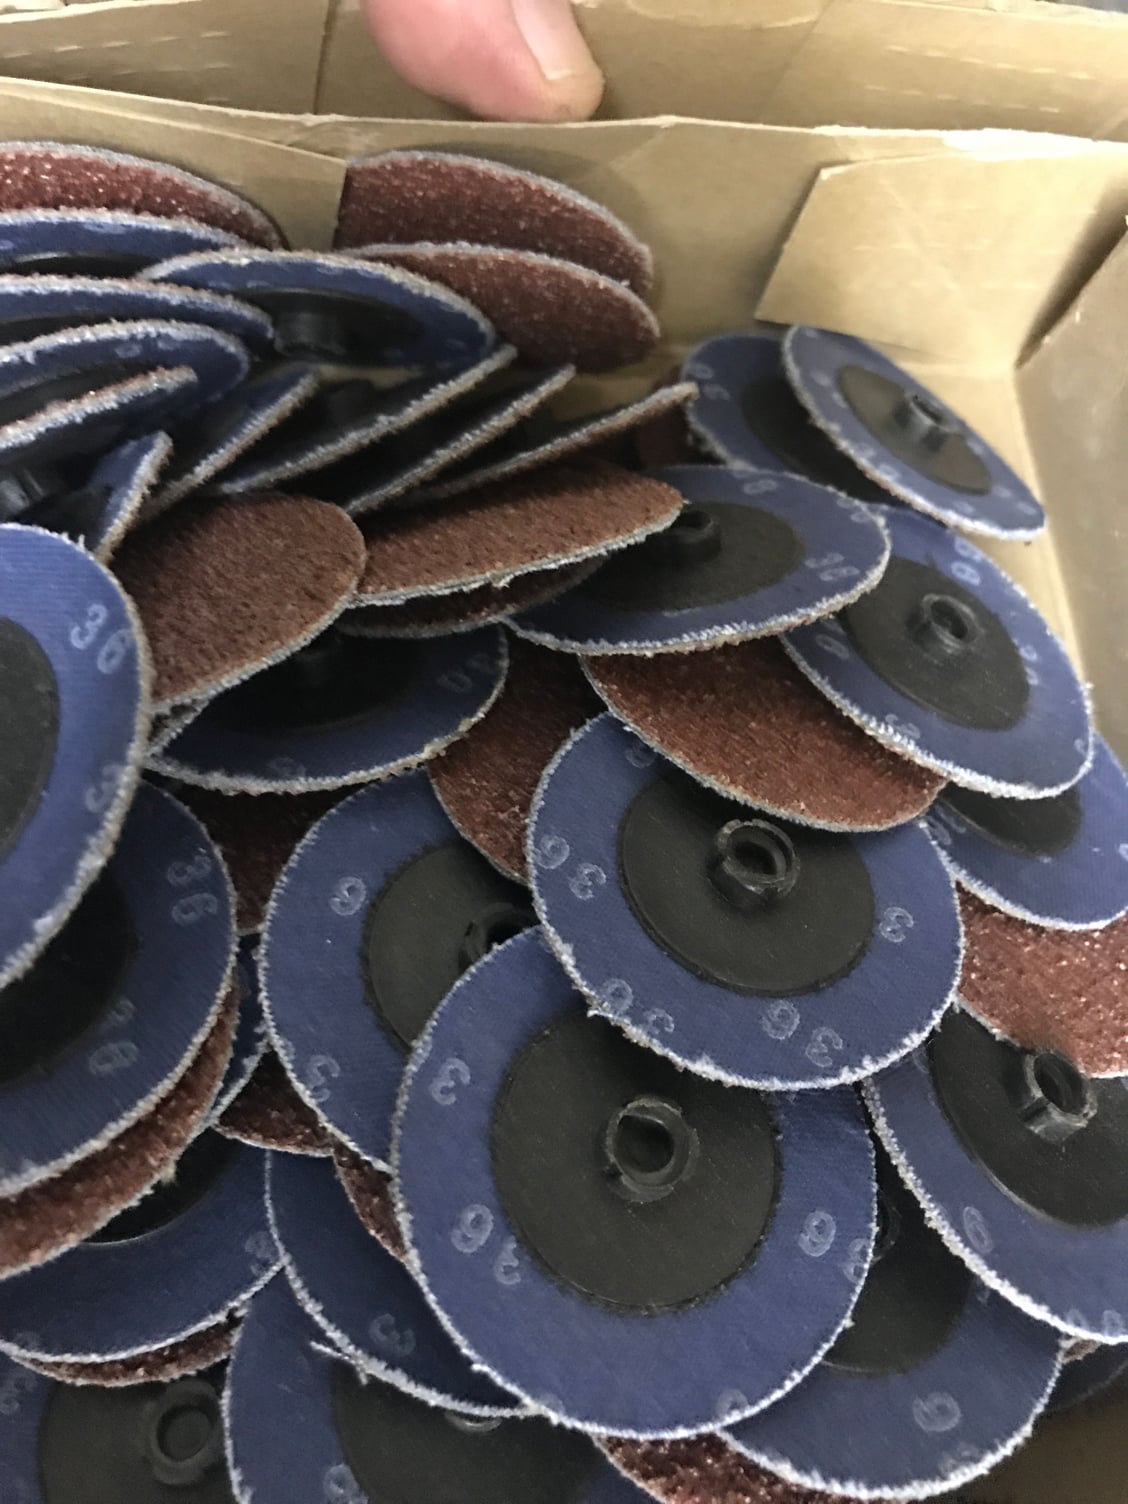
If you try to tackle this again I would suggest air tools. An angle grinder with a 2" 3M disk would have saved you a lot of time and angst. You can start with a coarse 36 grit to remove material and work your way up to 80 or so. Then switch to scotch bright pads on a 2" mandrel. It would have saved you countless hours along with a lot of hand cramping and give you more time to play. So cute!!! Ready to take on the 964.
Looks great can't wait to see it in the car.
PS:
For future projects these are a necessity. You can buy a 1" mandrel along with 2" or modify a two inch so it fits just the backing plate of the pad. This will allow you to break in the pad and use it in tight radius's. It takes on the shape of the curve. Once you are finished with 80 grit there are several scotch bright pads that will work from course to fine after that you can finish by hand. This is also great for pre prep for high polish. You can always finish off by hand with 200 or 400 grit wet but you can do one of those in no time with the help of these. BTW HF grinders for $15 are as good as the expensive ones. For the price toss when they break but I used to use these in commercial application and they lasted as long as the $200 ones.
I have a couple if you can source the mandrel I have some to spare.
This weekend was a bit of running around and then today, sorting slot cars...while watching a few YouTube documentaries on Porsche at lemans and Porsche at the targa florio...and then it flipped to supercharged gp cars of the thirties...
Anyway...had a little fun and stayed away from the intake today...
Things get very busy for me now until after the new year...so hopefully I'll be able to dedicate some time in the coming weeks..let's see...
I remember when I could get down on the floor like that. LOL
Enjoy the holidays. BTW Who makes the set? I have an early version when my son was young with early GT3's. It makes me want to break it out and act like a kid again.
Rob,
Fitted my WOT thingamajig. Required a minimal file adjust, and is a nice snug fit. You were right, the original one was cracked, although still functional (for now).
I have a question: What size is the inset screw? No metric allen key I own fit. I left it out, since the ting fits tight enough and is also kept by the circlip.
Ah yes...sorry George. I spec'd a metric set screw when i had them made- but being an American machine shop...and therefore incapable of following direction, they used an SAE size Allen....forgive me- i should have mentioned that since you are in the normal world of easy measurement!
I have no idea what size it is...but it is some fraction of an inch...can you get your hands on sae size tools over there? Lemme know if i need to send you one.
For the rest of you...i still have more of these. So if yours is cracked, pm me and I'll get one out.


 11-11-2018, 06:49 PM