When you click on links to various merchants on this site and make a purchase, this can result in this site earning a commission. Affiliate programs and affiliations include, but are not limited to, the eBay Partner Network.
Wow! The amount of time to properly tape and protect the areas that are not going to get painted is insane! I love this level ove detail, can’t wait to see everything come back together. You need to step up the timeline so you still get some drive time this summer and fall!
It was worth the read. Thanks for sharing and good work. Your level of attention is impressive.
The 964 was my first Porsche. It was a nice car and great to work on... I miss it somehow!
And Dean, that�s high praise Sir as I know how well you take of your car. Your engine bay has had more attention than my interior, and glad to see you taking care of the fan properly. You�re a good steward. We�re both due for a nice long drive when these cars are back on the road.
Thanks mate! No way, the amount of work here far surpasses my front lawn workshop efforts! I'll hopefully be back on the road tomorrow! Can't wait to see your progress this weekend! Keep up the good work!
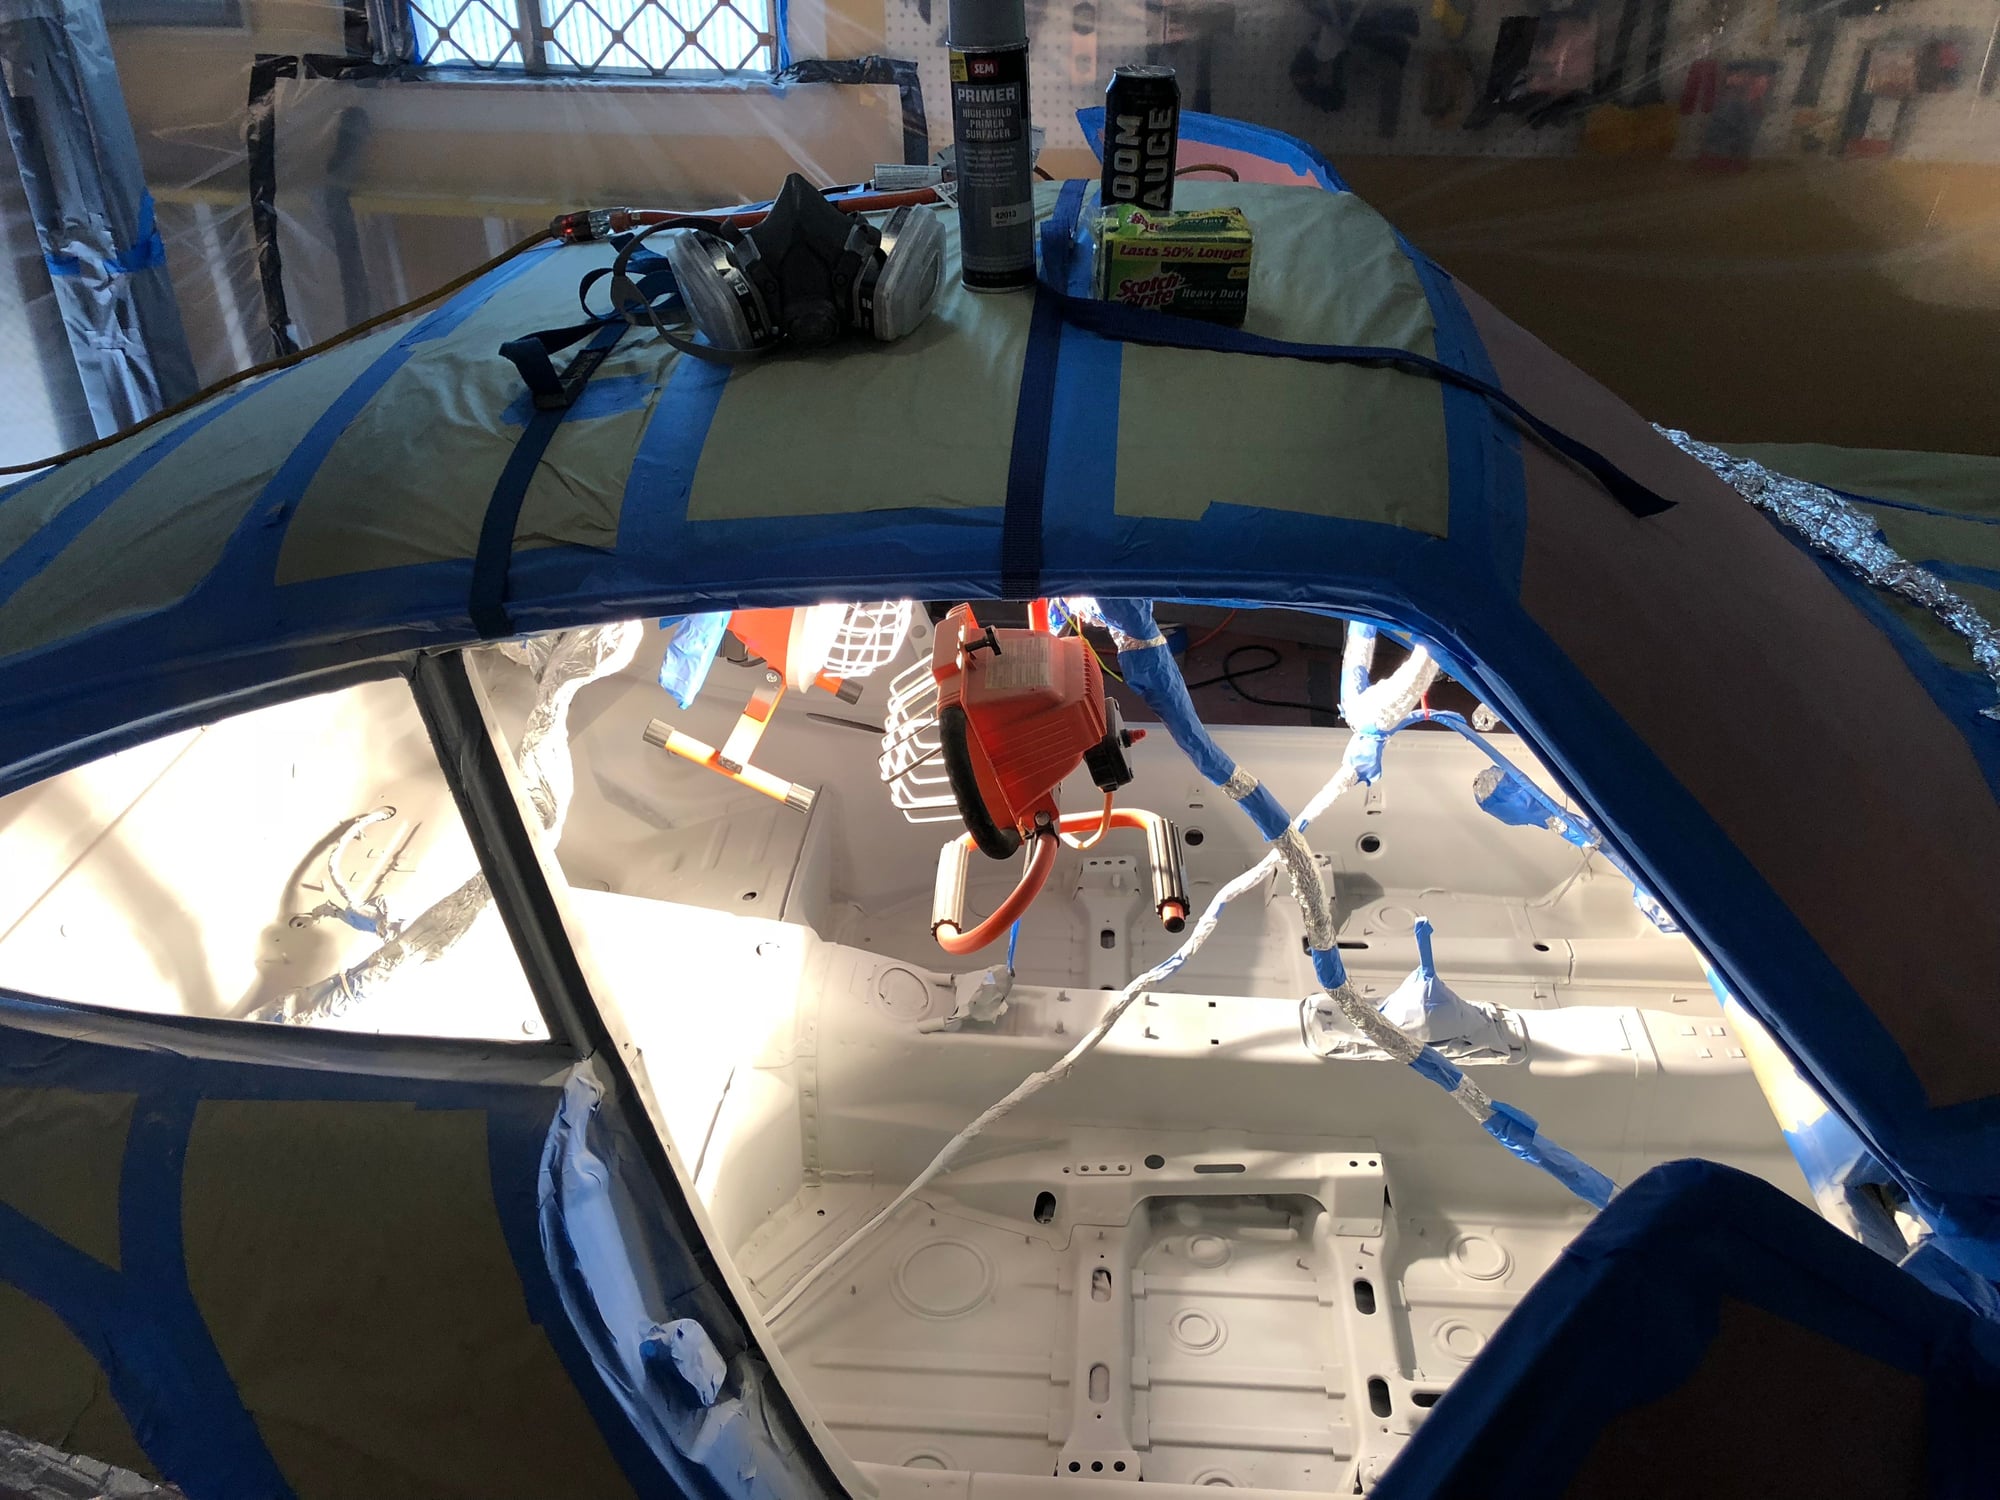
Thanks for the nod Infinite1, greatly appreciated. Bravery or sheer madness, I�m finally making some real progress. I gave the car a final wipe down with SEM solve prep, and laid down the first few coats of etching primer tonight.
The job job went pretty smoothly. A few bits of dust blew out the crevices, so I need to lightly sand the rear floor boards before applying the next few coats of high build primer. Also a few minor drips from the five cans of paint that I went through, but all in all the paint looks great and the rust is gone! It�s all down hill from here. I just hope I can get everything wired correctly again when the job is done.
You're very welcome! Not madness...I would say it's sheer love for the car. In the future, I plan on respraying my car and the idea of leaving the interior bare came to mind. Is this a direction you plan to go? If not, are you just going to lay the carpet down without any sound barrier?
Wow! The amount of time to properly tape and protect the areas that are not going to get painted is insane! I love this level ove detail, can�t wait to see everything come back together. You need to step up the timeline so you still get some drive time this summer and fall!
Thanks Marine Blue - The tape up definitely took longer than anticipated, as has much of this endeavor. But a job worth doing... And the K2 paint is nasty stuff, with bulletproof over-spray. Even the masking paper is specifically suite for this paint. I can't wait to get this project wrapped up,and get the car back on the road. Wilbur was my daily driver last summer, and the best part of my day.
Originally Posted by Jjm4life
I know others have offered to help, but can I just come watch you work? I'll bring the beers!
Ha! Anytime at all Jim. After all, you can't do this kind of work without plenty of beer on hand!
Originally Posted by Greg Wolfe
Love the pics. Keep up the good work!
Mr. Wolfe
Thank you Mr. Wolfe. Those are kind words from a lupine to a vulpine.
Originally Posted by Infinite1
You're very welcome! Not madness...I would say it's sheer love for the car. In the future, I plan on respraying my car and the idea of leaving the interior bare came to mind. Is this a direction you plan to go? If not, are you just going to lay the carpet down without any sound barrier?
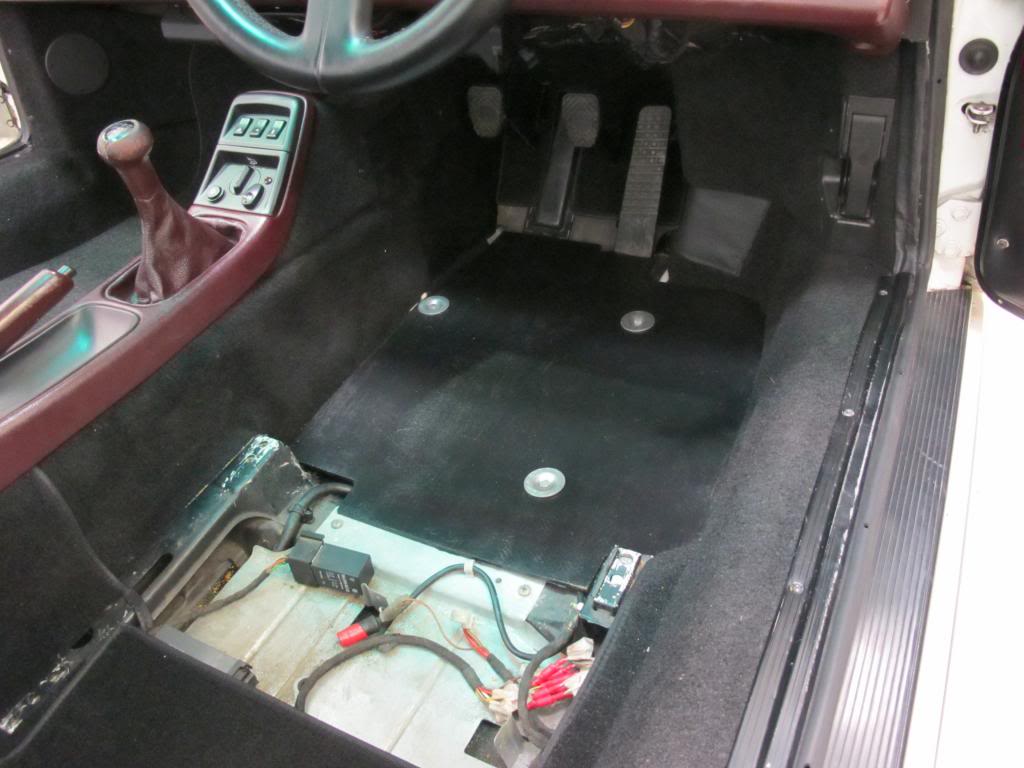
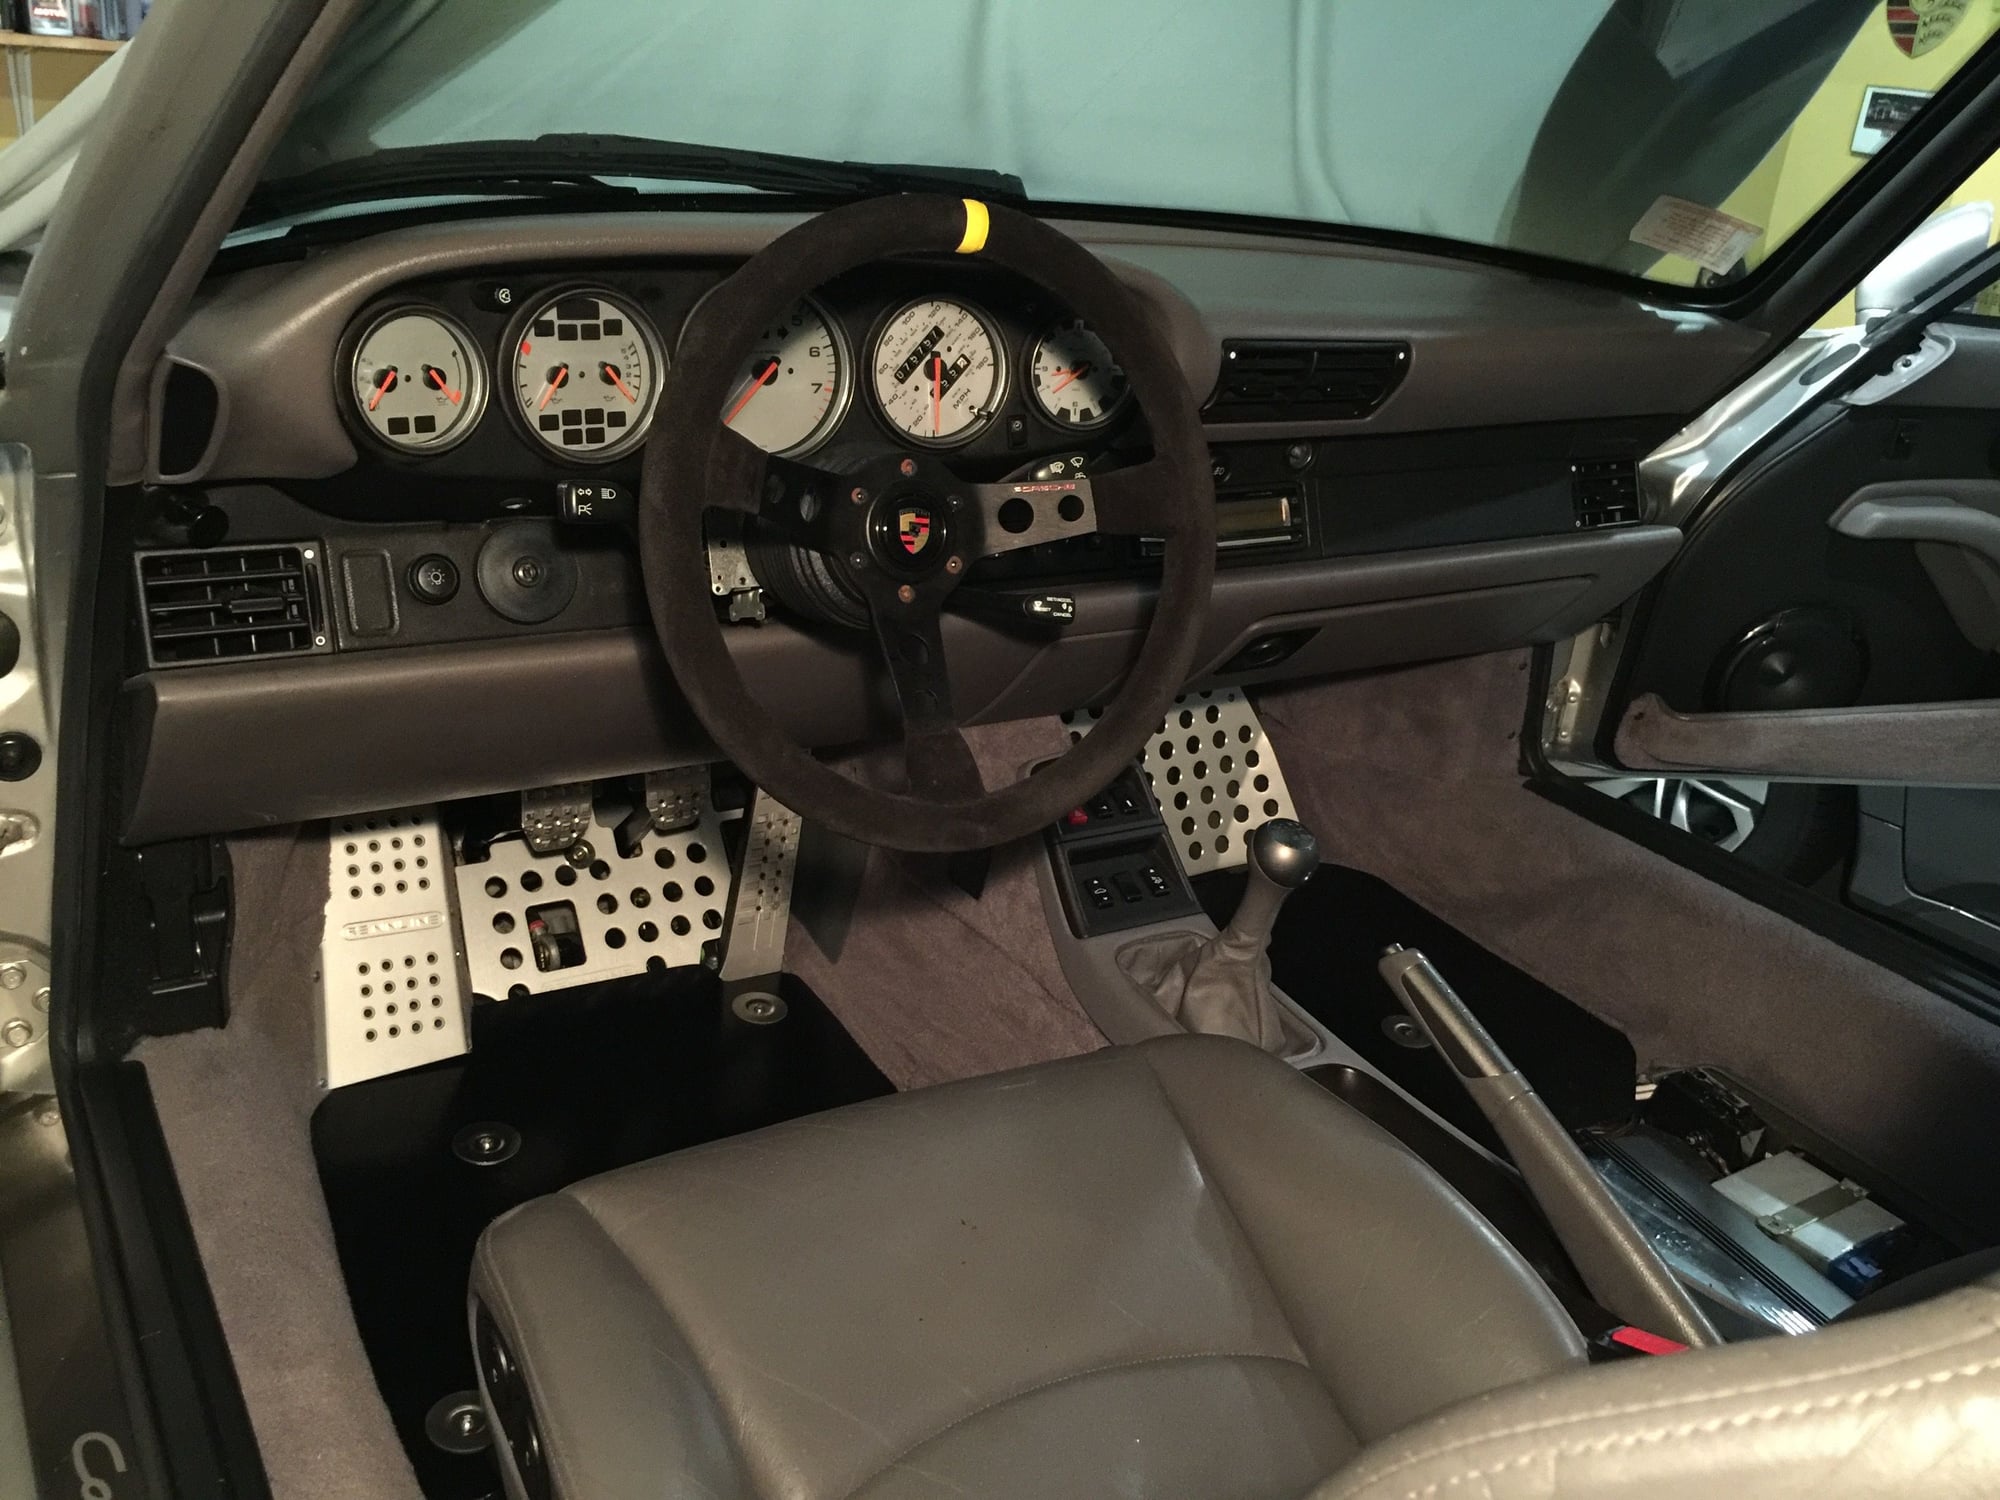
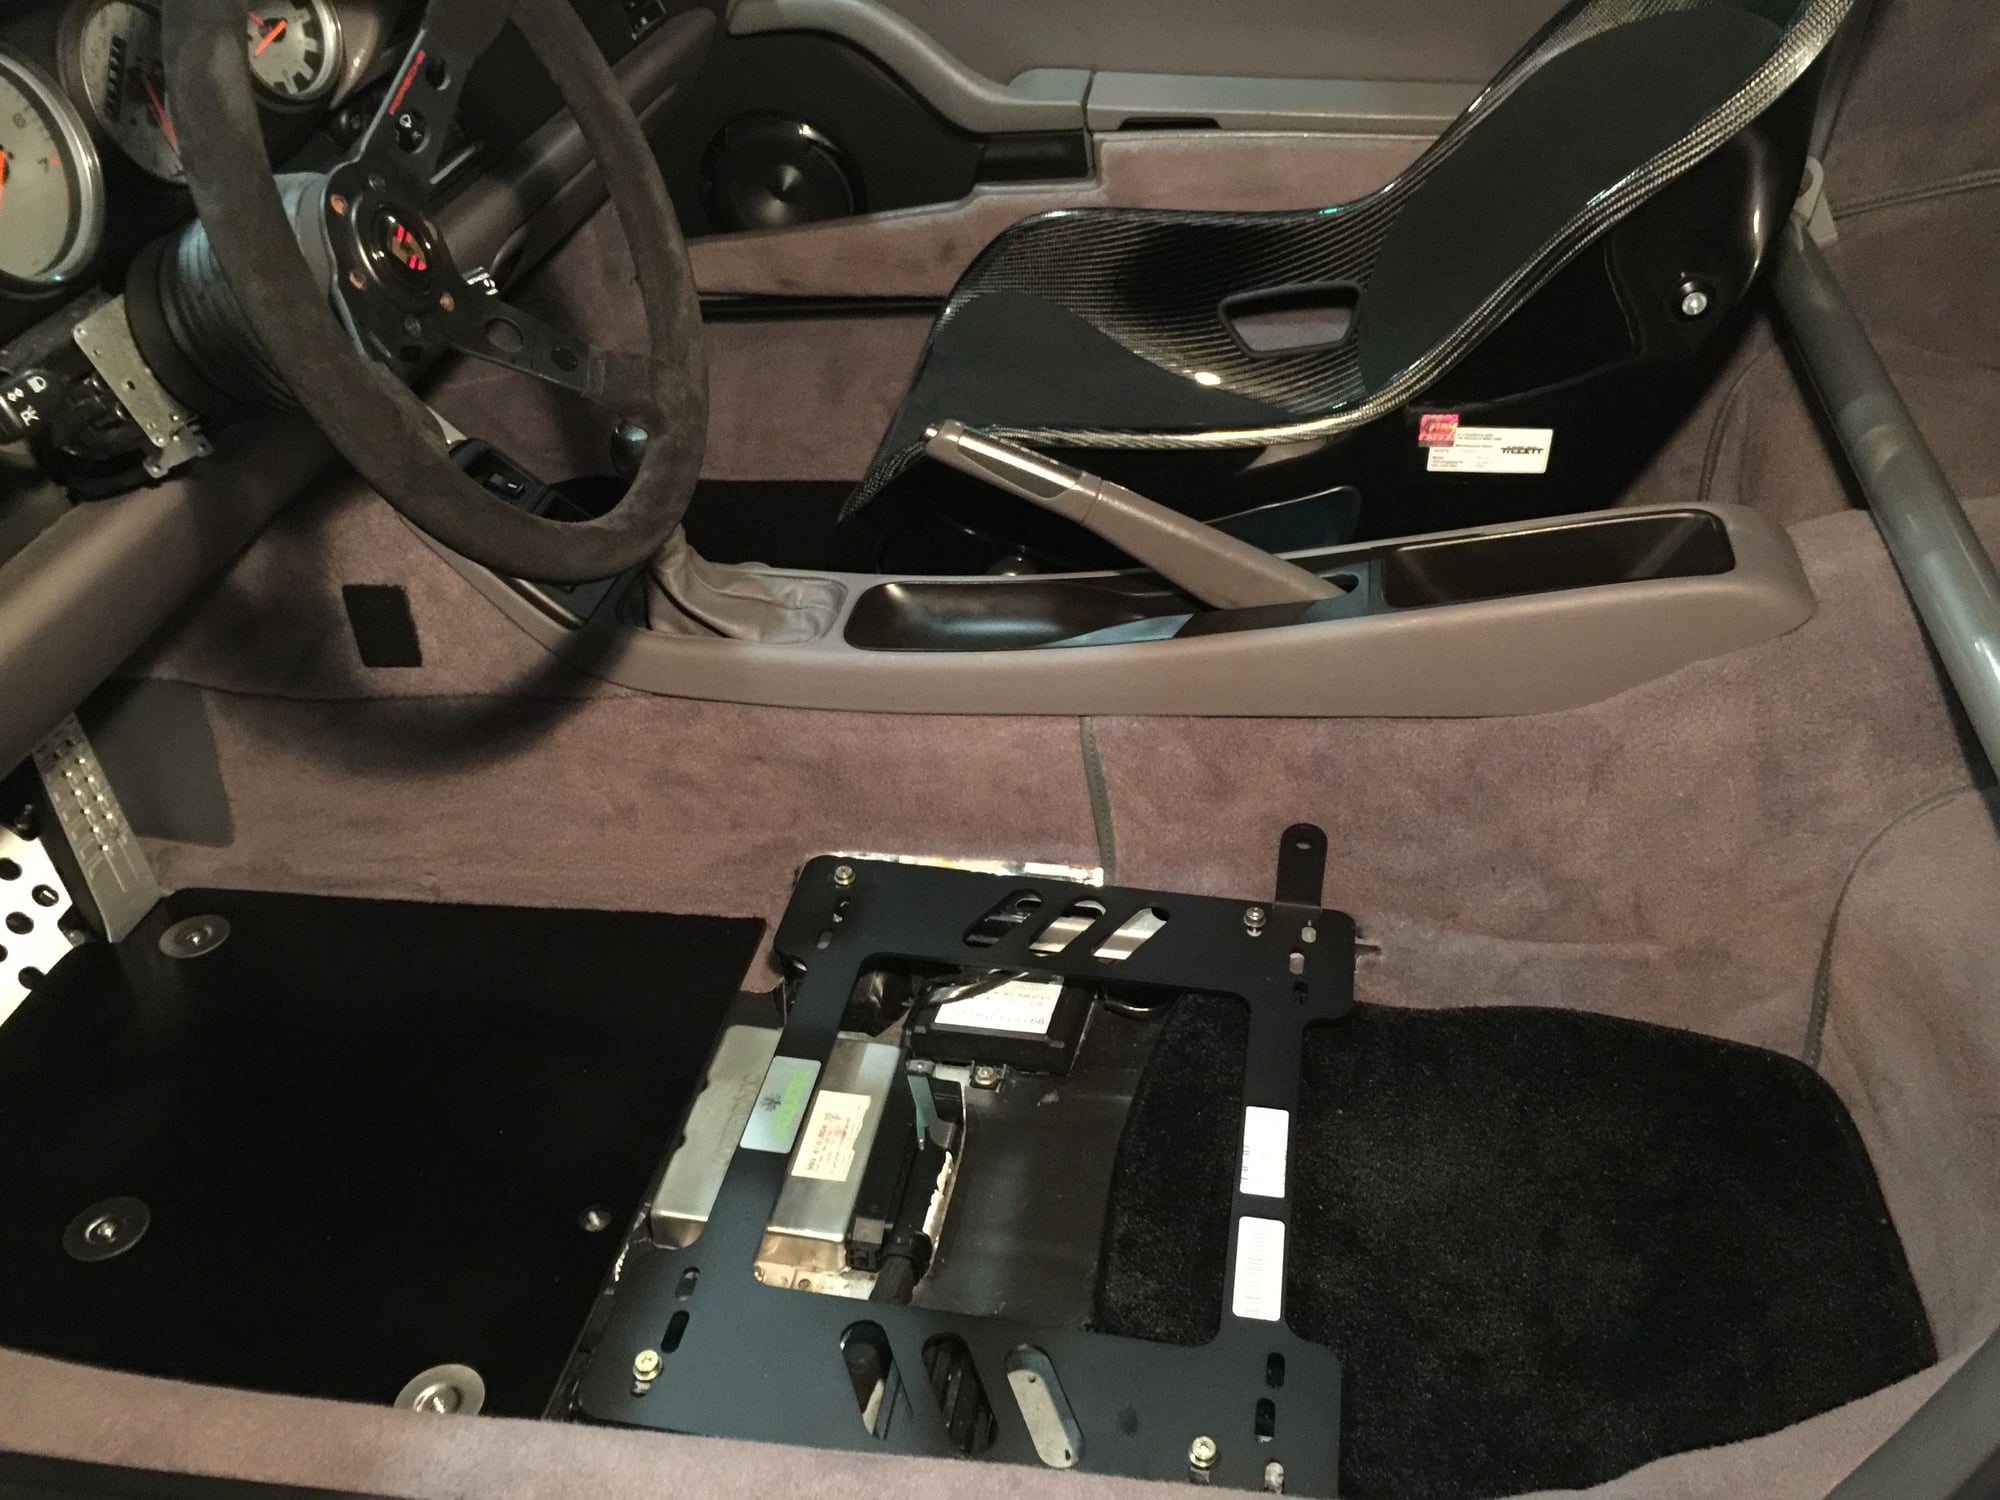
The plan is to leave the car bare naked - no carpet or insulation. I'll cut up a few plywood floorboards and rattle can them black, and that's it. I really like the look of the bare interior, and the weight savings is significant!
...The plan is to leave the car bare naked - no carpet or insulation. I'll cut up a few plywood floorboards and rattle can them black, and that's it. I really like the look of the bare interior, and the weight savings is significant!
Naked tub for the win! I see you've shaved the metal tunnel switch/**** holders in anticipation of moving the switches to the dash.
It was worth the read. Thanks for sharing and good work. Your level of attention is impressive.
The 964 was my first Porsche. It was a nice car and great to work on... I miss it somehow!
Thanks Irocman - I agree these cars are really great to work, and quite rewarding and worth the effort of preserving.
Originally Posted by 911Jetta
Naked tub for the win! I see you've shaved the metal tunnel switch/**** holders in anticipation of moving the switches to the dash.
Yes Sir! I'm looking forward to relocating the switches to Rennline's radio delete plate. I even picked up a nice red hazard light switch. I still haven't quite figured out how I'm going to run the brake wire back to to the handbrake in the console - and I hope I can still find that darn wire.
Thanks for that link to Boxsey's thread 911Jetta. That's a great DIY method I went down down this road when I did the RS carpet install on my 993 https://rennlist.com/forums/993-foru...l#post14773933
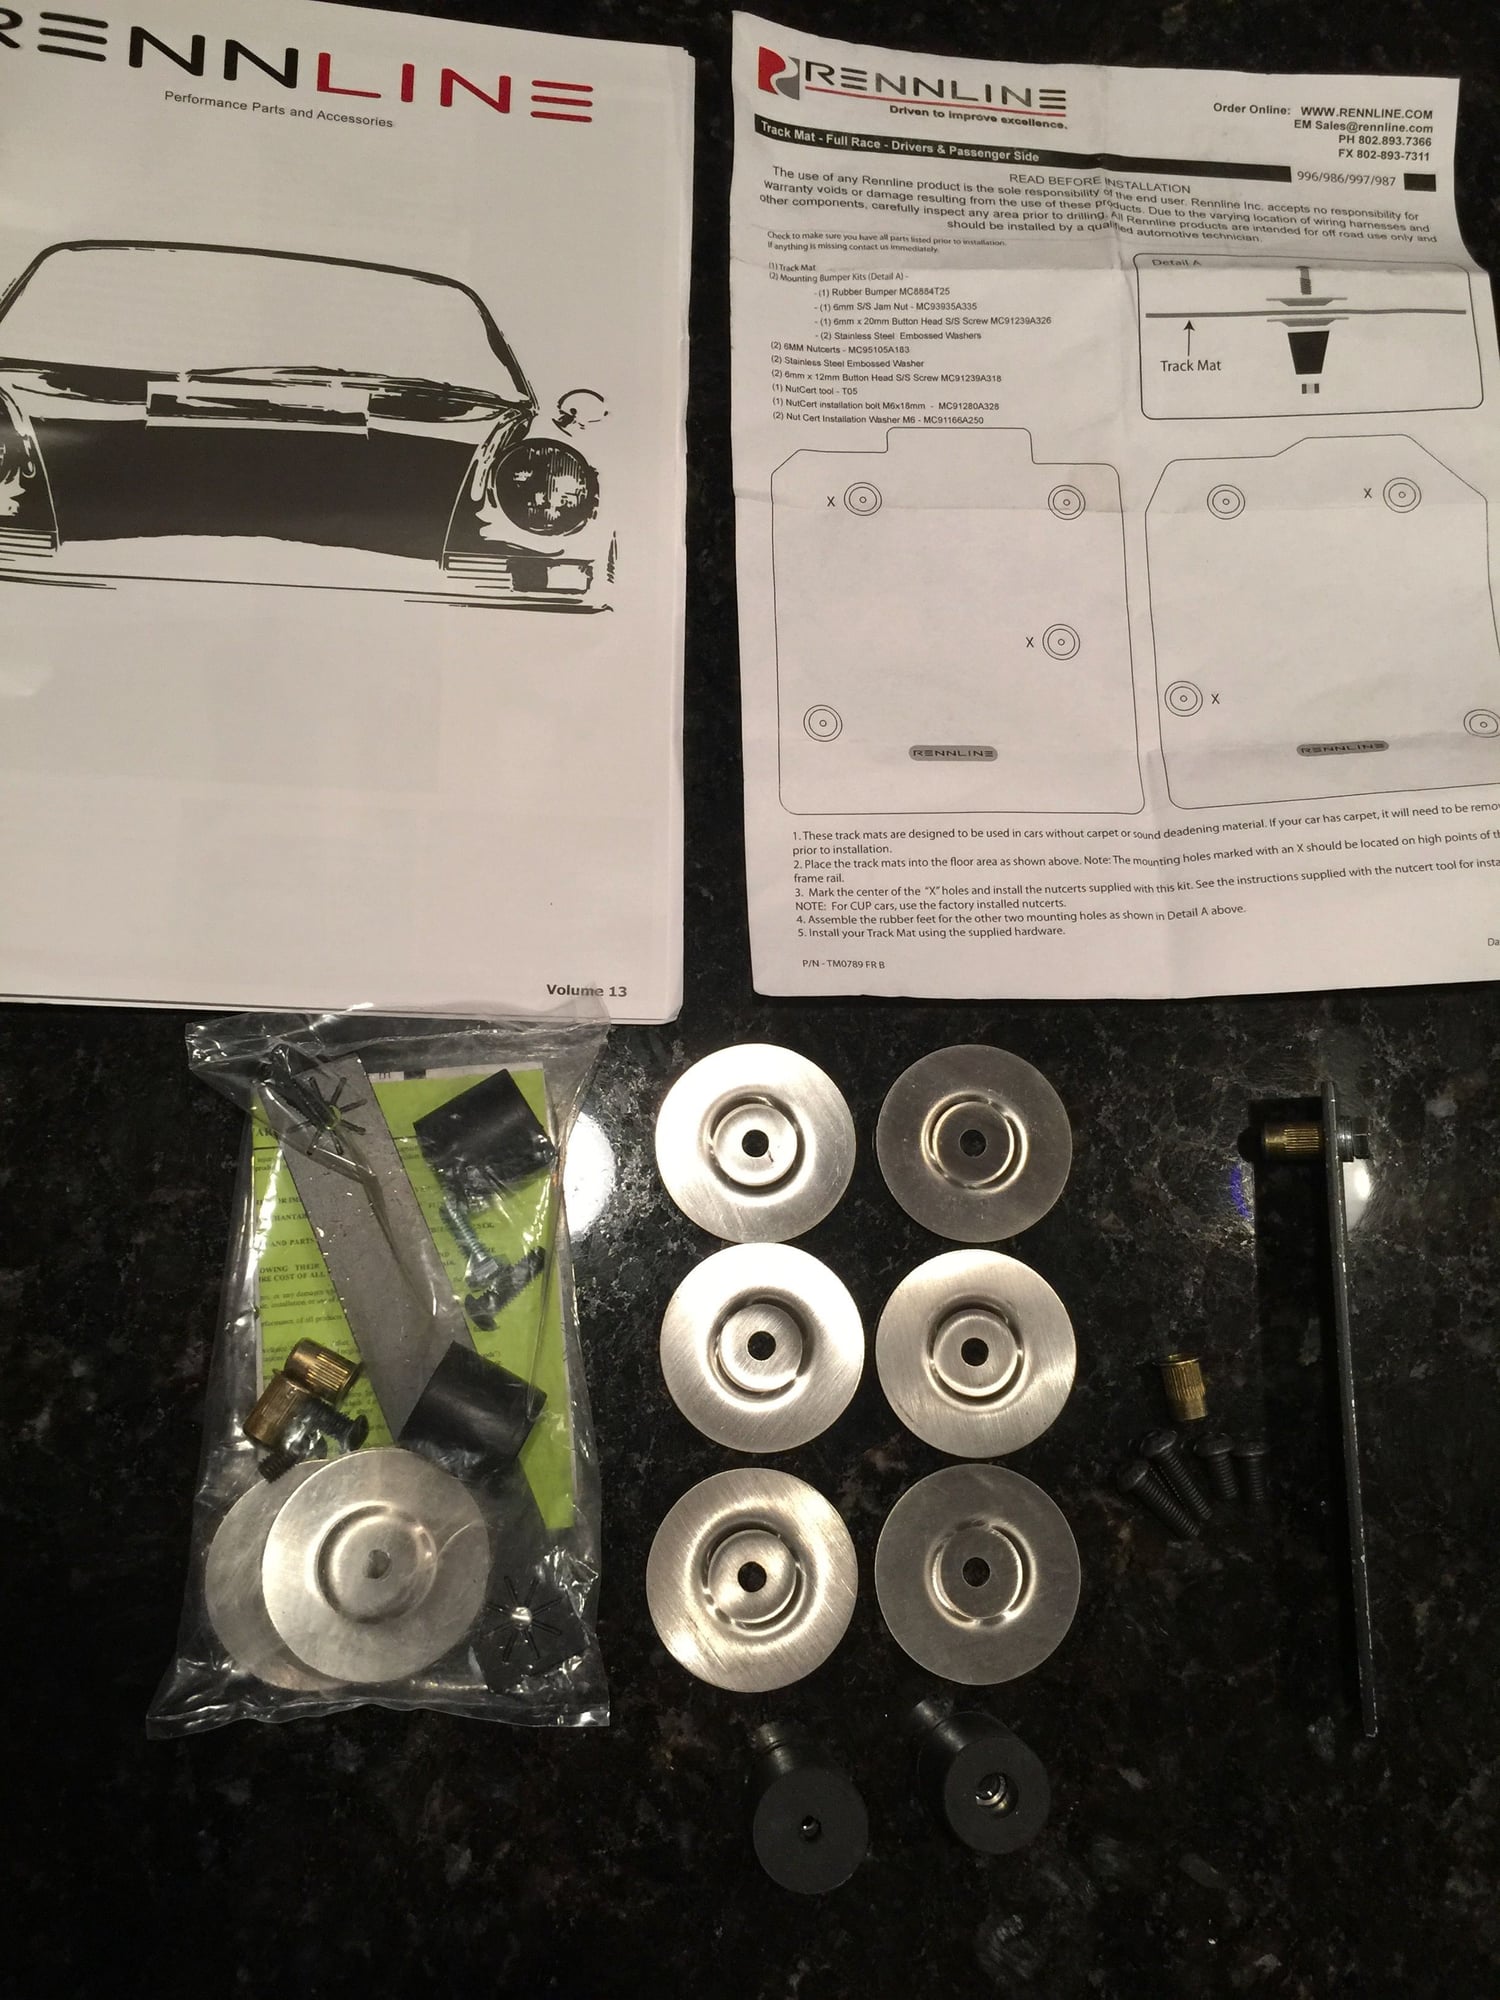
Shaping the floorboards was a snap using Rennline's track mats as a template. There's no one size fits all, as the floorboards will vary depending on how much carpet and insulation you have (or don't have). But the Rennline track mat was a good template to whittle down from. The tricky part was finding a set of authentic looking washers. After searching for weeks, I stumbled across a thread and discovered that Rennline carries the stainless countersunk washers I'd been looking for. The kit includes all the necessary hardware including rubber feet and rivnuts, and the washers look right IMHO. I already purchased a set of the Rennline washers for the 964, and the birch plywood is ready to go. Here are a few photos from the 993:
Thanks for that link to Boxsey's thread 911Jetta. That's a great DIY method I went down down this road when I did the RS carpet install on my 993 https://rennlist.com/forums/993-foru...l#post14773933
Shaping the floorboards was a snap using Rennline's track mats as a template. There's no one size fits all, as the floorboards will vary depending on how much carpet and insulation you have (or don't have). But the Rennline track mat was a good template to whittle down from. The tricky part was finding a set of authentic looking washers. After searching for weeks, I stumbled across a thread and discovered that Rennline carries the stainless countersunk washers I'd been looking for. The kit includes all the necessary hardware including rubber feet and rivnuts, and the washers look right IMHO. I already purchased a set of the Rennline washers for the 964, and the birch plywood is ready to go. Here are a few photos from the 993:
DIY Floorboards in the 993
Rennline hardware kit for proper hardware
Hi
Which seat console are you using? Is it a straight fit without issues? They include belt attach right?
Which seat console are you using? Is it a straight fit without issues? They include belt attach right?
Thx
Hi bricem13,
The seat you see in the last photo is a Tillet B6XL. Their newer model is called the B6 XL screamer, and it�s now 20% lighter. I installed these seats in my 993, which is largely dedicated for track and Autocross. The seats are plug and playing 993 or 964 with a Planted bracket. Very easy install. You can see the details in this thread. https://rennlist.com/forums/993-foru...stalled-3.html
In addition to weight savings, the Tillet seats are so minimal they allow my 6�4� frame to sit in the car with a helmet without hitting the roof. And the seats are set at the highest setting, so they could drop an inch or two lower. This is not a seat that I would recommend for daily driving. The seats are very comfortable, but getting in and out is a bit of a chore. So the search continues for new seats for the 964.
Here�s another shot of the Tillets. They�re phenomenal for the track, yet still very comfortable for two hour rides back and forth from the track.
More progress today. Scrubbed the etching primer with some scotch brite, and cleaned up again with a repeated combination of air gun and and SEM Solve. The SEM solve has a lot of Xylene, don�t mix with beer. Just laying down a few coats of high build primer, and after a final sand and clean we�ll be ready for the real paint. My daughter�s High School graduation ceremony is tomorrow, so it will be a few more days before the final paint job.
The 964 would be a great DD for New England, not nearly as insulated as new cars so you feel like your going faster even at somewhat reasonable speeds. Looking forward to seeing you wrap this up so you can enjoy it for the next few months.


 06-01-2018 | 01:31 AM


 In the future, I plan on respraying my car and the idea of leaving the interior bare came to mind. Is this a direction you plan to go? If not, are you just going to lay the carpet down without any sound barrier?