

Pauly's go quicker project. (Data Logs!)
 02-19-2013, 12:26 AM
#466
Three Wheelin'
 My head and (something else
  02-26-2013, 02:57 AM
#468
Professional Hoon
Rennlist Member
Rennlist Member
Thread Starter
Join Date: Jan 2010
Location: Melbourne, Australia
Posts: 7,090
Likes: 0
Received 4 Likes
on
4 Posts
And the Post Man came today.. He did give me more goodies but no head  I hope it's here by friday! Tracker says it's still in the USA and was sent out thursday morning (in US time)
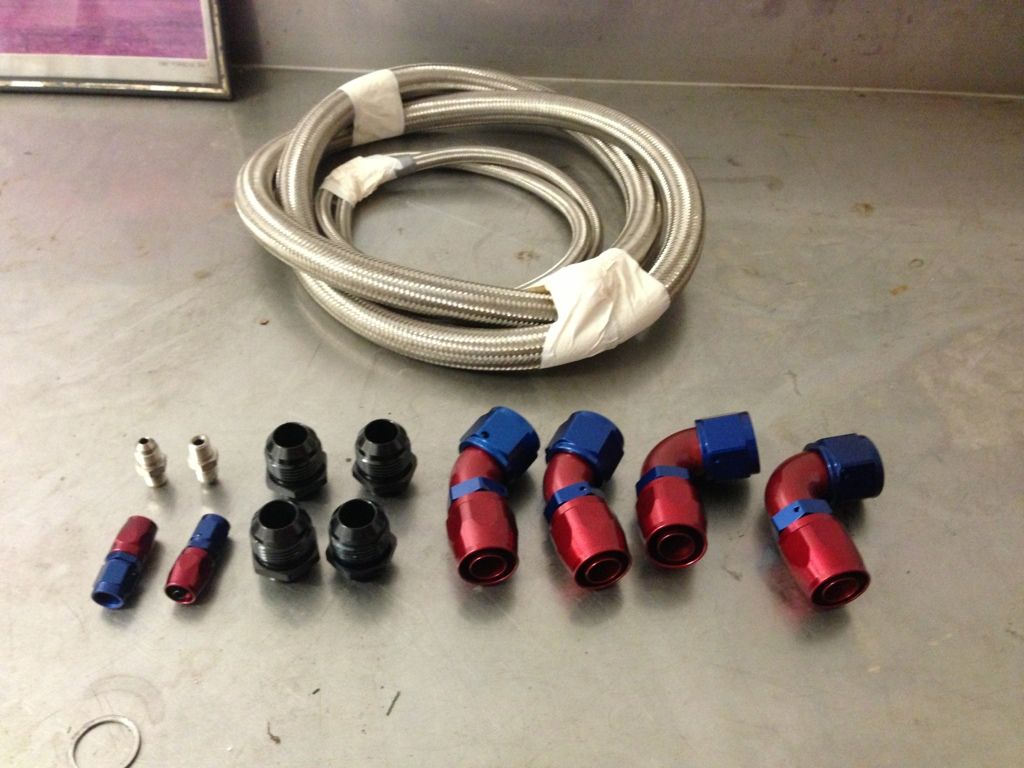
These are fittings for my new oil lines! They are "Speed Flow" Australian made I'm surprised actually, didn't know Australia had made these fittings. must be quality, dam well feels like it
I have: (oil line)
2x -12 45 Degree hose end
2x -12 90 Degree hose end
4X -12 male to M22x1.5 male
1.5M -12 SS braided hose
And the others are for my steam vent.. yes i wanted to go braided because it looks cool..
2x -4 to 1/8 BSPT
2x -4 Straight hose end
1m -4 hose
I hope it's here by friday! Tracker says it's still in the USA and was sent out thursday morning (in US time)These are fittings for my new oil lines! They are "Speed Flow" Australian made
I'm surprised actually, didn't know Australia had made these fittings. must be quality, dam well feels like itI have: (oil line)
2x -12 45 Degree hose end
2x -12 90 Degree hose end
4X -12 male to M22x1.5 male
1.5M -12 SS braided hose
And the others are for my steam vent.. yes i wanted to go braided because it looks cool..
2x -4 to 1/8 BSPT
2x -4 Straight hose end
1m -4 hose
03-04-2013, 08:39 AM
#471
Professional Hoon
Rennlist Member
Rennlist Member
Thread Starter
Join Date: Jan 2010
Location: Melbourne, Australia
Posts: 7,090
Likes: 0
Received 4 Likes
on
4 Posts
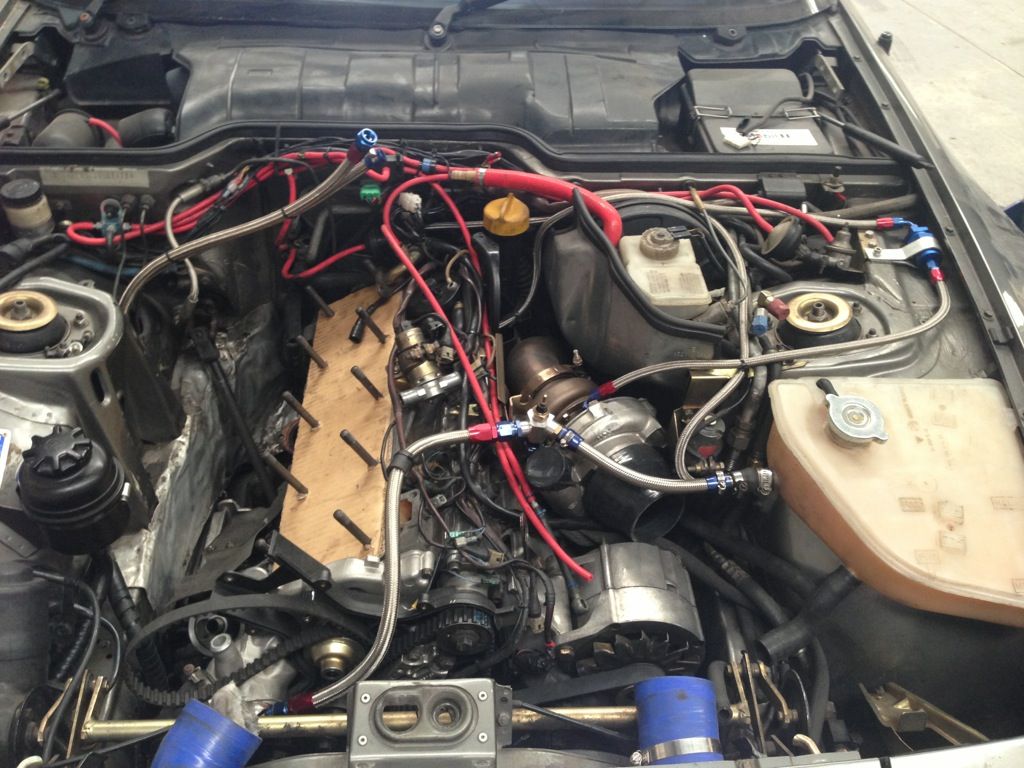
I did the oil lines last thursday i just had forgotten to post them up. It wasn't the easiest job (don't recommend people to do it with out the right tools) To make them you need a vice with soft jaws (aluminium jaws) so it doesn't damage the fittings and a long/deep socket to get the adapters on, or you risk damaging them.
Fixed my aircon pipe leak
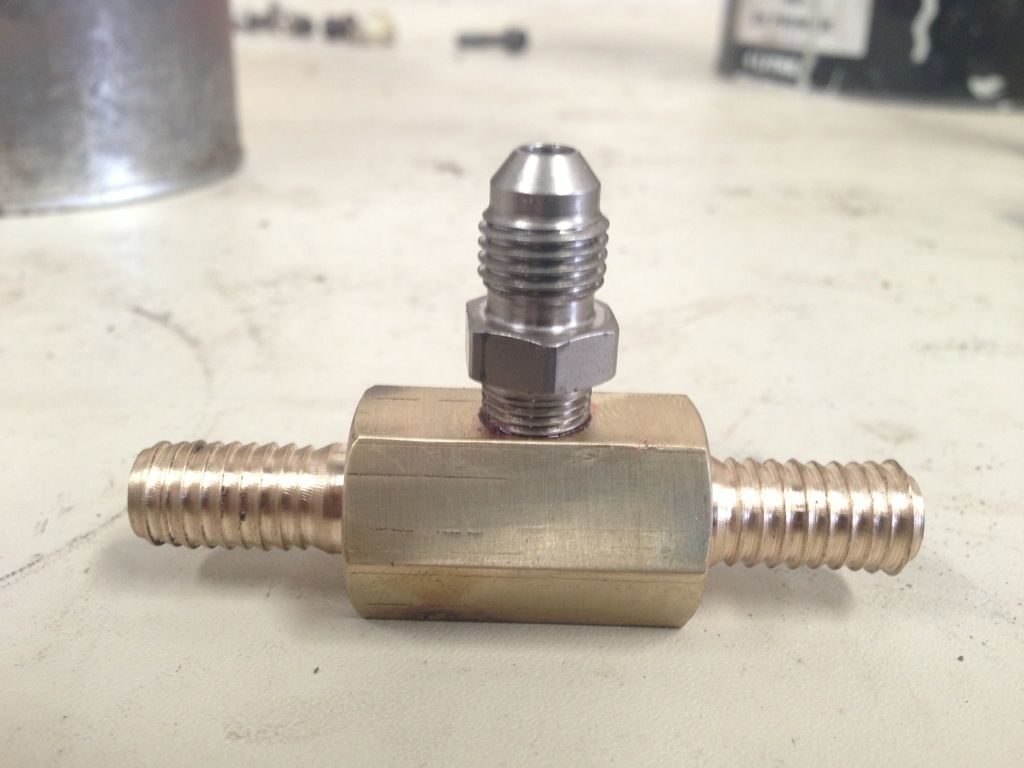
I made a fitting for the steam vent
I have pretty must everything installed except what goes on after the head.
Pictures:
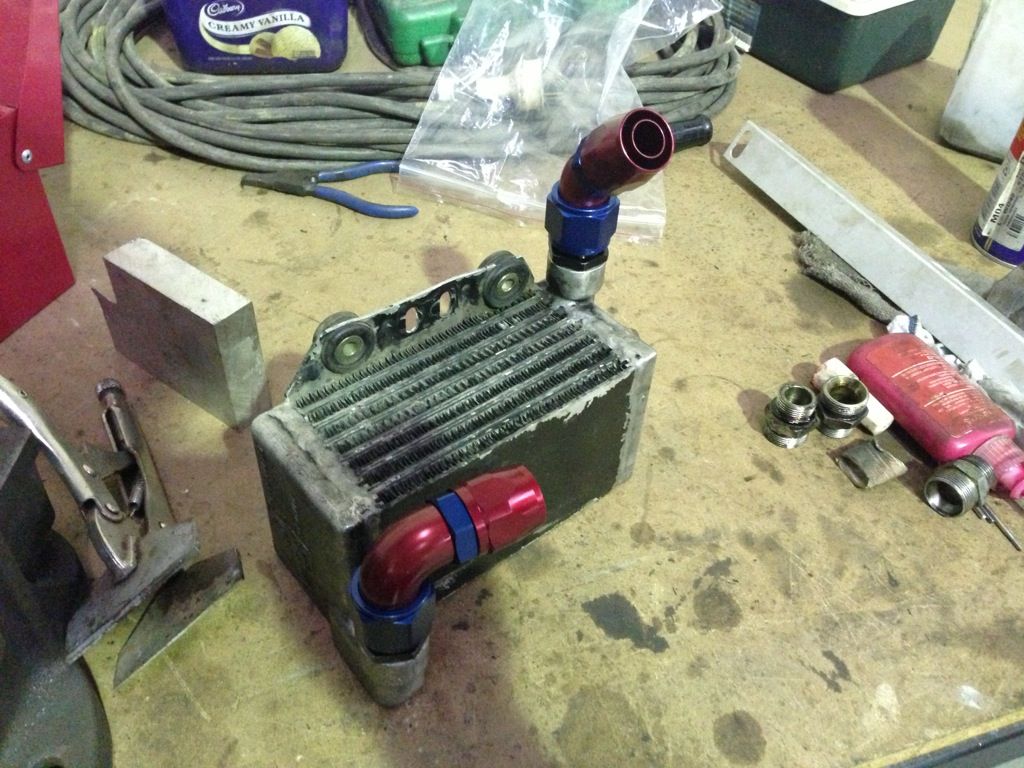
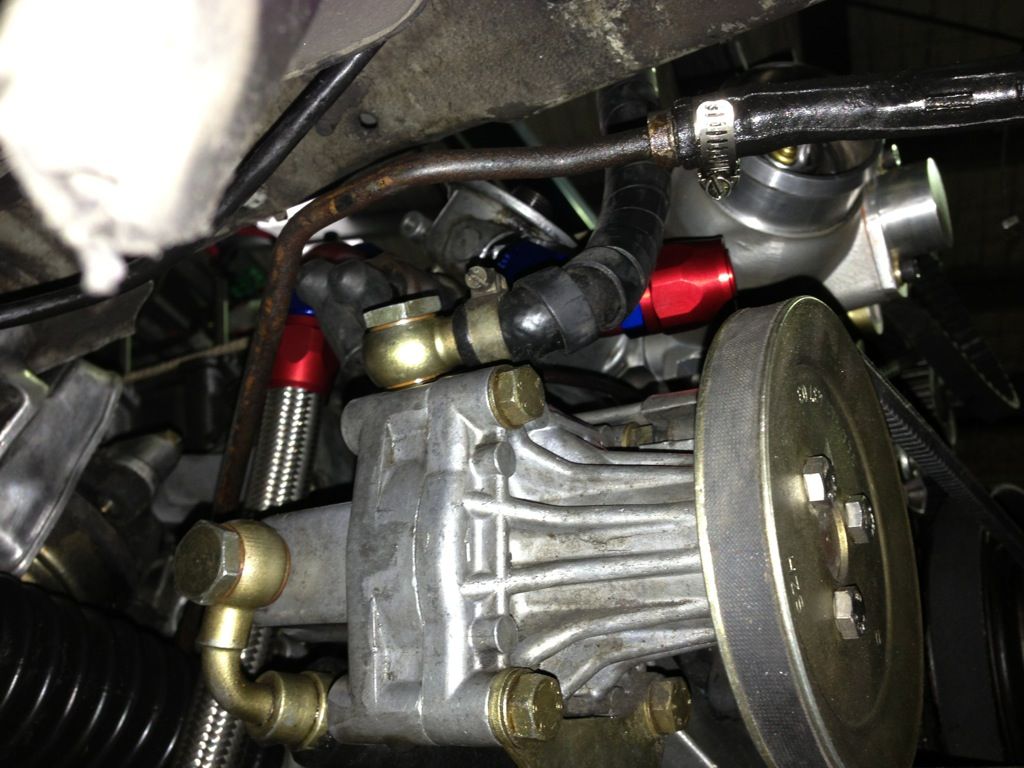
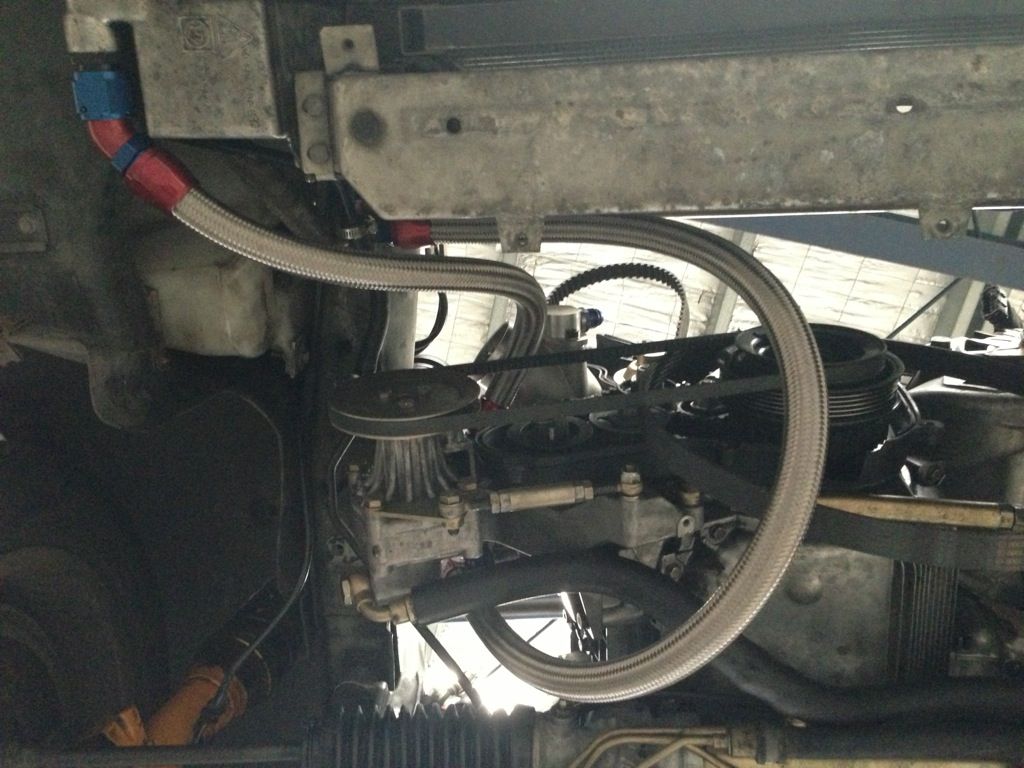
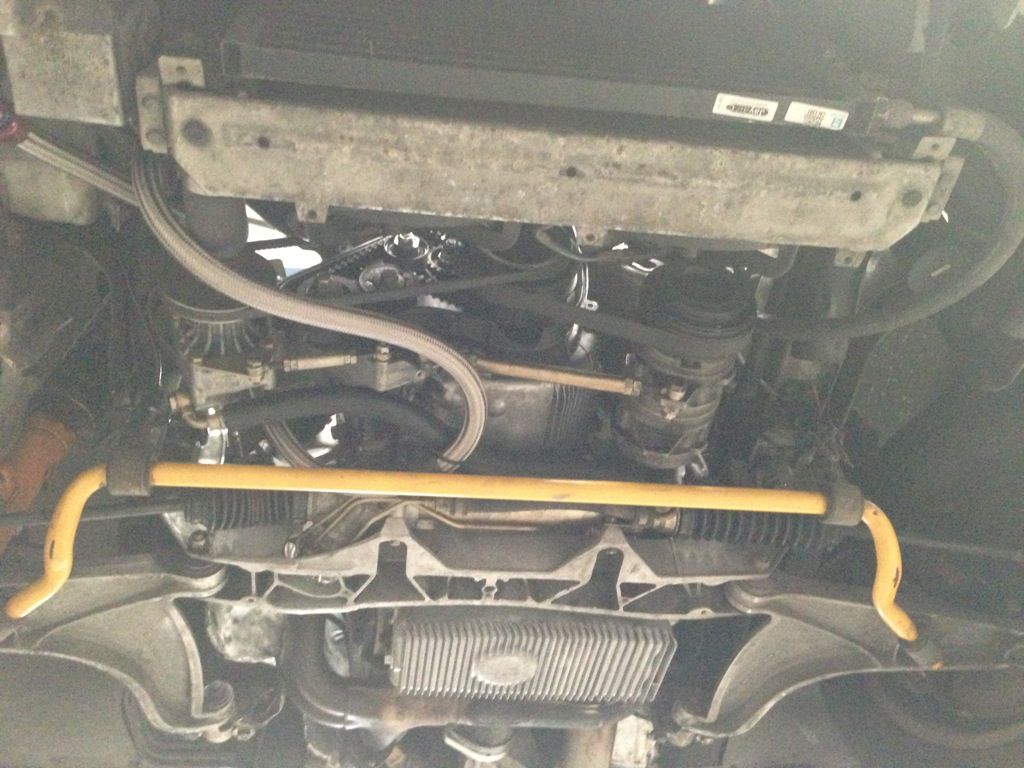
Not the most prettiest piece i've made but it took 5 min and it'll work like a charm.
Fixed my aircon pipe leak
I made a fitting for the steam vent
I have pretty must everything installed except what goes on after the head.
Pictures:
Not the most prettiest piece i've made but it took 5 min and it'll work like a charm.
03-04-2013, 08:59 AM
#473
Professional Hoon
Rennlist Member
Rennlist Member
Thread Starter
Join Date: Jan 2010
Location: Melbourne, Australia
Posts: 7,090
Likes: 0
Received 4 Likes
on
4 Posts
The day it arrives it goes on. It should have been here friday but for some reason it's not. I called up today (monday) and they said it hasn't been through customs yet so i'll call them tomorrow and see where it is. He told me today it should be here by the end of the week.
03-04-2013, 02:54 PM
#474
Rennlist Member
Good to hear everything is imminent. Not long now Paulyy!
03-04-2013, 07:38 PM
#475
Professional Hoon
Rennlist Member
Rennlist Member
Thread Starter
Join Date: Jan 2010
Location: Melbourne, Australia
Posts: 7,090
Likes: 0
Received 4 Likes
on
4 Posts
If i understood the lady on the phone correctly, today is the day.
I'll probably go pick up another 5L of break-in oil because i'm not sure if 5L each run will be enough.
And i also need PS fluid. I thought I had some but i don't think it's enough.
I'll probably go pick up another 5L of break-in oil because i'm not sure if 5L each run will be enough.
And i also need PS fluid. I thought I had some but i don't think it's enough.
03-05-2013, 06:15 AM
#476
Professional Hoon
Rennlist Member
Rennlist Member
Thread Starter
Join Date: Jan 2010
Location: Melbourne, Australia
Posts: 7,090
Likes: 0
Received 4 Likes
on
4 Posts
Something arrived in the mail today 
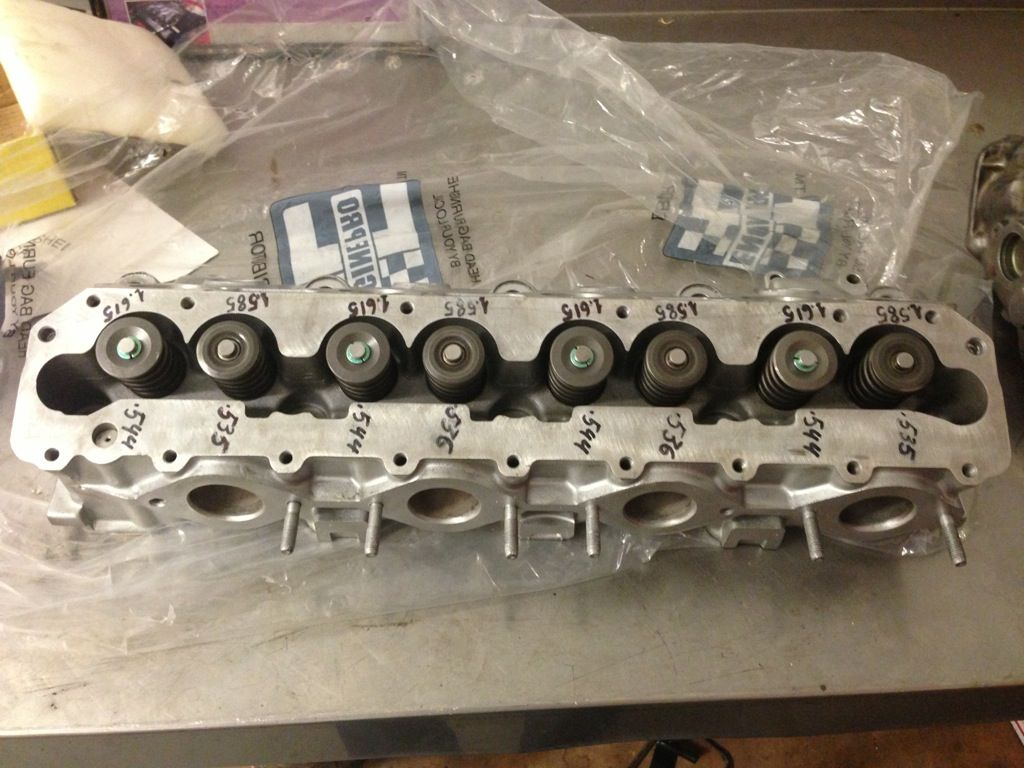
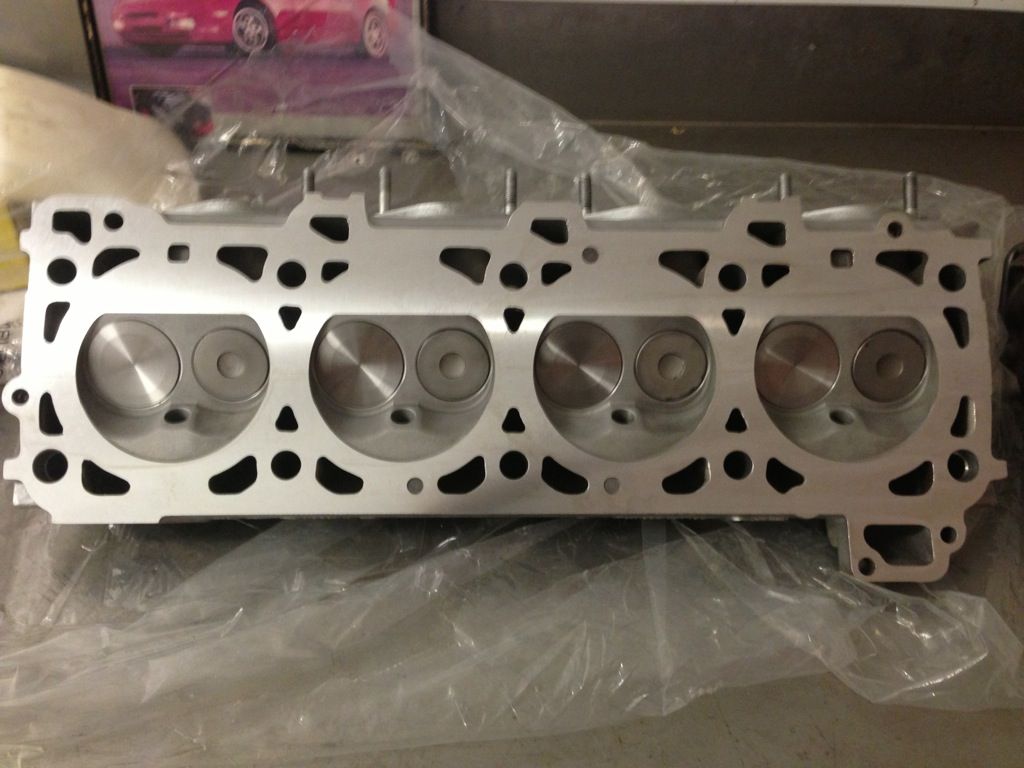
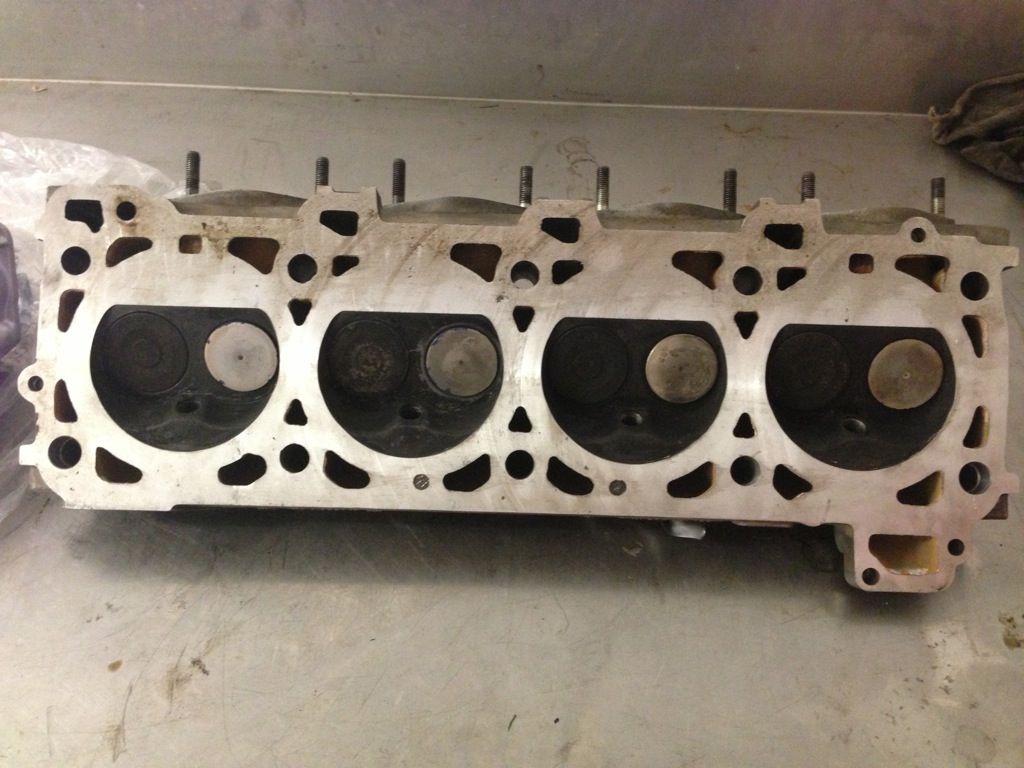
Yes my head arrived... along with something else I and a few others have kept quiet.
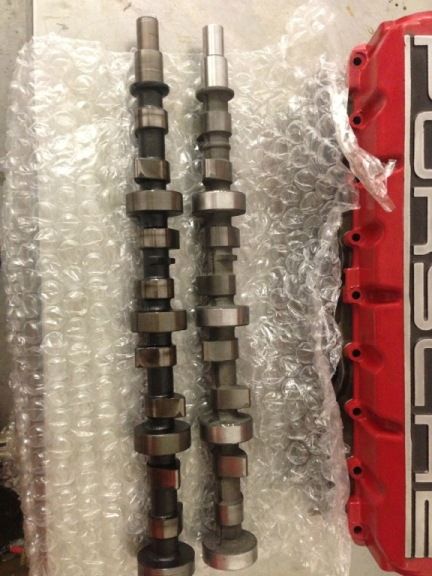
This is no ordinary head, It's a CEP custom head built with a specific cam shaft which is a JME custom (not off the shelf) grind and custom lifters for the intake to accommodate the extra lift.
The head has the works, Ti retainers, springs, larger valves ported ect.. with the cam it's capable of delivering power to 7400 rpm and can achieve over 500 rwhp but i won't push it that hard, not with a stock bottom end. Maybe one day i'll get a new bottom end, but for now It'll do. It's a street car and it'll see track now and then. I should see the same amount of power at ~3 psi less right to red line.
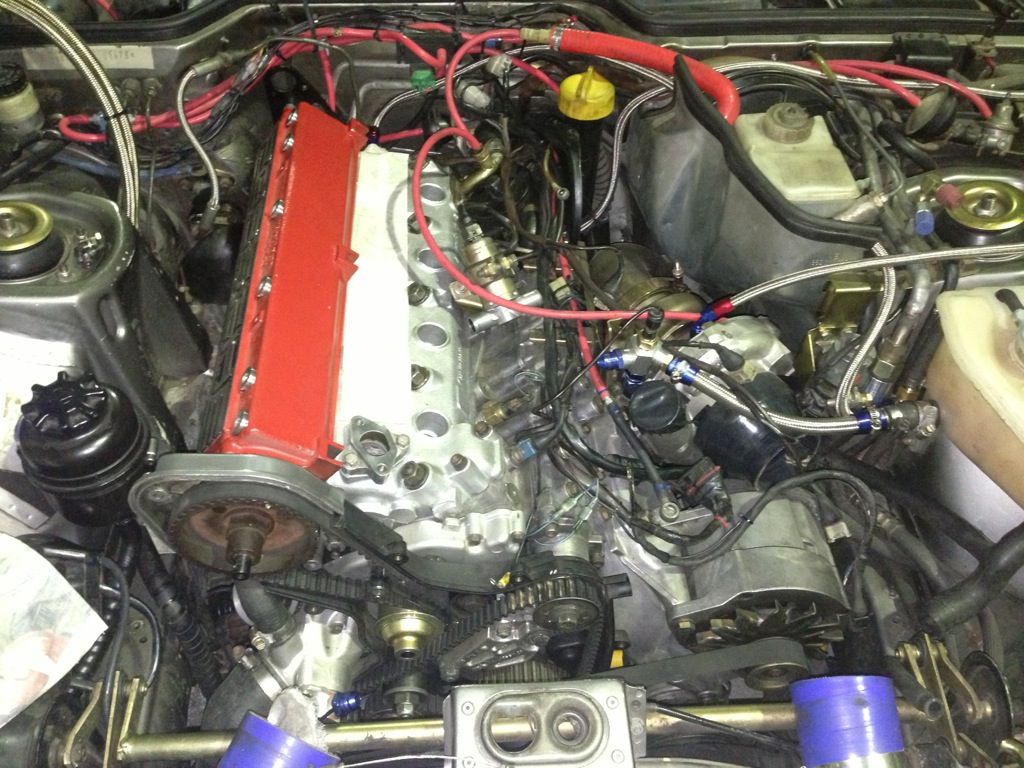
Progress: The head and cam are installed, tomorrow i'll need to time the belts and i'll start it tomorrow.
I have 30w run-in oil for run in.
I'll be taking this procedure:
- 20min @ 2000-2200 rpm to break in the cam. Change filter and oil
- 2 tanks of fuel (roughly 500-800miles) @ 4000 rpm limit, it'll see some boost but probably nothing more then 7-10 psi at small bursts. All that to break in the rings and over time the bearings. Change filter & oil.
- Back to normal driving with 20-60 semi synthetic oil (is what i normally use) and raise the boost to 16-18 psi
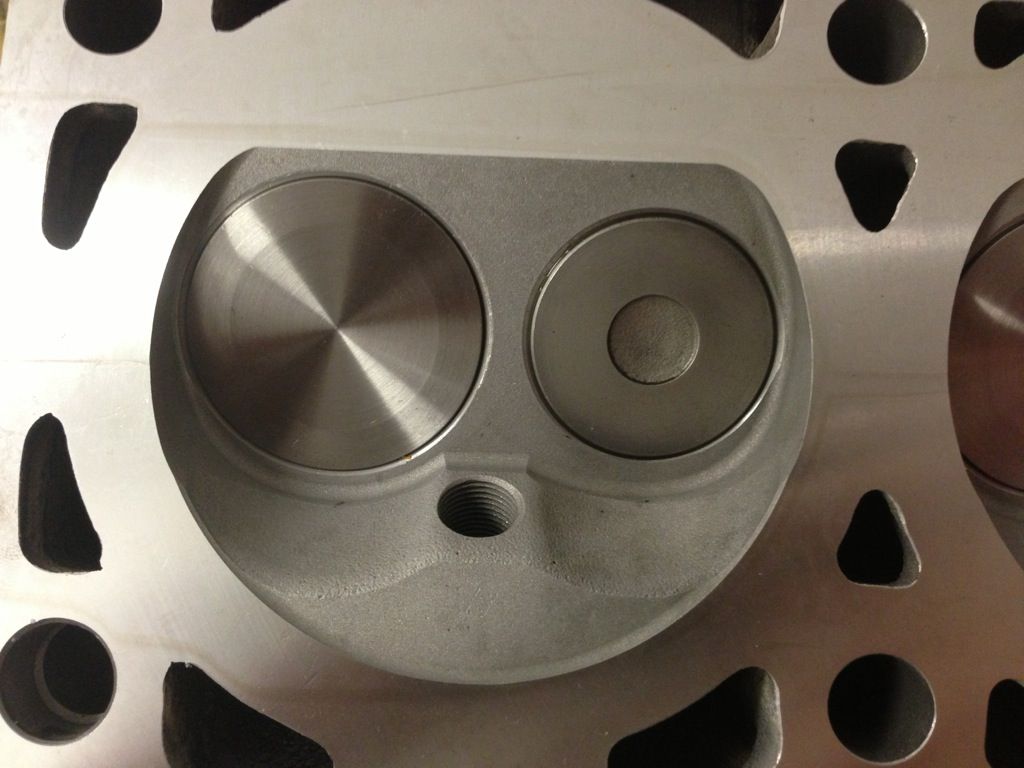
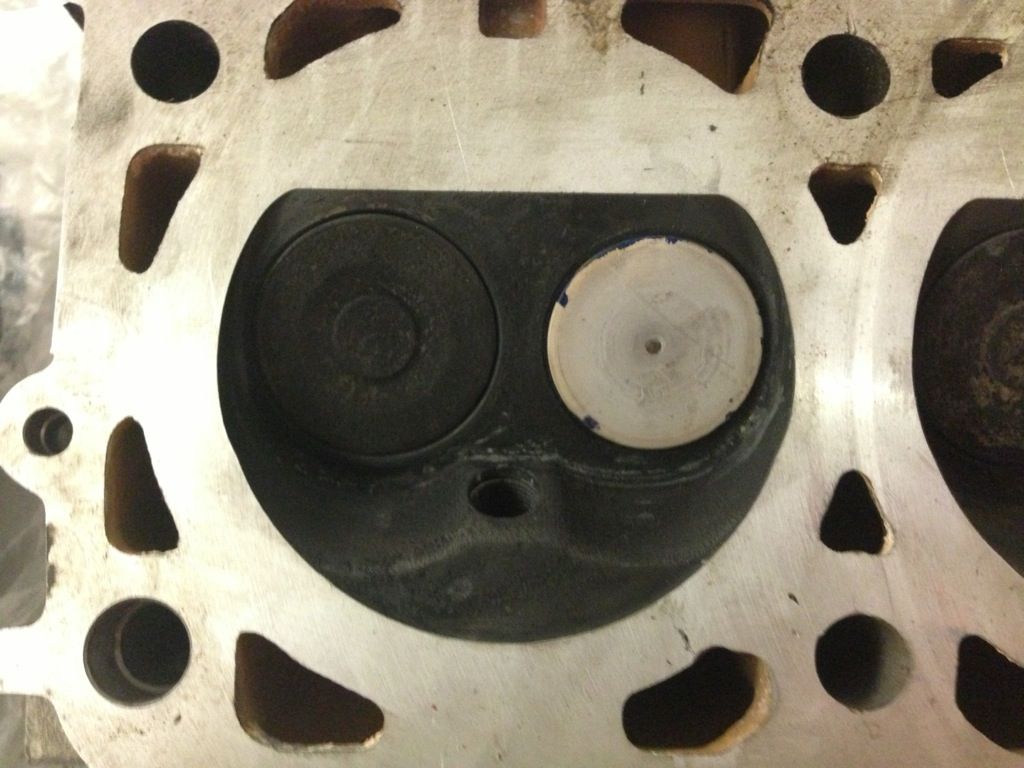
Pictures :
You can see the differences with the old and new!
Yes my head arrived... along with something else I and a few others have kept quiet.
This is no ordinary head, It's a CEP custom head built with a specific cam shaft which is a JME custom (not off the shelf) grind and custom lifters for the intake to accommodate the extra lift.
The head has the works, Ti retainers, springs, larger valves ported ect.. with the cam it's capable of delivering power to 7400 rpm and can achieve over 500 rwhp but i won't push it that hard, not with a stock bottom end. Maybe one day i'll get a new bottom end, but for now It'll do. It's a street car and it'll see track now and then. I should see the same amount of power at ~3 psi less right to red line.
Progress: The head and cam are installed, tomorrow i'll need to time the belts and i'll start it tomorrow.
I have 30w run-in oil for run in.
I'll be taking this procedure:
- 20min @ 2000-2200 rpm to break in the cam. Change filter and oil
- 2 tanks of fuel (roughly 500-800miles) @ 4000 rpm limit, it'll see some boost but probably nothing more then 7-10 psi at small bursts. All that to break in the rings and over time the bearings. Change filter & oil.
- Back to normal driving with 20-60 semi synthetic oil (is what i normally use) and raise the boost to 16-18 psi
Pictures :
You can see the differences with the old and new!
03-05-2013, 06:44 AM
#477
Rennlist Member
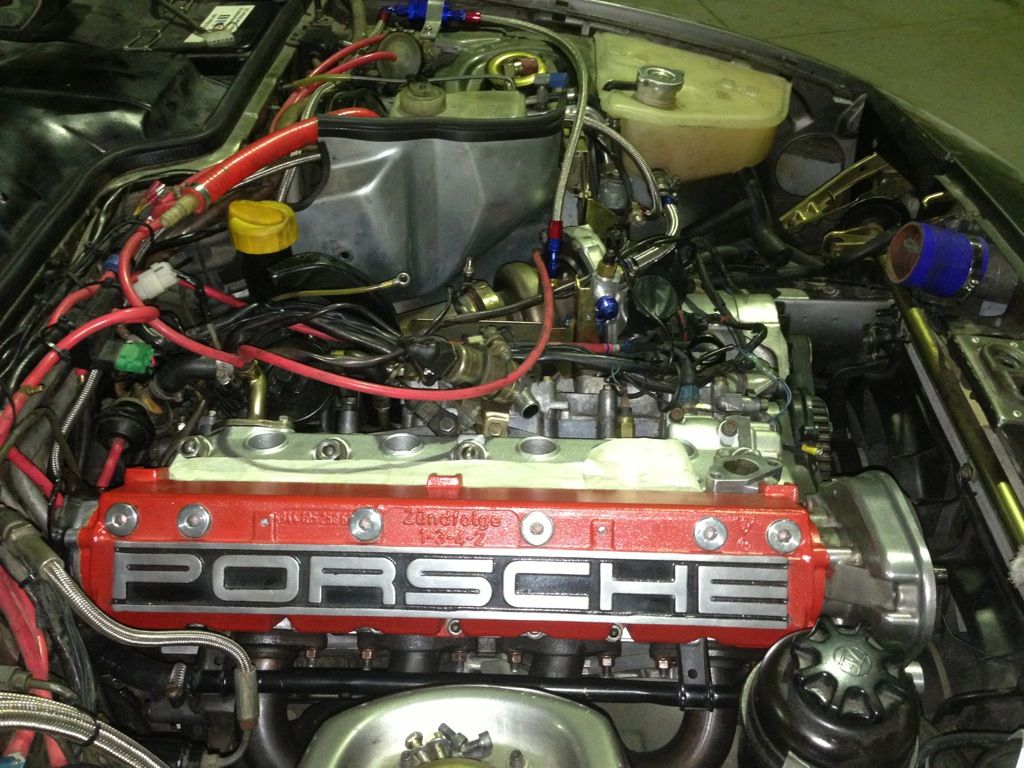
Nice!!! Them's some decently large intake valves you got going on there. Next will be some headers, intake...err I'll leave the rest out, but a great start to the rest of your build Paulyy. I was pretty close to buying that head at one stage to put on the old motor. Glad it still made it's way down here.
03-05-2013, 07:20 AM
#478
Professional Hoon
Rennlist Member
Rennlist Member
Thread Starter
Join Date: Jan 2010
Location: Melbourne, Australia
Posts: 7,090
Likes: 0
Received 4 Likes
on
4 Posts
Nice!!! Them's some decently large intake valves you got going on there. Next will be some headers, intake...err I'll leave the rest out, but a great start to the rest of your build Paulyy. I was pretty close to buying that head at one stage to put on the old motor. Glad it still made it's way down here.

Haha, Uhhh i'm not sure about headers, I mean i've looked into custom ones, but the space there is, is very limited. If i had one of those lego build your own headers kit (i forgot what it's called) i would probably have made some by now. But an intake, is something that has crossed my mine a few times. now with a spare head, i can mock one up any time with out pulling apart the engine. I have been thinking custom ITBs just build them up slowly but i'll let that sit for now haha.
If i really think about it, all i have left is the bottom end, intake & headers.
I probably could improve on the intercooler and make my own with a nicer core and make an oil cooler also.. I'm gona stop here