
Show your 951 pics here......


 03-17-2008, 11:07 AM
#1397
Rennlist Member


 04-26-2008, 10:08 PM
#1402
Instructor
Join Date: Nov 2006
Location: San Diego, CA
Posts: 173
Likes: 0
Received 0 Likes
on
0 Posts
Just took this the otherday, i'm on a different computer right now though, but i've got a few other amazing shots... this one is just b/w without anyother editing...
 04-27-2008, 12:57 AM
#1405
Rennlist Member
I'm only doing this because my wife maintains that nobody actually cares what we do to our cars. So, without further delay, I give you my "Project 951".
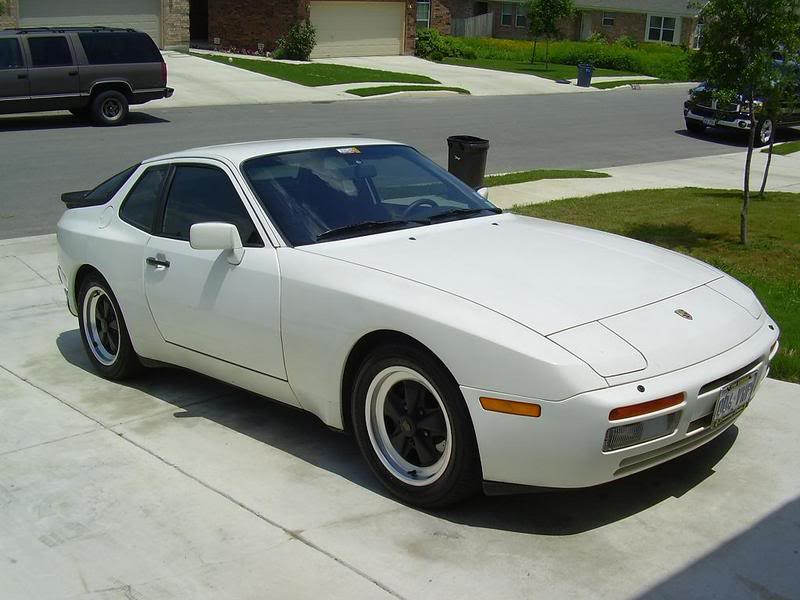
This is my 'precious' and my wife was convinced she would be a porsche widow before she was even a bride. Not true. But it is a beautiful car!
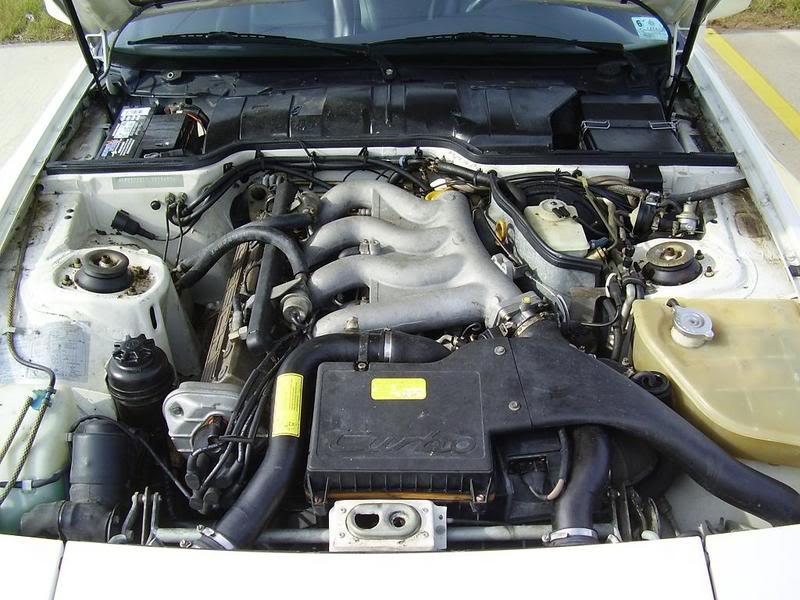
A quick look under the hood, nothing too impressive and everything is bone stock.
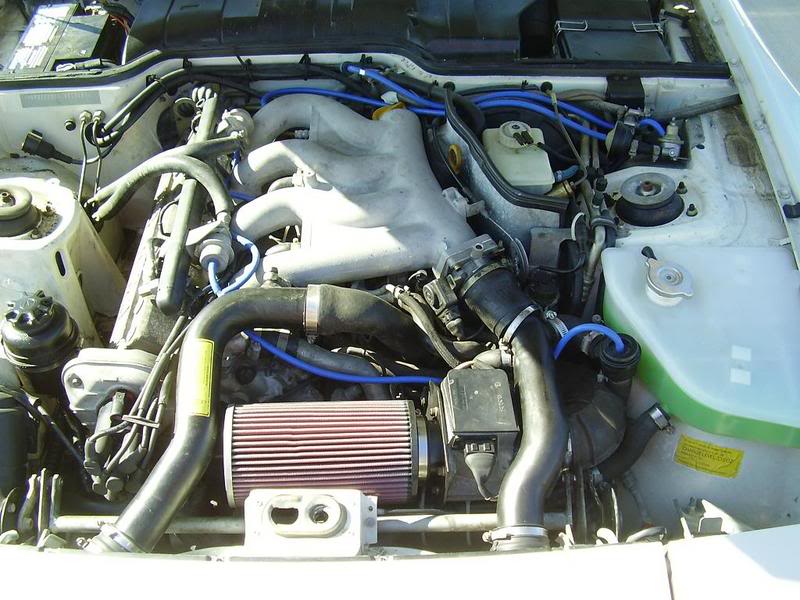
A quick look under the hood after doing a few 'upgrades'. I deleted the stock airbox and replaced it with a MAF unit from 9xauto.com. I replaced all of the vacuum lines with a replacement silicon kit from lindsey racing.com. Also, I noticed that my battery box was accumulating a ton of crud, so I sanded it down and laid 2 coats of 3M spray-on bedliner. I *highly* recommend this for anyone that's worried about rust.
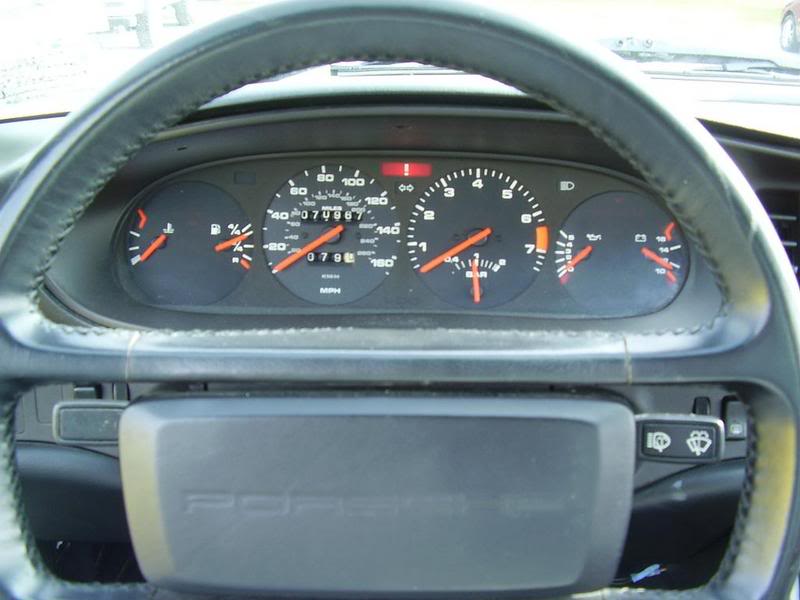
Wow. Look at those gauges. A *huge* improvement over my previous Porsche, but still, they look a little lacking. After searching high and low over the internet, I thought I would have to spend $120 for some steel rings to go around the gauges to spice them up a bit. But then a fine German vendor on ebay decided to offer the same thing for right around $25. Score. Oh, and my gauge lights had all but died. Basically, the mirrored material that reflected the light onto the gauge faces had burned away over time. So, a quick order to Jager Engineering in BC, Canada netted me LED replacement lights that are brighter *and* use lower wattage. 5 Hours of troubleshooting later, I had all the lights working and the dash was back together.
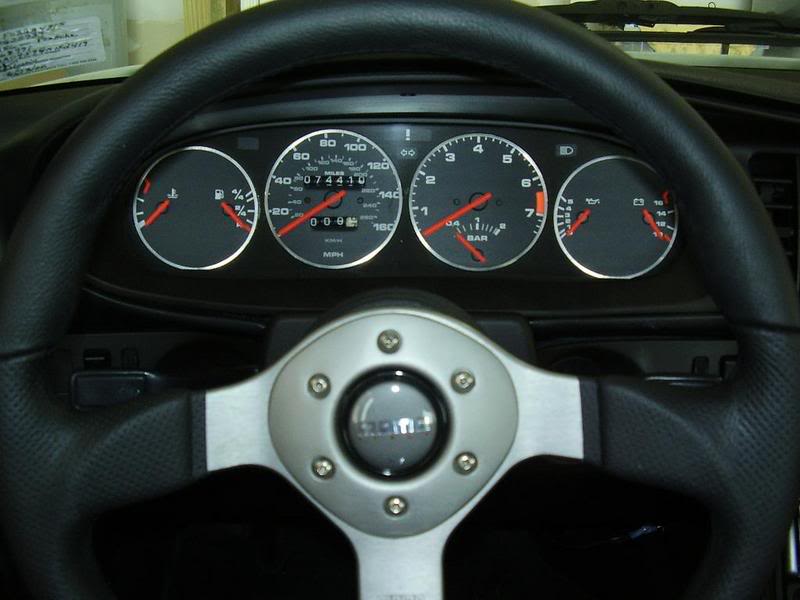
The finished product. Talk about a world of change. The gauge rings look amazing. The LED lights in the gauges are better than any other kit I've seen. That's a Momo Fighter wheel. I picked up a great condition momo hub right here on the forum and searched for the right steering wheel for me. Looks trick while still being very comfortable.
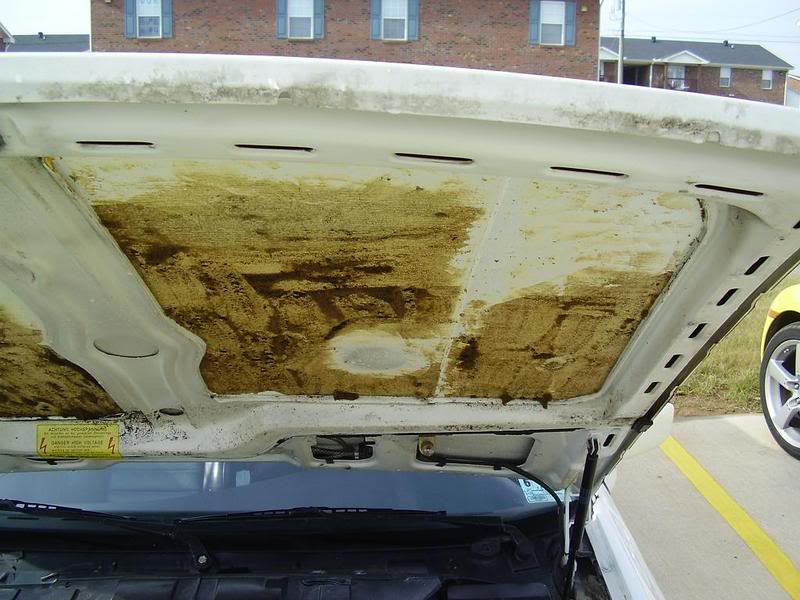
What a disgusting sight!!! This is what's left of my under-hood insulation panels after the foam on them disintegrated. It was gross. The yellow stuff is 3M general adhesive that's been baked on for 20 years. And it was a *bitch* to get rid of.
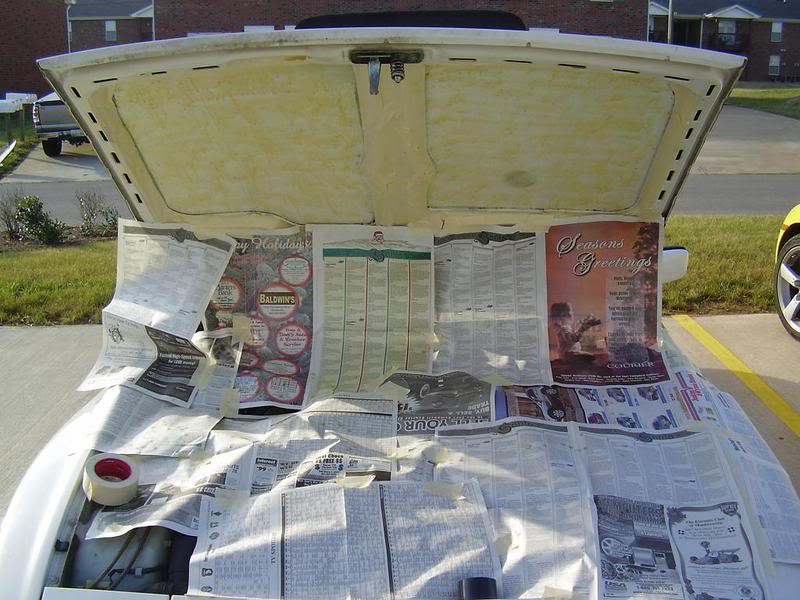
After I got all the rest of the old adhesive off, I immediately sprayed some new stuff on. Trust me, the irony of removing glue to put more on wasn't lost on me. It took a little over a week to get to this point. The weather finally cooperated. That stuff is sticky enough to put your brother on the ceiling and have him stay there. Even when you've got brothers my size.
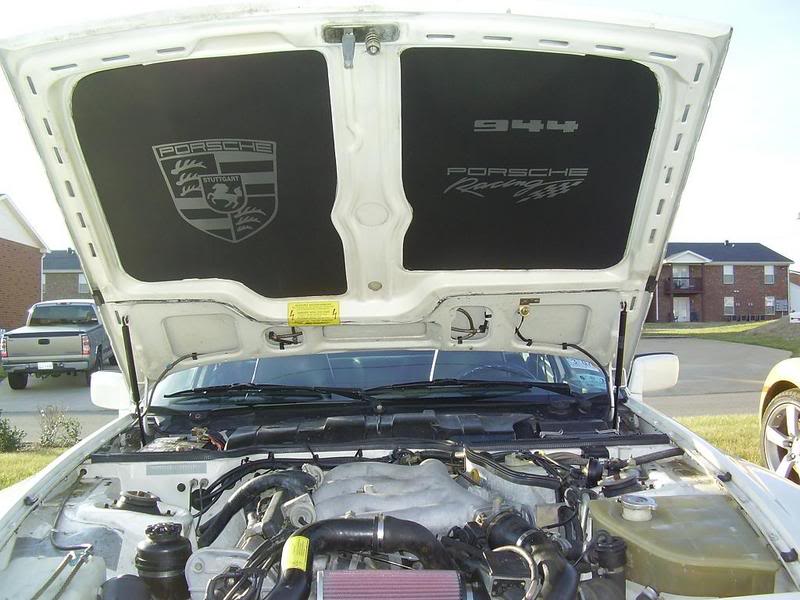
The finished product. New FAA approved foam pads from Jager Engineering that come complete with Porsche decals. *Very* stunning in person and a much needed facelift under the hood.
 \
\
Wow. What a change new, Zimmerman cross-drilled rotors and brake pads will make in slowing down... But it wasn't all just sexiness. I spent literally an entire weekend replacing those bastards. Apparently bolts that haven't been removed in 20 years don't like to be taken out. Who knew?
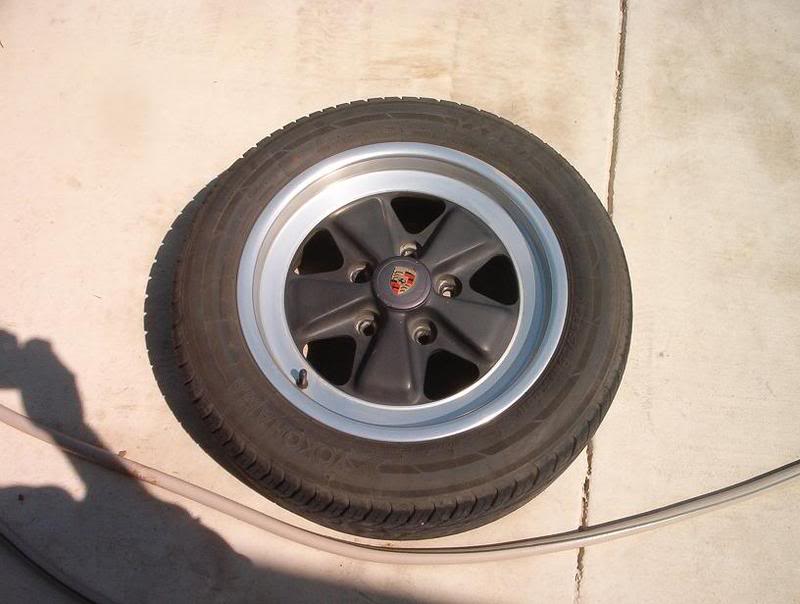
*Please Note* The inside of the wheel is 'black' but it's not BLACK. And it always looked dirty. Can't have that!
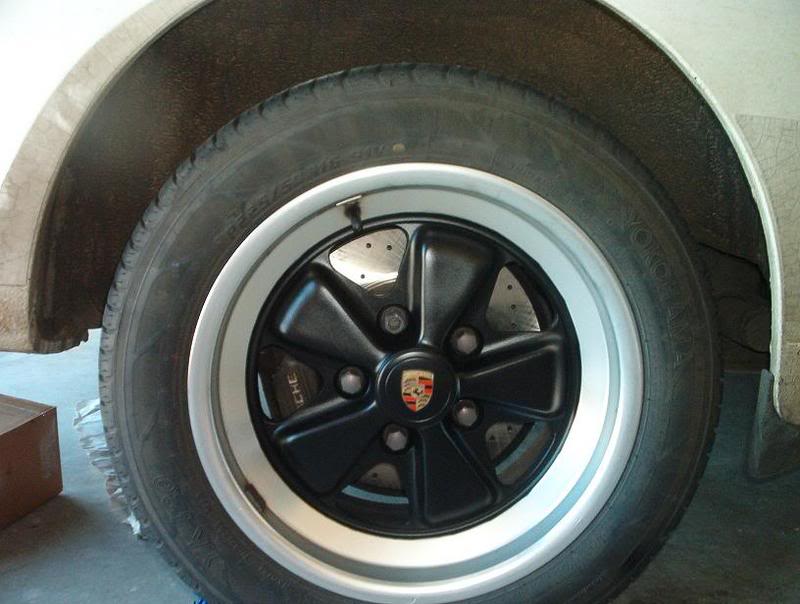
And the finished product. What a change it made!! Super black wheels with fresh rotors and pads. I could cry... but I won't.
A much improved look *and* feel. Sadly, there were casualties in this conversion. A 1/8" drill bit didn't make it back to the bin...
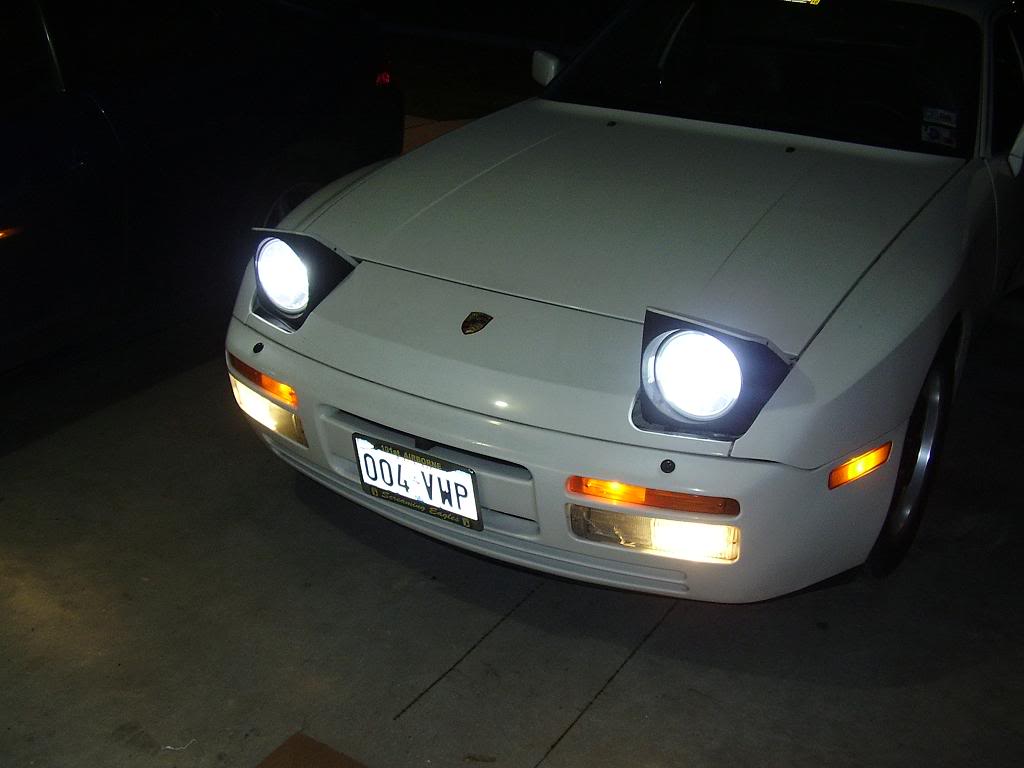
If you have H4 Hella headlights, call Ian right now and order his HID kit for H4 headlights. The difference is night and day (literally!)
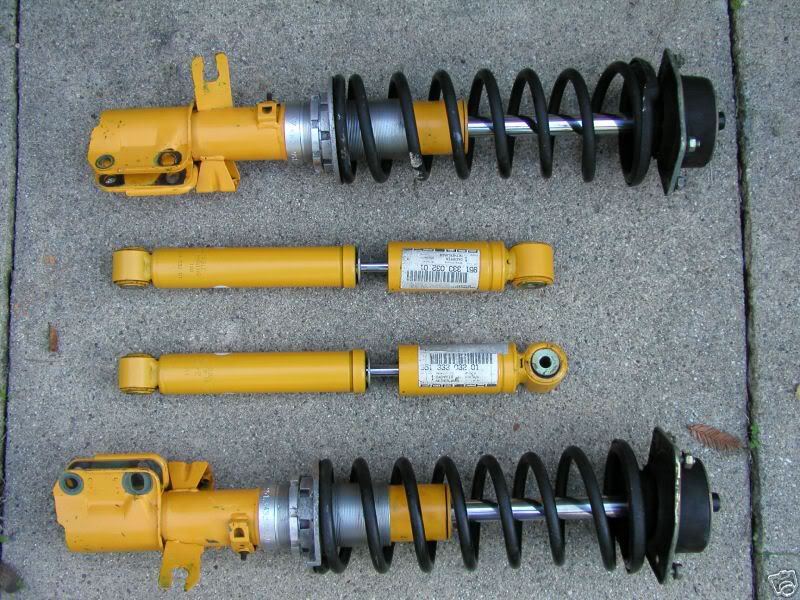
After a bit of wheeling and dealing, I wound up with a semi-complete M030 suspension set up. Looks great, doesn't it?
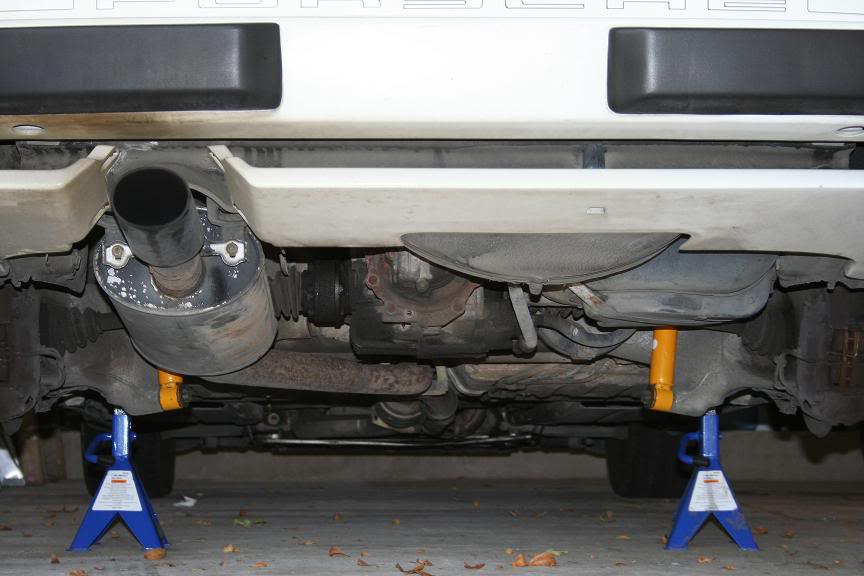
Here are the rears installed, I couldn't bring myself to photograph the old ones coming out. They were completely gone!
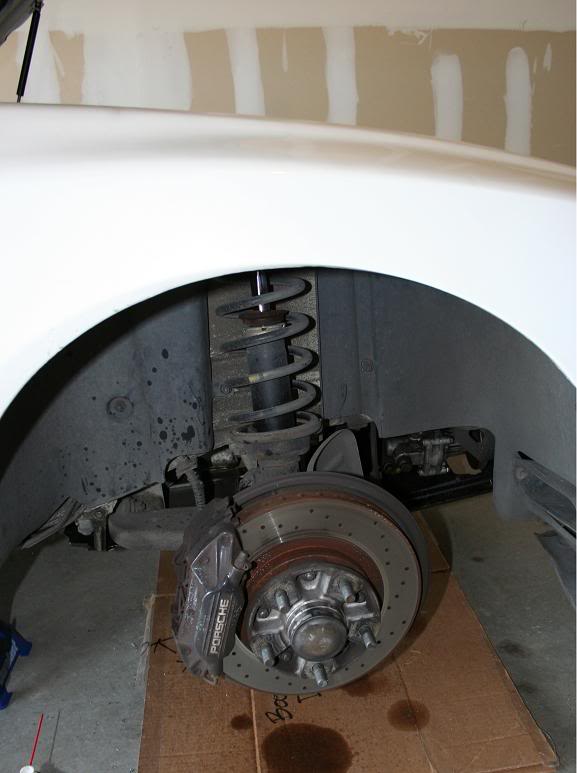
Here are the old front struts still on the car, not bad but they aren't Koni!
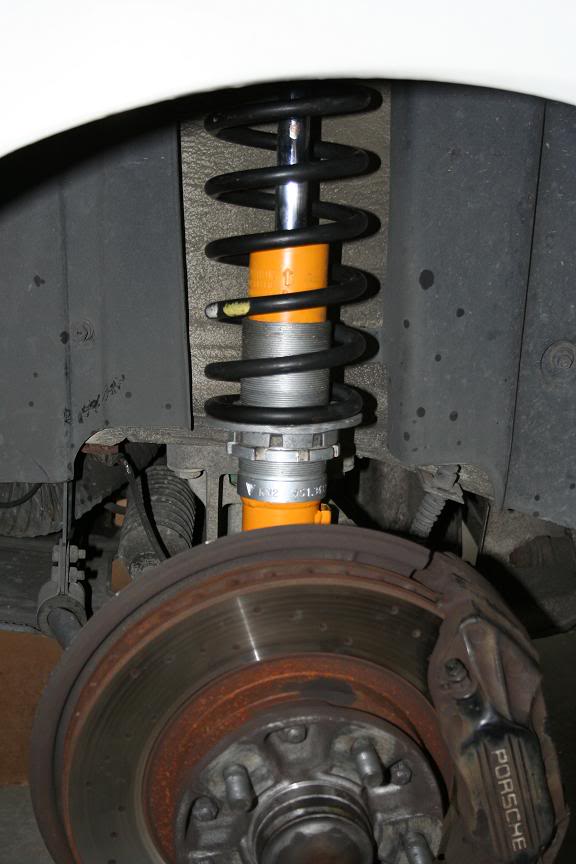
And... Out with the old and in with the new! The difference in handling, ride quality and general enjoyment is almost indescribable. I love this car!
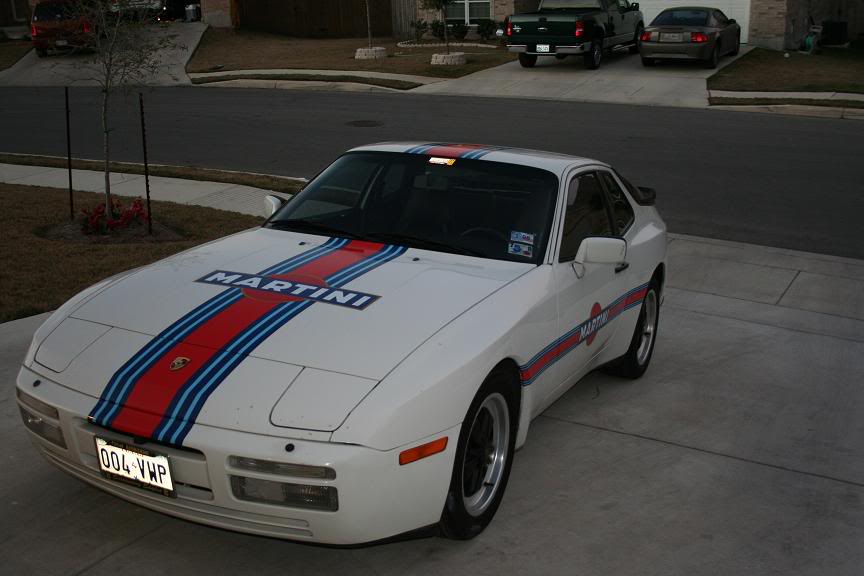
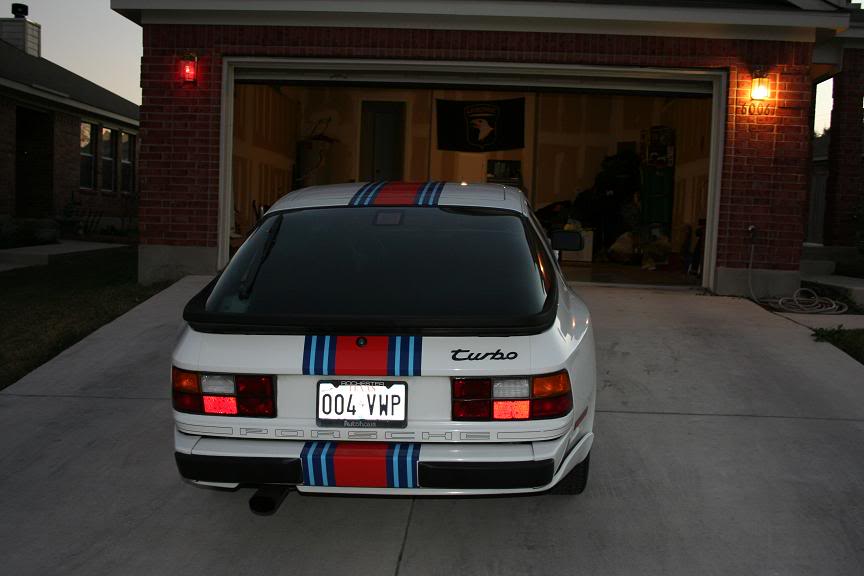
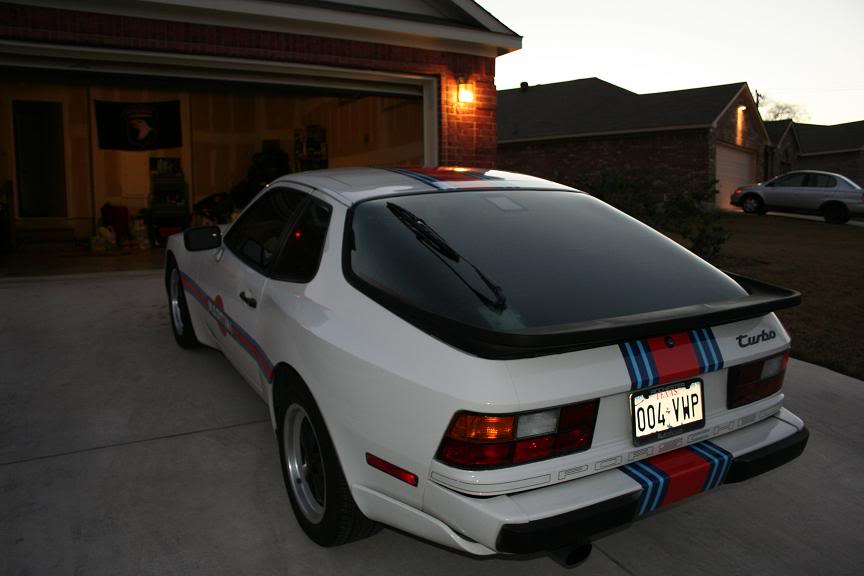
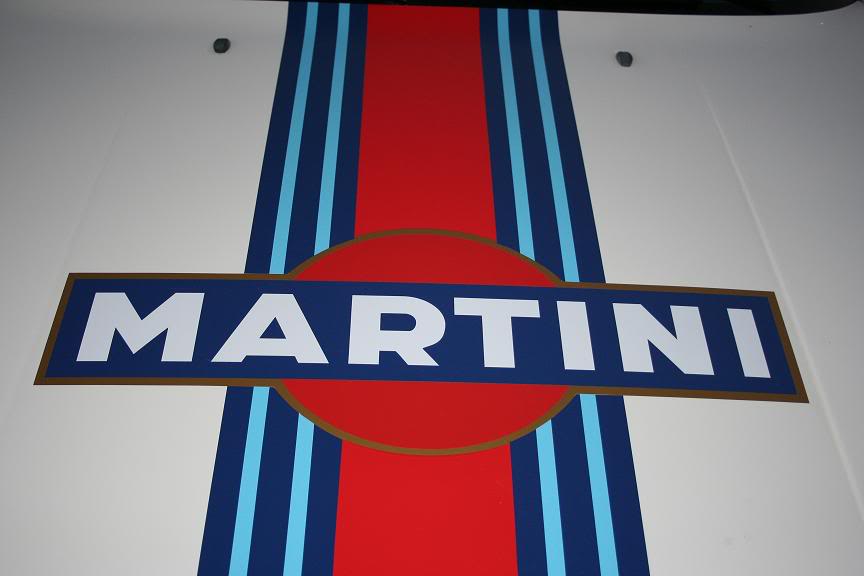
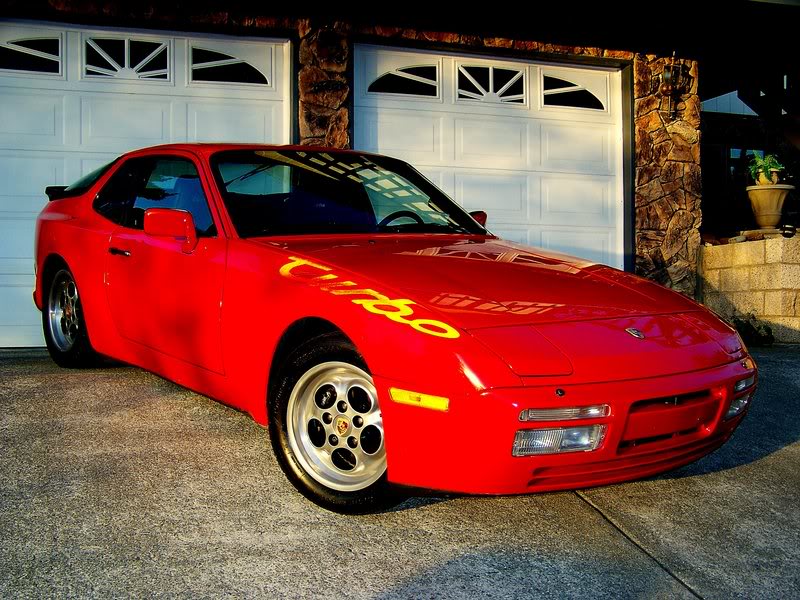
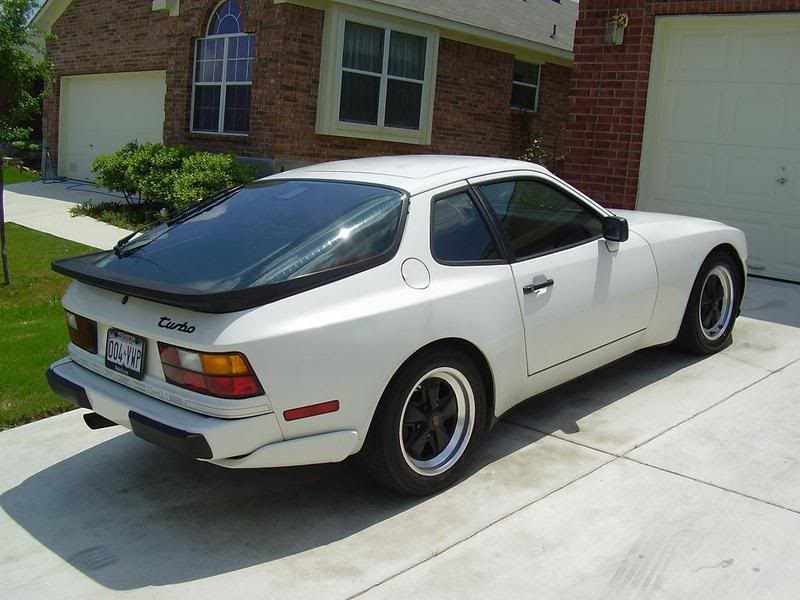
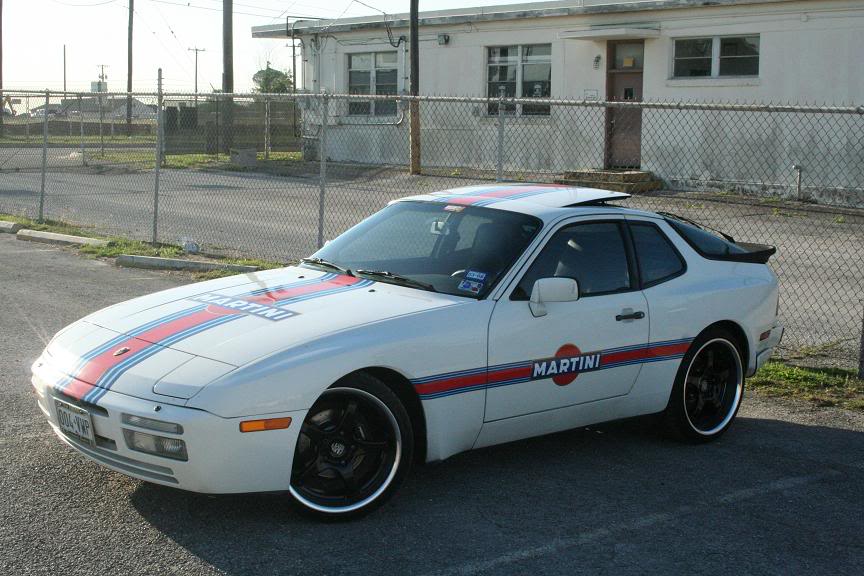
Lining up all of those stripes was a total pain! This was definitely one of those projects where at the end you think two things; "I'm glad that I did this, and I never want to do it again." I feel both of those statements completely. Anyway, I drove around a bit today and I'm satisfied with the results, I turned heads everywhere I went. Before, I was the only white 944 Turbo in San Antonio, now I'm the only martini liveried 944 Turbo in Texas. Hope you all enjoy and get inspired.
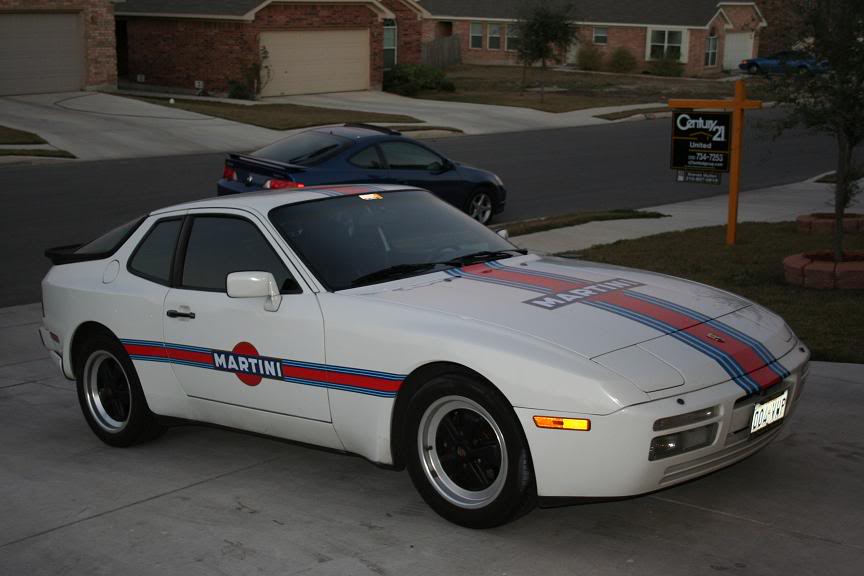
Ok... After waiting *way* too long to get these actually on the car, here are a few pics of where I'm at so far. Just a quick side note, it is a *huge* PITA to mount longer wheel studs on the early style hubs. It wound up costing more to get new wheel studs and have them put in than it did for the wheels and tires. Go figure. And so far as I know, I've got the only Martini liveried 944 Turbo in the state of Texas. So, if you see it cruising down the road, you'll know it's Ramius665.
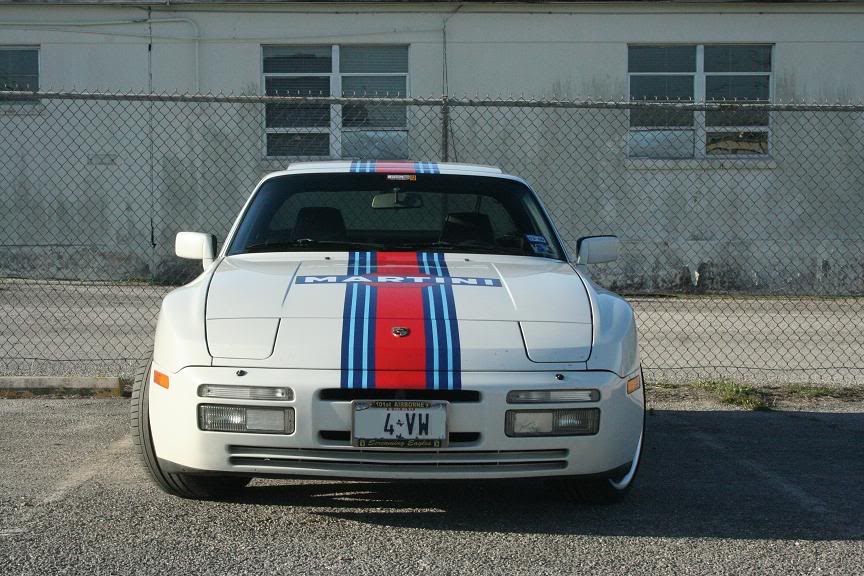
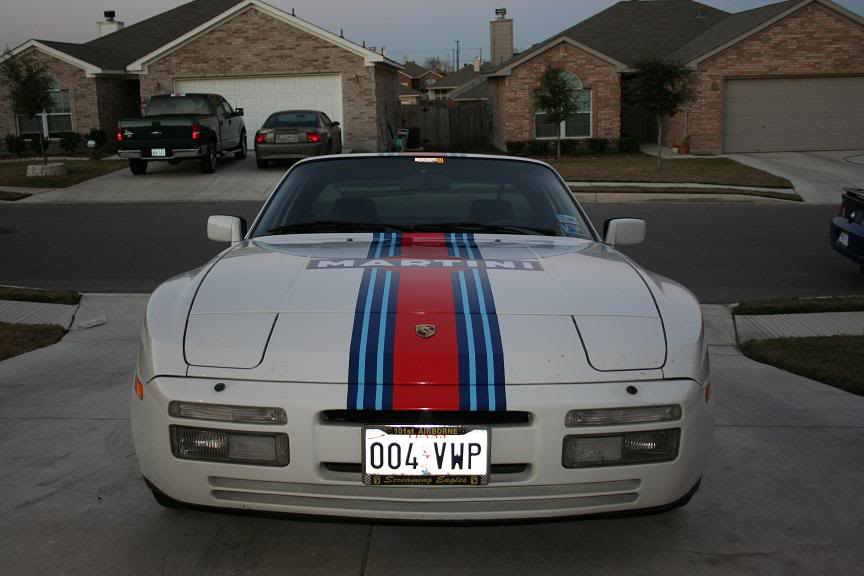
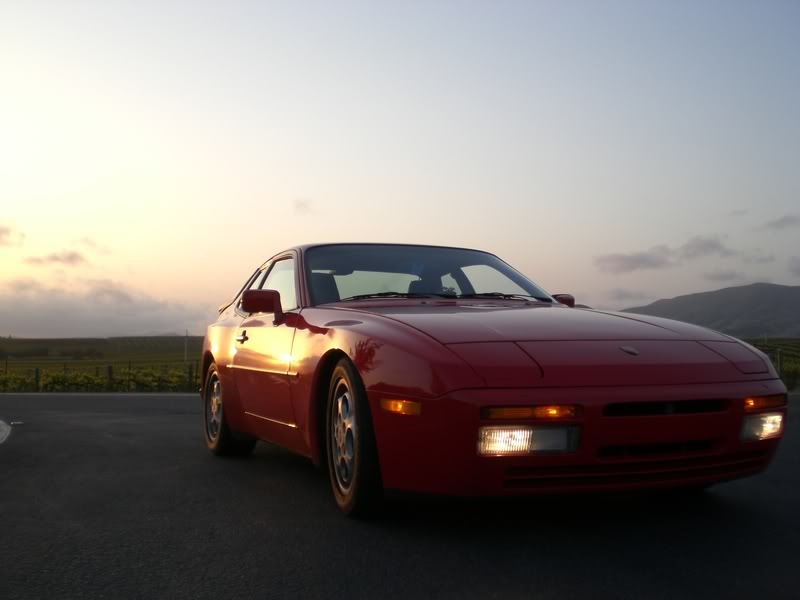
First off, a head-on shot that I think came out very well. I've always liked how the turbo cars appear from the front...
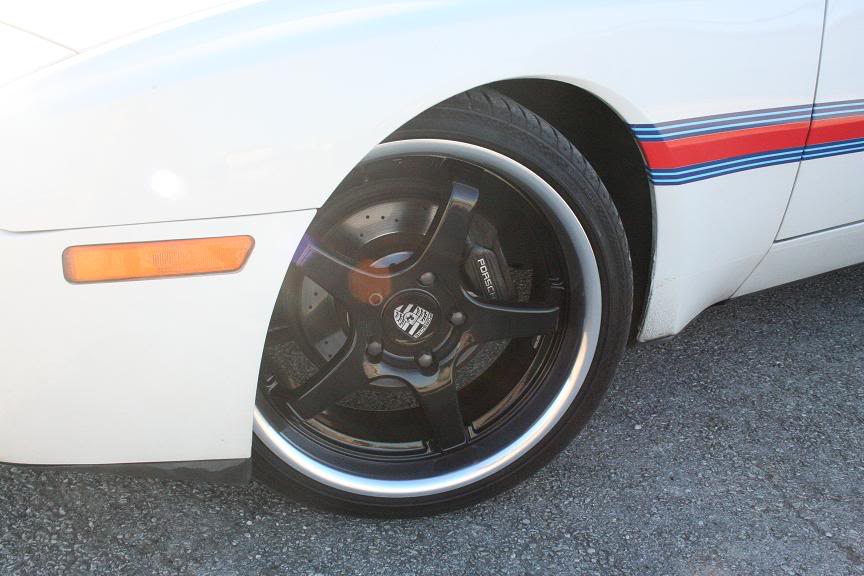
A close-up of a front wheel. They're 8.5x19 in the front.
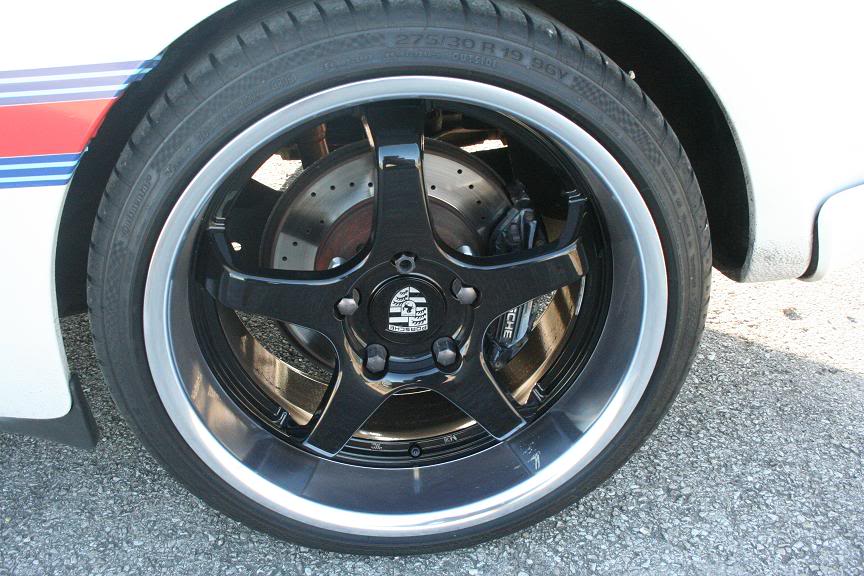
Here's a closer look at a rear wheel. Note the 4" wide lip! These are 10x19, absolutely gigantic in real life!
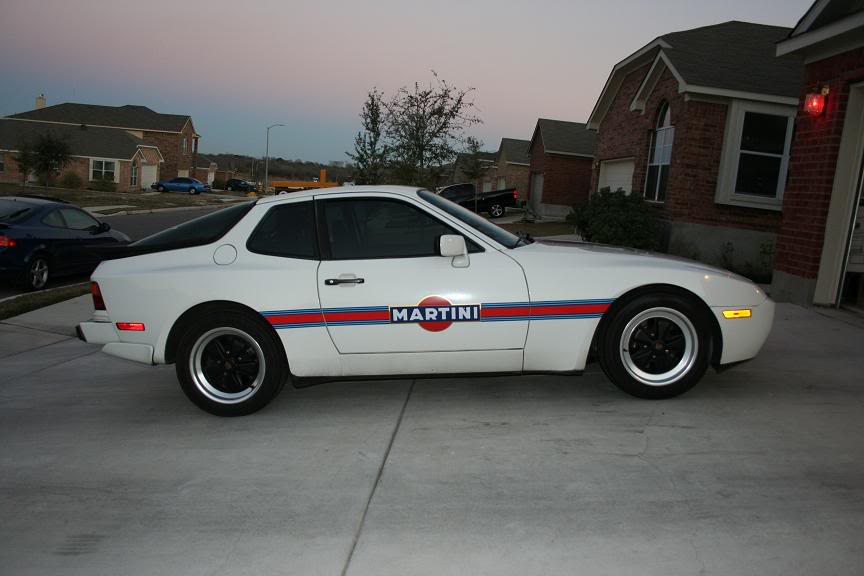
Here's a shot of the early morning sun gleaming off of the paint. For some reason I always like to see that...
Anyway, I hope y'all like what I've done so far, and if it gives you inspiration, even better! Remember, have a plan and drive it like you stole it!
This is my 'precious' and my wife was convinced she would be a porsche widow before she was even a bride. Not true. But it is a beautiful car!
A quick look under the hood, nothing too impressive and everything is bone stock.
A quick look under the hood after doing a few 'upgrades'. I deleted the stock airbox and replaced it with a MAF unit from 9xauto.com. I replaced all of the vacuum lines with a replacement silicon kit from lindsey racing.com. Also, I noticed that my battery box was accumulating a ton of crud, so I sanded it down and laid 2 coats of 3M spray-on bedliner. I *highly* recommend this for anyone that's worried about rust.
Wow. Look at those gauges. A *huge* improvement over my previous Porsche, but still, they look a little lacking. After searching high and low over the internet, I thought I would have to spend $120 for some steel rings to go around the gauges to spice them up a bit. But then a fine German vendor on ebay decided to offer the same thing for right around $25. Score. Oh, and my gauge lights had all but died. Basically, the mirrored material that reflected the light onto the gauge faces had burned away over time. So, a quick order to Jager Engineering in BC, Canada netted me LED replacement lights that are brighter *and* use lower wattage. 5 Hours of troubleshooting later, I had all the lights working and the dash was back together.
The finished product. Talk about a world of change. The gauge rings look amazing. The LED lights in the gauges are better than any other kit I've seen. That's a Momo Fighter wheel. I picked up a great condition momo hub right here on the forum and searched for the right steering wheel for me. Looks trick while still being very comfortable.
What a disgusting sight!!! This is what's left of my under-hood insulation panels after the foam on them disintegrated. It was gross. The yellow stuff is 3M general adhesive that's been baked on for 20 years. And it was a *bitch* to get rid of.
After I got all the rest of the old adhesive off, I immediately sprayed some new stuff on. Trust me, the irony of removing glue to put more on wasn't lost on me. It took a little over a week to get to this point. The weather finally cooperated. That stuff is sticky enough to put your brother on the ceiling and have him stay there. Even when you've got brothers my size.
The finished product. New FAA approved foam pads from Jager Engineering that come complete with Porsche decals. *Very* stunning in person and a much needed facelift under the hood.
\Wow. What a change new, Zimmerman cross-drilled rotors and brake pads will make in slowing down... But it wasn't all just sexiness. I spent literally an entire weekend replacing those bastards. Apparently bolts that haven't been removed in 20 years don't like to be taken out. Who knew?
*Please Note* The inside of the wheel is 'black' but it's not BLACK. And it always looked dirty. Can't have that!
And the finished product. What a change it made!! Super black wheels with fresh rotors and pads. I could cry... but I won't.
A much improved look *and* feel. Sadly, there were casualties in this conversion. A 1/8" drill bit didn't make it back to the bin...
If you have H4 Hella headlights, call Ian right now and order his HID kit for H4 headlights. The difference is night and day (literally!)
After a bit of wheeling and dealing, I wound up with a semi-complete M030 suspension set up. Looks great, doesn't it?
Here are the rears installed, I couldn't bring myself to photograph the old ones coming out. They were completely gone!
Here are the old front struts still on the car, not bad but they aren't Koni!
And... Out with the old and in with the new! The difference in handling, ride quality and general enjoyment is almost indescribable. I love this car!
Lining up all of those stripes was a total pain! This was definitely one of those projects where at the end you think two things; "I'm glad that I did this, and I never want to do it again." I feel both of those statements completely. Anyway, I drove around a bit today and I'm satisfied with the results, I turned heads everywhere I went. Before, I was the only white 944 Turbo in San Antonio, now I'm the only martini liveried 944 Turbo in Texas. Hope you all enjoy and get inspired.
Ok... After waiting *way* too long to get these actually on the car, here are a few pics of where I'm at so far. Just a quick side note, it is a *huge* PITA to mount longer wheel studs on the early style hubs. It wound up costing more to get new wheel studs and have them put in than it did for the wheels and tires. Go figure. And so far as I know, I've got the only Martini liveried 944 Turbo in the state of Texas. So, if you see it cruising down the road, you'll know it's Ramius665.
First off, a head-on shot that I think came out very well. I've always liked how the turbo cars appear from the front...
A close-up of a front wheel. They're 8.5x19 in the front.
Here's a closer look at a rear wheel. Note the 4" wide lip! These are 10x19, absolutely gigantic in real life!
Here's a shot of the early morning sun gleaming off of the paint. For some reason I always like to see that...
Anyway, I hope y'all like what I've done so far, and if it gives you inspiration, even better! Remember, have a plan and drive it like you stole it!


 04-27-2008, 02:43 AM
#1408
Banned

Join Date: Apr 2008
Location: Youngstown (14174), New York
Posts: 469
Likes: 0
Received 0 Likes
on
0 Posts
OH MY GOD. MARTINI RACING PORSCHE 951 WAS THE GREATEST THING I HAVE EVER SEEN. You my friend are a God. You must feel like Walter Rohrl. Get the matching jacket!!!!!!!!!!!!!!!
04-27-2008, 04:42 AM
#1409
Rennlist Member
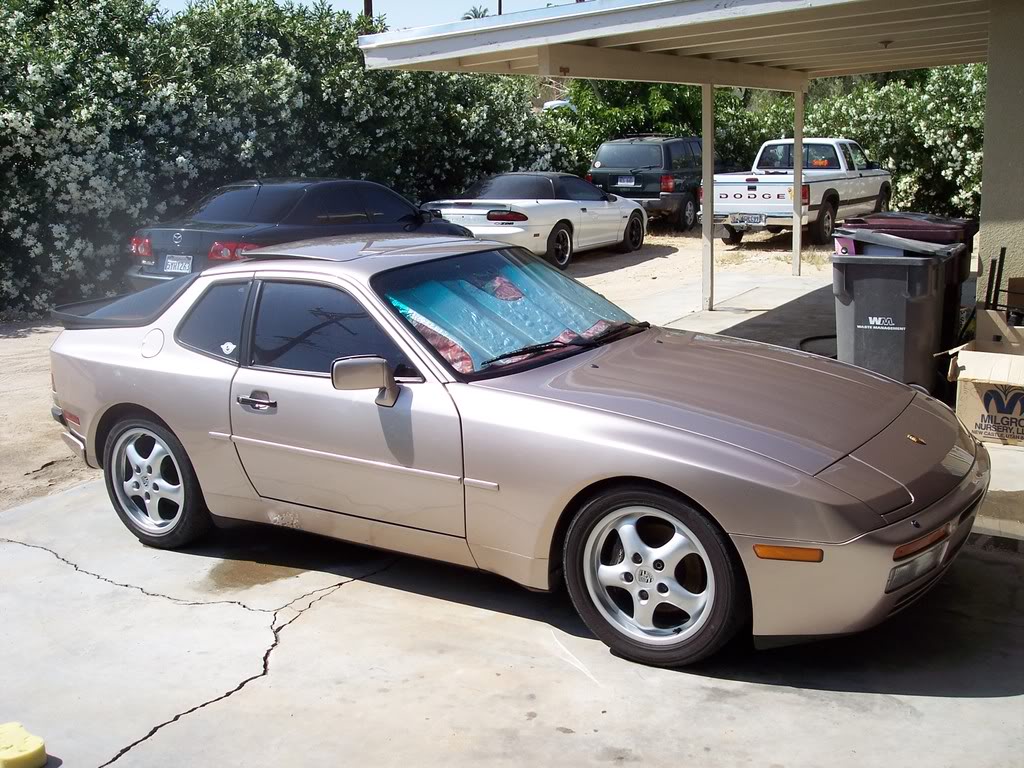
I was looking through Pelican forums a few weeks ago and came across a picture of a nice looking Slate Grey Metallic 951 that even had the same Boxter wheels on it that mine had from the PO. The closer I looked, the more I thought that it had to be my car before I'd bought it 2.5 years ago. As it turned out it was, and the PO was just posting it for some reason. Anyway I think it looks nice even like that so here it is...