When you click on links to various merchants on this site and make a purchase, this can result in this site earning a commission. Affiliate programs and affiliations include, but are not limited to, the eBay Partner Network.
In reading about intake refresh items, I see the ISV and TPS are listed as replacement items. Do these two items typically fail or are they more often replaced as a preventative measure?
The ISV especially is pricey and my prior experience several motronic/jetronic VWs and my 911 have shown these to be a pretty reliable part, requiring cleaning but I've not had one actually fail.
If the TPS microswitches close and open electrically is there any need to replace the TPS unit? I'm at the beginning of this intake refresh and am probably getting ahead of myself but figured I'd throw the questions out there so I can better understand and evaluate the parts as I get to them.
My ISV was trash and had to be replaced last year. The cars are old enough now that the ISVs are nasty. But there are aftermarket ones around $260 that are of variable reliability. My new one works most of the time.
In reading about intake refresh items, I see the ISV and TPS are listed as replacement items. Do these two items typically fail or are they more often replaced as a preventative measure?
The ISV especially is pricey and my prior experience several motronic/jetronic VWs and my 911 have shown these to be a pretty reliable part, requiring cleaning but I've not had one actually fail.
If the TPS microswitches close and open electrically is there any need to replace the TPS unit? I'm at the beginning of this intake refresh and am probably getting ahead of myself but figured I'd throw the questions out there so I can better understand and evaluate the parts as I get to them.
Good to se you are getting close to the bottom of the barrel- just get the cam covers off ready for refurbishment and then you will be in a position where you are on your way up.
The throttle position switch is a quirky thing. The idle contact is a micro switch but the full throttle switch is not with leaf type contacts and is prone to failure. When this happens the brains cannot switch to the full load map and thus stay on the cruise map [or so I understand] and thus you lose some of the top end. It seems some soldered connections fail and then contact is a bit of a hit and miss affair.
Those of us who use ST2 can work around this by telling the computer to ignore the WOT maps and programme the cruise map to do the same thing. Beyond me as to why Porsche did what they did given it seems to me that the operating point does not see the map cells relating to full throttle conditions whilst cruising.
So thanks for the advice on TPS and ISV. Roger has an aftermarket ISV that was pretty easy on the wallet and I'll take a look at the TPS while I'm testing it, maybe reflow the joints if it looks like it will help.
So just an update, spent the day yesterday replacing the passenger side door handle (just as much fun as the driver's side). Window motor was dead as well so that's on the list for next weekend.
Spent today putting my quarter-window trim back on (used the 24 gauge wire trick, worked like a charm), cleaning the engine compartment, and cleaning a stack of 911 and 928 parts to bring to the powder-coaters. I also pop-riveted the clips onto a refurbed replacement oil cooler I picked up that was missing two of them. PO had hit hit something hard enough to crush the old cooler and cause it to leak.
I feel like I've spent the bulk of my time over the last two weekends degreasing and cleaning parts but it seems like I'm down to the bottom of the pile. I still need to cleanup the alternator, p/s pump and a/c compressor but the engine compartment is starting to look pretty tight, its going to looked loved once its back together.
Going to hit the PC place tomorrow, GeorgeM and my body guy both recommended them highly but I'll still be going over the process with them and making sure they understand the dangers involved with the intake manifold, since they did George's already, I'm hoping its second nature to them. I'm going to go with matte black on the intake and covers, not original but I think it'll be a nice, clean, understated look.
Yes, more pics coming but things are kind of in the boring phase right now so not much to show...
Oh yeah, almost forgot. So my gas cap (red) cover was chimped off with brute force, its broken in multiple places. Surprisingly, the pawl is in good condition, and after soaking the cylinder in PB, the key once again turns the cylinder properly. I'm planning on gluing the red cover back together, I've got it clean enough to eat off of, but I'm open to suggestions for a suitable glue. Two questions come to mind:
- Does anyone know what TYPE of plastic that cover is made of?
- Is there ANY hope of 3D printing something like that? Doesn't seem a good candidate for printing but I know very little about 3D printing so I thought I'd ask.
After dragging their feet for 3 full months, I received a refund check on my Title Application last week. No explanation (though I included my email and a nice note asking them to communicate with me should there be any problem with my application), and no notification to the last titled owner as of yet.
Thank you NYS for being a bunch of lazy and good for nothing bureaucrats with absolutely no responsibility to the people you supposedly serve. I look forward to another half-dozen phone calls which may eventually get me in touch with someone other than the "down state general call center".
So, looks like another two weeks to get in touch with someone, and another 3 months to wait for their fat asses to do their job. So frustrated with these idiots, restoring an old vehicle is time-consuming enough without these hassles.
Enough ranting. Latest on the GT is that the parts are all off being coated, I'll be soaking, scrubbing and scrubbing some more when the parts are finished. I ordered two sets of bearings from Roger and hope to get rebuilding in about two weeks when the parts are finished.
Meanwhile, and not to jinx myself, my S4 continues to run like a CHAMP. I'm about to cross 60k miles. I had a lot of thinking to do as to which car will eventually be sold off, and I have a hard time parting with a car as reliable (and fun) as the S4, so I've continued driving it over that 60k-drop-in-value threshold anyway.
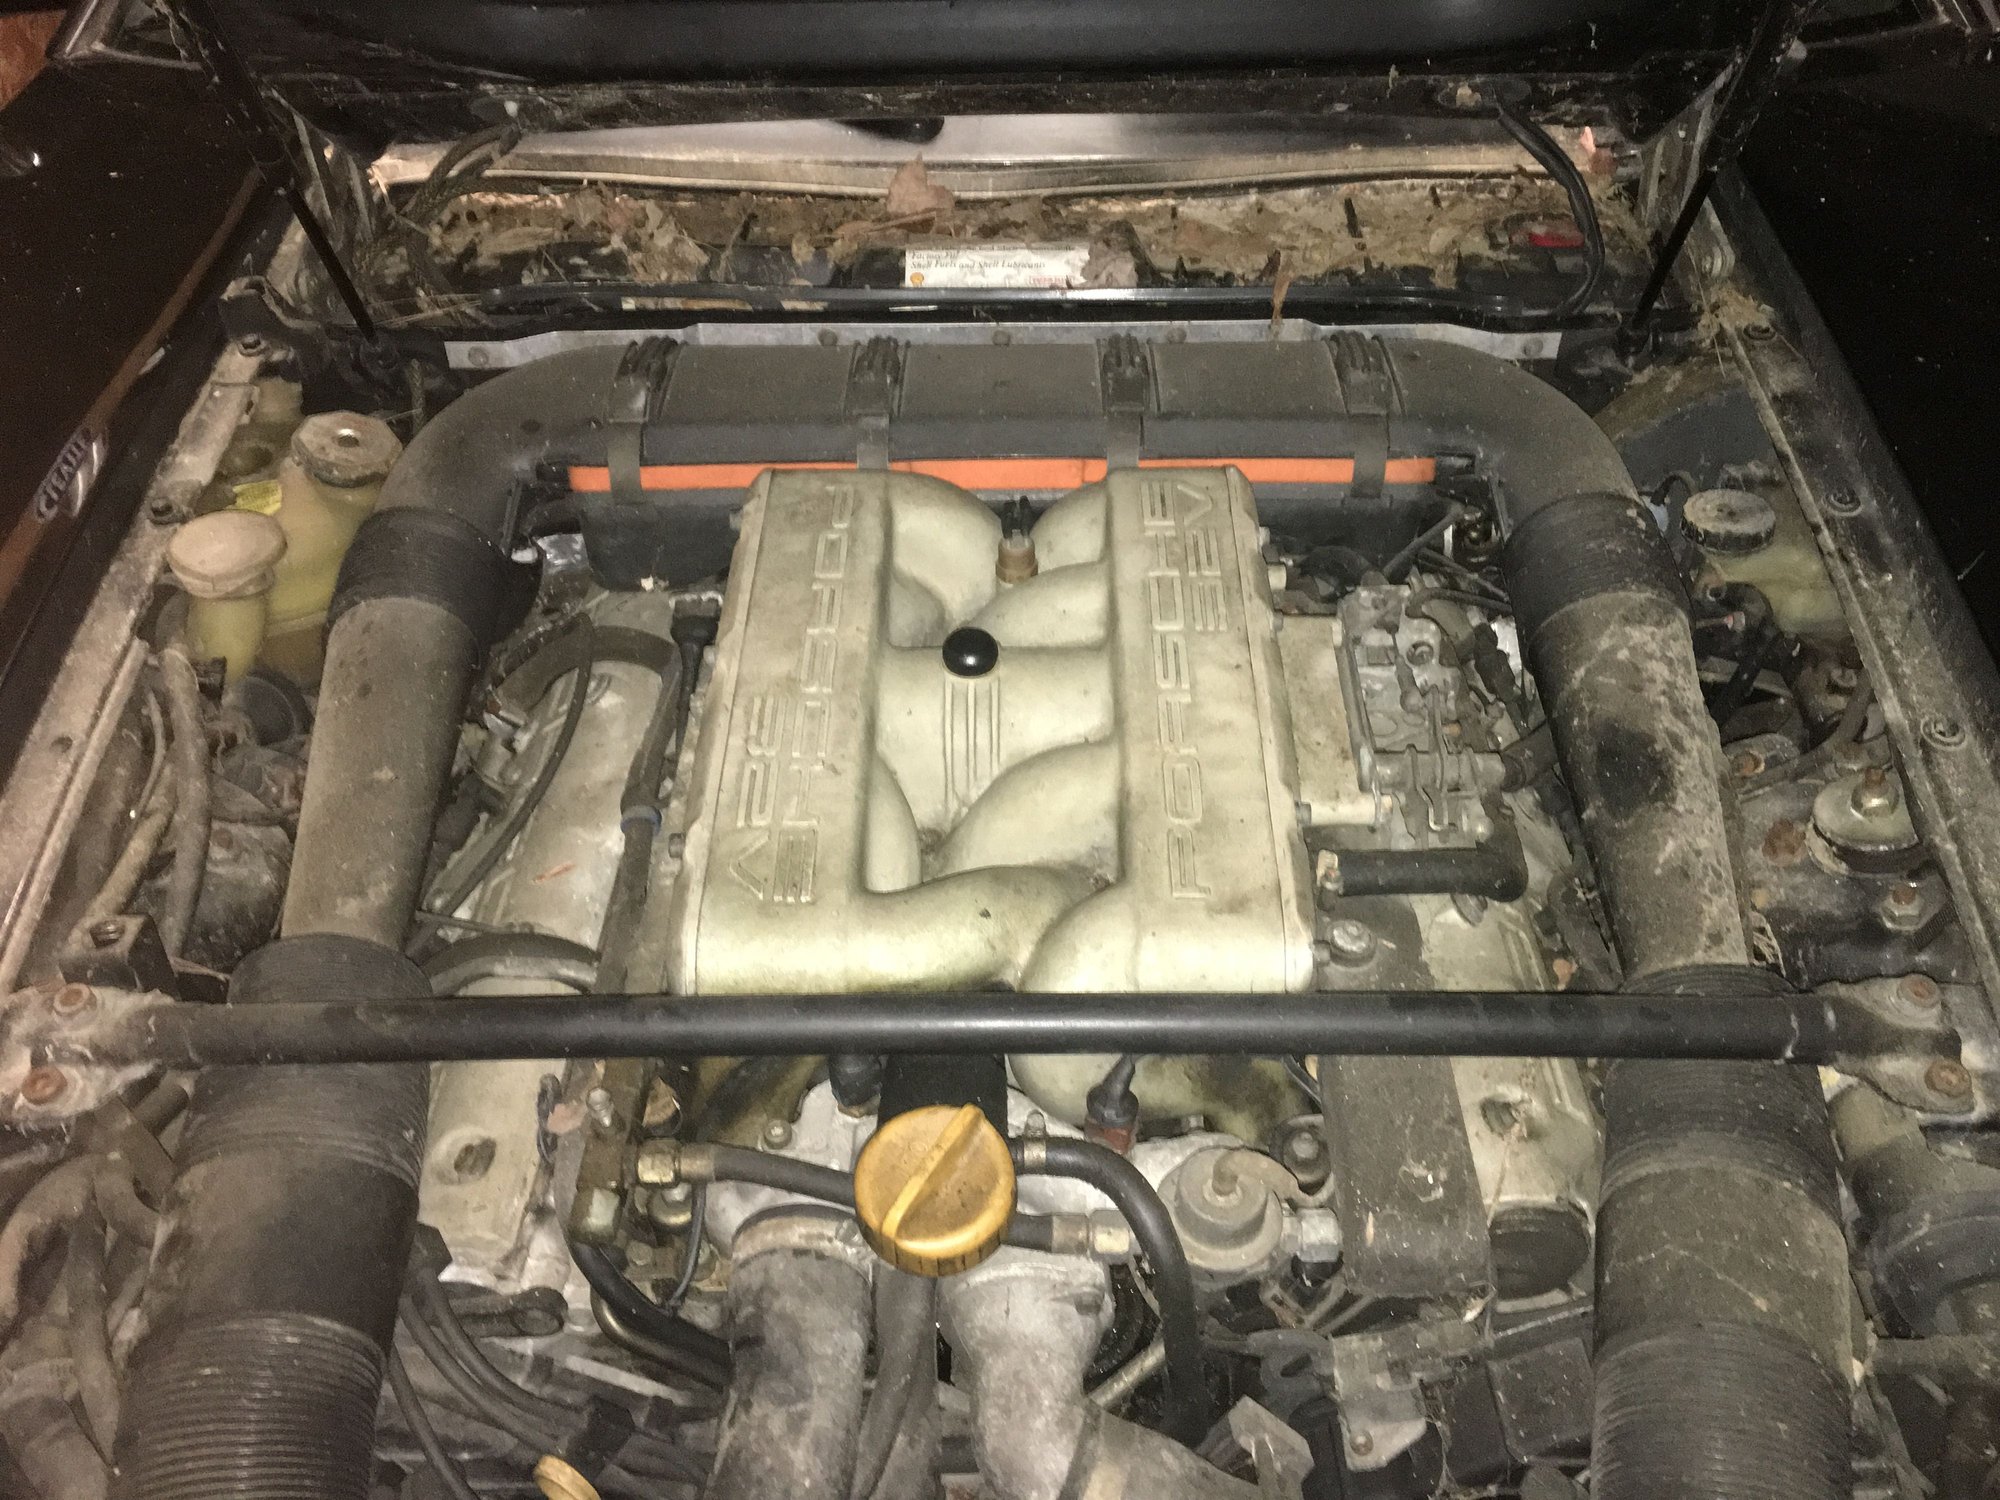
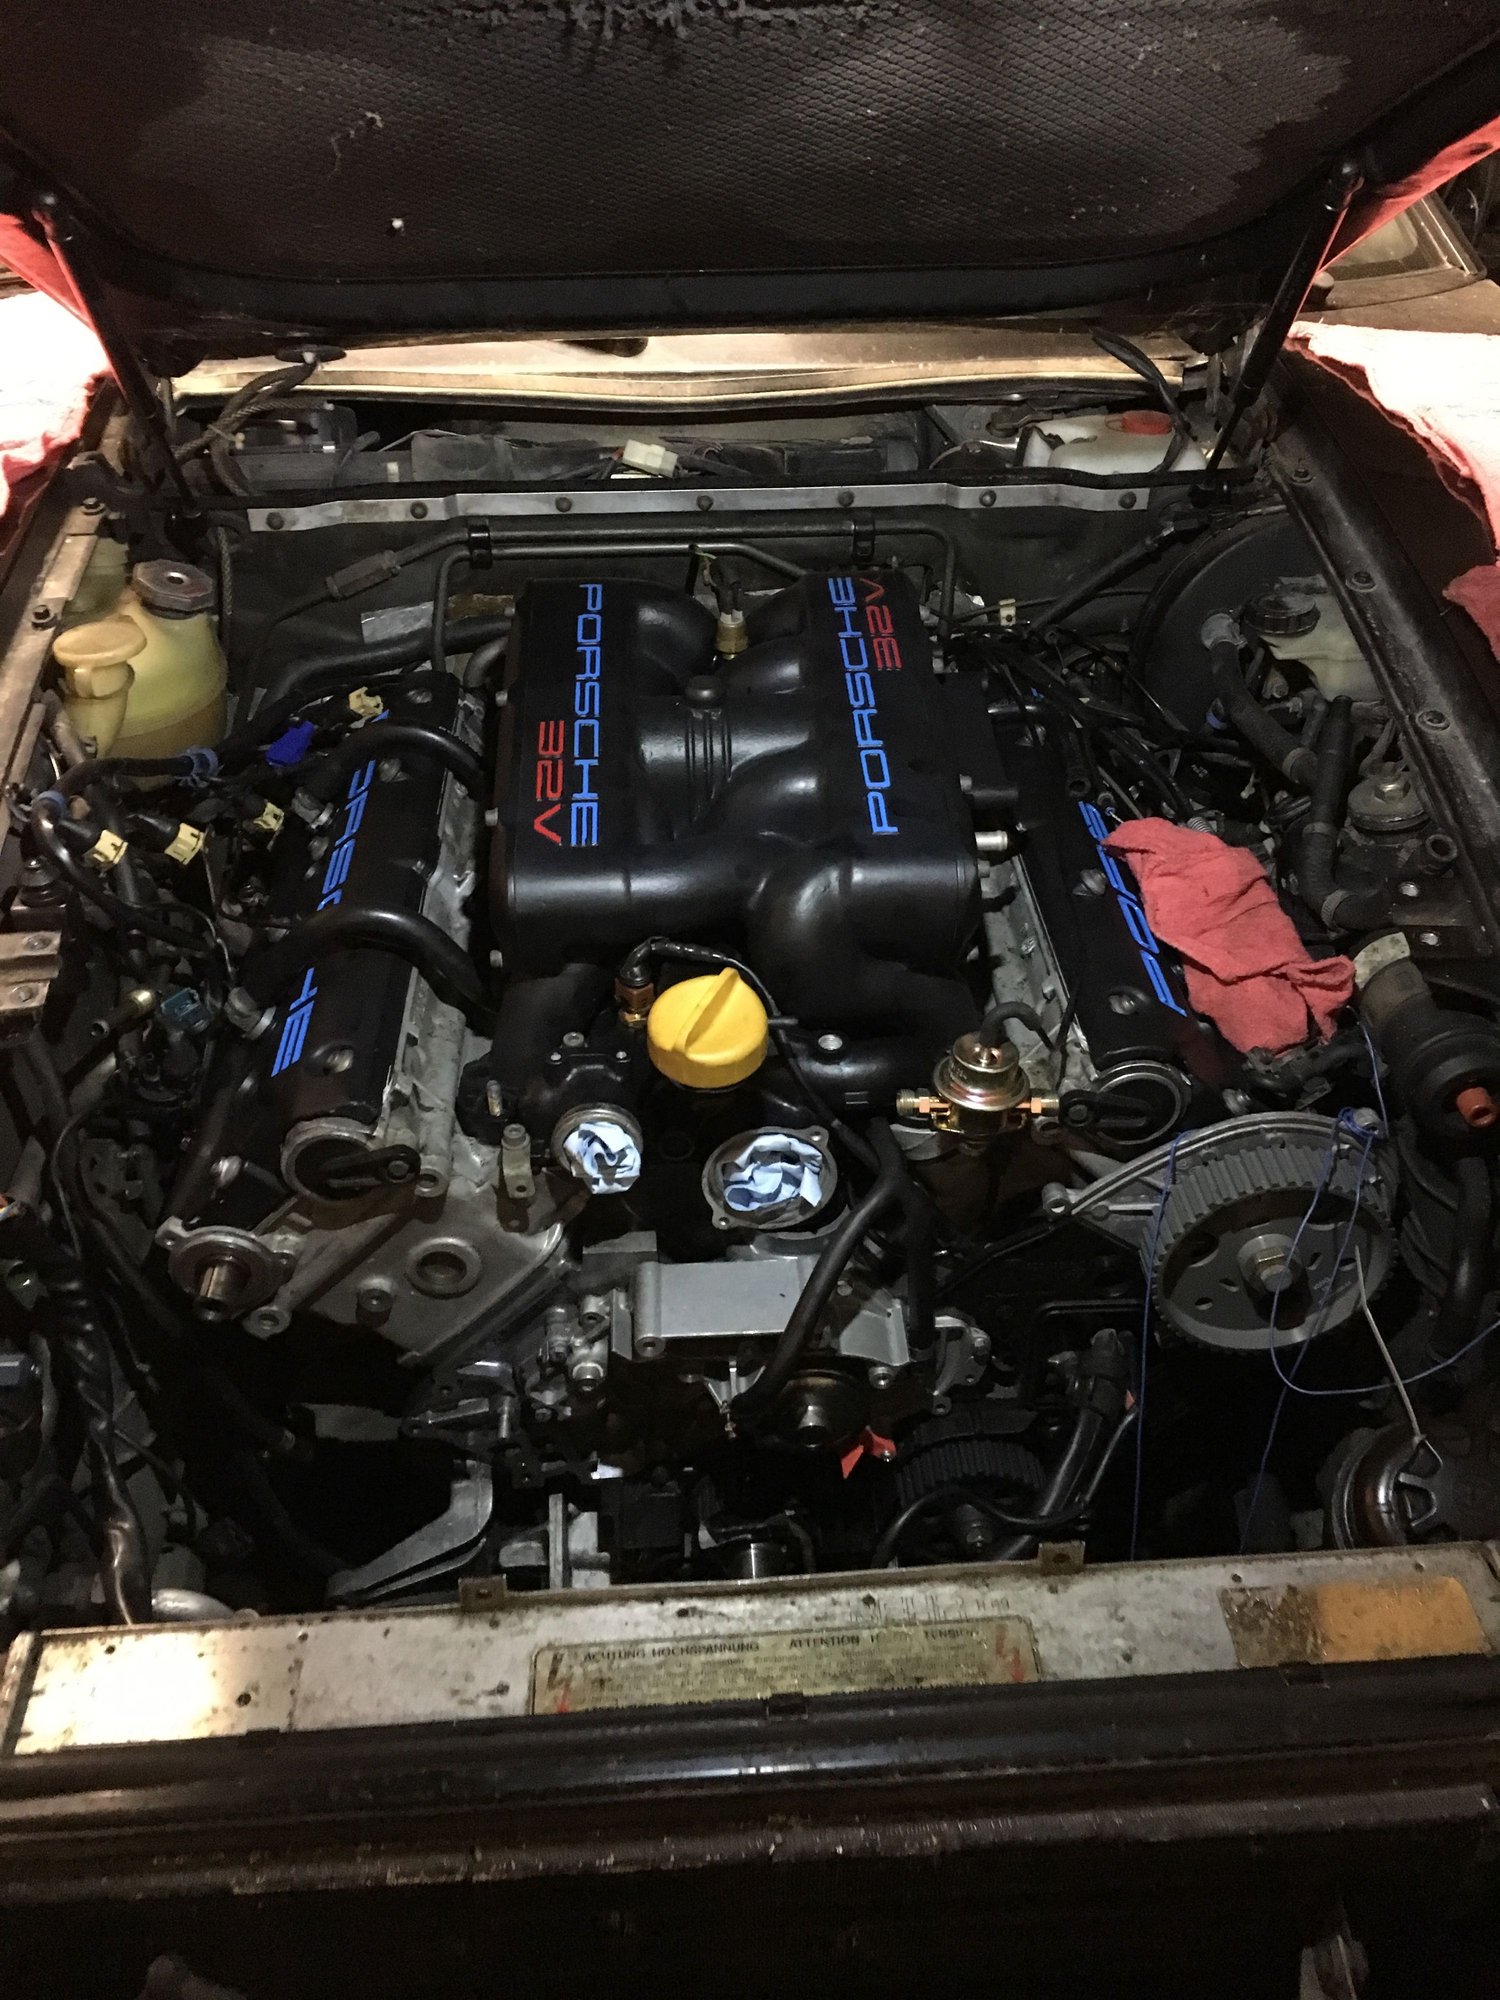
Its been many months, I largely took the summer off from the shop but have been back working over the last couple of weekends. Intake is refurbed and back in place, and (not shown) the timing belt is on and the covers back on. I've sent my injectors off to Witchhunter and will be sending my MAF out as well. Meanwhile, plenty of non-engine related issues to keep me busy. Below are before and after (well, in-progress) pics.
Before
(closing in on) After
Edit: pay no attention to the misplugged coolant sender connector!
Wow what a difference, I like your color choice.
Take little bites and you will be rewarded with a terrific machine.
I predict running issues with the PCd water bridge,
the temp sensors like a solid ground path,
the PC likes to change that,
its not the first time this has been discussed.
NOTE if you didnt hear of this, now is the time to fit a Greg Brown oil block off plate.
This part goes under the oil fill tube use Drei Bond to seal it
Swap out the old PS reservoir and the two hoses that go to it.
you need 4 banjo sealing washers so you can also drain the rack and put in fresh fluid.
Swap in a new master cylinder and clean out the tank.
fit new SS flex brake lines. Get a 1 liter can of ATE Gold fluid.
Remove the rusty metal collars from the washer fill tube and tank clean out the washer tank.
Hey Stan, thanks as always for the input! I ended up replacing pretty much everything on the Roger intake spreadsheet. Makes for an expensive job but the amount of labor to pull the intake for a failed part makes the cost more digestible.
The W/B ground problem you mention... is this due to powder coating on the center pipe preventing contact to the block? The side pipes both have the paper plus rubber ring gasket between the wb and the block so I'd think those would be poor ground paths. Shouldn't the coolant (water being a conductor) ground everything together from the inside? Is there a fix short of pulling the w/b and grinding off the p/c?
EDIT: Ok, I see that the anti-corrosives in coolant work by reducing conductivity, make sense. If I remove some of the coating below the mounting bolt heads, THAT should do it right?
I put two P/S reservoir/filters on order on Sunday night, I realized I never did my S4. Have a torn rack boot on the GT so I'll be diving into the steering system after the engine is together. My goal is to have every fluid refreshed, and every hose (at least) cleaned and examined by the time I'm "done".
Addressing the braking system will be next on my list.
Originally Posted by Mrmerlin
Wow what a difference, I like your color choice.
Take little bites and you will be rewarded with a terrific machine.
I predict running issues with the PCd water bridge,
the temp sensors like a solid ground path,
the PC likes to change that,
its not the first time this has been discussed.
NOTE if you didnt hear of this, now is the time to fit a Greg Brown oil block off plate.
This part goes under the oil fill tube use Drei Bond to seal it
Swap out the old PS reservoir and the two hoses that go to it.
you need 4 banjo sealing washers so you can also drain the rack and put in fresh fluid.
Swap in a new master cylinder and clean out the tank.
fit new SS flex brake lines. Get a 1 liter can of ATE Gold fluid.
Remove the rusty metal collars from the washer fill tube and tank clean out the washer tank.


 03-01-2017, 11:16 PM