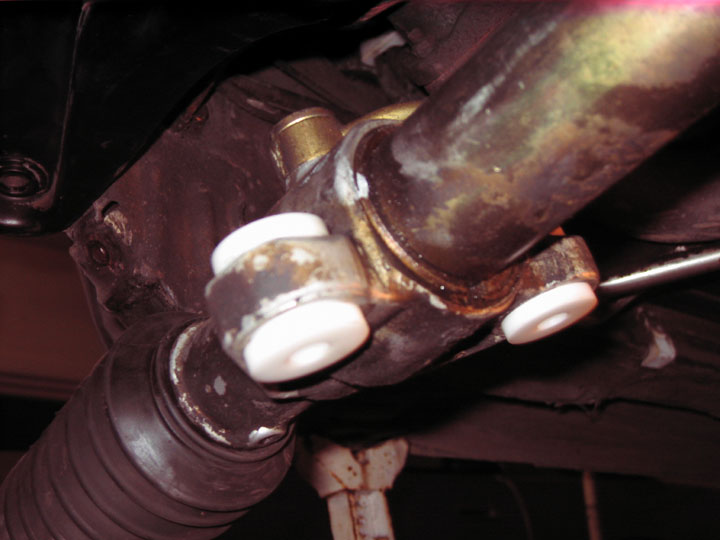


Delrin Rack Bushings-What a difference!
Addict
Rennlist Member
Rennlist Member

Joined: Sep 2010
Posts: 13,583
Likes: 1,046
From: Boulder Creek, CA

Ok..got the four bolts out..the allen wrench did the trick.
On a con-call for work now, but after that, I'll pull the set bolt out of the steering rod block to the rack input splines, apply screwdriver for some leverage and tap with hammer to remove..and then see what will suck next.
On a con-call for work now, but after that, I'll pull the set bolt out of the steering rod block to the rack input splines, apply screwdriver for some leverage and tap with hammer to remove..and then see what will suck next.
Drifting
Joined: Apr 2011
Posts: 3,036
Likes: 98
From: New Canaan, CT
Lining up the splines from the steering rack input shaft and the steering sucks. The splines on the steering shaft gave me a lot of problem to reattach as you cannot get much leaverage. If possible do not remove all the way. I don't remember if that will work.
Bilal
Bilal

Rennlist Member
Joined: Apr 2006
Posts: 35,695
Likes: 511

Addict
Rennlist Member
Rennlist Member
Joined: Sep 2010
Posts: 13,583
Likes: 1,046
From: Boulder Creek, CA
Ya..I gave up on the steering knuckle/shaft. Wouldnt come loose.
I can get the inner liner of the bushing out, but damnit...with a leaking radiator dripping from 2 places into my ear, hair, shirt ever 18 seconds, and I STILL dont have the first bushing outter shell removed.
30 minutes guys...really??
Im likely gonna be on this thru every evening this week, unless the ah-ha moment on those outter liners of the OEM bushings happens.
Will get a different chisel, and needle-nose vise grips today at the store too.
I can get the inner liner of the bushing out, but damnit...with a leaking radiator dripping from 2 places into my ear, hair, shirt ever 18 seconds, and I STILL dont have the first bushing outter shell removed.
30 minutes guys...really??
Im likely gonna be on this thru every evening this week, unless the ah-ha moment on those outter liners of the OEM bushings happens.
Will get a different chisel, and needle-nose vise grips today at the store too.

Rennlist Member
Joined: Nov 2009
Posts: 8,660
Likes: 427
From: Dubuque, IA
A more elegant way to get at the upper side of those bolts is to use a very short socket.
Like this one: http://www.craftsman.com/shc/s/p_101...9&blockType=L9
Fit perfectly. Inexpensive. Use in combination with a 17mm wrench.
Like this one: http://www.craftsman.com/shc/s/p_101...9&blockType=L9
Fit perfectly. Inexpensive. Use in combination with a 17mm wrench.
Rennlist Member
Joined: May 2007
Posts: 272
Likes: 0
From: Placerville, CA
Seriously, 30 minutes, all four. The key is to find the slit in the outer shell, get the chisel tip on it, and tap until it folds in towards the center. It's really quite flimsy once you get it to move. I have an air chisel as well, but felt the manual process of chisel and hammer would be easier. Plus I was worried about nicking the rack with the air chisel. I did use a 3 pound hammer, feeling the extra inertia, but with less force needed behind the blow, was a plus. You'd really have to wail on the chisel if using a small hammer.
Rennlist Stories
The Best Porsche Posts for Porsche Enthusiasts

Porsche's Top 5 Most Questionable Naming Decisions
Verdad Gallardo
Pogea Racing's 964 Porsche 911 Reimagination Stands Out in a Crowded Field
Verdad Gallardo
6 Convertible Top MYTHS Most People Don't Understand!
Michael S. Palmer
2026 Porsche 911 Club Coupe is Spectacular, And Everything Wrong with the Porsche Market
Joe Kucinski
Talos Takes Your 991 Porsche 911 GT3 to the Next Level for a Cool $1.13 Million
Verdad Gallardo
9 Vehicles Porsche Helped Engineer that Aren't Porsches
Verdad Gallardo
9 Features and Characteristics That Only Porsche People Understand
Verdad Gallardo
I've Written 500 Rennlist Articles: Here's How Porsche Has Changed Along the Way
Joe Kucinski
10 Most Unnecessary Porsches Ever Built (And Why We Love Them)
Verdad Gallardo
Rennlist Member
Joined: Jul 2009
Posts: 3,066
Likes: 436
From: Cleveland, MN
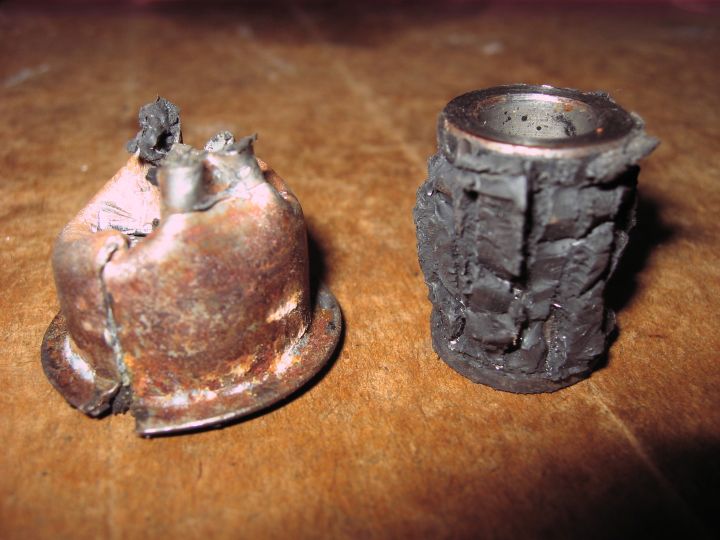
Granted, I had already removed the "inners" (about 20 minutes) but it only took about 10 minutes to remove the "outers".
Bushing Tools.jpg
Bushing.jpg
Bushing Tools.jpg
Bushing.jpg

Addict
Rennlist Member
Rennlist Member
Joined: Sep 2010
Posts: 13,583
Likes: 1,046
From: Boulder Creek, CA
Ok..lunch and a beer solves all.
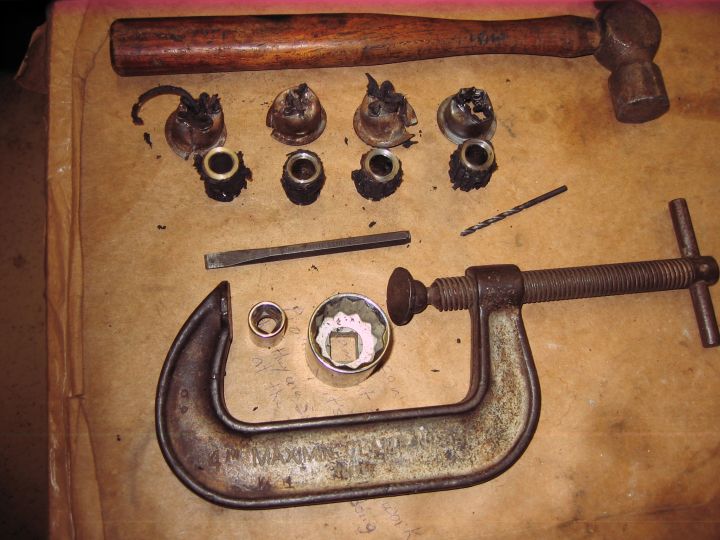
Got a -better- 1/4" chisel at the store, and went at it.
20min later, all four outters out.
Will post photos of captain caveman's tools to get that done...later.
Now..read Email, let work know im still 'working'..and go put it back up.
Im told thats simple.
Got a -better- 1/4" chisel at the store, and went at it.
20min later, all four outters out.
Will post photos of captain caveman's tools to get that done...later.
Now..read Email, let work know im still 'working'..and go put it back up.
Im told thats simple.
Rennlist Member
Joined: Apr 2006
Posts: 4,373
Likes: 2
From: Patterson, Ca
I'm in the middle of the same job on the GTS. The only replacement top lock nuts I could find were 3/8 by 16, 9/16 head vs the original 17mm. Are these OK, and what should I torque them to? I assume the 33lbs would be a little severe for a 9/16 nut.
Instructor
Joined: Apr 2010
Posts: 190
Likes: 1
From: St Louis, MO
I used a large step drill to ream out the bushings. Once the external ring fell off the inner sleave, a punch and hammer finished the job. This took 5 minutes for the last one. I've included a link to northern tool. Harbor freight has them, too.
http://www.northerntool.com/shop/too...tep-drill-bits
http://www.northerntool.com/shop/too...tep-drill-bits