When you click on links to various merchants on this site and make a purchase, this can result in this site earning a commission. Affiliate programs and affiliations include, but are not limited to, the eBay Partner Network.
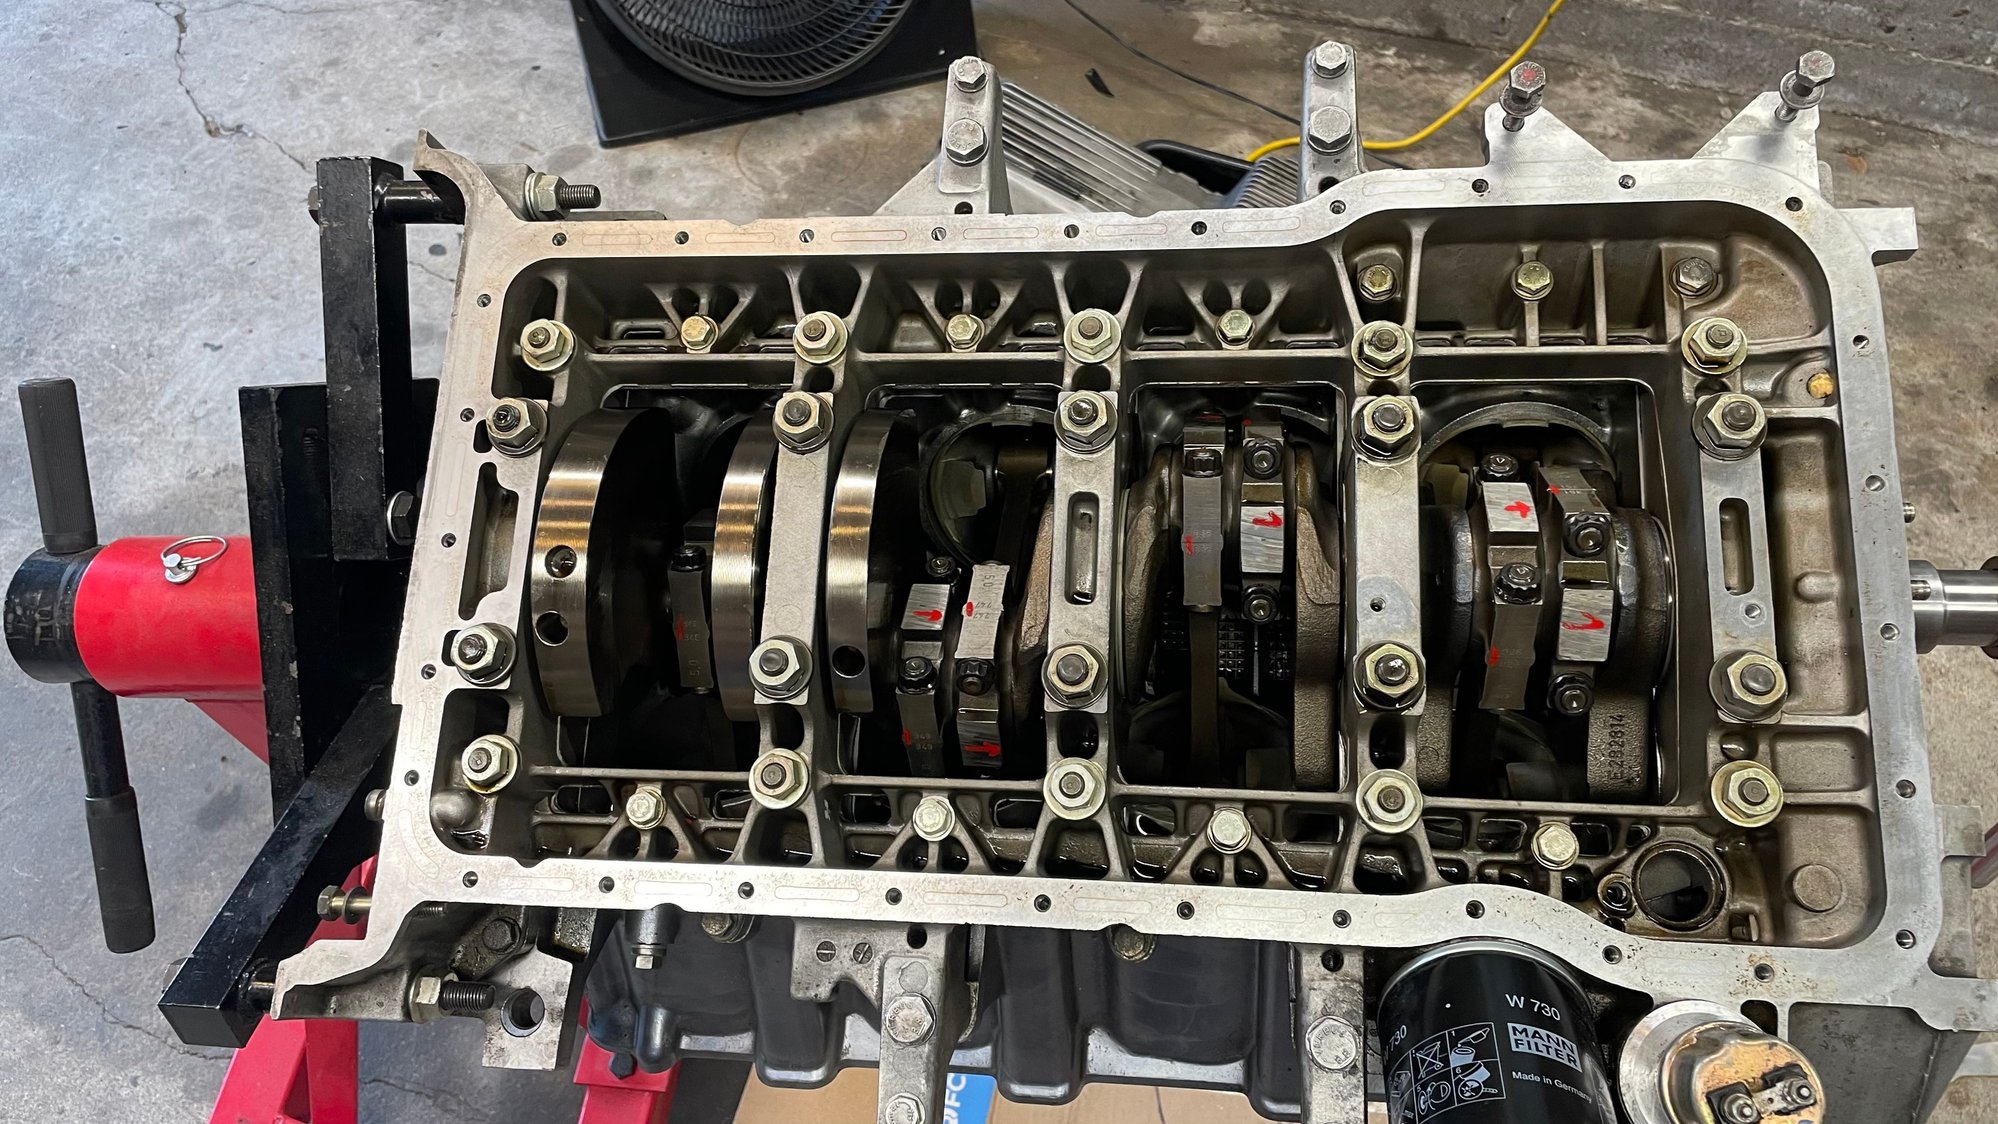
This weekend @Zirconocene came over and helped me break down the block this past weekend. I wasn't able to find much in the manner of disassembly instructions in the WSM, so we used the reverse assembly process. Things came apart pretty easily. This is my first time inside any engine so I would appreciate feedback on what to check and what looks good.
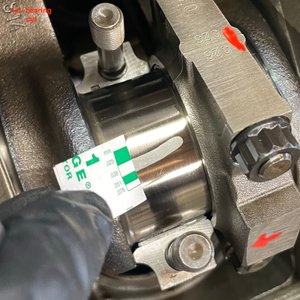
We checked the clearances of the connecting rod bearings for cylinders 1 and 5 using a Plastigage. The clearances showed less than 0.38mm. The WSM specification is between <!--td {border: 1px solid #cccccc;}br {mso-data-placement:same-cell;}-->0.02 - 0.07mm for new bearings, and the wear limit is 0.1mm. These first couple of bearings measured new. I was thinking of replacing all of the connecting rod bearings, given the ~ $150 for the set. Any thoughts on re-installing them?
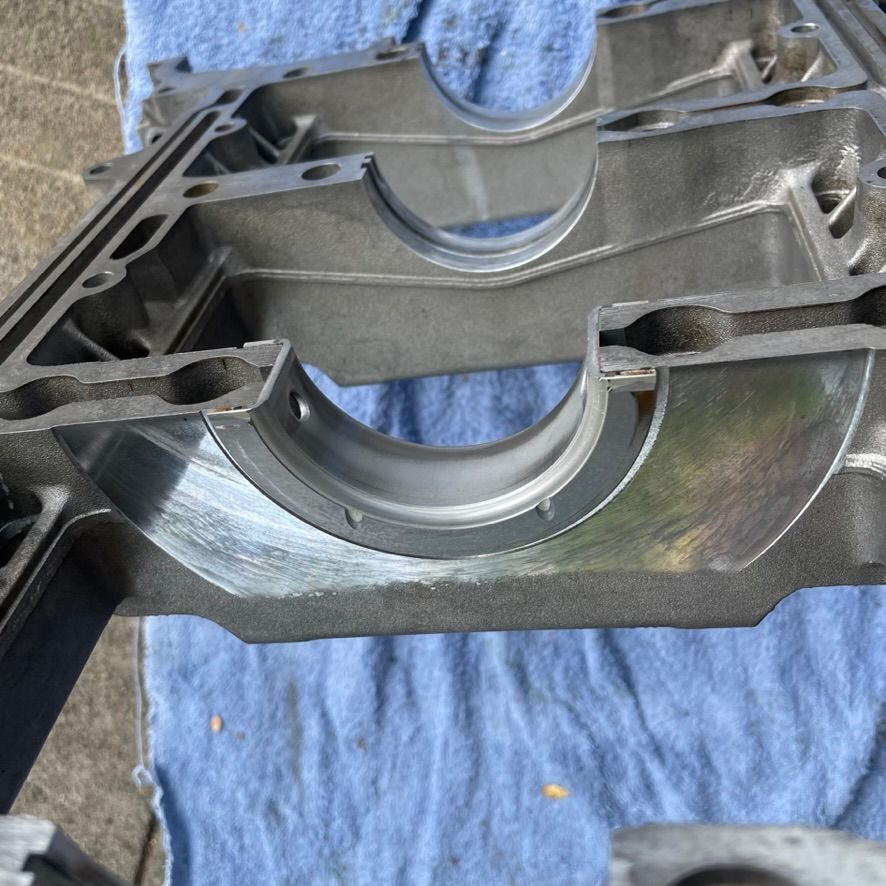
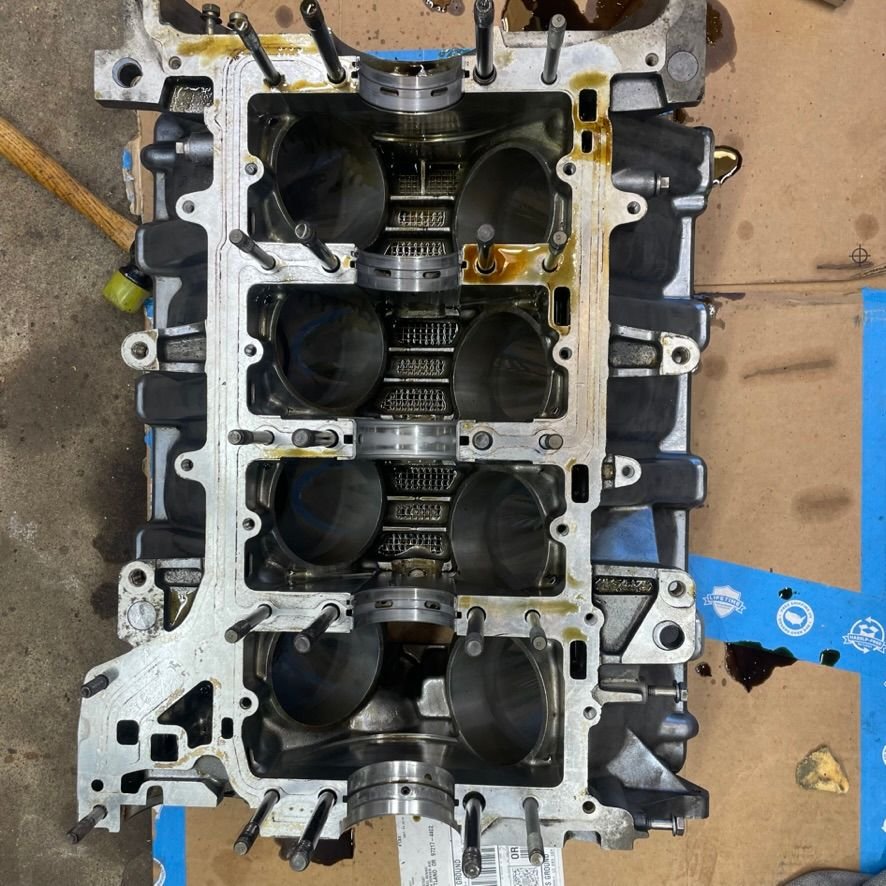
Here are some pictures of the rest of the assembly. You can see the condition of the main bearings here. I did not get a measurement of these bearings. I did not measure them using a plastigague before removal. Is that a critical step? Are main bearings a must-replace item at this stage or can they be re-used if they are in specification? I have not measured them yet.
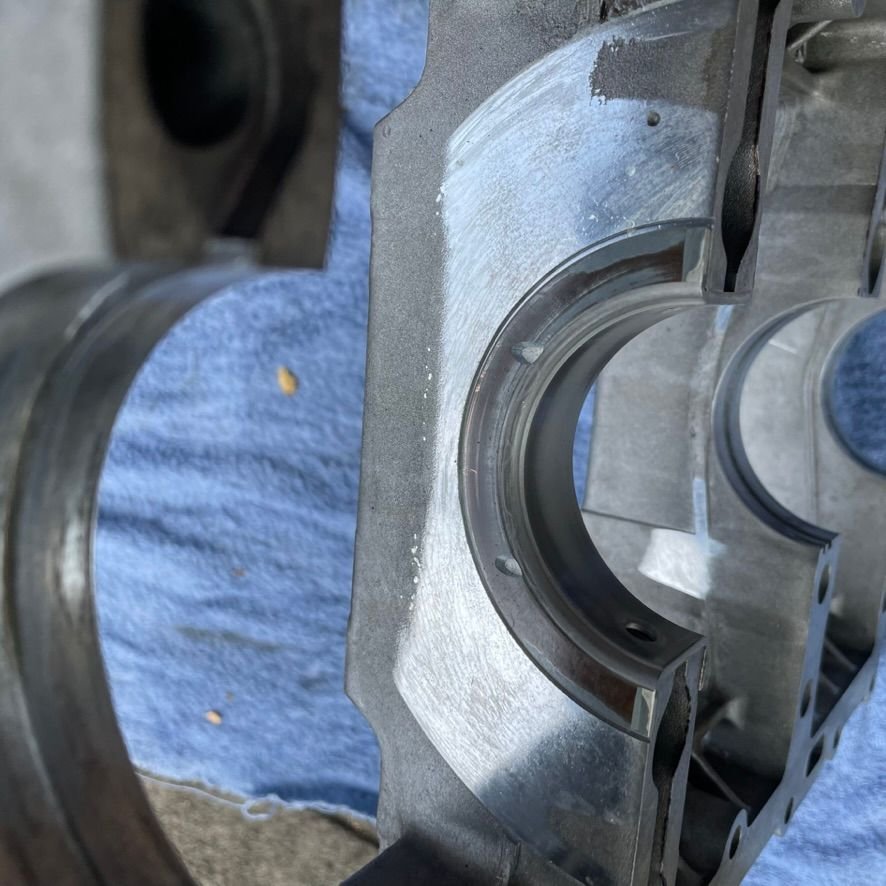
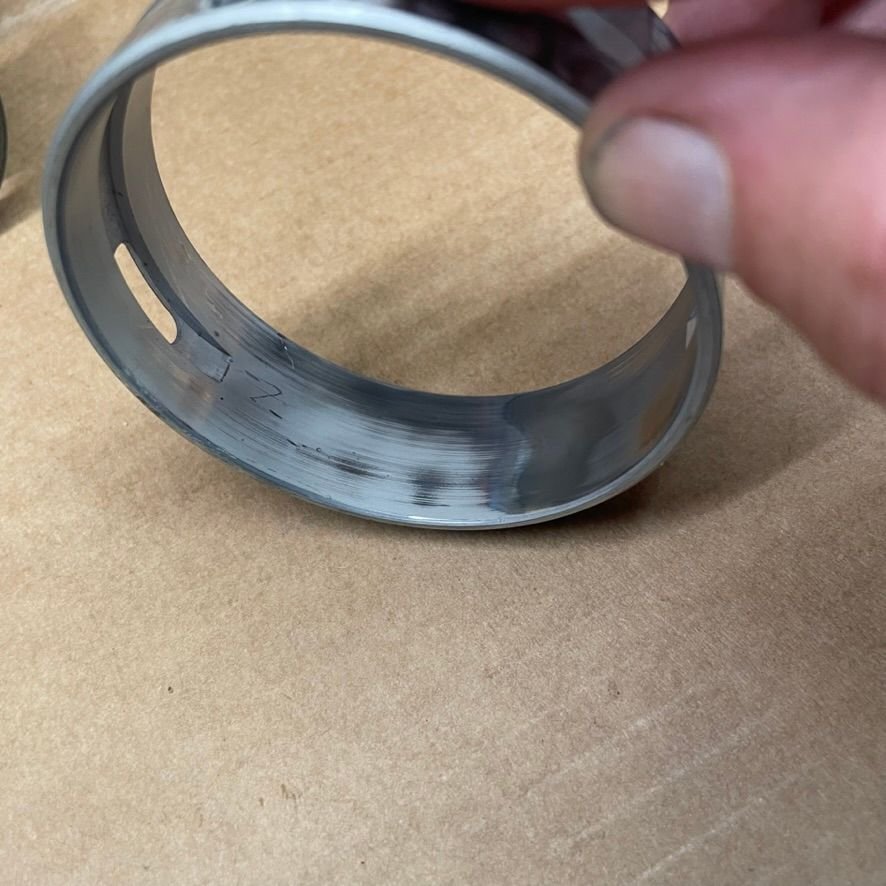
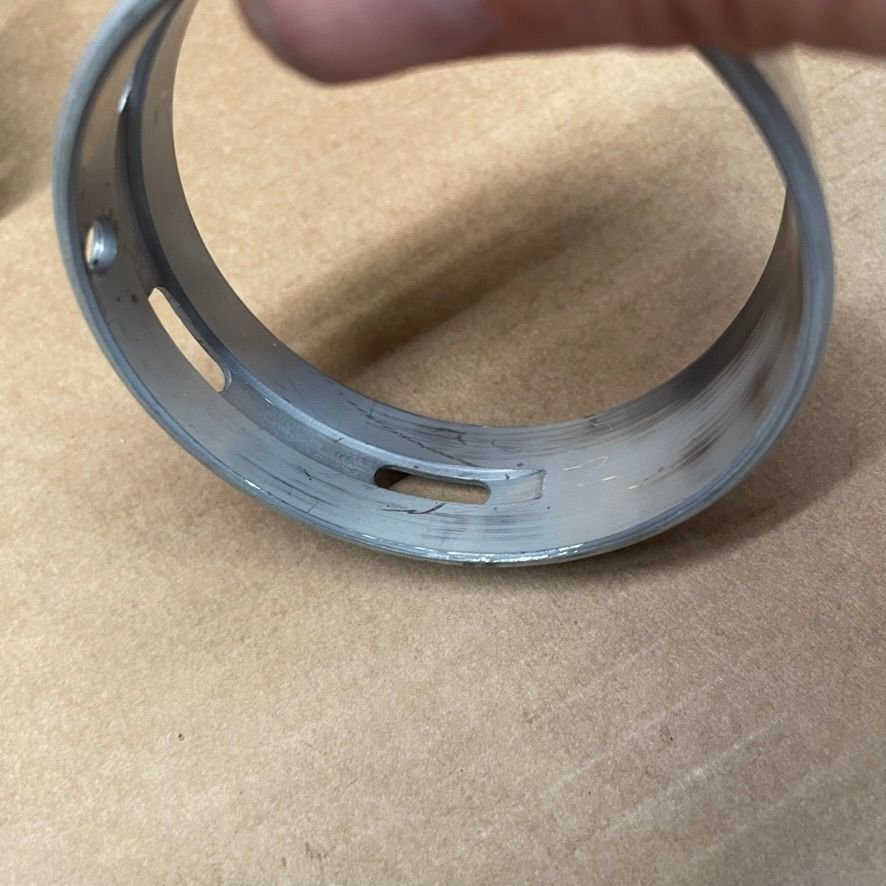
Here is the lower girdle with the thrust bearing still installed.
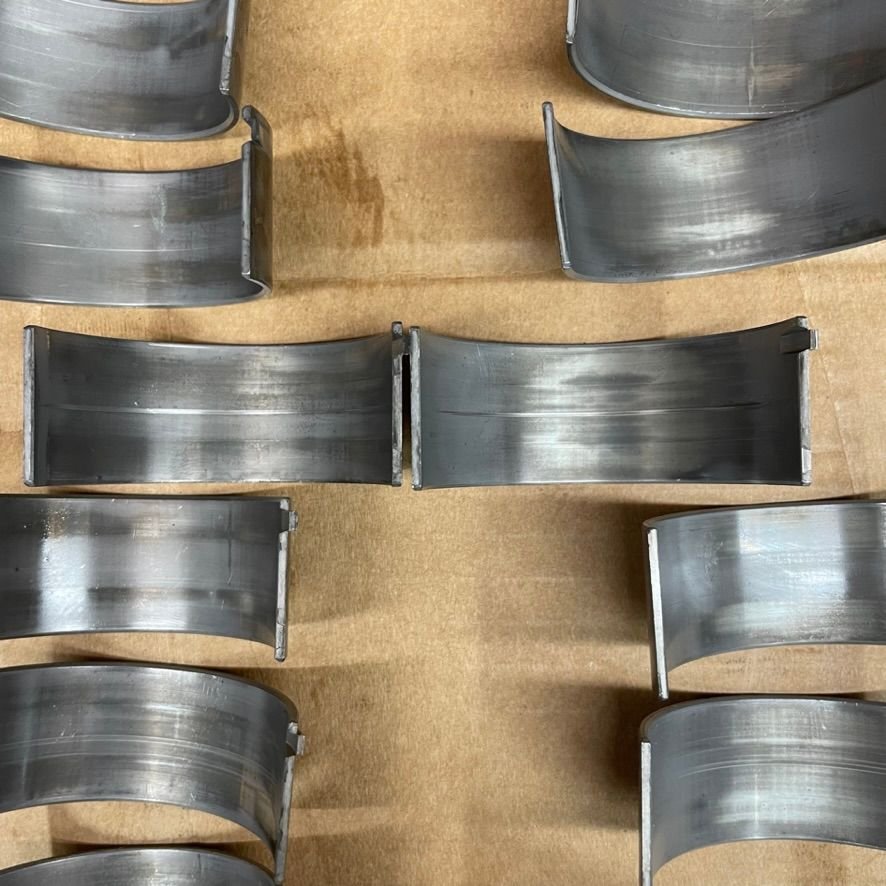
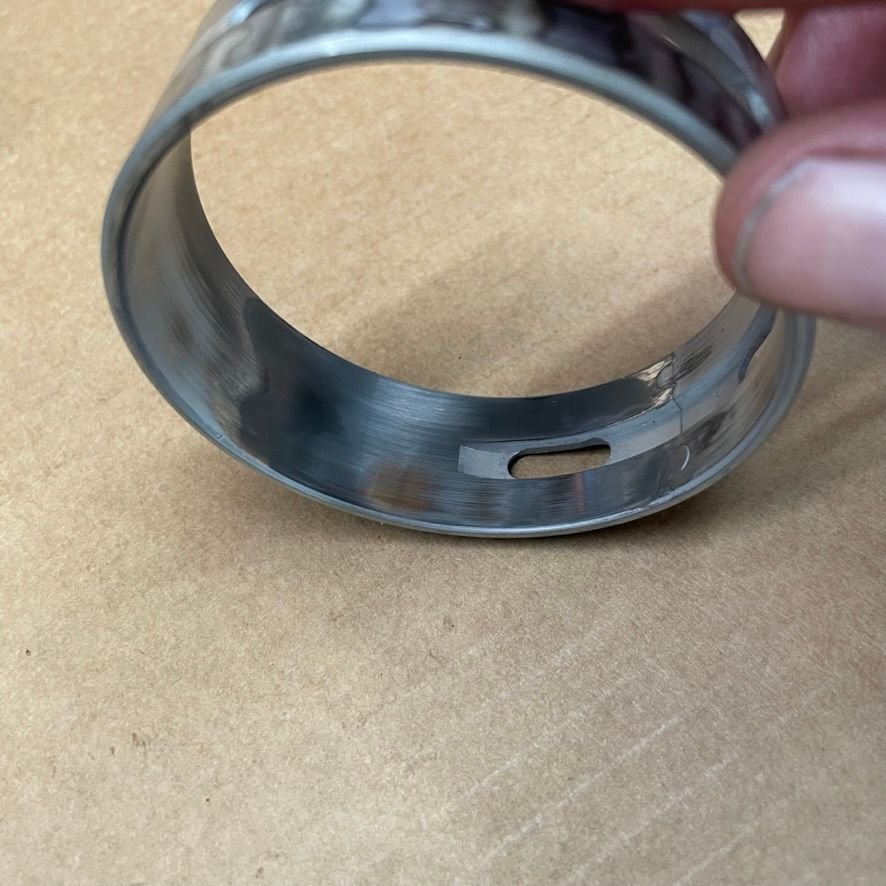
Here are some close-ups of the thrust bearing. Am I correct to understand Thrust Bearing Failure wear would show up as side loading wear on the bearing race? I don't see any wear here. As a reminder, the runout was measured at 0.1651mm (New Specification: 0.110 - 0.31 mm, Wear limit: 0.40 mm).
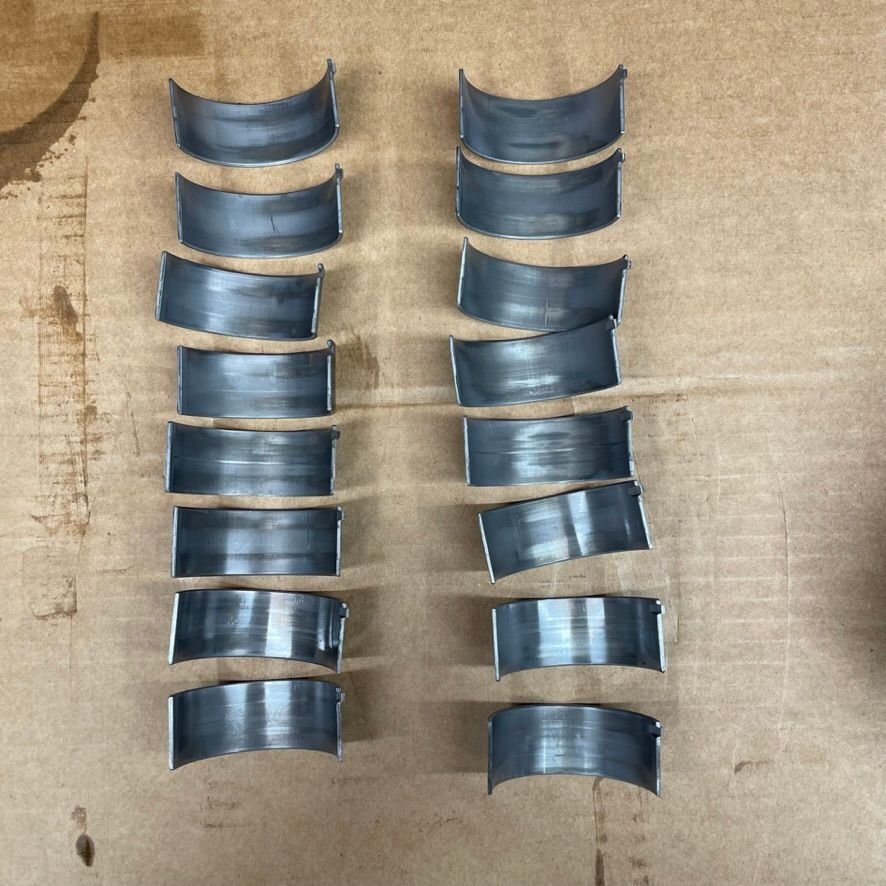
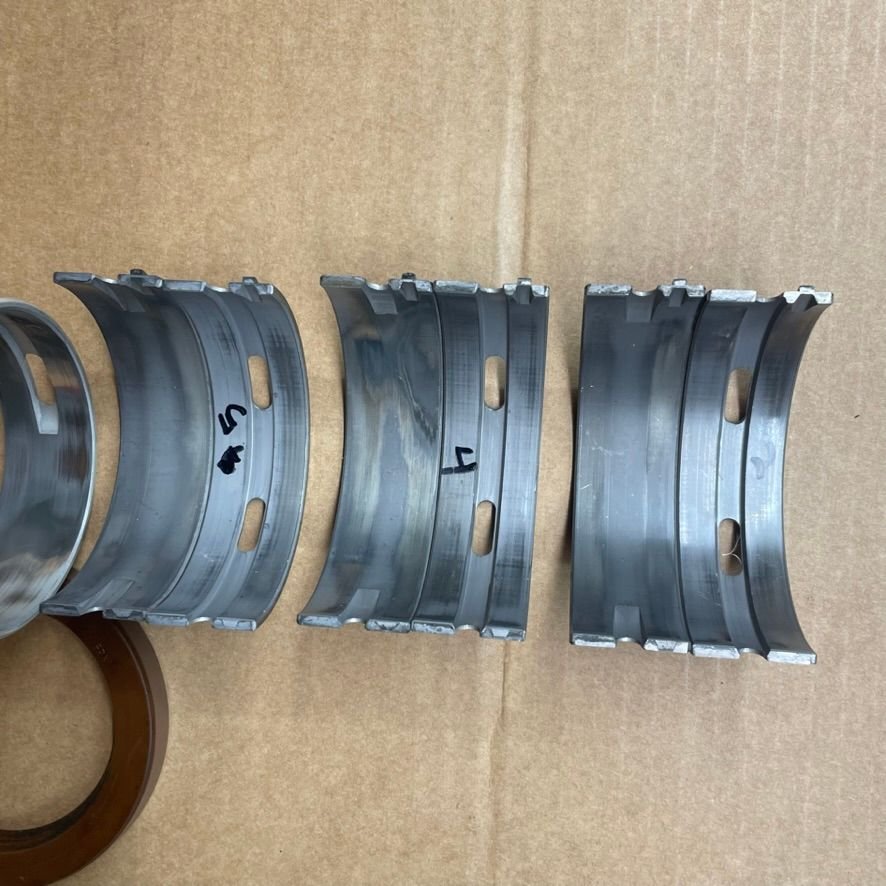
Here are the rest of the main bearings.
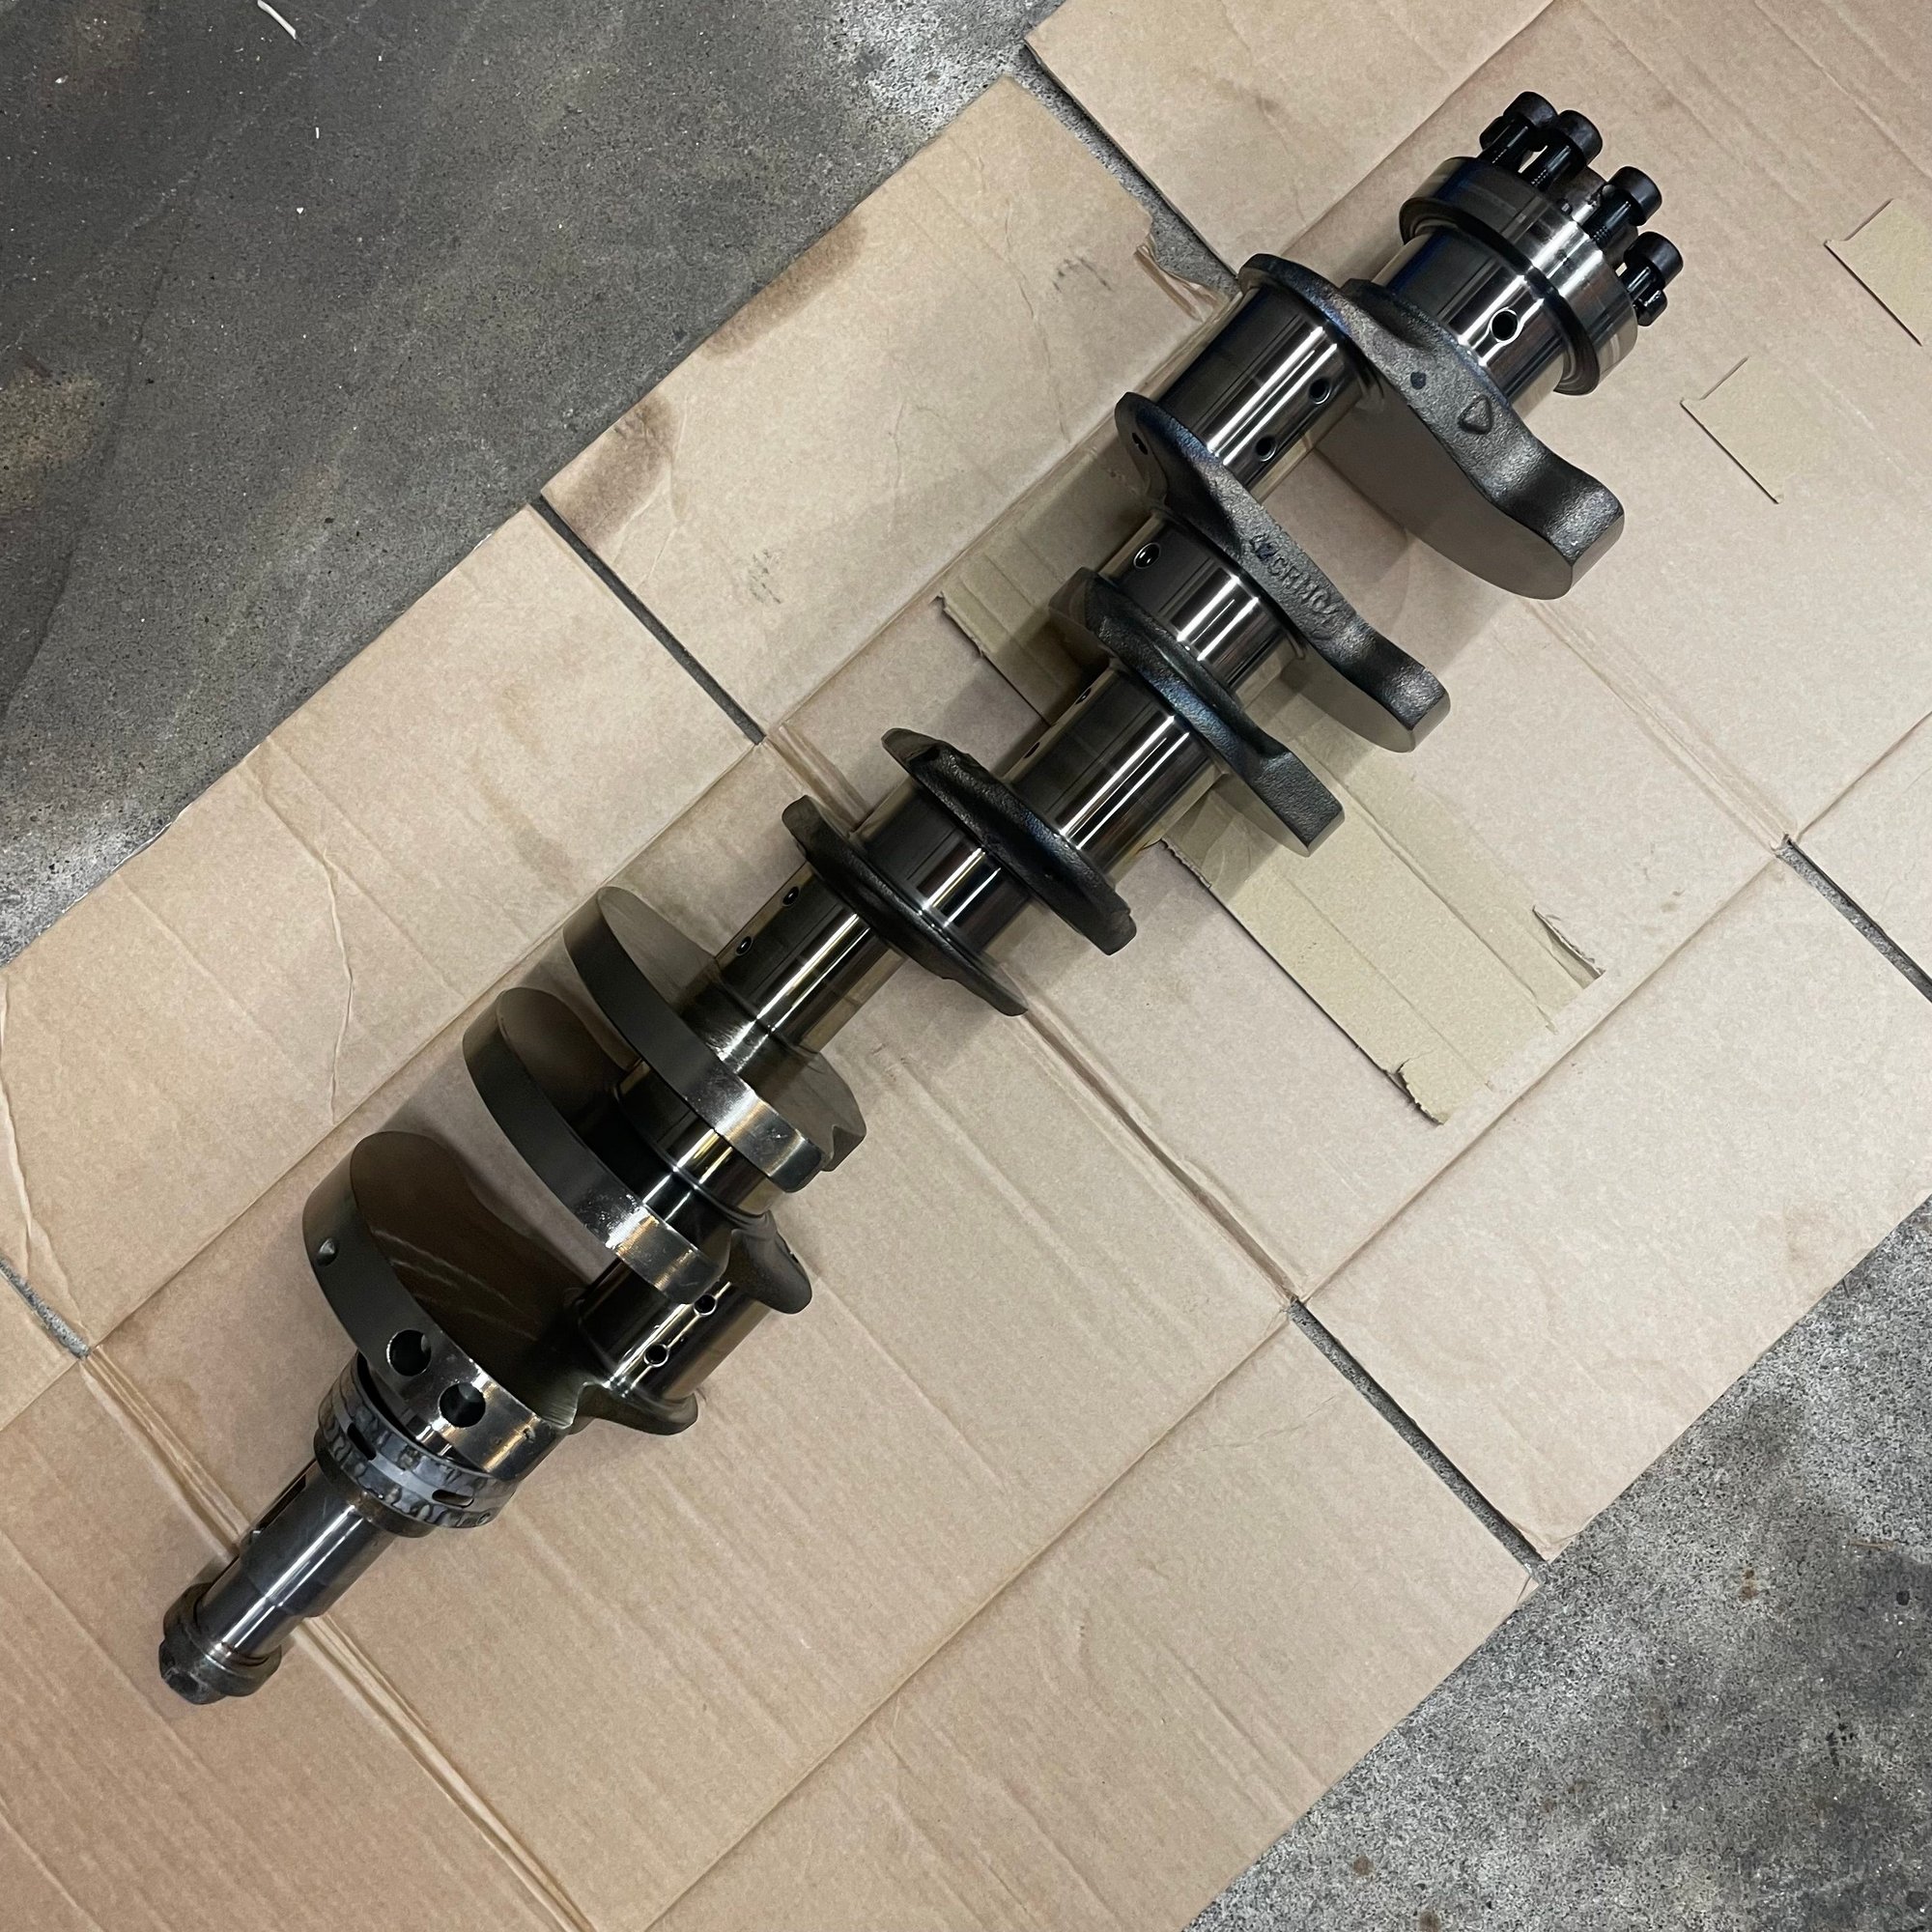
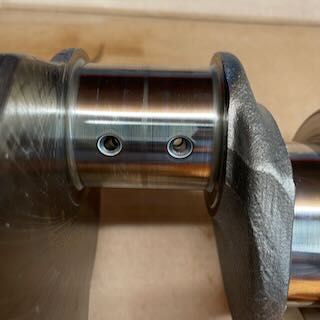
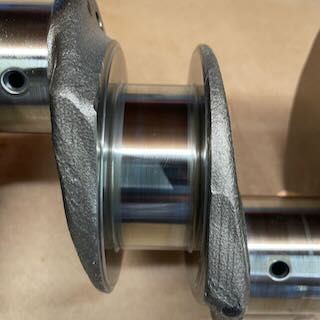
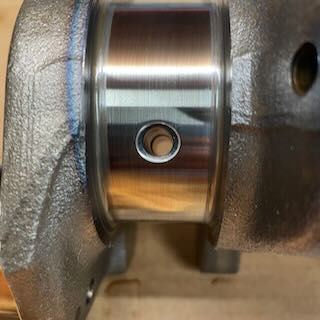
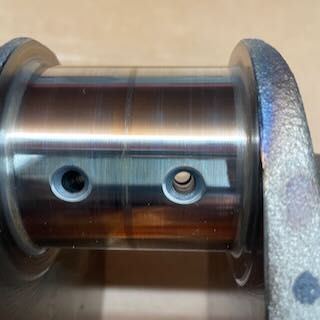
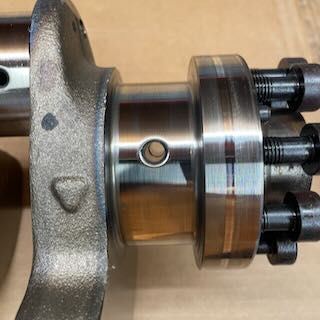
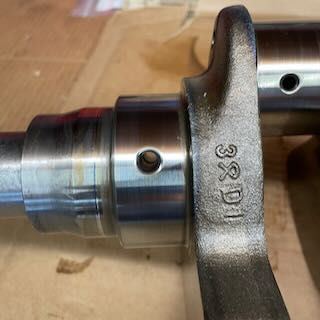
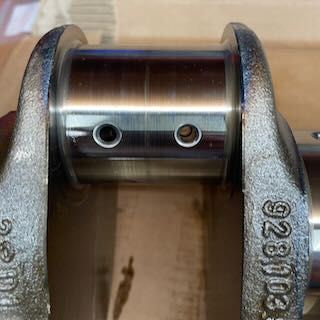
Here are some close-ups of the crank. It seems very clean
All the oil passages are perfectly clean
So now I have the block disassembled with the intention of having the deck resurfaced to get rid of the head gasket indentations. I have a bunch of questions:
Any special guidance for the machine shop on cleaning the block inside and out? There is a lot of coolant calcification in the water jacket. My understanding from a Chemist is these deposits will not impact cooling.
Should I bring the lower girdle in as well for cleaning?
On the lower girdle, should I leave the oil hose fittings installed? I have read that threads can break when removing the fittings.
Last edited by Michael Benno; 09-19-2023 at 02:35 AM.
Today, I inspected the bores with the pistons out...
Cylinder 4
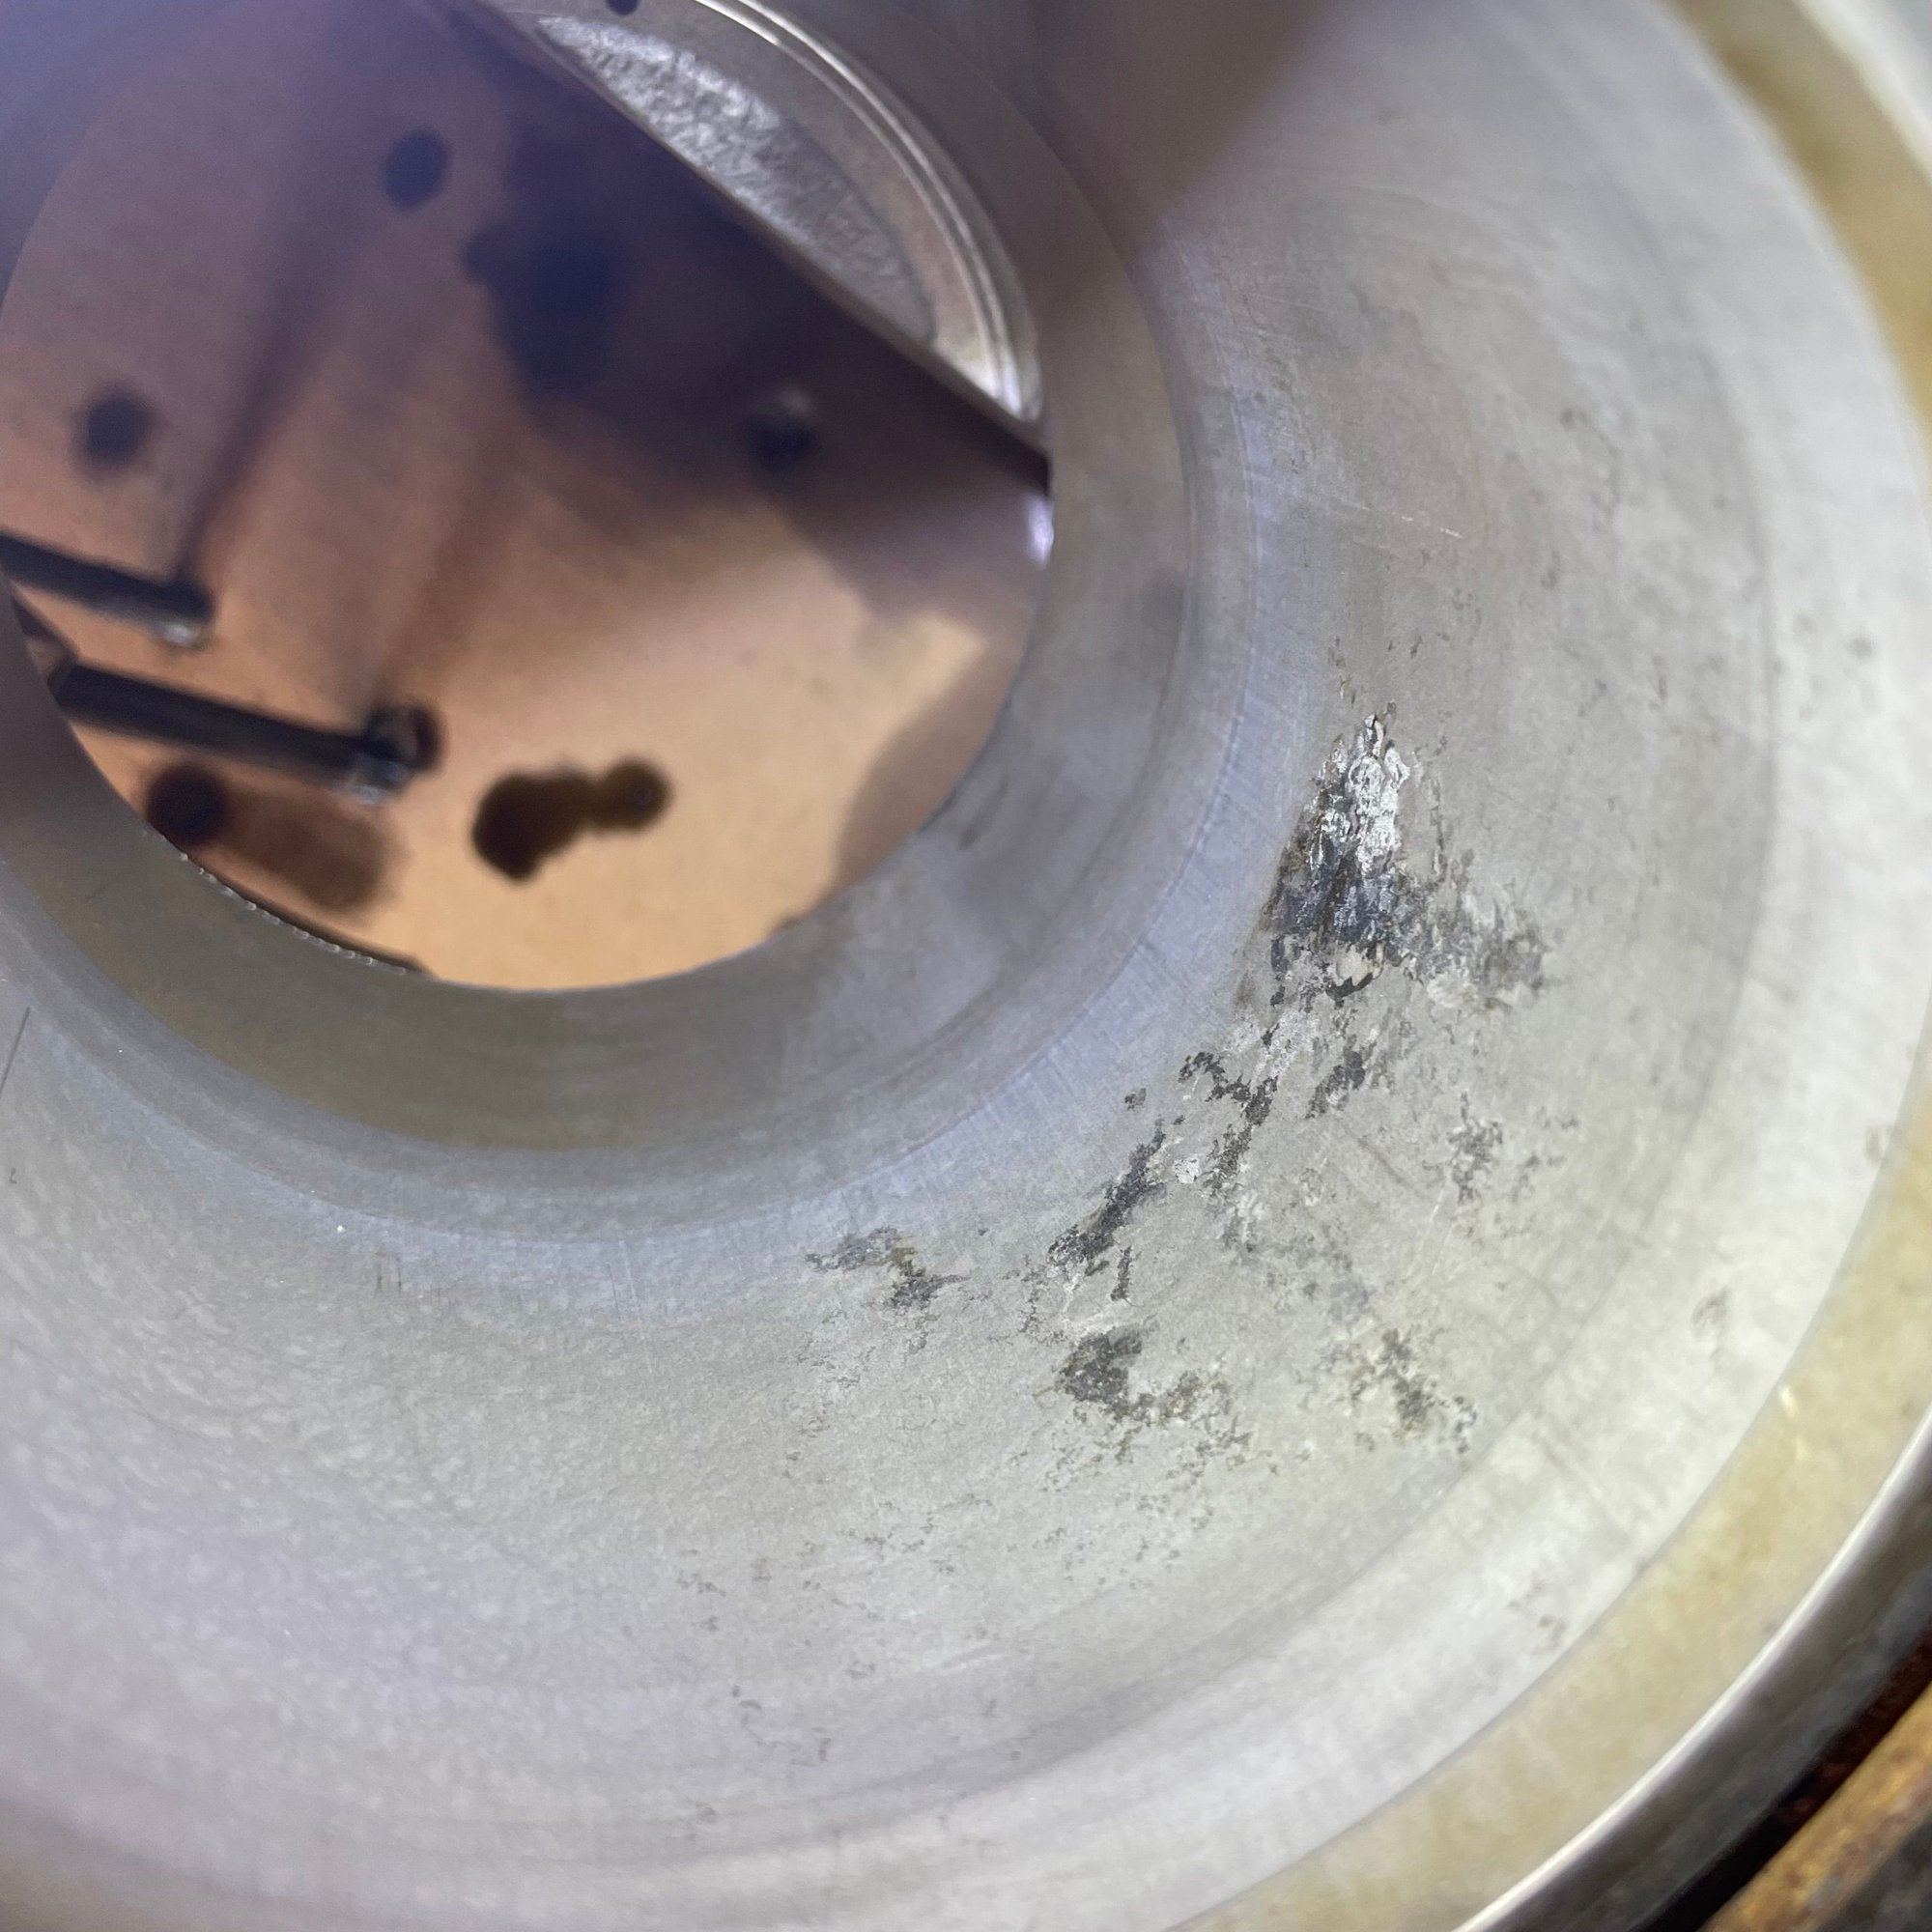
The bore has some light corrosion on the cylinder wall. I cleaned it well. However, the surface feels a little rougher with my fingernail.
Here is the corresponding piston. The rings are stuck and the corrosion aligns to the piston wall.
I cleaned the piston for a bit and was able to free the lower ring and oil ring, but the upper ring is still stuck.
Is this damage from moisture getting in there? I wonder if it was from me removing the heads. Maybe some coolant got in there and I missed cleaning it out. I sprayed mystery oil in there after removing the heads. Or maybe this is what was causing the engine to run rough before it was pulled. I don't see any evidence of HG failure.
Is this damage something that can be addressed with honing/polishing or will the cylinder need to be expanded to the first oversize? Can I just increase the size of one cylinder or do I need to do all of them? I'd appreciate your insights on how to approach this.
Last edited by Michael Benno; 09-19-2023 at 02:37 AM.
Very interesting indeed and frustrating that the block has this damage.
Greg, we are all enthusiasts and amateurs so we will be pleased if you part some of your rare time with us and explain what happened. The brown junk on the piston looks more like oil based than coolant.
I have at the moment a broken 445 hp tractor engine, two hours after leaving the dealers shop receiving new injectors and an high pressure pump the engine runs very rough and we found 10 gallons of diesel
in the oil pan.
A new engine is 50.000 � plus work, not funny for all involved parties. 15 t imobilised aren't easy to handle...
Several reasons why the piston and cylinder looks like that. A small problem from the beginning turning into a much bigger. I haven't enough experience with these alu-sil engines though, so I will be silent. I do hope you Greg have the time to inform everybody on your insights. Anxiously waiting for your response, hopefully with pictures..
When the rings seize like that it is usually due to over heating causing the oil to coke up -that can happen with a water pump failure but not on one piston only! Also the gunge on the side of the piston looks gummy rather than carbonised and looks more like it formed in the static condition rather than dynamically.
I also find the apparent corrosion on the cylinder bore somewhat puzzling. It sure looks as though the alloy has superficially corroded given the white powder that appears to have formed on the surface but that again looks as though it had to occur in the static condition. For that to happen the coolant [if that is what caused the event] would have to have acidised or so I would think. What I do not see are any signs that the rings were rusting - i would think they would be more prone to corrosion attack. Somewhat baffling to say the least. That the damage is on one side of the bore is also mystifying.
The head gasket looks as though it was pulled not a day too early. One can see signs of rust leaching through the aramd fibre sheeting. If you have the time and inclination it would be interesting to see a section of the gasket material lifted [where it appears to be more orangy brown in colour] to expose the steel barbed mesh underneath - something around the size of a coin. Remember the gasket is formed by pressing two sheets of klingerite type gasket material onto both sides of a barbed mesh.
Why is the cylinder wall so cloudy? Normally they look grey without nuances in color?
Is this from the stuck rings and is the damage on the side with the highest piston pressure?
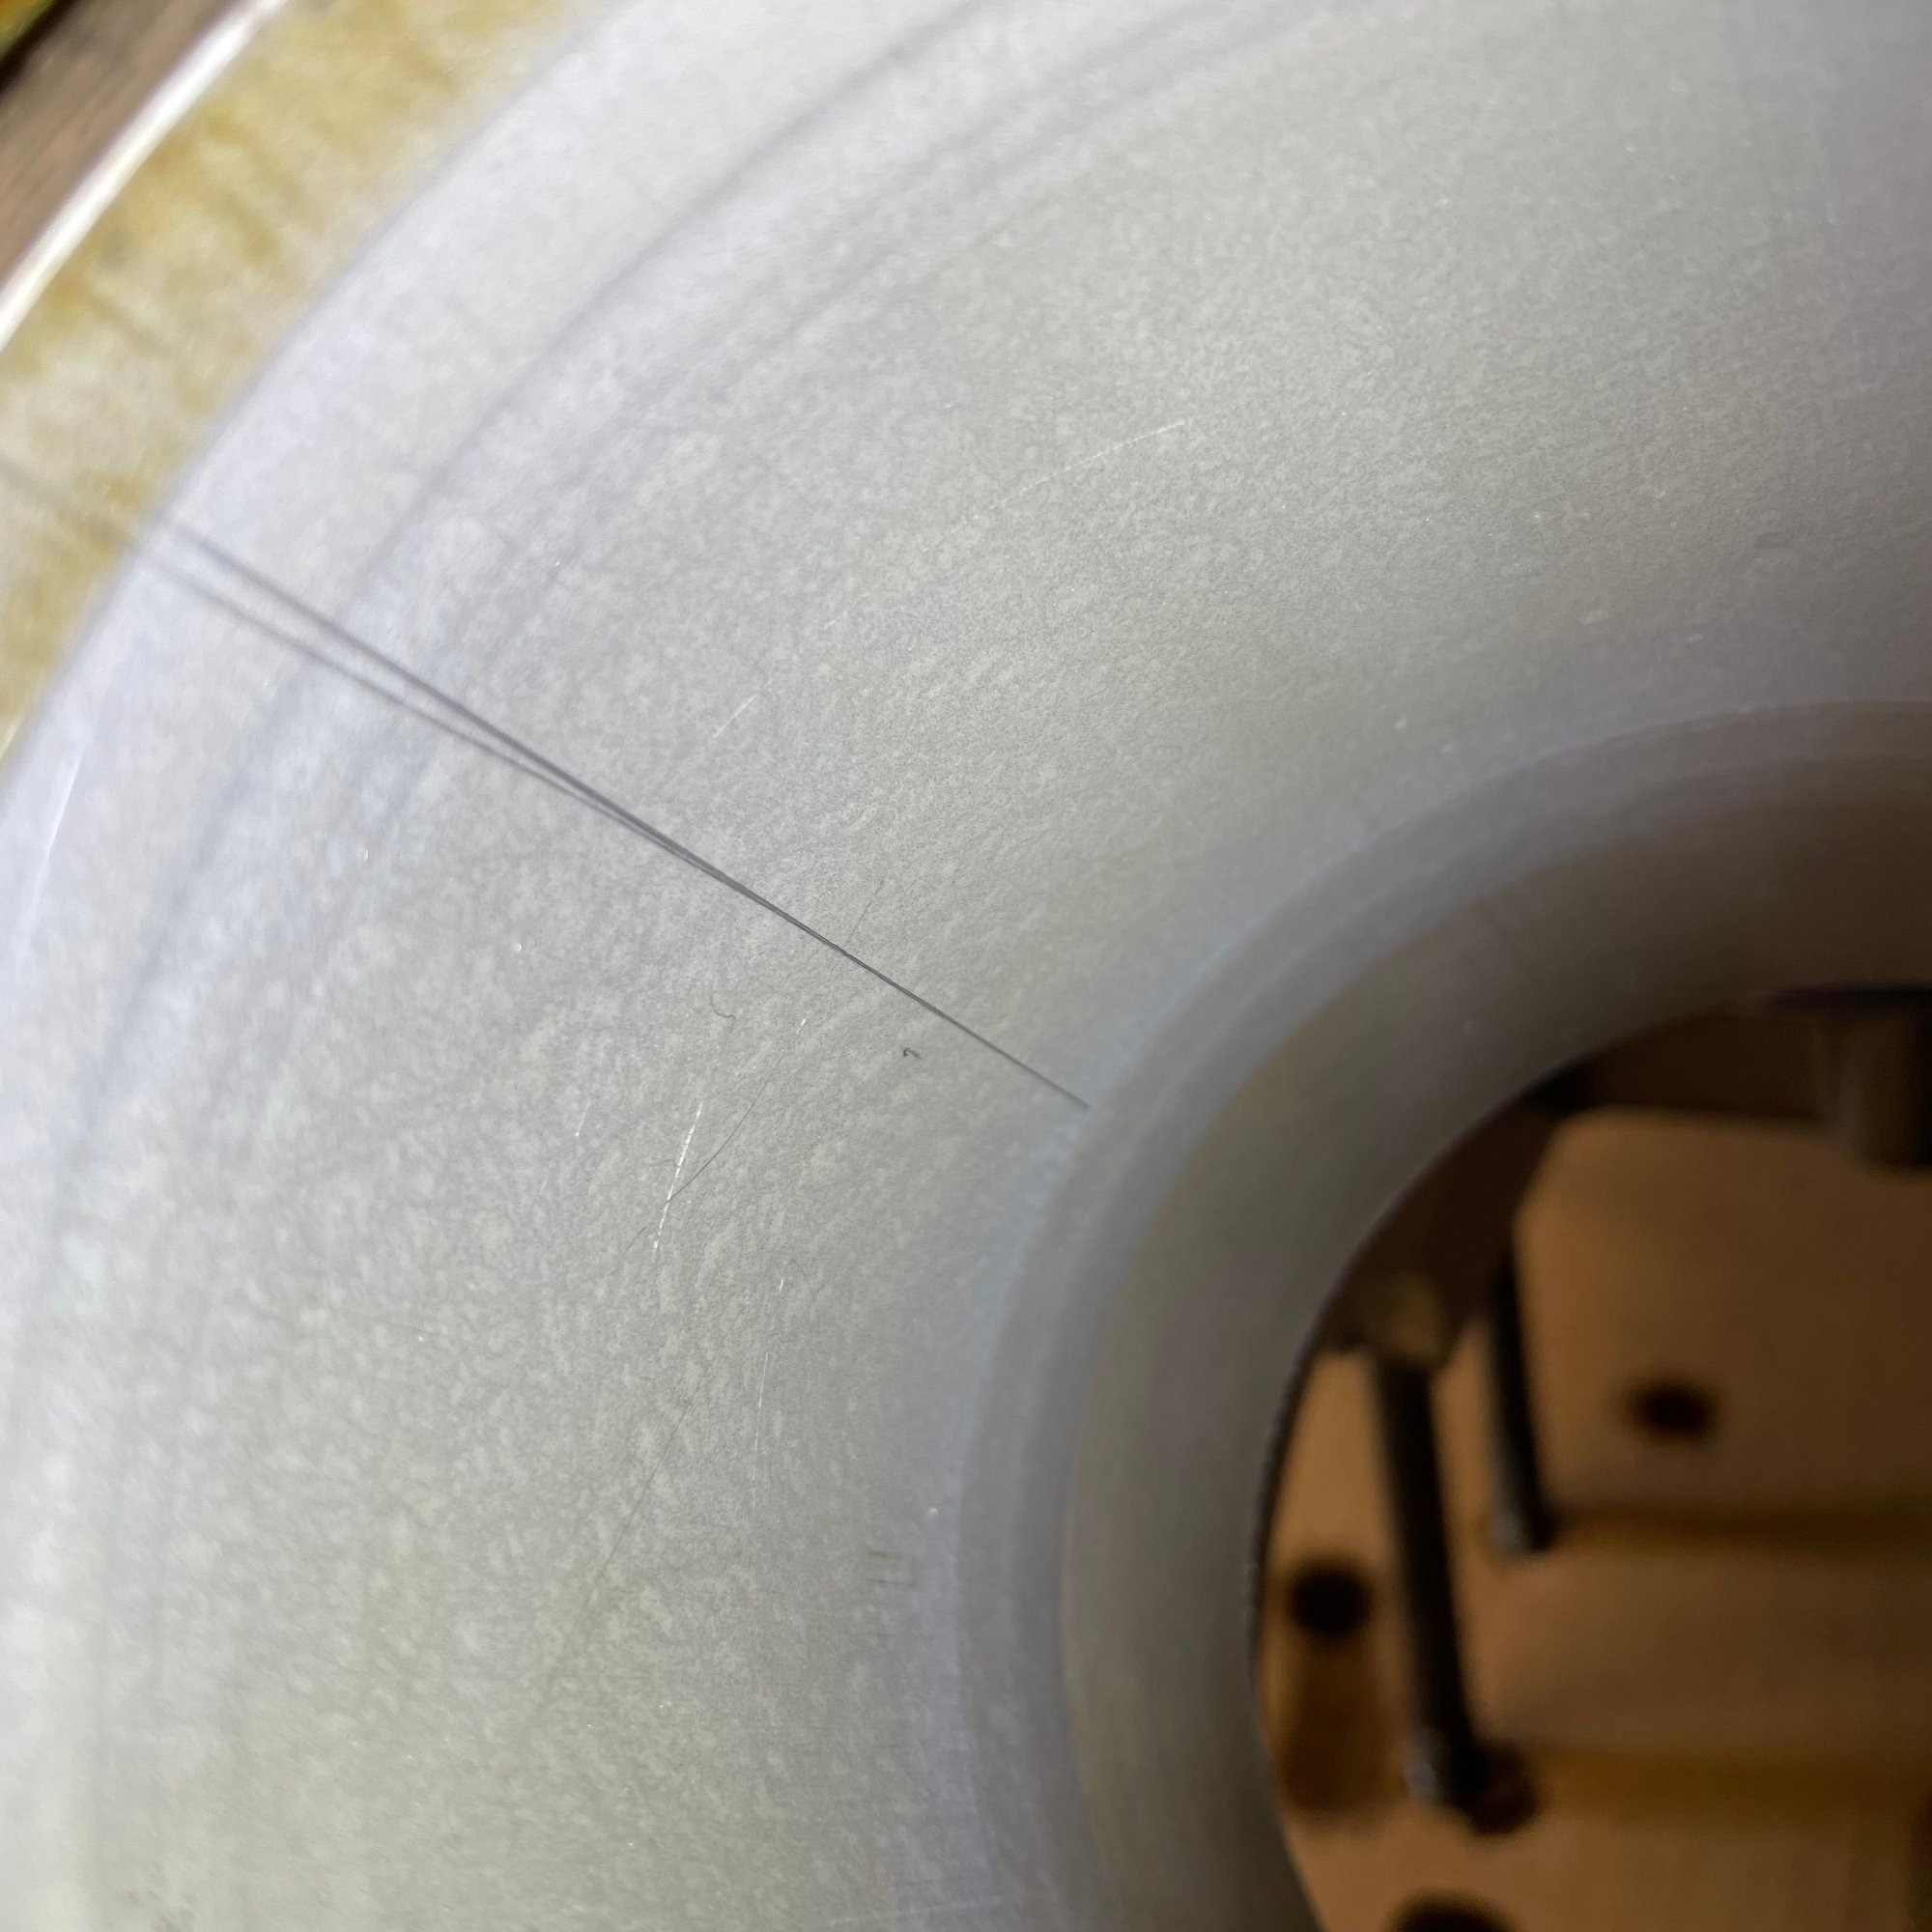
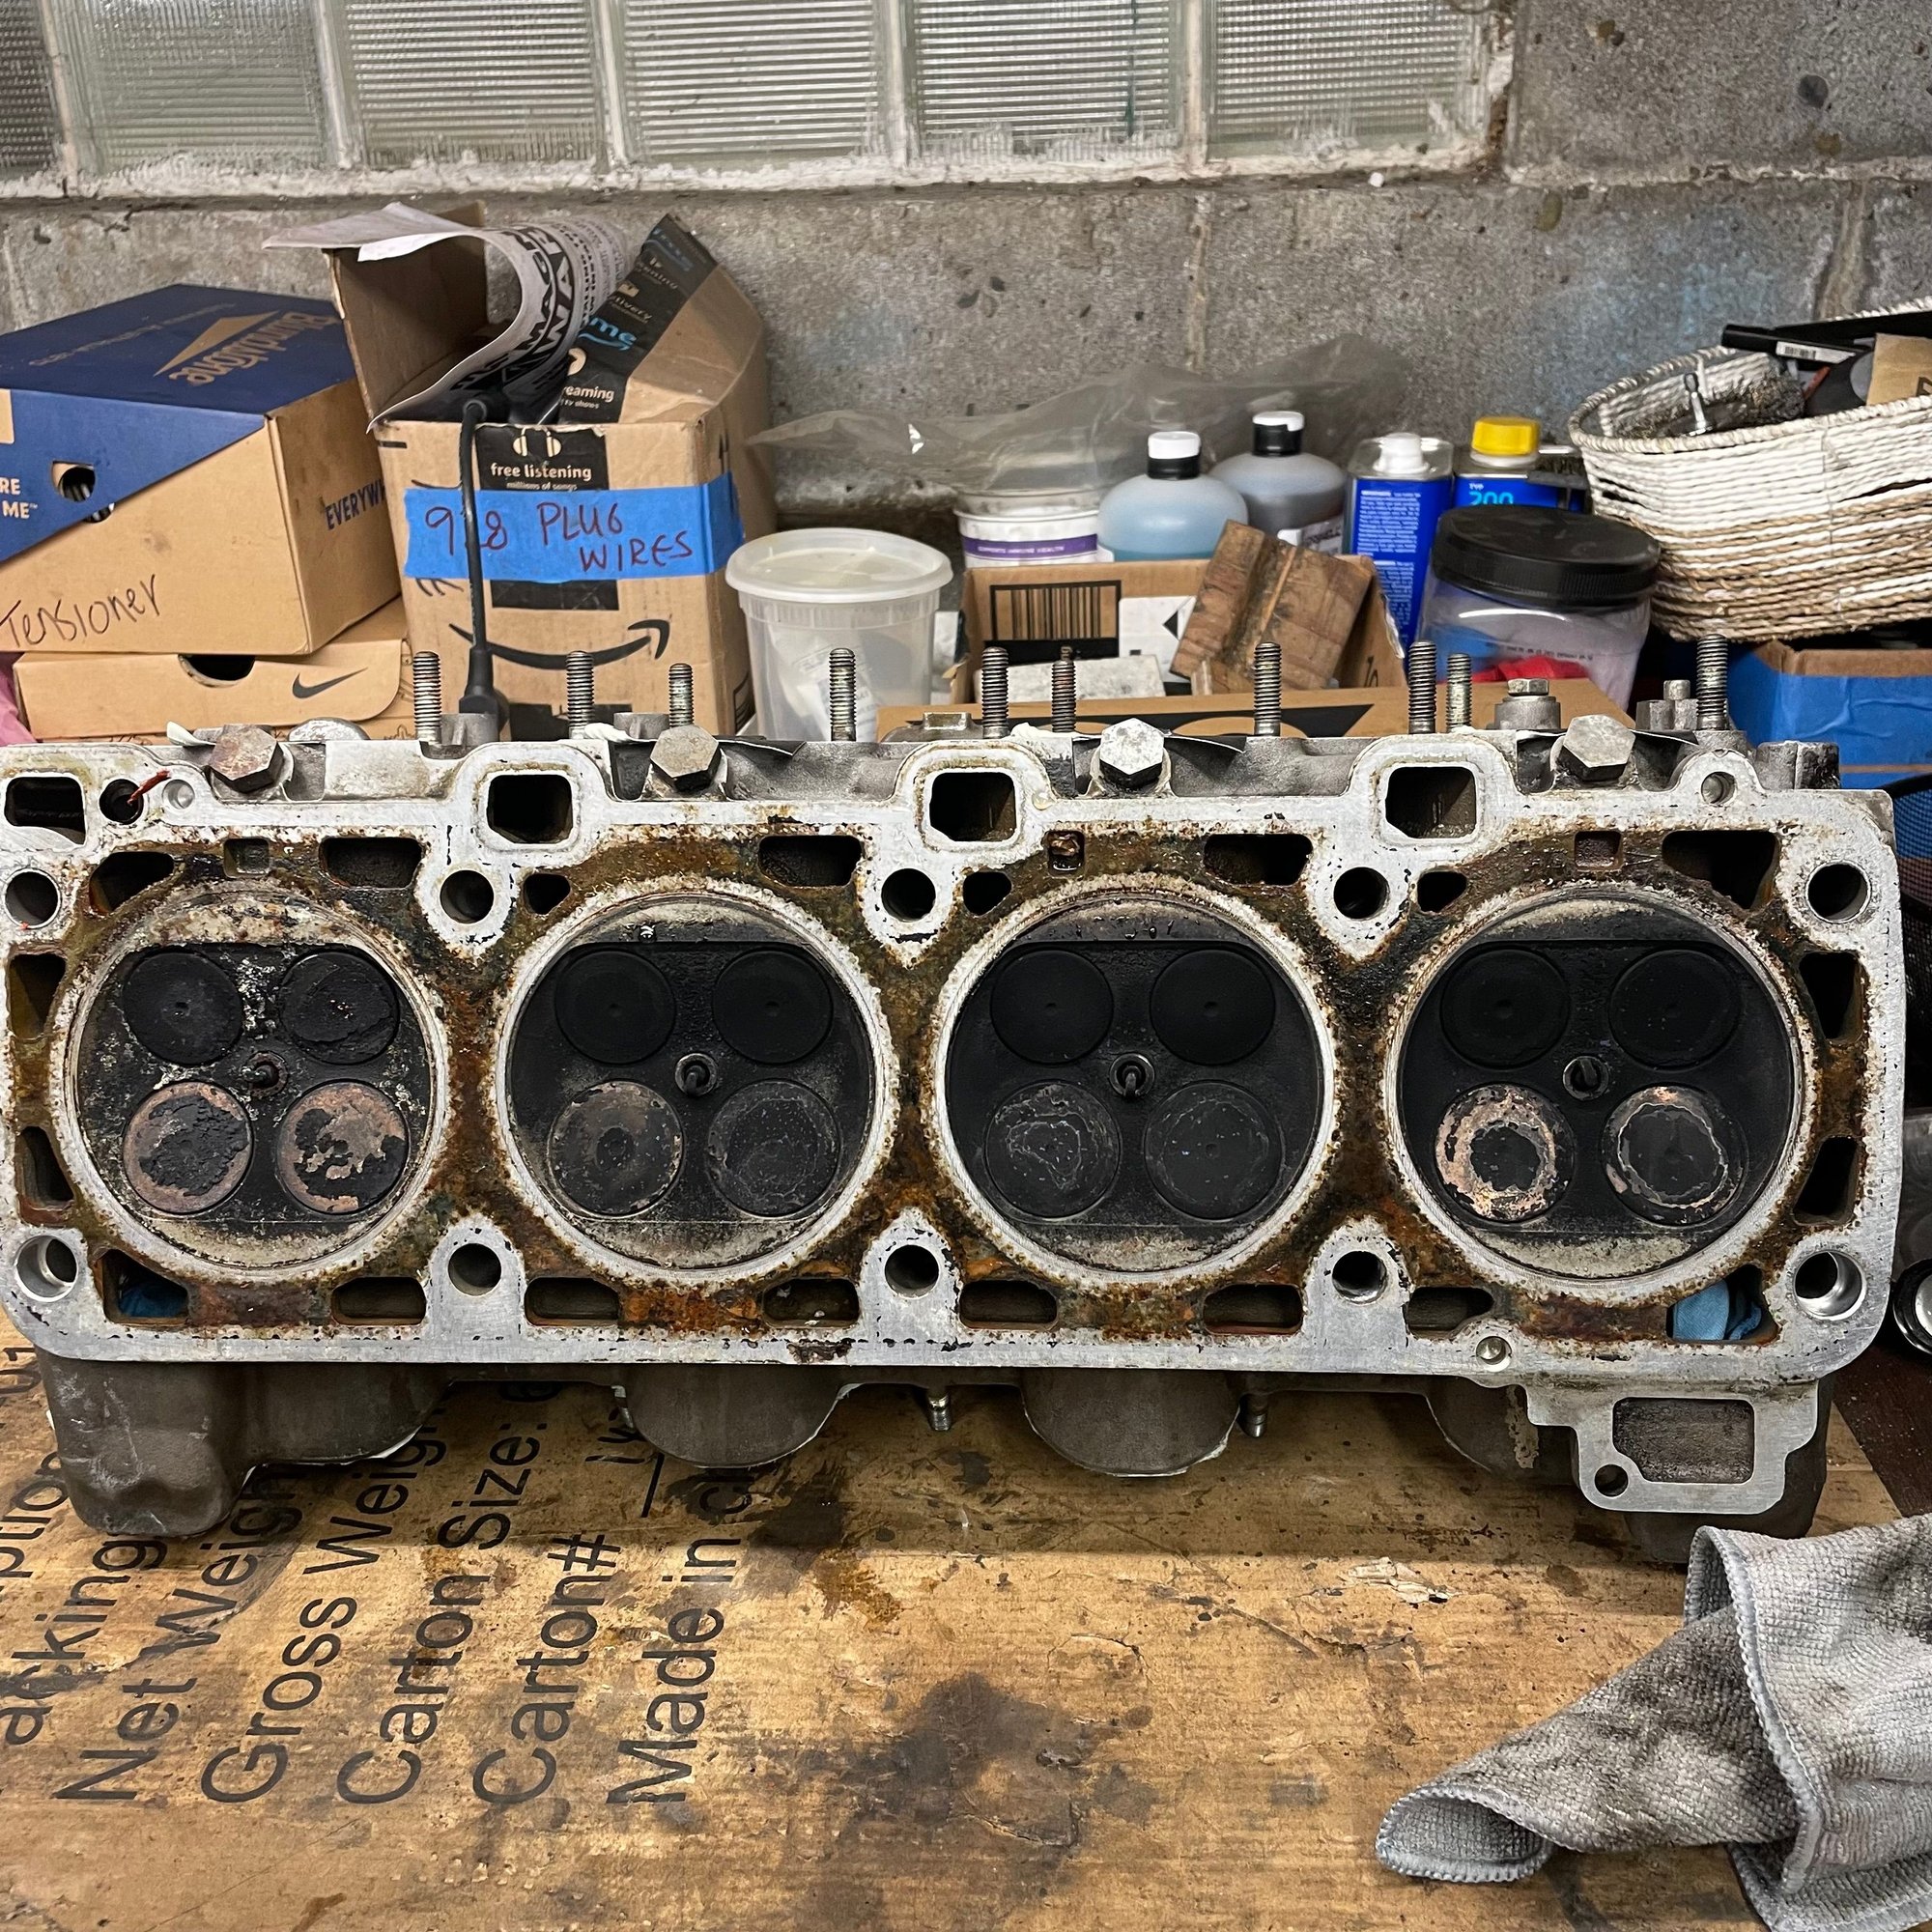
Still not exactly sure where to start from....so I'm going to go back a bit, in this thread and move one of Michael's pictures here:
Note the white residue in combustion chamber #4.
This is usually what coolant/water leaves behind....there's really no other source for this residue, in the combustion chamber.
Initially, I can't tell if this occurred from a blown head gasket or if somehow water got inside #4 cylinder when the engine was sitting.
However, right at the top of the #4 combustion chamber, note the two black areas, right were the fire ring would be.
Additionally, looking back at the pictures of the cylinder head port, I see no sign of any corrosion in any of the intake posts...which make water intrusion when sitting, less likely.
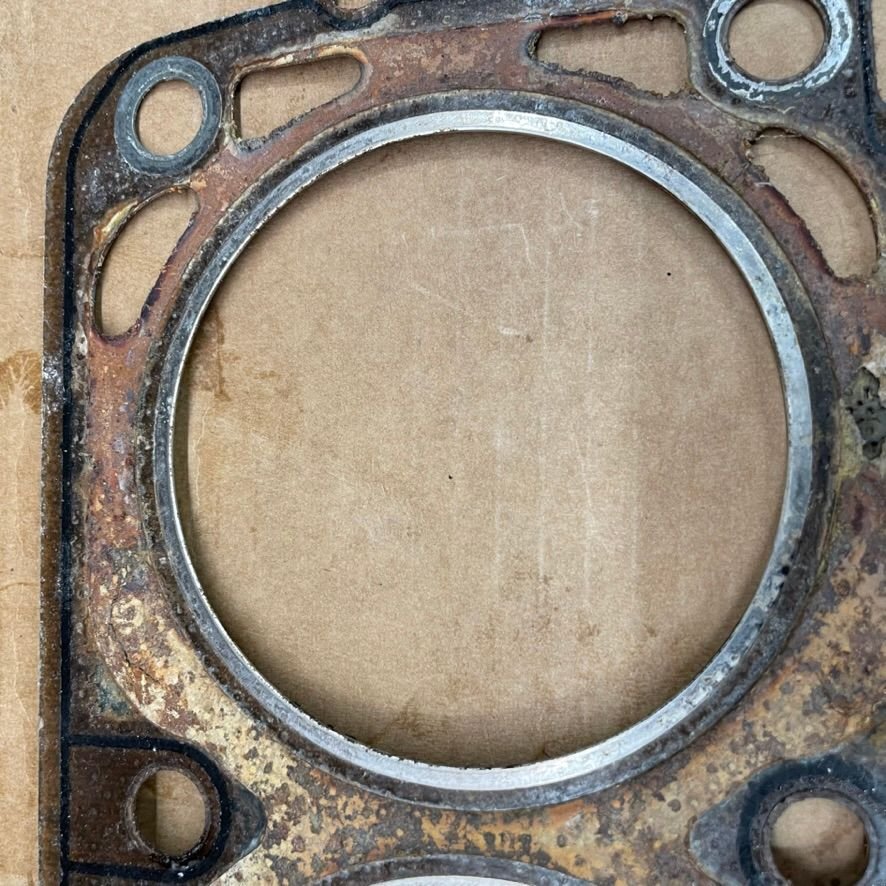
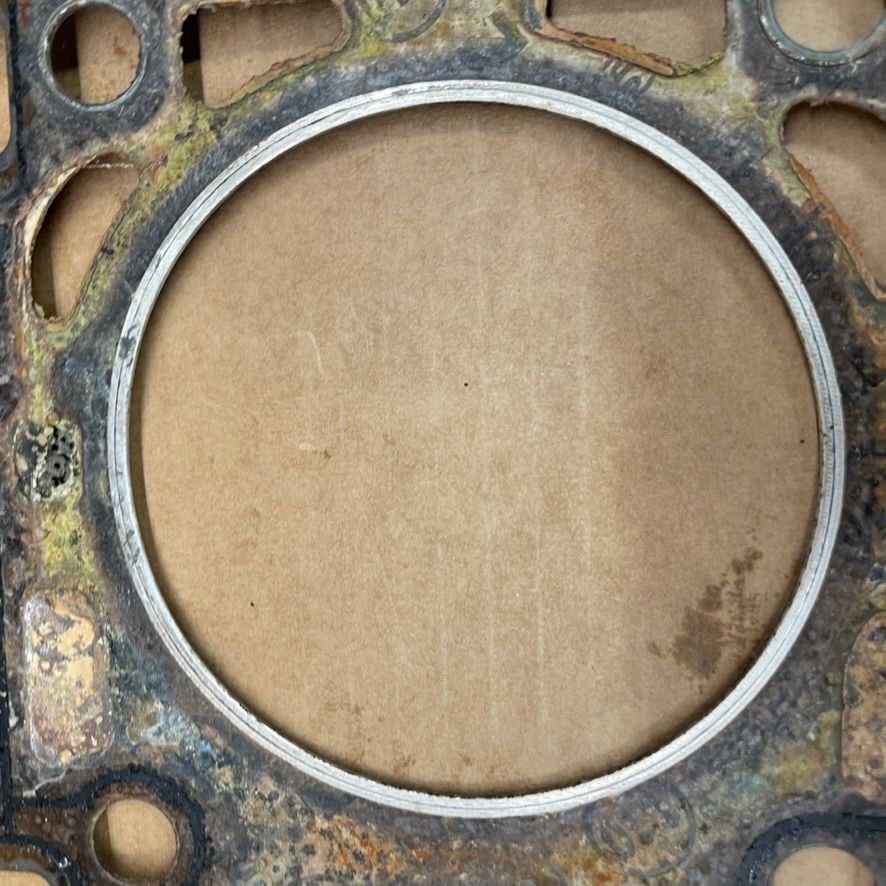
Next, study this picture:
This, of course is the cylinder side of a head gasket...either from #4 or from #8.
The black staining tells you that there was water either ready to flow into a cylinder, or already flowing.
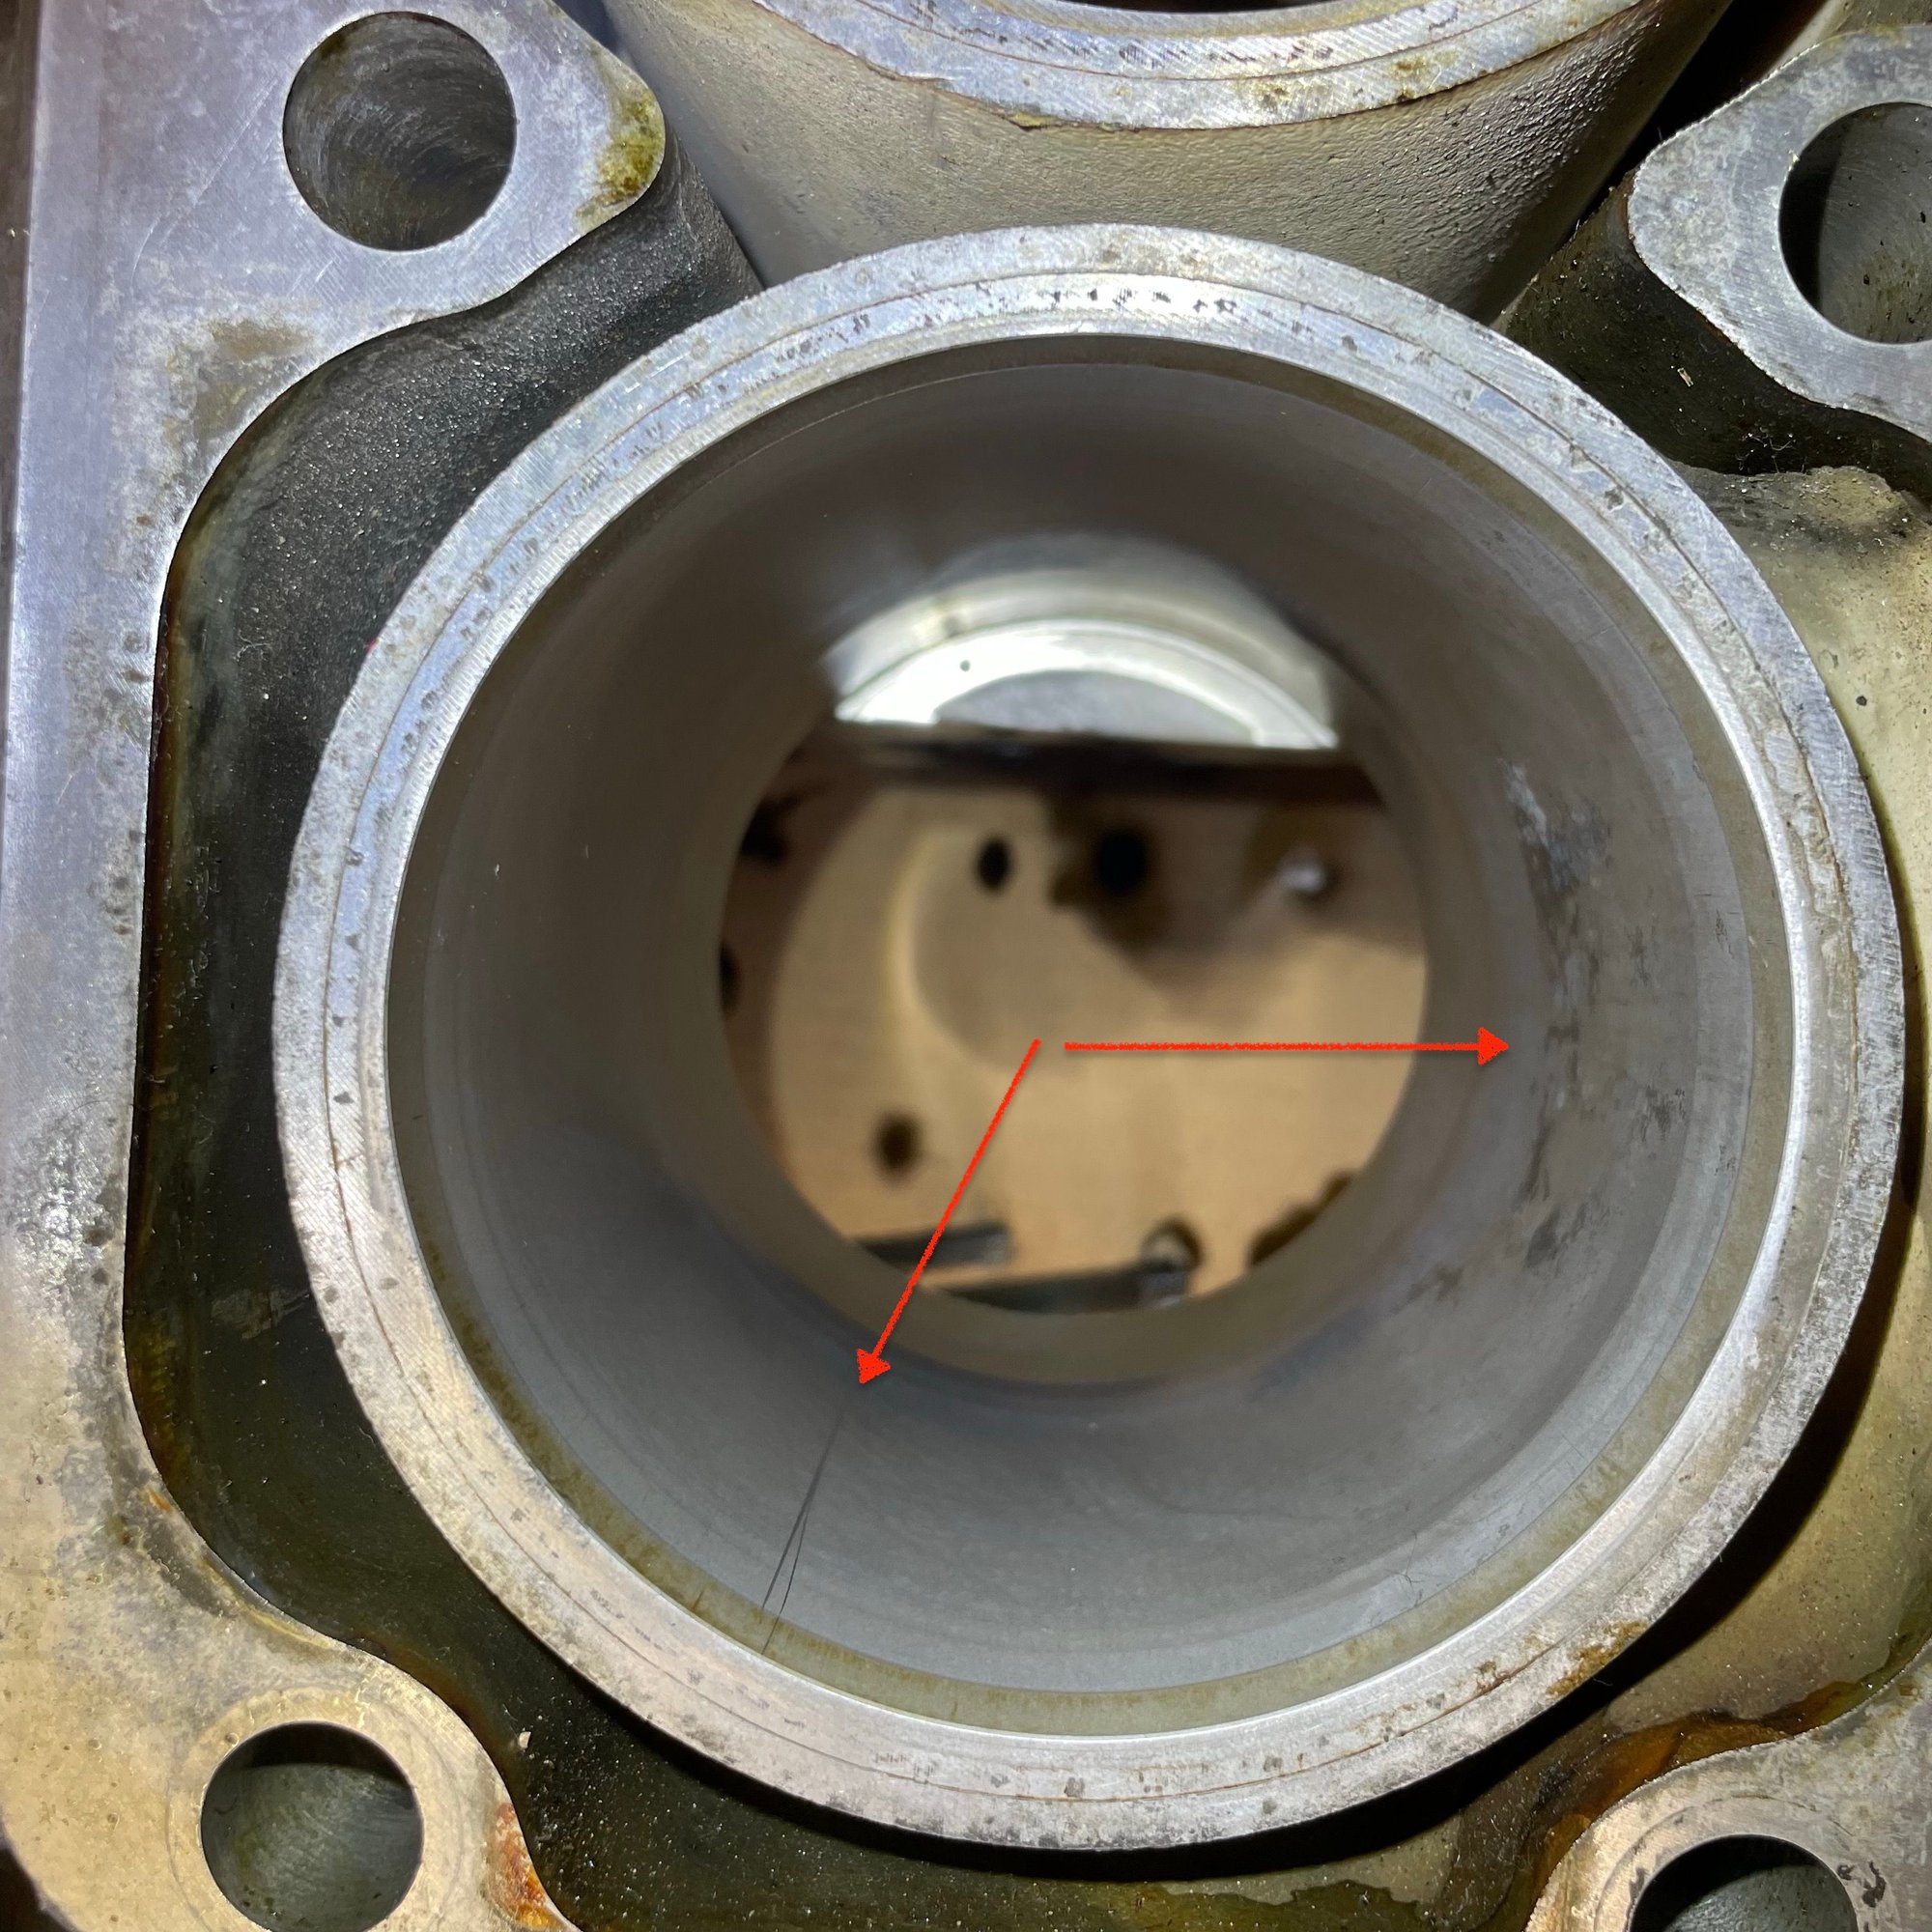
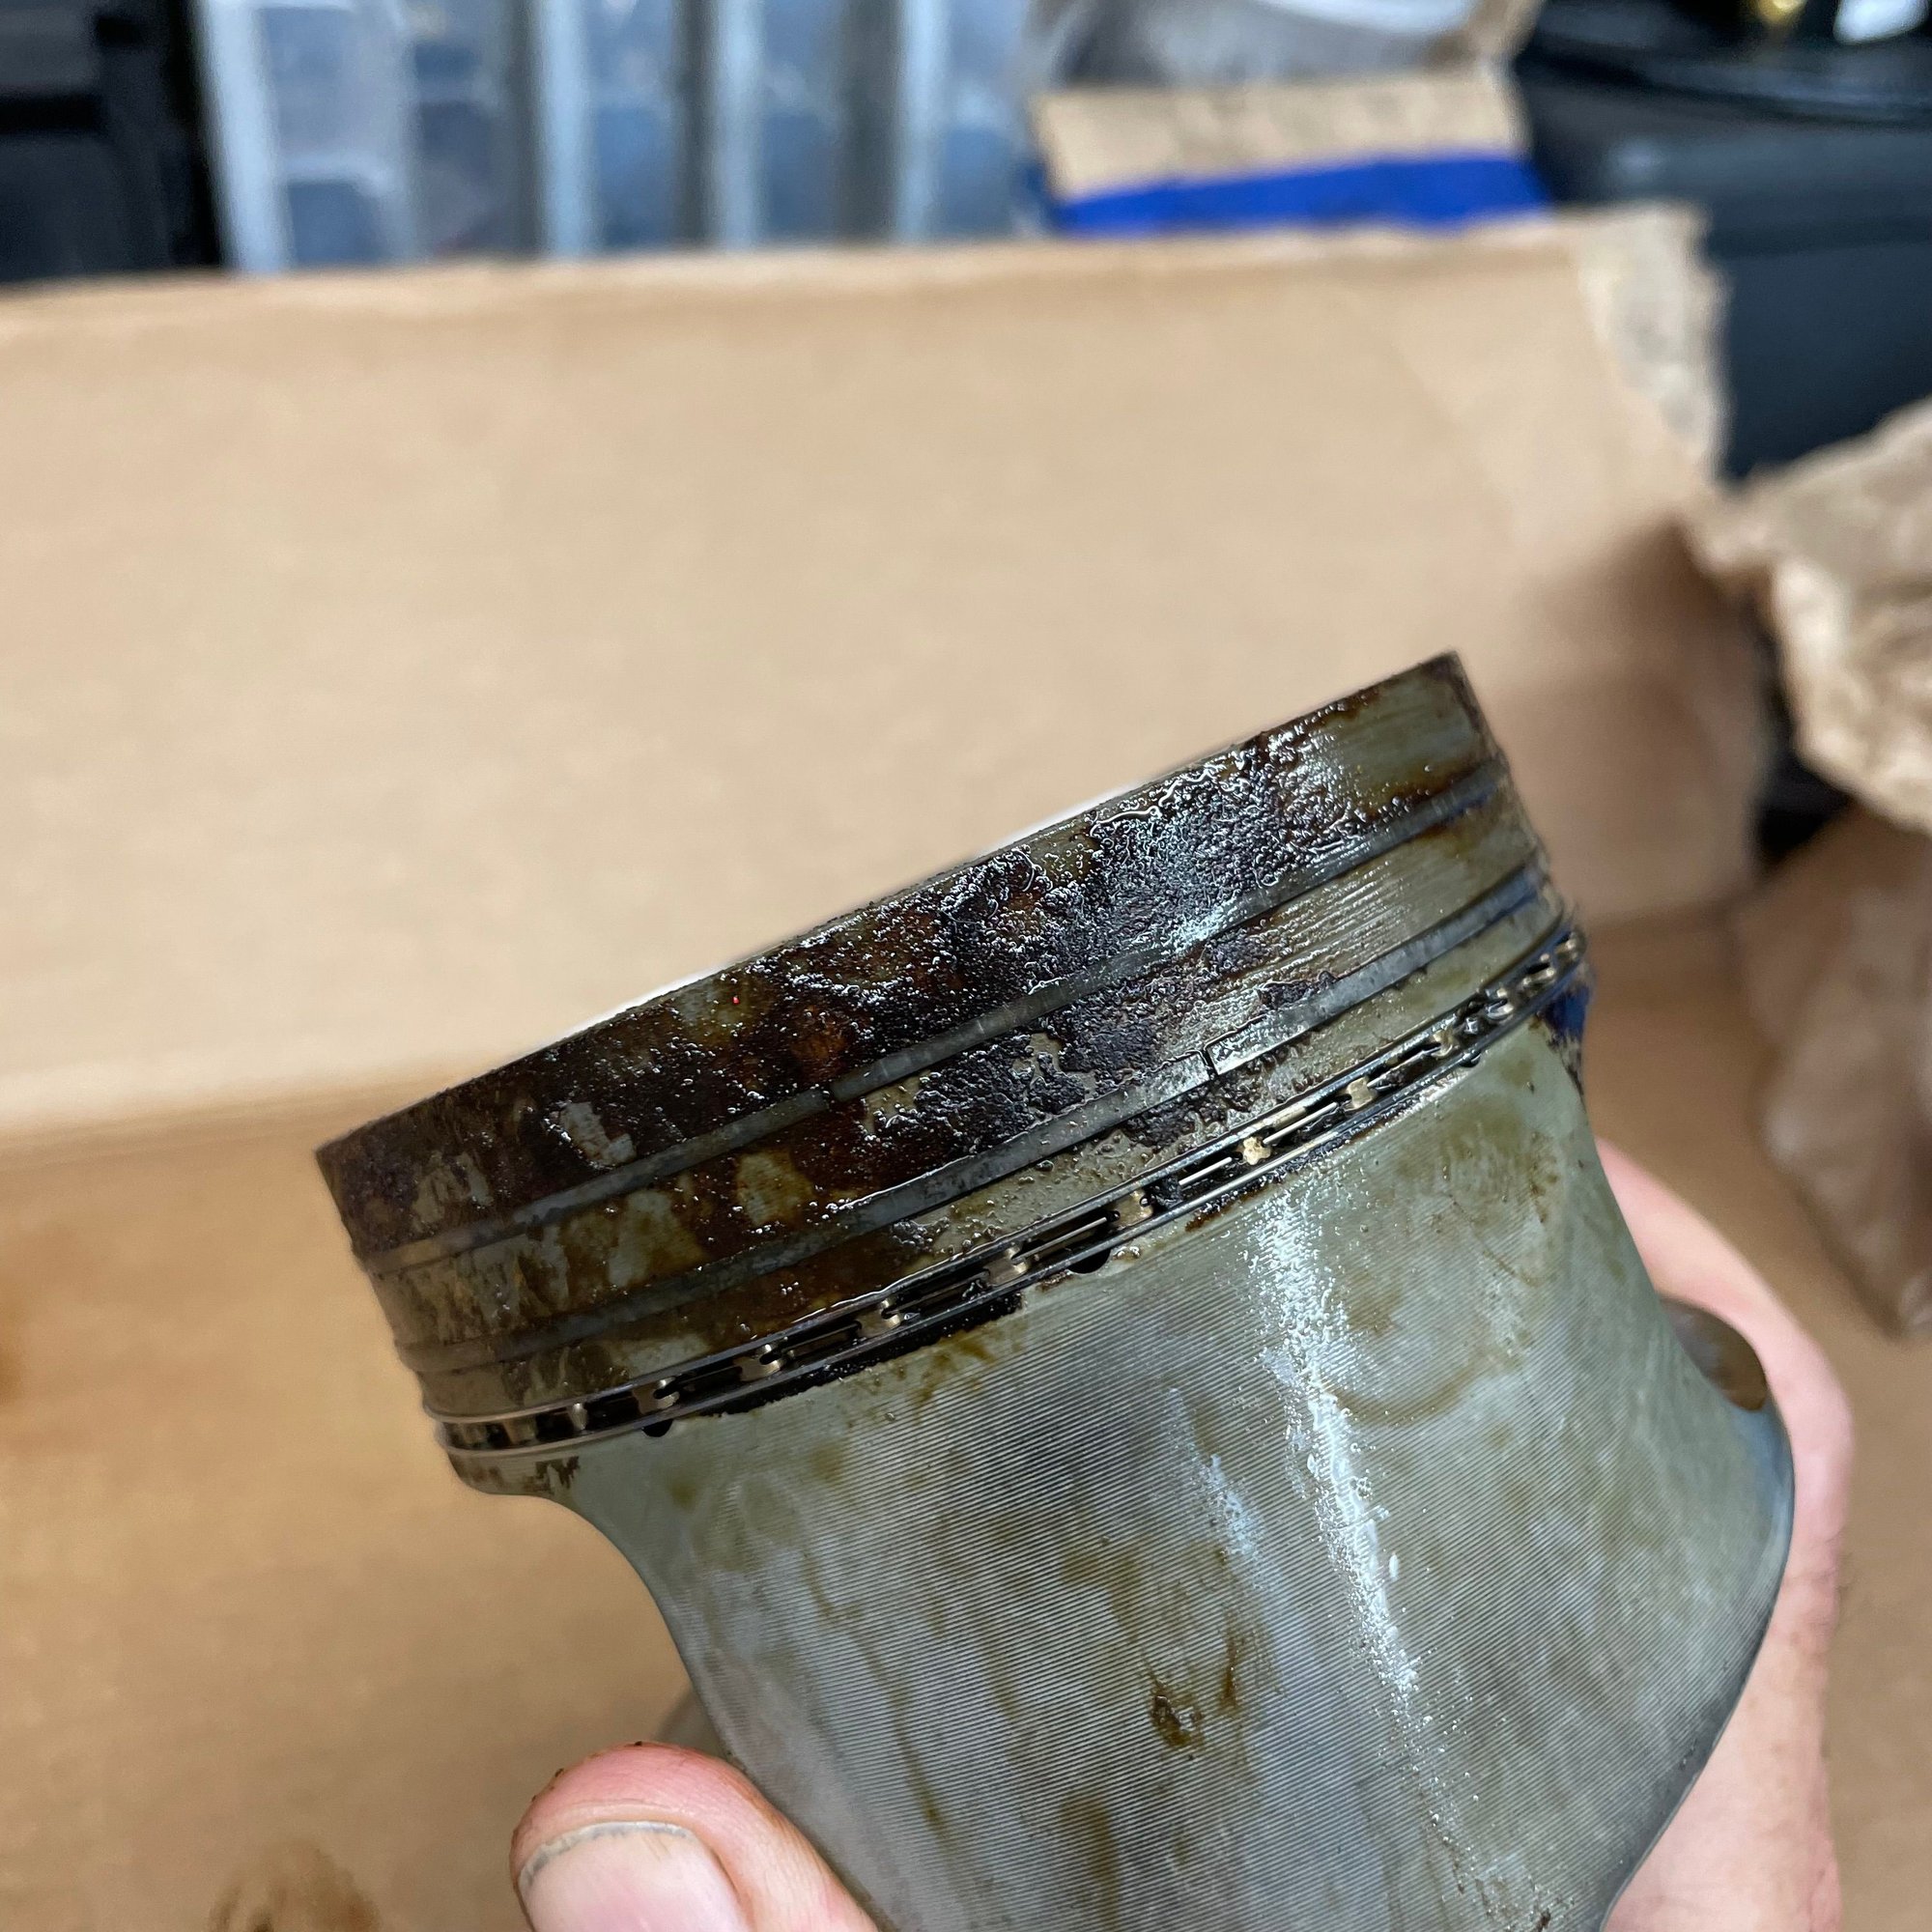
Now look at this picture, of the cylinder bore #4.
This is obviously water/coolant eating at the cylinder wall. The piston was down in the bore, just below where this stain is. There's a sharp line where the water sat above the top ring. In a couple of areas, the stain migrates lower, which just means it migrated past the top ring and made its way down to the second ring.
The rings on piston #4 being stuck is also likely due to water...however, if this engine seeped water into the combustion chamber after being hot and them cooling down (amazingly common for a 928 head gasket failure), the engine cold have certainly had a hydraulic issue, when the next time starting was attempted. This can compress the ring lands and also bend that connecting rod. (I'd certainly have that connecting rod checked. very carefully. If this engine had the cast rods, instead of the sintered rods, I would throw that rod in the trash, without even a second thought.)
I highly suspect that there was water intrusion into cylinder #4, in this engine, from the fire ring area of the head gasket.
The corrosion in cylinder #4 looks significant enough that I doubt "honing" alone will be sufficient. (I would certain try this and see how the cylinder looks, after honing.)
My guess is that cylinder #4 will require an oversize piston (which Porsche allows to be done, as a legitimate repair.)
The rings on piston #4 being stuck is also likely due to water. However, if water seeped into the combustion chamber after being hot and then cooling down (amazingly common for a 928 head gasket failure), the engine could have certainly had a hydraulic issue when the next time starting was attempted. This can compress the ring lands and also bend that connecting rod. I'd certainly have that connecting rod checked. Very carefully. If this engine had cast rods, instead or the sintered rods, I would throw that rod in the trash, without even a second thought. I highly suspect that there was water intrusion into cylinder #4, in this engine from the fire ring area of the head gasket. The corrosion in cylinder #4 looks significant enough that I doubt "honing" alone will be sufficient. I would certainly try this and see how the cylinder looks after honing. My guess is that cylinder #4 will require an oversize piston (which Porsche allows to be done, as a legitimate repair.)
Howdy Greg! Thanks so much for taking the time to help explain the causes and digging up the old photos to help illustrate the issues. Super informative!
Block Repairs: I'll bring the block in for the necessary repairs. I have found a local machine shop that is familiar with Alusil blocks (Mercedes and BMW) and cylinder repairs.
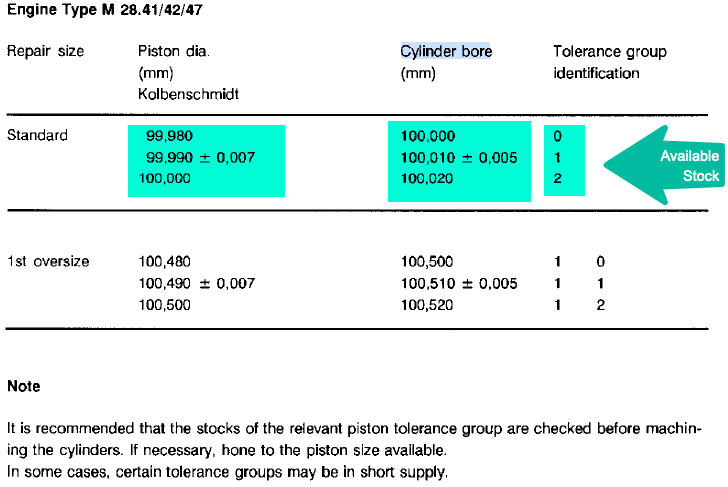
Oversize pistons: The WSM suggests finding stock on piston sizes before boring out the cylinder, which makes obvious sense to me. I found stock for standard tolerance groups 0, 1, and 2, but I could not find available stock for the oversized tolerance groups. Hopefully, the cylinder can repaired by removing up to 0.020mm, beyond that I am not sure where to find an oversize piston.
Originally Posted by GregBBRD
I'd certainly have that connecting rod checked. Very carefully. If this engine had cast rods, instead or the sintered rods, I would throw that rod in the trash, without even a second thought.
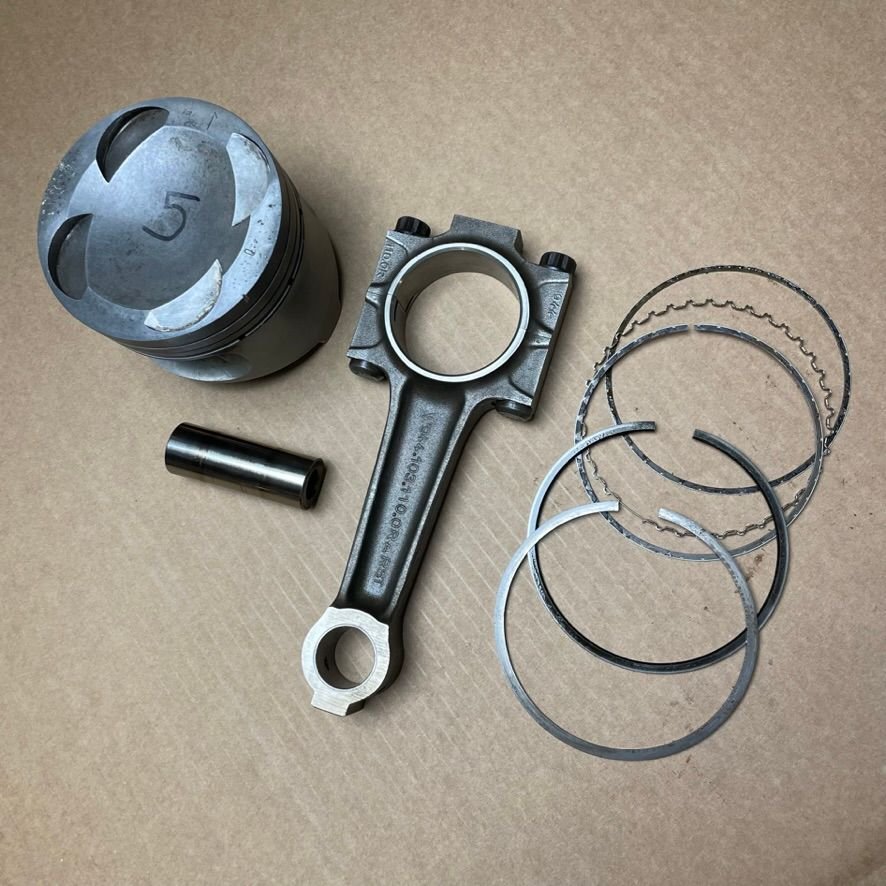
Rods: The connecting rods in the motor are stamped with the part number 944-103-110-0RARST. Can you confirm this is a forged rod? I can have it inspected for damage at the machine shop and get a replacement from Mark if needed.
edit: updated photo with correct cylinder
Last edited by Michael Benno; 09-20-2023 at 04:18 PM.
Howdy Greg! Thanks so much for taking the time to help explain the causes and digging up the old photos to help illustrate the issues. Super informative!
Block Repairs: I'll bring the block in for the necessary repairs. I have found a local machine shop that is familiar with Alusil blocks (Mercedes and BMW) and cylinder repairs.
Oversize pistons: The WSM suggests finding stock on piston sizes before boring out the cylinder, which makes obvious sense to me. I found stock for standard tolerance groups 0, 1, and 2, but I could not find available stock for the oversized tolerance groups. Hopefully, the cylinder can repaired by removing up to 0.020mm, beyond that I am not sure where to find an oversize piston.
Rods: The connecting rods in the motor are stamped with the part number 944-103-110-0RARST. Can you confirm this is a forged rod? I can have it inspected for damage at the machine shop and get a replacement from Mark if needed.
It's a sintered rod, not forged or cast. Basically, they take a whole bunch of tiny chunks of metal and squeeze it together under very high pressure. Almost like forging, but starting with tiny pieces of metal, instead of an entire chunk. Should be good reference material on the Internet.
Very robust...I've never seen one broken. There's a few other sintered pieces in these engines....the triangular cam drive pieces obviously are.
The resulting metal has special properties which make the process very worthwhile. One of these is that the resulting part will be very resistant to compression forces. Note that the cam drive "triangles" rarely have any compression marks and do not distort (although if left loose, they will crack at the keyway.) Carl made some "more robust" of these items out of billet. Terrible idea...these will wear into the camshafts and come loose....guaranteed. (That's why Porsche made them from sintered metal instead of billet.)
Have the machine shop check this rod it for straightness, proper length, and to make sure the pin end is in line with the big end.
With the mileage on this engine, I'd expect the big ends of the rods to be perfect....not needing to be reconditioned. Your machine shop can verify this. I'd expect the pin busing to have some wear. If this is the case, I would replace the pin bushings and have them sized.
I would think that the block will clean easily at 100.5mm. Getting a piston is another story. I paid dearly for a complete set of these oversize pistons a couple of years ago (sitting on a Rennlister's shelf) and am thrilled that I got them.
Finding a "single" might be easier. (Again, ask Mark to search his shelves.)
Another option is to have an Alusil sleeve installed in that cylinder and machine that sleeve back to standard. I've done this several times, when bores are too damaged for 100.5mm or when I can't find a piston. (I'll never understand why Porsche did not make 101mm pistons!)
I keep these sleeves in inventory. although this job will generally challenge the machine shop. (The sleeve is fairly big and thick to start with. This is the only way that the Alusil "mixture" can be poured, be equally distributed, and cool properly. The machine shop needs a very accurate lathe, a plan of action, patience, and a large bucket for scrap aluminum. Then they need to figure out the interference fit they want and get the machined sleeve installed. Then they need to bore the sleeve, hone it, and deck the block.
(Hint for you. Don't have the block decked, before figuring out this cylinder issue.)
One more question regarding the studs on the lower block that attach the girdle. I am assuming I need to remove them to have the block repaired. What is the best method to remove them? Is the double nut method acceptable? Do I need to apply heat? When reinstalling, what is the torque method? I did not see any guidance in the WSM but I assume it is similar to head stud RR.
No need to remove the girdle studs for having the bores or the decks kissed. In fact the machinist will want the girdle bolted down to stiffen the block when they set it up in the Sunnen machine.

 09-18-2023, 04:15 PM