When you click on links to various merchants on this site and make a purchase, this can result in this site earning a commission. Affiliate programs and affiliations include, but are not limited to, the eBay Partner Network.
Unlike the aftermarket tensioner thing, the factory tensioner will not allow the factory belt to jump cam timing, unless it falls off of the front of the engine or is insanely loose.
Under certain circumstances, a Continental belt can jump cam timing with a factory tensioner, due to the amount of stretch in that belt.
Shock! Desperate for relevance, a monotonously self-promoting bolt-turner makes inconsistent statements
Fortunately, where the stock turn-a-bolt-til-its-tight belt-tightener fails, the self-adjusting PKT-S2 shines, managing ANY belt, at any temperature; Gates RACING, Gates regular, Porsche, Dayco, Continental, Flennor...
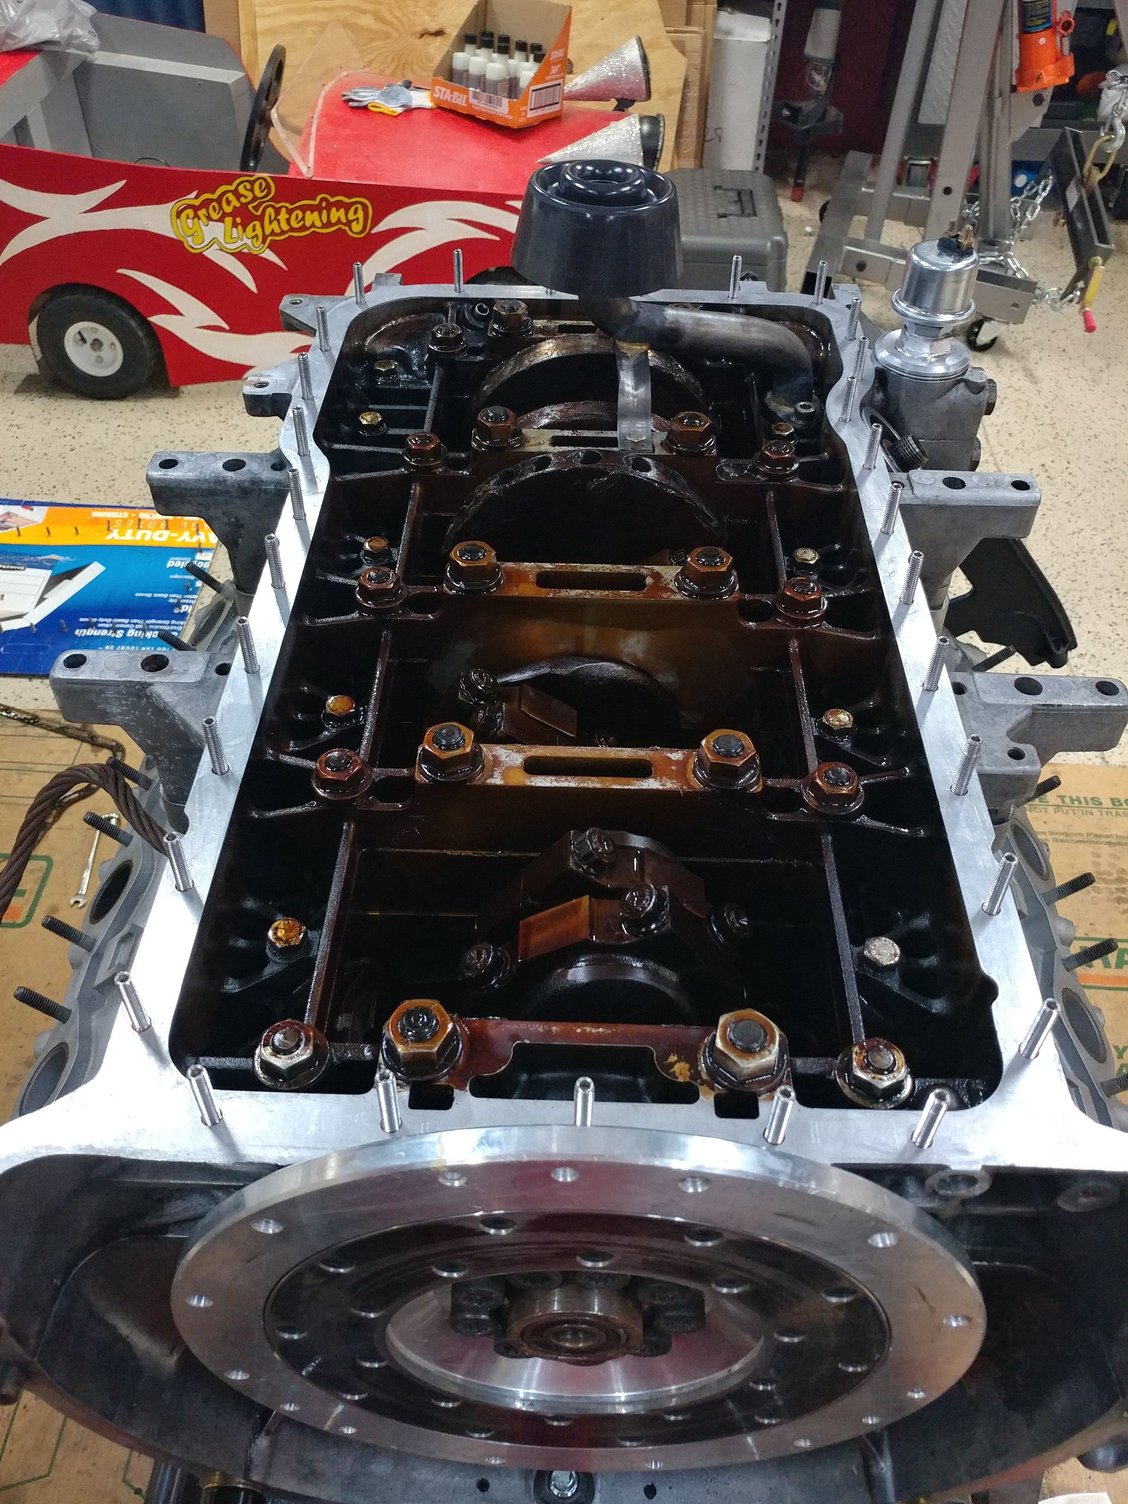
That engine is WAY cleaner inside than the '83 one I opened up that's now in my 79.
I did some degunkifying with seafoam in the oil (1 oz per quart) for the first couple hundred miles, which also unstick a lifter, and it's now running synthetic so should continue to clean up, but this is what it looked like.
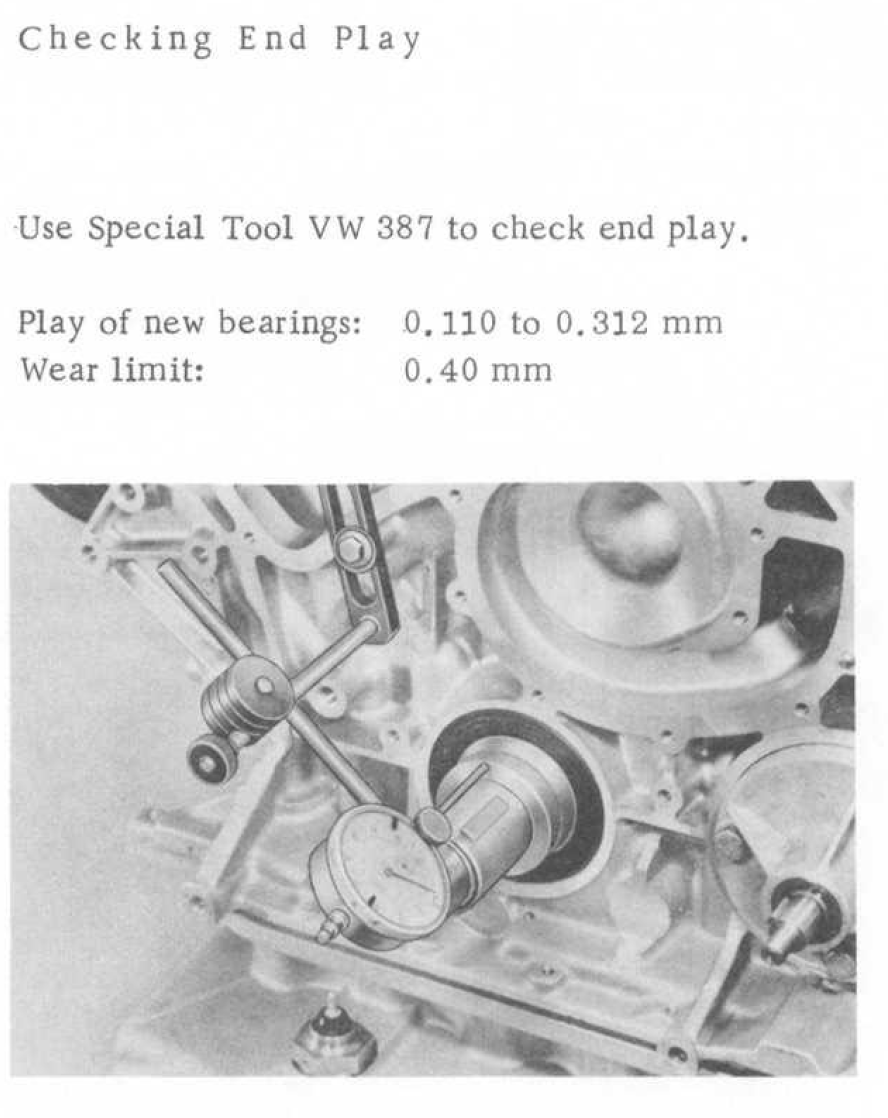
Crank End Play (aka Thrust Bearing play)
I checked the crank end play and it measures 0.1651mm (0.0065"). According to the WSM, the wear limit is 0.40 mm, and the play of new bearings is 0.110 to 0.312 mm. The seems like a really good number for a motor with 145K on the block. After seeing these good numbers, I rechecked a few times and took the average of the measurements. They were all very close.
Last edited by Michael Benno; 12-13-2022 at 09:57 PM.
0.0065" is about as close to spec as you can get - nice motor.
__________________
Does it have the "Do It Yourself" manual transmission, or the superior "Fully Equipped by Porsche" Automatic Transmission? George Layton March 2014
928 Owners are ".....a secret sect of quietly assured Porsche pragmatists who in near anonymity appreciate the prodigious, easy going prowess of the 928."
I am trying to figure out the next steps for this engine and could use a little support from the community. The crank end-play is excellent. The cam lobes and lifters "look" perfect. The backside of the bores "look" perfect. I cannot see any marks on the piston walls.
@karl ruiter suggested checking the rod bearings. I have been reading up on that procedure using the "Plastigage" method. That process looks interesting to learn.
Based on the age of the motor (1987) and mileage (145K), and everything I have read on RL, It would be a good idea to change the head gaskets. Is there any way to tell if the head gaskets have been changed on a motor with an unknown history? The bolts inside the heads do not have any tooling marks, so I am guessing they were not removed.
Should I do a compression check before removing the heads, or will there be a way to inspect ring conditions with the heads off?
Advice is appreciated here as this is new territory for me.
Last edited by Michael Benno; 12-13-2022 at 10:21 PM.
I am trying to figure out the next steps for this engine and could use a little support from the community. The crank end-play is excellent. The cam lobes and lifters "look" perfect. The backside of the bores "look" perfect. I cannot see any marks on the piston walls.
@karl ruiter suggested checking the rod bearings. I have been reading up on that procedure using the "Plastigage" method. That process looks interesting to learn.
Based on the age of the motor (1987) and mileage (145K), and everything I have read on RL, It would be a good idea to change the head gaskets. Is there any way to tell if the head gaskets have been changed on a motor with an unknown history? The bolts inside the heads do not have any tooling marks, so I am guessing they were not removed.
Should I do a compression check before removing the heads, or will there be a way to inspect ring conditions with the heads off?
Advice is appreciated here as this is new territory for me.
Re ring it, rod bearings, R&R the heads, good for another 40yrs.
Check for cracks at the bolt bosses on the heads.. That's where the leaks would occur on the early heads. If you can, do like Jeff M (Speedtoys) and source a seat of 89 and up heads with the updated (thicker) bosses. And new bolts all the way round.
New rod bearings at a minimum, pretty easy to gauge (plastigauge) once you get going on them. Tedious but important.
Maybe I missed it in the discussion, but what is the ultimate goal of this engine? Create a backup engine to drop in as needed, or maybe a high performance engine for fun? Get that figured out and then go from there.
Having a spare engine is a great thing to have....
Originally Posted by Michael Benno
Thanks, Jeff. I think I just needed to have someone say it. I'll start with pulling the heads offs to replace the head gaskets first.
I need to pull the crank bolt with the engine in the stand. How do folks lock the crank with the motor in the stand?
they are much easier to take apart than put together. Istill have one up in my attic in pieces from at least 15yrs ago. Thankfully haven't needed it but at some point i will put it back together.
No question that the head gasket needs doing. And very likely the head will need servicing. This will mean surfacing the head (at minimum), grinding valves and seats, and probably replacing the guides. This is a little bit expensive. Somewhere in the $1k range plus the cost of the head gaskets. As for how far you go after that, its up to you. Replacing the rings, replacing the rod bearings, and checking the main bearings is easy and not expensive. And it gives you a lot more clarity as to what you have when you are done. However it does increase the size of the reassembly process. And sometimes that process can get so big that it overwhelms you and the project can stall. That is the main thing you don't want to happen. You kind of have to do the heads, the lower ends are mostly just for confidence and completeness. Regarding the bearings, I don't think you really need the plastiguage, so much as a visual inspection (and photos) to make sure there is no crazy wear. You will have to replace the rod cap nuts if you inspect the rod bearings and they are not as inexpensive as you might think. Sometimes one of the bearings has had some particle sucked into it or been oil starved and has wear you can see. To me, if It turned out I did not need the motor and wanted to sell it on, I would want to have photos of the bores, all the bearings, and the reworked heads to show potential buyers. Without that, nobody knows what you have.
Check for cracks at the bolt bosses on the heads.. That's where the leaks would occur on the early heads. If you can, do like Jeff M (Speedtoys) and source a seat of 89 and up heads with the updated (thicker) bosses. And new bolts all the way round.
New rod bearings at a minimum, pretty easy to gauge (plastigauge) once you get going on them. Tedious but important.
Maybe I missed it in the discussion, but what is the ultimate goal of this engine? Create a backup engine to drop in as needed, or maybe a high performance engine for fun? Get that figured out and then go from there.
Having a spare engine is a great thing to have....
... what is the ultimate goal of this engine? ...Get that figured out and then go from there.
Excellent advice @Tom. M, I need to spend some time considering that objective. At the moment the objective was to use the motor as an educational experience in learning how to do various repairs with the goal of assessing the rebuilding needs of the block. I am prepared to refresh the motor back to stock. But, I'll take some time to consider other options.
Originally Posted by karl ruiter
No question that the head gasket needs doing. And very likely the head will need servicing. This will mean surfacing the head (at minimum), grinding valves and seats, and probably replacing the guides. This is a little bit expensive. Somewhere in the $1k range plus the cost of the head gaskets. As for how far you go after that, its up to you. Replacing the rings, replacing the rod bearings, and checking the main bearings is easy and not expensive. And it gives you a lot more clarity as to what you have when you are done. However it does increase the size of the reassembly process. And sometimes that process can get so big that it overwhelms you and the project can stall. That is the main thing you don't want to happen. You kind of have to do the heads, the lower ends are mostly just for confidence and completeness. Regarding the bearings, I don't think you really need the plastiguage, so much as a visual inspection (and photos) to make sure there is no crazy wear. You will have to replace the rod cap nuts if you inspect the rod bearings and they are not as inexpensive as you might think. Sometimes one of the bearings has had some particle sucked into it or been oil starved and has wear you can see. To me, if It turned out I did not need the motor and wanted to sell it on, I would want to have photos of the bores, all the bearings, and the reworked heads to show potential buyers. Without that, nobody knows what you have.

 12-12-2022, 09:08 PM


")


 George Layton March 2014
