When you click on links to various merchants on this site and make a purchase, this can result in this site earning a commission. Affiliate programs and affiliations include, but are not limited to, the eBay Partner Network.
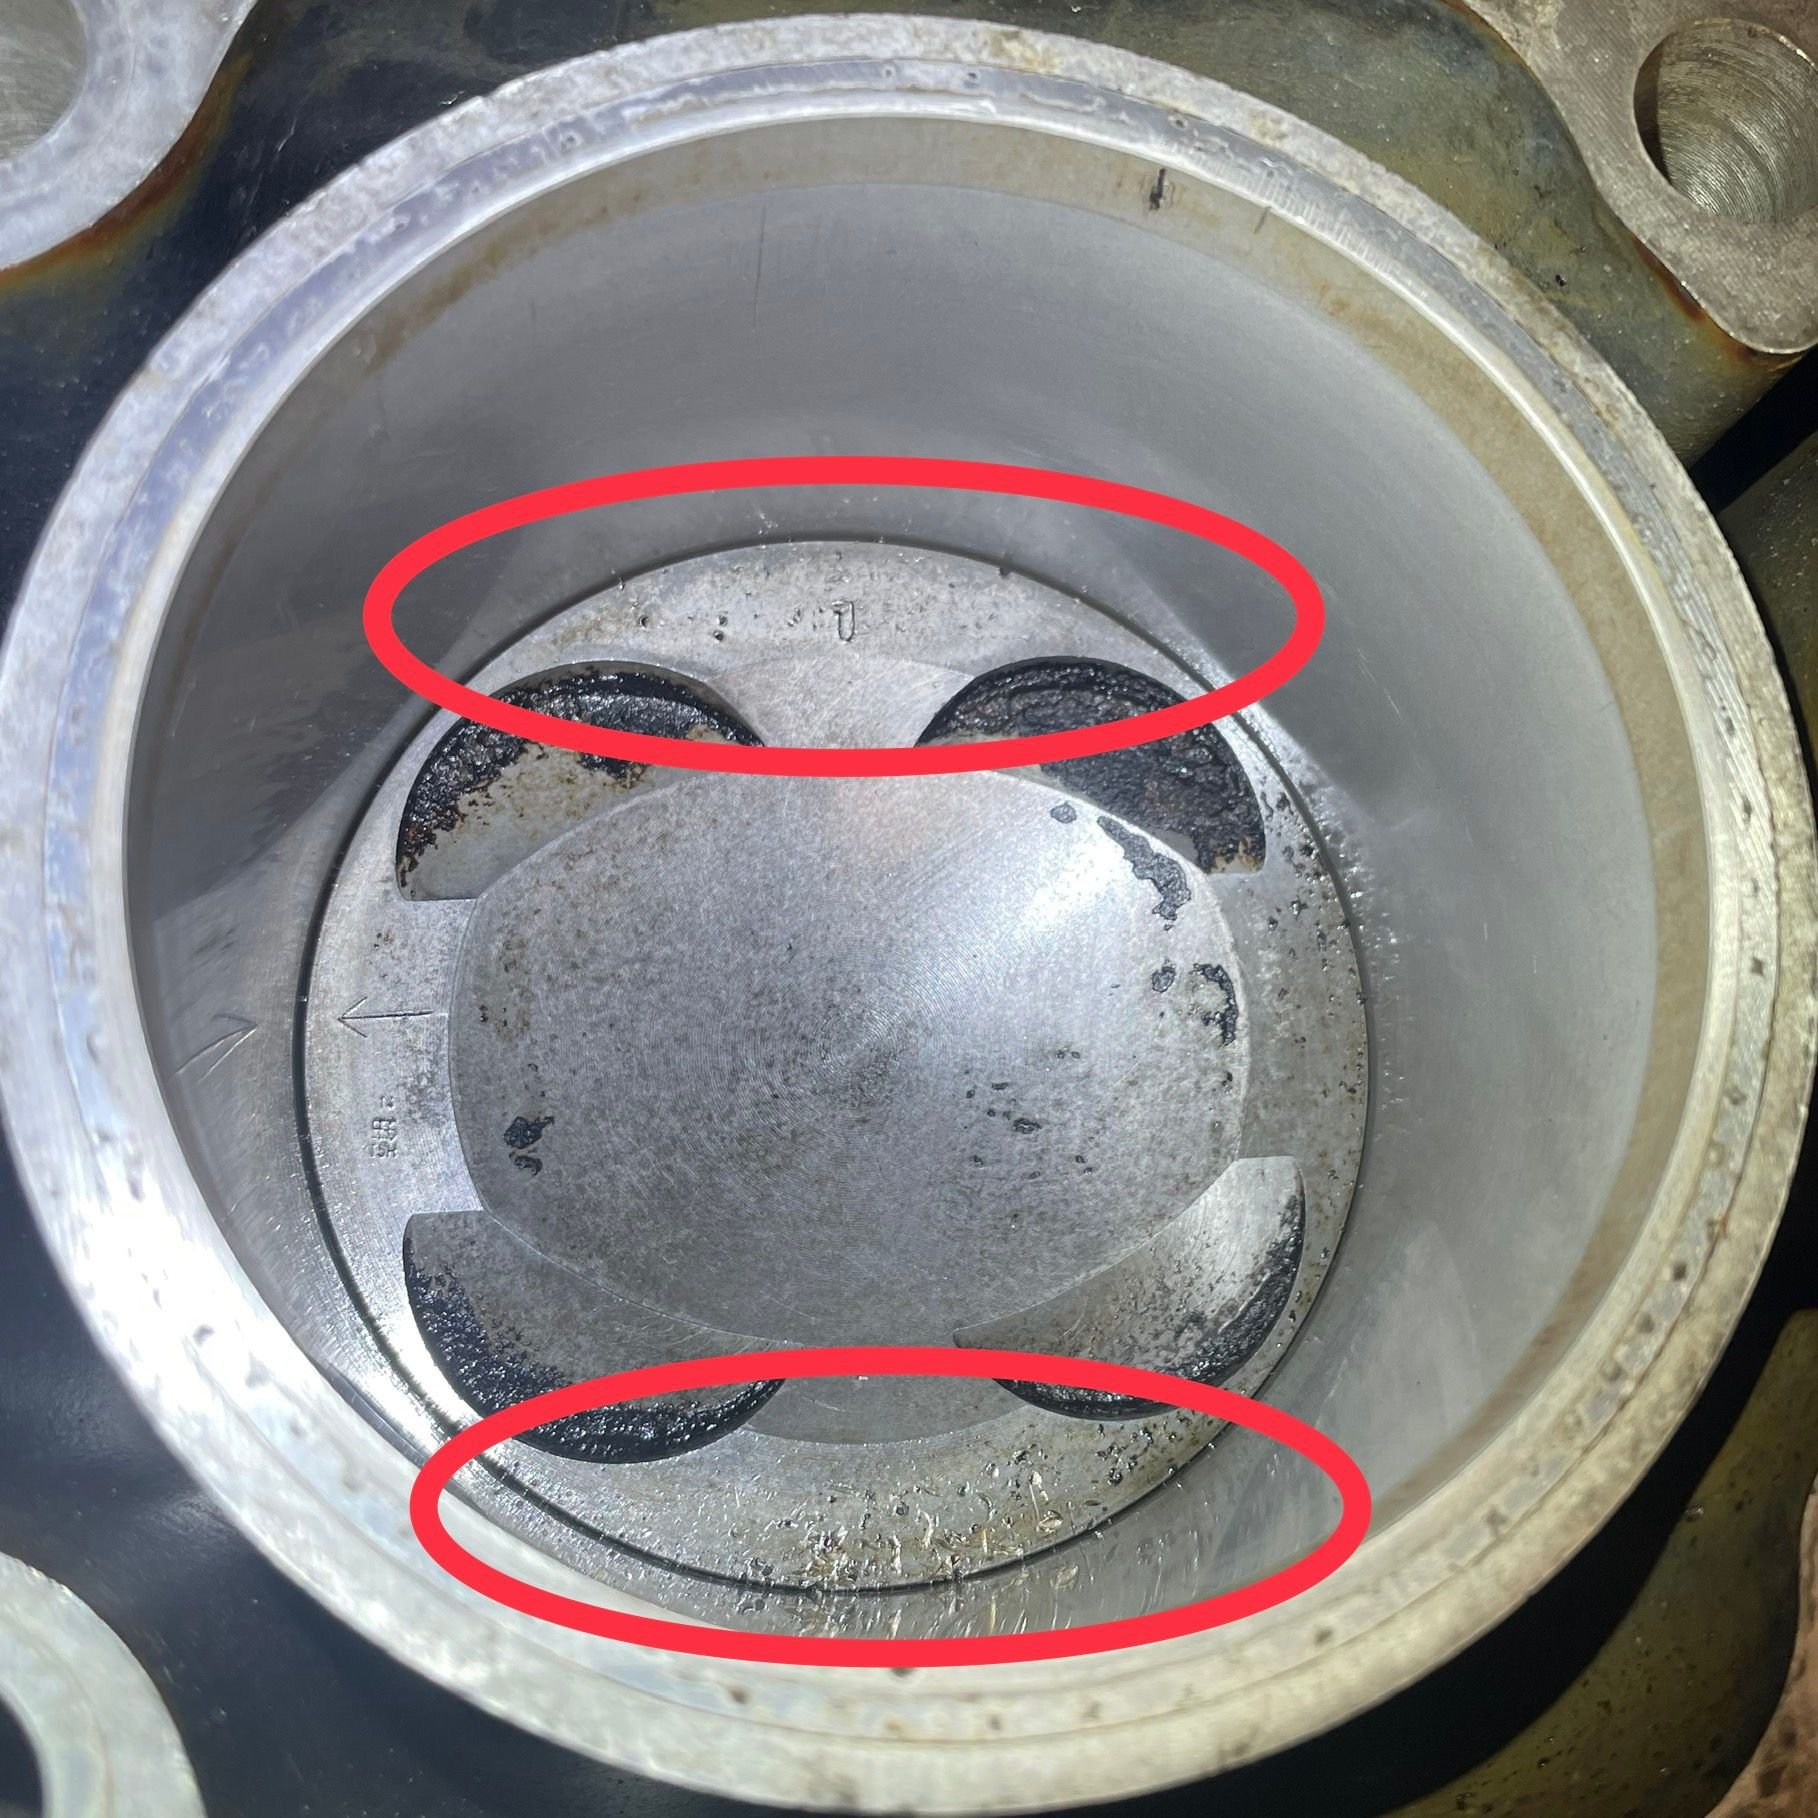
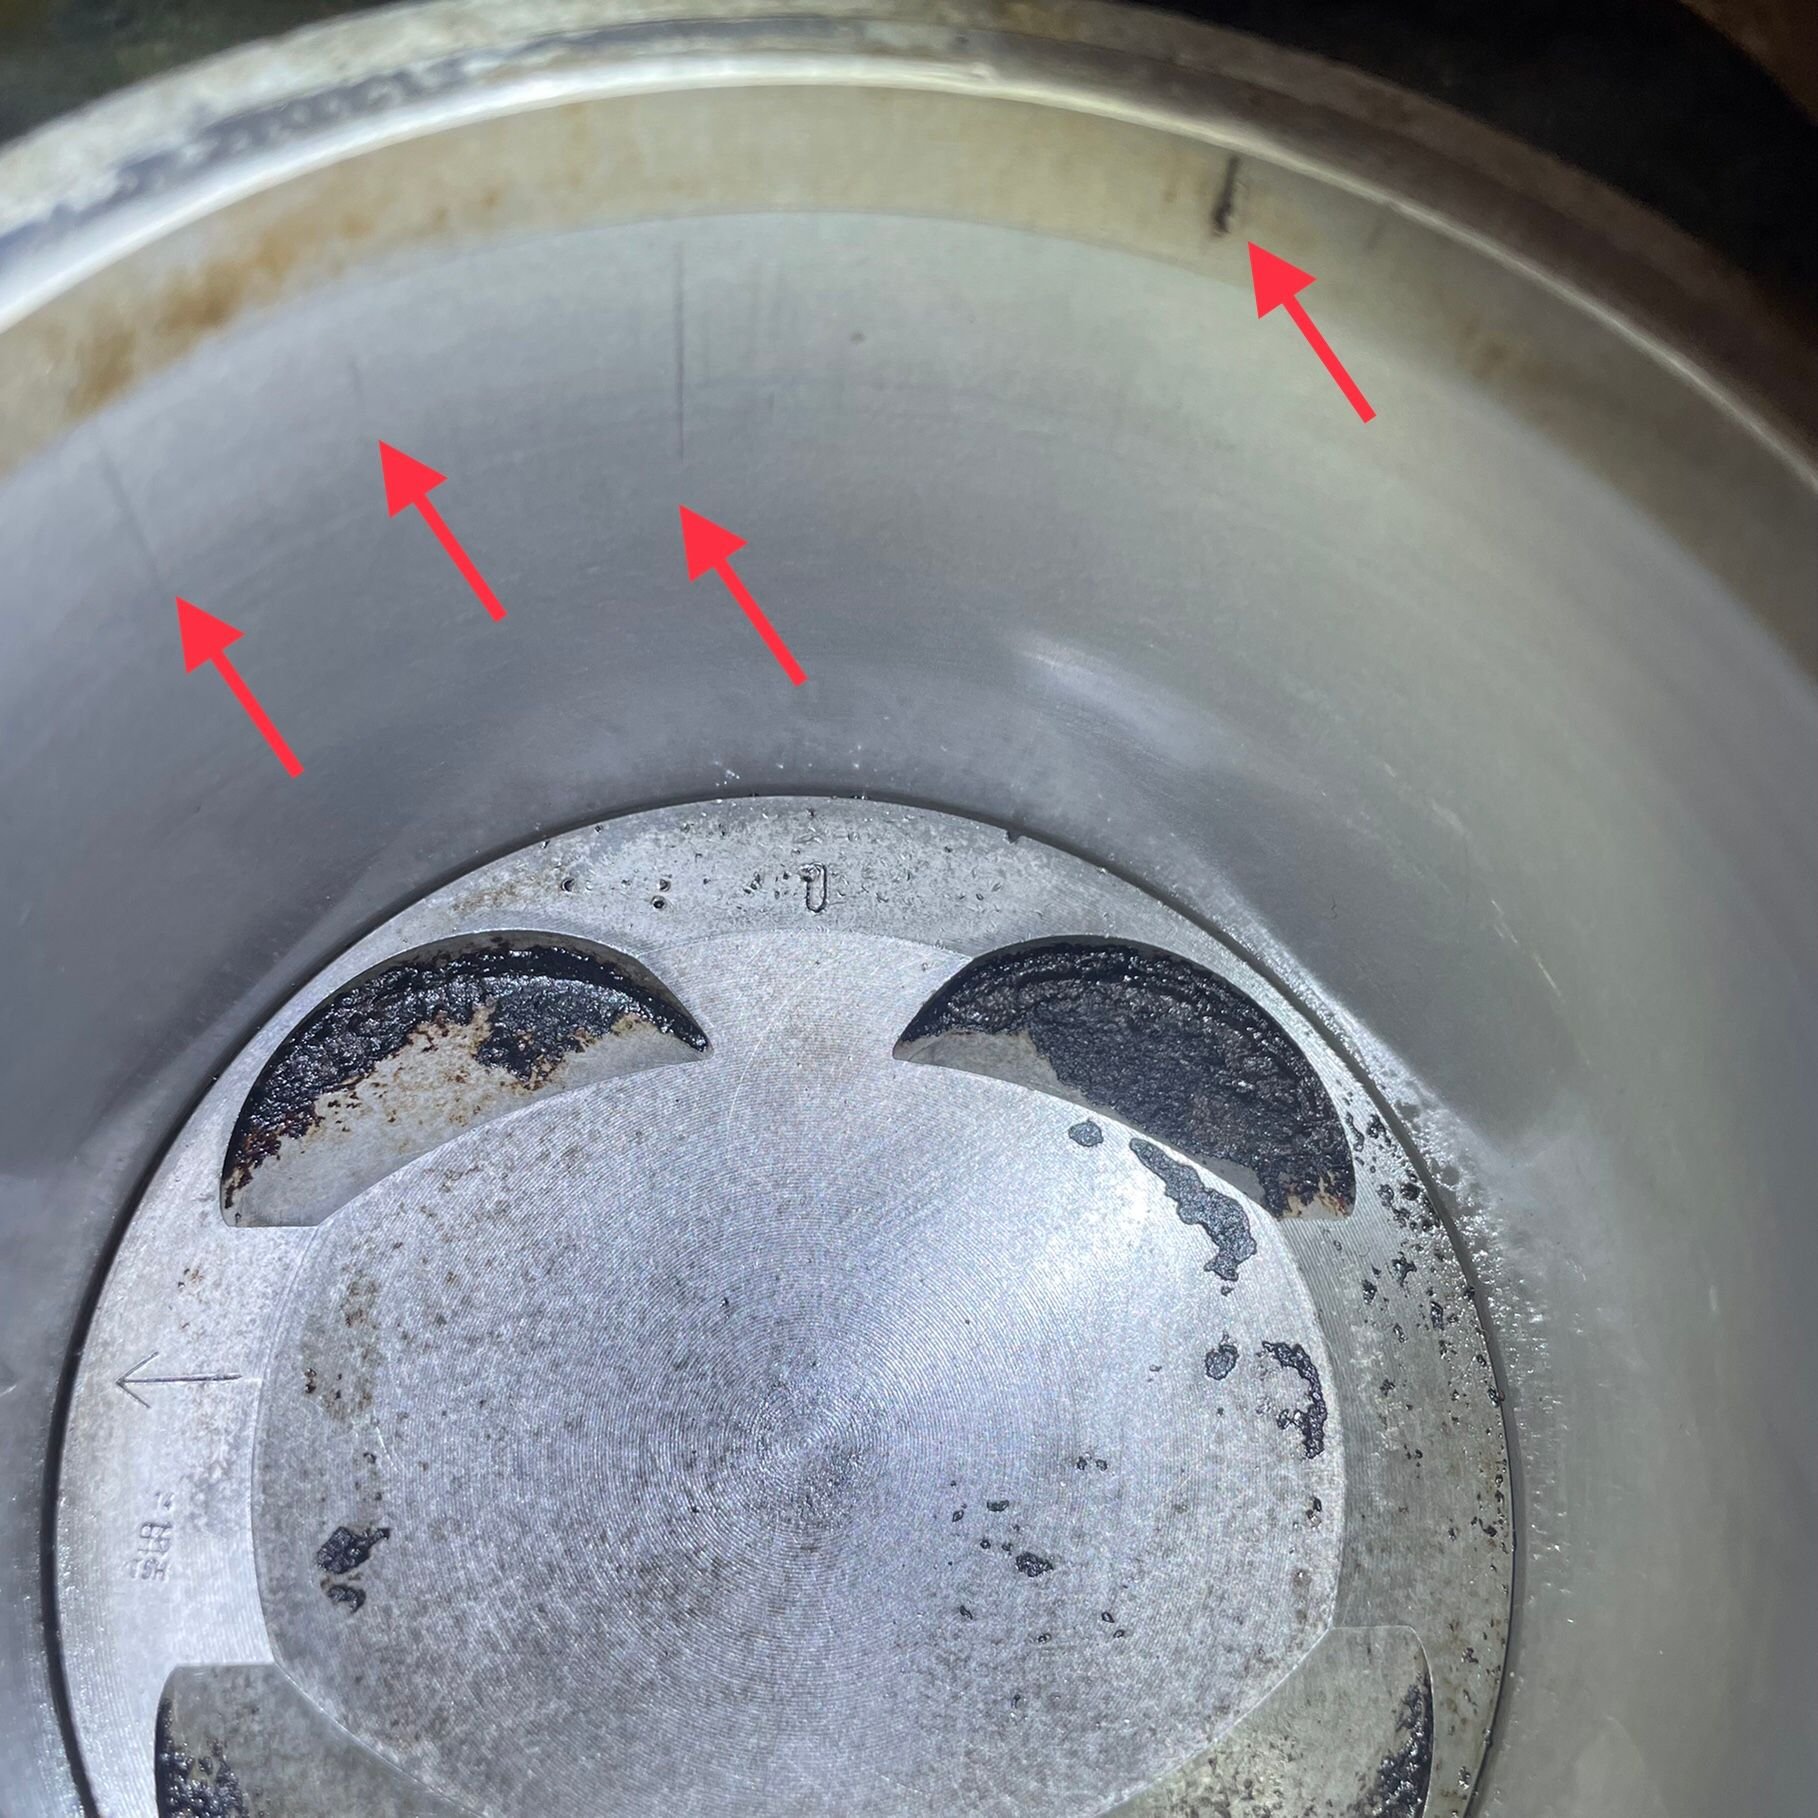
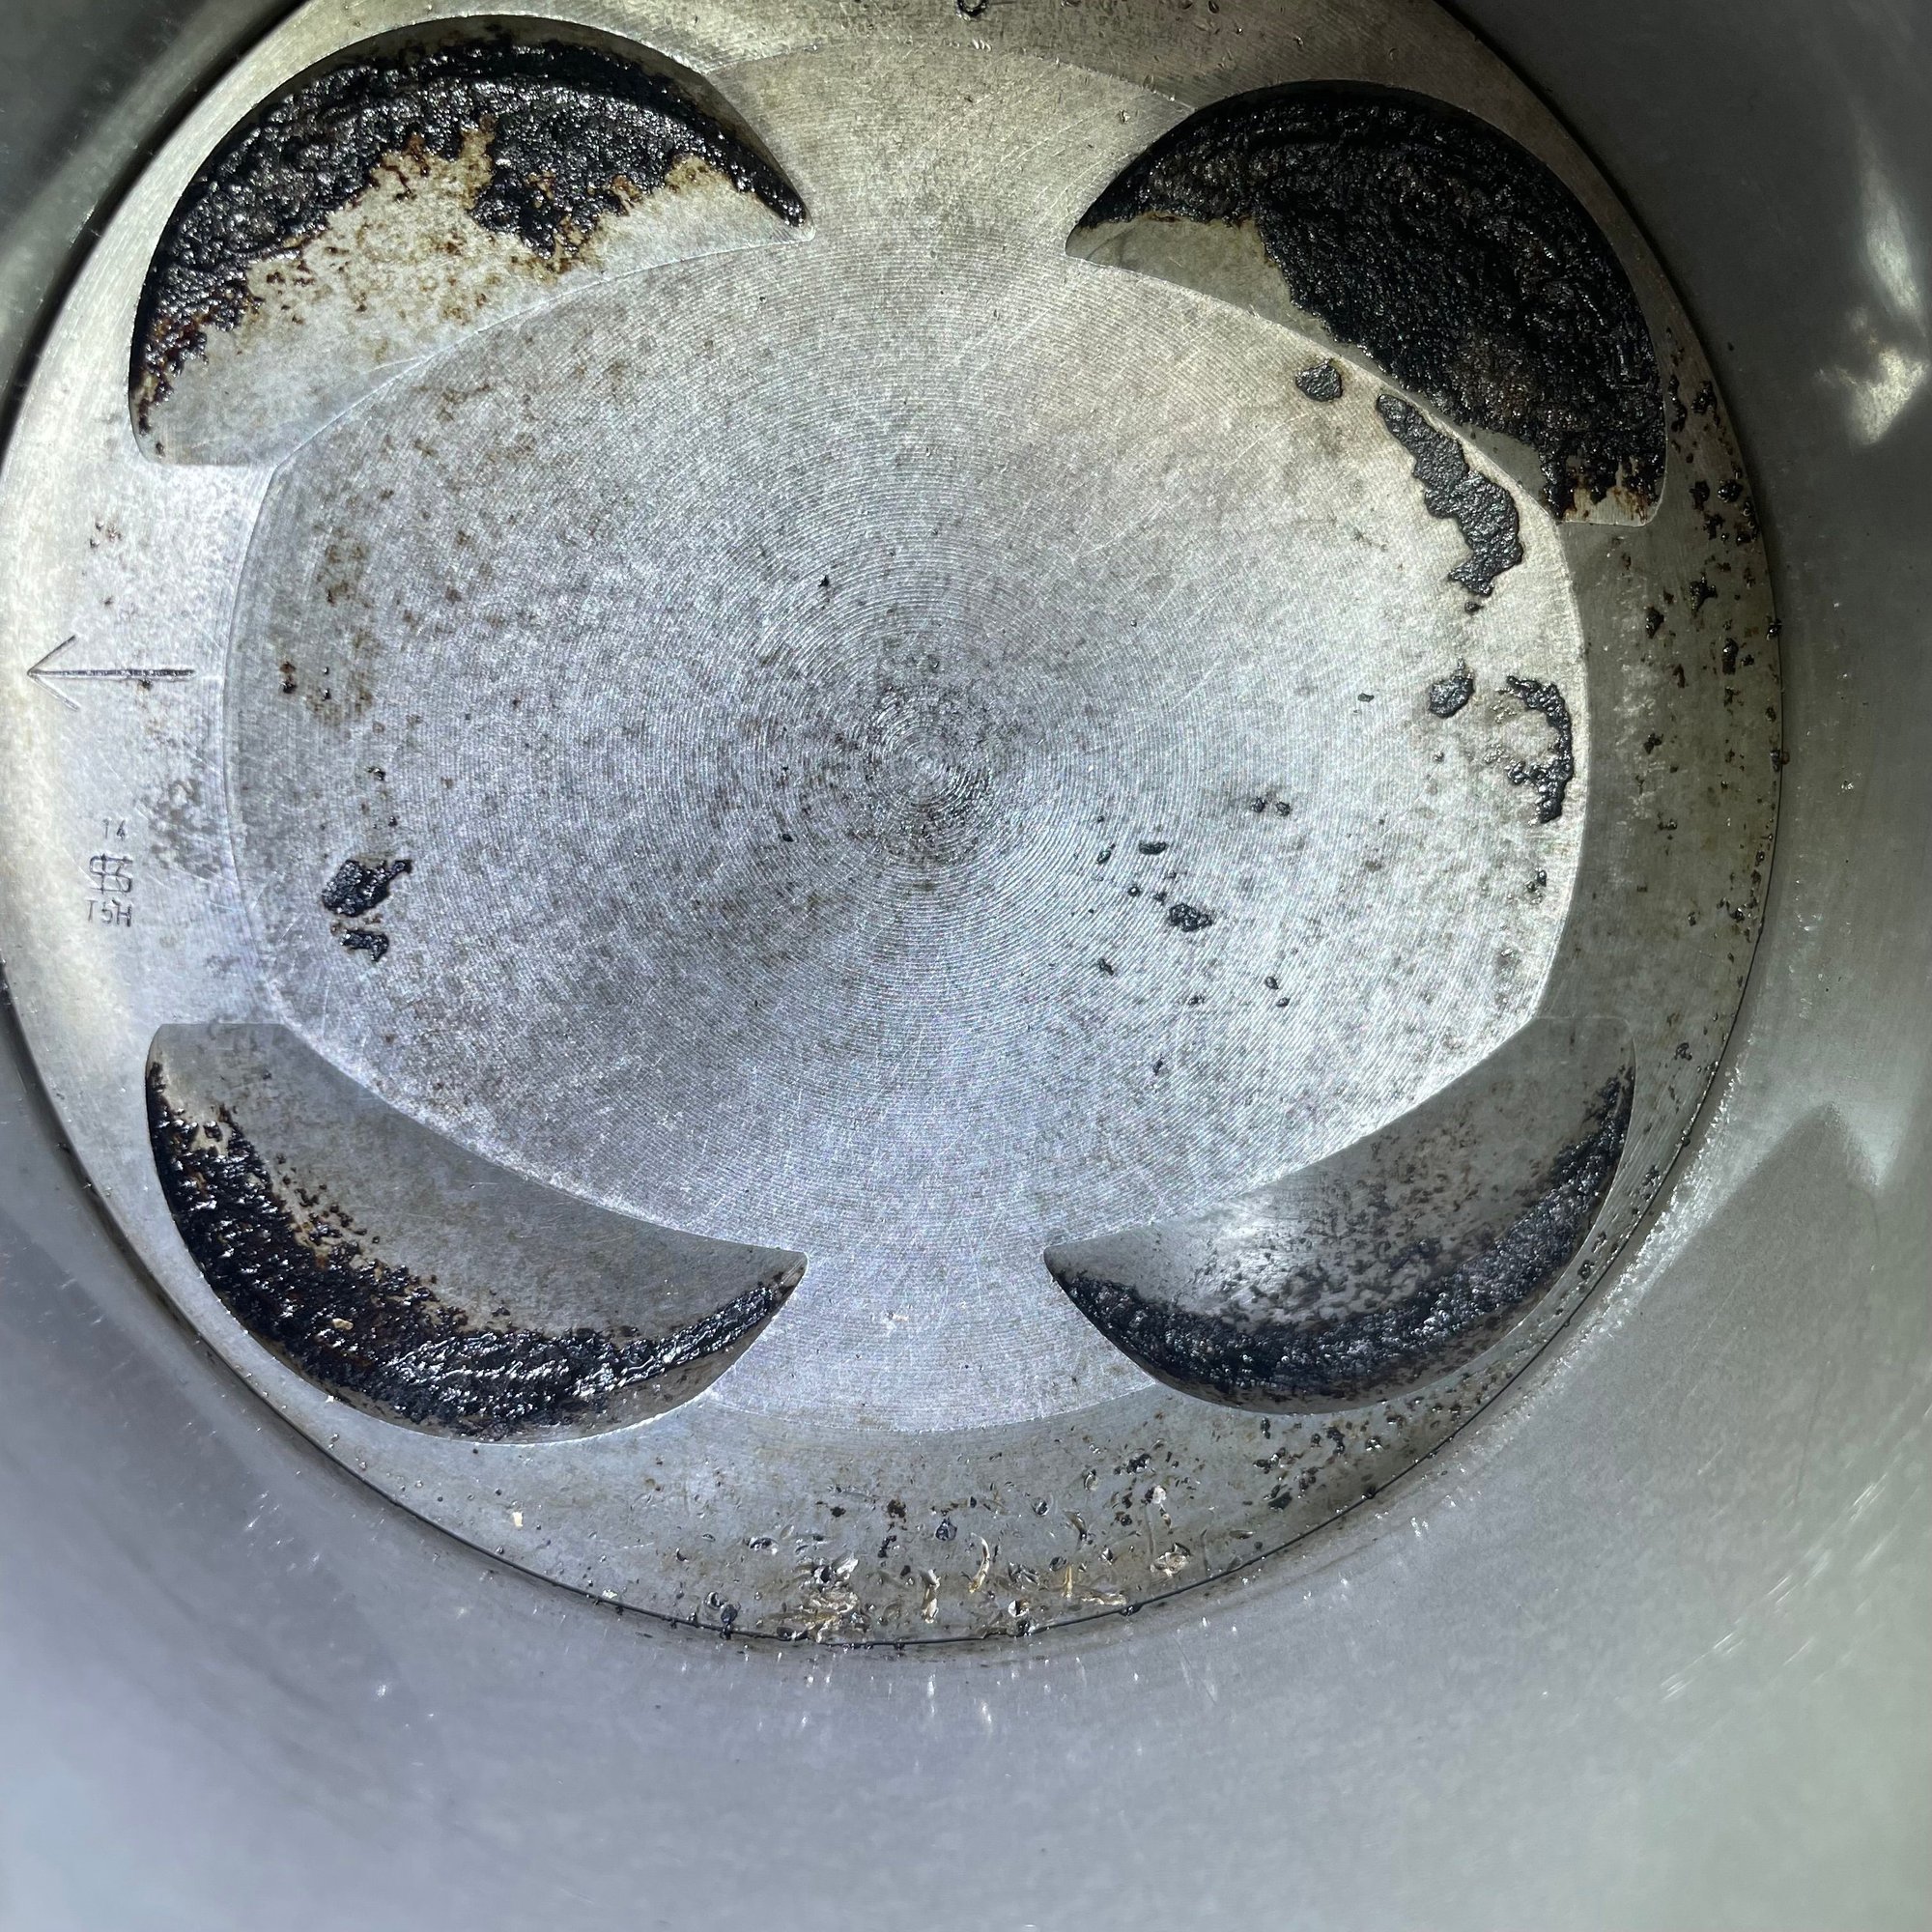
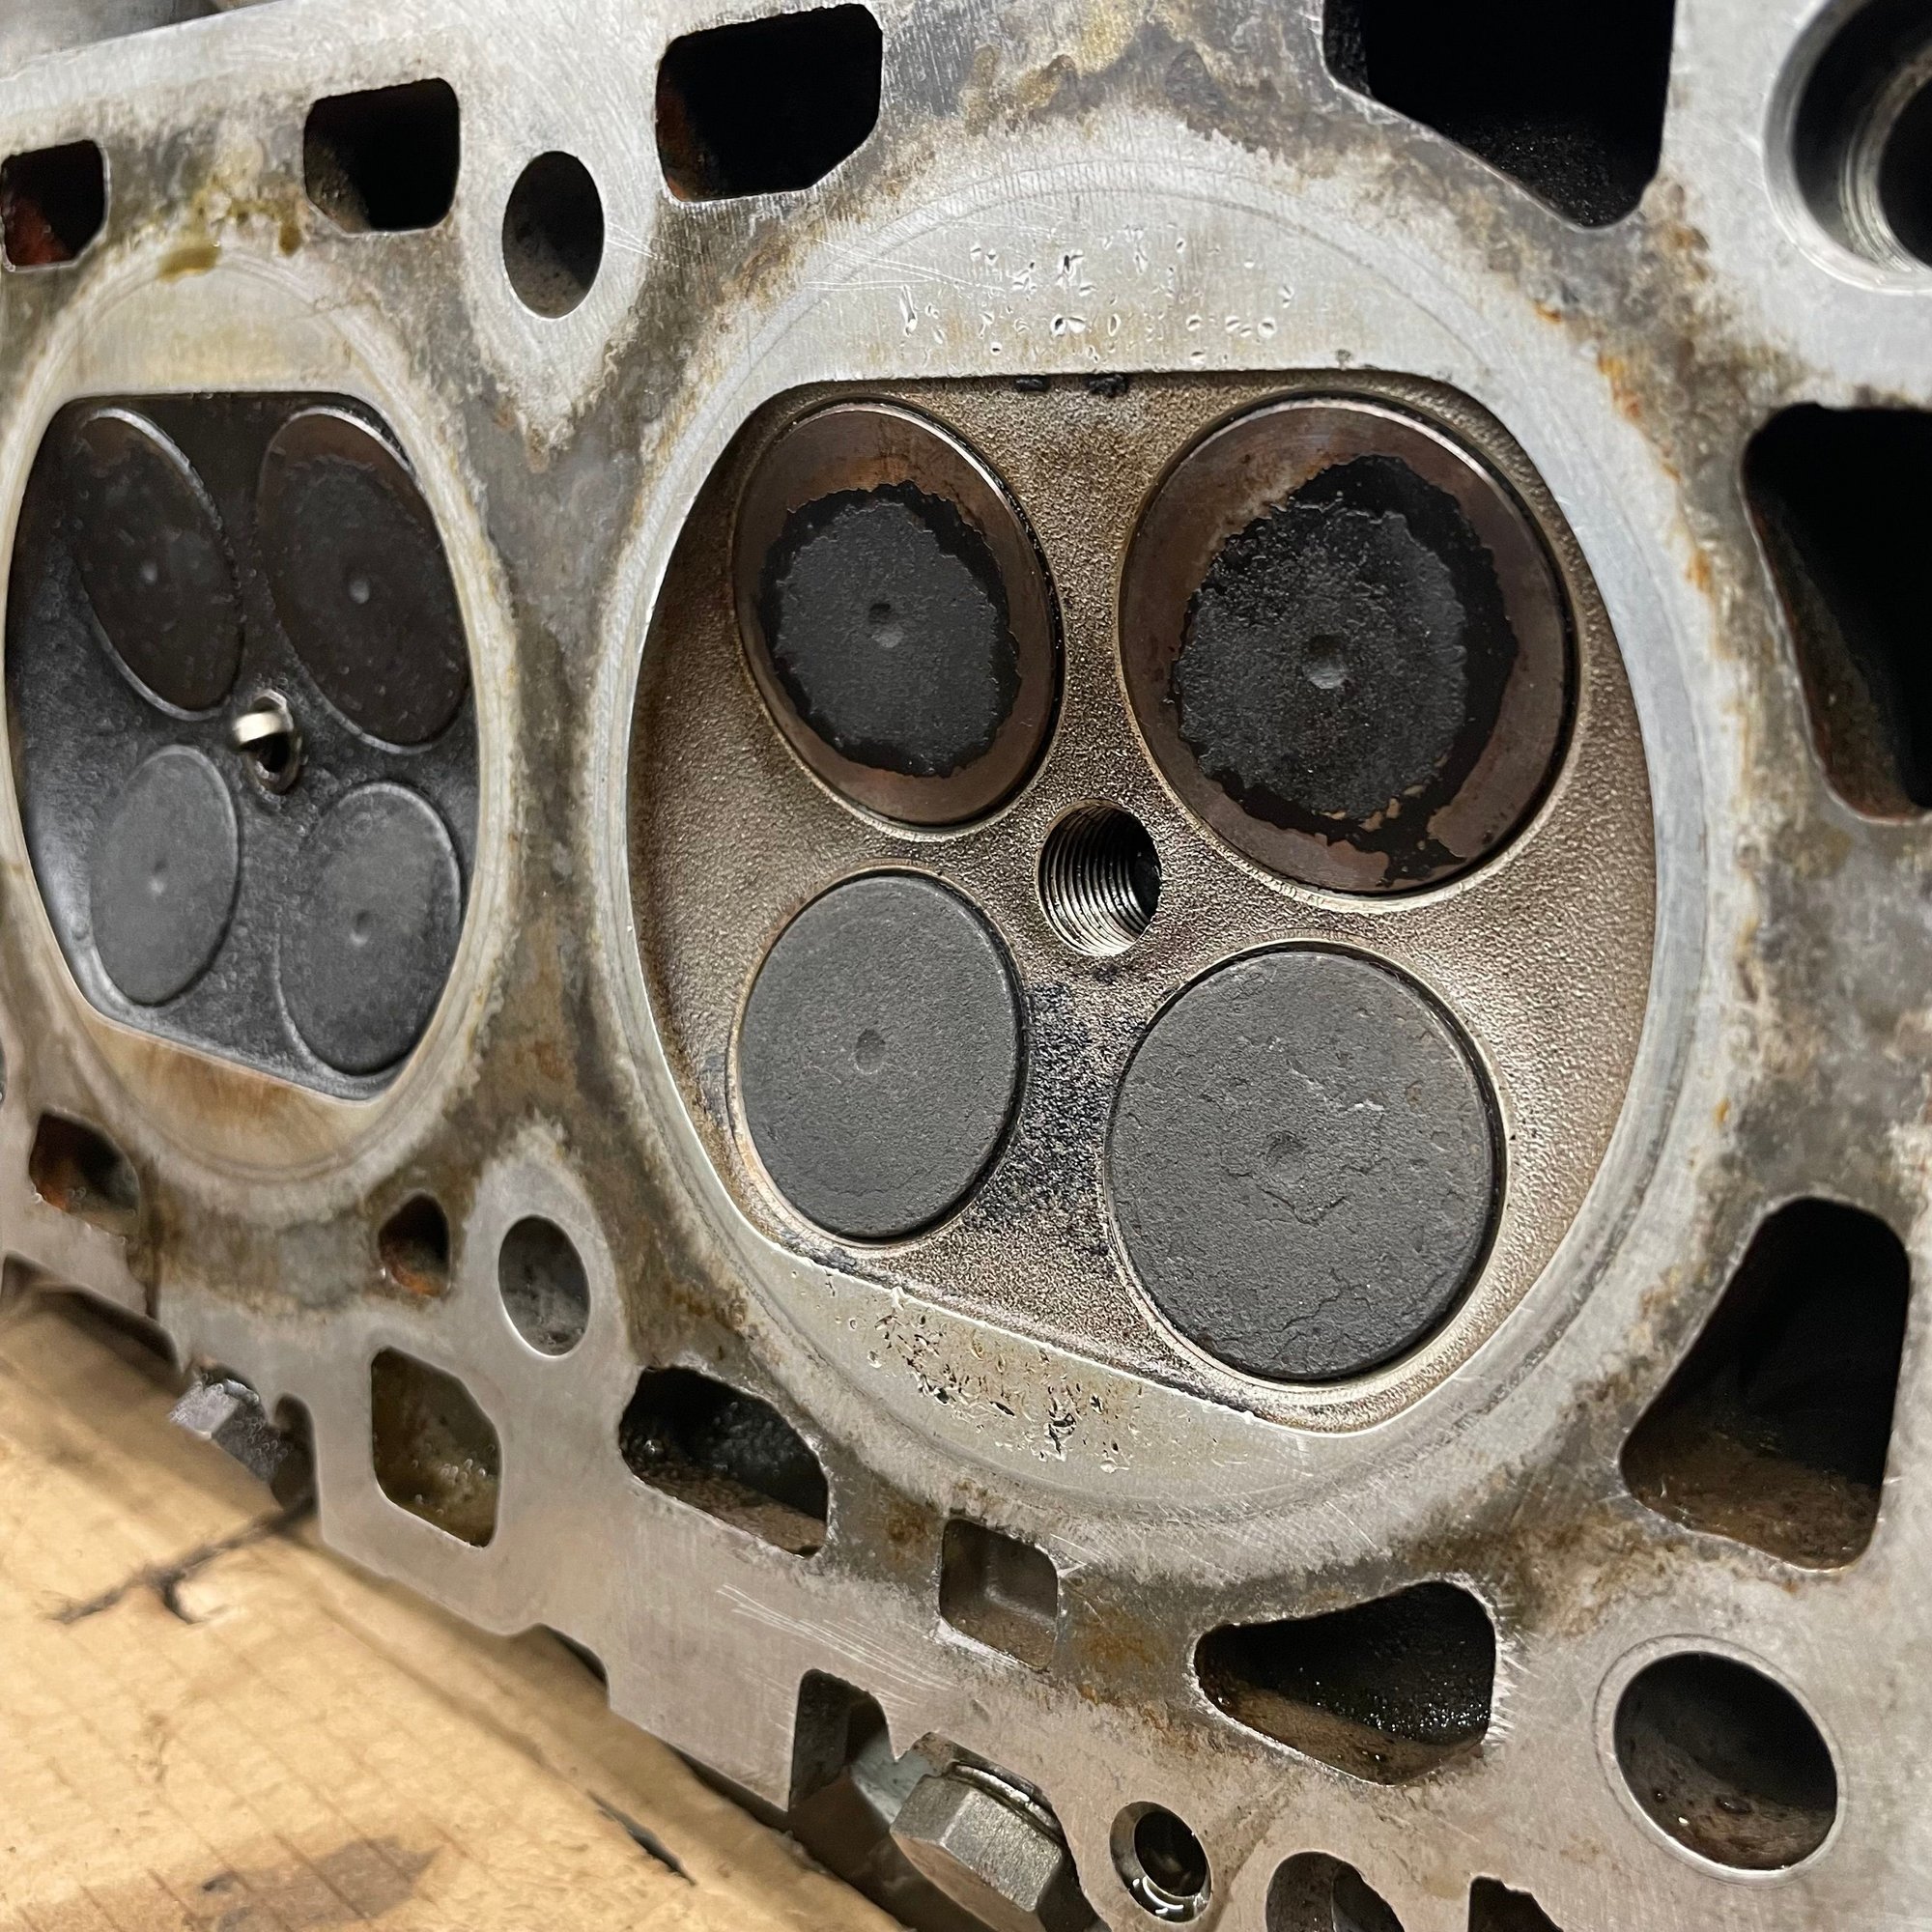
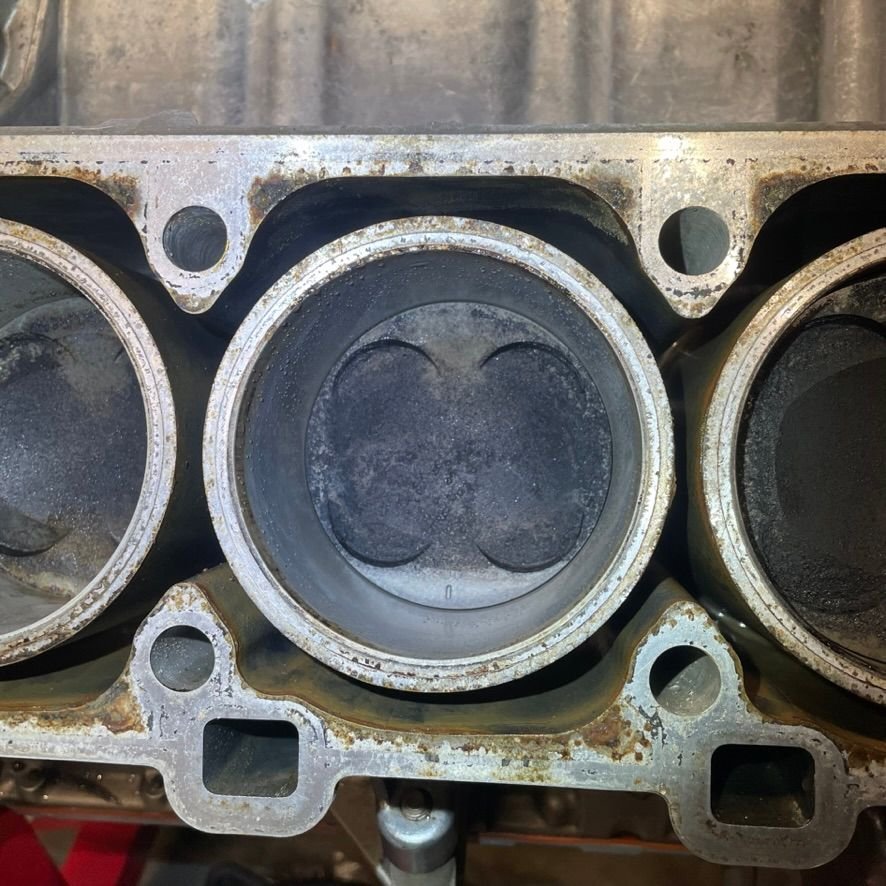
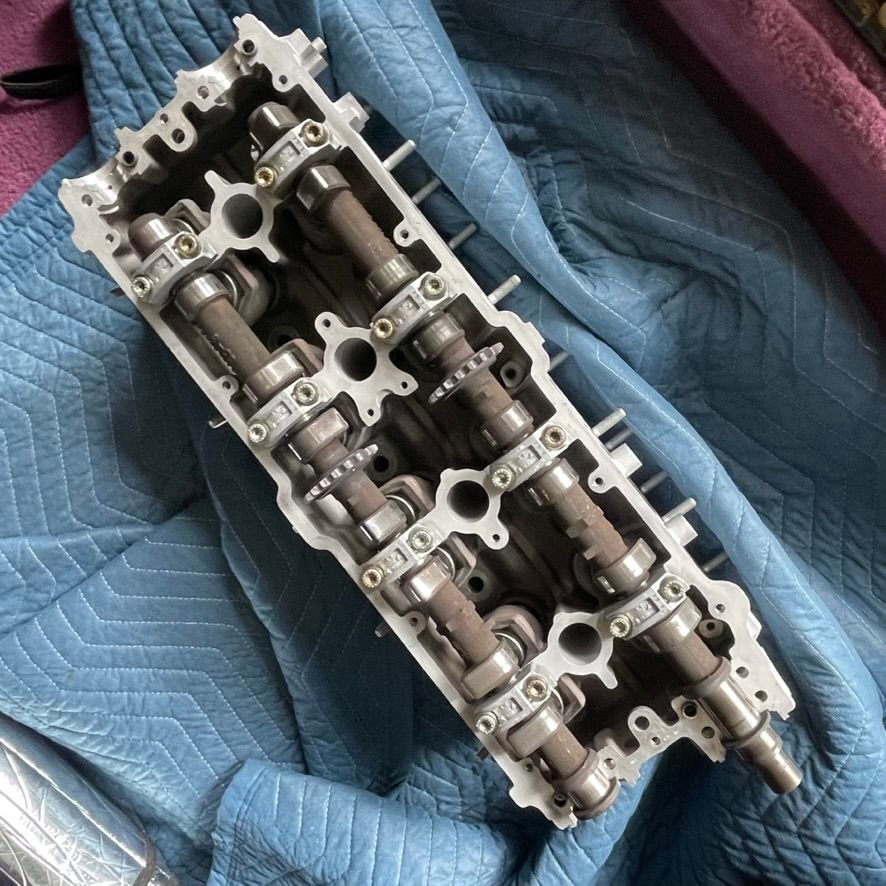
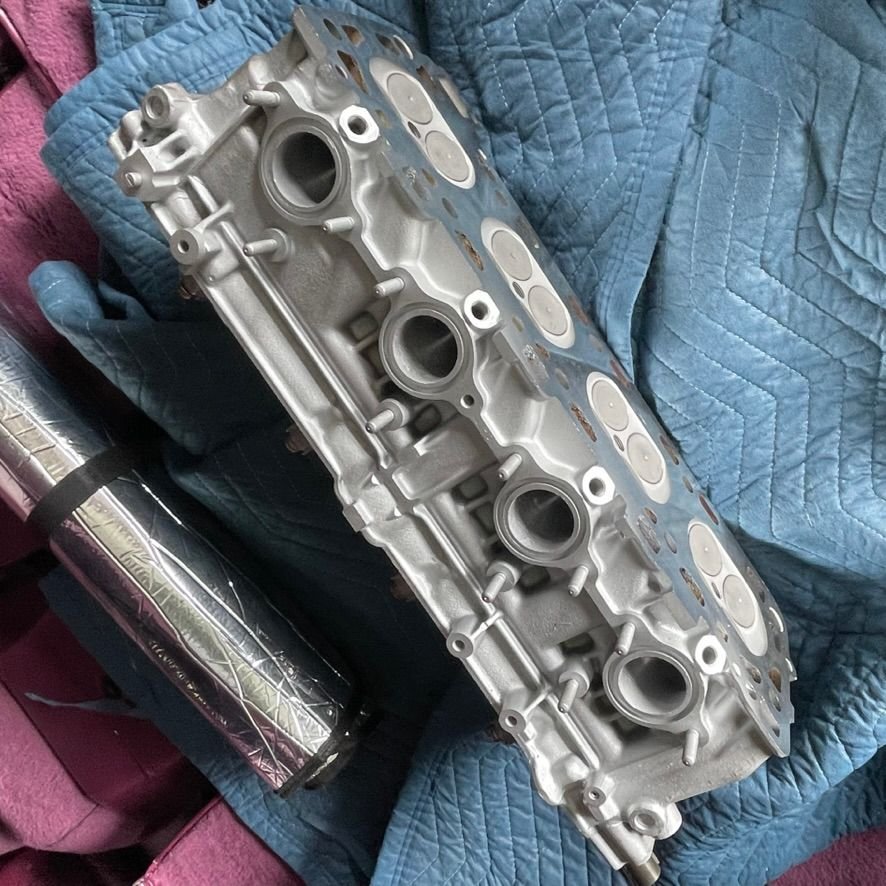
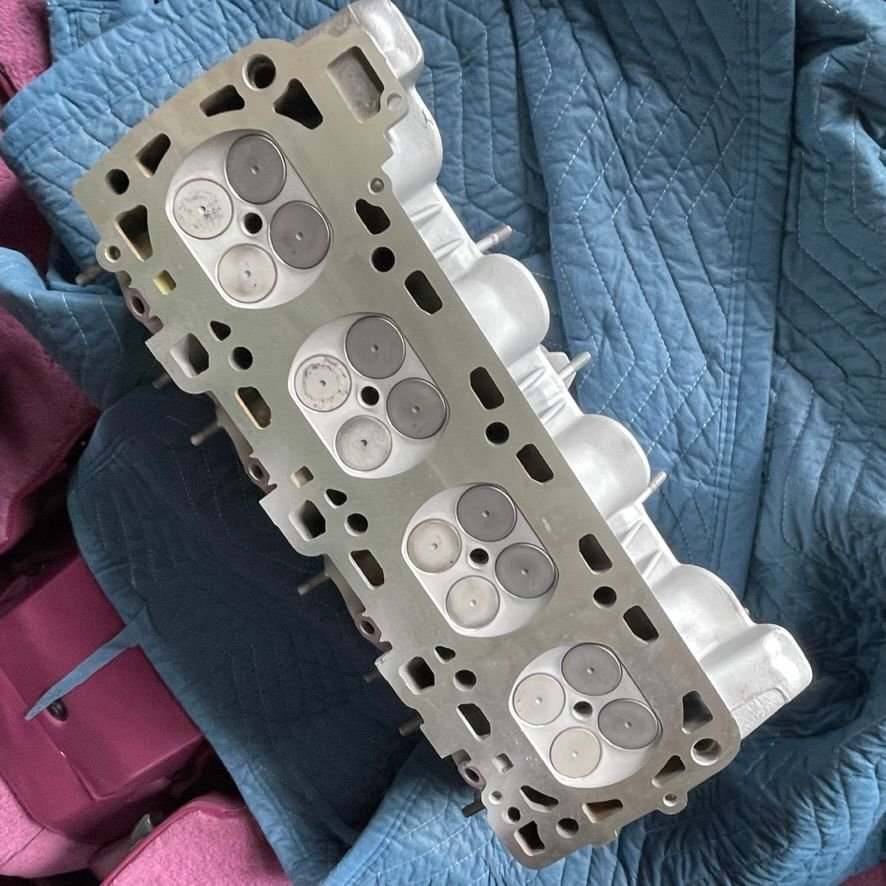
We had a pretty nasty ice storm here in the pacific northwest and that has kept many of us trapped in our houses. Christmas day I was feeling restless and finally, the temps were warm enough to spend some time in the garage. Returning to the S4 motor teardown, I removed the left side head (USA driver's side). There was minimal evidence of pitting/corrosion from the head gasket. Similar to the right side. However, there seems to be some damage to the surface of cylinder number 5 - FROM DETONATION. To my untrained eye, it looks like something was bouncing around in there and became pulverized and then left via the exhaust valves. The head gaskets were original so it did not look like anything was manually removed. Help me understand the significance of this damage. I see some light vertical lines on the cylinder wall. I cannot feel them with a fingernail. What is the rule of thumb when it comes to cylinder wall marks?
So, a late inlay in your great thread! What did you do about this damage and the piston? I have seen many seized pistons and damaged heads, both from detonation and debris in the cylinders. This does not look like detonation, to me something has clearly been in there and smashed in between...
But the bore looks good, the scratch above the ring land isn't important.
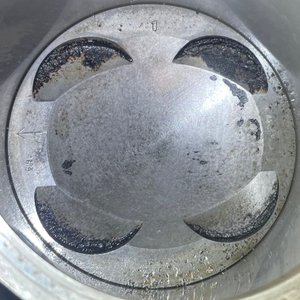
Ok, if anyone else don't see what I see:
This picture from the piston zoomed in..;
It clearly has some nicks,dents and pices missing. This goes passed the top on the piston and down on the side. How much I don't know, This is the main reason I asked.
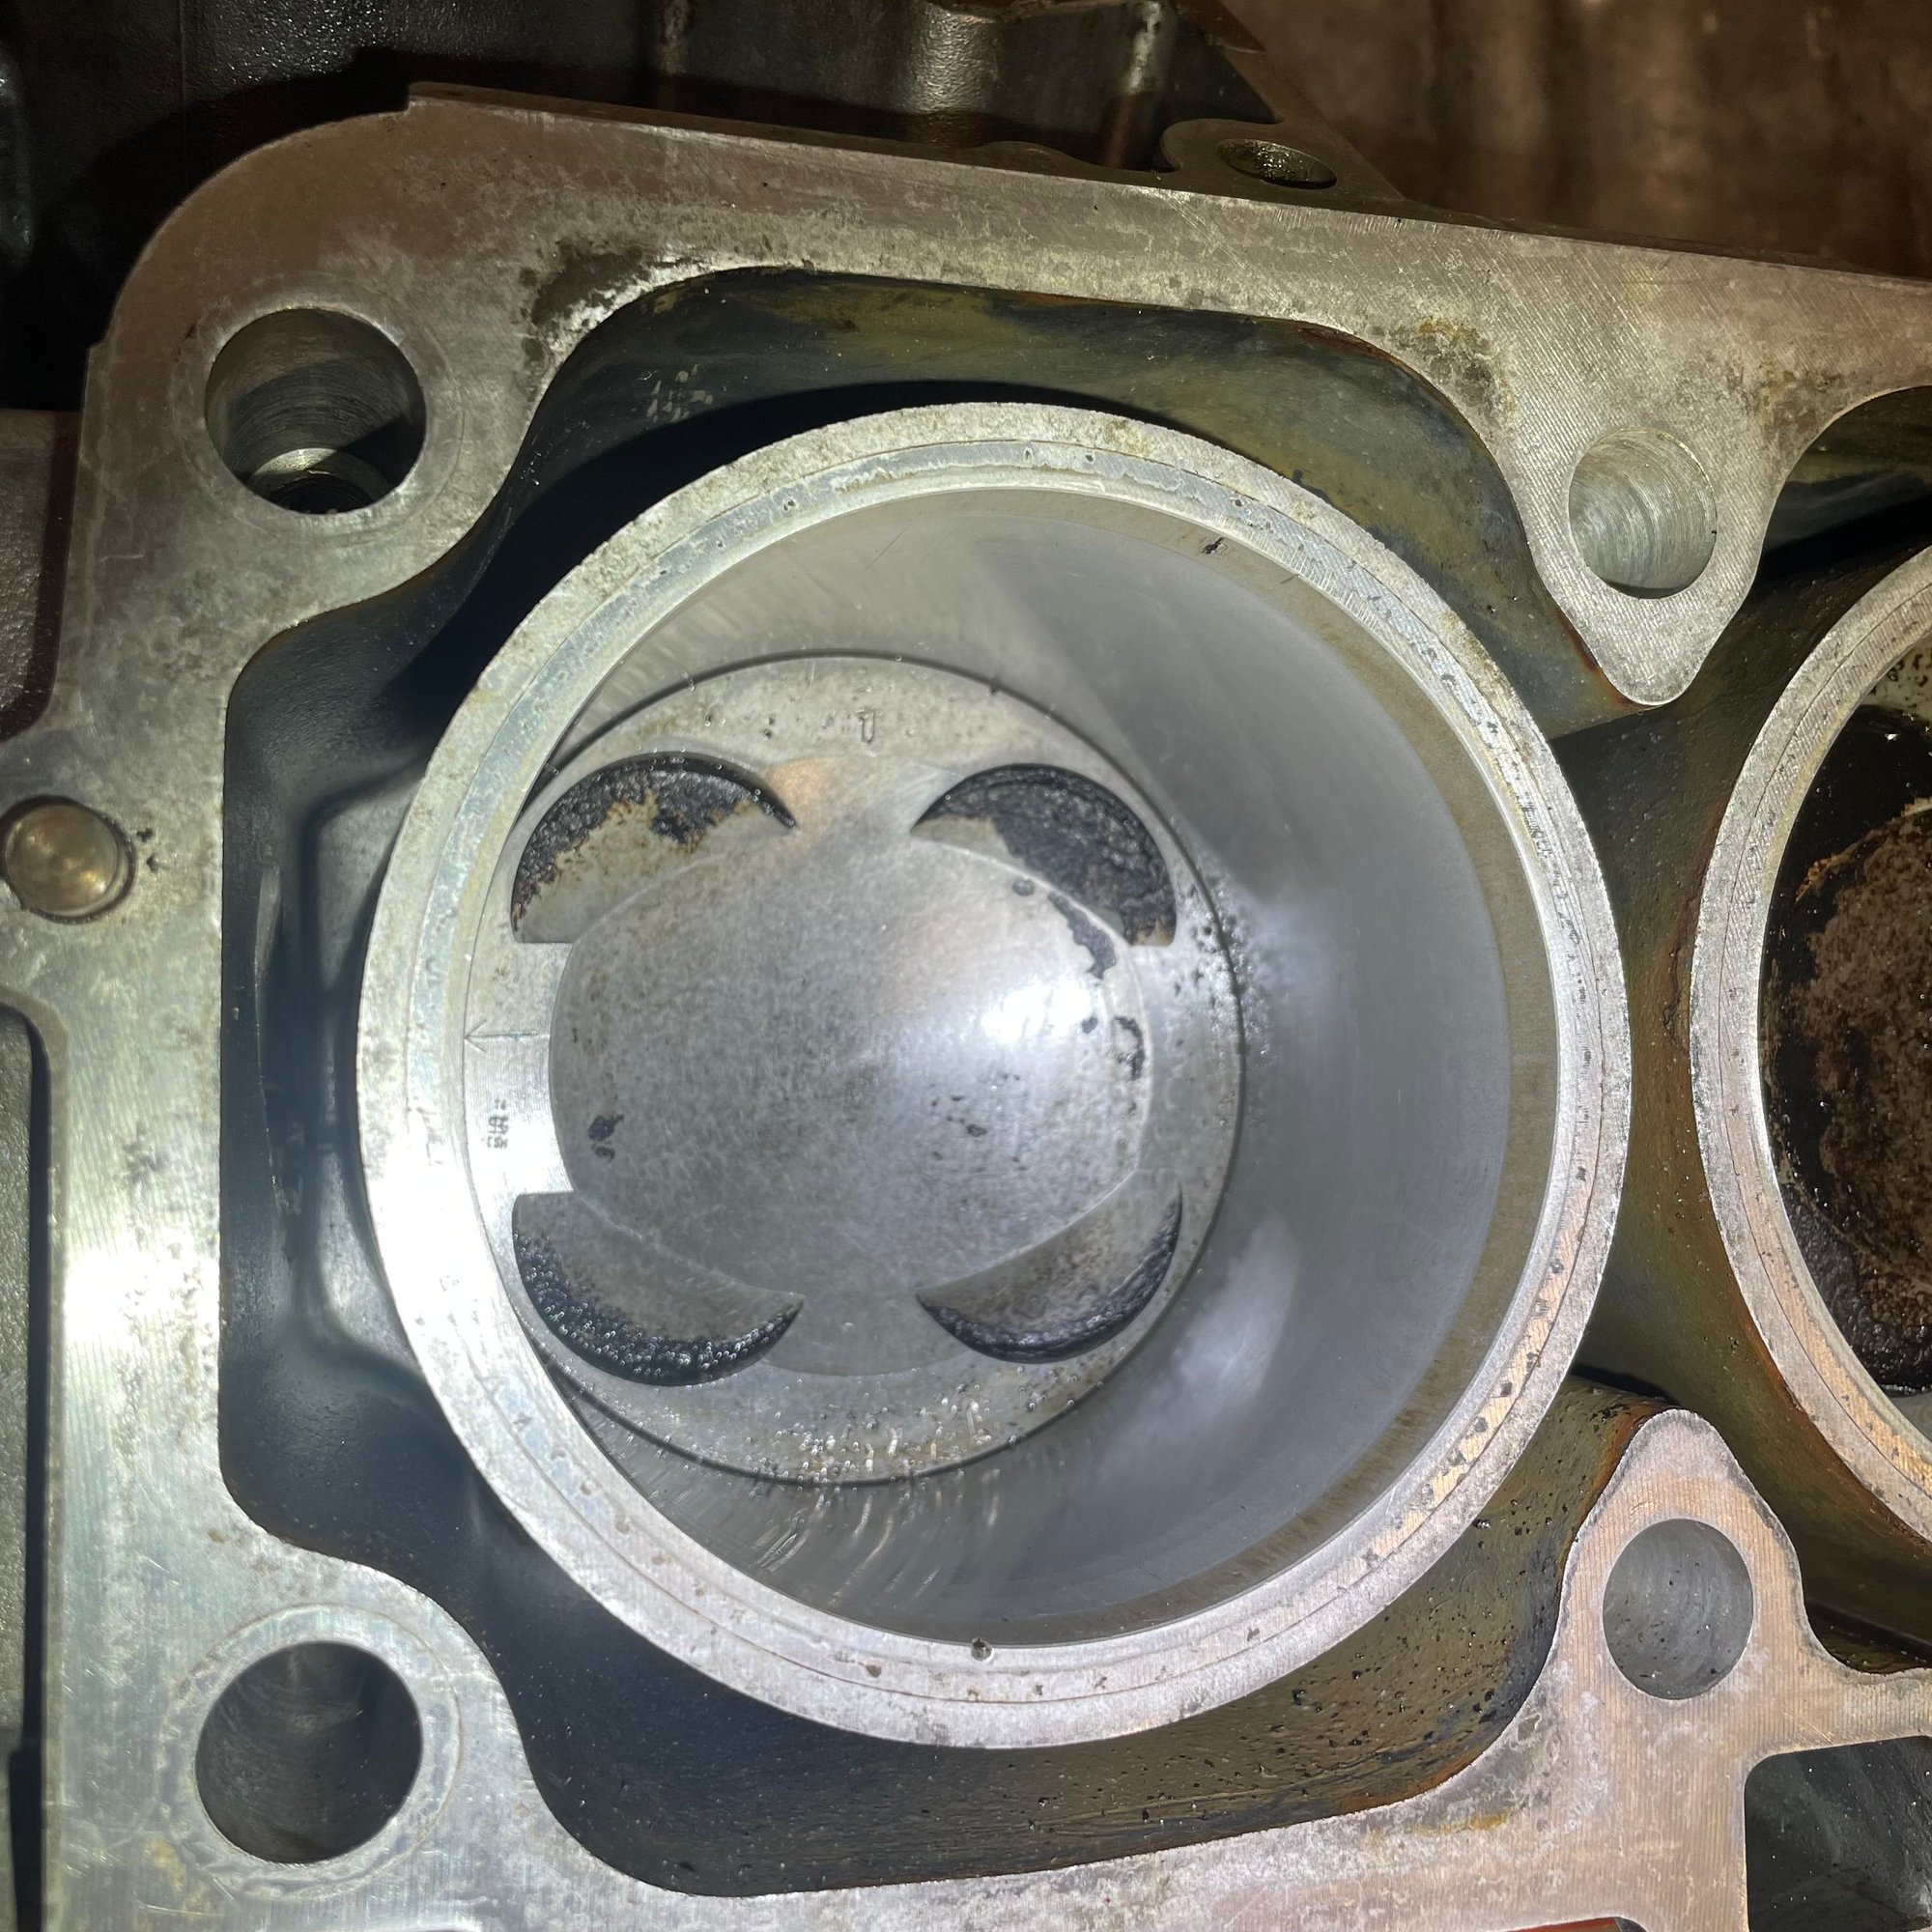
This picture..;
This is the same cylinder as the picture above. The deep scratch on top right is above and shouldn't be a problem. If it were I'm sure Greg or someone of our guru's would have chimed in. The other scratches look small but i cannot feel them so I will leave this open.
But I myself would really have a close look at this piston all around out of the engine, and ofcourse the whole bore too. Just my personal concern...
Benno: Great work so far, very interesting thread!
Pretty simple to find a good used "0" piston, so you don't have to even think about it/file on the edge where to metal is squished over. Mark Anderson might even have a new one....
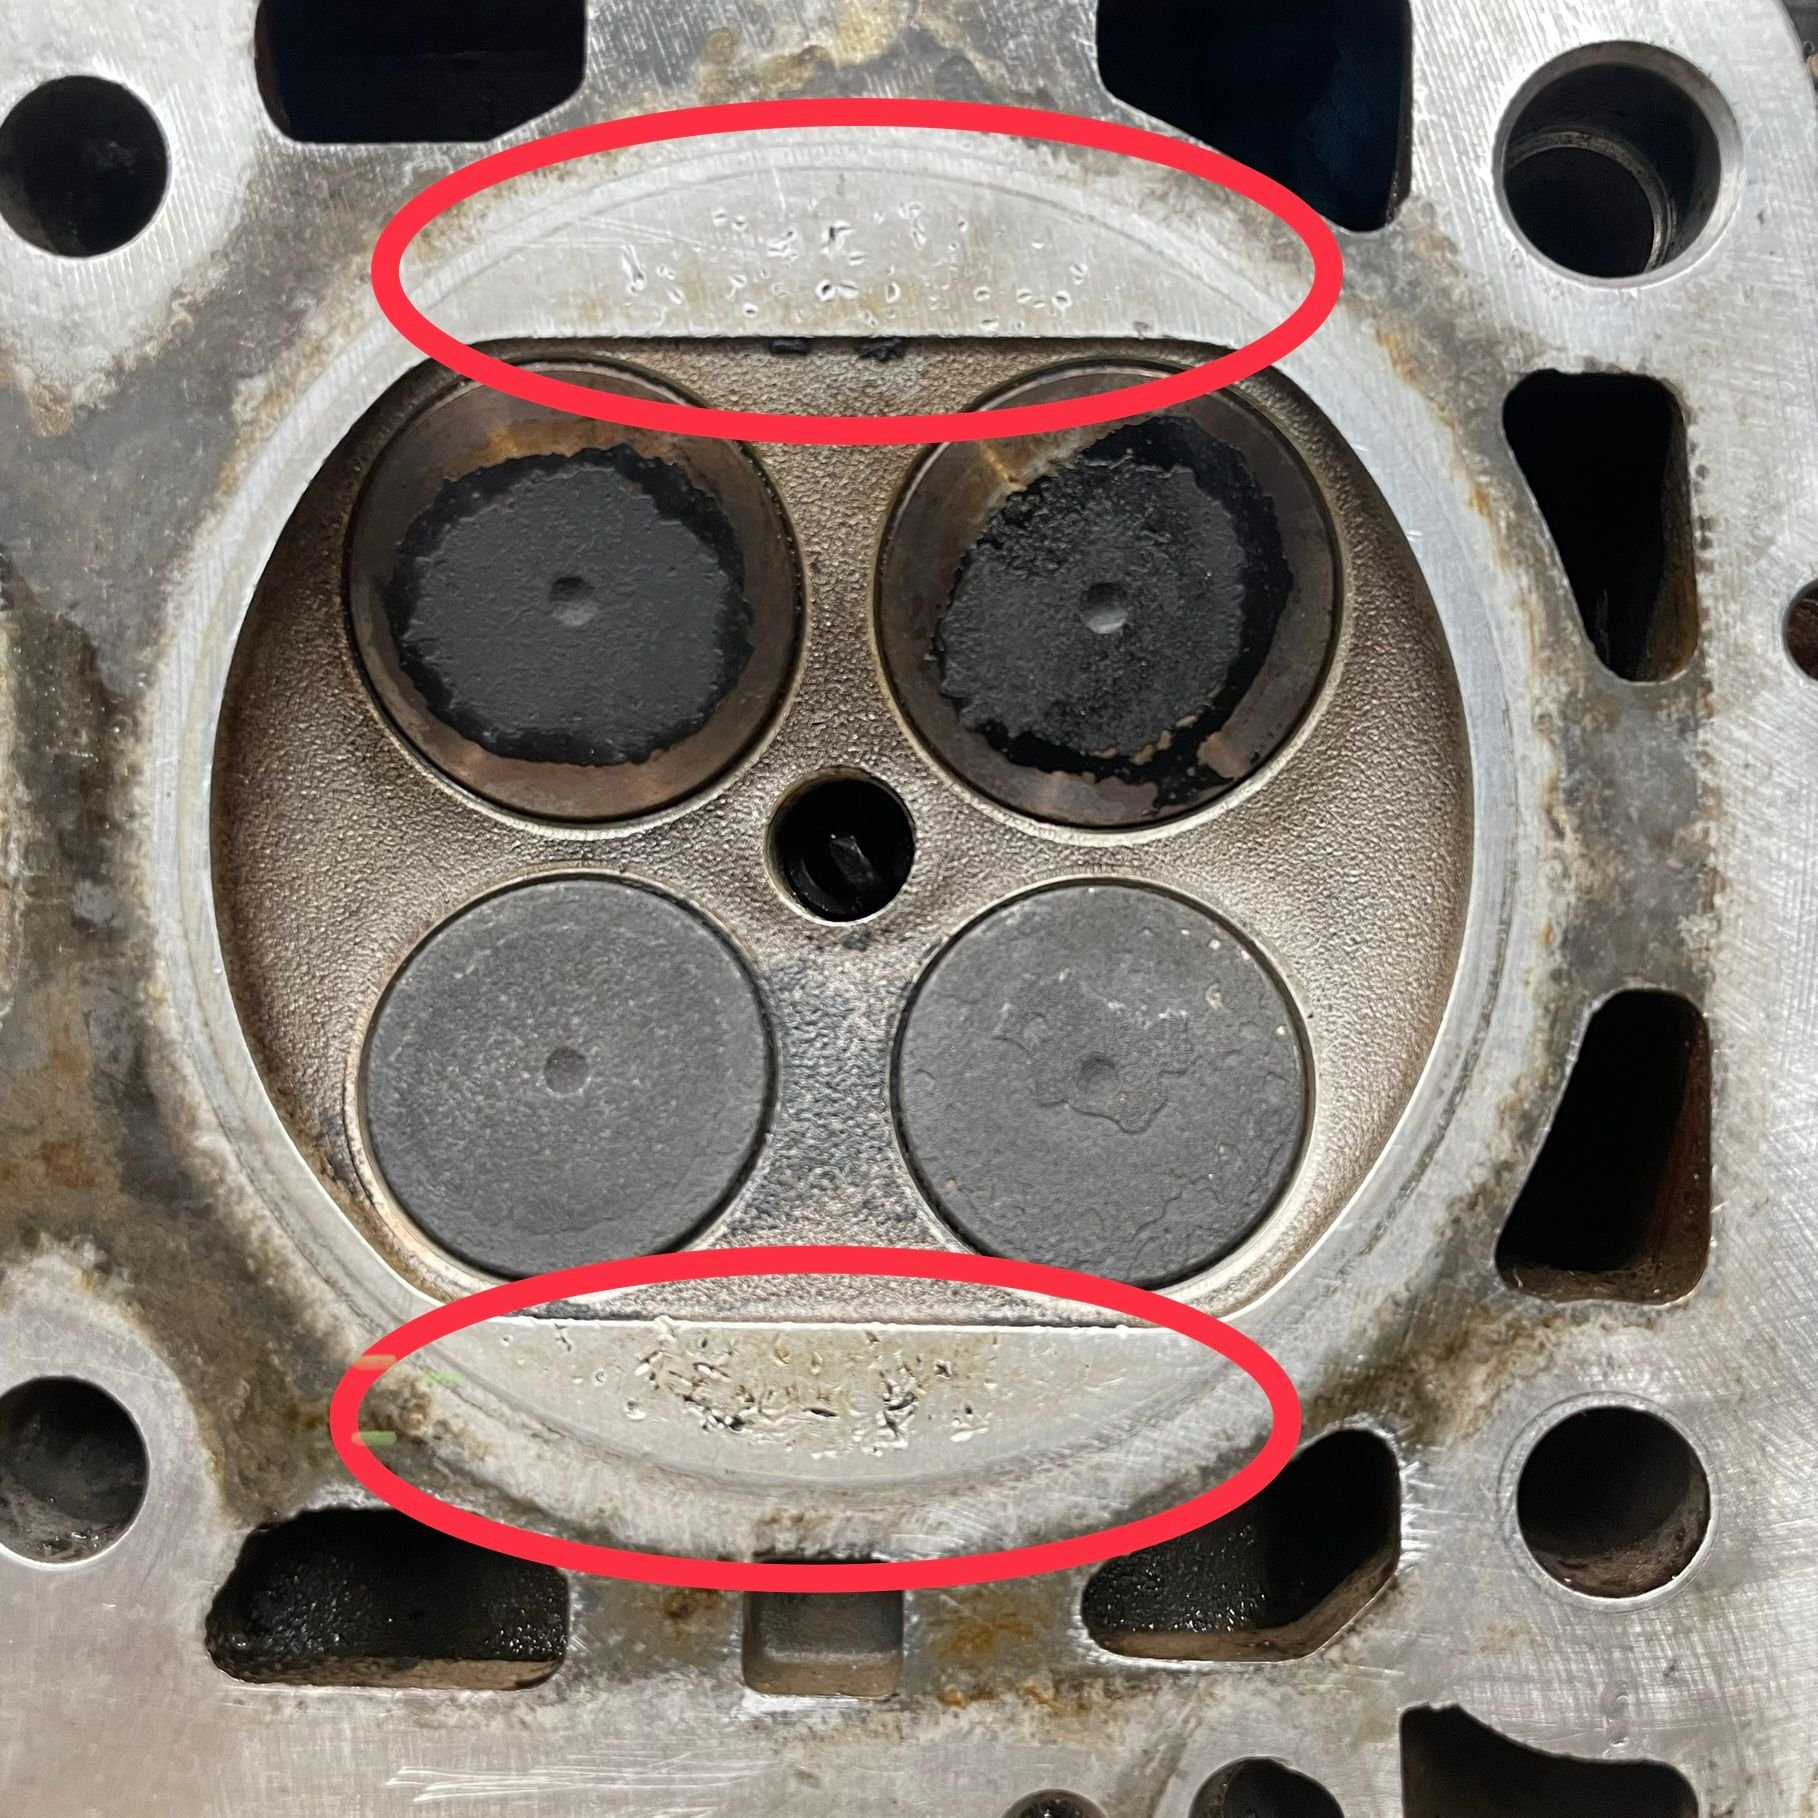
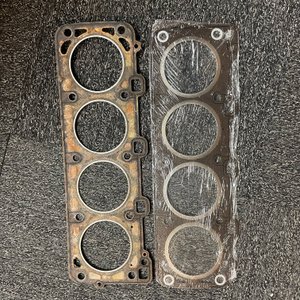
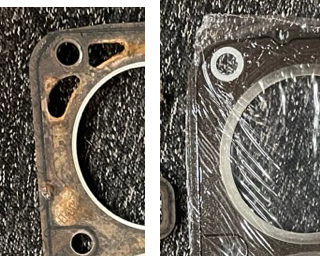
This engine was built, originally, with the narrow fire ring head gaskets (all that Porsche had, at the time.) These head gaskets always leave an impression/dent in the tops of the cylinders. You can usually feel this area with your fingernail....the traditional "go/no go" gauge.
The replacement gaskets have wide fire rings, which cover the entire top of the cylinders.
The new gaskets are not happy about this "divot" left from the early version head gasket...distorts the fire ring as it tries to conform to the "divot" and resulting high spot.
I generally will have the machine shop "kiss" the decks of the blocks which had the early head gaskets, in order to start with a perfect surface.
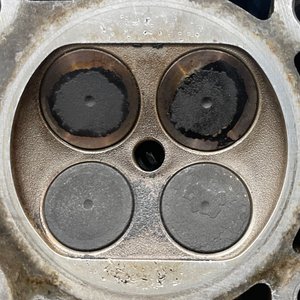
@WestInc Welcome to the thread and thanks for bringing this up. The head shop said the damage to the head was very minor and they did not recommend repairing it.
Originally Posted by GregBBRD
Pretty simple to find a good used "0" piston, so you don't have to even think about it/file on the edge where to metal is squished over.
Regarding the piston, as @GregBBRD points out there are a few nicks in the surface near the edge that look like they could scrape the walls. So the piston will need to be replaced or repaired.
Originally Posted by ador117
Bonjour, It is great and long job! "bon courage"! Happiness is at the end of the tunnel!!! Rapha�l
Merci Rapha�l. Votre article sur Toasted Head Gasket est une bonne inspiration!
Early vs Late Gasket Rings
Originally Posted by GregBBRD
This engine was built, originally, with the narrow fire ring head gaskets (all that Porsche had, at the time.) These head gaskets always leave an impression/dent in the tops of the cylinders. You can usually feel this area with your fingernail....the traditional "go/no go" gauge. The replacement gaskets have wide fire rings, which cover the entire top of the cylinders. The new gaskets are not happy about this "divot" left from the early version head gasket...distorts the fire ring as it tries to conform to the "divot" and resulting high spot. I generally will have the machine shop "kiss" the decks of the blocks which had the early head gaskets, in order to start with a perfect surface.
Thanks for bringing this up, Greg. I was wondering about those marks on the top of the cylinder bores. I can feel this with my fingernail. Based on your suggestion, the surface will need to be "kissed". Does this mean the block needs to be split and disassembled for this machine-work?
For everyone else, here are some visuals to help. Compare the width of the fire ring on the original OEM head gaskets versus the replacements.
And take a look at the imprint on the tops of the cylinders from the narrow fire ring.
Last edited by Michael Benno; 08-29-2023 at 05:18 PM.
Bonjour Michael,
I followed Greg's advise and I made the block kissed. As he said, if you use the actual head gaskets, it is better to have the cylinder top surface perfectly flat.
In addition, with the used engine I bought to get more spare parts, I did not found so far how it get coolant in the oil. I have to pressure check the heads to make sure my theory is good. I just wait my wallet to grow up before sending them for rework.
So far and if the heads are not cracked, my theory is that the border of the block was not flat, corrosion developed around the oil conduits so maybe coolant found a path to oil circuit. So kissing the block is one more reason to make sure the head gasket will seal correctly the heads against the block.
For that, yes, you will need to split the block. More rework...
Cheers,
Rapha�l
I believe that one of the "tricks" to not having 1R heads crack is to use new head bolts.
The old bolts are hydrogen embrittled and they end up with higher torque when being angle tightened.
(The new factory bolts will angle torque about 20 ft, lbs under the used ones.)
@WestInc Welcome to the thread and thanks for bringing this up. The head shop said the damage to the head was very minor and they did not recommend repairing it.
Regarding the piston, as @GregBBRD points out there are a few nicks in the surface near the edge that look like they could scrape the walls. So the piston will need to be replaced or repaired.
As I clearly pointed out with your pictures, my main concern was the piston-damage, from smashing bits between the head and piston. It was in need of exchange. Great that you Greg confirmed this...
I believe that one of the "tricks" to not having 1R heads crack is to use new head bolts.
The old bolts are hydrogen embrittled and they end up with higher torque when being angle tightened.
(The new factory bolts will angle torque about 20 ft, lbs under the used ones.)...For what it's worth...
Excellent pro tip thank you! I will follow your guidance.
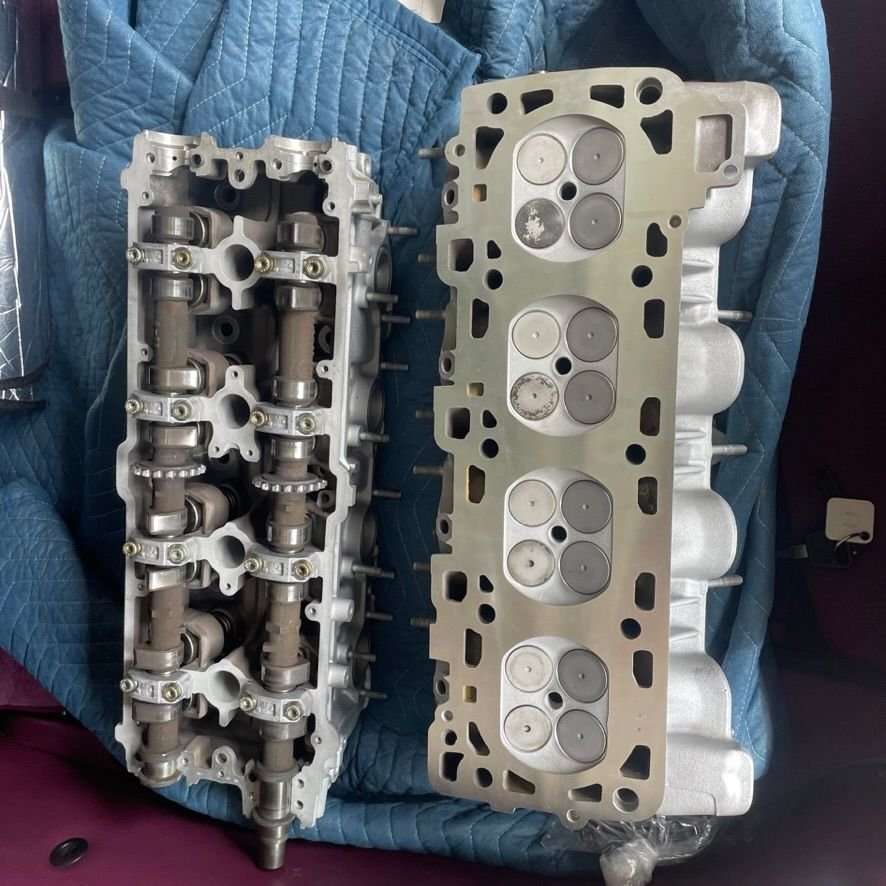
Just picked up the heads today!
The head shop said these heads and internals had minimal wear. The valve guides were all well within wear specifications (less than 50%), similar to the valves. The cam lobes and lifter surfaces we
The service was about $1200. The lifters were cleaned and rebuilt. It will be a while before I am able to install them. I still need to disassemble the block and have it decked. Any particular guidance on storing these heads while I wait? Spay them with oil/WD40 perhaps?
The good news is the machine shop can do the decking and send the block off for Alusil honing. I still need to do some research on who they use so I can talk with them about the process. But at least I have a path forward.
EDIT: I called the head shop about how best to clean the heads, given the debris I found inside. They offered to re-clean the heads for me.
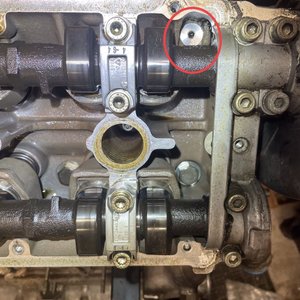
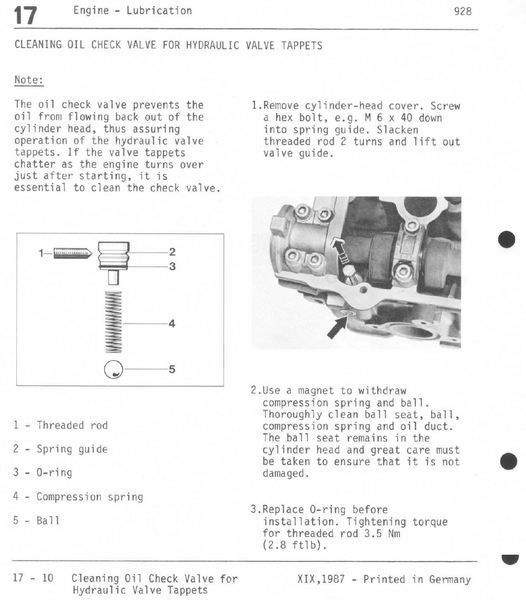
Earlier in the thread, I was informed about these anti-drainback valves in the head and the need to change the seals.
The WSM does a good job describing the functionality and respective service.
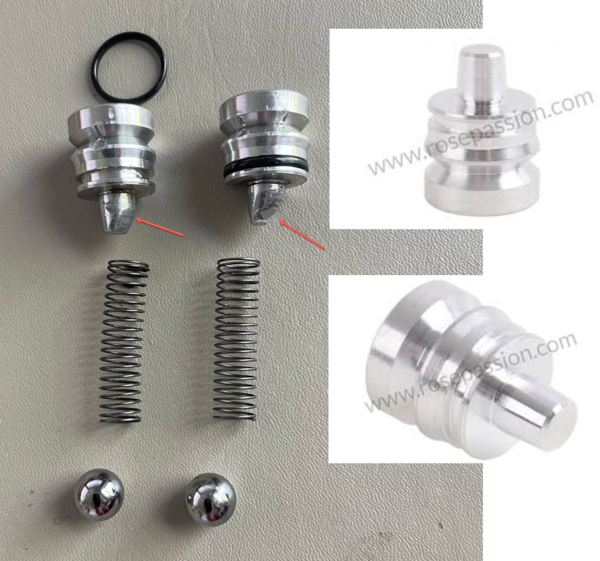
I had forgotten to remove these before sending the heads off before rebuilding. Last night, I removed the check valves in each and noticed some odd wear on the spring holder pin as compared to a new part. So both of those will be replaced. But the wear is quite odd.
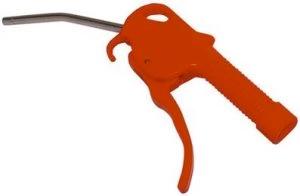
Also, when cleaning out the oil supply port, I discovered some debris from the headwork in the port and on the *****. it was small metal shaving from the resurfacing and some grit from the vapor blasting. This causes concern for me, and now I want to thoroughly clean the hards and all the oil ports to assure me that all the debris has been cleaned. I could use some suggestions and insight on how best to clean everything. I was thinking of using compressed air with a long probe tip. Should I use WD40, Brake clean, or mineral spirits? I am concerned about moving debris from one area to another. I am sure anyone who has had a head rebuilt has had to double-check and inspect. I'm looking for some best practices here.
Last edited by Michael Benno; 09-13-2023 at 02:57 PM.
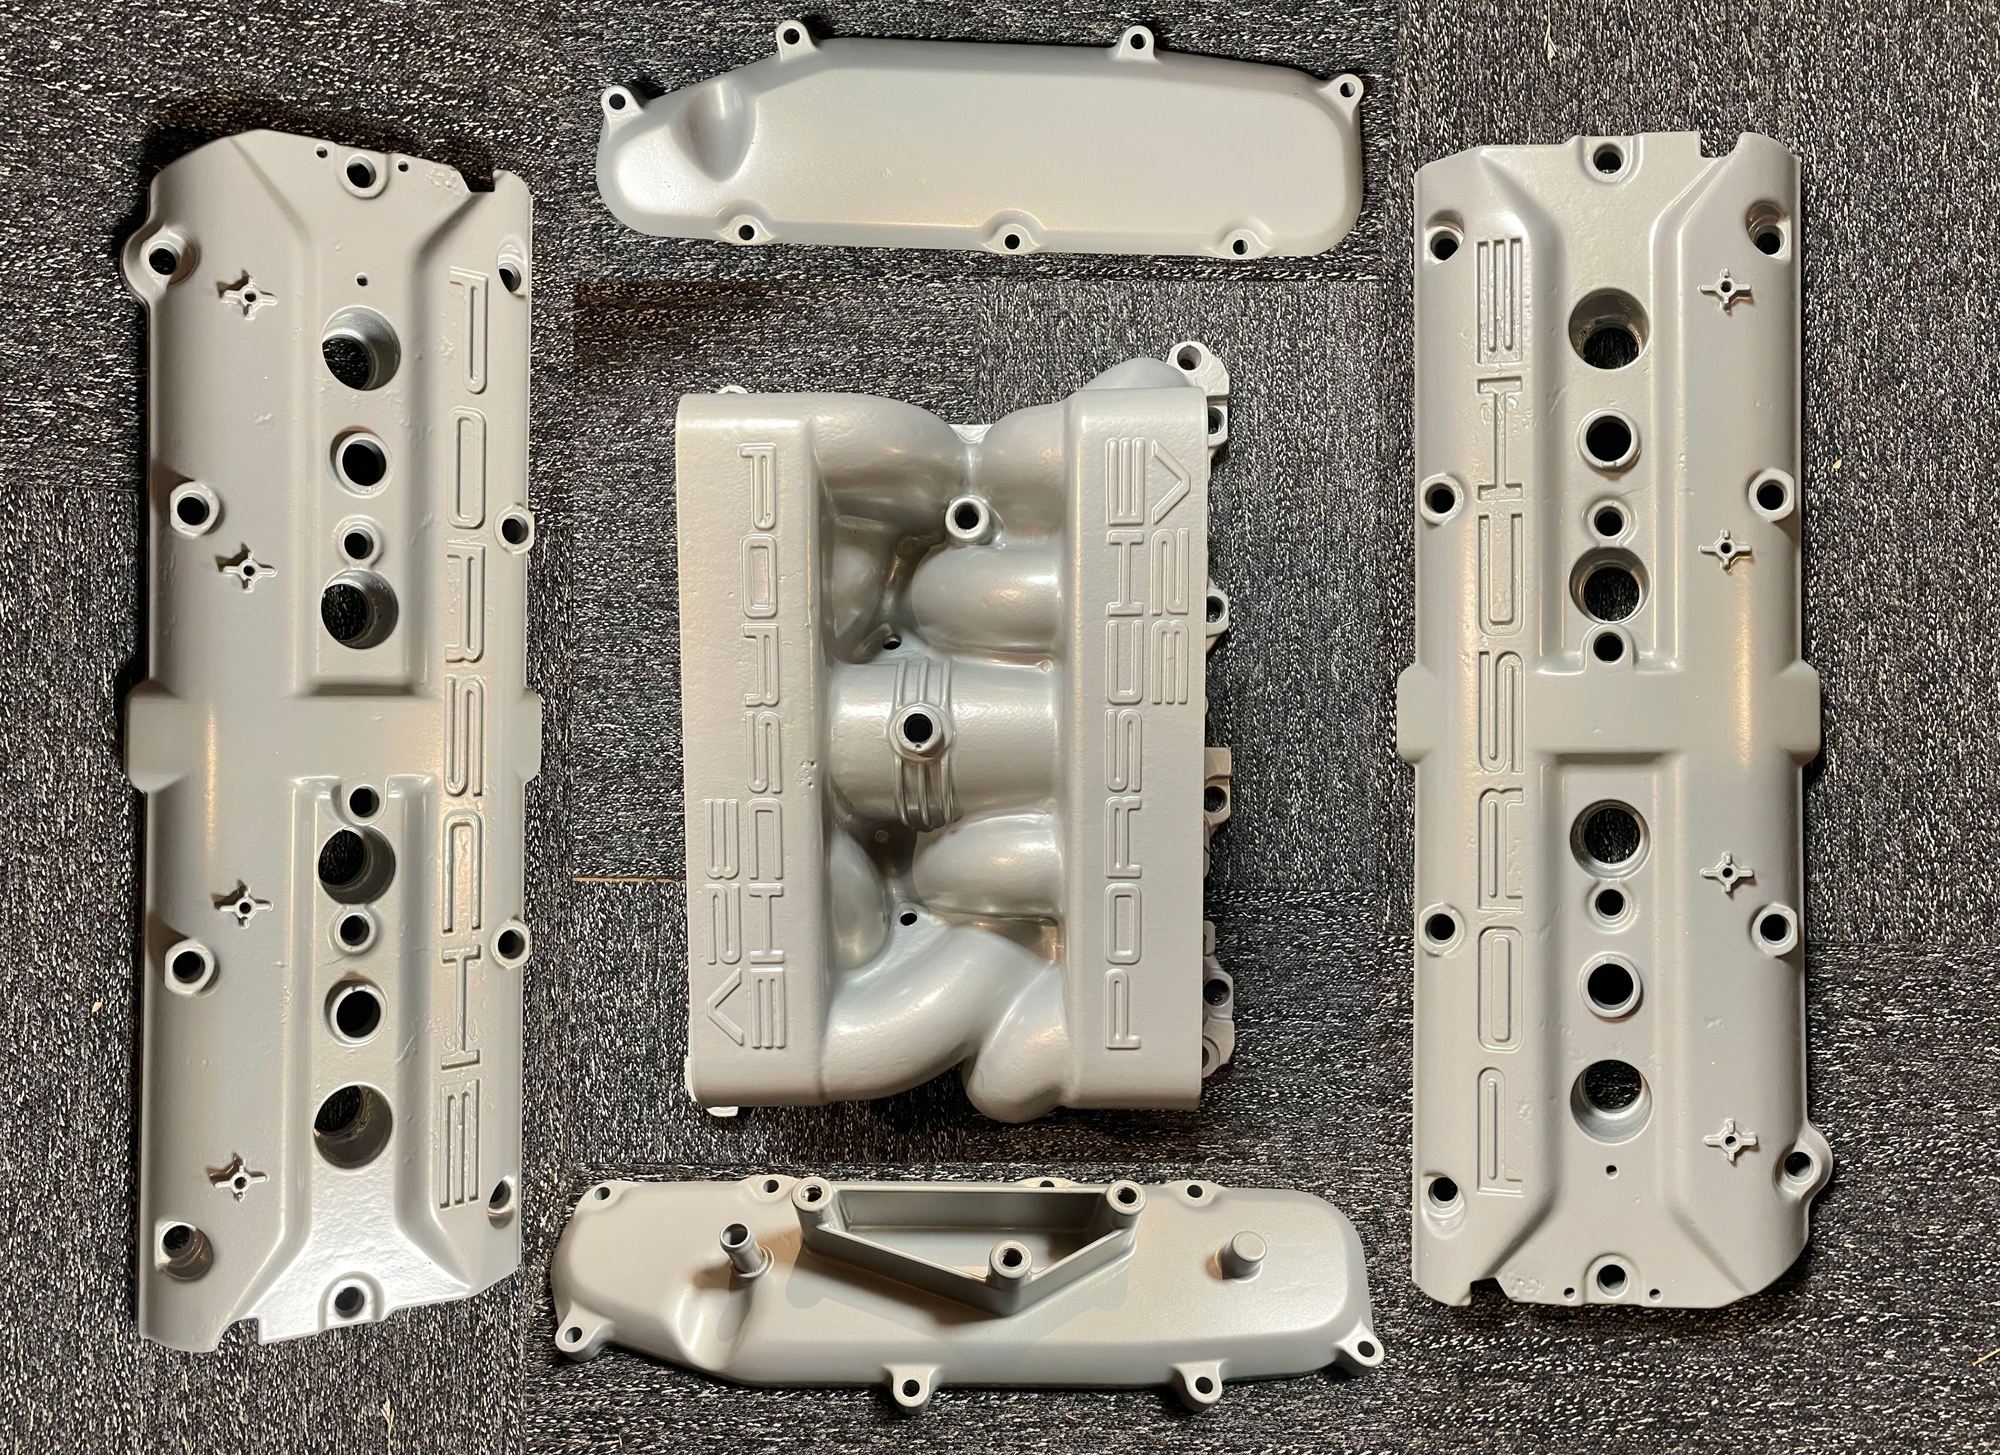
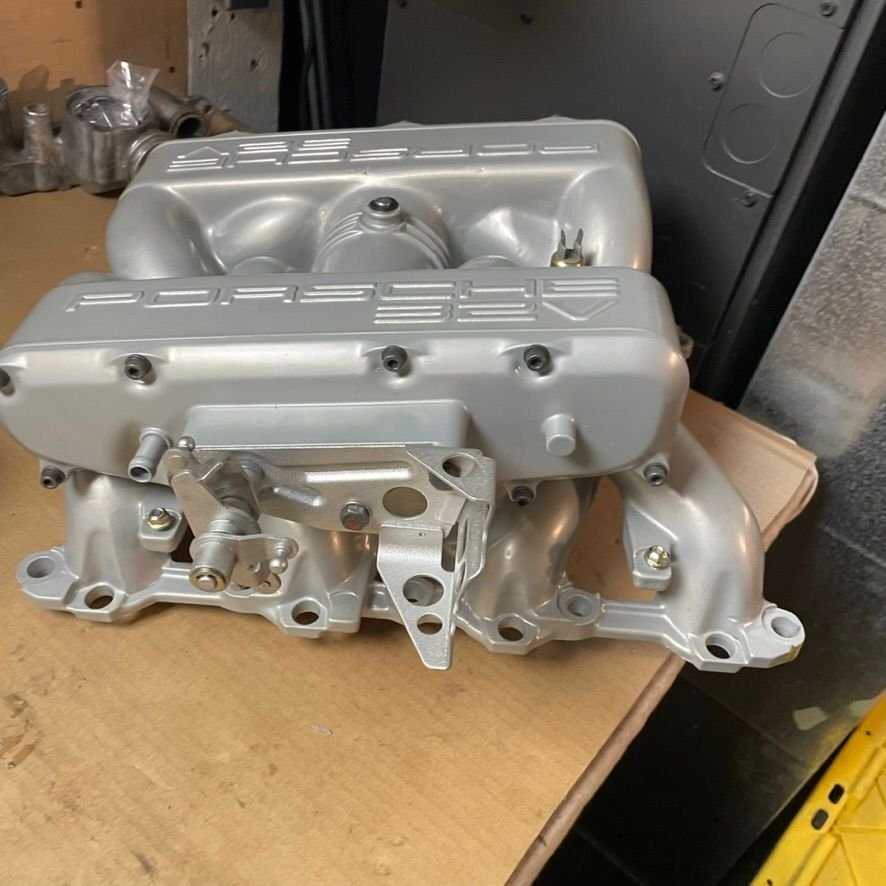
Big shout out to @DonaldBuswell for the work he did on the refurbishment of the intake components. The color and quality are perfect, and the confidence that all the blast media has been removed is reassuring. I highly recommend this service. Thanks Donny!
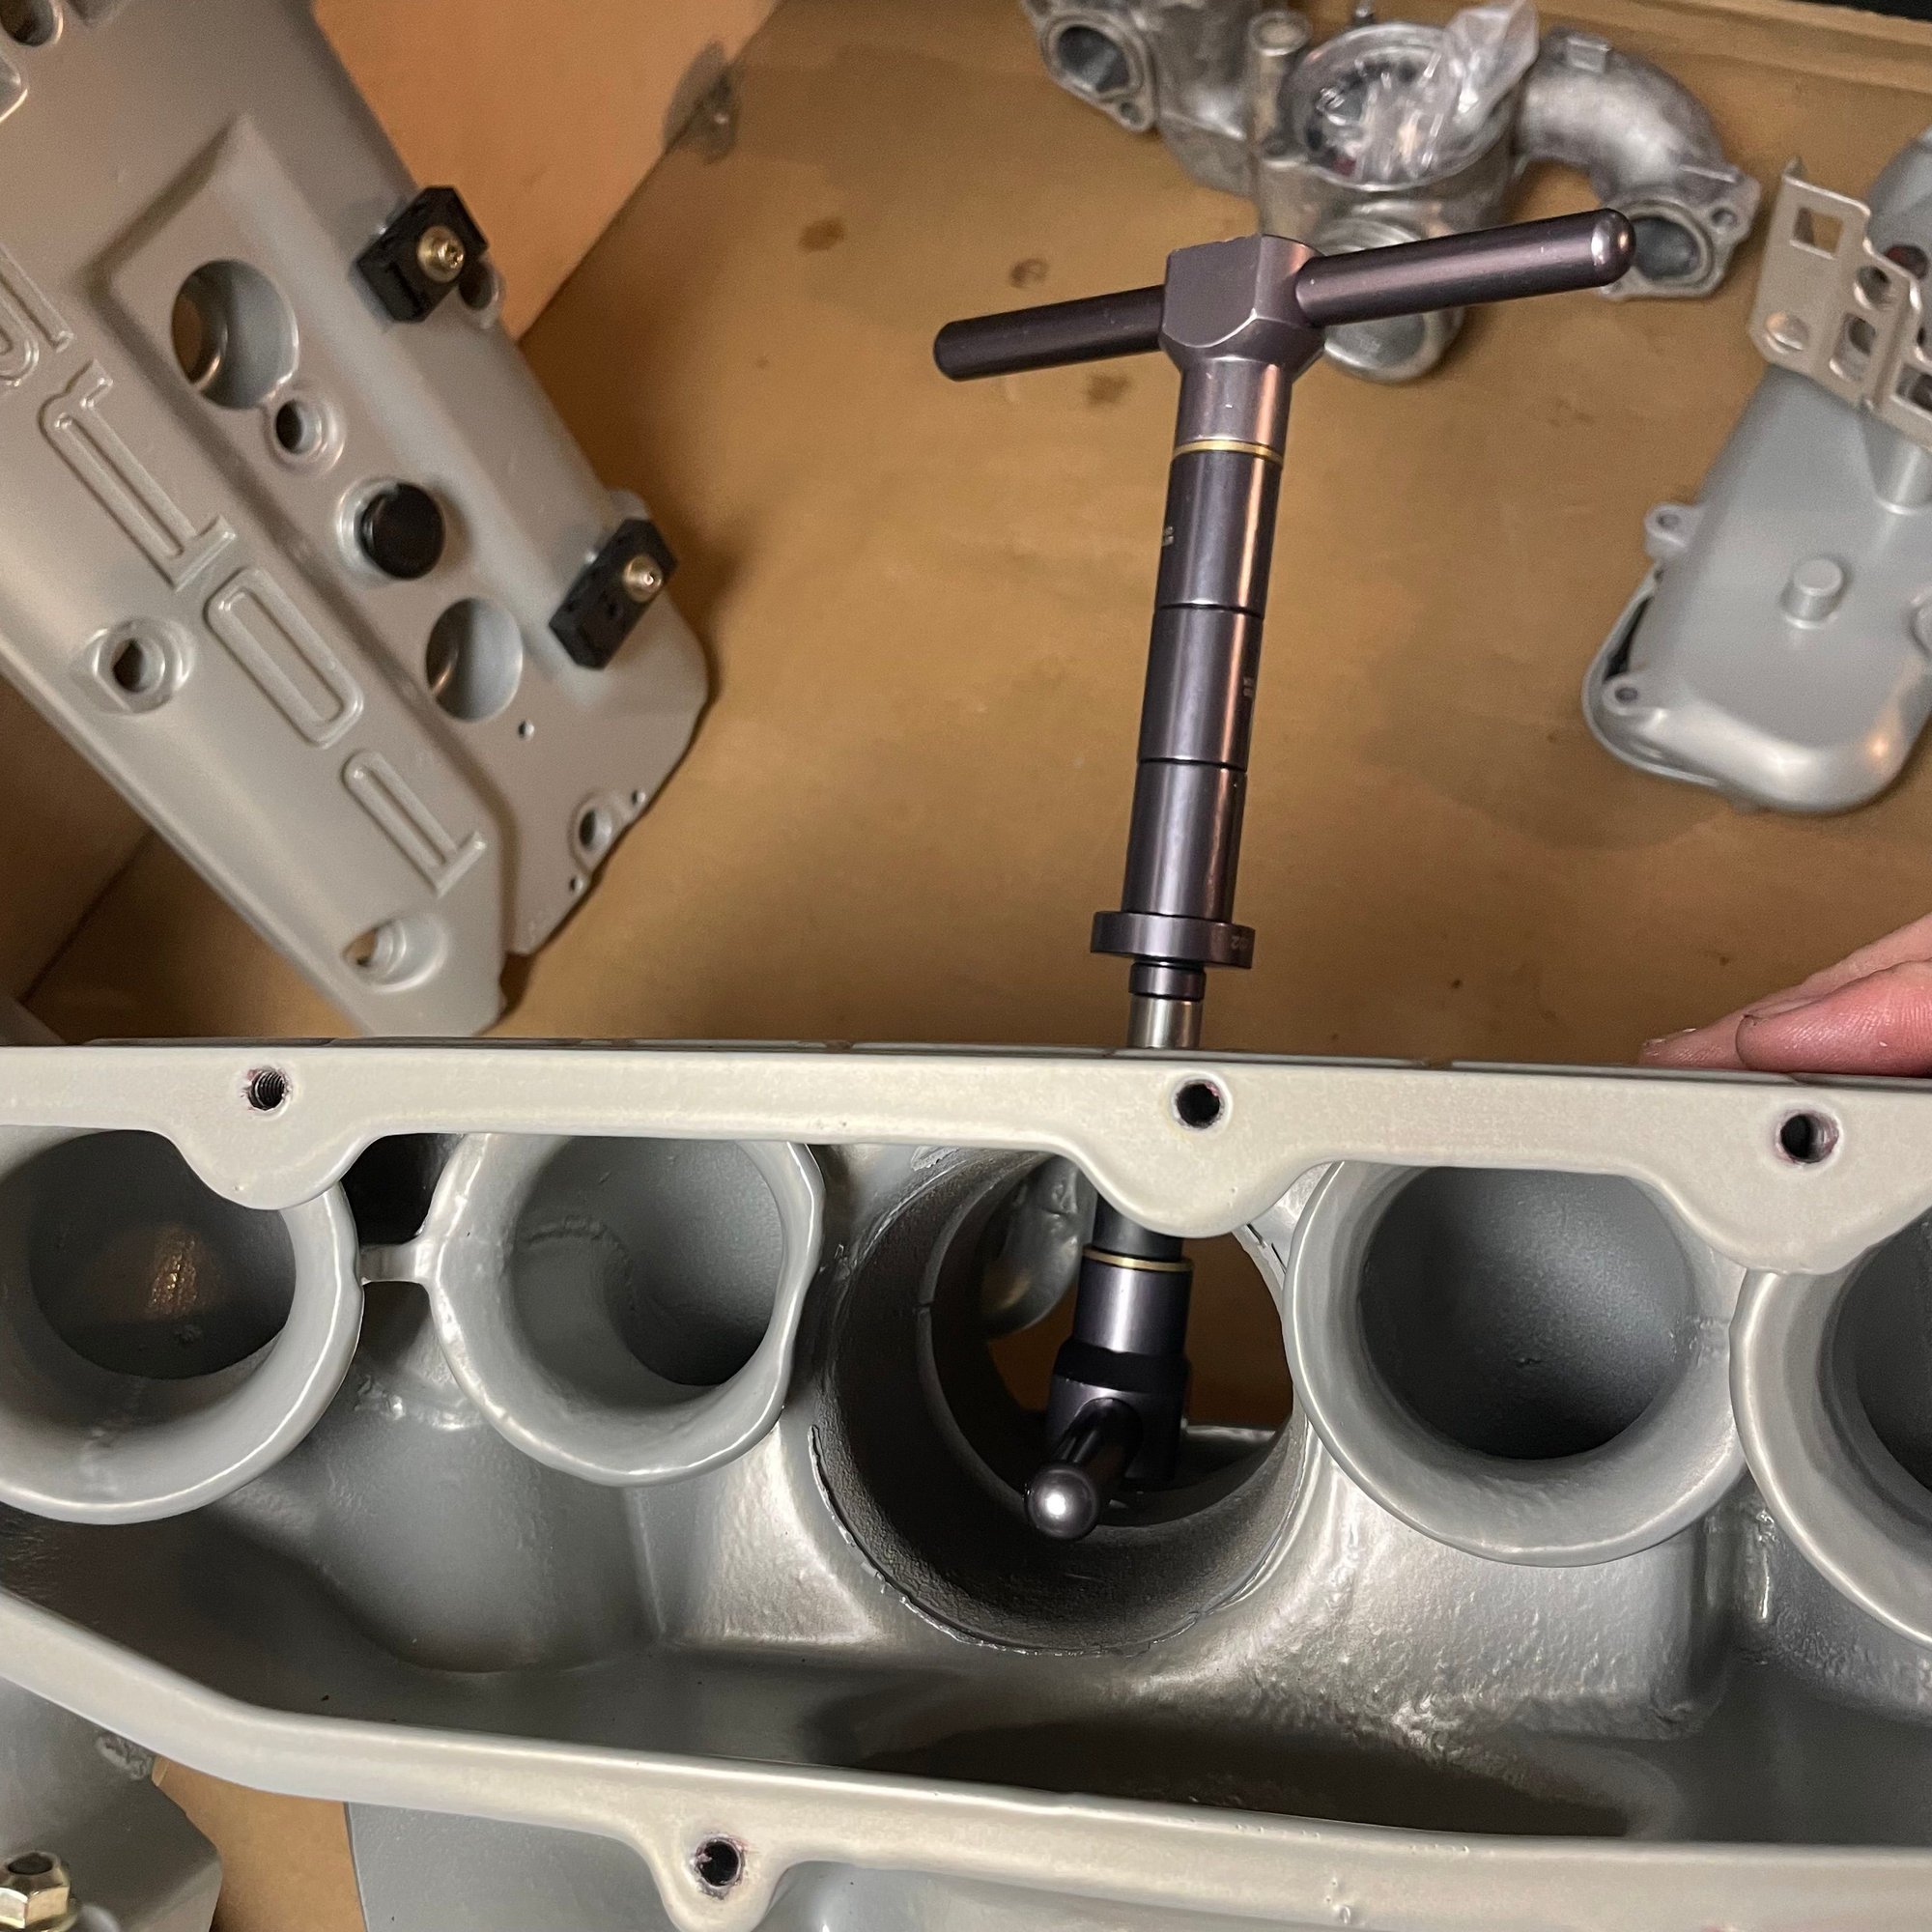
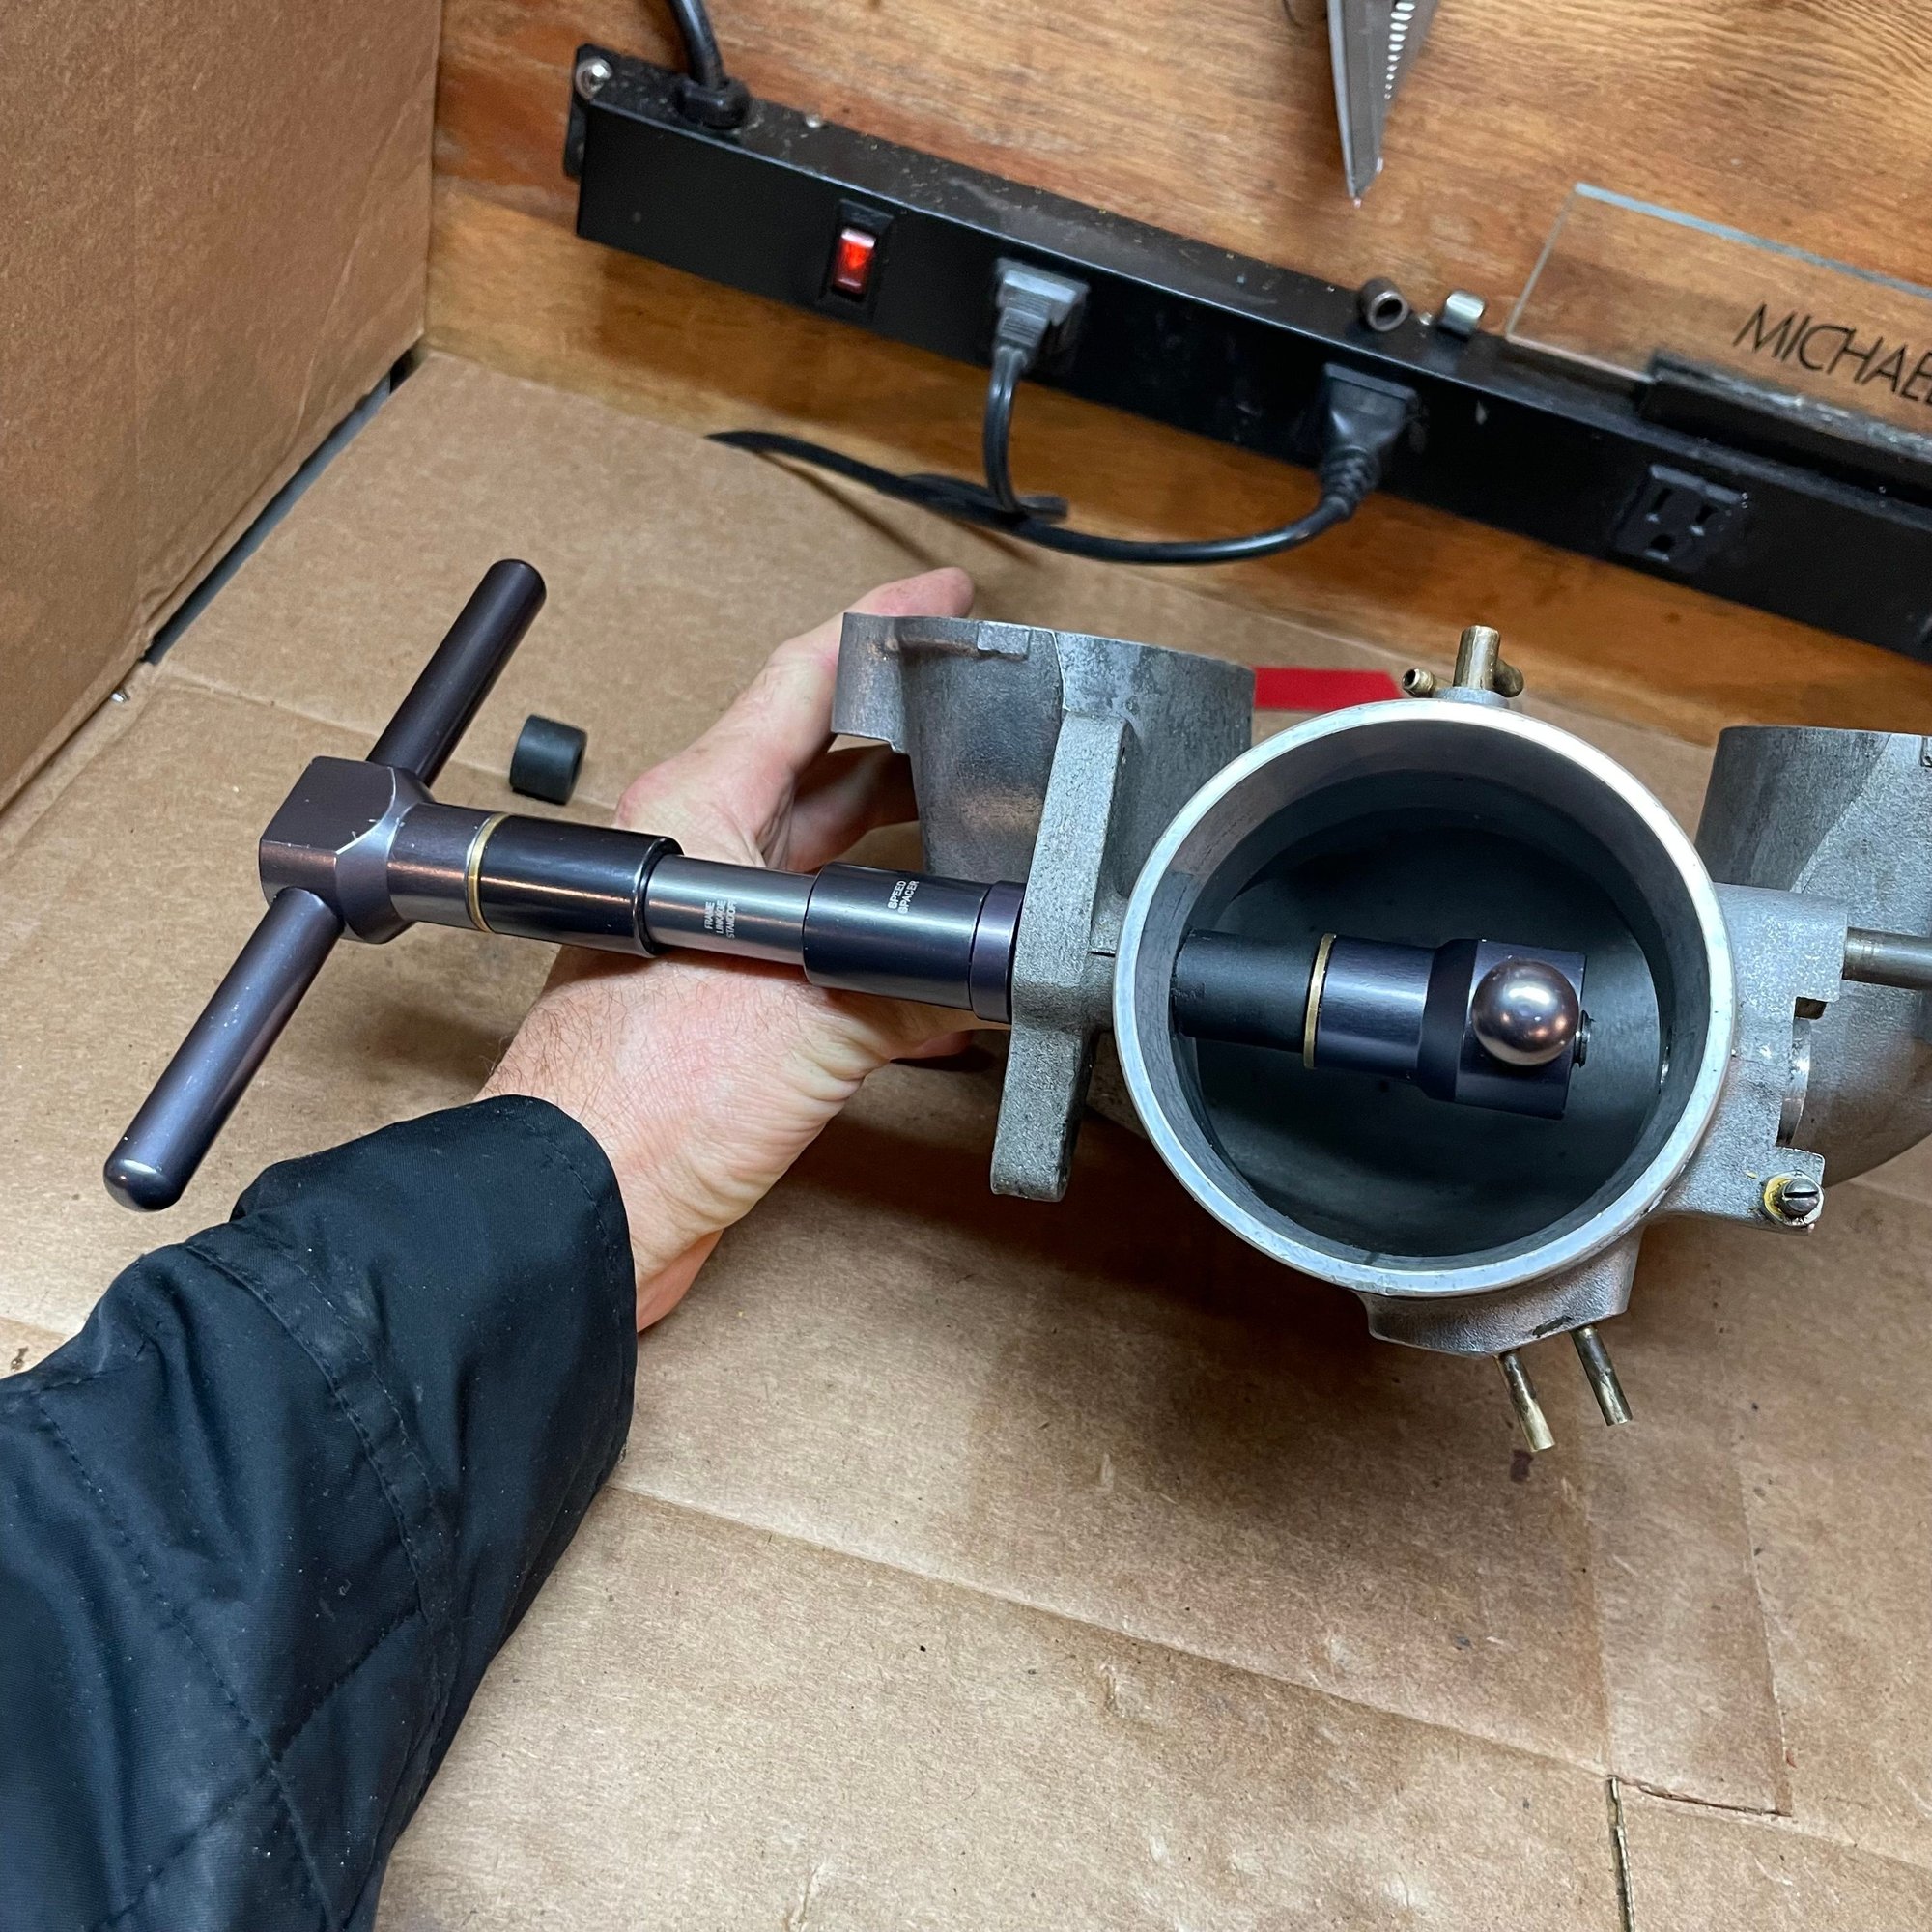
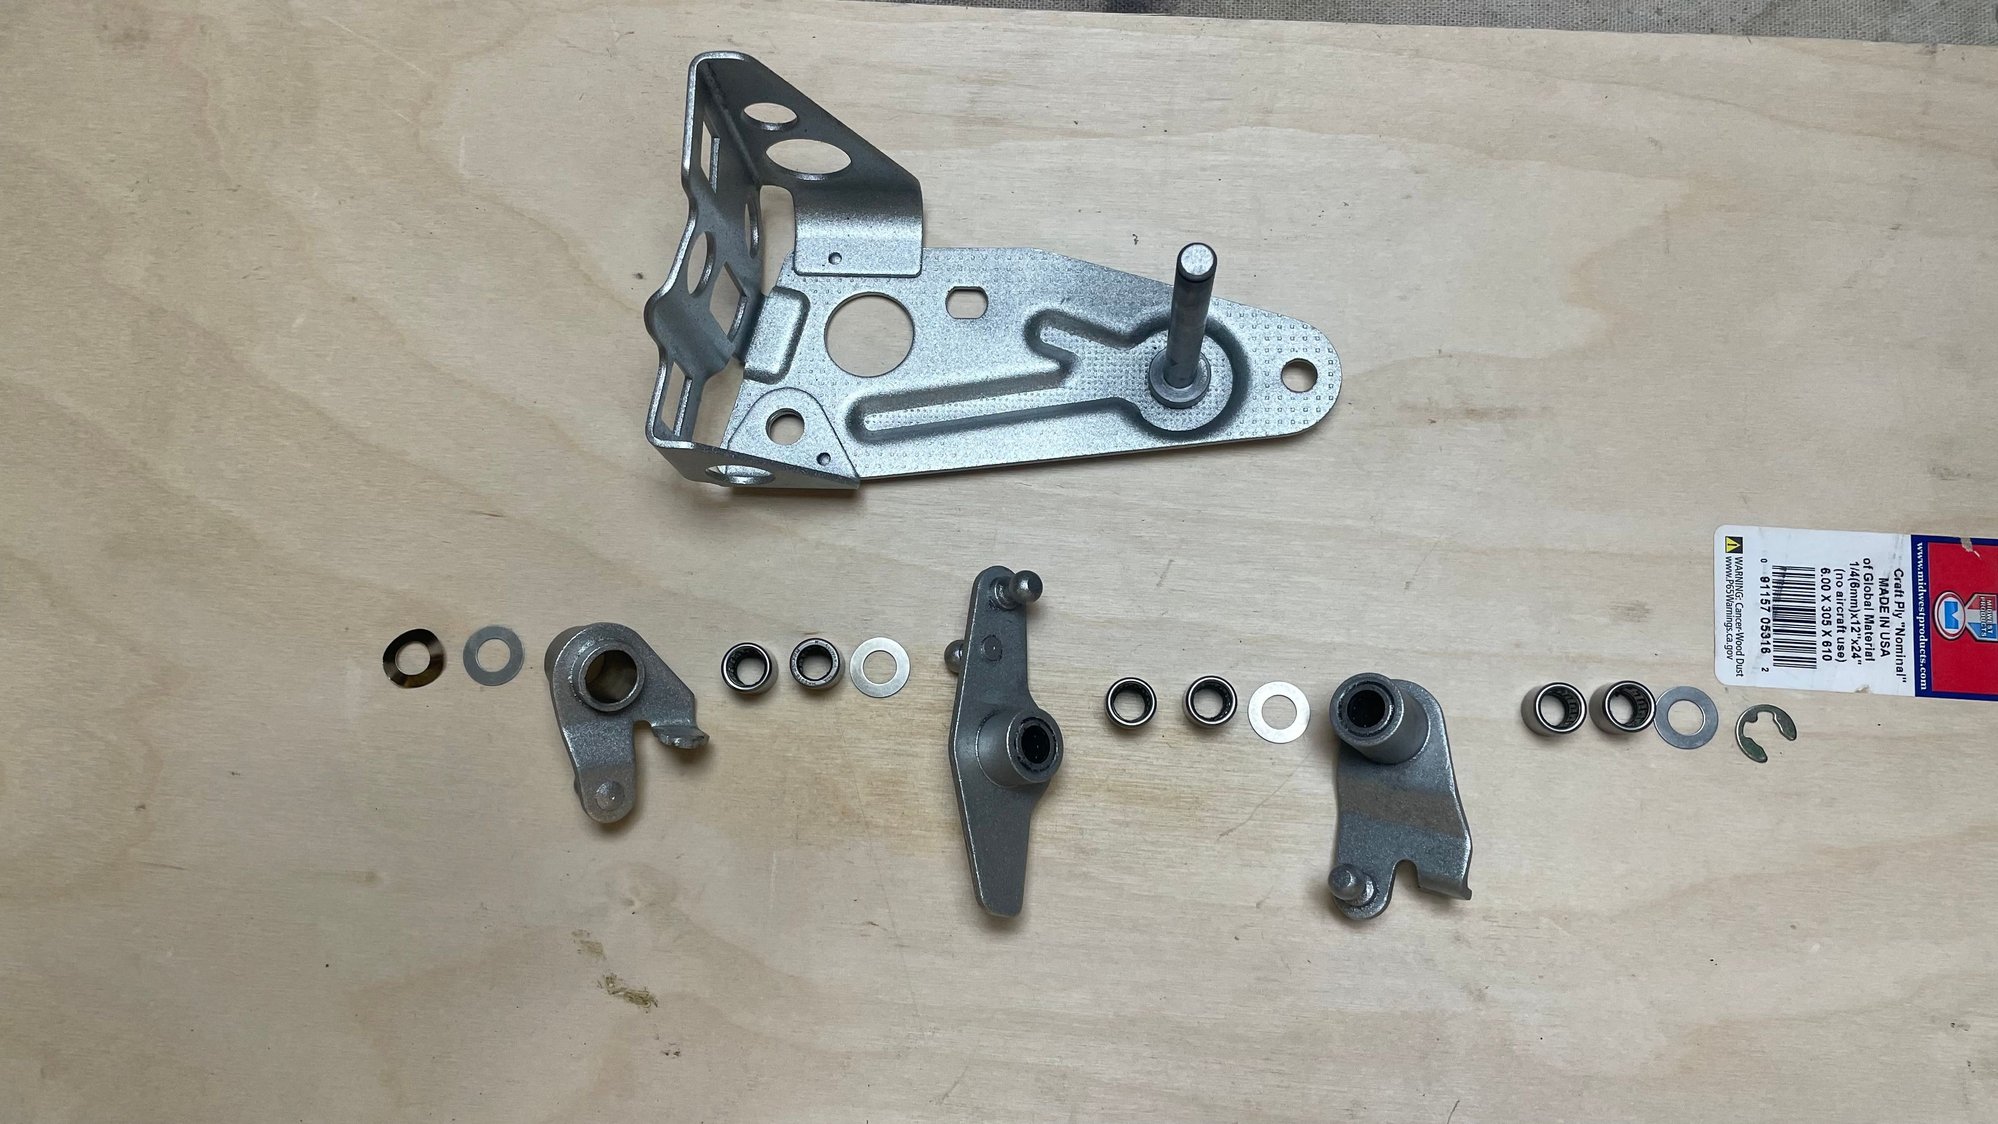
I decided to do some partial re-assembly of the intake components since that can be done and put away while the rest of the engine is worked on. Specifically, I rebuilt the bearing assemblies for the flappy, throttle plate, and throttle quadrant. The two bearings used in the flappy are the same that are used in the throttle plate: Bearing number HK 1012 RS
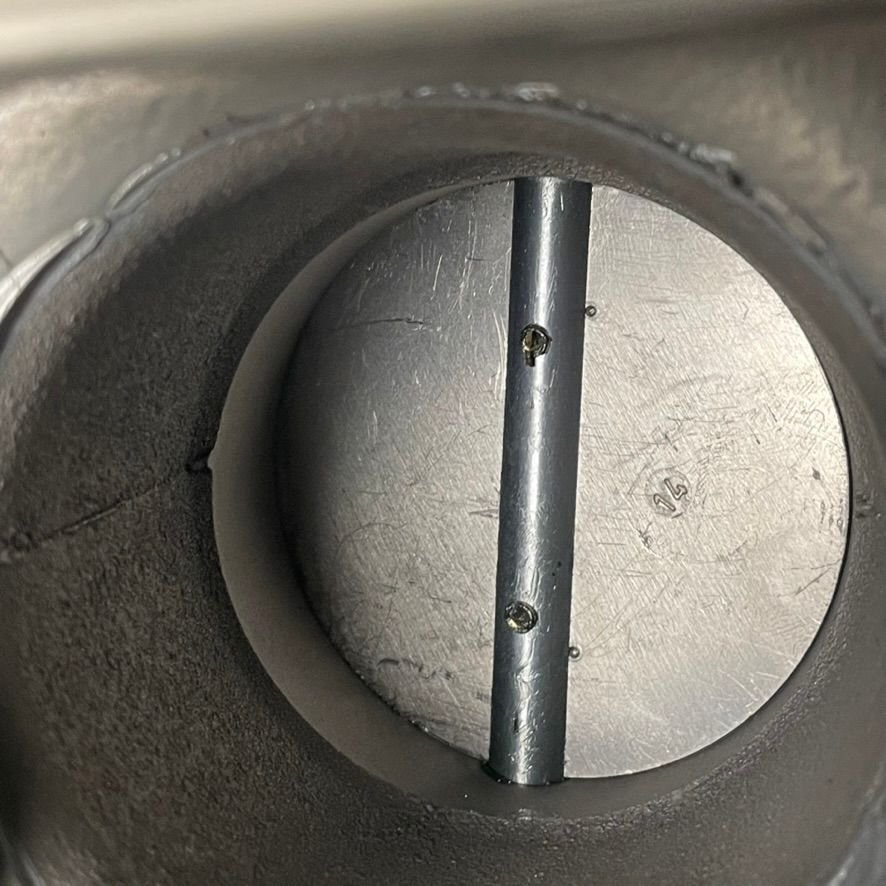
Installing the flappy: Notice the two dots on the flappy plate. These are centering points. Both dots should be equal distance from the center bar. A properly centered plate should not bind and should have no light leaks. This was a protip from @GregBBRD. Thanks for that guidance! BTW, Can you tell me what is incorrect about this picture? The screw faces should be on the same side as the dots. I incorrectly installed the flapply plate backwards. Something I discovered when I tried to connect the linkage on the underside. This has since been rectified.
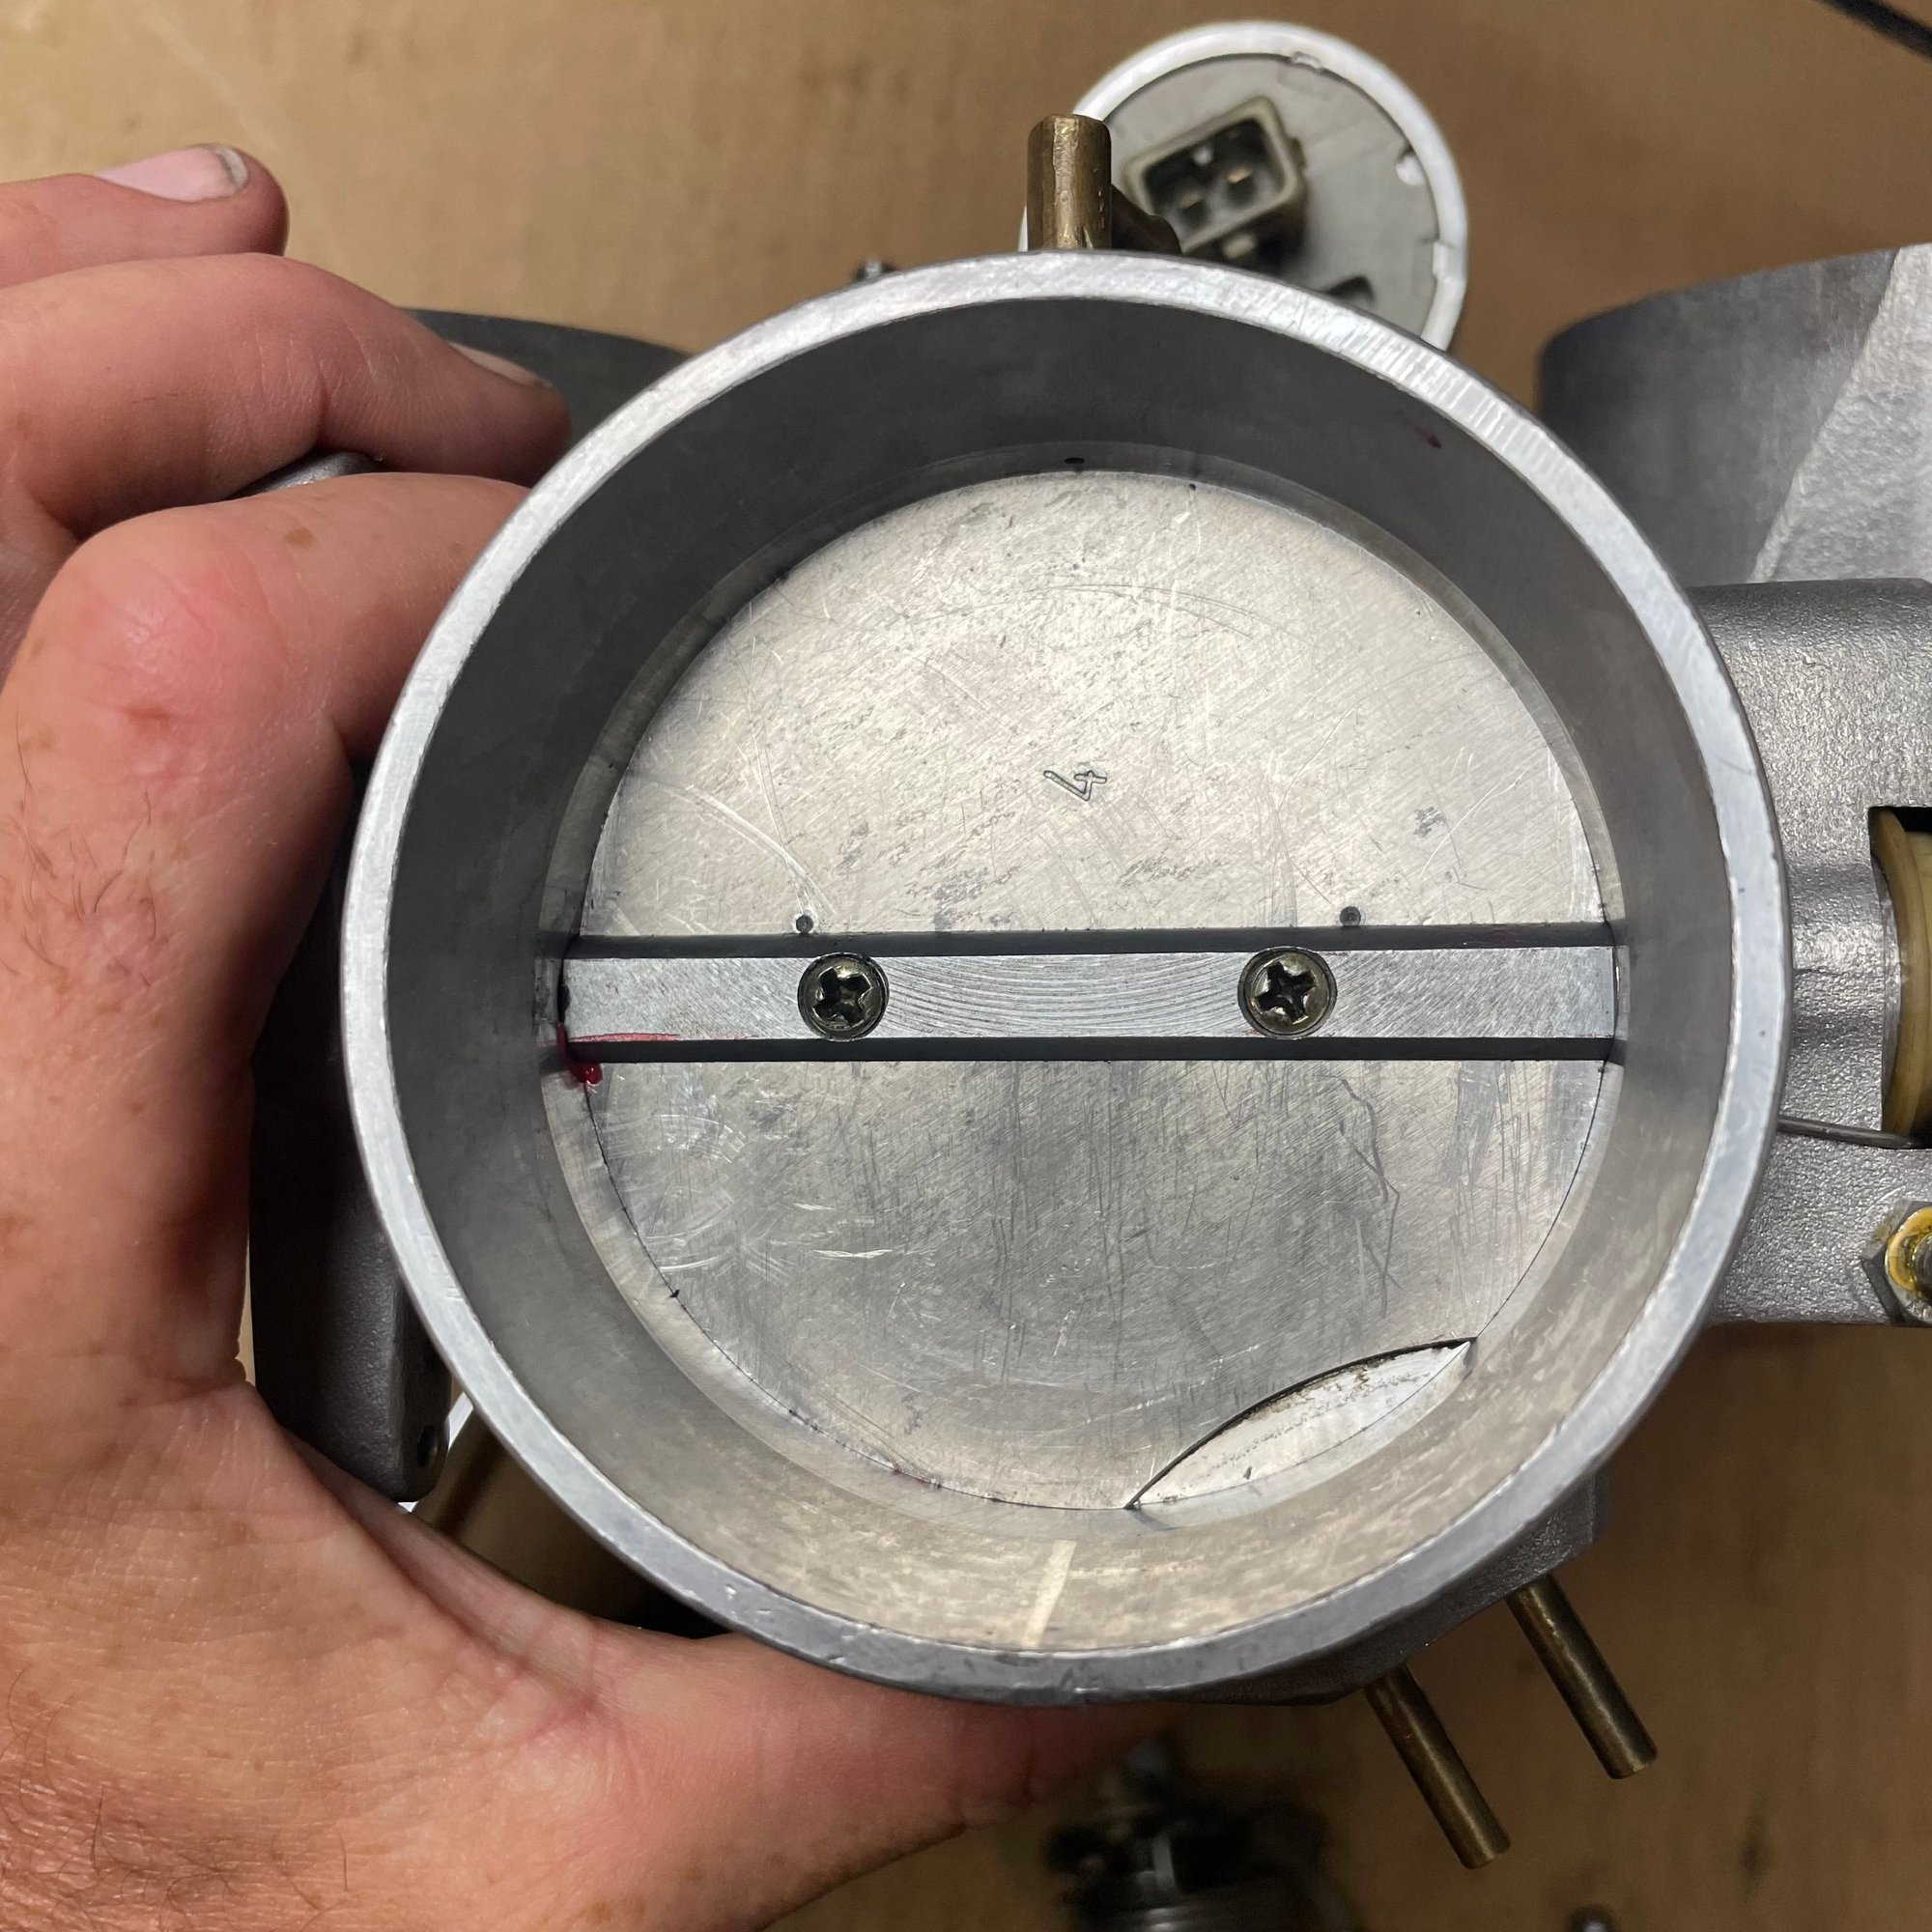
Throttle plate Similar centering dots on the throttle plate. Both dots should be equal distance from the center bar.
The throttle quadrant used 6 bearings. The bearing number is HK0810.
I did a little pre-assembly and testing to make sure everything operated smoothly and then packed them away in a box till they rebuilt motor is ready.
Last edited by Michael Benno; 09-14-2023 at 04:15 PM.

 08-25-2023, 05:20 AM