When you click on links to various merchants on this site and make a purchase, this can result in this site earning a commission. Affiliate programs and affiliations include, but are not limited to, the eBay Partner Network.
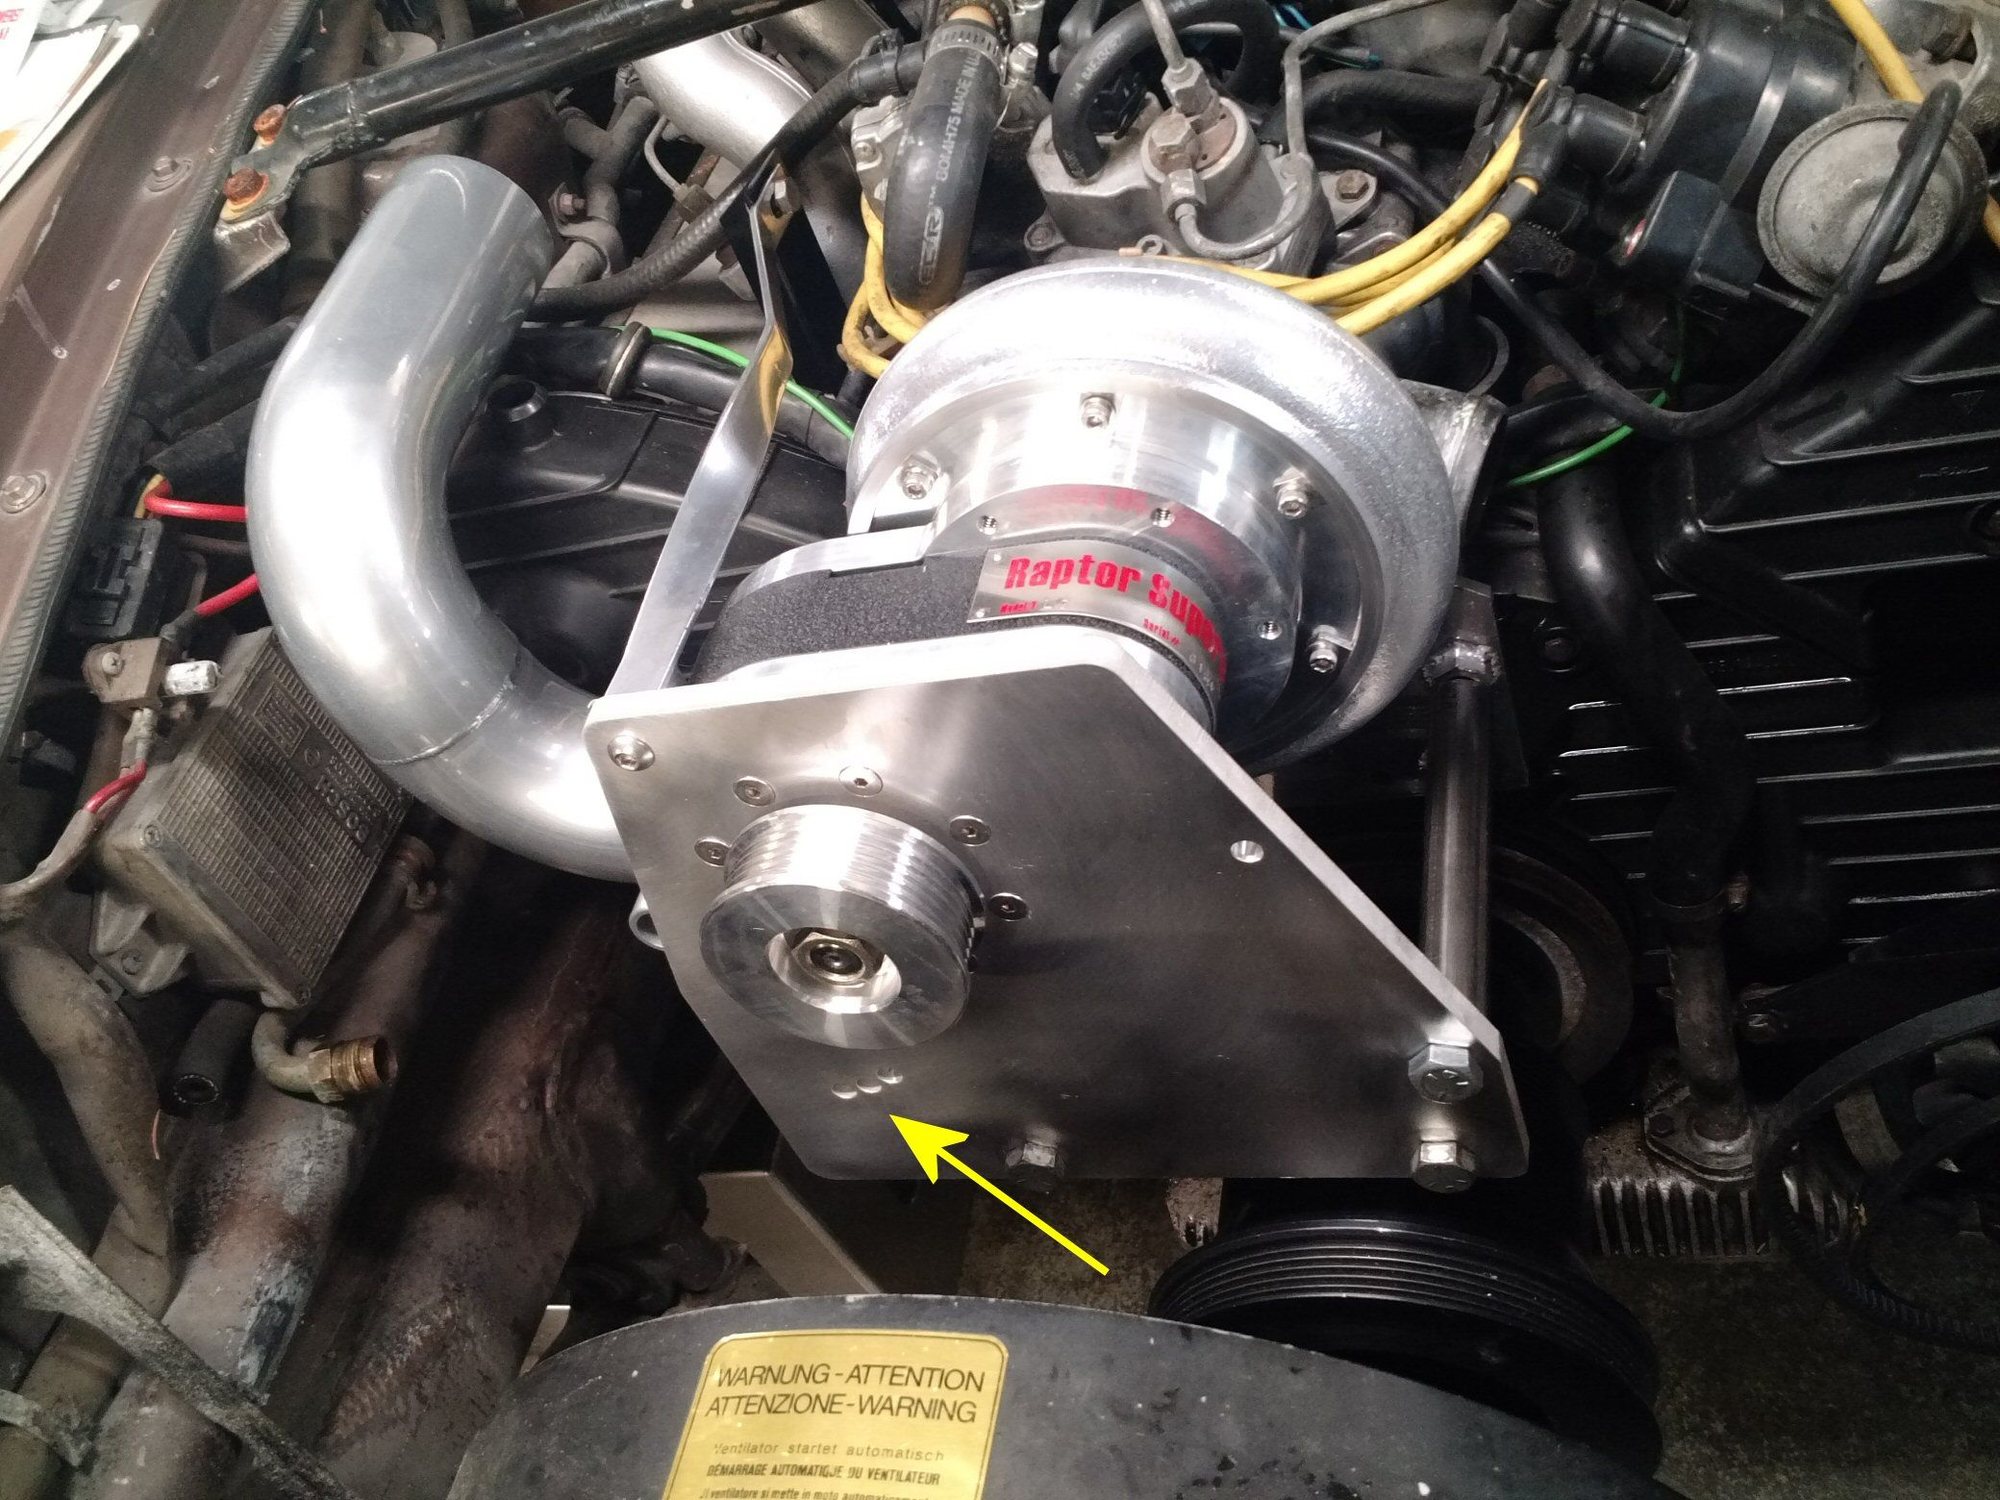
There are three holes in your mounting plate for the belt tensioner. Each one represents a different range of adjustment. So, if you are at the end of adjustment, but in the center hole, move the bolt to the third hole to get a new range.
That's the part number in the picture: 25-060365
Carl, I have a Powerdyne and my mounting plate doesn't look like that - just two holes and the long slots in the tensioner roller assembly that allow it to slide and then get clamped to the plate
Ach - of course you are right. For the reader: Pete received our last 16v supercharger kit with a Powerdyne supercharger. We have since converted to use the Raptor supercharger on the 16v cars like we do on e the 32v cars.
Sorry, Pete - I posted the wrong picture. Make sure you install the top strap on your supercharger bracket. I think I have seen it in other pics, its just not in this one.
As to your belt slip issue; change the pulley to the one I sent you and that should be the end of it. You have discovered that the next belt size smaller than you have is a LOT smaller, not a little. The problem with that is it requires you to move your belt tensioner way out, and that means you have less belt wrap. We like to see 180 to 200 degrees of belt wrap, like you have now. The other, better, way to reduce the belt slip would be to go to the next size up in supercharger drive pulleys. You get more tractive force that way and lower the load too. But I know you are a boost monster and are reluctant to lower it even if it is only by 1 psi
Carl,
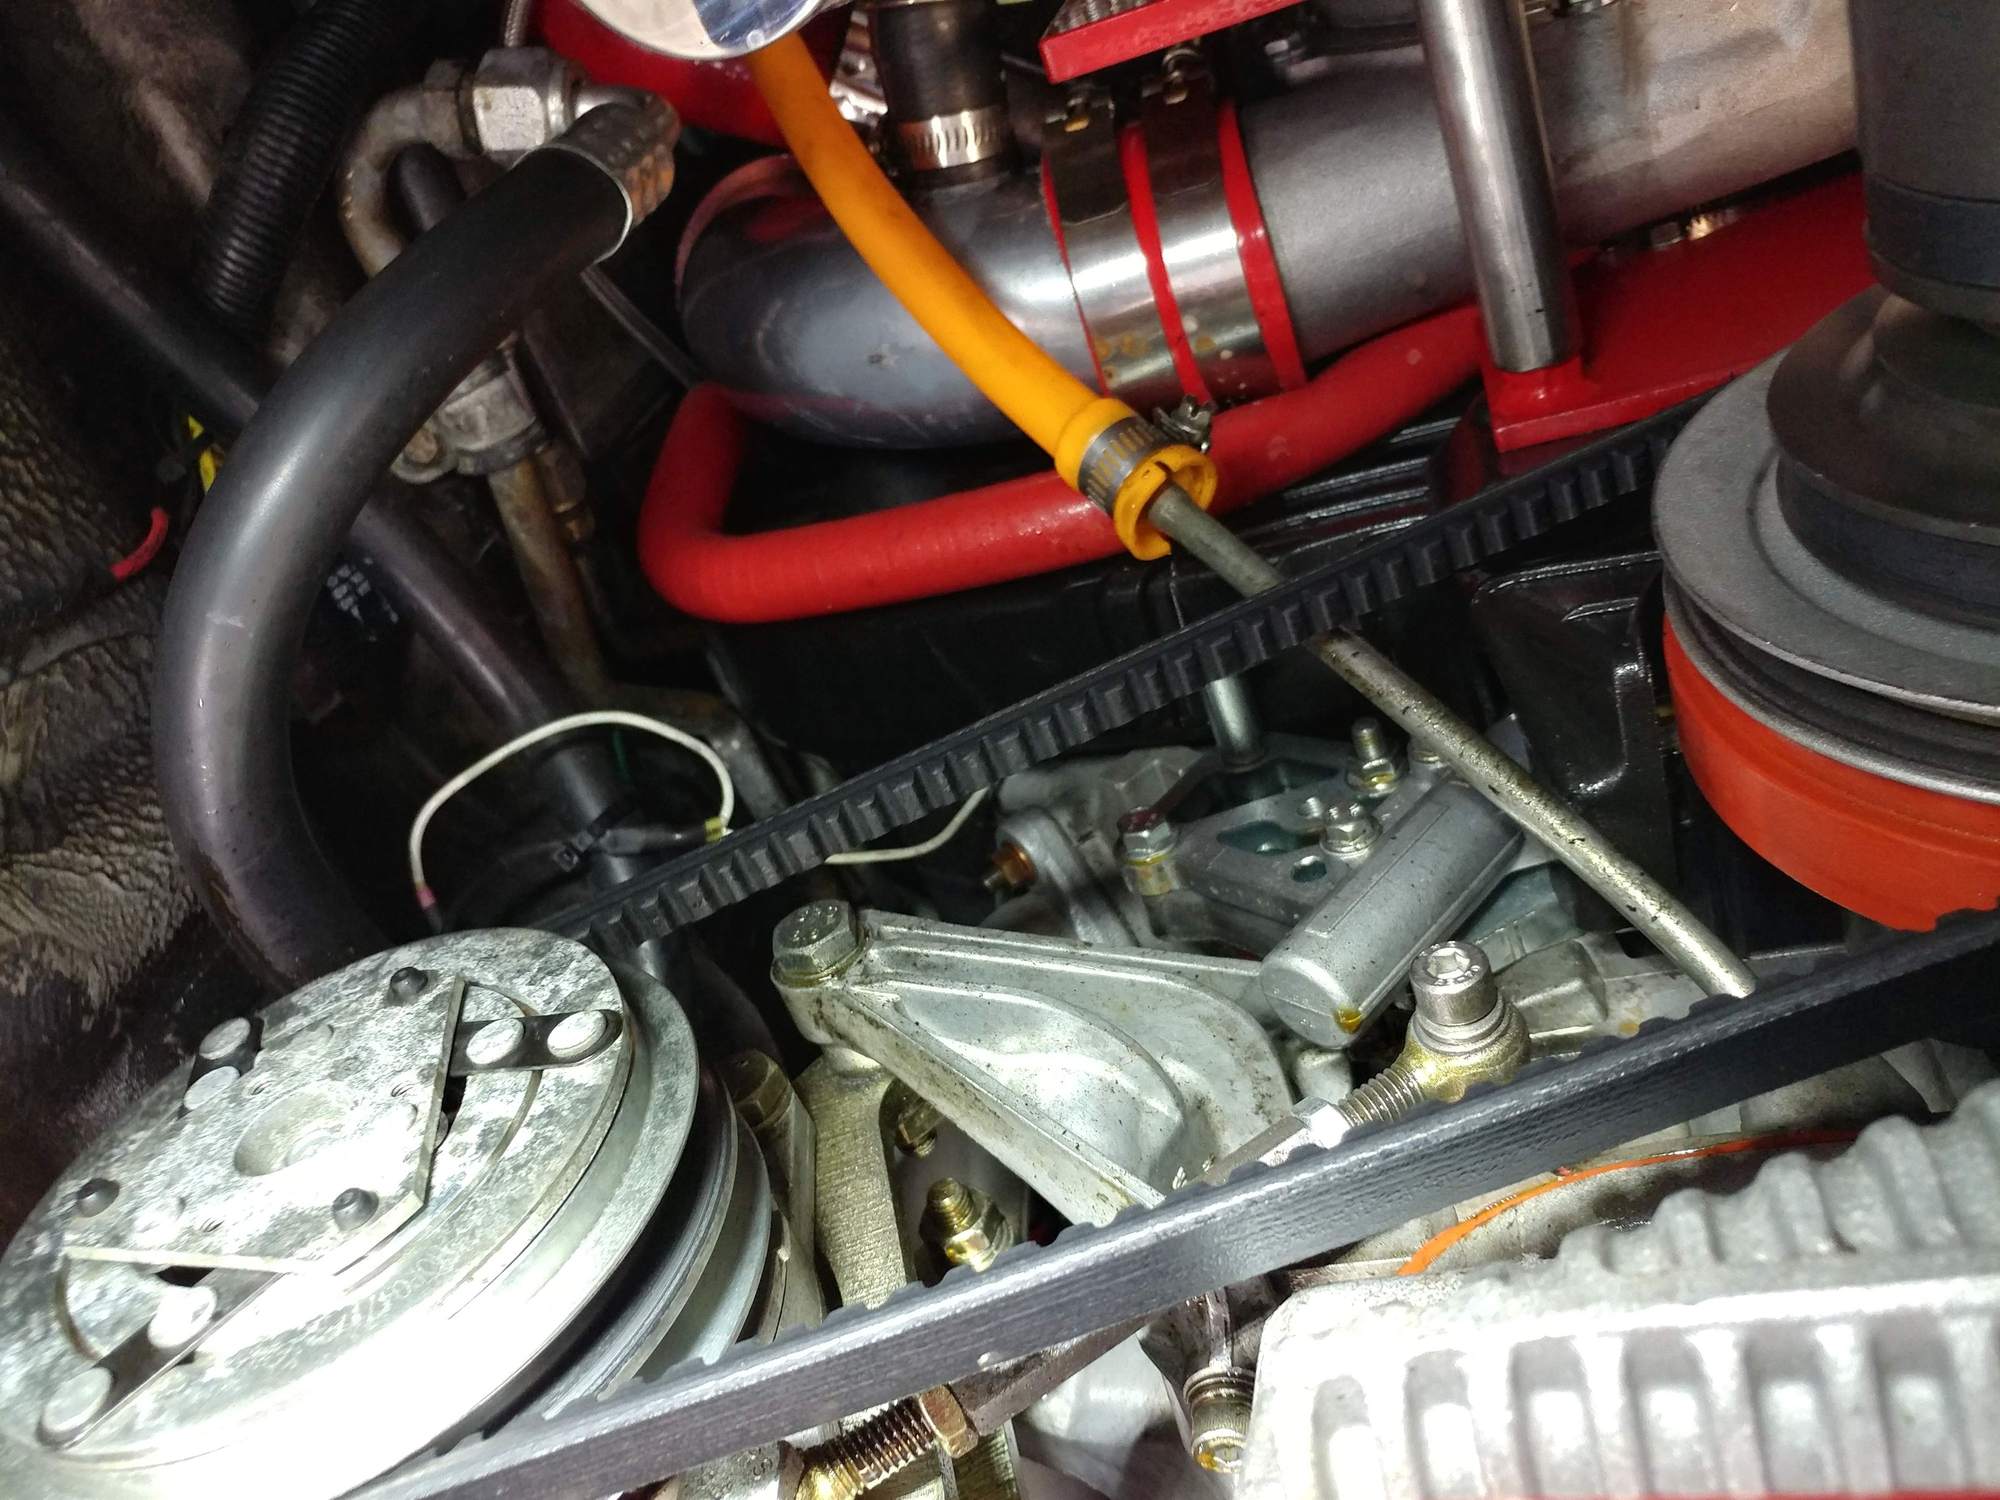
The top strap is always installed - that was the only photo I had during assembly that showed a good view of the plate and the tensioner on the plate. Finished installation looks like this.
Right, the next size belt I think is 10mm shorter, which doesn't work. Hoping the Sur-Grip pulley is the end of it as I don't want less circumference of the pulley wrapped by moving the belt to the outside of the tensioner roller rather than to the inside of it as that will just exacerbate the the slippage issue. The only alternative solution I can think of would be to use a larger diameter idler roller on the tensioner that encroaches more into the belt path with the tensioner in the same physical position on the adjustment screws. Is there or could there be such an option for the idler roller so I could actually get the belt tighter than I can today?
That might be possible, but it is unresearched so I do not know the availability of another idler pulley with a larger diameter. But yes, that should be possible. Lets see how it goes with the Sur-Grip pulley first.
Drove it some more today. Still need to do some verifying that it's running on all cylinders. Under boost above 3,000 rpm, it pulls great and feels smooth. It feels different below that than it used to. Is it possible that this larger 4.7 motor with higher compression and then the cams from the 4.5 have moved the power band of the motor up some or should it be stronger everywhere? It drives fine below 3,000 rpm but there is a noticeable smoothness and power bump above that - almost like variocam plus in my 997 feels like when it kicks in
I still need to get under the car and shoot the inlet branches of the headers with an IR thermometer to see if there are any differences on the 2 that had been fouling the plugs. I also need to pull the plugs again and look at them now that I have a few drives on them. If I still have fouling, I may also try a slightly hotter plug to a BR7ES and see what that does in the lower rpm range and if it helps prevent the fouling.
I'm also going to have the injectors pop and pattern tested.
Could a stuck lifter cause a fouling issue and has anyone ever put Seafoam into their oil to clean and remove sludge (1-1.5 OZ / quart). When I did my pan gasket, the engine was a bit sludgy and I'm wondering if I could free a stuck lifter with a seafoam treatment then an oil change though I did the cams and cam towers myself with assembly lube and they were clean and not sludgy when they went back together.
A stuck lifter would reduce the amount of lift the valve sees, therfore, with the injector firing normally, the spark plug could be fuel fouled.
Yes, a can of Sea Foam in the oil might help. We used to use Rislone in the past for the same. Lifters do not get a lot of oil exchange - not a lot goes in and out - so once stuck they are often stuck till you go get 'em.
On the 16v motor, the lifter can be inspected and replaced by just removing the cam tower. Not too bad a job...
Carl, have you ever taken the large 38mm valve lifter for the 2-valve engines apart?
�ke
Have you dyno'ed the car with this iteration of the motor? You drive a supercharged 997 and a Cayenne Turbo S with what, 500 hp? Your butt dyno is suspect.
Have you dyno'ed the car with this iteration of the motor? You drive a supercharged 997 and a Cayenne Turbo S with what, 500 hp? Your butt dyno is suspect.
Carl dynoed the original 4.5L build at about 350 & 350. Haven't done it since the higher compression 4.7L with the supercharger upgrades (Impeller, bearings, vented case, working heat exchanger.
BTW, the 997 is about 485 HP and the modded and tuned Cayenne Turbo S about 650 HP, but that's also a 5,000 lb vehicle. My wife's 997 is stock at 355 HP so a good comparison.
I decided to pull the boat trailer from the lift so I could try to sort out the remaining issues with the 928 over the weekend, such as:
determine where a new oil leak is coming from
remove the extended vent line I ran to move oil vapor to the back of the car now that the new AOS is installed
Figure out the missing issue I think I still have
Install the upgraded Sure-Grip supercharger pulley from Carl to eliminate the belt slip I'm getting at 4-5 lbs of boost.
etc
I've put about 100 miles on the car since the water bridge repair and AOS install.
First the good news - the cooling system is performing flawlessly. No leaks into the valley or anywhere else. Temperature runs right in the middle of the gauge when doing normal driving. Sitting in traffic it creeps up to just below the top while line, then the push/pull cooling fans kick on and it stays right there... forever - never goes above the last while line.
The AOS also seems to be working well. If I rev the motor, I can feel a little pressure out the vent line so there is flow there, but there is virtually no oil coming down that line. I'm assuming it's draining back into the oil pan as designed, but am going to pull the drain hose to make sure it has oil residue in it at the end where it tees into the oil filler pipe to make sure it's not backing up into the AOS.
The car pulls really well and I think just last night I got the timing dialed in to where I'm no longer get Knocklink warnings at high RPM under full boost, and drivability is good - which is actually surprising....here's where the bad news starts .... because I'm only running on 7 cylinders, but here's what's interesting....
Getting the car up in the air, I shot all the header branches with an IR thermometer and it's clear that #6 is the one not firing now. I say that's interesting because when I last pulled the spark plugs, you may remember that it was #5 & #7 where the plugs looked fouled and the other 6 plugs all looked fine, including #6. So I replaced the injectors for #5 & #7 with 2 of the old ones from my 4.5L and from the temp readings, those cylinders look to be firing. I'm going to pull all the plugs again to see what the coloring looks like.
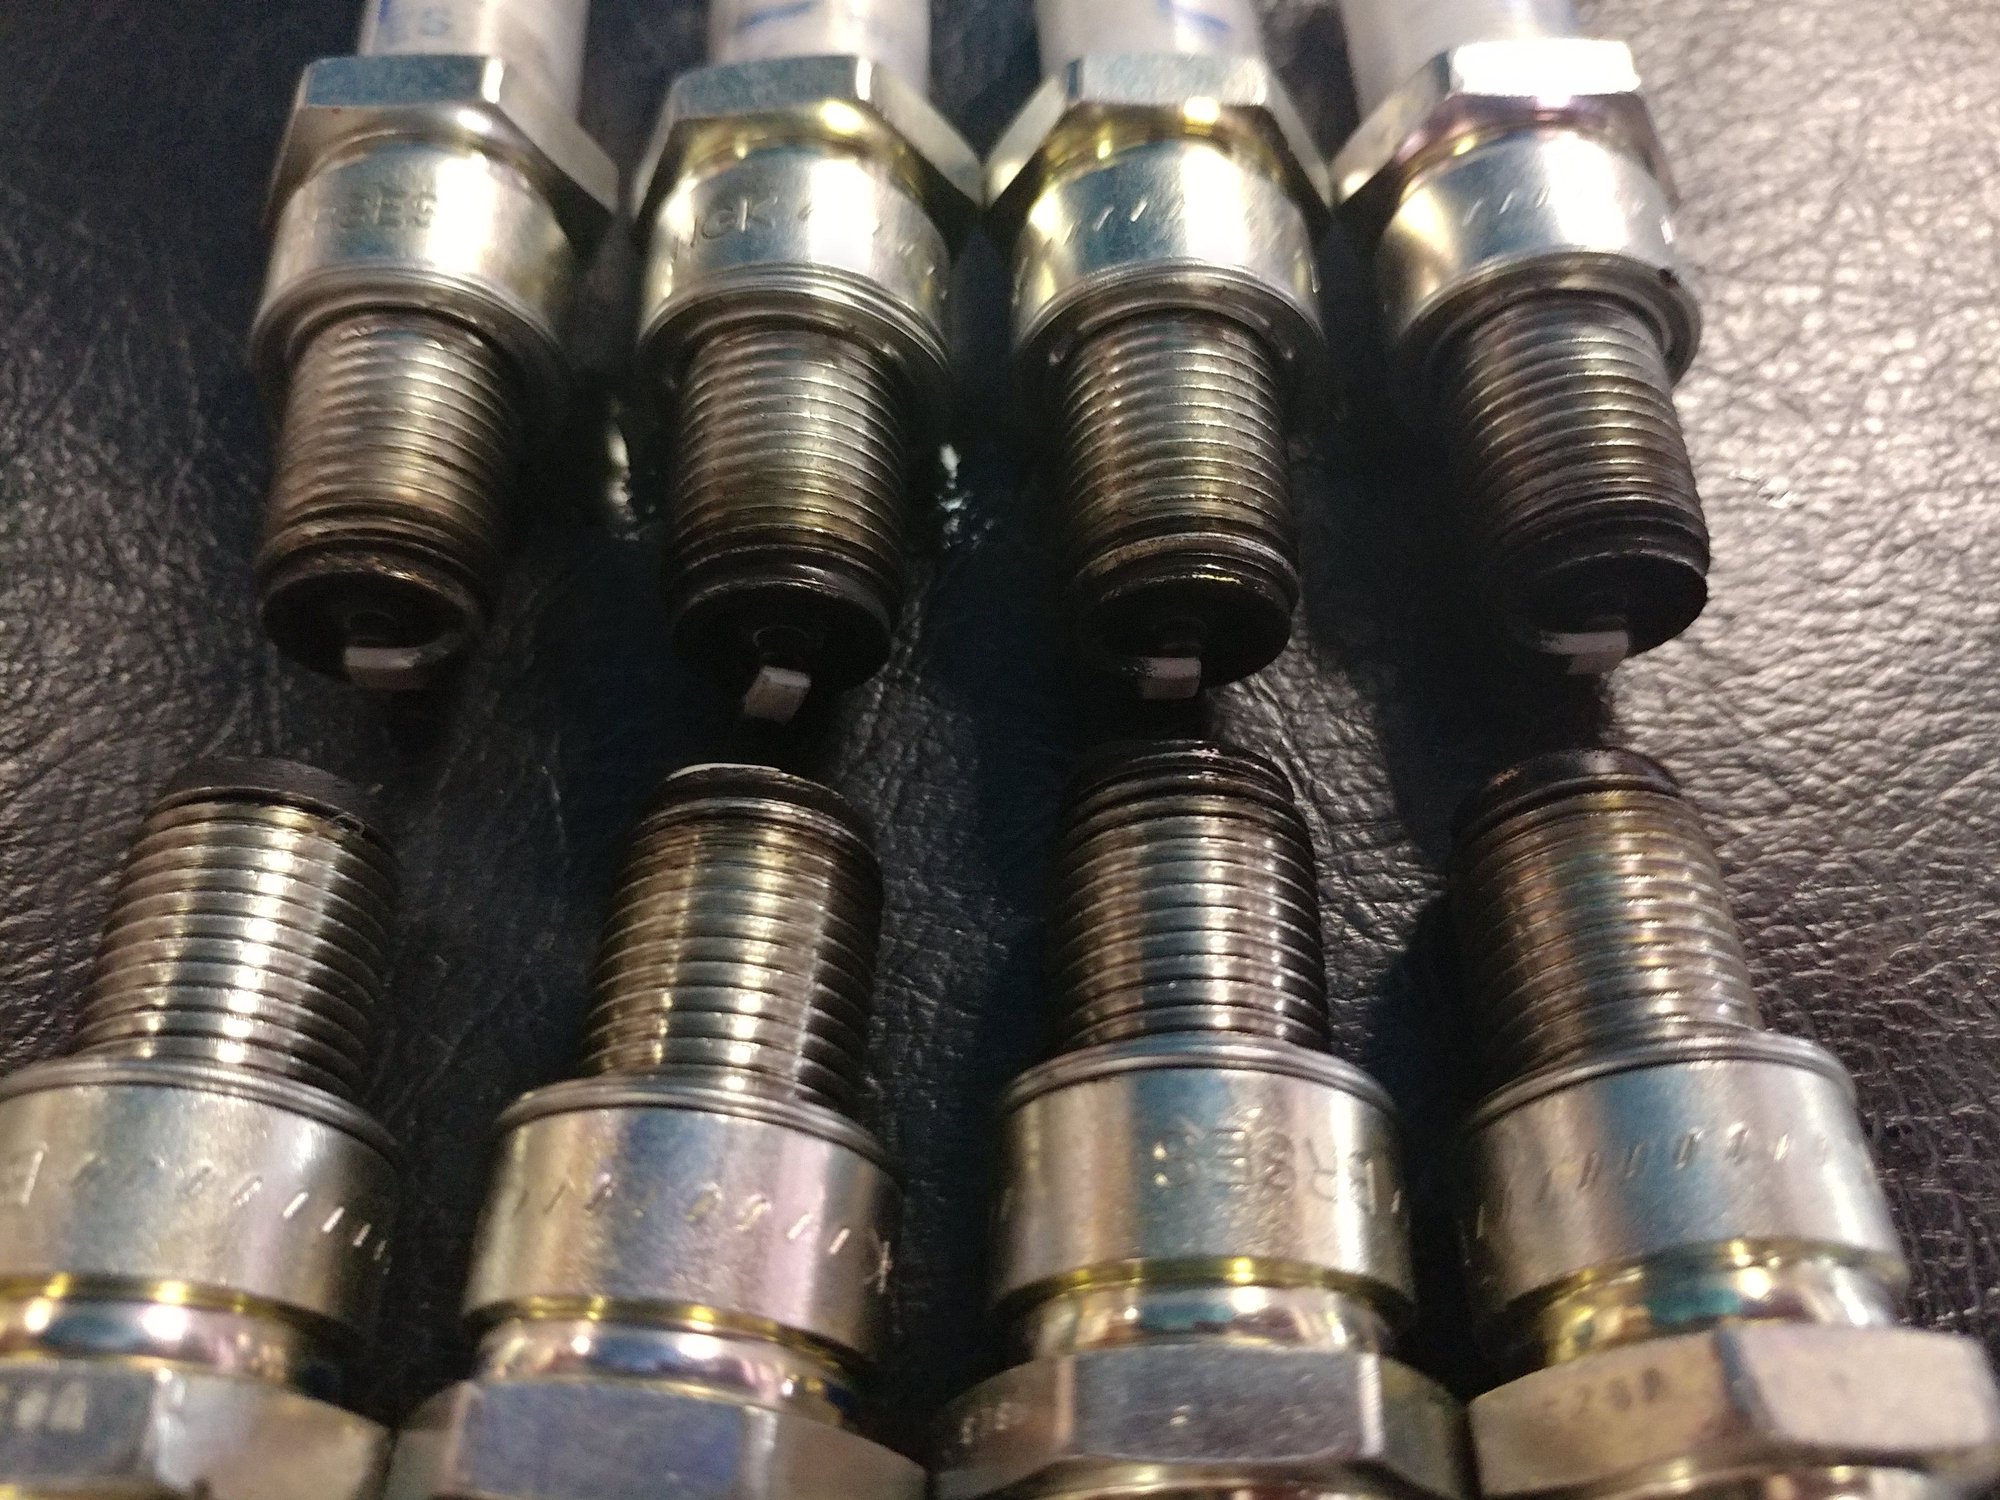
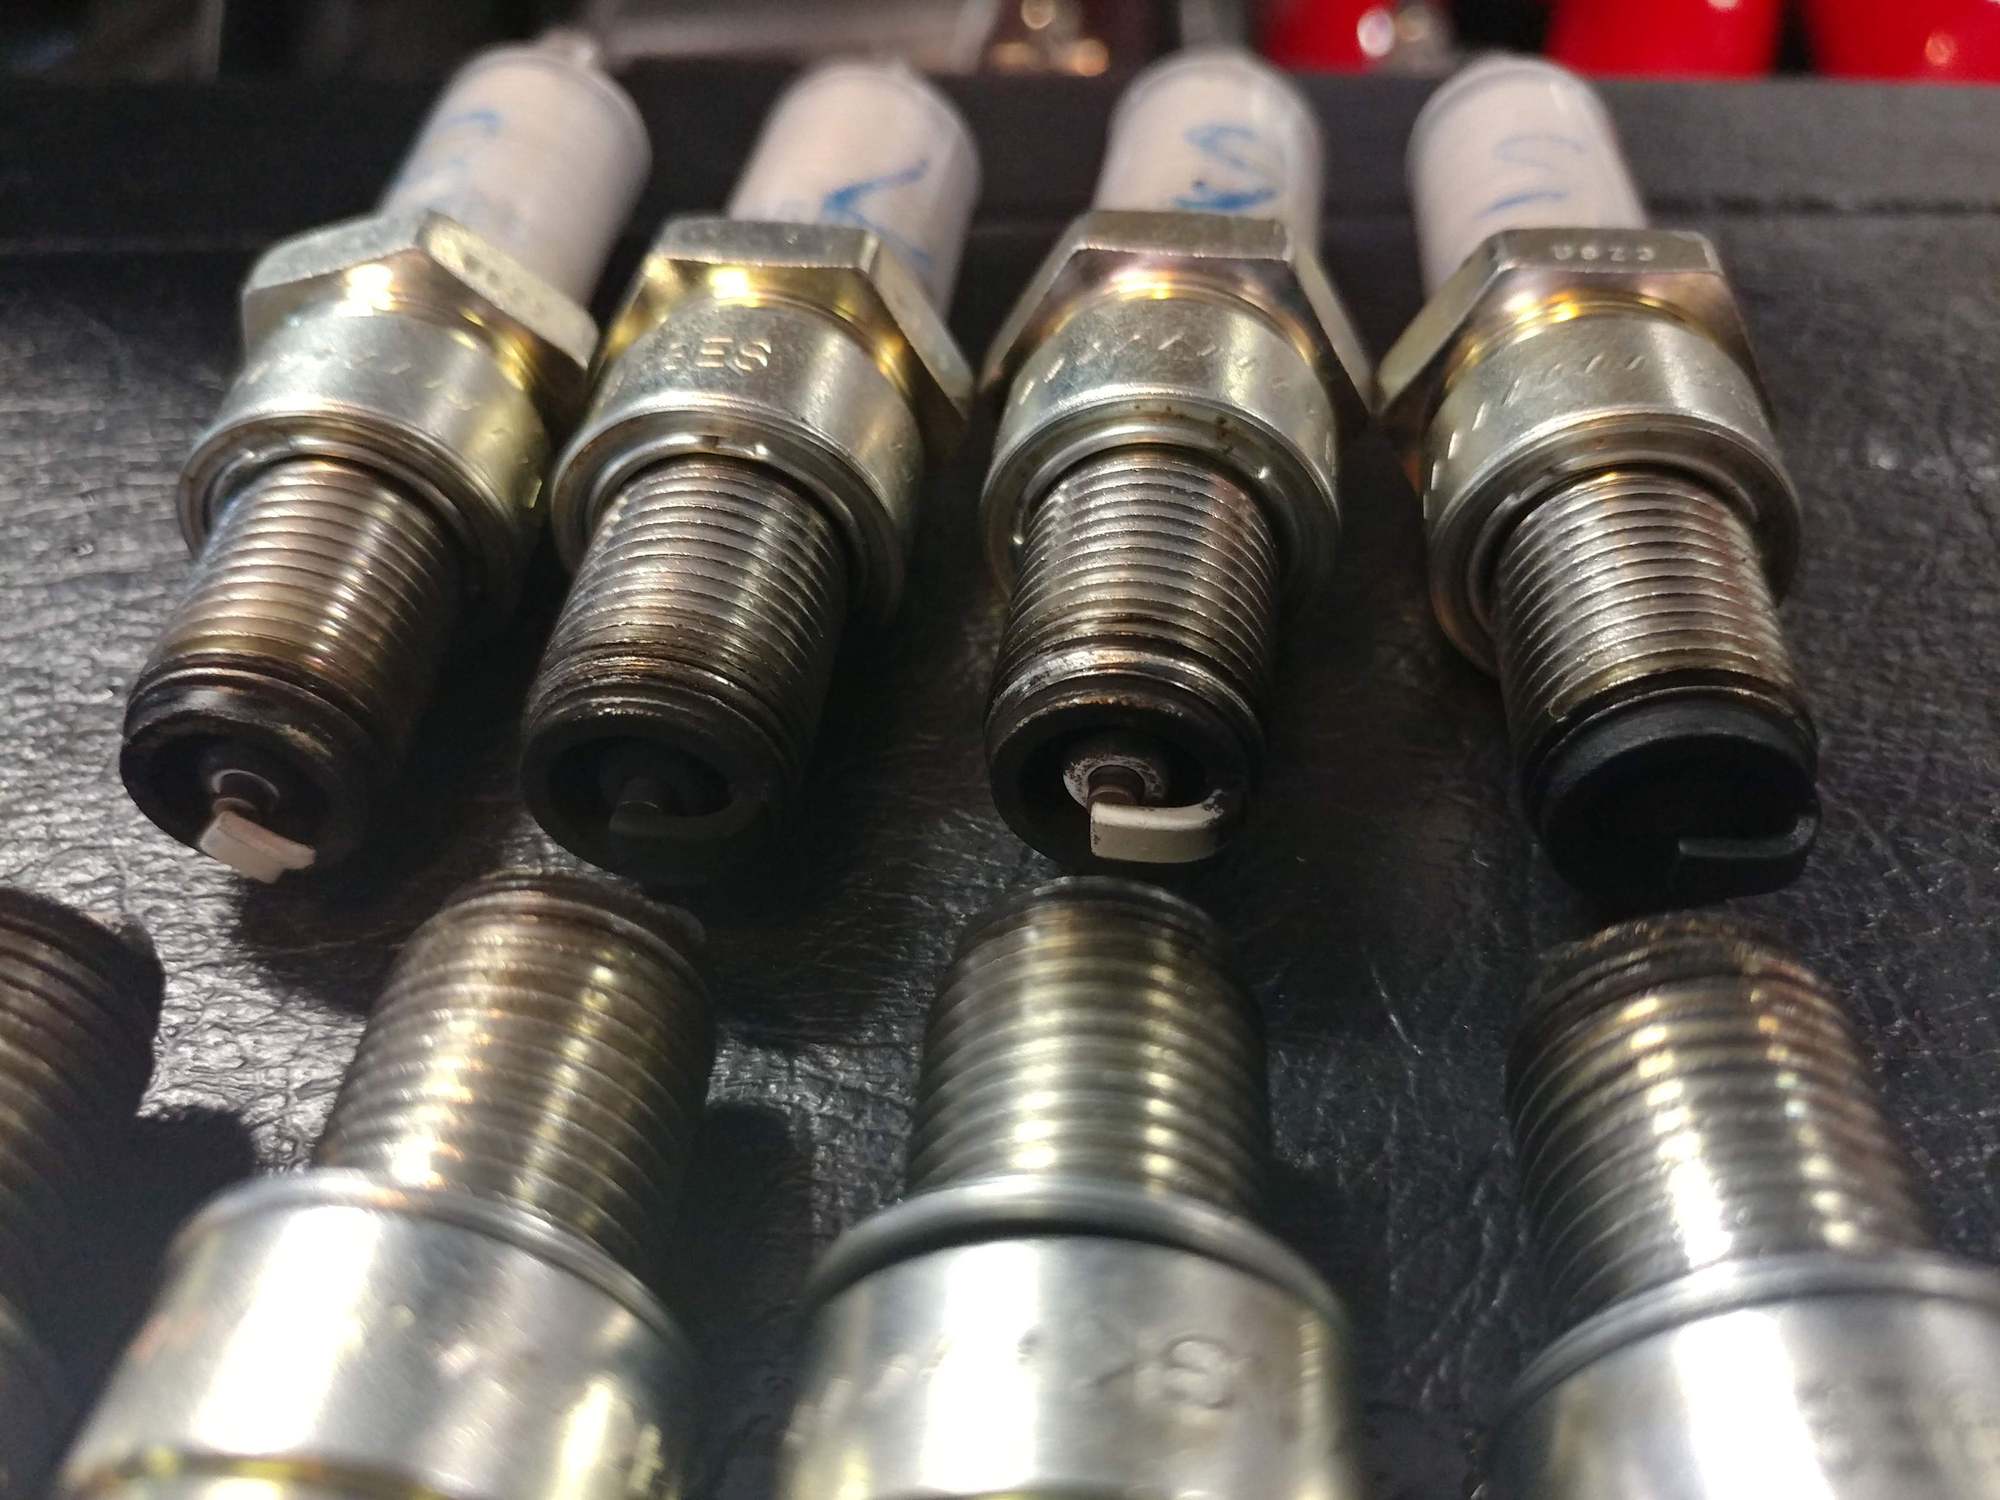
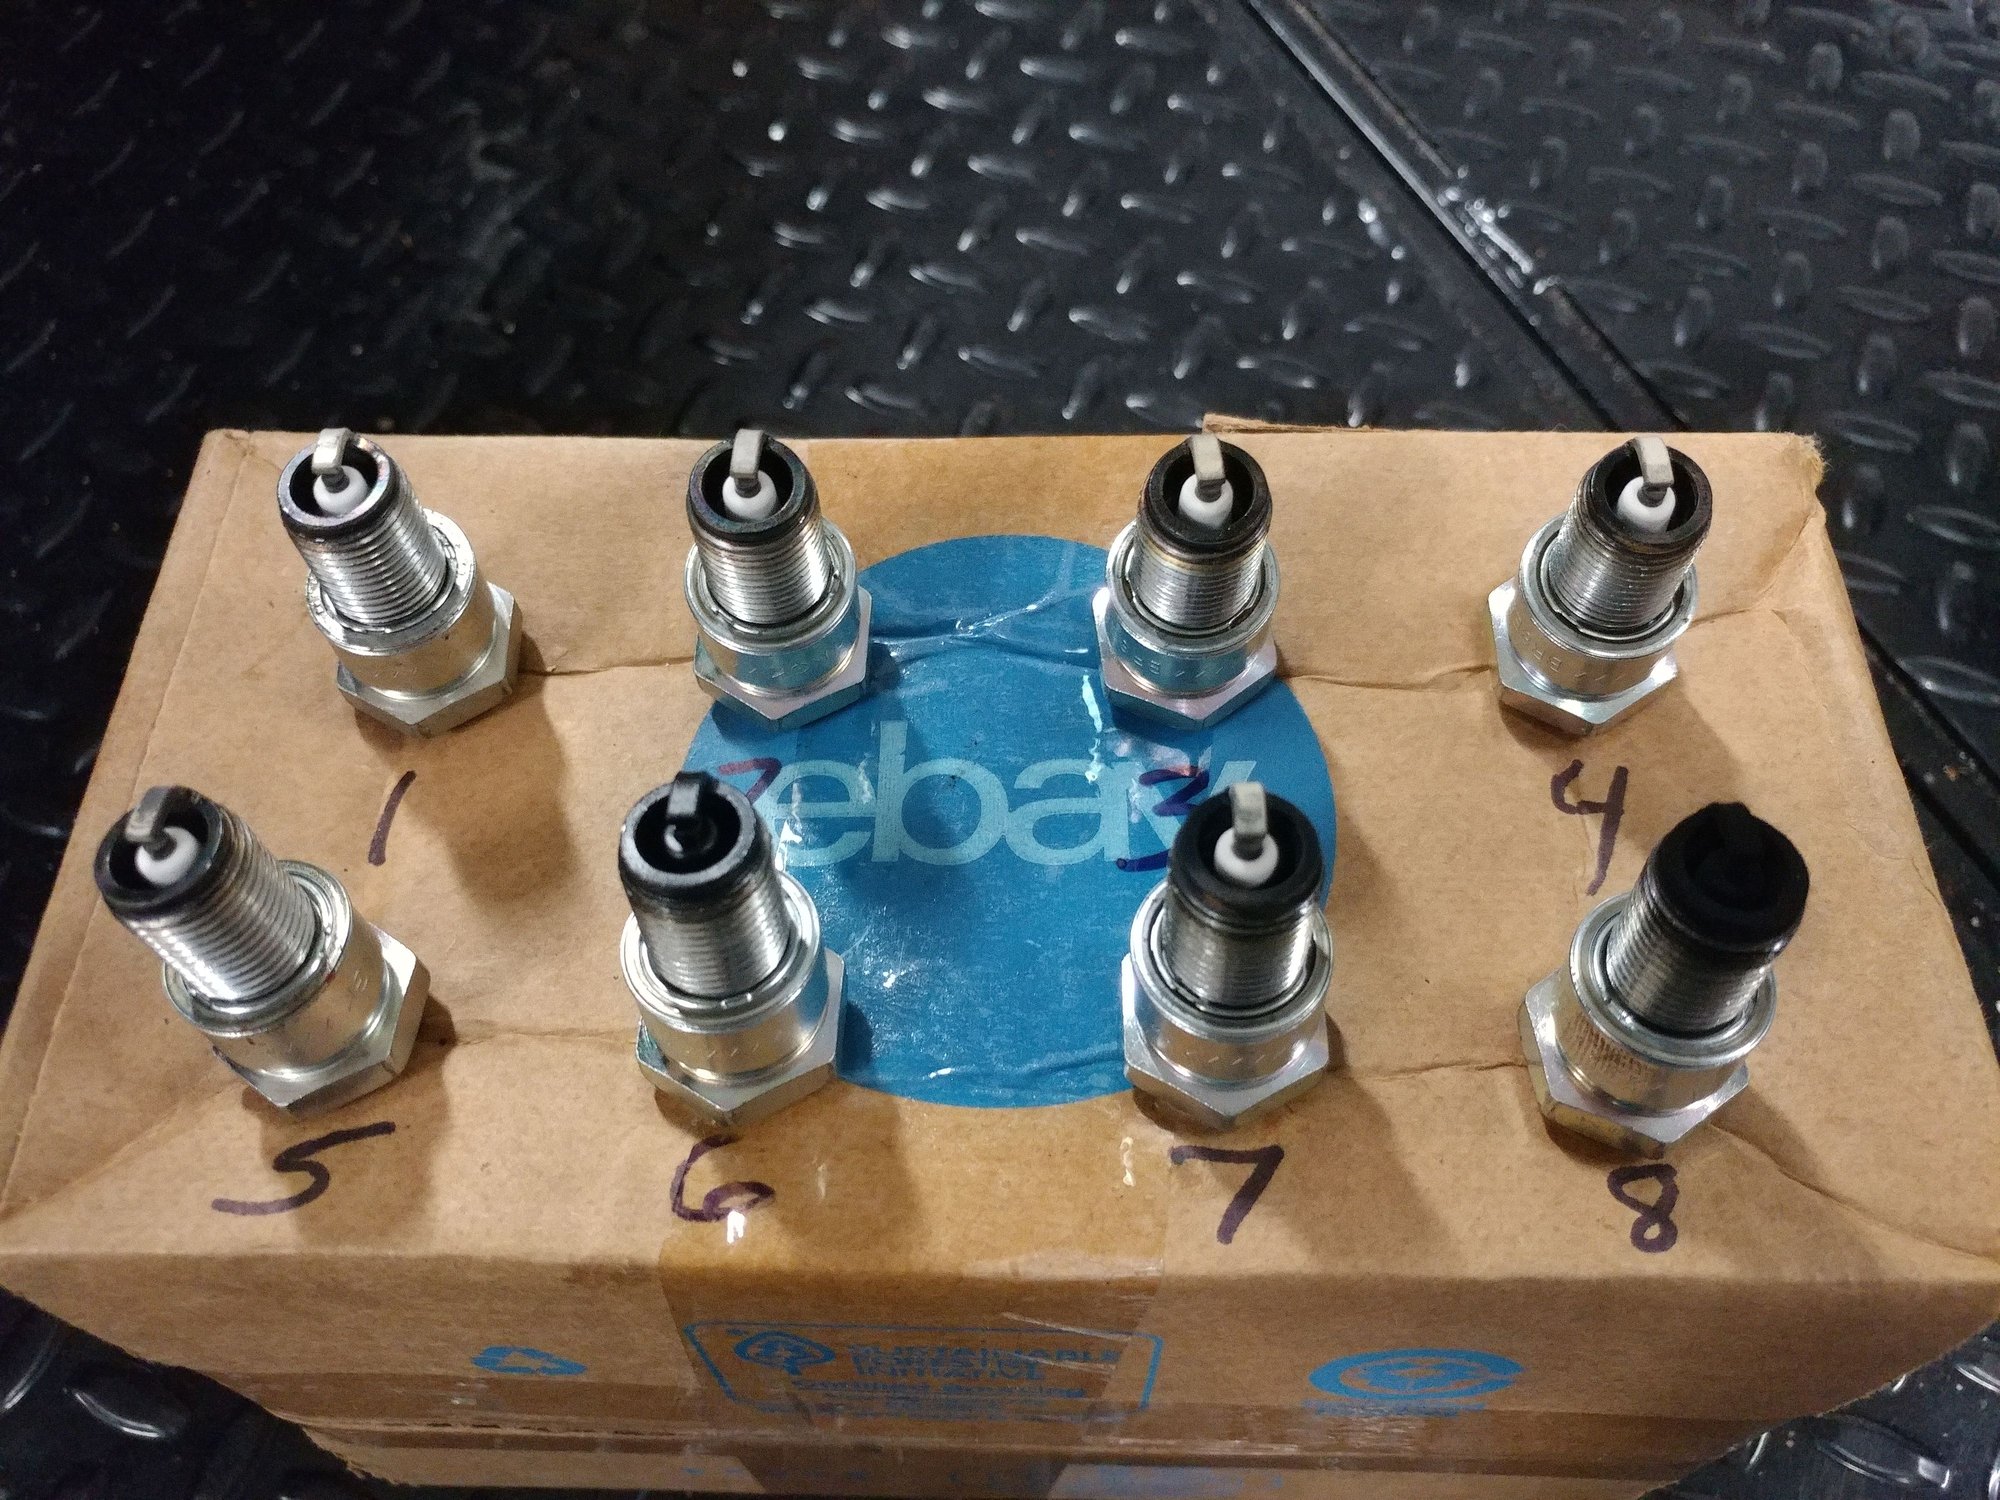
Here are photos from the last plug pull a couple months ago.
Cylinders 1-4
Cylinders 5-8. See how 6 and 8 look fine and it's 5 & 7 that look questionable.
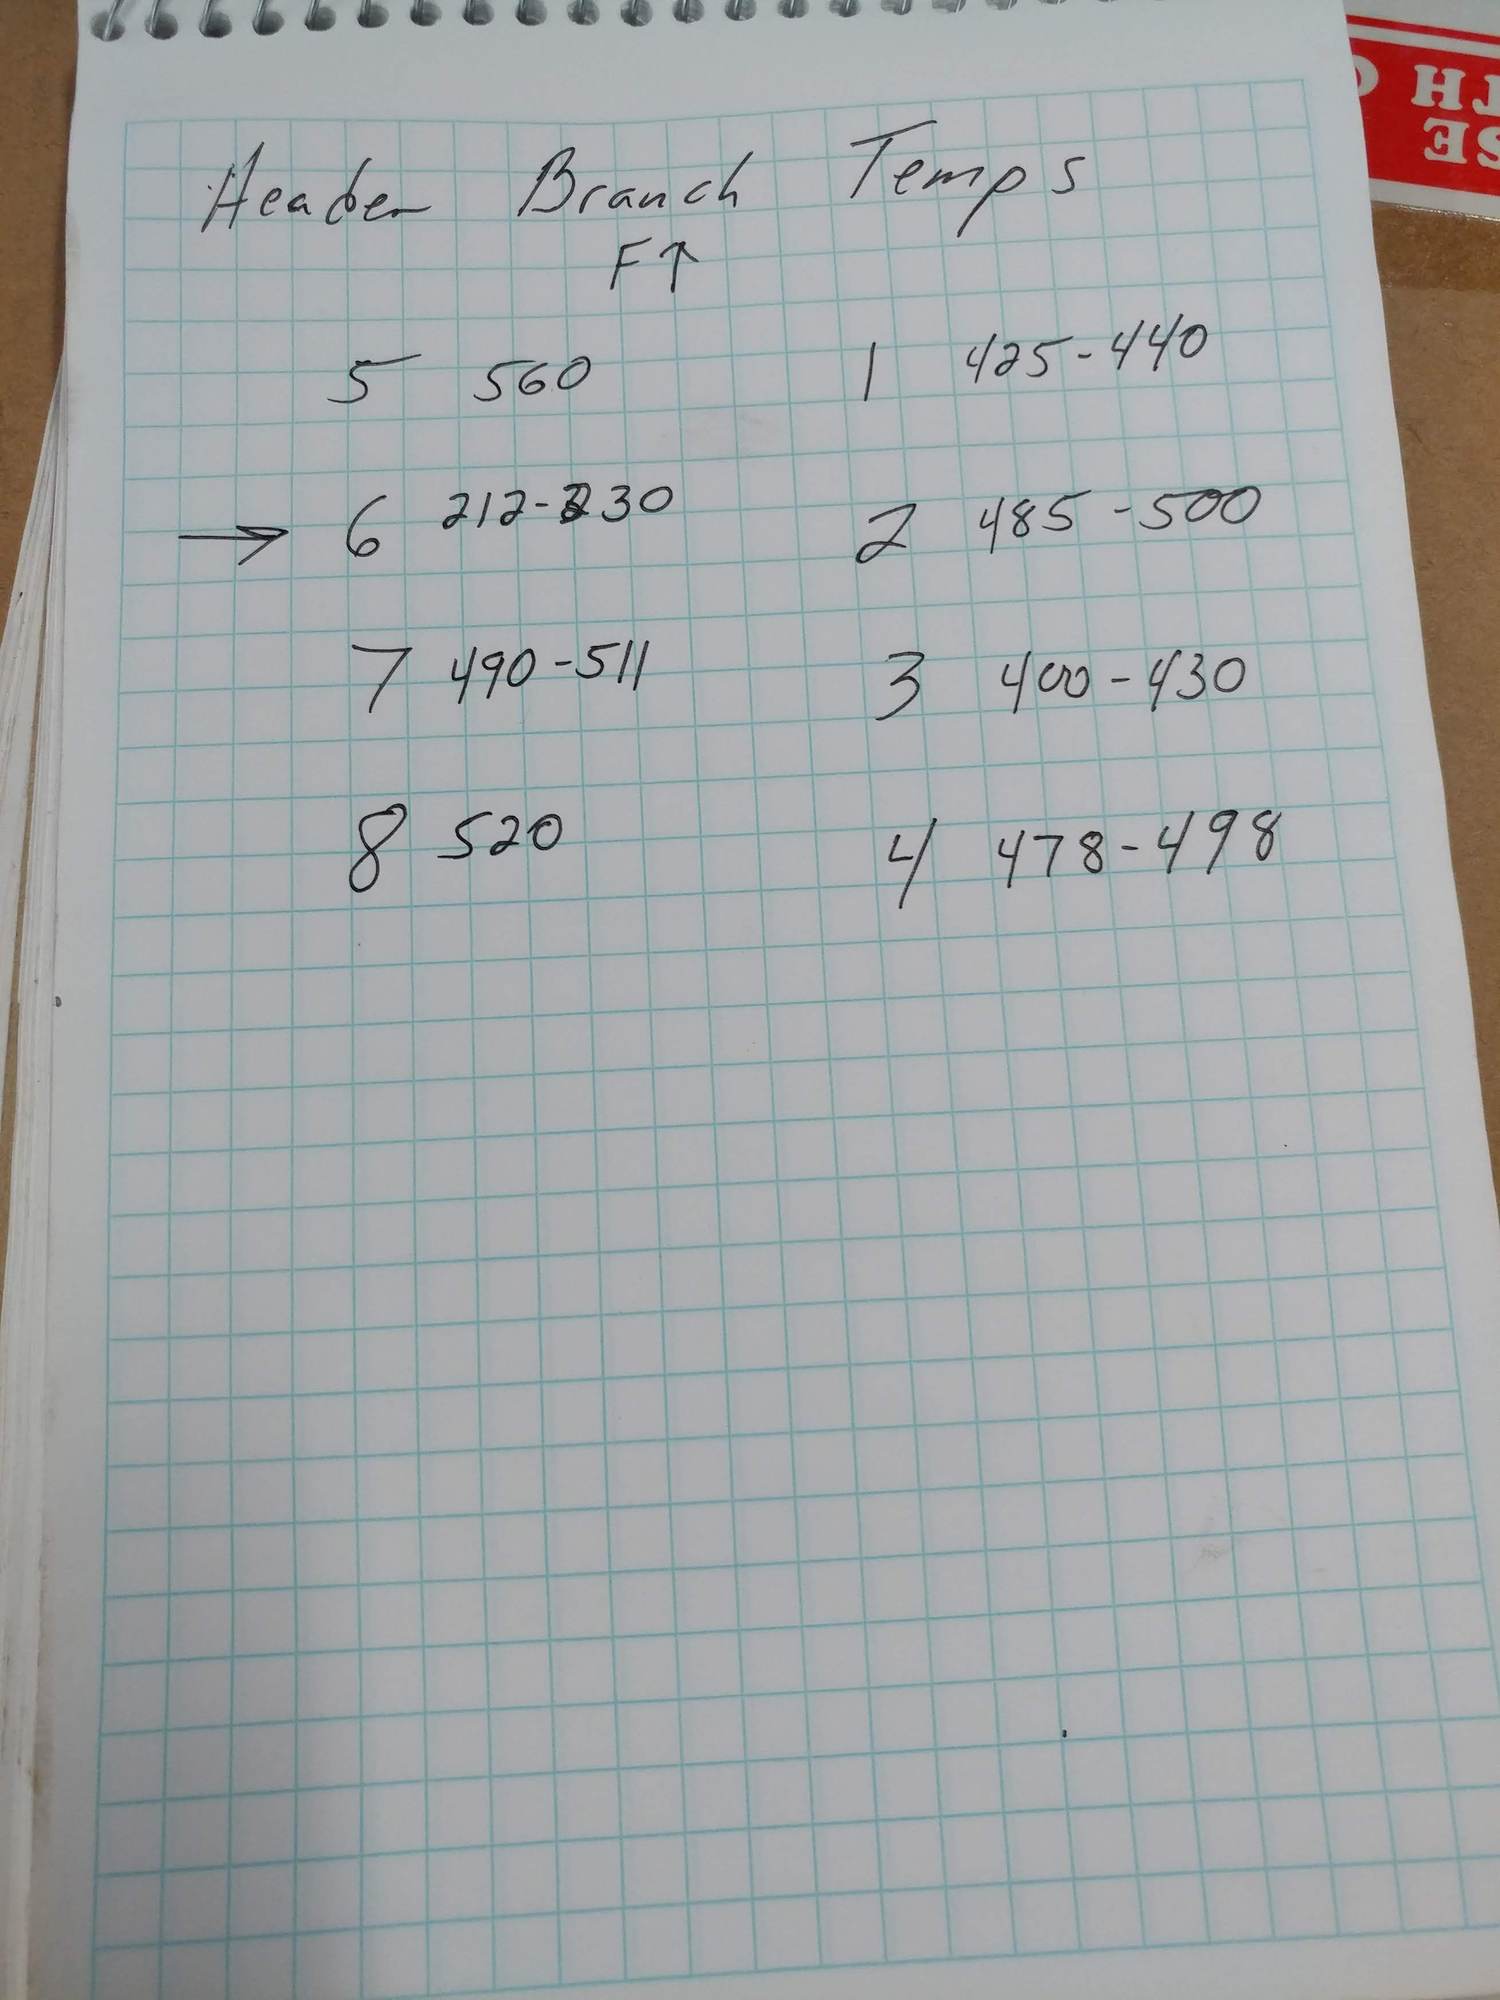
But here are the IR temperature readings at idle and clearly #6 isn't firing as it's couple hundred degrees lower than all the others. There is also fuel residue on the header pipe.
So, I think what I'm going to do is replace the injector that's in #6 with another of my old ones and I'm also going to install a new set of plugs that are one heat range warmer than the current ones to see if that will keep them from fouling, then I'll reshoot the header temps to determine if #6 is firing and go from there.
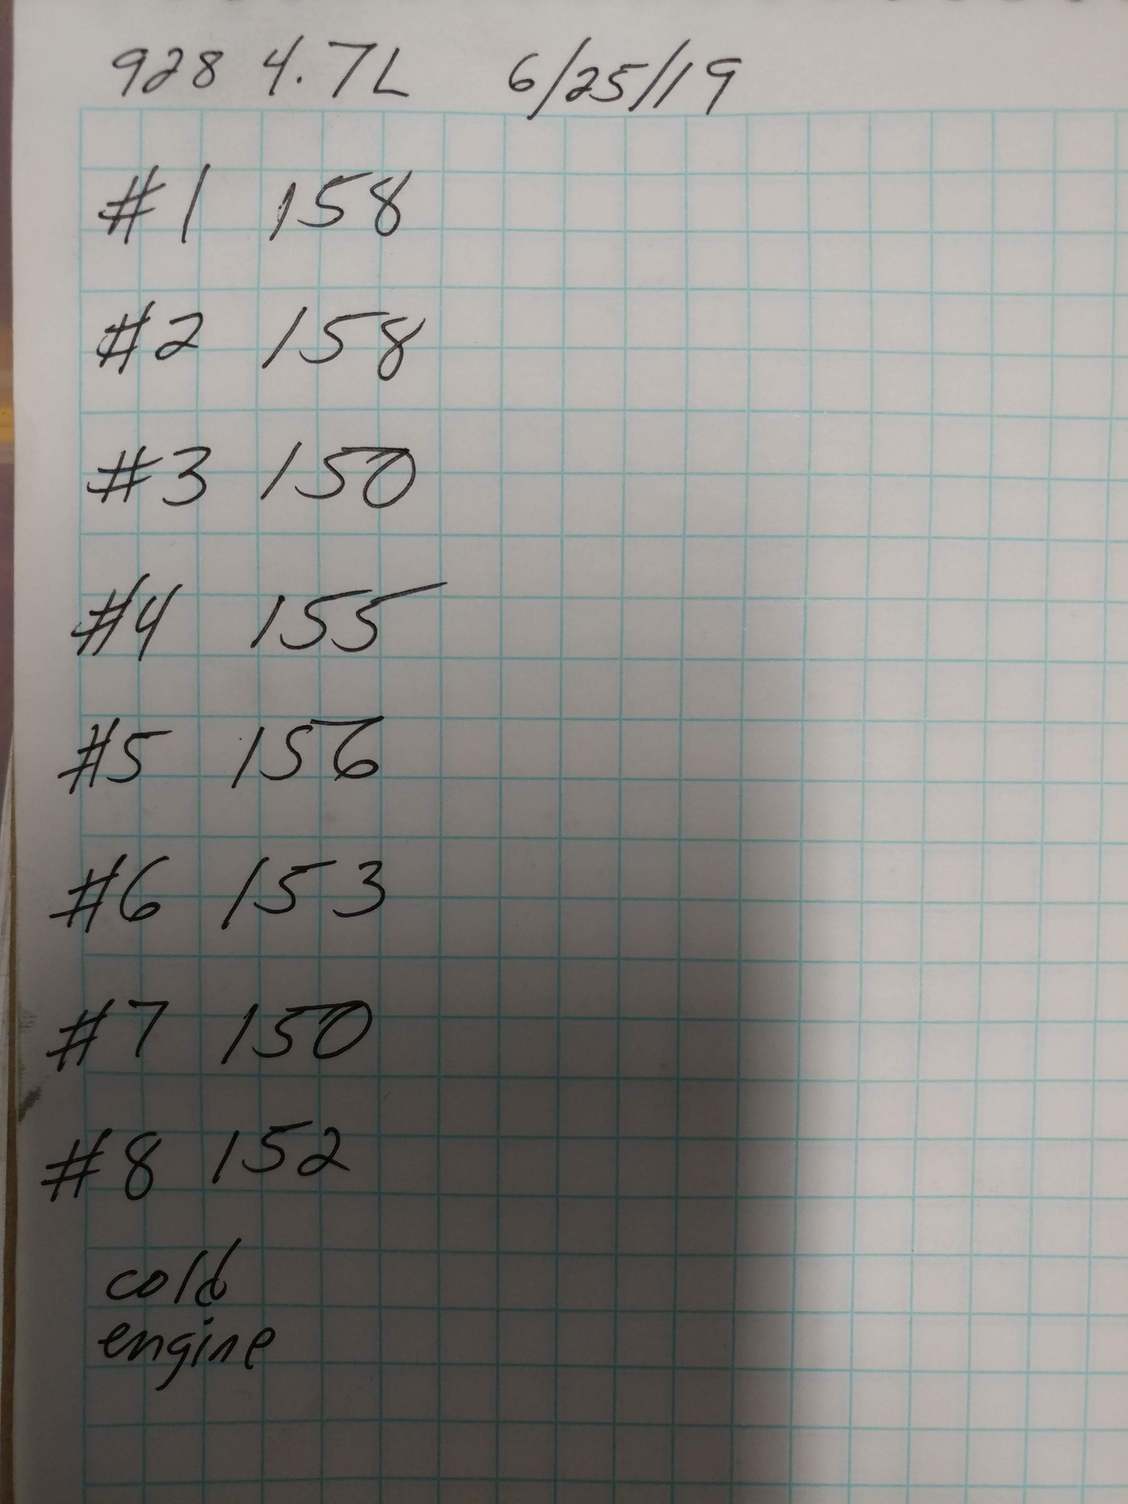
Here are the compression test #s from when I did that test too and doesn't look like there's anything wrong there.
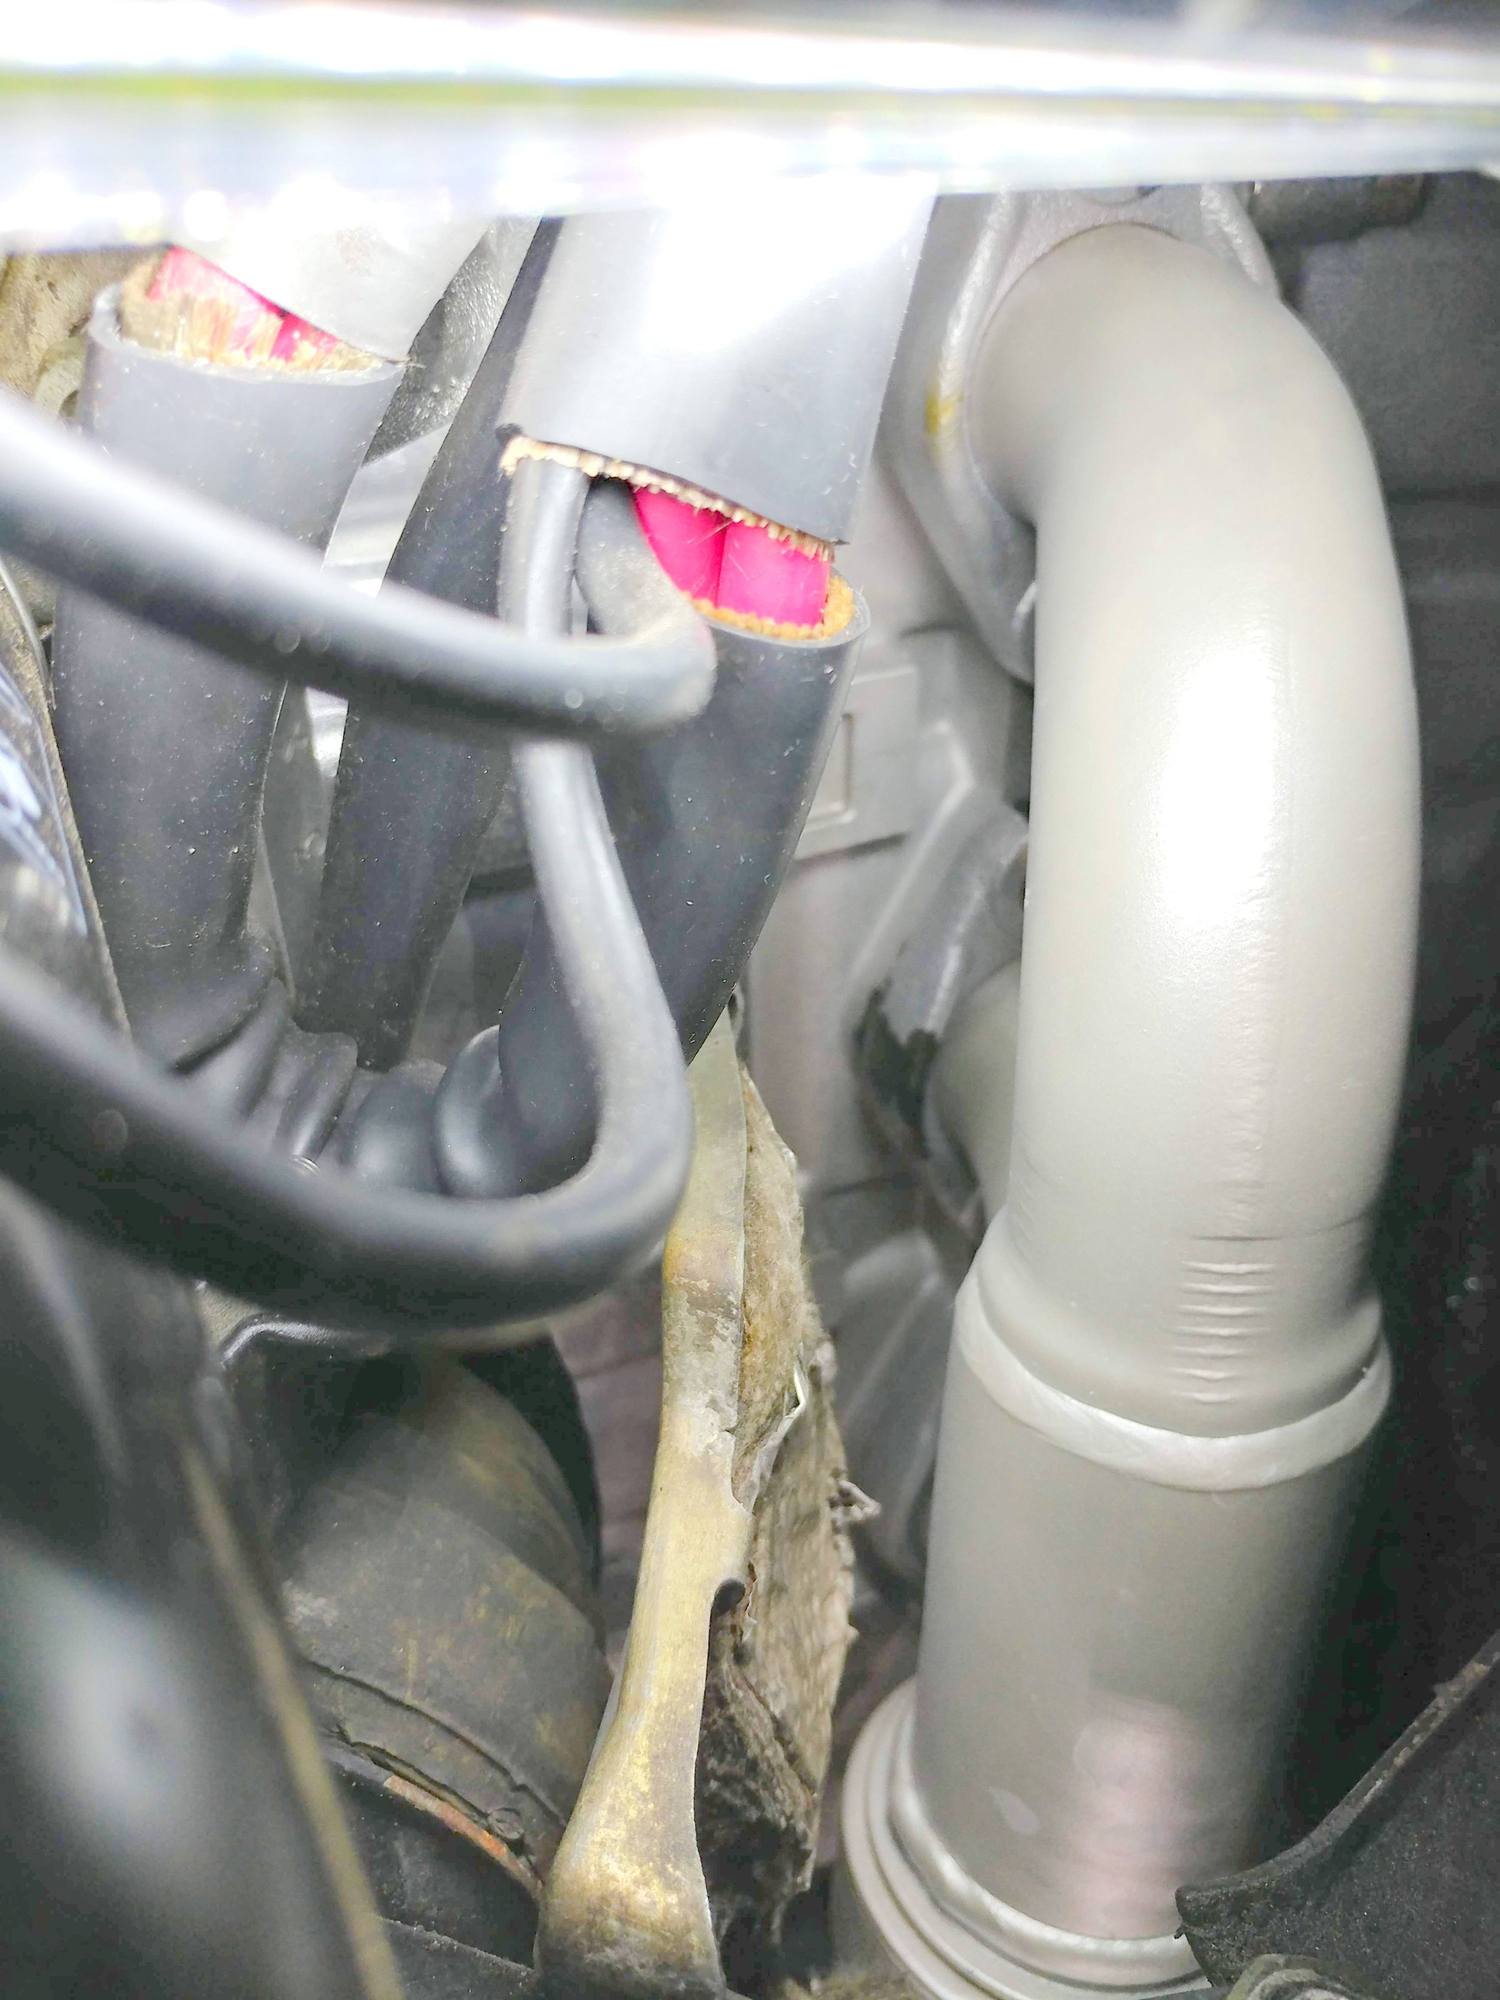
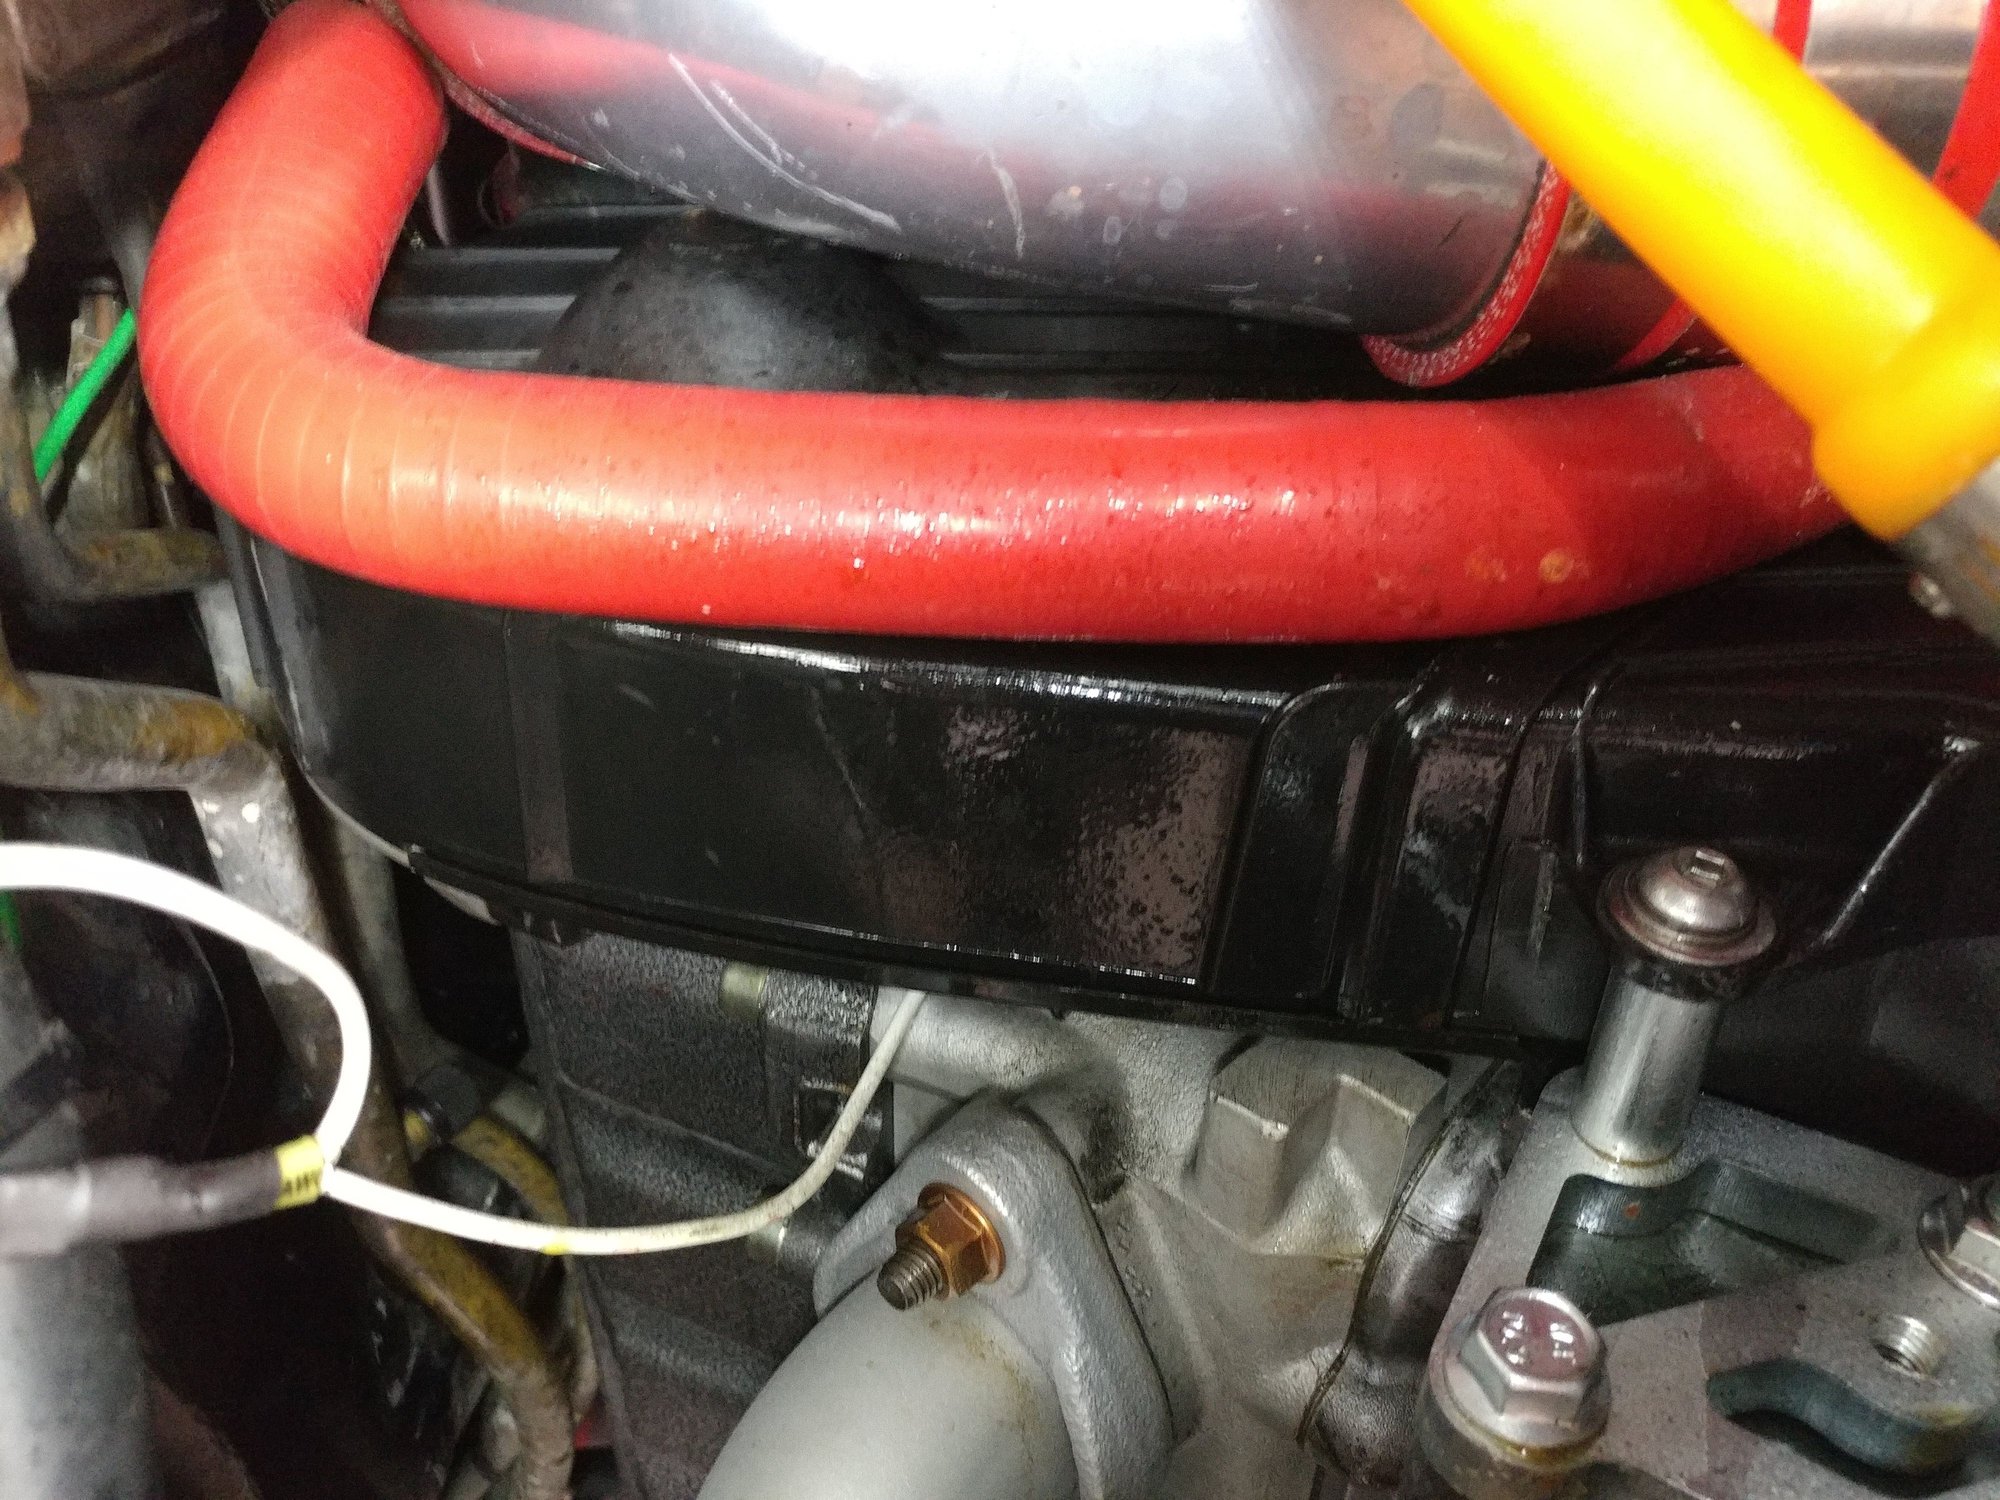
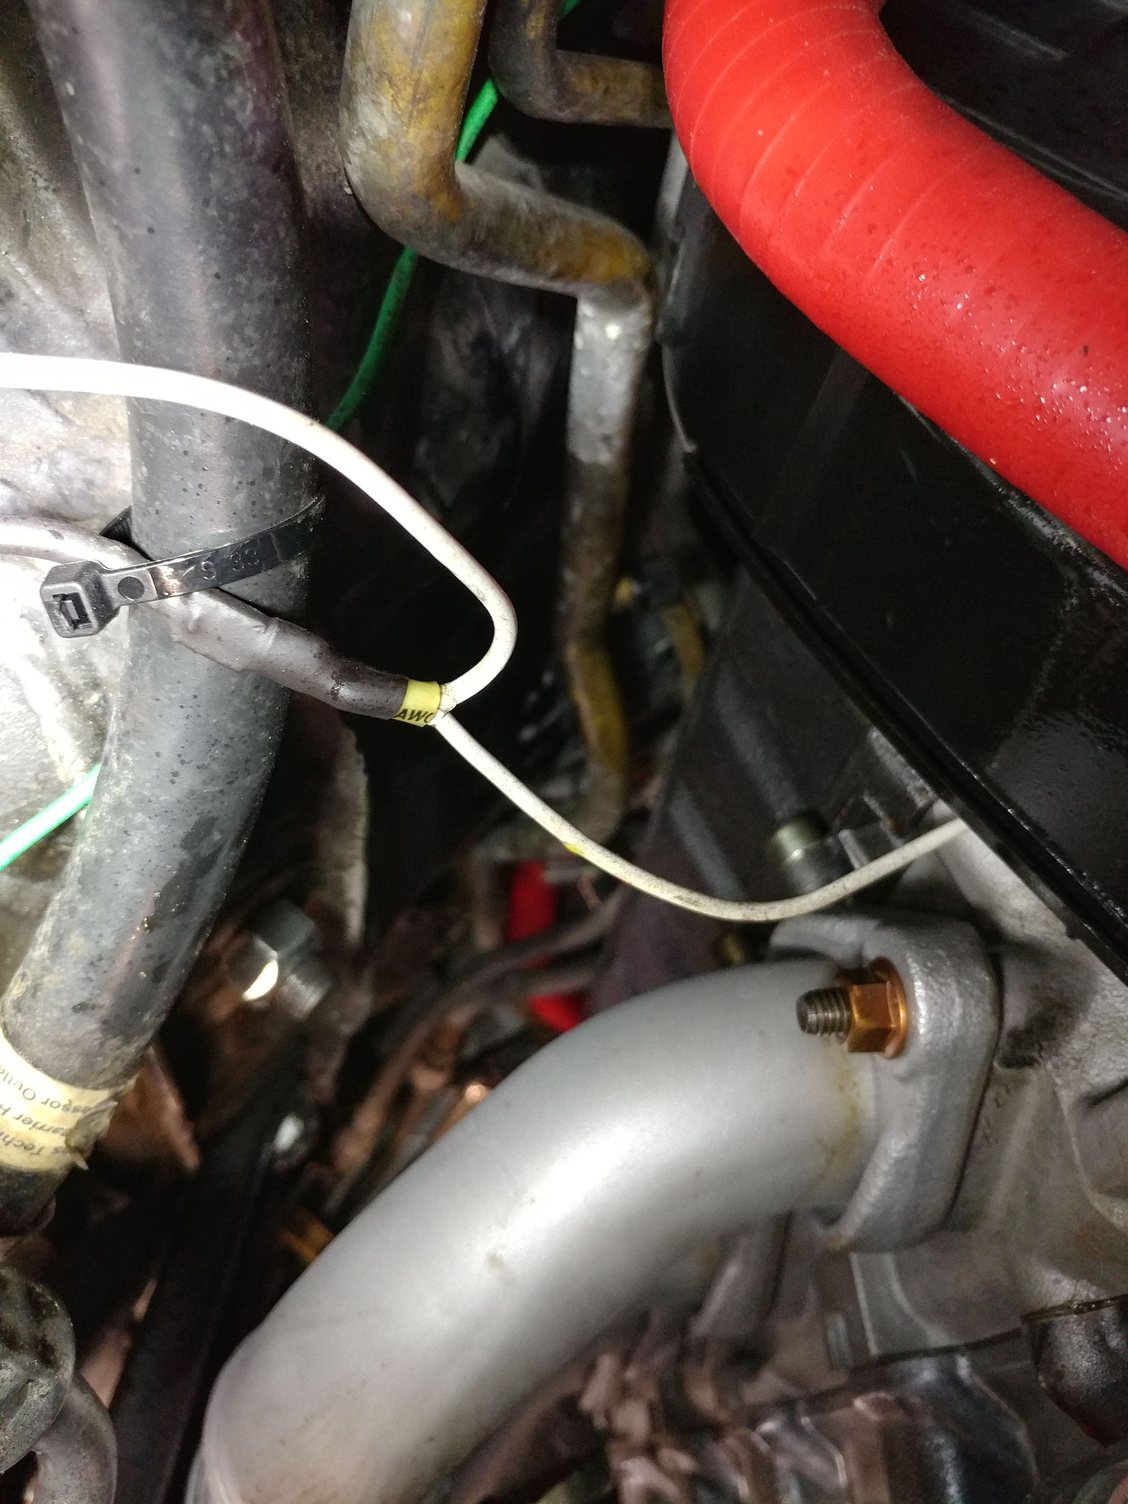
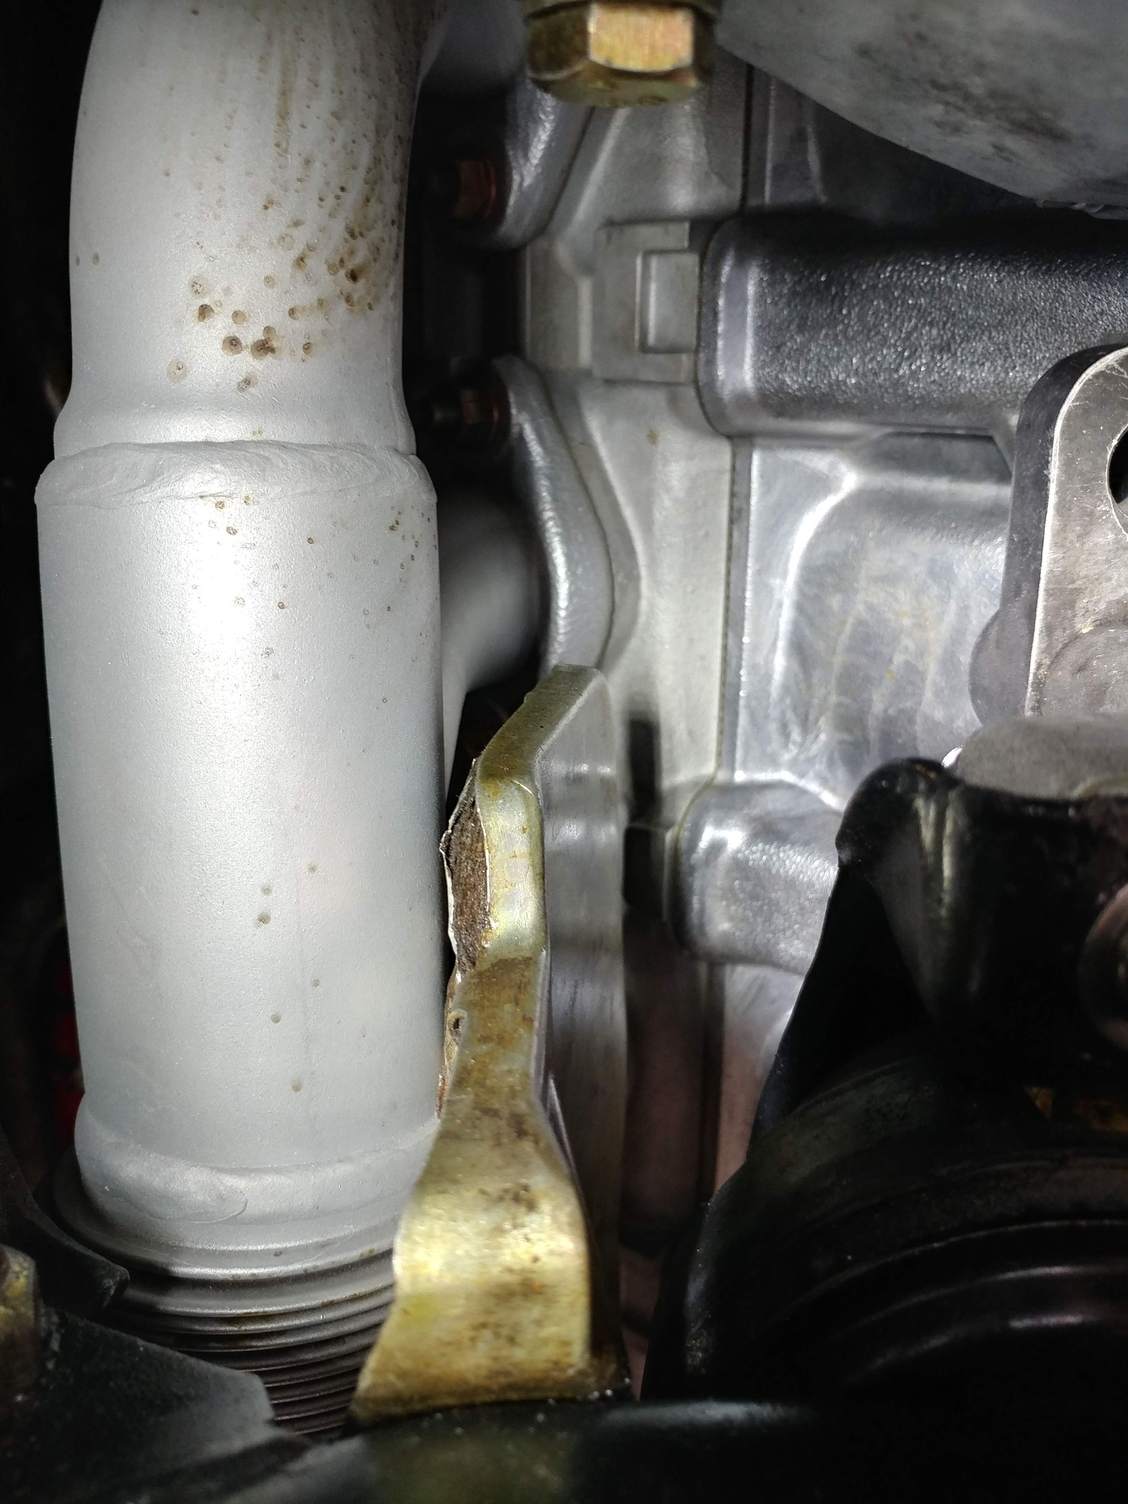
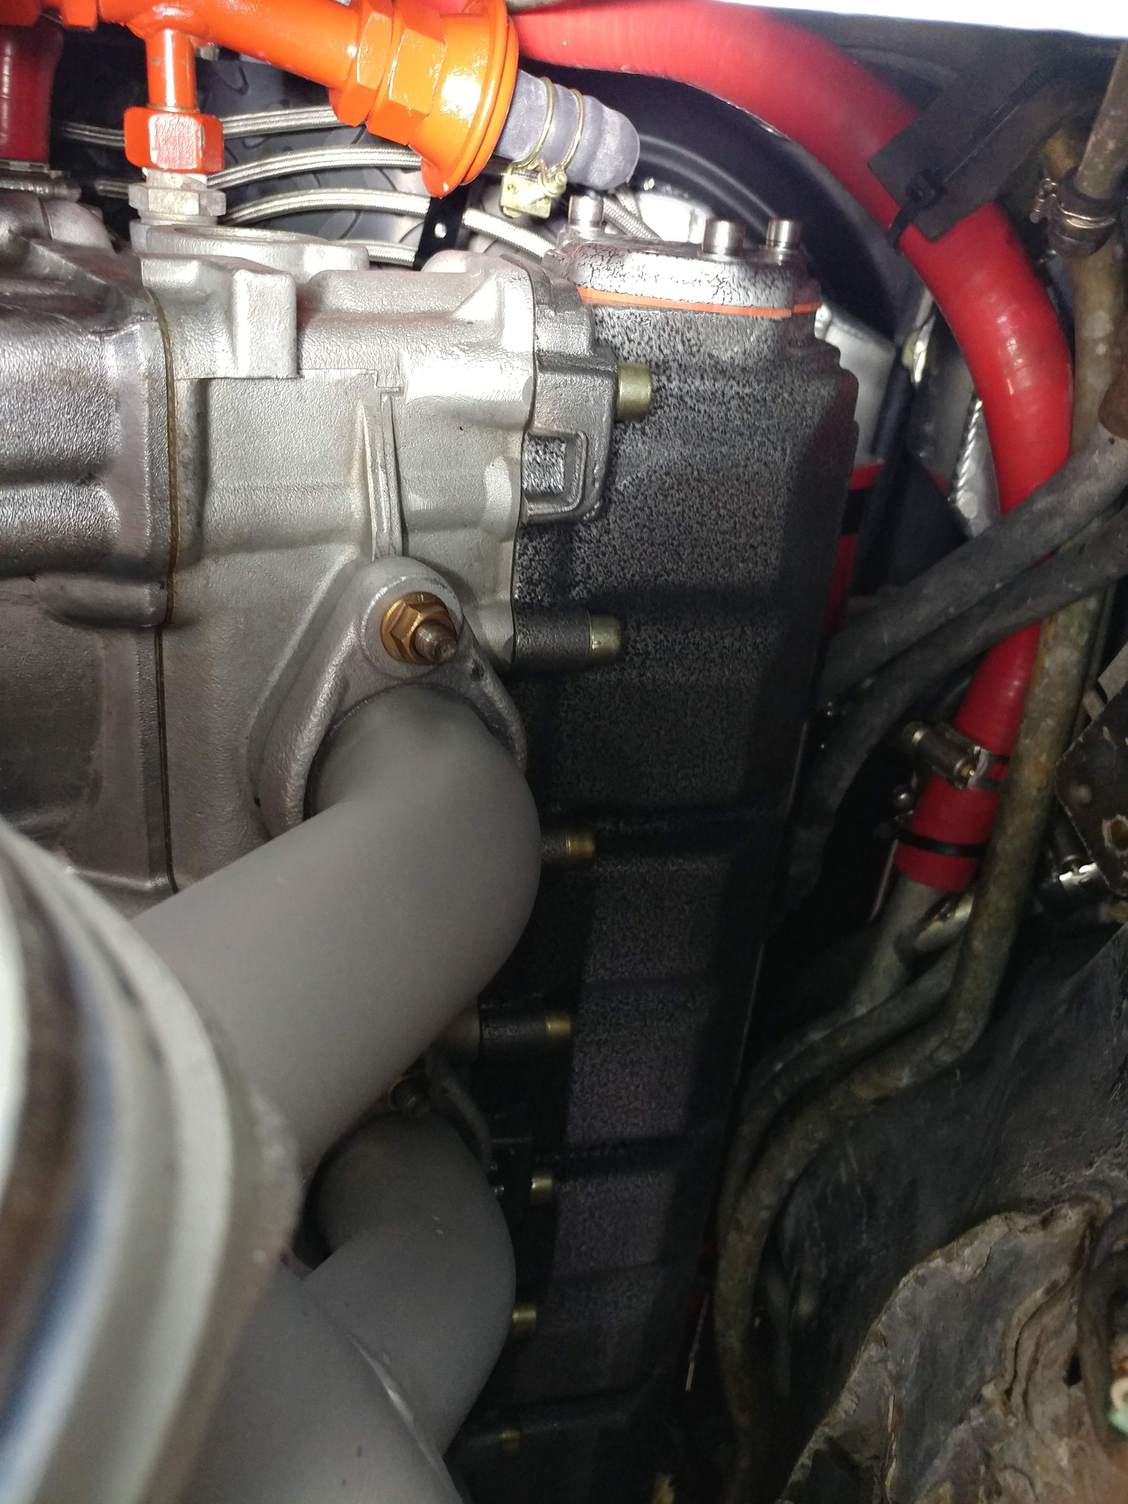
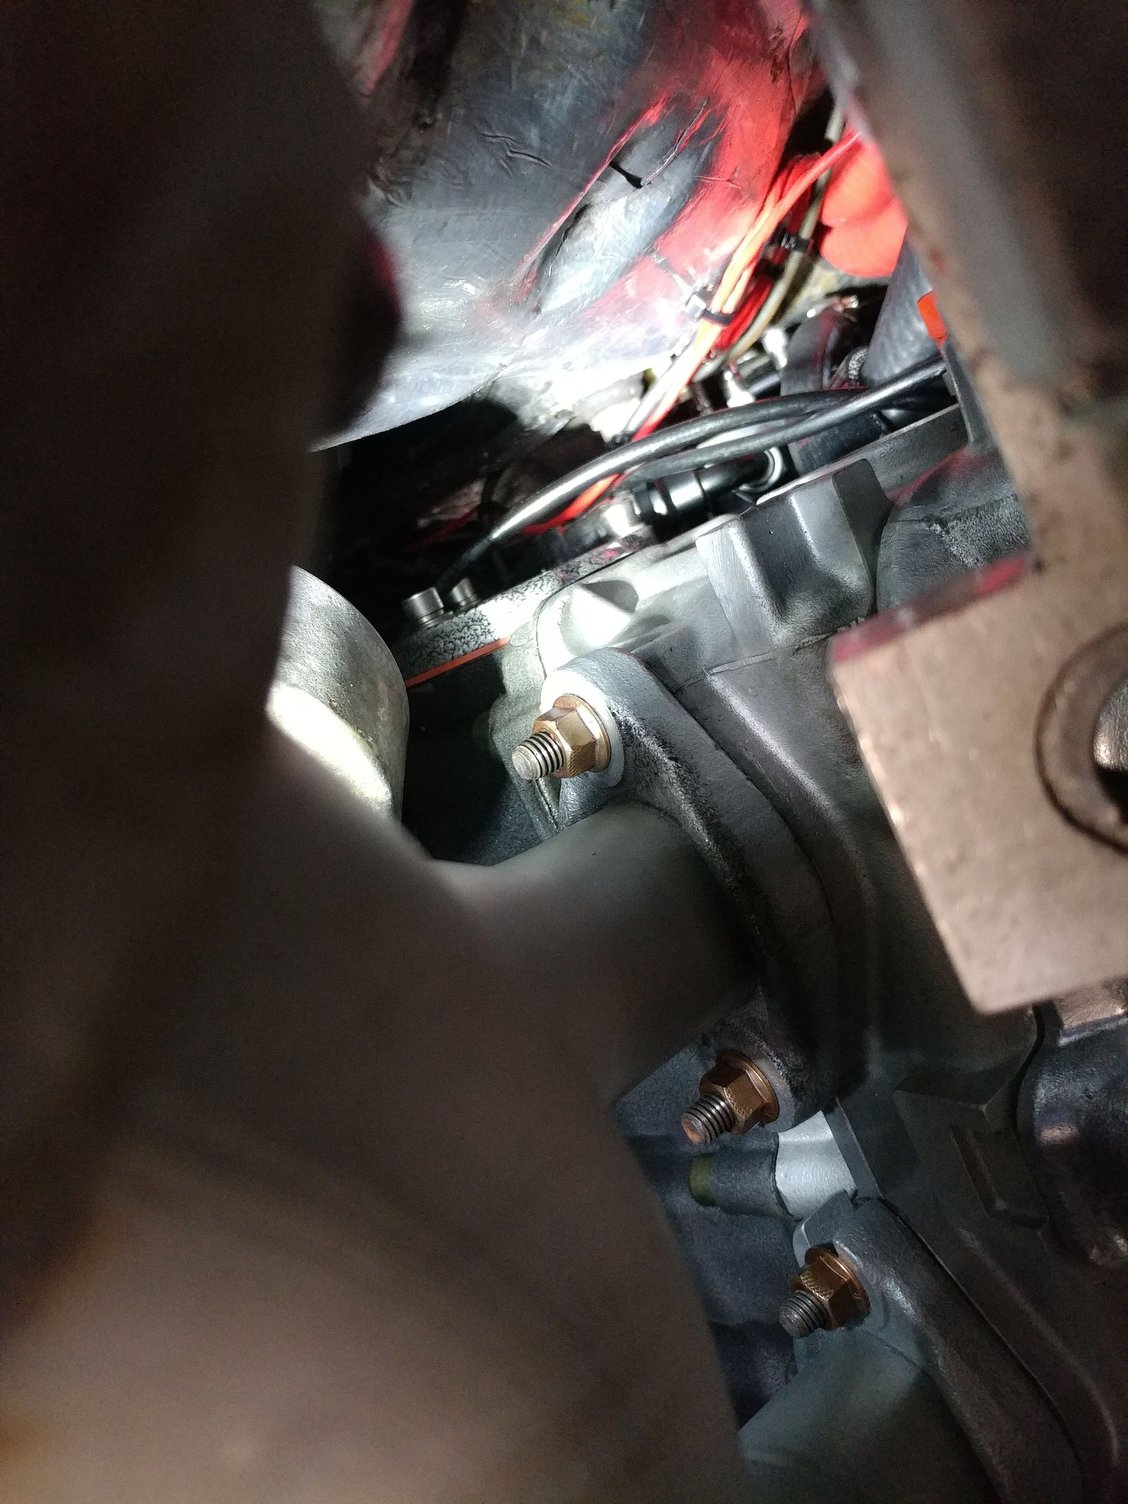
Here's my next issue - I have a new oil leak. From these photos can you tell the point of origin? I think the head gaskets, cam tower seals, and rear cam seals look nice and dry. Front camshaft seals were all new and the good ones with the spring inside from Roger when I put the motor together.
Could it be coming out of the junction where I have the dipstick extender installed onto the OEM dipstick tube or does it look like it's coming from higher up, like from inside the cam cover. The dipstick extension is because it's virtually impossible to reach the original dipstick with the supercharger and blowoff valve setup.
Does anyone or has anyone ever made a longer metal dipstick tube and dipstick that will thread into the stock oil pan - I need one of these. Carl, new product idea?
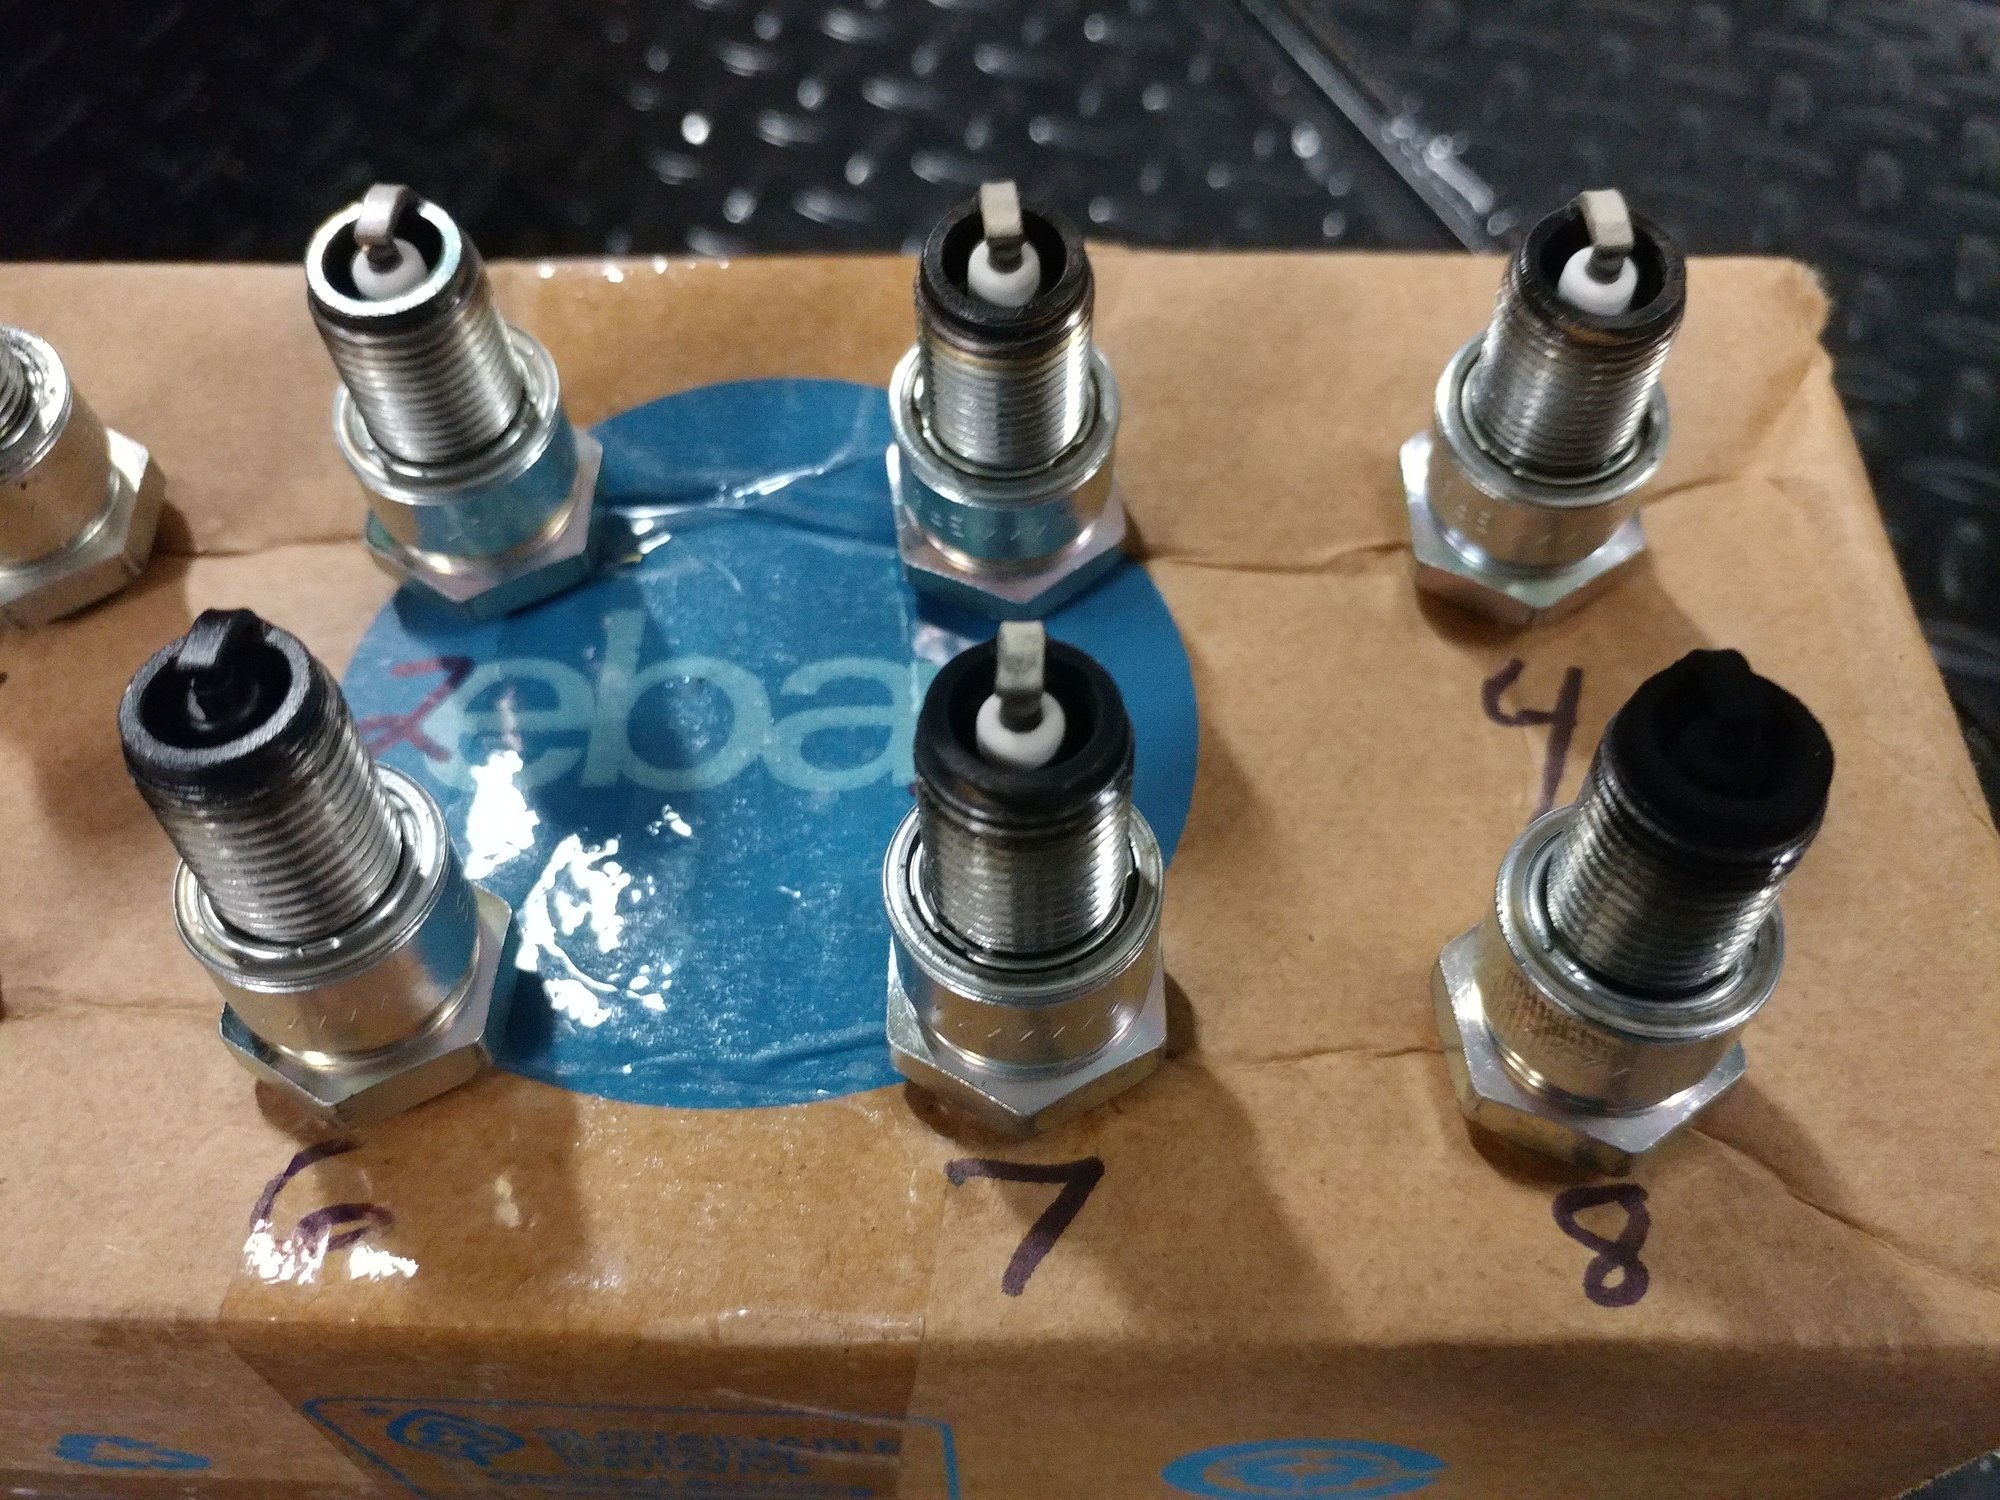
Just finished changing the plugs. These are NGK BR8ES and were run for a couple hundred miles.
Based on the IR Thermometer readings, #6 looked like I thought it would - black and shiny. The surprise was #8 that was black and fuzzy. Fuzzy is carbon or oil fouled, correct, or too cold a plug? This is weird, because in the last set I pulled, it was 6 and 8 that looked good and 5 and 7 that didn't, and I'm certain I have not mixed them up because as I remove each one I put it into the numbered hole of the box in the photo.
What I've now installed are NGK BR7ES gapped at 0.028mm, which is one heat range warmer. NGKs get warmer as the number gets lower vs Bosch that get colder as the number gets lower. My hope is that these burn warm enough to prevent fouling. I'm going to start the car and immediately shoot the header branches to see if when brand new they all are firing.
Based on these plugs, I'm going to replace the injectors in 6 and 8 before the restart.
The other 6 cylinders look like they're colored a little lean to me - is that right or are they OK considering the limited use. AFR under boost is between 12-13, driving along 13.5-14.5 but at idle and under vacuum, definitely lean, like 16-17, but no load in those situations. Maybe once all the plugs are firing it will change the AFR numbers I've been seeing on the wideband O2 gauge.
You put the orange pan gasket on when you changed it. I have found in that area the pan gasket leak will blow UP, and that pattern you show looks familiar.
You put the orange pan gasket on when you changed it. I have found in that area the pan gasket leak will blow UP, and that pattern you show looks familiar.
Hmmm, interesting even though that seems unlikely. Also interesting it only happens on one side and not the other side of the oil pan.


 09-09-2019, 10:36 AM