When you click on links to various merchants on this site and make a purchase, this can result in this site earning a commission. Affiliate programs and affiliations include, but are not limited to, the eBay Partner Network.
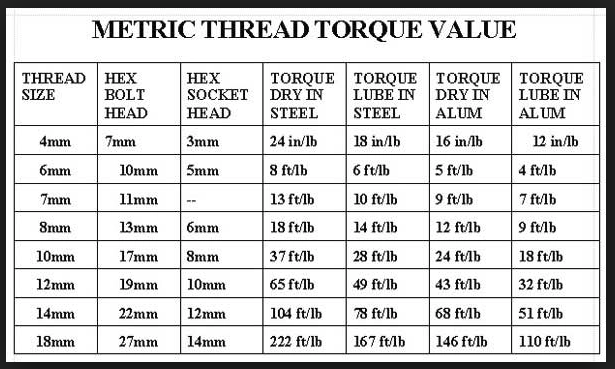
You have to be careful with thread lubricants. Most torque specs are dry unless other-wise mentioned. If you add anti-seize or some lubricant, it is very easy to over-torque the fastener because the lubricity allows over-rotation during assembly.
Check some typical torque charts, the good ones call out the different torque values depending on which lube you use. Here is just a simple version I found. Note how, if lube is used, you need to tighten to a much lower torque. Other charts are more precise as to which type of lube is used, but that's more than the average weekend mechanic needs to worry about. Problems of over-torque can include: over-clamping and deforming the parts being clamped; damage (strecthing) of the fastener; and failure of the threads in the fastener or the host material
Thanks Carl, I was aware of that, but others may not have been. For example, on my 997s, the revised torque spec for the M14 lug bolts is 118 ft. lbs. I use anti-seize on those as well and only tighten to 90-95 ft lbs instead.
Doing some further research on this, without going into the different types of anti-seize lubricants that can be used, if using anti-seize on normally dry torque spec fasteners, it looks like a torque reduction of 25% should be about right as a general rule.
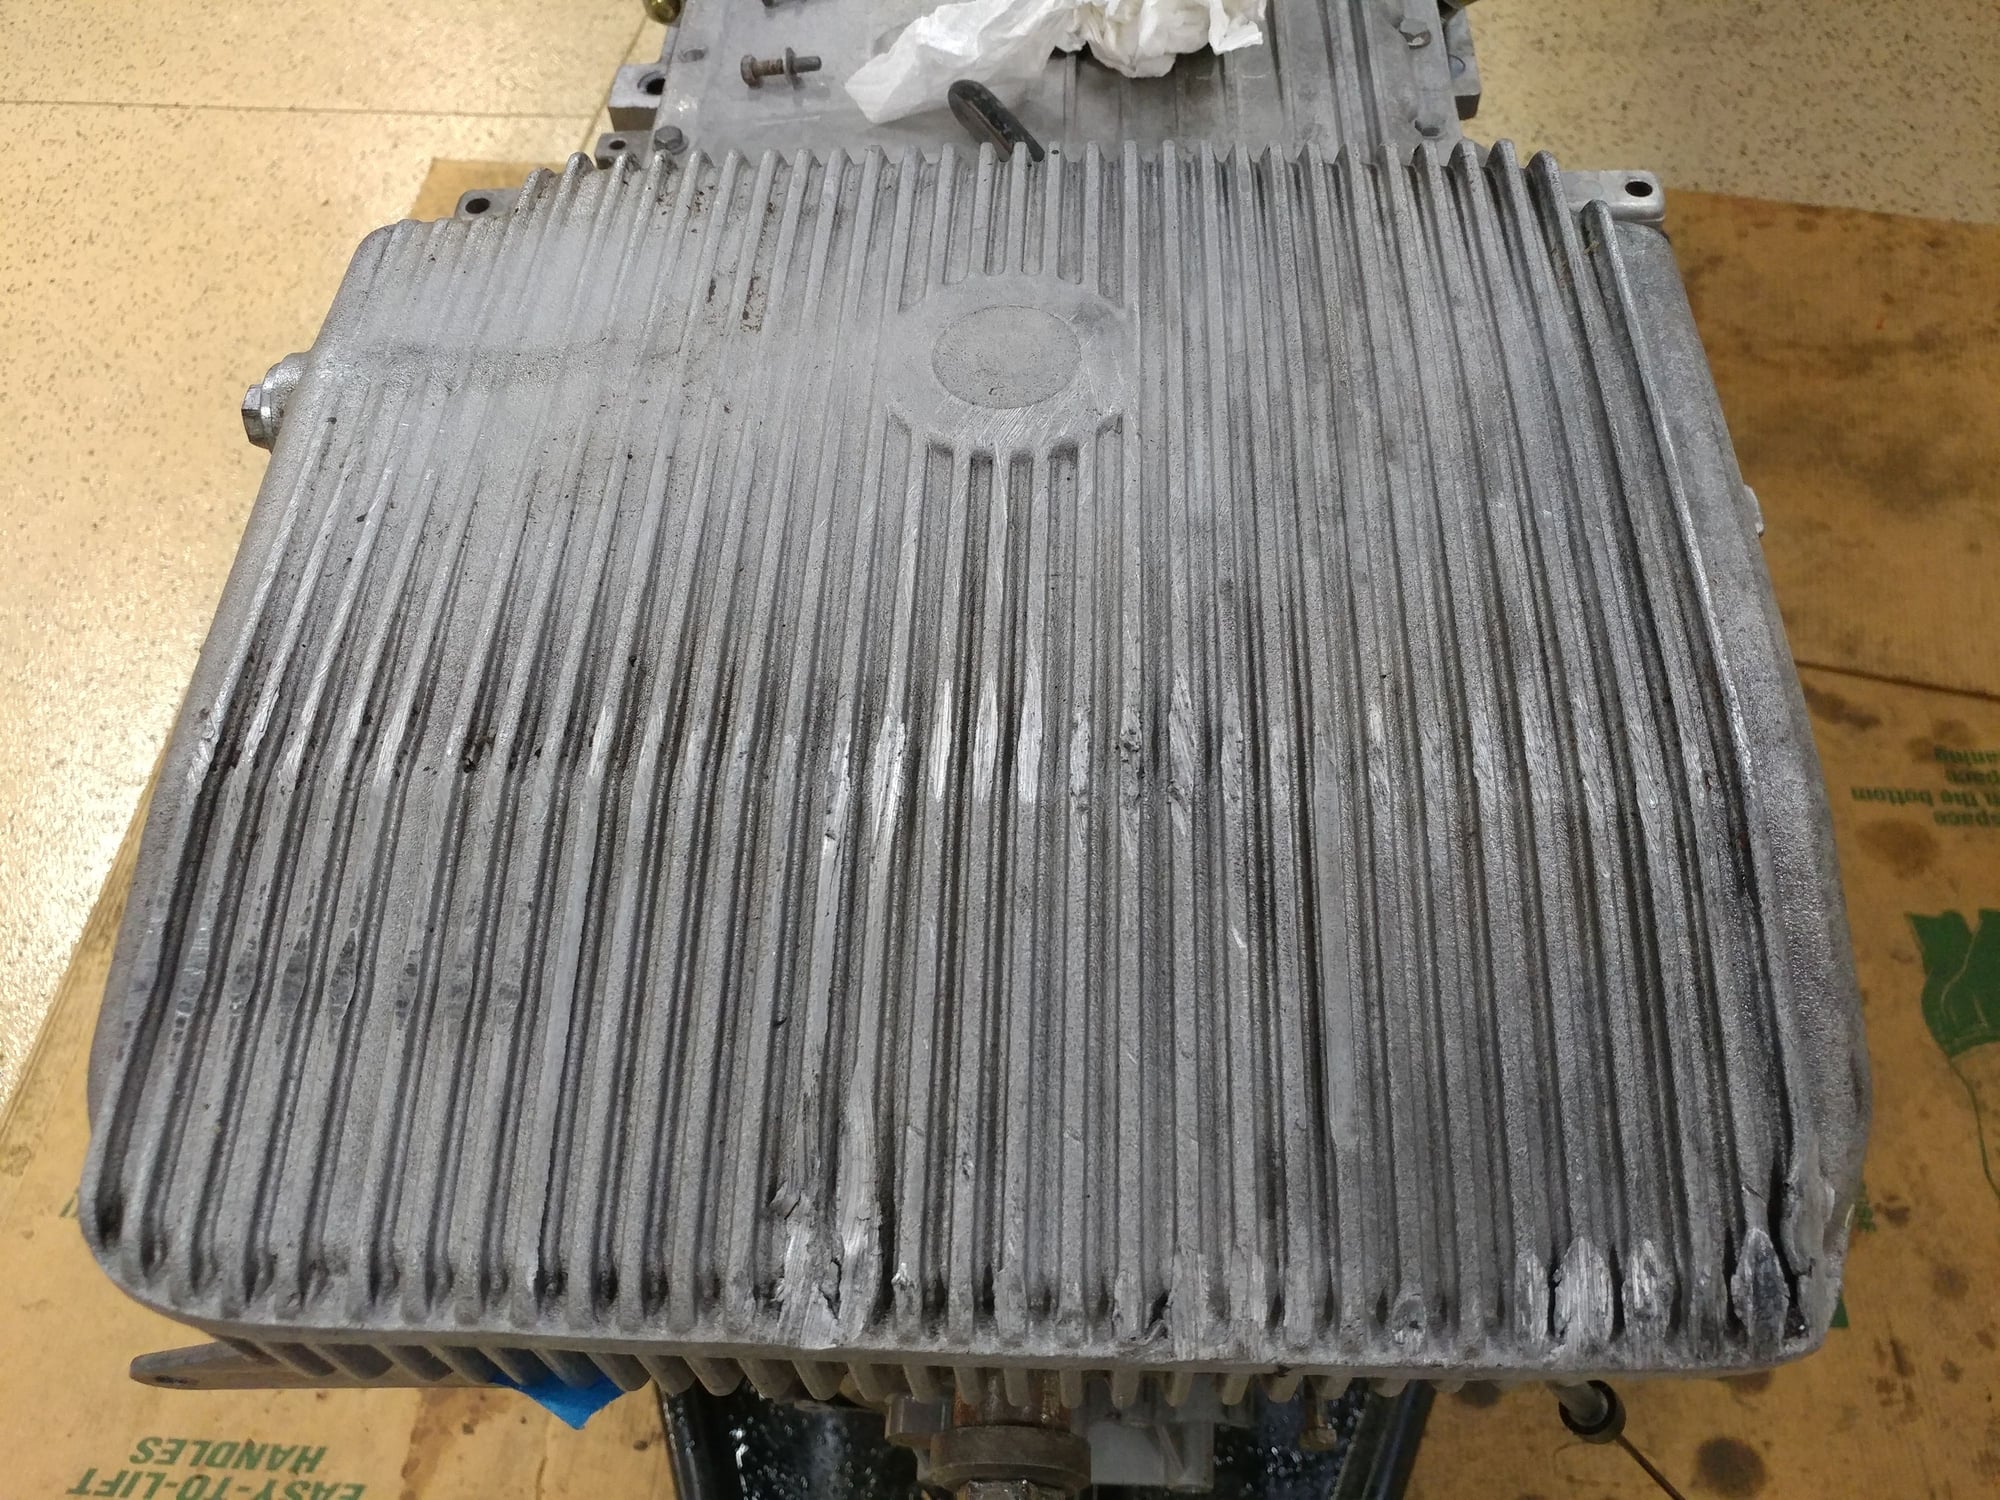
I flipped the 4.7L motor on the stand with the intention of doing the oil pan gasket tonight, but the pan has visible damage, either from shipping or from bottoming out when in use.
Do you guys think this pan is OK to use or should I source a replacement. I can clean up the grooves to make it look better and I don't believe it's going to leak as there was a little residual oil in the motor that doesn't look like it has leaked out.
Let me know what you think. I'm a little concerned about the right front corner (as shown here upside down, so the passenger front corner).
Hi Pete,
If you don't see any fractures on the fins and obviously the sealing surface, I would think you are OK. I also know the work you do, and I bet you can clean up those fins so they will look very good. Maybe someone else has had experience with a similar oil pan?
Good luck,
Dave
I would try to make sure it's okay and then reuse it. Replacing an oil pan isn't really a major project if it ends up leaking. Of course I've never replaced one on the 928 so maybe it is..
I would try to make sure it's okay and then reuse it. Replacing an oil pan isn't really a major project if it ends up leaking. Of course I've never replaced one on the 928 so maybe it is..
In a 928 it usually is, but in my case, I have the 928MS 3-piece front cross-member where I can remove the center section without disturbing the side pieces, the suspension, or the motor mounts, so I guess that would be an option. I cleaned up the crushed vanes and once they turn the same worn aluminum color as the rest of the pan will probably be OK. I have to pull the pan to upgrade the gasket anyway so I'll be able to see if there are any cracks in that one corner I'm concerned about. Worst case scenario is I could pull the pan from my 4.5L but it has always leaked around the drain plug so I was hoping not to have to reuse it and that motor is sitting on a skid on the oil pan so not convenient to extract it.
I'll probably proceed with this one.
Yesterday I pained some of the parts I had cleaned up the day before -harmonic dampener, oil return tube, coolant crossover pipe, motor brackets, steering rack plate, and the backside of the OEM flywheel which I'm keeping as a spare. I mounted and torqued down the lightweight flywheel to the new motor yesterday.
I can't do much more besides cleaning until I get a couple of the shipments I'm waiting on and the cam towers back from the powdercoater. I could finish polishing the headers and Y-pipe.
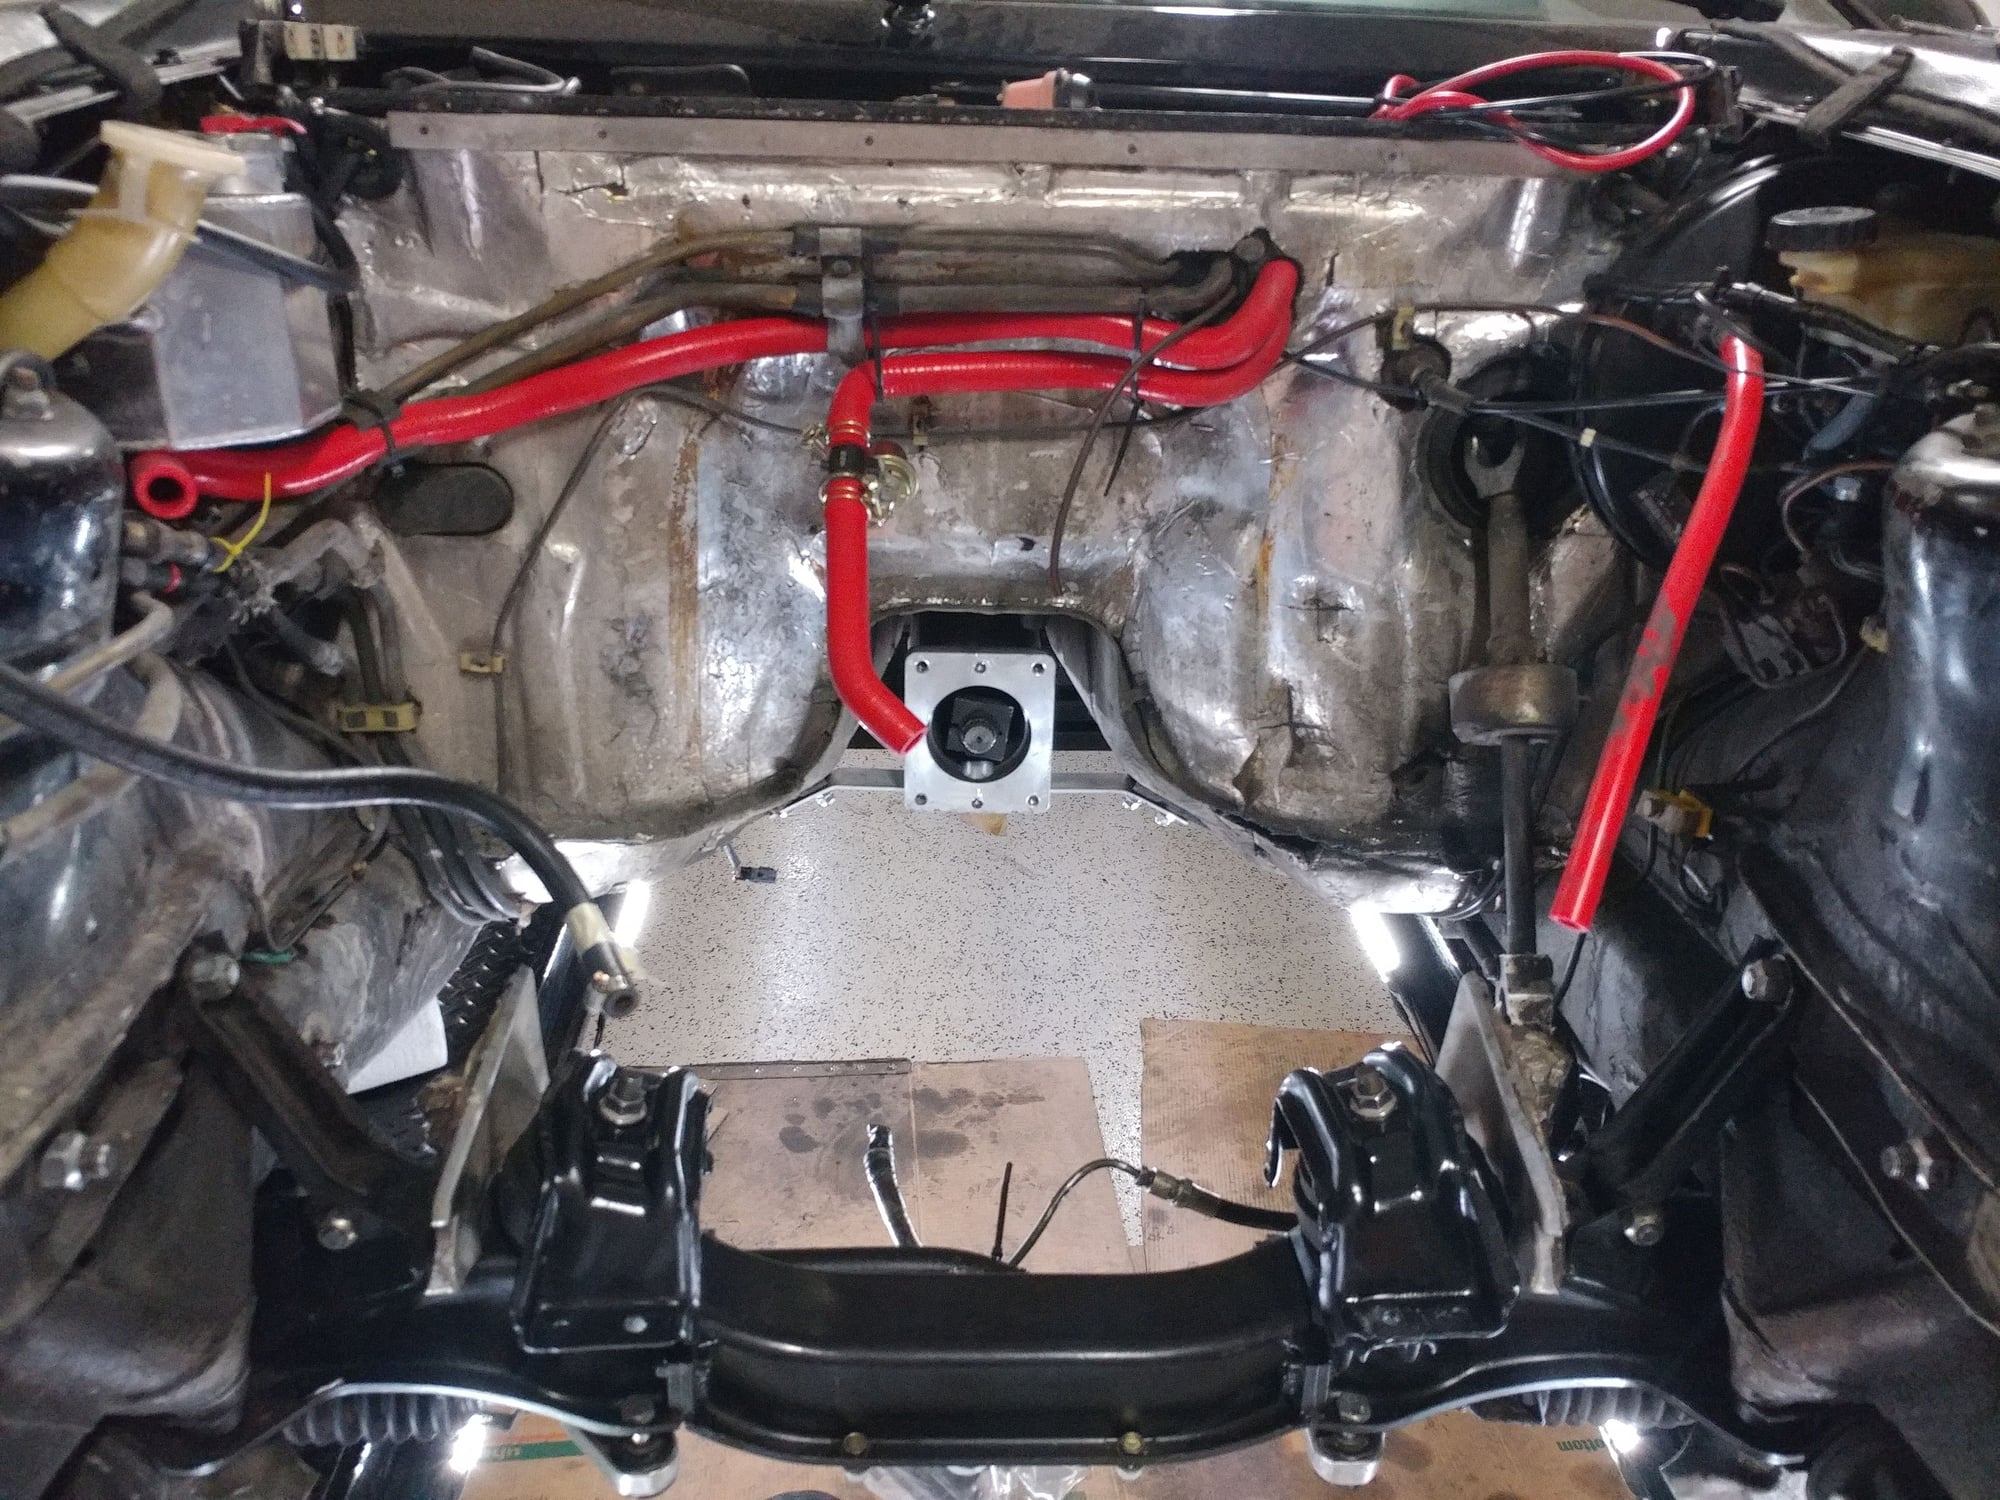
I installed the repainted motor brackets onto the mounts, then installed some new 4-ply silicone coolant hoses that came with the set I bought when I replaced the original hose that blew and caused the loss of coolant and overheating event that started this adventure.
I'll figure out the best orientation and length for the short hose that connects to the motor once it's back in place.
Hi Pete,
If you don't see any fractures on the fins and obviously the sealing surface, I would think you are OK. I also know the work you do, and I bet you can clean up those fins so they will look very good. Maybe someone else has had experience with a similar oil pan?
Good luck,
Dave
Of course 'someone else' had a similar experience.
My pan has a significant 'impact mark' on the bottom,
When I did the pan gasket & MMs, we found a small area inside that was cracked. It was still attached on one side, but it had lifted a bit.
It doesn't go through and has held just fine for several years.
Thanks guys. I didn't want to open up the bottom of the engine and then find out it was cracked and have to leave it that way for a week, so I sourced a nice used one that will be here next week.
I'm still looking for some input on which set of cam followers I should use from post 172 below if anyone has any.
Since you have not gotten an answer I will submit my unqualified opinion. I believe the camshaft and lifters wear into each other and should be kept together. Wear is probably not the correct word but the effect is that each lobe and lifter "break-in" together. If you mix the lifter positions or replace them they have to break-in again. I would install the 4.5 cams and lifters into the 4.7 cam tower so long as the lifter dimensions are the same.
Since you have not gotten an answer I will submit my unqualified opinion. I believe the camshaft and lifters wear into each other and should be kept together. Wear is probably not the correct word but the effect is that each lobe and lifter "break-in" together. If you mix the lifter positions or replace them they have to break-in again. I would install the 4.5 cams and lifters into the 4.7 cam tower so long as the lifter dimensions are the same.
Thanks for your input. From what it looks like, the lifters rotate during regular use as I can see from the light marks on both the inside and outside of both sets so I didn't know if I should use what looks like the fresher set (darker bronze color inside of the 4.7L versions) or keep them paired as you suggest which is also why I labeled and kept straight each lifter in the egg crates.


 04-24-2019, 12:07 PM