When you click on links to various merchants on this site and make a purchase, this can result in this site earning a commission. Affiliate programs and affiliations include, but are not limited to, the eBay Partner Network.
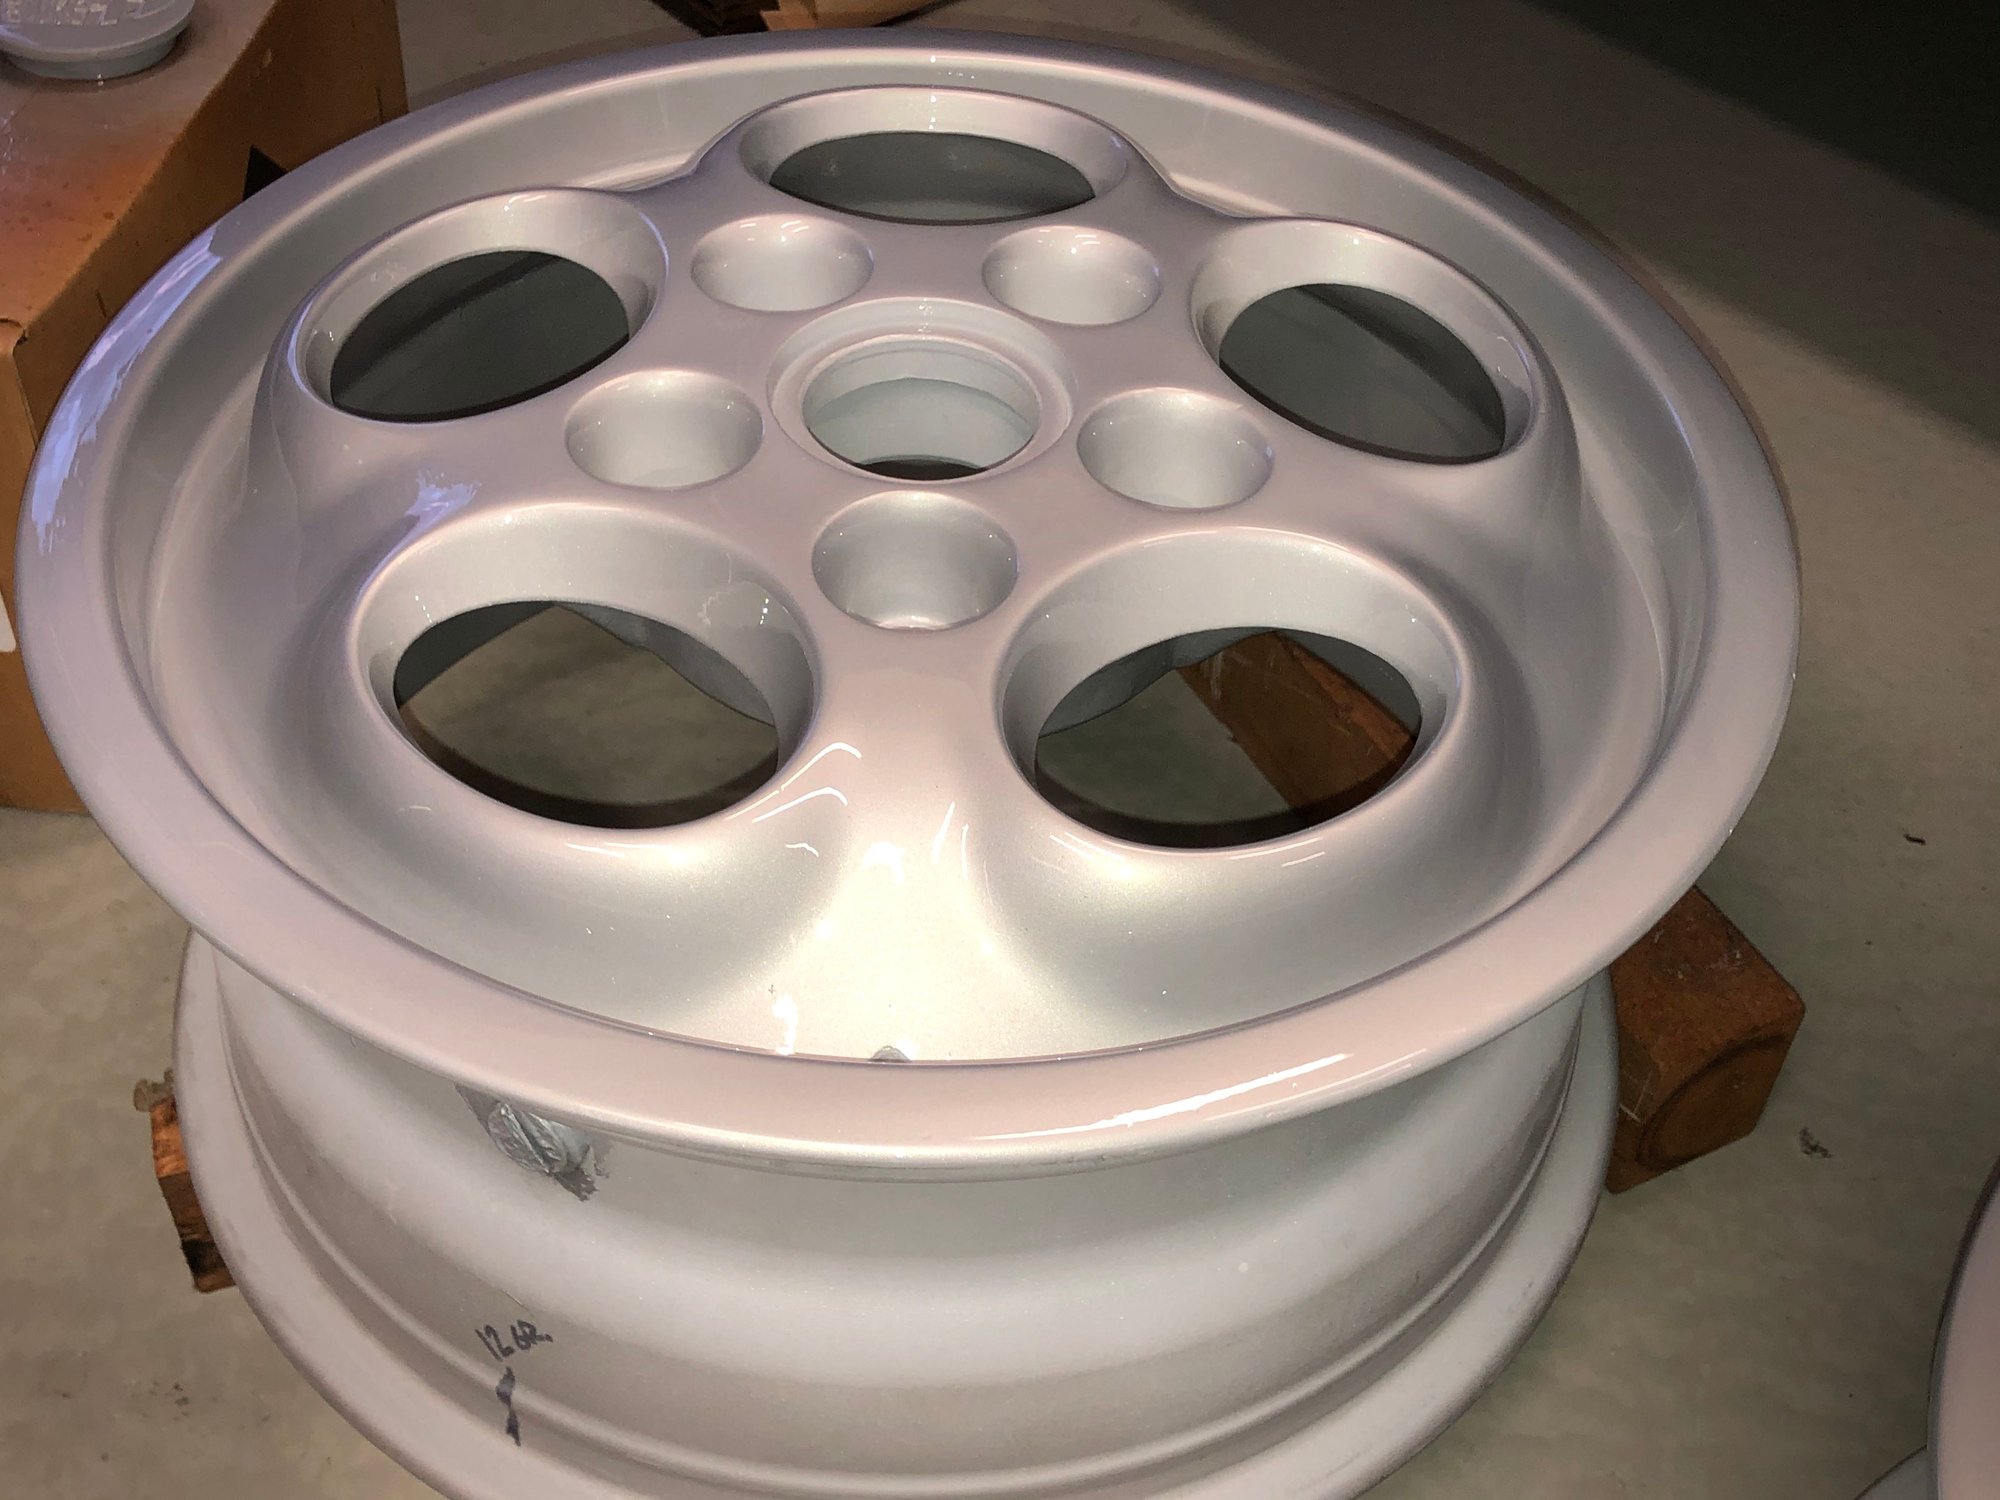
For the past 8 months I've been experimenting with ultra bright silver paints to do justice to the 9 June 1976 wheel image. If they truly were white wheels, then I can't do that. If they are ultra bright silver then there must be a modern equivalent formulation that can provide some contrast to the Silver body color. After a lot of experimenting. The mix turned out to be 28% Porsche No. 936 + 42% Silver pearl +29% custom silver blend (July 2019) + 1% Ferdinand Porsche Hair = the ideal color for phone dials: After a massive effort in prep and base coat application: Done.
Last edited by mit Wasser; 11-20-2019 at 02:09 AM.
Don't worry, this is just a base coat This is the first of the three stage paint: solid white base coat applied in a catalyzed ultra thin layer.
High build primer was applied in July when the car was paint work. Wheels have all been straightened and balanced (down to the gram) and coated in etching primer. Based coat cured for 4 months.
OCD is applying a guide coat to your wheels after high build. This involves hours of sanding. Twice: first in 320 grit and again in 400 wet. The problem with guide coating is that there is no turning back. You have to finish all four wheels to perfection. Like front bumper covers, this became a 'never again' idea.
Today was highly productive in getting the there stages all applied: White base (capitalized) , Silver pearl base coat and finally clear coat.
Before the base coat is sanding the high build
The only thing between this image and some vintage rubber is cure time..
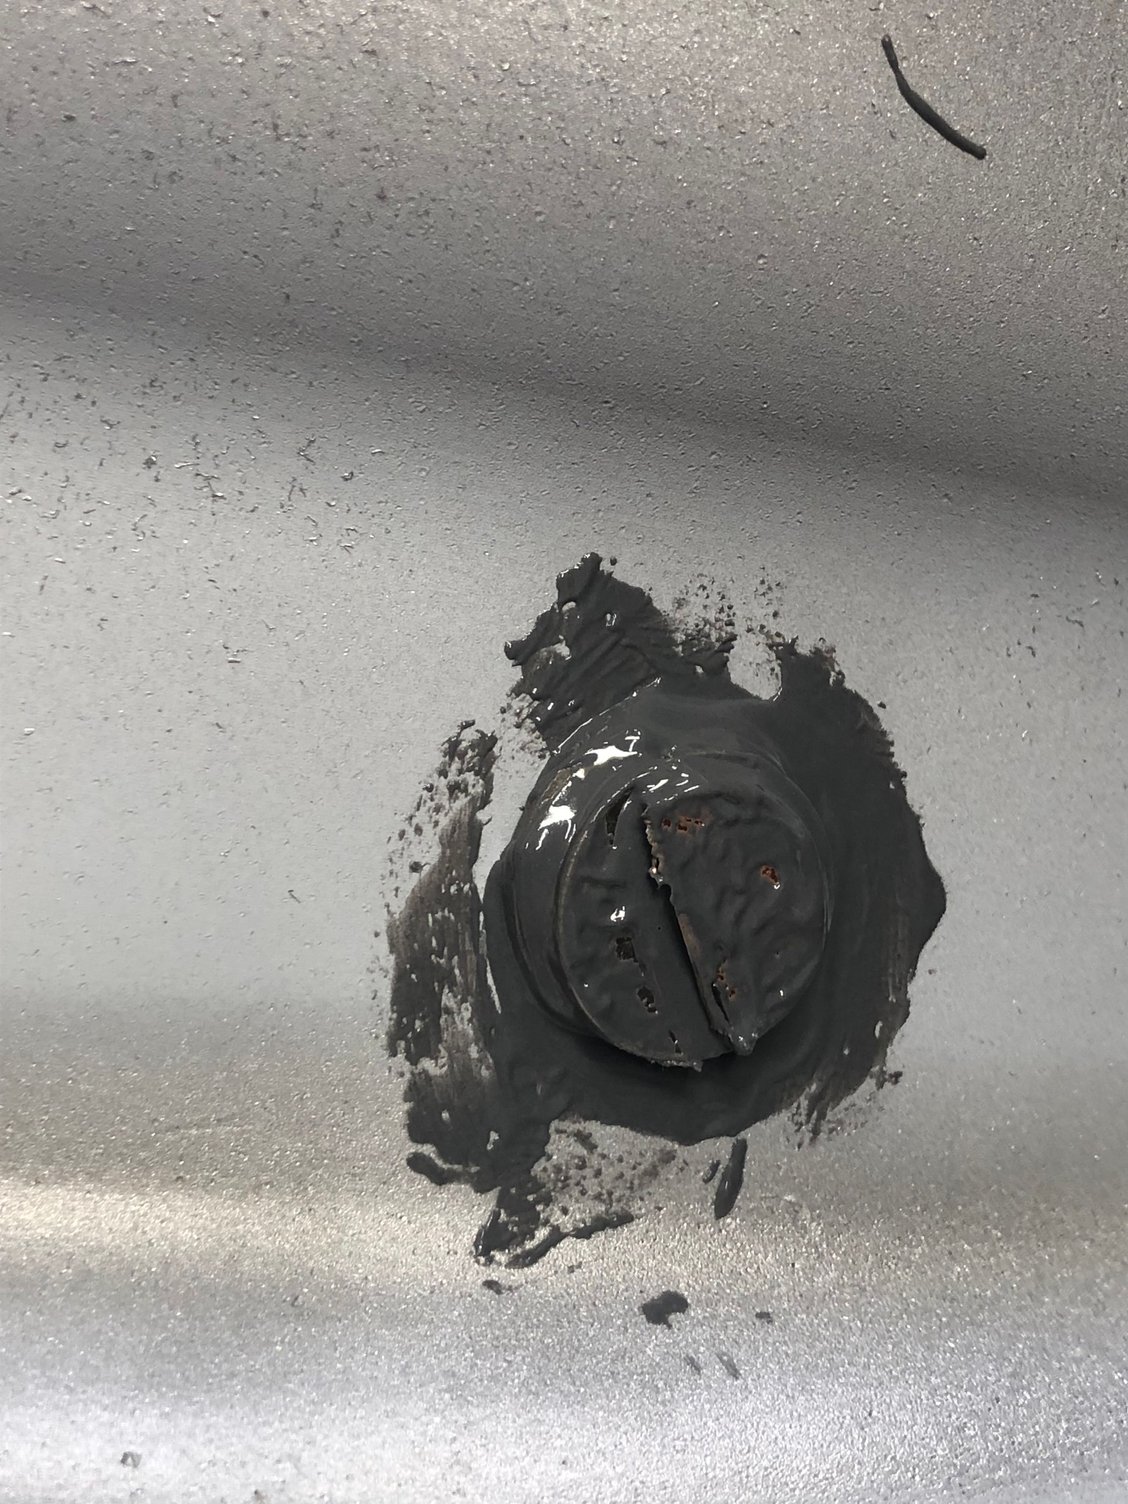
Yes, in the gutter of the inner rim, completely away from all beading action. All four wheels went to the balancer after striaghtening. Each wheel had a specific and precise weight require to get each wheel to balance neutral. The idea being that when we install reproduction / vintage tires, the counter balance (lead weights) will only be the effect of the tires. 18 Grams placed. The wheel balancer called for 19 grams to be placed a specific tick mark placed on the inner rim. It is hard to tell in this image but it is 18 grams. + 1 gram of epoxy One gram of epoxy applied.
Definitely can taste the finish line. Rear quarter windows are back from the upholsterer and went in without a struggle. Even remembered to hook up the speakers. This is the original vinyl just restretched and redyed and reglued back on the plastic molded panels.
what dye was used...
I just ordered(las night) a can of Porsche black 917 from colorplus to experiment with. My black is starting to look a bit worn and faded...and I wanted to re dye my sunroof liner.
I just ordered(las night) a can of Porsche black 917 from colorplus to experiment with. My black is starting to look a bit worn and faded...and I wanted to re dye my sunroof liner.
Tony,
For these internal vinyl surfaces we really like SEM satin black for vinyl materials. The key -as always with painting- is the getting the surface squeeky clean. Good luck.
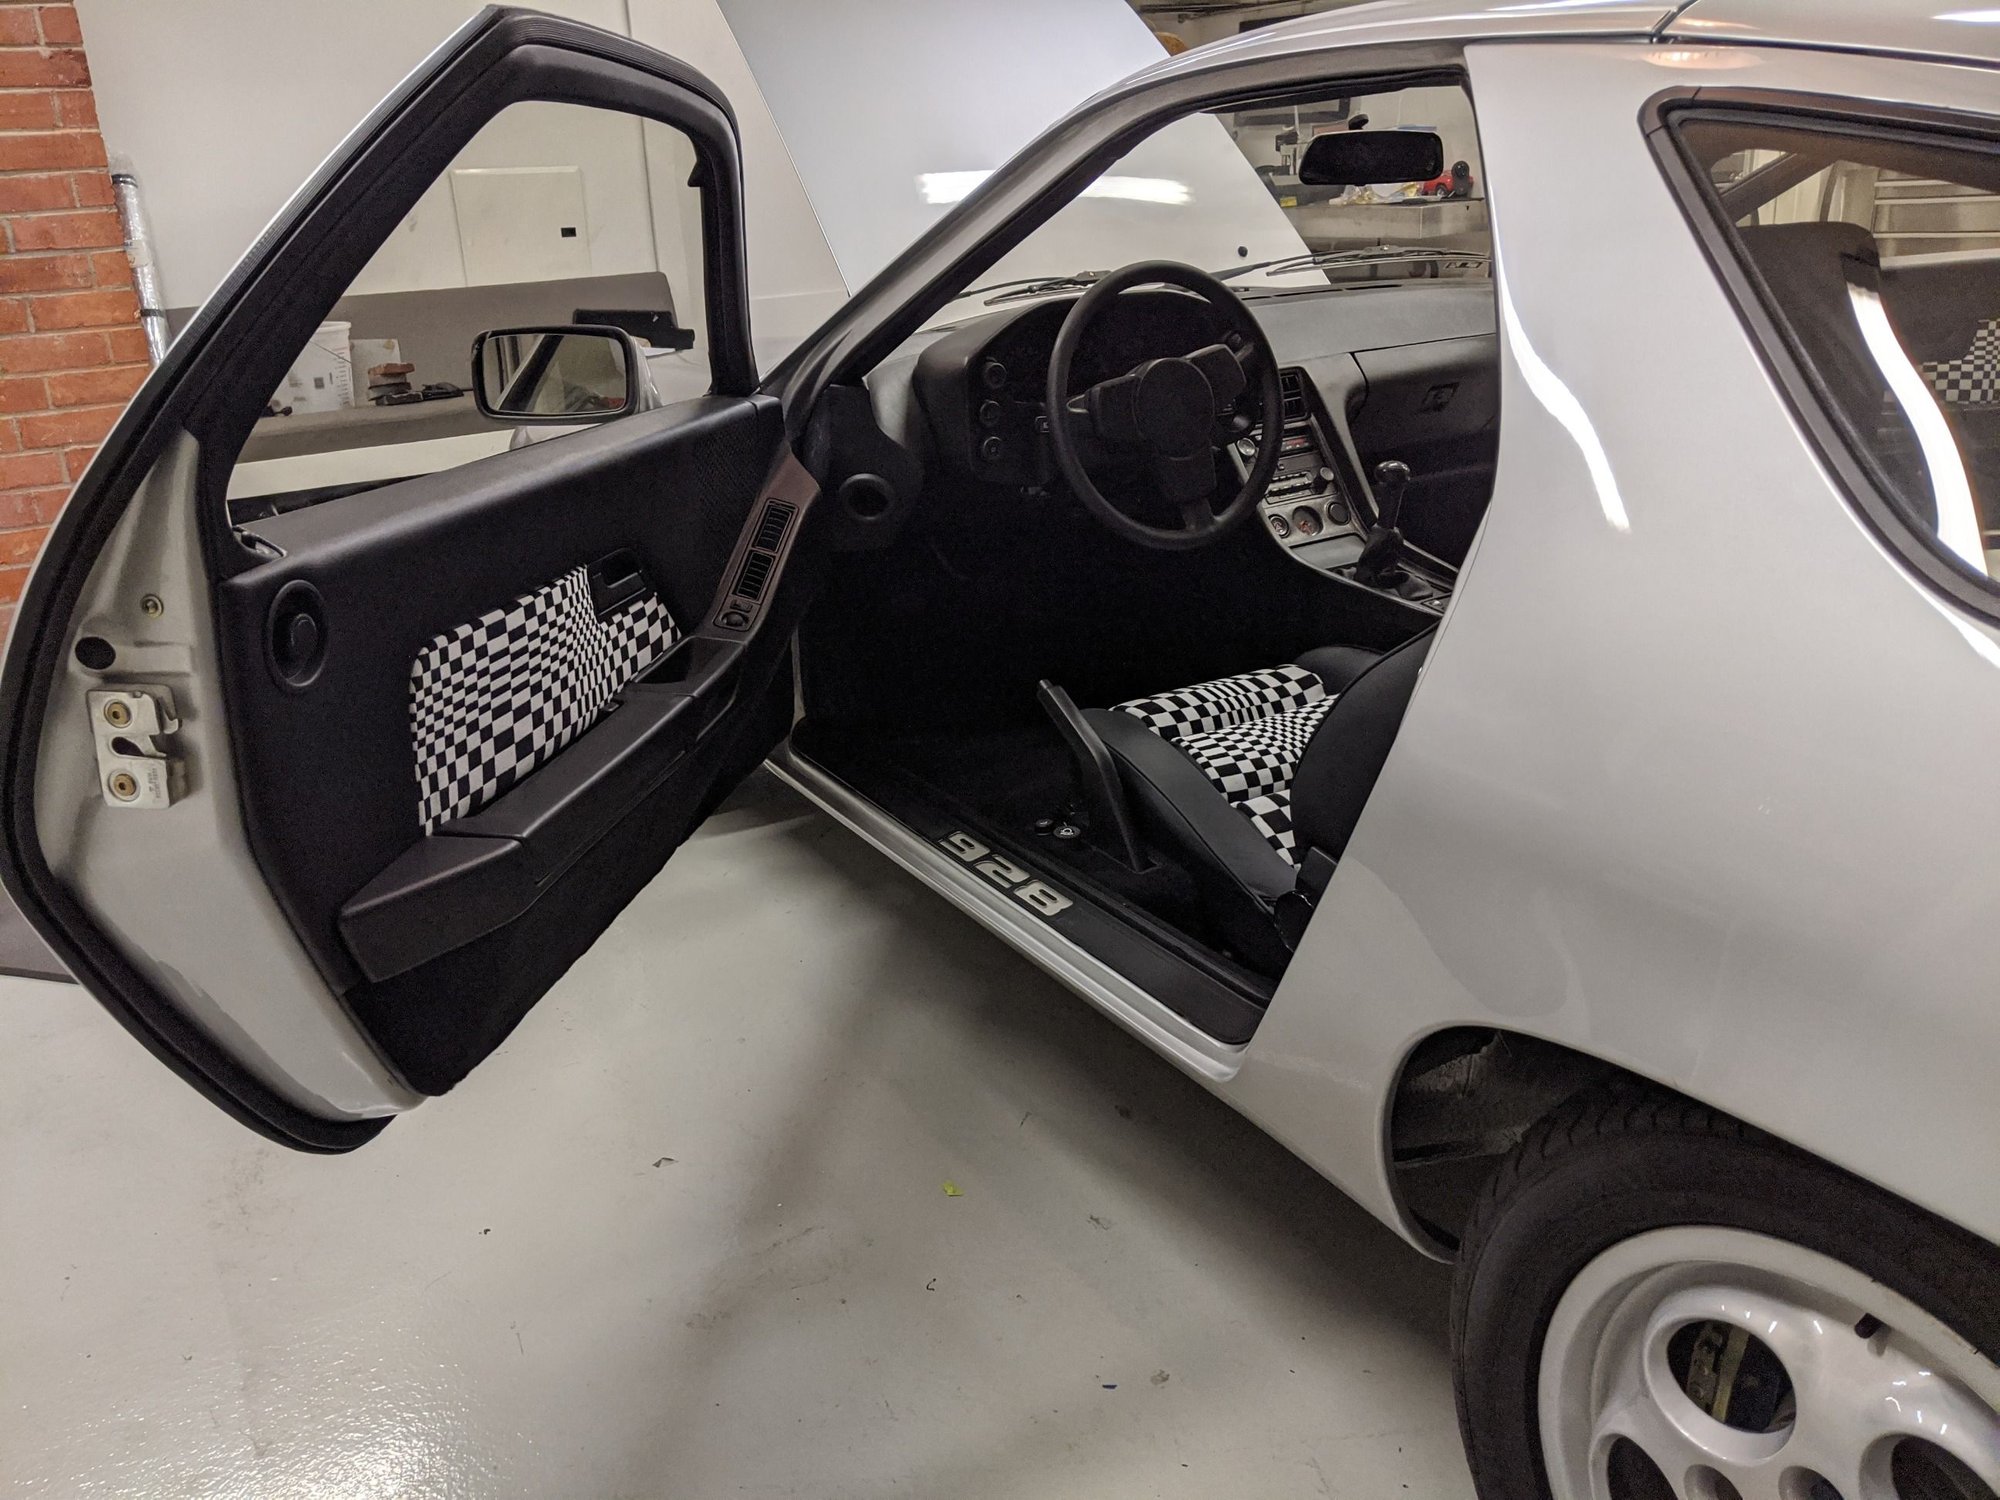
Saving the best for last / final interior assembly / PASHA!
We've been looking forward to this moment for months. With all systems finally functioning as designed, it was finally time for some interior assembly. This interior has been done for the past 4 months, in storage waiting for the installation. The pasha pattern brightens up the silver color with a significant contrast. Technically this Pasha should be matched to black vinyl (hide of the naga). I just couldn't do it. So all complimenting seating surfaces are in matching leather to the rear seat sides and center console. New leather on rear center console arrived just in time. Special attention was paid to aligning the pattern in the center and matching the pattern between the upper and lower seat cushions.
We've been looking forward to this moment for months. With all systems finally functioning as designed, it was finally time for some interior assembly. This interior has been done for the past 4 months, in storage waiting for the installation. The pasha pattern brightens up the silver color with a significant contrast. Technically this Pasha should be matched to black vinyl (hide of the naga). I just couldn't do it. So all complimenting seating surfaces are in matching leather to the rear seat sides and center console. New leather on rear center console arrived just in time. Special attention was paid to aligning the pattern in the center and matching the pattern between the upper and lower seat cushions.
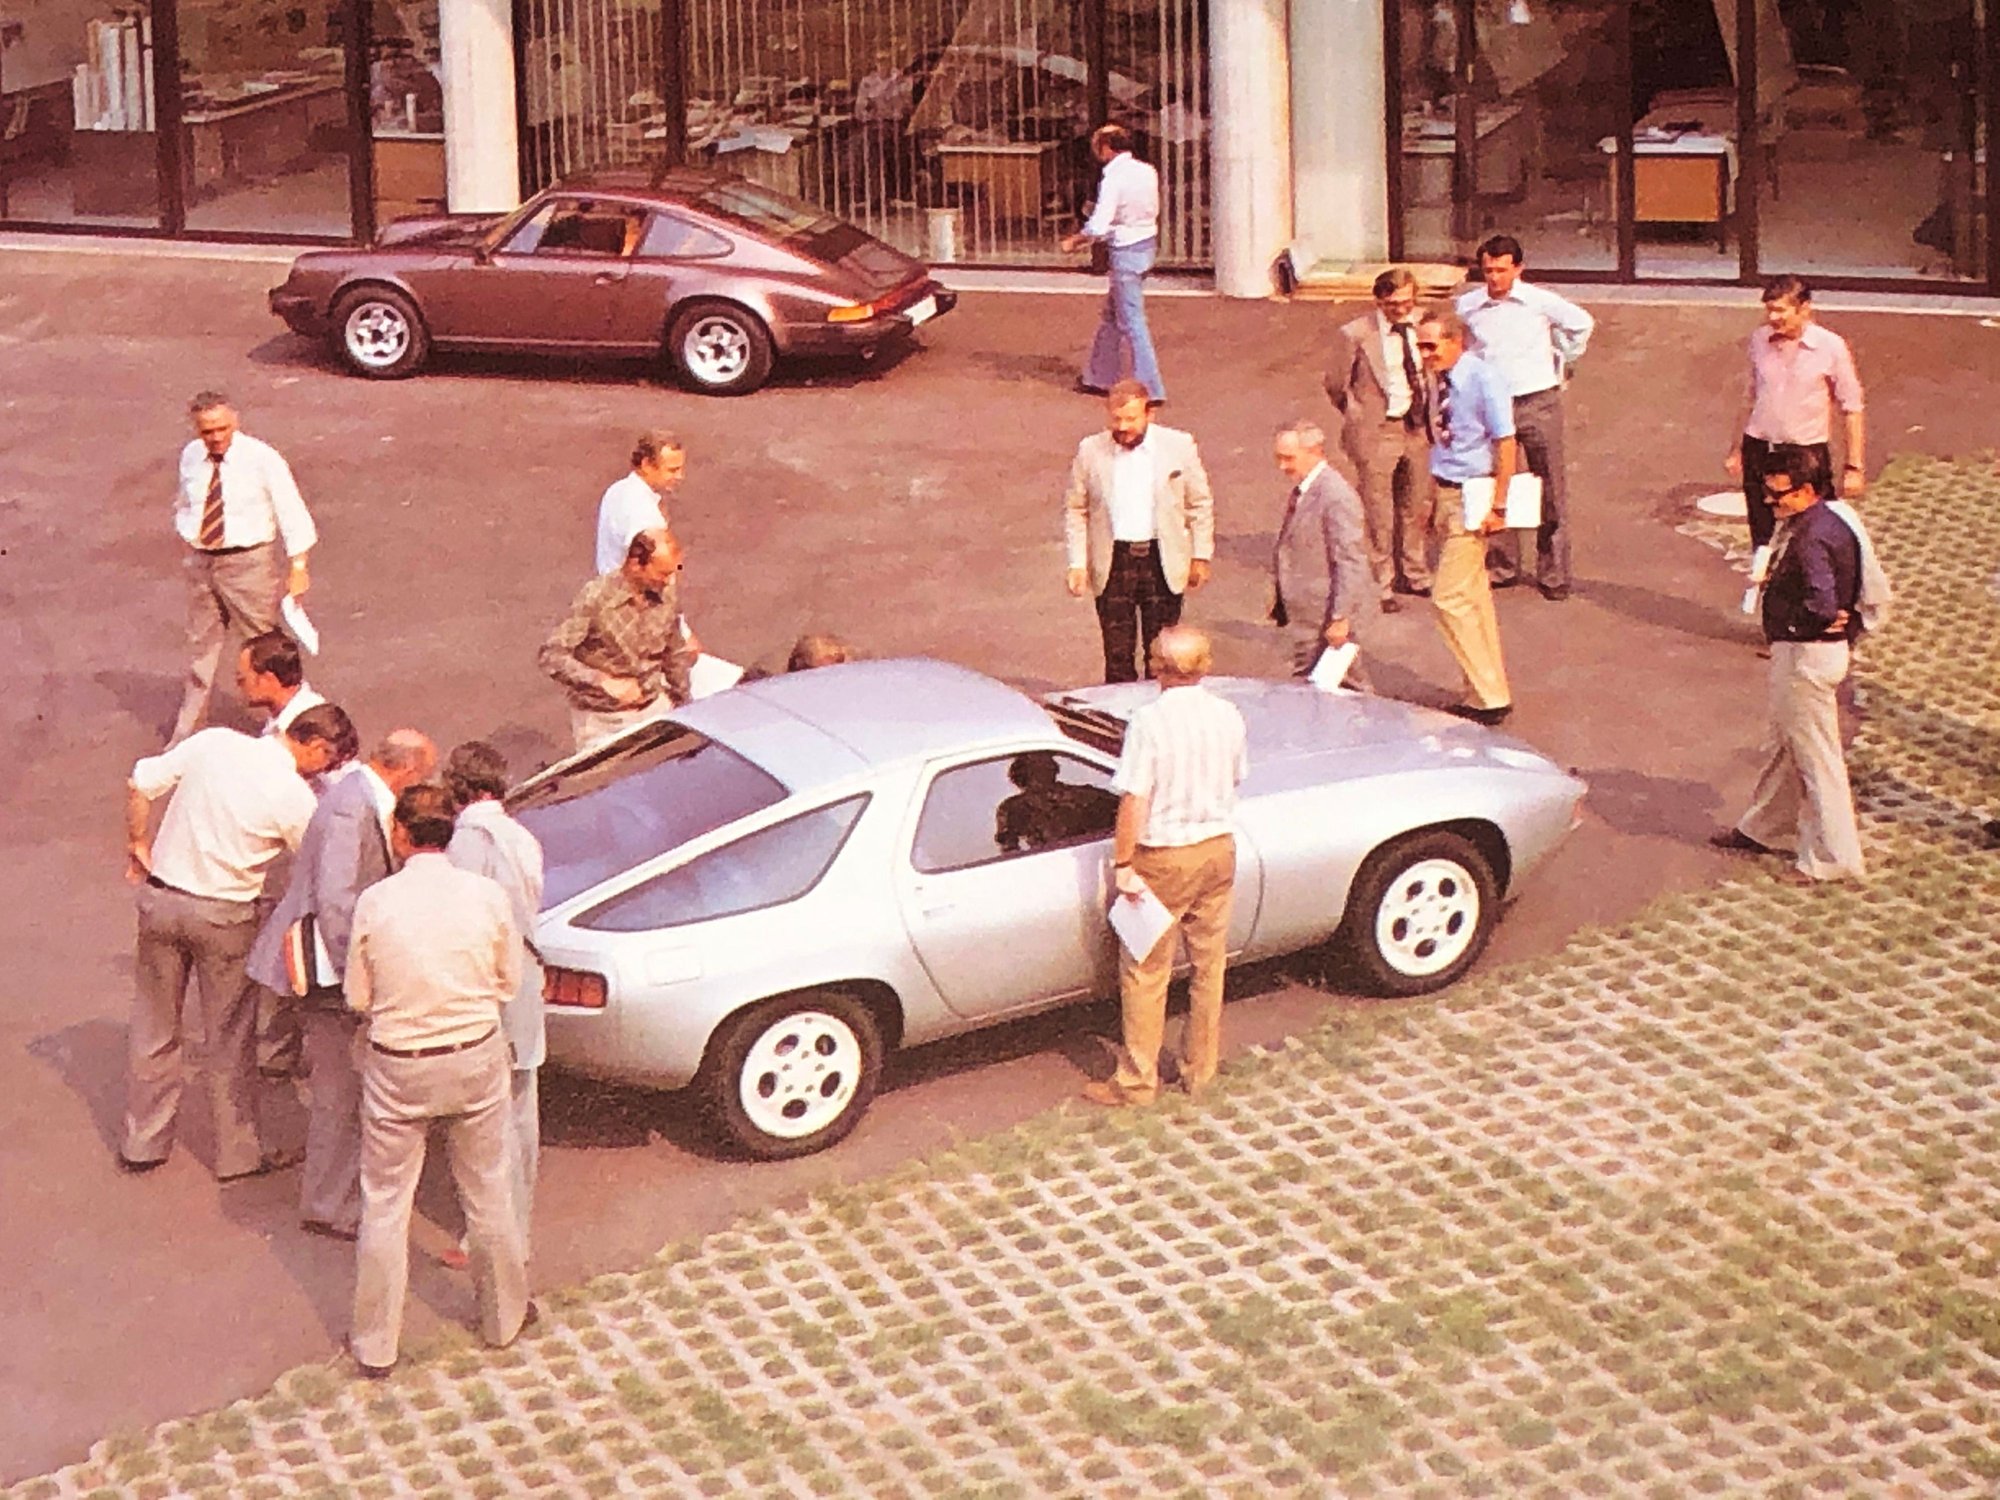
To me one of the most iconic images of the development of the 928 is the 9 June 1976 image where a prototype is revealed for the first time- to the 'other' managers at Porsche. This is the original of the crack in the ice.
In this image we are seeing the purest of the design intent. Note the color of the wheels. If not white, then an ultra brilliant version of silver.
This is what the designers intended. I've been studying the image for one year. I can't take my eyes of the wheels and the contrast to the Silver paint.
I think it's a really white-ish silver...almost pearl? The whole execution of your project has been outstanding!
Hey Paul,
Super nerdy question: I'm finishing up doing a suspension refresh on my '83 and somehow just noticed for the first time, after all these years, that PET shows a "spoiler" on the bottom of the lower front control arms. I do not believe that my car ever came equipped with them, and I notice in your pictures that you didn't seem to install them on your car either. Do you have any information on whether these spoilers were installed (or not) originally on the pre-S4 cars?
Cheers,
Rick
They were used on the early 928S cars, starting in 1980. The part # for the 80-86.0 spoilers is 928 341 389 01, while they became left-right asymmetric in '86.5, part # 928 341 389 03 and 390 03.
Someone (PO) had mickey moused the CE panel with some crude industrial wiring to try and address the high current draw coming through fuse 16. All scary stuff and now removed. Looking at fuse holder 16 it was clear it was overheating, trying to provide enough current to drive the large Bosch fan in front of the condenser.
I am not one to change the original design, but it is clear that as the fan motor ages, it need more amps than the harness and CE panel can deliver. So, the proposed solution...... I made a small relay harness that will fit underneath the hood latch panel. This device is fully reversable to stock and uses the original style two pin Molex connectors. It is the OEM large A/C relay (50 amp?) taken from the CE panel. A new lead (+12v) is connected to the Jump post and this moves all the high current switching to the front of the car - only a few feet between the jump post and the fan assembly. The original wiring at the CE panel and HVAC console all remains stock. The connector that use to connect the motor now controls this forward relay. Hopeful this crushes the problem.
Should you consider fusing the 12v supply line from the Jump Post?
Thanks Rob. I found this picture of the later style. Pretty cool, and pardon the unintended pun! I think I�ll retrofit, and despite the control arm design change, I suspect it would fit. Just for completeness do you happen to have a picture of the earlier style, for comparison?


 11-20-2019, 01:54 AM