When you click on links to various merchants on this site and make a purchase, this can result in this site earning a commission. Affiliate programs and affiliations include, but are not limited to, the eBay Partner Network.
Hi Everyone,
I recently ordered the PKT (PKTensioner Kit) from Roger. This is my first time doing a timing belt job and I'd like another set of eyes to catch anything I may (will likely ) be doing wrong.
I plan to take photos along the way and replace any parts as well. This is for a 1991 S4 with 90k miles. The last time the belt was changed was at 65k via the prior owner. I noticed the current factory tensioner was leaking pretty badly, hence the service.
My next steps are cleaning, a smog pump rebuild, and, taking off the crank bolt.
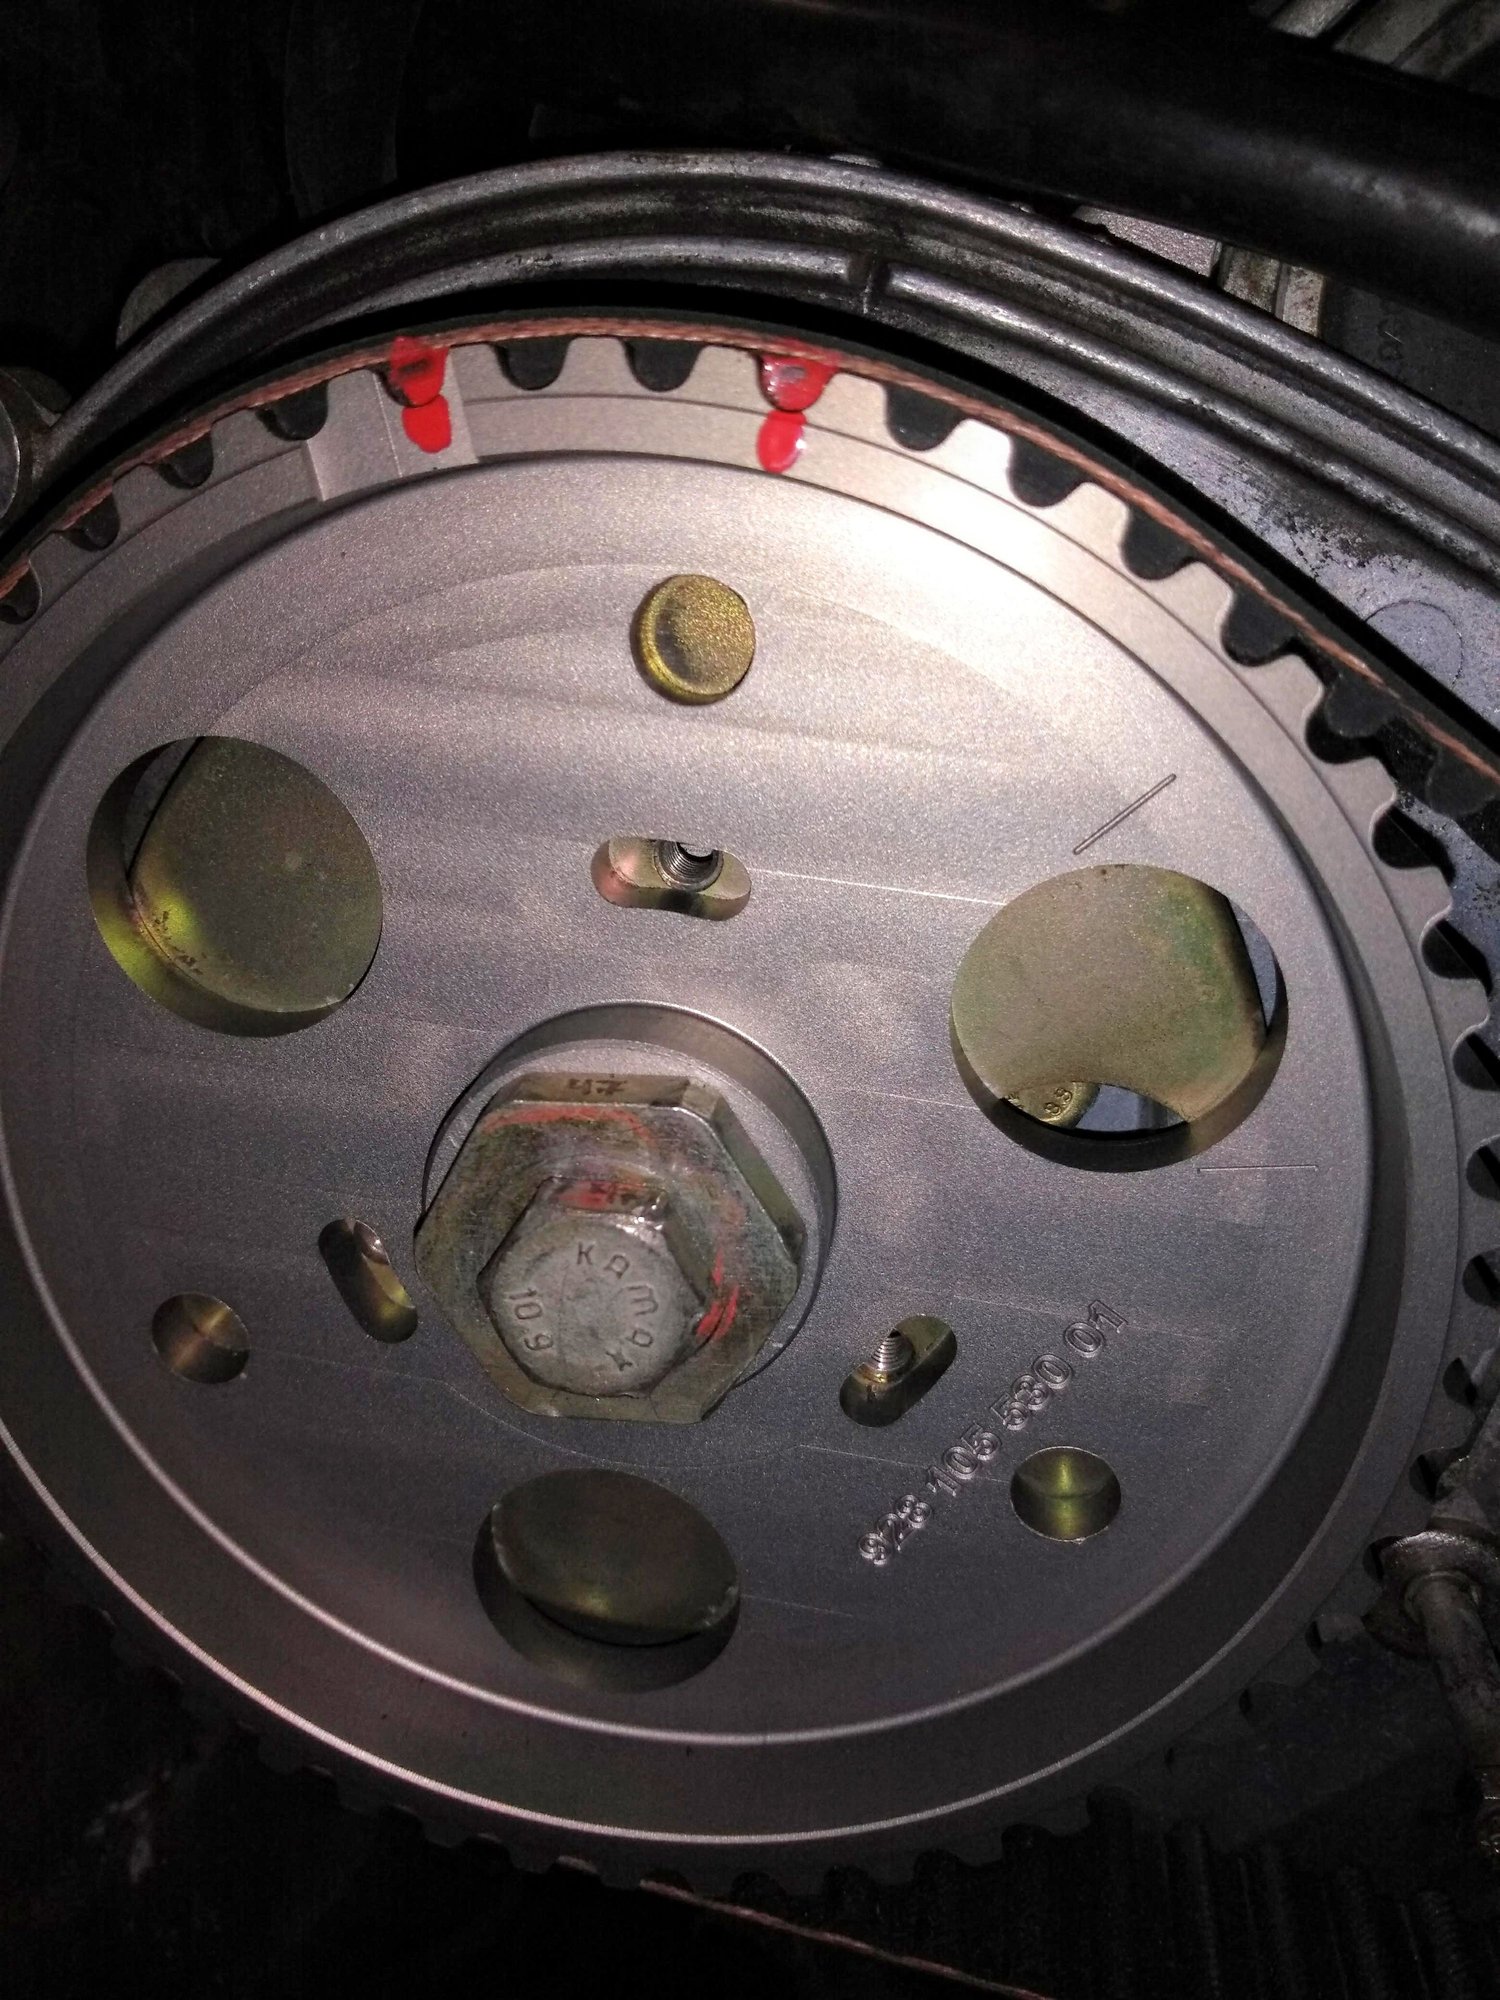
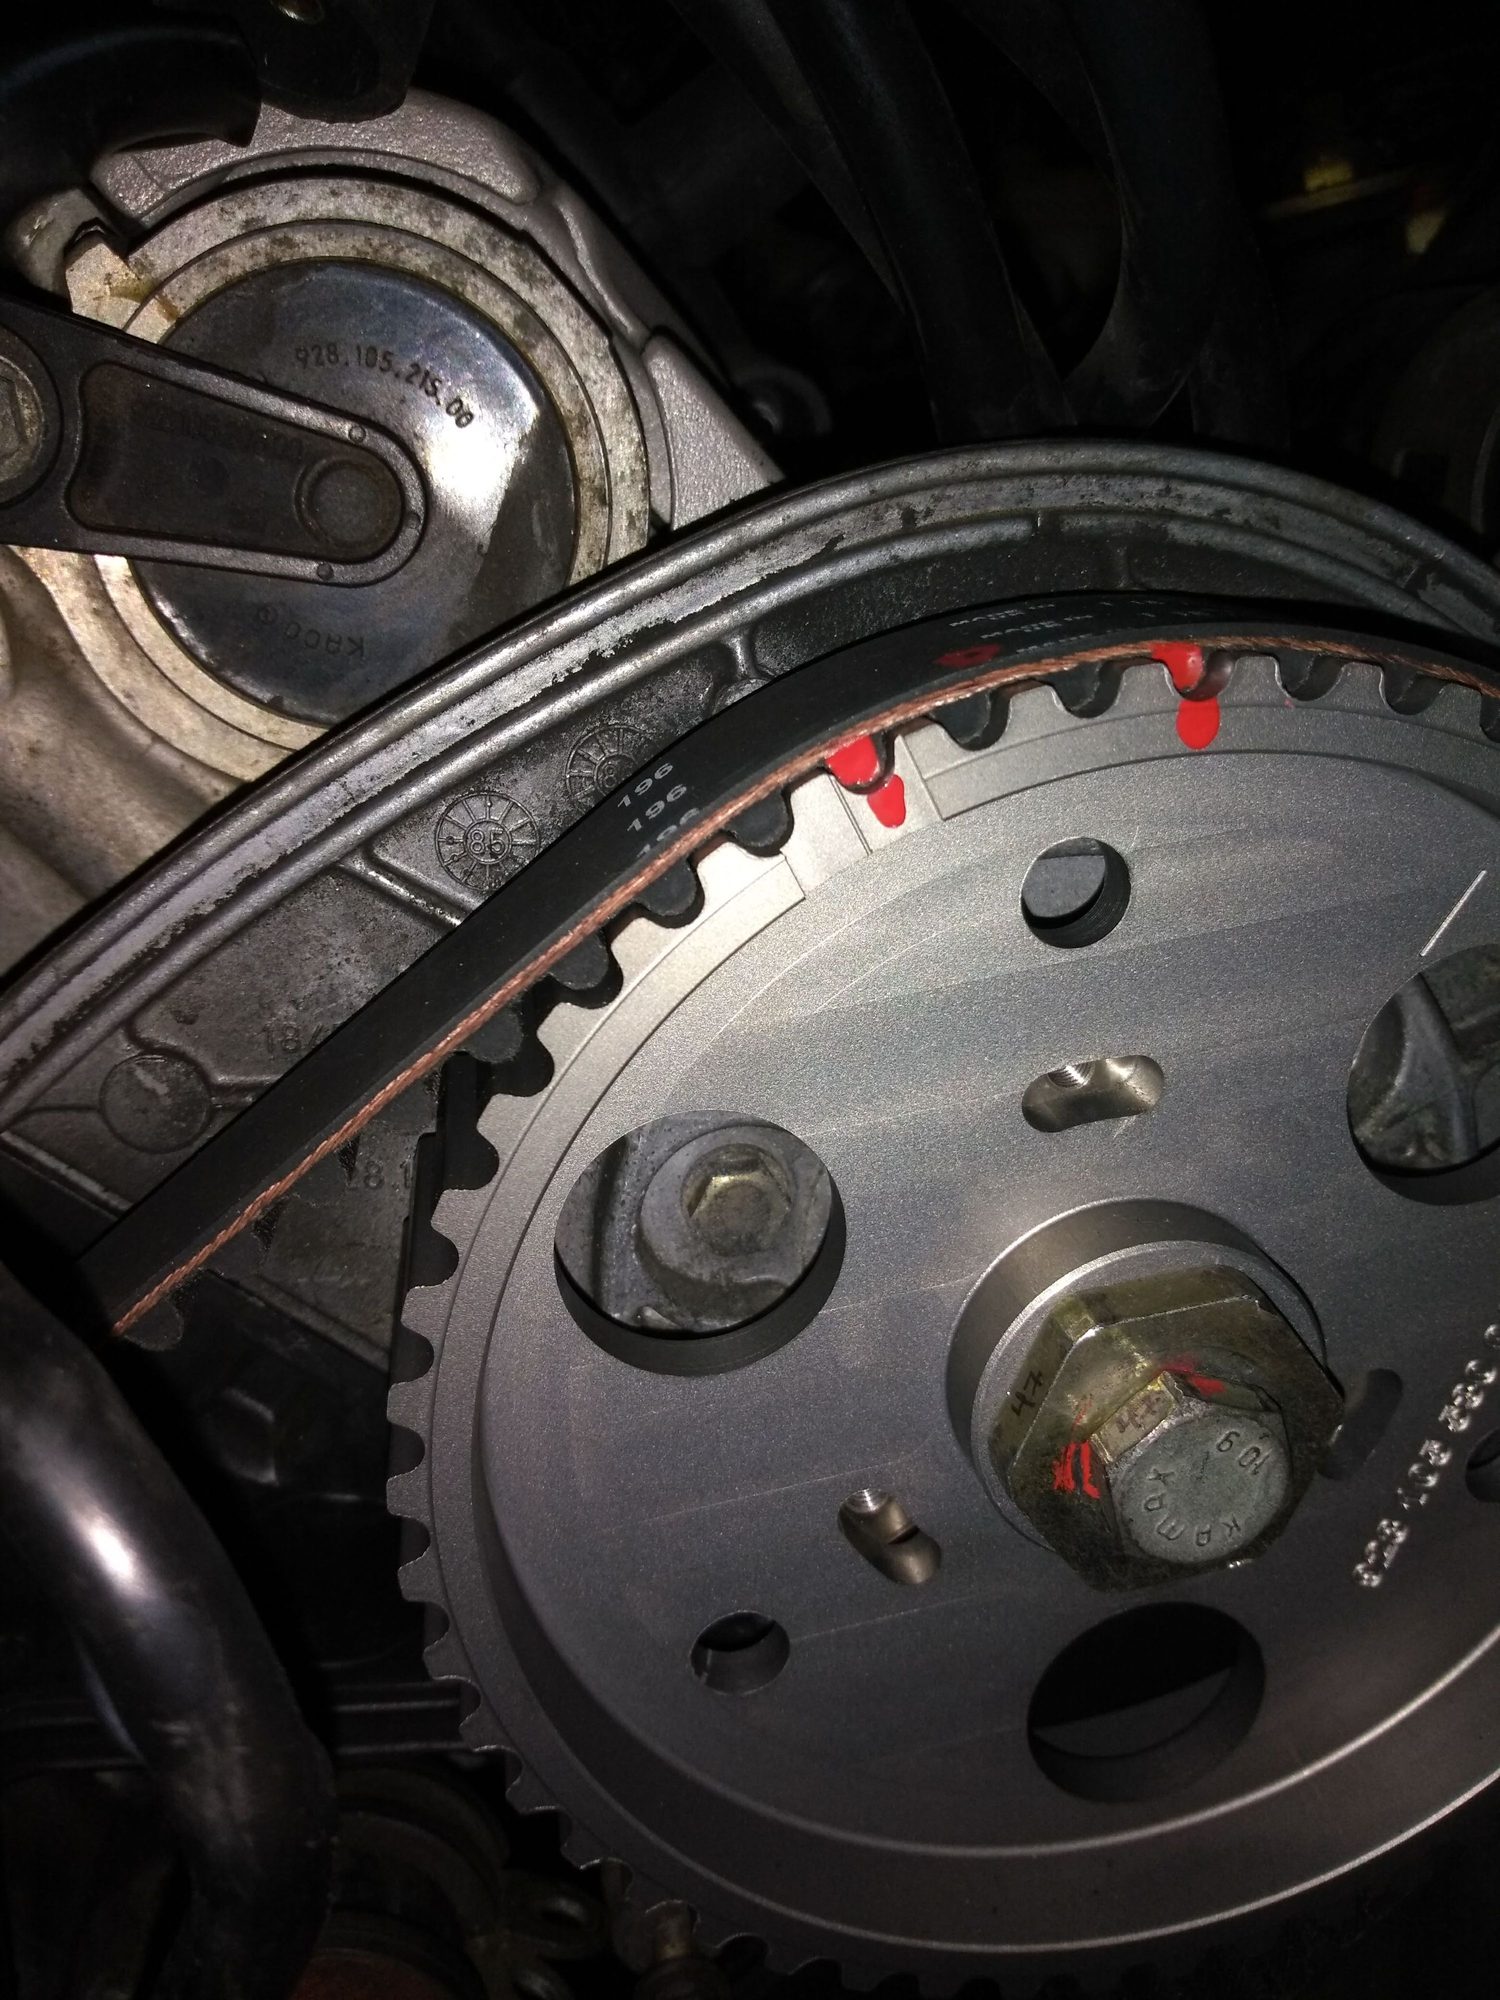
Would you guys mind confirming the crank and cam positions look right before I pull off the crank bolt?
By the way the cover on the driver's side coil is positioned incorrectly- the aperture should be on the underside- if water gets in there it will be trapped- not good!
Thanks Fred! Really appreciate the eagle-eye here.
@Sean - I had all the accessory belts out, the smog pump off. I unbolted the center cover and was able to gently tilt it forward and lift it out. Came out pretty easy. Agree that the oil pump gear is toast; I'm making a list for Roger as we speak.
Thanks,
MIke
Hi All,
Some updates:
- Lots of cleaning...
- Finished the air pump rebuild. The pump needed a new front bearing and some general cleaning. Sounds nice and smooth now. The old front bearing was awful - grinding quite badly.
- Tensioner is off and had no oil left, the boot looked like it was put on incorrectly LOL. With no oil, does this mean the belt tension was at maximum?
- Got the oil pump gear off, and its pretty worn down. See photos below... have a new one on order.
- Nor sure what to do about the cam gears.... they have some of he coating gone, but, they look like they have some life left. Maybe since I'm using a PKT they'll be fine for another few years? I'm not sure here... lots o' wear on the oil pump gear driver's cam gear
I think, based purely on the feedback I've seen given over the years, that you need at least to get your cam gears recoated, if not replaced. Supposedly they wear very quickly once the coating is gone.
Those gears will wear out a new belt very quickly. I've put on a boatload of new belts on gears like that, over the years (for people that can't afford new gears), and the engine will run fine...but the belt and the gears will be absolute trash in 15,000 miles....you will want to take a look at 7500 miles!
if you replace the cam gears, also order a new crank gear. Alhough steel, they also wear and will transfer their wear to the belt and thus to the new gears prematurely. Start over with 4 new gears.
I'm not aware of any actual scientific study that substantiates a longer gear life with a PKT....lots of "Internet Myth" and wishful thinking....no actual mearsured comparision data that an engineer or scientist would want to see.
Thanks guys, you've confirmed my thoughts; its time to replace (maybe re-coat, need to inspect better) the gears.
What I didn't show in the photos was the fine black dust on the surfaces adjacent the cam gears. I can't say 100% that this dust is belt material that has been 'eaten off' by the worn gears, but, I'd bet money that it is. This dust also appears to sparkle with metal (aluminum) - which seems to indicate the belt and gears were eating each other...
I'd speculate the DFL coating (which is a dry film lubricant) wearing off means the belt system is essentially running not properly lubricated.
Now I need to do some research on how to properly remove & replace the cam gears.
Any tips on marking the gears so that they come off and go back on exactly in the same orientation?
Regards,
Mike
The gears have a woodruff key, just transfer your 45 degree timing mark to the new gears and slap them on. If you have not already invest in Ken's 32v timing kit and a bump stick.
As far as coating the old gears it's too late, once the tops of the gears are worn down like yours the profile has changed and will wear the belt regadless.
I'm not aware of any actual scientific study that substantiates a longer gear life with a PKT...
However, there is lots of evidence of what the stock (essentially solid) tensioner does to the cam gears with unmanaged high and low tension, or better said, without active belt management (like you get with a sprung/dampened system used on all modern engines).
Originally Posted by msteiner805
Now I need to do some research on how to properly remove & replace the cam gears.
Any tips on marking the gears so that they come off and go back on exactly in the same orientation?
Easiest is to buy or borrow a PK32V'r (made easier with a PKBumpStick kit). With a new belt it is not as important however as the belt will change timing as it wears in (stretches). You can get away with roughly aligning two of the rotor bolt holes in the center of the gear slots (the third is offset) for the first 1K or so miles.
Once you remove the rotors, you will see that the cam gears have slots...so the gear can move in relationship to the camshaft. Simply take a scribe and mark the slots on the piece behind it....before you loosen the cam gears from the cams. Install the new cam gears/recoated cam gears so the slotted holes line up with the marks you made. The cam timing will be really close. You can certainly check it at 1000 miles, but realize that the specification called out in the Workshop Manual is for a new engine, without belt stretch (This is the specification that Porsche used when they were assembling the engines. This specification took into account belt stretch and the seating in of the cam gears onto the belt.) If you set it at 1,000 miles, you will need to "invent" a new specification.
Thank you everyone for the guidance so far, very helpful!
Some updates over the past few days:
- Cleaning LOL. Even with the time I already spent, the front of the engine isn't anywhere near what Dwayne's write-up is. Embarrassing...
- I purchased and installed some new cam gears (not Porsche factory parts - we'll see how these non-factory parts perform going forward!). My plan is to get my factory gears-coated in the meantime to see how they turn-out. I did my best to center them and it looks close enough. What I'm thinking is running for 1000 miles (as mentioned in the PKT-S install document, and, then redoing the timing with the bump stick kit).
- Installed new steel oil pump gear.
- Replaced oil pump seals.
- Replaced the bearing in the crank roller.
- Decided to leave the water-pump in place. I listened to it via stethoscope before I started the job and heard smooth operation so I'm deciding to leave it alone. No leaks, no noises, and I periodically inspect so I should be OK here.
- Decided to not replace the crank gear. I put a straight edge on the ridges and no-daylight. I think its got some good life left.
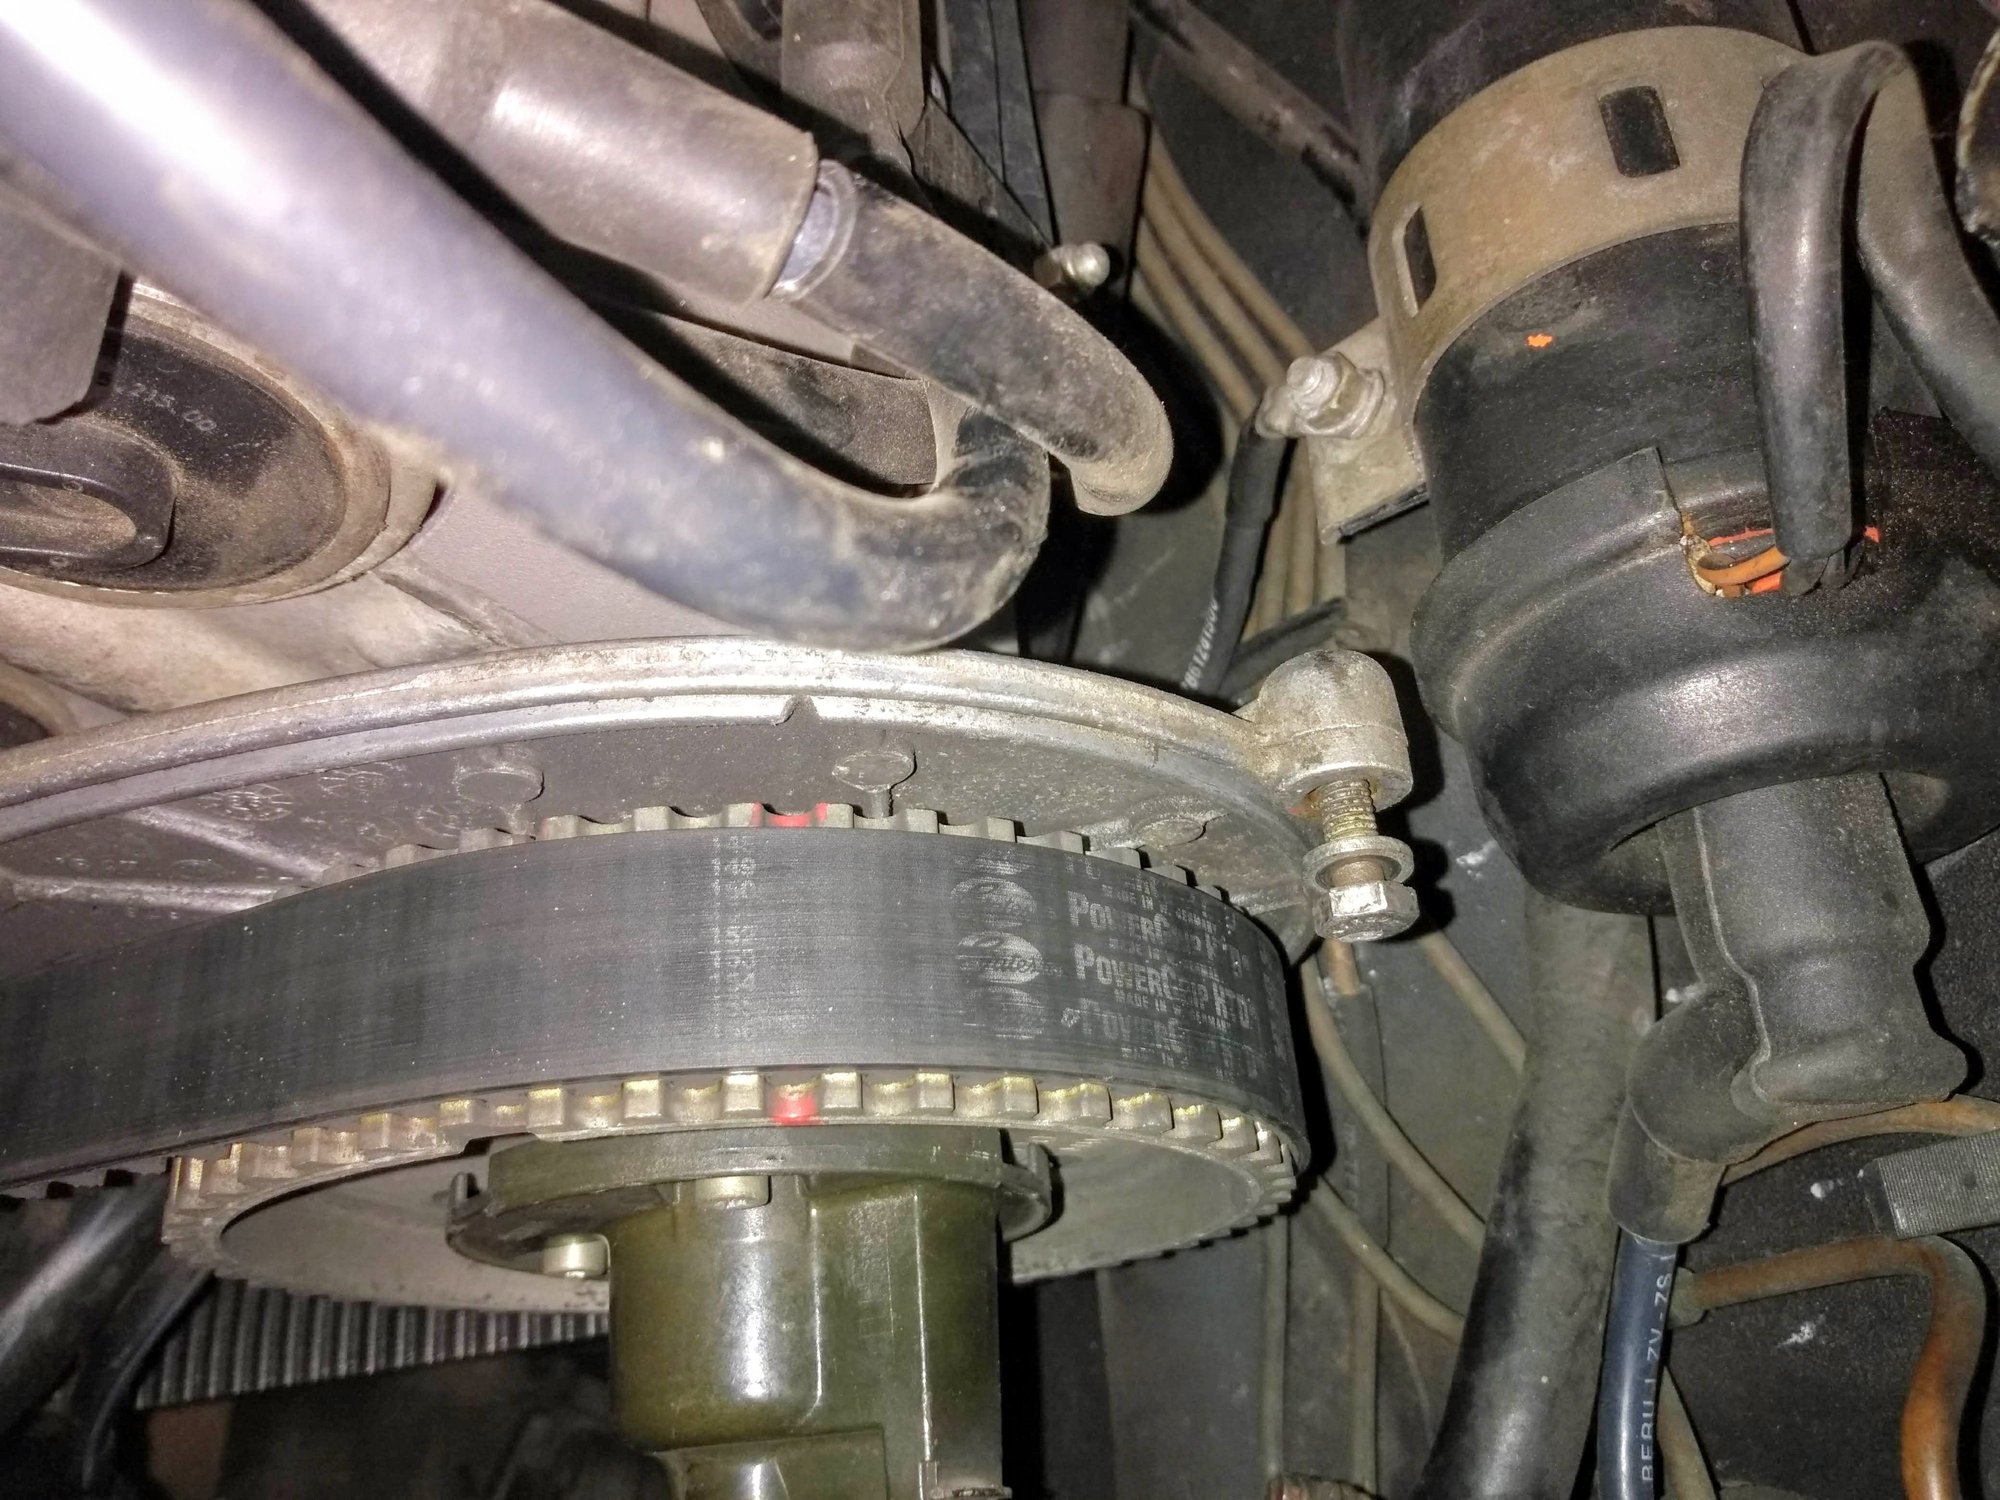
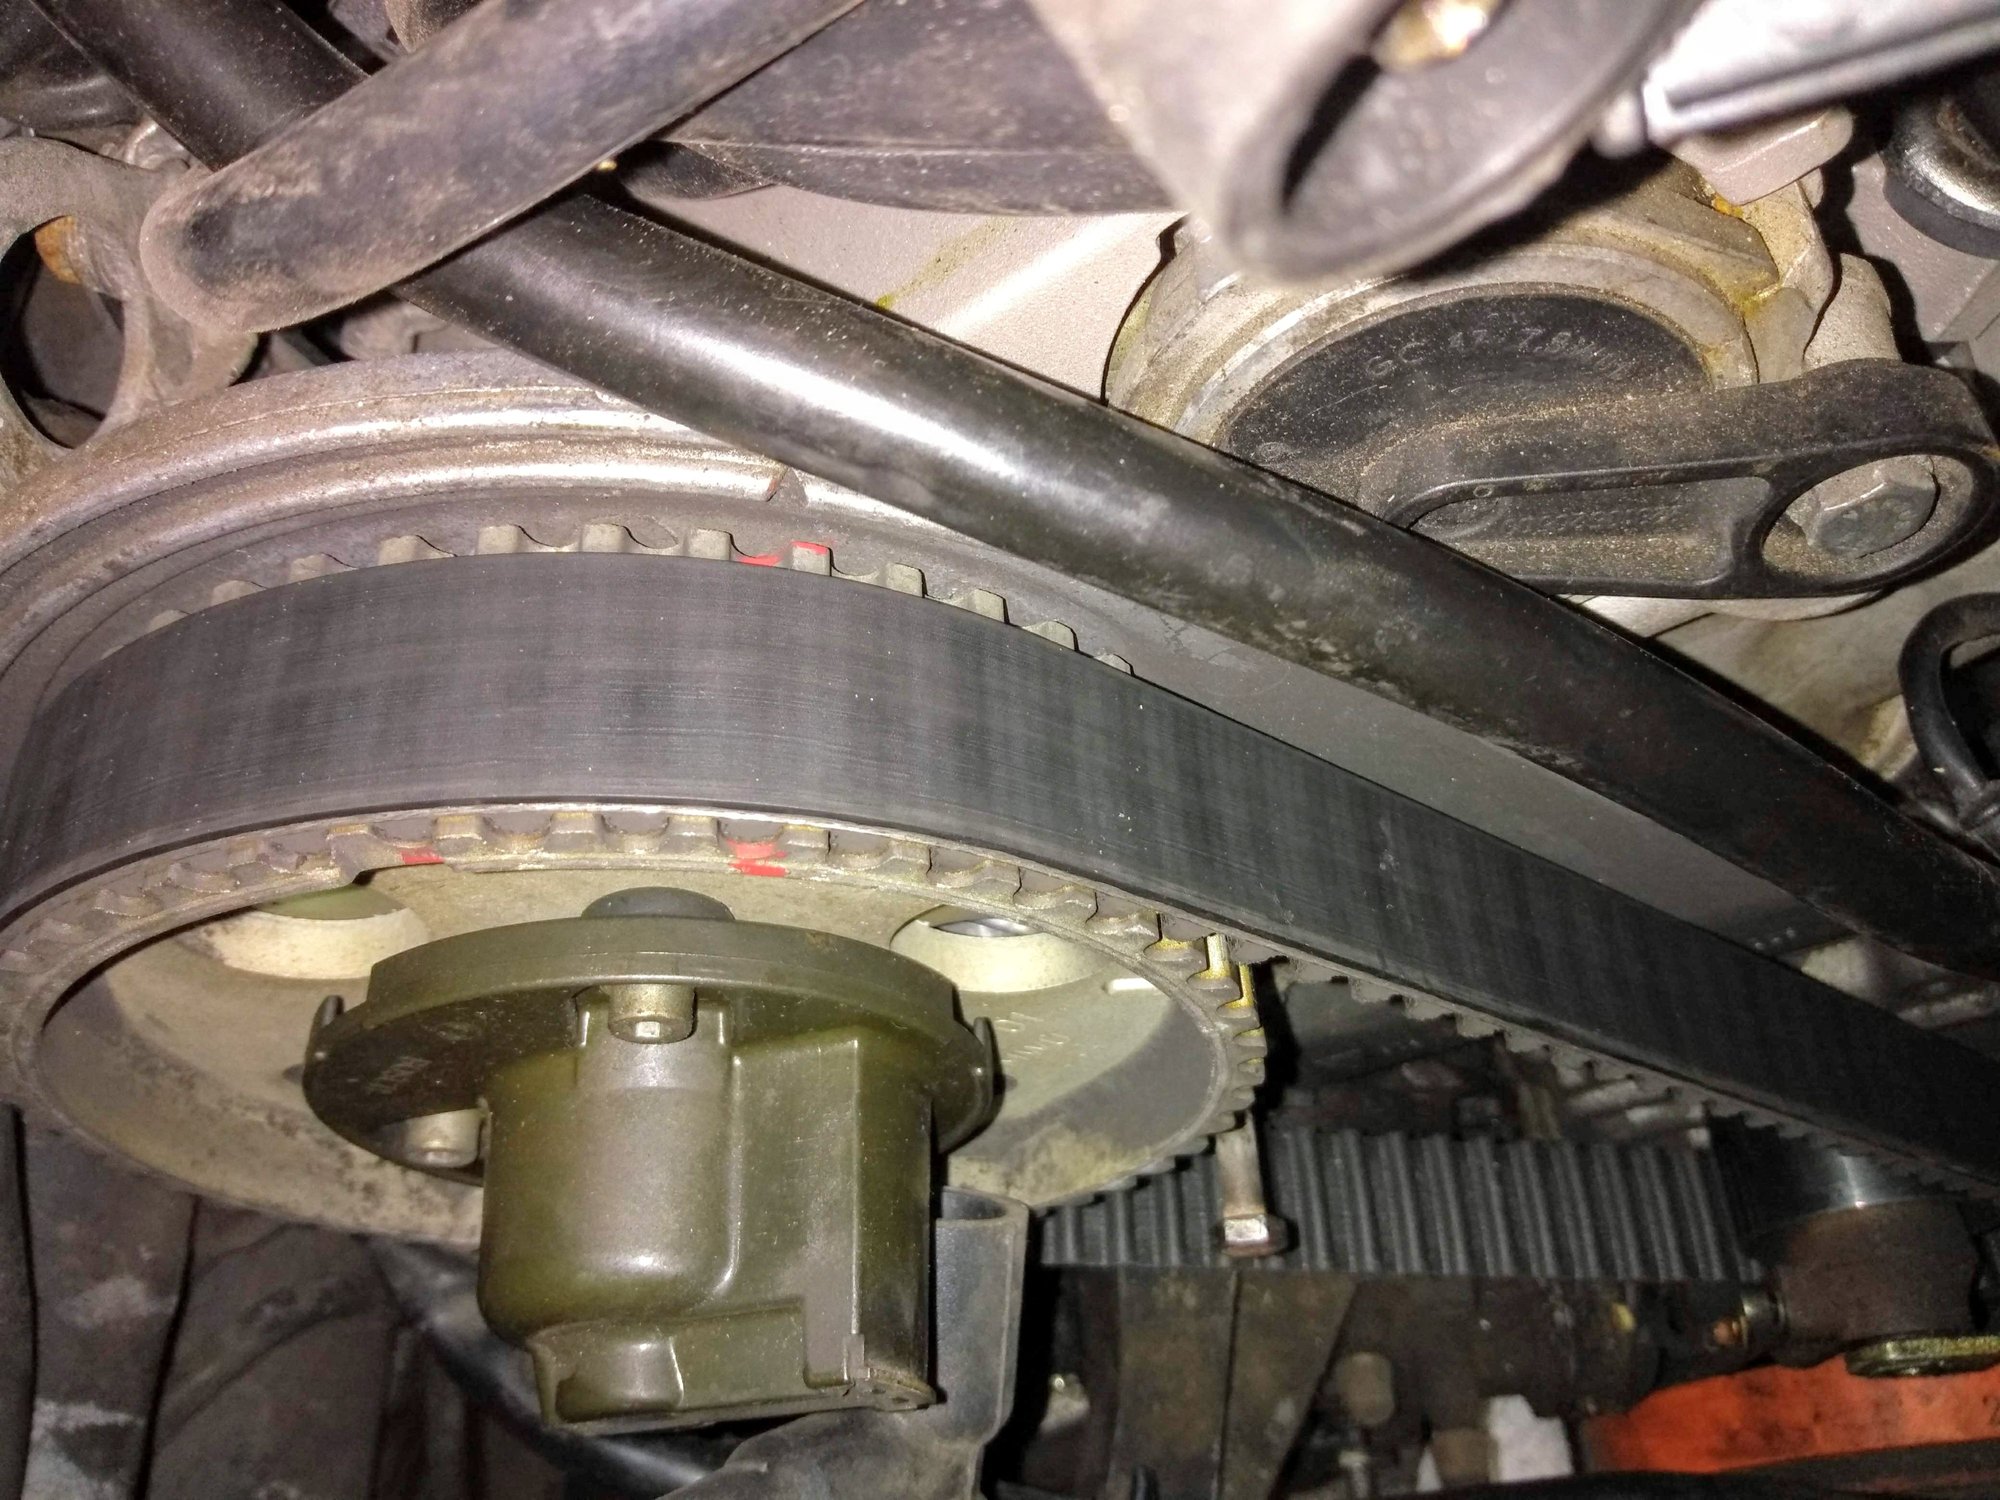
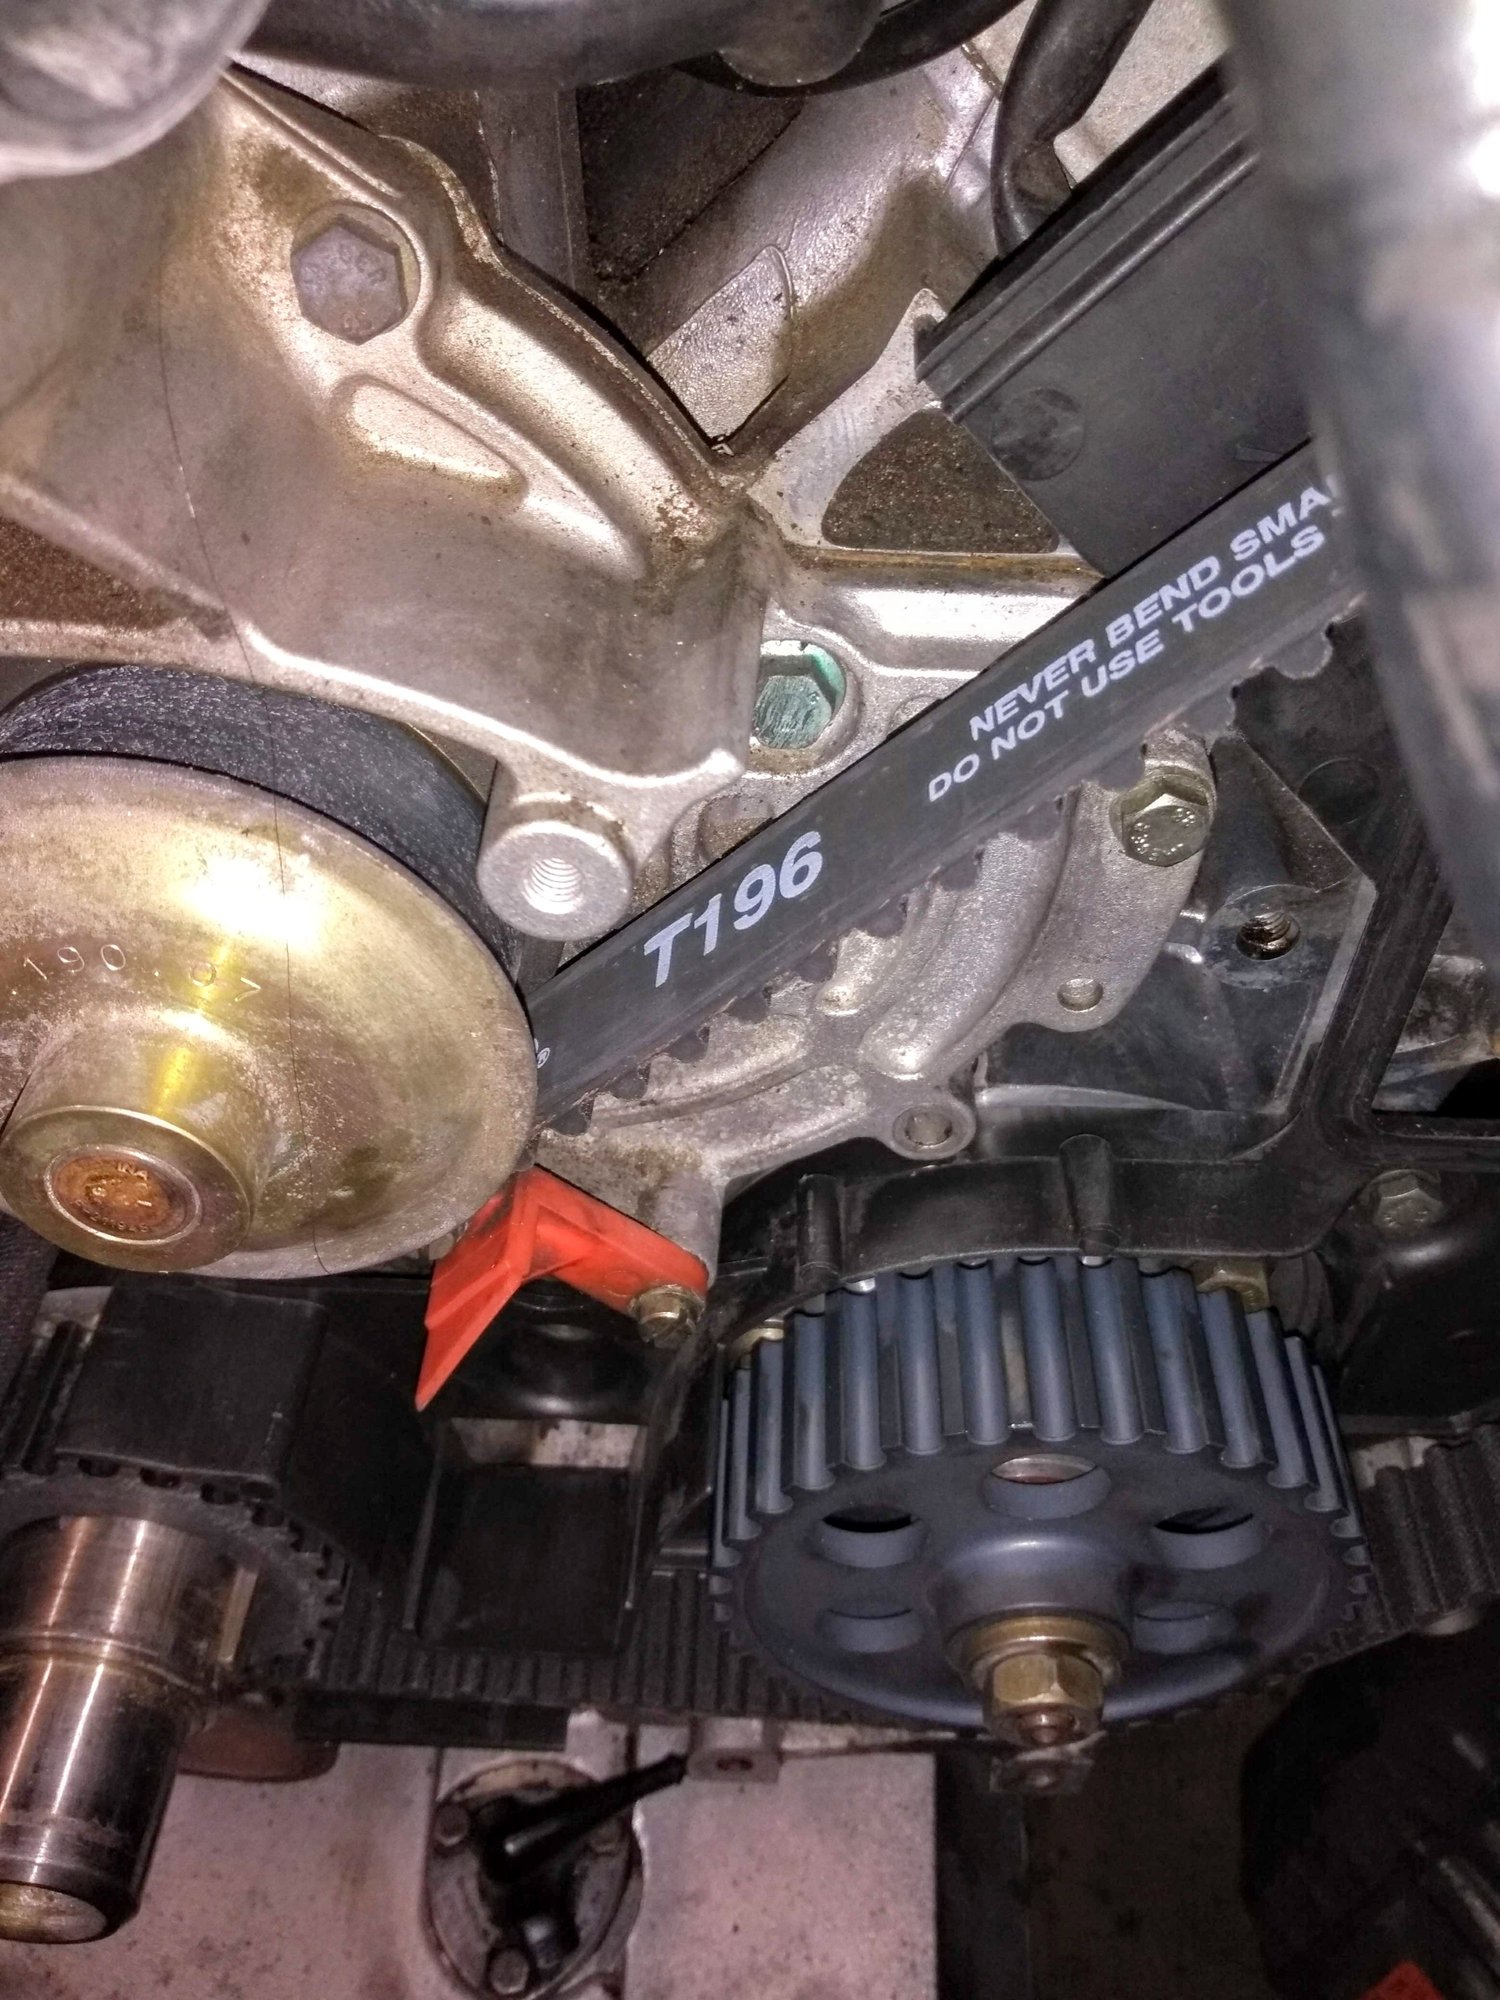
- Replaced the timing belt. I marked the old belt at the crank and at the cam gears and then transferred the marks to the new belt. This helped a lot in getting it aligned the same way the old one came off.
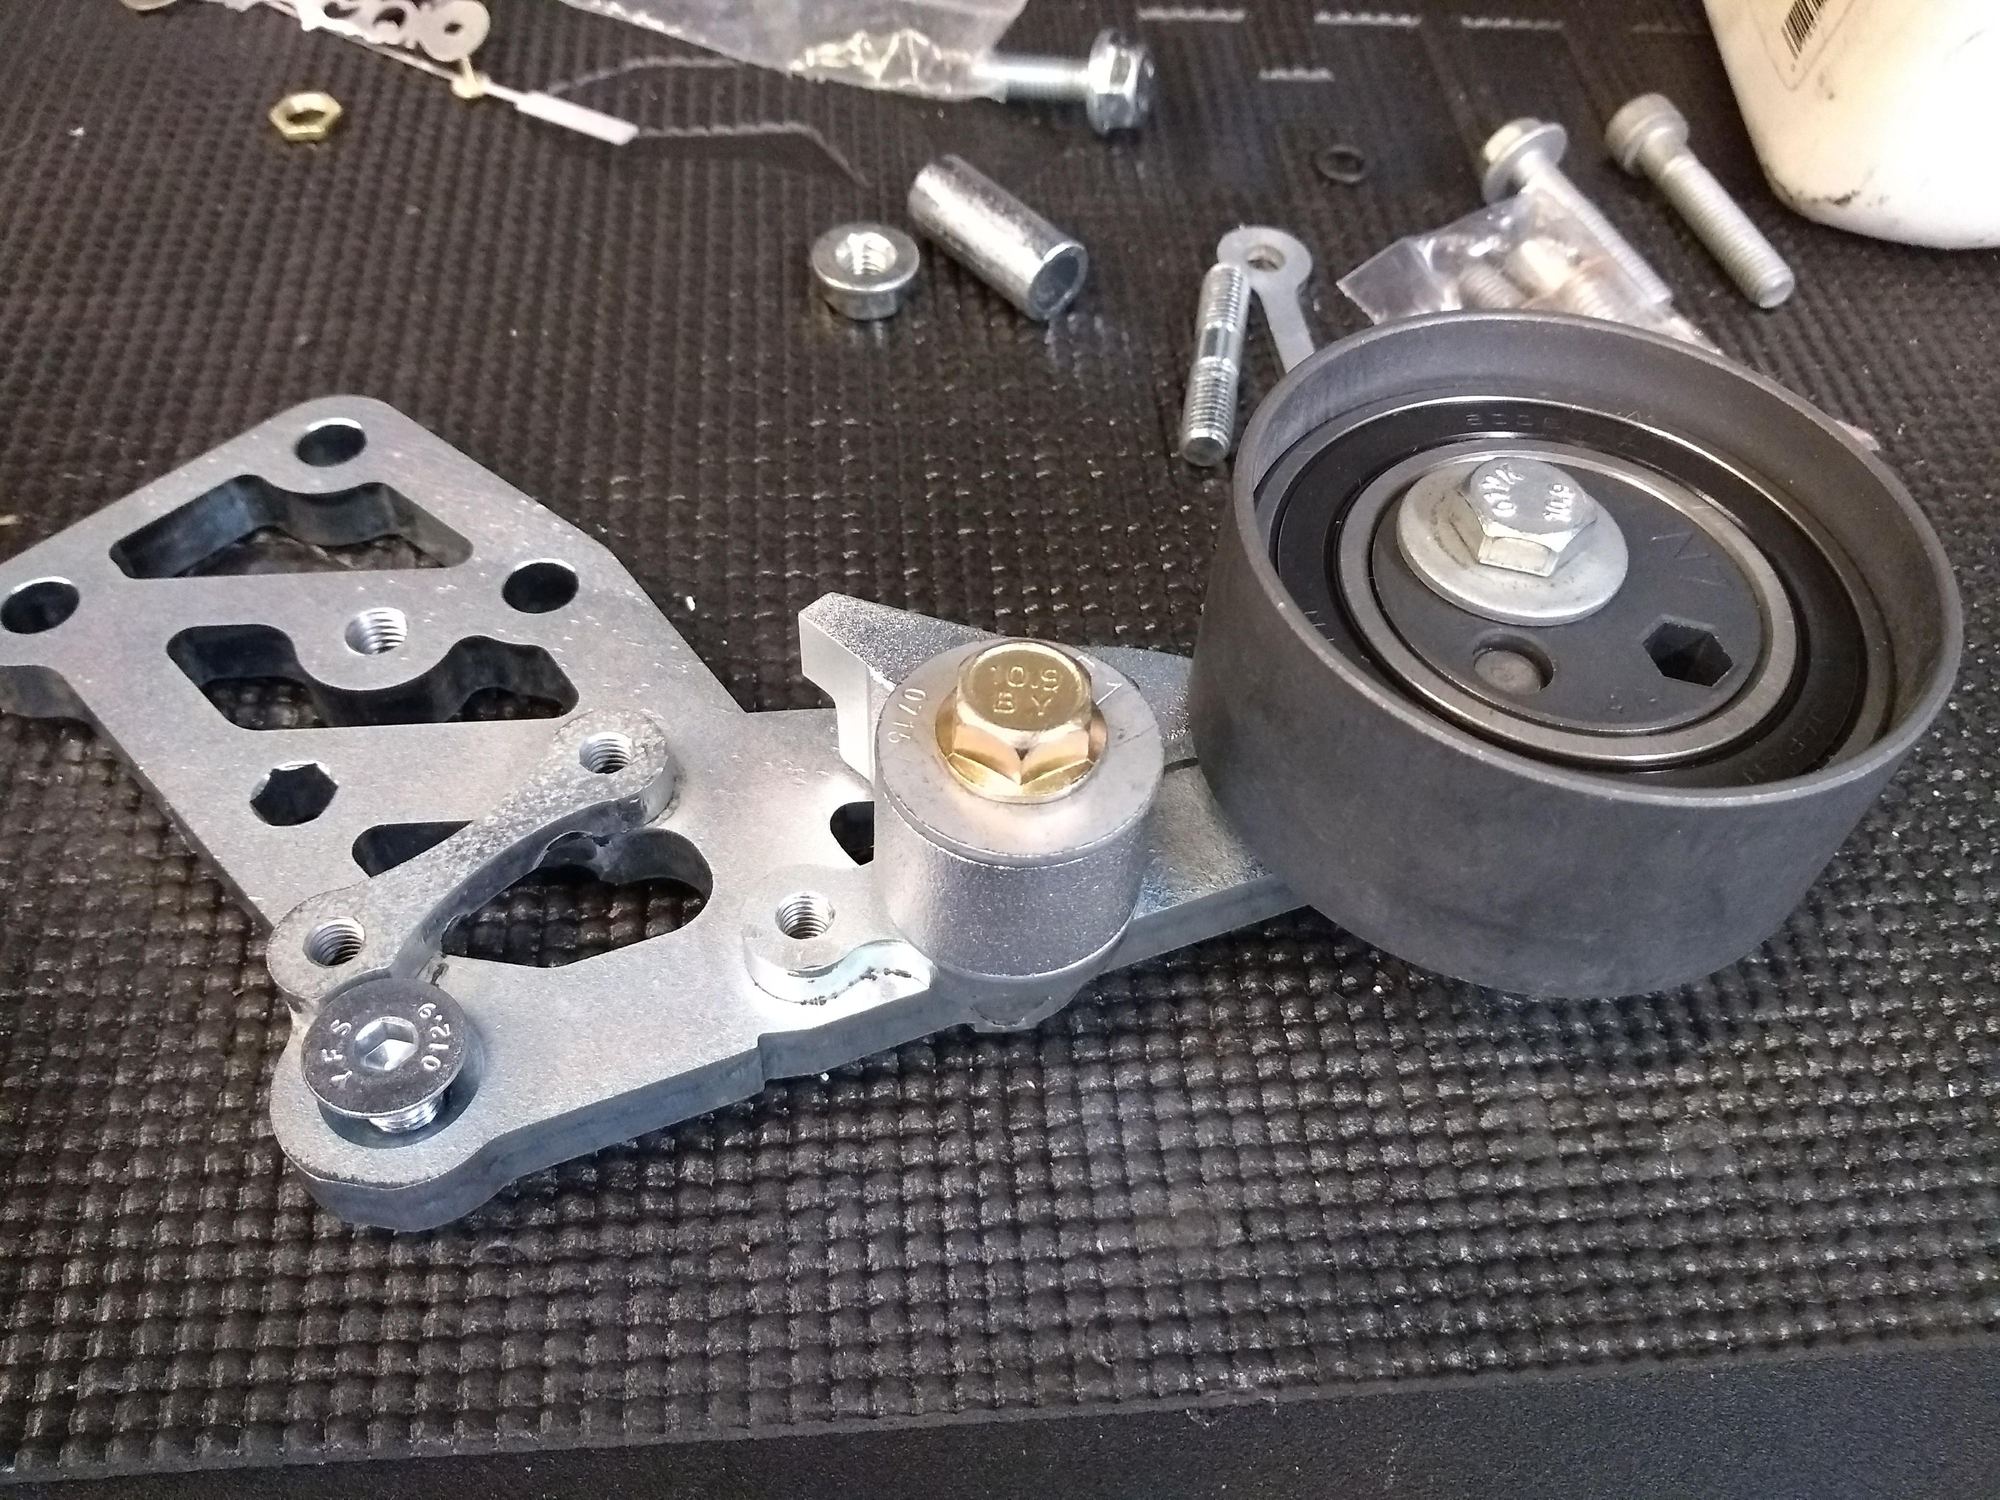
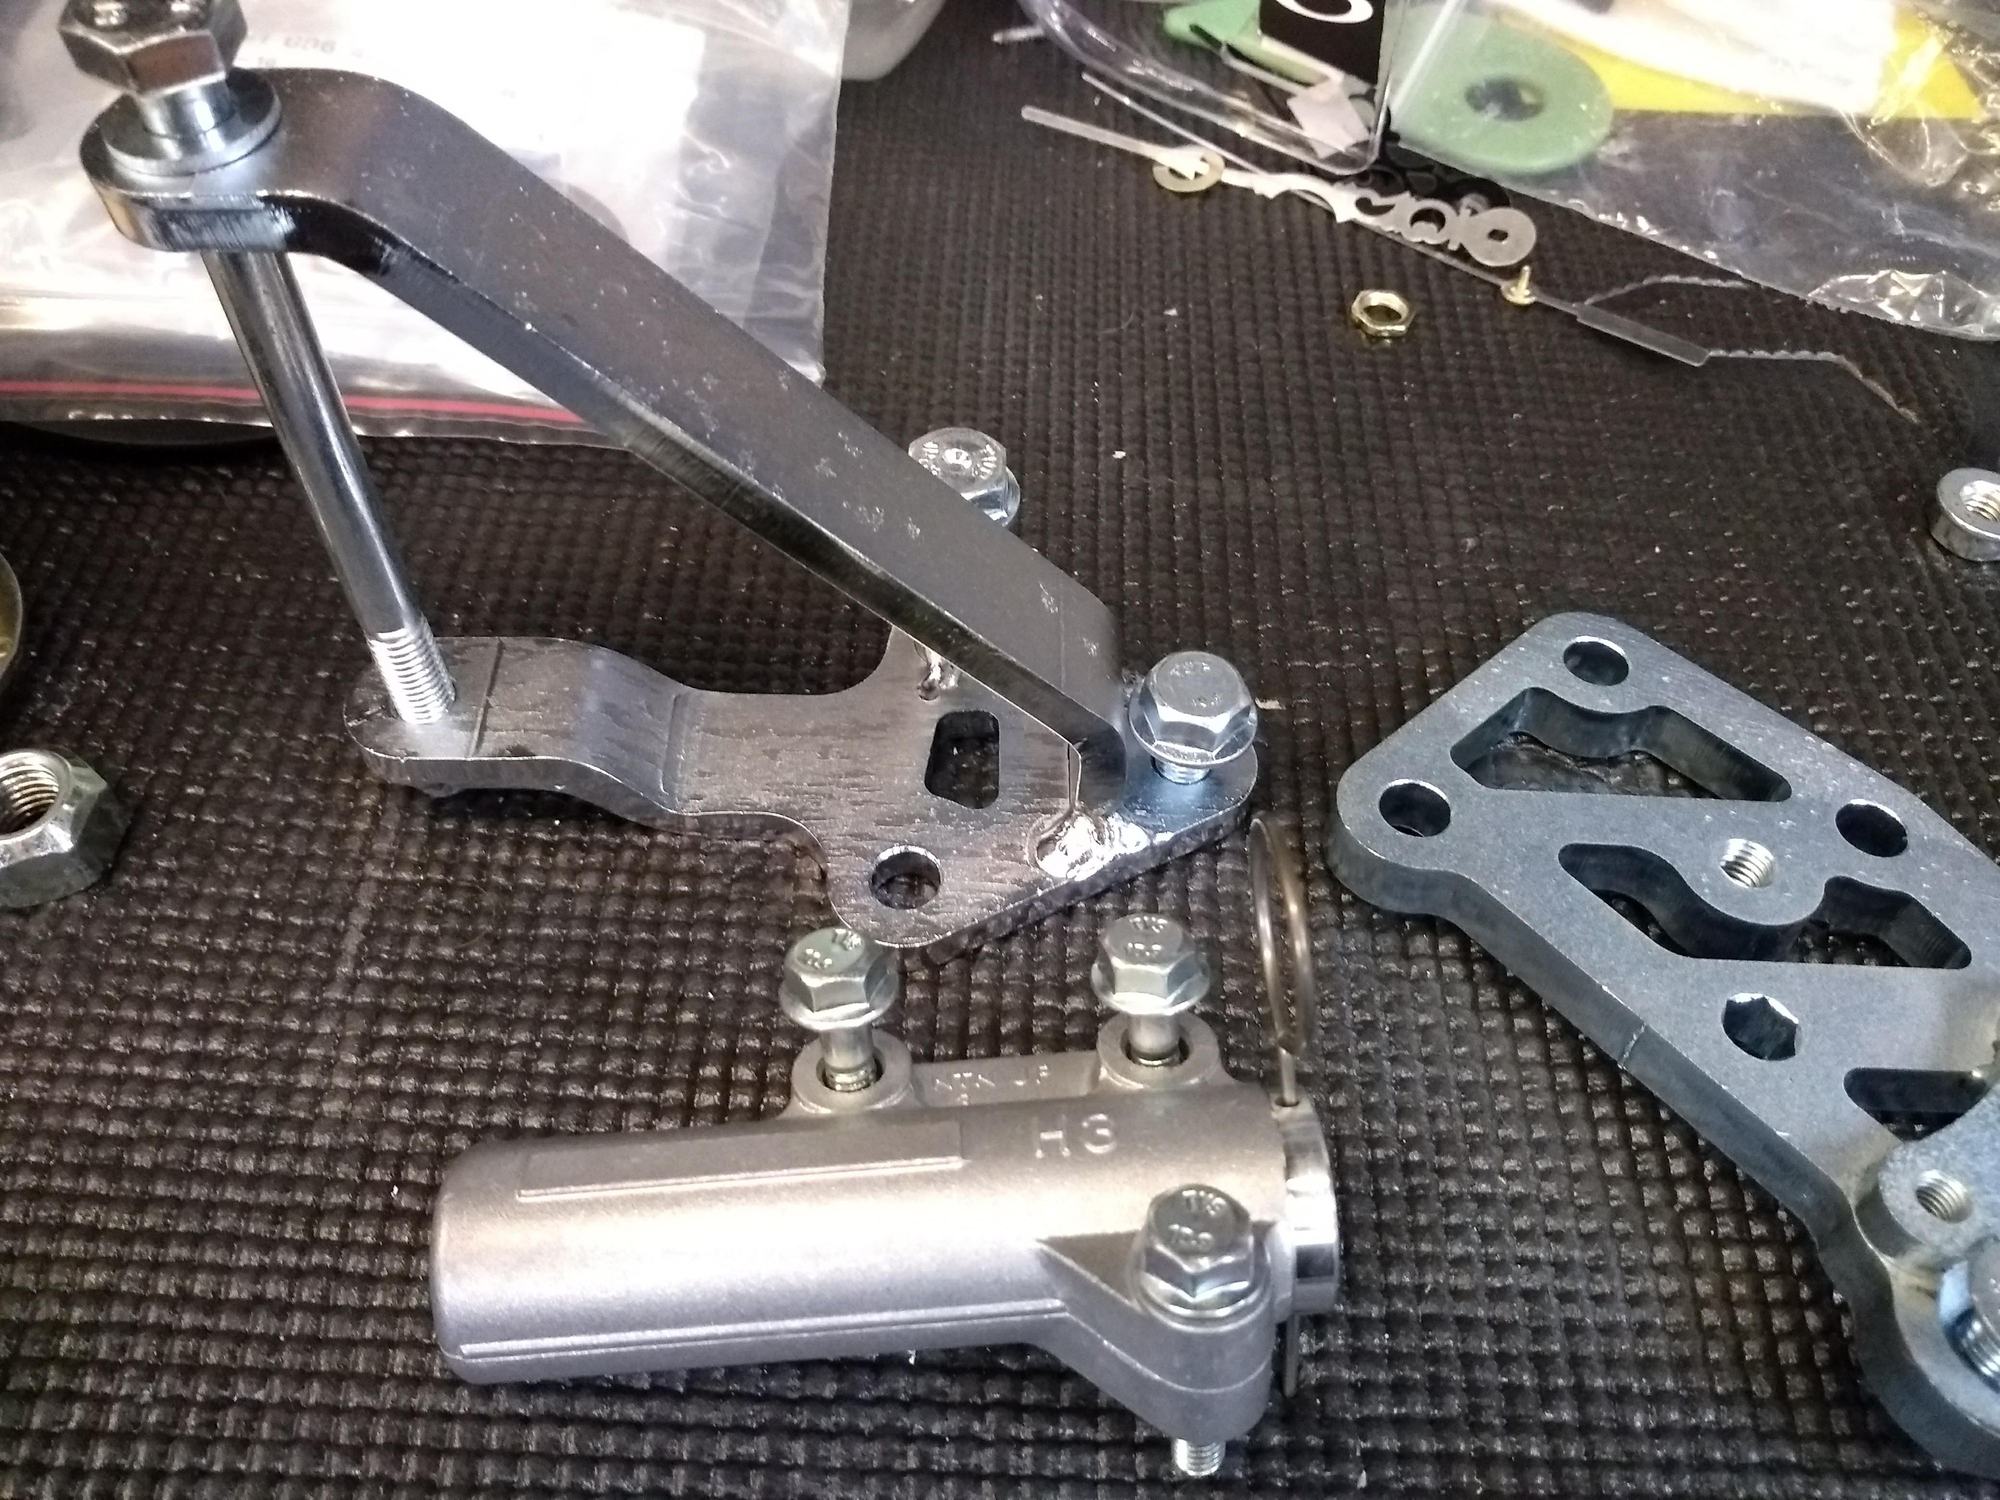
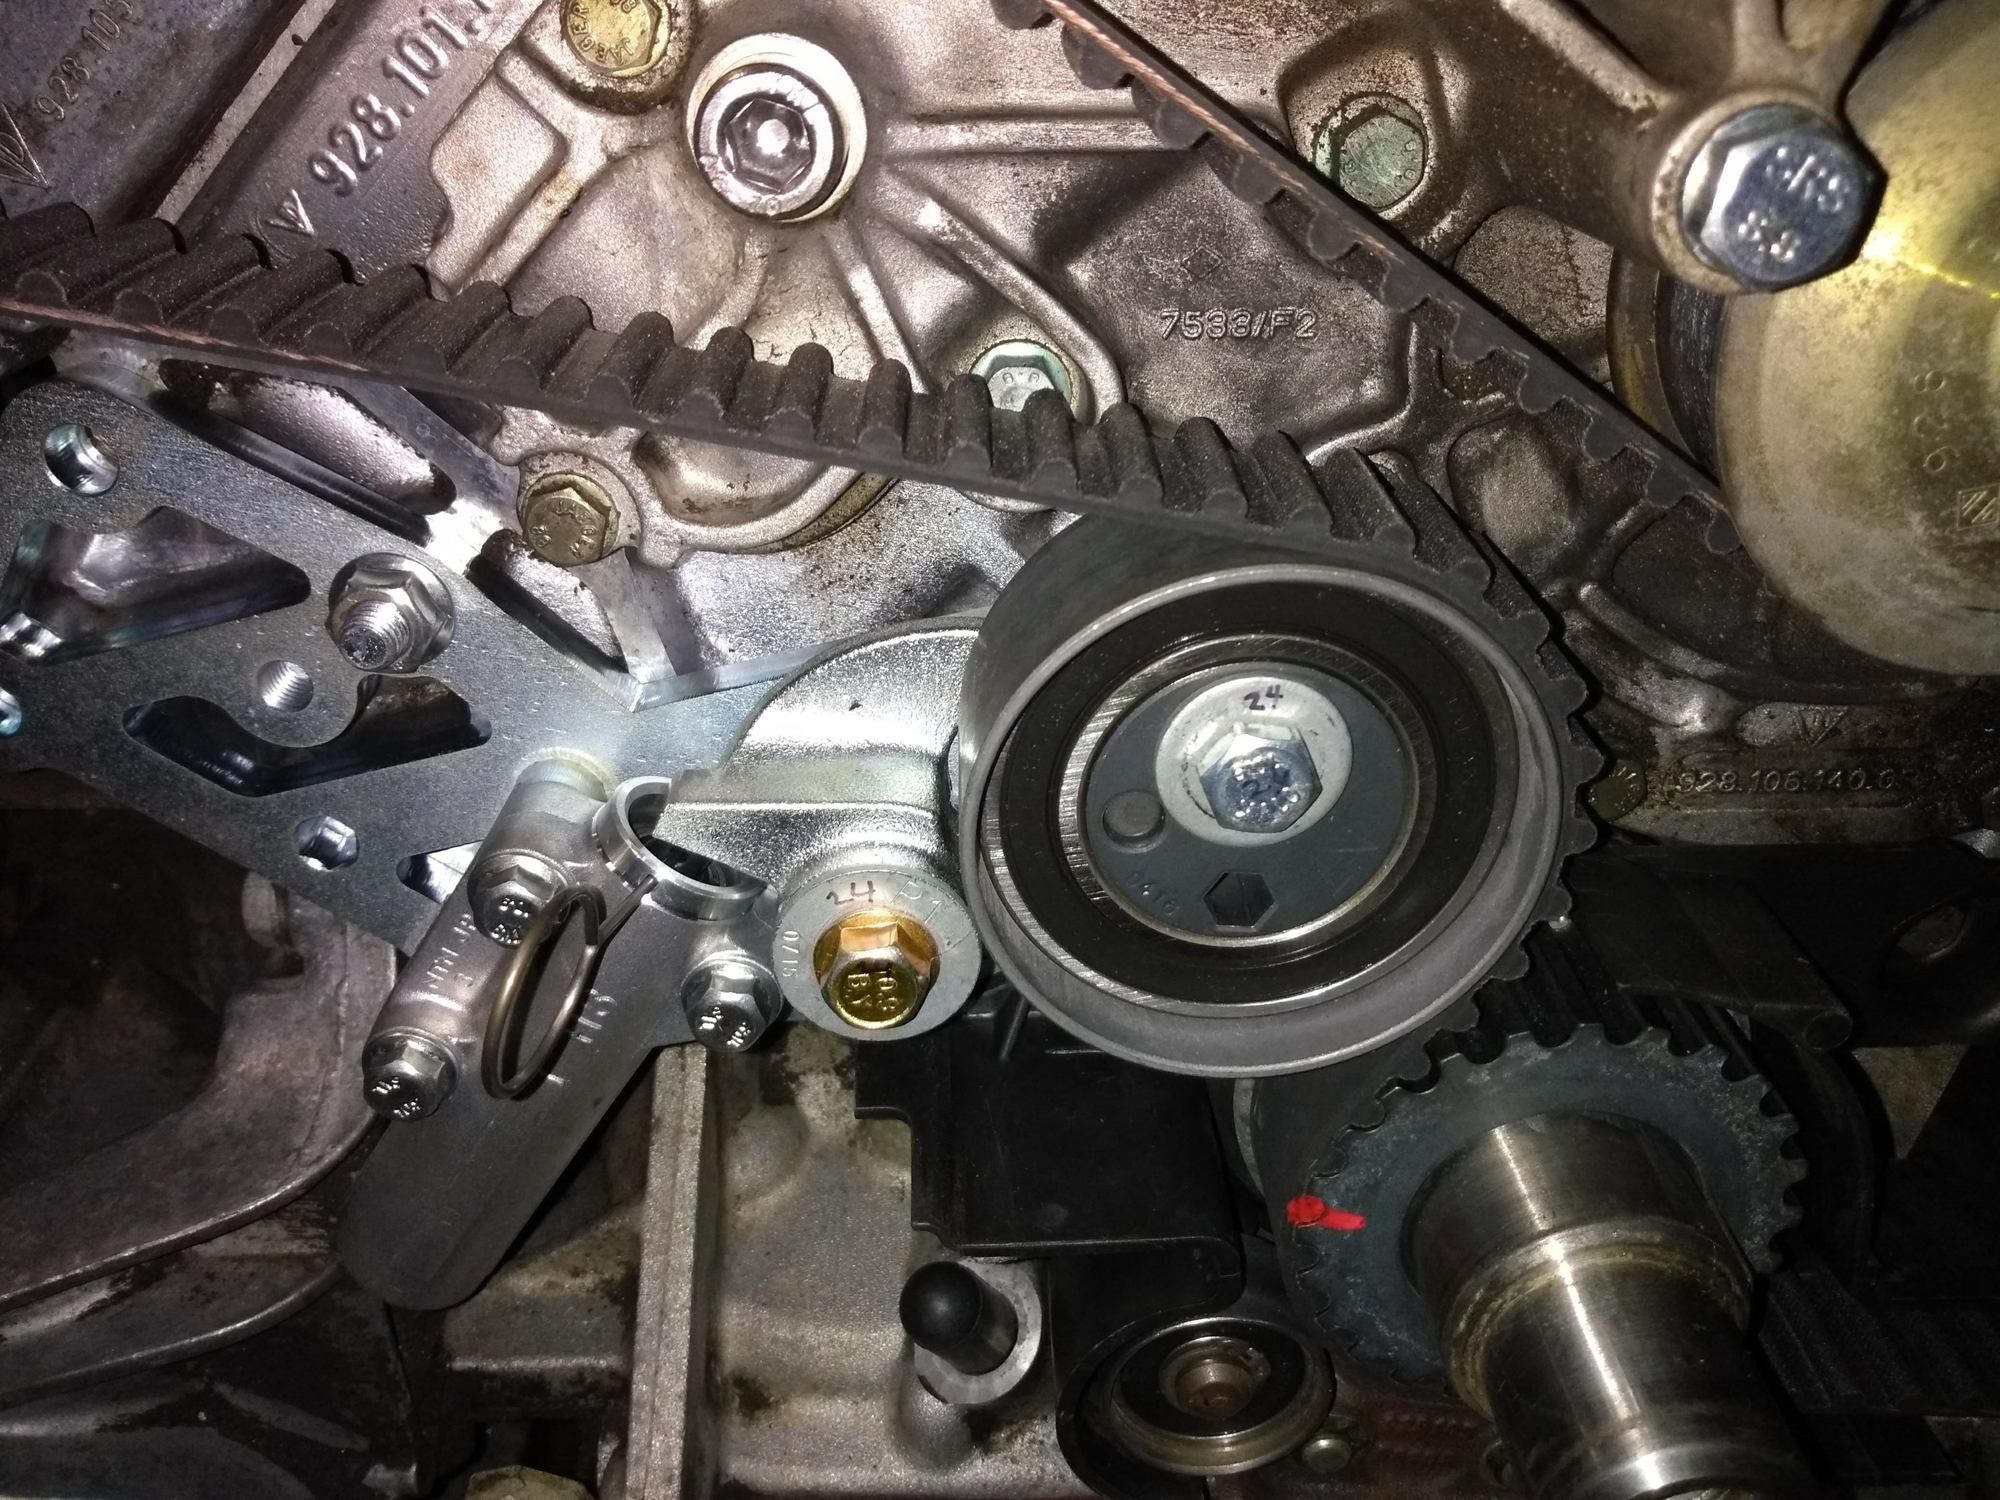
- Partially installed the PKT-S. Couple of questions here:
1) This is a smog-pump car, I'm curious what the next steps are to install the smog pump.
2) Does everything look right to pull the pin? I'm going to check everything again tonight and install the vibration damper and remove the lock and turn the engine to check the new tensioner.


 06-05-2018, 03:32 PM

 ) be doing wrong.