When you click on links to various merchants on this site and make a purchase, this can result in this site earning a commission. Affiliate programs and affiliations include, but are not limited to, the eBay Partner Network.
Centering the gears does not mean that cam timing is correct. Not even close I am afraid.
I would have recommended replacing the waterpump regardless of how it felt.
Thanks Lizard928,
My understanding is that I should run the car for 1000 miles or so and then do the timing with the tool, right?
I thought that doing it now would mean I have to redo it anyway...
Does everything look ok to do a some engine turns with the pin removed at this point?
Thanks Lizard928,
My understanding is that I should run the car for 1000 miles or so and then do the timing with the tool, right?
I thought that doing it now would mean I have to redo it anyway...
Does everything look ok to do a some engine turns with the pin removed at this point?
Mike
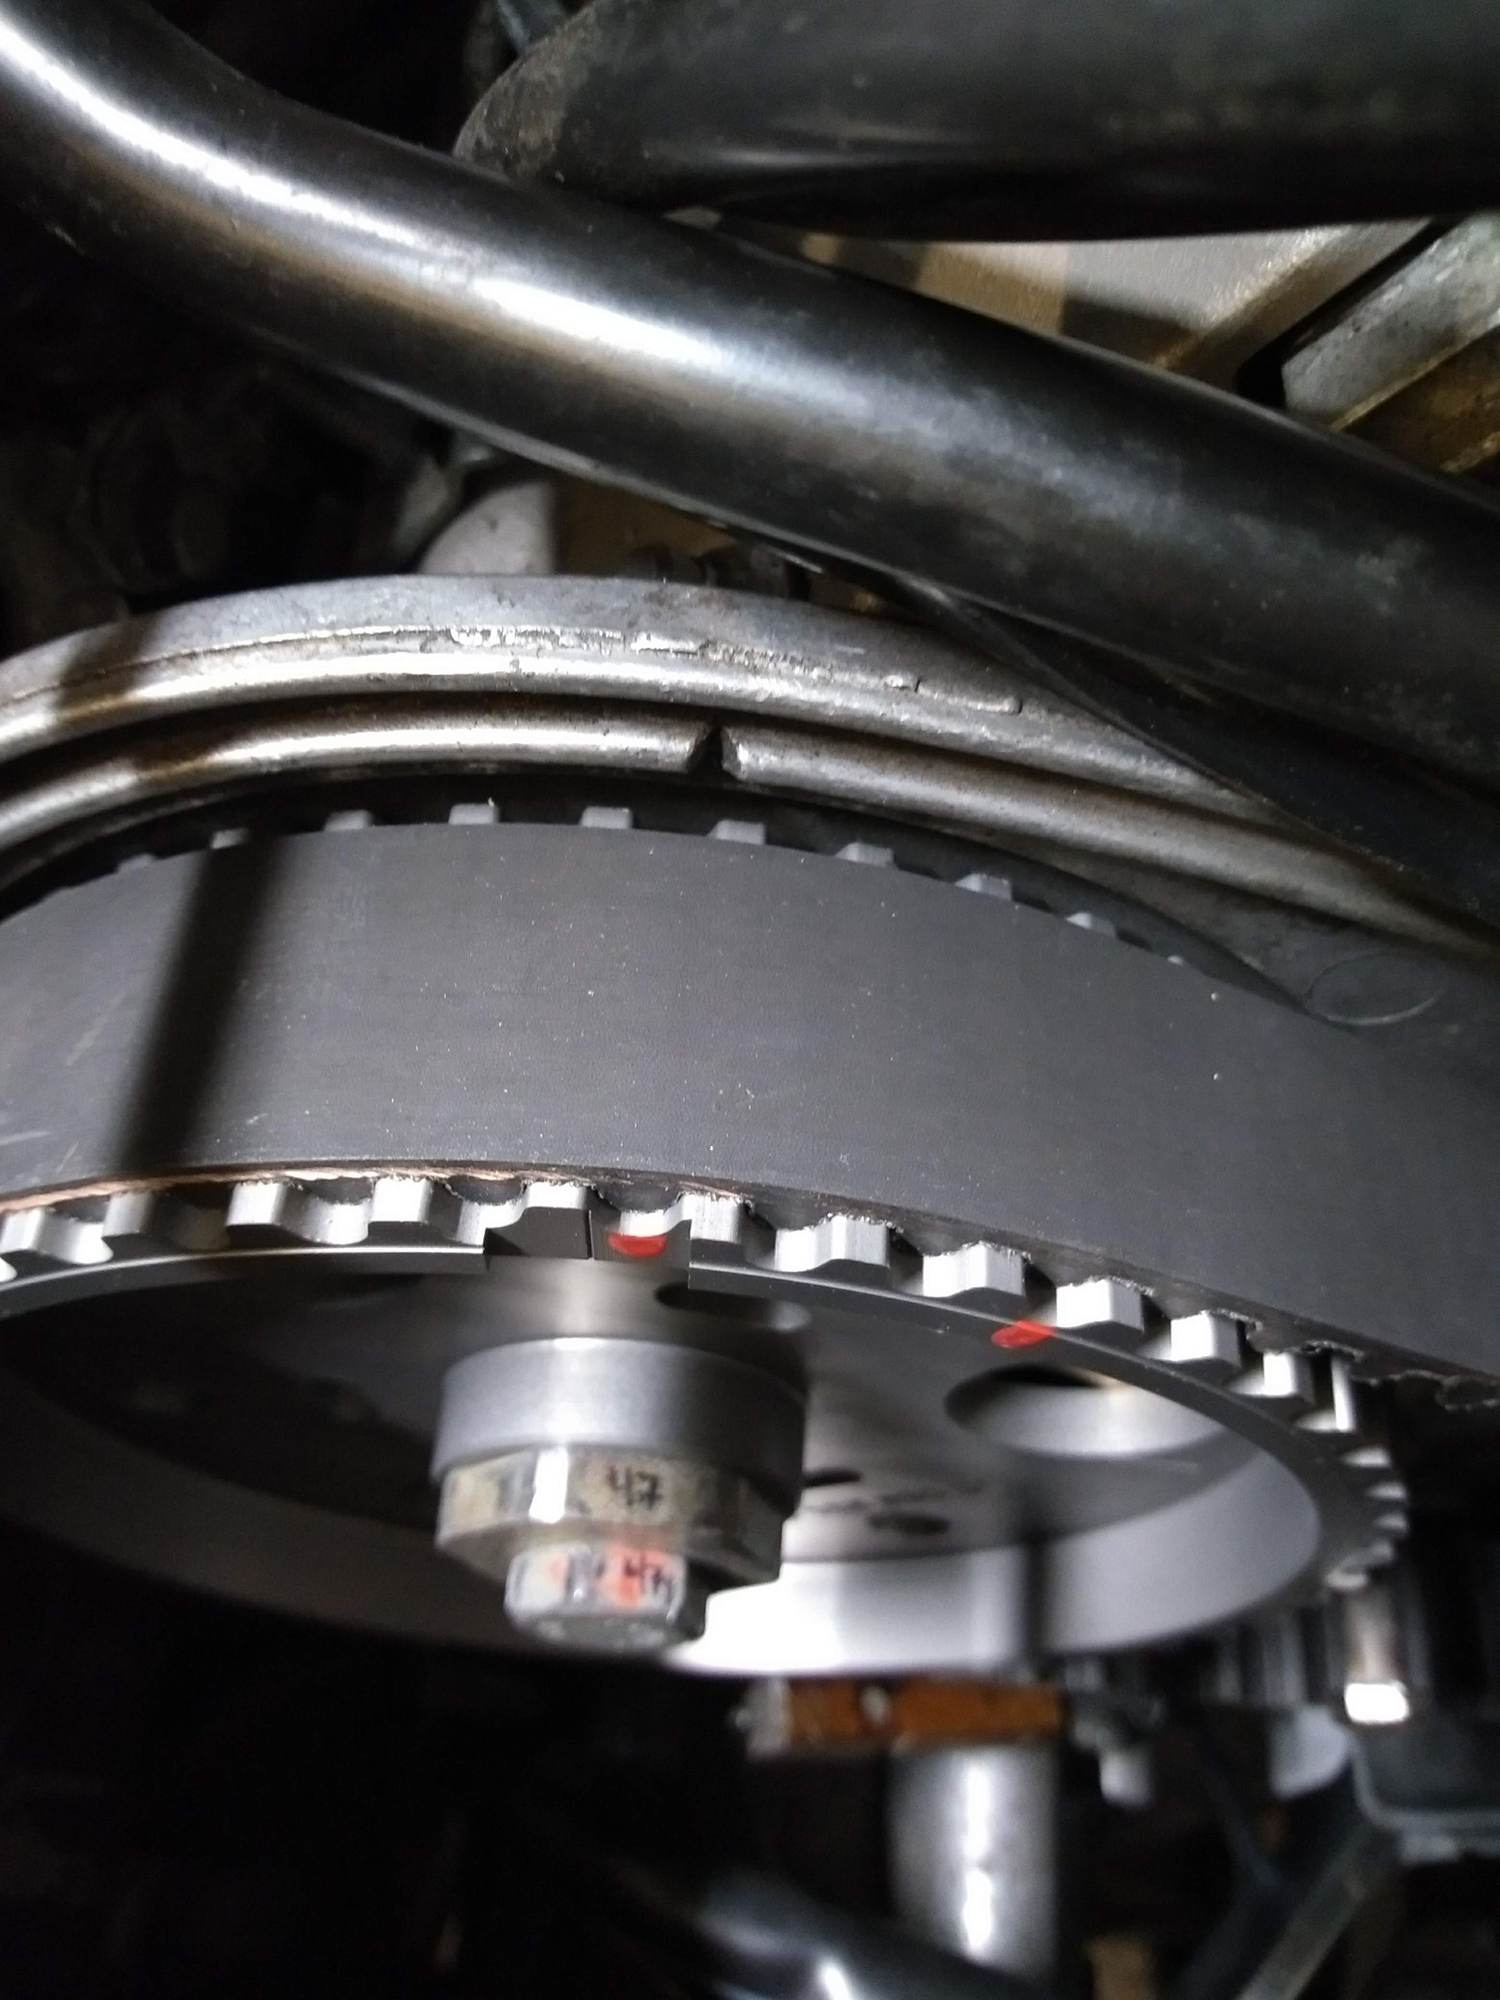
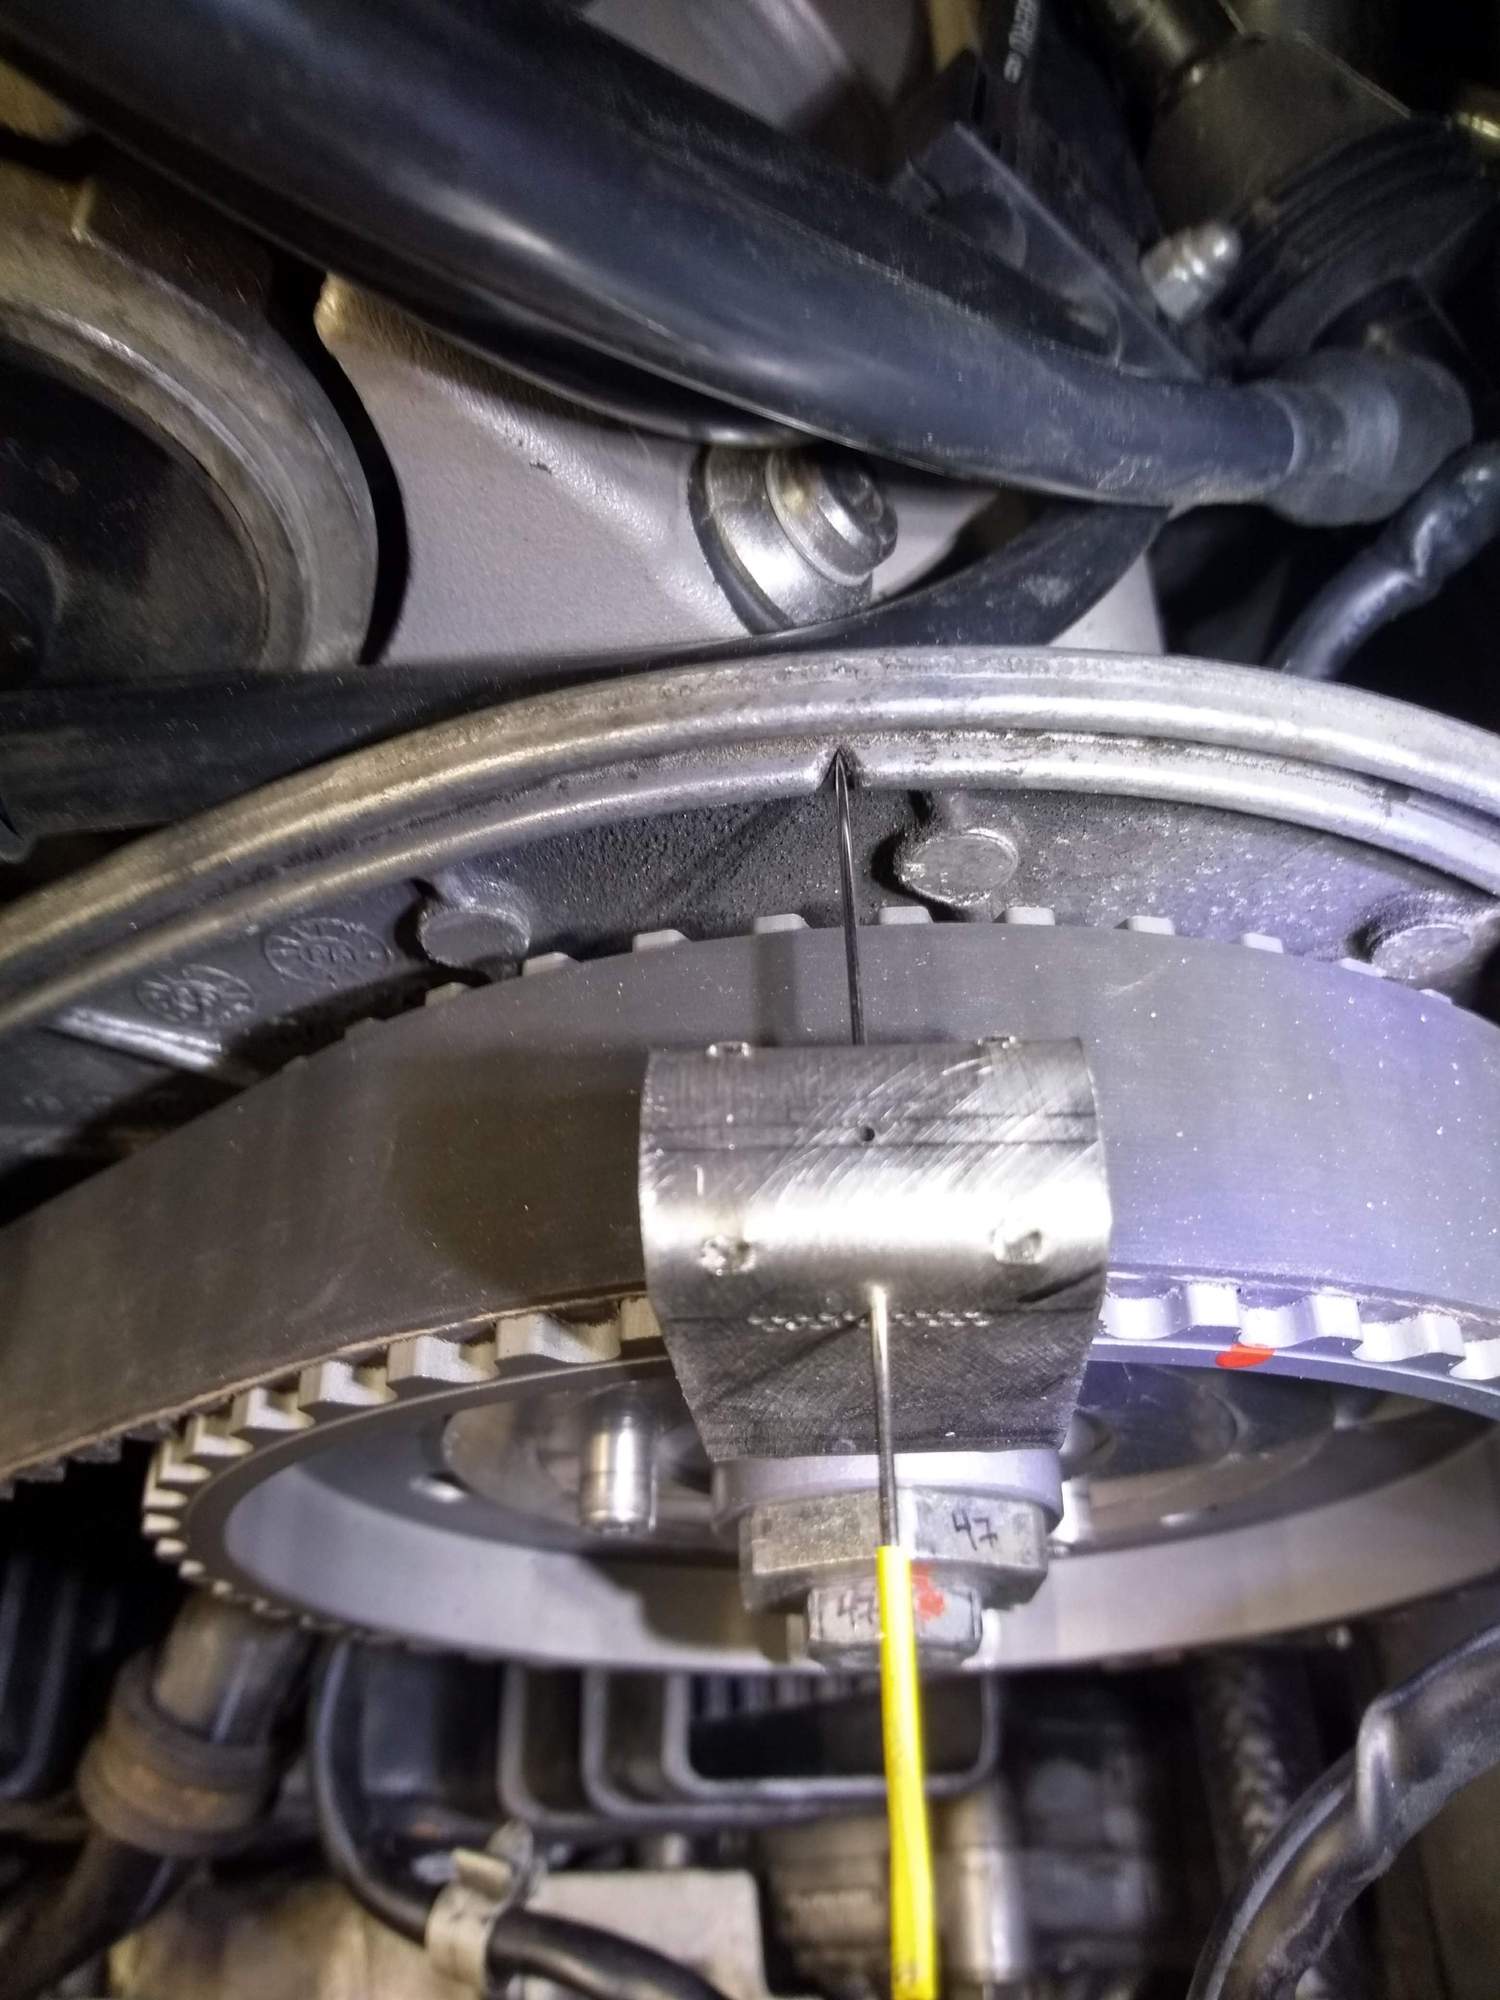
If you are using the 32VR tool and fitting a new belt the cam timing can be corrected for a new belt as per the instructions- that or set the timing using the old belt and then slip on the new one.
Hi Everyone,
Some updates:
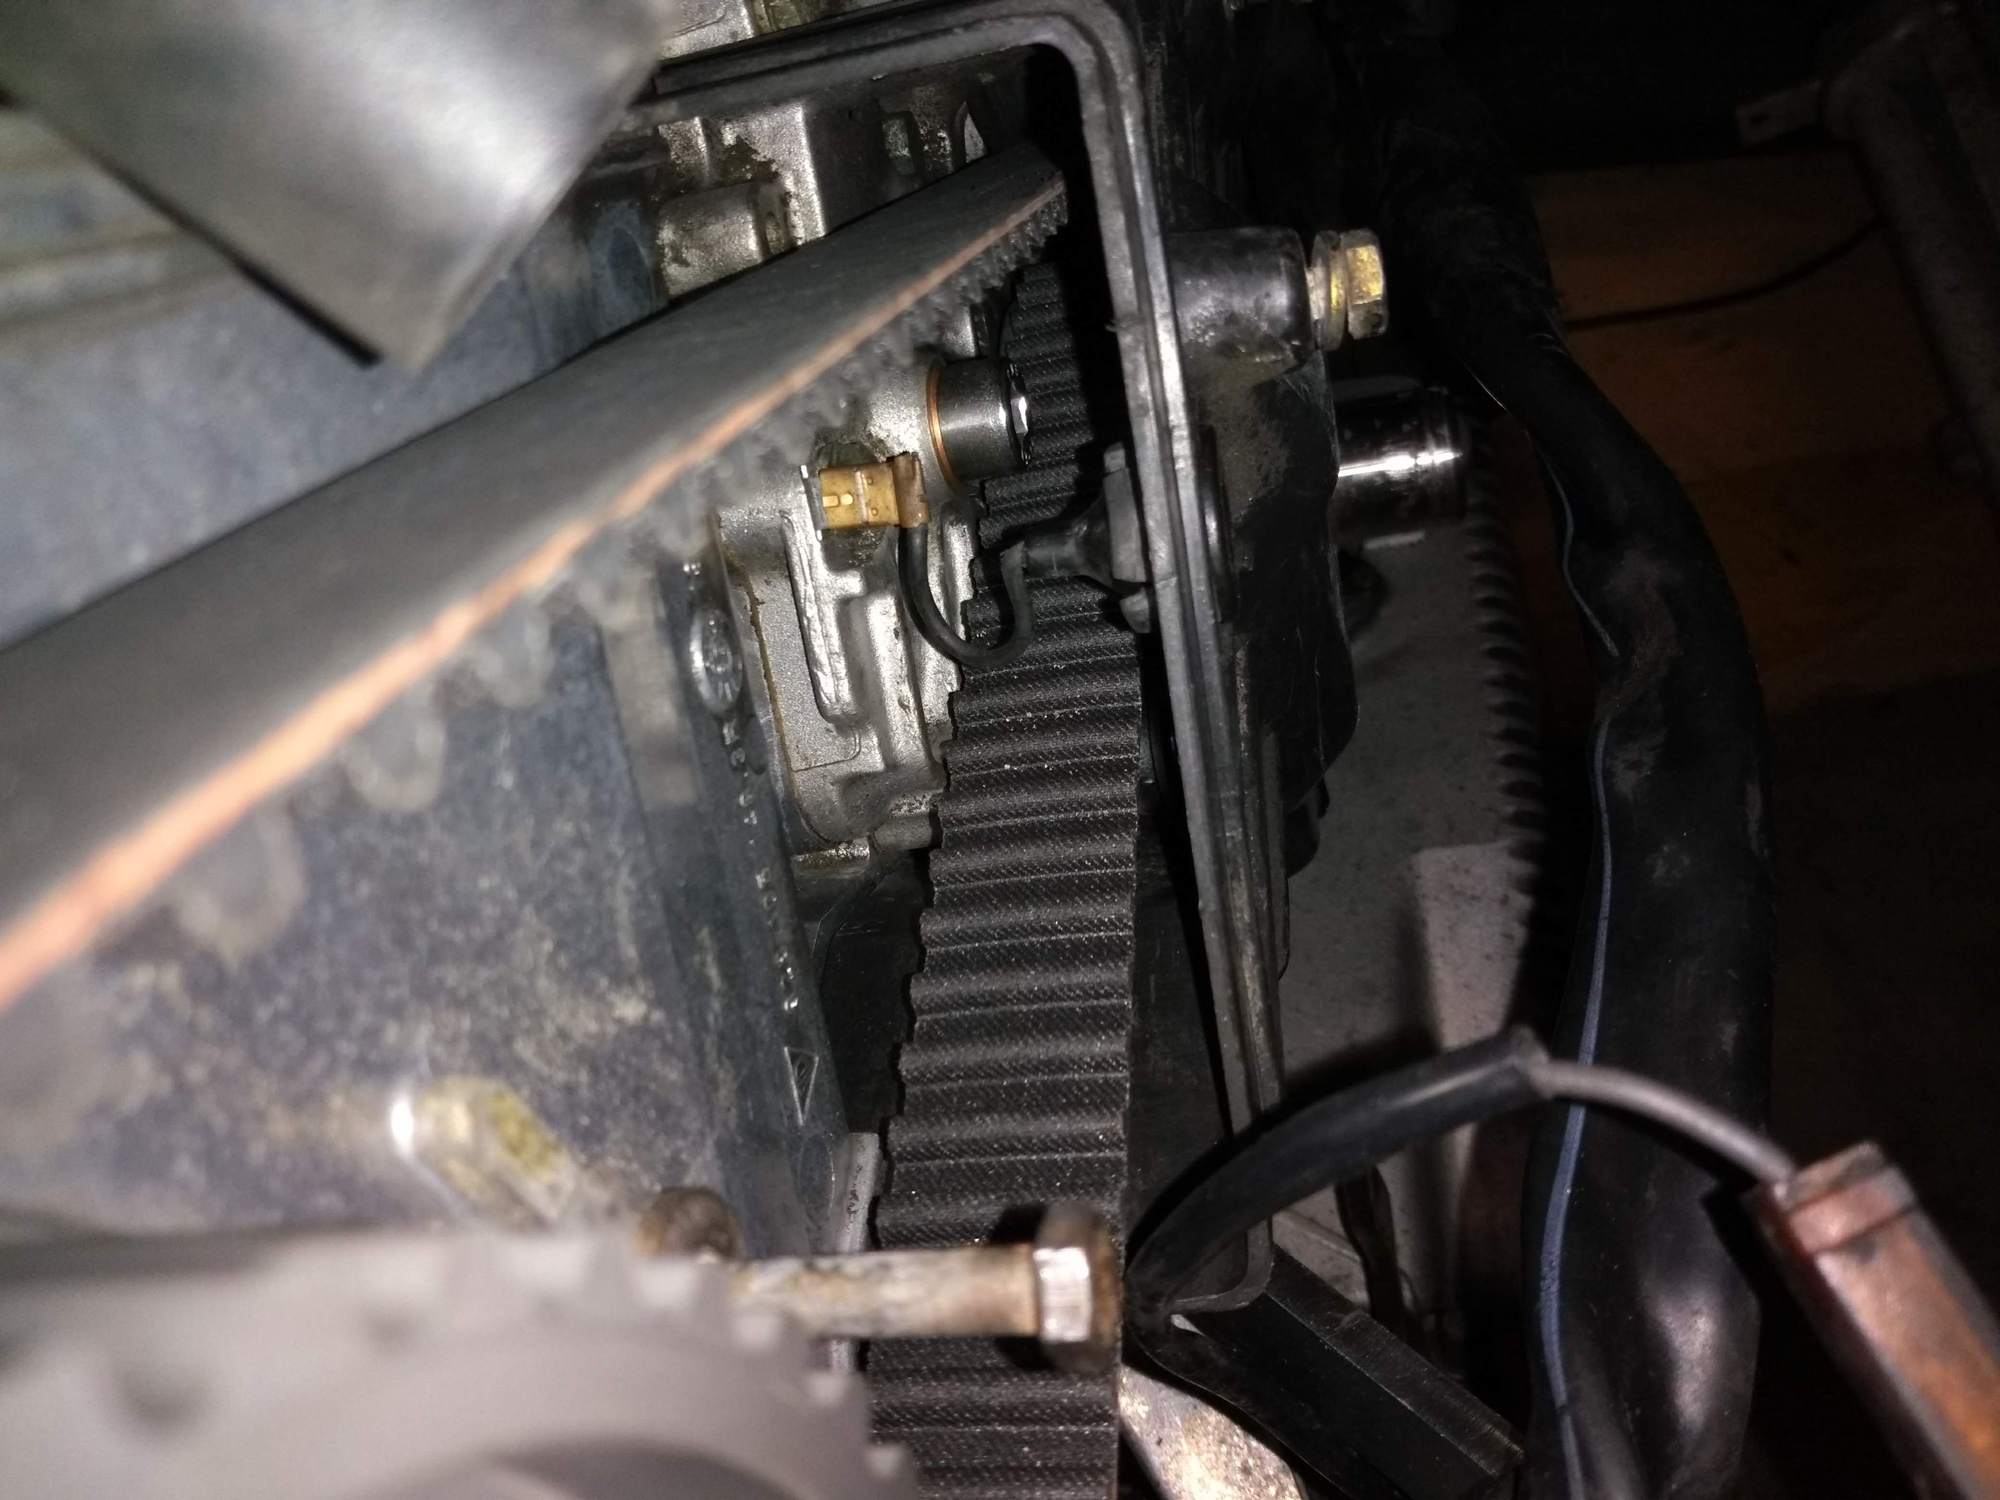
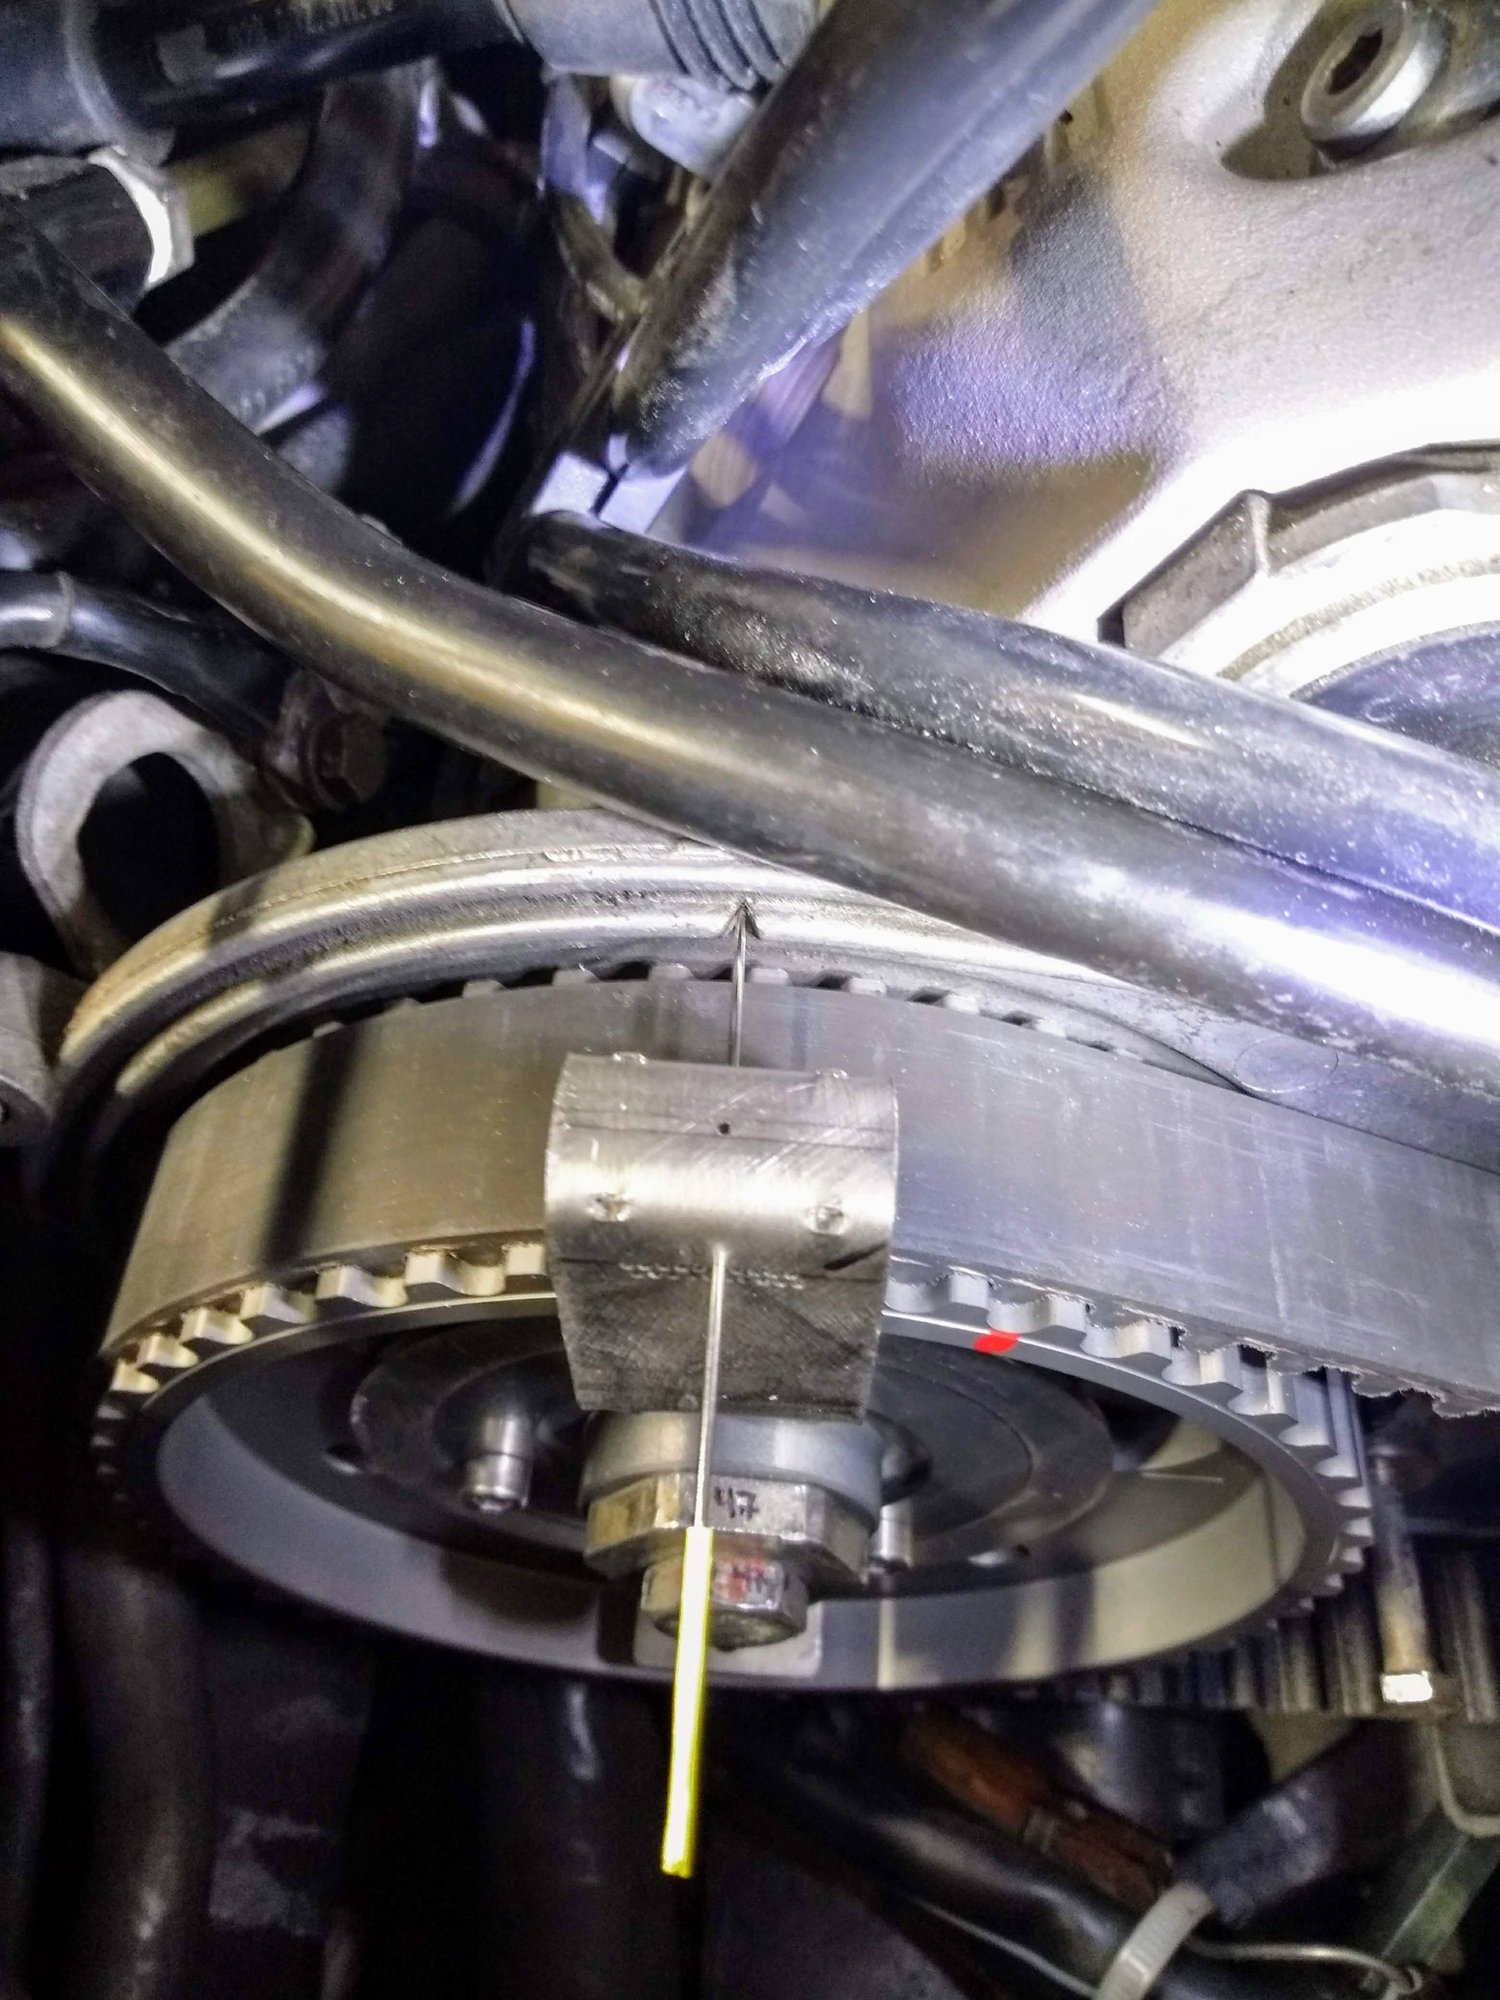
- Pulled the pin on the PKT! No explosions... turned the engine several dozen times and measured 2.5mm extension which I read to be in spec. for the PKT.
- Timing looks close to 0 deg on the driver side and several degrees retard(?) on the pass side. Still waiting for the 32V'r tool to get it right.
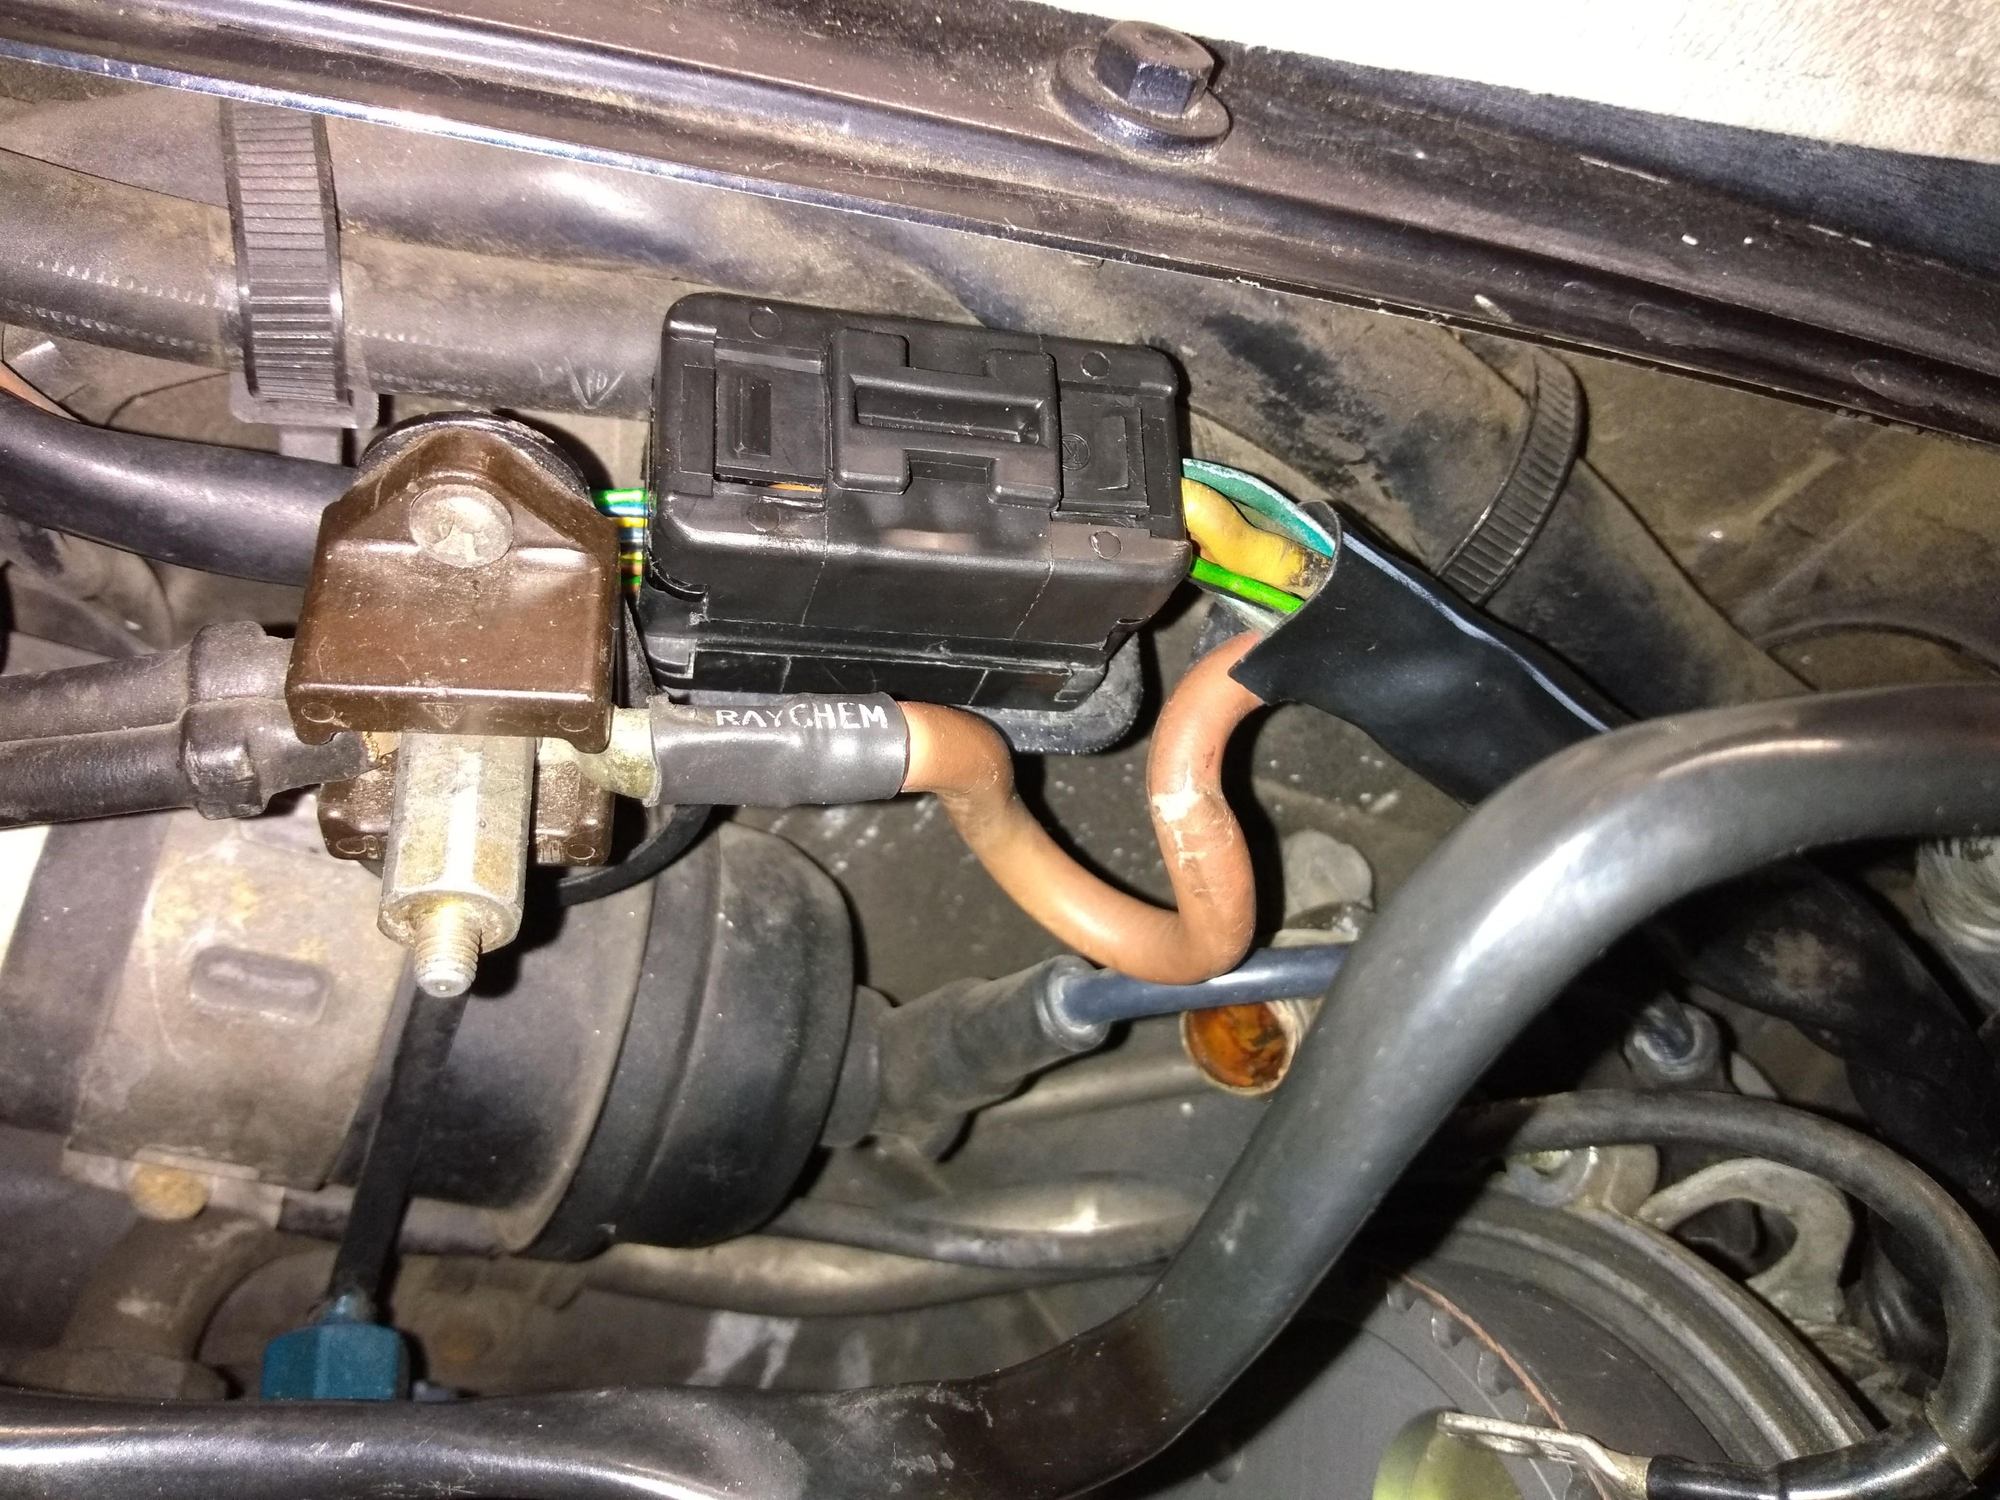
- Replaced the 14 pin connector. It crumbled when I took it apart. Pin out below is what I could deduce from the schematic:
Pin 0.5mm 1.0mm
1 BL BL
2 BL/BK BL/BK
3 BL/YE BL/YE
4 BL/WT BL/WT
5 BR/GN BR/GN
6 GN/BL GN/BL
7 BR/GN BR/RE
8 Open
9 BK BK
10 BR/BL GN
11 Open
12 Open
13 BR BR
14 YE YE
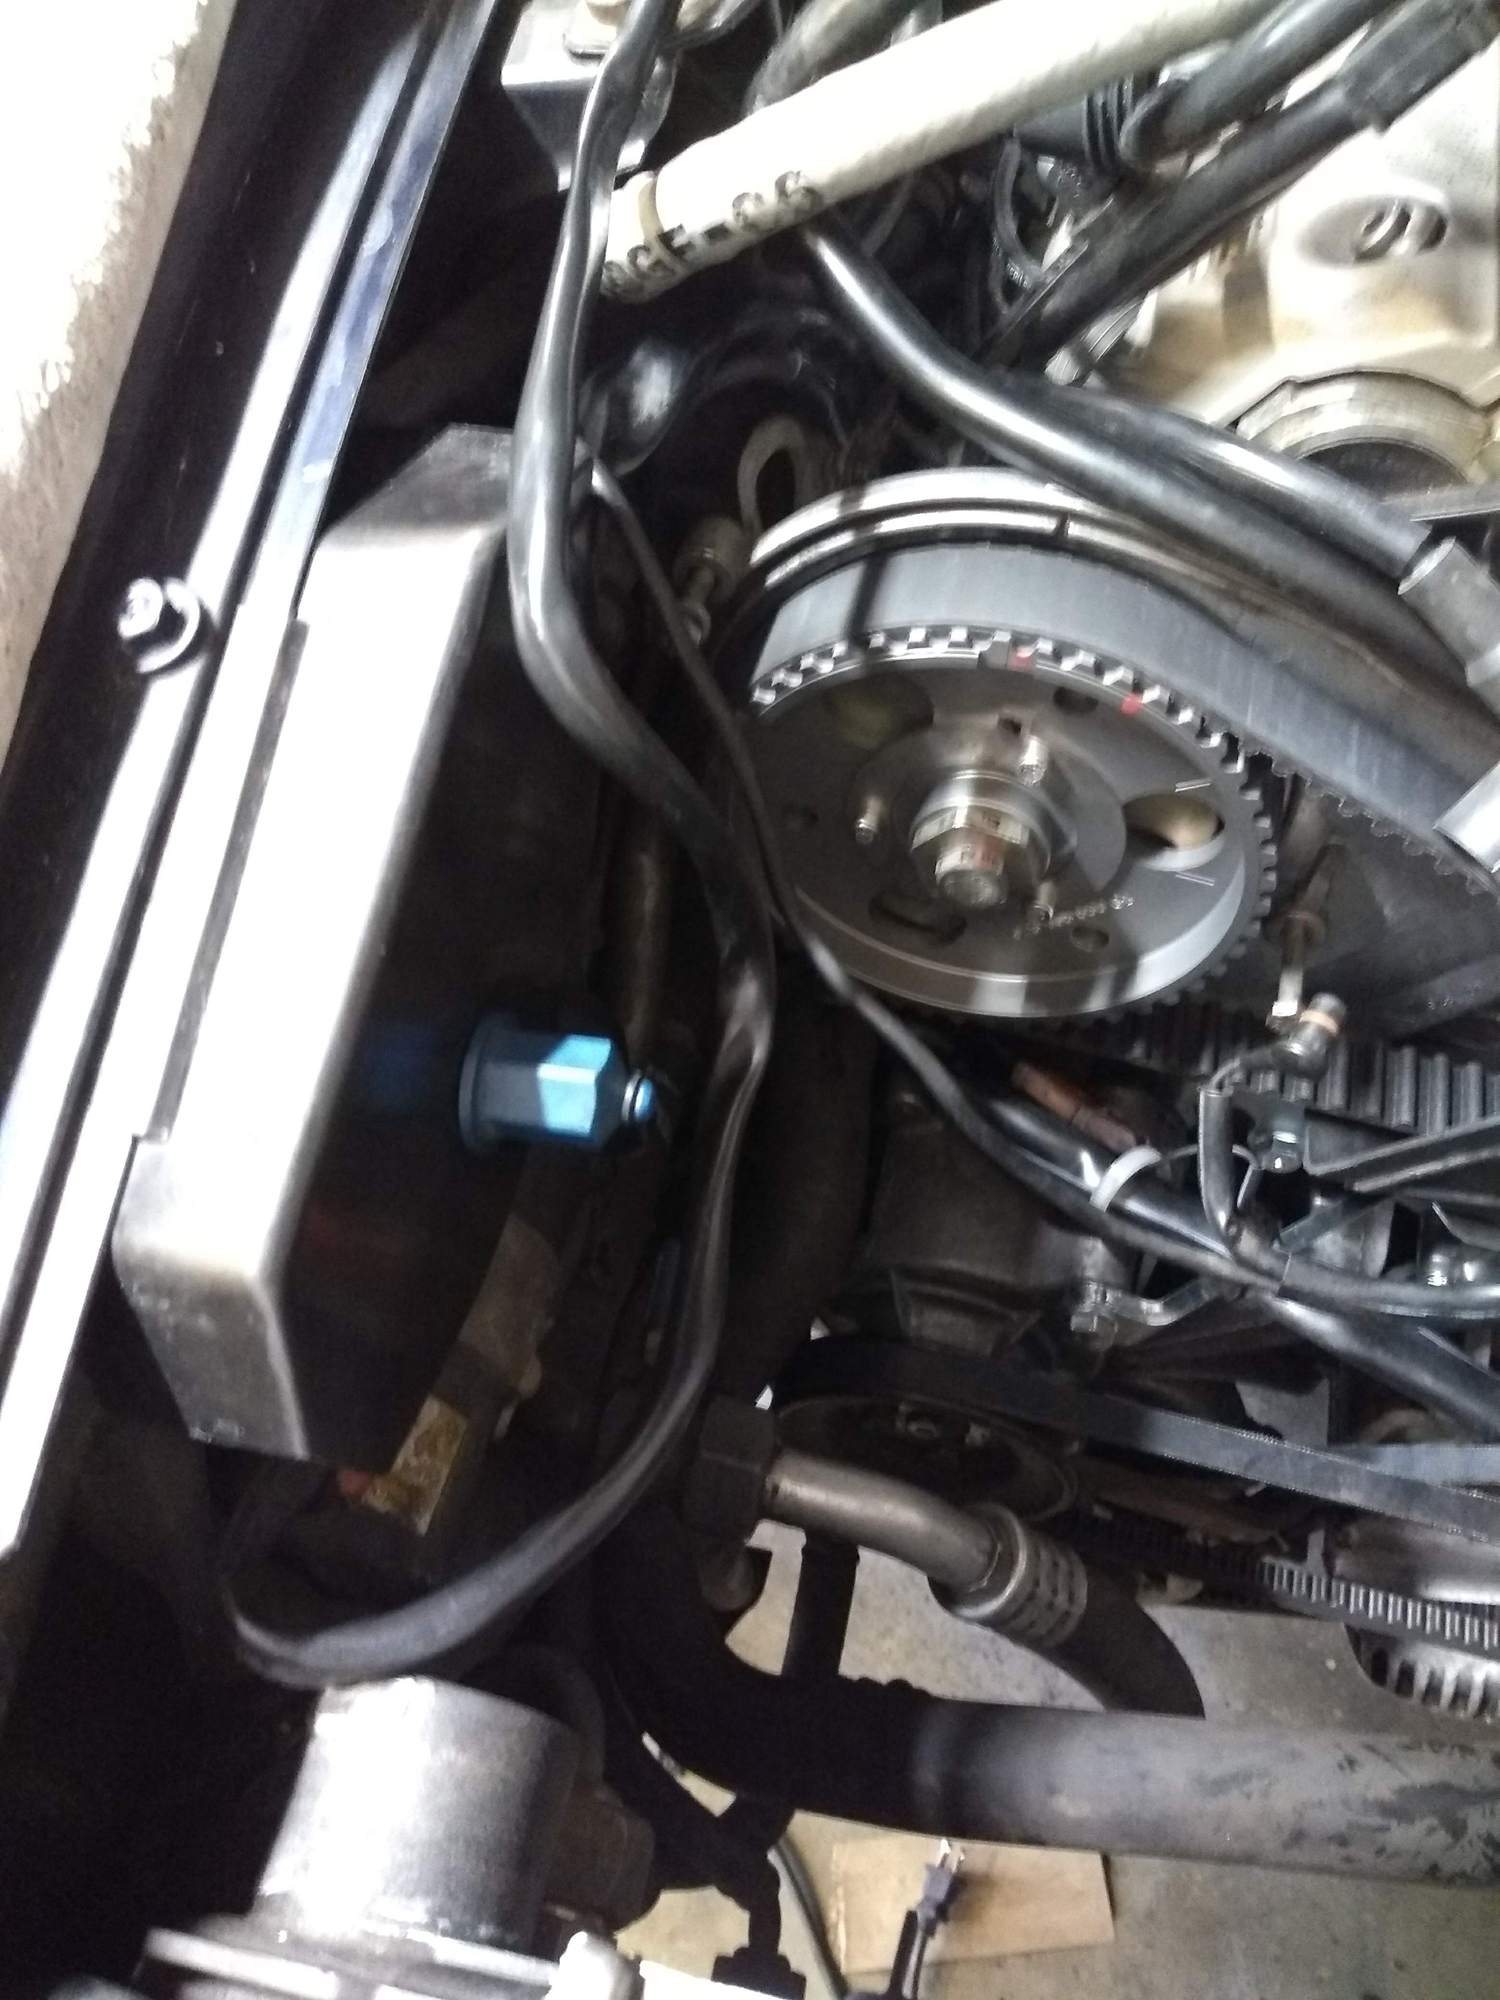
General Update - Almost there...
Replaced all the accessory belts, got all the belts tights.
Was able to borrow a 32v'r from a fellow rennlister (thank you Kevin!).
The DSU gear was off -2 and the PSU was at 0. I adjusted the DSU to 0 degrees and am going to button everything up over the next couple days.
To do:
-Torque crank bolt to spec.
-Plugs, wires, caps, cam covers
-fan install
-Hoses and coolant
Anything else I should check before I try to start the car?
Make sure the washer on the crank bolt is the right way.
There is a 'rim and hollow' on one side, with 'flat' on the other. The flat side faces out.
The rim needs to be pushing on the pulley.
If the flat side is facing the pulley, it won't be tight.
It will flop around and destroy the pulley within a few seconds on startup.
Also, do you have a jump post cap & cover?
You show the new 14 pin connector, it would be a good idea to protect it (you may have one and I missed it).
The "big brown cable" is in fact a 16mm2 red cable and carries a non fused power supply to the central electrics. When they are that colour invariably lumps of insulation can and invariably do drop off somewhere sooner or later and can form a welding machine when earthed.
At least the yellow 4mm2 cable to the starter motor solenoid looks yellow rather than a sorry mustard colour and the other cores visible look to have some colour in them- if you can flex the cables and they do not crack that is a positive sign but if they are the originals then chances are they will be on their last legs as it were and that before one sees inside the harness sleeving.
Not saying you are going to have immediate problems - just advising what to be wary of.
Thanks Guys!
Made sure the crank bolt washer was correct, and, added the infamous jump post cover!
@Fred - thanks! I've been a bit concerned about this as also. I replaced the spark plug wires last year (they were arcing quite a bit using the spray mist-in-the-dark method). I think next year I'll tackle a general re-wire project as well as I have a few other electrical gremlins. For example, I have a battery drain issue: in pulling fuses, I see a 150mA reduction when I remove the door lock fuse, and another ~50mA reduction when I pull what I recall as the headlight washer fuse... If I recall correctly, the car should draw less than 100mA when everything is off, right? Now it draws about ~350mA so I have some more debugging to do...
Also, the voltage gauge in the dash is a bit erratic. It is usually between 12-13V, but its not consistent given the day all else being equal.
Regards,
Mike
Pin 1 is the dash voltage if that is jumping about almost certainly the wiring is suspect., same if you have issues with oil pressure indication as those wires seem to like being toasted. As I remember the current drain when alarmed should be around 30mA . At 350mA you are flat in about 200 hours or 8 days.
All the wiring harnesses are more or less guaranteed to be junk by now if still original unless they have been "cocooned". Did a partial rewire a couple of years ago and the full job last January or whenever. Replacing those decrepit power cables made a day/night difference. Mine were in a similar looking state externally to yours- thought they were OK for use but upon destructive examination they were appalling in places. Just another of those jobs one cannot get away from if one wants the car to run as it should. After replacement it started like an olympic sprinter much to my surprise
Final Update - car runs great!
Buttoned everything up, filled up the coolant and gave her a start ... all good. Sounded great. Better than after I did an intake refresh a few years ago.
I forgot to report that when I was taking off the center belt cover, the ground strap connecting to the coil on the drivers side was completely broken - no contact at all.
I replaced that connection with a better strap, and, when starting the car today after several weeks of inactivity, the engine sounded much smoother.
I think the combination of known good timing, this better ground strap, and, the new 14 pin connector allowed the computer to start-up with a smoother map (just a half baked theory here as when I started her up after doing a month-long refresh the idle was rougher but then smoothed out substantially after 2-3 restarts).


 06-14-2018, 01:02 PM