
My first timing belt/water pump/PK-Tensioner job. Worklog. 92 GTS.
 01-29-2018, 12:35 PM
#1
Pro
Thread Starter
Some of you might have seen my other active thread regarding motor mount/oil pan gasket/steering rack bushings job. Well that job is now completed and I have started on the next task.
I had to clean up the floor and my tools and get everything sorted before I started. Ordnung muss sein, as they say in Germany?
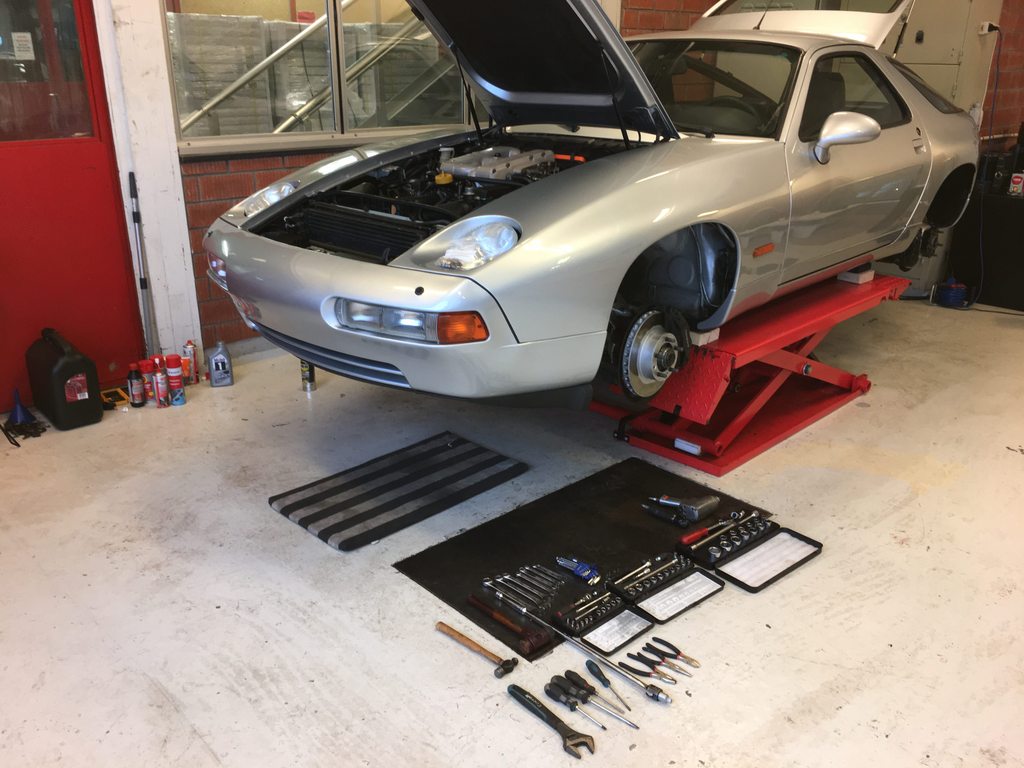
This is my starting point. I have taken lots of photos from different angles for documentation, though I know some of the routing of vacuum hoses and such are wrong, so I have to correct that. But I think most of it is ok.
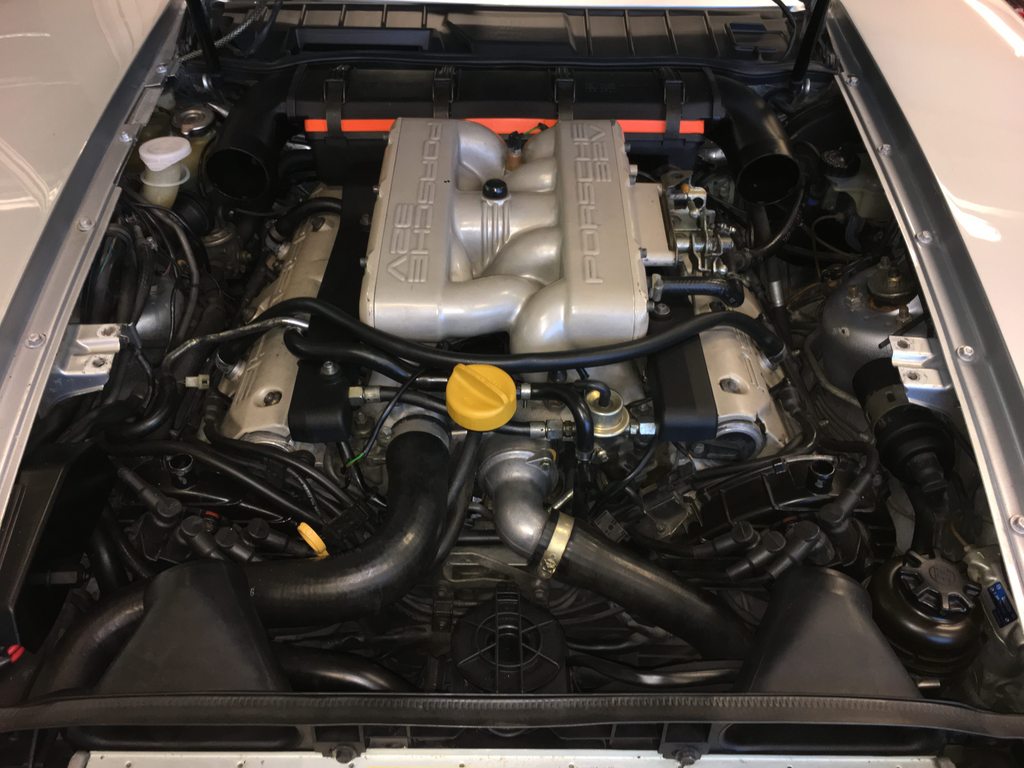
And here is where I am at now:
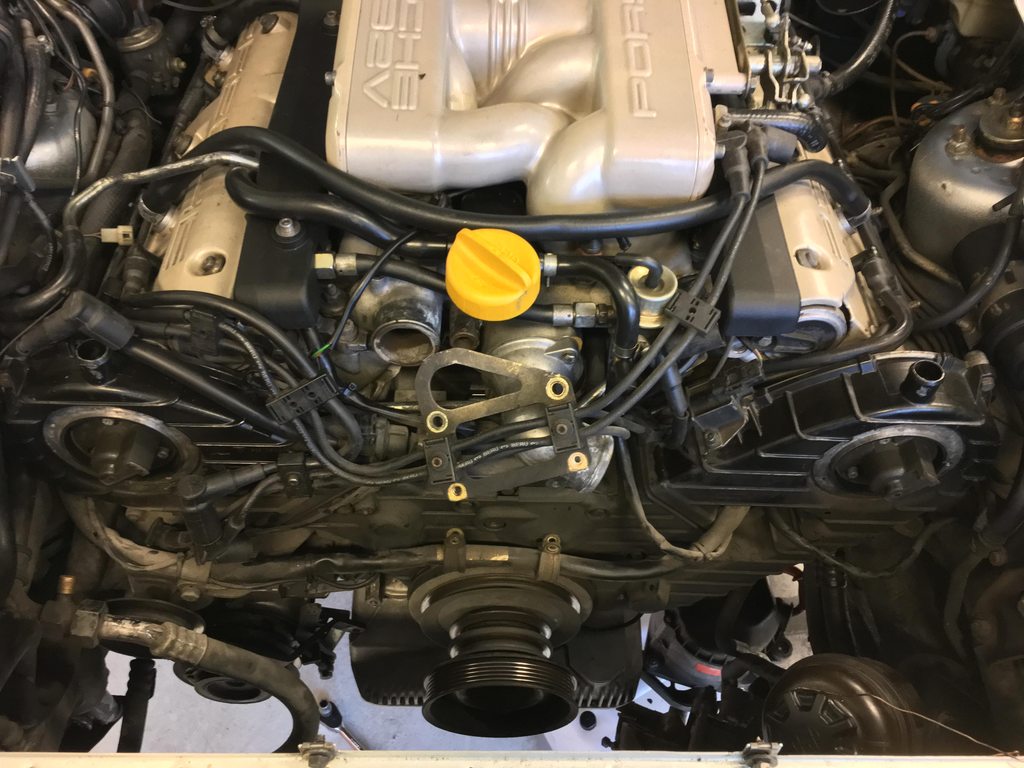
I drained the coolant and have just started removing things, mostly following Dwaynes tutorial. Until now straight forward, I had some problems understanding the AC compressor - how to loosen tension, I don't think this system looks the same as in Dwaynes writeup. Anyway I just cut the AC belt as I have a new one anyway. Will figure the tensioning out later. (I will probably have to remove the whole AC compressor because after I cut the belt and tried to roll the wheel it did not sound very healthy, at all. But will look into that later.)
Nearby I also found my first other challenge. The bolt that holds both the AC compressor bracket and air pump bracket together, just snatched, I barely touched it, and without any force it just fell off. Didn't even get to try to remove it. Not sure how to get the remainings out, any ideas?

I had to clean up the floor and my tools and get everything sorted before I started. Ordnung muss sein, as they say in Germany?
This is my starting point. I have taken lots of photos from different angles for documentation, though I know some of the routing of vacuum hoses and such are wrong, so I have to correct that. But I think most of it is ok.
And here is where I am at now:
I drained the coolant and have just started removing things, mostly following Dwaynes tutorial. Until now straight forward, I had some problems understanding the AC compressor - how to loosen tension, I don't think this system looks the same as in Dwaynes writeup. Anyway I just cut the AC belt as I have a new one anyway. Will figure the tensioning out later. (I will probably have to remove the whole AC compressor because after I cut the belt and tried to roll the wheel it did not sound very healthy, at all. But will look into that later.)
Nearby I also found my first other challenge. The bolt that holds both the AC compressor bracket and air pump bracket together, just snatched, I barely touched it, and without any force it just fell off. Didn't even get to try to remove it. Not sure how to get the remainings out, any ideas?
 01-29-2018, 01:02 PM
#2
Three Wheelin'
Looks to me like a comfortable spot to use a bolt extractor and some heat from a micro torch.
That would be my suggestion. Lots of 'How to' YouTube videos available as well.
Kits sold at Lowe's and HD.
That would be my suggestion. Lots of 'How to' YouTube videos available as well.
Kits sold at Lowe's and HD.
Last edited by Koenig-Specials 928; 01-29-2018 at 01:06 PM. Reason: add
01-29-2018, 02:13 PM
#3
Pro
Seeing as there is a fair bit of thread above the surface I would try grinding two flat edges onto the sides of what is left to try and get an open end spanner onto it and just undo that way. It usually works for me
01-29-2018, 03:38 PM
#4
Drifting

There seems to be plenty of meat and room to use a bolt extractor like these, or you may find with no pressure from the head, the shaft just turns out if you can get vise grips on it.
01-30-2018, 05:43 AM
#5
Drifting
PS and you're right about the AC tensioner - depending on model year, it can look and behave nothing like the drawing in PET or on some other cars! This threw me for a while too.
01-30-2018, 08:10 AM
#6
Pro
Thread Starter
 will be interesting to see if it fits the remaining material. It looks like a nice thing to have in the drawer anyway.
Ok - nice to know it was not only me. Regarding the unhealthy sound from the AC belt wheel that I mentioned, strangely enough when I rolled the wheel today it feels like new without any sound at all. No play, no sounds, very nice and tight and is rolls without resistance. Almost as if I began wondering if I had a bad dream or something last time. Very strange.
01-30-2018, 08:39 AM
#7
Pro
Thread Starter
Trending Topics
01-30-2018, 09:22 AM
#8
Rennlist Member
Love it! That garage is clean! As it should be; and organized. I had a drafting teacher back in high school who used to say "cleanliness is next to Godliness!" Indeed it is (altho he'd probably be fired today for saying such an incindeary thing).
Anyway, as for the bolt, another option is to grind a slot in it, and use a large screwdriver to turn it out. Regardless of the method, use lots of penetrating oil first, and soak it well, plus a few taps to break the threads from the hole.
Lastly, what lift is that? How do you like it? Cost?
Anyway, as for the bolt, another option is to grind a slot in it, and use a large screwdriver to turn it out. Regardless of the method, use lots of penetrating oil first, and soak it well, plus a few taps to break the threads from the hole.
Lastly, what lift is that? How do you like it? Cost?
01-30-2018, 09:22 AM
#9
Drifting
They are among the most useful tools I've ever bought (there are two sets of different sizes, you may need smaller set for this application), and have got me out of some bad situations including getting rounded front caliper bolts off.
01-30-2018, 02:35 PM
#10
Pro
Thread Starter
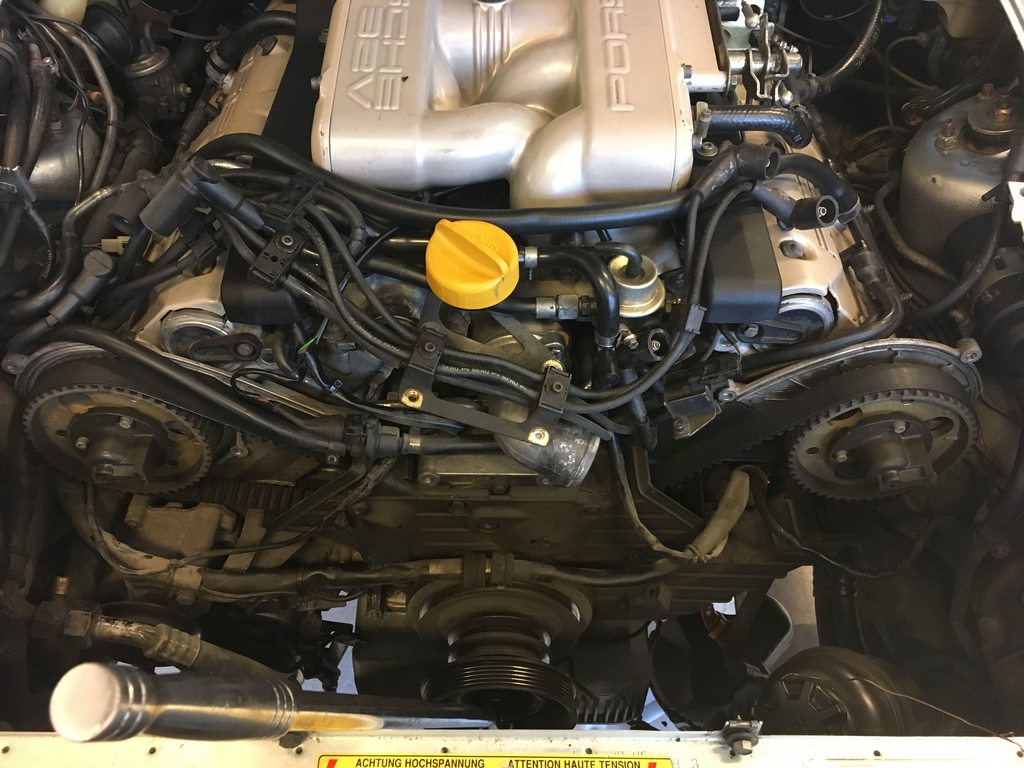
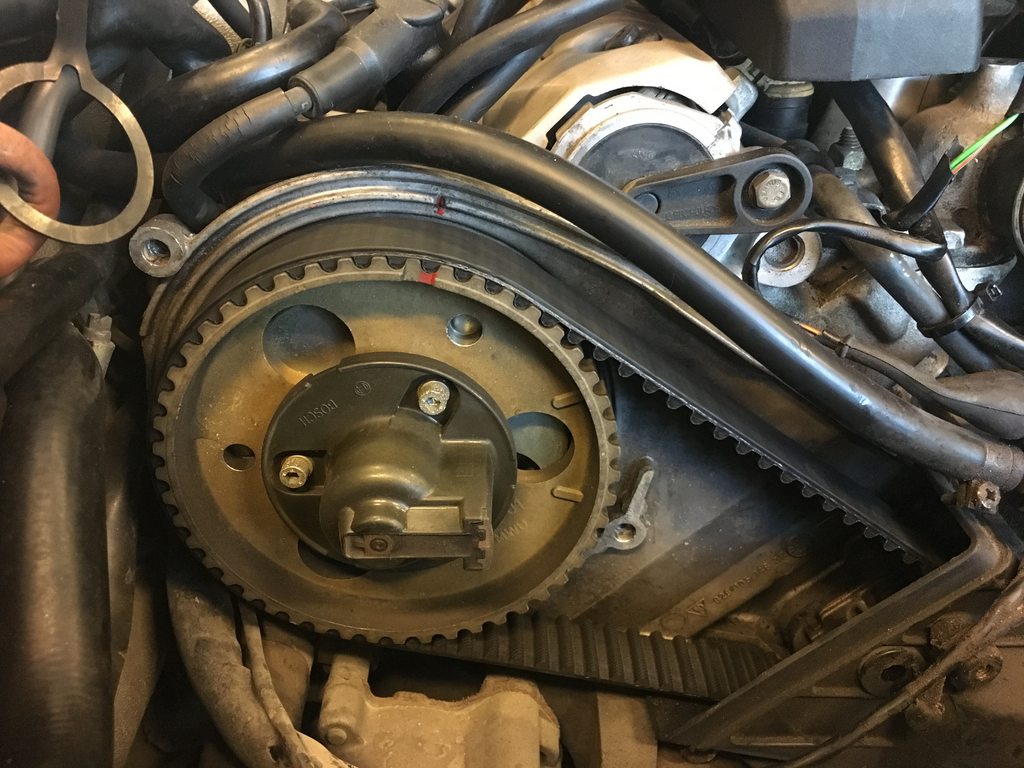
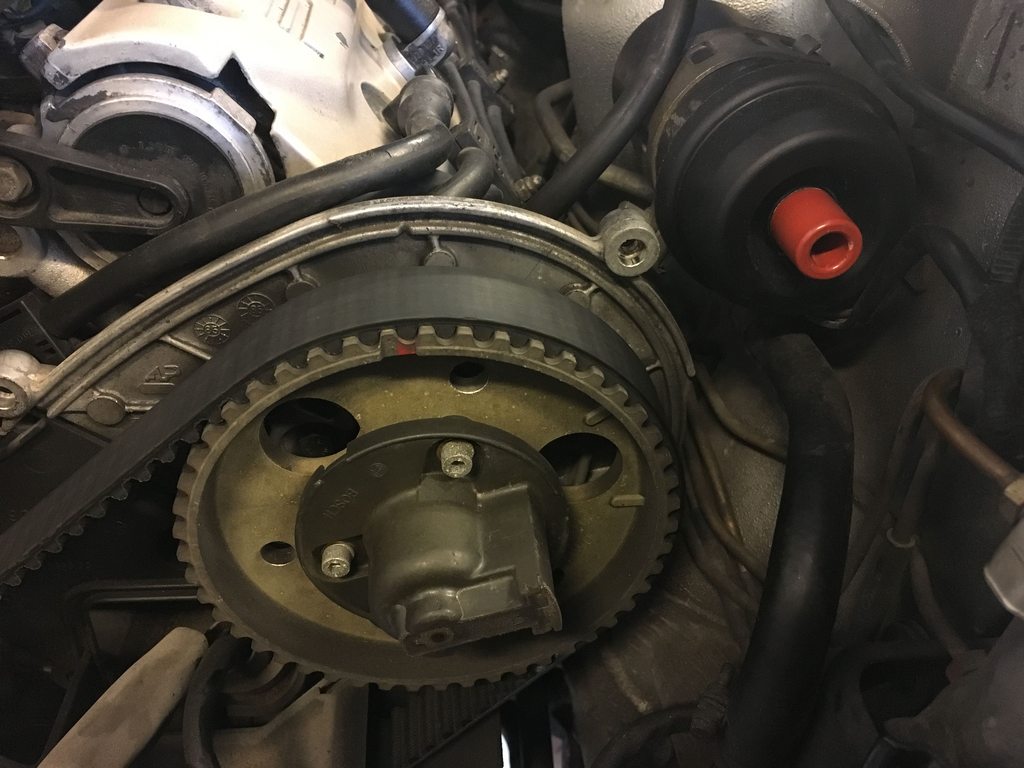
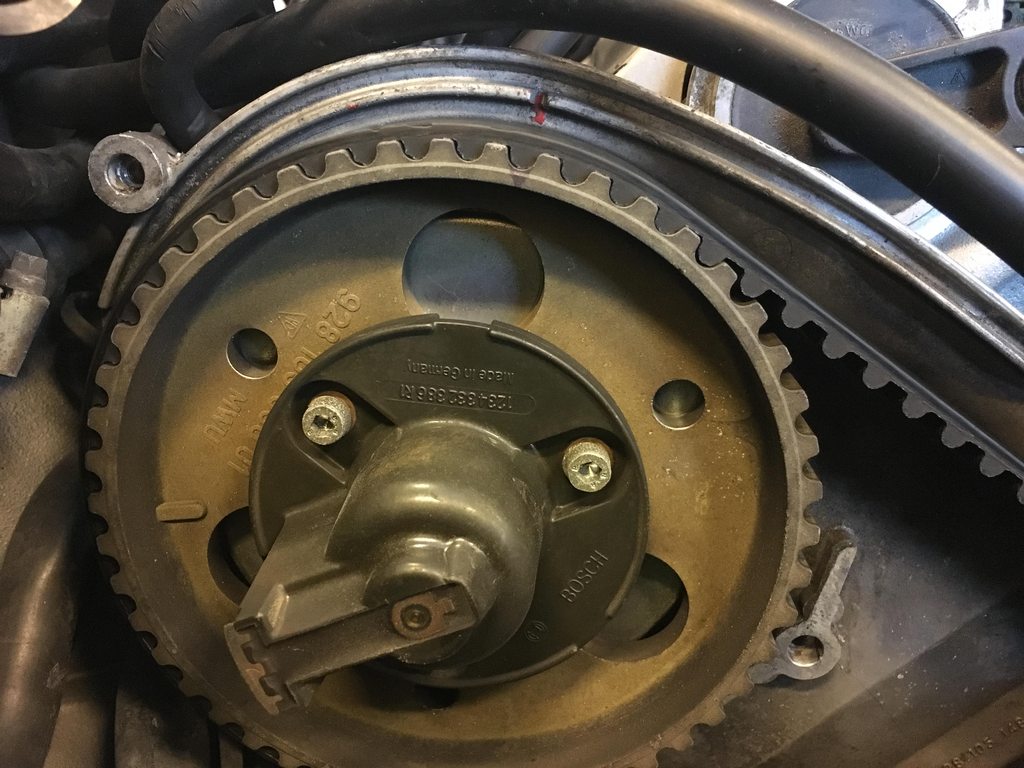
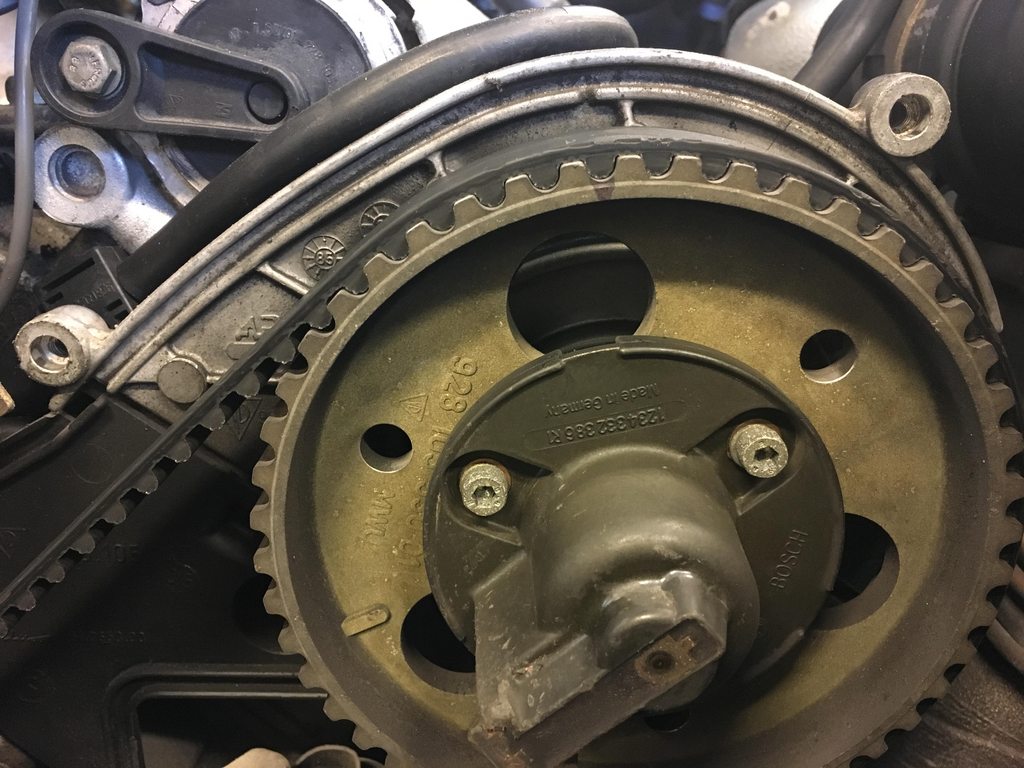
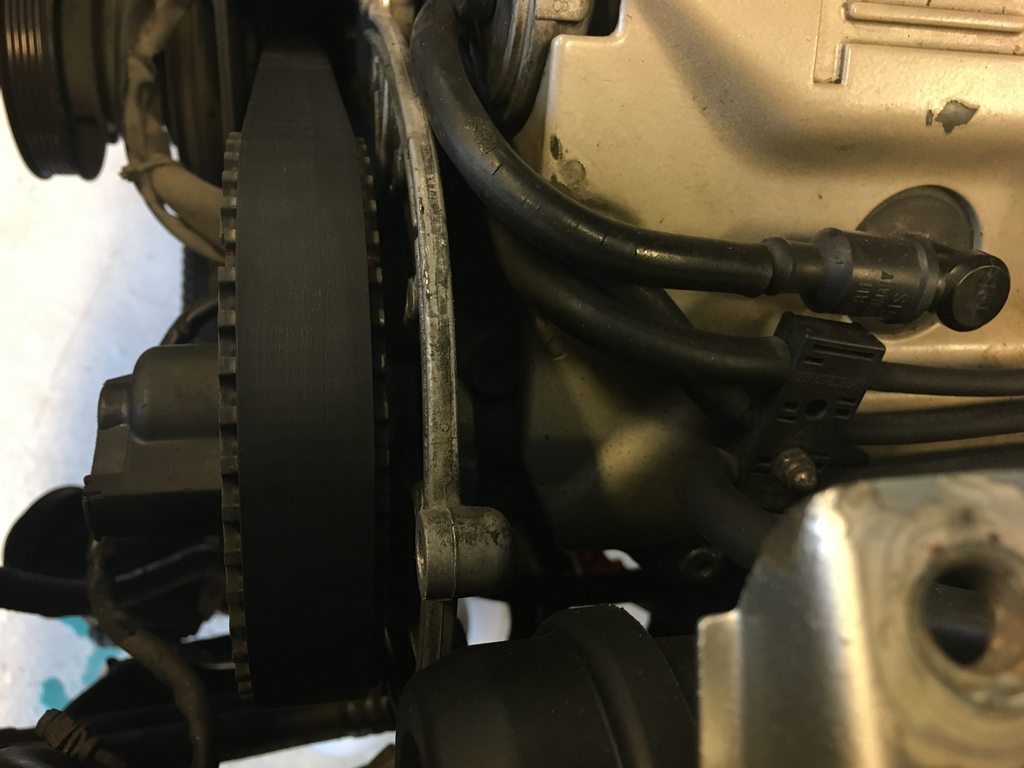
Not a lot of progress but I removed the upper cambelt covers and checked the cam gear position at TDC and they were spot on. I moved the engine to 45 degrees BTDC, and marked the cam gear positions. That's about how far I've come. Dwayne's writeup, again, thank you!
The belt is sitting right in the middle of the driver side cam gear, but is very far out on the passanger side. What controls this? Is it something to worry about?
Progress:
PS gear at TDC:
DS gear at TDC:
PS gear marked at 45 BTDC:
DS gear marked at 45 BTDC:
PS side belt:
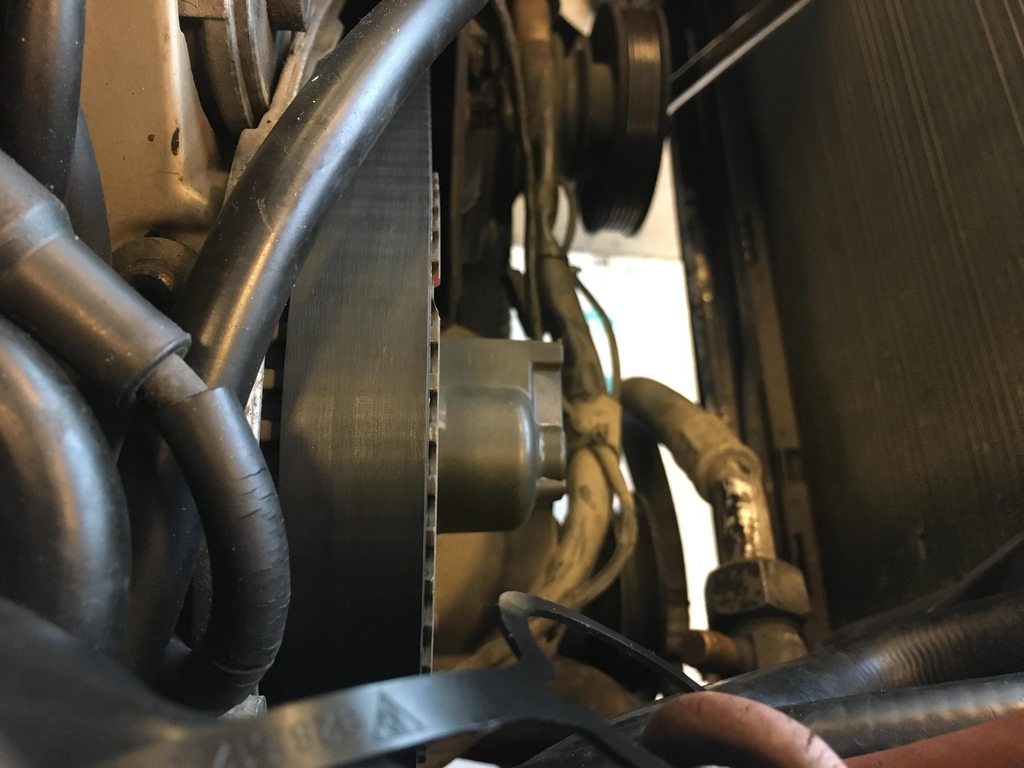
DS side belt:
The belt is sitting right in the middle of the driver side cam gear, but is very far out on the passanger side. What controls this? Is it something to worry about?
Progress:
PS gear at TDC:
DS gear at TDC:
PS gear marked at 45 BTDC:
DS gear marked at 45 BTDC:
PS side belt:
DS side belt:
01-30-2018, 08:14 PM
#11
Rennlist Member

Had a few bolts snap when I rebuilt the motor in my daughter's 83 928s and here is what I did. Since you have meat sticking out you can screw a nut onto the broken bolt as far as it can go. You then mig weld the center of the nut/bolt so they are one solid piece. The heat will help free the bolt and you can then use the nut head to back it out. This assumes you have access to a mig welder.
Make sure you mark the front side of the balancer on the main pulley before removing as it can be confusing which way it goes back together. At least on the 83 it can go either way, but the wrong way will throw off the cam timing.
Make sure you mark the front side of the balancer on the main pulley before removing as it can be confusing which way it goes back together. At least on the 83 it can go either way, but the wrong way will throw off the cam timing.
01-31-2018, 09:26 AM
#12
Pro
Thread Starter
I am waiting for the flywheel tool to arrive, either today or tomorrow.
Meanwhile, I am a bit confused regarding the whole process of engine/cam setting. I read some do the work at TDC and some do it at 4 5 BTDC. I am changing the cam gears and hall sensor too. Should that influence what I do? What should I do?
Another thing, I see in another thread that there is two 4 5 BTDC positions? Or is it that there is two 4 5 positions, BTDC and ATDC(my guess will be on this)? In that case, how do I know where I am of those two, when it only says 4 5 on the balancer?
And what is this 32V-r tool or something. To set timing correct? Do I need this for my upcoming tasks? (as you understand I am a bit on thin ice here).
Last edited by paalw; 01-31-2018 at 11:02 AM.
01-31-2018, 09:43 AM
#13
Rennlist Member
I am waiting for the flylock tool to arrive, either today or tomorrow.
Meanwhile, I am a bit confused regarding the whole process of engine/cam setting. I read some do the work at TDC and some do it at 4 5 BTDC. I am changing the cam gears and hall sensor too. Should that influence what I do? What should I do?
Changing the TB at TDC is no problem at all. 45 BTDC on the crank is the ONLY position where the pistons will NOT hit the valves regardless what you with the cams. This is the position that the factory recommends if you change the cams.
If you want to be extra cautious, bring the crank to 45 BTDC and mark the cam positions with some paint as reference marks.
Another thing, I see in another thread that there is two 4 5 BTDC positions? Or is it that there is two 4 5 positions, BTDC and ATDC(my guess will be on this)? In that case, how do I know where I am of those two, when it only says 4 5 on the balancer?
There is only one 45 BTC.
And what is this 32V-r tool or something. To set timing correct? Do I need this for my upcoming tasks? (as you understand I am a bit on thin ice here).
When the cam gears are removed, you'll need to fix the exact position of them (with three small bolts (M5x30 IIRC). Otherwise timing will be slightly out of tune, not dangerous but not 100%. The 32VR tool is used at TDC to set the cams at exactly the correct position and with this, also to compensate the driver side timing for block expansion due to heat.
01-31-2018, 09:46 AM
#14
Team Owner
UMM in the 45 degree BTDC pictures ,
your still 180 out in otherwords,
you need to make one more crank revolution.
The correct picture will show your red marks on the pulley to be 4 teeth before the hash mark on the cam tower housing
your still 180 out in otherwords,
you need to make one more crank revolution.
The correct picture will show your red marks on the pulley to be 4 teeth before the hash mark on the cam tower housing
01-31-2018, 10:04 AM
#15
Pro
Thread Starter
And what is this 32V-r tool or something. To set timing correct? Do I need this for my upcoming tasks? (as you understand I am a bit on thin ice here).
When the cam gears are removed, you'll need to fix the exact position of them (with three small bolts (M5x30 IIRC). Otherwise timing will be slightly out of tune, not dangerous but not 100%. The 32VR tool is used at TDC to set the cams at exactly the correct position and with this, also to compensate the driver side timing for block expansion due to heat.
When the cam gears are removed, you'll need to fix the exact position of them (with three small bolts (M5x30 IIRC). Otherwise timing will be slightly out of tune, not dangerous but not 100%. The 32VR tool is used at TDC to set the cams at exactly the correct position and with this, also to compensate the driver side timing for block expansion due to heat.
Thanks for explaining
Thanks, I was starting to get a hunch about that. Will move it. Does this mean that in the pics, I am at 4 5 ATDC?