When you click on links to various merchants on this site and make a purchase, this can result in this site earning a commission. Affiliate programs and affiliations include, but are not limited to, the eBay Partner Network.
I do hope to have the engine pulled in short order and on the stand. With the heads onto the work bench shortly thereafter. However, it will slow down after that. There will be the issue of affording the work on the heads. My machinist and I have set up a schedule of work based upon payments.
As I get the money together for each event, the work will be performed. He trusts me enough to do it all in one hit and I pay him over time. However, I don't like being on the hook like that, and it isn't fair to him.
The Factory Workshop Manual has a few "errors" or "places that do not seem to make sense."
The torque on the water drains, cylinder head torquing, and the wear limit on the valve guides comes to mind. (As mentioned before, some people can't figure out the cam timing method, but it is exactly correct.)
Tell your machinist to ignore the wear limit on the valve guides, or you will not end up with a very good result. (With the mileage you have on this engine, plan on replacing the exhaust valve guides, minimum.)
Avoid the "standard" replacement valve guides that are commonly sold. They are generally sold as .001" oversize guides and are too big for the bores in the heads. Have him measure the bores and order the correct size guides from PEP.
"American" engine machinists are used to always replacing valve springs.....especially on an engine with your kind of mileage. New factory valve springs are a bit pricey....and almost never fail.....or loose even 5% of their original tension. Have him carefully check the springs on a spring tester....it is very rare to find a weak spring.
If the heads need to be welded on the deck surface (likely), they must be carefully preheated, welded, and then allowed to cool down back in the preheat oven.
I've always suggested that the oil galley plugs be removed, the galleys cleaned, and the plugs replaced. This has recently turned into a HUGE problem. Both the aftermarket and the factory oil galley plugs have suddenly changed and the sealing "lip" is extremely narrow. I've had a terrible time getting these not to leak, for the past 6 months or so. The problem is so bad, that I'm now leaving the plugs installed. When they soda blast the heads (NO BEAD BLASTING!!!! ONLY SODA BLASTING!!!!), have them re-hot tank the heads and blow through the oil passages, after they rinse the heads. Once the machine work is completely done, have them clean the heads....and spray solvent through all the oil passages, just before assembly.
Especially important on these heads is the installation of the stem seals. If the machinist installs the stem seals just a tiny bit too much, the top of the guide will touch the lips of the seals. This will "open" up these lips on the seals and oil will pour down the guides. There is a special tool (9225-1) for installing the stem seals....I suggest you borrow one and have him use it (You can borrow mine, if you can't find one closer to you.)
There are also some special tools to determine what valve spring shims are required to correctly install the valve springs. Your machinist will also need these. If you have a M28.43/44 engine, You need special tool 9240. Again, if you can't find any close to you, you can borrow mine.
As you can see, there's really nothing to this....almost anyone can do it correctly.
I'm doing a similar thread linking with my threads about my 81. However I am doing each thread 1 at a time and linking them on the original post as I go instead of what you're doing which is linking created threads all at once.
Honestly haters gonna hate, don't let it get to you. You're doing great
Also, you can just blast the cams in WD-40. The WD stands for Water Displacer after all
Thank you! I appreciate the advice and vote of confidence.
Originally Posted by hlee96
Seth! Pull the engine and keep us informed on the progress. I had done the same with my 2nd 928 purchase (wow, just 2 years ago with the '78 manual), and I can confirm that WYAIT things will get you! Now, I am putting an euro s cis engine in there and doing ALL THE ENGINE BAY STUFF prior to getting this car going. Best of luck!
-Hoi
Thanks, Hoi! I am slowly chipping away at the WYAIT items. If nothing else, having the engine out will make reinstalling the power brake booster that much easier. It was a beyatch to get out...
Thanks for the advice and vote of confidence! I do appreciate it.
Originally Posted by the flyin' scotsman
how many miles are on this engine Seth? It would be interesting to know what compression each cylinder has if you can.
Ignore the detractors; good luck for an expedient rebuild.
Hello scotsman! As of now, the Red Witch has covered 168,*** miles. I didn't think to get compression readings before I took apart the cams and timing belt. However, on the engine stand, I can get a set of leak down readings.
I am still on the fence about replacing the rings.
Thanks you!
Originally Posted by Chris Lockhart
Welcome to the club Seth!!! Anything I can do to help, let me know. It's not as bad as it looks. Just document EVERYTHING so you know where it goes when you put it back together. (Of course you do awesome documentation so that shouldn't be a problem. Good luck with it all.
Originally Posted by Chris Lockhart
Lot's of fun. Definitely clean the engine bay.
Thanks, Chris! Baggies, a Sharpie, and a digital camera are my best friends. Its just one piece at a time. And alot of pieces...
Oh yeah, I have mineral spirits and toothbrushes waiting for the engine compartment.
Originally Posted by Guy
Smart move. In the end, It will be easier and a better finished product. Pulling the engine is not that difficult in the grand scheme of things.
I liked the links........
Thanks, Guy. That is what I have been telling myself. Do it now, get it done, and down't worry about it for another 20 years.
Glad you are happy with what I am doing. Thanks!
The Factory Workshop Manual has a few "errors" or "places that do not seem to make sense."
The torque on the water drains, cylinder head torquing, and the wear limit on the valve guides comes to mind. (As mentioned before, some people can't figure out the cam timing method, but it is exactly correct.)
Tell your machinist to ignore the wear limit on the valve guides, or you will not end up with a very good result. (With the mileage you have on this engine, plan on replacing the exhaust valve guides, minimum.)
Avoid the "standard" replacement valve guides that are commonly sold. They are generally sold as .001" oversize guides and are too big for the bores in the heads. Have him measure the bores and order the correct size guides from PEP.
"American" engine machinists are used to always replacing valve springs.....especially on an engine with your kind of mileage. New factory valve springs are a bit pricey....and almost never fail.....or loose even 5% of their original tension. Have him carefully check the springs on a spring tester....it is very rare to find a weak spring.
If the heads need to be welded on the deck surface (likely), they must be carefully preheated, welded, and then allowed to cool down back in the preheat oven.
I've always suggested that the oil galley plugs be removed, the galleys cleaned, and the plugs replaced. This has recently turned into a HUGE problem. Both the aftermarket and the factory oil galley plugs have suddenly changed and the sealing "lip" is extremely narrow. I've had a terrible time getting these not to leak, for the past 6 months or so. The problem is so bad, that I'm now leaving the plugs installed. When they soda blast the heads (NO BEAD BLASTING!!!! ONLY SODA BLASTING!!!!), have them re-hot tank the heads and blow through the oil passages, after they rinse the heads. Once the machine work is completely done, have them clean the heads....and spray solvent through all the oil passages, just before assembly.
Especially important on these heads is the installation of the stem seals. If the machinist installs the stem seals just a tiny bit too much, the top of the guide will touch the lips of the seals. This will "open" up these lips on the seals and oil will pour down the guides. There is a special tool (9225-1) for installing the stem seals....I suggest you borrow one and have him use it (You can borrow mine, if you can't find one closer to you.)
There are also some special tools to determine what valve spring shims are required to correctly install the valve springs. Your machinist will also need these. If you have a M28.43/44 engine, You need special tool 9240. Again, if you can't find any close to you, you can borrow mine.
As you can see, there's really nothing to this....almost anyone can do it correctly.
Hello Greg, thanks for your advice!
I have printed everything I thought applicable from Section 15 of the WSM and am giving it to my machinist before I drop the heads off. He and I are going to have a long talk about these heads. What I want done, what should be done, how he is going to do it, etc... He and I have built up an excellent relationship in the past 10+ years. I trust him. He has not done a Porsche 928 cylinder head. However, he has done many, many aluminum SOHC/DOHC cylinder heads. Welding and machining the head deck surfaces, valve jobs, guides, etc... I trust him to have the skills to do this.
However, if he and I can't come to an agreement on how to do the heads, I will go elsewhere.
85-86 heads aren't terribly common. I don't want to mess these up. On that note, the Red Witch has an M28/44 engine.
I plan on going through the valve timing procedure in the WSM to prove it to myself.
I fully expect to have to replace all 32 valve guides in both heads. I am hoping to have to replace as few as valves as possible.
I will give my machinist your instructions on the guides.
As well, I will caution him on the installation of the valve stem seals.
I had not planned on replacing the valve springs. I have noticed on Rennlist that they are almost never changed. Only time I have seen valve springs mentioned is when someone is upgrading due to performance camshafts.
Your comments about the oil gallery plugs scare the hell outta me!!!
I have always read the mantra 'Remove the plugs, clean the passages!"
OK, Hot tank, soda blast ONLY, weld, machine, hot tank again, lots of solvent through the oil galleries. Correct?
I VERY much appreciate your offer of borrowing your factory tools mentioned above. However, when the time comes, I will not borrow them. I will gladly RENT them. Makes me feel better that way.
NOW, Public Service Announcement: Some of you may think I am being an a$$ by refusing Greg's offer to 'borrow' his tools. I am not. I would rather pay him a deposit while the tools are in my possession, then pay him a little for his trouble and the use of his tools. Remember, I am Joe Blow to him, and hell and gone across the country. This is insurance to him that I will take care of his tools.
You don't like it? Too bad.
Any way, I really appreciate ALL the advice I have been given by ALL of you! Talking to another Rennlister, he mentioned that the people are what make 928 ownership so good. I agree with him.
Seth, Holy Crap Batman! You are an absolute BEAST when it comes to working on this machine! When and / or if my engine needs to be rebuilt I'm coming to your house!!! Good luck, keep it up and keep us posted!!
Seth, Holy Crap Batman! You are an absolute BEAST when it comes to working on this machine! When and / or if my engine needs to be rebuilt I'm coming to your house!!! Good luck, keep it up and keep us posted!!
Thanks, Joel!
I would like to say I know what I am doing, but I am making this up as I go. You are watching the result of 3 years of watching, searching, and paying attention on Rennlist. I have observed issues and trials others have gone through with their 928's. Mike and Pete sold me a wicked bitchin' 928. I am now making it that much better.
I have spent over a year doing exactly what I said I wouldn't. Well...no more denial. I am trying to make this car right and reliable. Then, drive the wheels off of her!
I appear to have committed a breach of etiquette faux pas here on Rennlist. I have ruffled some feathers with my linking of a bunch of my posts on the first post in this thread.
So...I want to apologize if that came across as attention seeking. It was not. With the decision to pull the engine to refurbish the heads, I had been asked to combine any of my applicable threads to make it easier to follow the scope of the work. That made sense to me, so I did. If you will notice, in each of those linked threads, I have also linked back to this thread, for continuity.
My intent was to tie all this together. I am sorry if it came across as shallow and whorish.
However, that is it. I am still carrying on as such. If you are offended by this, take my apologies. And read elsewhere.
Pfft. It was a bit annoying, but I figured it out after clicking on a couple of the "All work is now in this thread" posts. After that I simply didn't read all of the others. It also "ties up" the loose ends that can be far more annoying.
Besides, you aren't a REAL 928 owner unless you've annoyed the "resident curmudgeon" at least once.
Seth, your my hero brother! Keep up the good work!
Thanks, Ron! I am chewing through this slowly. I am my own worst enemy. I don't want the Red Witch to be perfect. That is unattainable and a waste of resources. I DO want her to be reliable. Hence, falling face first off the WYAIT Cliff, landing on the WYAIT Tree, and hitting every branch on the way down...
Originally Posted by Wisconsin Joe
Pfft. It was a bit annoying, but I figured it out after clicking on a couple of the "All work is now in this thread" posts. After that I simply didn't read all of the others. It also "ties up" the loose ends that can be far more annoying.
Besides, you aren't a REAL 928 owner unless you've annoyed the "resident curmudgeon" at least once.
Thanks, Wisconsin Joe! I apologize for the unwieldy nature of that post, but it was the best I could come up with on short notice. I had been asked to try to combine my threads. That 'seemed' to work...
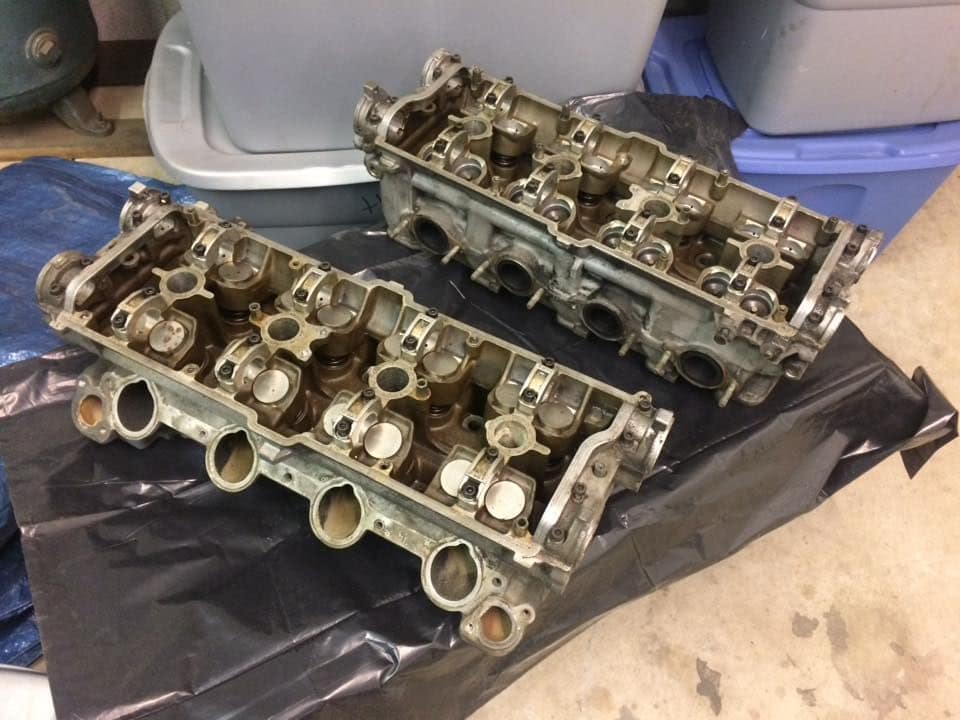
SCORE!!! I got a set of used 86 S3 cylinder heads for $150!
A buddy of mine sent me a link to a personal sale site with a set of Porsche 928 Cylinder Heads '85-'86 $150.
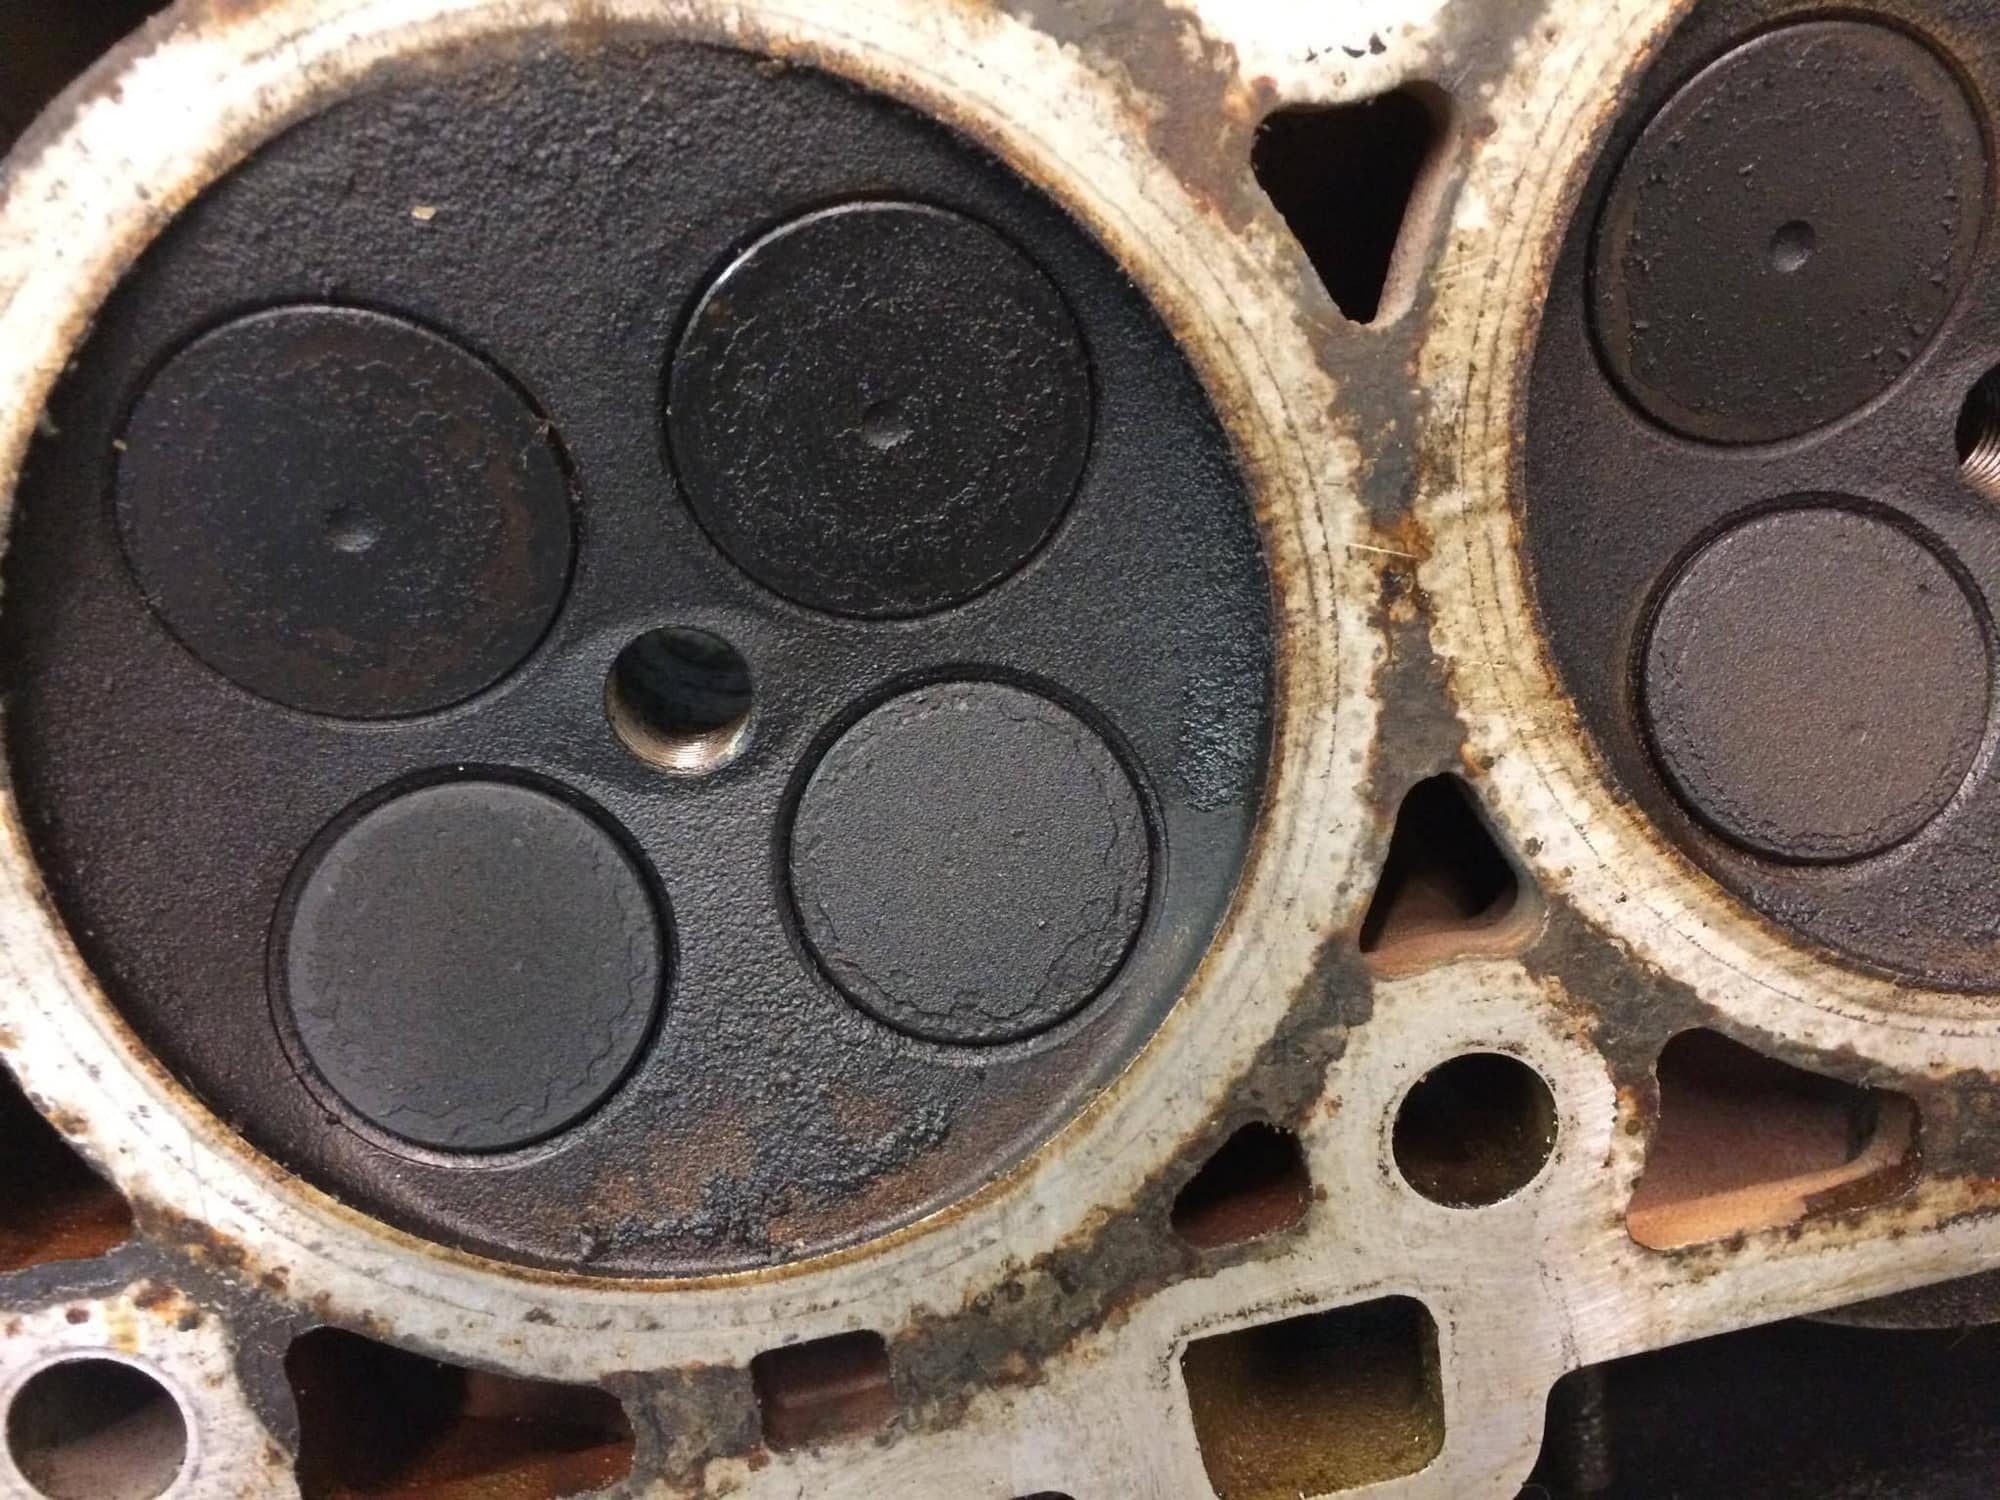
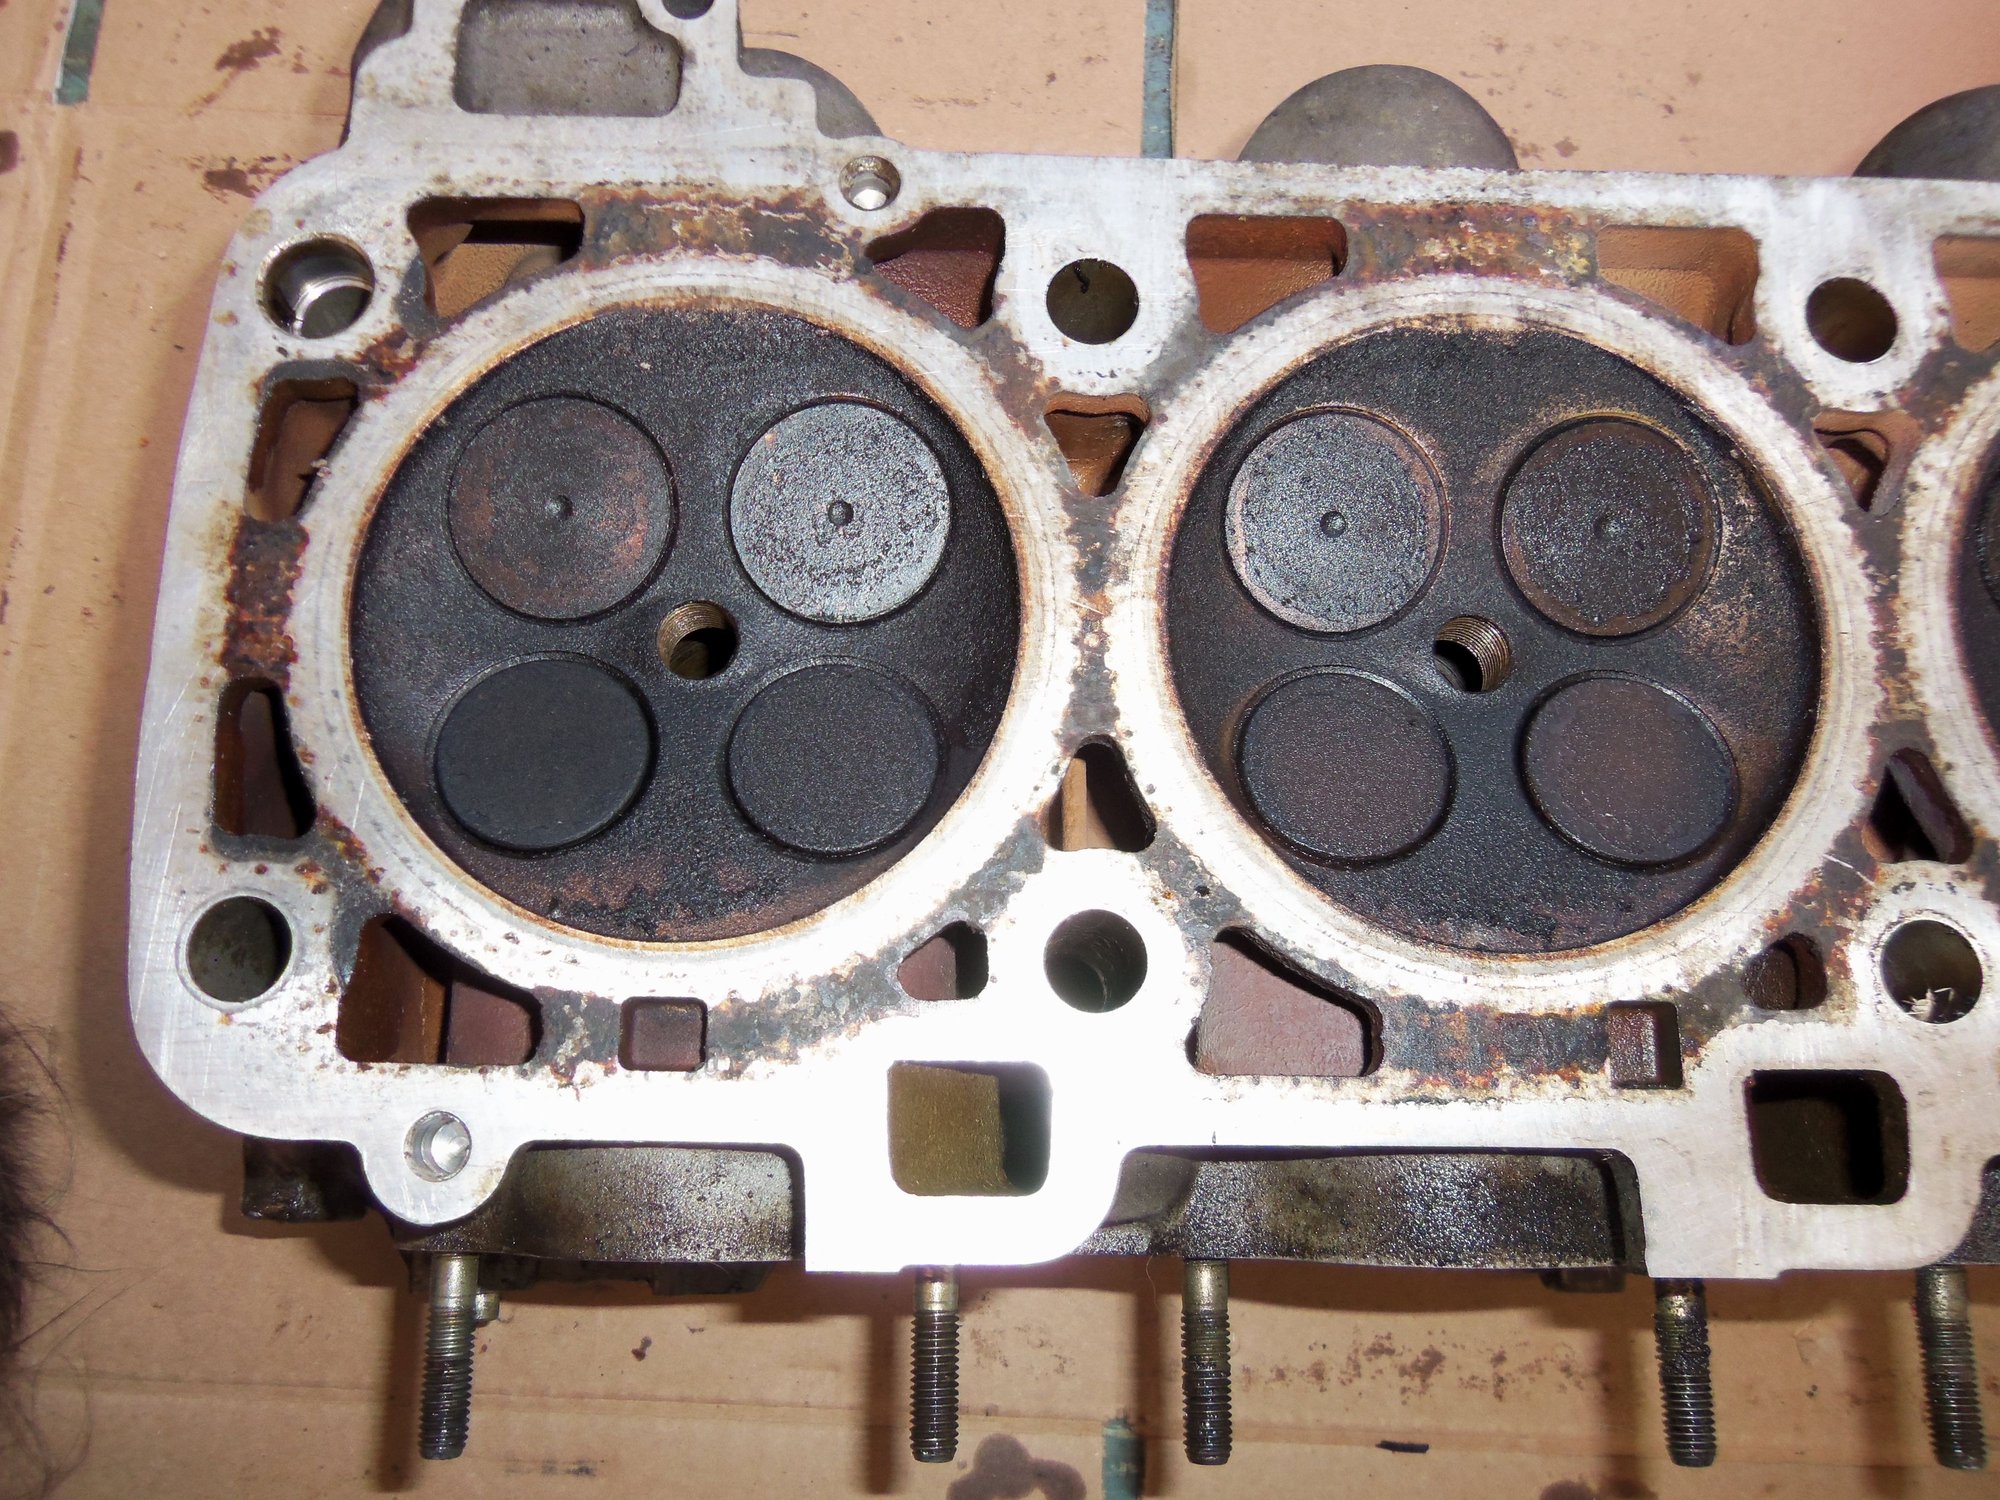
Ad showed a pair of heads without cams, but with cam caps as well as the valve train. According to the seller, they are off a 65,000 mile 1986 928. Photos look good:
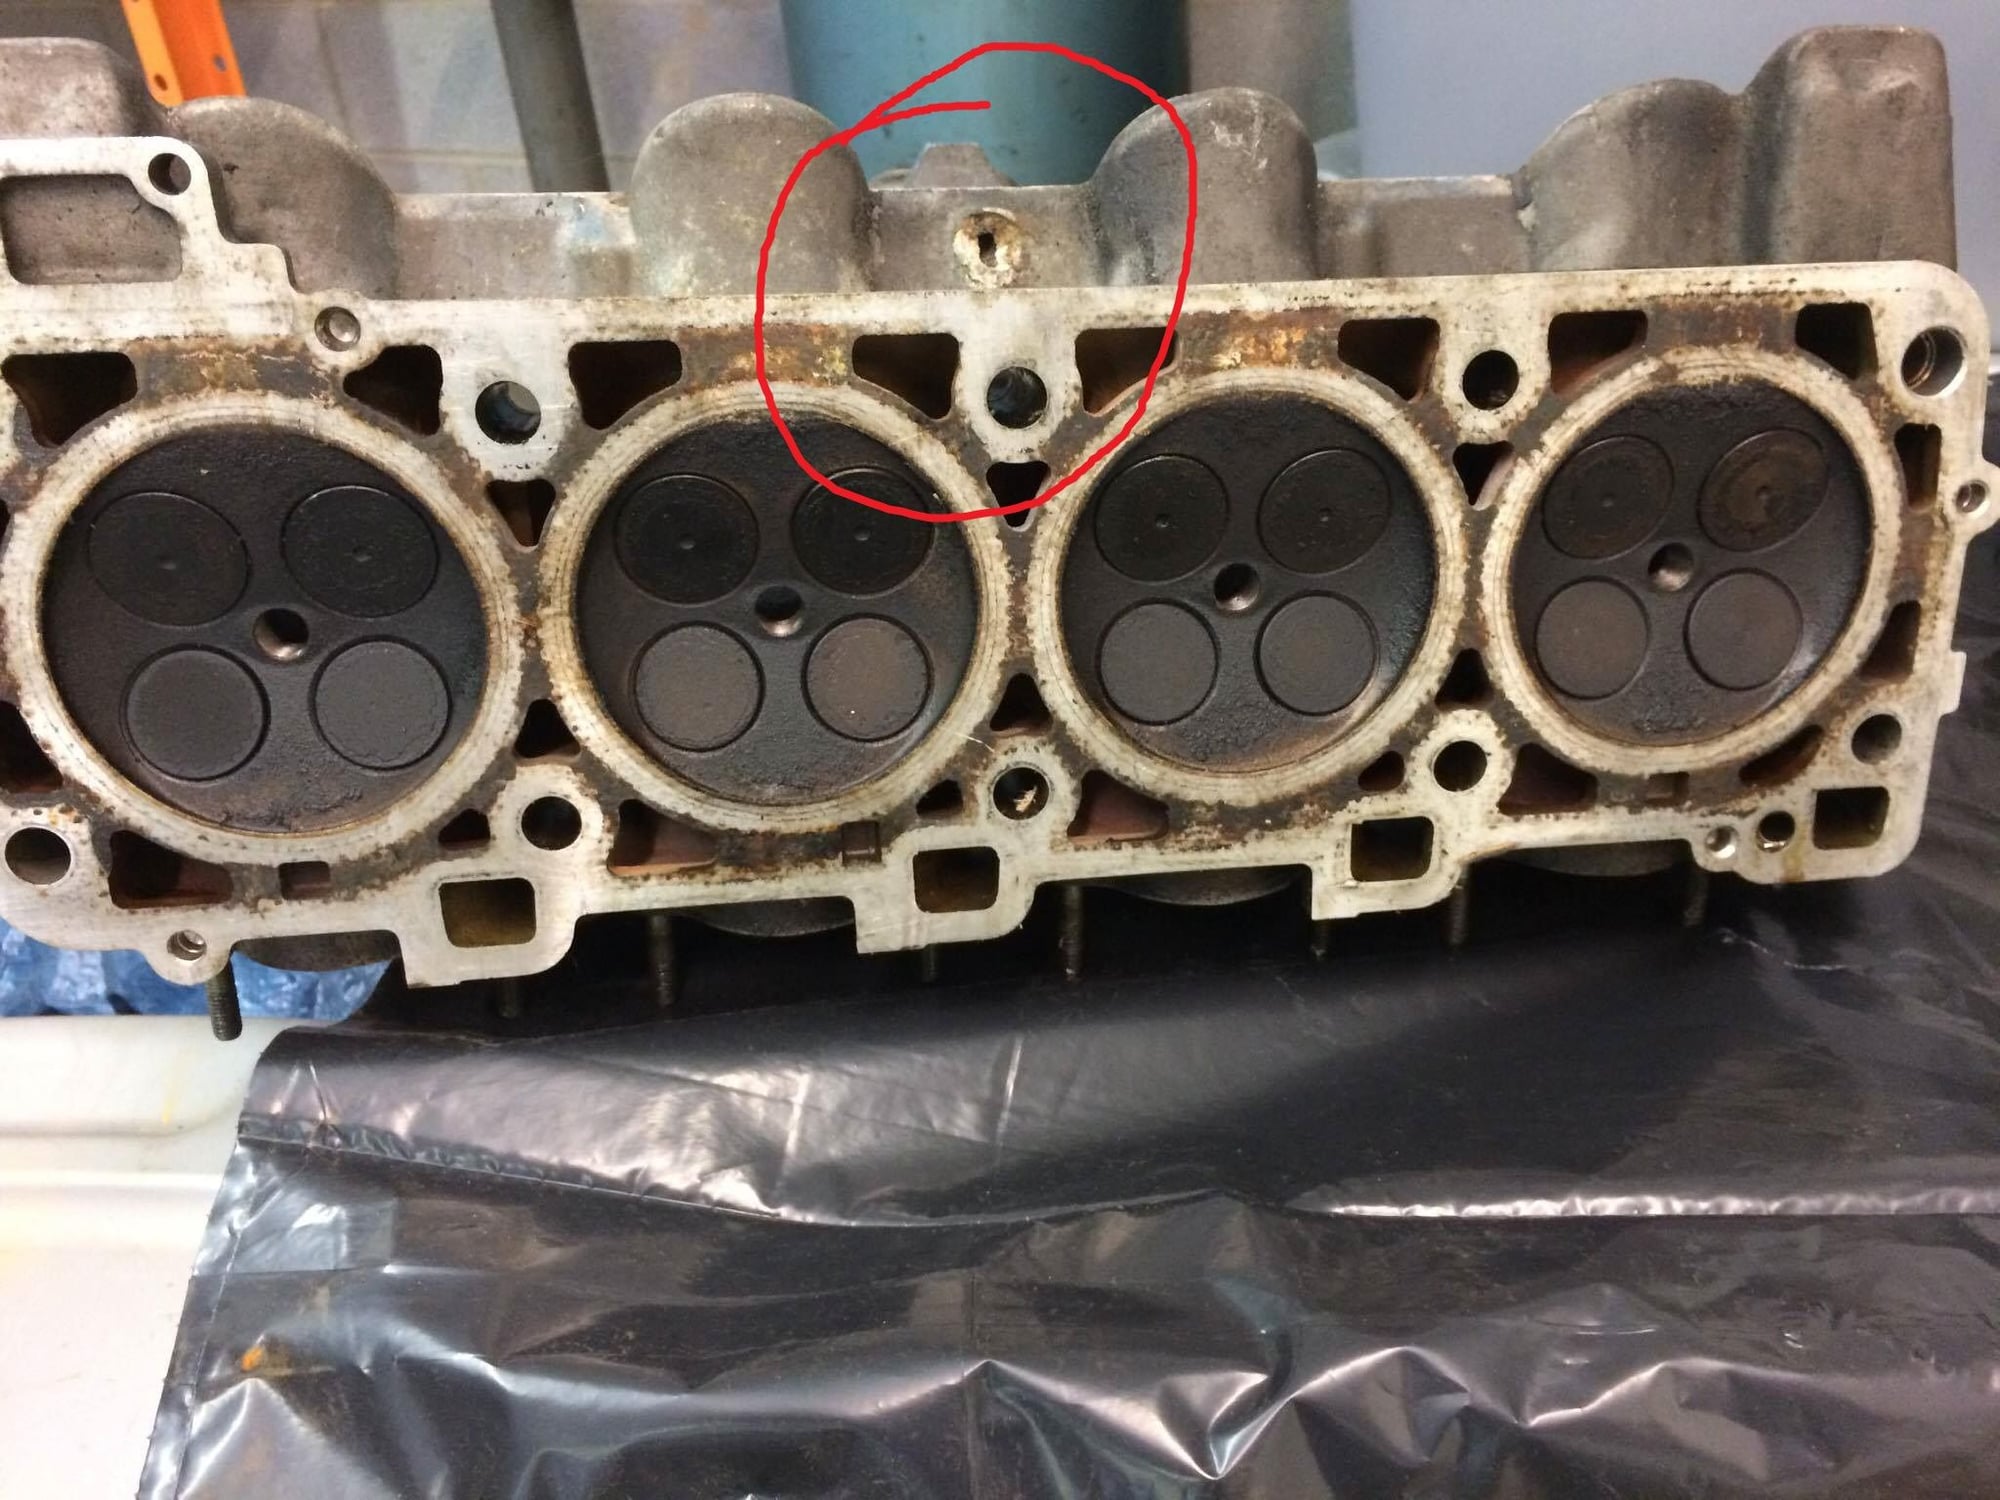
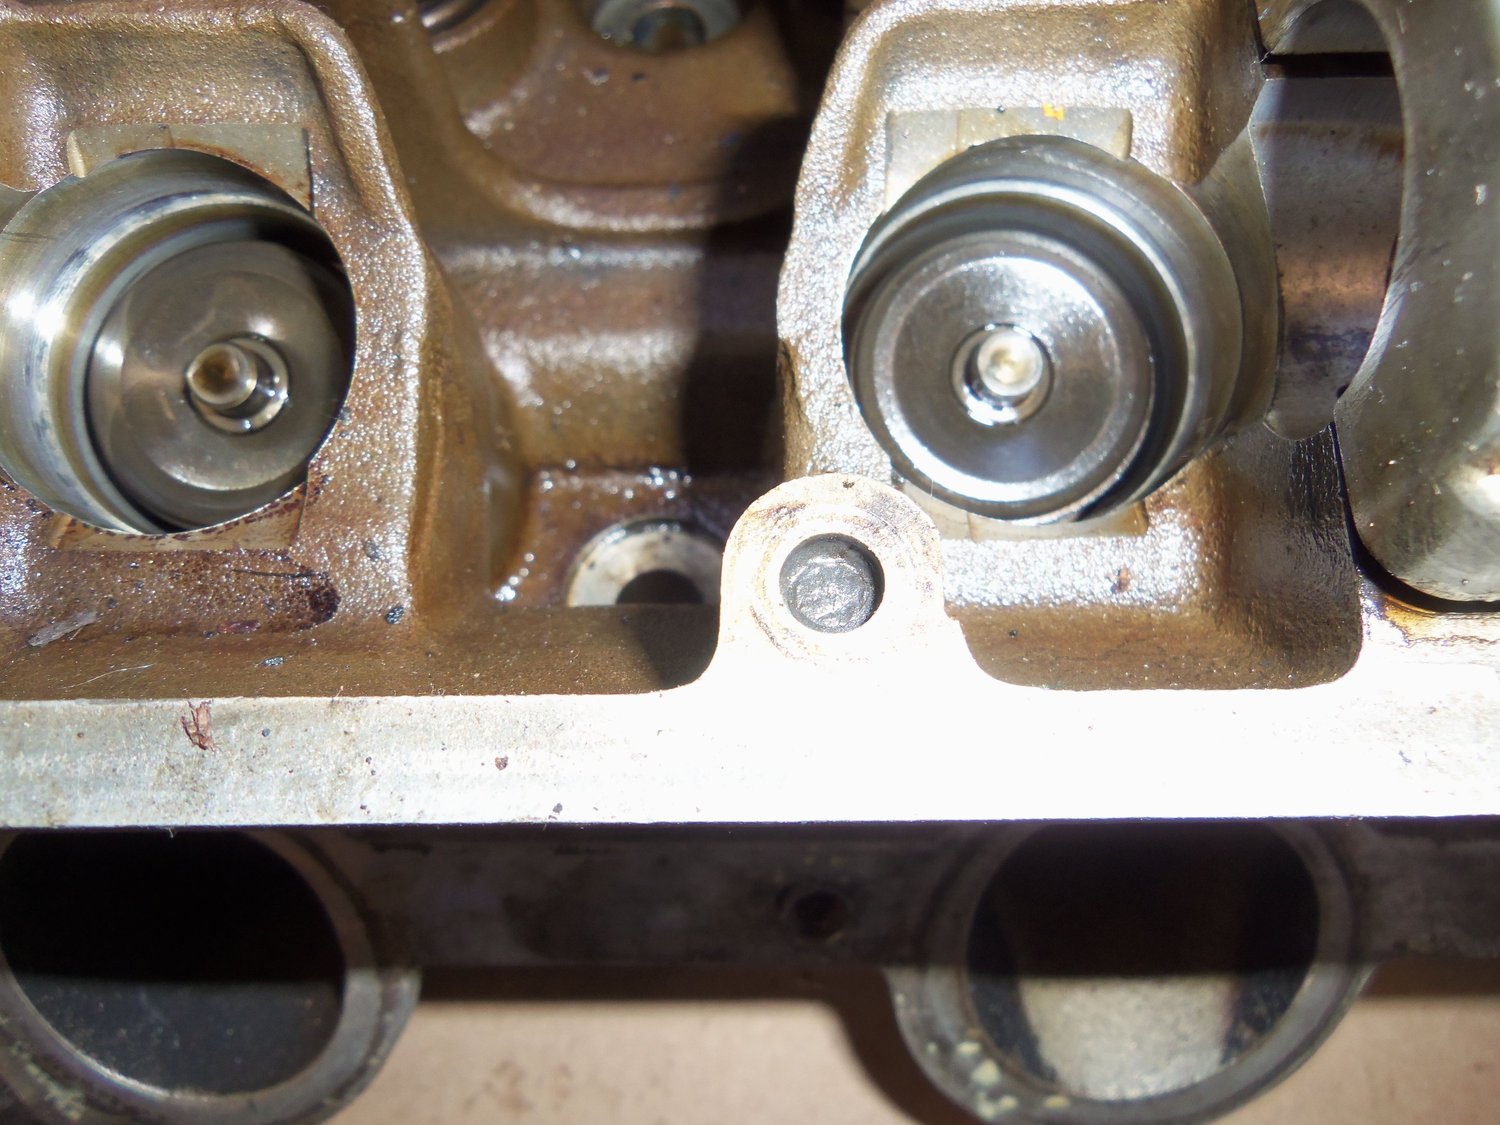
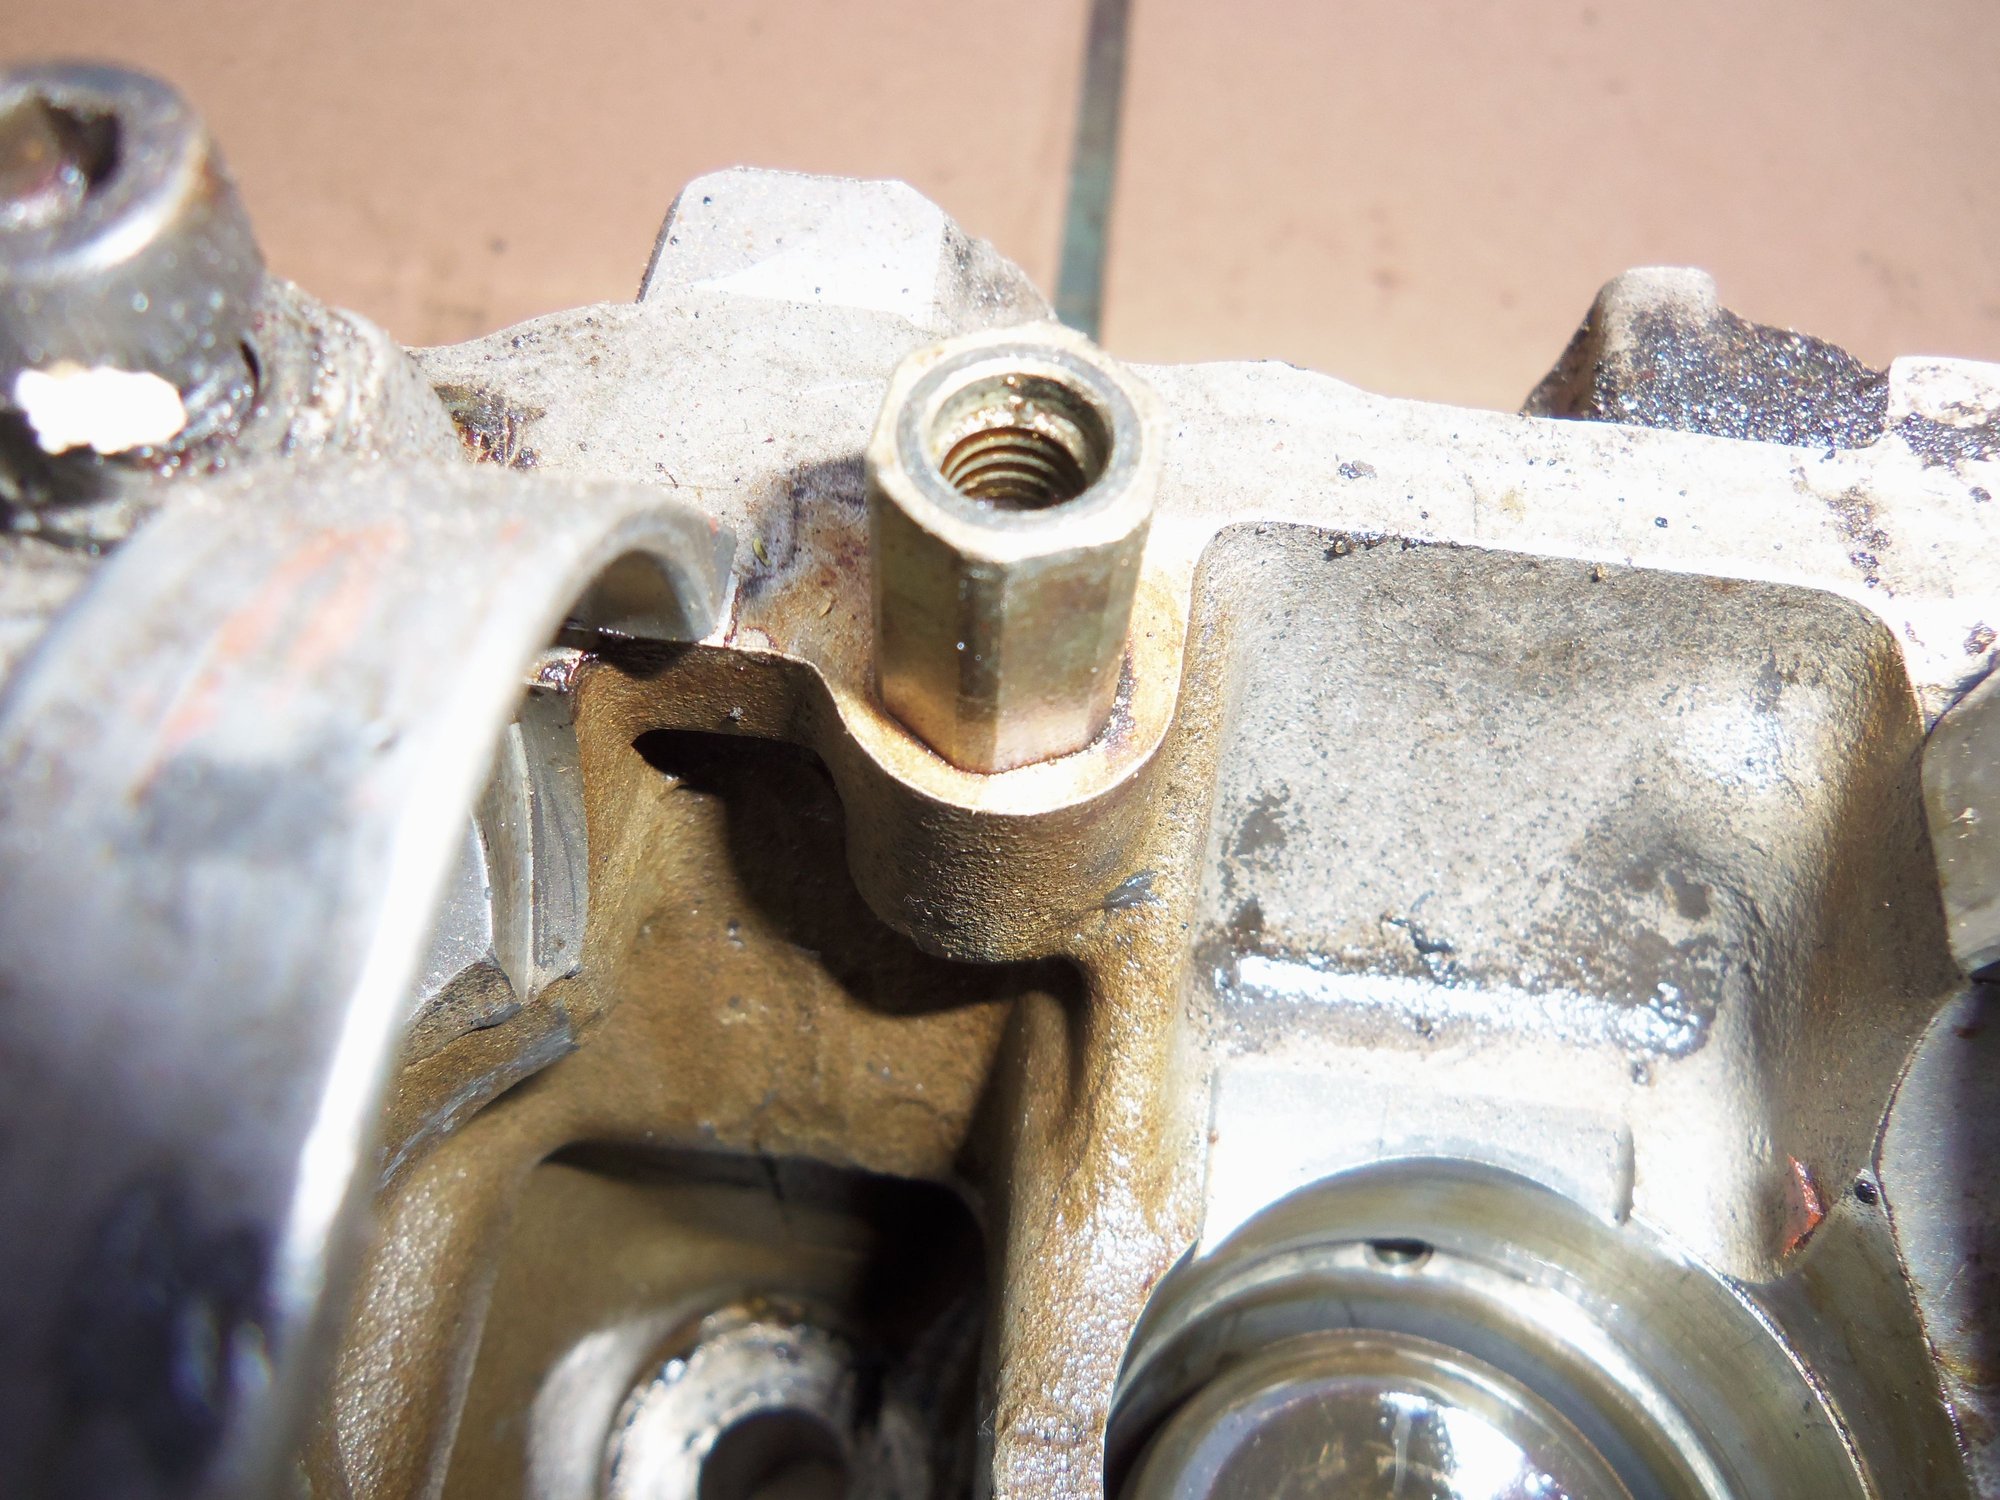
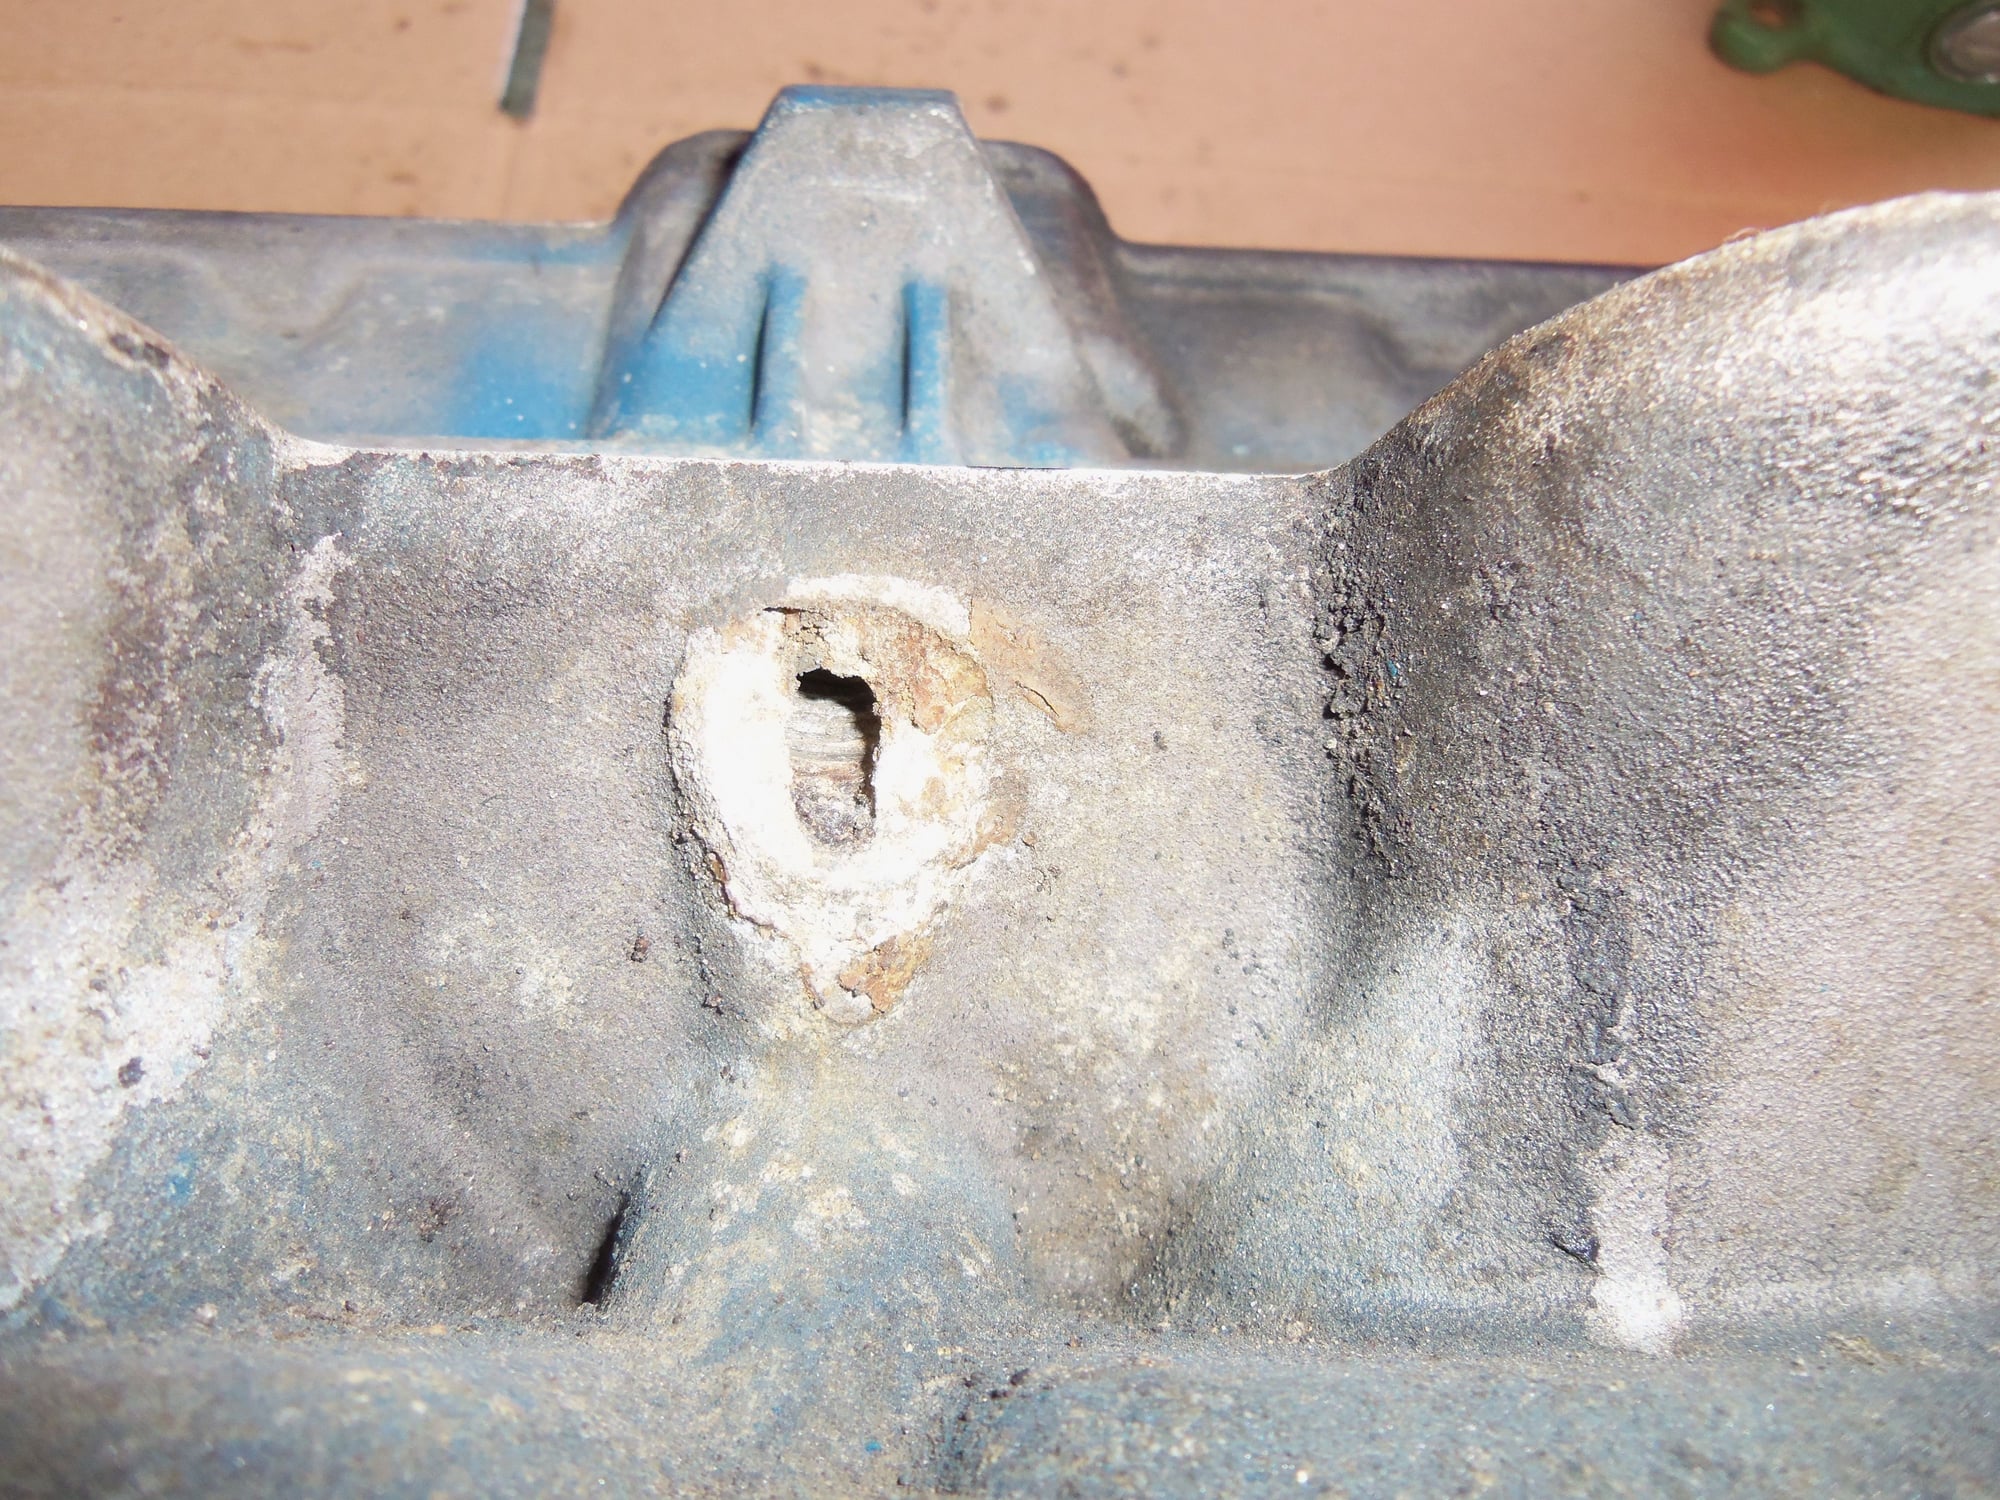
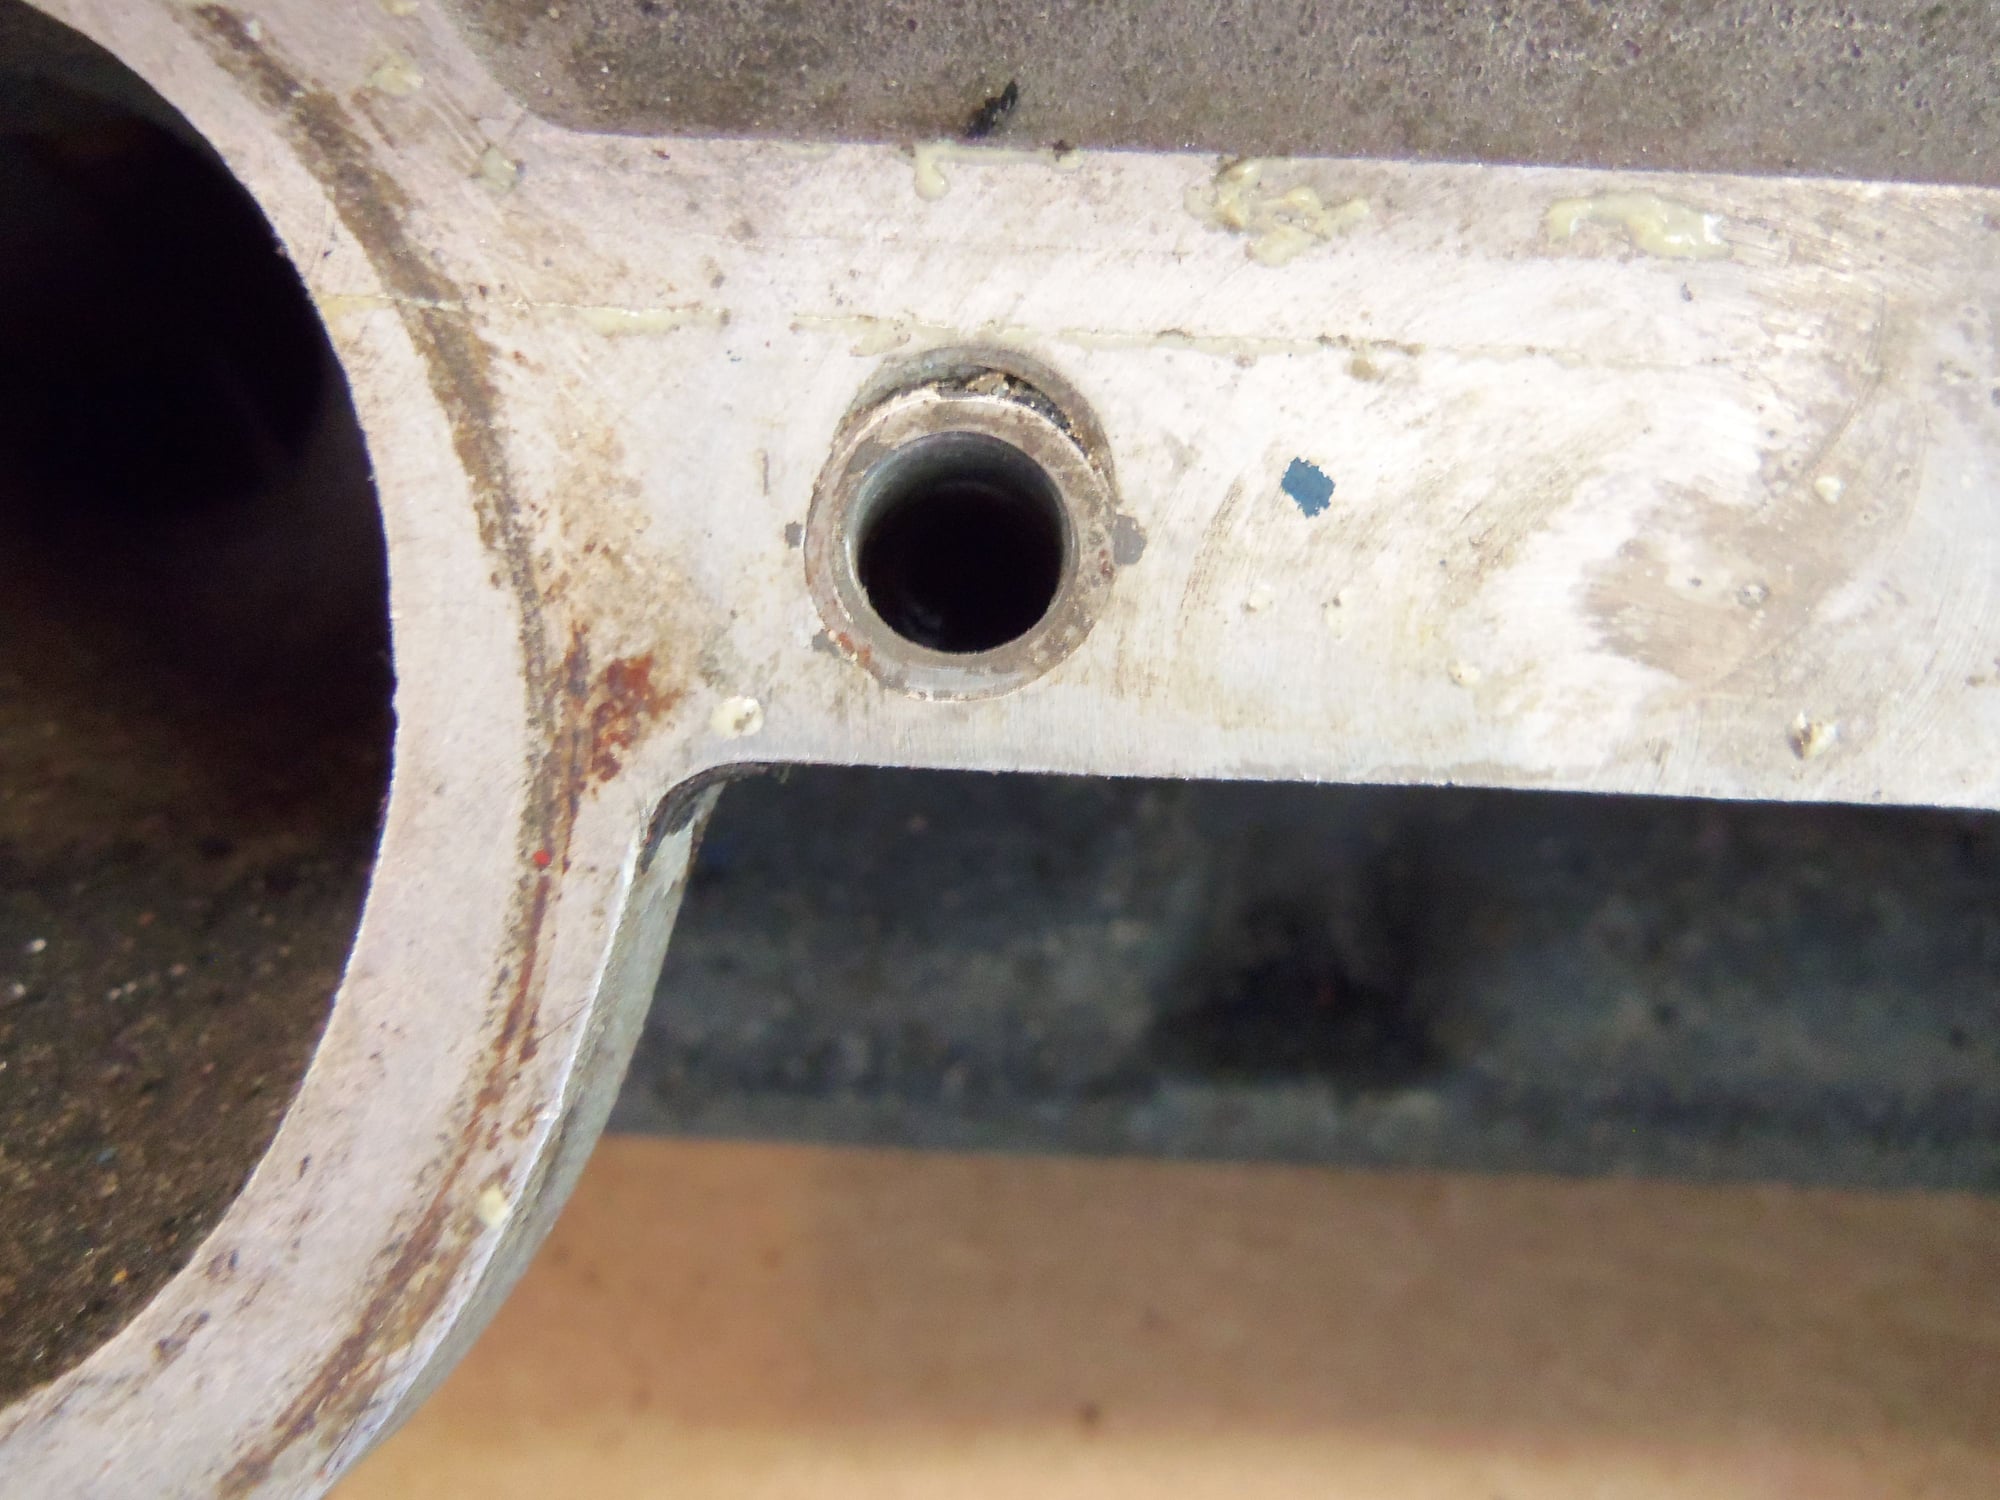
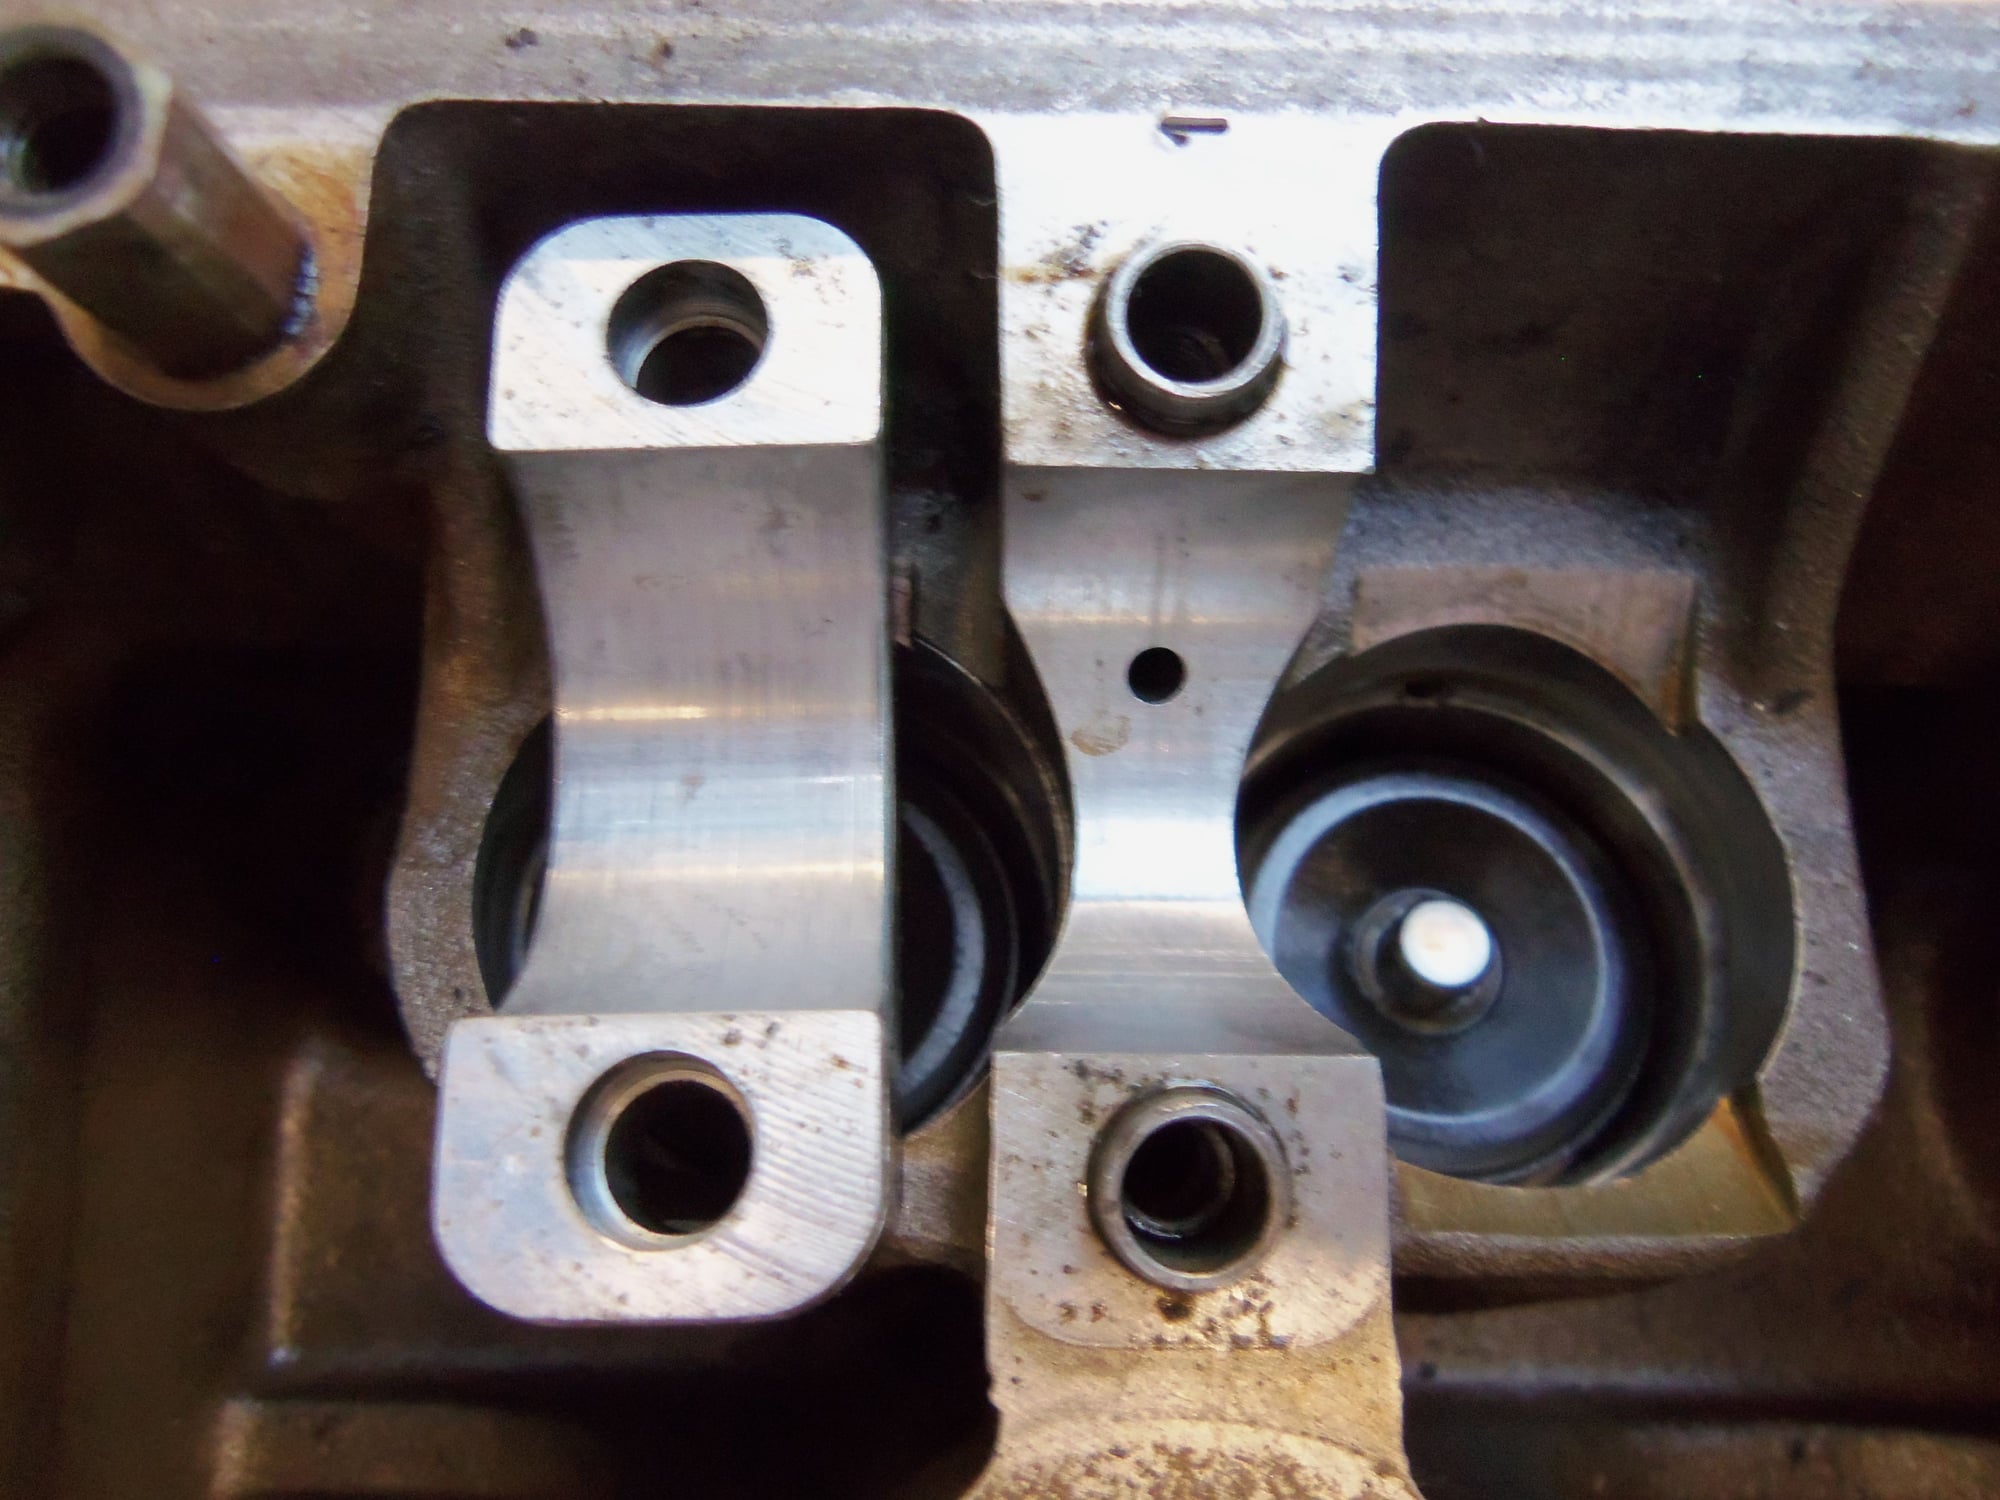
So far, so good! I do have a question on one of the cylinder heads. Can anyone tell me what this hole is in the red circle? Is it a flaw in the cylinder head?
As well, I got the cam covers, plastic timing belt covers, an injector rail, and a couple of injectors for an additional $50. Cam covers are worth it just for the breather elbows, oil separator, and lock nuts.
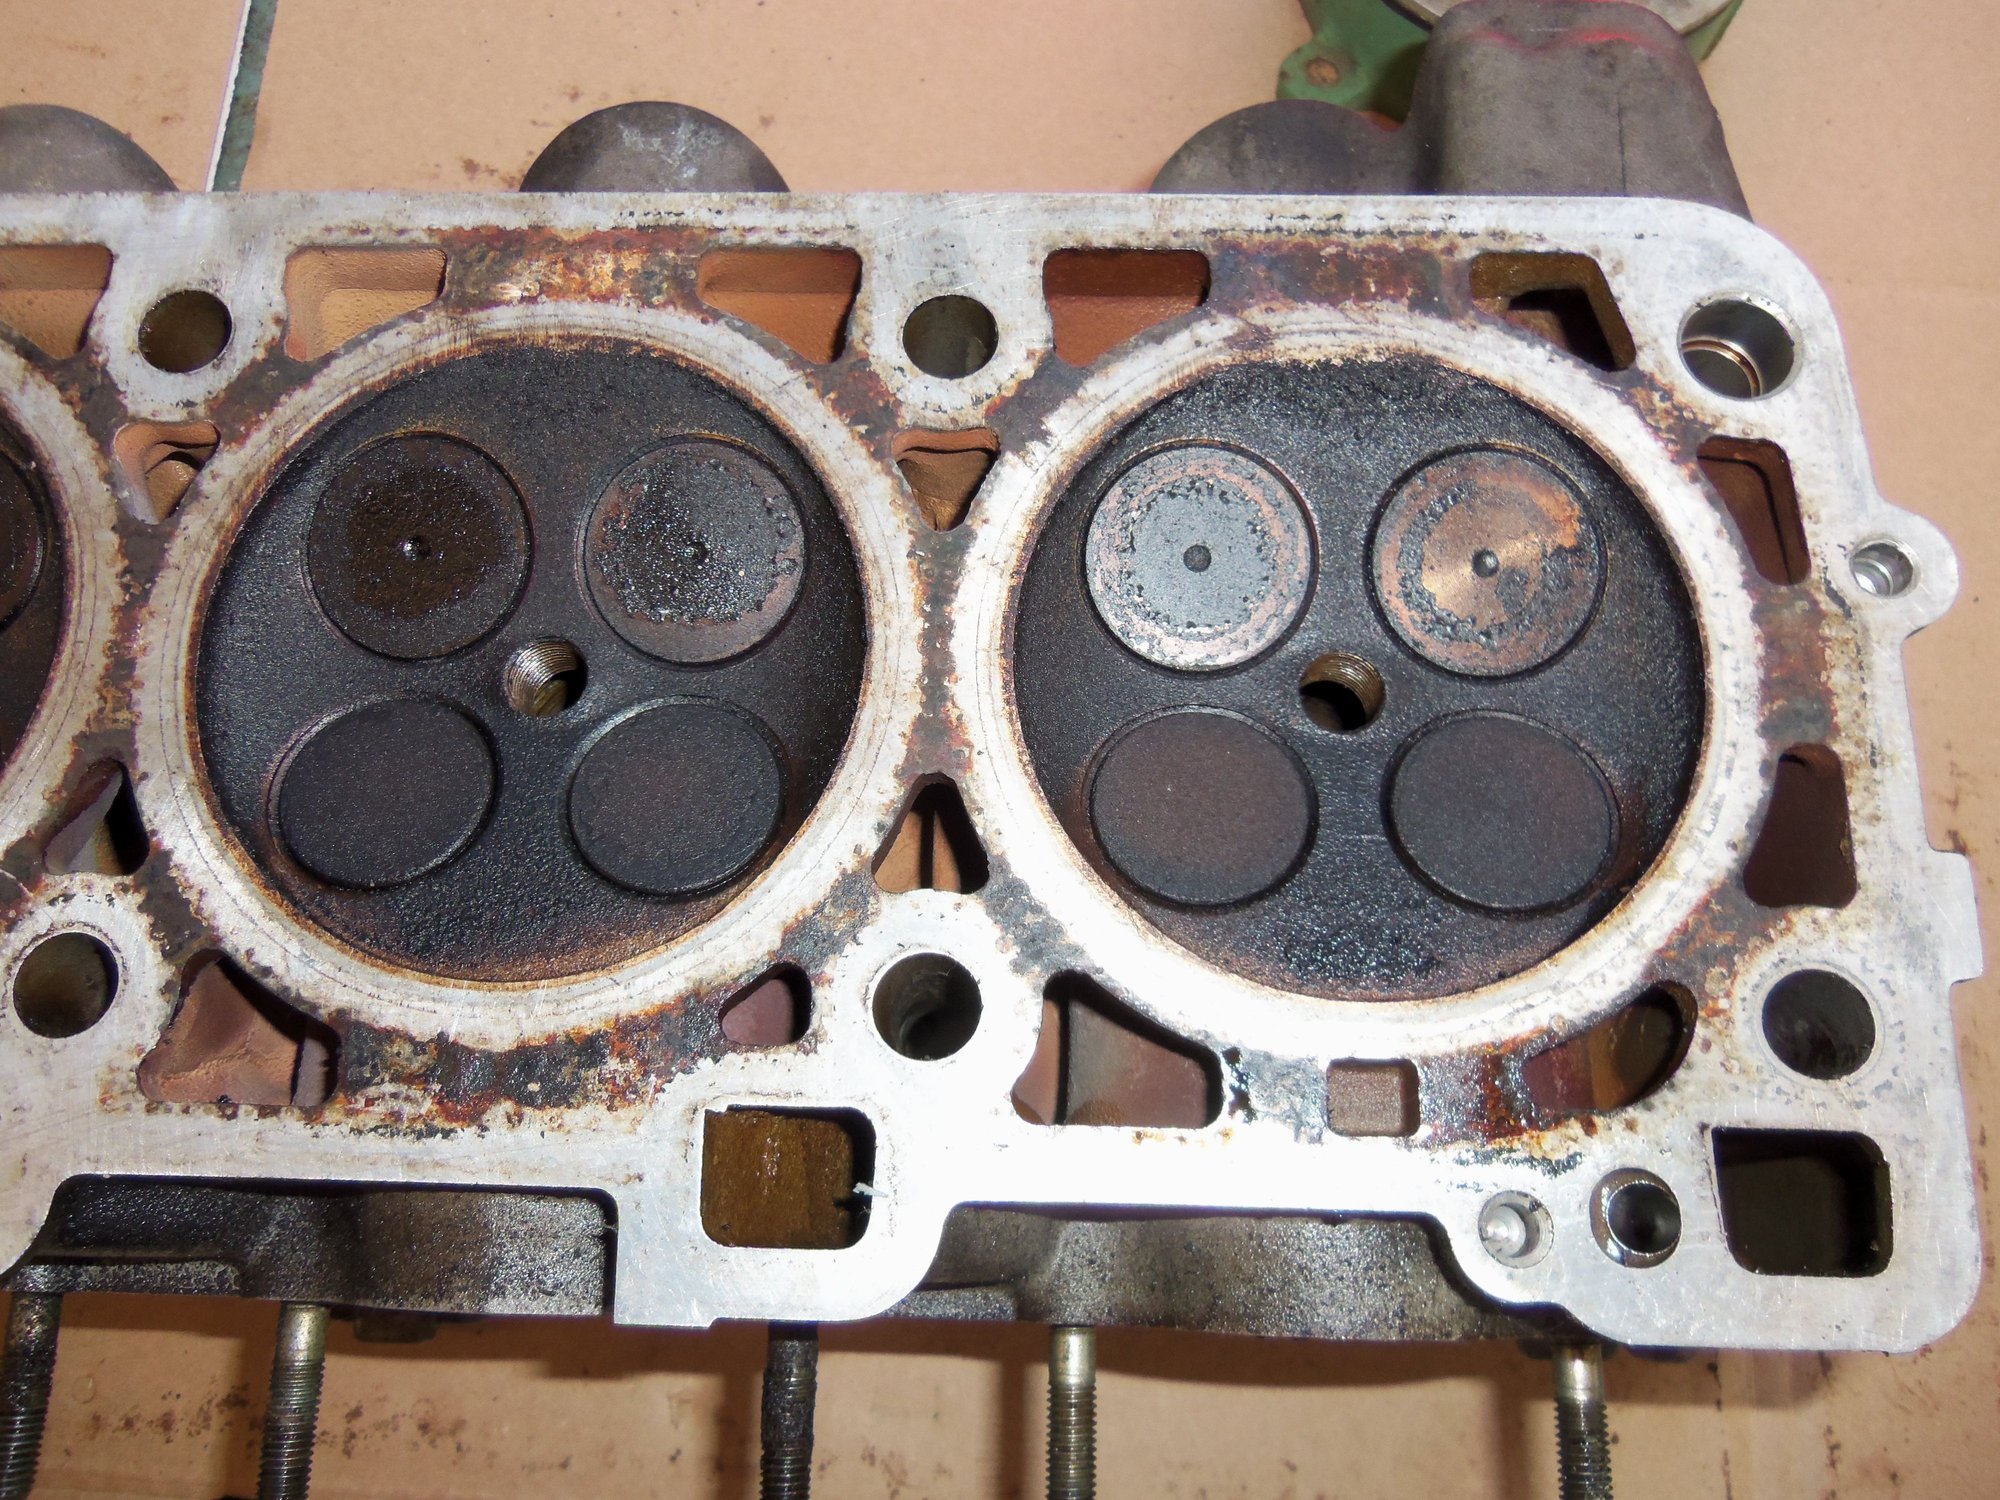
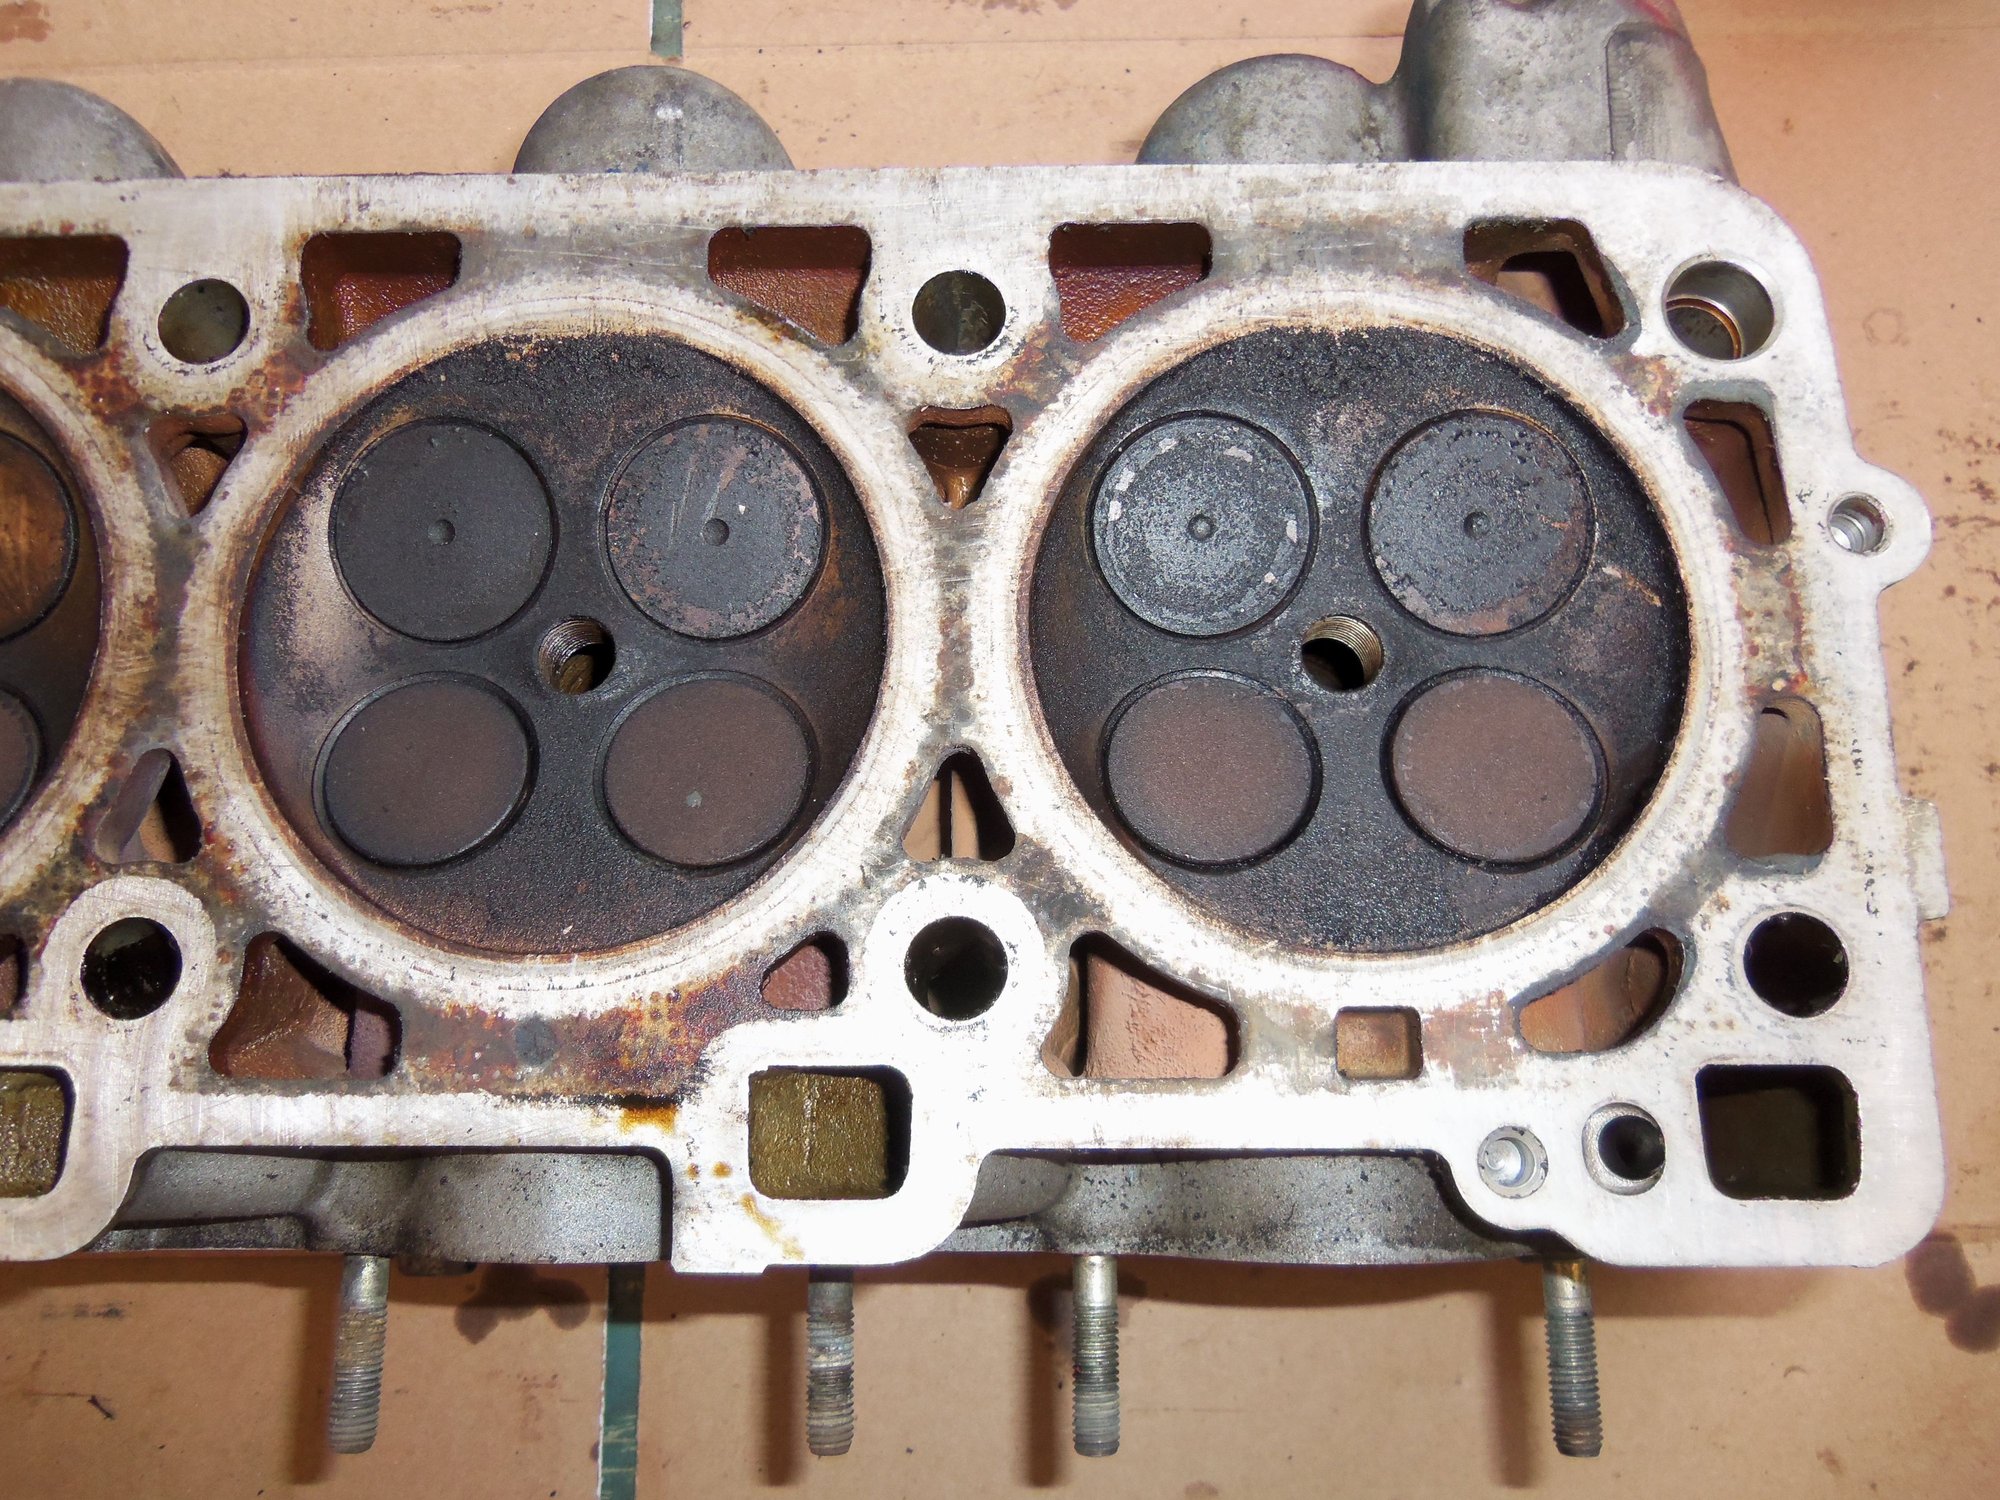
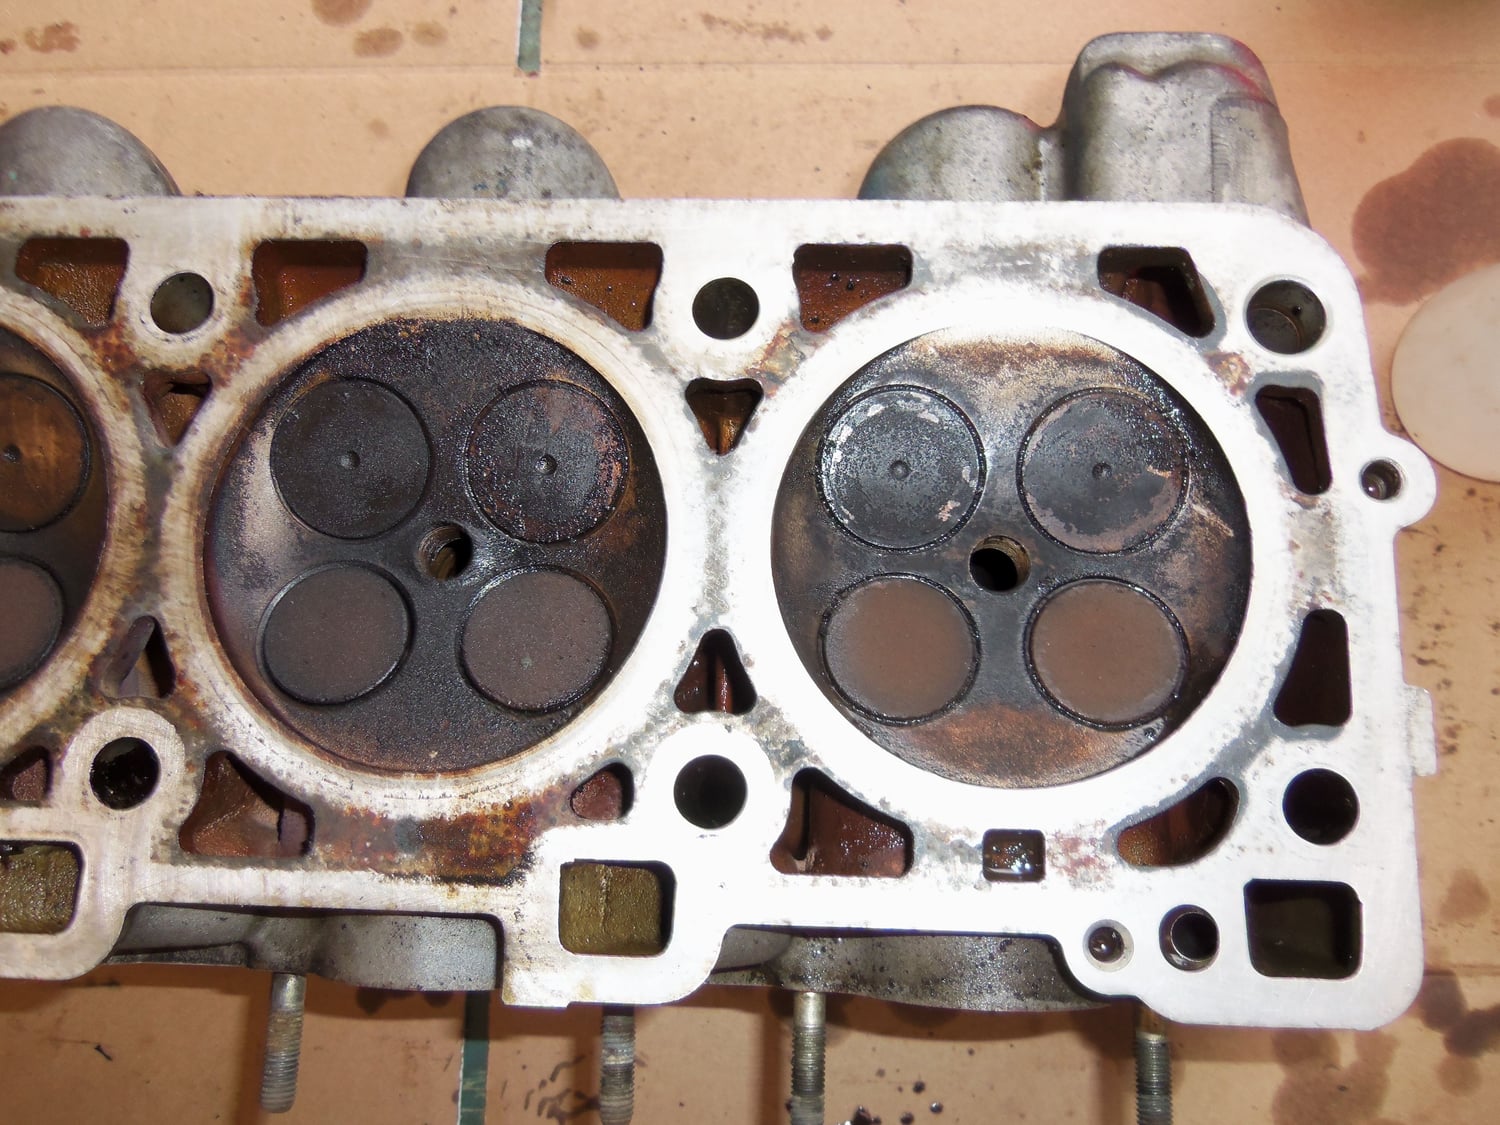
Looking at the heads, the deck surfaces look good. I am hoping they will clean up will with minimal welding and just need machined.
I am also hoping that the valve guides are in good condition. If nothing else, I am hoping they are in better condition than the cylinder heads on the Red Witch.
My plan is to pick up these heads and parts this coming weekend, then drop them off to my machinist for disassembly and inspection. Then, when I get the heads off the Red Witch, drop those heads off for disassembly and inspection. My intent then is to mix and match to come up with the best two sets of heads, valves, springs, etc...and do whatever machining is required.
The other heads and parts will get pickled and go into storage.
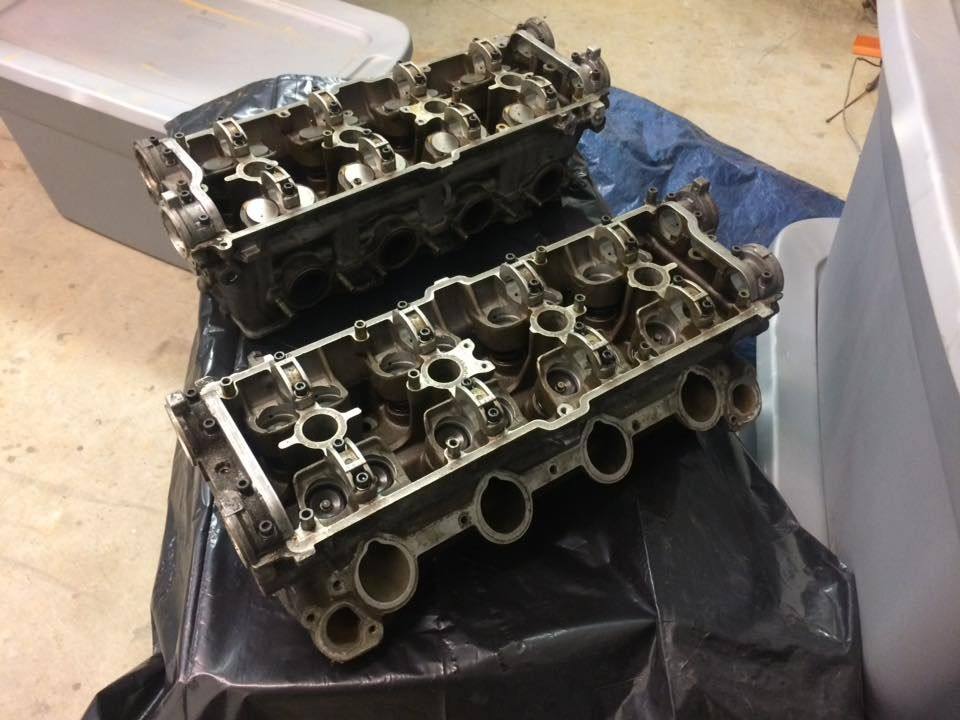
I picked up the cylinder heads today! I am happy...to a point.
I was so concerned with the deck surfaces that I overlooked the cam bearings. To be blunt, they look a bit scuffed.
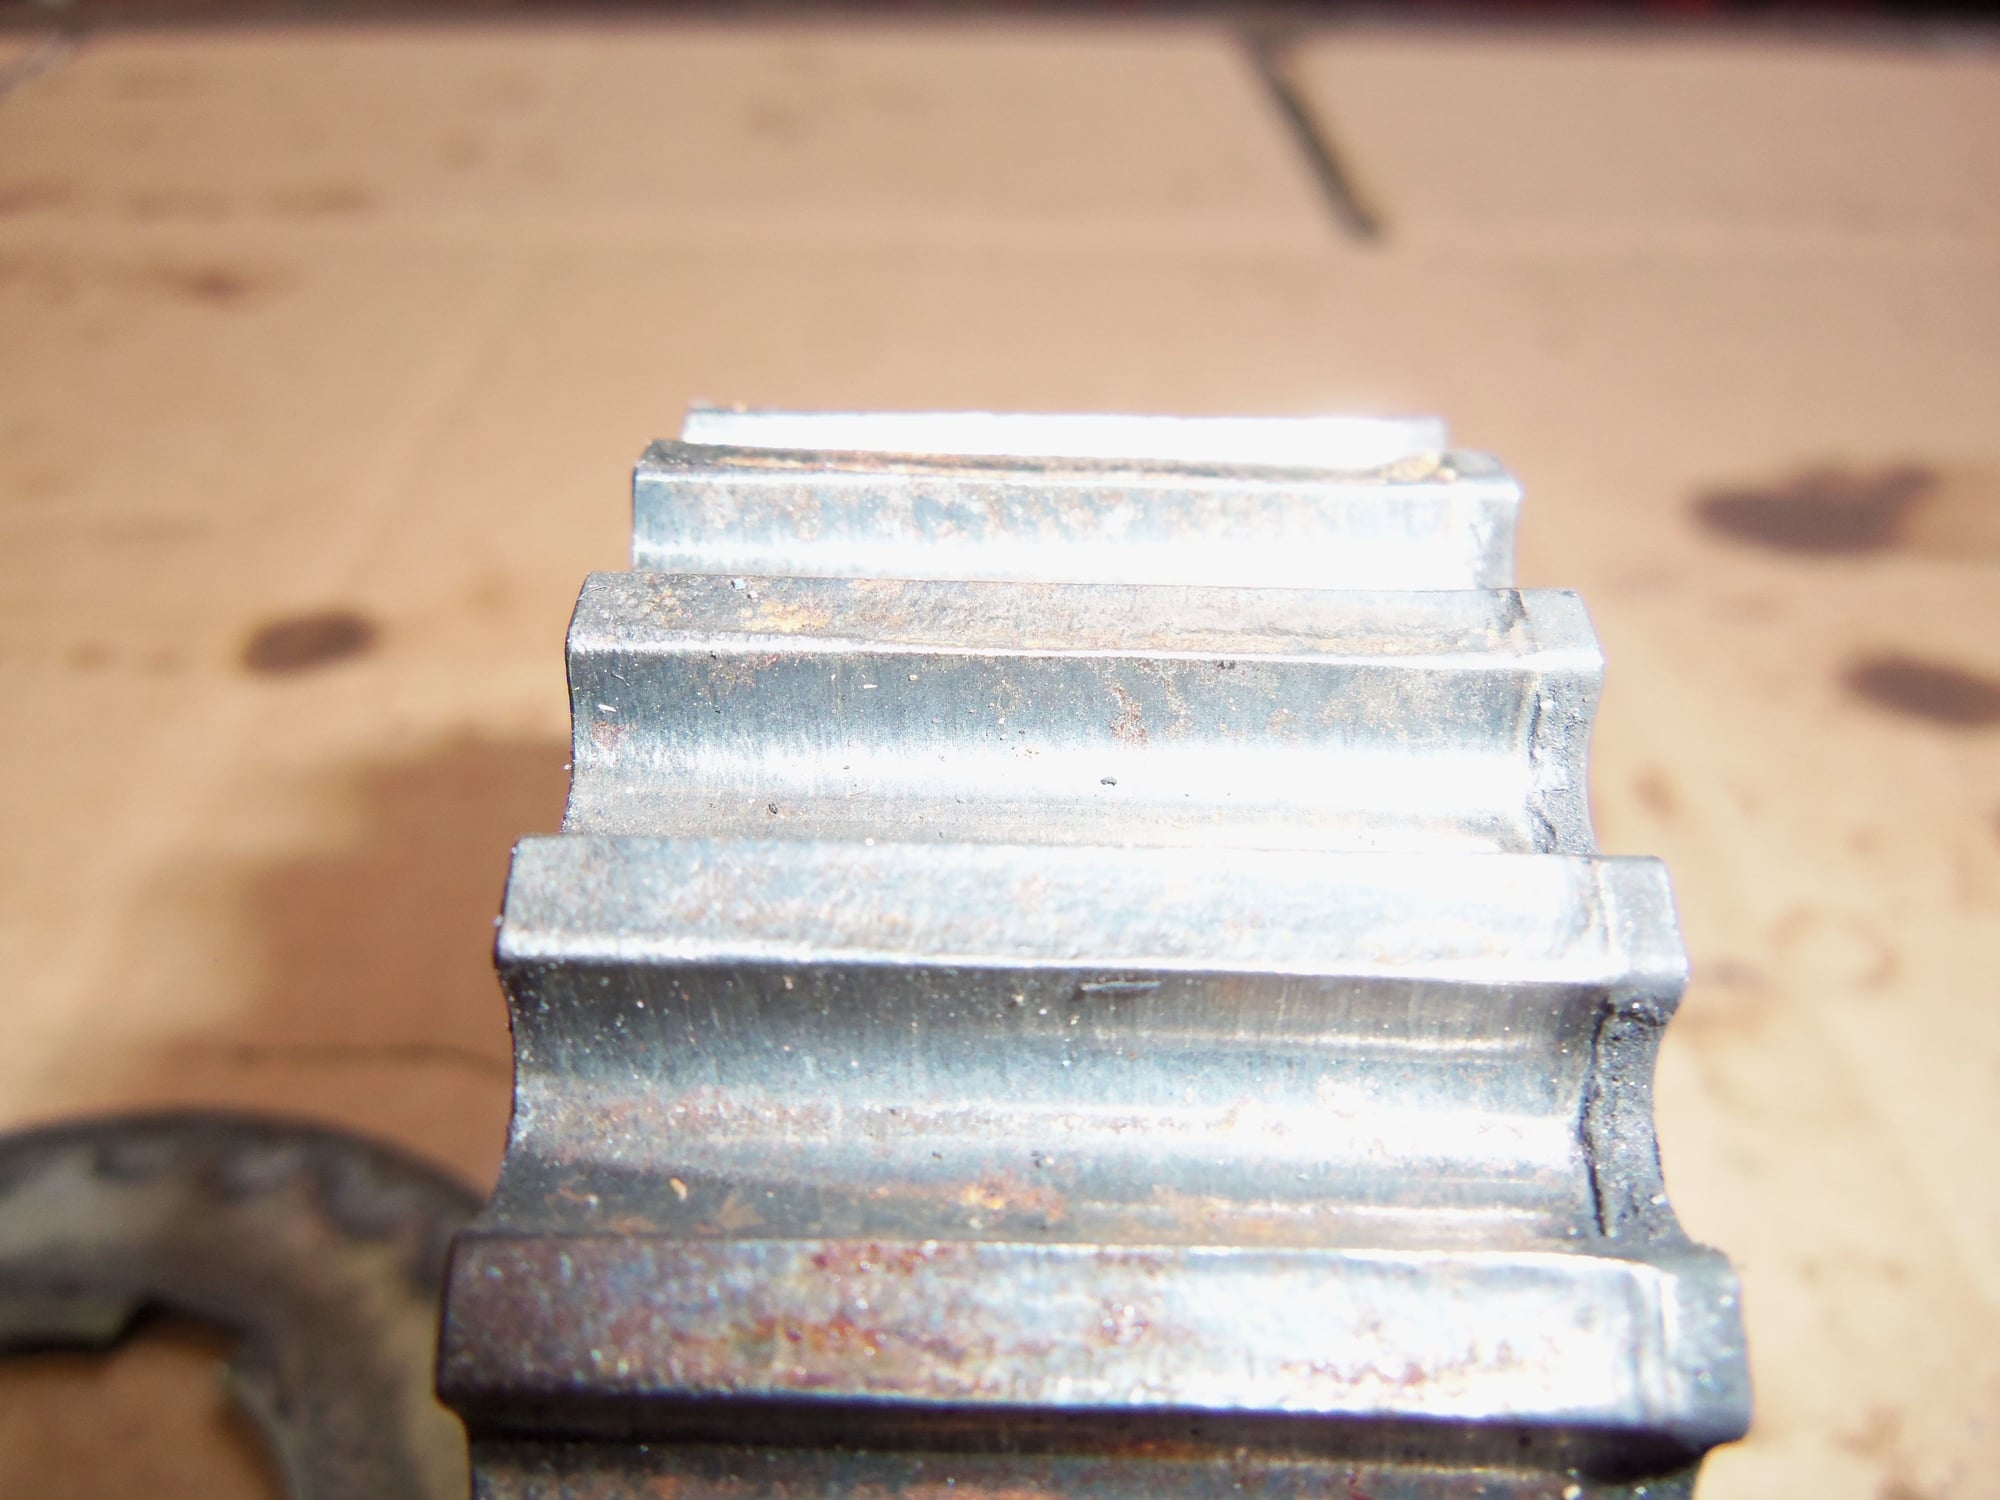
As well, these heads may not be so young. Guy, who is named Tim, and is a 944 guy, was quite nice and told me the back story on these heads. He bought them as a project for one of his 944's. He said he removed the heads himself from a ruined engine that had bottom end failure. He threw in a bunch of extra parts. One of them was the timing belt crank gear off the engine. Hmmm...it shows a helluva lot of wear for a 65,000 mile engine.
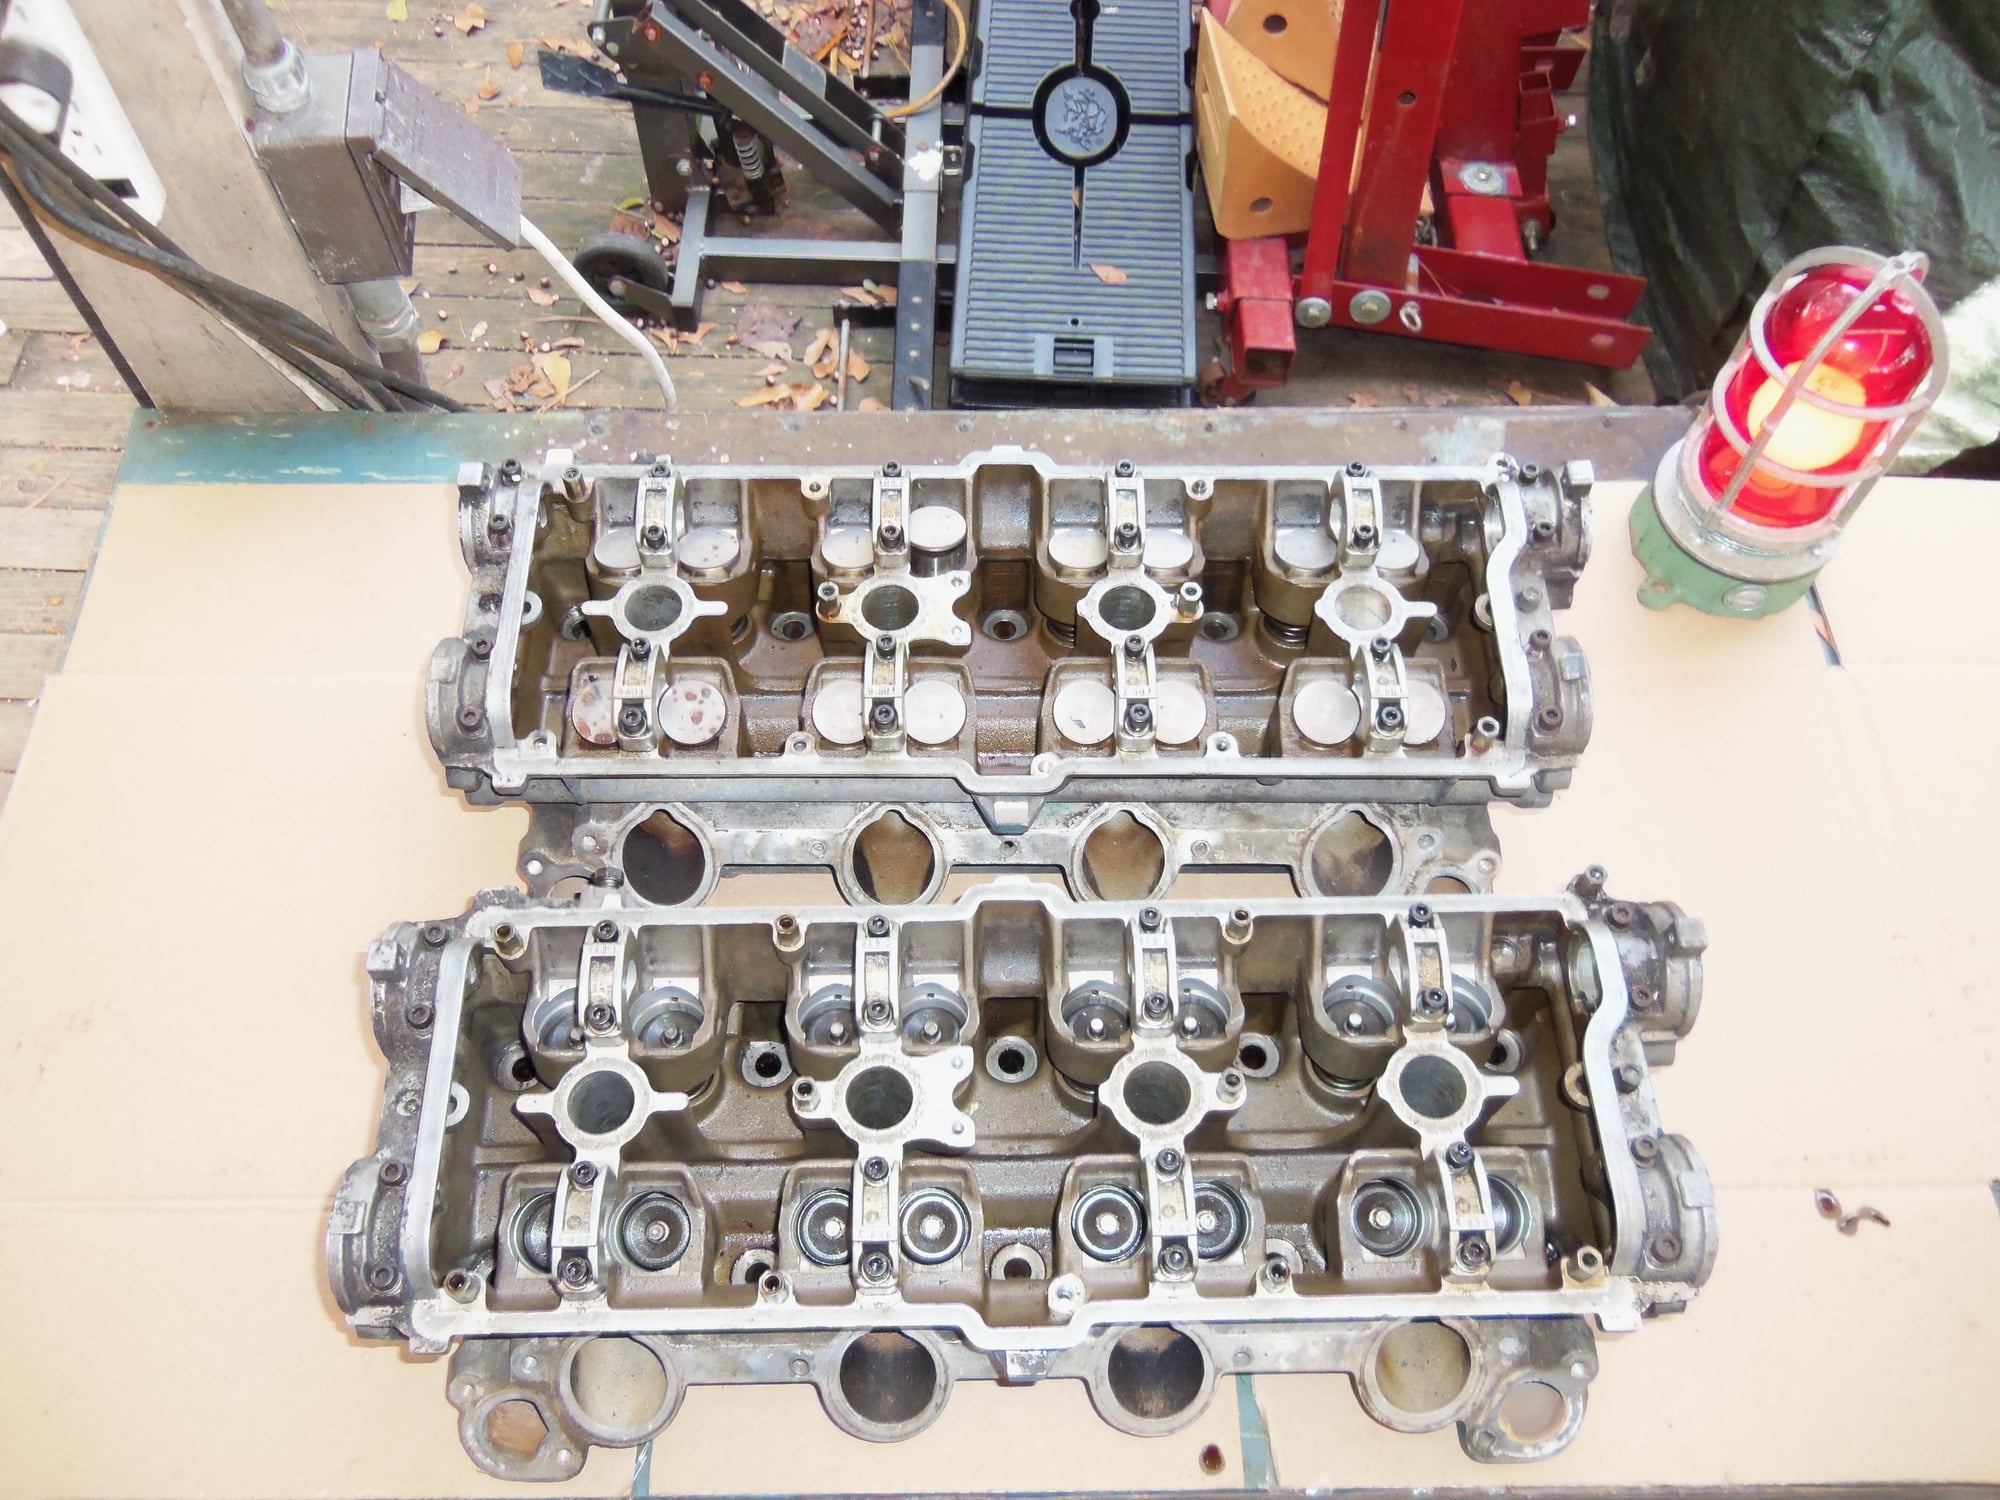
Anyway, here are photos:
Heads are complete for the parts that matter...the cam bearing caps.
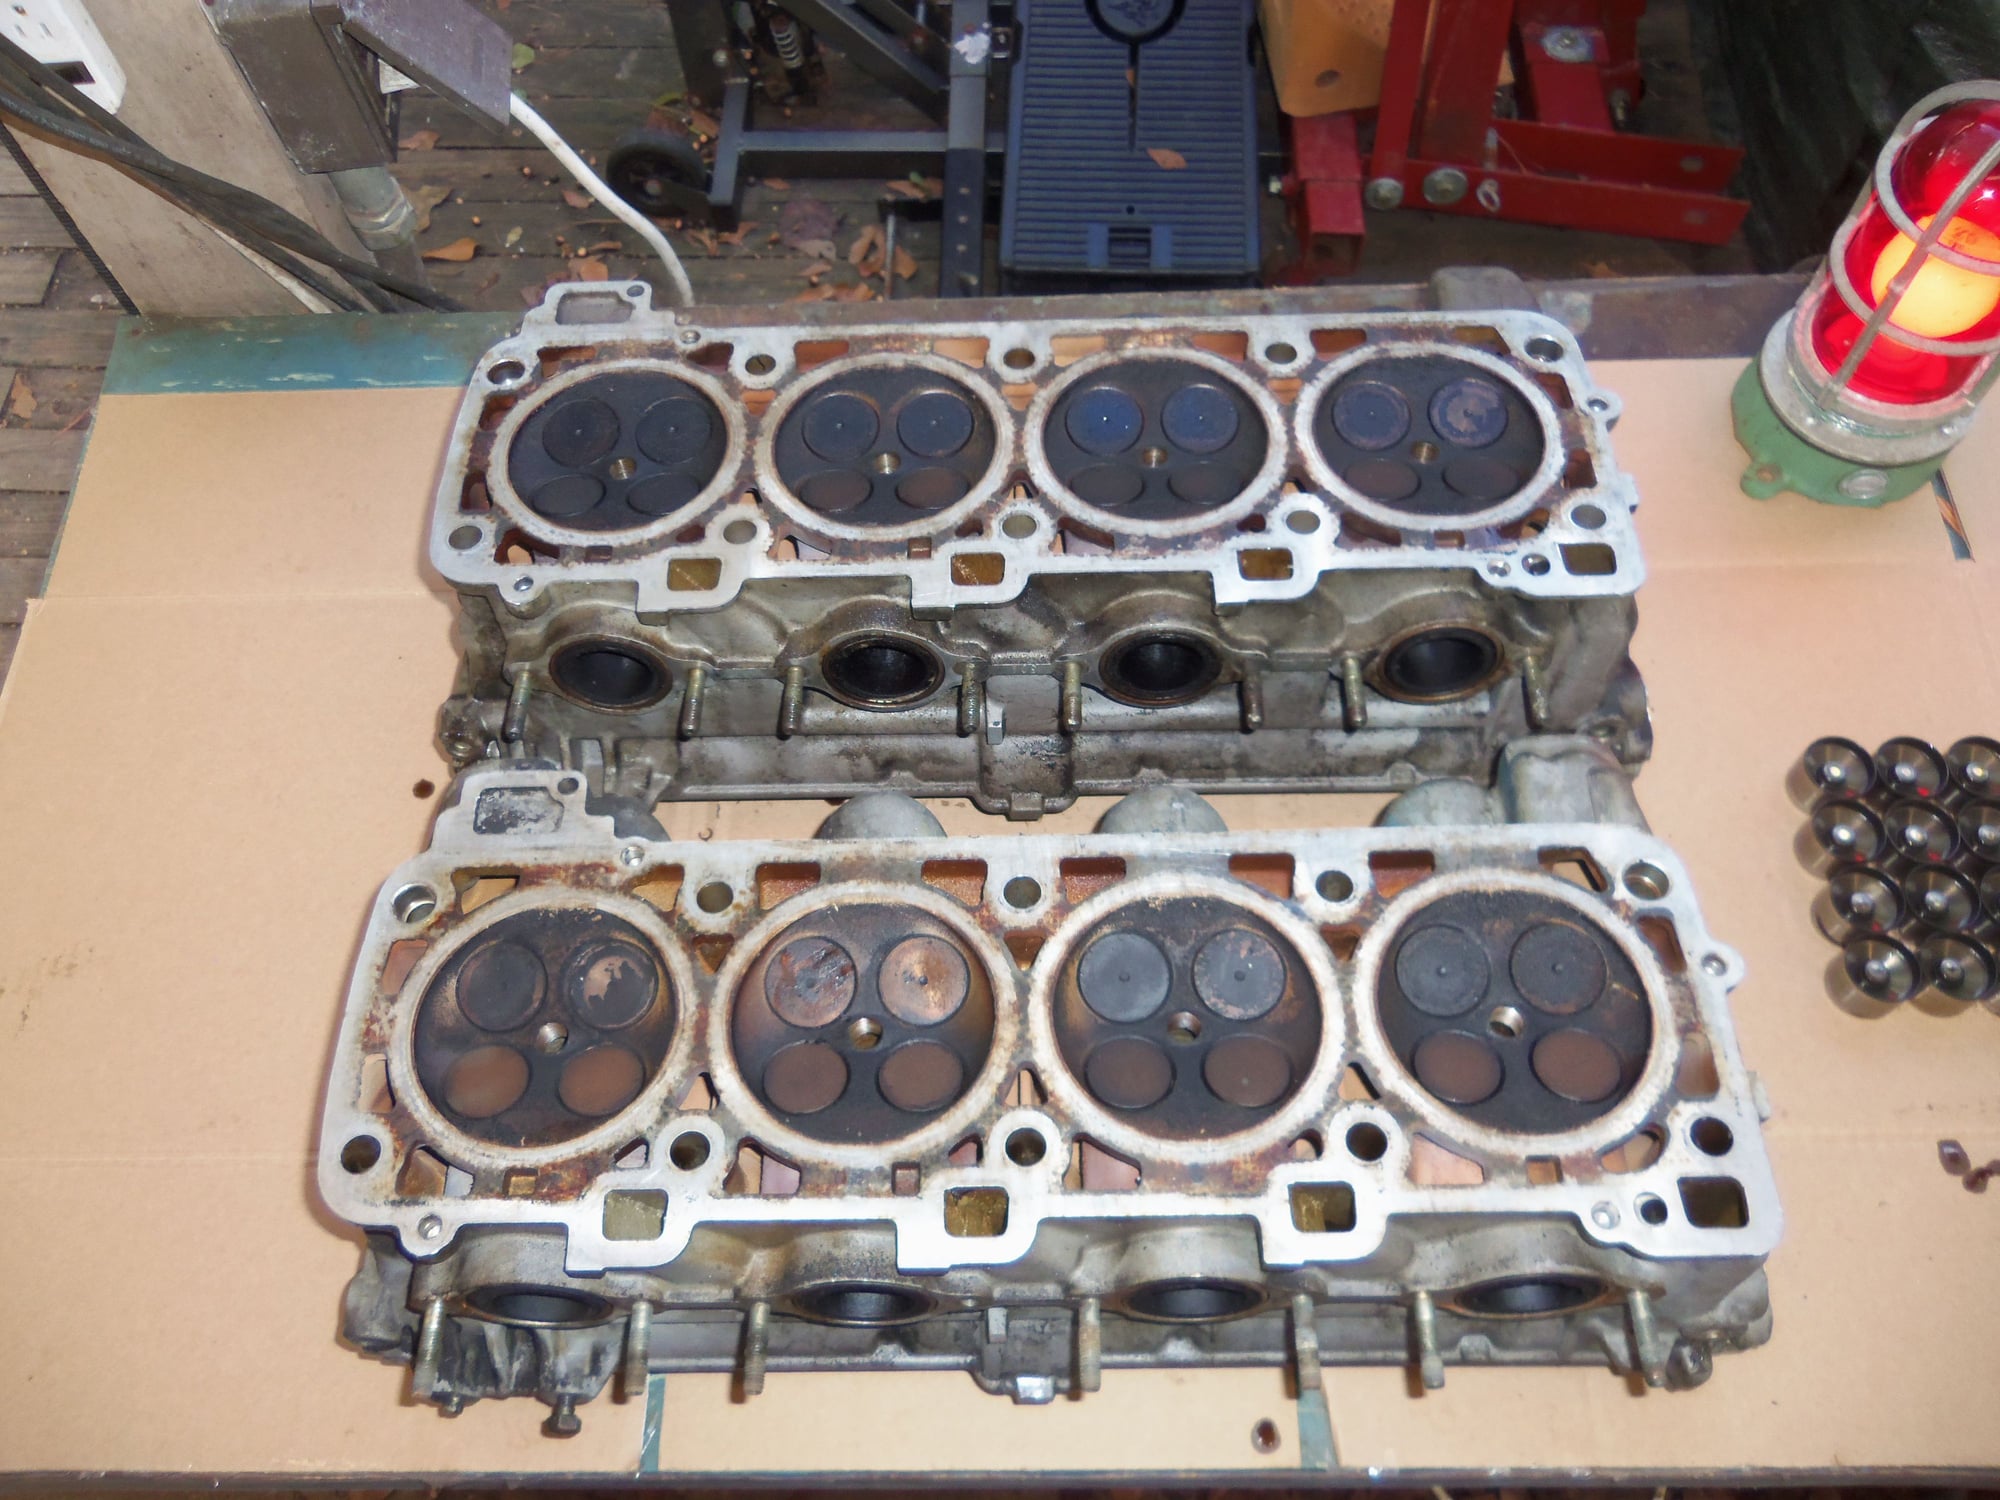
Deck surfaces don't look horrible. Main reason I bought the heads.
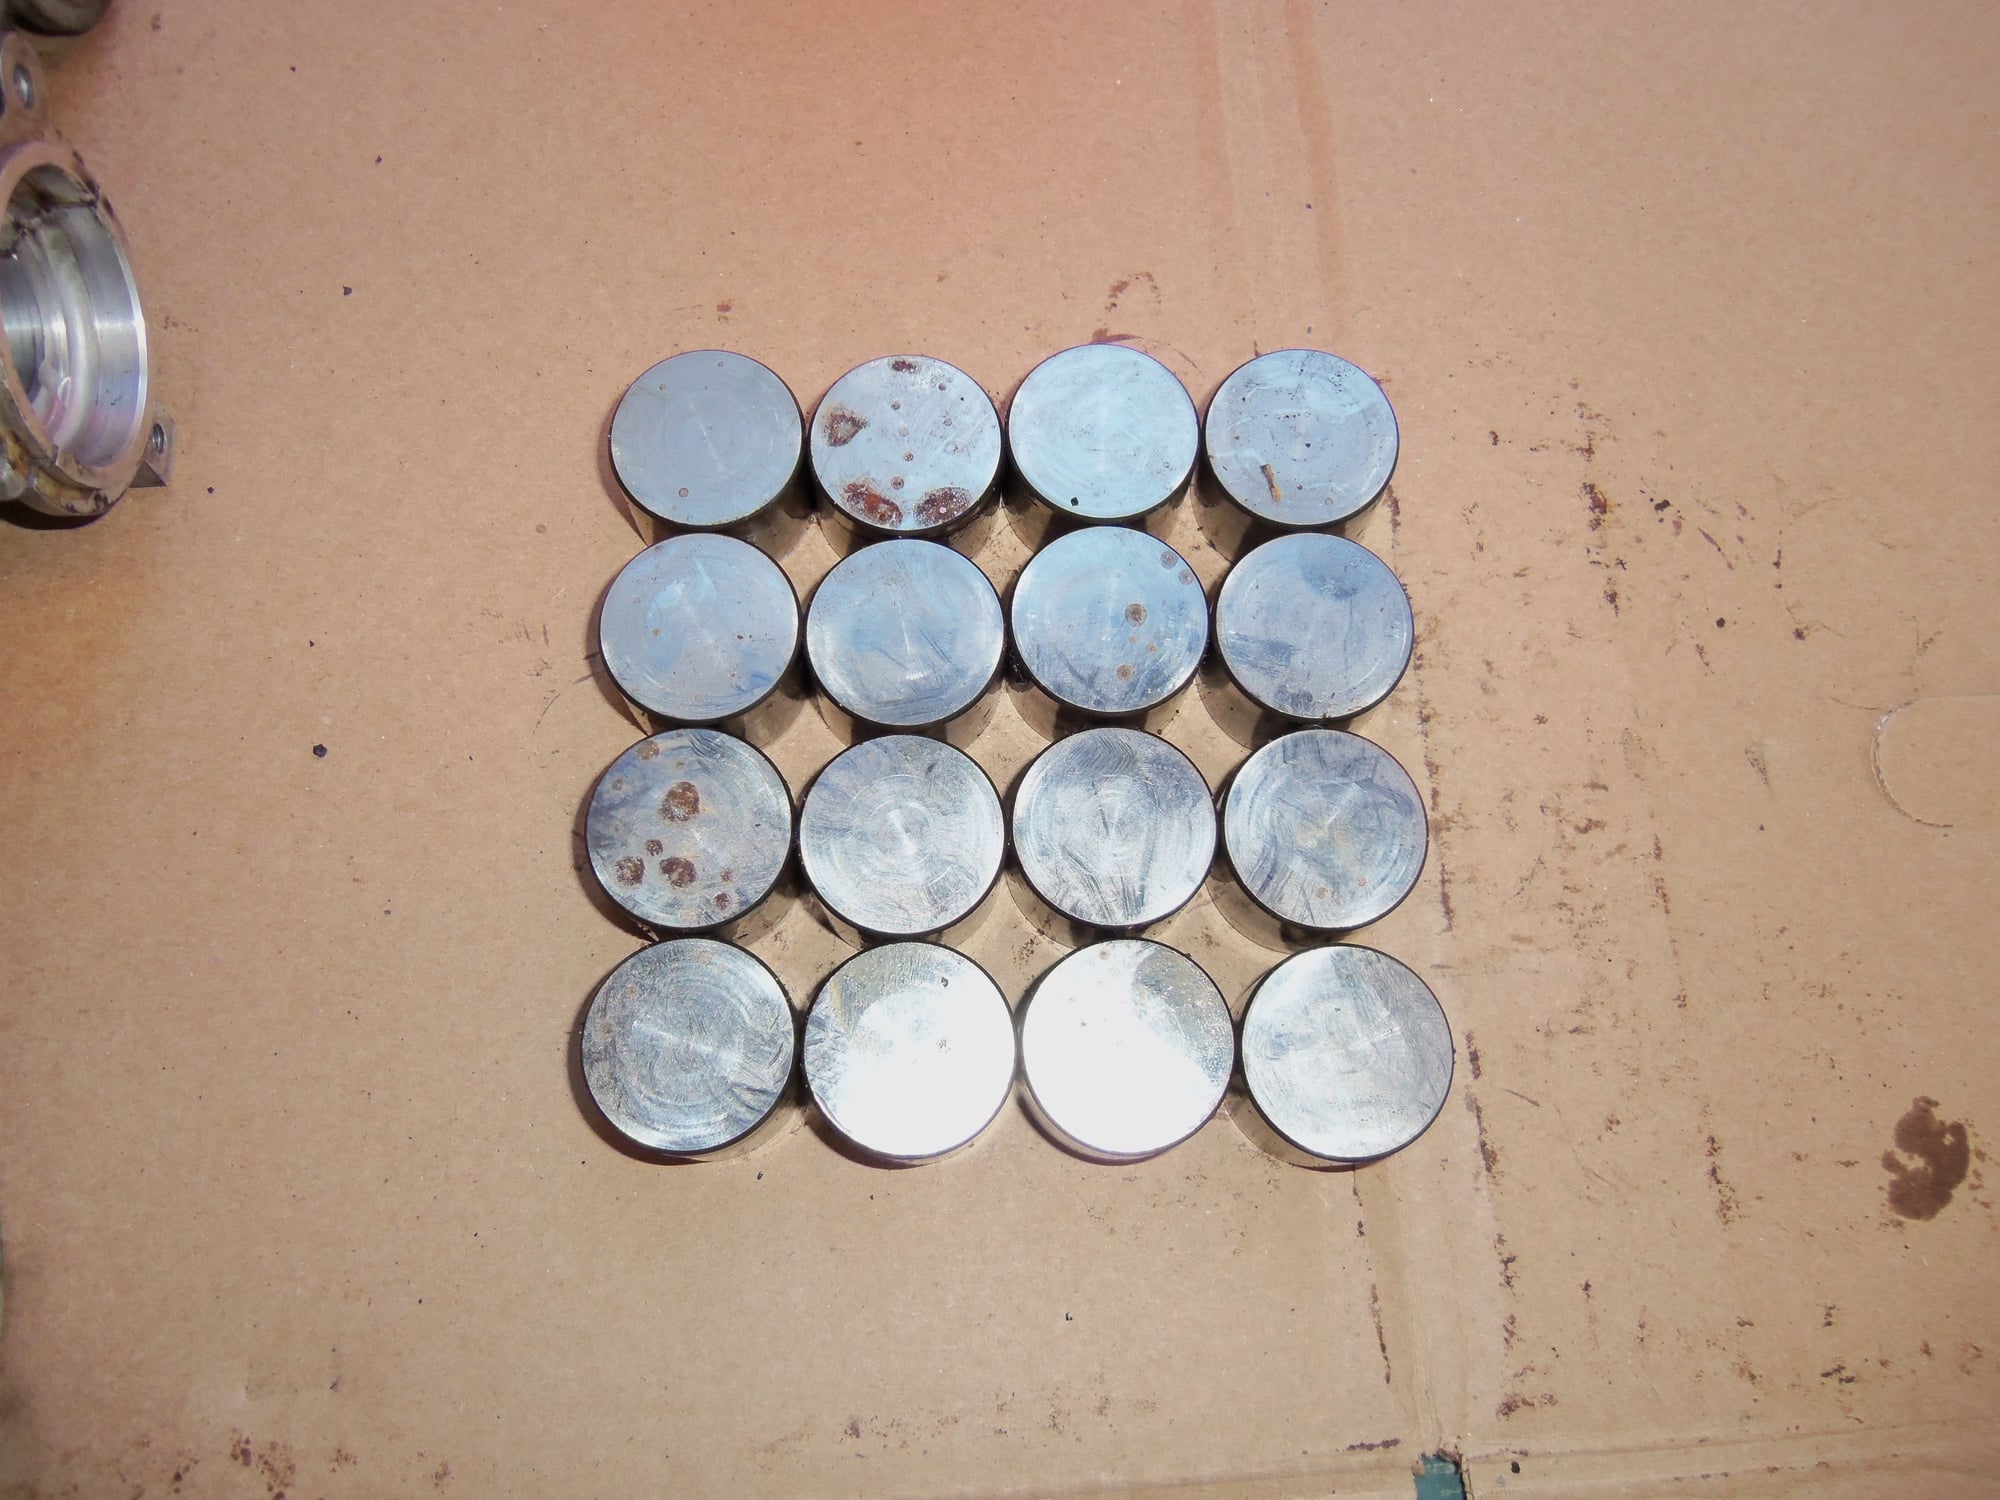
One head had all its lifters.
I think the lifters without rust on the faces can be put away as spares.
Broken cam cover bolt stand off. Free of charge.
One of several repaired cam cover bolt stand off holes.
One repair is backing out.
One of a couple of damaged cam cover bolt stand off holes. All these were on one head.
Seller said these heads were 86. Early 86, based upon the cam cover bolt stand offs.
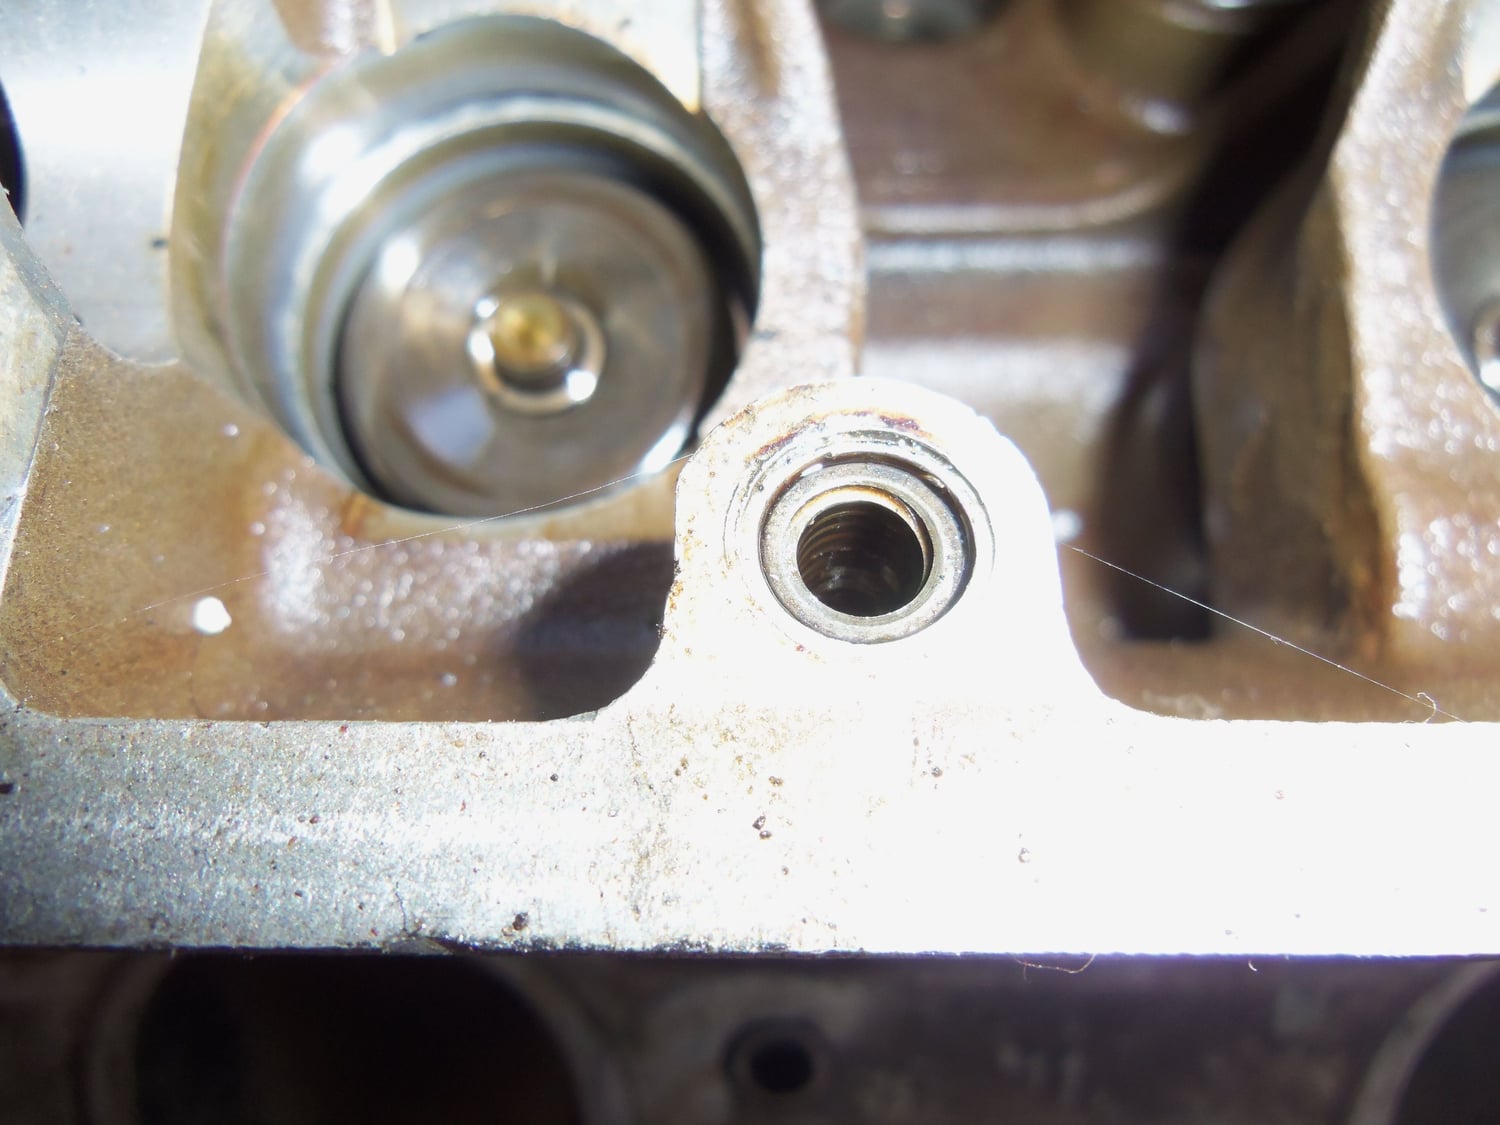
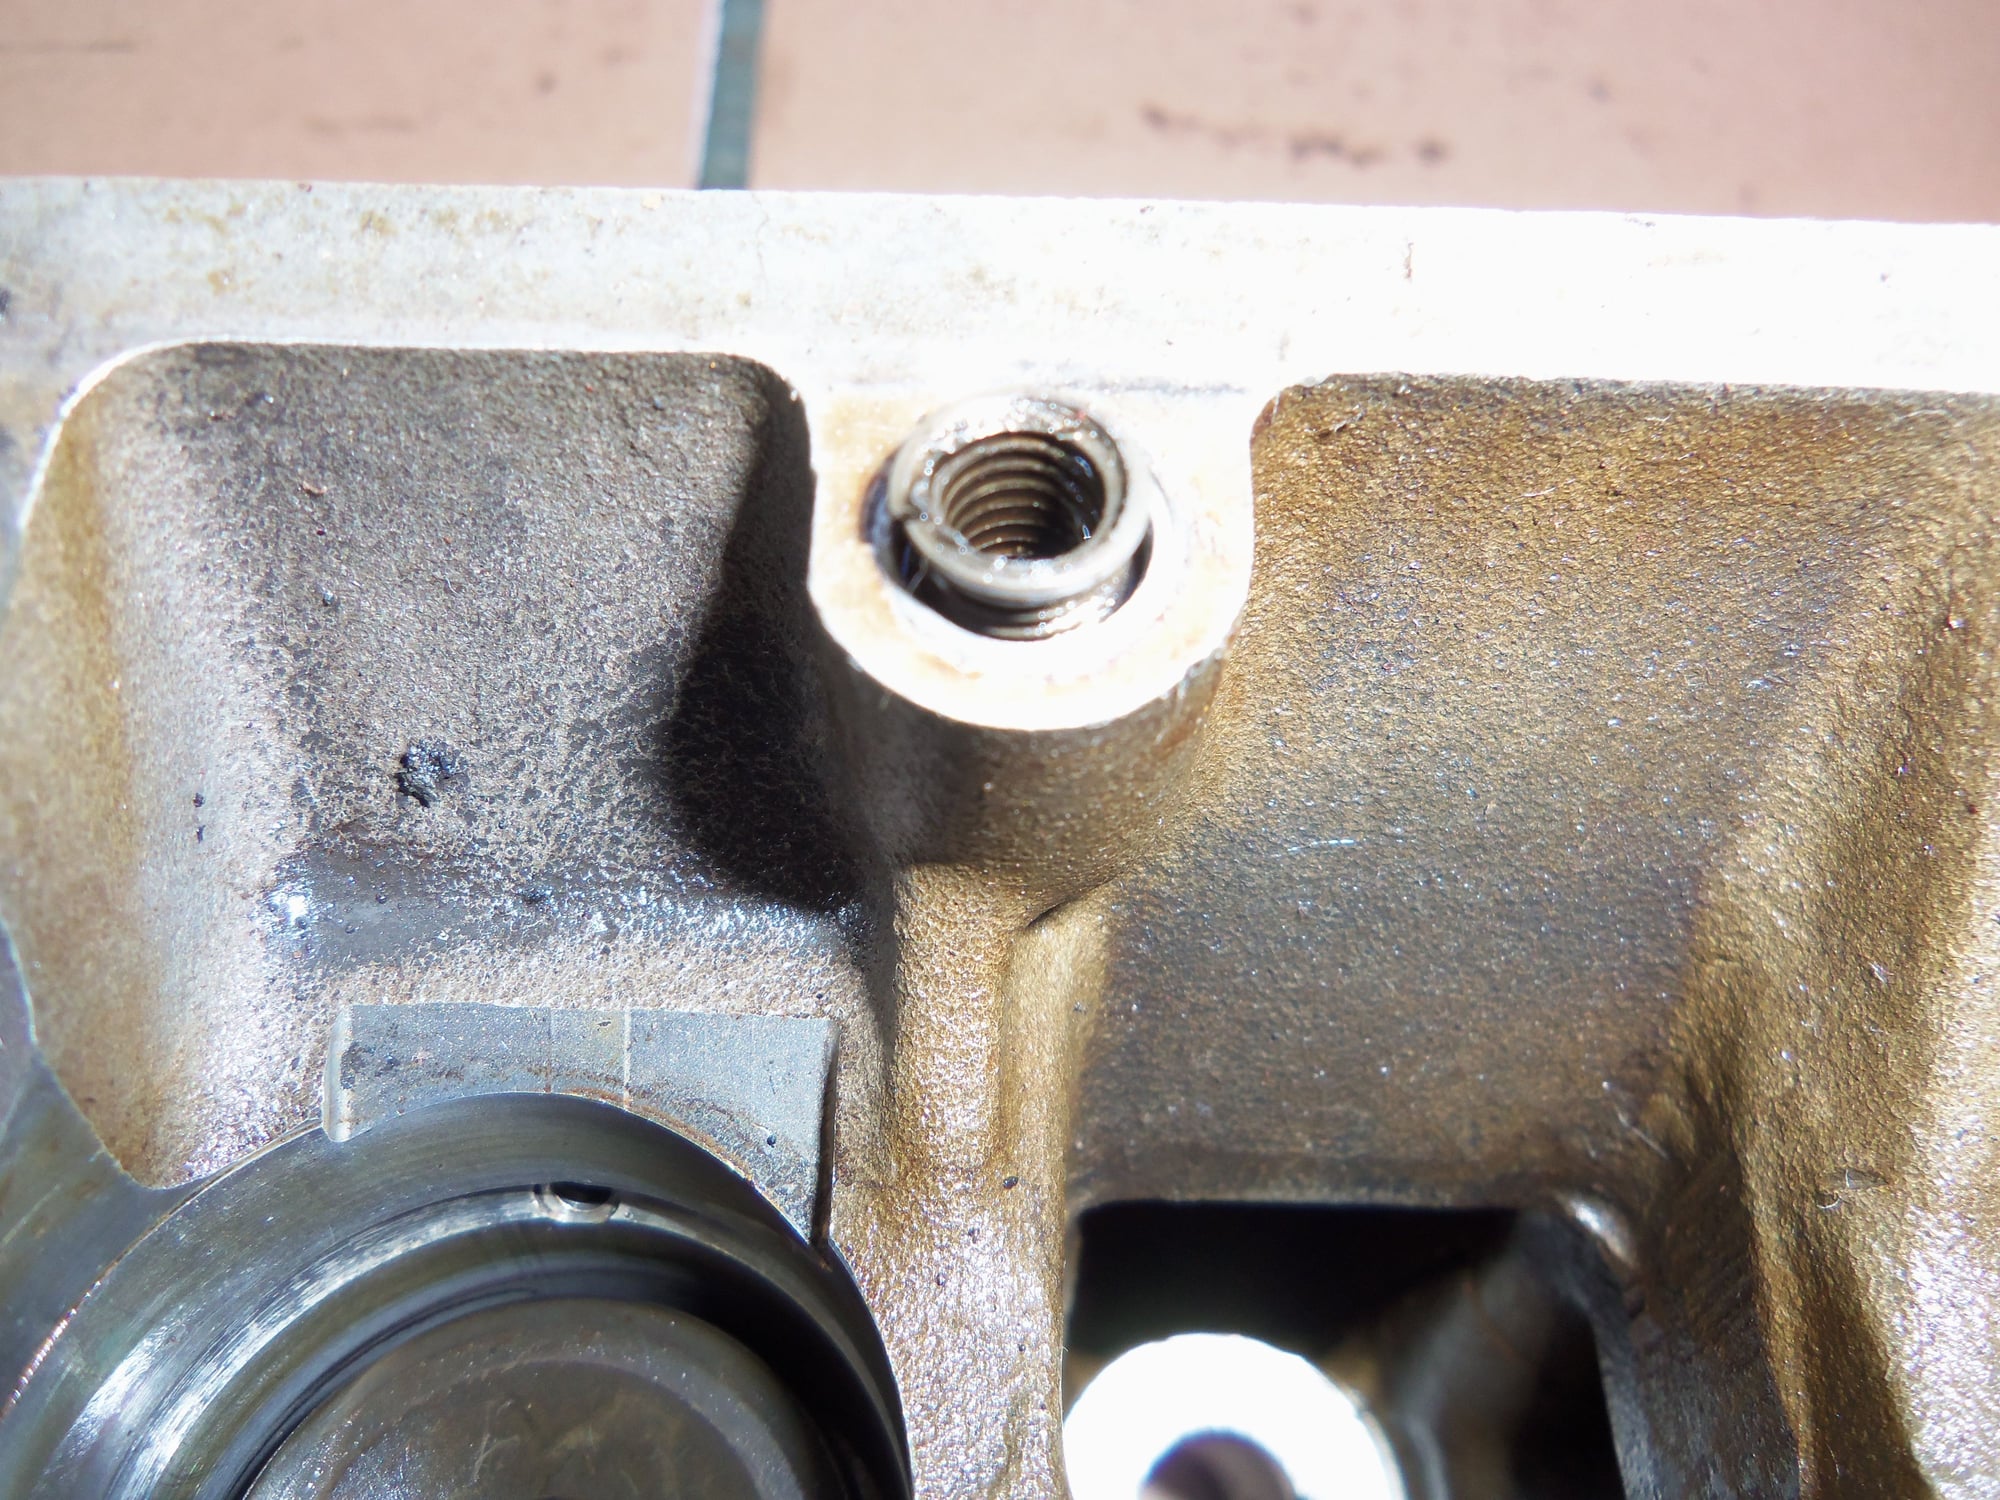
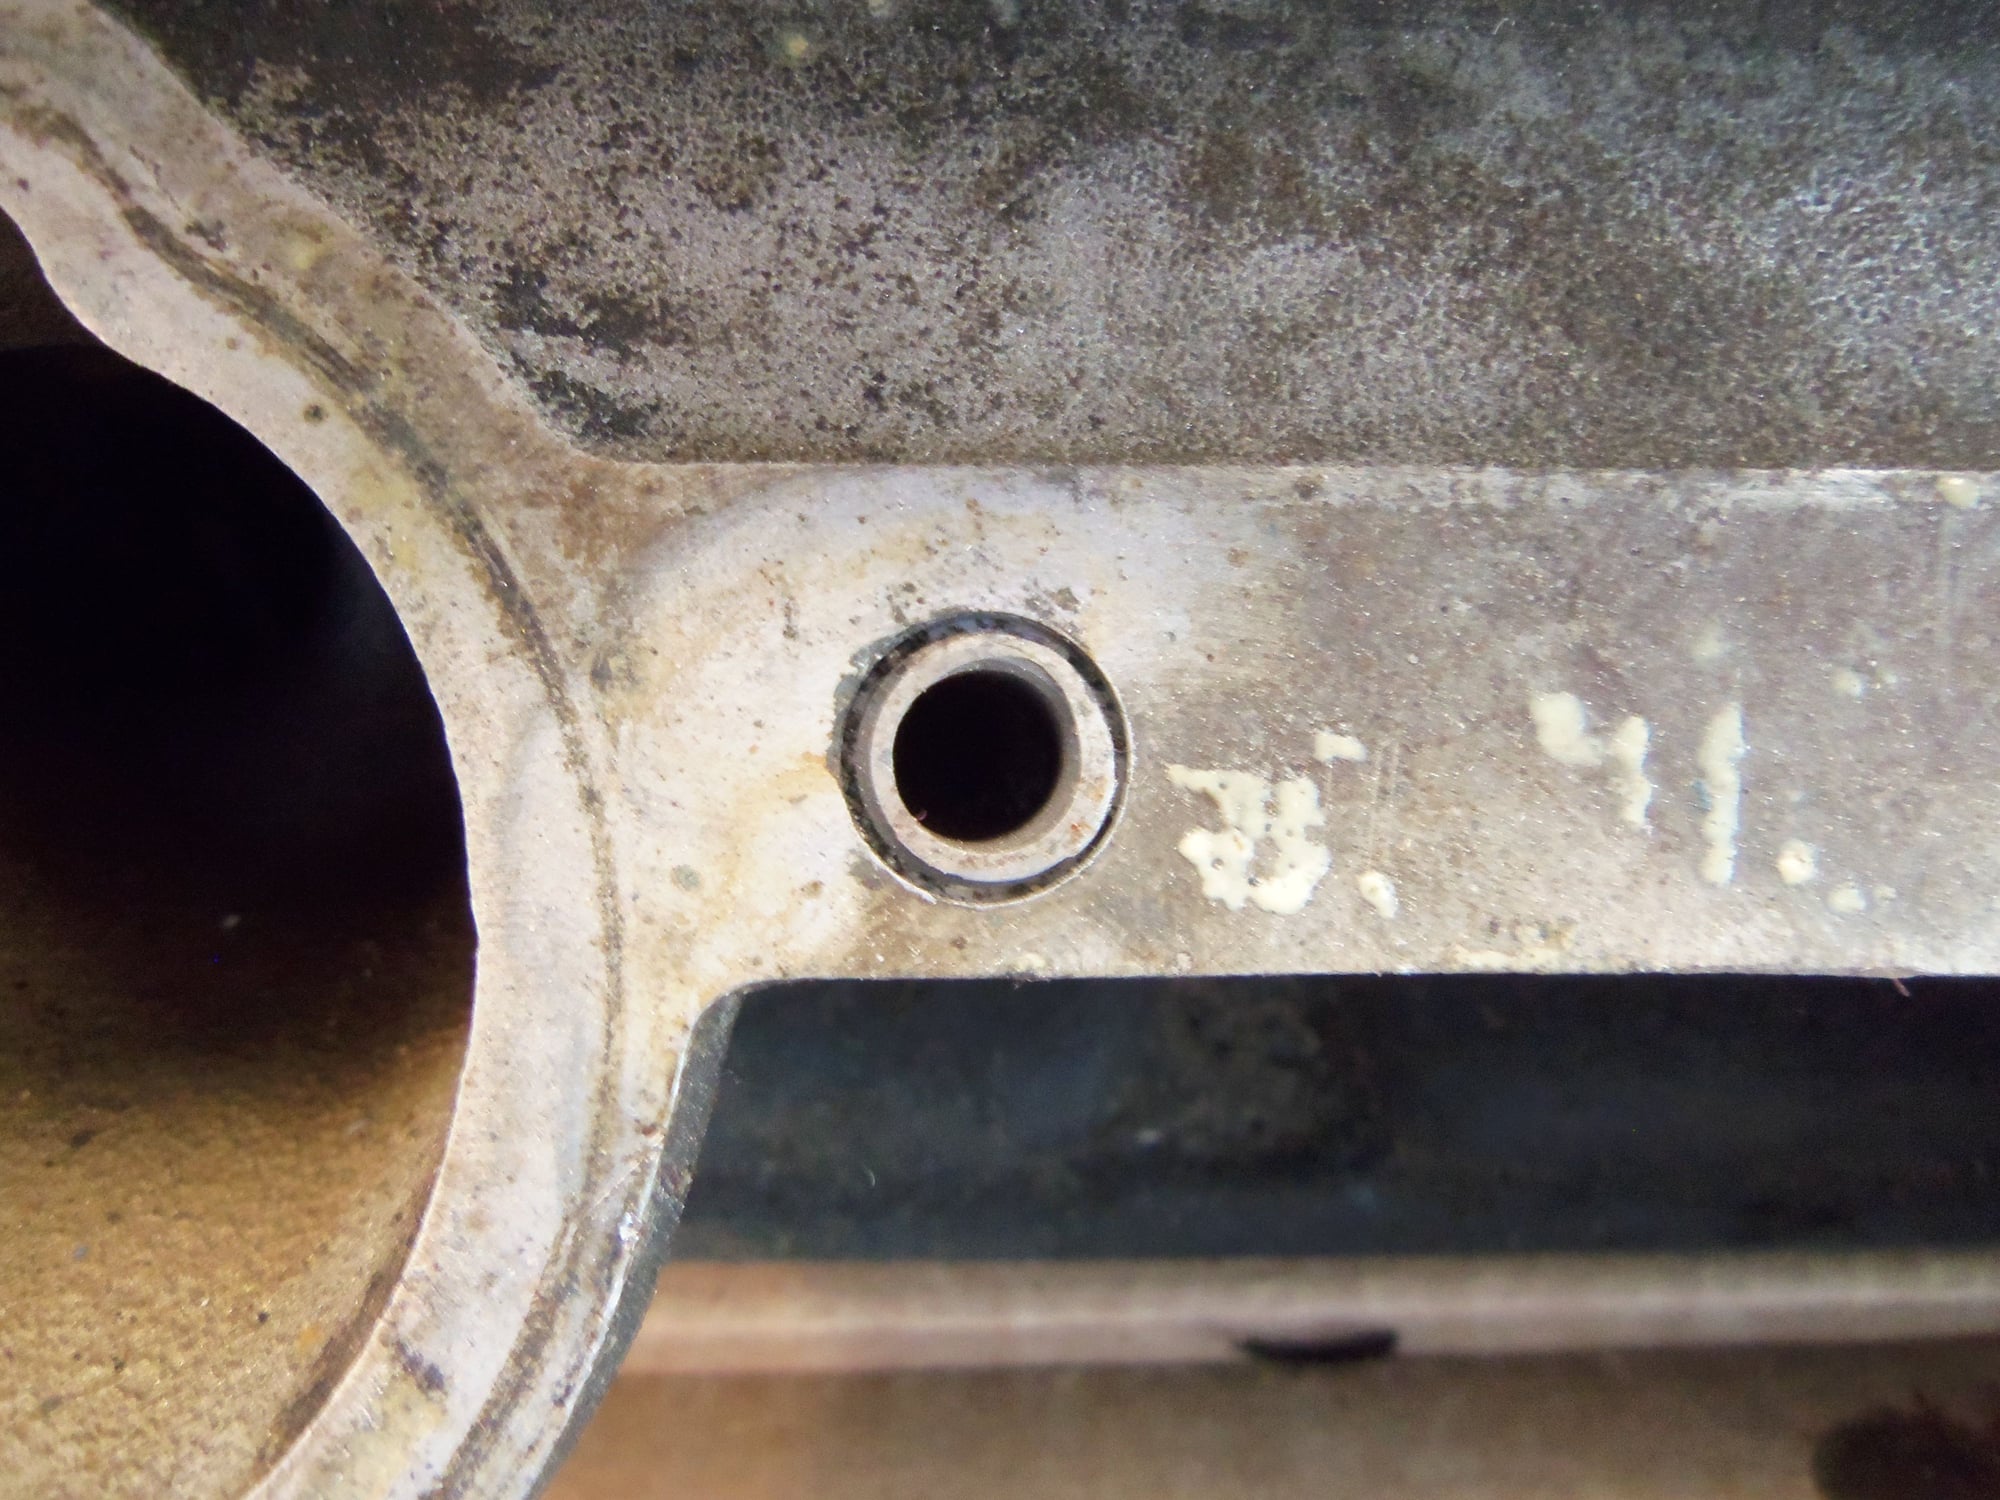
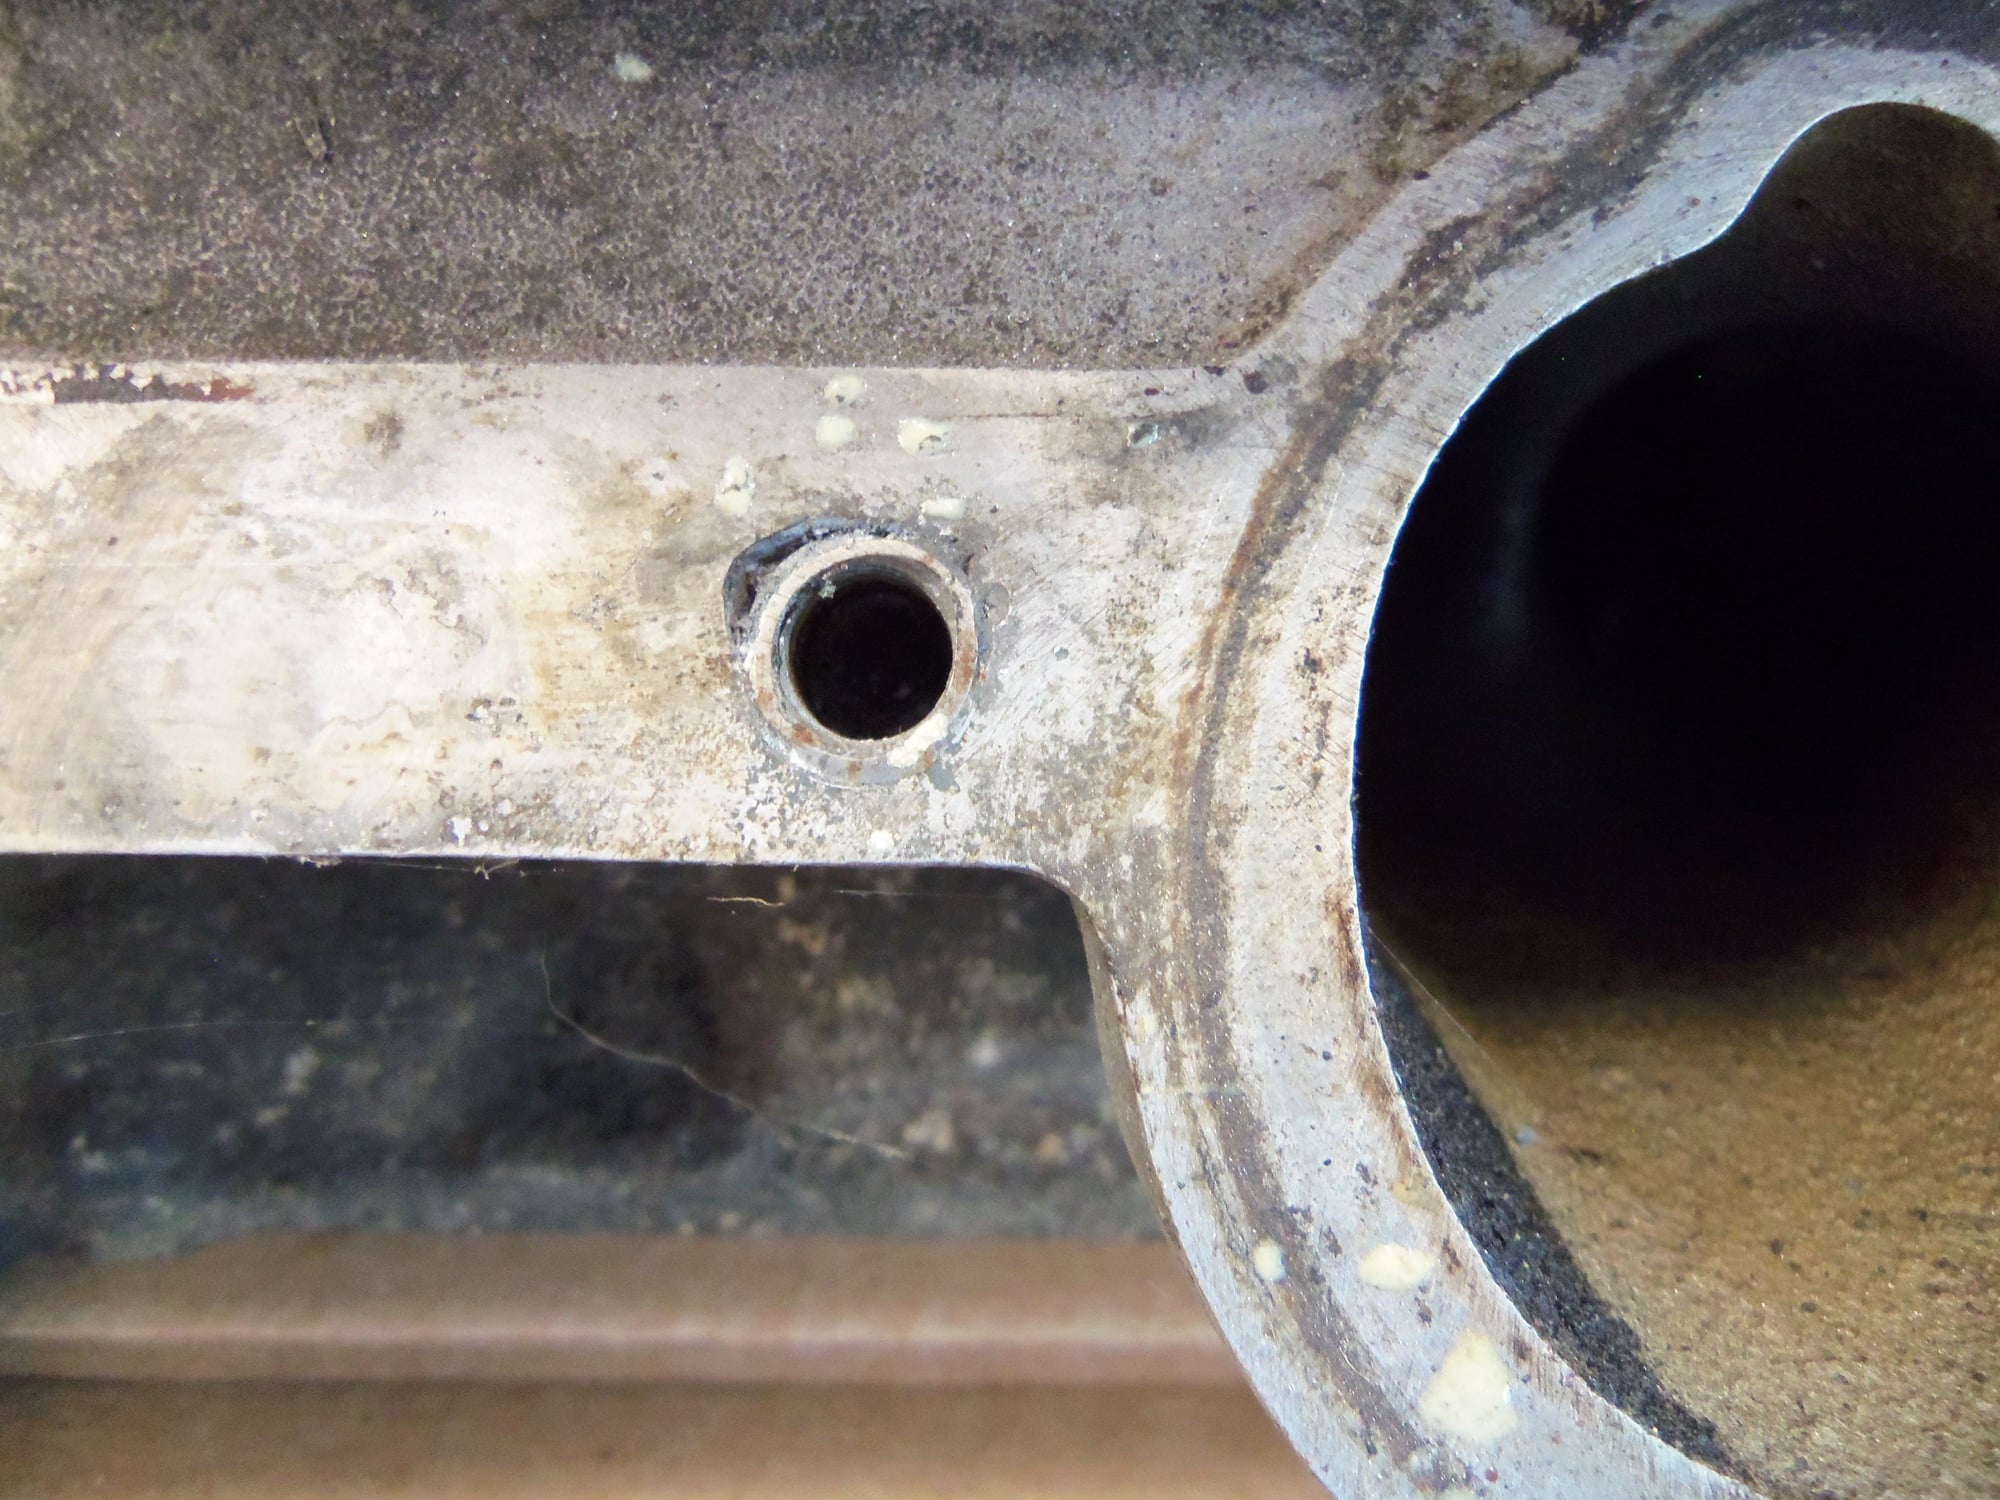
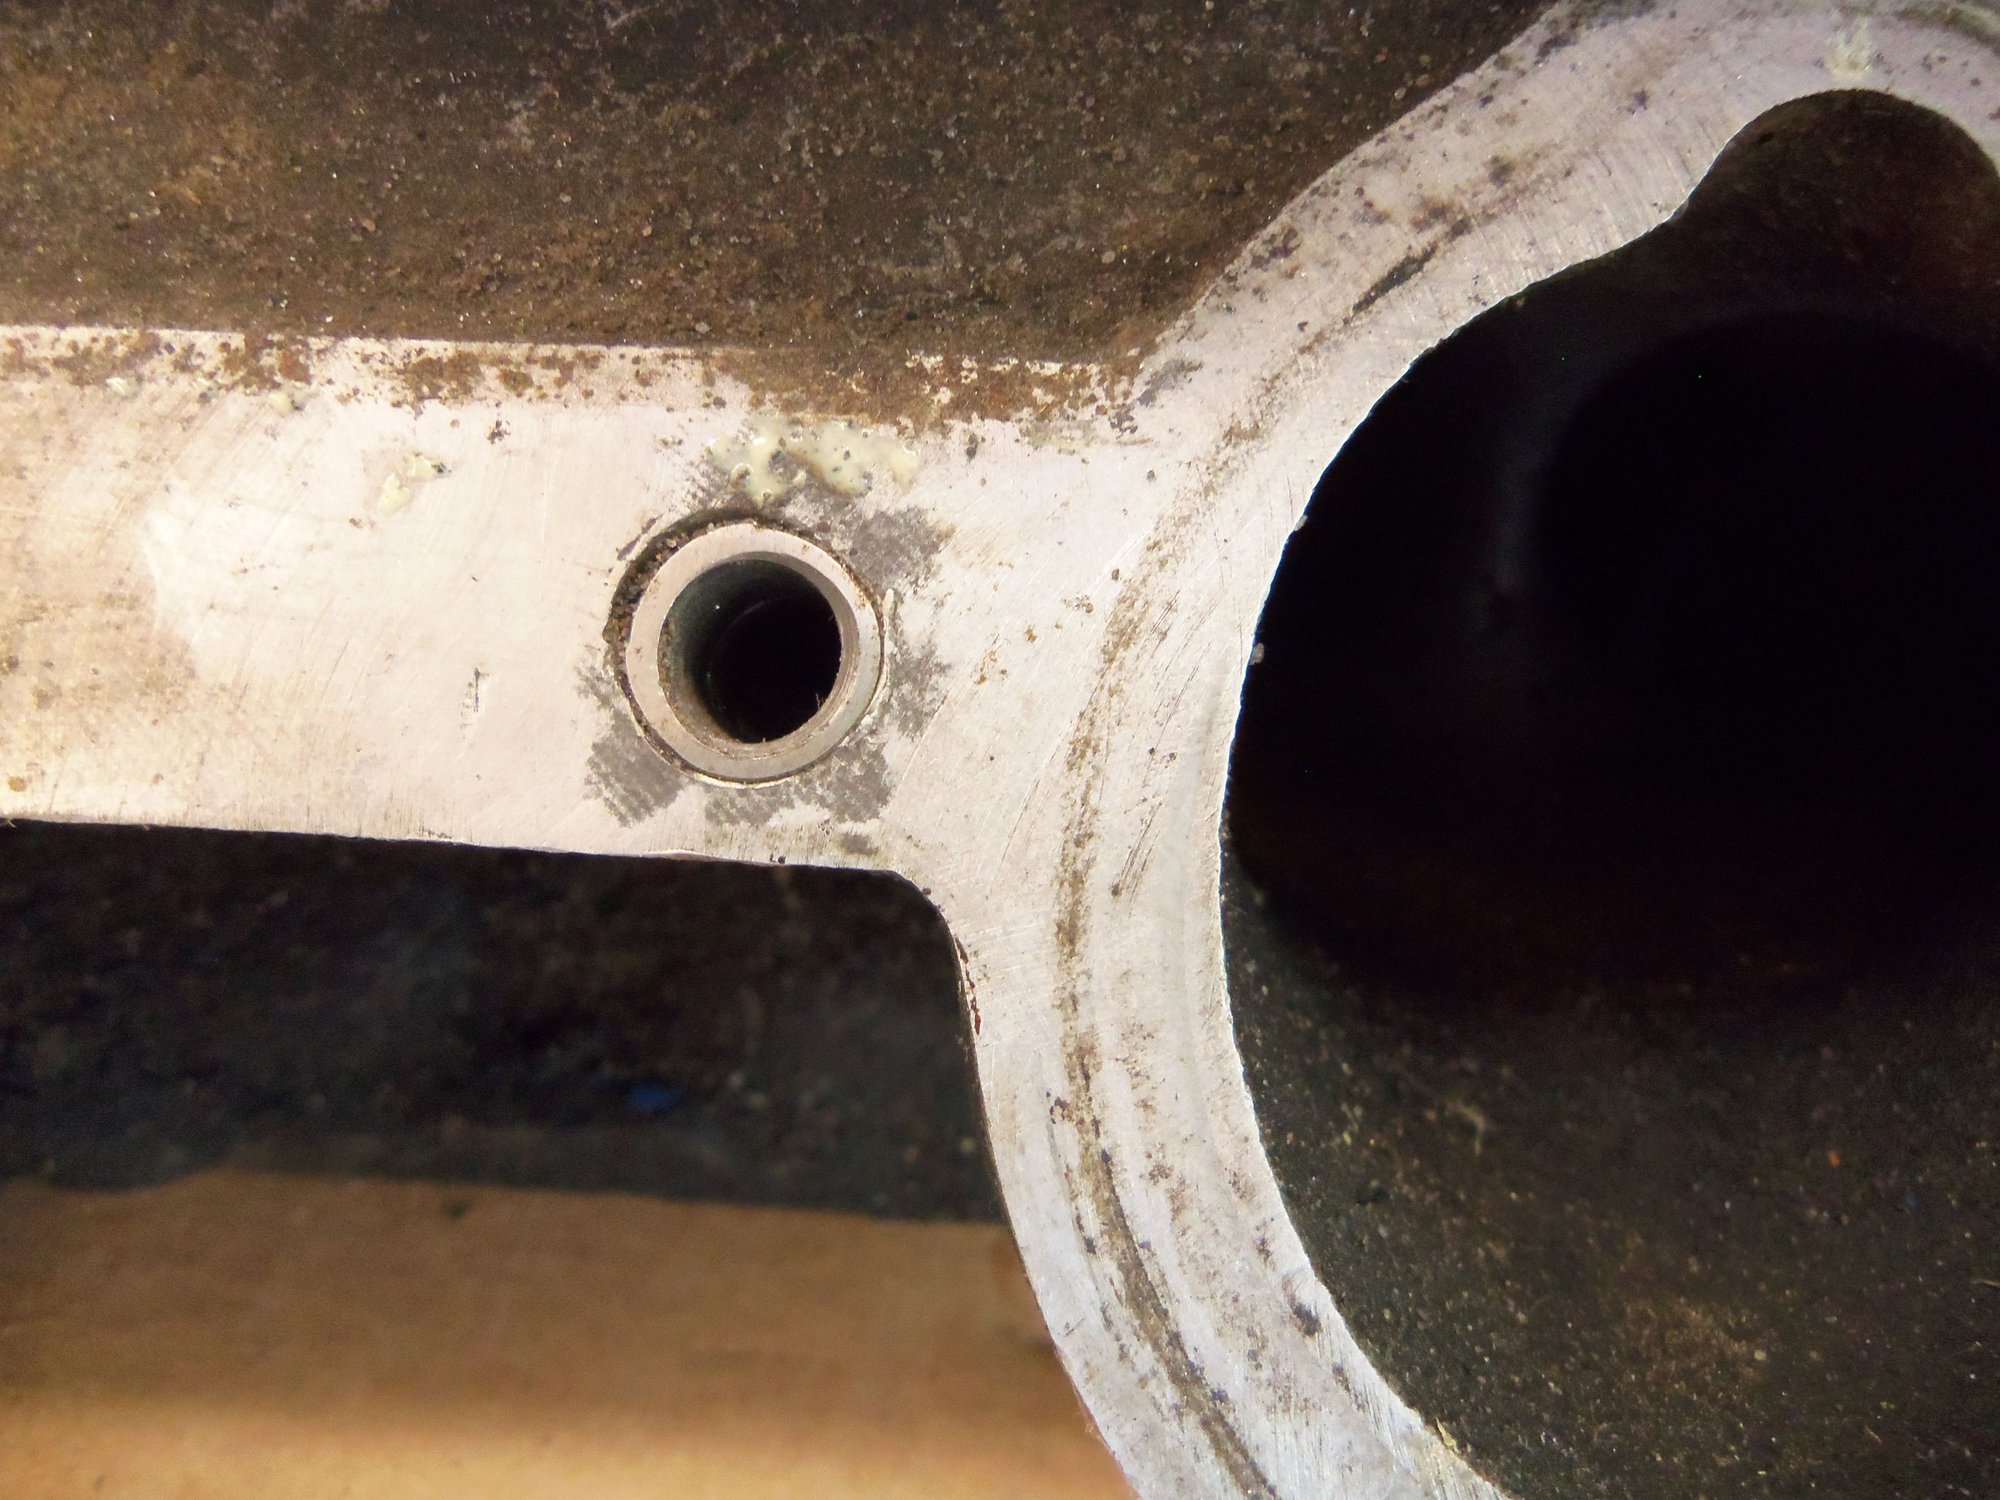
Hmmm...intake manifold bolt hole has been repaired.
As has another.
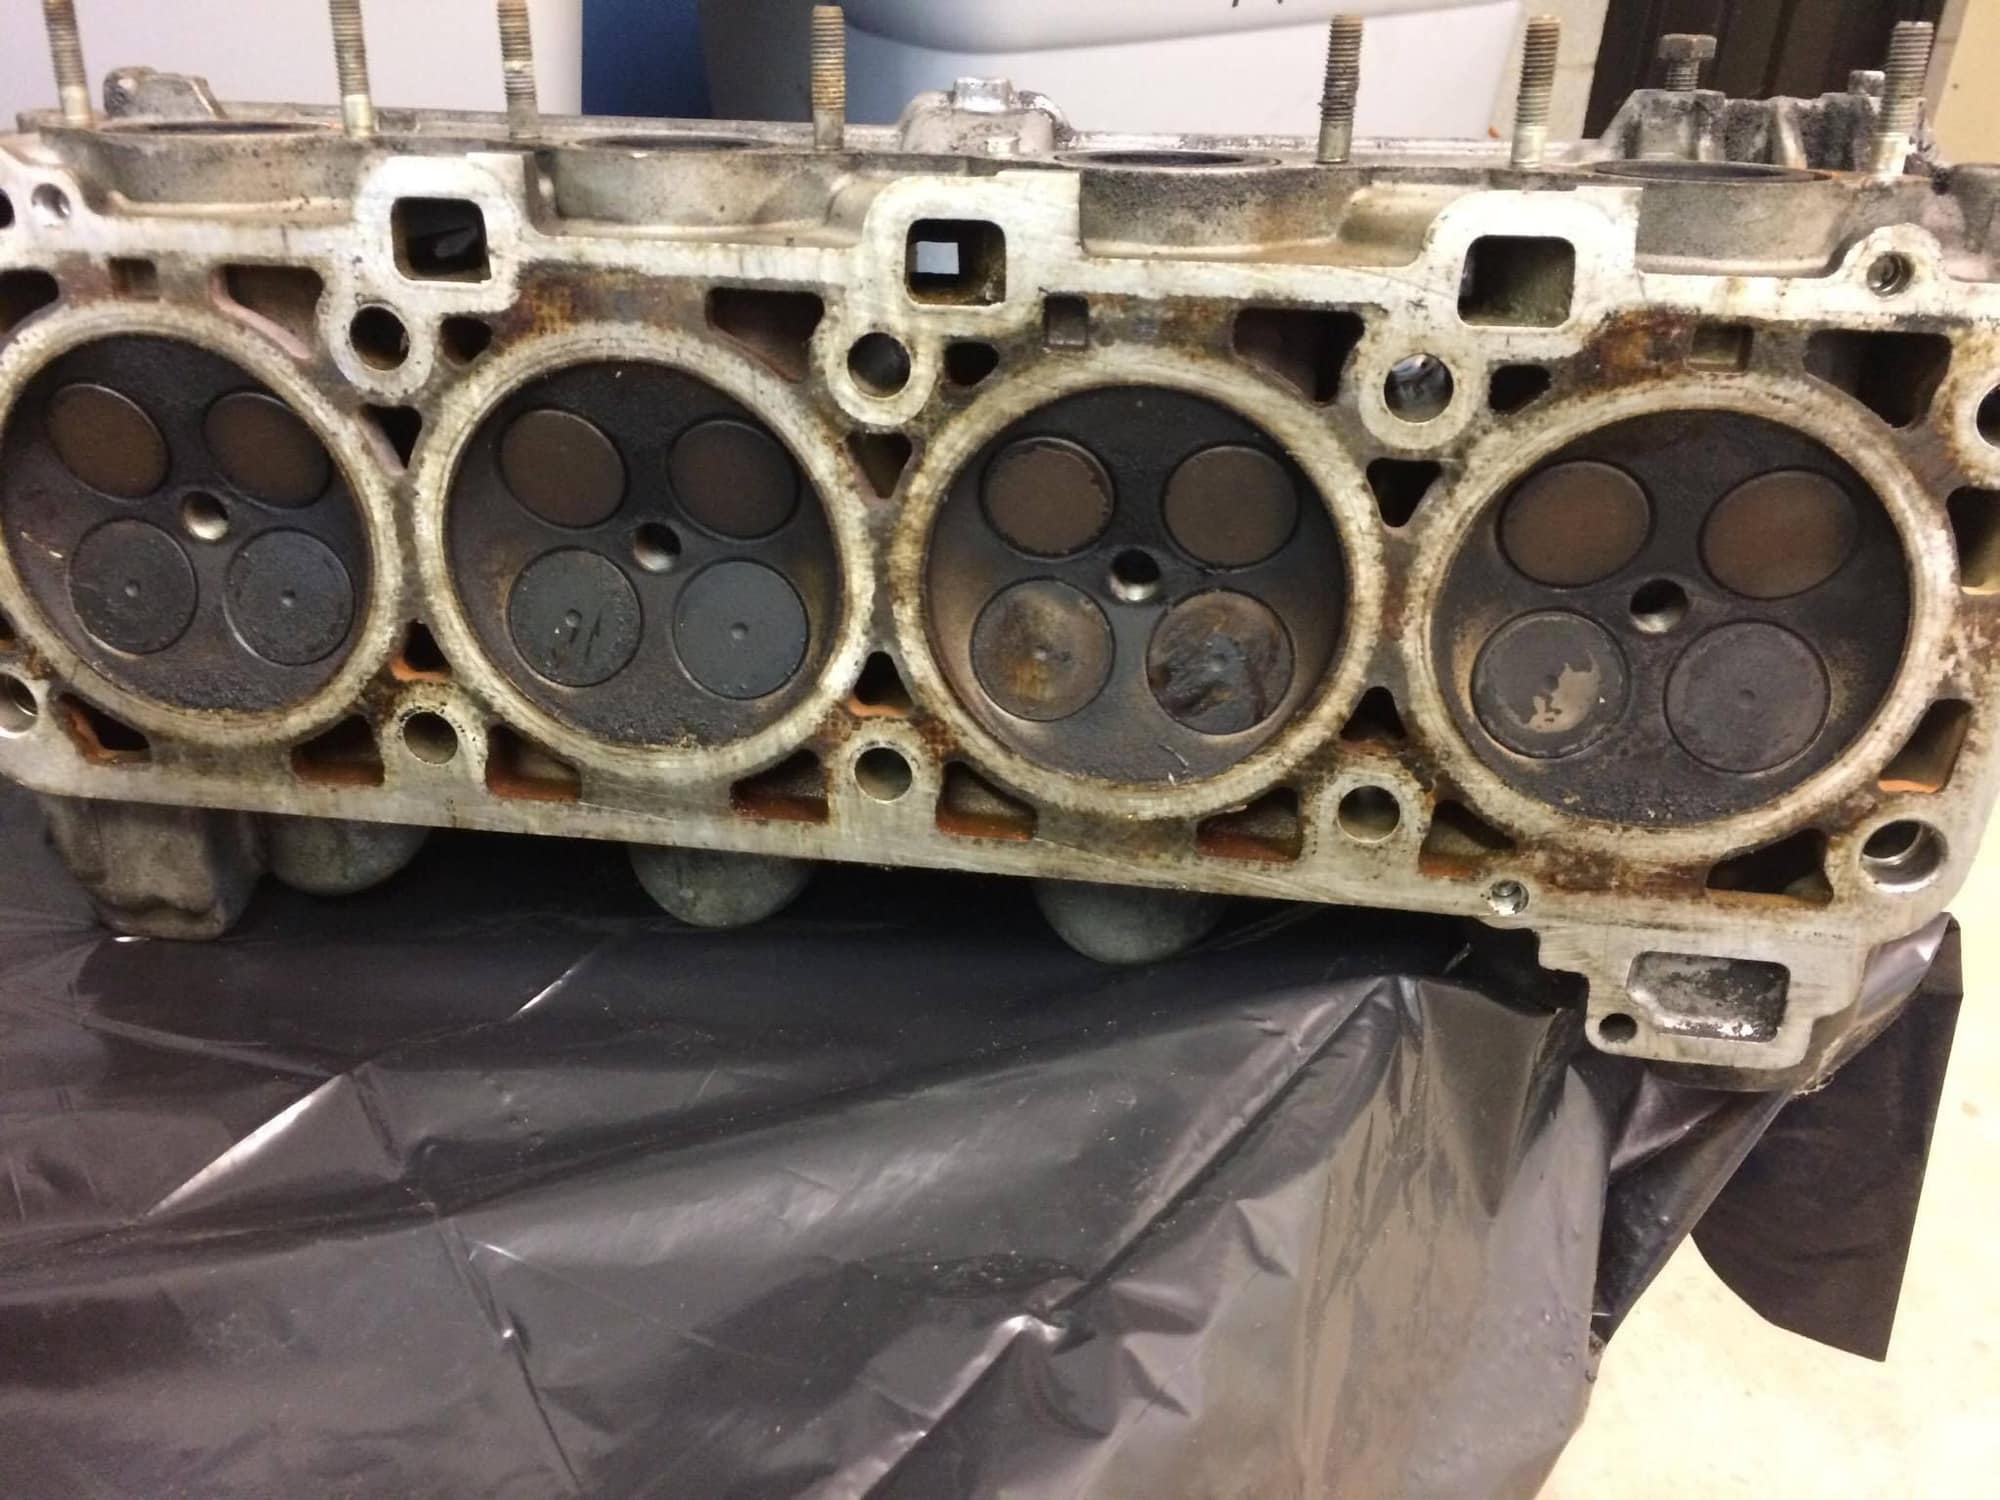
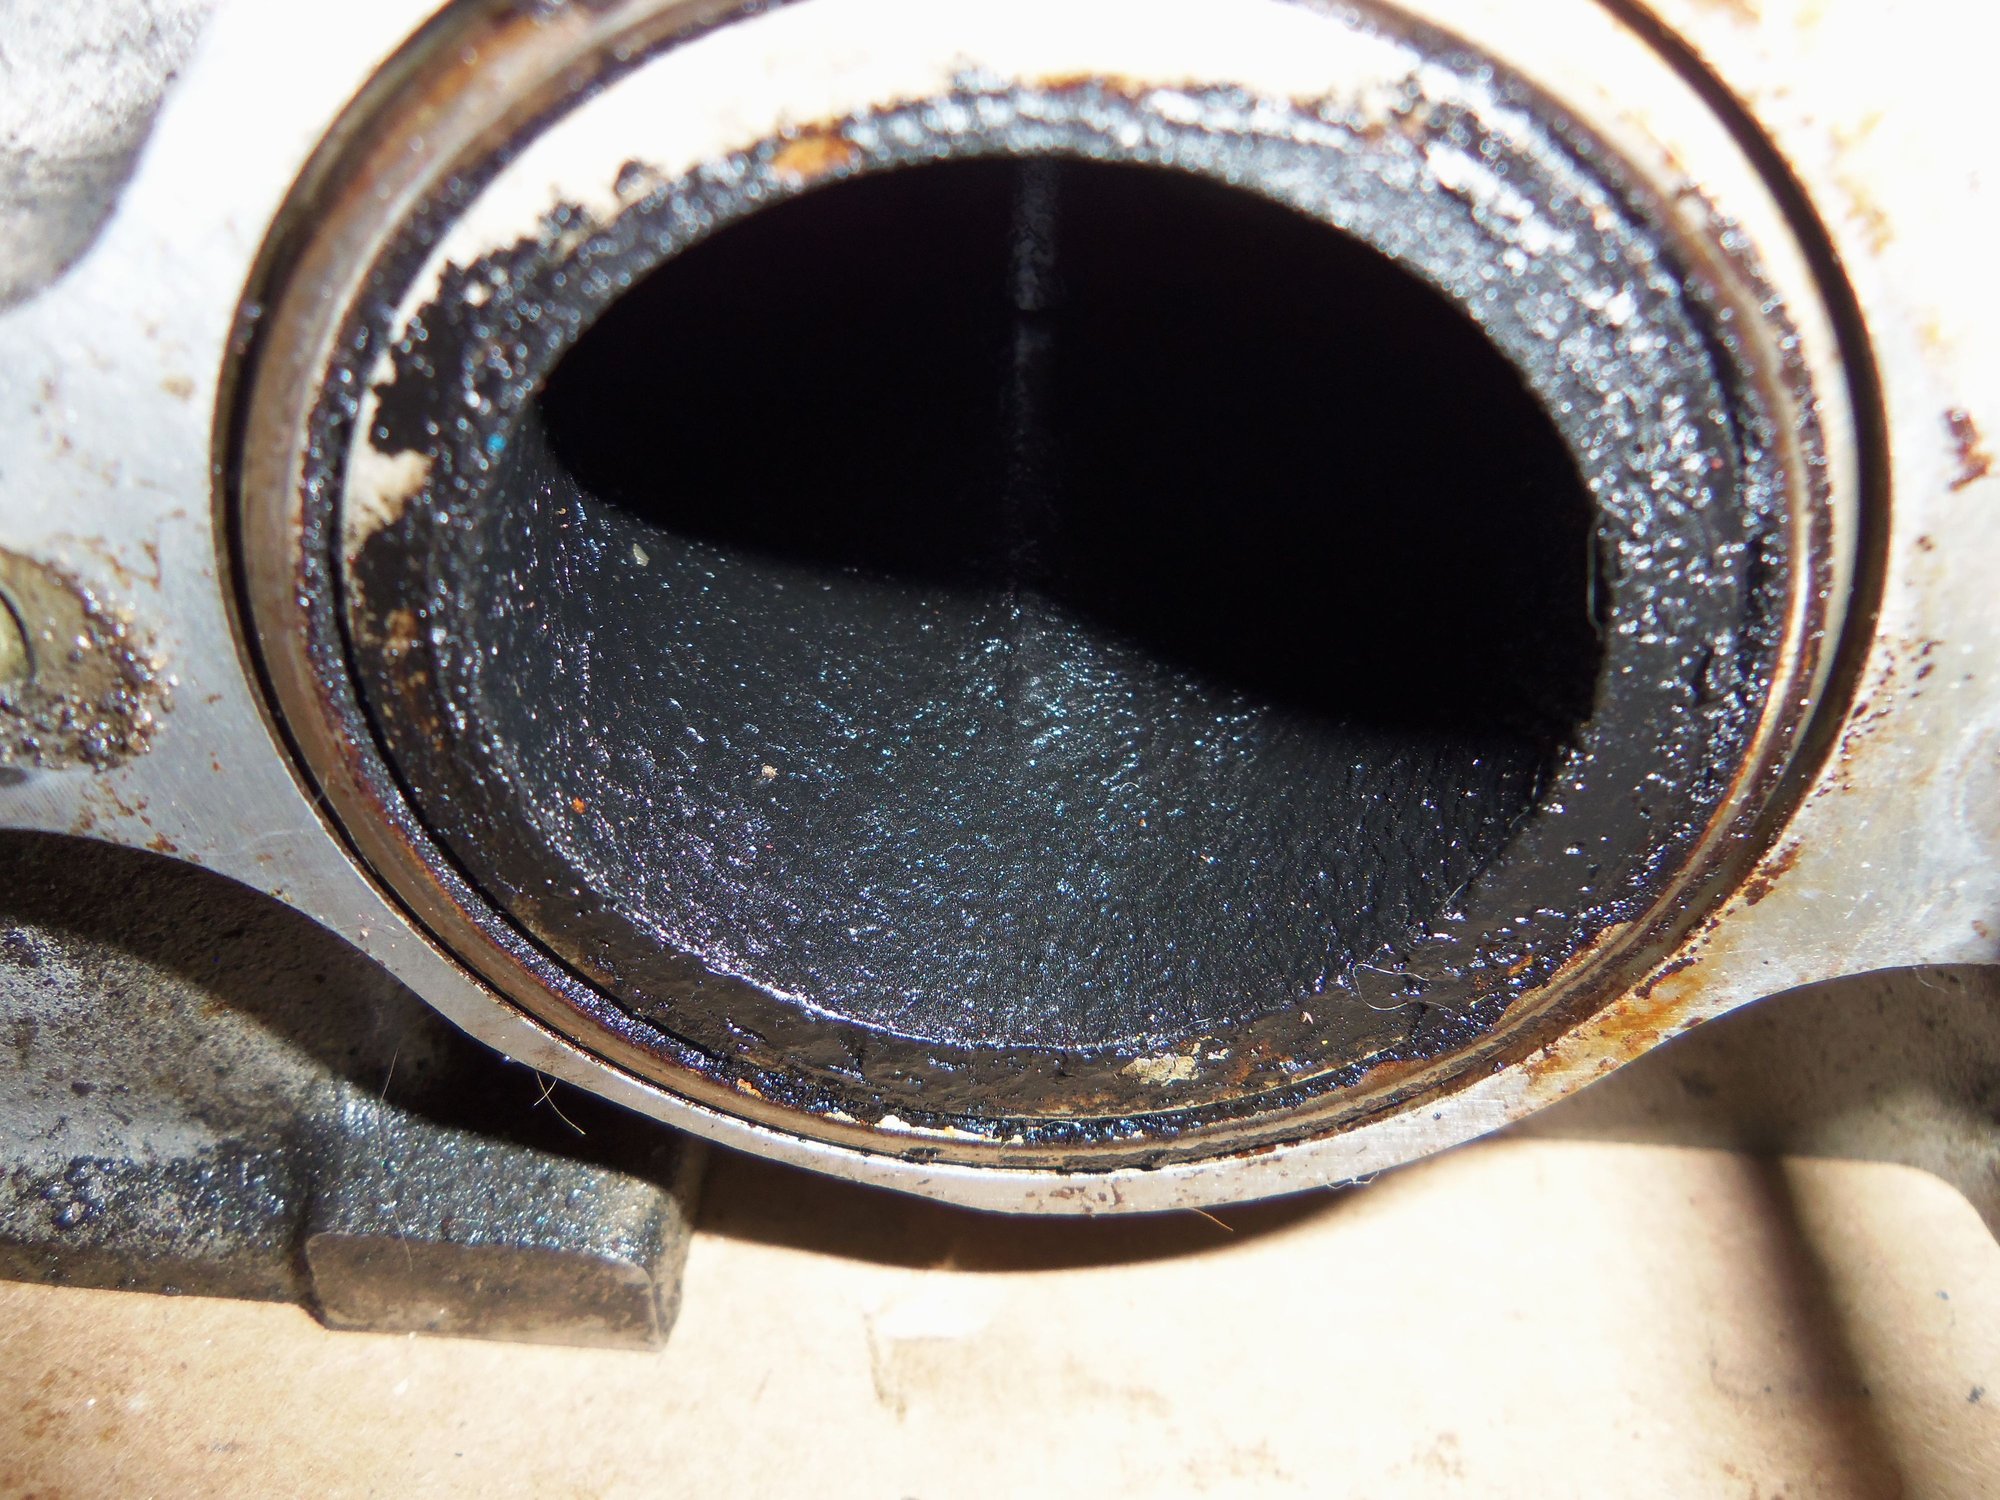
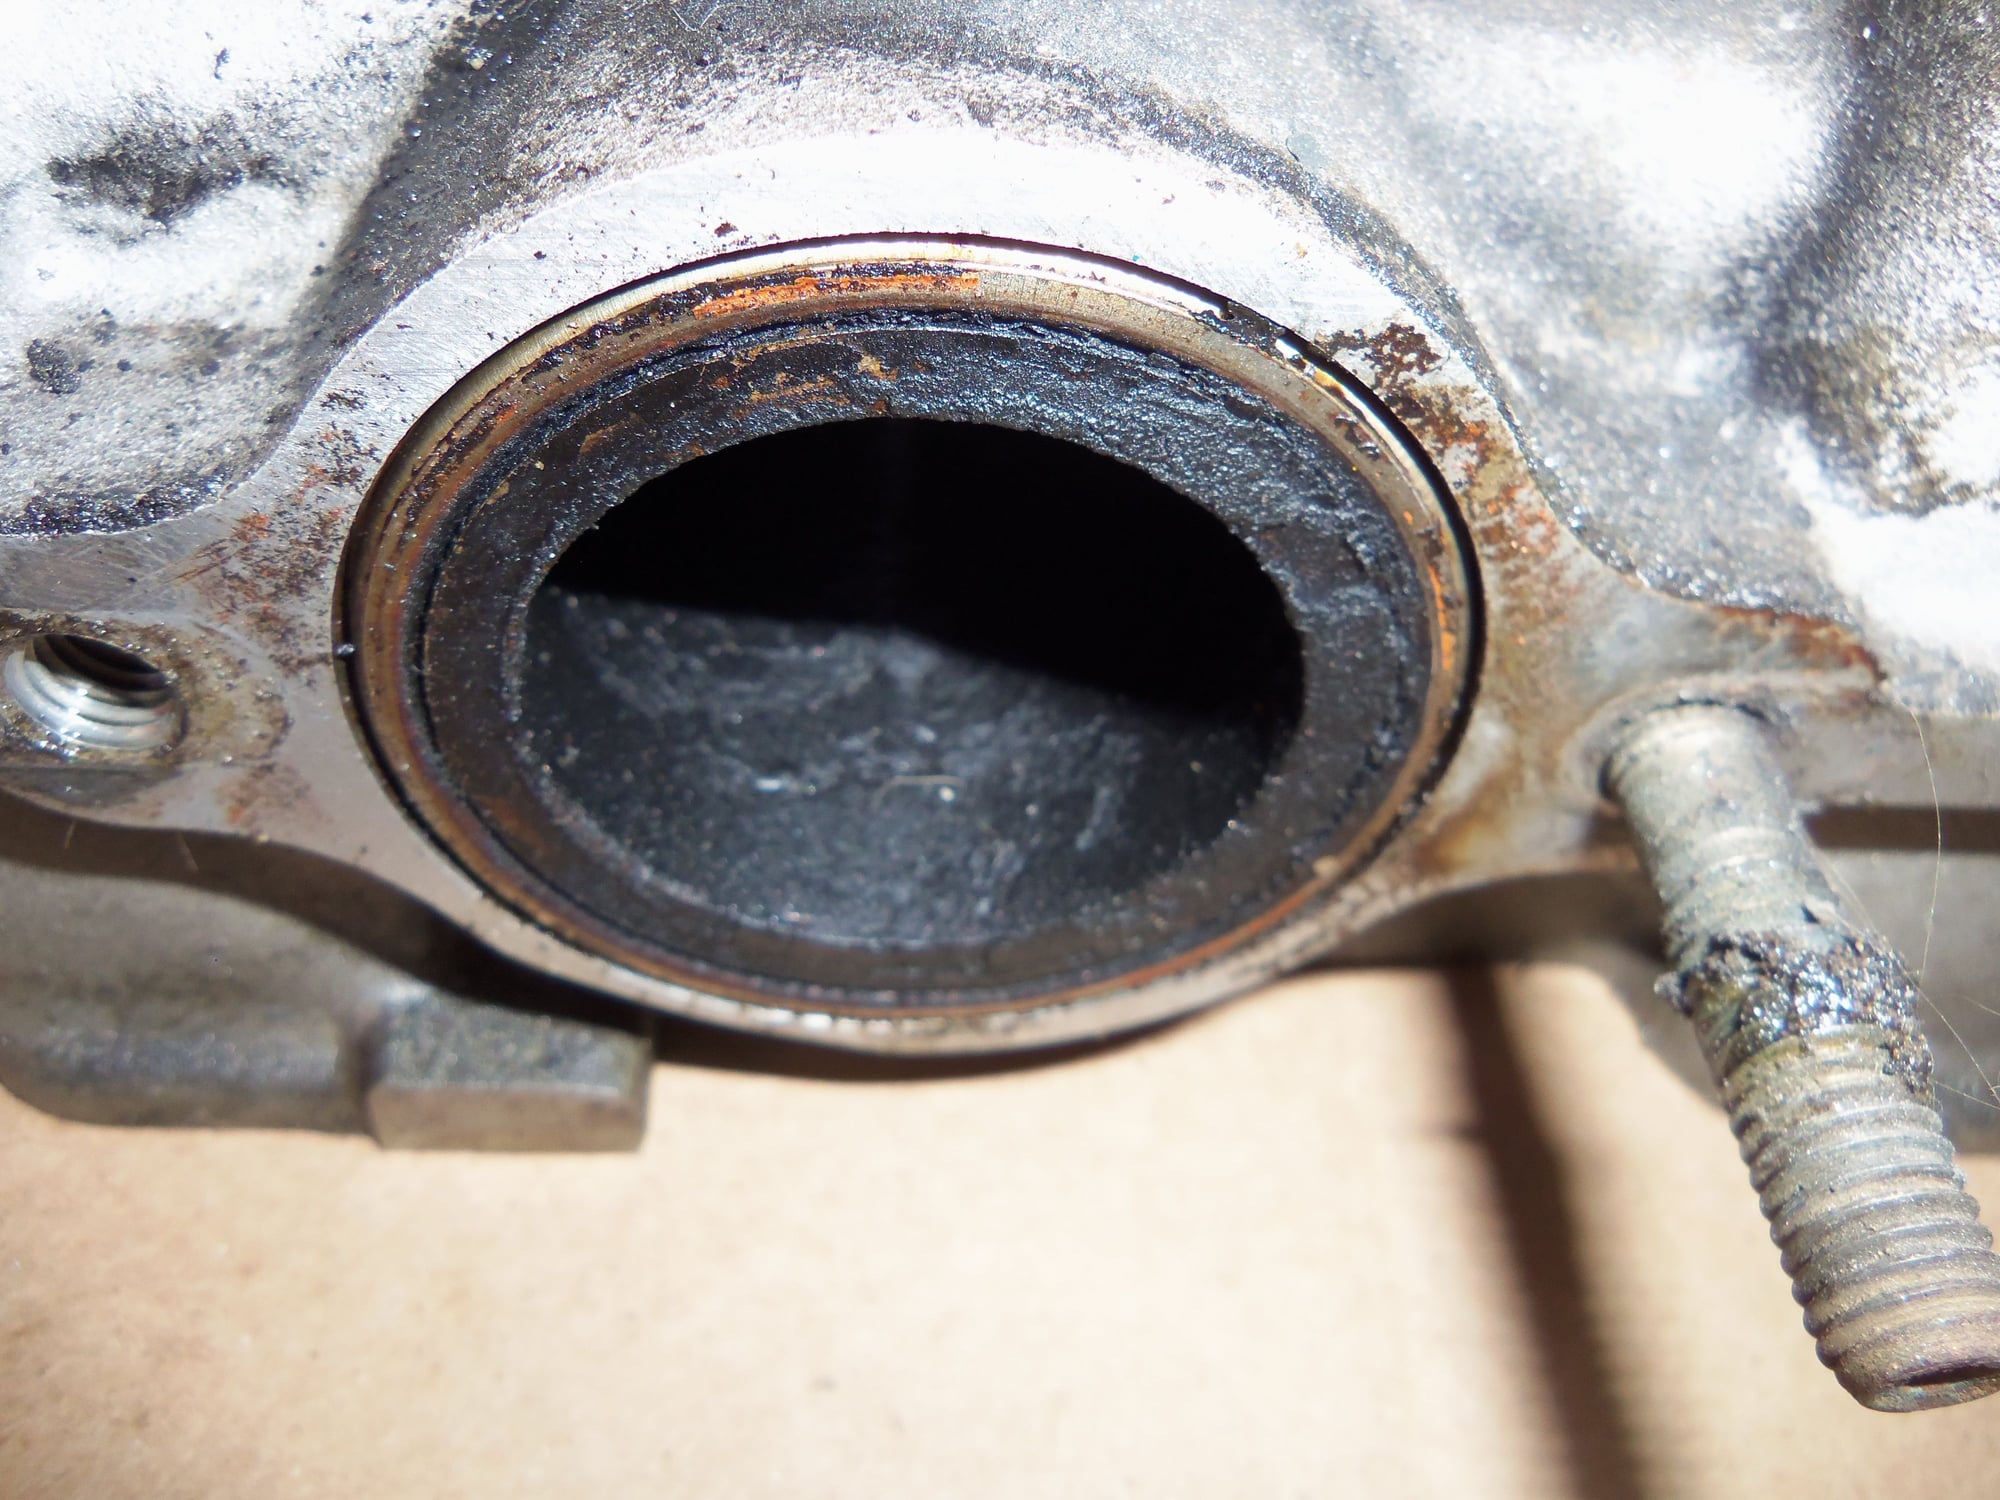
Don't know if this much oily sheen is normal in an S-3 exhaust port.
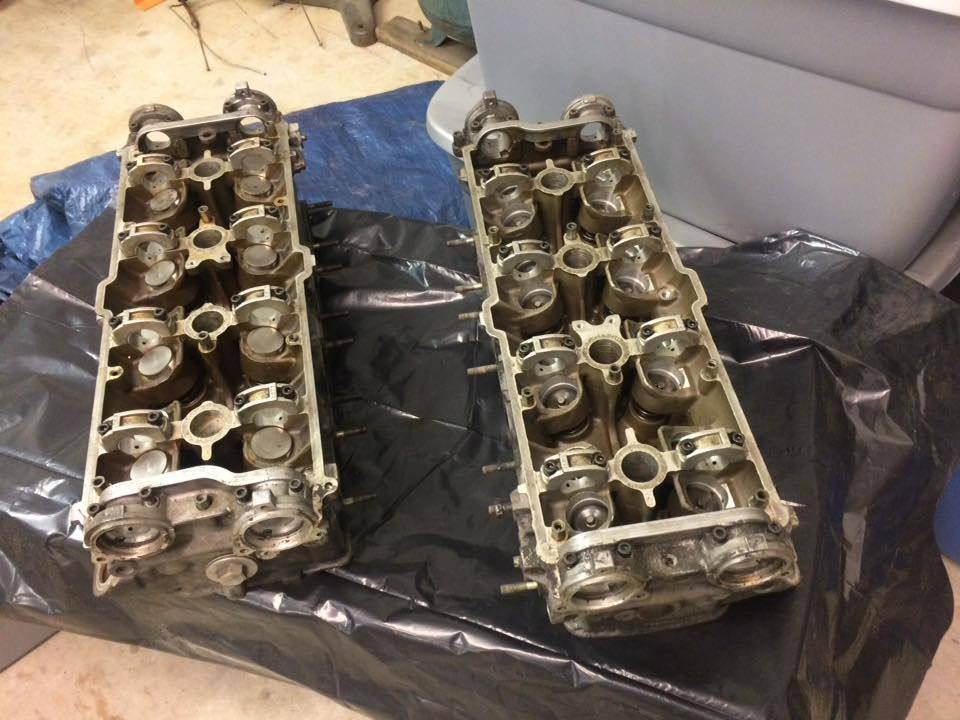
Deck surface doesn't look terrible.
Figured out what this hole is. Blown out bottom of an intake manifold bolt hole.
Only one damaged cam cover bolt stand off hole in the other head.
Hmmmmmmmm...same two intake manifold bolt holes have been repaired in the other head, as well.
Oily sheen in exhaust port in other head, as well as one missing exhaust manifold stud.
Deck surfaces don't look super hateful on the other head, either.
I lightly cleaned this part of the head with green scotchbrite and mineral spirits. I know that is BAD. However, if used, these heads will be machined. So, I didn't do any damage. Just wanted to see how it looked under the crud.
This is an awful lot of wear on the timing belt crank gear for only being 65,000 miles.
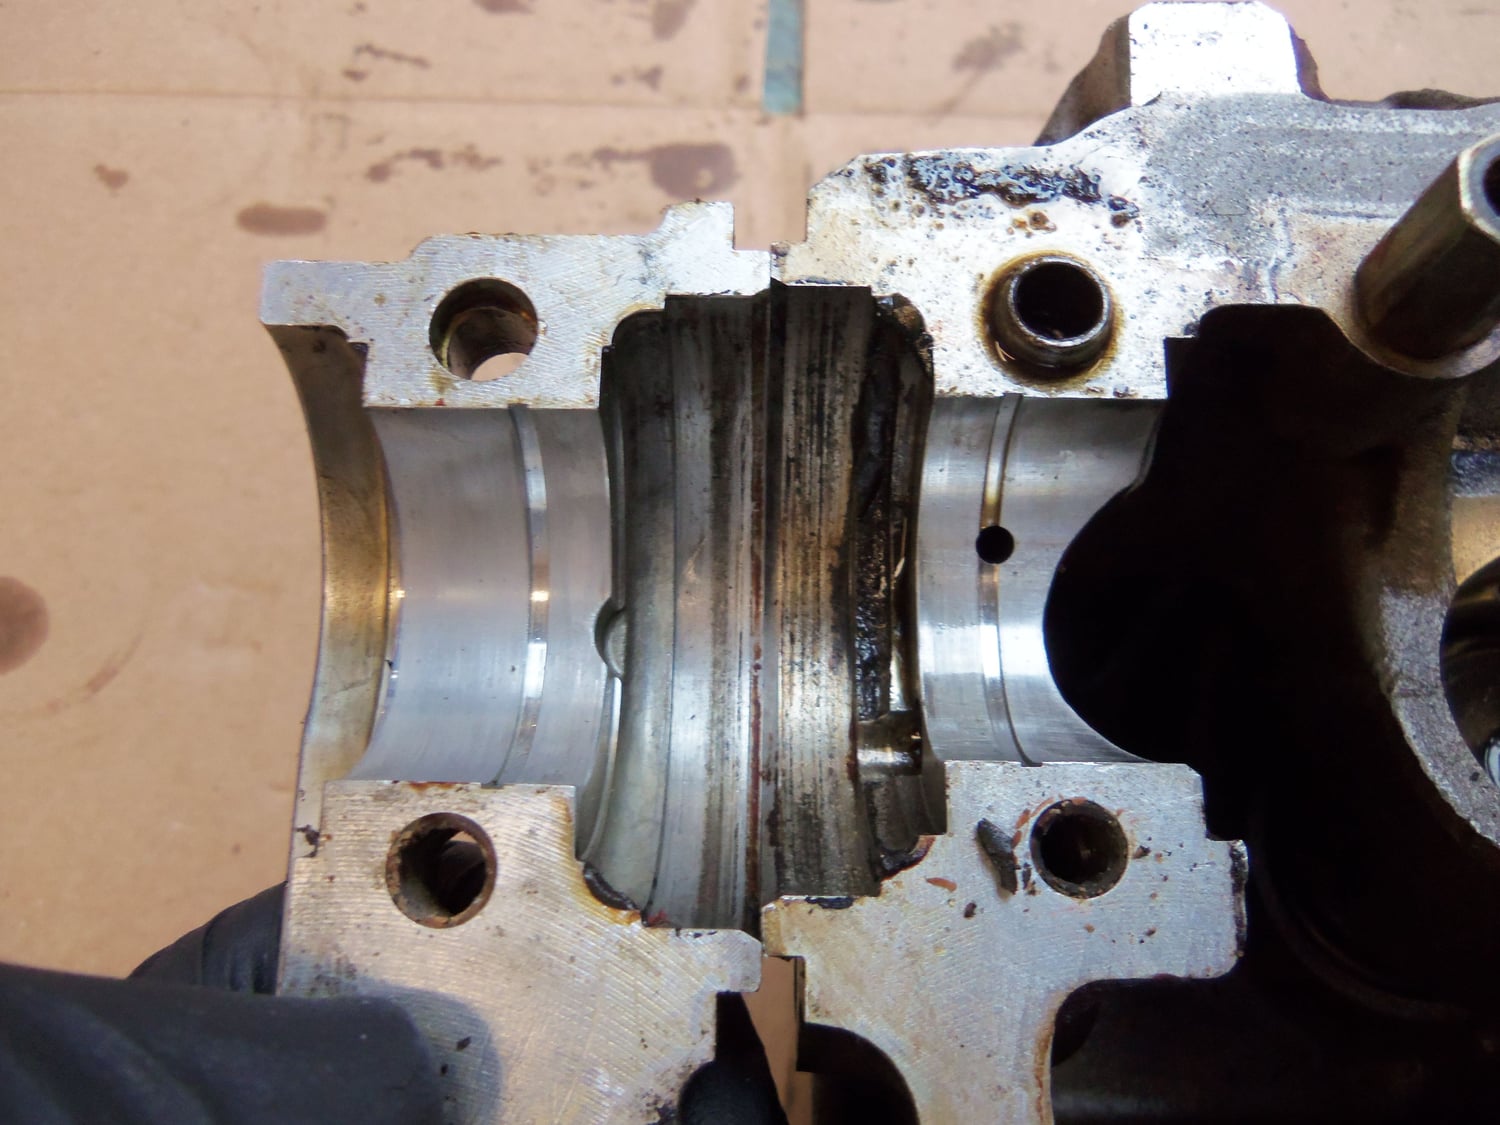
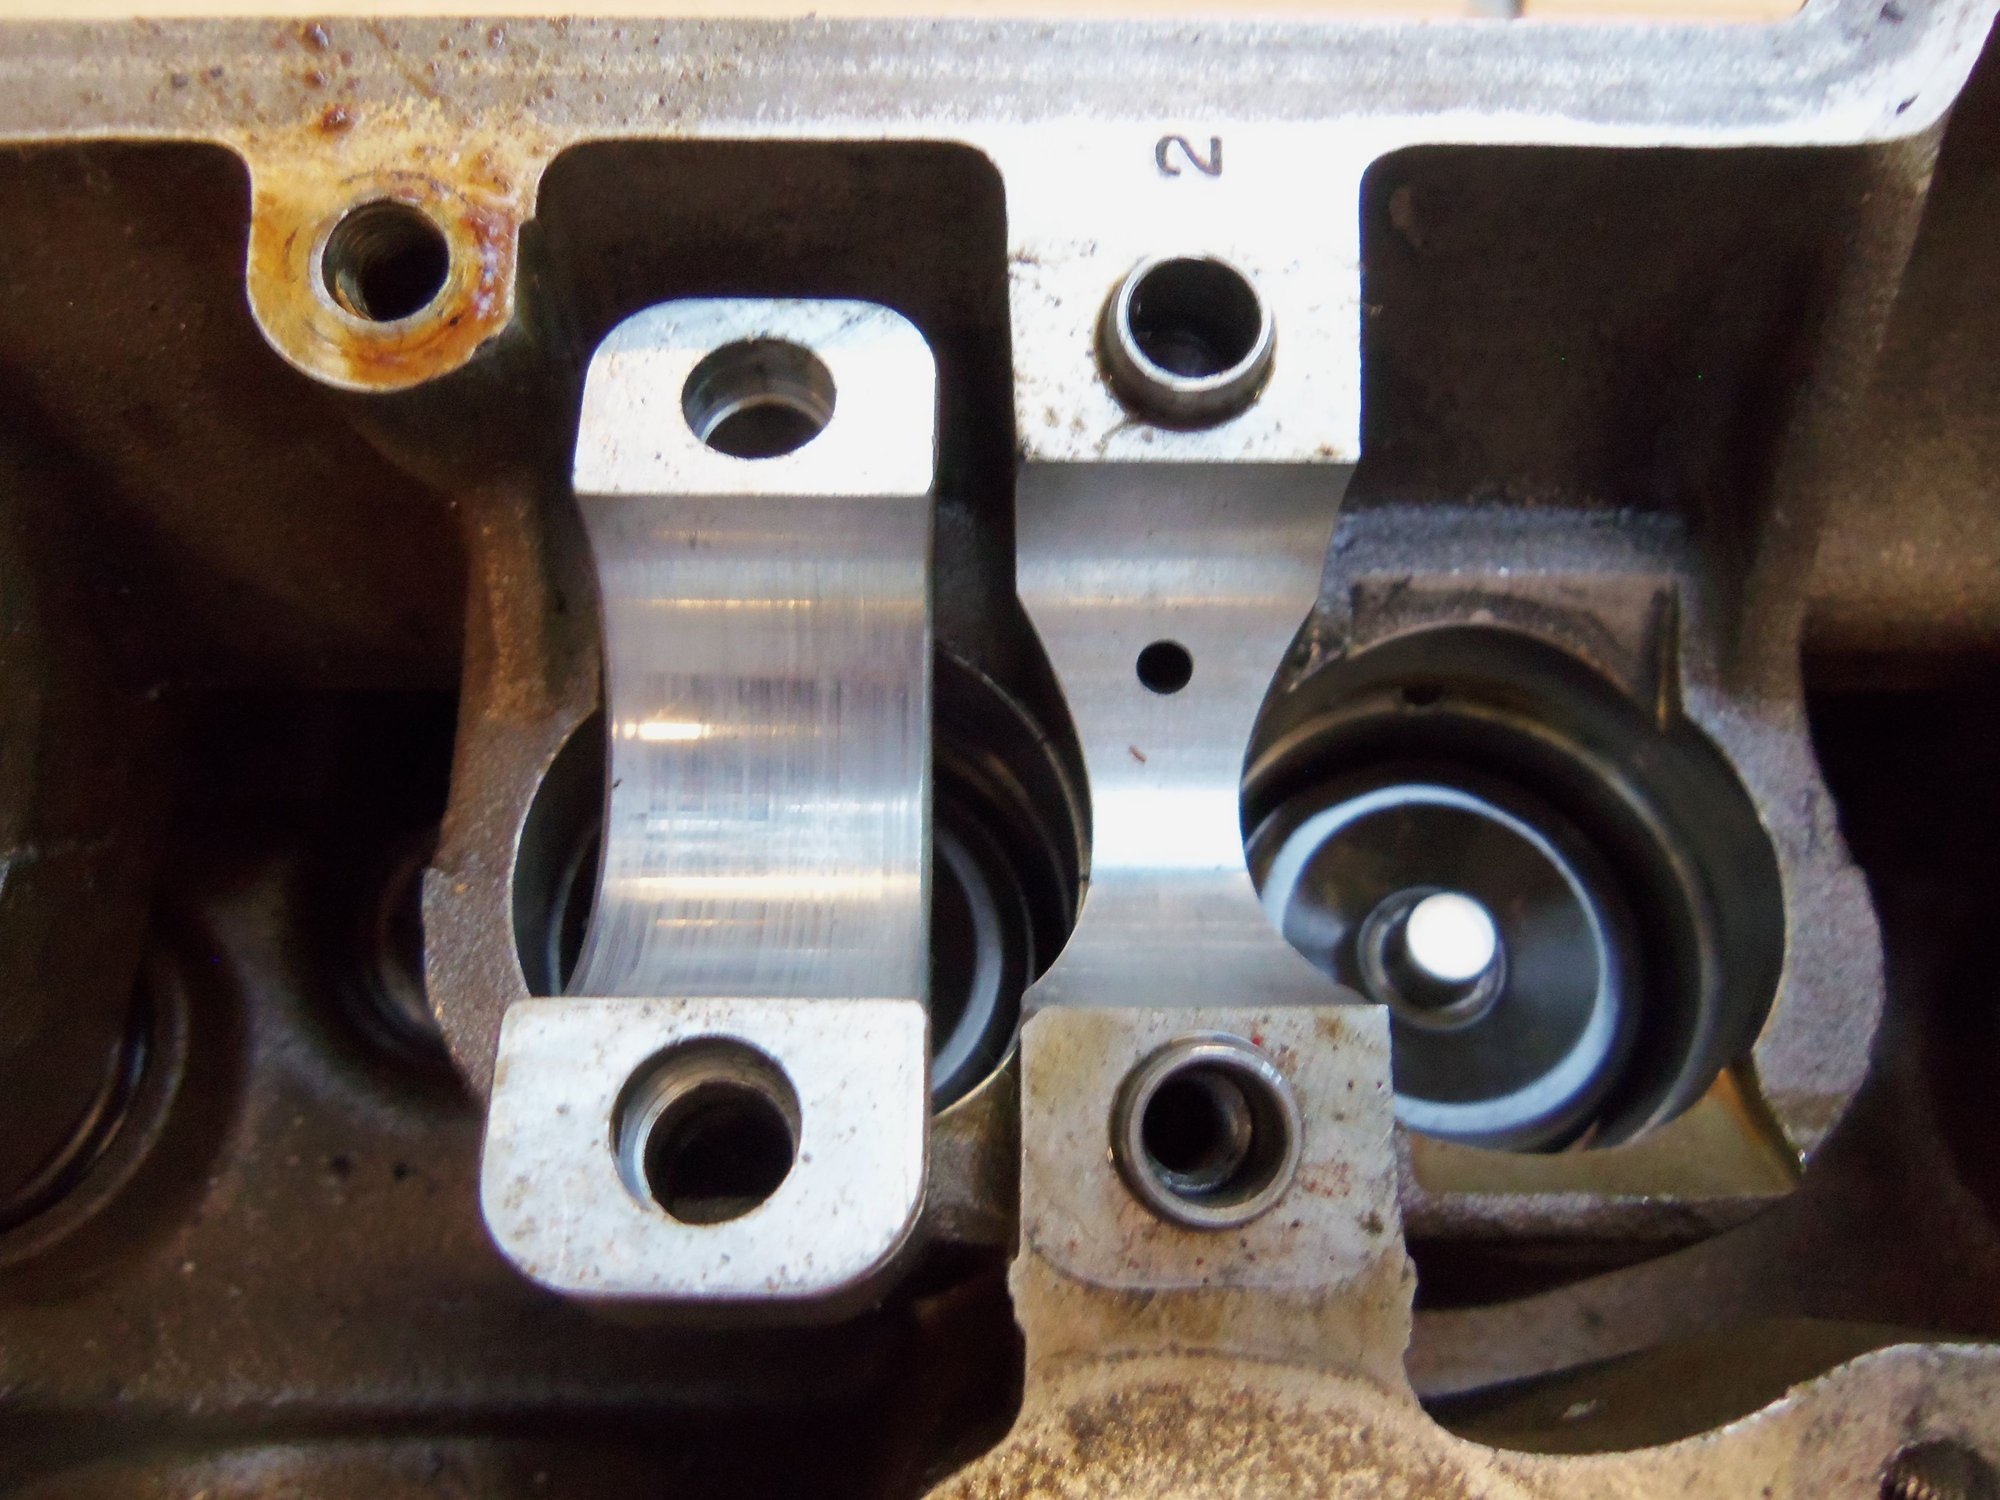
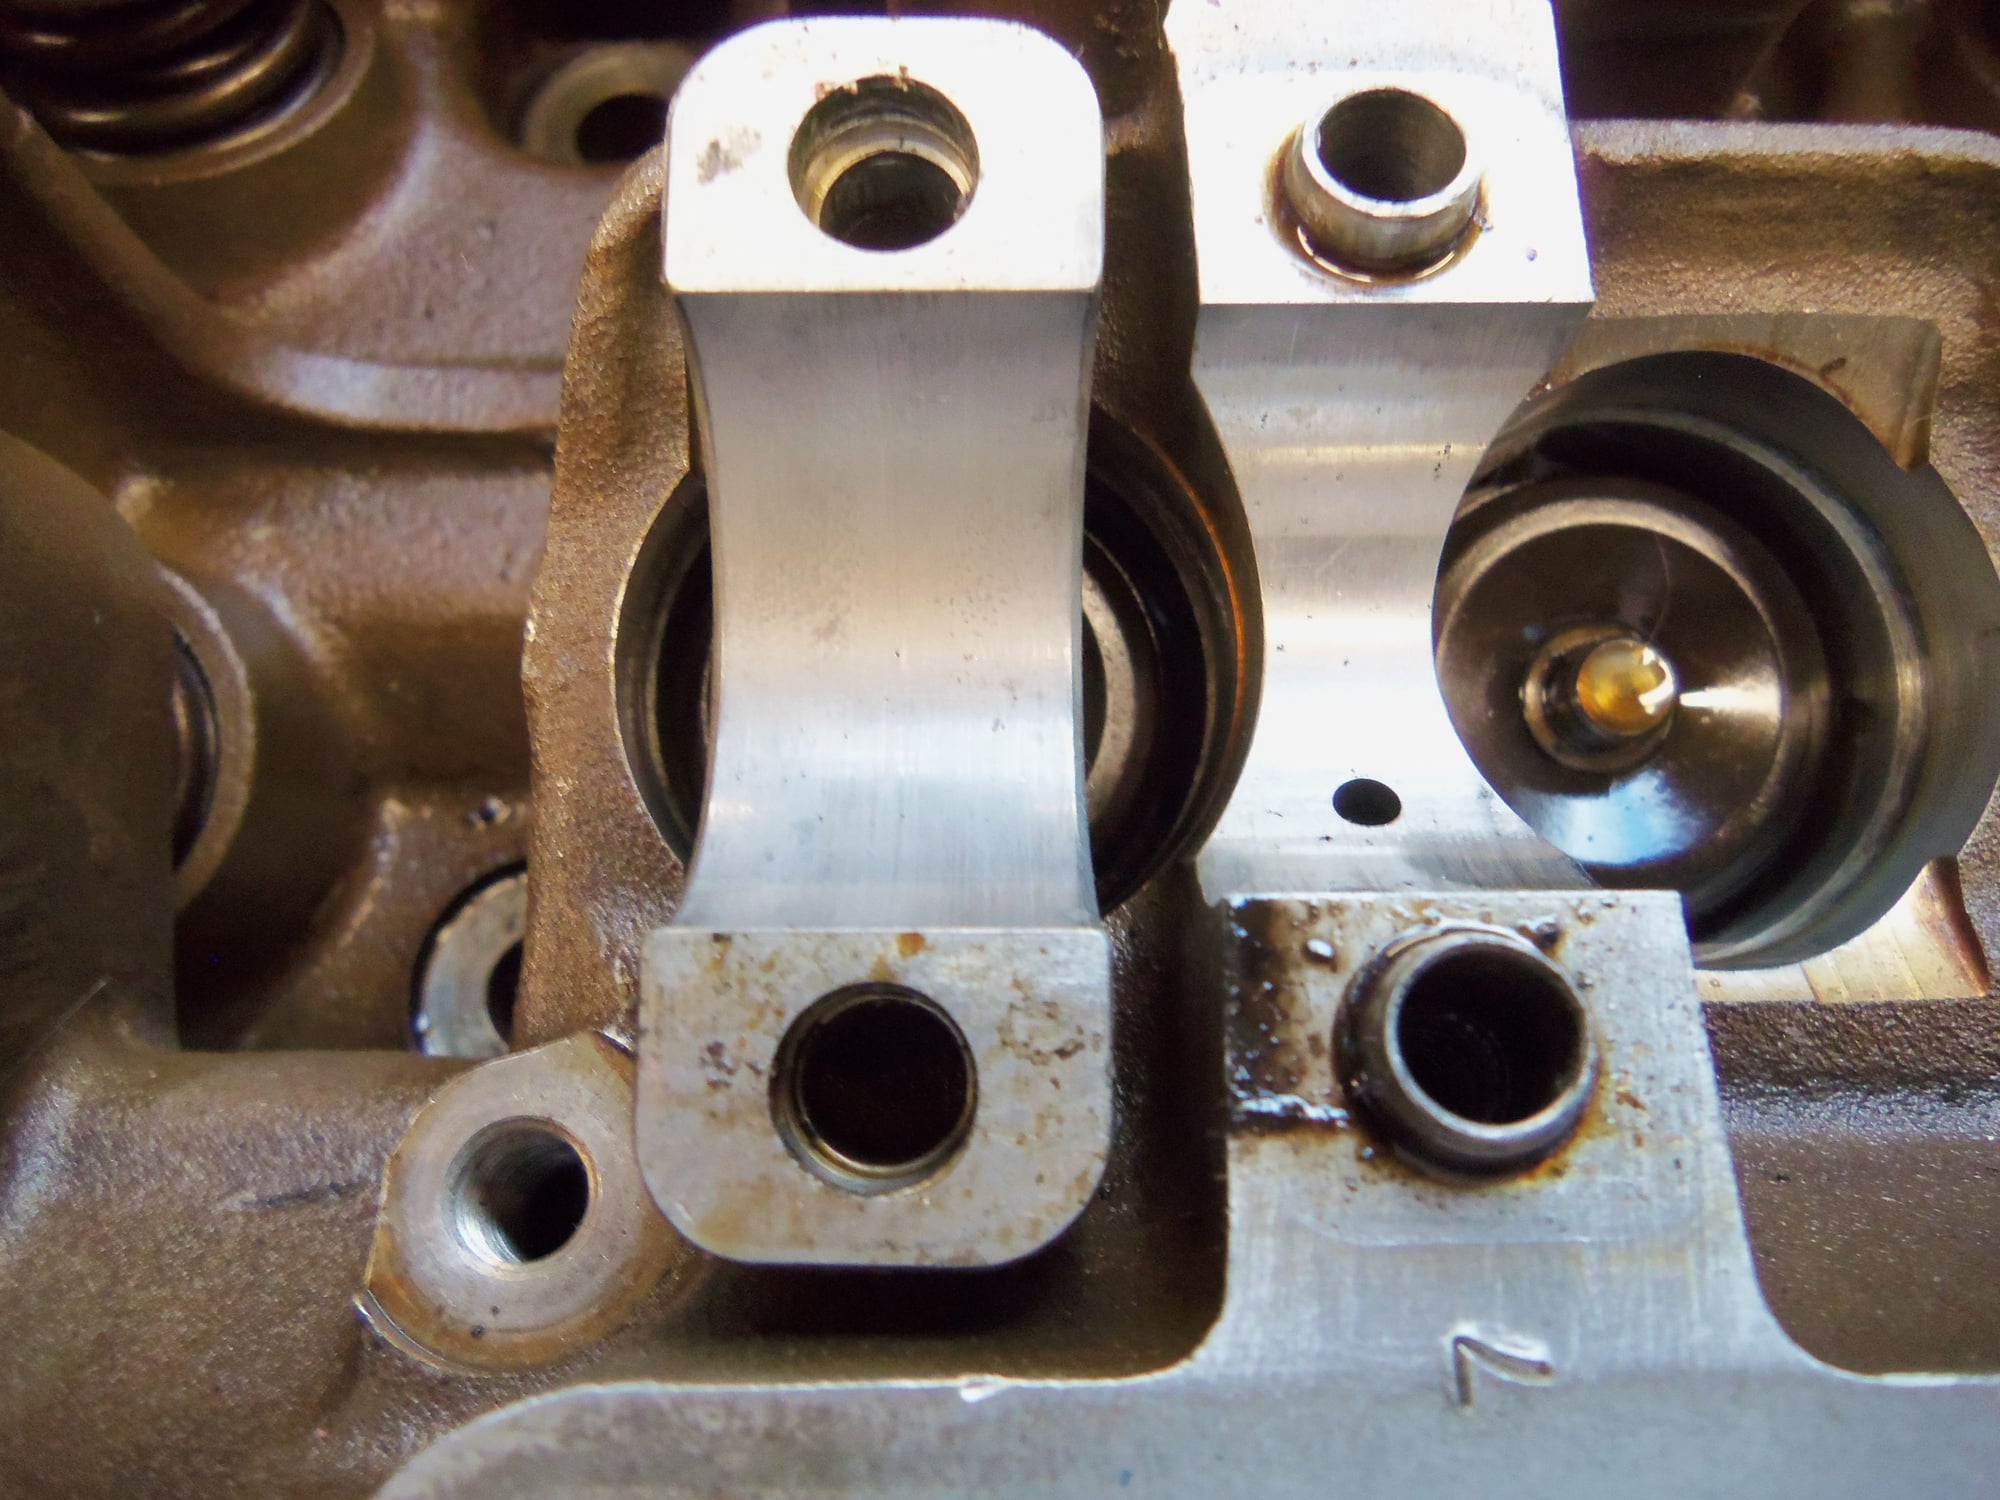
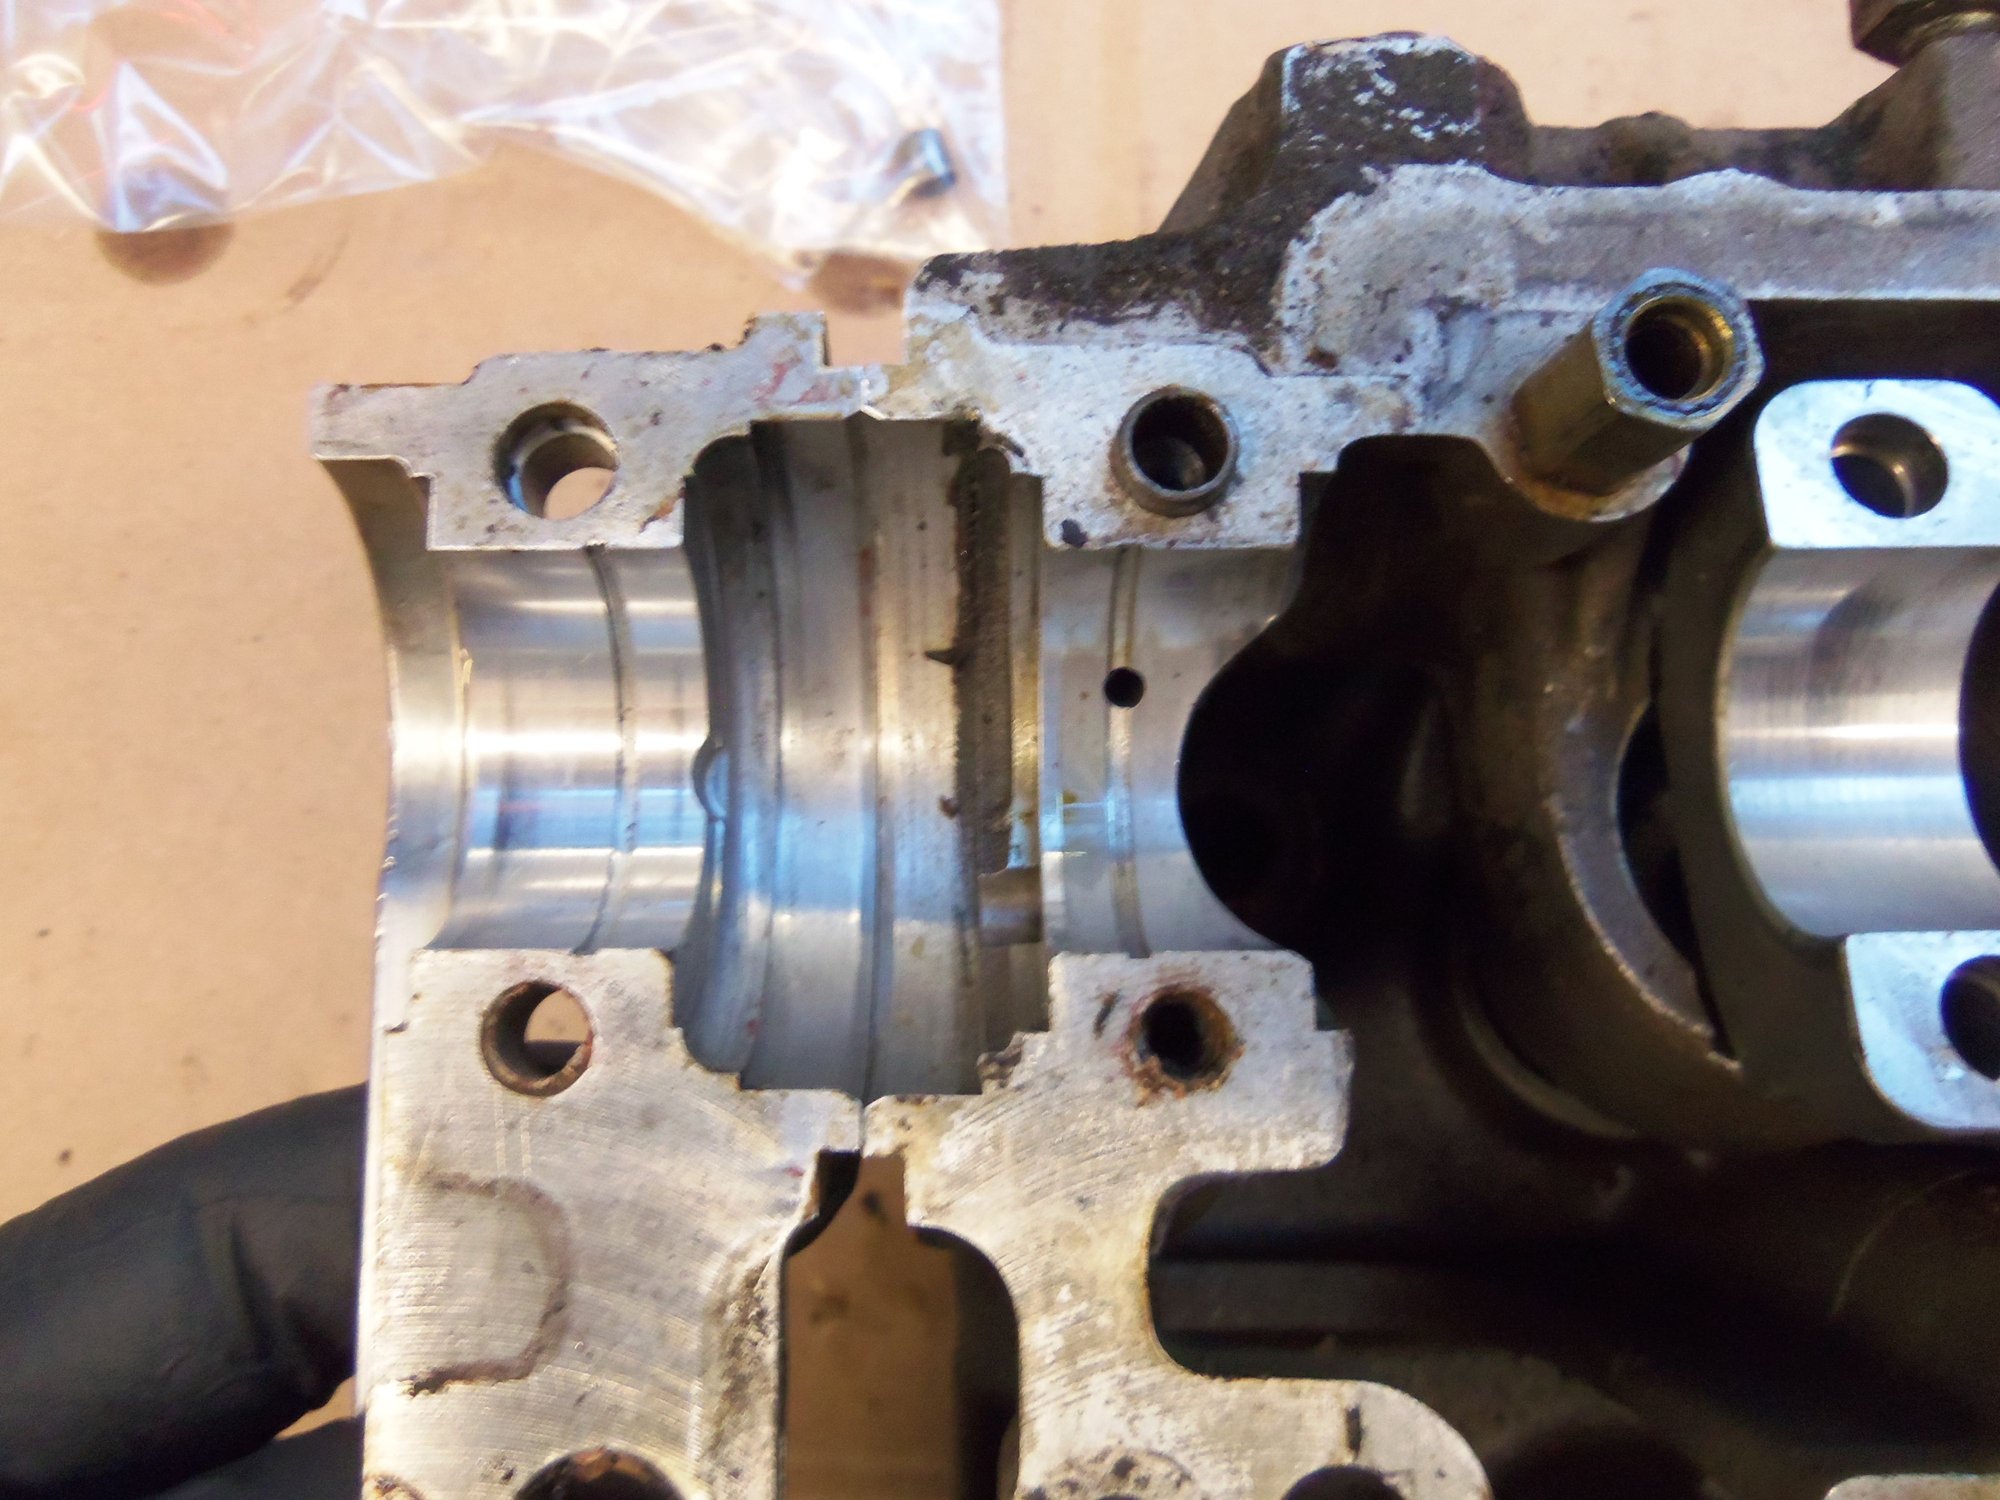
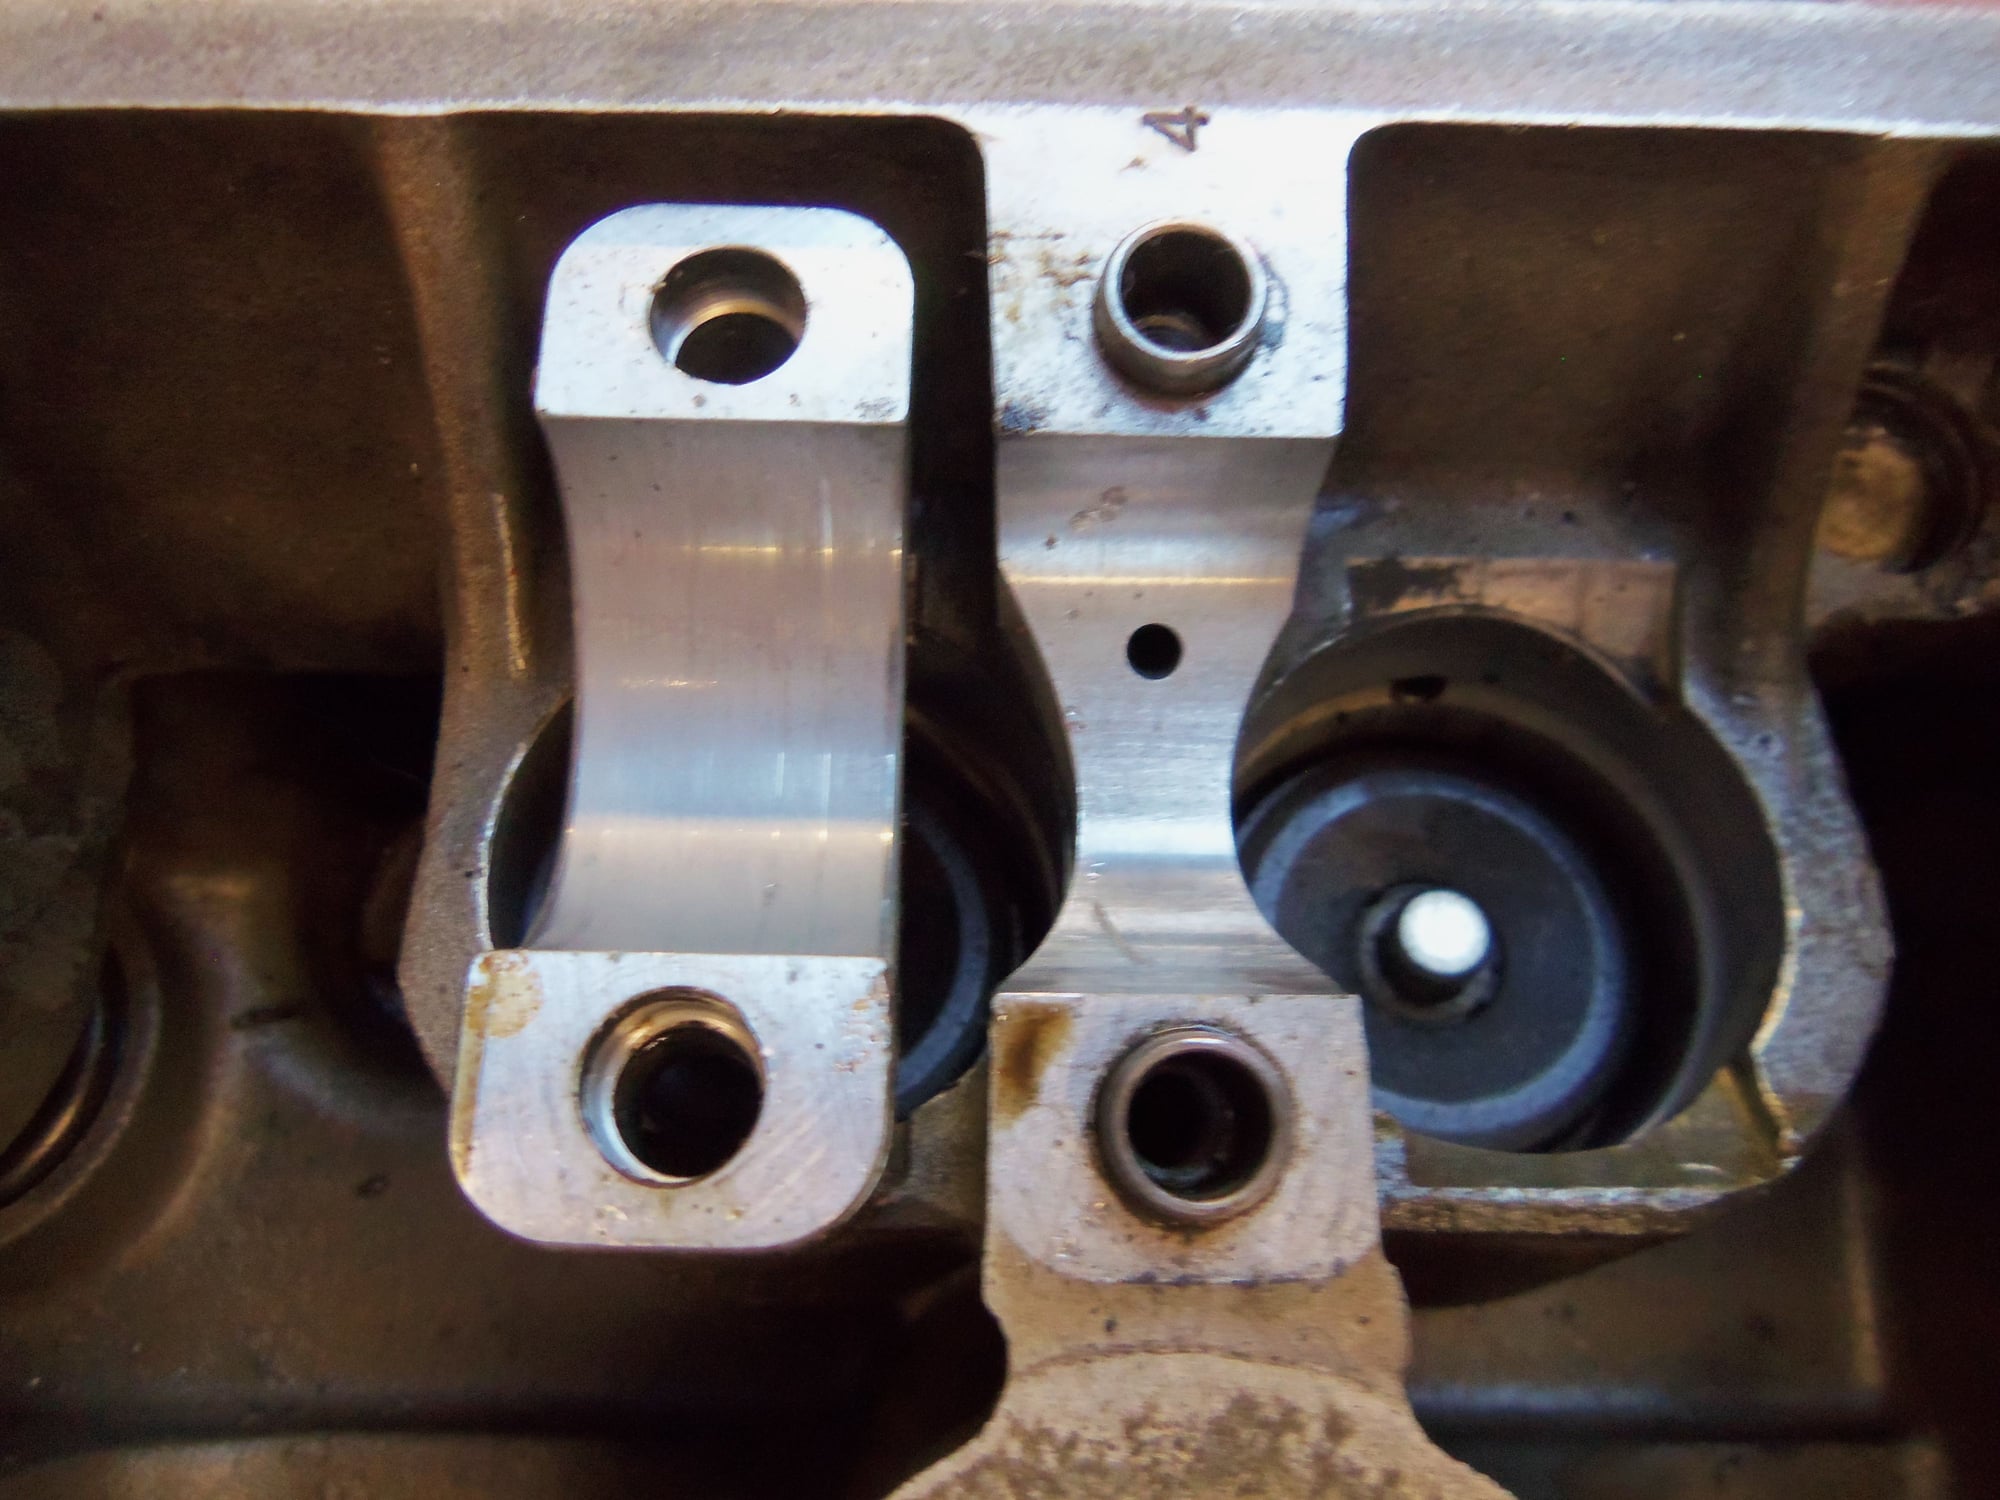
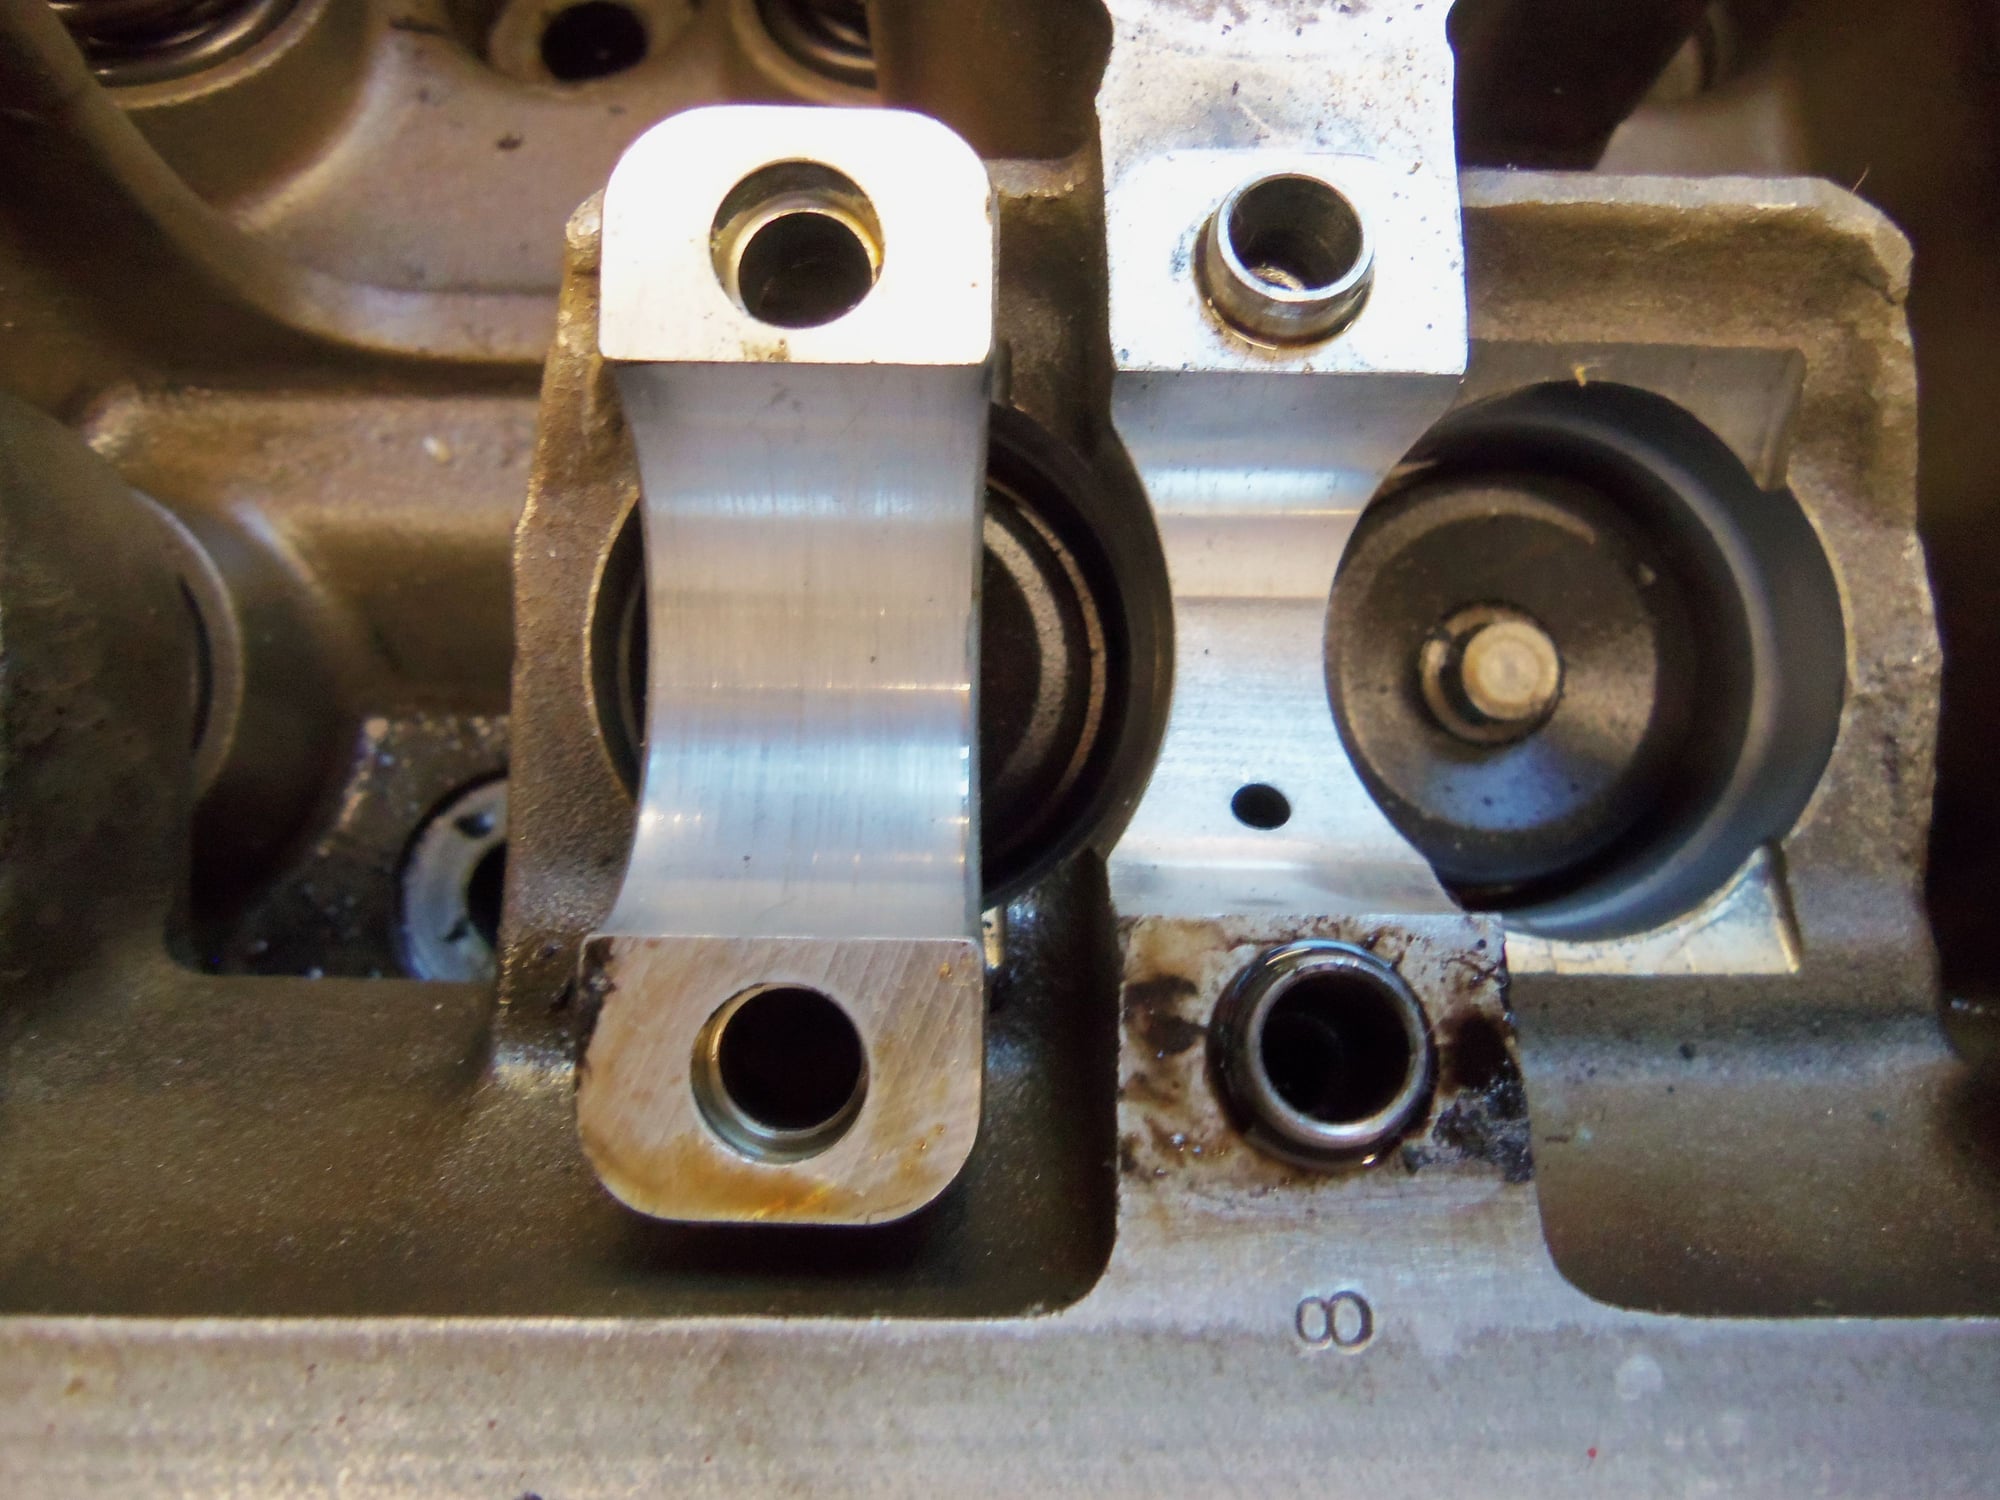
Now, if I still have your attention, please look at these photos of the cam bearing surfaces. I am VERY concerned that they are borderline unusable. I wiped each bearing off with brake cleaner on a lint free rag. Each photo is of the bearing in the head and its matching cap.
First head. Scuffing and embedded particulate matter?
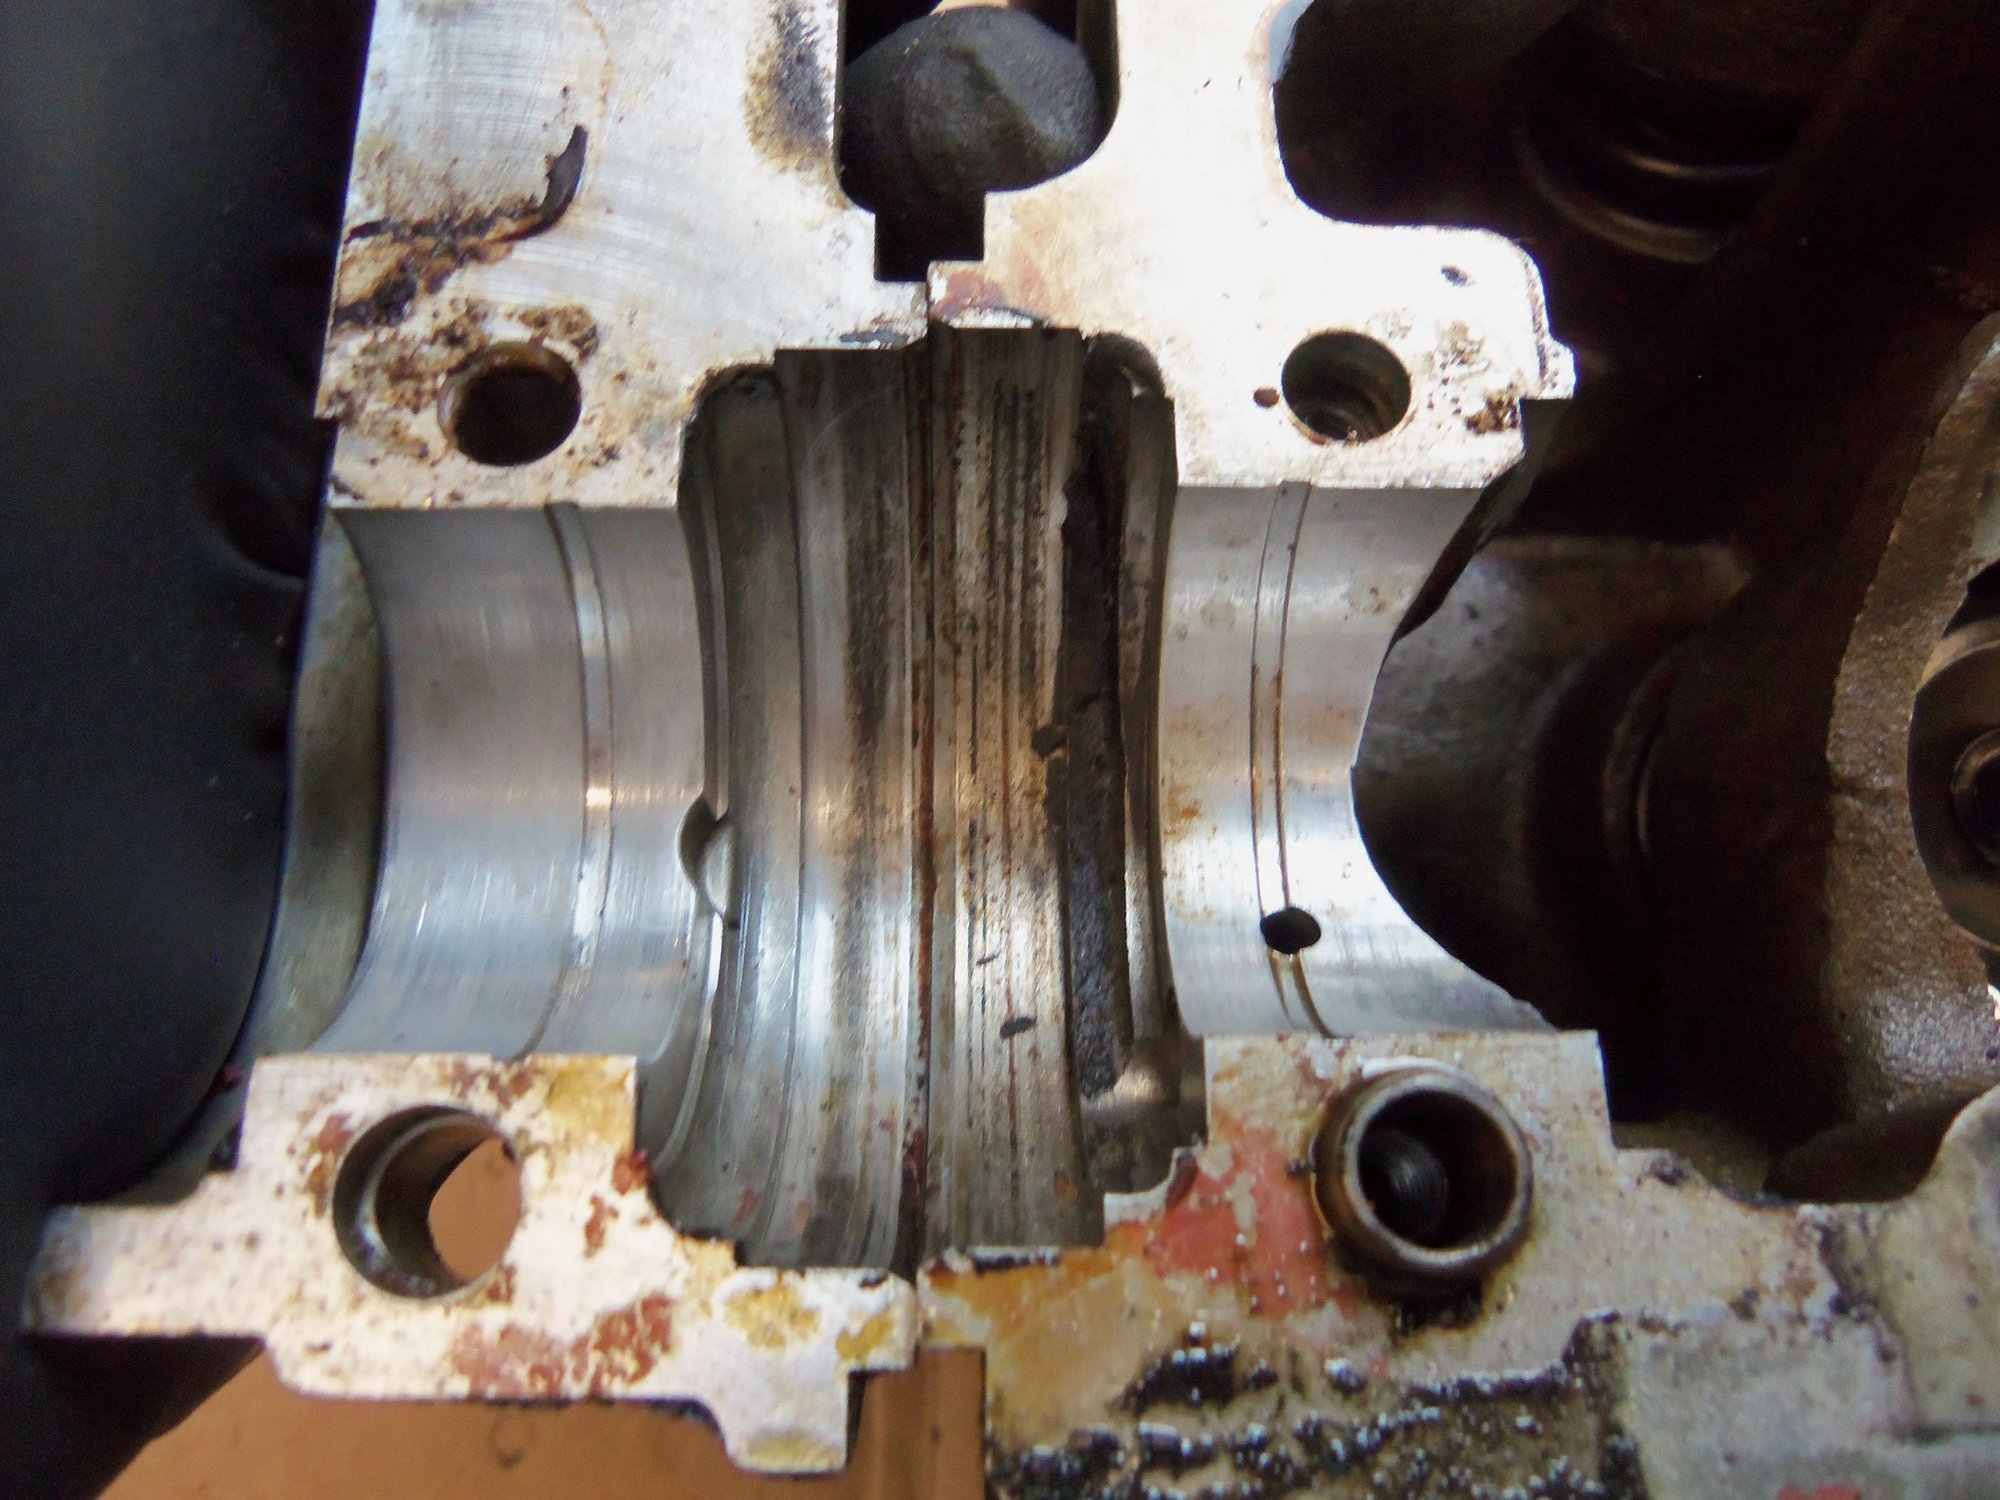
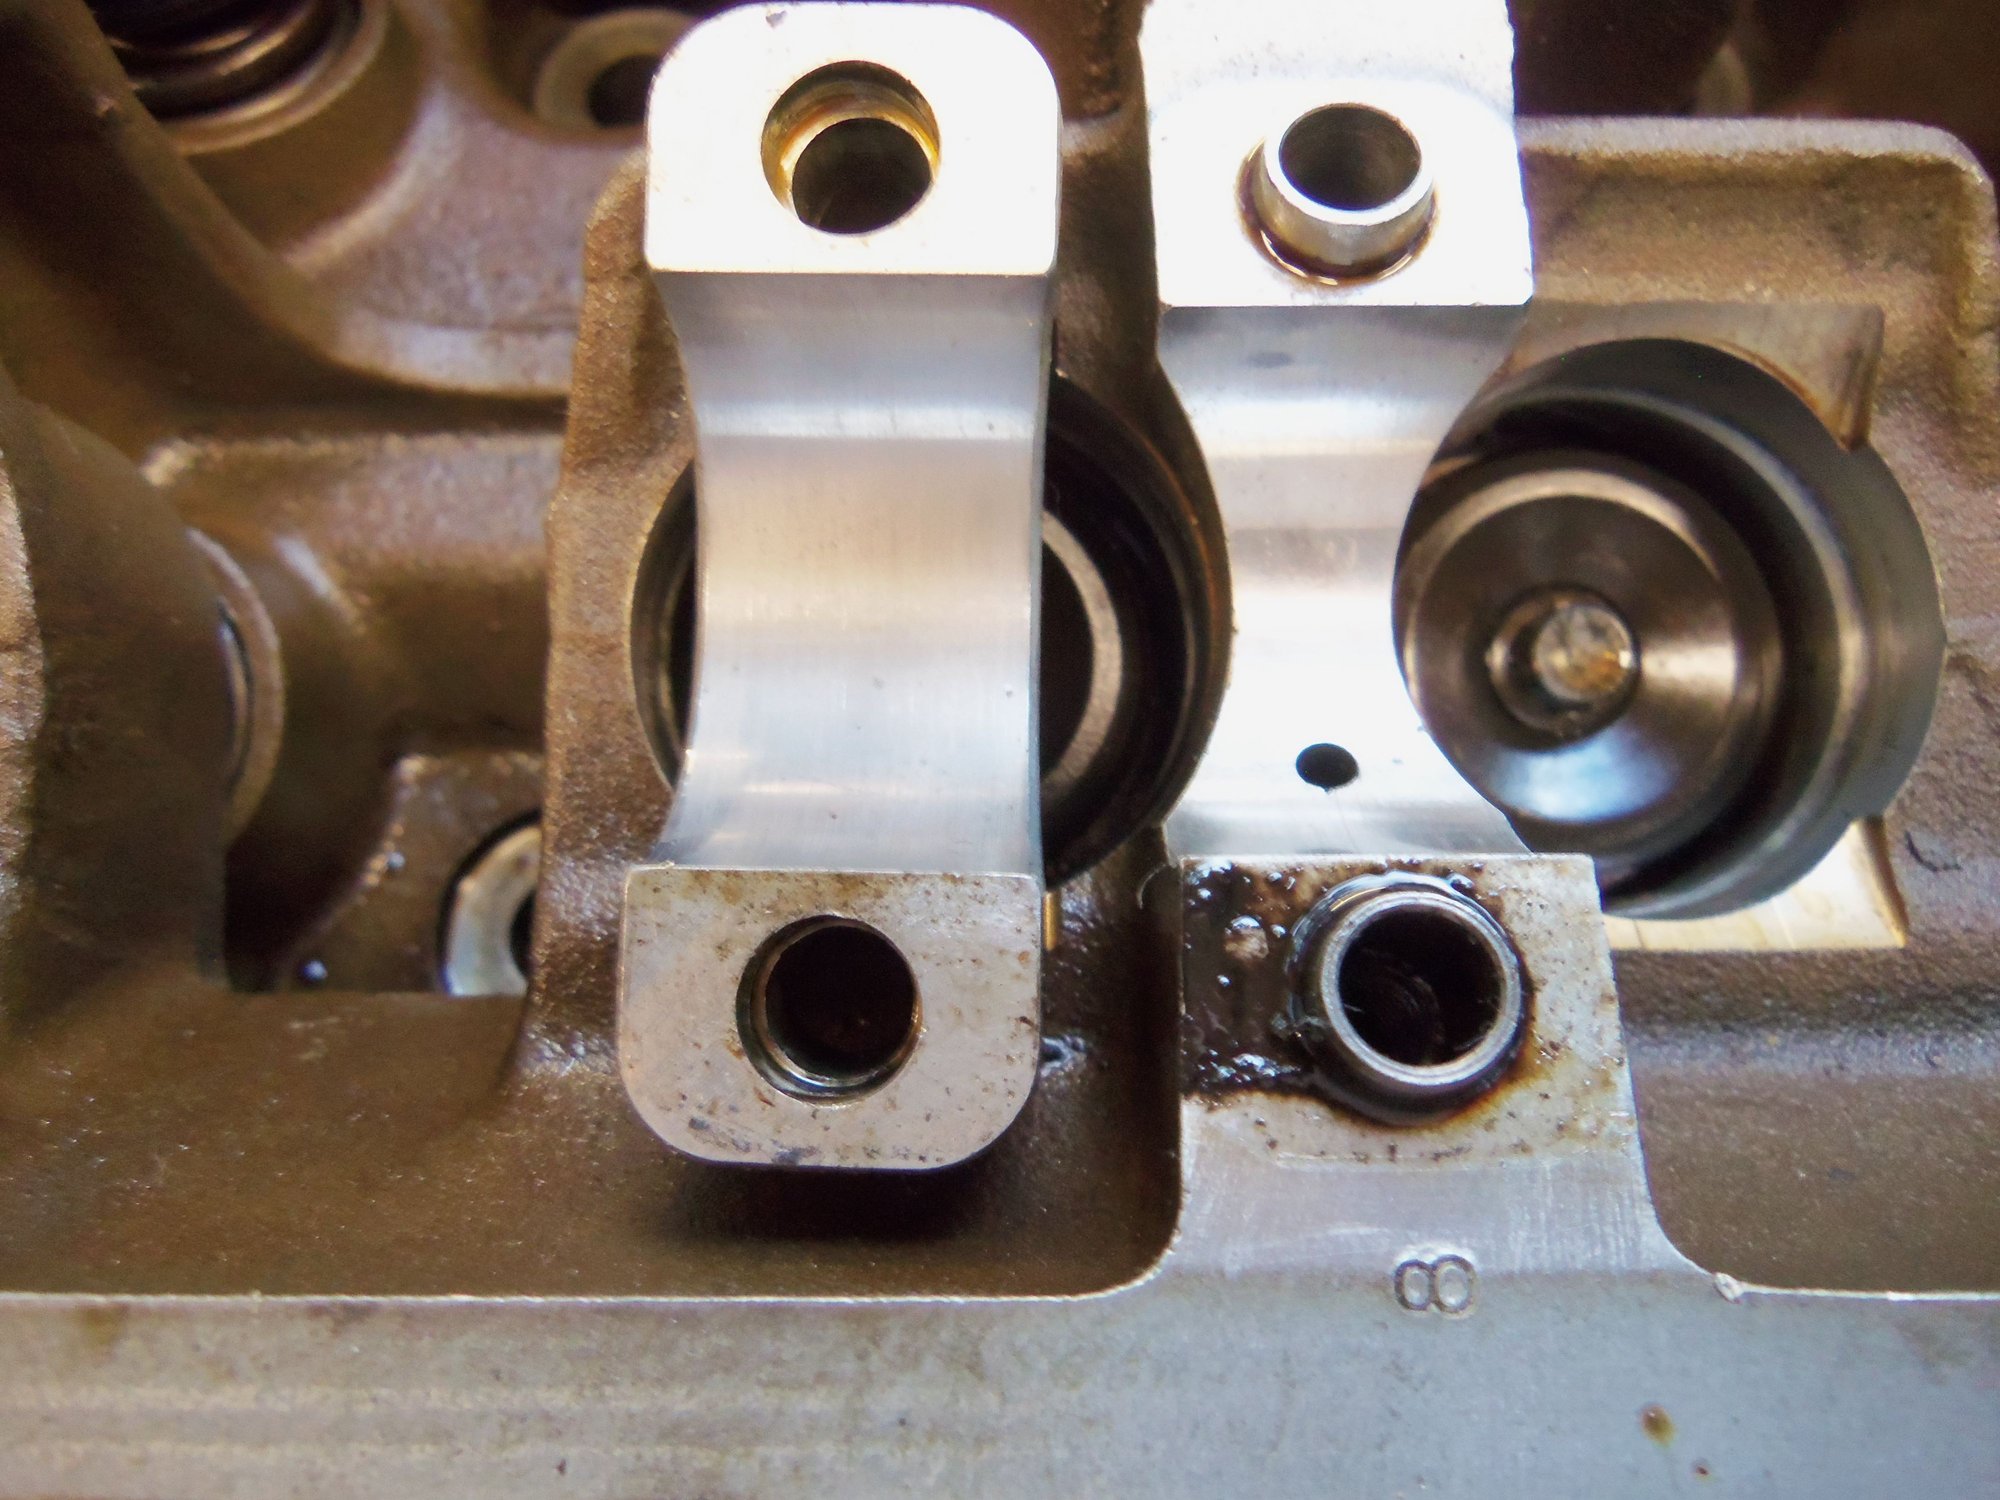
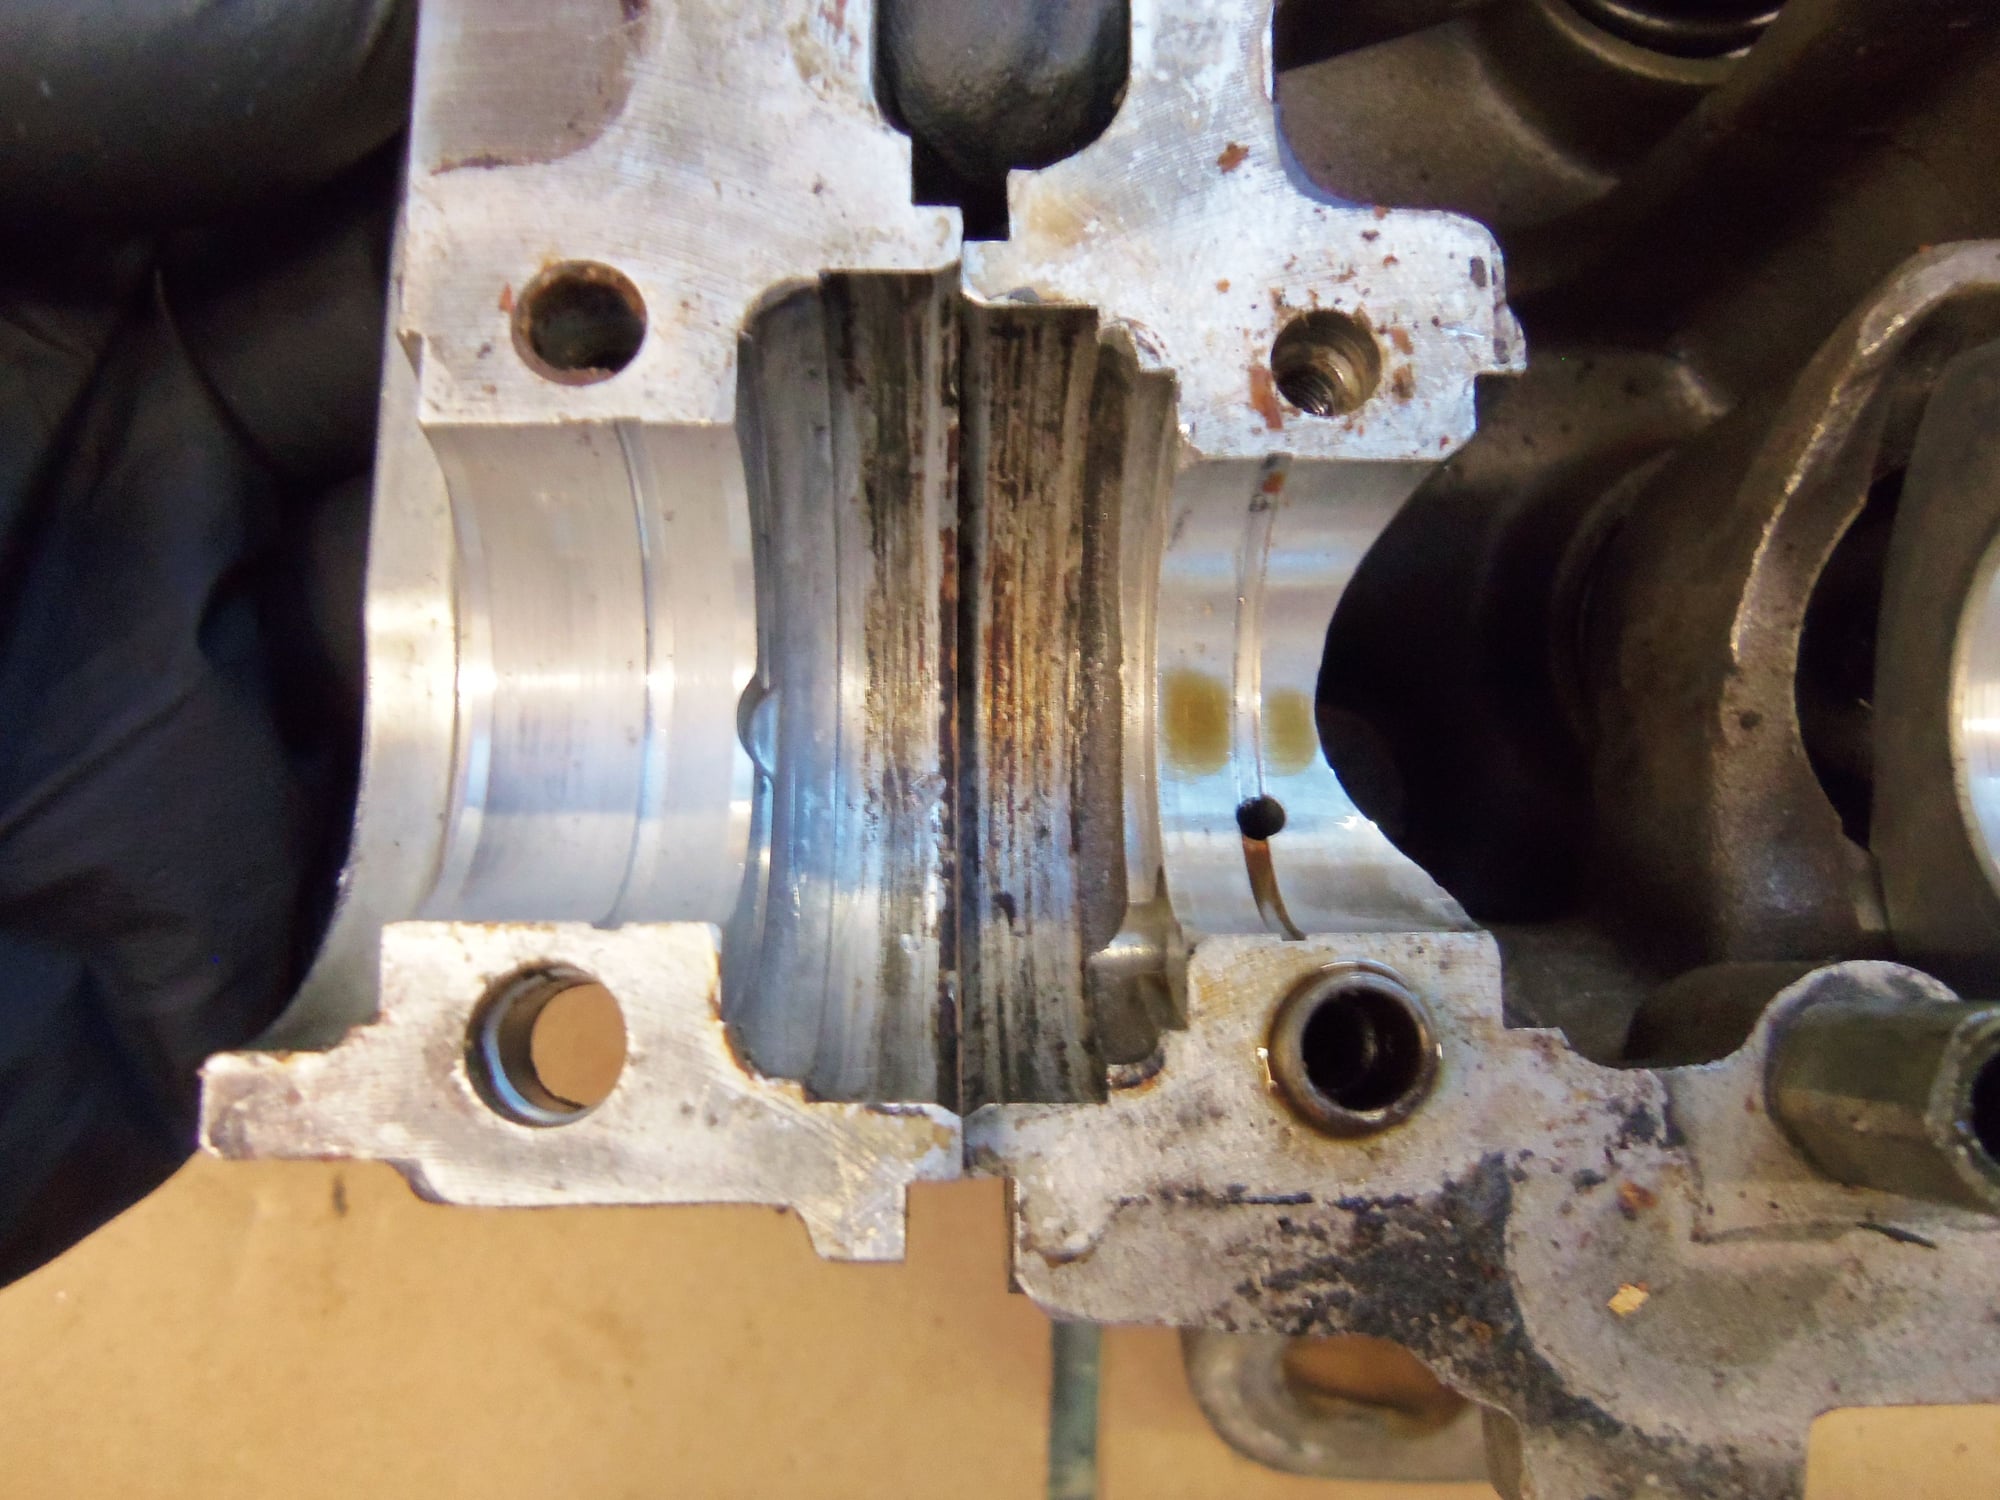
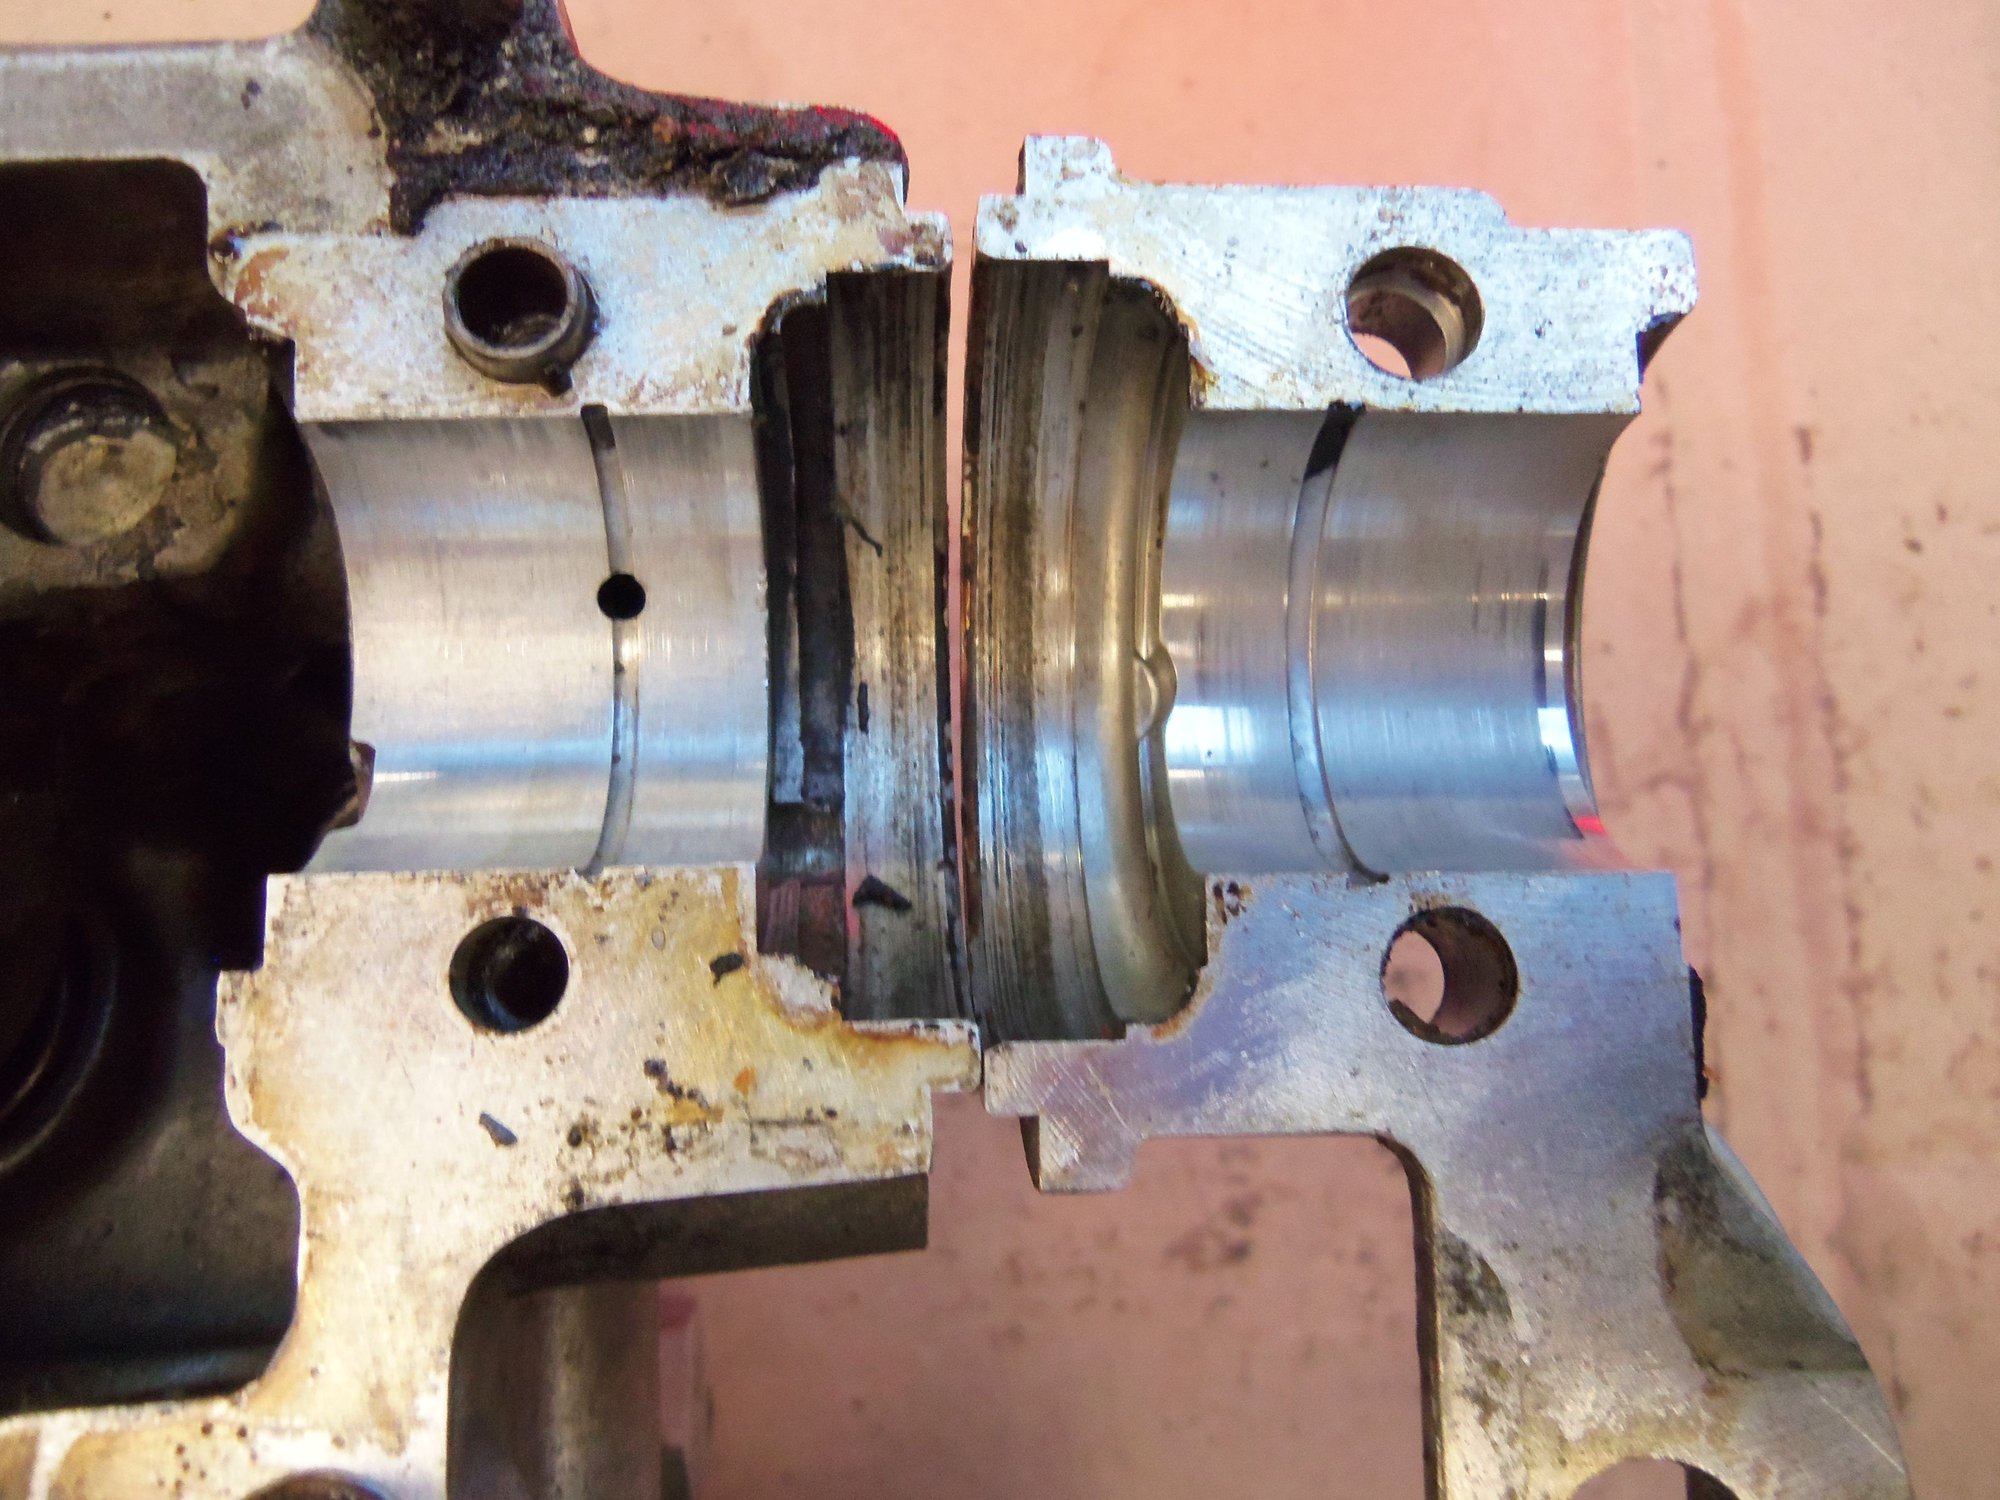
Scuffing? The stains on the head side bearing would not wipe off with brake cleaner.
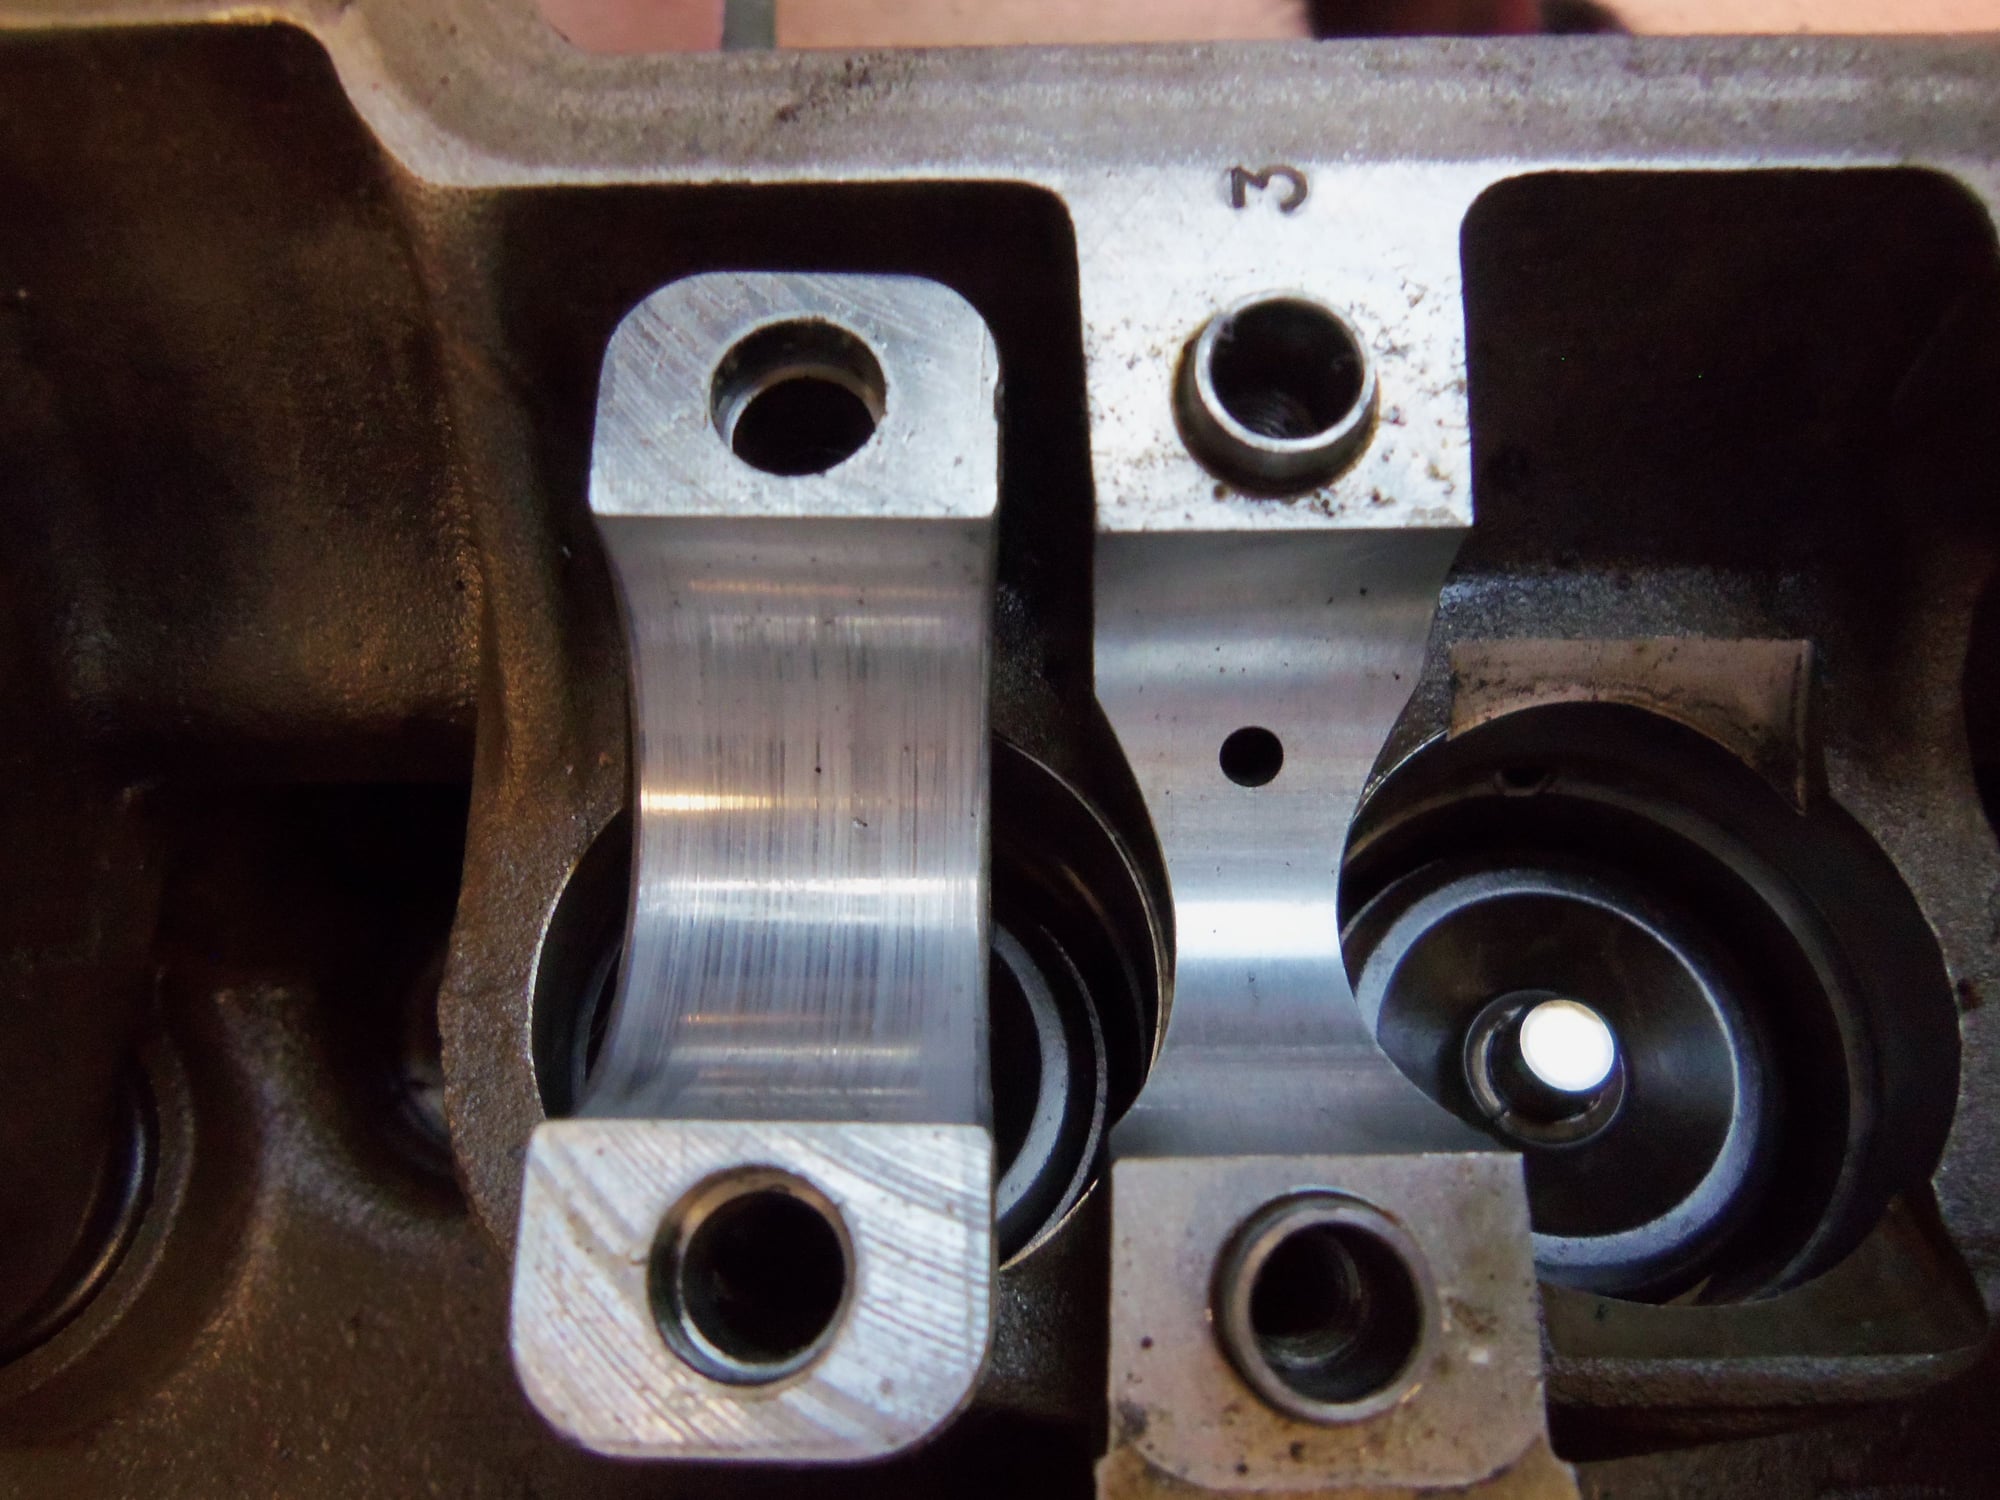
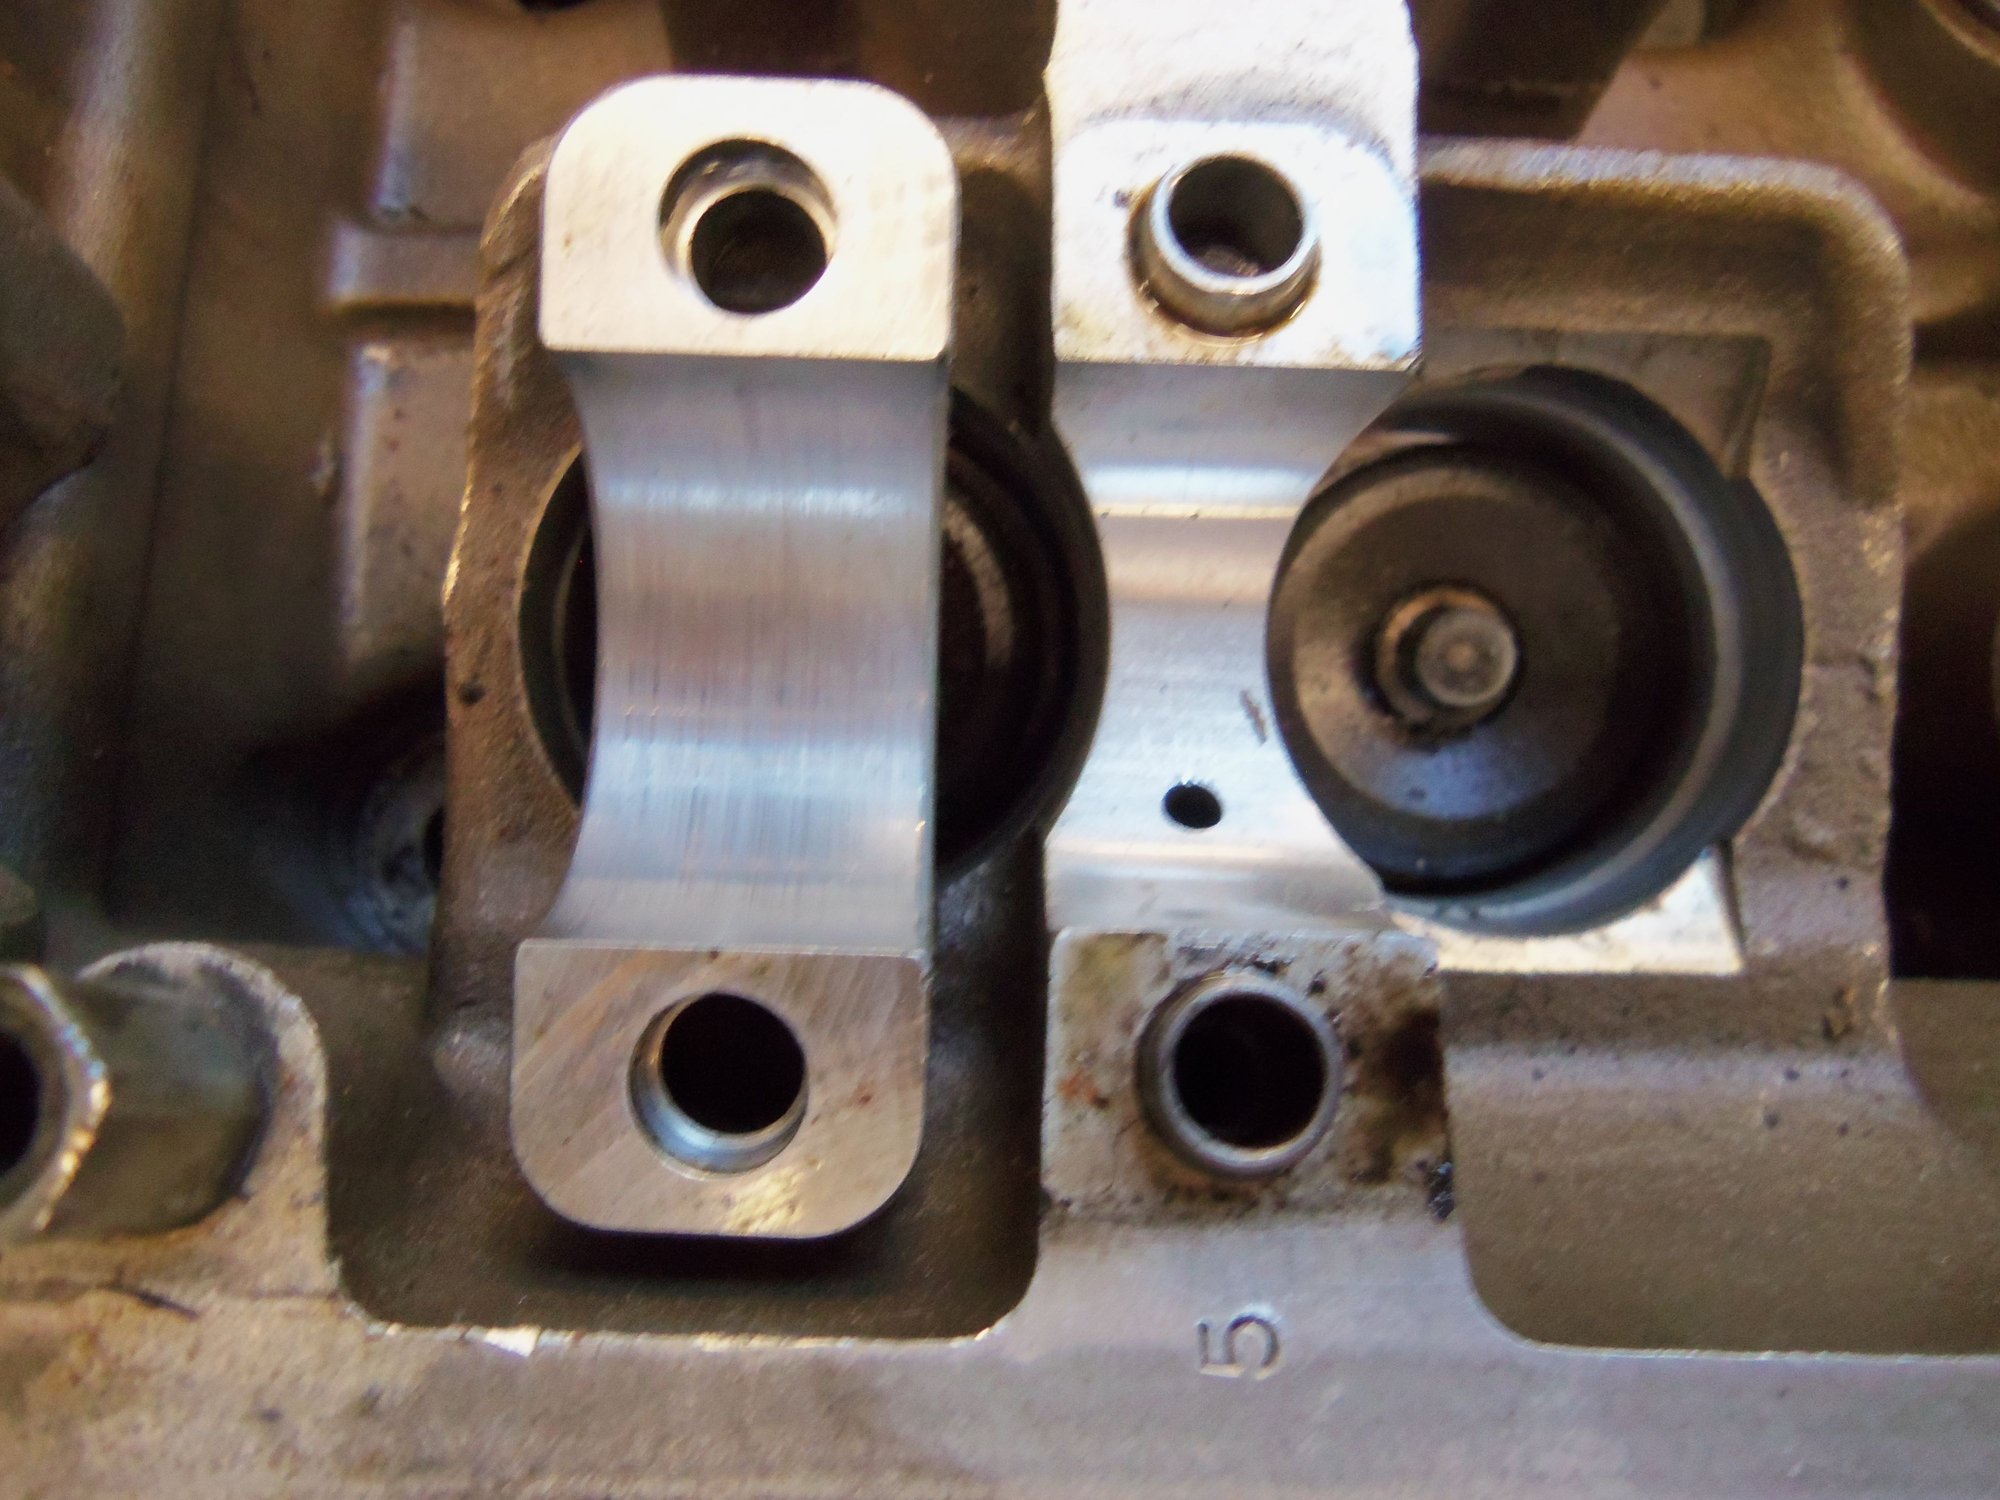
Scuffing? The stain on the head side bearing would not wipe off with brake cleaner.
Scuffing? Not sure what to call the shiny parts. Speck in head side bearing did not come off with a fingernail.
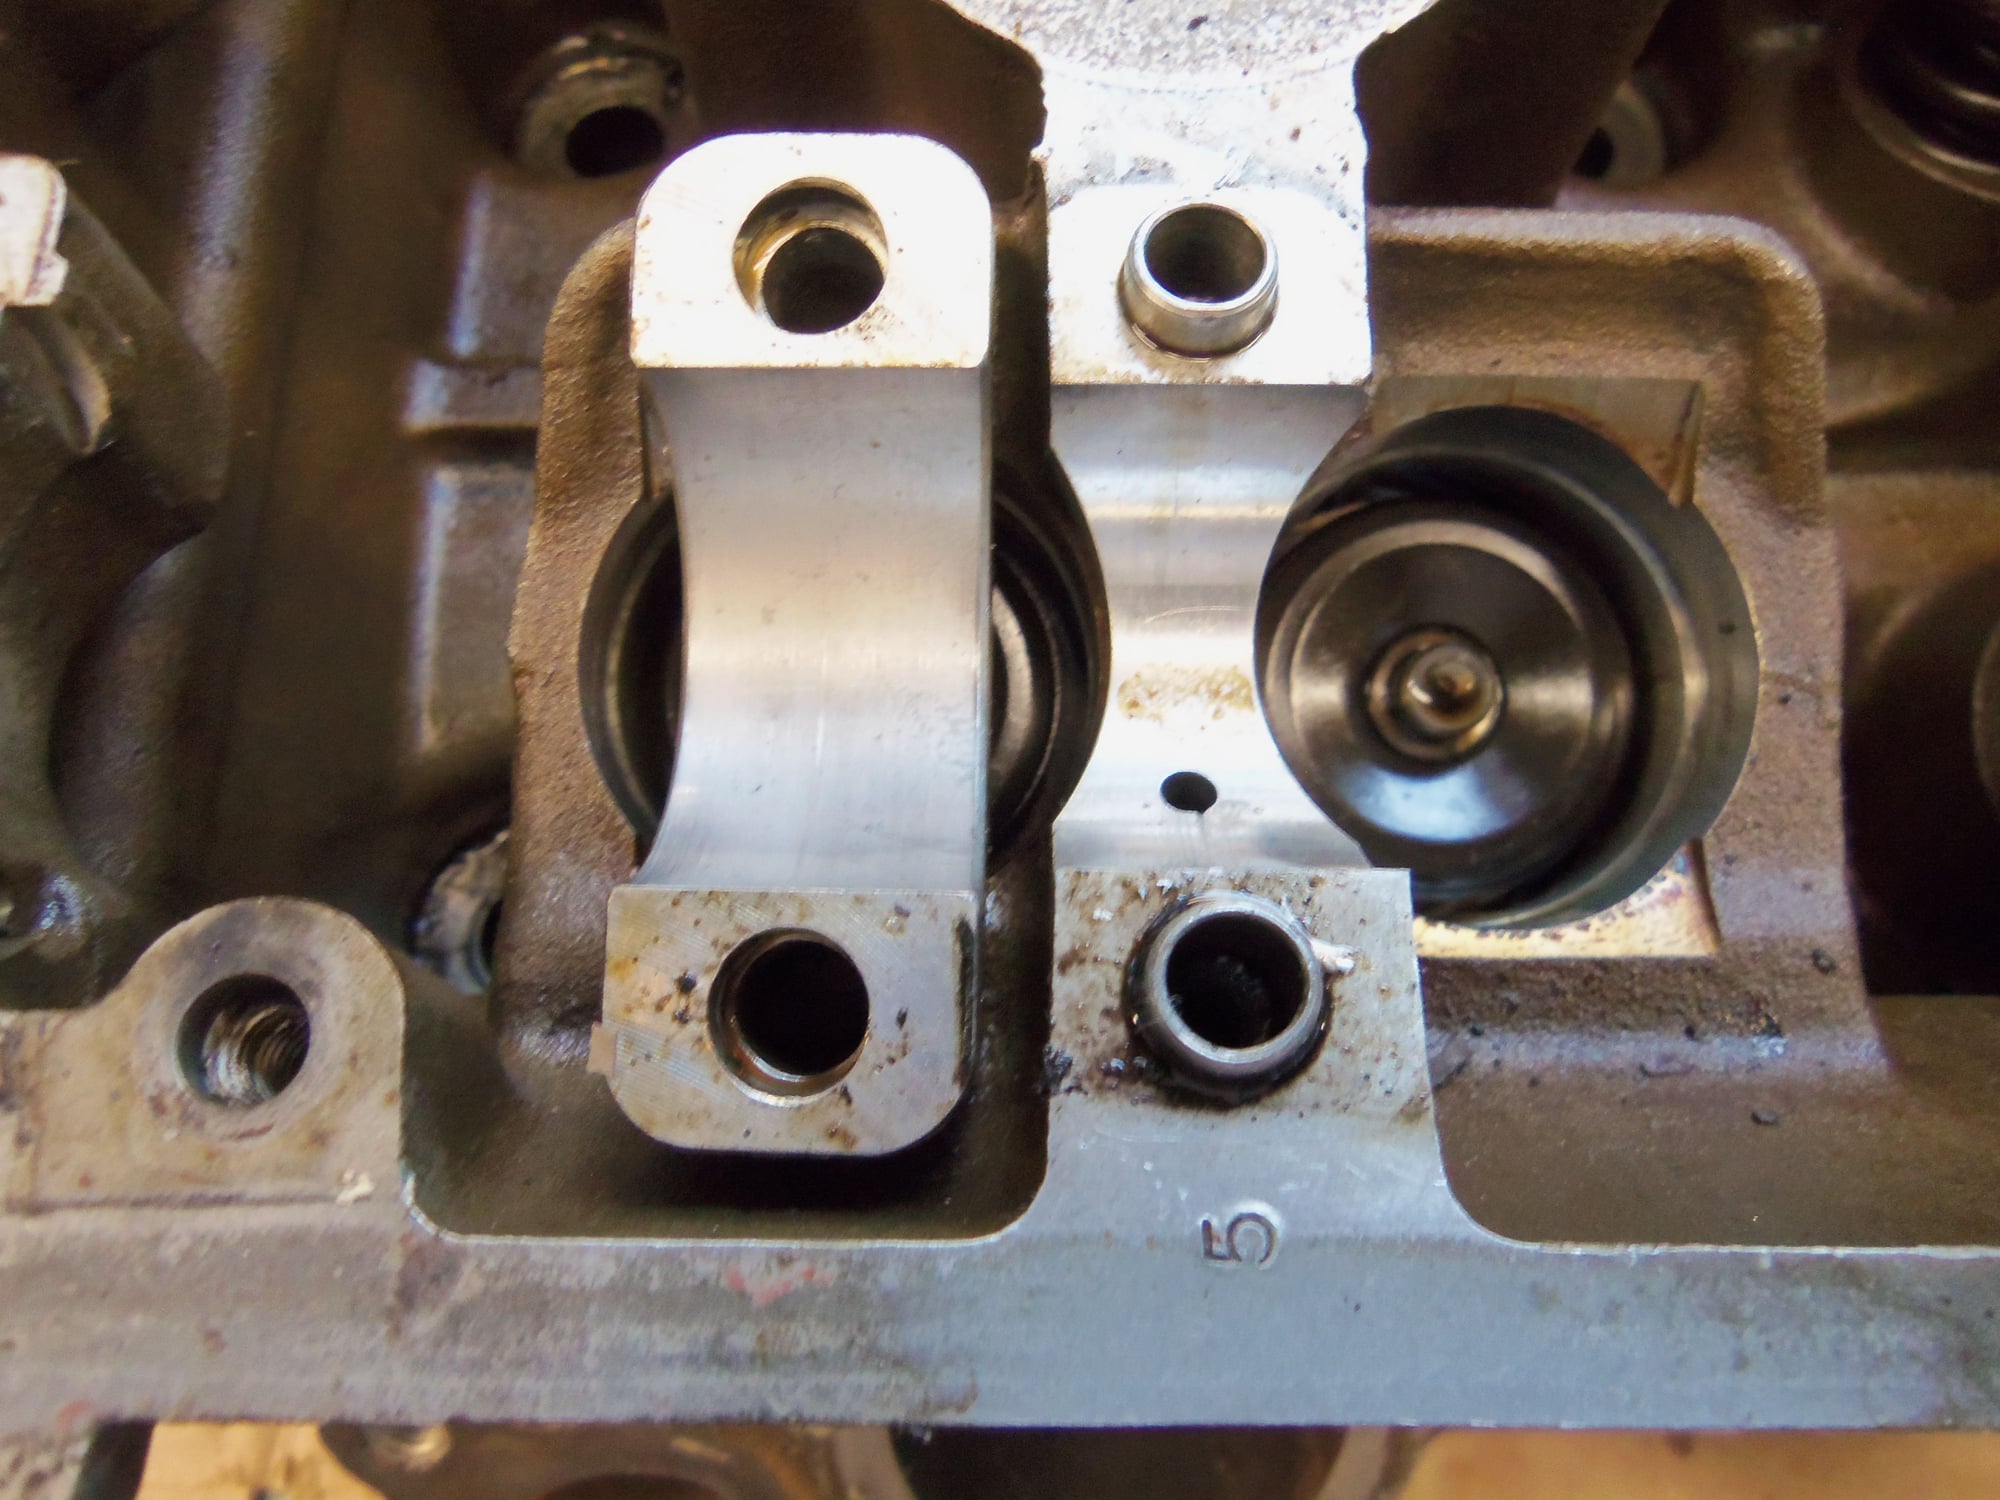
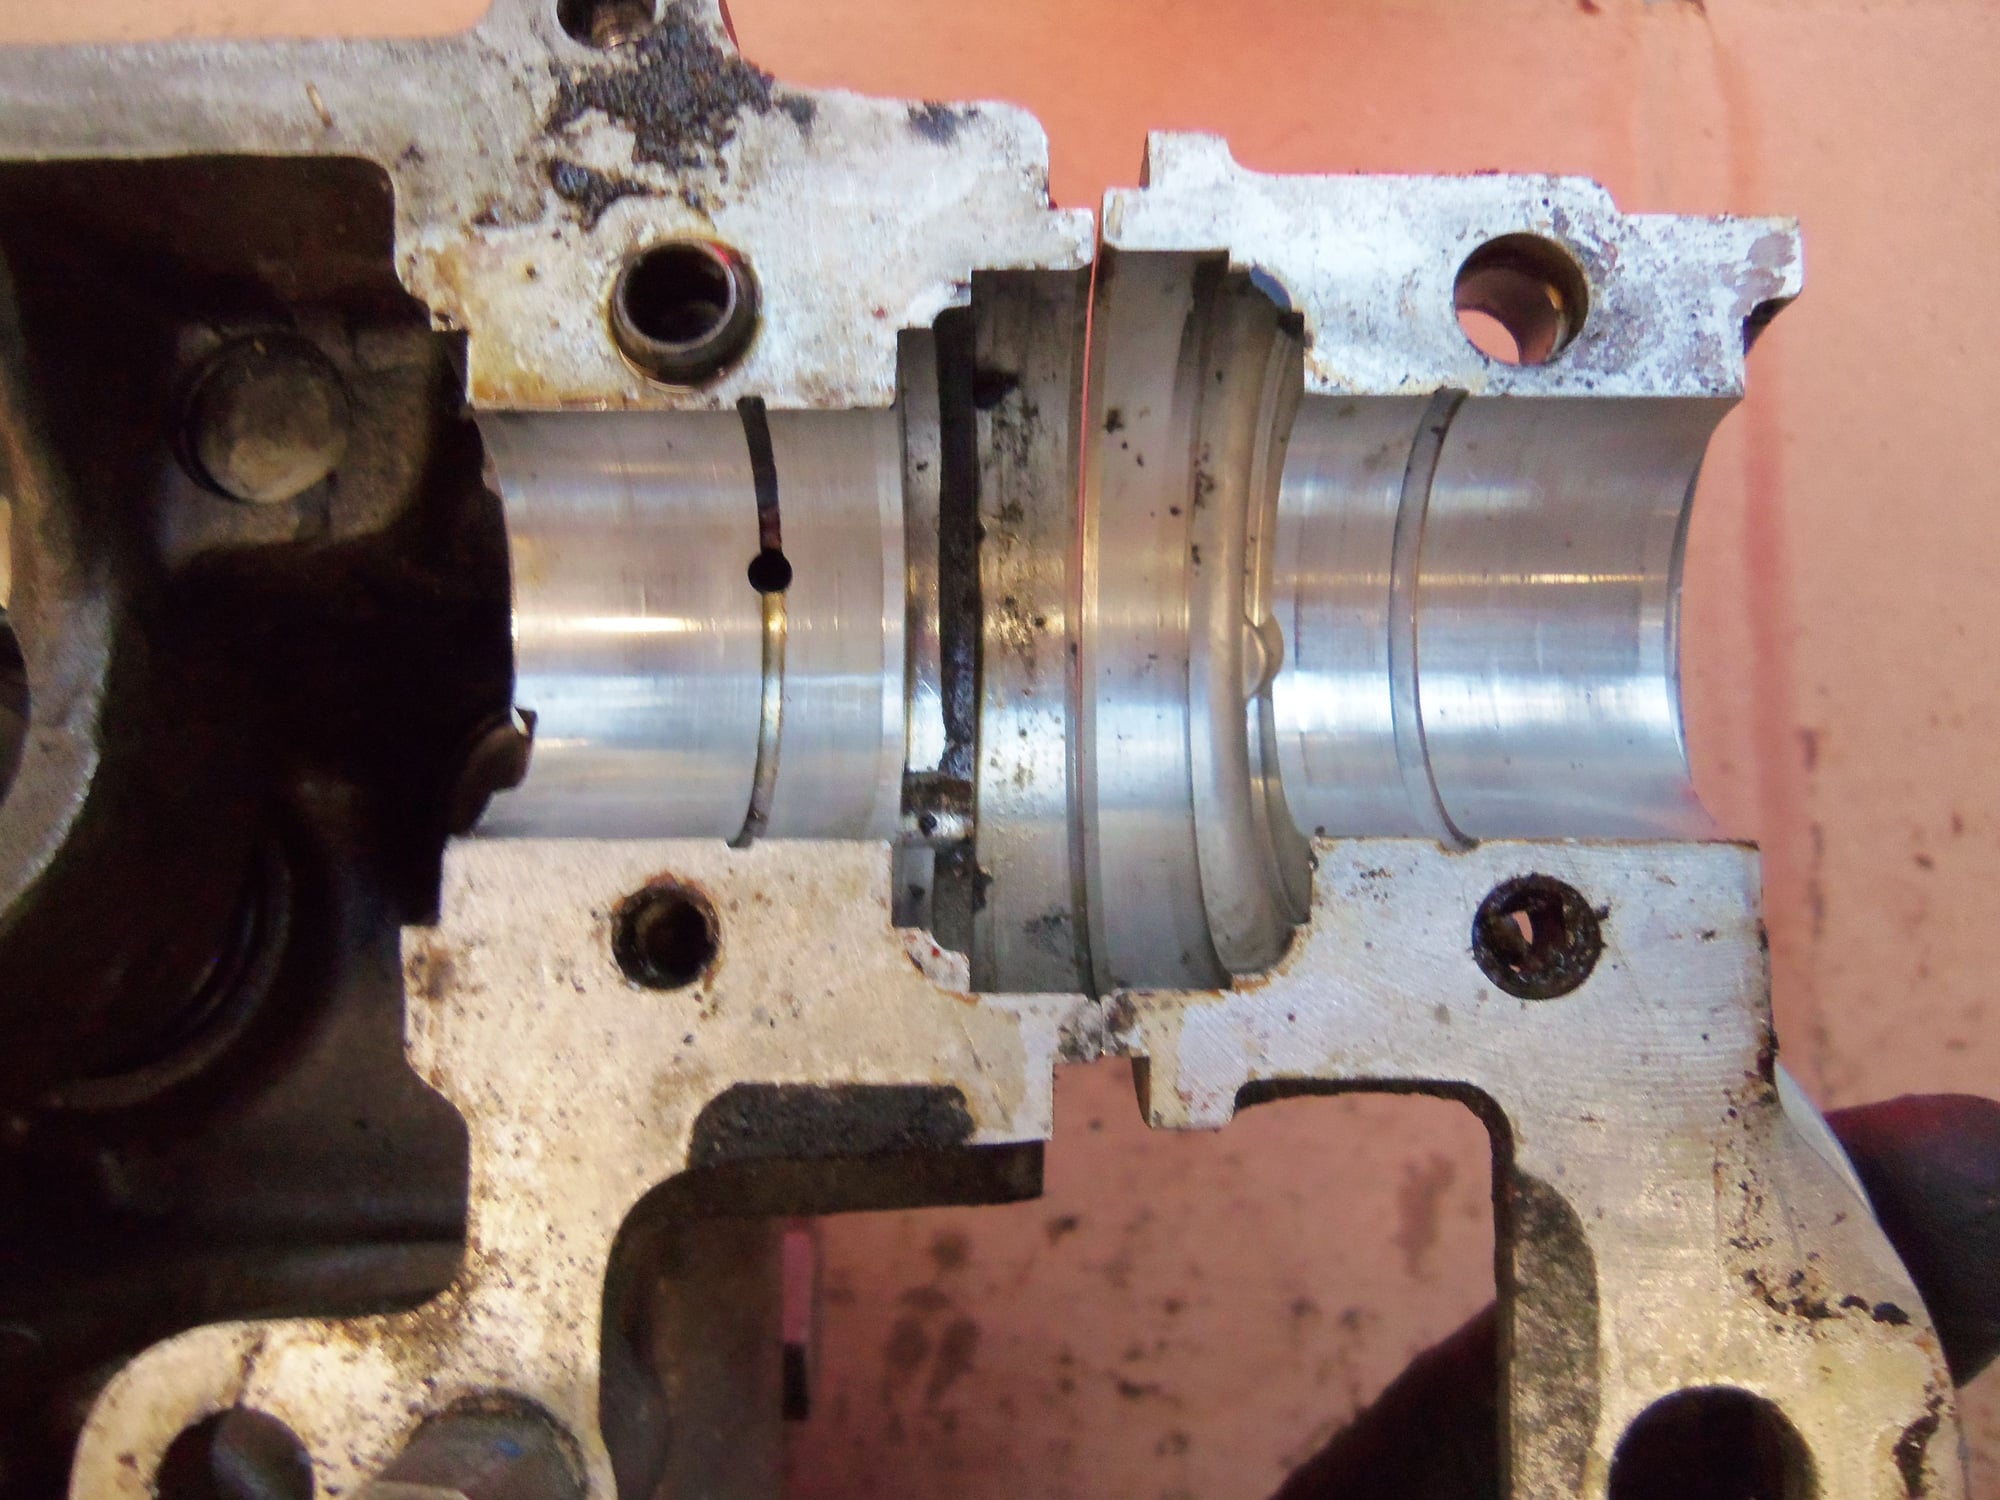
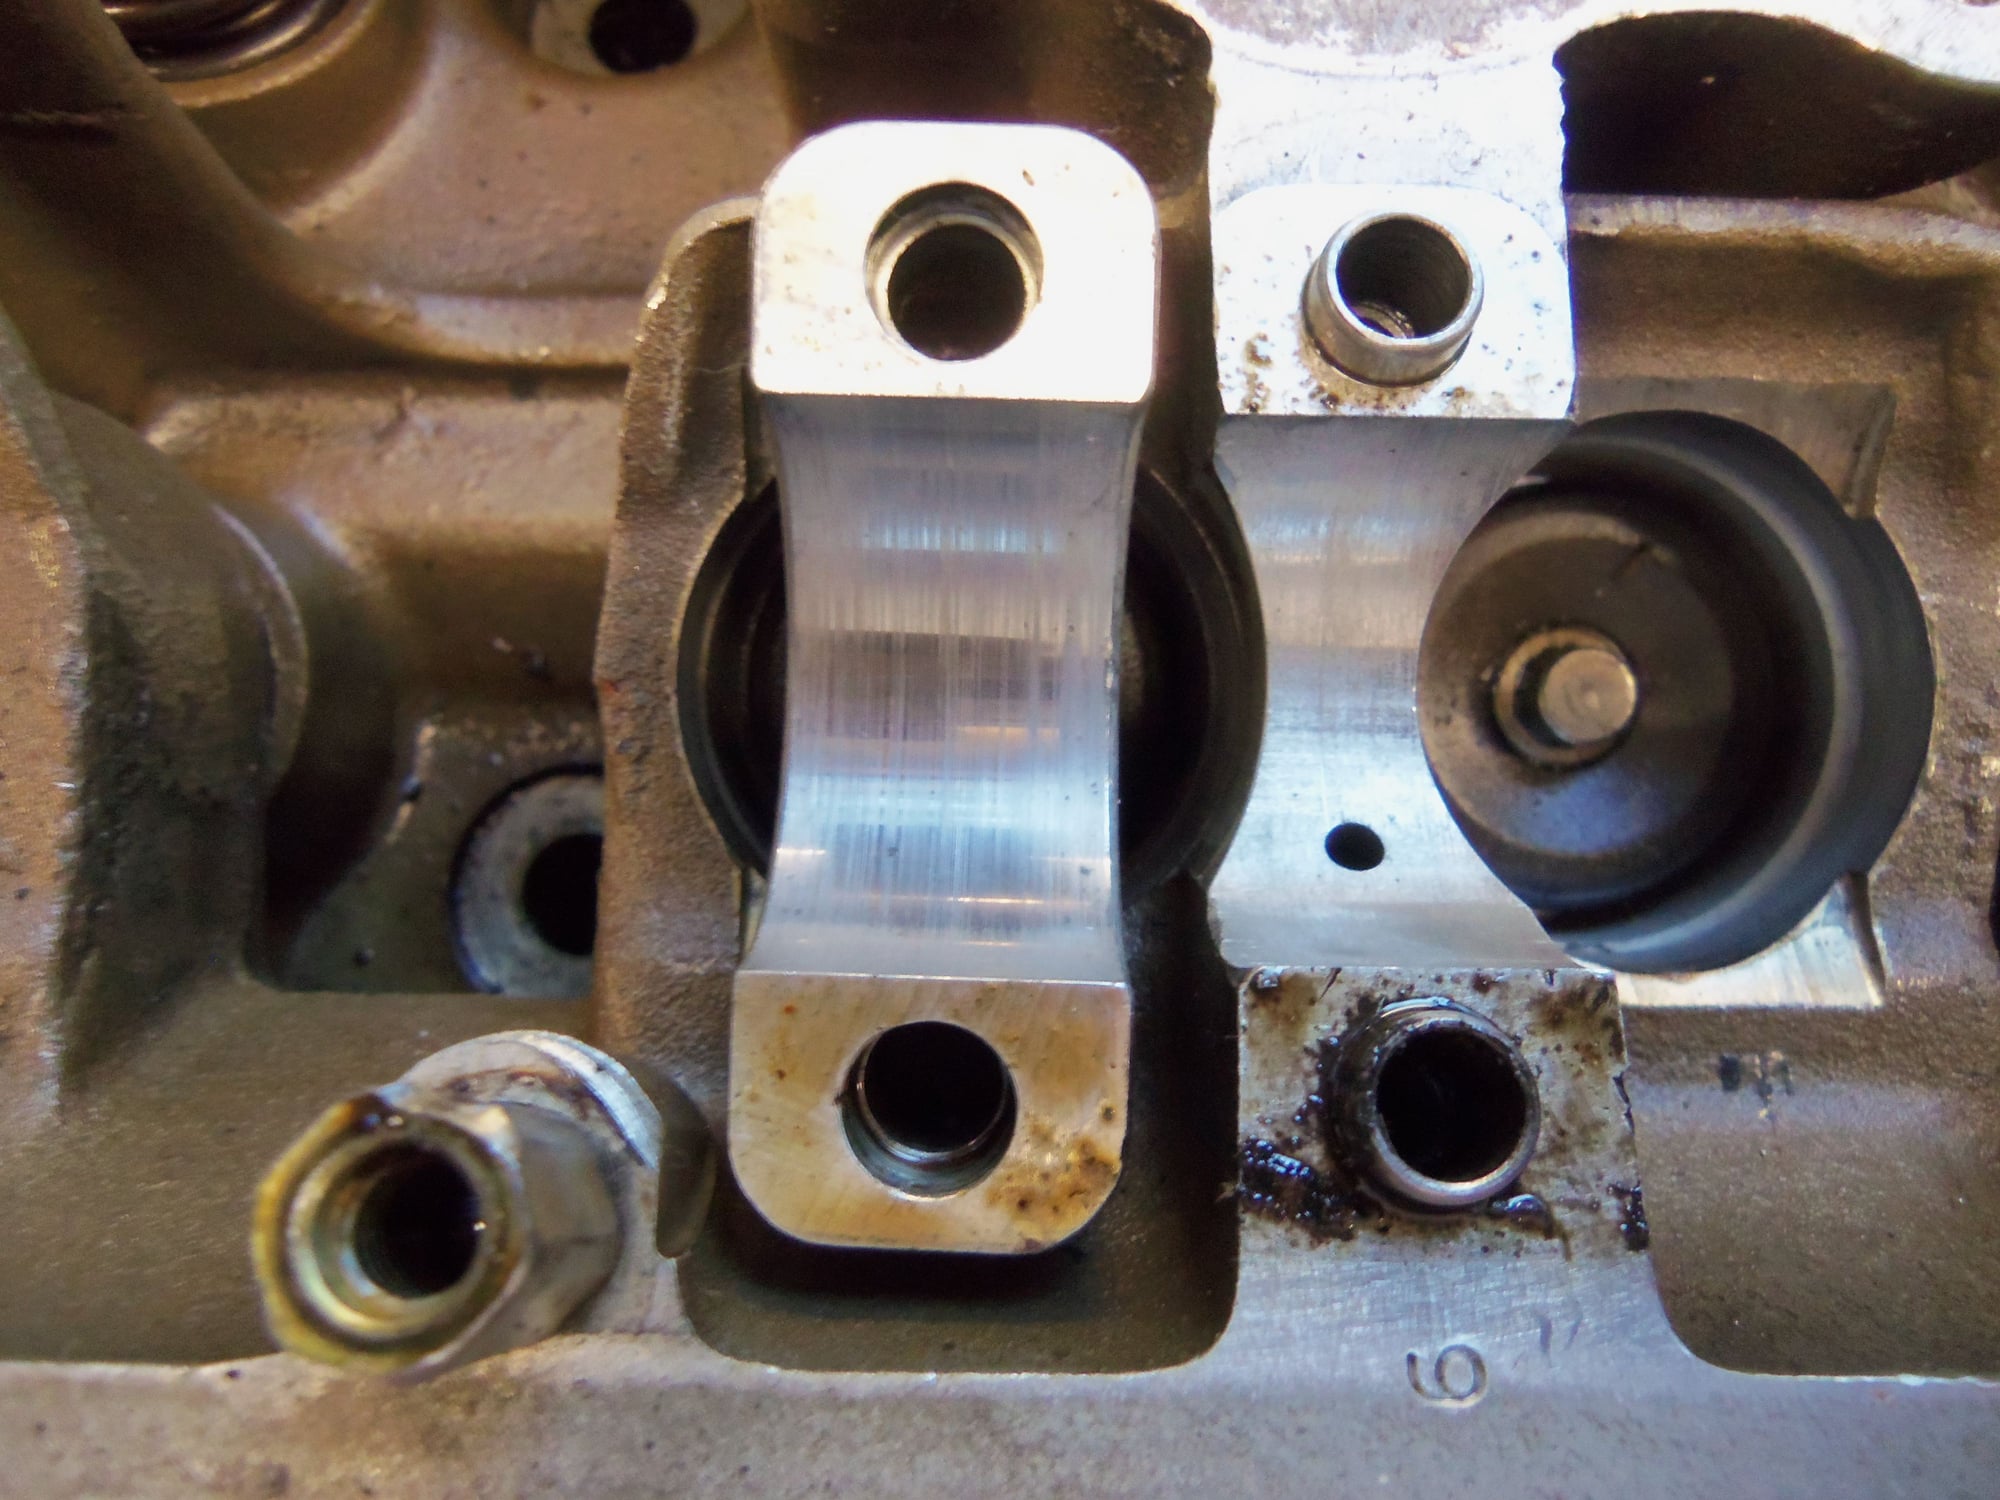
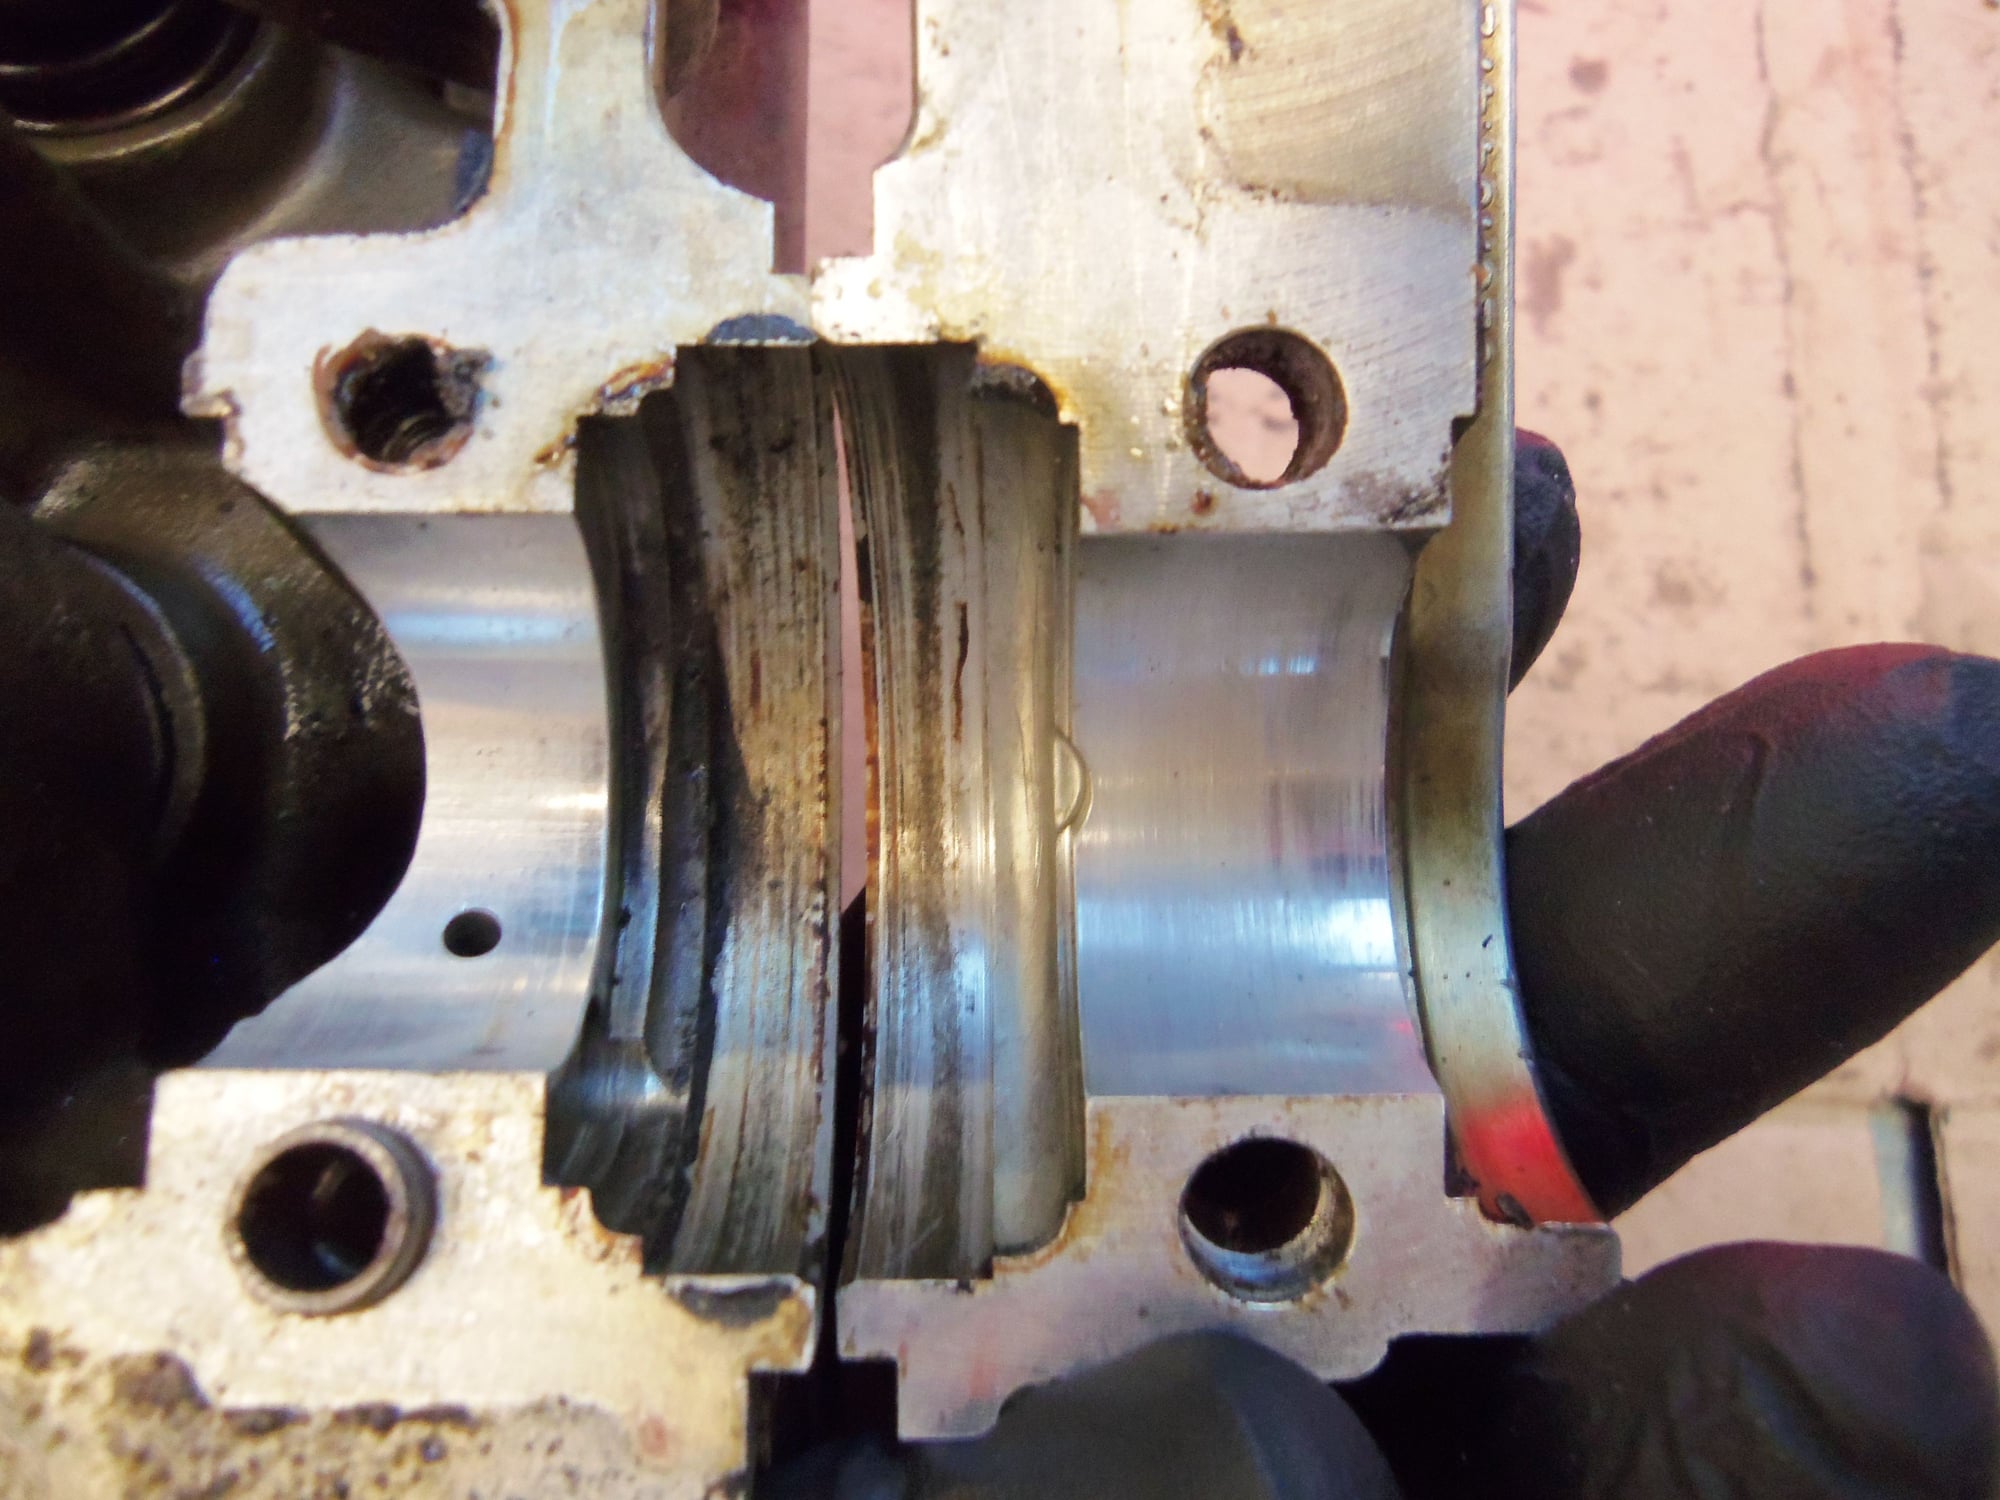
Scuffing, shiny, and embedded particulate matter?
Scuffing and embedded particulate matter?
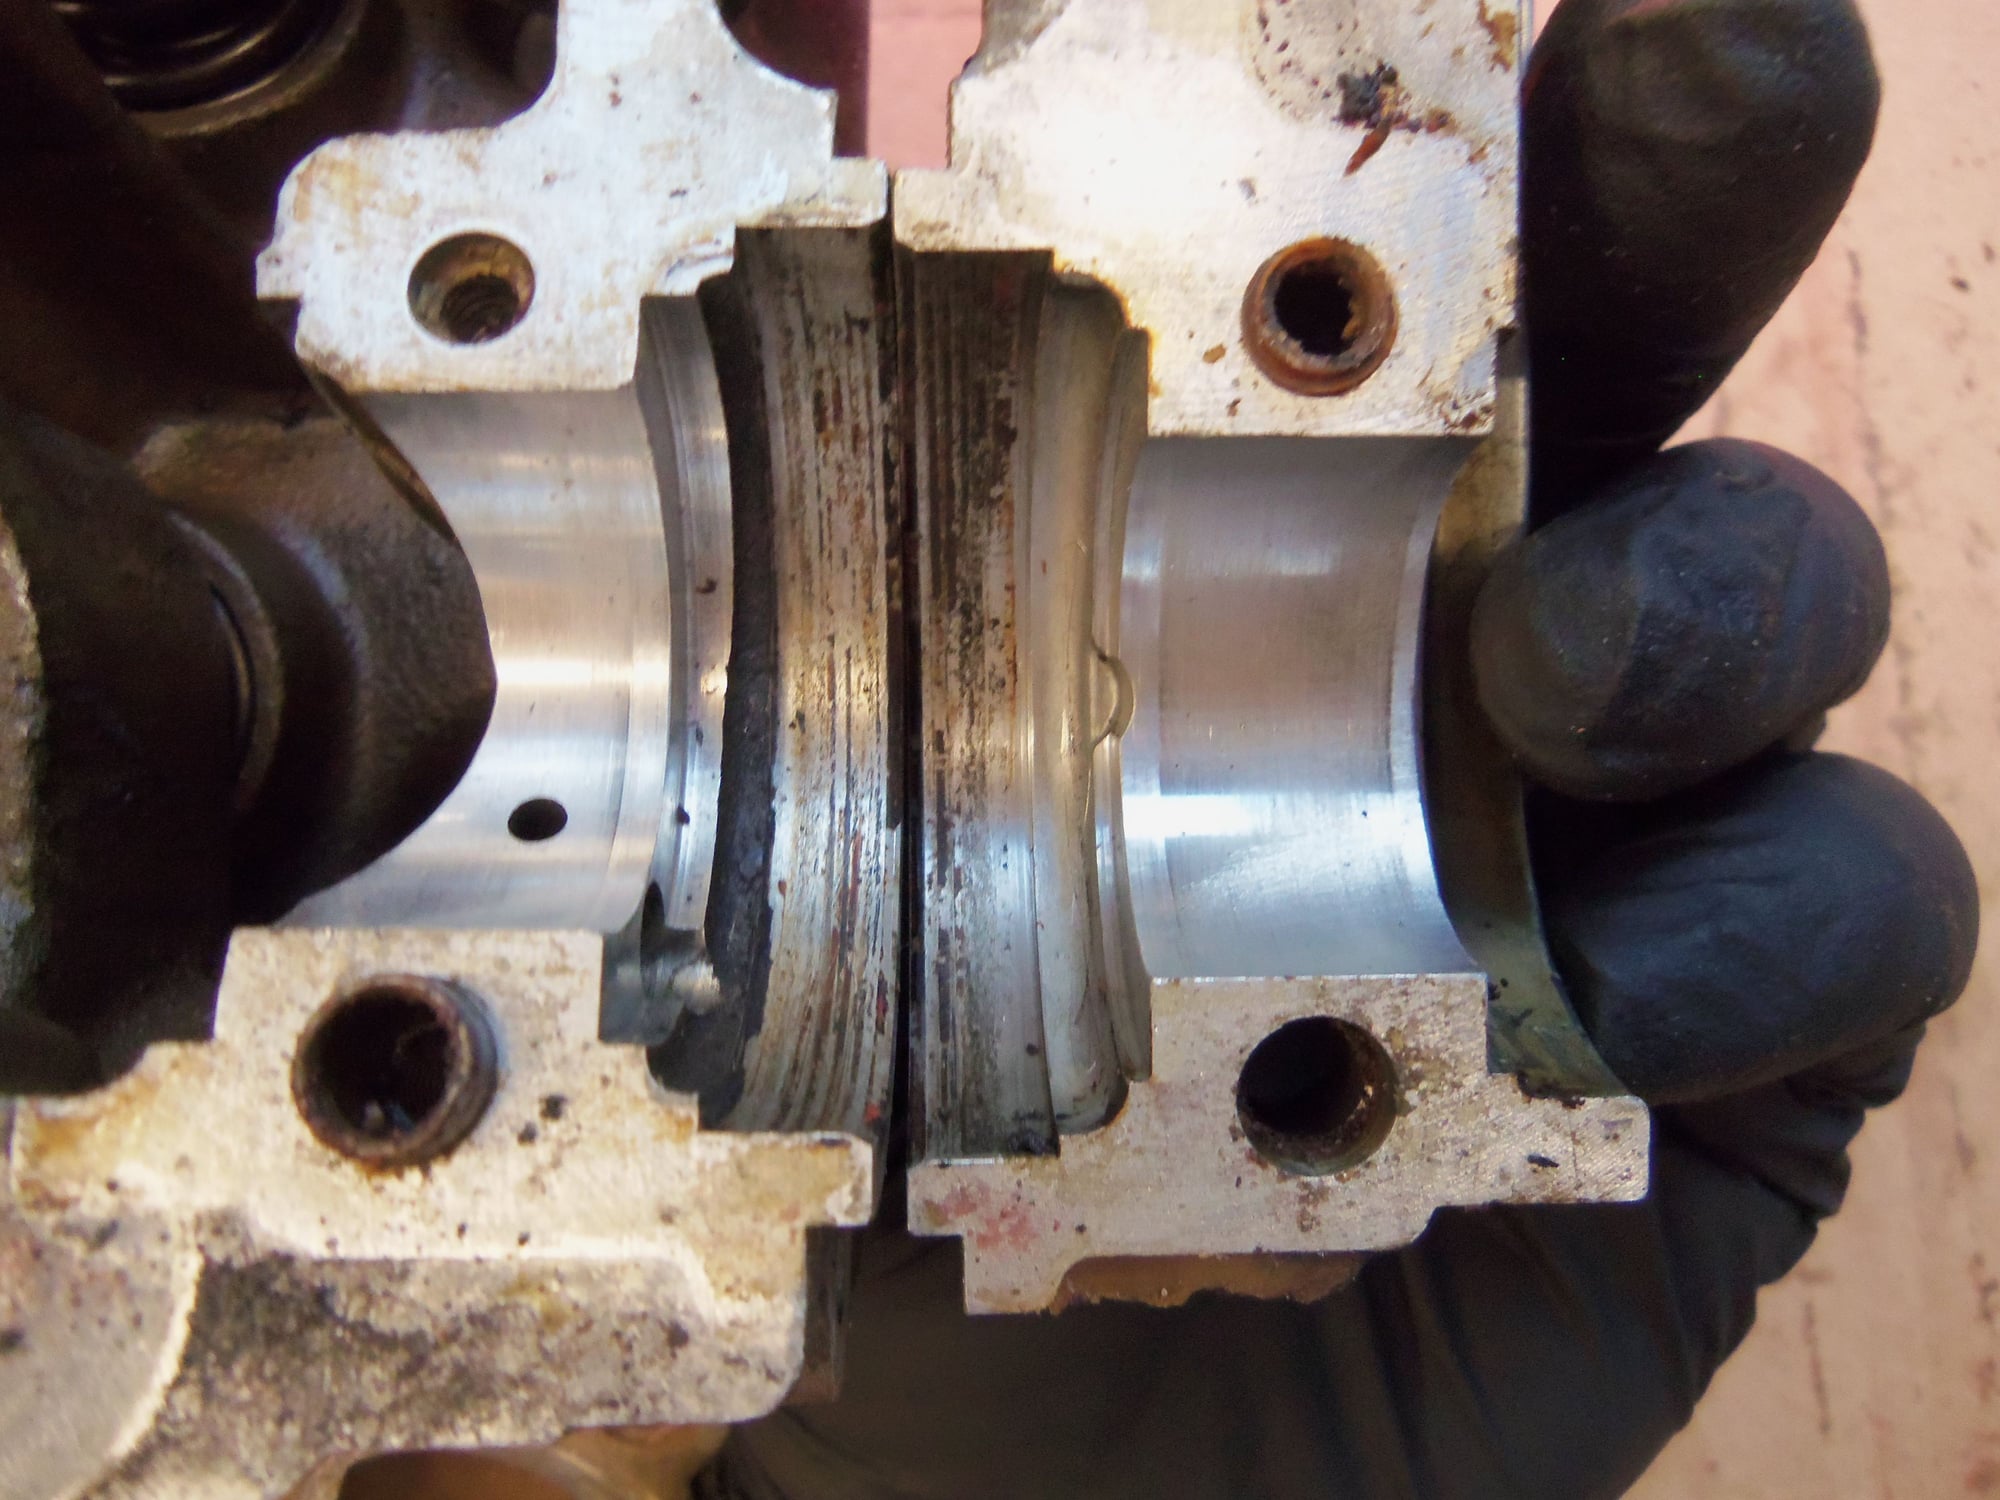
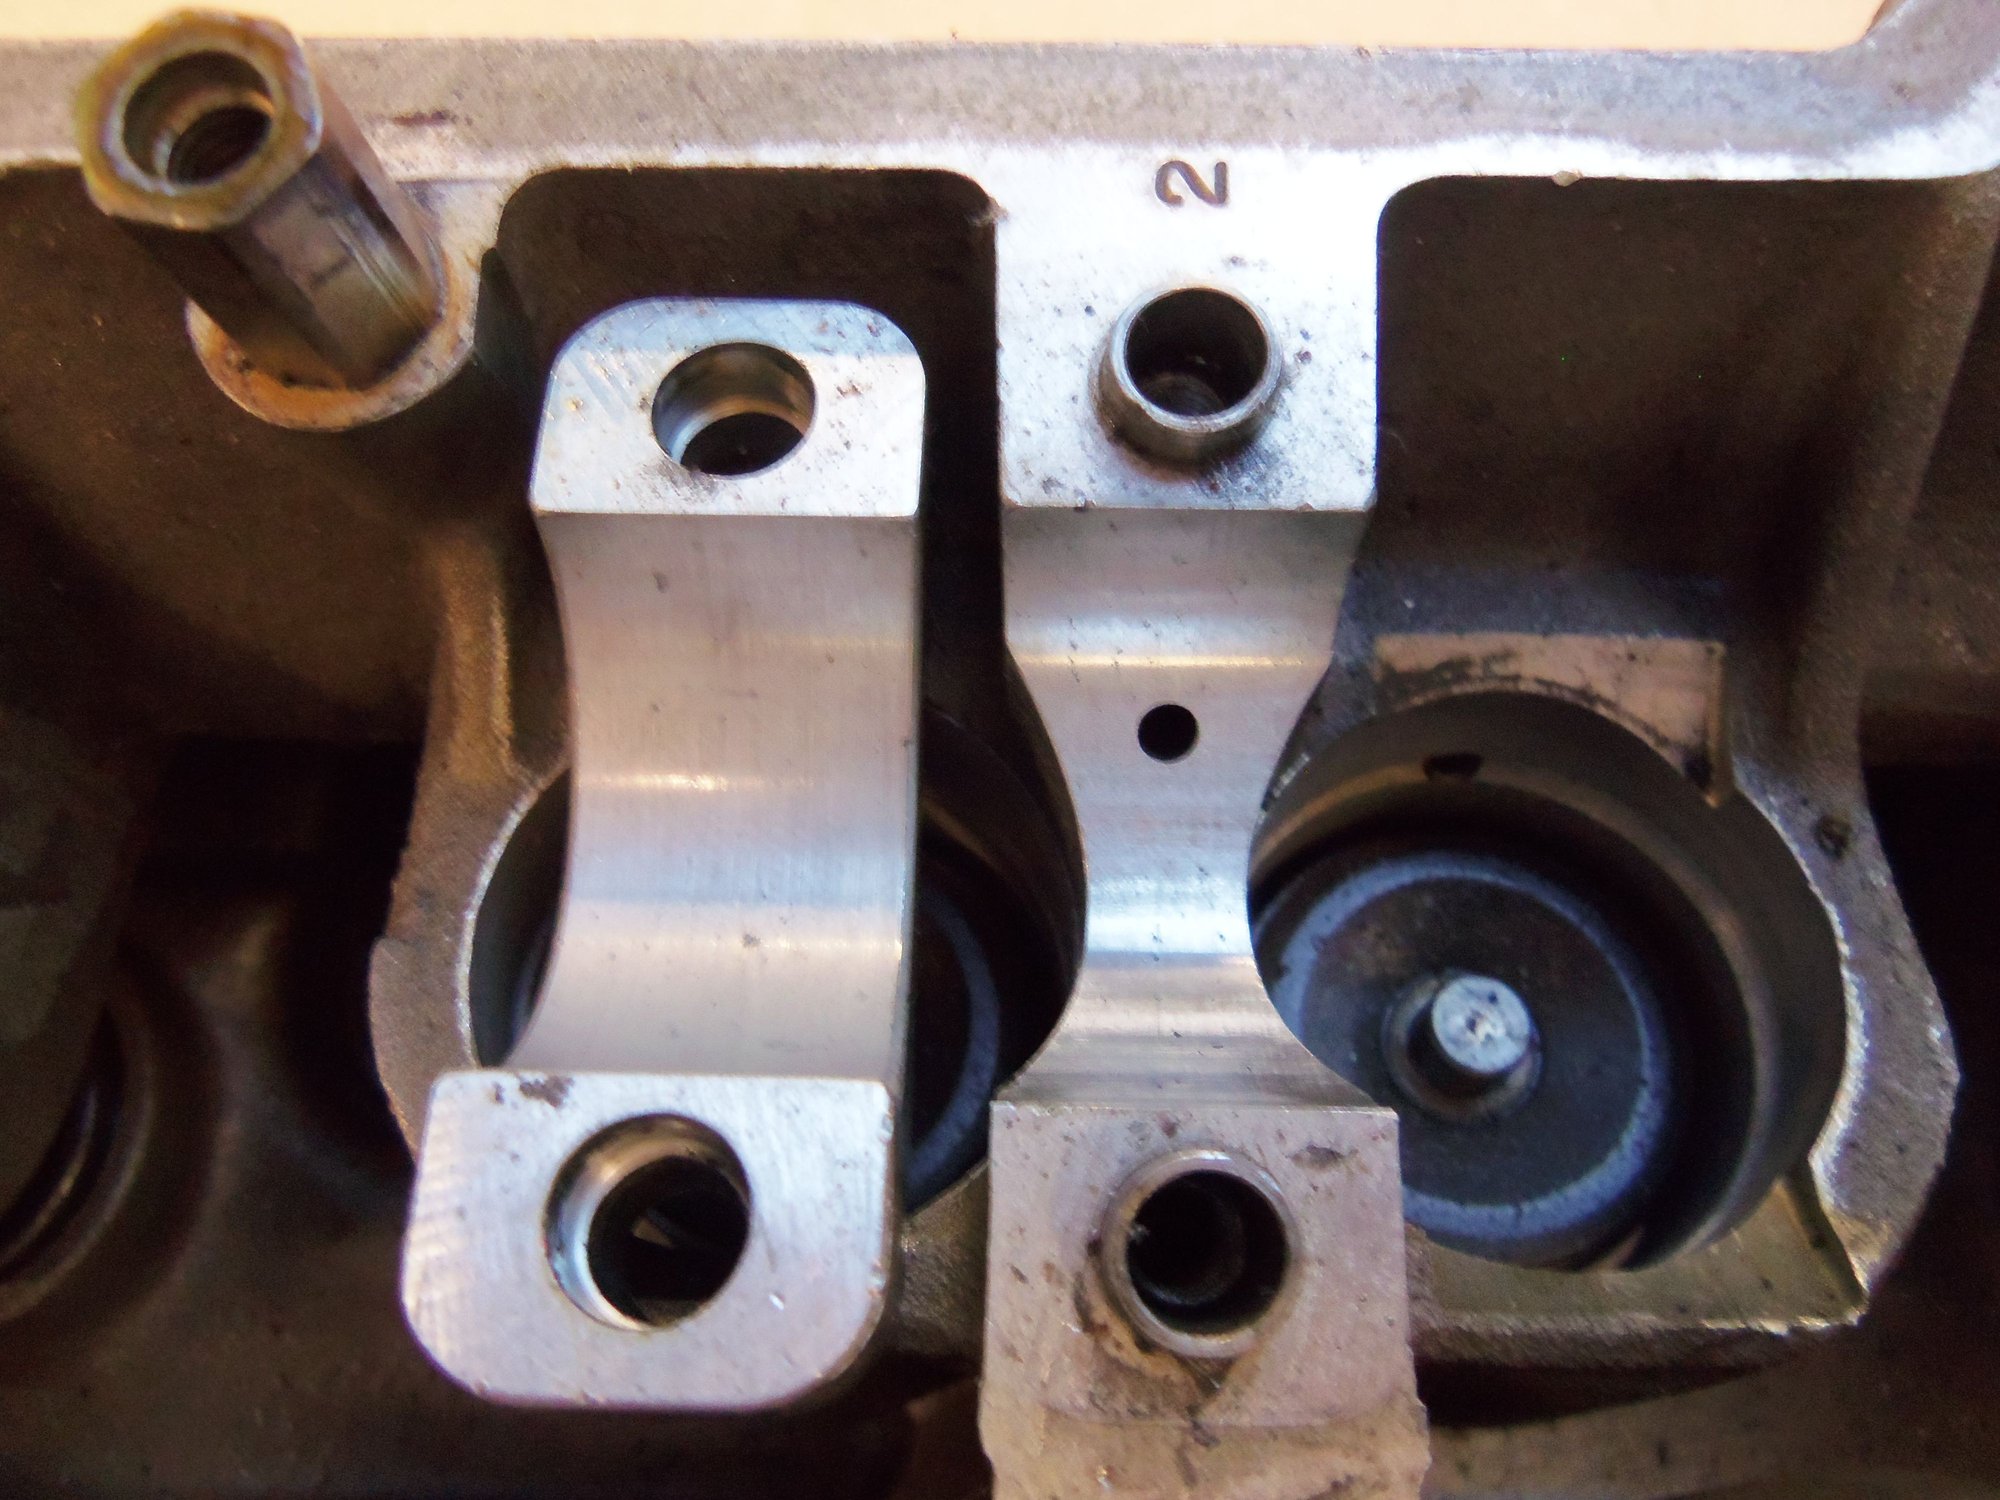
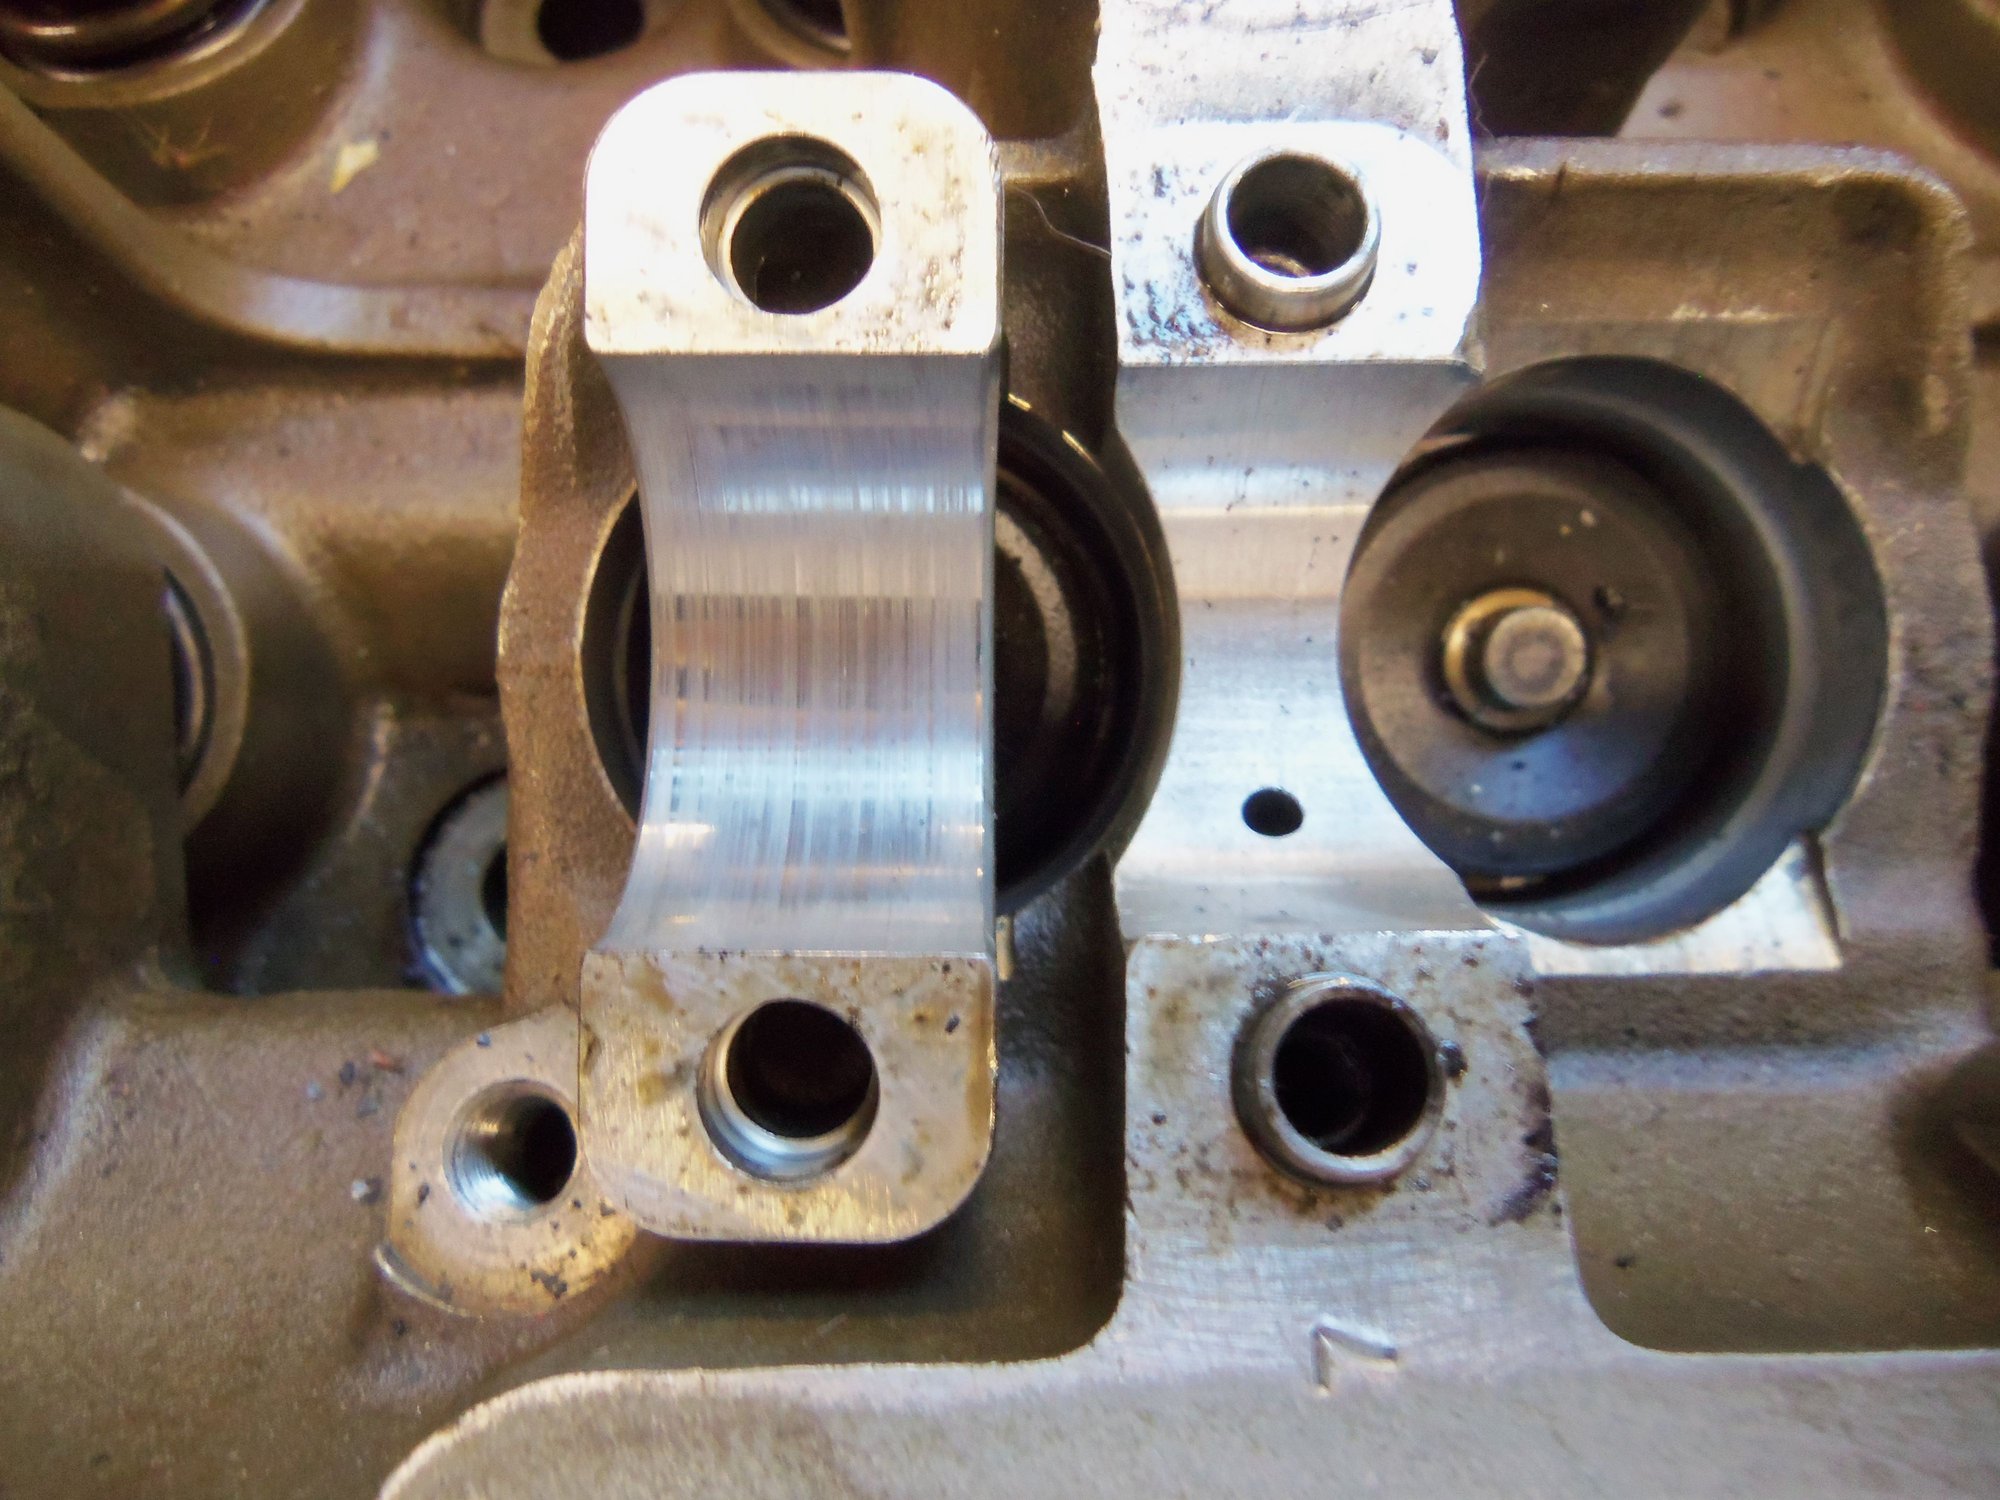
This one doesn't look as bad in terms of scuffing. Though it looks like a piece of dirt went around the bearing. The stains on the head side bearing did not come off with brake cleaner.
This one doesn't look as bad in terms of scuffing. Though it looks like a piece of dirt went around the bearing. The stains on the head side bearing did not come off with brake cleaner. Not sure what the line is across the bearing cap surface.
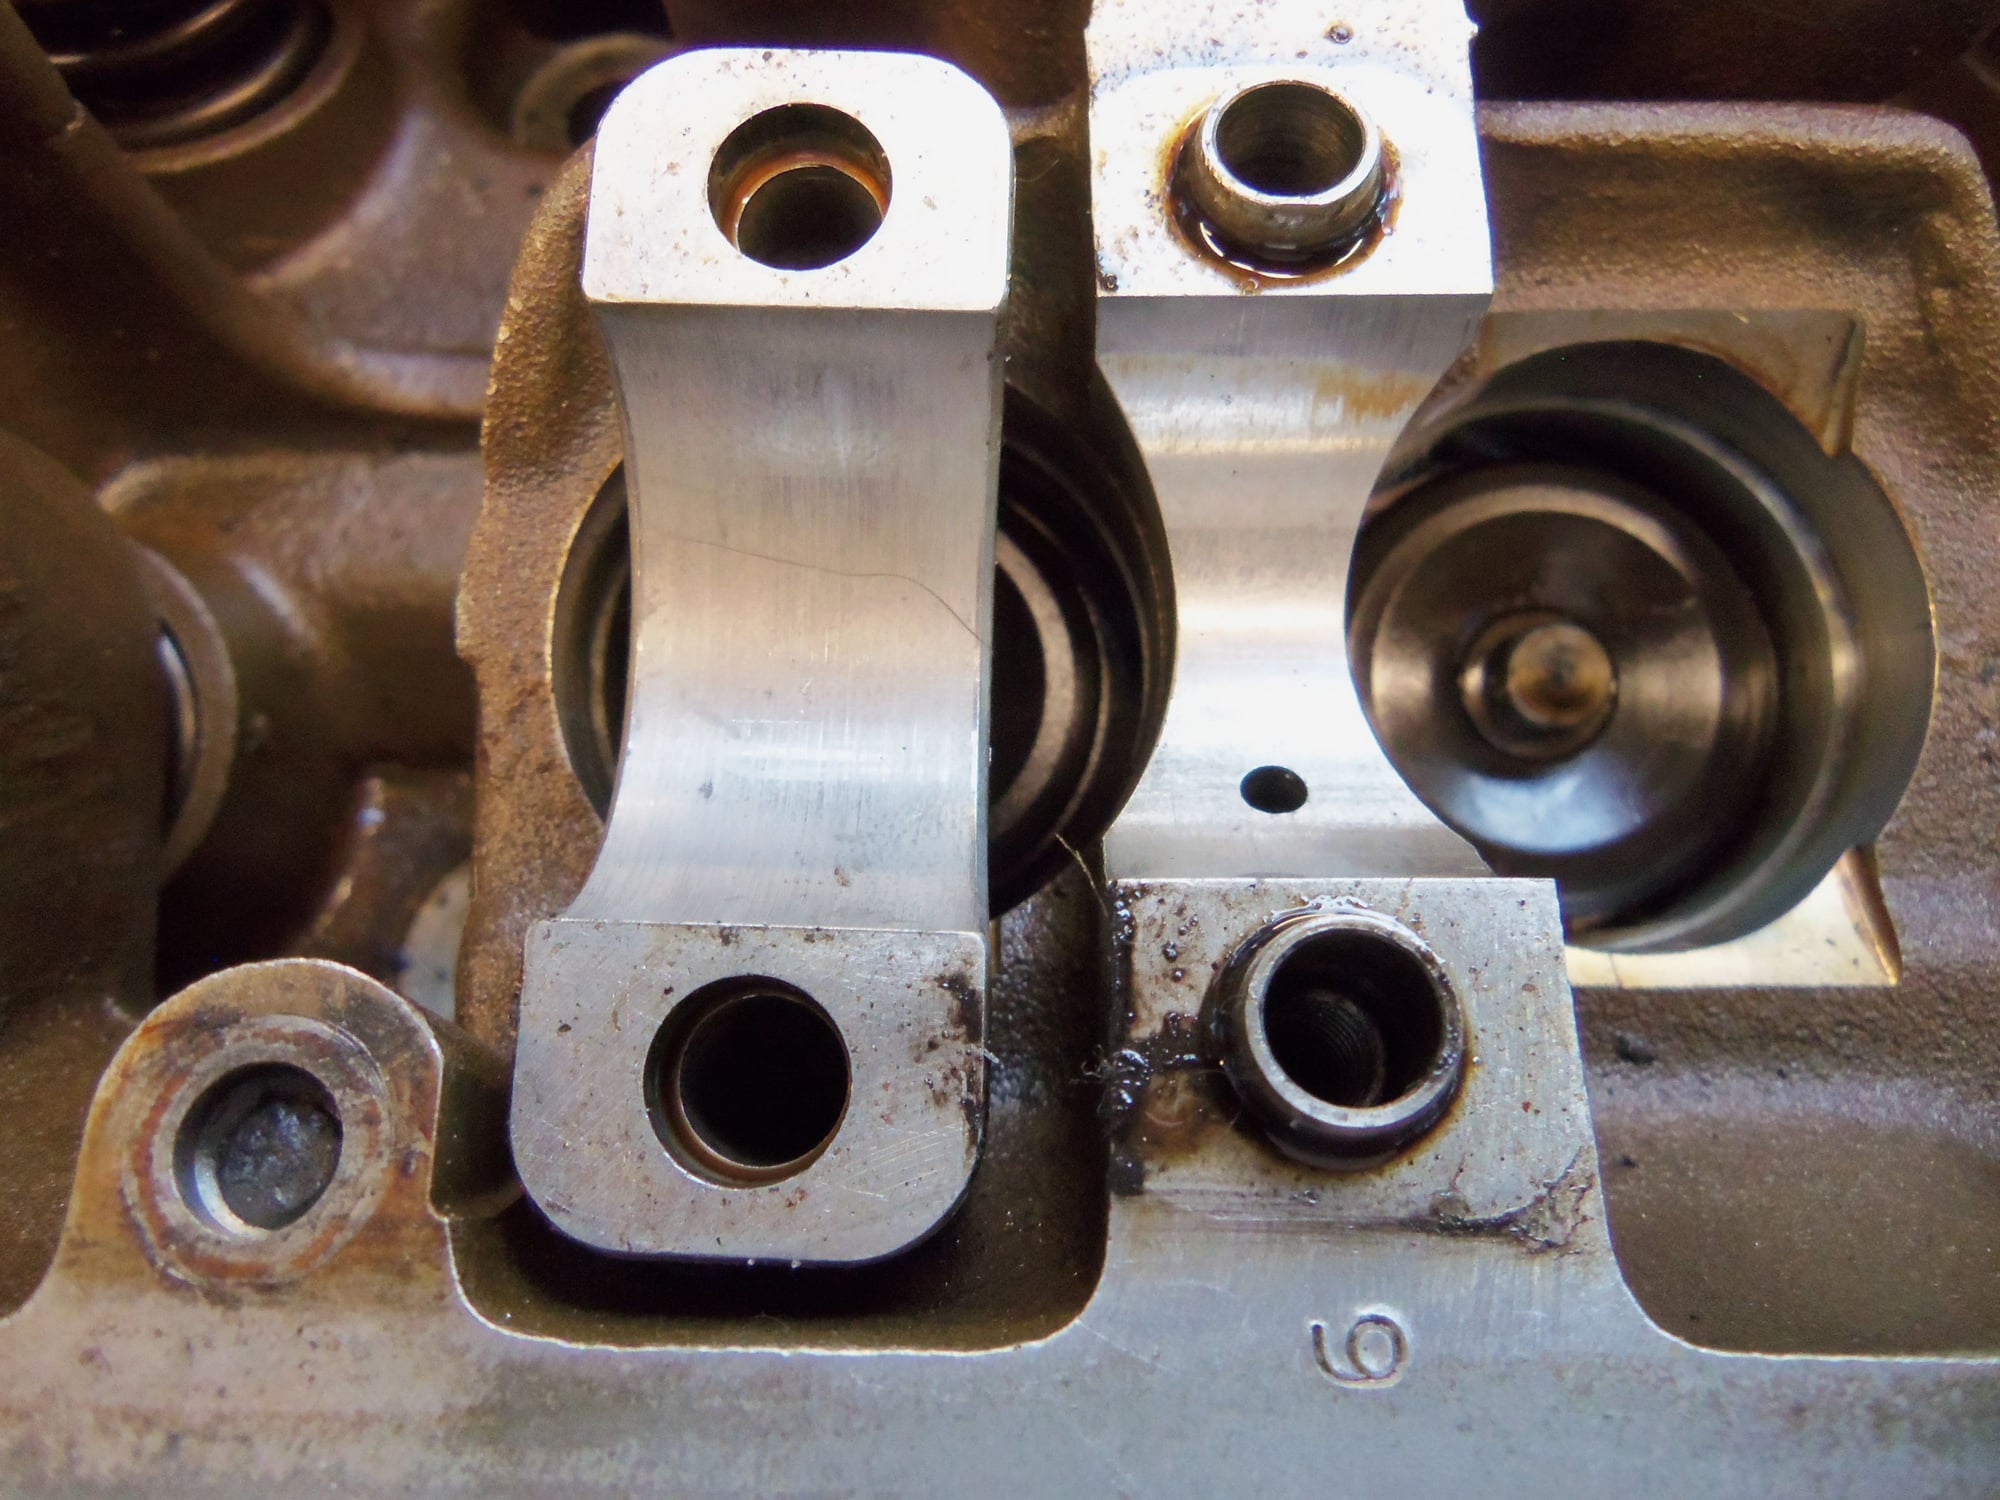
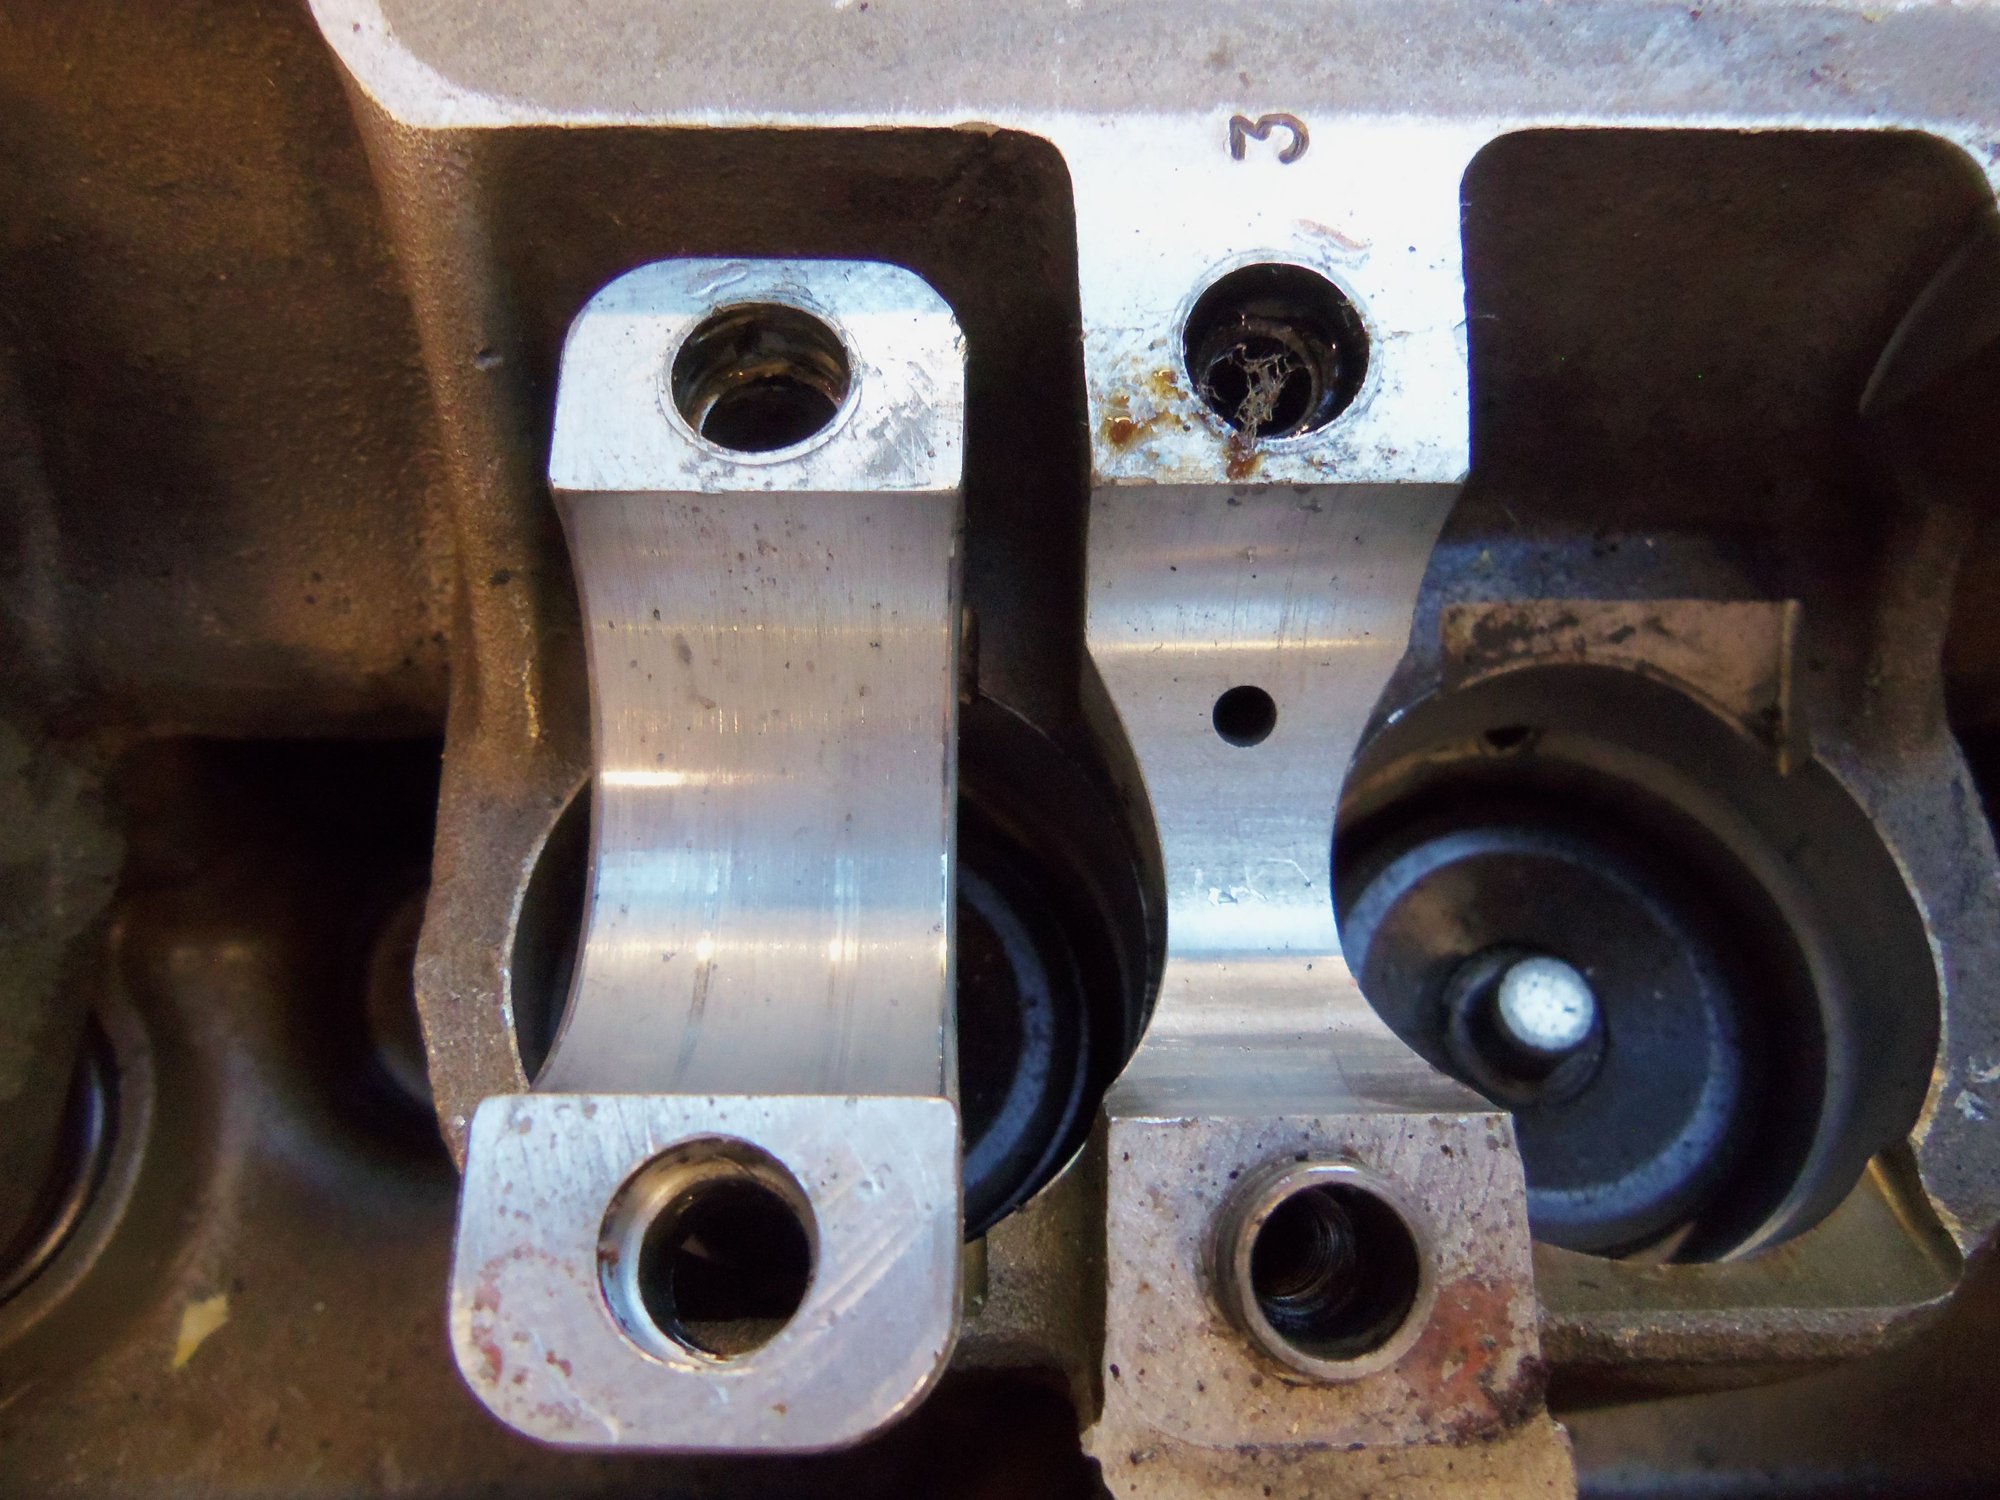
Not as bad in terms of scuffing, but there looks to be embedded particulate matter?
Not too bad overall.
Scuffing, shiny, and embedded particulate matter?
Scuffing, shiny, and embedded particulate matter?
Second head. Scuffing, shiny, and embedded particulate matter?
Scuffing, shiny, and embedded particulate matter? Stain in head side bearing did not come off with brake cleaner.
Scuffing, shiny, and embedded particulate matter? Stain in head side bearing did not come off with brake cleaner.
This one doesn't look as bad in terms of scuffing. Though there does look to be embedded particulate matter.
This one doesn't look as bad in terms of scuffing. Though it looks like a piece of dirt went around the bearing. As well as embedded particulate matter.
This one doesn't look as bad in terms of scuffing. Though it looks like a piece of dirt went around the bearing. Not sure what the mark is by the outboard bolt hole in the head side bearing.
Light scuffing. Whatever is on the head side bearing did not come off with a fingernail.
Scuffing and shiny.
Scuffing and shiny, with some embedded particulate matter.
Not too bad, though there does appear to be a little embedded particulate matter.
Scuffing.
Scuffing and a little embedded particulate matter.
Let me know what you think about these bearing surfaces. If they are no good and the heads should not be used, I can live with that. I have made far worse than $150 mistakes.
On the other hand, if you think they can be saved...
I am beginning to think I might have made a mistake buying these heads.
Cons: broken bolts, cruddy, distinct possibility the oil passages are full of trash from lower end failure, all cam bearing surfaces are suspect
Pro's: deck surfaces look surprisingly free of major corrosion, cooling passages look pretty clean
I am going to hold off on taking these to the machine shop, pending what you guys think of the cam bearing surfaces.
In the mean time, I am going to work on pulling the engine from the Red Witch, and getting those heads off.

 10-16-2017, 04:13 PM