When you click on links to various merchants on this site and make a purchase, this can result in this site earning a commission. Affiliate programs and affiliations include, but are not limited to, the eBay Partner Network.
The car is looking amazing!! Something about a black 944 is just so elegant. Do you have any of the original documentation that came with the car originally or any service records from the car's life? Is the interior super nice as well?
I have the original owners manual and service book. The last service stamp in the book is from 10/23/89 at 24,460 miles. I know my wife's uncle continued to take the car to the Porsche dealer for service, but he also was changing his own oil and timing belts in there as well. I guess they stopped stamping the book along the way.
I also have the microfiche from 1986 of the WSM and a 1986 dealer literature.
The interior is quite nice. I really don't have many pictures of it (re: I have one) so I should probably remedy that. The dash has one small crack in it, maybe one inch long but not too deep and the carpet trim cloth has some rips in it right near the hatch release button. I'm sure I can fix that if I remove the piece of carpet and sew in a new trim strip.
The vinyl on the sunroof needs to be reapplied with adhesive since it's starting to separate at the front of the sunroof. I have the adhesive for it, I just have to actually do it at some point. I'll use that opportunity to replace the sunroof seals while I'm at it.
I rebuilt my '88 n/a engine last year also, so far i have about 1400 miles on her, no major issues yet! I just changed the break-in oil and filter for the first time, New oil -hi zinc Valvoline ZR1 20w-50. I did have a stalling issue, and it sat for 6 weeks before I figured it out, it turned out to be a bad Fuel Press. Regulating valve, totally blocked causing fuel press. to rise quickly to 125psi before shutting off. Replaced now all good again! -keeping my fingers crossed, this is my first 944 engine rebuild!
Changed the oil today for the first time since rebuilding the engine. Discovered the OPRV and the oil pressure sender were weeping a bit so gave them a little bit of an extra turn to tighten them down.
Tightened up some of my cooling hose clamps since some of the joints were weeping a bit. Turns out some of them were pretty loose once things heated up and I was having a few small drips from various places.
My cooling fan switch went bad today so I ordered a new one of those. Just replaced it back in 2014, but I used a cheap-o MTC switch - probably a mistake seeing how they only cost less than 5 bucks. The OE Porsche switch was on sale with ECS Tuning so I bought one of them this time around.
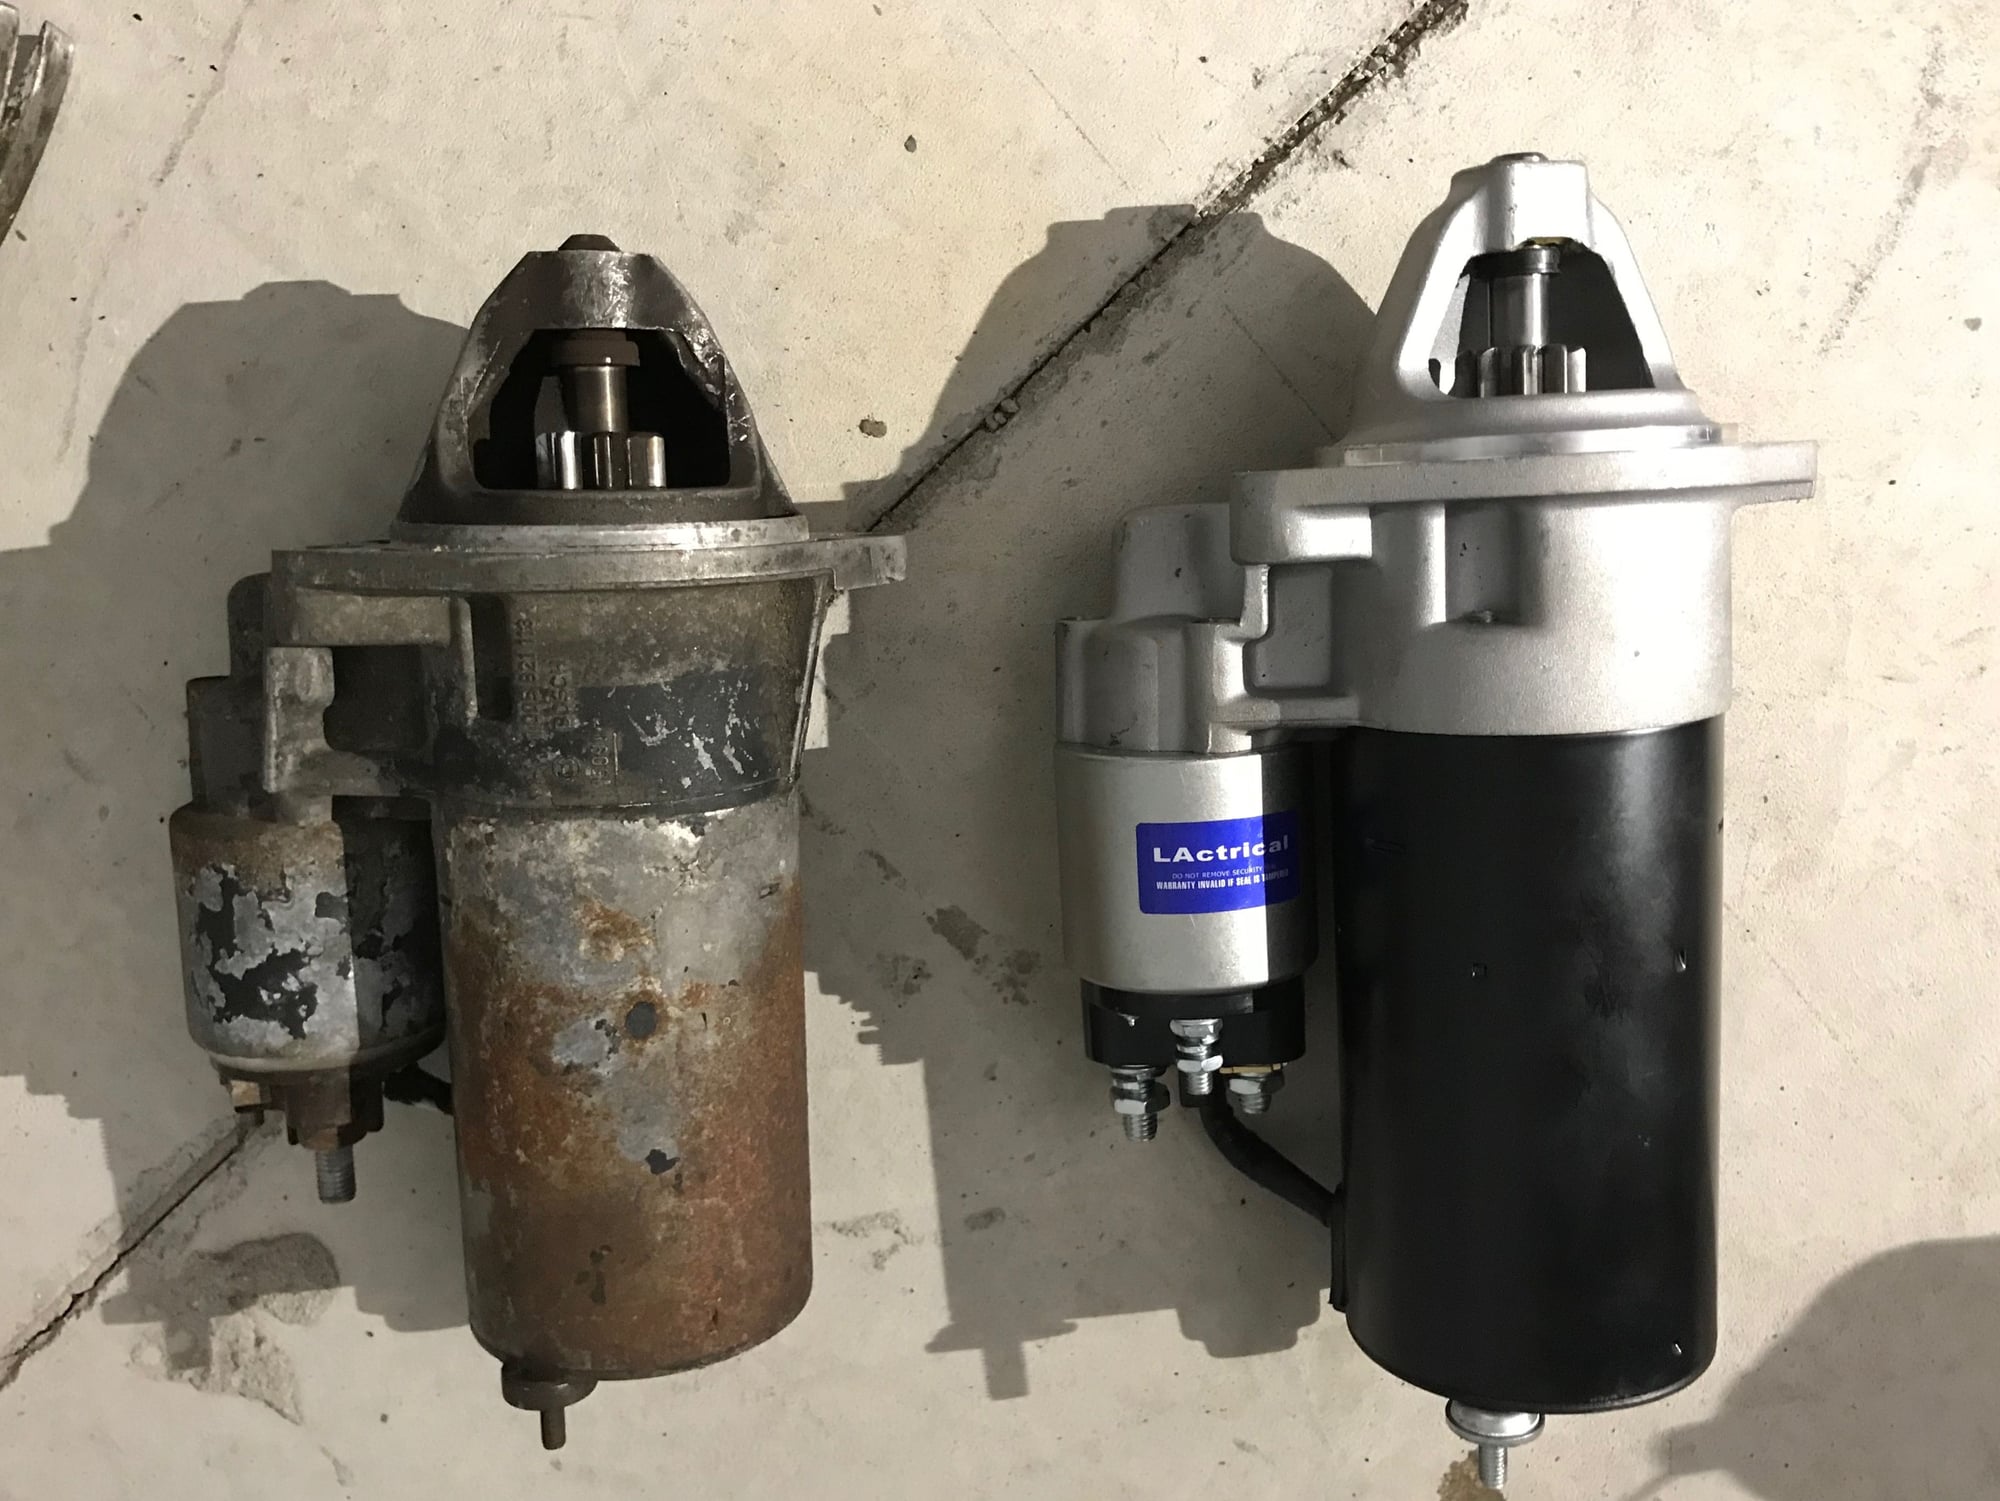
Also replaced my starter since the old one wasn�t sounding so good now that it�s 32 years old.
I actually found the new starter on Amazon for under $100 shipped. It�s no Bosch starter, but figured for the price I�d give it a shot. Seems like decent quality, but I did have to rotate the solenoid to get the wiring to fit properly.
Justin
Last edited by JRP944; 07-02-2021 at 01:06 PM.
Reason: Adding title
Your car has great cosmetics, and once you get all the mechanicals finished you will have a keeper, that will give many smiles per mile for a long time to come!
Your car has great cosmetics, and once you get all the mechanicals finished you will have a keeper, that will give many smiles per mile for a long time to come!
Ha, thanks. It has decent cosmetics as long as you're not closer than 10 FT from it. The hood has gotten especially bad over the years - the paint is really cracking everywhere for some reason. If memory serves me correctly, I think my wife's uncle said the hood was resprayed early on in the car's life due to it being attacked by the fallout from a salt truck on the highway.
I�ve been working on the car over the last handful of weeks. For those who have been following, I�ve been dealing with an oil leak that just didn�t seem to want to go away and with everything I did to try and fix it, it just seemed to get worse. I finally bit the bullet and decided it was time to pull the oil pan and redo the pan gasket and oil pump seal once and for all. For those who have done the oil pan gasket replacement on a creeper, you know it�s not fun and incredibly labor-intensive. Definitely a job I�m not in any rush to do again, if ever...
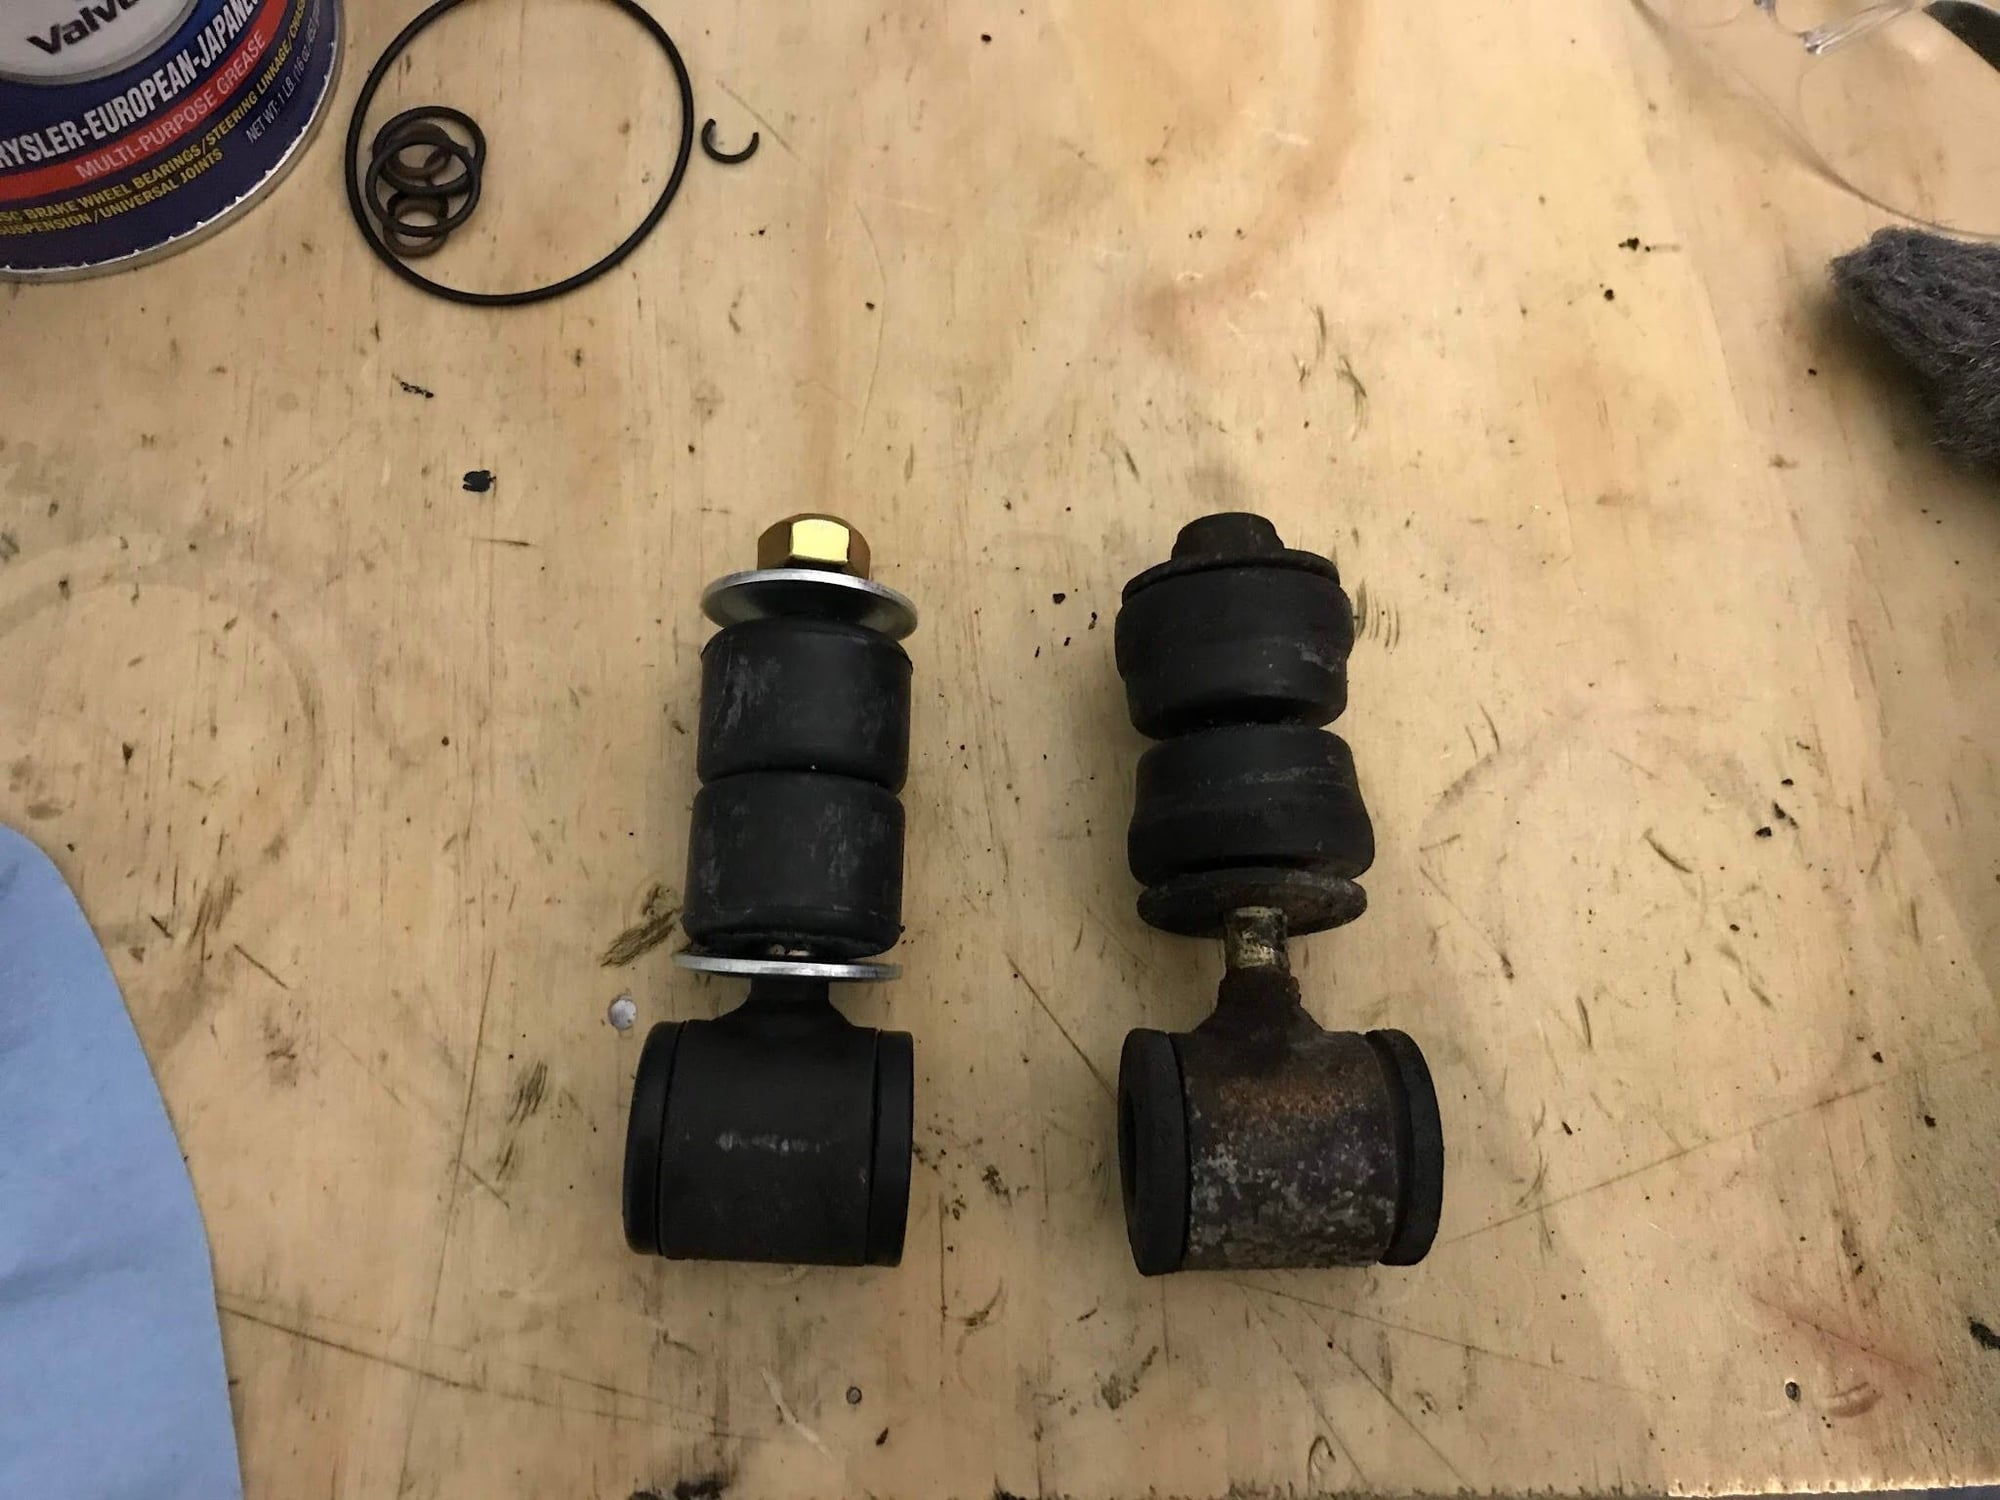
My power steering system leaked like most 944s and I had planned on replacing everything a little further down the road. With everything that needs to be removed to pull the oil pan, I figured there was no time like the present to overhaul the steering system as well. I installed a rebuilt rack, all new steering lines ($$$) and rebuilt the power steering pump. I didn�t really take any pictures since that�s kind of pain in the *** when covered in oil, and let me tell you my system was pretty oily. Also replaced the front sway bar bushings and remembered to take a picture of new versus old on the drop link bushings.
So far everything in the steering system seems good, though I haven�t driven it much. I dropped it at a local shop to get it aligned, even though I must say it tracked pretty straight after the rack install. Hoping this will be the last time I have to touch the oil system or the steering system for a loooooong time.
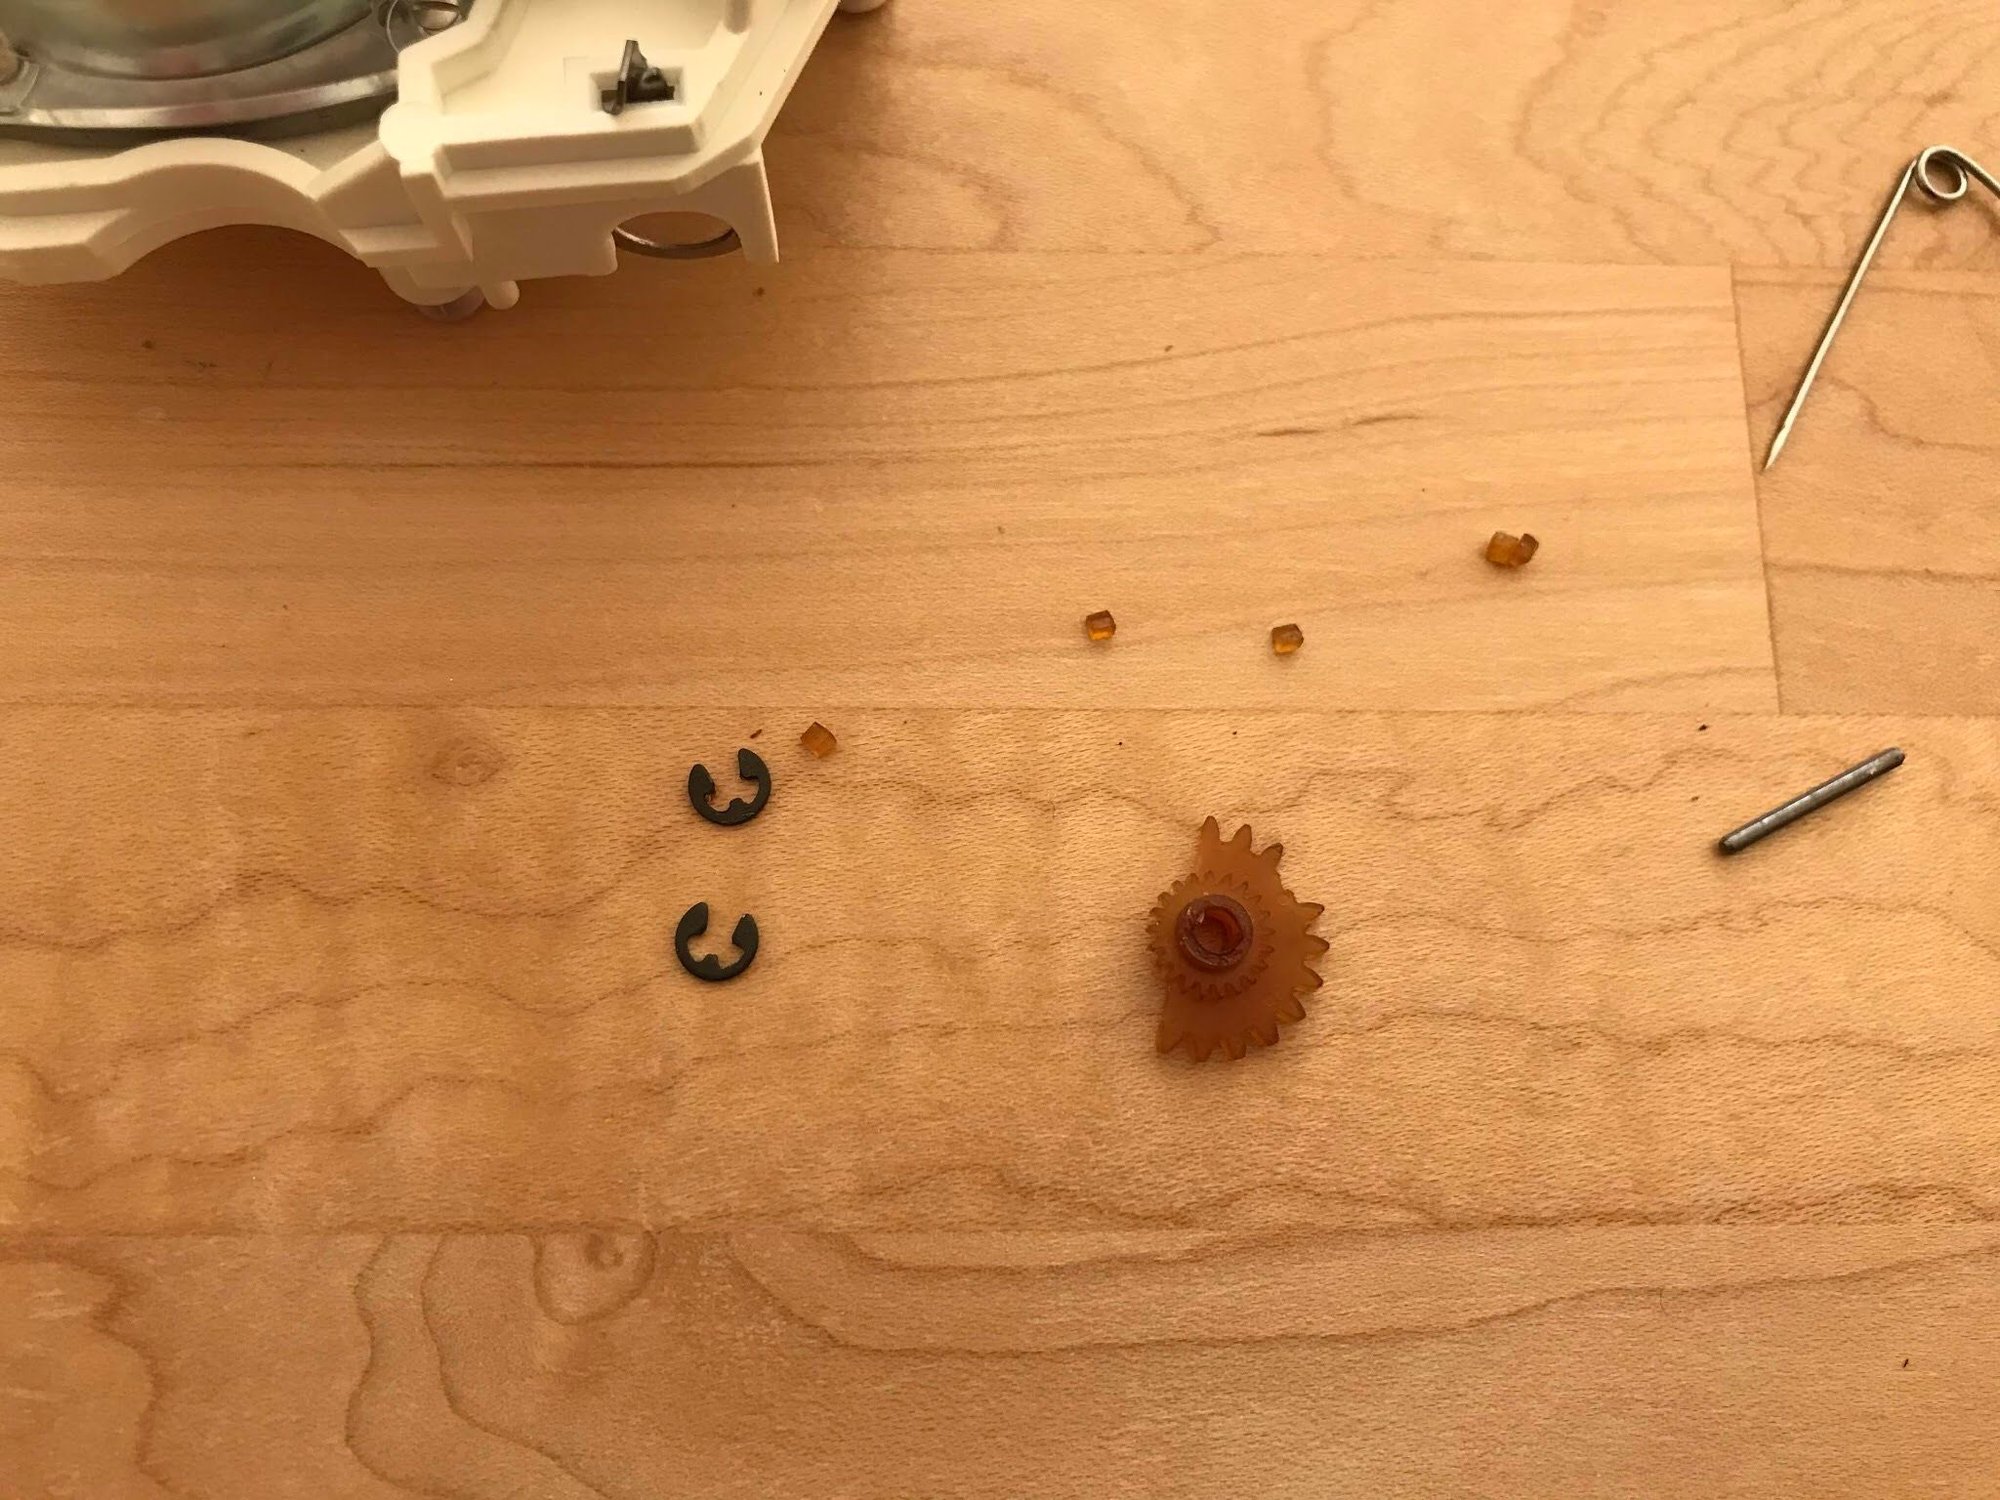
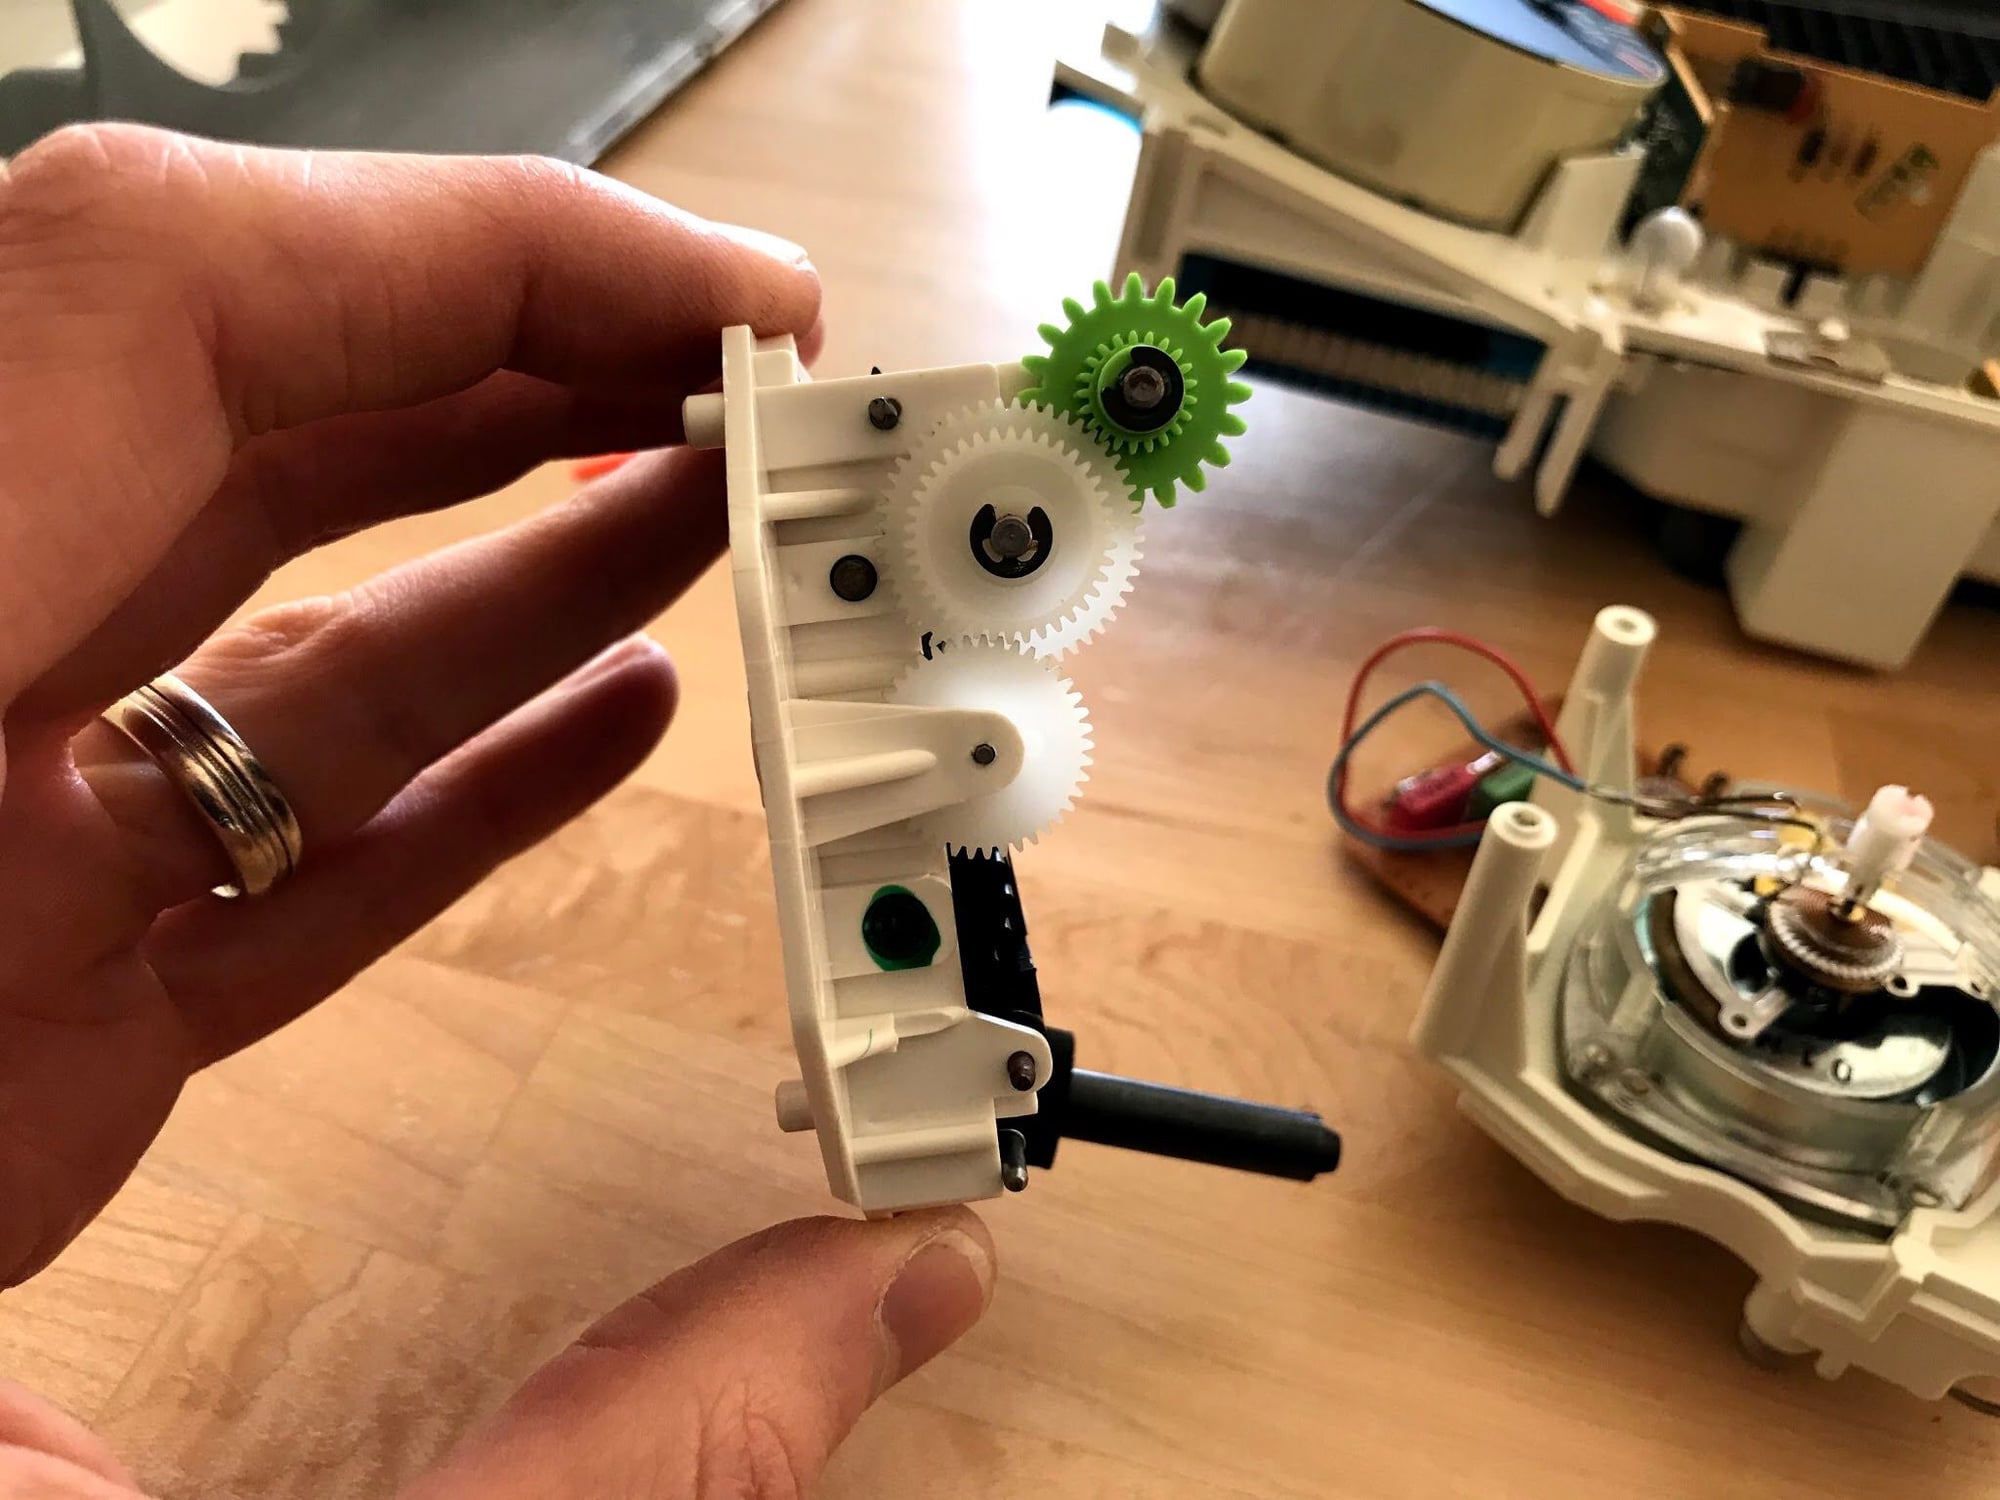
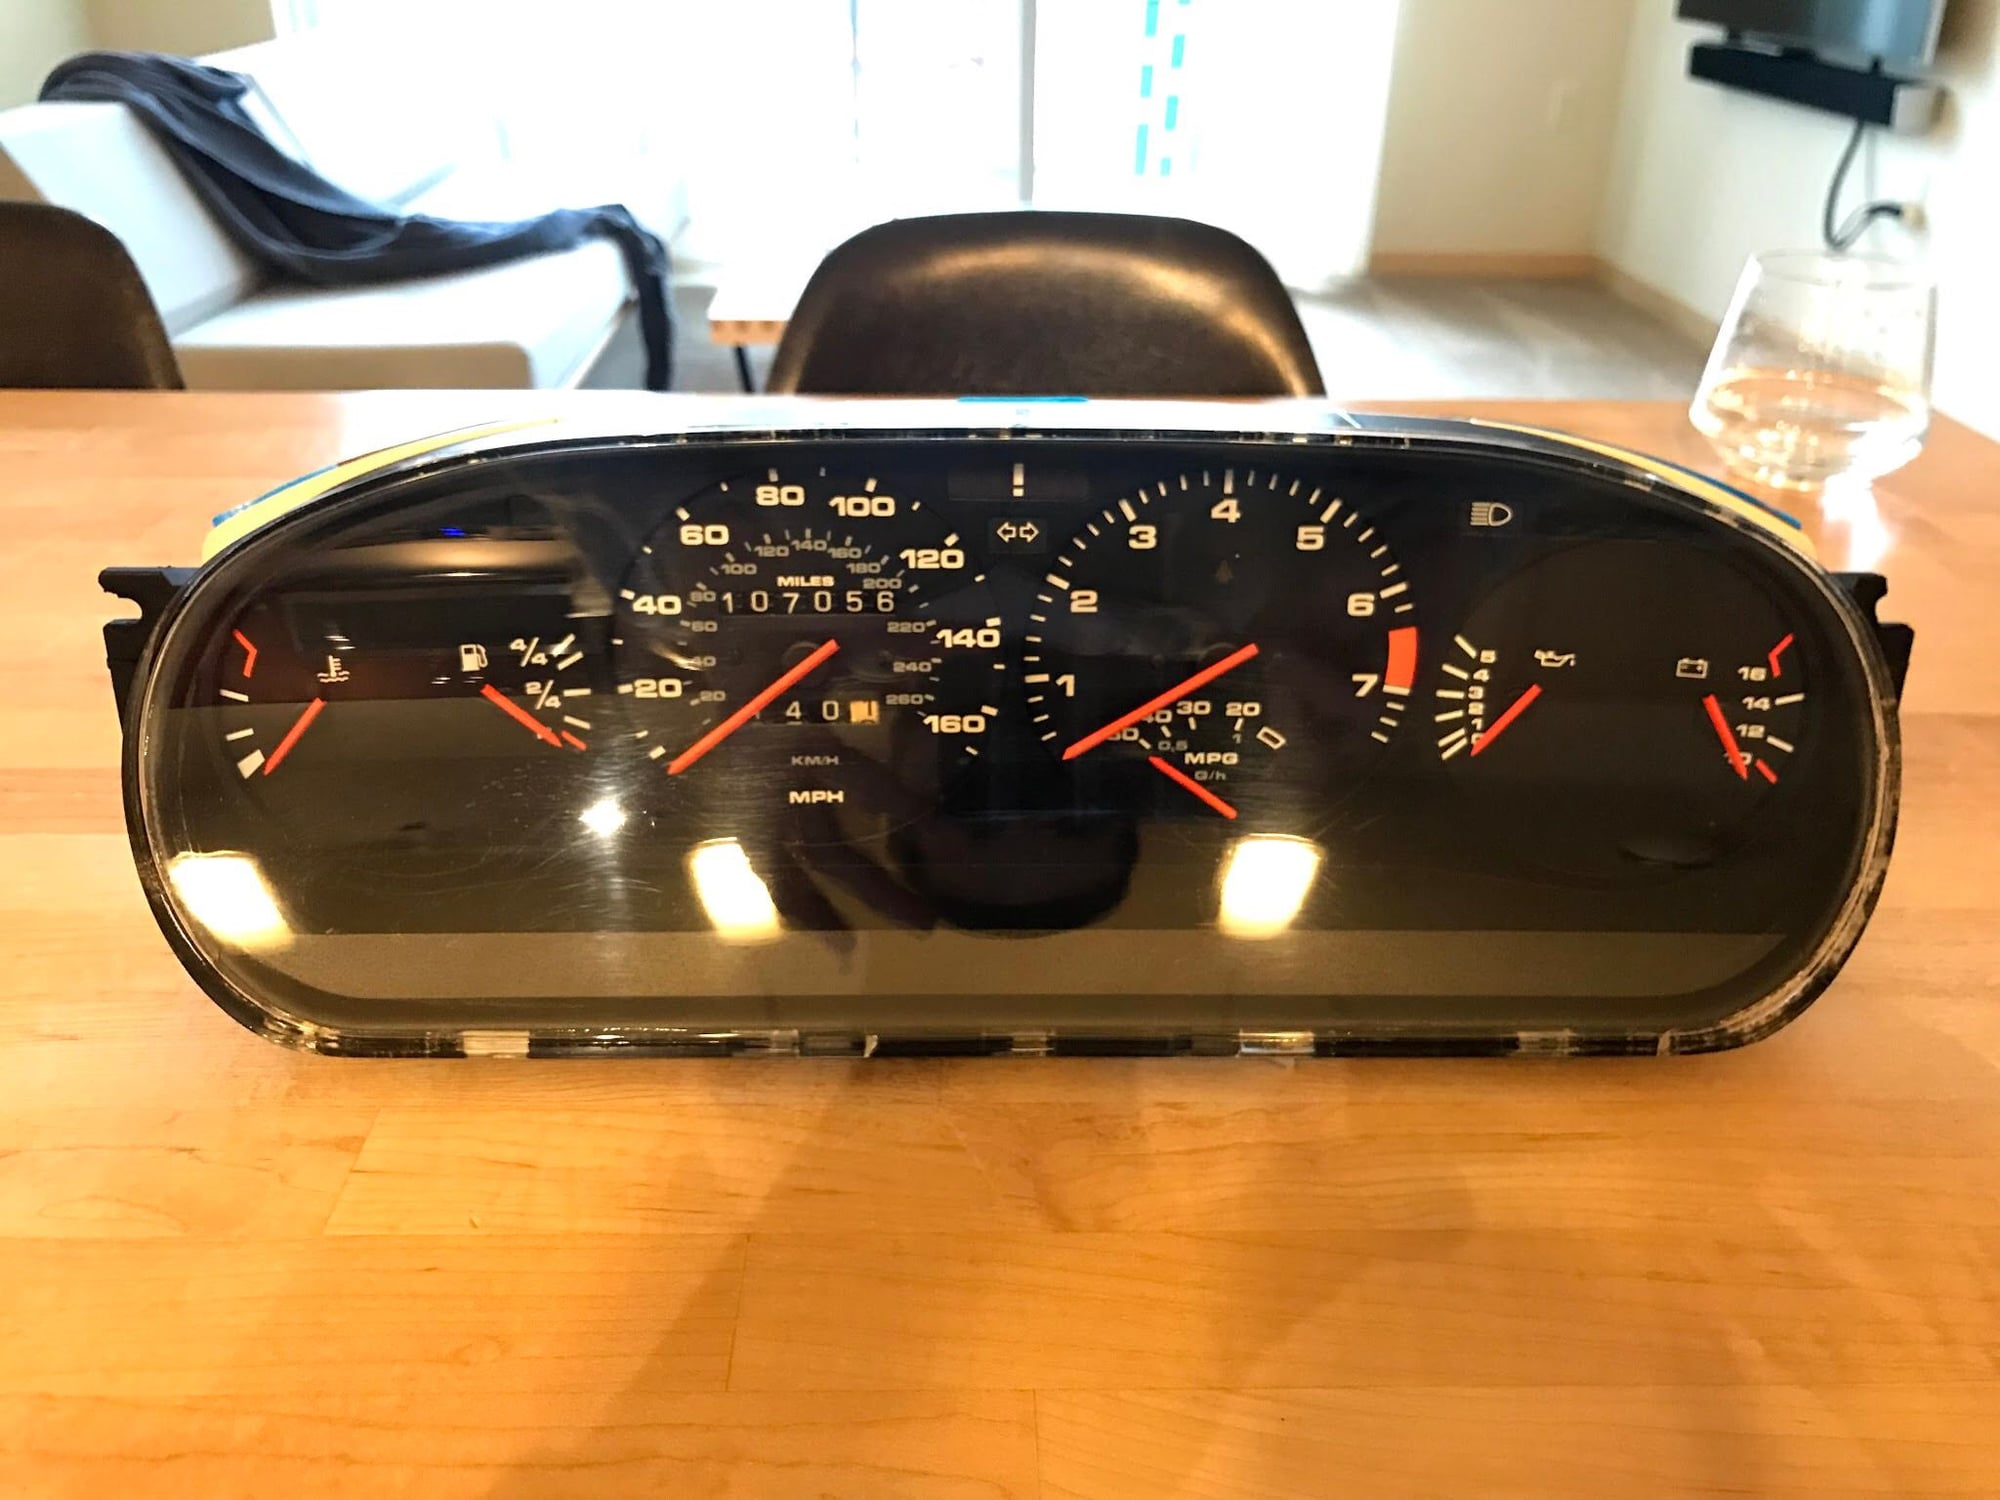
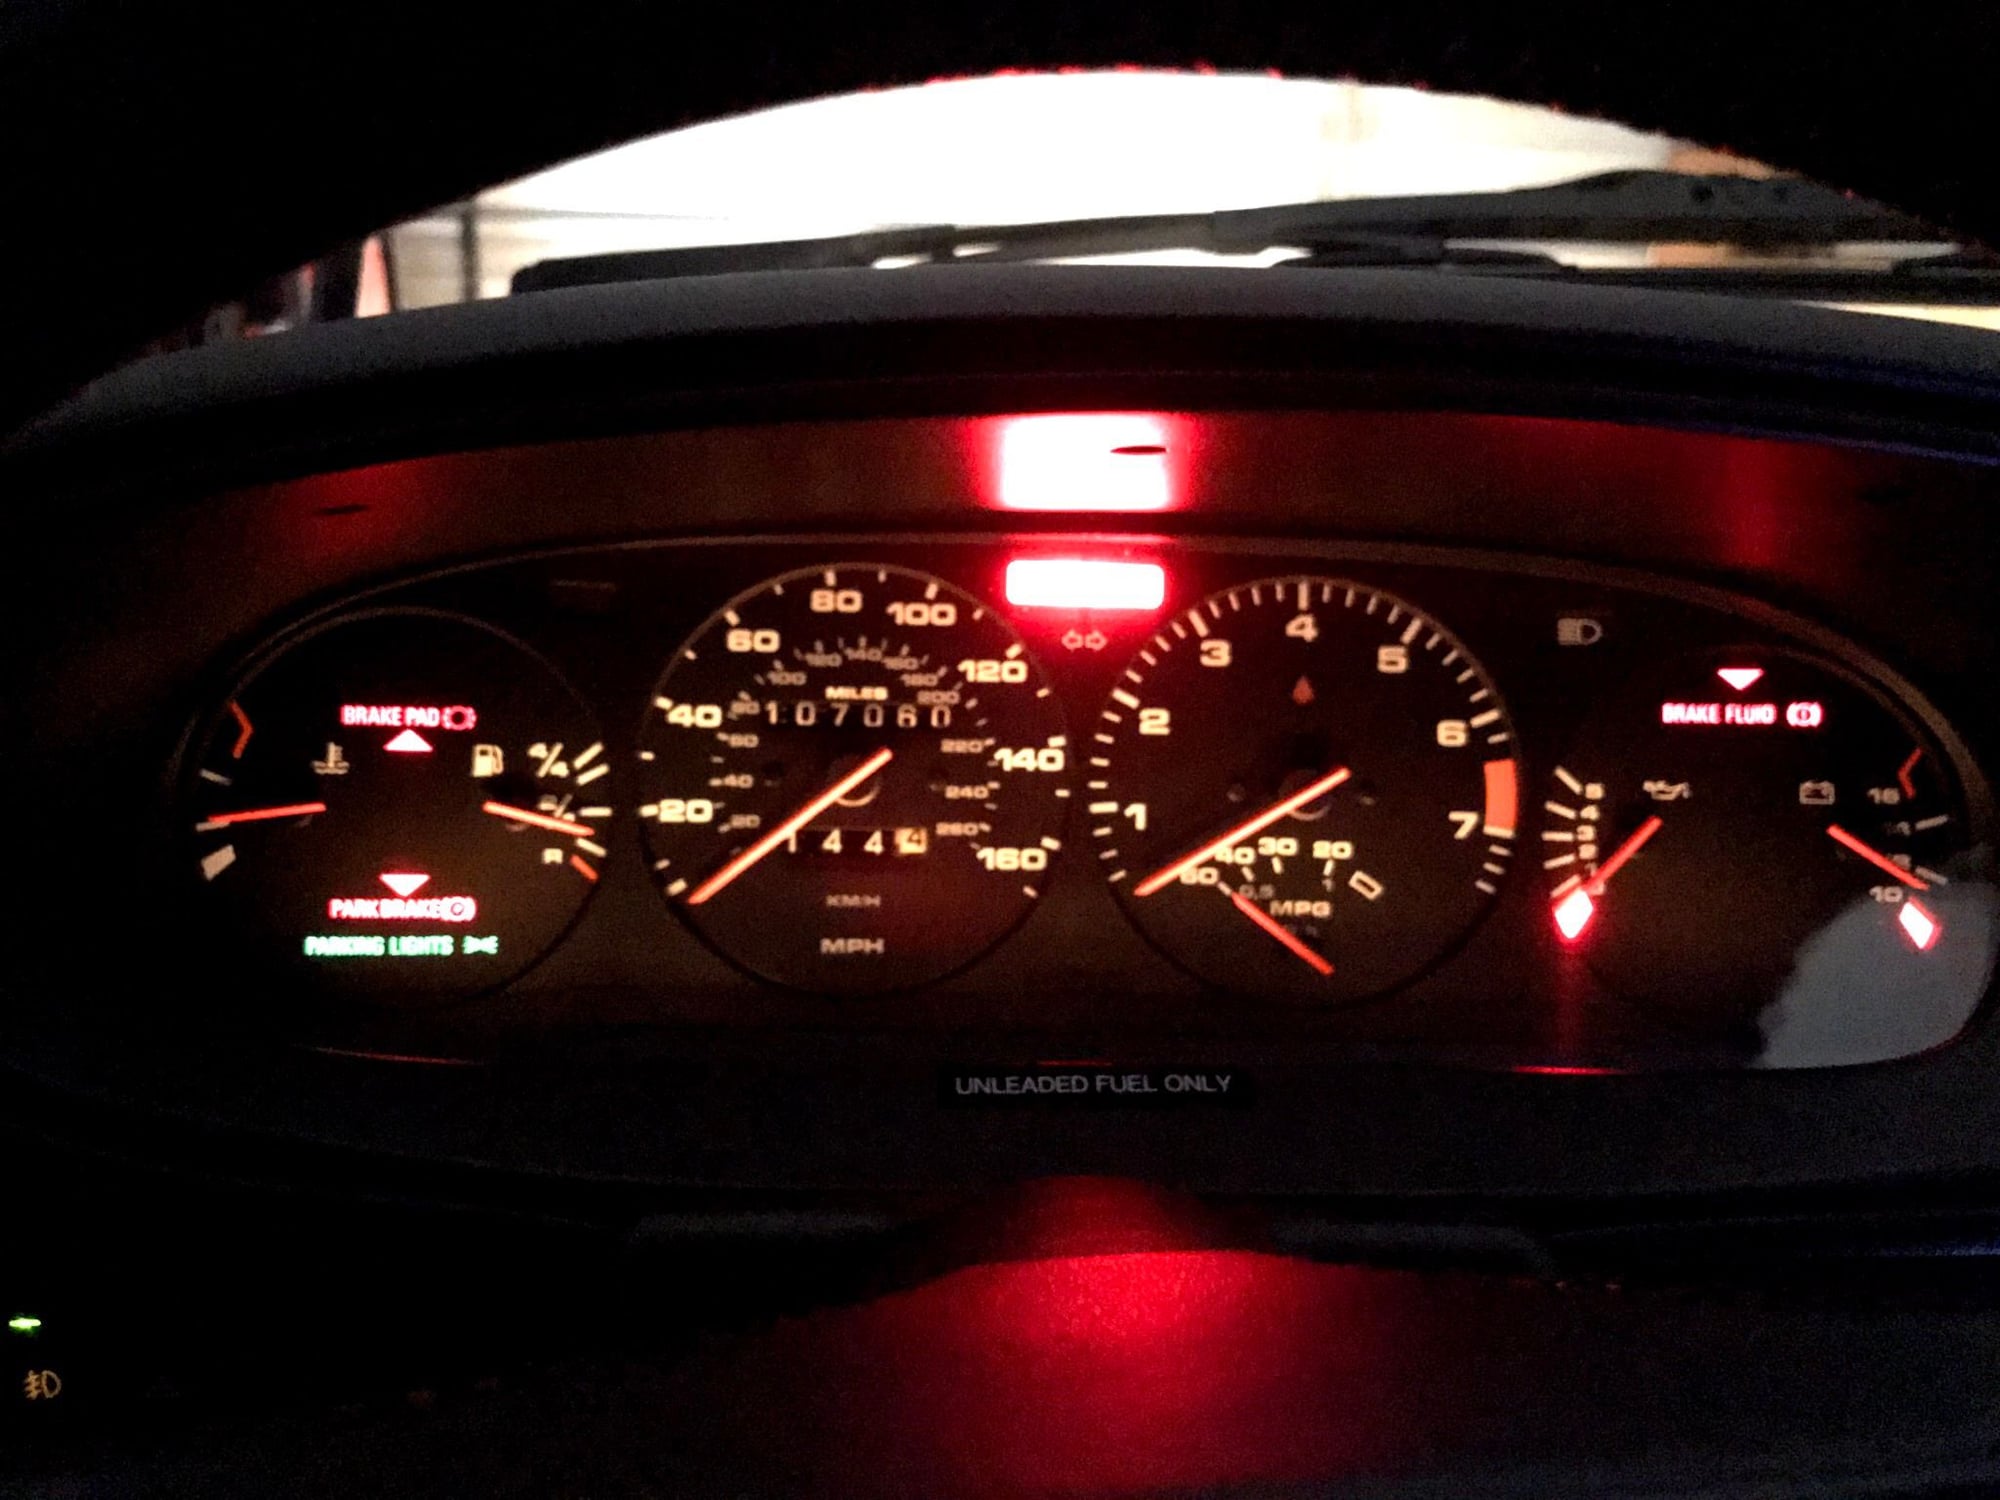
A few days before I started tearing everything apart, my odometer decided to stop working. I figured it was only a matter of time and replacing the odometer gear would give me a chance to refresh the light tunnels in the cluster since my gauges were pretty dark. I didn�t take a before pic to compare to, but they were quite dull just like everyone else�s. I did take a bunch of pics during the cluster restore. First off the failed odometer culprit!
Much better with a new gear installed.
However, disaster struck before I even replaced the gear. I went to pull the needle off the speedometer and the damn thing would not budge at all. So naturally it snapped when I continued to attempt removing it. I called two local Milwaukee speedo repair shops but neither wanted to touch it since I broke the needle. Called North Hollywood Speedometer and they said they could replace the speedometer motor, but at a price of $150 for the motor and $165 for labor. I figured I�d try my luck with another cluster and replace the speedo motor on my own. Found a used cluster on eBay for $100 and went to town pulling things apart. Thankfully the needle on the eBay cluster came right off without a hitch.
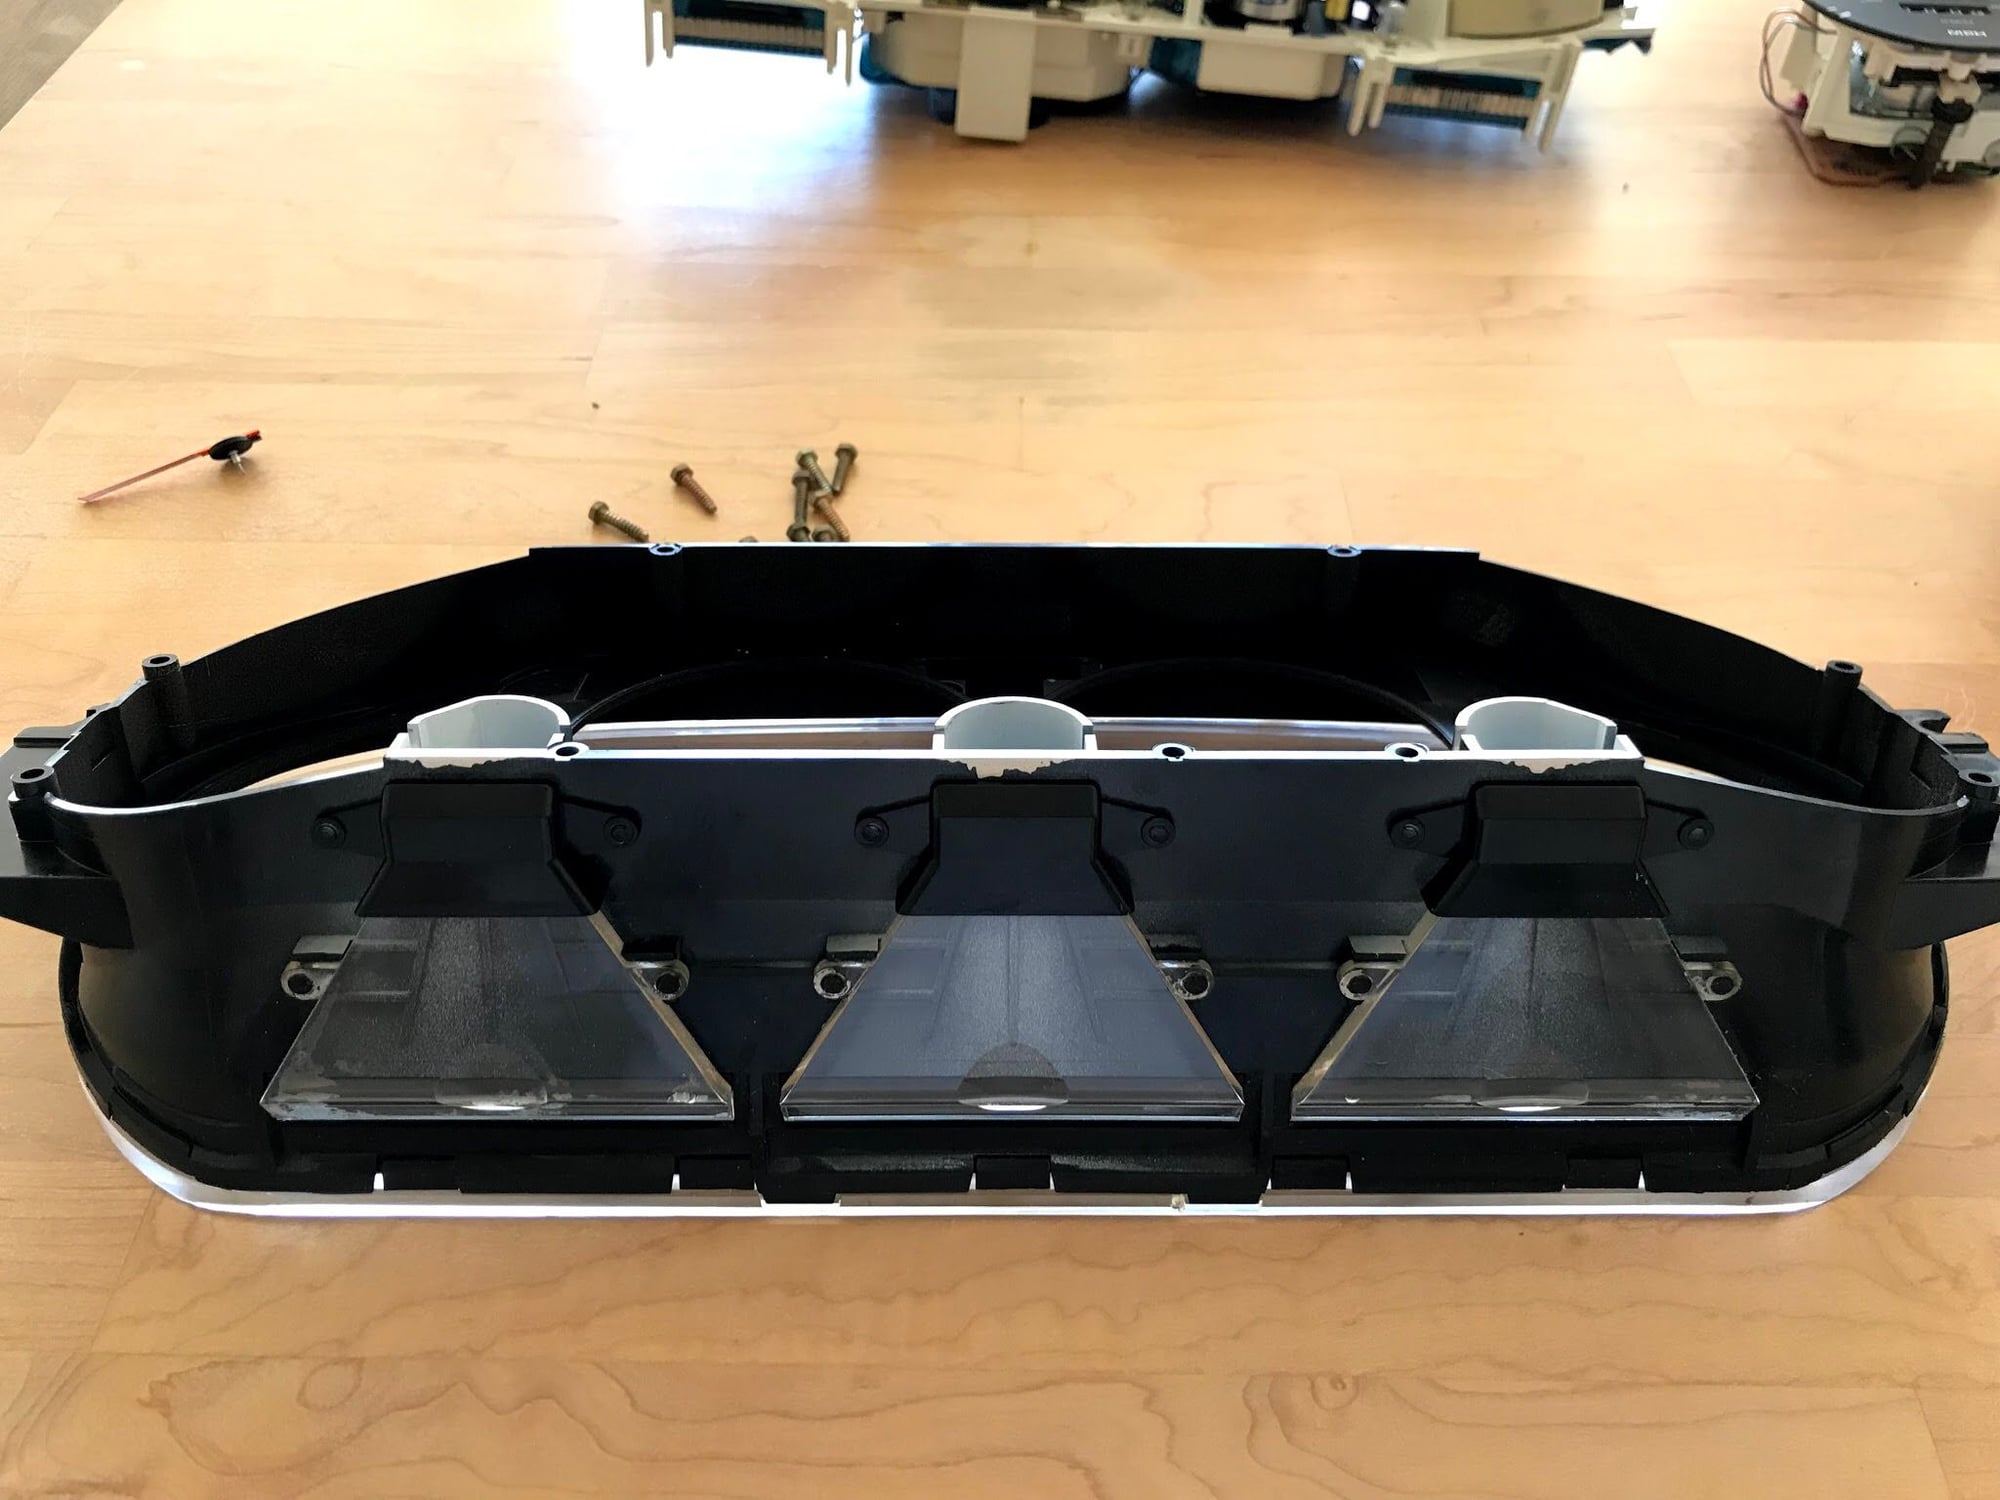
While everything was apart, it was time to refresh the cluster, so I cleaned up the light tunnels using non-acetone nail polish remover. Below is the before and after.
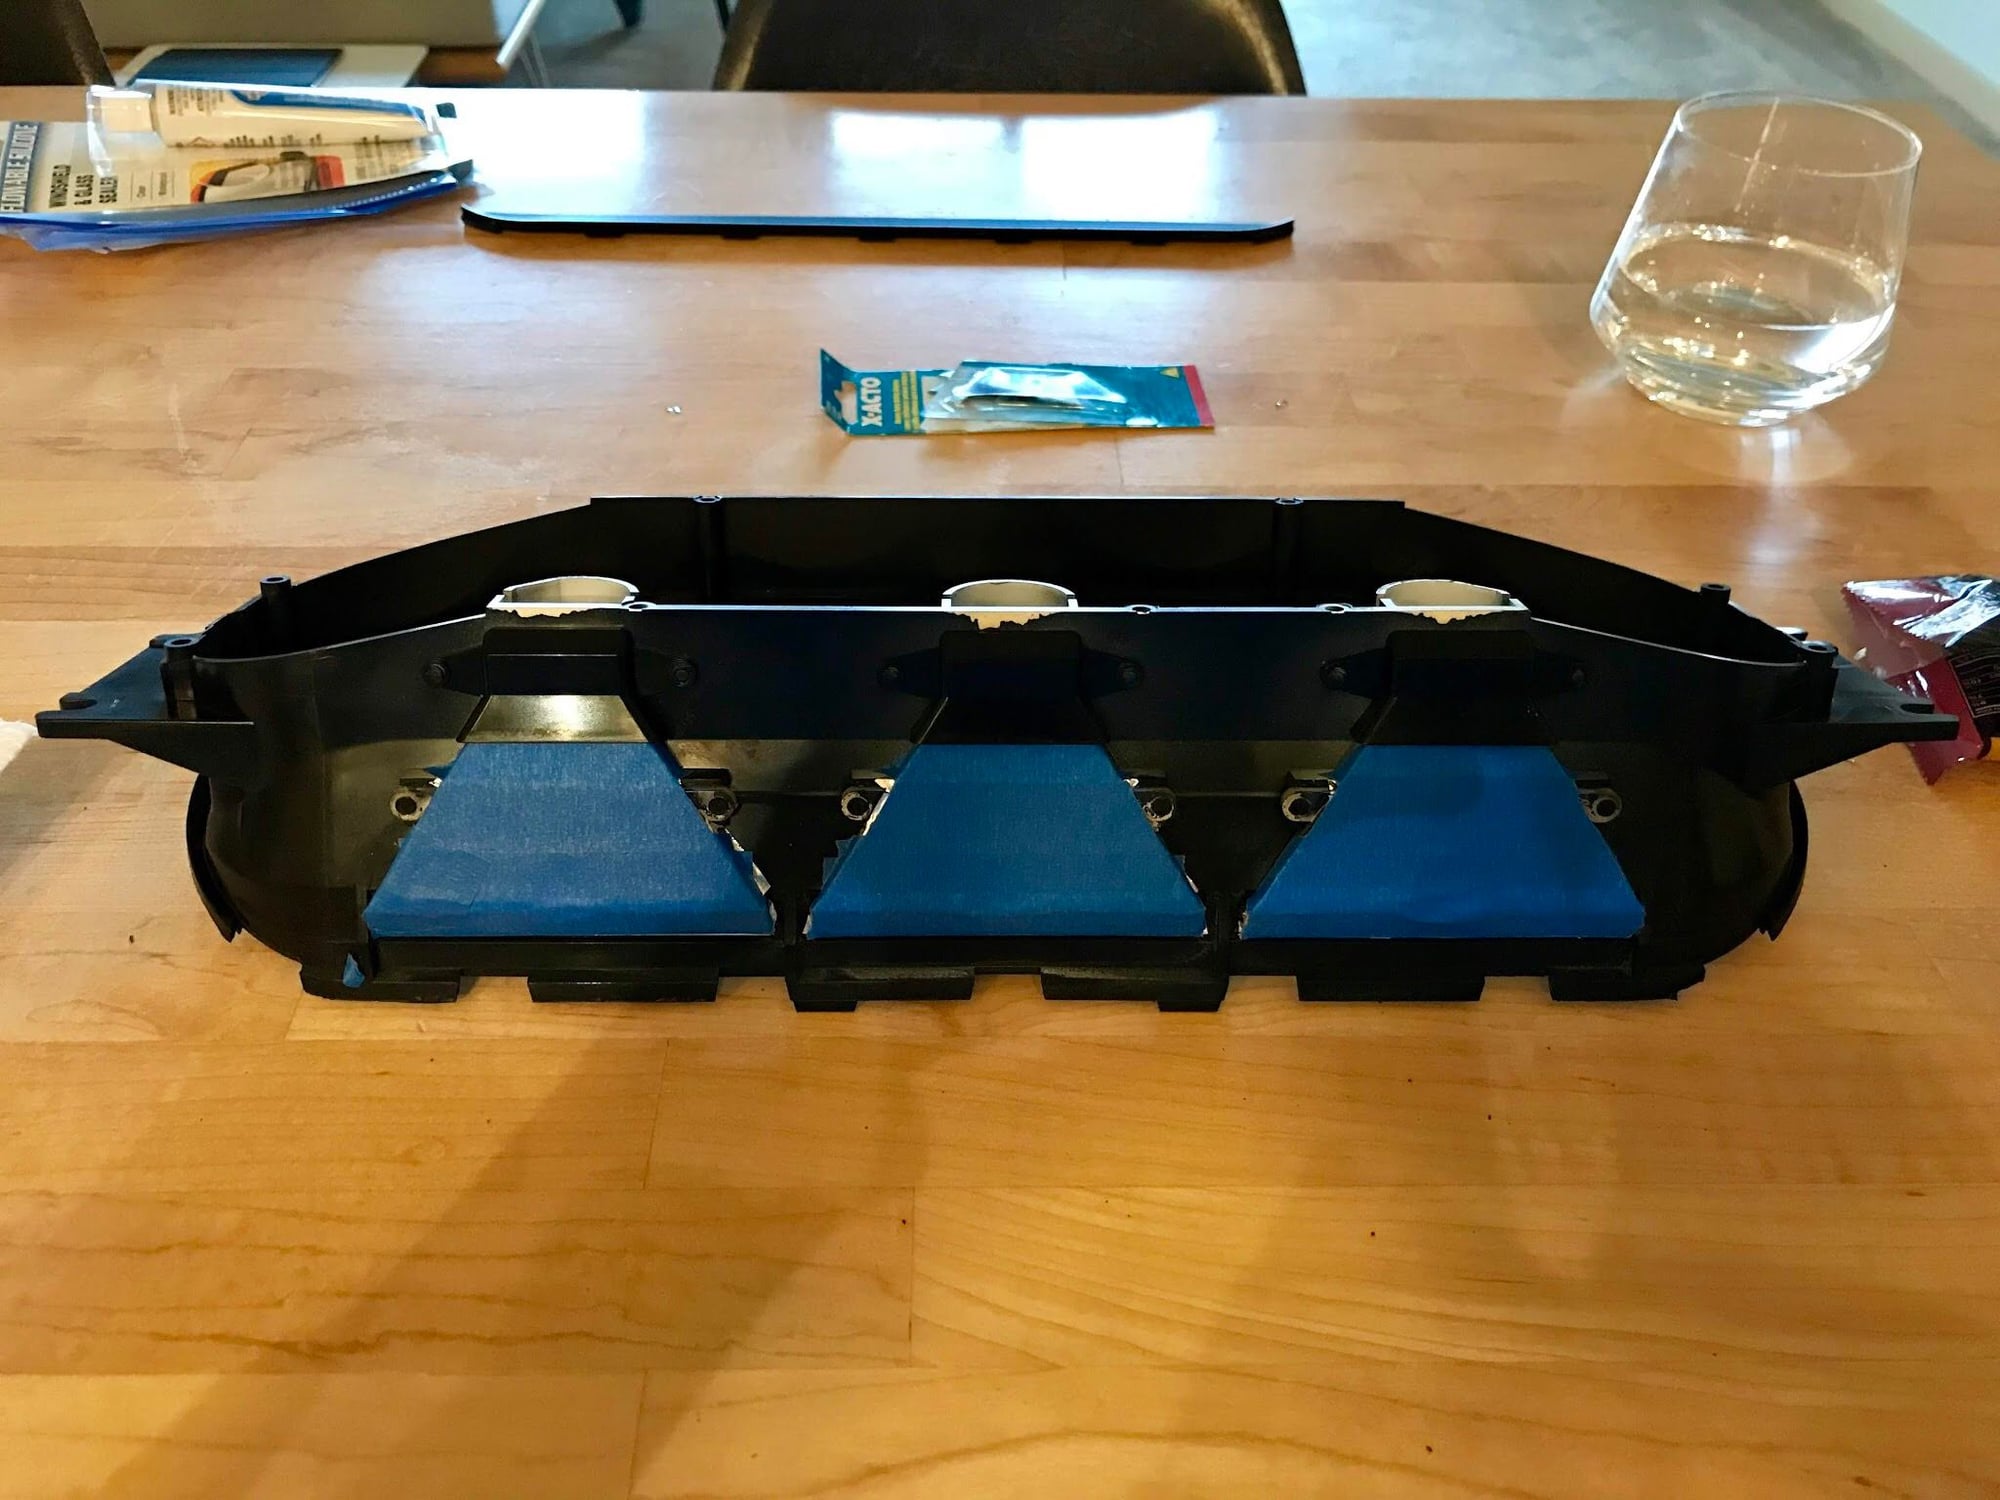
I went the aluminum foil route and made some new reflectors, installing them with double sided tape. Once installed I added some blue painters tape over the foil to protect it during the install in the car.
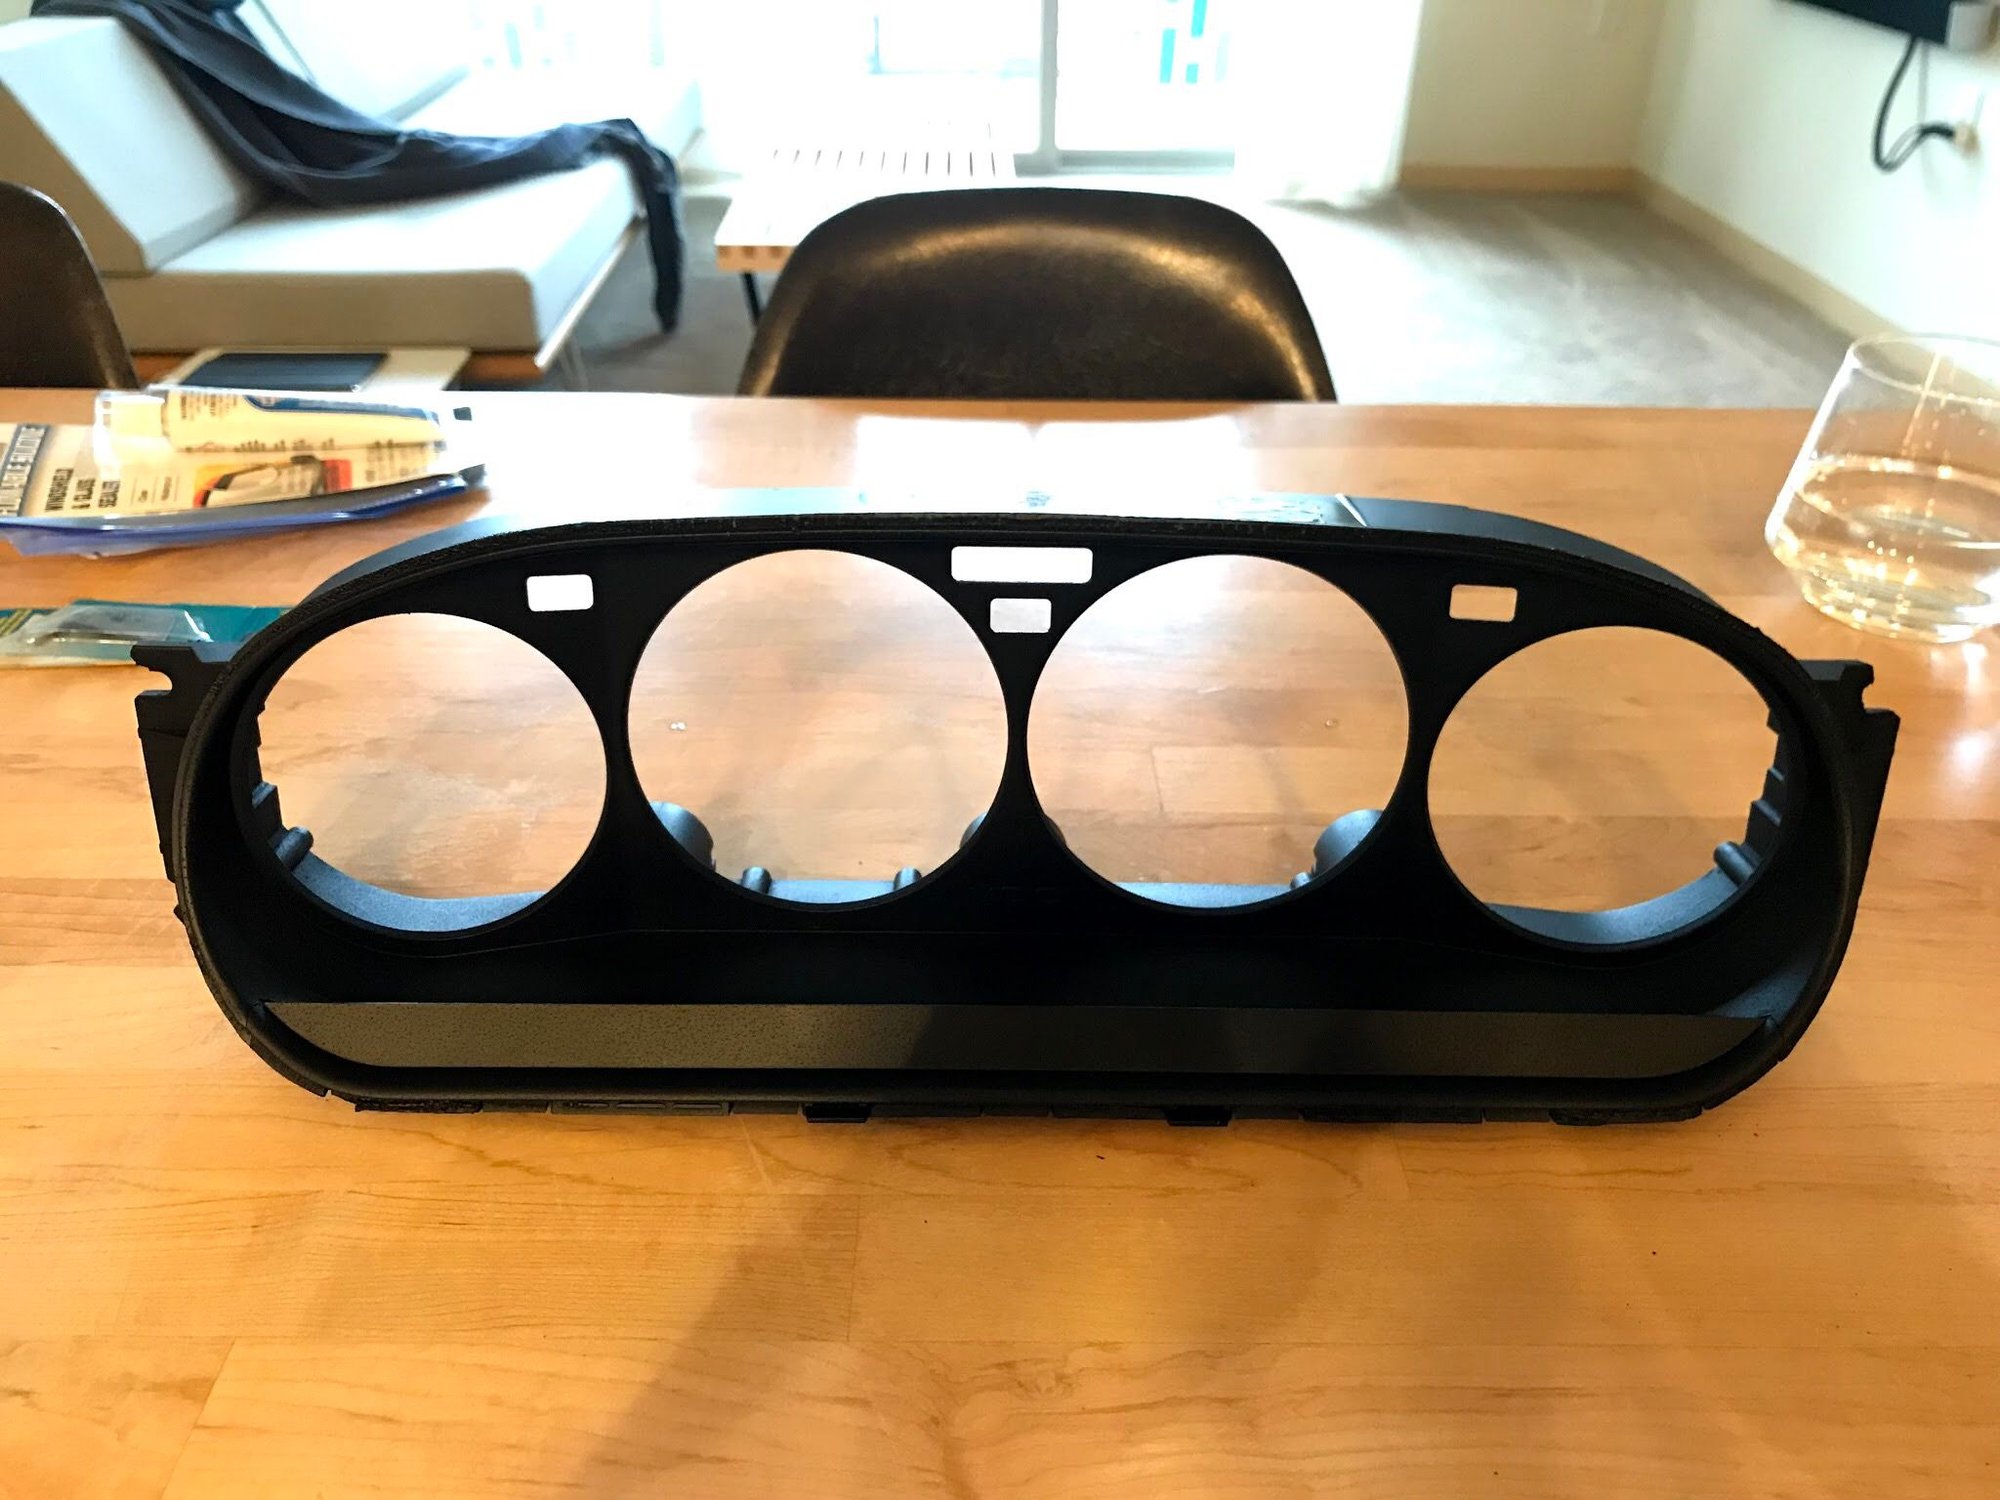
I separated the clear plastic cover from the gauge frame and repainted it matte black since it was fading and looking crappy.
Reassembled and ready to go back in the car!
I replaced the lights with 2.7W 168 bulbs to increase the brightness a bit. I didn�t want to bother with LEDs since I figured using standard bulbs would keep a more consistent 80s look to match the rest of the interior. It�s definitely noticeably brighter than before and should make it much easier to see in the dark.
I think that sums it up for now. I hope so at least, since it�s more fun driving the car than crawling underneath it!
Justin
Last edited by JRP944; 07-02-2021 at 01:06 PM.
Reason: Adding title
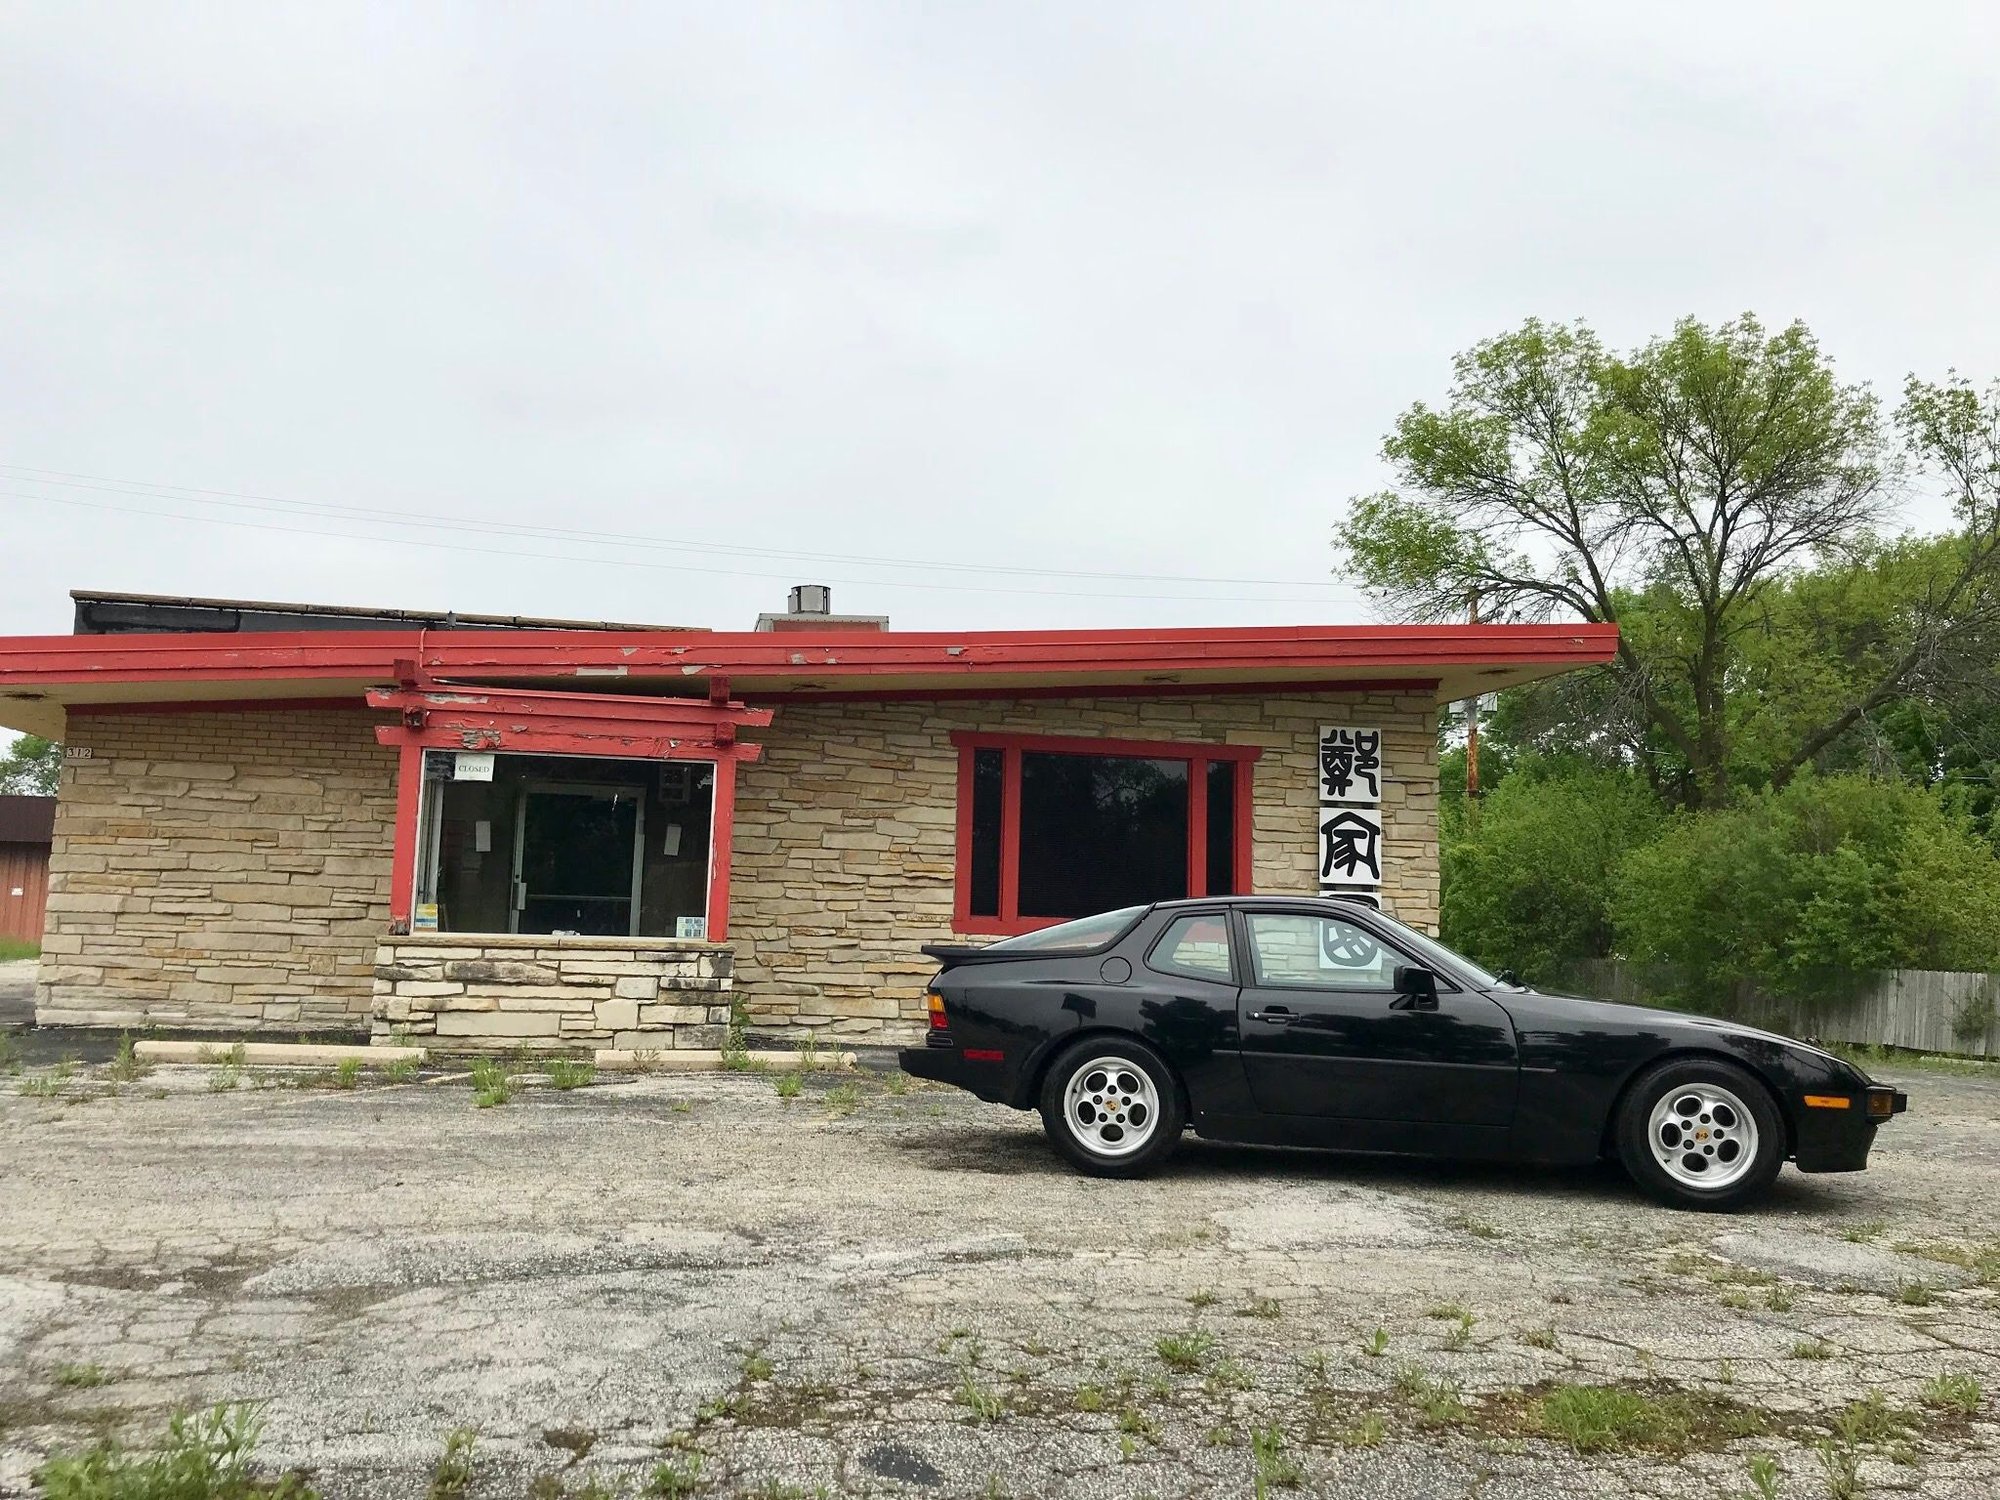
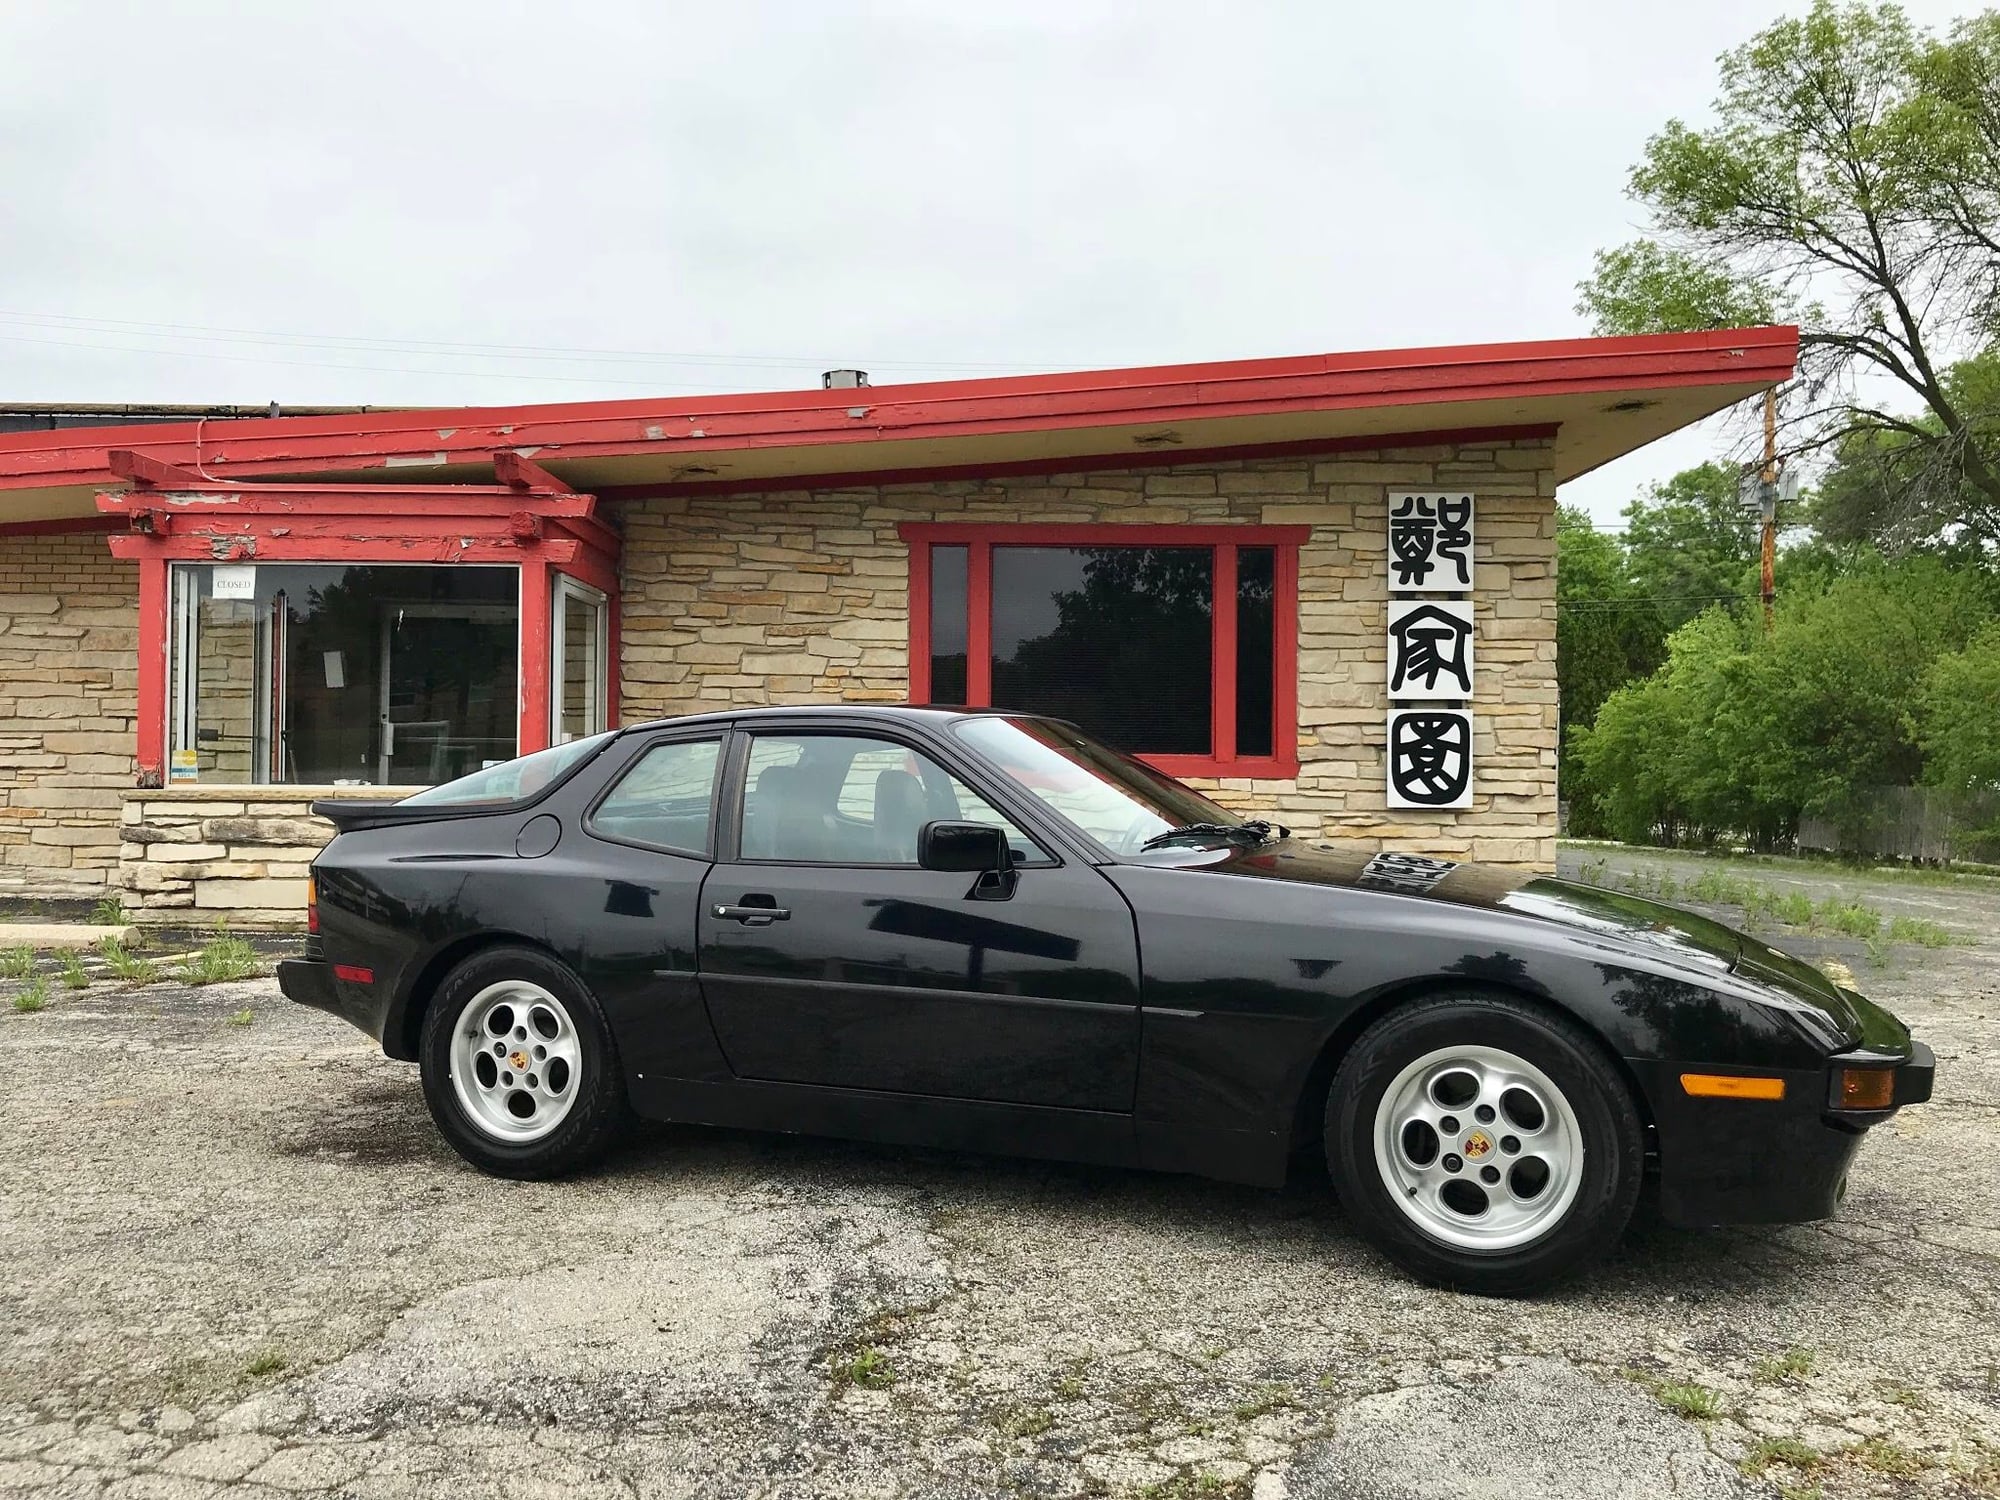
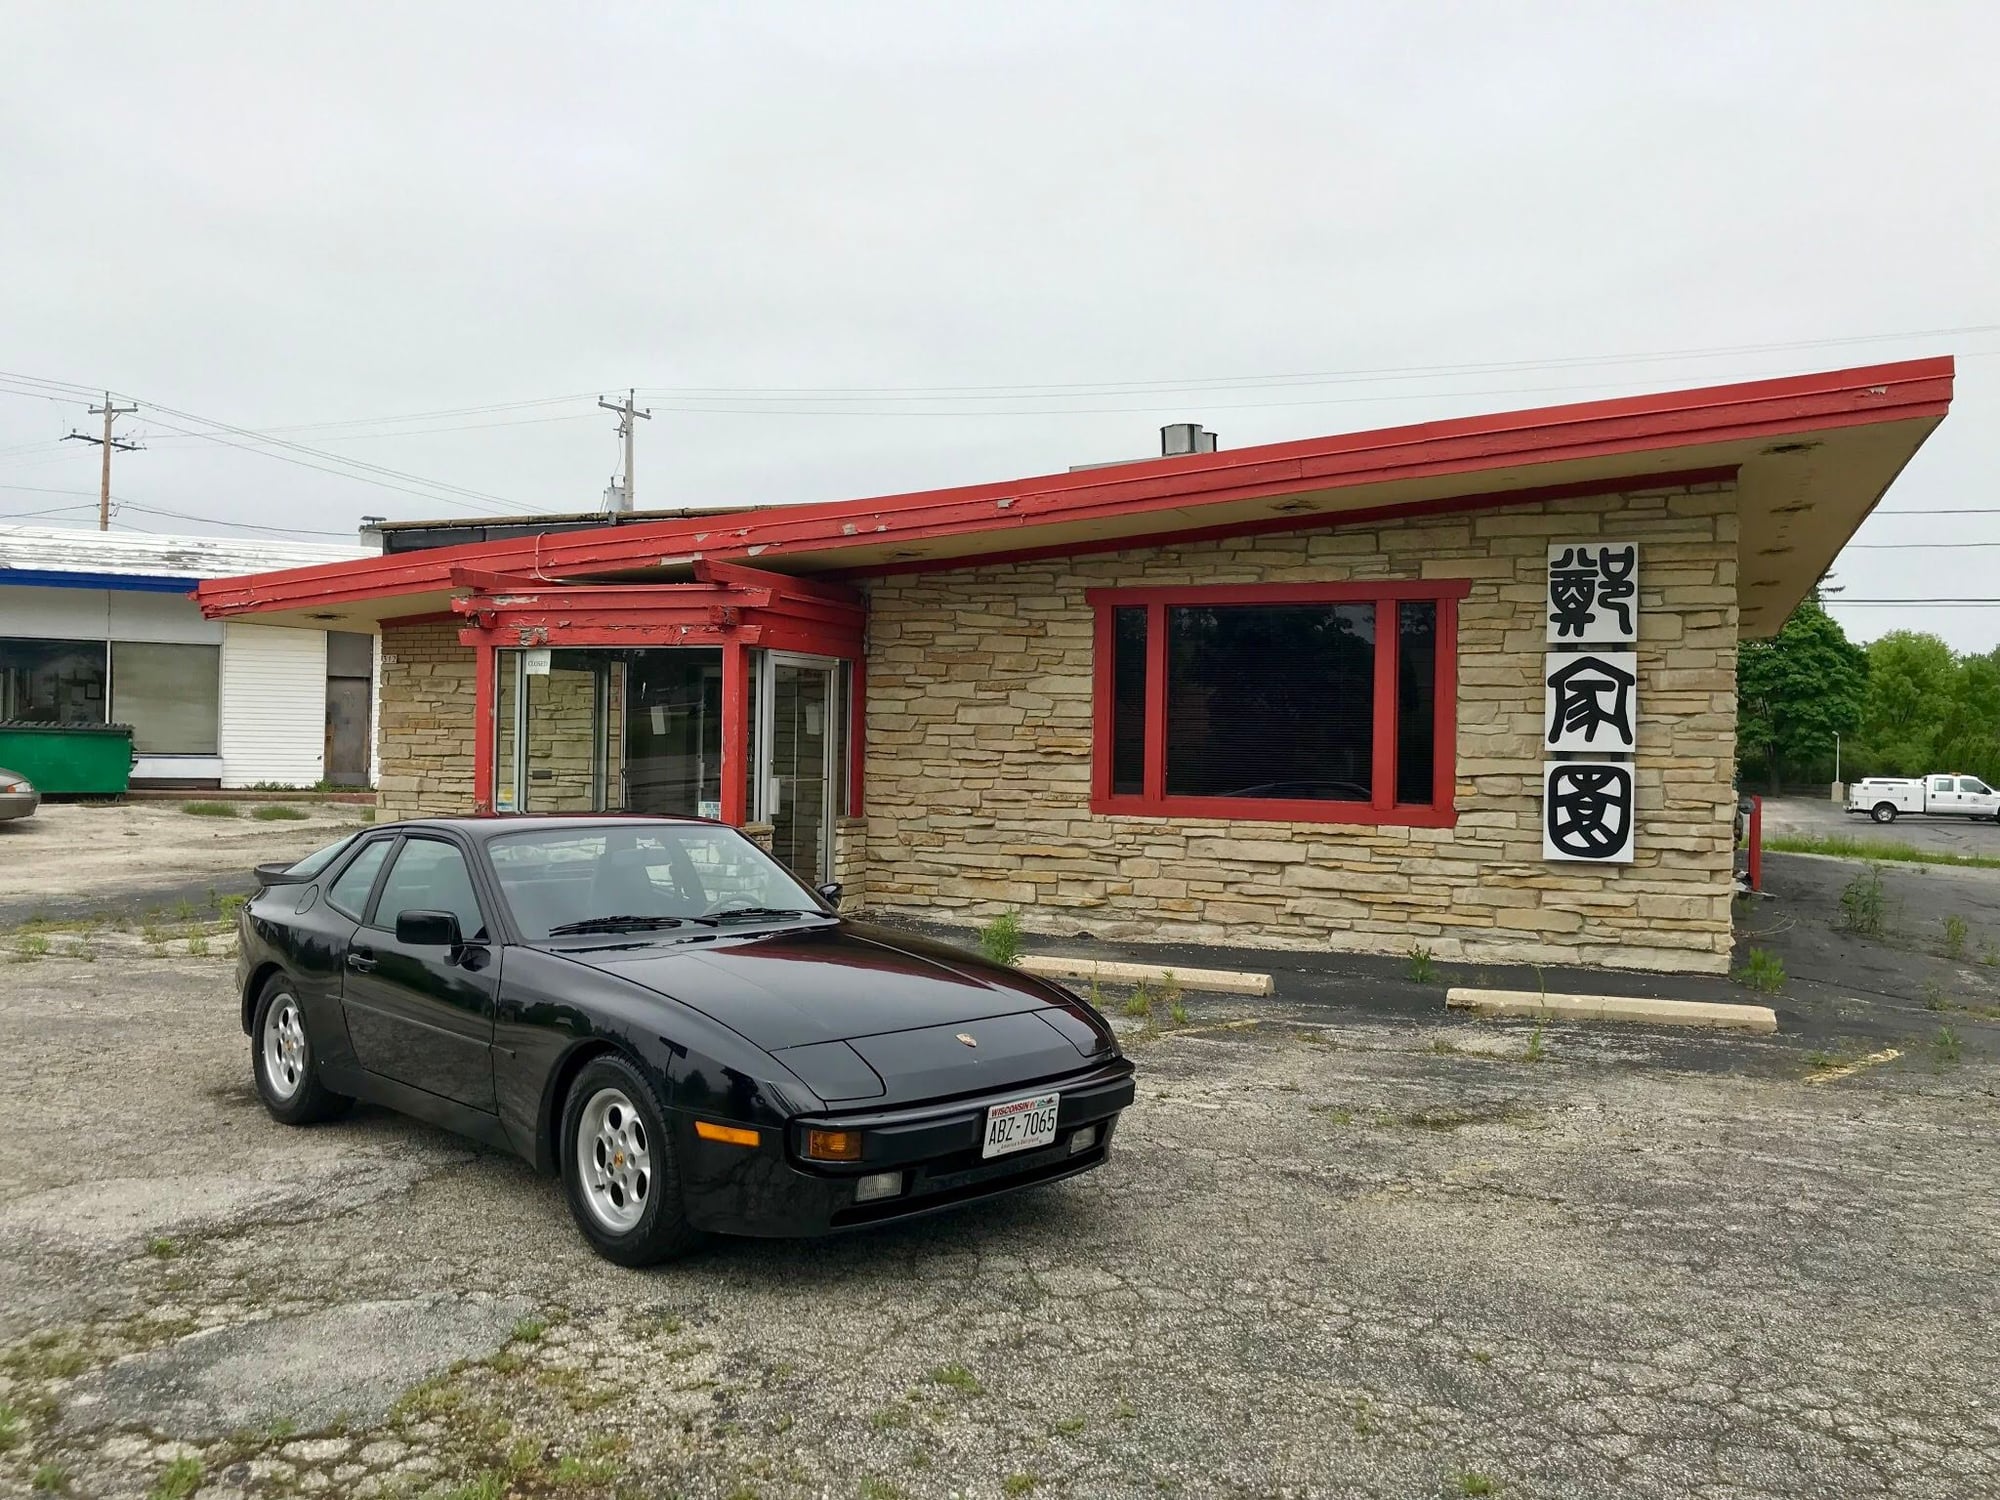
A bit of a photo update since I always seem to forget to take pictures of the outside of the car. I went to Volksfest 2018 here in Wisconsin and on the way home found an abandoned Chinese restaurant which served as a nice backdrop for a clean car.
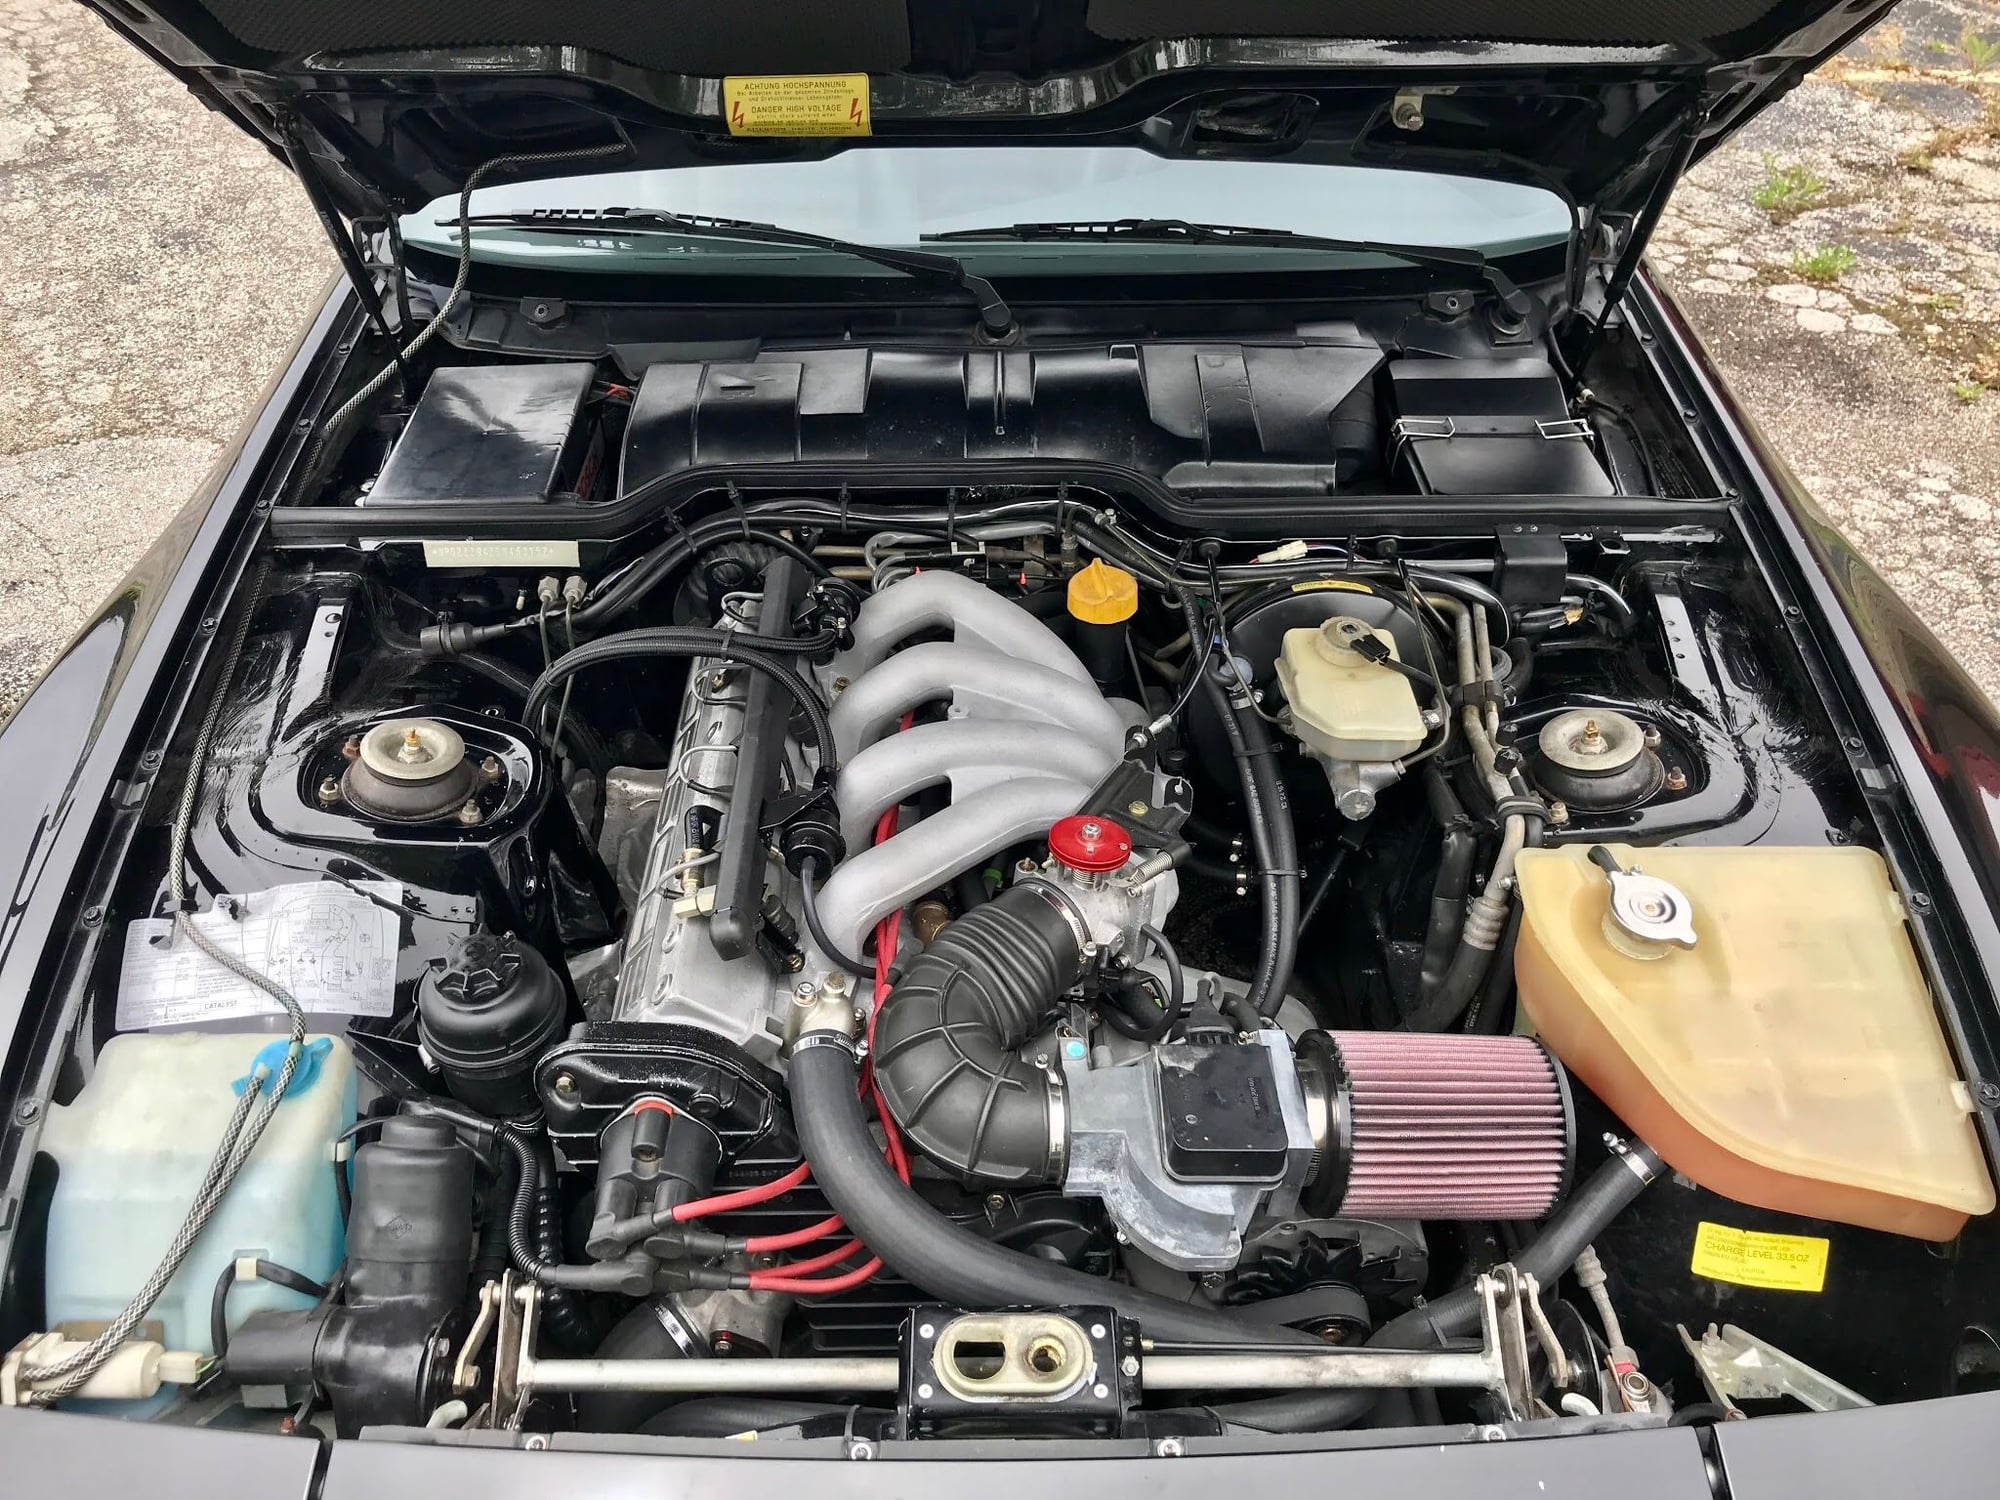
An updated picture of the engine bay now that things are pretty much cleaned up in there. Could use some detailing to get rid of the fingerprints on the intake though... I should also probably remove the vacuum diagram decal since it�s cracked and not accurate anymore now that I removed the Venturi, the control valves and the charcoal canister. Might help to make the bay look a little more �simple.�
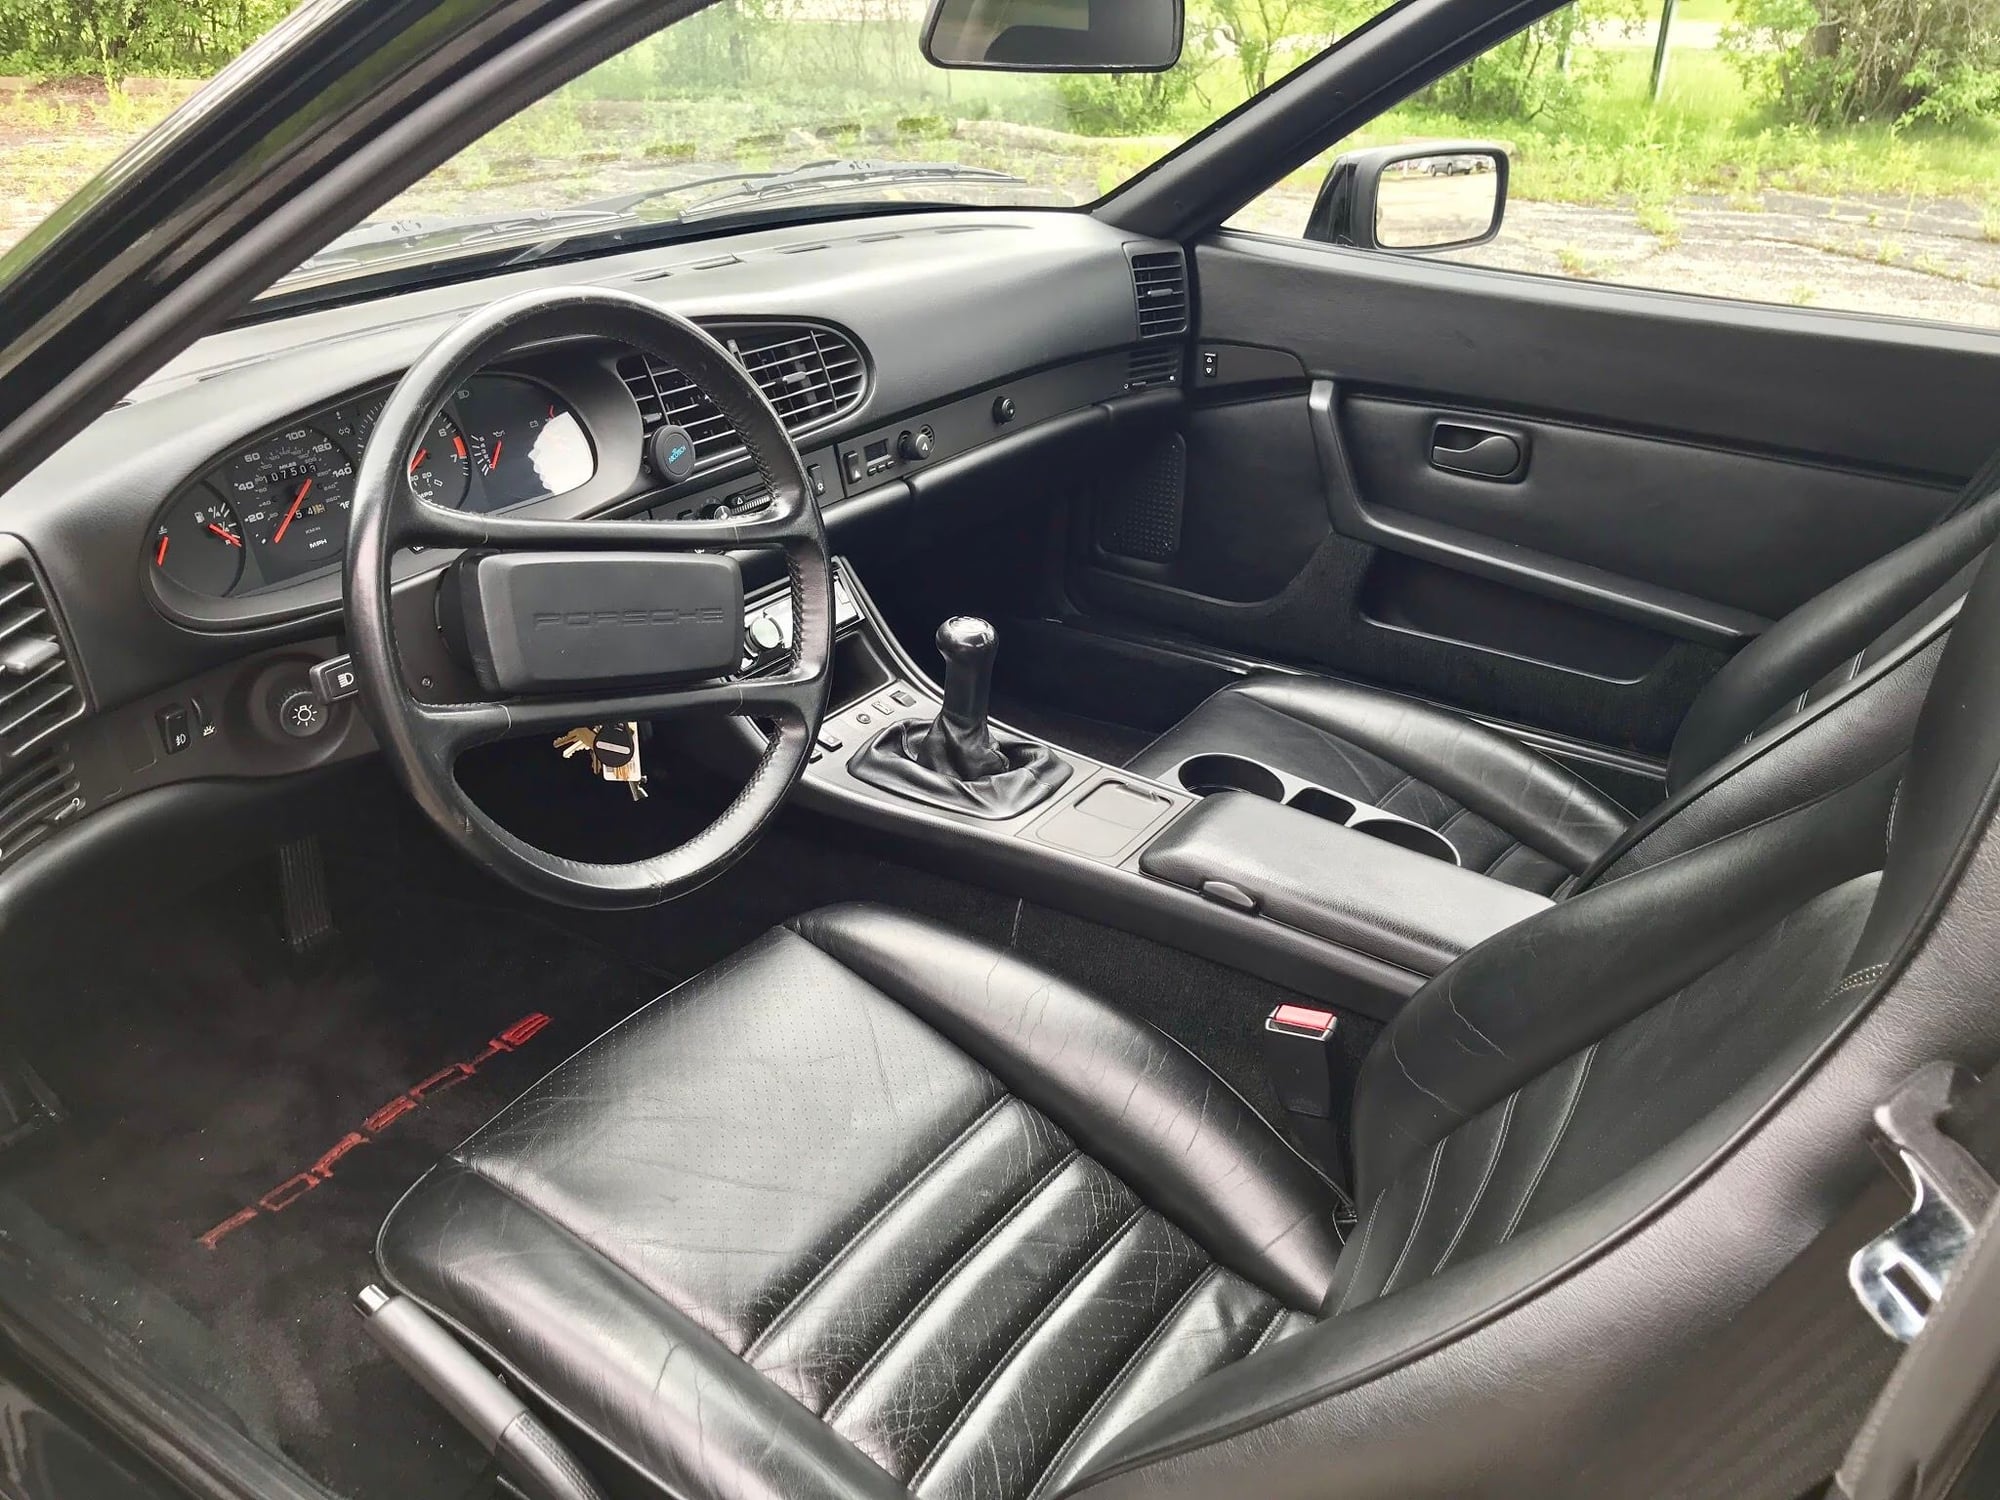
And an interior shot. I now have a few small cracks forming in the dash, which is a bummer. Probably the bumpy highways here in Wisconsin are the culprit.
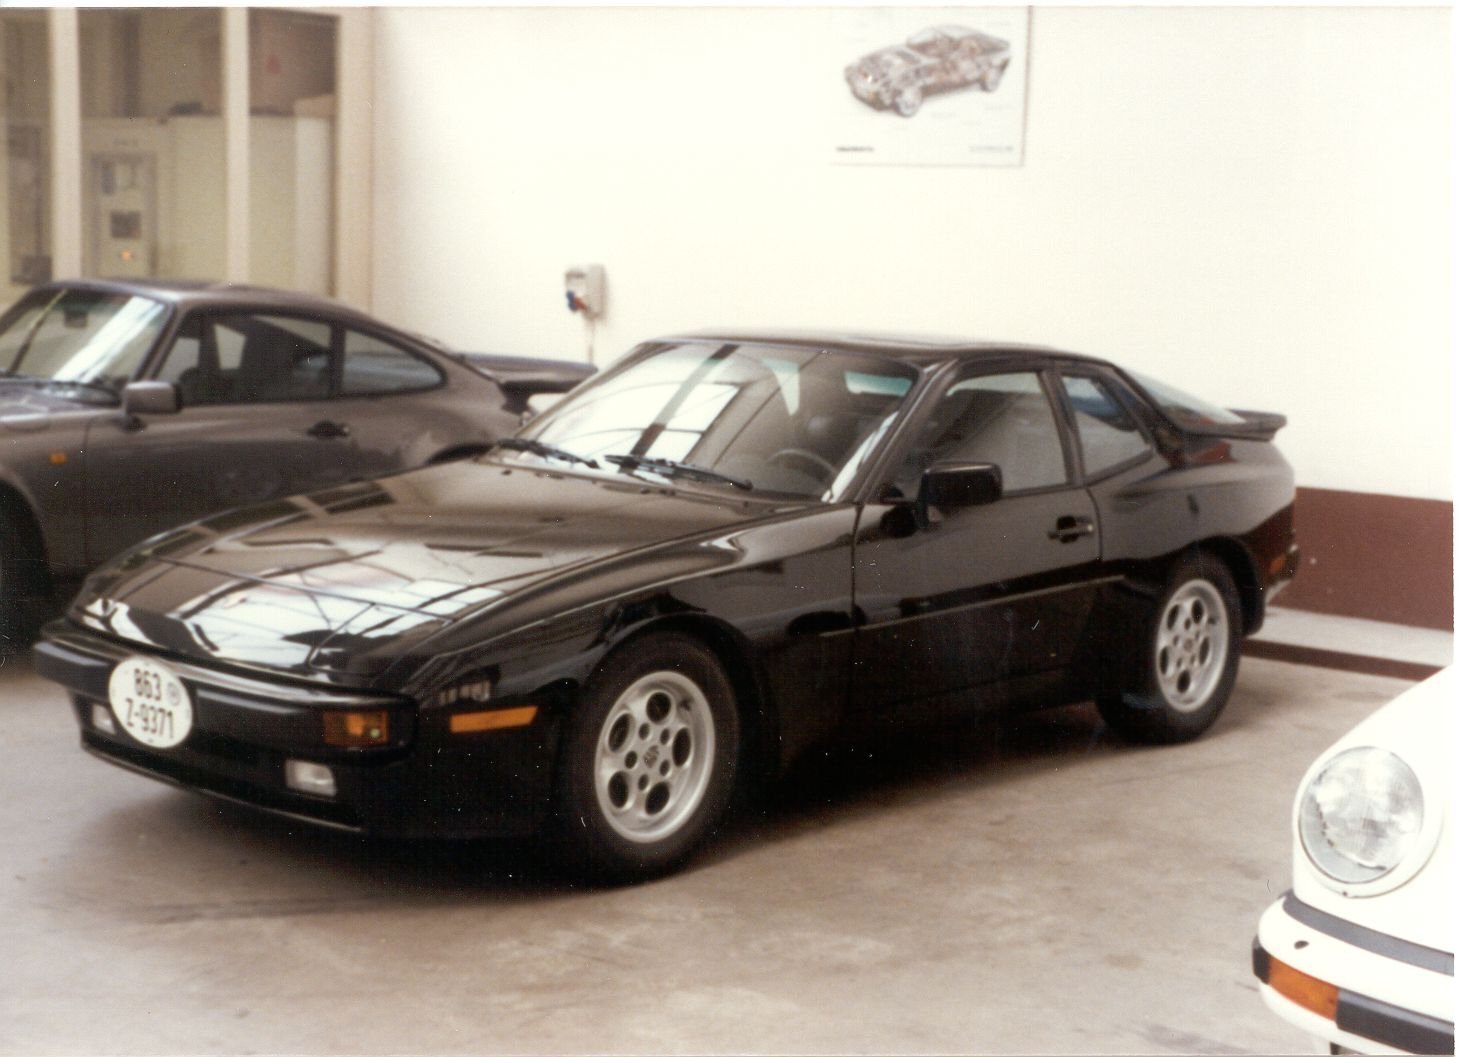
My wife�s uncle just sent me this photo this morning. This is the 944 when it was new, being picked up in Germany.
I still have the original German plates and the OG centercaps. At some point when I repaint the wheels, perhaps I�ll repaint the centercaps too and put the originals back on the car.
Just finished reading this thread post by post and all I can say is WOW! How much did the blasting cabinet run you? What else would one need in a media blasting setup? I'm getting ready to tackle my timing belt and if its cheap enough to source whats needed it might be a good idea to blast and paint some items as you have. Also I hope I dont have a similar issue with oil leaks and broken hardware as you did. Fingers crossed! Good luck with your ride!
How much did the blasting cabinet run you? What else would one need in a media blasting setup?
The blast cabinet was like $130 or thereabouts, and it required assembly. All the Chinese-manufactured ones I assume are roughly the same, whether it's from Eastwood, Harbor Freight or something on Amazon. You also need the glass bead media, which I purchased from Eastwood as well. I think they were 25 pound boxes that would normally run in the $25 range.
You'll also need an air compressor capable of keeping up with the cabinet. This can be a tall task since blast cabinets consume a lot of air. The blast cabinet will have the SCFM specs required to run it properly and you can look for a compressor in that range. When I did all the blasting, I did it at my father-in-law's house since he has an 80 gallon industrial compressor.
I suspect you can run a smaller compressor, in the 30 gallon range, and still have it work fine, but you may occasionally run the tank down far enough that the pressure output drops and you'll have to wait for it to catch up.
I suspect you can run a smaller compressor, in the 30 gallon range, and still have it work fine, but you may occasionally run the tank down far enough that the pressure output drops and you'll have to wait for it to catch up.
Justin
Pretty much what Justin said, but I think I paid about $300 for my cabinet + the thing that traps water. I use a small portable compressor that ran me about $300 more and I do need to let it catch up with the cabinet. It's not big enough to take anything larger than a cam cover, but it works just fine for small parts. Mine came from Harbor Fright too Can't remember where I got the compressor.
My new shop has an 80 gallon 2 stage compressor so I might be able to get a bigger box...

 03-16-2018 | 10:34 AM


 I called two local Milwaukee speedo repair shops but neither wanted to touch it since I broke the needle. Called North Hollywood Speedometer and they said they could replace the speedometer motor, but at a price of $150 for the motor and $165 for labor. I figured I�d try my luck with another cluster and replace the speedo motor on my own. Found a used cluster on eBay for $100 and went to town pulling things apart. Thankfully the needle on the eBay cluster came right off without a hitch.
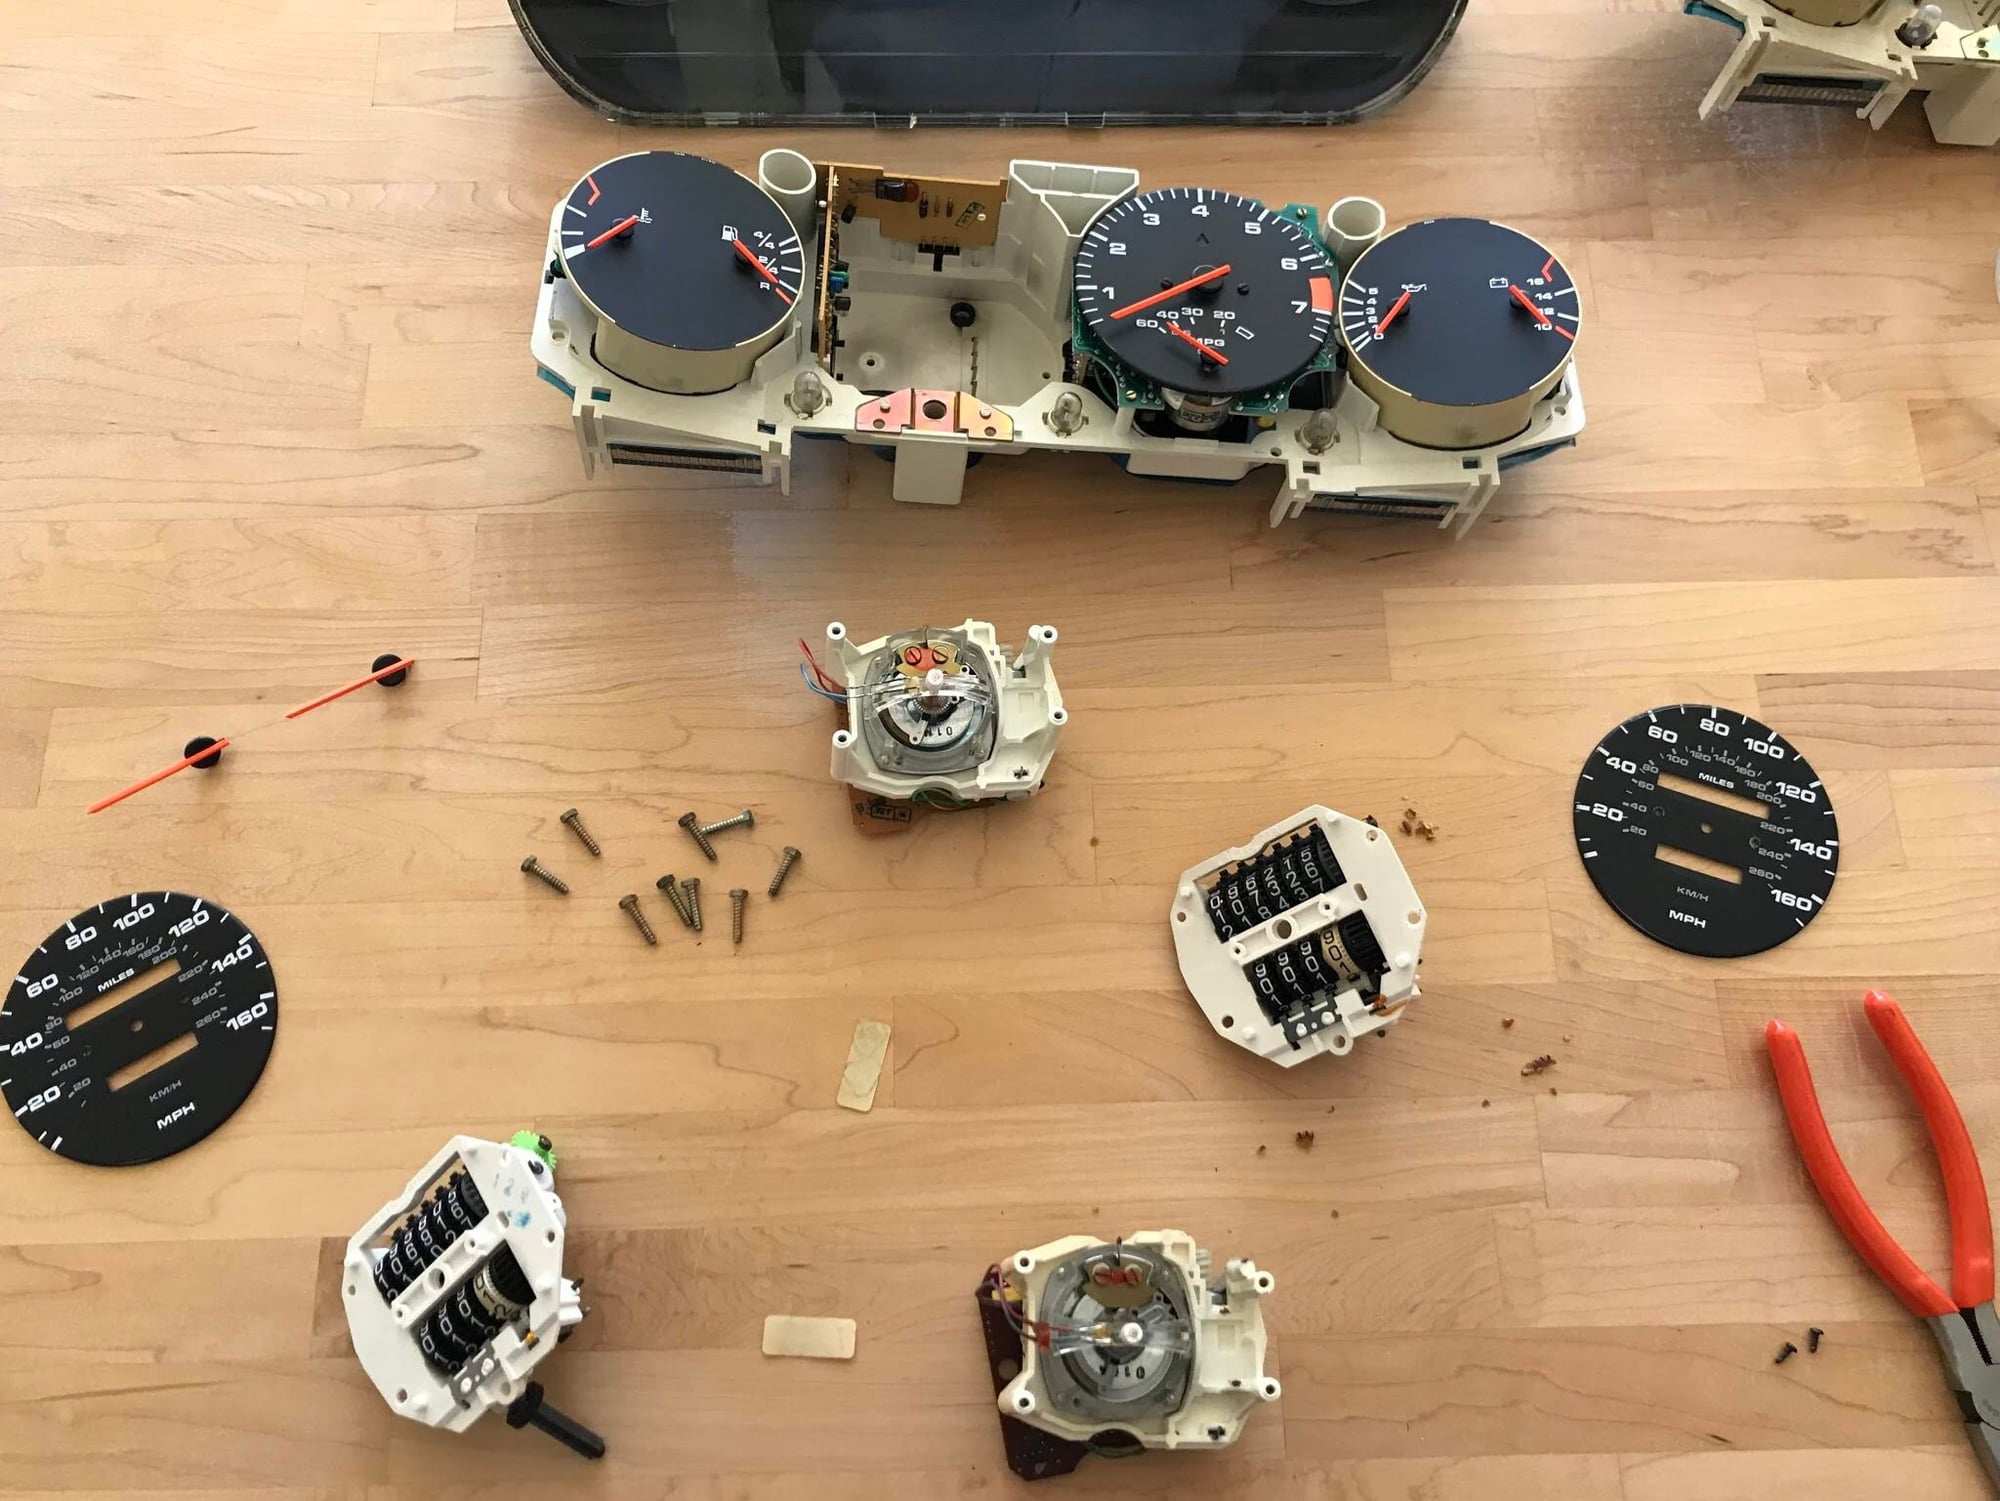


 Can't remember where I got the compressor.