When you click on links to various merchants on this site and make a purchase, this can result in this site earning a commission. Affiliate programs and affiliations include, but are not limited to, the eBay Partner Network.
Rear wiper delete plug needs to be UV resistant material - otherwise this should be doable. Maybe printed ABS with a UV resistant coating applied.
Sometimes I swear I'm the only person who paints printed parts that are going to be exposed to the elements.
A sandable filler/primer, a few swipes with some 120 grit, and some trim paint looks better (more OEM even) than bare print. Those body hole plugs above got painted, as well as the LED tail light conversion on the same vehicle:
While not directly related to our cars, emblems such as the one shown below might be a good item to print.
The one shown below is NLA from Porsche. You might see one from time to time show up on eBay listed with the typical 'unobtanium' price of around $3500.
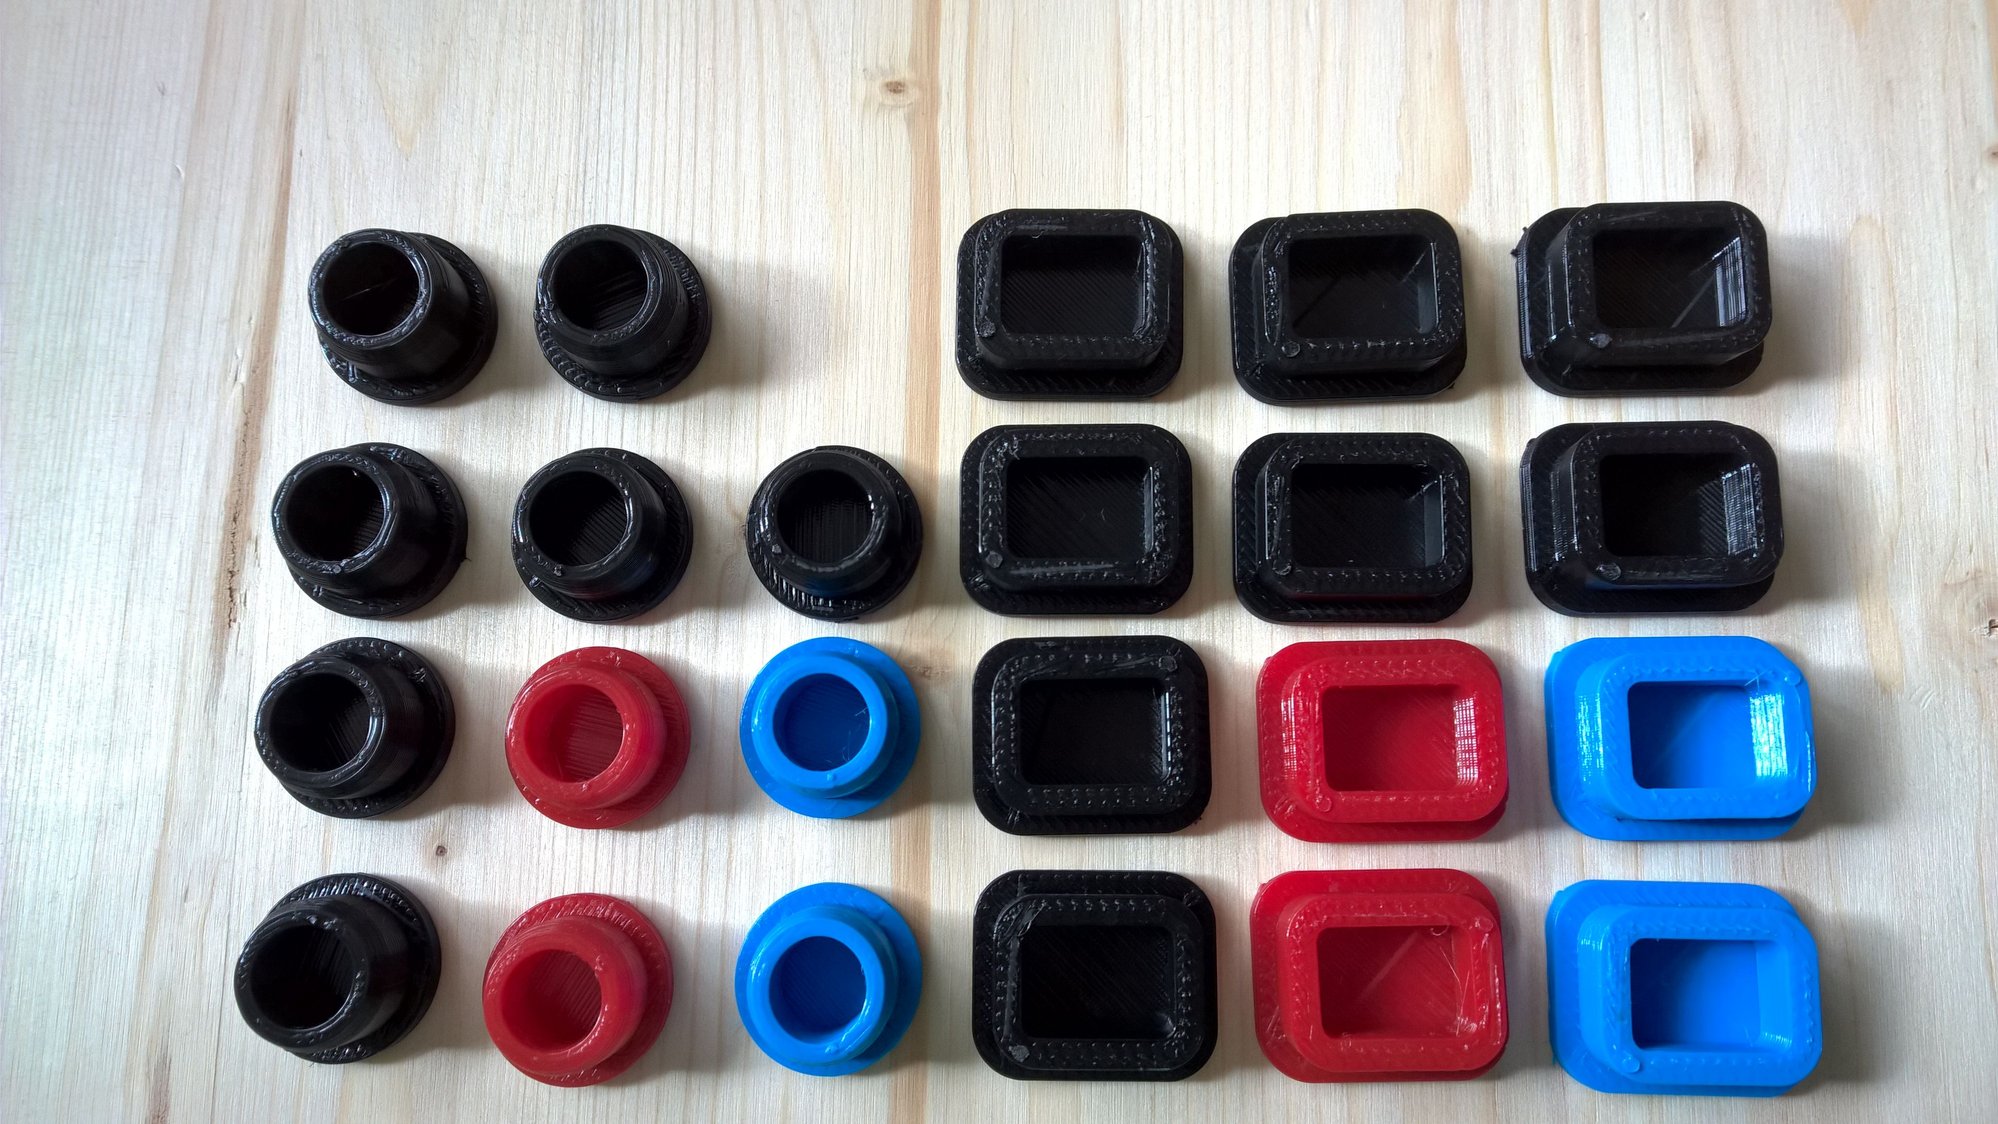
I printed a few plugs to get started and show the colour options available.
Square'ish plugs fit into the bellhousing 'window' for verifying TDC.
Round plugs fit into the bellhousing hole after removing the useless TDC sensor.
They fit snugly, so they require some finesse to install with the AOS in place. I used some double-sided tape and a long screwdriver to maneuver them into place. They are removable and re-usable.
I'll build up a small backlog, but I'm hoping to print these 'on-demand' for the most part. They will ship the next day after order.
Plug pricing is the same for either type, any colour:
One plug - $9 USD
Two plugs - $15 USD
Four plugs - $24 USD
Five or more - PM me.
Shipping (up to four plugs, same address, no-tracking)
Shipping to US.
'Small packet', $4.50 USD., 5-8 business days
Shipping within Canada
'Letter mail', $1.50 USD, 2-4 business days (according to Canada Post, don't hold me to it)
PM me your interest and I'll reply with my paypal address.
How big an item can you print, and what is the softening/melting point of the plastic?
My printer can (in theory) print a box about 11" x 11" x 10" high. Practically though, a large bed is better for multiple parts or maybe a long thin part.
There's so many factors that limit practical printing size:
Geometry
Thickness
Part orientation
Material
Printer speed
Random bad luck
Really have to look at each part on a case by case basis. Often trial and error.
Temps again depend on the material, but most materials are printing above 200�C (392�F). I've tested the Ninja Semi-Flex in a pot of boiling water and it maintained it's properties (listed max operating temp was 60�C).
I have a few parts installed in my car (in unquestionably hot areas) and have been driving it regularly over the past two weeks - Material (Ninja Flex) is holding up just fine.
Last edited by KVDR; 04-13-2016 at 06:27 PM.
Reason: Typo
GREAT! I had no luck sourcing replacement rubber - The original disintegrated when I tried to remove it prior to re-plating.
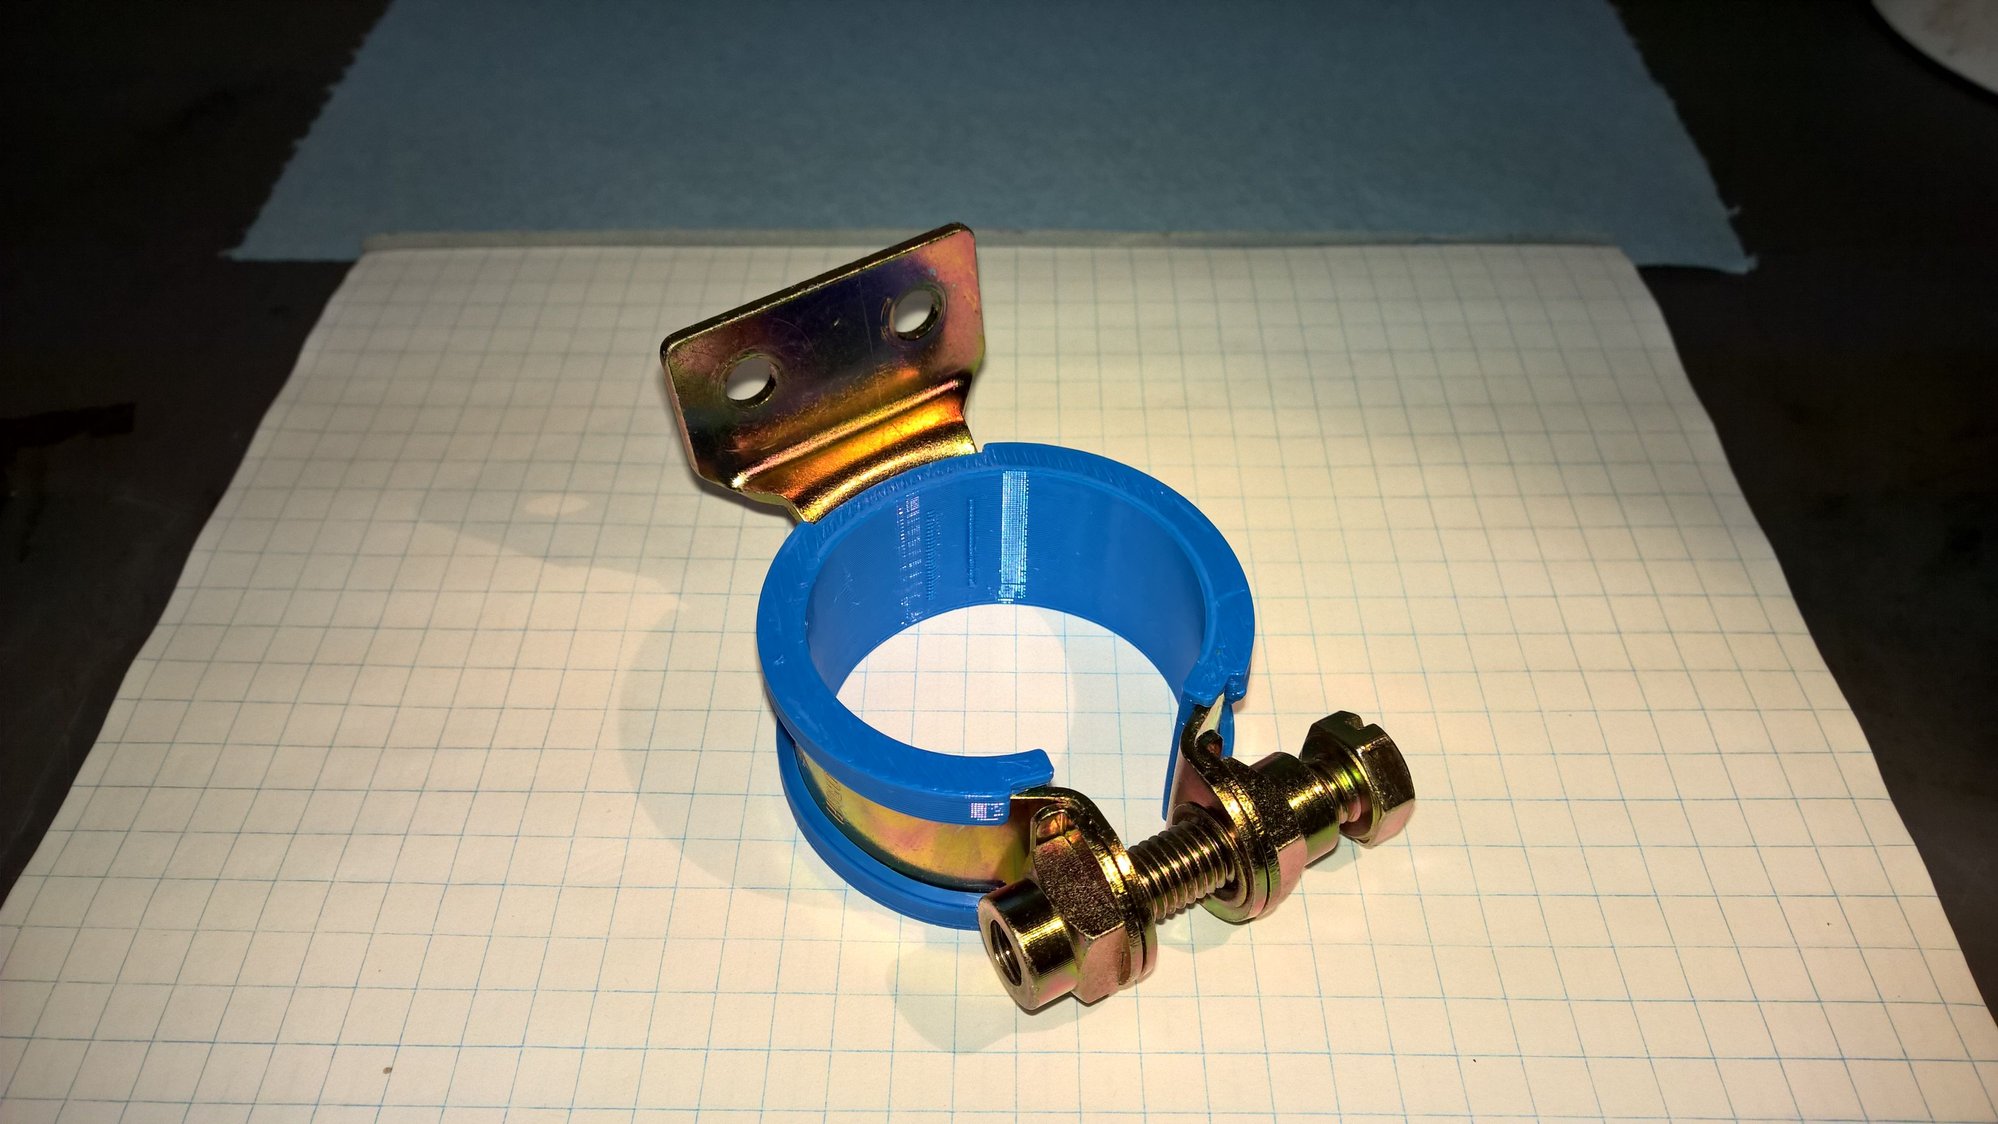
The ISV bracket is NLA and you would need to buy a complete water-pump bracket (or was it the other way around). Either way, standard P-clamp rubber is not wide enough. This was the only way.
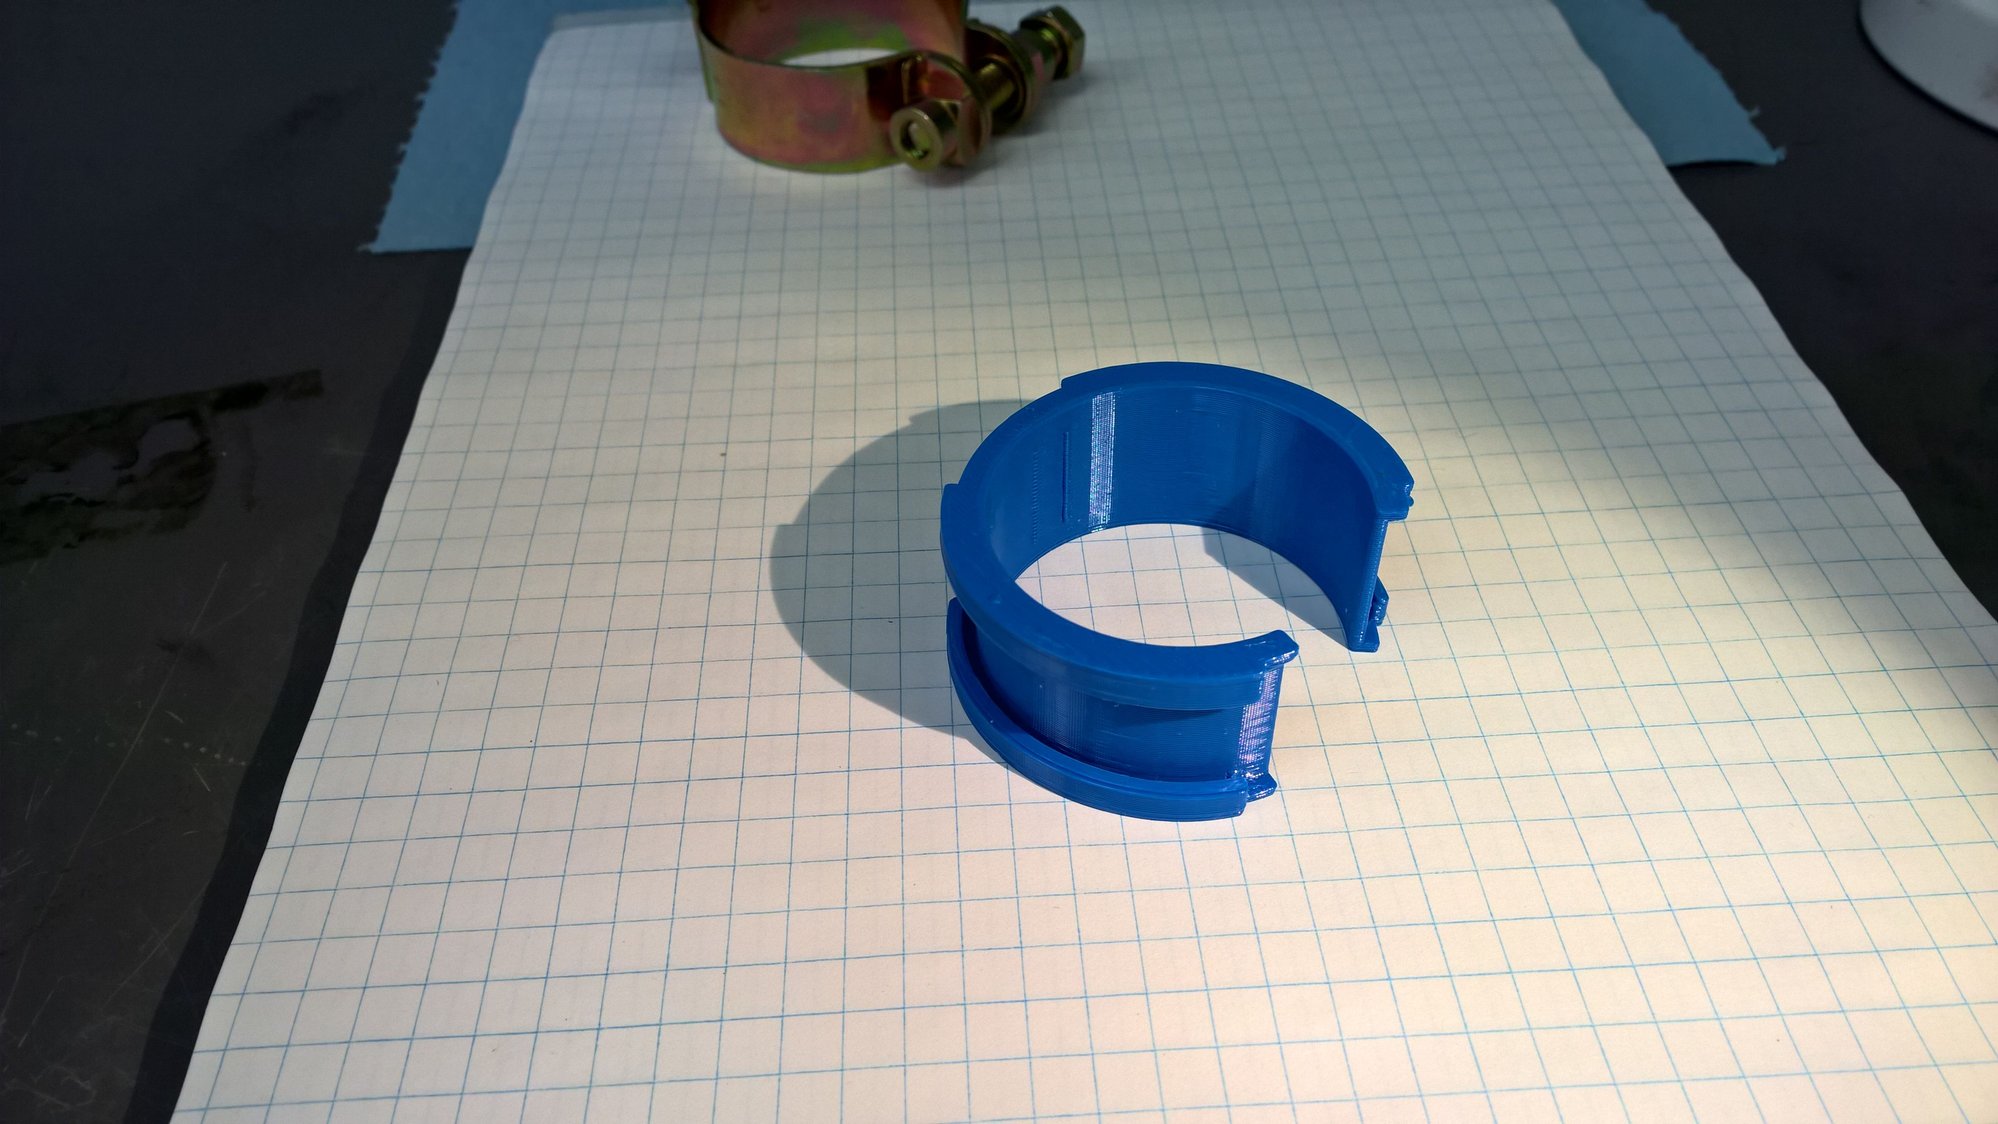
Attached is the STL 3D Printer source for the ISV and the water pump 'rubbers' so anyone can print their own (using Ninjaflex or similar flexible filament). They're similar in major dimensions, but the ISV bracket needed a bit more material 'notched out' to fit.
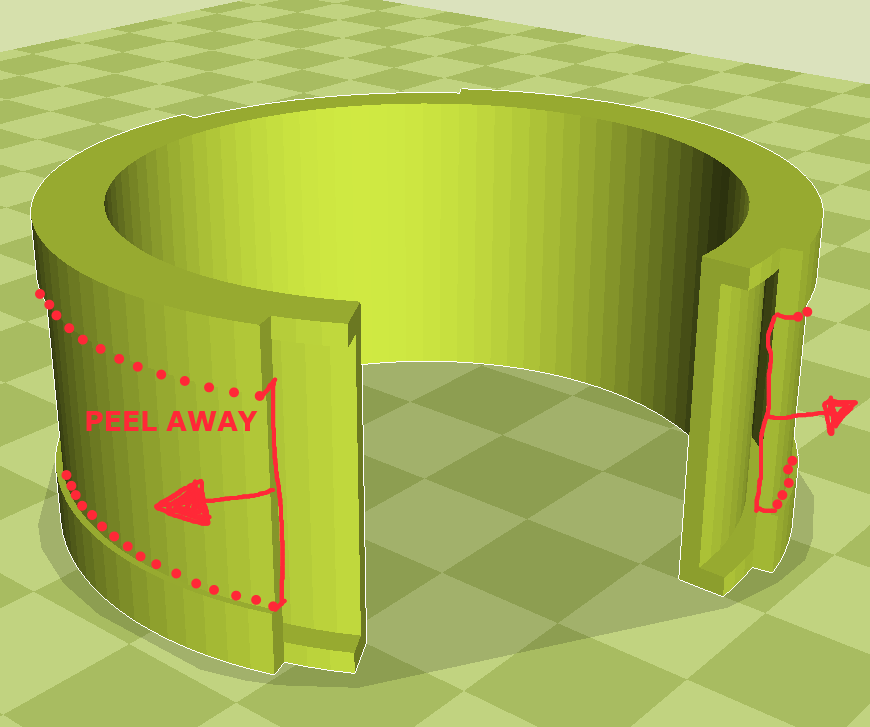
They print with some built in support material on the outside. I've found it's easily removed by peeling it away with pliers (rather than cutting). It makes a nice break between layers.
For those without printers, I'm going to throw them up on eBay tonight. Red, blue or black. Link to follow.
GREAT! I had no luck sourcing replacement rubber - The original disintegrated when I tried to remove it prior to re-plating.
The ISV bracket is NLA and you would need to buy a complete water-pump bracket (or was it the other way around). Either way, standard P-clamp rubber is not wide enough. This was the only way.
Attached is the STL 3D Printer source for the ISV and the water pump 'rubbers' so anyone can print their own (using Ninjaflex or similar flexible filament). They're similar in major dimensions, but the ISV bracket needed a bit more material 'notched out' to fit.
They print with some built in support material on the outside. I've found it's easily removed by peeling it away with pliers (rather than cutting). It makes a nice break between layers.
For those without printers, I'm going to throw them up on eBay tonight. Red, blue or black. Link to follow.
I had been sitting on the idea for a while. if my lawnmower wasn't so old and rusty I would actually chase this. i noticed the drain plug in my shower is almost fuch shaped also...

 03-30-2016, 12:55 AM