944 Turbo Mini Restoration
 12-29-2018, 07:12 PM
#1
Instructor
Thread Starter
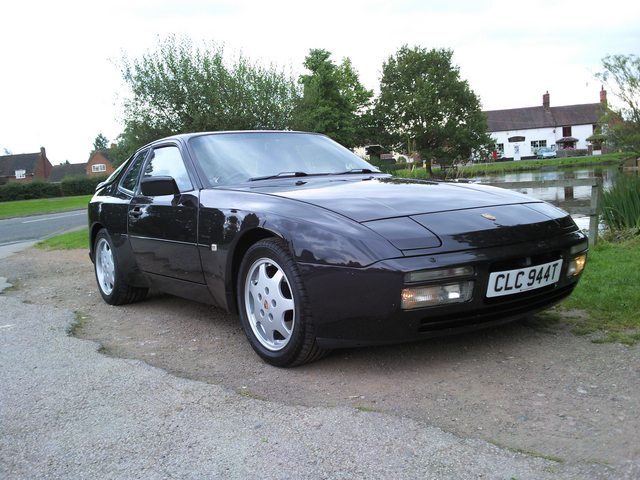
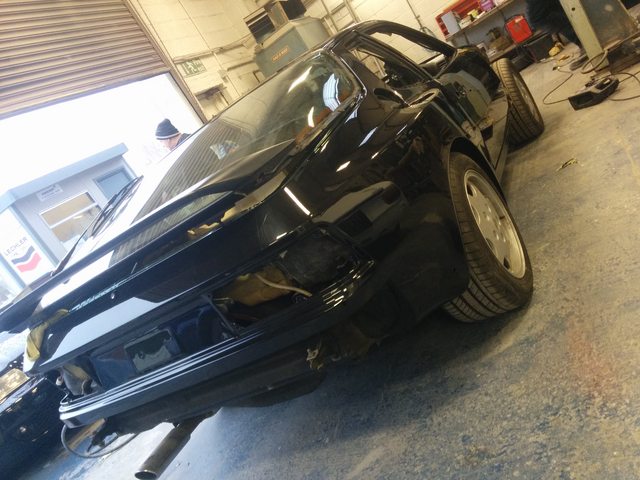
Hello Folks from across the pond in the United Kingdom! I've been a member of the forum for a long time now and regularly come hear to read the interesting posts. I've had my 944 Turbo since 2007 and for several years it was my daily driver right up until 2014 when I got a company car. I took the opportunity then to have a good look at the bodywork as some rust was starting to appear in the usual 944 places. Got it booked in with a local Porsche bodywork specialist who fitted some new body panels and repaired some sections. After this the car went into a local classic car bodyshop for a full glass out and bare metal respray in the original Panther Black. Car then went into storage for a few months whilst I sorted out moving home and it now sits in my garage where I've finishing off the assembly and attending to some maintenance items.
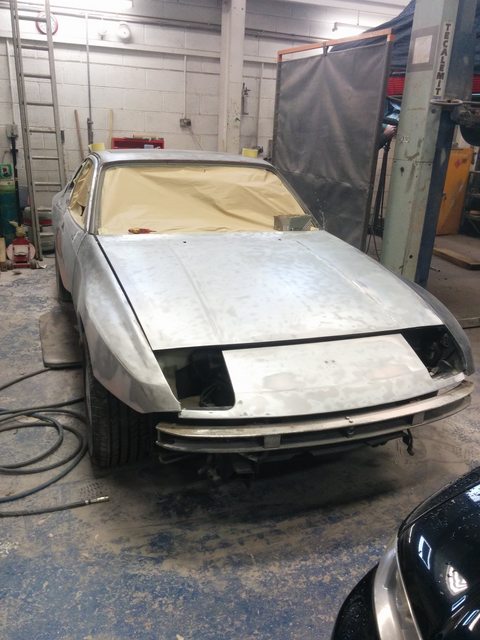
Picture pre-restoration -
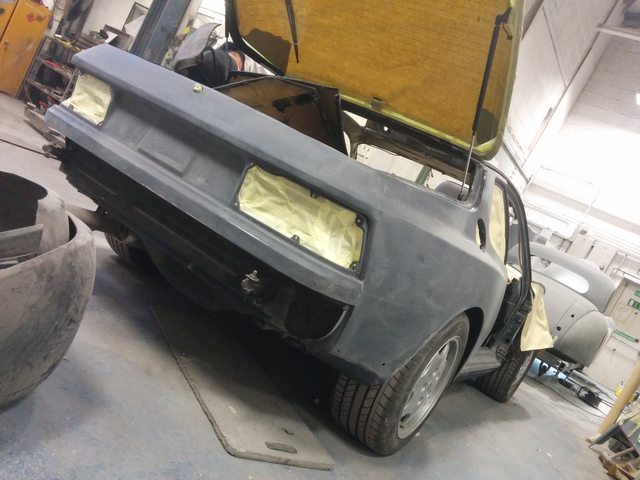
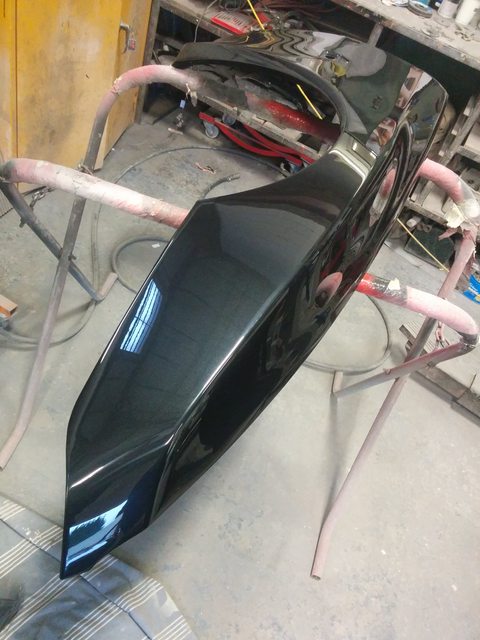
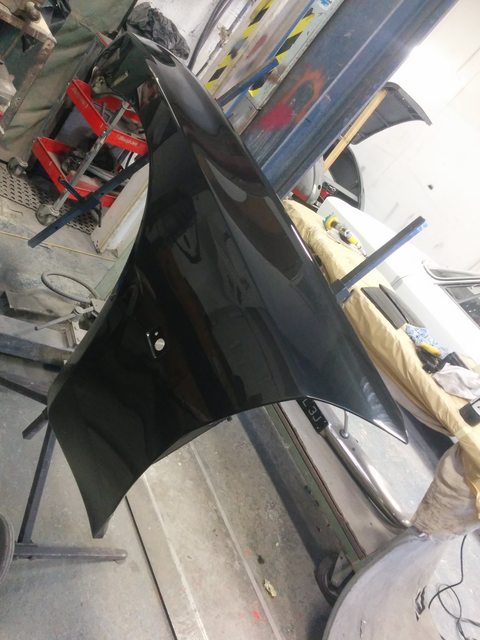
Bodywork, paint preparation and paint -
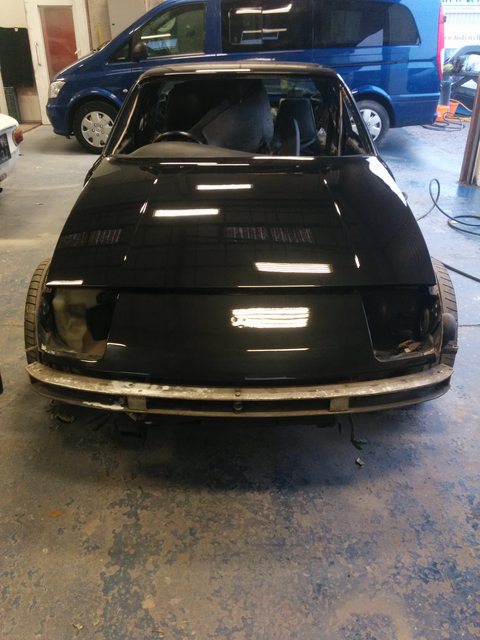
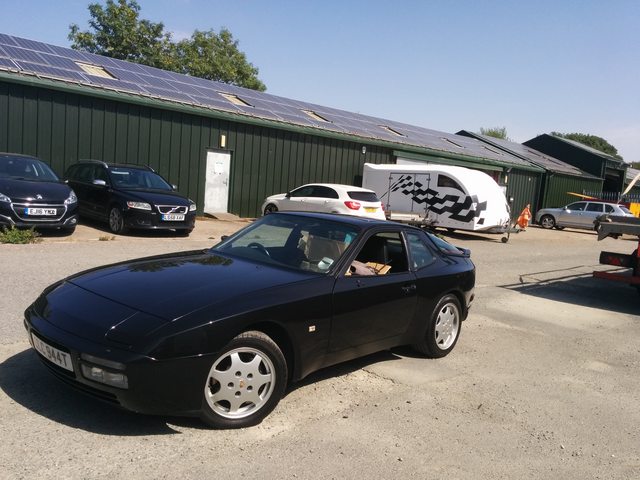
Prior to going into storage -
Picture pre-restoration -
Bodywork, paint preparation and paint -
Prior to going into storage -
 12-29-2018, 07:15 PM
#2
Instructor
Thread Starter
First order of work and I made a start on the interior, passenger seat wouldn't move forward or backward so after investigation I found that there was an electrical lead going to a rusty metal box that was sitting underneath the seat... Decided to remove the seat to find out what it was and then found I only had 2 loosely fitted bolts holding the seat down - (new bolts ready to fit!).
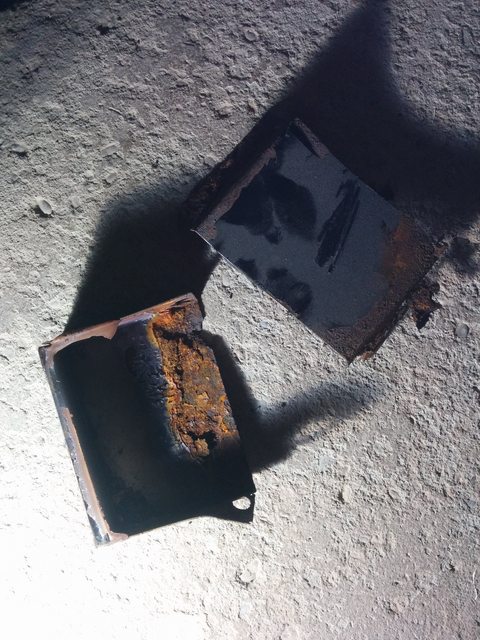
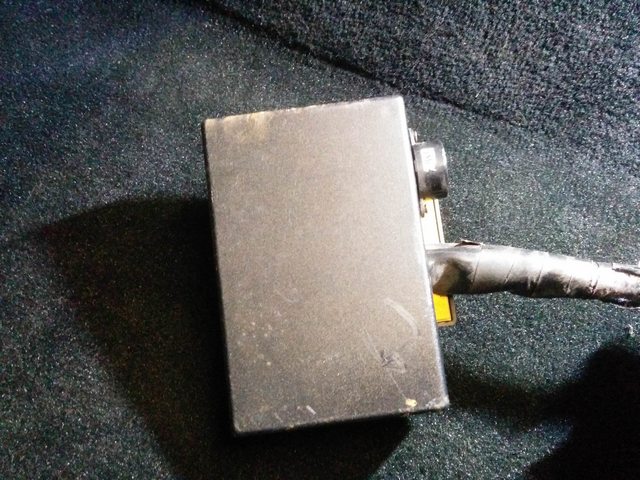
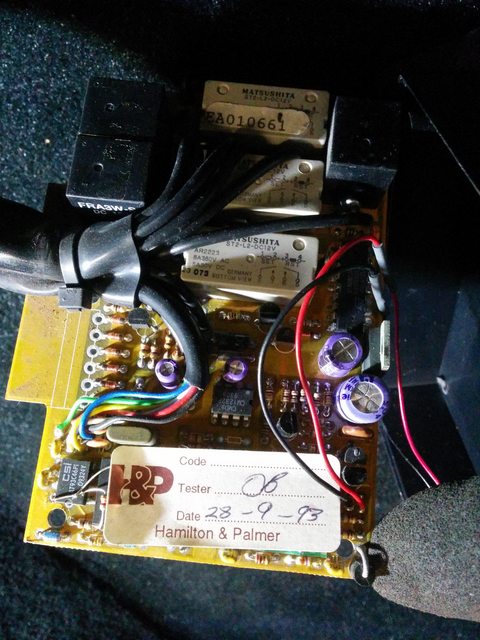
After a quick google and confirming my suspicions this was the original alarm / immobiliser fitted by Porsche UK. I'm pretty sure that it isn't functional as I now have a different more modern alarm / immobiliser fitted, however I've decided not to disturb the thick bundle of cables which heads into the unknown beneath the carpet. Found that it should have been tucked under the carpet beneath the seat and it sits there without impeding travel of the seat!
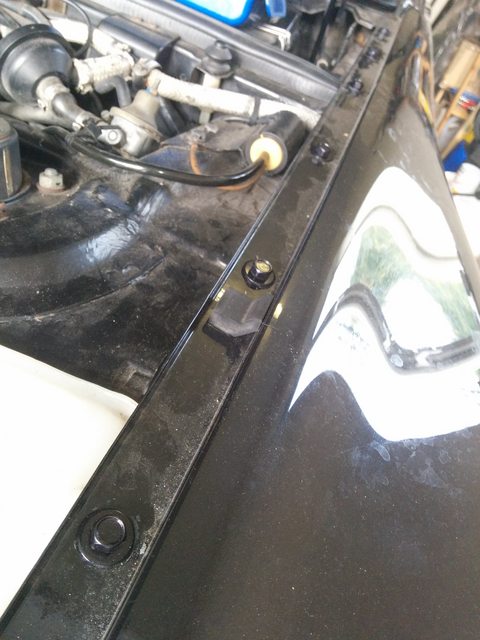
On to the next job, I was pretty sure that the front bumper and wings / fenders hadn't been installed properly judging by the wonky and rusty screws holding it all together. So time to dismantle it all!
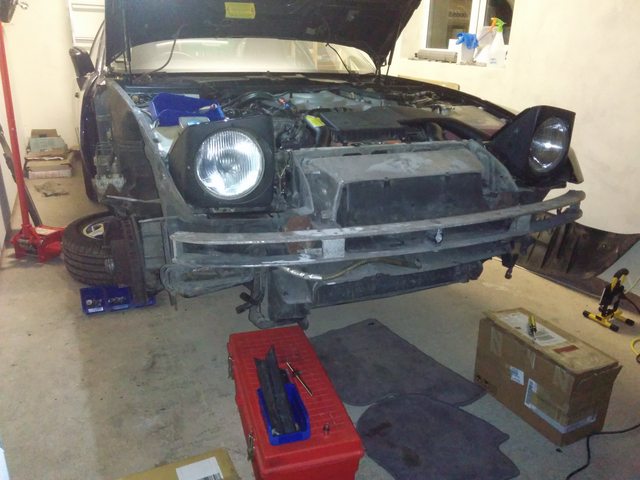
Whilst doing that I set about getting some new screws painted ready to fit to the top of the wings so it doesn't look ugly when opening the bonnet. I plan on using a piece of soft tubing to reinstall them and the tighten them very carefully to avoid chipping the paint.
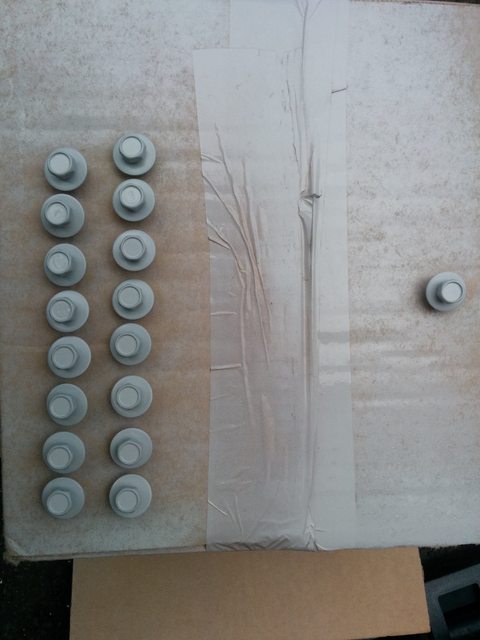
Was a bit disappointed with the final finish after applying the clear coat as they appear to be matte instead of glossy?!? - wondering if I'm going to need to polish them to bring out the gloss...
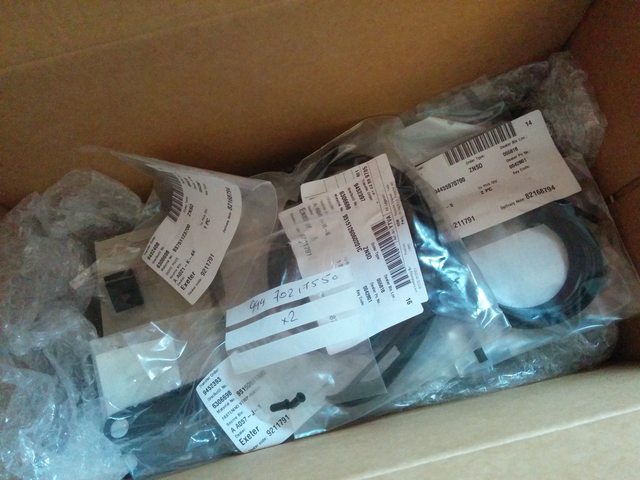
Whilst I was in the middle of that the courier showed up with a present from Porsche Exeter :worship:
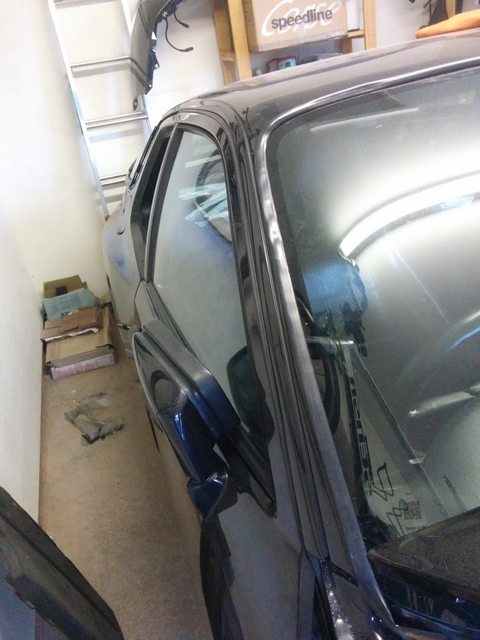
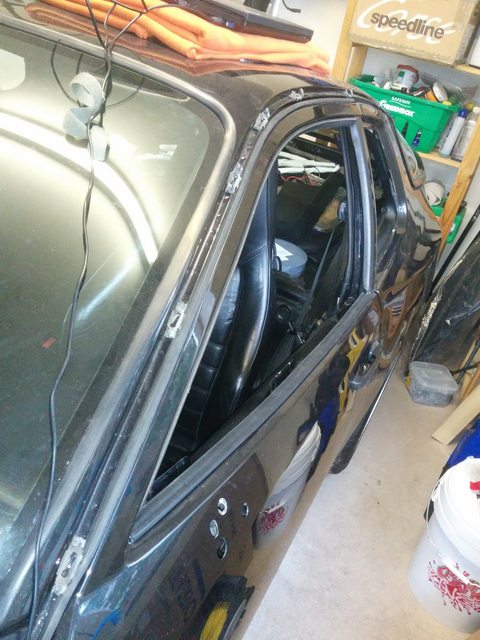
And then I managed to get the drivers side roof trim and new seal fitted.
After a quick google and confirming my suspicions this was the original alarm / immobiliser fitted by Porsche UK. I'm pretty sure that it isn't functional as I now have a different more modern alarm / immobiliser fitted, however I've decided not to disturb the thick bundle of cables which heads into the unknown beneath the carpet. Found that it should have been tucked under the carpet beneath the seat and it sits there without impeding travel of the seat!
On to the next job, I was pretty sure that the front bumper and wings / fenders hadn't been installed properly judging by the wonky and rusty screws holding it all together. So time to dismantle it all!
Whilst doing that I set about getting some new screws painted ready to fit to the top of the wings so it doesn't look ugly when opening the bonnet. I plan on using a piece of soft tubing to reinstall them and the tighten them very carefully to avoid chipping the paint.
Was a bit disappointed with the final finish after applying the clear coat as they appear to be matte instead of glossy?!? - wondering if I'm going to need to polish them to bring out the gloss...
Whilst I was in the middle of that the courier showed up with a present from Porsche Exeter :worship:
And then I managed to get the drivers side roof trim and new seal fitted.
12-29-2018, 07:18 PM
#3
Instructor
Thread Starter
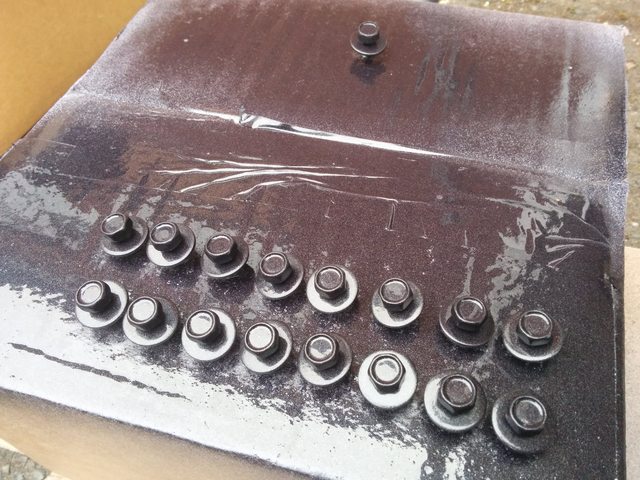
Found that the screws I painted for the wings came out a bit milky after applying the clear lacquer to it. Luckily a spot of autoglym super resin polish sorted it right out!

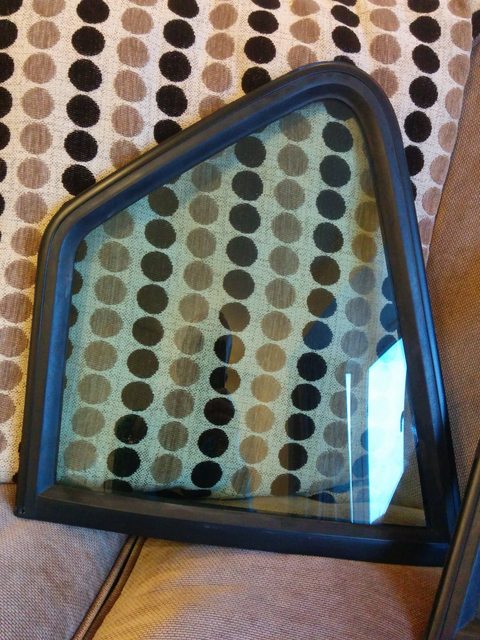
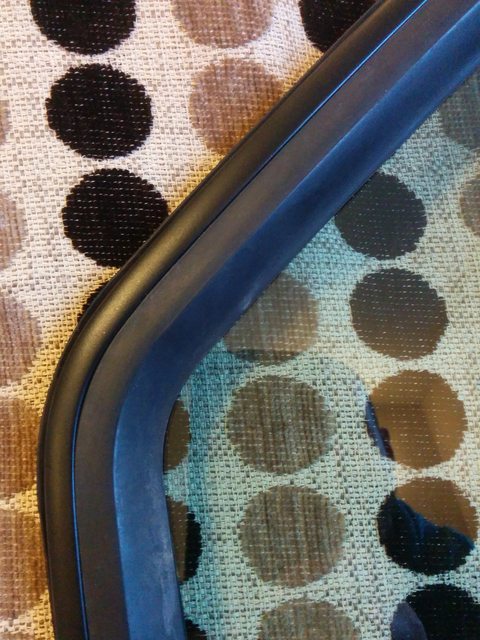
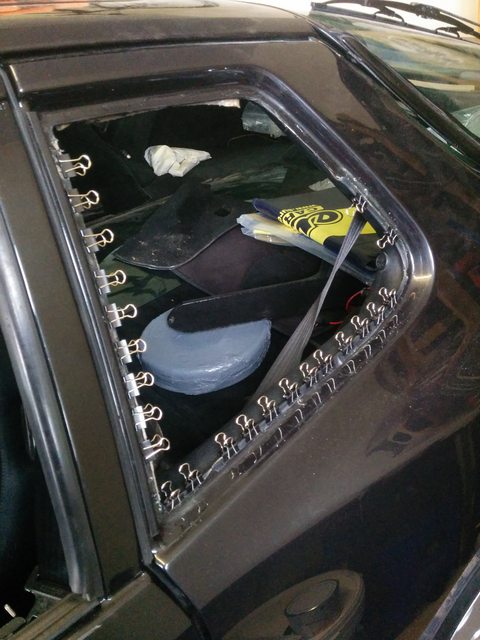
I then cleaned up the rear side windows and removed the old immobiliser stickers, whilst I was doing that I sanded down the metal trims that fit into the rubber seals and repainted them with some satin black paint.
Mate came over and we got the front wings fitted with the new screws - only loosely fitted for now until I get the bumper back on.

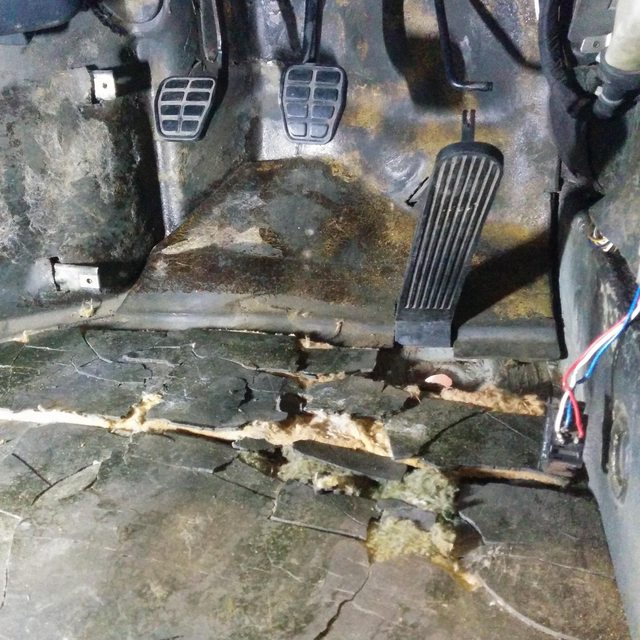
Also found there was a few odd bits of carpet underlay / dampening material in the boot. Took out both front seats which weren't attached properly and found that the missing bits went on the drivers side.
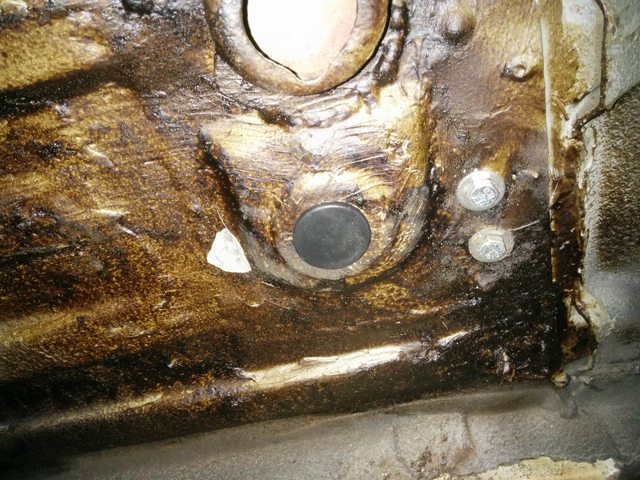
Whilst I was in there I refitted the accelerator pedal correctly, hammered the floor flat and sealed a hole in the floor with a rubber bung. Just need to seal it all when all is done with some underseal and then fit the plastic chassis protector.

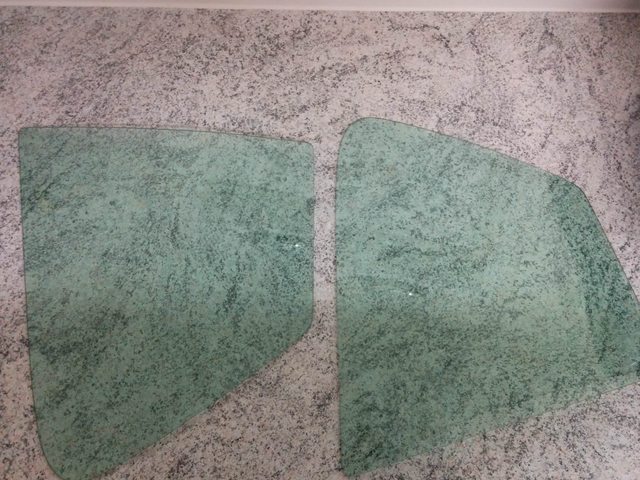
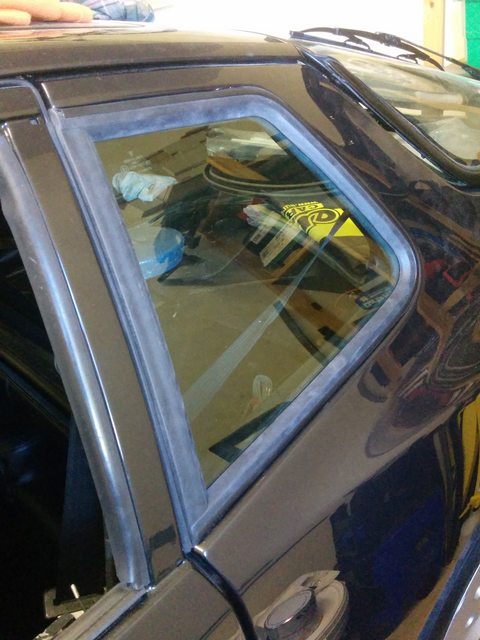
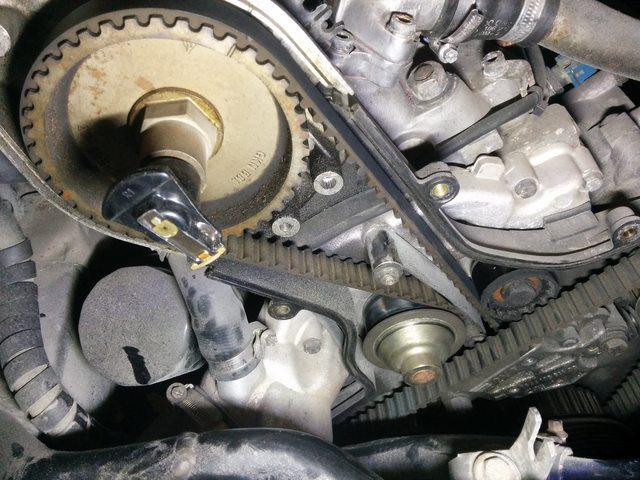
Next job is to put the rear windows back in, remove the power steering pump for new seals and change the timing and balance belts so a bit of preparation already done -
I then cleaned up the rear side windows and removed the old immobiliser stickers, whilst I was doing that I sanded down the metal trims that fit into the rubber seals and repainted them with some satin black paint.
Mate came over and we got the front wings fitted with the new screws - only loosely fitted for now until I get the bumper back on.
Also found there was a few odd bits of carpet underlay / dampening material in the boot. Took out both front seats which weren't attached properly and found that the missing bits went on the drivers side.
Whilst I was in there I refitted the accelerator pedal correctly, hammered the floor flat and sealed a hole in the floor with a rubber bung. Just need to seal it all when all is done with some underseal and then fit the plastic chassis protector.
Next job is to put the rear windows back in, remove the power steering pump for new seals and change the timing and balance belts so a bit of preparation already done -
12-29-2018, 07:19 PM
#4
Instructor
Thread Starter
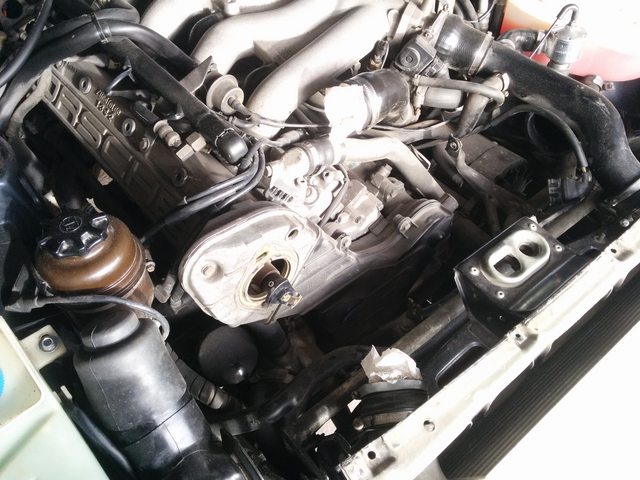
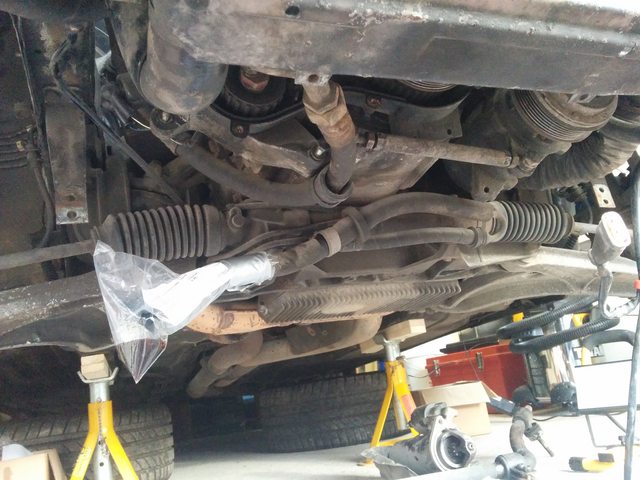
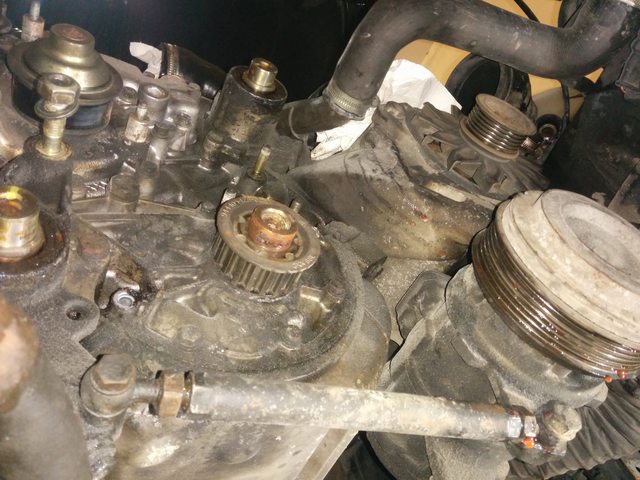
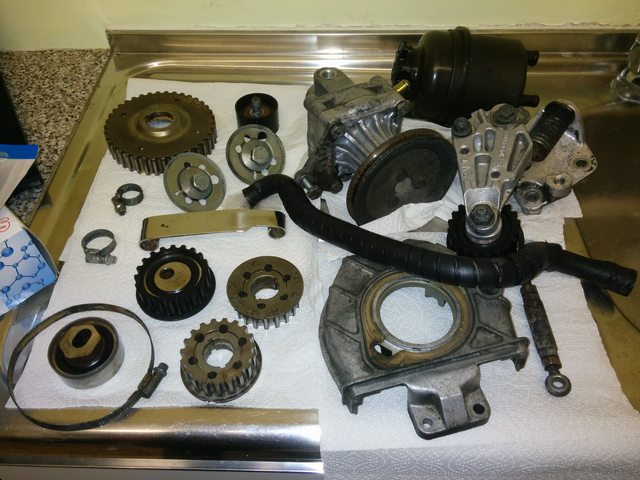
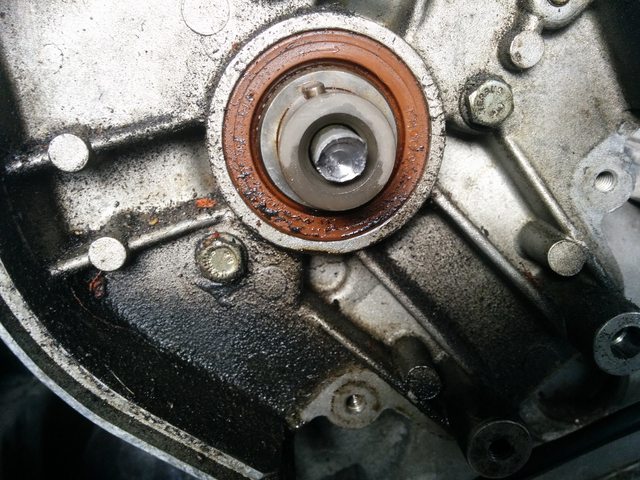
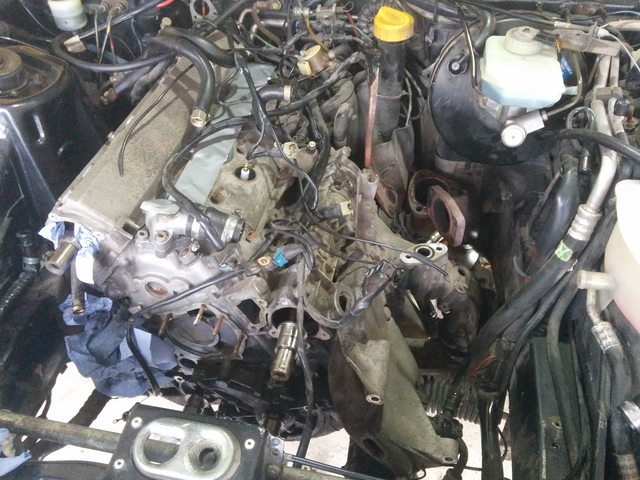
I fitted the rear quarter windows back in and began stripping down the front of the engine ready to replace the cam and balance belts. After getting in I realised that a little more work would be required so I ended up removing the power steering pump and anti-roll bar.
The balance shaft front seals look a bit weepy so will be getting replaced along with the front crankshaft and camshaft seals. Water pump pulley / bearing seems fine and all the rollers bar one idler can be reused. I'm hoping that the balance shaft races and oil pump gear aren't worn but haven't got to them yet so crossing those fingers (oil pump gear is quite expensive...).
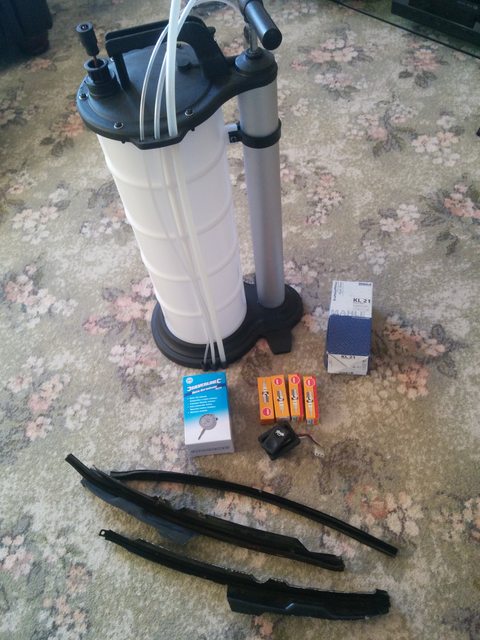
Picked up some more bits including brand new and correct spark plugs (previous ones don't appear to be correct).
And finally cleaned most of the parts ready for installation.
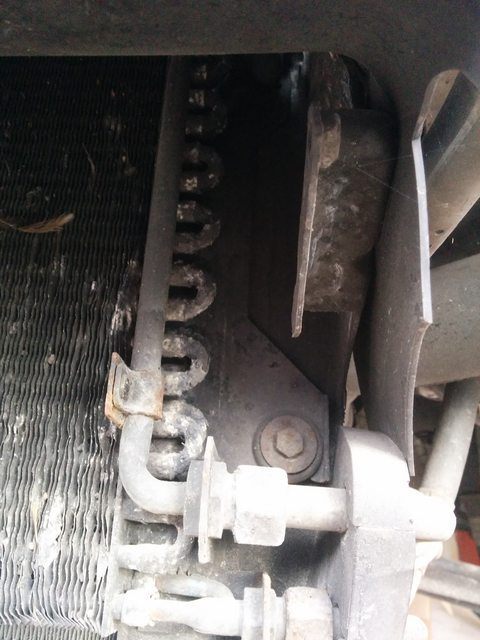
No wonder the air conditioning never worked the condensor looks completely knackered - but not a priority currently so will perhaps get replaced at a later time.
The balance shaft front seals look a bit weepy so will be getting replaced along with the front crankshaft and camshaft seals. Water pump pulley / bearing seems fine and all the rollers bar one idler can be reused. I'm hoping that the balance shaft races and oil pump gear aren't worn but haven't got to them yet so crossing those fingers (oil pump gear is quite expensive...).
Picked up some more bits including brand new and correct spark plugs (previous ones don't appear to be correct).
And finally cleaned most of the parts ready for installation.
No wonder the air conditioning never worked the condensor looks completely knackered - but not a priority currently so will perhaps get replaced at a later time.
01-02-2019, 05:10 PM
#5
Instructor
Thread Starter
Spent a few hours on New Years day and managed to do a few more things -
1. Removed the inlet manifold (after procuring a deep offset spanner to reach one of the awkwardly placed retaining bolts)
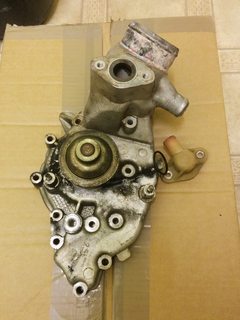
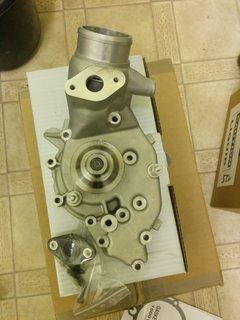
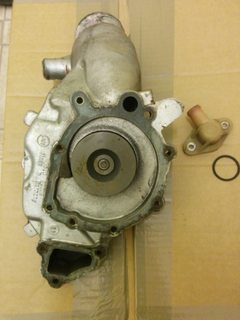
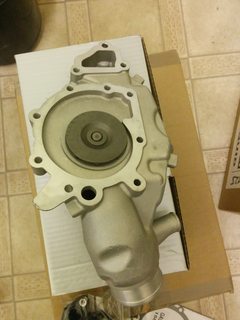
2. Removed the water pump (surprisingly easily after reading all the horror stories about snapped bolts and studs)
3. Drained the oil
4. Had a mare with the oil filter which the garage must have over-tightened when the oil was last changed.
So the water pump didn't actually look that bad and the bearing feels as good as the new pump (was a Laso) but after going through my receipts it was changed during the later months of 2007 so going on for 11 years old and just over 60k miles. I was looking at the Geba pump on Design911's website the other night and must have clicked the order button by mistake :grin:
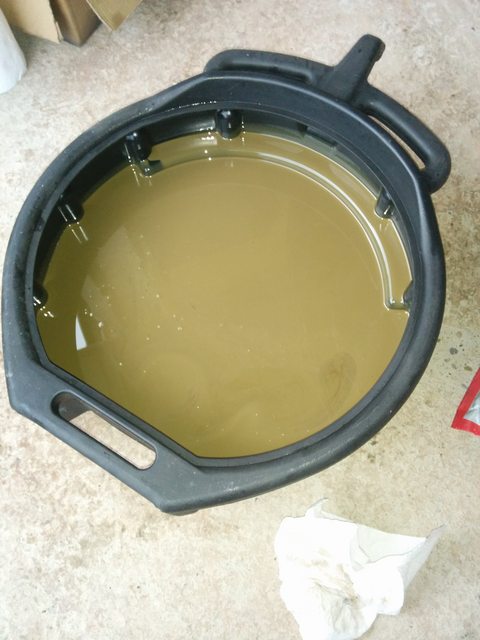
Now the oil is a bit of a horror... it has a strong smell of petrol in it but still has some viscosity. The colour looks very odd, almost like milk chocolate but the original oil was purple... last change was Royal Purple fully synthetic and I can't quite remember what used Royal Purple looks like, so it could be perfectly normal. The magnetic plug was covered in goo I set about spreading it out on a paper towel and couldn't see any metallic particles in it so wondering why it was stuck to the plug like that. Also I'm hoping that the petrol smell and perhaps the colour are more or less down to the car being off the road for 4-5 years and then the storage people flooding the engine when they tried to start it a few months ago (they never did get it started and claimed the battery was dead - which wasn't strictly true as I managed to charge it up with my CTEK conditioner fine). I've got some Shell Helix HX7 10W40 semi-synthetic ready to put in as a temporary flush oil when it is all back together.

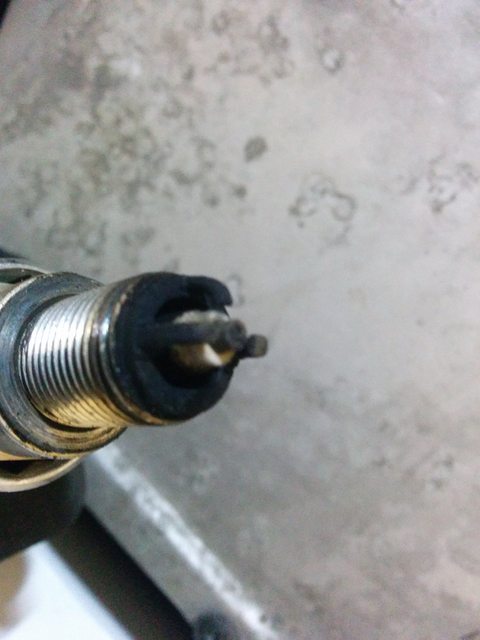
Once I am done with the front end engine seal and all the standard service items I will be doing a fuel pressure check to make sure the fuel pressure regulator hasn't gone bad (hoping not as they seem to be around �300!). I will keep an eye on the new spark plugs to see if any of the cylinders is getting overfueled. The picture of the spark plug in the posts above is from cylinder #1 and was very black and sooty, I haven't checked the others yet...
And then there was the goddamn oil filter that Jeff Capes tightened up... I tried a oil filter socket wrench (that just slipped). Then I tried my oil filter chain wrench (it moved about a mm or two and then proceeded to start squashing the filter and punctured it). I then resorted to the screwdriver stabbed through the side method and still couldn't get enough torque to get it to turn (perhaps needed an extra long screwdriver). So now I've decided to sacrifice my oil filter socket wrench and stuck it to the top of the oil filter with some araldite. Going to let it cure for a good couple of days and then give it another go. I'm hoping that should do the trick as I've had good results with araldite before. If that fails than hell knows what I will do - probably cry! :sad:
1. Removed the inlet manifold (after procuring a deep offset spanner to reach one of the awkwardly placed retaining bolts)
2. Removed the water pump (surprisingly easily after reading all the horror stories about snapped bolts and studs)
3. Drained the oil
4. Had a mare with the oil filter which the garage must have over-tightened when the oil was last changed.
So the water pump didn't actually look that bad and the bearing feels as good as the new pump (was a Laso) but after going through my receipts it was changed during the later months of 2007 so going on for 11 years old and just over 60k miles. I was looking at the Geba pump on Design911's website the other night and must have clicked the order button by mistake :grin:
Now the oil is a bit of a horror... it has a strong smell of petrol in it but still has some viscosity. The colour looks very odd, almost like milk chocolate but the original oil was purple... last change was Royal Purple fully synthetic and I can't quite remember what used Royal Purple looks like, so it could be perfectly normal. The magnetic plug was covered in goo I set about spreading it out on a paper towel and couldn't see any metallic particles in it so wondering why it was stuck to the plug like that. Also I'm hoping that the petrol smell and perhaps the colour are more or less down to the car being off the road for 4-5 years and then the storage people flooding the engine when they tried to start it a few months ago (they never did get it started and claimed the battery was dead - which wasn't strictly true as I managed to charge it up with my CTEK conditioner fine). I've got some Shell Helix HX7 10W40 semi-synthetic ready to put in as a temporary flush oil when it is all back together.
Once I am done with the front end engine seal and all the standard service items I will be doing a fuel pressure check to make sure the fuel pressure regulator hasn't gone bad (hoping not as they seem to be around �300!). I will keep an eye on the new spark plugs to see if any of the cylinders is getting overfueled. The picture of the spark plug in the posts above is from cylinder #1 and was very black and sooty, I haven't checked the others yet...
And then there was the goddamn oil filter that Jeff Capes tightened up... I tried a oil filter socket wrench (that just slipped). Then I tried my oil filter chain wrench (it moved about a mm or two and then proceeded to start squashing the filter and punctured it). I then resorted to the screwdriver stabbed through the side method and still couldn't get enough torque to get it to turn (perhaps needed an extra long screwdriver). So now I've decided to sacrifice my oil filter socket wrench and stuck it to the top of the oil filter with some araldite. Going to let it cure for a good couple of days and then give it another go. I'm hoping that should do the trick as I've had good results with araldite before. If that fails than hell knows what I will do - probably cry! :sad:
01-19-2019, 06:44 PM
#6
Instructor
Thread Starter
Oh I've missed a week 
So my drill bits arrived last week and I managed to drill the head off the cheese head bolt but the shaft was well and truly stuck inside the end of the cam (more on that further down).
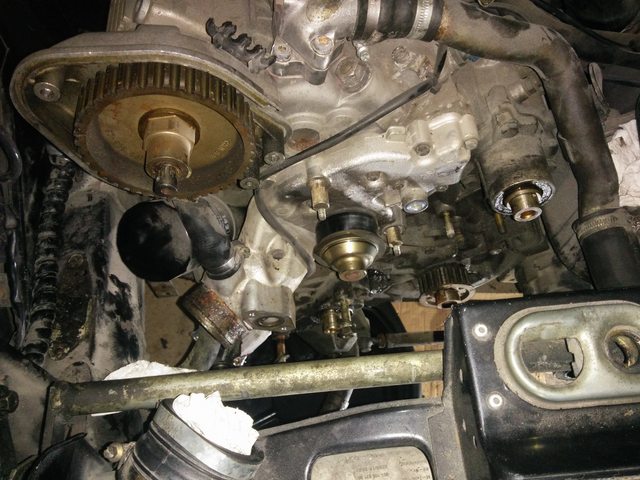
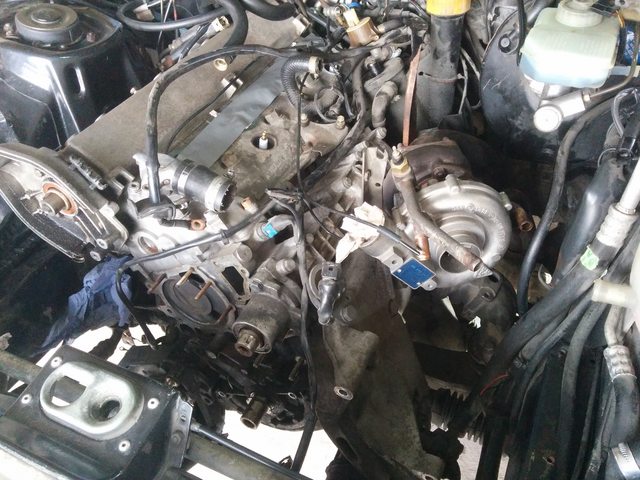
I also managed to get all but one bolt from the turbo assembly and that one is proving to be a right pain in the *** - I'm going to try a crowsfoot wrench on it as the access is extremely tight.

This is all so I can get to the blooming air oil separator and replace the seals.
And today I finally beat the damn spline bolt on the camshaft with the help of some stanley vise grips (and penetrating fluid that has had 5 days to soak in - was right down in the thread so worked a treat).
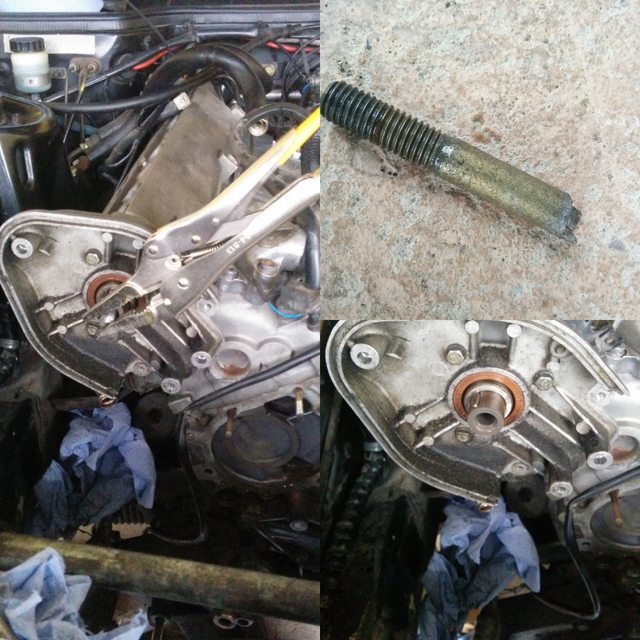
Finished off by removing the front covers for the balance shafts and camshaft to get the old seals removed and clean them up before refitting.
Next jobs are -
I've also been drooling over a nice new hose set for the oil cooler lines as they look well shabby - will make up a set of stainless braided lines.
https://rennlist.com/forums/944-turb...ent-lines.html
So my drill bits arrived last week and I managed to drill the head off the cheese head bolt but the shaft was well and truly stuck inside the end of the cam (more on that further down).
I also managed to get all but one bolt from the turbo assembly and that one is proving to be a right pain in the *** - I'm going to try a crowsfoot wrench on it as the access is extremely tight.
This is all so I can get to the blooming air oil separator and replace the seals.
And today I finally beat the damn spline bolt on the camshaft with the help of some stanley vise grips (and penetrating fluid that has had 5 days to soak in - was right down in the thread so worked a treat).
Finished off by removing the front covers for the balance shafts and camshaft to get the old seals removed and clean them up before refitting.
Next jobs are -
- Get the last bolt off the turbo
- Clean-up front of engine
- Replace crankshaft seal and oil pump drive gear
- Fit new balance shaft and camshaft seals
- Fit waterpump
I've also been drooling over a nice new hose set for the oil cooler lines as they look well shabby - will make up a set of stainless braided lines.
https://rennlist.com/forums/944-turb...ent-lines.html
01-19-2019, 10:28 PM
#7
Drifting
Oh man you bring back memories of removing the turbo to do my own AOS seals. For the crossover to turbo bolts, I used the method by the mechanic on this tutorial (see step 13):
https://www.pelicanparts.com/techart...eplacement.htm
As for your milky-coloured oil, that might be the infamous oil cooler housing seals. Do you have that same colour foamy stuff under the oil filler cap (and down the neck)? I did, and it's all gone now that I've changed those seals. Never had that kinda oil drain colour though...
Trending Topics
01-20-2019, 05:22 AM
#8
Instructor
Thread Starter
Oh man you bring back memories of removing the turbo to do my own AOS seals. For the crossover to turbo bolts, I used the method by the mechanic on this tutorial (see step 13):
https://www.pelicanparts.com/techart...eplacement.htm
As for your milky-coloured oil, that might be the infamous oil cooler housing seals. Do you have that same colour foamy stuff under the oil filler cap (and down the neck)? I did, and it's all gone now that I've changed those seals. Never had that kinda oil drain colour though...
https://www.pelicanparts.com/techart...eplacement.htm
As for your milky-coloured oil, that might be the infamous oil cooler housing seals. Do you have that same colour foamy stuff under the oil filler cap (and down the neck)? I did, and it's all gone now that I've changed those seals. Never had that kinda oil drain colour though...
EDIT - YES! - I had to use a 2 foot breaker bar plus a universal joint and an extension and it finally let go... will completely remove later in the week when I feel like lieing down beneath the car again! - Cheers!
Also the milky oil stinks of petrol / gasoline - car hasn't been driven since 2014 so I'm hoping that it will disappear after an oil flush. Also the turbos don't have an oil to water cooler as far as I'm aware as they have the external oil cooler setup, but they still have the oil filter mount housing which has a short connecting tube inside.
Thanks!
Last edited by dlknight; 01-20-2019 at 06:28 AM.
01-20-2019, 10:58 AM
#9
Drifting
Glad you got that one out. How is the lower bolt that threads into the welded nut? Careful on that one: mine snapped and I ended up having to cut (manually, with a hacksaw) that welded nut off. There's a reason they weld that nut on and if you have to cut it off like I did, you'll find out why on re-assembly. It's possible but one of the most interesting of jobs.
Mine's a 951 and yes, it's the housing with no actual cooler in it whose seals fail and result in milky white stuff in the AOS and I guess in the oil when draining. To re-assembly that baby, you'll need a special tool for the OPRV part. Should you need to change those seals, buy the tool when you order the seals kit or you'll be waiting another couple of weeks
Mine's a 951 and yes, it's the housing with no actual cooler in it whose seals fail and result in milky white stuff in the AOS and I guess in the oil when draining. To re-assembly that baby, you'll need a special tool for the OPRV part. Should you need to change those seals, buy the tool when you order the seals kit or you'll be waiting another couple of weeks
01-20-2019, 03:11 PM
#10
Instructor
Thread Starter
Glad you got that one out. How is the lower bolt that threads into the welded nut? Careful on that one: mine snapped and I ended up having to cut (manually, with a hacksaw) that welded nut off. There's a reason they weld that nut on and if you have to cut it off like I did, you'll find out why on re-assembly. It's possible but one of the most interesting of jobs.
Mine's a 951 and yes, it's the housing with no actual cooler in it whose seals fail and result in milky white stuff in the AOS and I guess in the oil when draining. To re-assembly that baby, you'll need a special tool for the OPRV part. Should you need to change those seals, buy the tool when you order the seals kit or you'll be waiting another couple of weeks
Mine's a 951 and yes, it's the housing with no actual cooler in it whose seals fail and result in milky white stuff in the AOS and I guess in the oil when draining. To re-assembly that baby, you'll need a special tool for the OPRV part. Should you need to change those seals, buy the tool when you order the seals kit or you'll be waiting another couple of weeks
 - it broke loose with a nice satisfying crack sound but didn't break. I'd tried loads of penetrating fluid and also a blow torch yesterday so maybe that helped.
The OPRV looks pretty dry on the outside so currently I wasn't planning on dismantling any of that - I'm hoping it was just the result of being stood for so long without being run and then the last person that tried to start it flooded the engine a bit due to a flat battery.
Going to run a fresh fill of Shell Helix through and change it out after a couple hundred miles and see what happens, can always come back and look at the OPRV as shouldn't take me long to clear a path to access it again (unlike the goddamn AOS).
Cheers
01-27-2019, 04:33 AM
#12
Instructor
Thread Starter
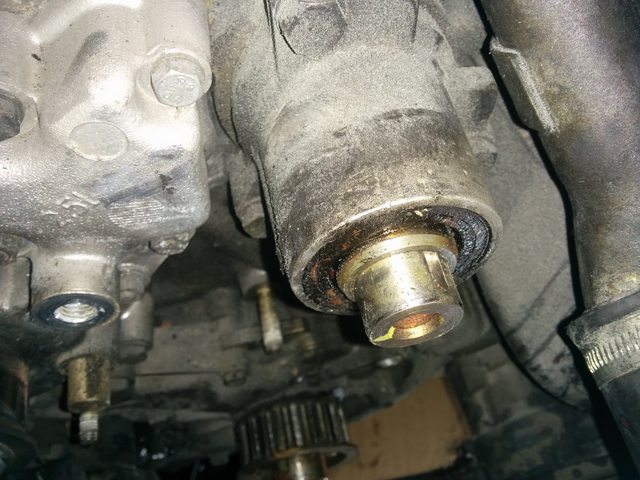
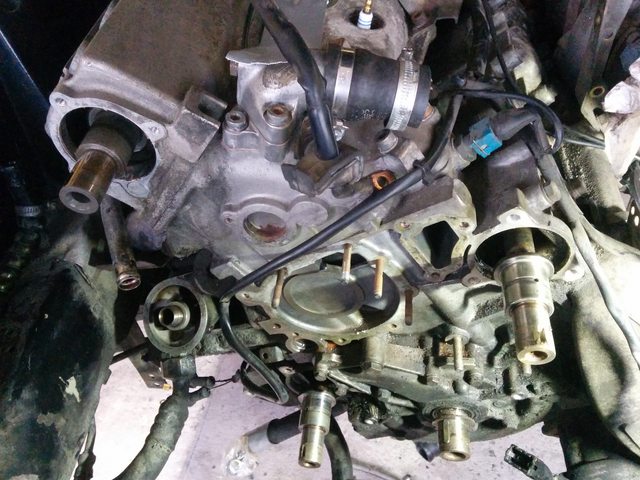
Managed to get the turbo completely removed today and took out the air / oil separator ready to clean up and fit new seals. Glad I decided to do this as there was a good thick layer of oil gunk on the outside of the engine all around the air / oil separator and looks like the o-rings haven't been sealing for some time. Spent ages scraping the oil off the block my finger (gloves on). Need to get some degreaser on it next to try and clean it up as much as possible before reassembling it all.

I also spent couple of hours the other evening rebuilding the power steering pump in the utility room...
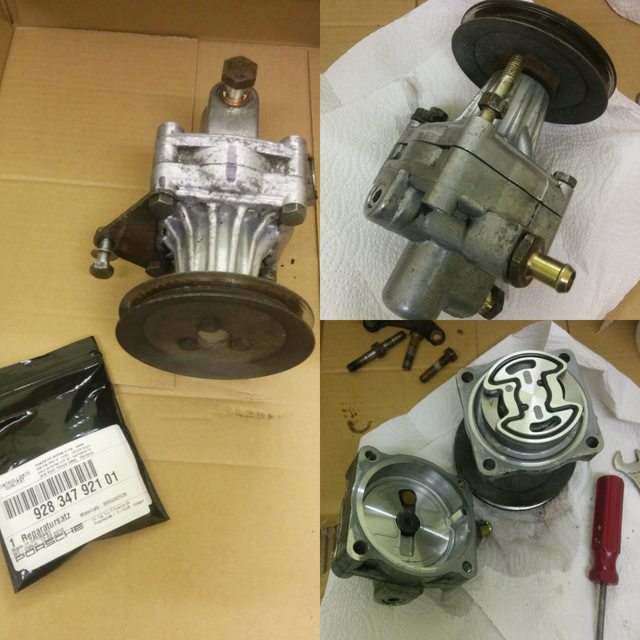
I also spent couple of hours the other evening rebuilding the power steering pump in the utility room...
01-28-2019, 02:49 PM
#14
Instructor
Thread Starter
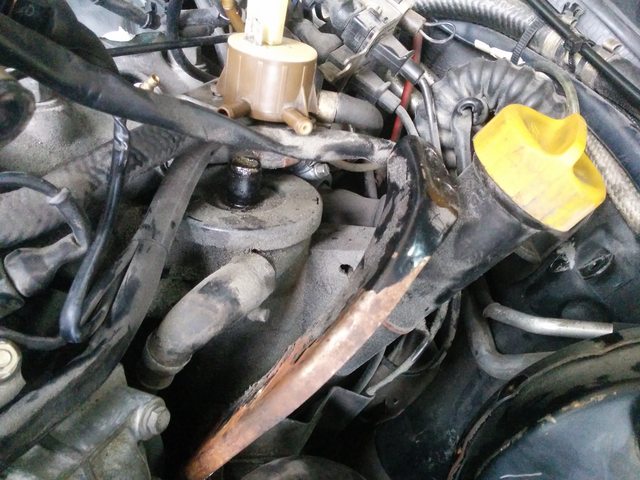
I decided to go ahead and do the oil filter housing as well whilst I have everything else in bits
was a right PITA getting the heat shield out from the top and one of the mounts was broken so I managed to pick up a NOS heat shield for a good price.Took out the OPRV to start with and I've managed to get one of the oil cooler hoses off so far (don't think they've ever been removed since the car was built).
Interestingly the OPRV itself had normal colour oil in it and none of the chocolate coloured stuff... but the oil cooler hose had the choco colour stuff...
 01-28-2019, 05:22 PM
#15
Drifting
That OPRV seal looks like it could use replacing. Make sure to use the alignment tool to put the housing back. Even with the tool, I had to fit it twice to get it right ie. easy threading with no binding. It's fun putting the oil cooler hoses back for sure lol!