944 Turbo Mini Restoration
 07-24-2020, 05:15 AM
#61
Instructor
Thread Starter
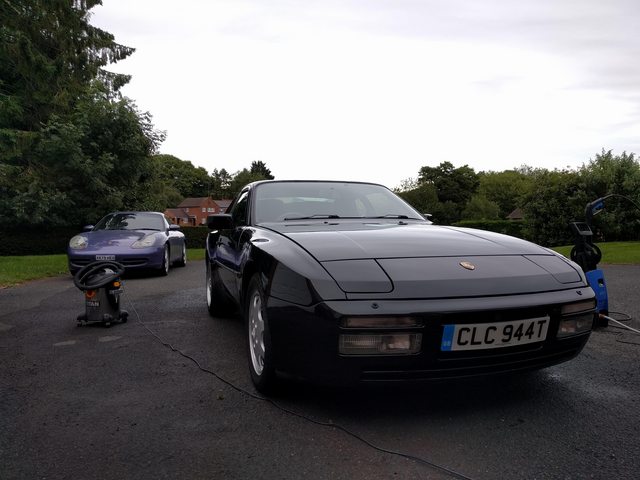
Time for an update on the 944 
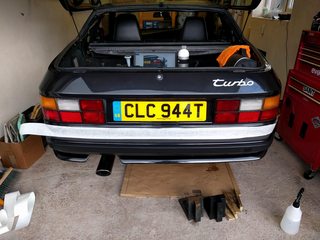
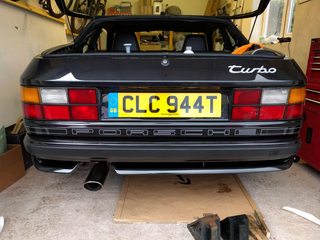
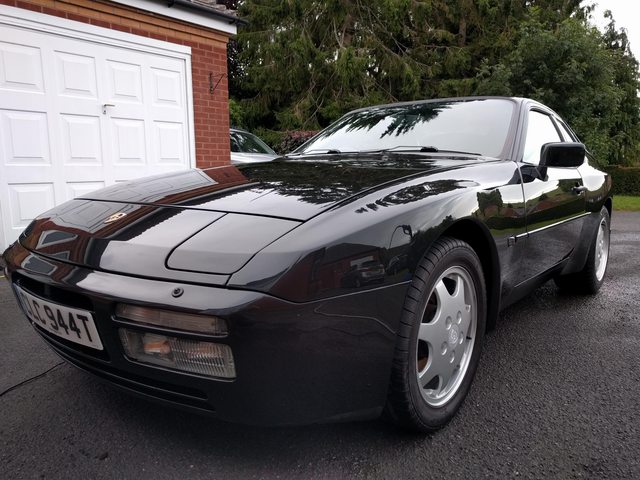
So I have had a rear "PORSCHE" decal in my parts box since last year and finally got around to sticking it on the rear of the car. Was incredibly difficult to get it straight, especially the stripes / shapes at either end of the word. So much so that I've damaged one of the stripes but you can only see if you look closely. Plan on sorting that at some stage with either a section cut out from a replacement decal or just cutting off the damaged piece...
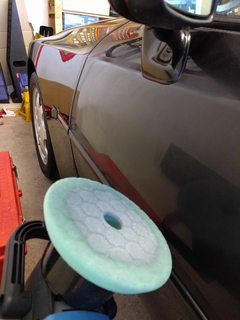
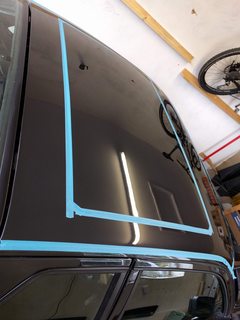
Next I set about cleaning and then polishing the car with my new DAS 6 PRO dual action polisher along with some Chemical Brothers pads and Koch Chemie polishes. Finished with a layer of Dodo Juice Purple Haze wax which smelt delicious! :grin:

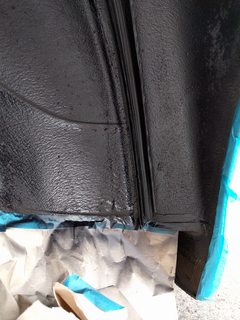
Next up I need to adjust the parking brake so whilst I had the wheels off I gave the inside of the rear arches a good deep clean. I had intended on stripping and repainting them in the winter with my other planned jobs but having seen the condition of them which wasn't too bad, I decided to give them a few coats of body colour paint and clear coat which I still had in the garage.
BEFORE
AFTER


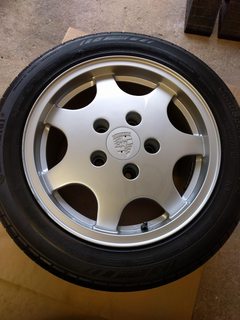
Also gave the rear wheels a good detailing before refitting with some Bilt Hamber Auto Wash, Korrosol fallout remover, Autoglym tar and glue remover and a layer of Finish Kare 1000p wax.
BEFORE
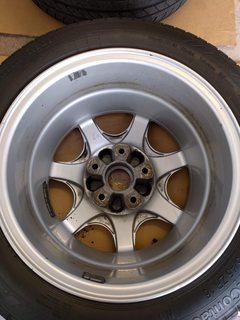
AFTER

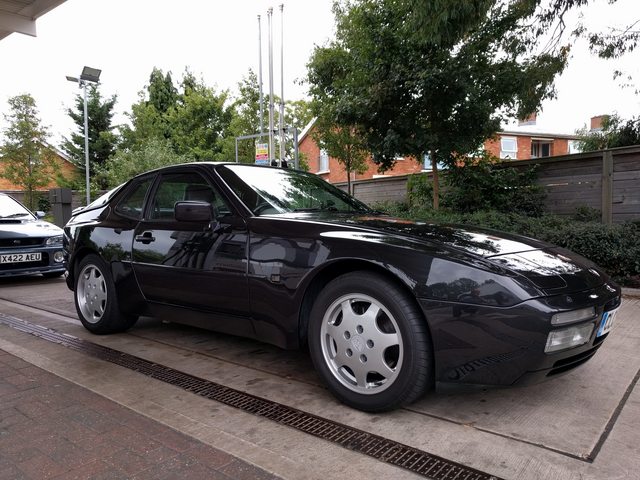
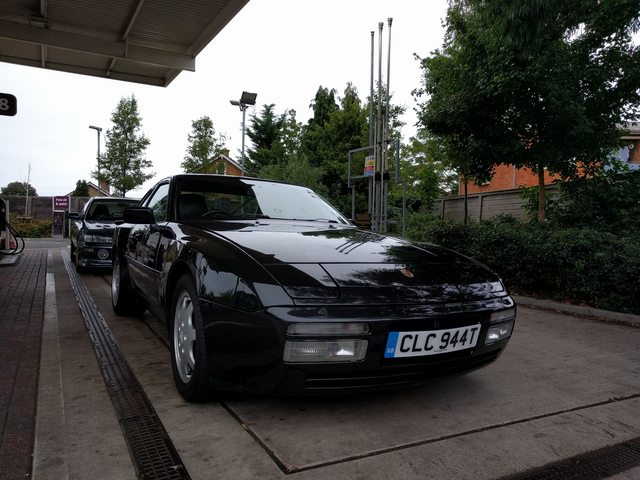
Gave the car another clean yesterday after taking it out in the rain last week -
So I'm planning on a big winter job to do the following (or as much of it as time and money allows)
Drop the exhaust
Drop the rear suspension
Rebuild the CV joints
Axles stripped and powder coated
Rear arms stripped and painted
Torsion tube stripped and painted
All worn bushes replaced
Wheel bearings replaced
Brake lines replaced
Fuel lines replaced
Corrosion around rear jack points rectified
Brake calipers reconditioned
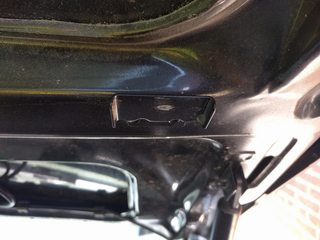
One thing I've noticed which is very odd is my car doesn't have a centre jack point on the right hand side.... so will get this replaced at some point.
Not happy with all the work I had done on the car previously but we can only move forward and learn from it. The drivers side outer sill was replaced with a custom made panel which is nowhere near as good as the original outer sill, so contemplating getting that replaced at somepoint perhaps next year...
Missing centre jack-point -
So I have had a rear "PORSCHE" decal in my parts box since last year and finally got around to sticking it on the rear of the car. Was incredibly difficult to get it straight, especially the stripes / shapes at either end of the word. So much so that I've damaged one of the stripes but you can only see if you look closely. Plan on sorting that at some stage with either a section cut out from a replacement decal or just cutting off the damaged piece...
Next I set about cleaning and then polishing the car with my new DAS 6 PRO dual action polisher along with some Chemical Brothers pads and Koch Chemie polishes. Finished with a layer of Dodo Juice Purple Haze wax which smelt delicious! :grin:
Next up I need to adjust the parking brake so whilst I had the wheels off I gave the inside of the rear arches a good deep clean. I had intended on stripping and repainting them in the winter with my other planned jobs but having seen the condition of them which wasn't too bad, I decided to give them a few coats of body colour paint and clear coat which I still had in the garage.
BEFORE
AFTER
Also gave the rear wheels a good detailing before refitting with some Bilt Hamber Auto Wash, Korrosol fallout remover, Autoglym tar and glue remover and a layer of Finish Kare 1000p wax.
BEFORE
AFTER
Gave the car another clean yesterday after taking it out in the rain last week -
So I'm planning on a big winter job to do the following (or as much of it as time and money allows)
Drop the exhaust
Drop the rear suspension
Rebuild the CV joints
Axles stripped and powder coated
Rear arms stripped and painted
Torsion tube stripped and painted
All worn bushes replaced
Wheel bearings replaced
Brake lines replaced
Fuel lines replaced
Corrosion around rear jack points rectified
Brake calipers reconditioned
One thing I've noticed which is very odd is my car doesn't have a centre jack point on the right hand side.... so will get this replaced at some point.
Not happy with all the work I had done on the car previously but we can only move forward and learn from it. The drivers side outer sill was replaced with a custom made panel which is nowhere near as good as the original outer sill, so contemplating getting that replaced at somepoint perhaps next year...
Missing centre jack-point -
 01-20-2021, 05:26 PM
#62
Instructor
Thread Starter
Wow I haven't been by in awhile and I've missed some old updates - so here goes, this one is from September 2020, back on lockdown over here in the UK so there will be plenty more updates coming!
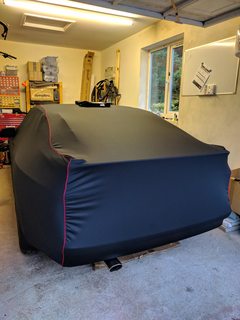
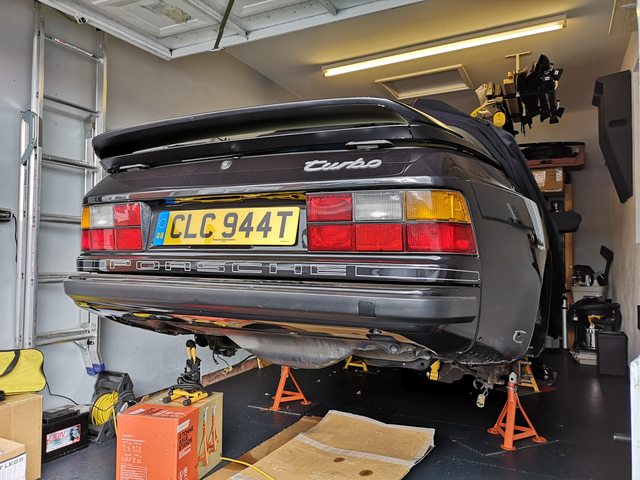
First off not long after the last update my car cover arrived so I tested it out, looks awesome but is back in the box currently whilst I drive the car as much as possible before winter. Then when I'm working on it in the garage I can leave the cover in place to protect the bodywork.

Then I set about tidying up my grotty keys and alarm fobs, Laserline still supply the original key fobs and you can even purchase a replacement key fob case, I purchased 2 for �20 direct from Laserline :thumb:
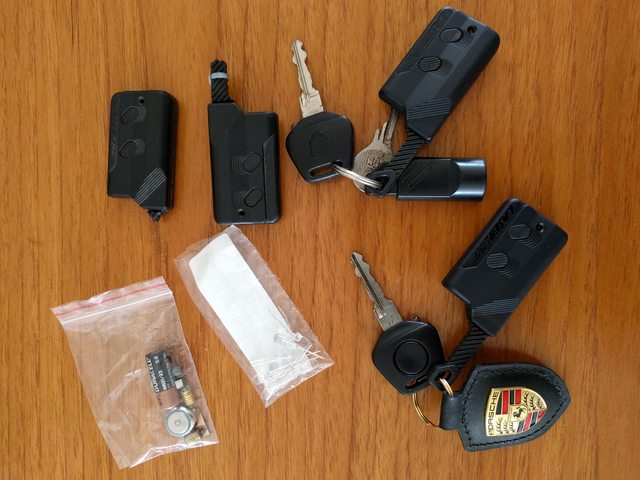
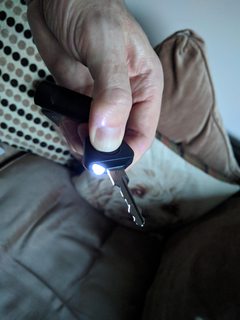
At the same time I also replaced the broken light bulb in the Porsche key with an ultra-bright white LED using the instructions on the link below.
https://drive.google.com/file/d/1C0W...ew?usp=sharing
Fixed the false alarms I was getting in hot weather, everytime I left the car outside in hot sun the alarm would start going off. Initially I thought it was the ultrasonics so disabled them when arming the alarm one day and found the alarm still went off. Luckily the Laserline 996v2 flashes an error sequence via the LED (which I didn't know about before but do now). I was seeing 3 flashes ''',''',''' which translates as "Alarm has been triggered by an earth contact circuit; e.g. boot, bonnet or doors have been opened". When the alarm is in this state it will beep when arming to say that something has been left open. This got me thinking I could test all the contact switches whilst arming the alarm to work out which one was faulty. I started with the contact switch which is under the bonnet next to the brake master cylinder. Held it down whilst arming the alarm - bingo! the alarm armed successfully. Having a close look the switch is held down by a bracket on the underside of the bonnet. It looks like 30 years of use had slightly bent the bracket so I gently bent it down to apply more pressure on the switch and I've had no more false alarms since! :thumbs:
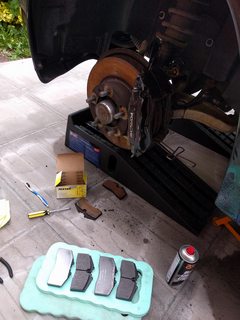
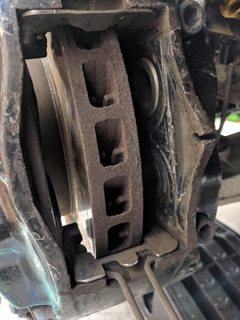
Knocked off a job that had been on my list to replace the front brake pads before they wear through the pad sensor wires. Time it just right as they were just starting to wear. Calipers are in good condition having had the slide plates replaced about 6 years ago, however a full refurb including fresh paint is also on my list for another time. Gave them a good clean and wipe down with some methyalated spirits to get rid of the brake dust.
For awhile now I've been trying to track down an issue with intermittent boost, sometimes I get what appears to be full boost and then it seems to stop for short amount of time and then come back again. After doing some research I thought of a few areas it could be, cycling valve, diverter valve or wastegate. I started with the easiest to diagnose - the diverter valve. I'd fitted a Bailey DV30 sometime ago as a bling upgrade, so after reading some instructions on testing I removed the valve and found that when pushing the valve in with a socket extension it was getting stuck and not releasing. This means that in operation it was sticking open and letting the boost out of the intake manifold and back into the air intake.
I tried dismantling and servicing the Bailey diverter valve but found that the o-ring inside had stretched and was too big hence why the valve was getting stuck. Bailey appear to be no more and after I emailed the only email address I could find for them a couple of weeks ago, I've had no reply so I guess my only option is to measure the valve and try and find a replacement o-ring.
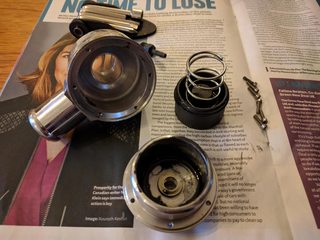
In the meantime I purchased an OEM diverter valve which are no longer made by Bosch but instead made by a company called Kayser. They are also only available from Porsche as they have a strict agreement in place with the manufacturer to not supply aftermarket. Luckily I found someone on ebay who had a surplus new stock valve for slightly cheaper than Porsche.
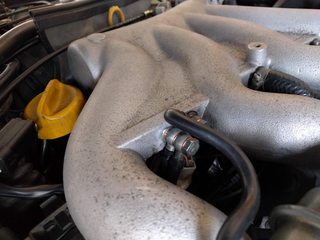
Also found an issue with the vacuum ports on the inlet manifold, the port that connects with the 2-port banjo bolt and feeds the KLR has come loose in the manifold, I tried my best to remove it using a combination of different spanners and pliers to try and unscrew it but it wouldn't come out so I made sure it was tight and and filled the gaps around it with some araldite until such point as I get work done on the inlet manifold.
Happy to say this cured the intermittent boost problem and the car is now boosting properly everytime. However I was now concerned that the car might be overboosting so purchased a new Prosport Evo Premium Boost Gauge. I did lots and lots of window shopping before I chose this gauge. Originally I wanted a mechanical style with a needle but after seeing some videos of this one I just wanted to have it. That and it has a warning and memory peak feature, plus 4 different colours that the display can be changed to including auto-dim with headlights on.
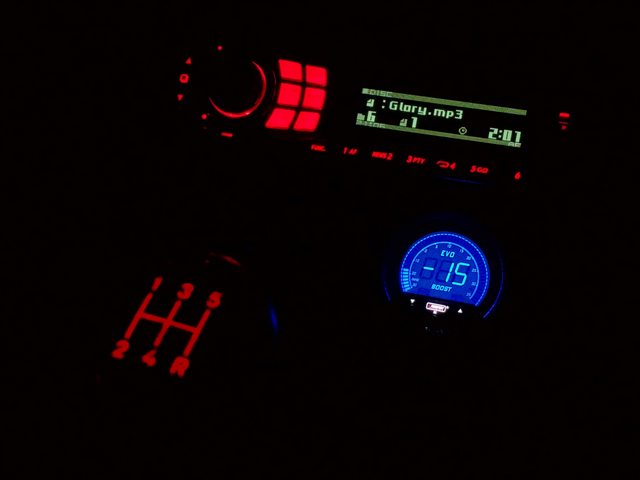
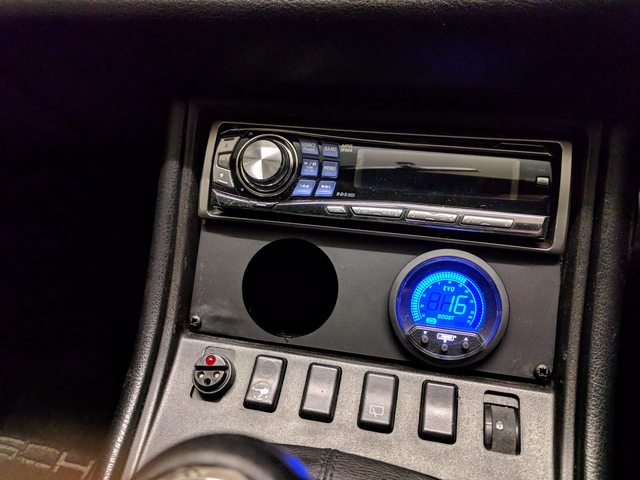
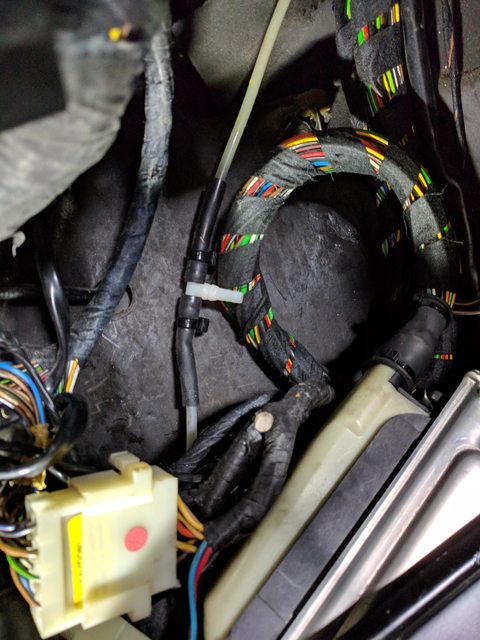
Plumbed it into the vacuum feed that goes to the KLR computer using the t-piece that came in the package and then wired it into the head unit wiring (the cable supplied with the gauge is tiny). They supply a jumper cable for additional gauges so you can daisy chain them together instead of having to wire each gauge individually. I will be getting the wideband gauge next!
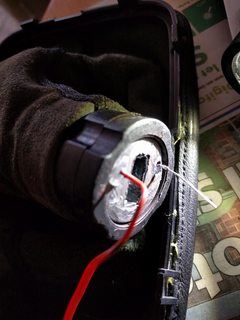
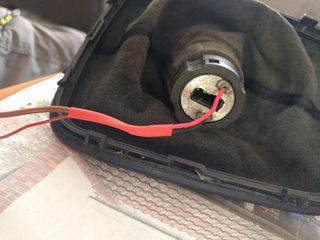
Whilst fitting the boost gauge I also repaired my aftermarket gear **** wiring, it has an awesome red glow on the H pattern which comes on when the lights are on. But the wires they supplied were so thin they broke after repeated use of the gear stick. I managed to solder a short piece of component wire to the remaining end of the wire and then attach a thicker gauge wire to it :thumb:
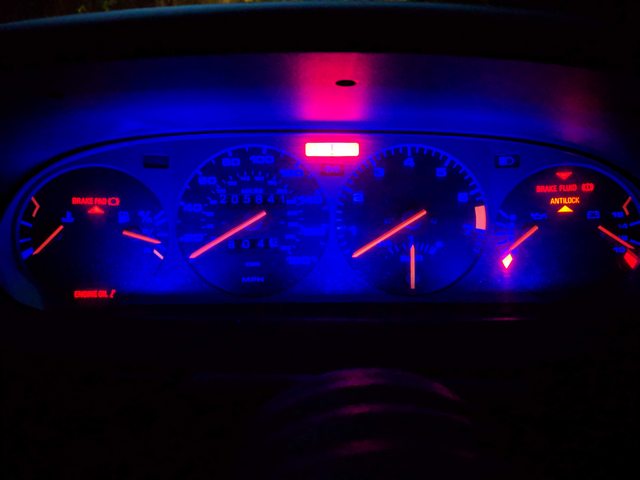
Also over the last couple of weeks I replaced the cheesy blue LEDs I'd put in the instrument panel over ten years ago. Following a thread on rennlist (PM me for a copy of the forum link) I purchased a load of replacement LEDs for the main panel lighting and also some of the warning lights. It is important to get the correct colours for the warning lights as they have filters built into the display.
BEFORE
I sanded down and recovered the light prisms with some aluminium sticky tape at the same time.
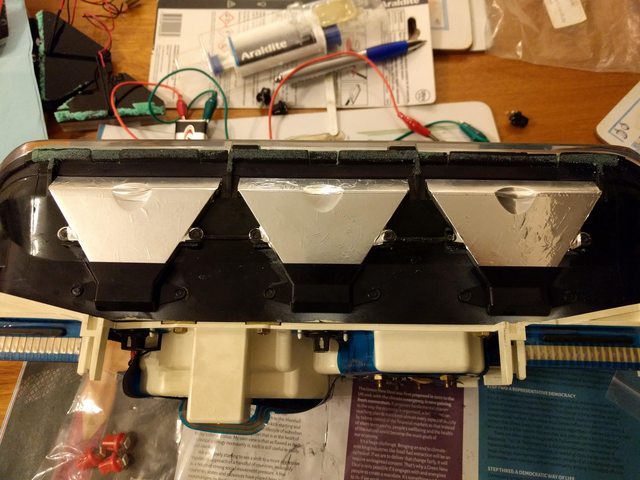
Testing the panel with a 9v battery before installing back in the car, I printed the instrument panel circuit diagram out from the workshop manual which helped with testing individual warning lights.
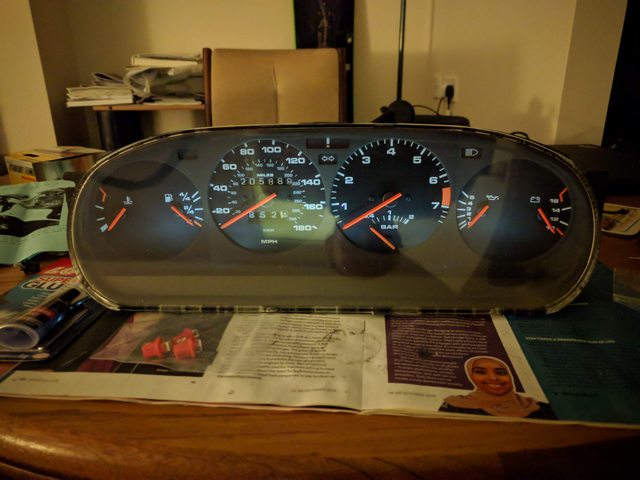
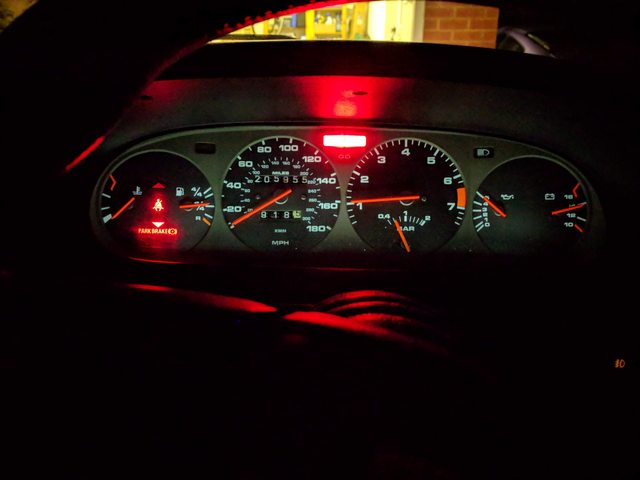
AFTER
I purchased the following items from an Amazon seller (cannot link as my post is disabled when I do (the fitment of these isn't great so if you can find better quality ones from a different supplier go for it, I had to get a few replacements for ones I broke trying to fit) -
1 x T5 B8.5D Yellow
1 x T5 B8.5D Blue
5 x T5 B8.5D Green
10 x T5 B8.5D Red
3 x T10 W5W 501 168 194 5 x LED 360 degree White LED
Doing this I found that the seatbelt warning light had blown a long time ago and I had a new warning light showing up on the test sequence :thumb:
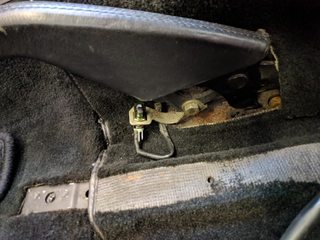
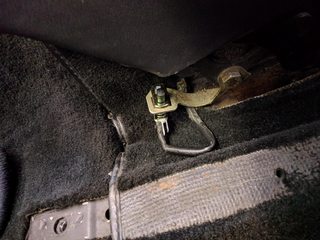
I also noticed the parking brake light was not working, on closer inspection the contact switch on the parking brake was completely mangled so I ordered some new ones. Had to temporarily remove the seat to be able to comfortably get to the contact switch and adjust it properly so it doesn't get mangled again.
And finally some nice pictures from an evening drive :bye:
Attachment 1340742
Attachment 1340743
First off not long after the last update my car cover arrived so I tested it out, looks awesome but is back in the box currently whilst I drive the car as much as possible before winter. Then when I'm working on it in the garage I can leave the cover in place to protect the bodywork.
Then I set about tidying up my grotty keys and alarm fobs, Laserline still supply the original key fobs and you can even purchase a replacement key fob case, I purchased 2 for �20 direct from Laserline :thumb:
At the same time I also replaced the broken light bulb in the Porsche key with an ultra-bright white LED using the instructions on the link below.
https://drive.google.com/file/d/1C0W...ew?usp=sharing
Fixed the false alarms I was getting in hot weather, everytime I left the car outside in hot sun the alarm would start going off. Initially I thought it was the ultrasonics so disabled them when arming the alarm one day and found the alarm still went off. Luckily the Laserline 996v2 flashes an error sequence via the LED (which I didn't know about before but do now). I was seeing 3 flashes ''',''',''' which translates as "Alarm has been triggered by an earth contact circuit; e.g. boot, bonnet or doors have been opened". When the alarm is in this state it will beep when arming to say that something has been left open. This got me thinking I could test all the contact switches whilst arming the alarm to work out which one was faulty. I started with the contact switch which is under the bonnet next to the brake master cylinder. Held it down whilst arming the alarm - bingo! the alarm armed successfully. Having a close look the switch is held down by a bracket on the underside of the bonnet. It looks like 30 years of use had slightly bent the bracket so I gently bent it down to apply more pressure on the switch and I've had no more false alarms since! :thumbs:
Knocked off a job that had been on my list to replace the front brake pads before they wear through the pad sensor wires. Time it just right as they were just starting to wear. Calipers are in good condition having had the slide plates replaced about 6 years ago, however a full refurb including fresh paint is also on my list for another time. Gave them a good clean and wipe down with some methyalated spirits to get rid of the brake dust.
For awhile now I've been trying to track down an issue with intermittent boost, sometimes I get what appears to be full boost and then it seems to stop for short amount of time and then come back again. After doing some research I thought of a few areas it could be, cycling valve, diverter valve or wastegate. I started with the easiest to diagnose - the diverter valve. I'd fitted a Bailey DV30 sometime ago as a bling upgrade, so after reading some instructions on testing I removed the valve and found that when pushing the valve in with a socket extension it was getting stuck and not releasing. This means that in operation it was sticking open and letting the boost out of the intake manifold and back into the air intake.
I tried dismantling and servicing the Bailey diverter valve but found that the o-ring inside had stretched and was too big hence why the valve was getting stuck. Bailey appear to be no more and after I emailed the only email address I could find for them a couple of weeks ago, I've had no reply so I guess my only option is to measure the valve and try and find a replacement o-ring.
In the meantime I purchased an OEM diverter valve which are no longer made by Bosch but instead made by a company called Kayser. They are also only available from Porsche as they have a strict agreement in place with the manufacturer to not supply aftermarket. Luckily I found someone on ebay who had a surplus new stock valve for slightly cheaper than Porsche.
Also found an issue with the vacuum ports on the inlet manifold, the port that connects with the 2-port banjo bolt and feeds the KLR has come loose in the manifold, I tried my best to remove it using a combination of different spanners and pliers to try and unscrew it but it wouldn't come out so I made sure it was tight and and filled the gaps around it with some araldite until such point as I get work done on the inlet manifold.
Happy to say this cured the intermittent boost problem and the car is now boosting properly everytime. However I was now concerned that the car might be overboosting so purchased a new Prosport Evo Premium Boost Gauge. I did lots and lots of window shopping before I chose this gauge. Originally I wanted a mechanical style with a needle but after seeing some videos of this one I just wanted to have it. That and it has a warning and memory peak feature, plus 4 different colours that the display can be changed to including auto-dim with headlights on.
Plumbed it into the vacuum feed that goes to the KLR computer using the t-piece that came in the package and then wired it into the head unit wiring (the cable supplied with the gauge is tiny). They supply a jumper cable for additional gauges so you can daisy chain them together instead of having to wire each gauge individually. I will be getting the wideband gauge next!
Whilst fitting the boost gauge I also repaired my aftermarket gear **** wiring, it has an awesome red glow on the H pattern which comes on when the lights are on. But the wires they supplied were so thin they broke after repeated use of the gear stick. I managed to solder a short piece of component wire to the remaining end of the wire and then attach a thicker gauge wire to it :thumb:
Also over the last couple of weeks I replaced the cheesy blue LEDs I'd put in the instrument panel over ten years ago. Following a thread on rennlist (PM me for a copy of the forum link) I purchased a load of replacement LEDs for the main panel lighting and also some of the warning lights. It is important to get the correct colours for the warning lights as they have filters built into the display.
BEFORE
I sanded down and recovered the light prisms with some aluminium sticky tape at the same time.
Testing the panel with a 9v battery before installing back in the car, I printed the instrument panel circuit diagram out from the workshop manual which helped with testing individual warning lights.
AFTER
I purchased the following items from an Amazon seller (cannot link as my post is disabled when I do (the fitment of these isn't great so if you can find better quality ones from a different supplier go for it, I had to get a few replacements for ones I broke trying to fit) -
1 x T5 B8.5D Yellow
1 x T5 B8.5D Blue
5 x T5 B8.5D Green
10 x T5 B8.5D Red
3 x T10 W5W 501 168 194 5 x LED 360 degree White LED
Doing this I found that the seatbelt warning light had blown a long time ago and I had a new warning light showing up on the test sequence :thumb:
I also noticed the parking brake light was not working, on closer inspection the contact switch on the parking brake was completely mangled so I ordered some new ones. Had to temporarily remove the seat to be able to comfortably get to the contact switch and adjust it properly so it doesn't get mangled again.
And finally some nice pictures from an evening drive :bye:
Attachment 1340742
Attachment 1340743
01-20-2021, 05:28 PM
#63
Instructor
Thread Starter
Next update is from October 2020!
Well not much to update since the last time - I've driven the 944 a bit more and pretty sure I've got an exhaust leak so over the winter when I'm tackling a few other jobs I will probably be dropping the entire exhaust system, checking for leaks, possibly new bits of modifications and refitting.
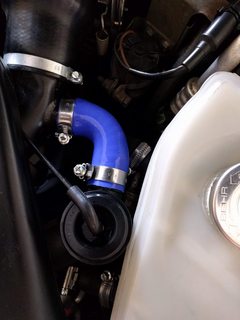
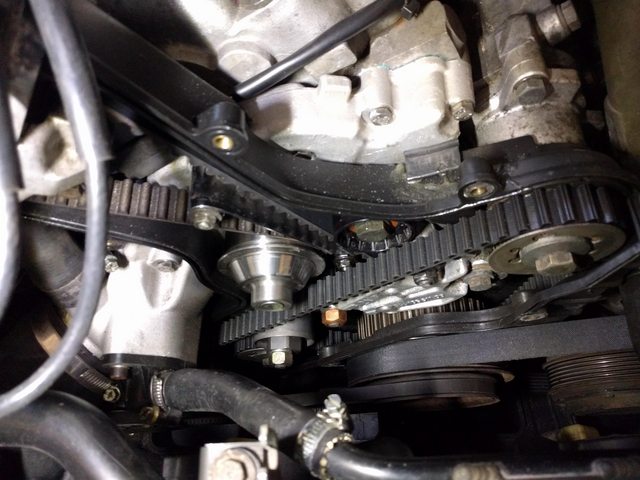
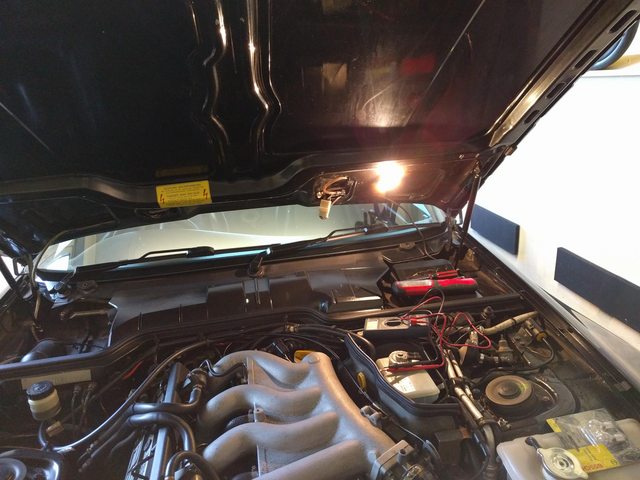
I also have a little bit of a coolant leak and a small oil leak so I took the belt covers off to check the condition of the belts and make sure that they weren't covered in oil or coolant. Thankfully it was nice and dry and the belts look fine, I've got some new coolant pipes and hoses on my winter shopping list.
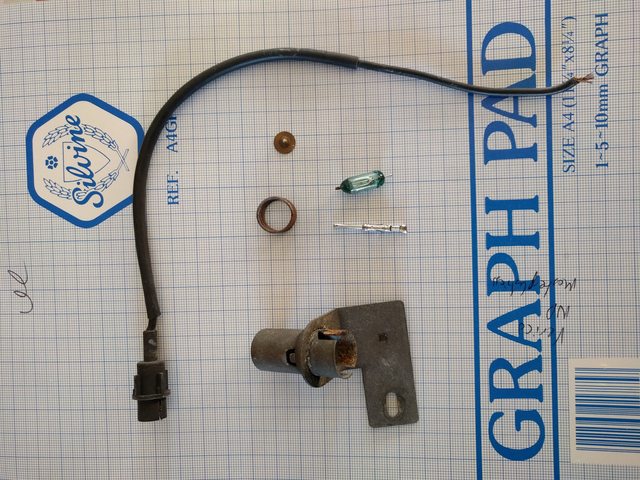
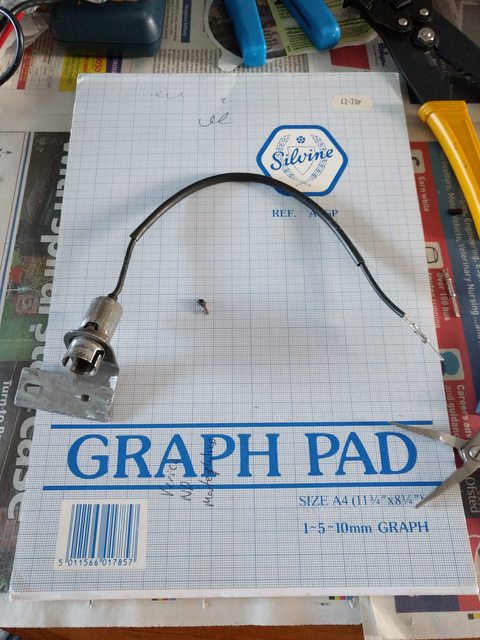
Another job I kept forgetting about was the under bonnet light so I stripped it down and gave all the parts a good clean and replaced the bulb. I had to modify the housing slightly as the mercury switch wasn't making full contact, possibly due to corrosion of the contacts, so I improvised and made a spacer with some aluminium foil and that worked a treat :thumb:
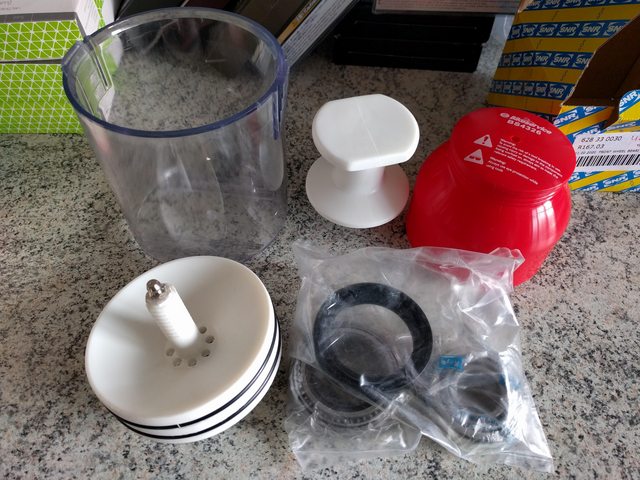
I've purchased a set of front wheel bearings as I did detect some play when I checked (although minimal) and had a look and its been almost 30k miles since they were last done so pretty much due for a change. Also picked up this lovely looking bearing packer to pack out the new bearings with grease, I'm sure my old manual method worked fine but you can never have enough tools. :grin:
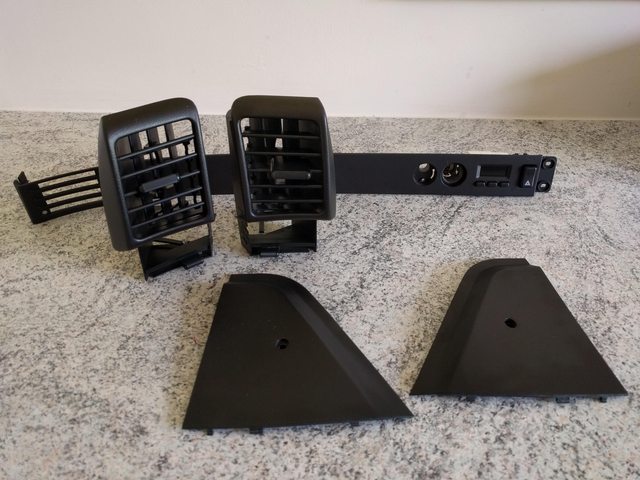
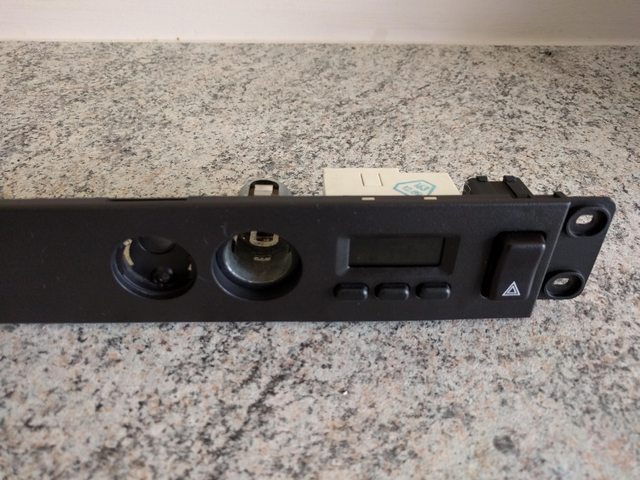
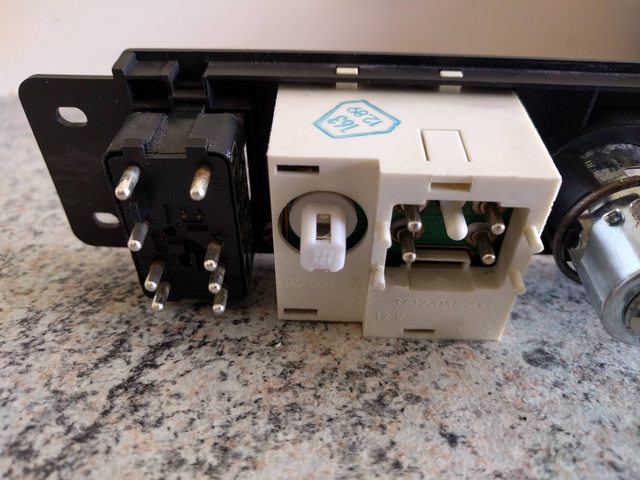
Finally I cleaned up some of the interior parts and replaced many of the bulbs with LED equivalents (including the LCD clock). Many of the bulbs weren't working so it was a bit of a revelation to see light where there had been none previously! 8)
I've also been drawn into the world of buying Porsche memorabilia and managed to get hold of a 1990 model years sales brochure including the 944 Turbo plus today I got hold of the 1990 price list.
Watch this space for more tinkering over the winter months, I'm just finishing up decorating the garage to make it a bit more of an hospitable place to be in :thumbs:
Well not much to update since the last time - I've driven the 944 a bit more and pretty sure I've got an exhaust leak so over the winter when I'm tackling a few other jobs I will probably be dropping the entire exhaust system, checking for leaks, possibly new bits of modifications and refitting.
I also have a little bit of a coolant leak and a small oil leak so I took the belt covers off to check the condition of the belts and make sure that they weren't covered in oil or coolant. Thankfully it was nice and dry and the belts look fine, I've got some new coolant pipes and hoses on my winter shopping list.
Another job I kept forgetting about was the under bonnet light so I stripped it down and gave all the parts a good clean and replaced the bulb. I had to modify the housing slightly as the mercury switch wasn't making full contact, possibly due to corrosion of the contacts, so I improvised and made a spacer with some aluminium foil and that worked a treat :thumb:
I've purchased a set of front wheel bearings as I did detect some play when I checked (although minimal) and had a look and its been almost 30k miles since they were last done so pretty much due for a change. Also picked up this lovely looking bearing packer to pack out the new bearings with grease, I'm sure my old manual method worked fine but you can never have enough tools. :grin:
Finally I cleaned up some of the interior parts and replaced many of the bulbs with LED equivalents (including the LCD clock). Many of the bulbs weren't working so it was a bit of a revelation to see light where there had been none previously! 8)
I've also been drawn into the world of buying Porsche memorabilia and managed to get hold of a 1990 model years sales brochure including the 944 Turbo plus today I got hold of the 1990 price list.
Watch this space for more tinkering over the winter months, I'm just finishing up decorating the garage to make it a bit more of an hospitable place to be in :thumbs:
01-20-2021, 05:29 PM
#64
Instructor
Thread Starter
Latest update 
Well I was going to say happy new year folks - but I'm sure you know what I mean :thumb: rather best wishes to everyone :thumbs:
Started the winter jobs on the 944 today and managed to get the garage nice and warm using my oil filled radiator whilst it was near 0C outside.
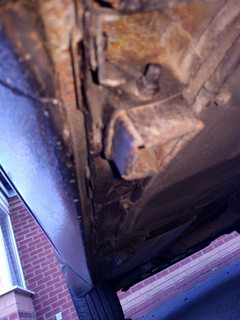
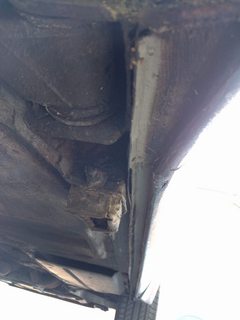
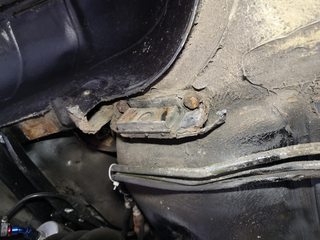
I've got a whole list of work to keep me busy throughout the colder months and wanted to start by cleaning up the rear lift points and trailing arm mount.
Planning on de-rusting and painting the rear lift points first then moving the axle stands from the trailing arms, removing the rear suspension completely and then cleaning up the trailing arm mounts plus any other bits that need attention after removing the suspension.
Will be using U-POL degreaser, Bilt Hamber Deox-Gel, Hydrate 80, a good quality primer and top coat such as the Eastwood Extreme Chassis Paint.
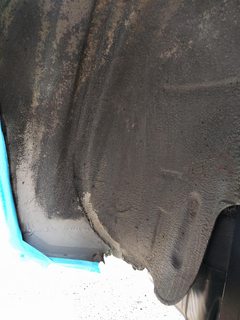
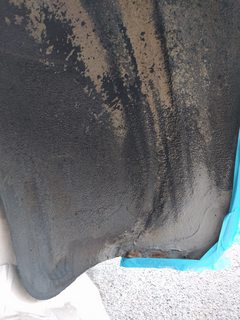
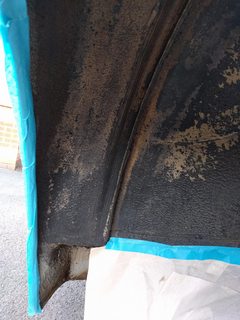
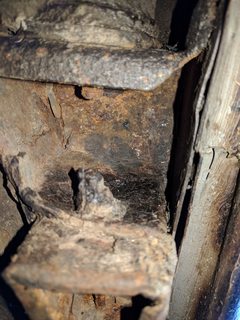
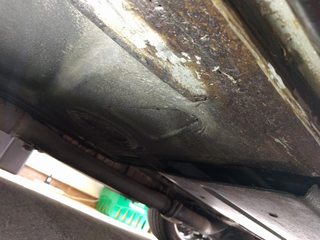
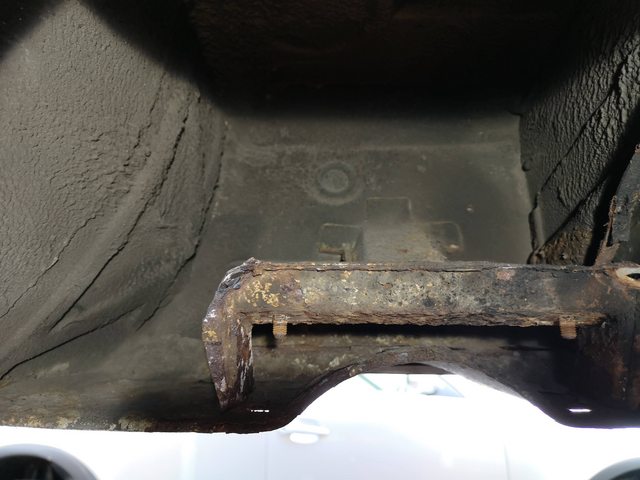
So this is what the rear lift points looked like prior to me starting...
Attachment 1340704
After a couple of hours with a chisel and hammer I'd removed most of the rust scale and the metal beneath seems to be solid, but I'm having a right job trying to get any wire brush drill attachments into the areas as it is very small.
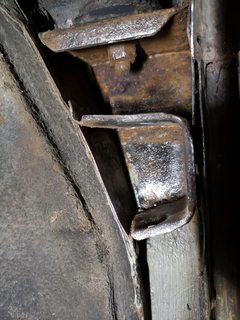

One side looks a lot better than the other but I've only wire brushed the cleaner side (right / off-side).
You might have noticed I removed the lift point extension bars which I believe are fitted to the S2 / Turbo (and possibly 968?) due to the extra clearance required when the plastic sill covers are installed. Either they have been replaced at some point during 30 years or they have survived pretty well considering they are right in front of the rear wheel! I was expecting these to be a real bugger to remove but after tapping them with a hammer and punch a few times they came out with the aid of a pair of vice grips and lots of wiggling (after removing the retaining bolt with the aid of a mini hacksaw).

Still need to tidy it up more before the Deox-Gel gets applied, I welcome any criticism or helpful comments :lol:
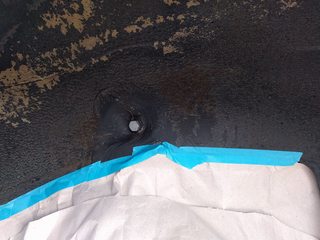
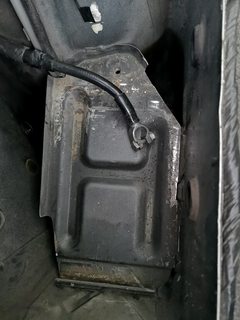
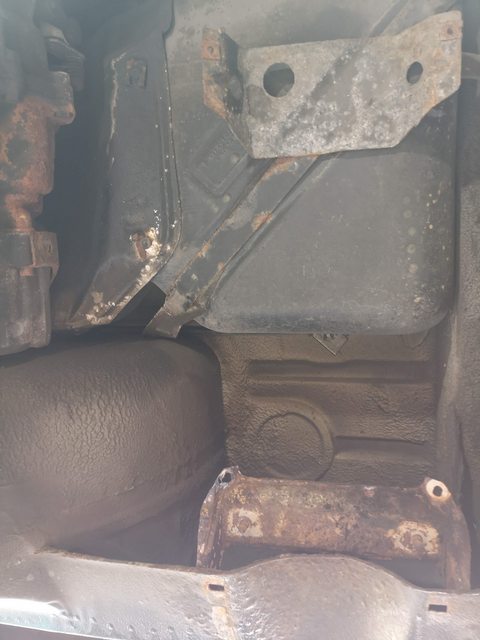
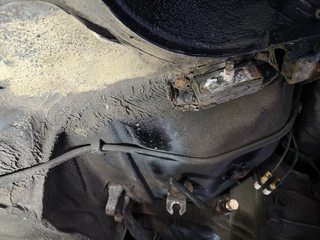
Also have a rusty rear "cubby" underneath the battery tray so my only option appears to be cutting the welds off the battery tray so I can remove it and get to the rust underneath. I've had a good tap around with a socket extension and it feels solid so hopefully only surface rust.
Attachment 1340709 Attachment 1340710
Well I was going to say happy new year folks - but I'm sure you know what I mean :thumb: rather best wishes to everyone :thumbs:
Started the winter jobs on the 944 today and managed to get the garage nice and warm using my oil filled radiator whilst it was near 0C outside.
I've got a whole list of work to keep me busy throughout the colder months and wanted to start by cleaning up the rear lift points and trailing arm mount.
Planning on de-rusting and painting the rear lift points first then moving the axle stands from the trailing arms, removing the rear suspension completely and then cleaning up the trailing arm mounts plus any other bits that need attention after removing the suspension.
Will be using U-POL degreaser, Bilt Hamber Deox-Gel, Hydrate 80, a good quality primer and top coat such as the Eastwood Extreme Chassis Paint.
So this is what the rear lift points looked like prior to me starting...
Attachment 1340704
After a couple of hours with a chisel and hammer I'd removed most of the rust scale and the metal beneath seems to be solid, but I'm having a right job trying to get any wire brush drill attachments into the areas as it is very small.
One side looks a lot better than the other but I've only wire brushed the cleaner side (right / off-side).
You might have noticed I removed the lift point extension bars which I believe are fitted to the S2 / Turbo (and possibly 968?) due to the extra clearance required when the plastic sill covers are installed. Either they have been replaced at some point during 30 years or they have survived pretty well considering they are right in front of the rear wheel! I was expecting these to be a real bugger to remove but after tapping them with a hammer and punch a few times they came out with the aid of a pair of vice grips and lots of wiggling (after removing the retaining bolt with the aid of a mini hacksaw).
Still need to tidy it up more before the Deox-Gel gets applied, I welcome any criticism or helpful comments :lol:
Also have a rusty rear "cubby" underneath the battery tray so my only option appears to be cutting the welds off the battery tray so I can remove it and get to the rust underneath. I've had a good tap around with a socket extension and it feels solid so hopefully only surface rust.
Attachment 1340709 Attachment 1340710
01-24-2021, 10:17 AM
#65
Instructor

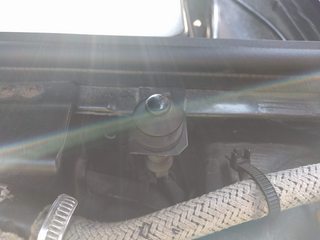
Beautiful 951 and care you lavish on it. Whenever I look at photos of cars in Britain I�m always reminded what a harsh environment it is ... you guys are always chasing corrosion.
I want to say thanks for that spanner/wrench zip-tied to the rear shock idea; I�m about to replace them on my 924S and will employ that method.
Many moons ago I had an an �89 S2 with D90�s ... different color to yours but for me, that body style is the best of all 924/44/68 family. In black, extra stunning.
Keep up the great work,
John
The following users liked this post:
dlknight (01-26-2021)
01-25-2021, 05:48 AM
#66
Instructor
Thread Starter
Beautiful 951 and care you lavish on it. Whenever I look at photos of cars in Britain I�m always reminded what a harsh environment it is ... you guys are always chasing corrosion.
I want to say thanks for that spanner/wrench zip-tied to the rear shock idea; I�m about to replace them on my 924S and will employ that method.
Many moons ago I had an an �89 S2 with D90�s ... different color to yours but for me, that body style is the best of all 924/44/68 family. In black, extra stunning.
Keep up the great work,
John
I want to say thanks for that spanner/wrench zip-tied to the rear shock idea; I�m about to replace them on my 924S and will employ that method.
Many moons ago I had an an �89 S2 with D90�s ... different color to yours but for me, that body style is the best of all 924/44/68 family. In black, extra stunning.
Keep up the great work,
John

Hopefully the corrosion will slow down enough that it won't be much more of a problem in my lifetime now, I no longer drive it when the roads are salted or very wet / muddy and it's now stored permanently in the garage

Only problem with a black car is they always look dirty unless it is the first few hours / days after you've cleaned it!
Good luck with the shock replacement on the 924 - pretty easy job once you have something to hold that nut
01-25-2021, 11:29 PM
#67
Instructor
Here�s my thread:
http://forums.pelicanparts.com/porsc...ilitation.html
Some old photos of my former S2 up around the last page (presently) or thereabouts.
best, John
http://forums.pelicanparts.com/porsc...ilitation.html
Some old photos of my former S2 up around the last page (presently) or thereabouts.
best, John
The following users liked this post:
dlknight (01-26-2021)
01-26-2021, 06:36 PM
#68
Instructor
Thread Starter
So since the last post I did some more work on those pesky rear jacking points, more wire-brushing and I also purchased a new toy, a black and decker power file which came in really useful on the hard to reach spots up in those cavities. Also my spare radiator to keep me warm whilst working in the garage during the recent alpine conditions!
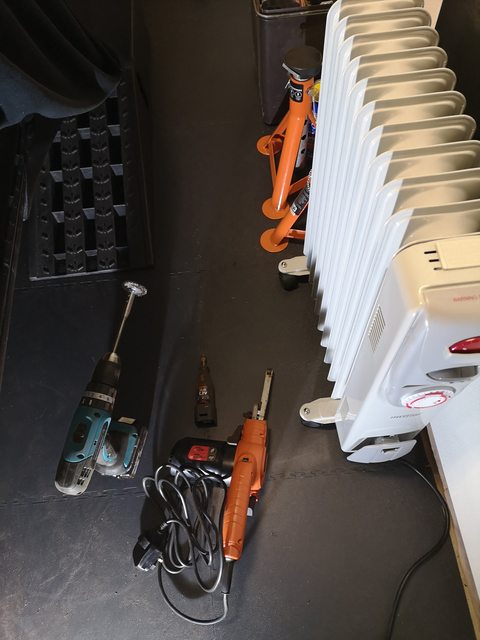
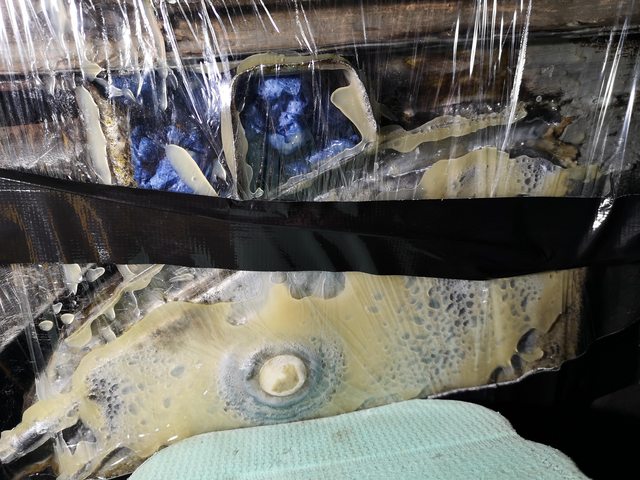
Next I degreased using some U-POL slow degreaser and then washed the area with Surfex HD before drying with a heat gun. Then treated all bare metal with Deox-Gel, you might notice the blue paper towels stuffed in the cavities, it occurred to me that to keep the gel up inside the cavity I needed something to hold it in there, so I rolled up some paper towels and drenched them in gel.
In the meantime I managed to continue cutting out the welds on the battery tray in order to gain access to the corrosion underneath. This was quite a job as there were several welds all round the tray which were awkward to grind or cut. Combination of an angle grinder with cutting disc, dremel and one of those special mini hacksaws dealt with them.
Corrosion isn't too bad and better than I thought, bit of scale which needs chipping off and then some serious wire brushing and perhaps sanding before treating with Deox-Gel.
So I left the Deox-Gel for 48 hours (Saturday until today, Monday) and it has done an amazing job. I wire-brushed, washed, rinsed and dried using a heat gun. Don't have time for another treatment in the next couple of days so have left it all nice and dry ready for another Deox-Gel treatment on the weekend. Will then assess whether it needs a third treatment.
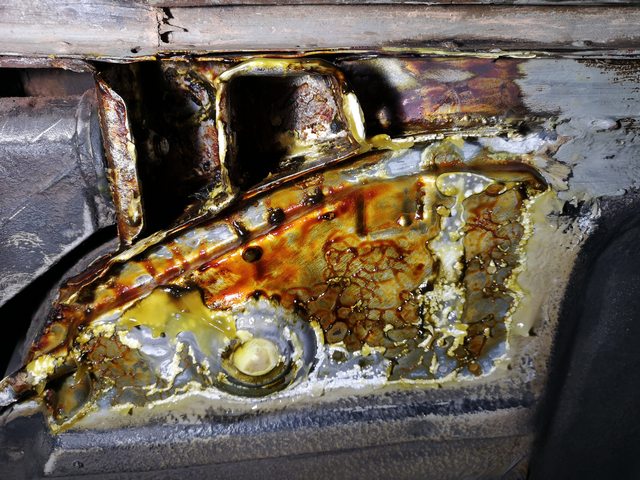
06-27-2021, 04:30 PM
#69
Instructor
Thread Starter
I'm back! - got burnt out on the car so had a break from it for awhile, I actually did some work on it during february / march but didn't get on here to update the progress! Instead I was repairing an old NAD tape deck and a Technics tape deck for my other hi-fi obsession! 
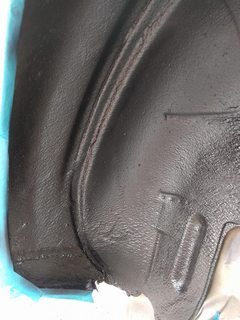
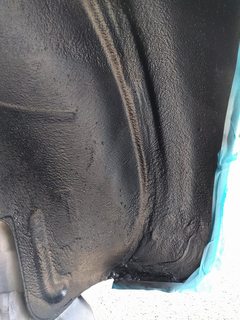
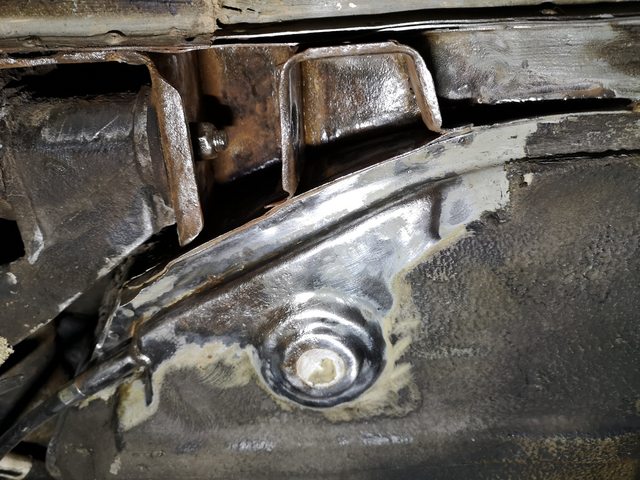
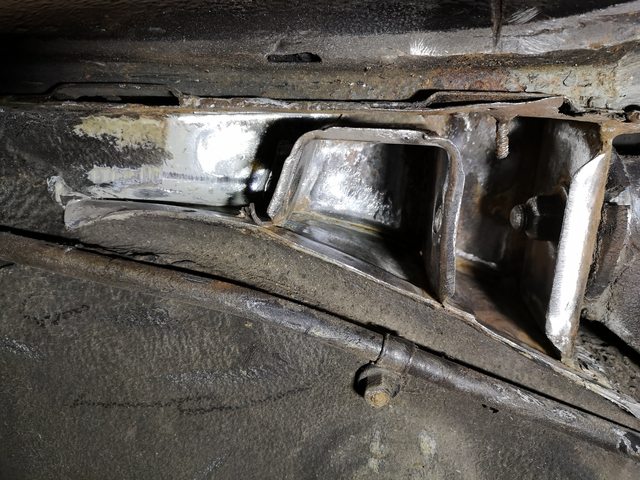
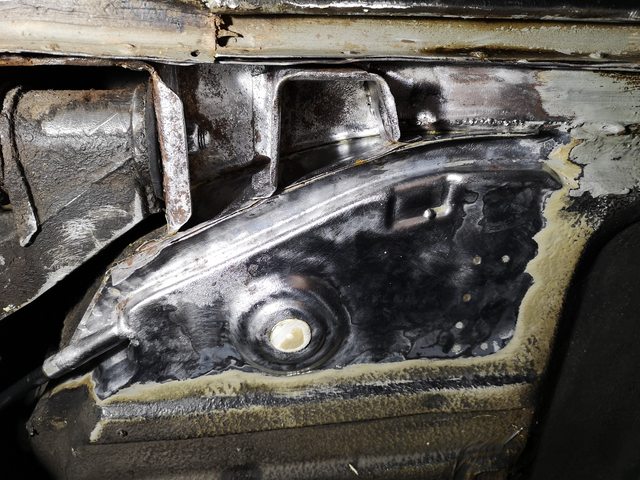
So early february I got the Bilt Hamber electrox primer over the de-rusted areas.
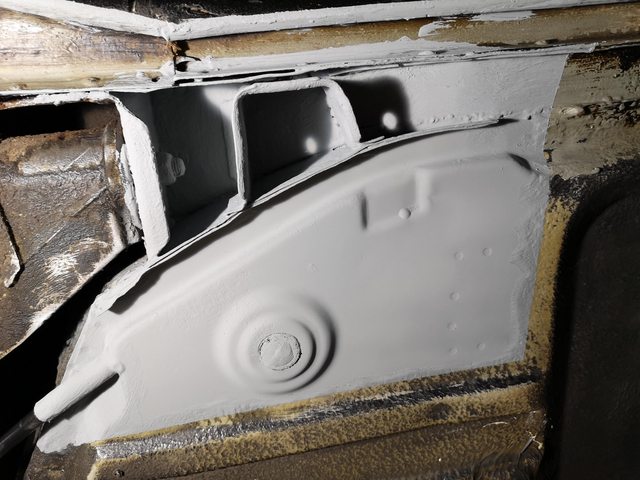
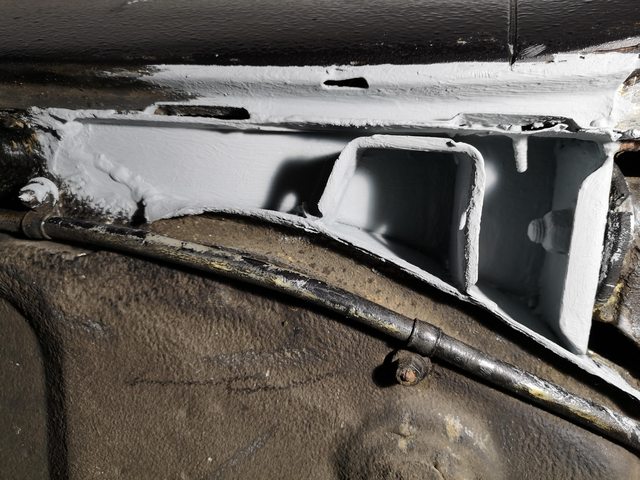
I then filled the seams with some seam sealer -
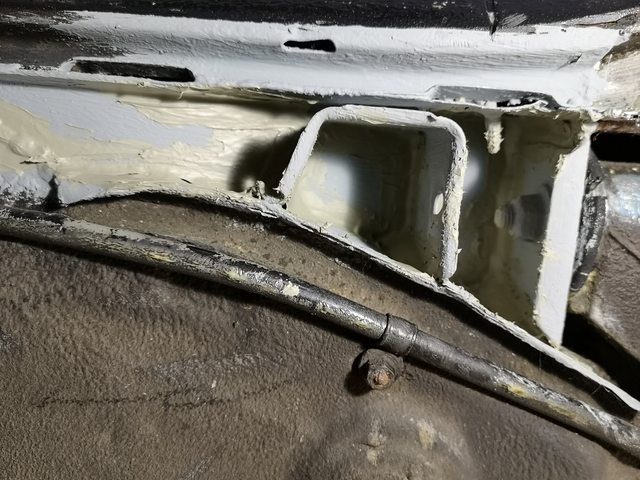

And then finally coated it with some grey epoxy mastic (yes I know should have bought black, I'm actually going to order a tin of black today for the rest of the car).
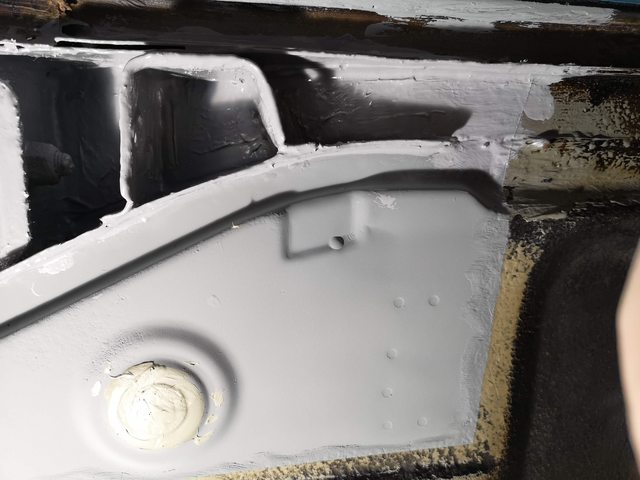
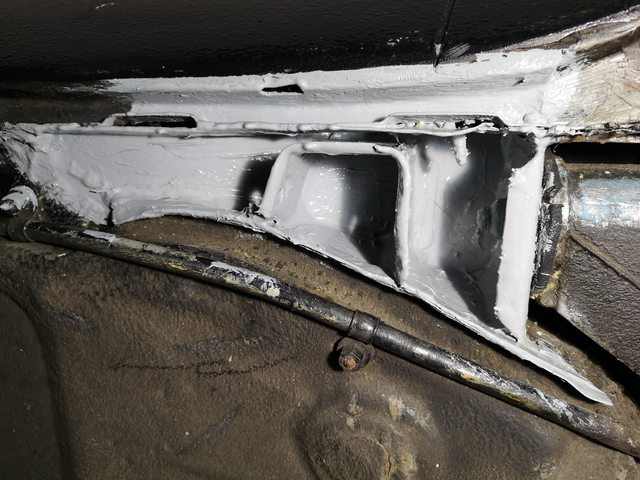
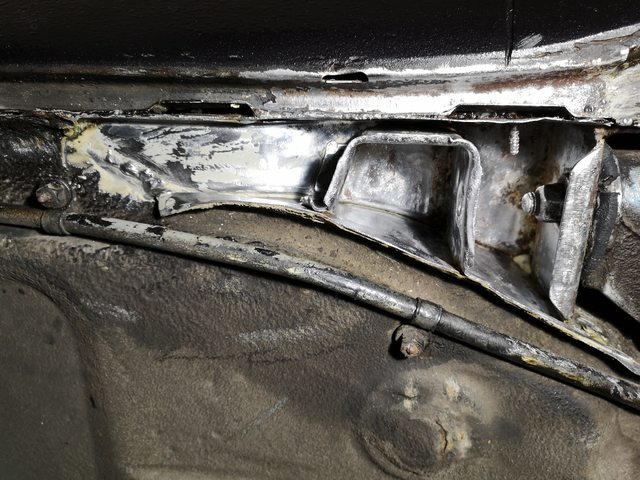
I also started to de-rust the area underneath the battery compartment, still needs a little more wire brushing / sanding and then some chemical treatment. You might be able to spot a little hole in the wheel arch on the left of the picture.... I got a bit carried away when removing the welds on the battery tray and accidently ripped the weld off which put a hole in good metal... need to get it welded when the other jobs are done, unless there is a better way to fix it.
So early february I got the Bilt Hamber electrox primer over the de-rusted areas.
I then filled the seams with some seam sealer -
And then finally coated it with some grey epoxy mastic (yes I know should have bought black, I'm actually going to order a tin of black today for the rest of the car).
I also started to de-rust the area underneath the battery compartment, still needs a little more wire brushing / sanding and then some chemical treatment. You might be able to spot a little hole in the wheel arch on the left of the picture.... I got a bit carried away when removing the welds on the battery tray and accidently ripped the weld off which put a hole in good metal... need to get it welded when the other jobs are done, unless there is a better way to fix it.
06-27-2021, 04:31 PM
#70
Instructor
Thread Starter
On to more recent times and the beginning of June I started working on the car again.
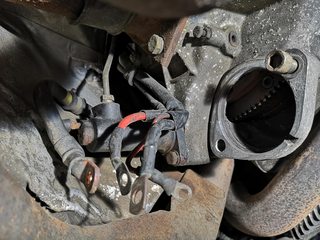
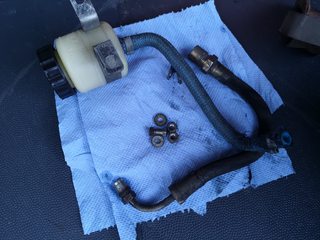
Since the car has been in the garage I'd noticed a pool of brake fluid developing in the area under the clutch slave cylinder... I took out the starter motor and sure enough the slave cylinder was leaking into the bell housing. I managed to get this off which wasn't easy as the gland nut had rounded so had to use a pair of vice grips. Not sure if I will be able to repair the hydraulic line or will have to make up a new one... I've got a slave cylinder rebuild kit from Porsche and looking at rebuilding or replacing the master cylinder as well. The rubber flexi pipe on the master cylinder was also shot so that also needs replacing.
Back to task I need to get the exhaust system off as part of my masterplan to completely remove the rear suspension and refurbish it all.
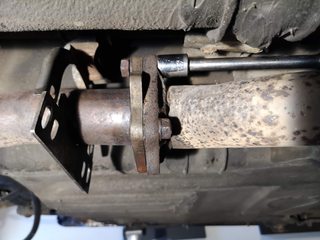
Well I don't think the exhaust system has been off for a very long time and most of the bolts had become one with the exhaust joints / flanges through corrosion.
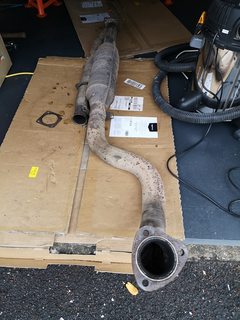
After battling with them over a couple of weekends and use of a drill and angle grinder I managed to remove the back box and catalytic convertor without damaging the exhaust.
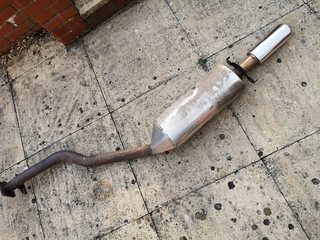
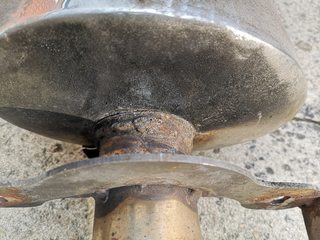
I also found one possible culprit for my exhaust fumes in the car issue! looks like the tailpipe weld had cracked on the back box at some point, there is a lot of soot on the back box and under the car in the same area...
The top bolts on the exhaust flange actually came undone but the bottom ones were welded in place by corrosion.
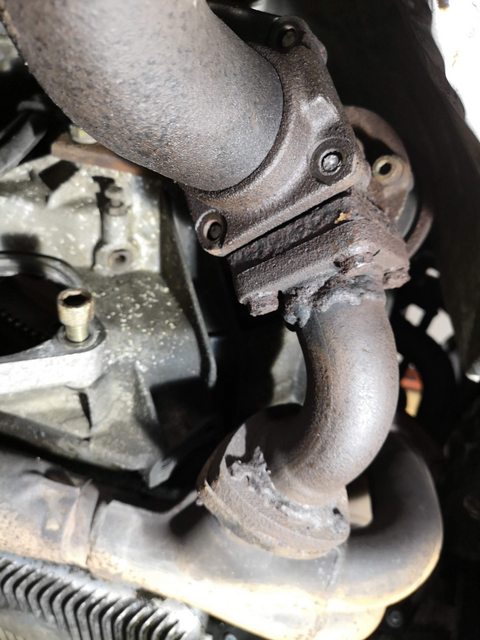
After trying to shine a light into the catalytic convertor and take a picture at the same time, it looks like scrap to me as there is a large hole in the top of the honeycomb material and the material also looks corroded. So will be looking at getting a bypass section.

Also looks like I'm going to have fun removing the wastegate as looks like corrosion has also cause the joints and bolts to become one!
I broke the heads from all four bolts holding the bypass "dump" section of pipe whilst trying to remove the exhaust...
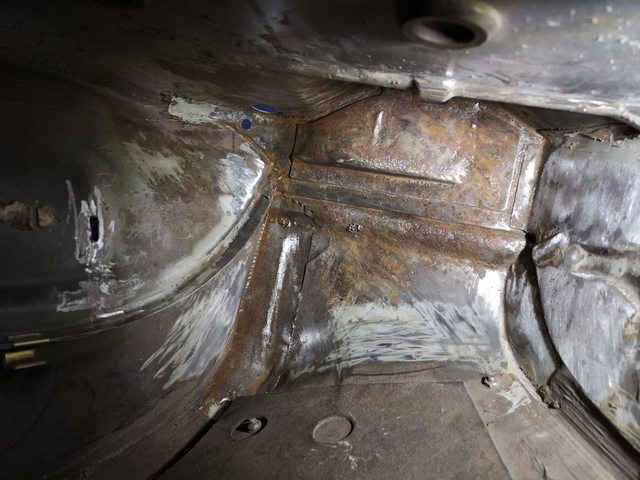
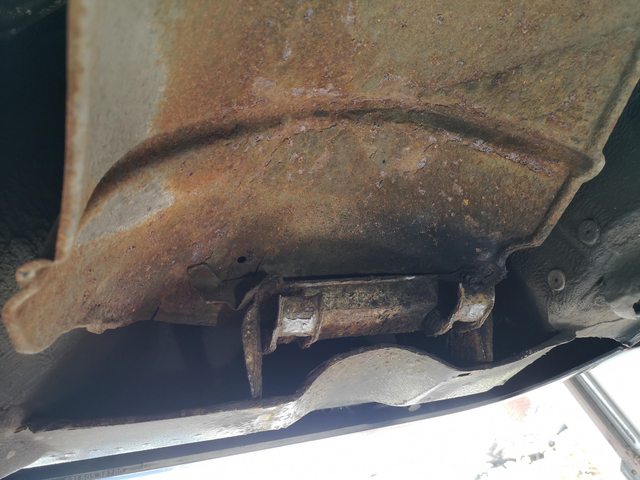
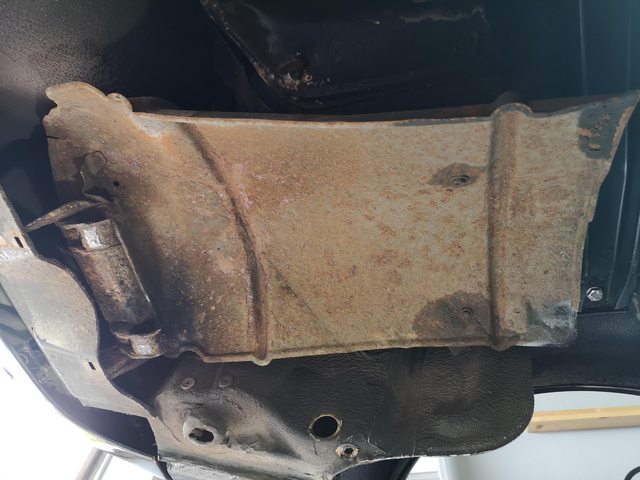
And on to a more recent update from yesterday I removed the rear exhaust hangers, heat shield and set about removing the rear axles in preparation for removing the hubs and trailing arms.
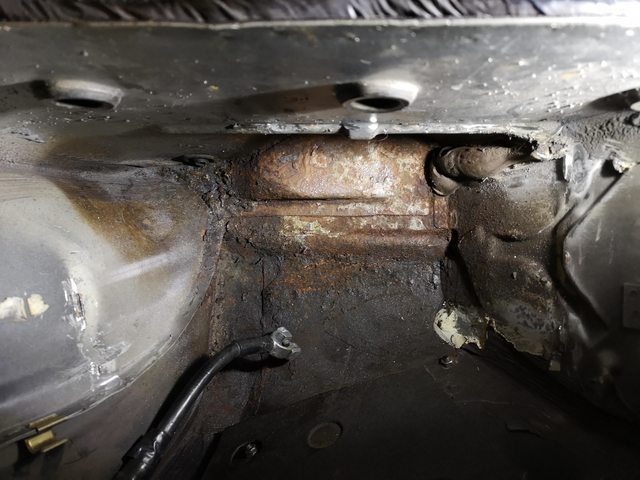
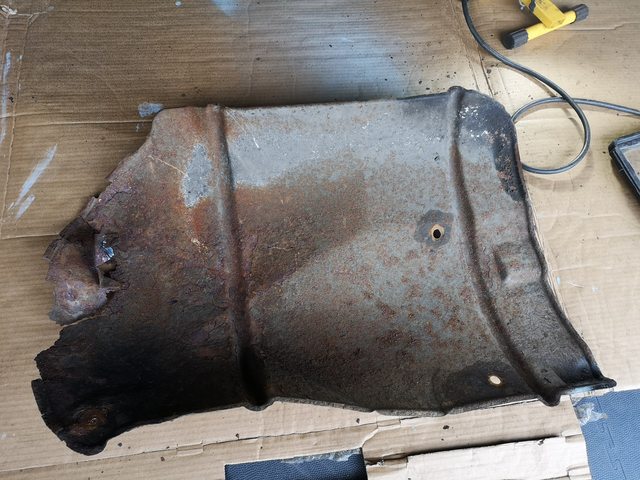
Quite a bit of corrosion above the rear exhaust box which will need treating before I reassemble the exhaust system. The heat shield isn't great so will be looking to either replace (discontinued part and hard to find a second hand one for the turbo) or make something perhaps from sheet metal?
Next update coming soon - will hopefully have the axles off and someway to removing the hubs if they play nicely (hub nuts already removed)!
Since the car has been in the garage I'd noticed a pool of brake fluid developing in the area under the clutch slave cylinder... I took out the starter motor and sure enough the slave cylinder was leaking into the bell housing. I managed to get this off which wasn't easy as the gland nut had rounded so had to use a pair of vice grips. Not sure if I will be able to repair the hydraulic line or will have to make up a new one... I've got a slave cylinder rebuild kit from Porsche and looking at rebuilding or replacing the master cylinder as well. The rubber flexi pipe on the master cylinder was also shot so that also needs replacing.
Back to task I need to get the exhaust system off as part of my masterplan to completely remove the rear suspension and refurbish it all.
Well I don't think the exhaust system has been off for a very long time and most of the bolts had become one with the exhaust joints / flanges through corrosion.
After battling with them over a couple of weekends and use of a drill and angle grinder I managed to remove the back box and catalytic convertor without damaging the exhaust.
I also found one possible culprit for my exhaust fumes in the car issue! looks like the tailpipe weld had cracked on the back box at some point, there is a lot of soot on the back box and under the car in the same area...
The top bolts on the exhaust flange actually came undone but the bottom ones were welded in place by corrosion.
After trying to shine a light into the catalytic convertor and take a picture at the same time, it looks like scrap to me as there is a large hole in the top of the honeycomb material and the material also looks corroded. So will be looking at getting a bypass section.
Also looks like I'm going to have fun removing the wastegate as looks like corrosion has also cause the joints and bolts to become one!
I broke the heads from all four bolts holding the bypass "dump" section of pipe whilst trying to remove the exhaust...
And on to a more recent update from yesterday I removed the rear exhaust hangers, heat shield and set about removing the rear axles in preparation for removing the hubs and trailing arms.
Quite a bit of corrosion above the rear exhaust box which will need treating before I reassemble the exhaust system. The heat shield isn't great so will be looking to either replace (discontinued part and hard to find a second hand one for the turbo) or make something perhaps from sheet metal?
Next update coming soon - will hopefully have the axles off and someway to removing the hubs if they play nicely (hub nuts already removed)!
 06-07-2022, 06:38 AM
#73
Instructor
Thread Starter
Thanks for the kind words guys!
Hope everyone is doing well and enjoying their cars.
Well she is still sitting in the garage on axle stands and I've started working on her and also the 996 again. God forbid I had the thought of adding a 928 or 968 to the stable. These two alone keep me busy enough! Well if I win the lottery I can always find a good garage to look after a 968 and 928 for me.... there are some dreams.
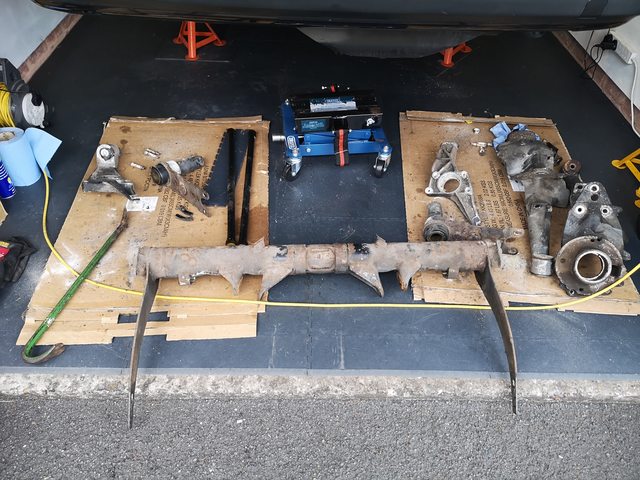
So I managed to eventually remove the drive shafts, had one stuck bolt on the gearbox which refused to come undone. In the end after trying several methods it was the simplest that worked! I took out all the bolts apart from the one which was stuck and then forced the large spacer/washer out in a clockwise direction and it turned the bolt at the same time!
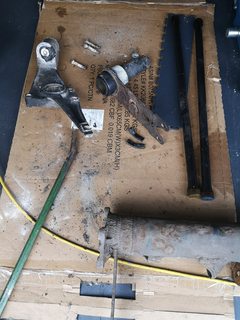
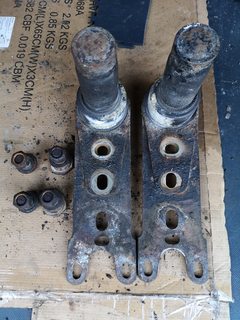
I now have removed the stub axles and since these photos I've removed everything from the trailing arms apart from a couple of sheared bolts on each side (the ones that hold the cable holder and brake disc cover). Hoping I can try and drill those out on my pillar drill or get a workshop to do them for me.
More photos incoming - I'm stuck with the large M12 bolts at the moment that attach the torsion tube carriers to the chassis. The nuts have corroded badly and are stuck to the bolt fast. Planning on trying to cut the nut end off with a hacksaw (if that fails perhaps a reciprocating saw). Not much space to work so that will be fun...
Surprisingly most of the bolts on the spring plates came off fine with the electric impact wrench.
Once all is removed going to sort it out and contact the local workshop that does vapor blasting and see if we can get them cleaned up. Then the fun starts replacing worn bushes, brake lines etc and reassembling it all.
Hope everyone is doing well and enjoying their cars.
Well she is still sitting in the garage on axle stands and I've started working on her and also the 996 again. God forbid I had the thought of adding a 928 or 968 to the stable. These two alone keep me busy enough! Well if I win the lottery I can always find a good garage to look after a 968 and 928 for me.... there are some dreams.
So I managed to eventually remove the drive shafts, had one stuck bolt on the gearbox which refused to come undone. In the end after trying several methods it was the simplest that worked! I took out all the bolts apart from the one which was stuck and then forced the large spacer/washer out in a clockwise direction and it turned the bolt at the same time!
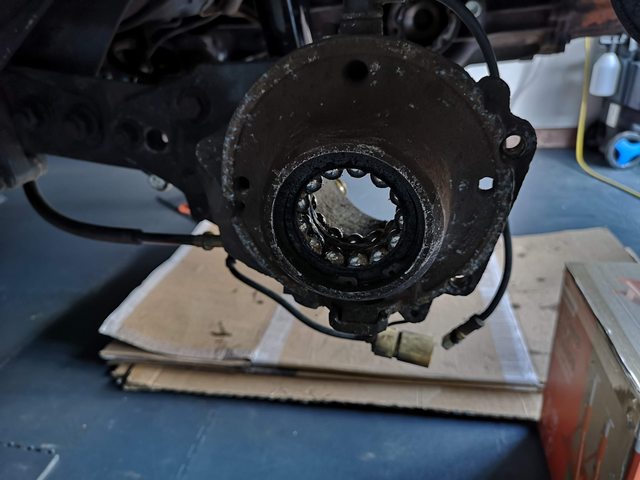
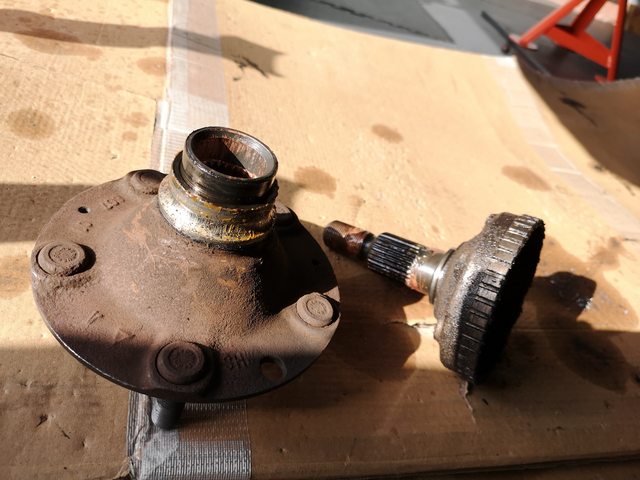
I now have removed the stub axles and since these photos I've removed everything from the trailing arms apart from a couple of sheared bolts on each side (the ones that hold the cable holder and brake disc cover). Hoping I can try and drill those out on my pillar drill or get a workshop to do them for me.
More photos incoming - I'm stuck with the large M12 bolts at the moment that attach the torsion tube carriers to the chassis. The nuts have corroded badly and are stuck to the bolt fast. Planning on trying to cut the nut end off with a hacksaw (if that fails perhaps a reciprocating saw). Not much space to work so that will be fun...
Surprisingly most of the bolts on the spring plates came off fine with the electric impact wrench.
Once all is removed going to sort it out and contact the local workshop that does vapor blasting and see if we can get them cleaned up. Then the fun starts replacing worn bushes, brake lines etc and reassembling it all.
06-07-2022, 06:38 AM
#74
Instructor
Thread Starter
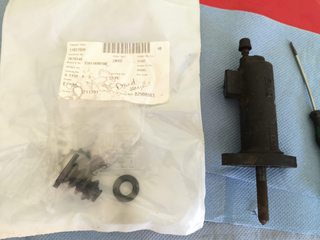
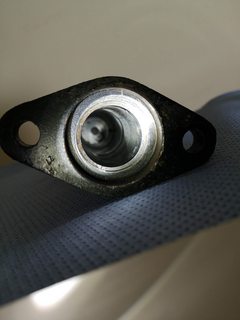
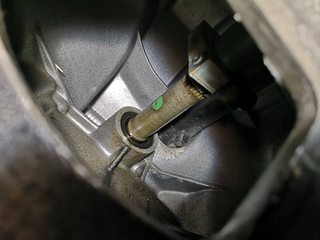
Had a go at rebuilding my clutch slave cylinder with the repair kit from Porsche (part no. 92811690100). The bore looks a bit corroded though, so might try and clean it up with some fine wet and dry paper. Otherwise I will have to bite the bullet and get a replacement. Looking at reconditioning the clutch master cylinder too but those jobs can wait a bit.
Leaky gearbox input shaft, will be dropping the gearbox soon to fix this.
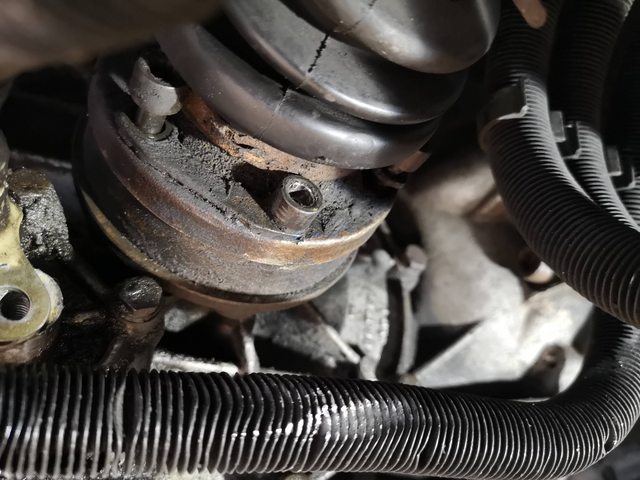
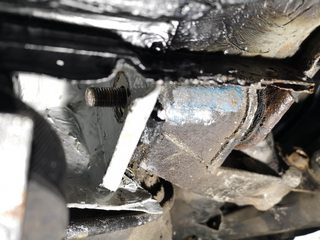
Then I turned my attention back to the rear torsion bar, managed to get the drivers side chassis mount bolt undone fairly easily with the aid of an Irwin Bolt Grip. But no such luck on the passenger side as the bolt had seized in the bushing. So a good 30 minutes of sawing with some Bahco 14tpi metal hacksaw blades and managed to cut through both ends of the M12 bolt.
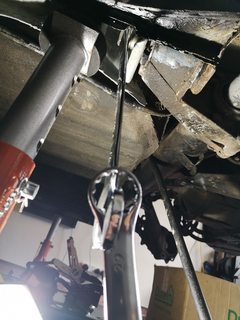
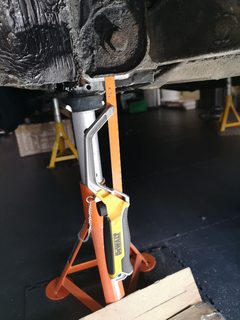
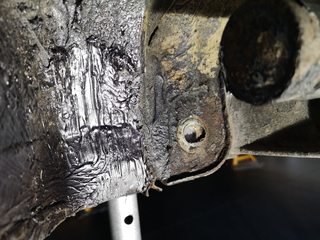
And finally managed to pry the torsion bar down off the chassis with a crowbar and using my transmission jack to support the weight.
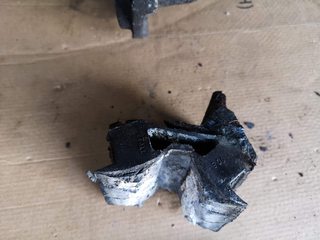
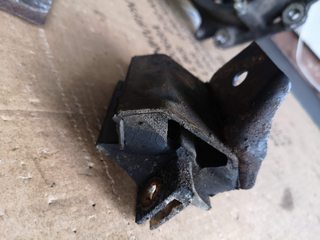
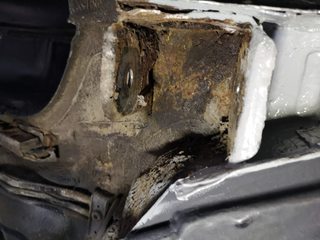
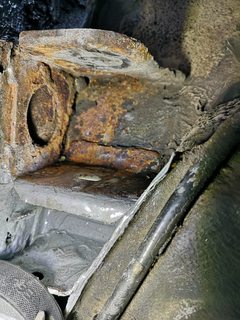
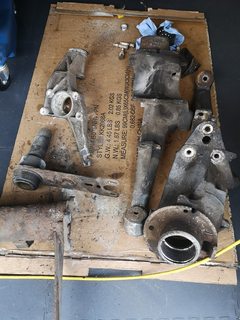
One of the banana arm mounts was completely destroyed, both torsion carrier mounts were toast and fell apart. The chassis mount points look good with plenty of surface rust as the jacking point had. So hoping they will clean up nicely when I get to that stage of the work.
Leaky gearbox input shaft, will be dropping the gearbox soon to fix this.
Then I turned my attention back to the rear torsion bar, managed to get the drivers side chassis mount bolt undone fairly easily with the aid of an Irwin Bolt Grip. But no such luck on the passenger side as the bolt had seized in the bushing. So a good 30 minutes of sawing with some Bahco 14tpi metal hacksaw blades and managed to cut through both ends of the M12 bolt.
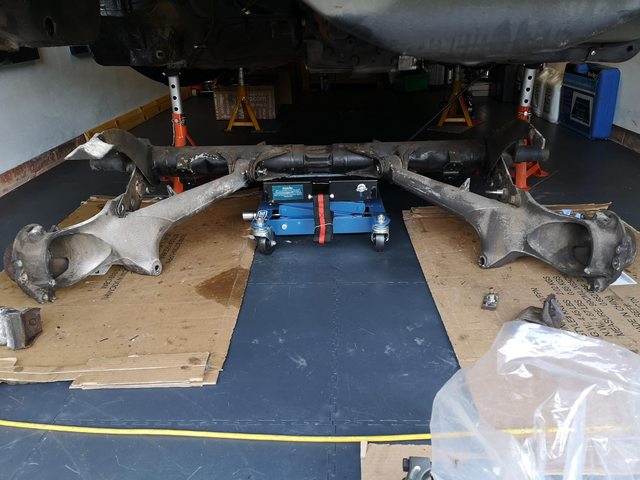
And finally managed to pry the torsion bar down off the chassis with a crowbar and using my transmission jack to support the weight.
One of the banana arm mounts was completely destroyed, both torsion carrier mounts were toast and fell apart. The chassis mount points look good with plenty of surface rust as the jacking point had. So hoping they will clean up nicely when I get to that stage of the work.
06-07-2022, 06:40 AM
#75
Instructor
Thread Starter
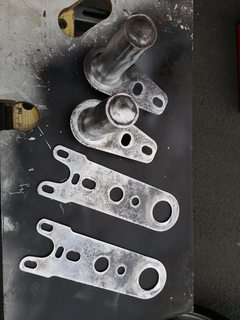
Next jobs were to strip down the torsion bar and rear trailing arms. The torsion bars themselves looked brand new and the inside of the torsion bar carrier was in new condition. The outside however needs a good blasting and powder coating. Some of the nuts and bolts holding the spring plate to the trailing arm were pretty well seized but some slow work with a large breaker bar and some WD40 with plenty of tightening and untightening did the trick without snapping anything.
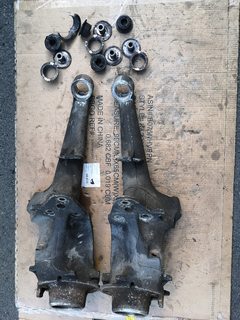
Had some fun getting the inner bushings out of the trailing arms, heated them up with a propane torch and pulled out the rubber part. Then had to hacksaw the metal sleeve and hammer it out with a punch. I'm hoping to get the trailing arms vapour blasted locally.
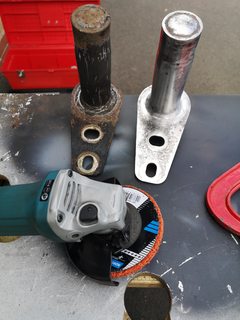
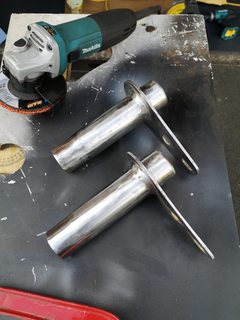
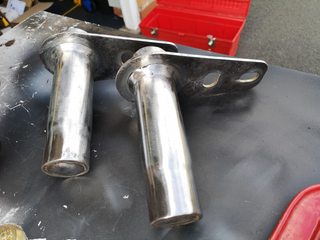
Next I moved on to the spring plates and used the propane torch again to heat up the rubber bushes and used a screwdriver to spilt them away from the metal and left them up off the tube. I then tried using my drill with some wire brushes and a flap wheel to clean up the rust and paint you can see in the image above but it wasn't working too well. Back indoors for a cuppa and it dawned on me that I had bought some Norton Blaze Clean and Strip discs for my angle grinder last year. They worked great at removing the crud off the spring plates!
Next job is dropping the gearbox....
Had some fun getting the inner bushings out of the trailing arms, heated them up with a propane torch and pulled out the rubber part. Then had to hacksaw the metal sleeve and hammer it out with a punch. I'm hoping to get the trailing arms vapour blasted locally.
Next I moved on to the spring plates and used the propane torch again to heat up the rubber bushes and used a screwdriver to spilt them away from the metal and left them up off the tube. I then tried using my drill with some wire brushes and a flap wheel to clean up the rust and paint you can see in the image above but it wasn't working too well. Back indoors for a cuppa and it dawned on me that I had bought some Norton Blaze Clean and Strip discs for my angle grinder last year. They worked great at removing the crud off the spring plates!
Next job is dropping the gearbox....