944 Turbo Mini Restoration
 06-07-2022, 09:57 AM
#76
Racer
Nice work, the car is looking really good! I’m in the middle of an engine swap on my 914 so I’ve been neglecting my 951, but you’re motivating me to get back to some needed projects. Cheers!
 06-07-2022, 12:36 PM
#77
Burning Brakes

I'm stuck with the large M12 bolts at the moment that attach the torsion tube carriers to the chassis. The nuts have corroded badly and are stuck to the bolt fast. Planning on trying to cut the nut end off with a hacksaw (if that fails perhaps a reciprocating saw). Not much space to work so that will be fun...
06-07-2022, 04:14 PM
#78
Instructor
Thread Starter
Got them off in the end, one side was fine and just needed an Irwin Bolt Grip to hold the nut as it had rounded. The other side I had to cut the head and tail off the bolt with a hacksaw as the body had seized inside the alloy sleeve in the bushing.
Last edited by dlknight; 06-07-2022 at 04:15 PM.
06-27-2022, 11:48 AM
#79
Instructor
Thread Starter
After a brief break to do some jobs on the 996 (header tank and low temp thermostat). Got back to the 944 and made a start at removing the rest of the transmission components.
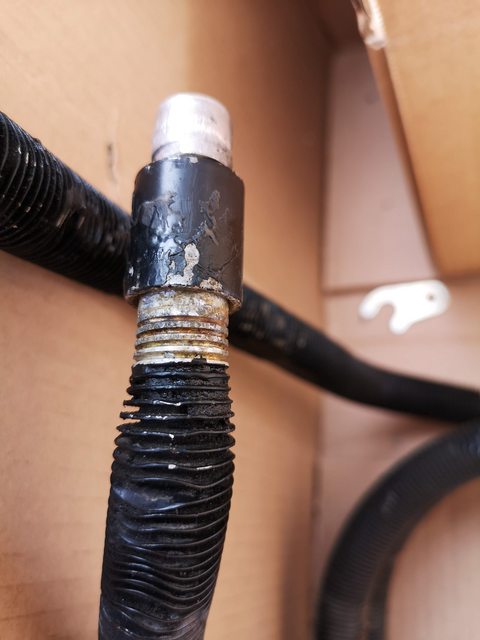
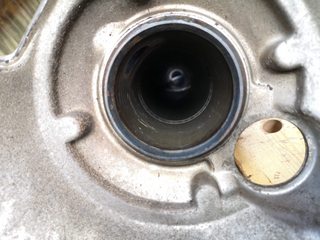
First job was to drain and then remove the gearbox. The dowel pins were stuck in quite well and had to give the bell housing a good pry with a large screw driver to force the gearbox to part. Possible leaks from the selector shaft seal, output flange seals and oil pump output to cooler. I had to remove the cooler to make it easier to get to the gearbox to bell housing bolts and examined the oil pump end of the cooler. The connecting piece is totally marred and squashed so is likely the cause of one leak. Unfortunately there are no repair pieces although I have seen someone on PCGB had a friend make a replacement on a CNC lathe. Other option is to buy an aftermarket gearbox cooler as adaptors are available to AN fittings.
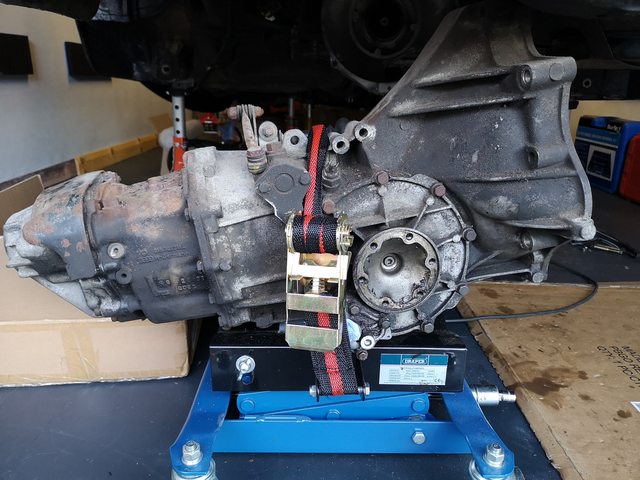
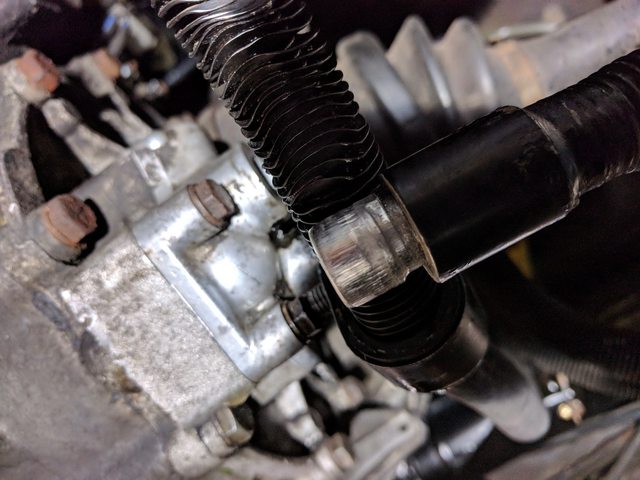
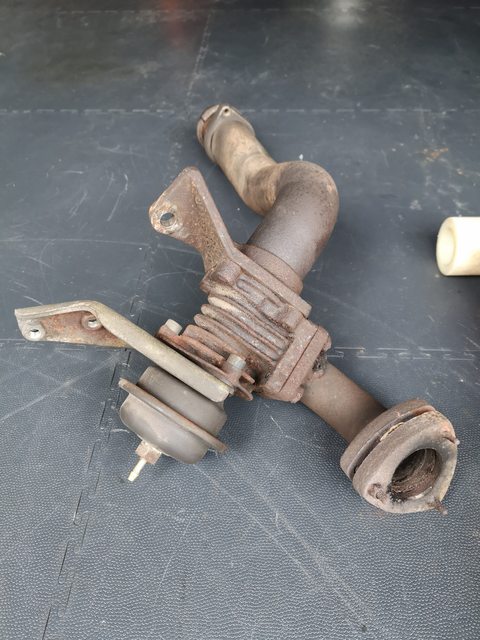
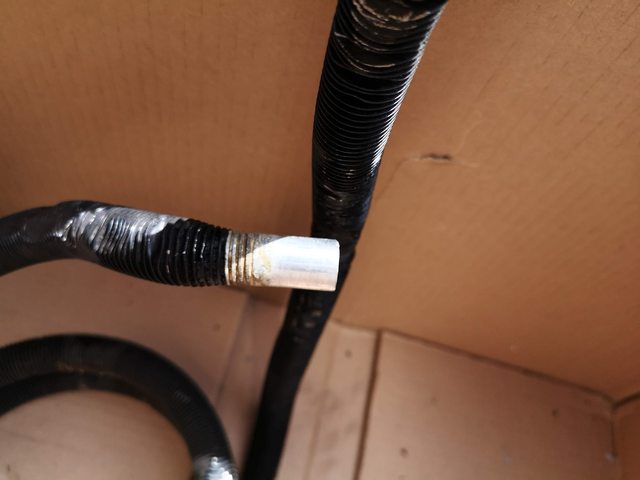
Next job was to remove the waste gate so I could drop the torque tube. Unfortunately I'd already snapped 4 bolts on the output side of the waste gate. Was interesting undoing the bolts that secure it to the torque tube housing... I also found the possible cause of my exhaust leak and fumes when driving. The input pipe was loose on the crossover section as the nuts and bolts on the compression fitting had completely corroded through and there were clear soot marks on the outside of the pipe.
It also appears that someone has attempted to fix a leak in the past by welding the compression flanges on to the pipe. I've had one session of grinding the welds off in an attempt to free the flange up as it should be.
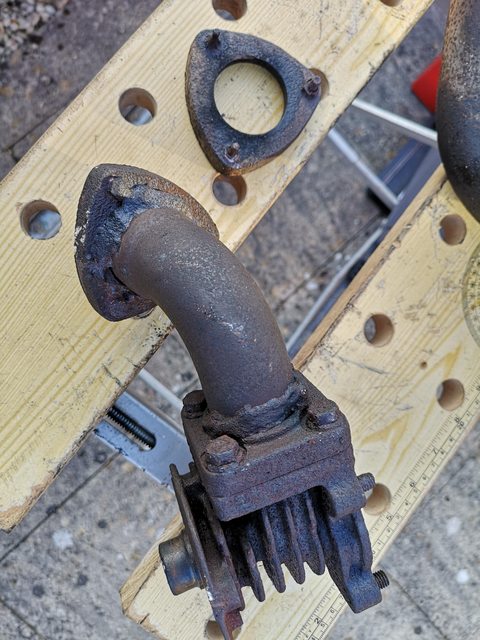
I managed to free up 2 of the remaining 4 bolts on the waste gate body (inlet side) by soaking the whole body in a diesel / petrol mixture for a couple of days. Cleaning with brake cleaner and then heating the area around the bolt for a couple of minutes. Unfortunately the other 2 snapped so I'm stuck with 6 broken bolts in the body. Possibly going to take it to a local engineering shop to see if they can extract them for me. I managed to save the loose flange by grinding the rusted in bolts flat and using heat again until it was pretty hot. Then a carefully positioned punch and smacking it with a sledge hammer until they popped out. I'm glad about that as the flange is silly money from Porsche as is the short inlet pipe.
Next was the torque tube, that was pretty easy, just time consuming to remove the two braces from the tunnel.

Unfortunately (well it has driven over 200k miles) the bearings sound very dry. So I will be refurbing the torque tube, I've heard this is one of the worst jobs to undertake on a 944.... awesome!
Latest update from Sunday evening is I managed to remove the clutch cover after much faffing and squashed hands. The worst part was trying to remove the sensors. Although I've learnt a couple of tricks now! I undid the sensor bracket before removing the cover. The top bolt on the housing and also the earth connection are very very hard to get to, I reckon they are going to be as much fun when re-assembling as well.
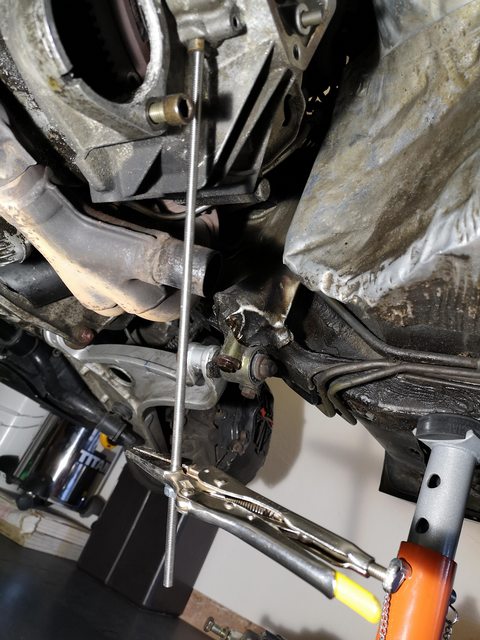
The clutch fork pin was stuck in quite well so I constructed a tool from a section of M8 threaded bar, a couple of lock nuts, pair of vice grips and a BFH (or sledge hammer). That finally got it out and after a lot of wiggling and couple of smacks with a rubber mallet the cover came out along with the sensor bracket.
The next fun job is removing the pressure plate, clutch disc and fly wheel...
Going to measure the clutch but I reckon after all that hassle I should probably just replace it with a full kit including the pilot bearing and release bearing. Also going to replace the clutch fork pin and bearings. Clutch fork looks fine with no obvious bends or cracks.
First job was to drain and then remove the gearbox. The dowel pins were stuck in quite well and had to give the bell housing a good pry with a large screw driver to force the gearbox to part. Possible leaks from the selector shaft seal, output flange seals and oil pump output to cooler. I had to remove the cooler to make it easier to get to the gearbox to bell housing bolts and examined the oil pump end of the cooler. The connecting piece is totally marred and squashed so is likely the cause of one leak. Unfortunately there are no repair pieces although I have seen someone on PCGB had a friend make a replacement on a CNC lathe. Other option is to buy an aftermarket gearbox cooler as adaptors are available to AN fittings.
Next job was to remove the waste gate so I could drop the torque tube. Unfortunately I'd already snapped 4 bolts on the output side of the waste gate. Was interesting undoing the bolts that secure it to the torque tube housing... I also found the possible cause of my exhaust leak and fumes when driving. The input pipe was loose on the crossover section as the nuts and bolts on the compression fitting had completely corroded through and there were clear soot marks on the outside of the pipe.
It also appears that someone has attempted to fix a leak in the past by welding the compression flanges on to the pipe. I've had one session of grinding the welds off in an attempt to free the flange up as it should be.
I managed to free up 2 of the remaining 4 bolts on the waste gate body (inlet side) by soaking the whole body in a diesel / petrol mixture for a couple of days. Cleaning with brake cleaner and then heating the area around the bolt for a couple of minutes. Unfortunately the other 2 snapped so I'm stuck with 6 broken bolts in the body. Possibly going to take it to a local engineering shop to see if they can extract them for me. I managed to save the loose flange by grinding the rusted in bolts flat and using heat again until it was pretty hot. Then a carefully positioned punch and smacking it with a sledge hammer until they popped out. I'm glad about that as the flange is silly money from Porsche as is the short inlet pipe.
Next was the torque tube, that was pretty easy, just time consuming to remove the two braces from the tunnel.
Unfortunately (well it has driven over 200k miles) the bearings sound very dry. So I will be refurbing the torque tube, I've heard this is one of the worst jobs to undertake on a 944.... awesome!
Latest update from Sunday evening is I managed to remove the clutch cover after much faffing and squashed hands. The worst part was trying to remove the sensors. Although I've learnt a couple of tricks now! I undid the sensor bracket before removing the cover. The top bolt on the housing and also the earth connection are very very hard to get to, I reckon they are going to be as much fun when re-assembling as well.
The clutch fork pin was stuck in quite well so I constructed a tool from a section of M8 threaded bar, a couple of lock nuts, pair of vice grips and a BFH (or sledge hammer). That finally got it out and after a lot of wiggling and couple of smacks with a rubber mallet the cover came out along with the sensor bracket.
The next fun job is removing the pressure plate, clutch disc and fly wheel...
Going to measure the clutch but I reckon after all that hassle I should probably just replace it with a full kit including the pilot bearing and release bearing. Also going to replace the clutch fork pin and bearings. Clutch fork looks fine with no obvious bends or cracks.
Last edited by dlknight; 06-27-2022 at 11:49 AM.
07-02-2022, 03:11 PM
#80
Instructor
Thread Starter
Smaller update from me today and possibly the omen of bad news a bit further down...
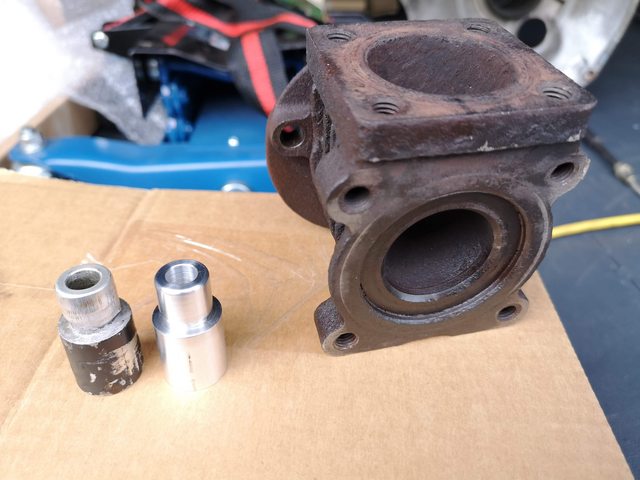
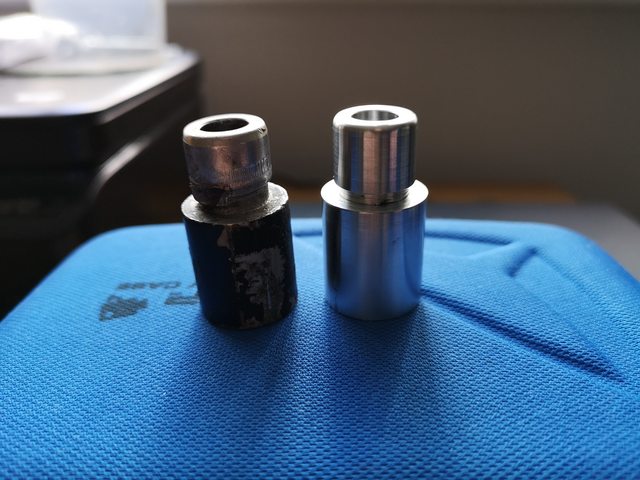
So made some progress on my gearbox oil cooler. I managed to remove the worn out connecting piece from the end which connects to the oil pump. I took it along with my waste gate to a local tool shop (Mac's Tool Shop in Bromyard) and they were able to mill me a replacement piece and also removed the broken bolts from my waste gate.
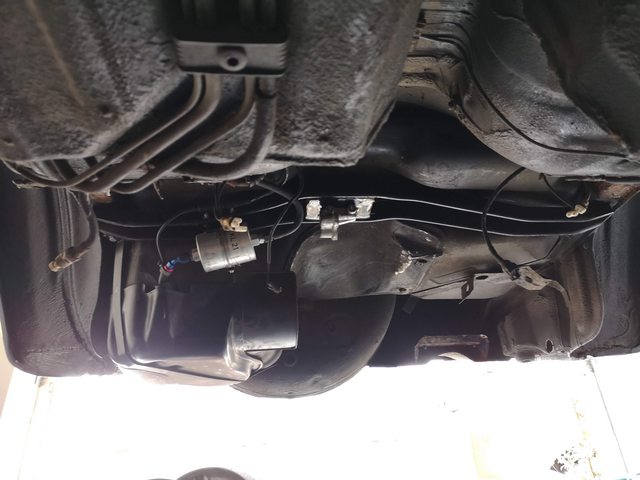
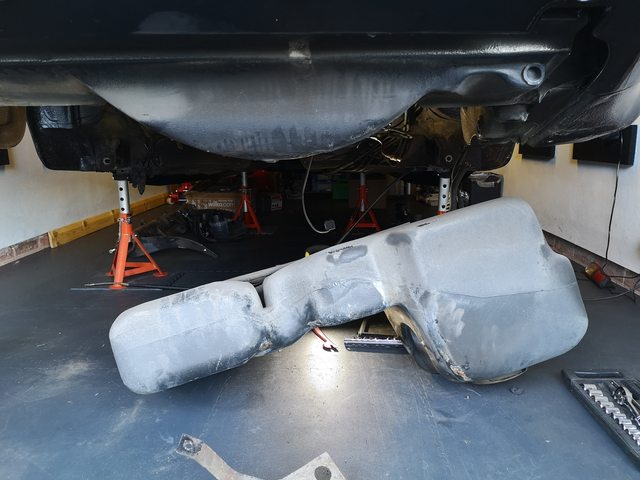
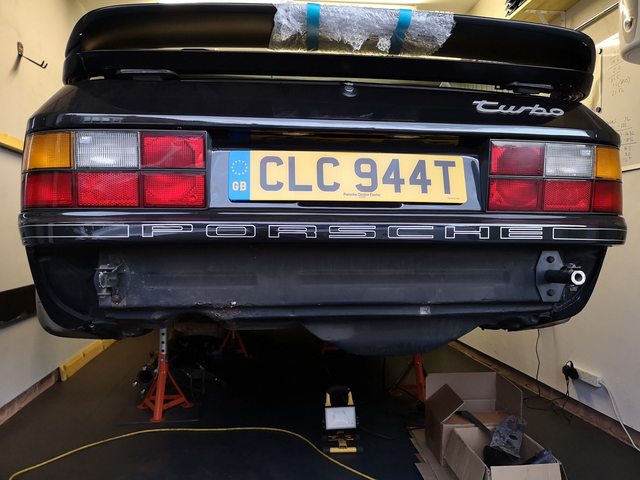
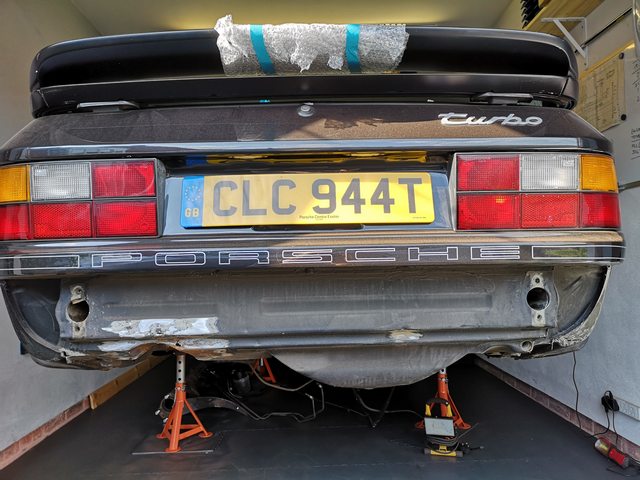
After that little success I continued with the clutch and flywheel removal today. Also took a picture of the almost empty rear underbody (fuel tank will be dropping down at some point to check and replace hoses).
3 of the 9 pressure plate bolts had rounded off so I had to drill those out. I got some Sealey left hand drill bits from Amazon which worked great. Instead of completely taking the head off they also undid the bolt once it had released the tension.
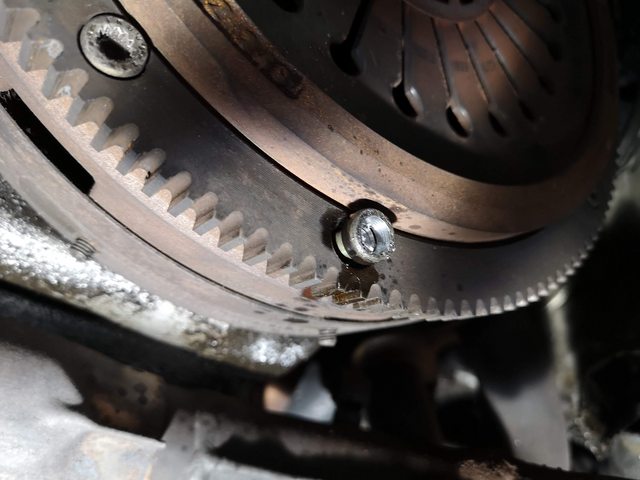
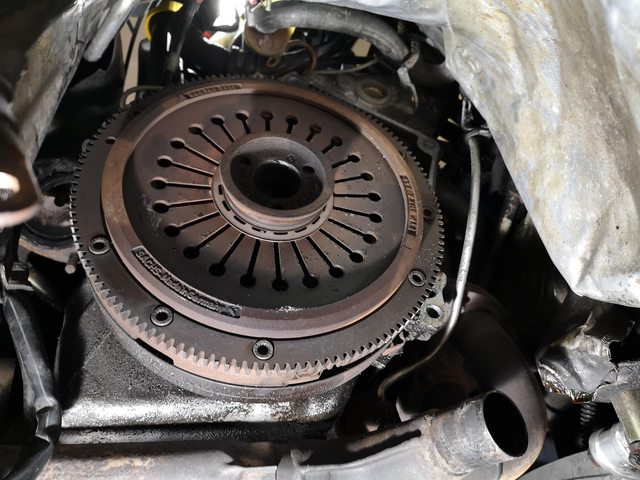
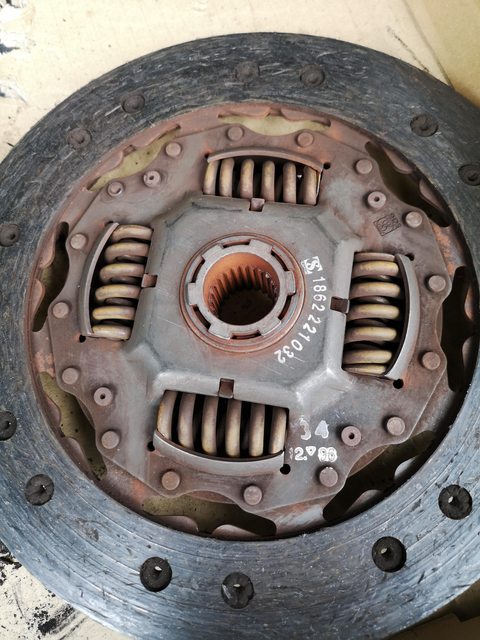
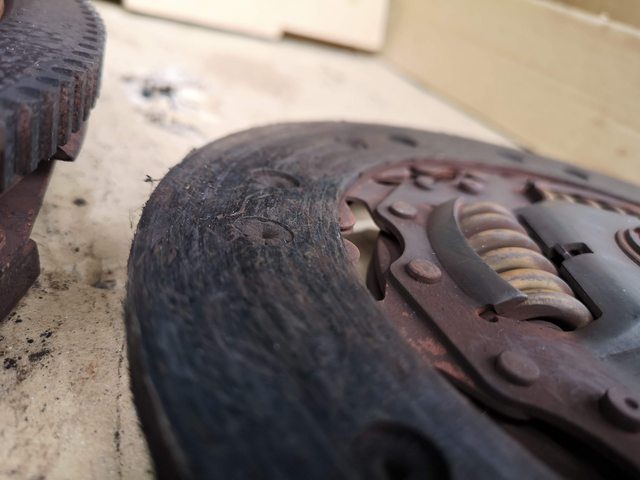
Looking at the clutch and pressure plate I can see a big 34 with 12 96 stamped. So looks like my clutch was replaced some point after week 34 of 1996. Wear was almost up to the rivet heads so I'm hoping the flywheel can be resurfaced as they aren't cheap either.
The flywheel came out much more easily BUT I noticed a problem. The crankshaft appeared to have a lot of end play.
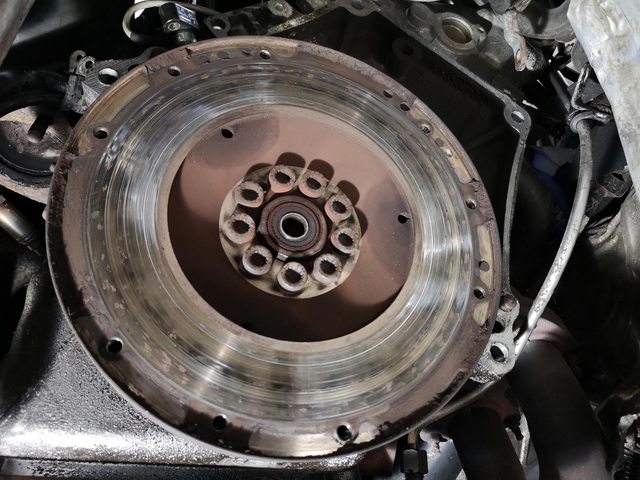
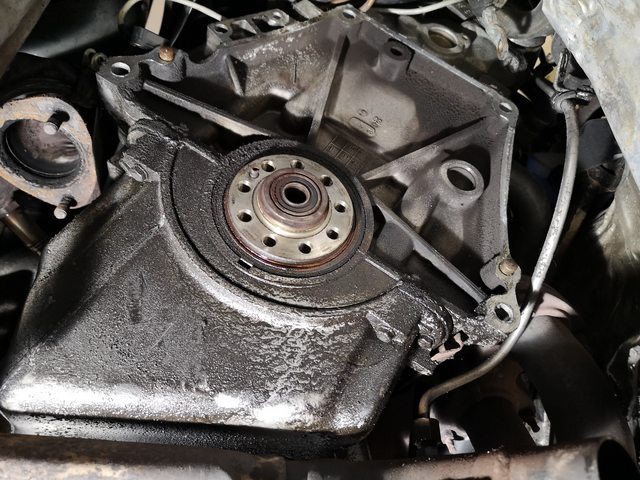
I got out my dial gauge and got a repeatable measurement of 0.84mm...
The wear limit in the WSM is 0.40mm so I'm over twice that... which I guess means that the thrust bearing is completely worn out...
I assume this is also why the RMS leak is sooo bad...
I hadn't planned on doing an engine rebuild also but looks like that is where this is heading. No point fitting a new clutch etc and putting everything back as it is best done now whilst everything is apart...
Now I need to consider my options... and probably continue restoring the rear end so I can get some wheels on to move the car around for engine removal..
So made some progress on my gearbox oil cooler. I managed to remove the worn out connecting piece from the end which connects to the oil pump. I took it along with my waste gate to a local tool shop (Mac's Tool Shop in Bromyard) and they were able to mill me a replacement piece and also removed the broken bolts from my waste gate.
After that little success I continued with the clutch and flywheel removal today. Also took a picture of the almost empty rear underbody (fuel tank will be dropping down at some point to check and replace hoses).
3 of the 9 pressure plate bolts had rounded off so I had to drill those out. I got some Sealey left hand drill bits from Amazon which worked great. Instead of completely taking the head off they also undid the bolt once it had released the tension.
Looking at the clutch and pressure plate I can see a big 34 with 12 96 stamped. So looks like my clutch was replaced some point after week 34 of 1996. Wear was almost up to the rivet heads so I'm hoping the flywheel can be resurfaced as they aren't cheap either.
The flywheel came out much more easily BUT I noticed a problem. The crankshaft appeared to have a lot of end play.
I got out my dial gauge and got a repeatable measurement of 0.84mm...
The wear limit in the WSM is 0.40mm so I'm over twice that... which I guess means that the thrust bearing is completely worn out...
I assume this is also why the RMS leak is sooo bad...
I hadn't planned on doing an engine rebuild also but looks like that is where this is heading. No point fitting a new clutch etc and putting everything back as it is best done now whilst everything is apart...
Now I need to consider my options... and probably continue restoring the rear end so I can get some wheels on to move the car around for engine removal..
07-16-2022, 01:42 PM
#81
Instructor
Thread Starter
Since the last update I have been working on the torque tube rebuild and also got some parts vapour blasted locally.
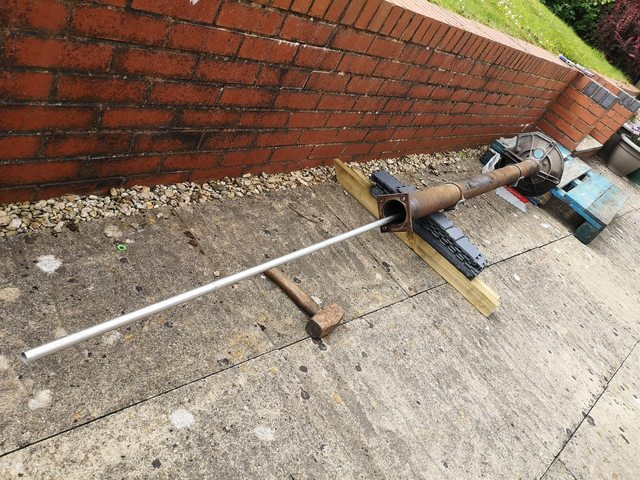
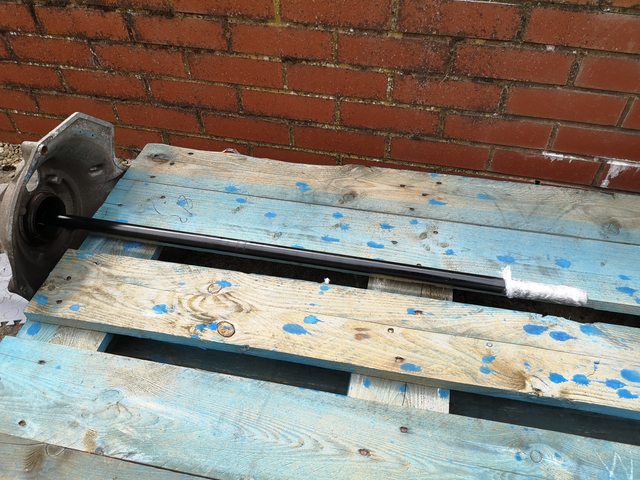
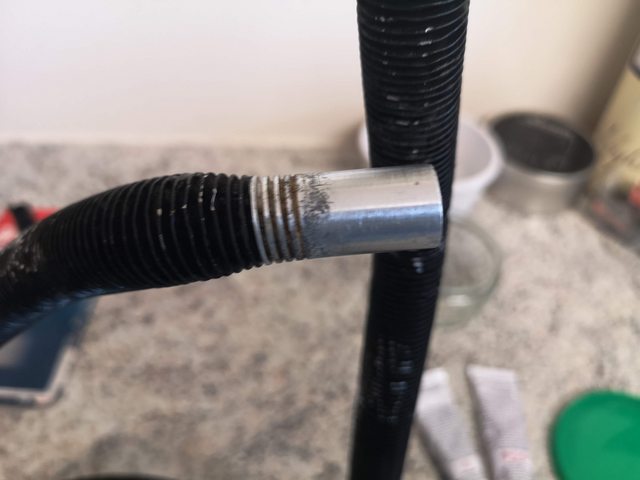
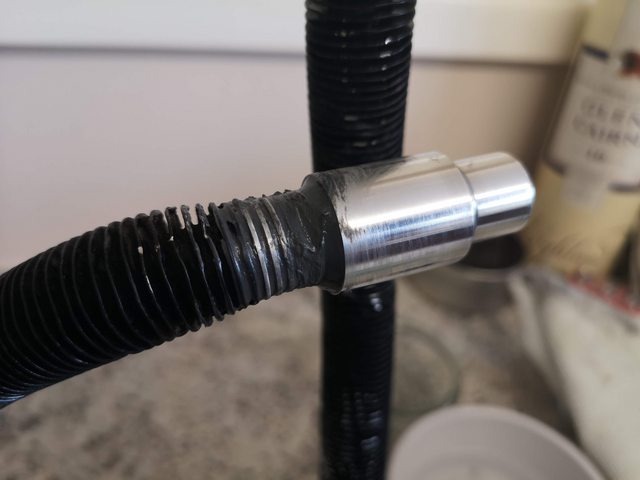
First off removing the drive shaft from the torque tube was very hard. I obtained 3m of 20mm metal conduit from Screwfix to use to knock out the torque tube. This diameter allows the end of the steel conduit to rest on the spigot at the clutch end of the drive shaft. The drive shaft is hardened so the soft steel metal conduit will not damage it.
I cut the conduit down to 2m and started of with the 1m piece until I had knocked the shaft far enough through the torque tube.
It took plenty of pounding with my sledge hammer to get the shaft past the first bearing. I actually hurt my hand pretty bad just from the motion of hitting the steel conduit. Once it was past the first bearing it moved much more quickly and on the second evening of trying to get the shaft out it came out.
I ordered some aluminium suspension parts from Retro Automotive products in the USA as they were a great price and looked like NOS to me even though they were listed as used. Postage was really reasonable and they even gave me a refund as the postage worked out cheaper than anticipated. The parts also arrived quickly (in 5 days), they were actually in the UK in 2 days, they just spent ages sitting at Heathrow.
Left & Right torsion bar mounts
Right M030 rear trailing arm (unfortunately they didn't have a matching Left to go with it)

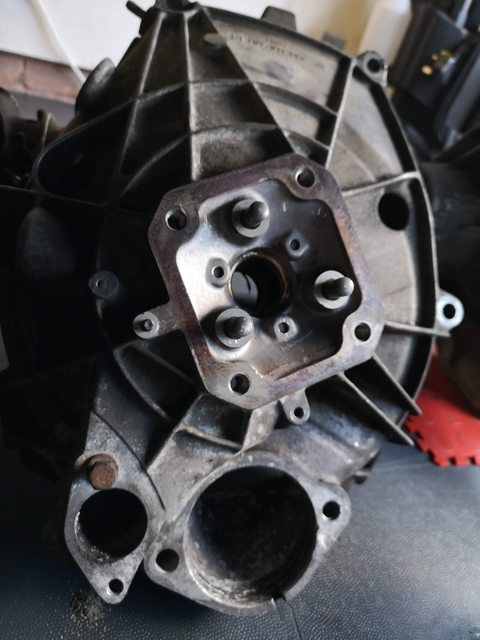
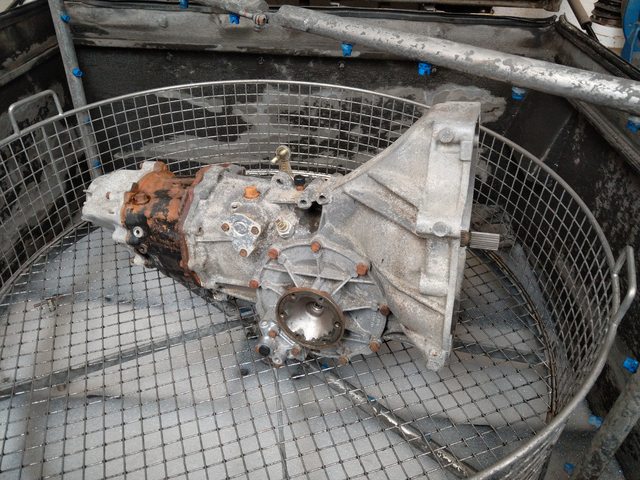
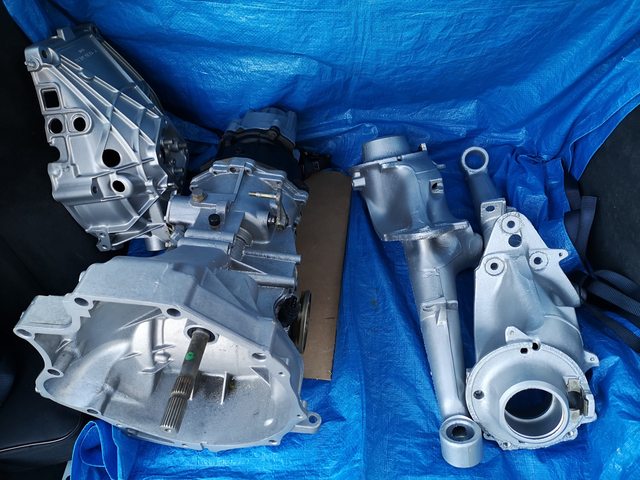
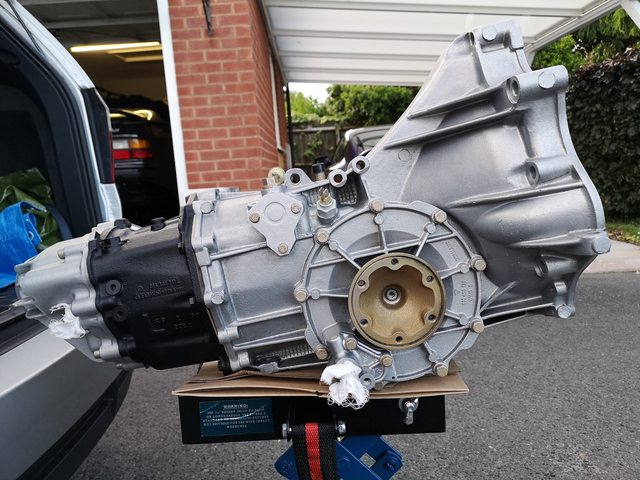
I also took my gearbox, current trailing arms and stub axles to the vapour blaster for cleaning and blasting. I was really pleased with how they turned out, he even painted the centre steel section on the gearbox for me. All I need to do now is get the steel parts re-treated and the gearbox resealed with the repair kit from Porsche.


First off removing the drive shaft from the torque tube was very hard. I obtained 3m of 20mm metal conduit from Screwfix to use to knock out the torque tube. This diameter allows the end of the steel conduit to rest on the spigot at the clutch end of the drive shaft. The drive shaft is hardened so the soft steel metal conduit will not damage it.
I cut the conduit down to 2m and started of with the 1m piece until I had knocked the shaft far enough through the torque tube.
It took plenty of pounding with my sledge hammer to get the shaft past the first bearing. I actually hurt my hand pretty bad just from the motion of hitting the steel conduit. Once it was past the first bearing it moved much more quickly and on the second evening of trying to get the shaft out it came out.
I ordered some aluminium suspension parts from Retro Automotive products in the USA as they were a great price and looked like NOS to me even though they were listed as used. Postage was really reasonable and they even gave me a refund as the postage worked out cheaper than anticipated. The parts also arrived quickly (in 5 days), they were actually in the UK in 2 days, they just spent ages sitting at Heathrow.
Left & Right torsion bar mounts
Right M030 rear trailing arm (unfortunately they didn't have a matching Left to go with it)
I also took my gearbox, current trailing arms and stub axles to the vapour blaster for cleaning and blasting. I was really pleased with how they turned out, he even painted the centre steel section on the gearbox for me. All I need to do now is get the steel parts re-treated and the gearbox resealed with the repair kit from Porsche.
The following 3 users liked this post by dlknight:
07-16-2022, 01:43 PM
#82
Instructor
Thread Starter
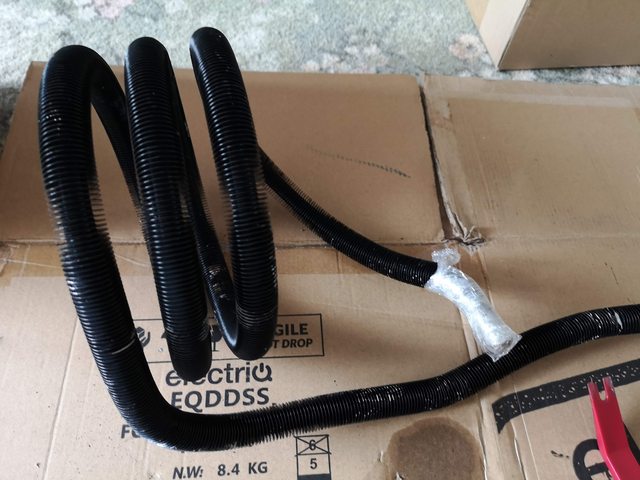
Spent a few hours straightening the cooling fins on the gearbox oil cooler....
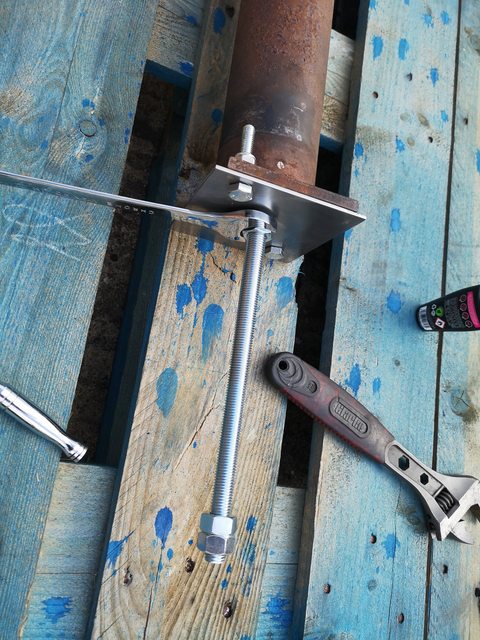
Continued working on the torque tube rebuild - I ordered the following bits -
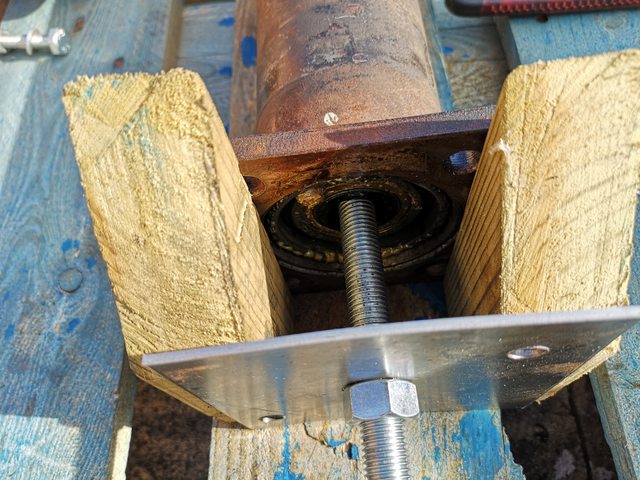
Then drilled a central 16mm hole in the sheet to pass the threaded bar through.
Followed the instructions on Clarks Garage, I used an old hand sanitiser bottle to apply a line of engine oil to the threaded shaft for lubrication.
After this I squirted neat fairy liquid at each end and a good amount through the shifter bracket mounting holes, then also sprayed a soap / water solution into the tube using a small spray bottle.
Then used my electric impact wrench and it pulled the bearings out in a few minutes! :bounce:
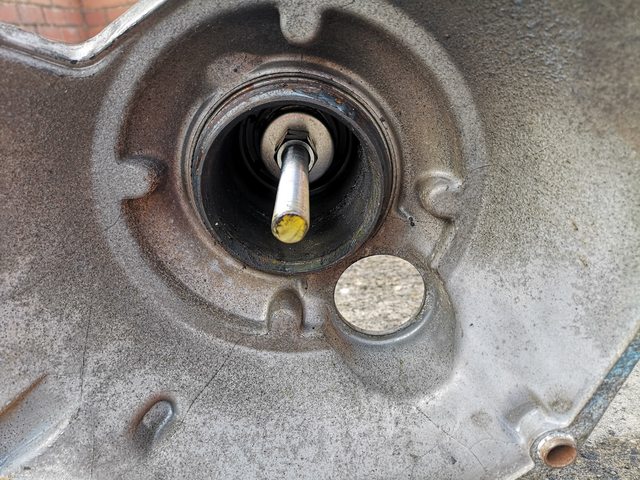
Used some blocks of wood to step the metal sheet away from the torque tube flange when the bearings got to the end.
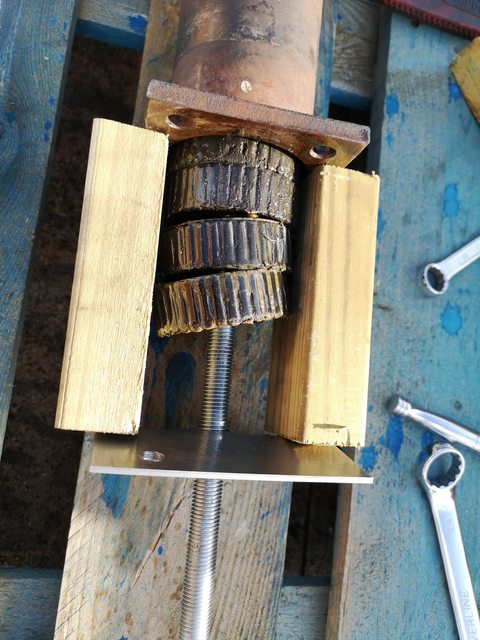
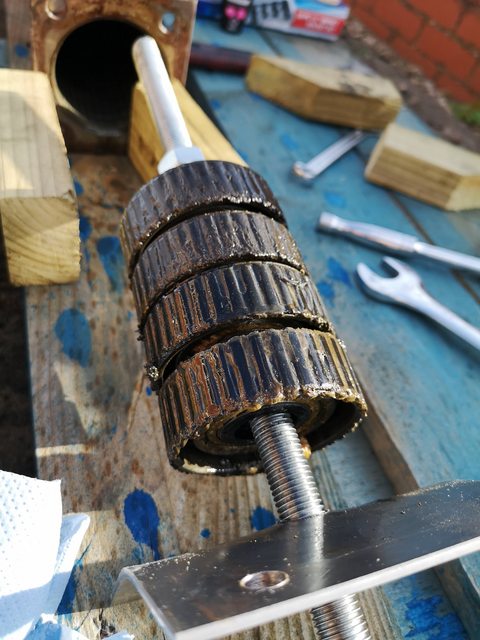
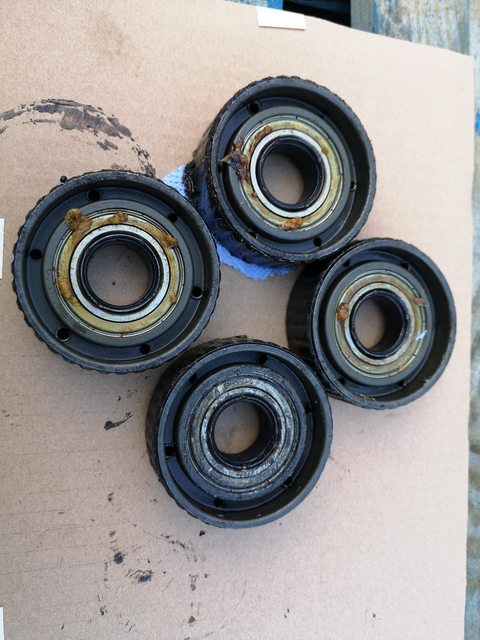
As you can see most of the grease has come out of the bearings, 2 were quite dry and noisy, 1 not so bad and 1 still felt OK.
Now I have to decide how much money I want to spend replacing them, I definitely don't want to have to do this job again though!
I've seen some suppliers listing C4 bearings by SKF in the right size, so just need to decide if the bearing carriers and inner sleeves are worth it or if I need to get the whole lot...
Looking at the inner sleeves for the drive shaft I think two of them have cracks in but are still solid.
I have the earlier type bearing carriers that are stamped together, the outer rubber doesn't look too bad (the pictures look bad as they were covered in fairy liquid and grease).
Can anyone recommend a good paint to use for the torque tube once I've had it blasted? I don't fancy powder coat due to it being close to the exhaust. I guess a good chassis paint would be good? Will probably use a brush paint (Eastwood or Frost?).
Also wondering if painting it silver would help with the heat (instead of black)...
Continued working on the torque tube rebuild - I ordered the following bits -
- 16mm Threaded Bar
- 10 x M16 full nuts
- 5 x M16 Form G washers (17mm x 50mm x 3mm)
- 125mm x 125mm sheet of mild steel (3mm thick)
- 16mm blacksmiths drill bit (stepped)
Then drilled a central 16mm hole in the sheet to pass the threaded bar through.
Followed the instructions on Clarks Garage, I used an old hand sanitiser bottle to apply a line of engine oil to the threaded shaft for lubrication.
After this I squirted neat fairy liquid at each end and a good amount through the shifter bracket mounting holes, then also sprayed a soap / water solution into the tube using a small spray bottle.
Then used my electric impact wrench and it pulled the bearings out in a few minutes! :bounce:
Used some blocks of wood to step the metal sheet away from the torque tube flange when the bearings got to the end.
As you can see most of the grease has come out of the bearings, 2 were quite dry and noisy, 1 not so bad and 1 still felt OK.
Now I have to decide how much money I want to spend replacing them, I definitely don't want to have to do this job again though!
I've seen some suppliers listing C4 bearings by SKF in the right size, so just need to decide if the bearing carriers and inner sleeves are worth it or if I need to get the whole lot...
Looking at the inner sleeves for the drive shaft I think two of them have cracks in but are still solid.
I have the earlier type bearing carriers that are stamped together, the outer rubber doesn't look too bad (the pictures look bad as they were covered in fairy liquid and grease).
Can anyone recommend a good paint to use for the torque tube once I've had it blasted? I don't fancy powder coat due to it being close to the exhaust. I guess a good chassis paint would be good? Will probably use a brush paint (Eastwood or Frost?).
Also wondering if painting it silver would help with the heat (instead of black)...
The following 2 users liked this post by dlknight:
EliteThink (07-16-2022),
Voith (07-18-2022)
07-16-2022, 06:40 PM
#84
Rennlist Member
Regarding the fin straightening on the trans oil cooler loop, what tool did you find most effective? I see what appears to be a plastic trim removal tool...
07-17-2022, 02:59 PM
#85
Instructor
Thread Starter
The fins are very soft and bend easily with a little pressure.
The following users liked this post:
EliteThink (07-18-2022)

 08-31-2022, 11:17 AM
#87
1st Gear

Join Date: Aug 2022
Posts: 1
Likes: 0
Received 0 Likes
on
0 Posts
I have the exact same issue with the transmission oil cooling fitting.
How did you remove the worn out connecting piece? Looks like it's just press fitted? Just used a lot of force with some pliers?
And more importantly, how did you get the new piece on it?
btw, very nice work! Appreciates all the help and inspiration from this thread.
How did you remove the worn out connecting piece? Looks like it's just press fitted? Just used a lot of force with some pliers?
And more importantly, how did you get the new piece on it?
btw, very nice work! Appreciates all the help and inspiration from this thread.
09-01-2022, 06:36 AM
#88
Instructor
Thread Starter
I have the exact same issue with the transmission oil cooling fitting.
How did you remove the worn out connecting piece? Looks like it's just press fitted? Just used a lot of force with some pliers?
And more importantly, how did you get the new piece on it?
btw, very nice work! Appreciates all the help and inspiration from this thread.
How did you remove the worn out connecting piece? Looks like it's just press fitted? Just used a lot of force with some pliers?
And more importantly, how did you get the new piece on it?
btw, very nice work! Appreciates all the help and inspiration from this thread.
I cleaned up the surface to attach my new piece and used some standard JB Weld applied liberally and then cleaned up the excess after firmly pushing the new piece into place.

 09-01-2022, 01:24 PM
#89
Instructor
Thread Starter
Back once again for the restoration Porsche... 
Cleaned the inside of the torque tube with a home-made pipe cleaner consisting of an old broom handle, used soft drinks bottle, old chamois and some methylated spirits.
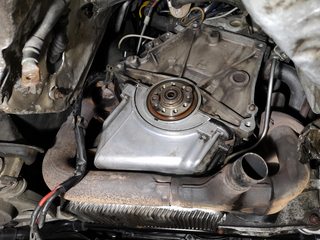
Cleaned up the rear side of the engine with some brake cleaner just to make it look tidier.
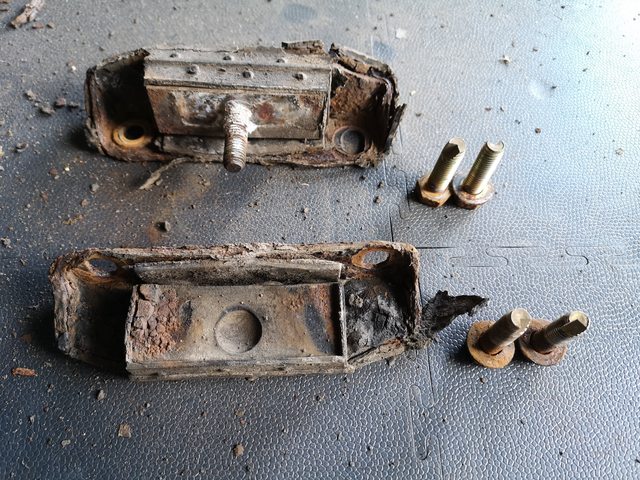
Finished up removing all the torsion bar mounts from the body / chassis. I used a normal house hold scrubbing brush to dry clean the dirt and mud of the chassis. This worked really well and the plastic bristles didn't damage the factory underseal.
Chassis is in pretty good condition, does anyone know what product Porsche used for the beige rubber type coating? Where I'm tidying up some bits of surface corrosion I'd like to use the same product if possible as it has done a great job of protecting the car for 32 years.
Finally split all the bearing carriers and cleaned everything.
Got some new delrin bushings and rivets from Augment Automotive and made a start on filing down the rivets to fit in the bearing carriers.
The rubber outers for the bearing carriers are reusable.
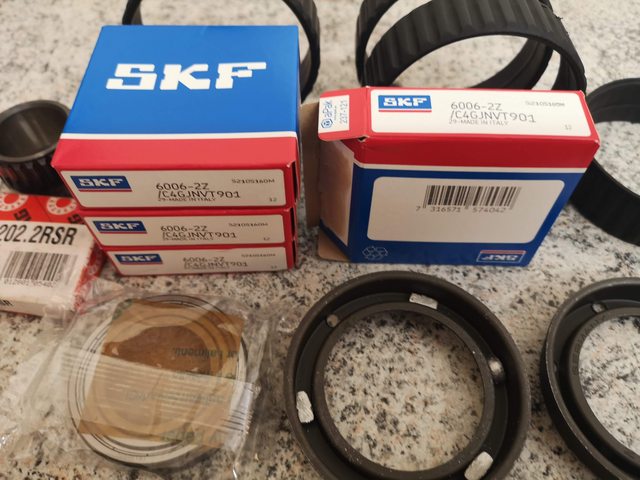
I managed to get 4 new SKF 6006 2Z C4 bearings from bolton bearings on ebay for a good price.
As you can see the original bearings out of the torque tube were also C4 made by INA, I've seen reference to C5 bearings on rennlist but not sure where that information perpetuated from as mine are clearly C4.
Also picked up a pilot bearing while I was at it (6202.2RSR from ***).
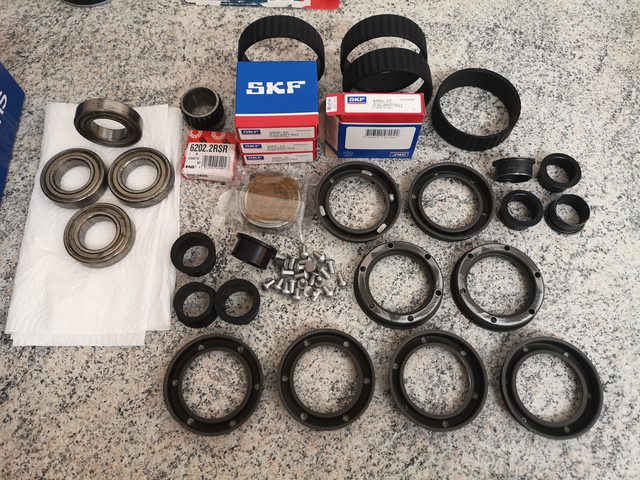
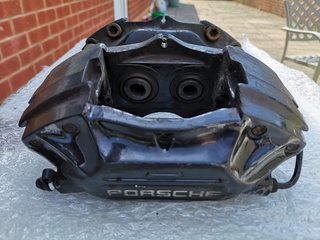
I was going to get the rear brake calipers rebuilt by Pro Calipers but as he doesn't offer painting services anymore and I don't trust the other companies (lots of poor feedback on different car forums) I'm doing them myself. So started the stripping process by removing the spring plates and pad retaining clip. I've also left the pistons in place but covered them with gaffer tape. Will get these blasted (possibly soda blasted), and then pickup a VHT paint kit. I've already got the new Porsche decals ready to go.
Surprisingly the spring plates came off pretty easily, I had them serviced several years ago by Promax so that must have helped. I also spent ages cleaning out the head of the torx screws with brake cleaner and a plastic brush.
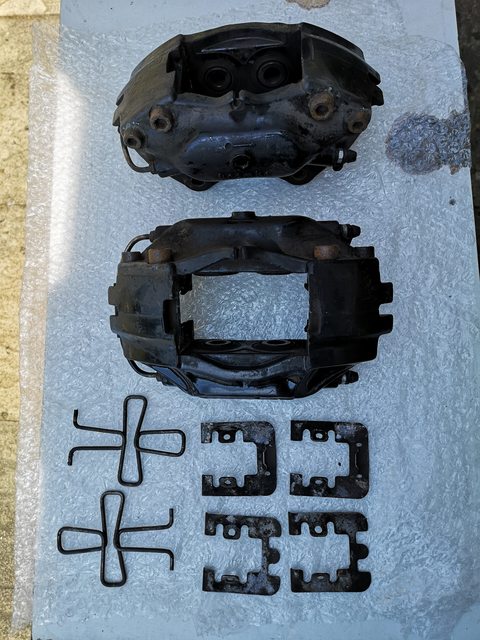
Since the photo I cleaned up the spring plates and retaining clips with Bilt Hamber Deox Gel so they are back to a shiny stainless steel finish again.
Cleaned the inside of the torque tube with a home-made pipe cleaner consisting of an old broom handle, used soft drinks bottle, old chamois and some methylated spirits.
Cleaned up the rear side of the engine with some brake cleaner just to make it look tidier.
Finished up removing all the torsion bar mounts from the body / chassis. I used a normal house hold scrubbing brush to dry clean the dirt and mud of the chassis. This worked really well and the plastic bristles didn't damage the factory underseal.
Chassis is in pretty good condition, does anyone know what product Porsche used for the beige rubber type coating? Where I'm tidying up some bits of surface corrosion I'd like to use the same product if possible as it has done a great job of protecting the car for 32 years.
Finally split all the bearing carriers and cleaned everything.
Got some new delrin bushings and rivets from Augment Automotive and made a start on filing down the rivets to fit in the bearing carriers.
The rubber outers for the bearing carriers are reusable.
I managed to get 4 new SKF 6006 2Z C4 bearings from bolton bearings on ebay for a good price.
As you can see the original bearings out of the torque tube were also C4 made by INA, I've seen reference to C5 bearings on rennlist but not sure where that information perpetuated from as mine are clearly C4.
Also picked up a pilot bearing while I was at it (6202.2RSR from ***).
I was going to get the rear brake calipers rebuilt by Pro Calipers but as he doesn't offer painting services anymore and I don't trust the other companies (lots of poor feedback on different car forums) I'm doing them myself. So started the stripping process by removing the spring plates and pad retaining clip. I've also left the pistons in place but covered them with gaffer tape. Will get these blasted (possibly soda blasted), and then pickup a VHT paint kit. I've already got the new Porsche decals ready to go.
Surprisingly the spring plates came off pretty easily, I had them serviced several years ago by Promax so that must have helped. I also spent ages cleaning out the head of the torx screws with brake cleaner and a plastic brush.
Since the photo I cleaned up the spring plates and retaining clips with Bilt Hamber Deox Gel so they are back to a shiny stainless steel finish again.
09-01-2022, 01:27 PM
#90
Instructor
Thread Starter
I then had a couple of international parcels arrive, one from Poland and the other from Germany.
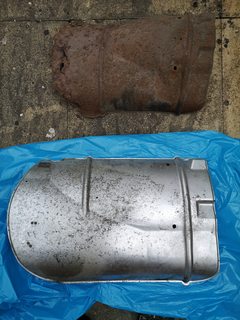
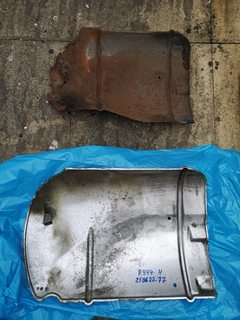
My existing exhaust heat shield from the back had completely rotted so when I saw this shiny example on ebay I snapped it up.
Konrad from rennlist was making a batch of billet torsion bar mounts so I ordered a set from him and I'm extremely happy with the quality of them, can't wait to get them fitted.
Attachment 1336819
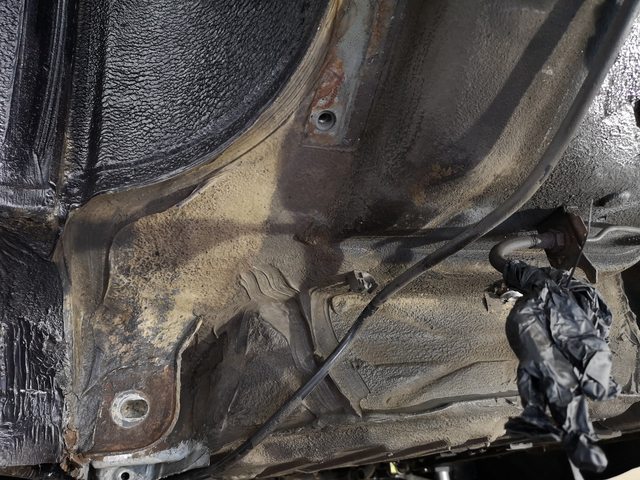
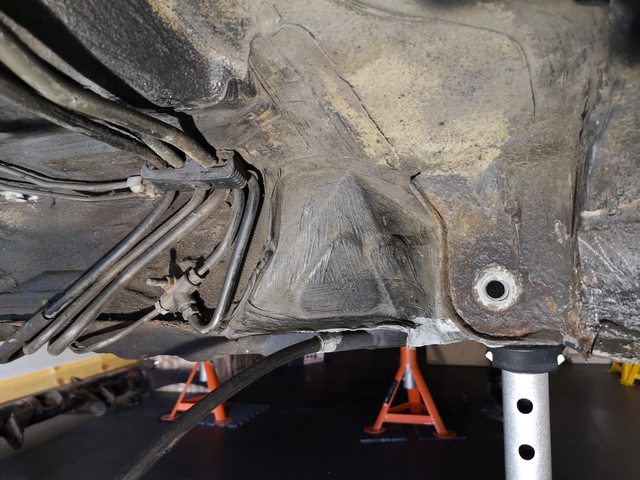
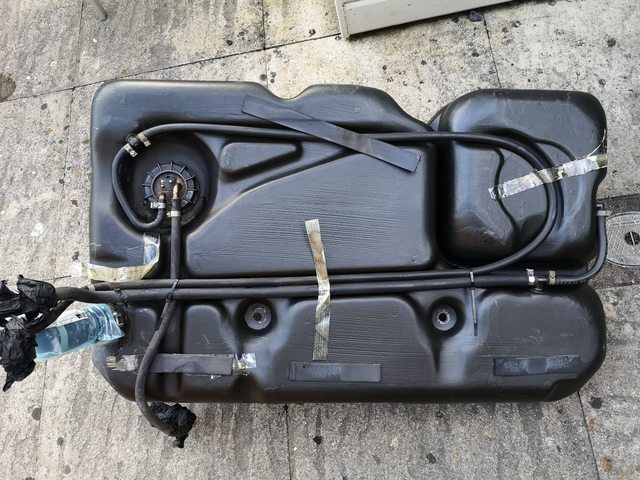
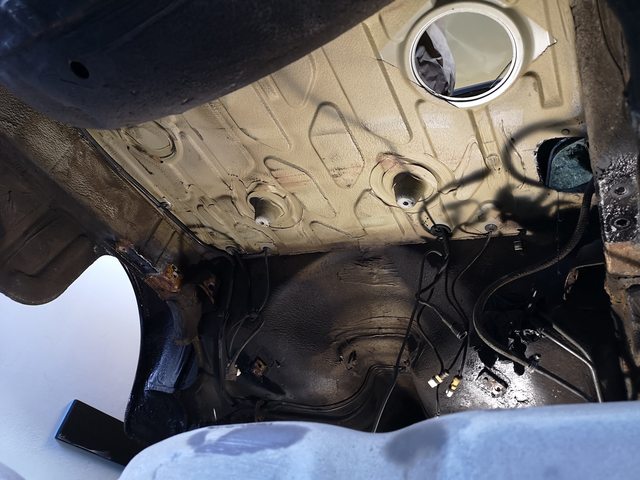
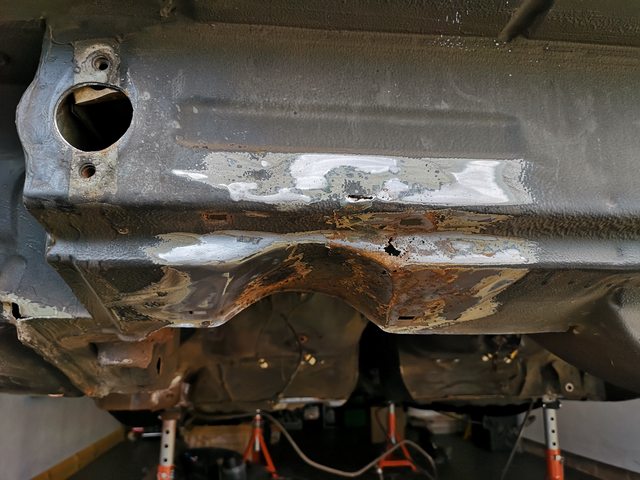
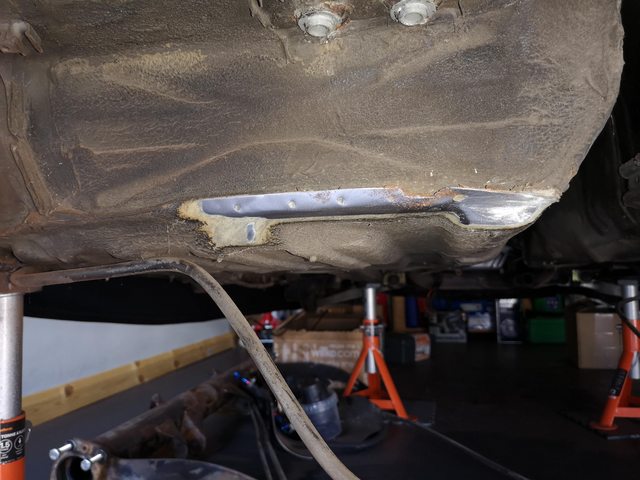
Most recently I finally removed the fuel tank which enables me to start tidying up the little bits of surface corrosion on the chassis before reassembly.
After a good wash with brake cleaner and then some Bilt Hamber Surfex HD.
And revealed under the fuel tank the original colour of the chassis underseal / paint that was applied at the factory.
Which brings me right up to date.
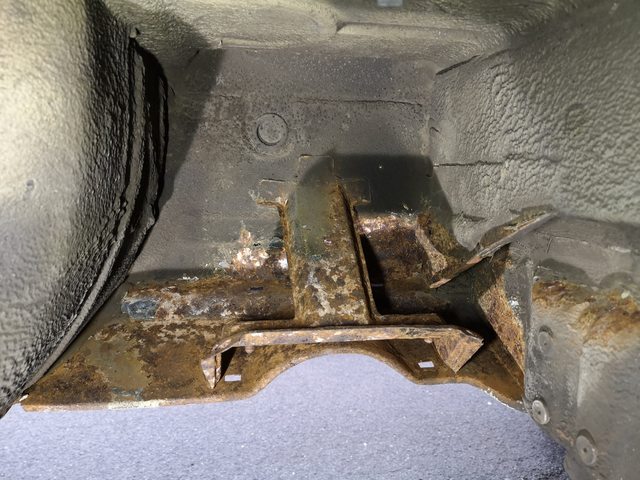
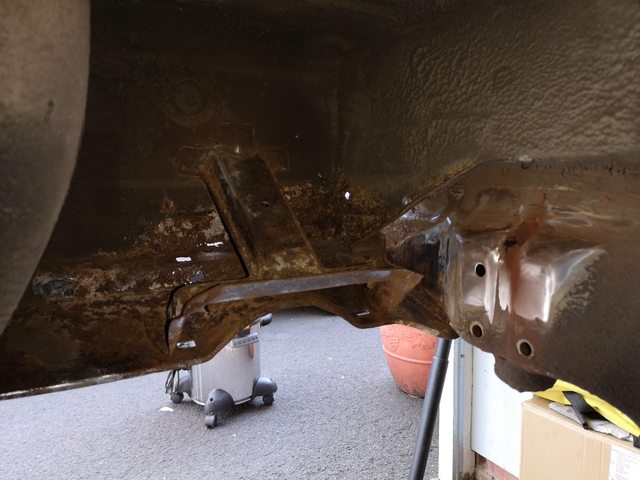
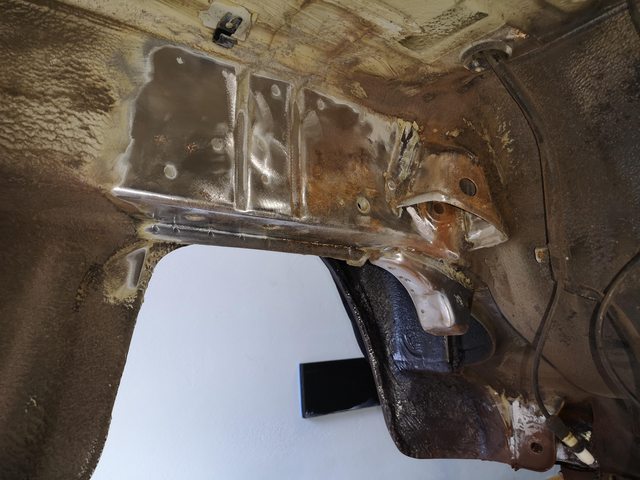
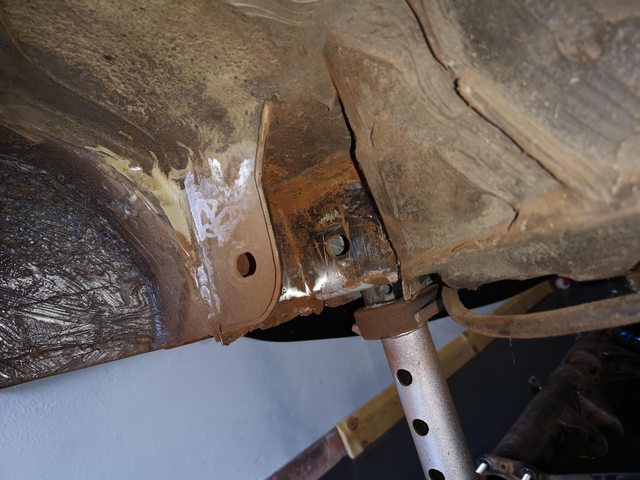
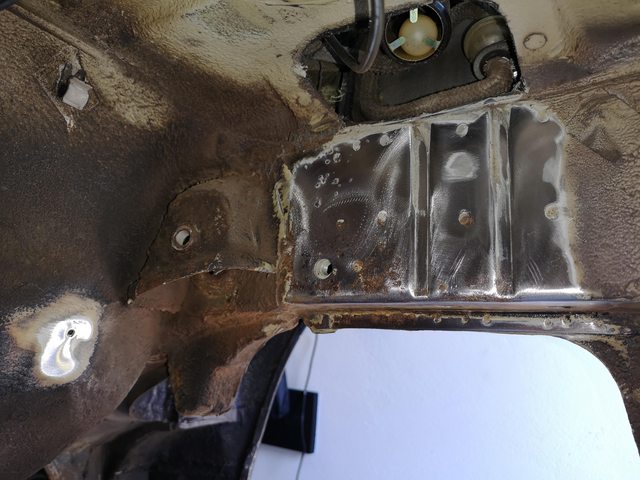
Spent a couple of hours chipping the rust scale away from the inside of the rear valance / exhaust mount. Unfortunately the bottom of the valance is pretty rotted and the repair section is NLA from Porsche. However I think I've managed to find one available as NOS for a decent price. I bet everyone has a similar looking rear valance. Someone has a rear section from a cabrio listed on ebay and the corrosion looks almost identical to mine.
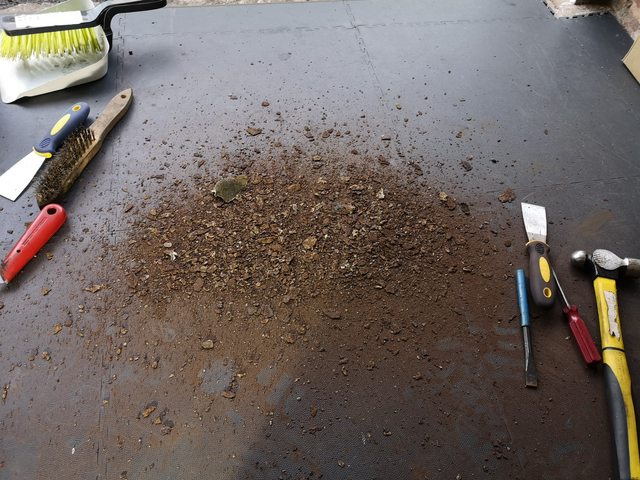
So then got out the angle grinder and abrasive discs from Norton Blaze. They ripped through the underseal and deposited it mainly on my arms and head and all over the garage floor :sad: I also used a variety of wire brush attachments on my cordless drill to get into the tight spots.
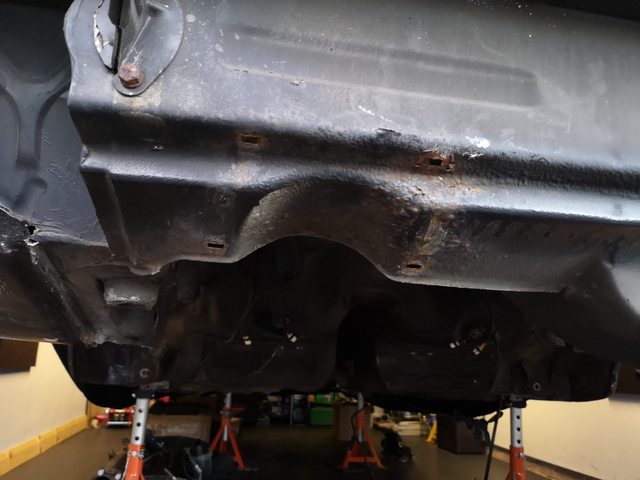
The corrosion on the rear valance looks limited to the area just above the exhaust so I think it must be from the condensation and heat. New valance repair section is on the way from The Netherlands and I've just asked for a quote from the body shop to get that done (something I can have done whilst rebuilding the engine).
Does anyone know of the beige undercoat product that was originally applied by Porsche? I'd like to use the same product if possible as it has done a great job of protecting the chassis and has lasted 32 years.
My existing exhaust heat shield from the back had completely rotted so when I saw this shiny example on ebay I snapped it up.
Konrad from rennlist was making a batch of billet torsion bar mounts so I ordered a set from him and I'm extremely happy with the quality of them, can't wait to get them fitted.
Attachment 1336819
Most recently I finally removed the fuel tank which enables me to start tidying up the little bits of surface corrosion on the chassis before reassembly.
After a good wash with brake cleaner and then some Bilt Hamber Surfex HD.
And revealed under the fuel tank the original colour of the chassis underseal / paint that was applied at the factory.
Which brings me right up to date.
Spent a couple of hours chipping the rust scale away from the inside of the rear valance / exhaust mount. Unfortunately the bottom of the valance is pretty rotted and the repair section is NLA from Porsche. However I think I've managed to find one available as NOS for a decent price. I bet everyone has a similar looking rear valance. Someone has a rear section from a cabrio listed on ebay and the corrosion looks almost identical to mine.
So then got out the angle grinder and abrasive discs from Norton Blaze. They ripped through the underseal and deposited it mainly on my arms and head and all over the garage floor :sad: I also used a variety of wire brush attachments on my cordless drill to get into the tight spots.
The corrosion on the rear valance looks limited to the area just above the exhaust so I think it must be from the condensation and heat. New valance repair section is on the way from The Netherlands and I've just asked for a quote from the body shop to get that done (something I can have done whilst rebuilding the engine).
Does anyone know of the beige undercoat product that was originally applied by Porsche? I'd like to use the same product if possible as it has done a great job of protecting the chassis and has lasted 32 years.