
My 1967 912 Build Thread


Thread Starter
Professor of Pending Projects
Rennlist Member
Rennlist Member

Joined: Nov 2001
Posts: 9,898
Likes: 33
From: Ocala, FL
Thread Starter
Professor of Pending Projects
Rennlist Member
Rennlist Member
Joined: Nov 2001
Posts: 9,898
Likes: 33
From: Ocala, FL
Got a few parts today... Now I can fix something!
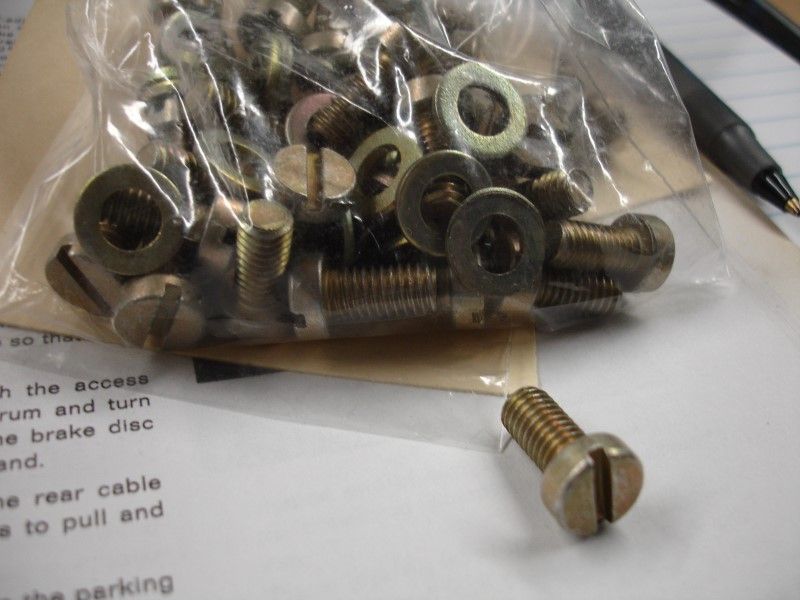
For the side vent windows in the front
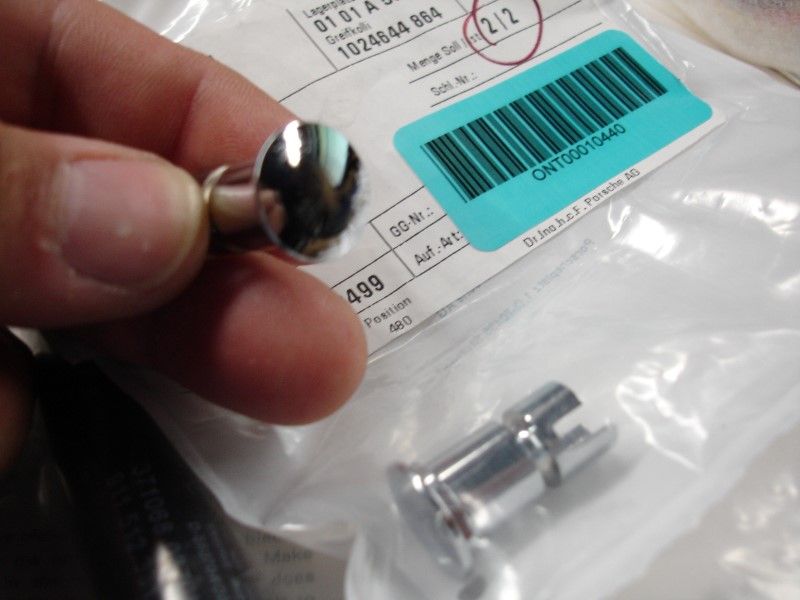
I had ordered stainless steel bolts, but was able to cancel those and get cadmium plated steel bolts instead...
No more hitting my head with trunk or engine lid...
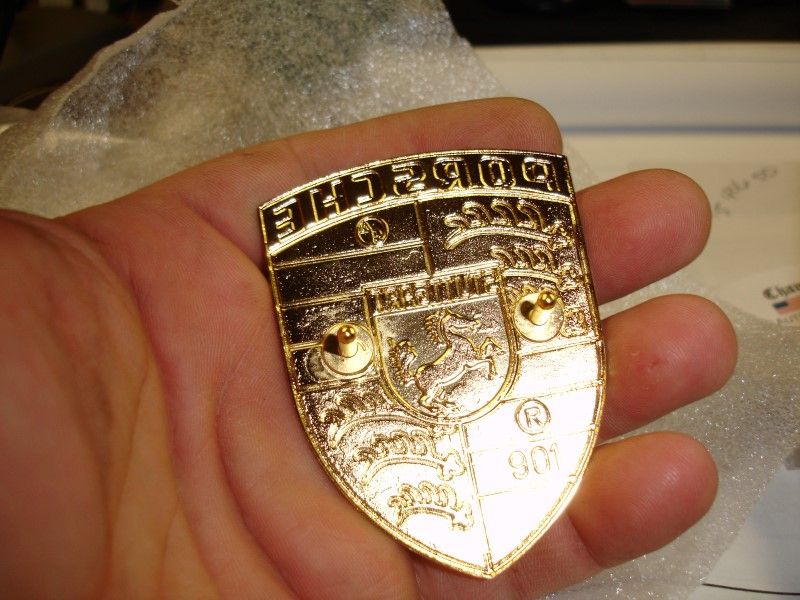
New orange stripe badge!!!! Even if the car looks like it is painted in red primer I want her to feel proud
For the side vent windows in the front
I had ordered stainless steel bolts, but was able to cancel those and get cadmium plated steel bolts instead...
No more hitting my head with trunk or engine lid...
New orange stripe badge!!!! Even if the car looks like it is painted in red primer I want her to feel proud
Thread Starter
Professor of Pending Projects
Rennlist Member
Rennlist Member
Joined: Nov 2001
Posts: 9,898
Likes: 33
From: Ocala, FL
Hey, restoring the horn was one of the first things I did. Took apart the horn and I just used some etching primer and rustoleum....Actually worked pretty good. Then I found some foam that was probably a quarter inch or so thick and replaced the old crumbling foam. I simply used black shoe polish on the horn leather and OMG...it looked great. The one thing I am not happy with is I used spray on chrome....while it looks much better, I would definitely chrome it. At some point I will chrome it but its a low priority right now. If I get out to my storage unit I will take a picture and post.
Looking forward to the photos!!
Thread Starter
Professor of Pending Projects
Rennlist Member
Rennlist Member
Joined: Nov 2001
Posts: 9,898
Likes: 33
From: Ocala, FL
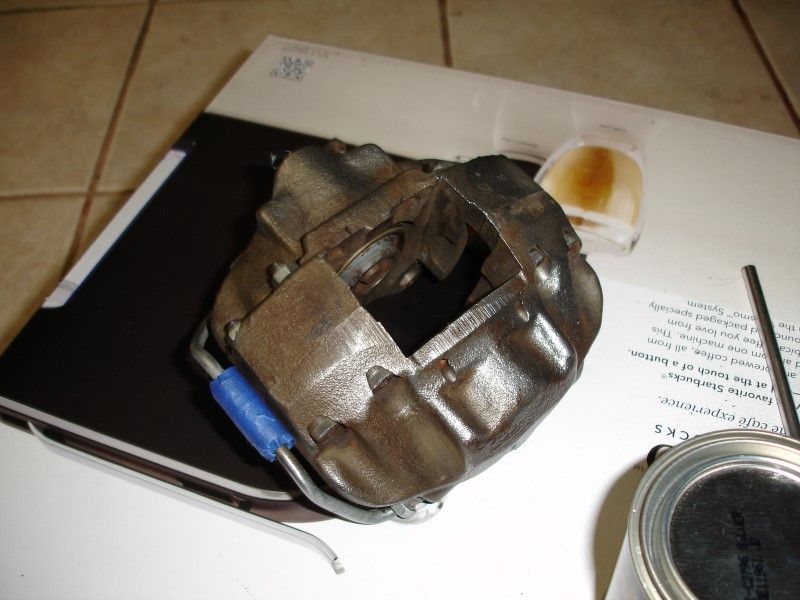
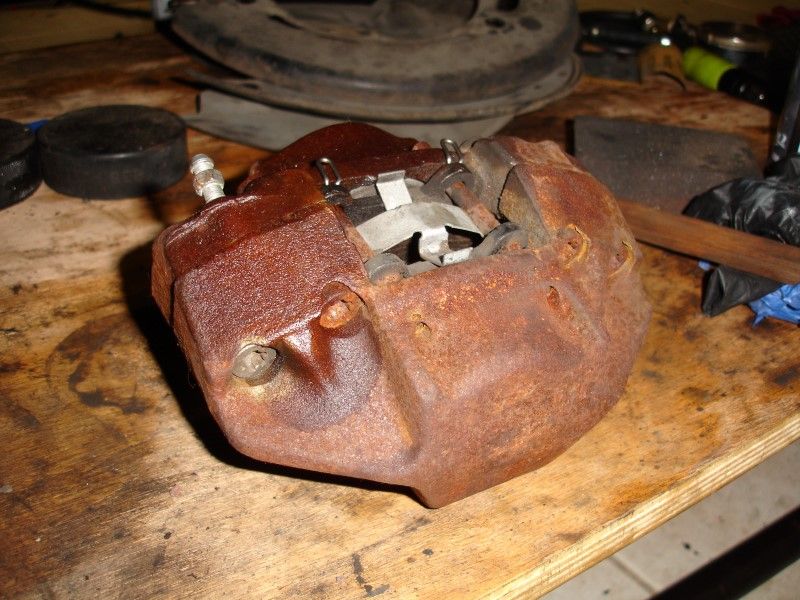
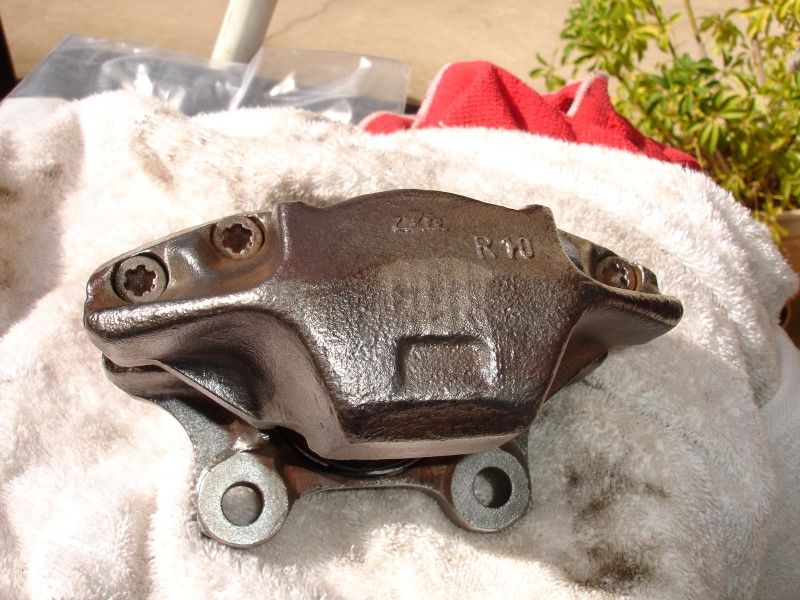
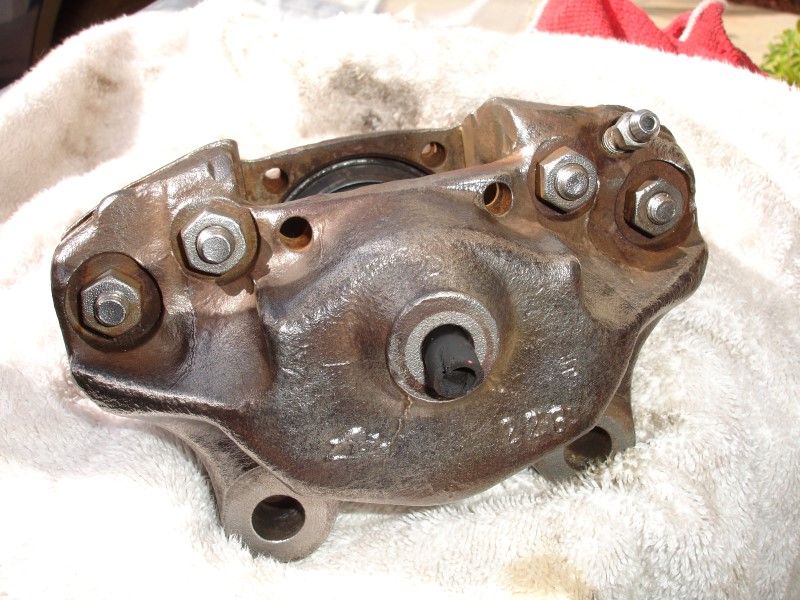
Started cleaning and painting the calipers... started with the best looking one:
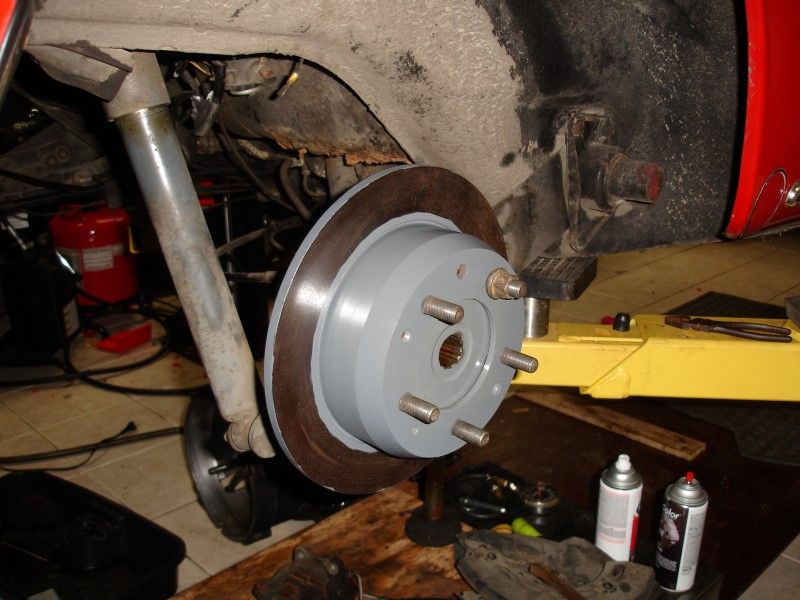
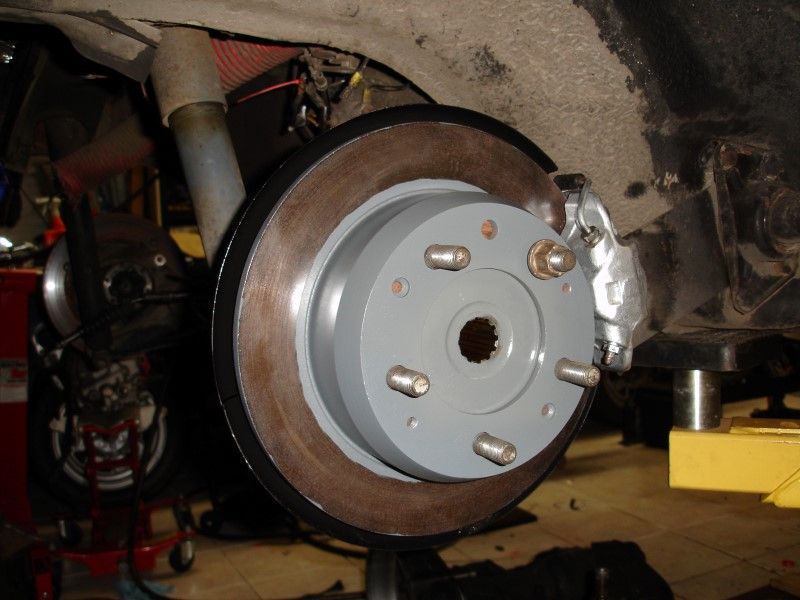
Rear brake rotor/hub before:
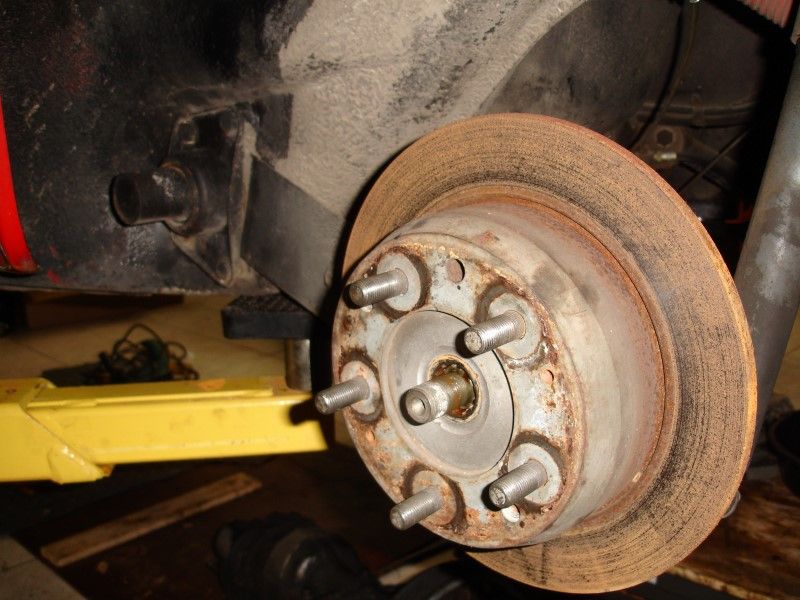
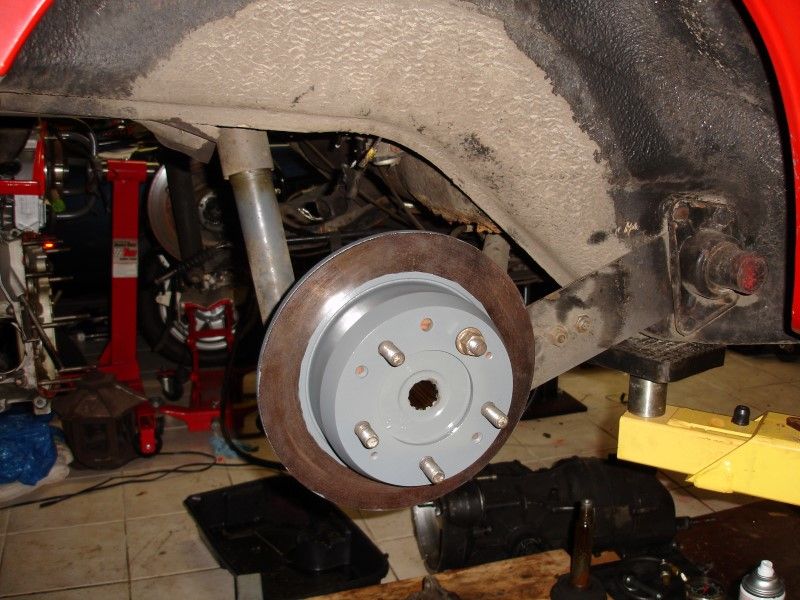
I only had Rust Oleum Ford Gray... so that is what I used. After it was dried I put it back just to get it out of the way... not a perfect circle masked... but at the first use of the brakes it will be
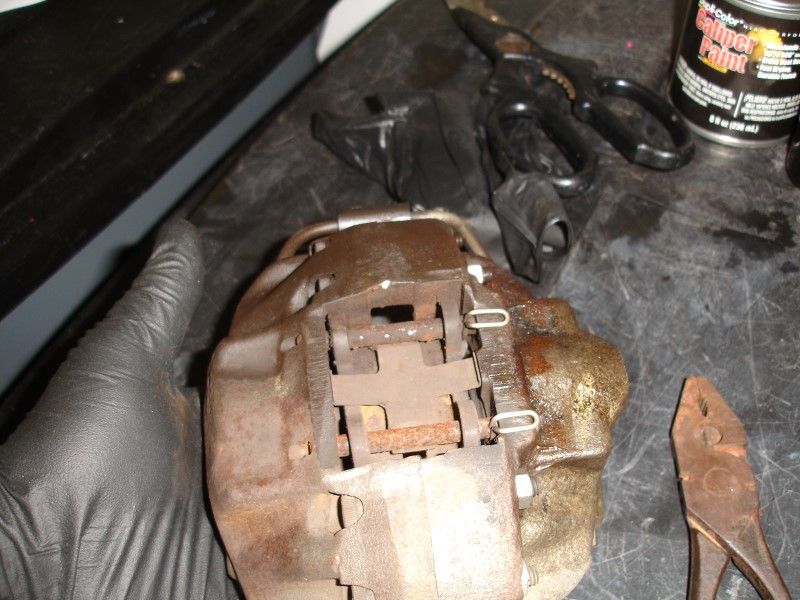
Back to the caliper, let's remove as many parts as possible to paint only the caliper and not anything else.
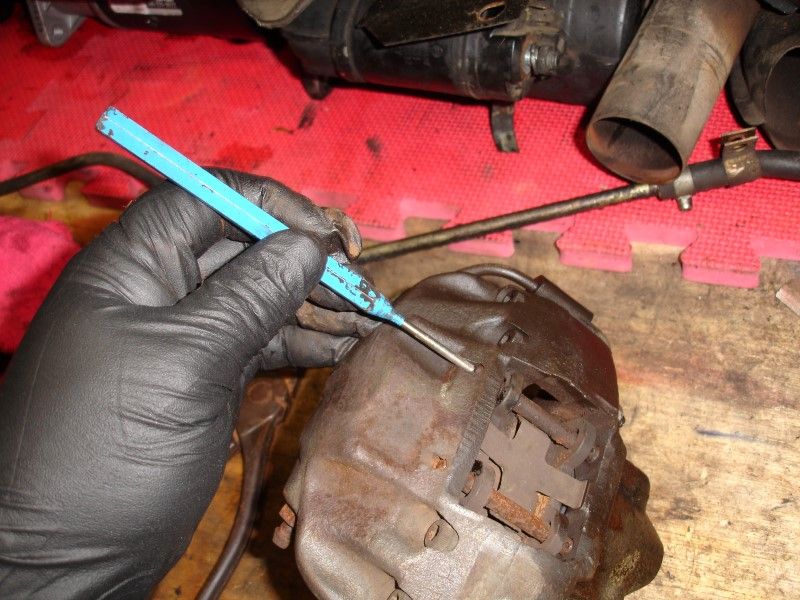
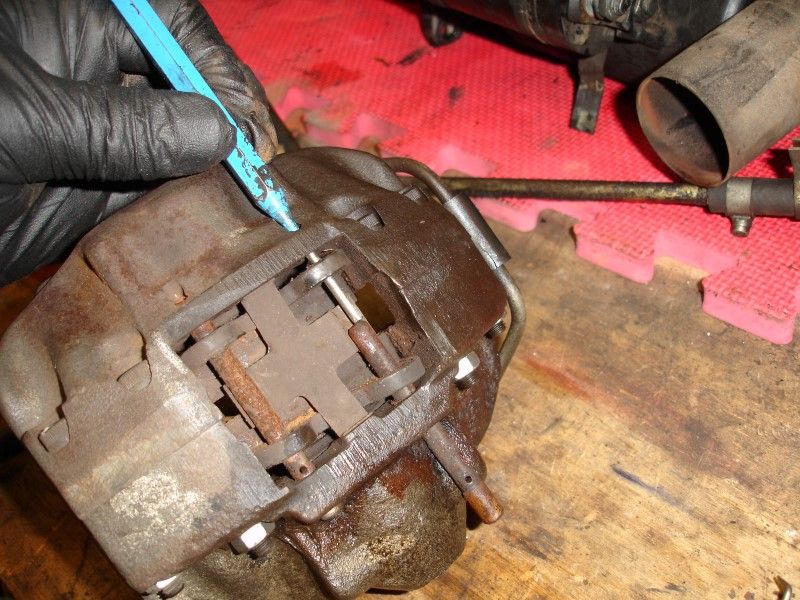
After cleaning and going over with a fine wire brush and some 3000 sand paper
Wire brush to clean the caliper, some brake parts cleaner spray, clean rag to wipe off everything... and ready to paint
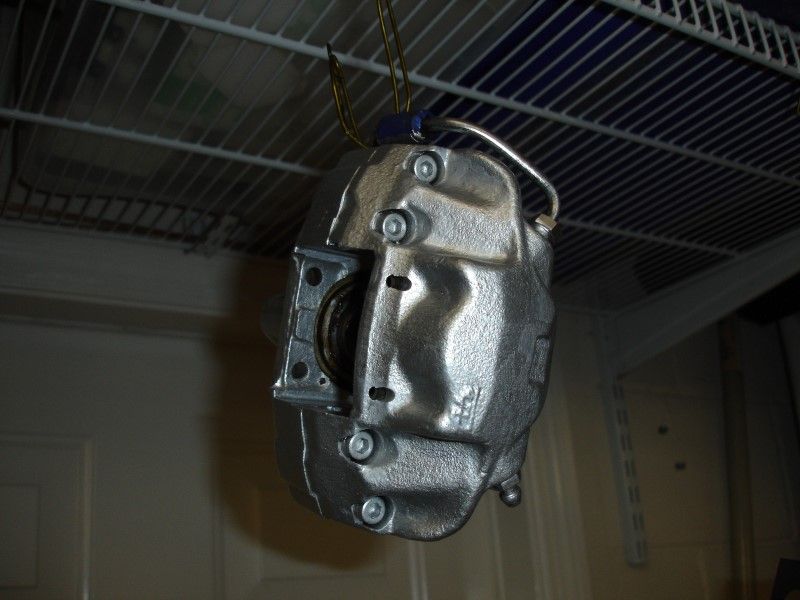
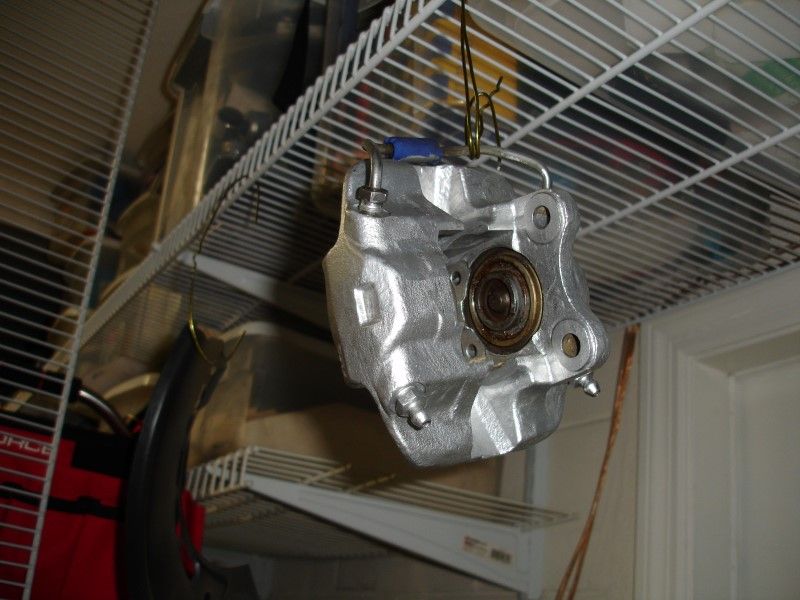
After painting it (used the caliper paint that comes in a pint and a small brush). Ordering new bleed nipples
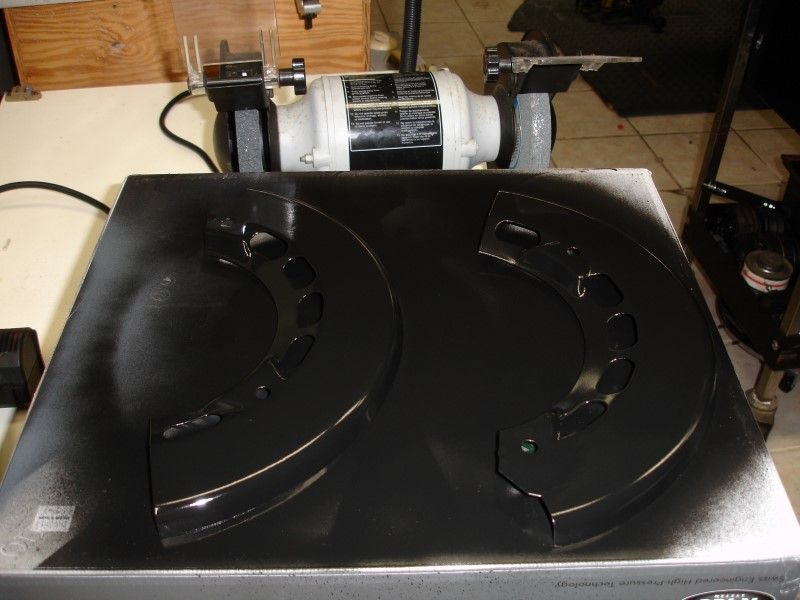
Covers painted Rust Oleum Semi Gloss Black
I had to put it all together for a few photos... I know that is not the correct caliper for that side... but the other one was still drying... No worries, I will mount it correctly when the time comes to put it all back together.
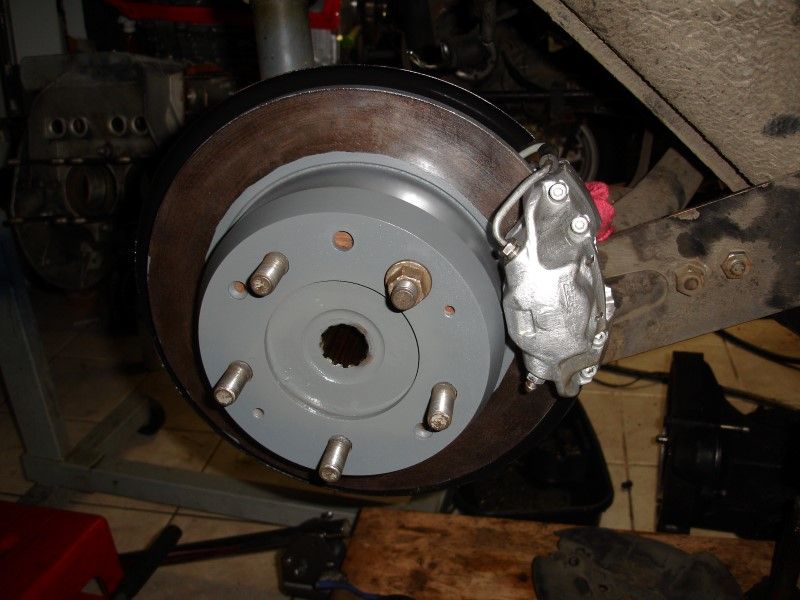
I did both rear calipers, brake disk hubs, and dust covers... I have to remove the e-brake hub, but waiting on the two seals before I punch it out. Then it is cleaning the wheel well, removing the suspension bits to clean & paint, and to replace the bushings on the radius arm.
Tomorrow I will do the same with the front calipers... those have a little bit more surface rust...
Rear brake rotor/hub before:
I only had Rust Oleum Ford Gray... so that is what I used. After it was dried I put it back just to get it out of the way... not a perfect circle masked... but at the first use of the brakes it will be
Back to the caliper, let's remove as many parts as possible to paint only the caliper and not anything else.
After cleaning and going over with a fine wire brush and some 3000 sand paper
Wire brush to clean the caliper, some brake parts cleaner spray, clean rag to wipe off everything... and ready to paint
After painting it (used the caliper paint that comes in a pint and a small brush). Ordering new bleed nipples
Covers painted Rust Oleum Semi Gloss Black
I had to put it all together for a few photos... I know that is not the correct caliper for that side... but the other one was still drying... No worries, I will mount it correctly when the time comes to put it all back together.
I did both rear calipers, brake disk hubs, and dust covers... I have to remove the e-brake hub, but waiting on the two seals before I punch it out. Then it is cleaning the wheel well, removing the suspension bits to clean & paint, and to replace the bushings on the radius arm.
Tomorrow I will do the same with the front calipers... those have a little bit more surface rust...
Last edited by Wachuko; Feb 2, 2014 at 02:20 AM.
Thread Starter
Professor of Pending Projects
Rennlist Member
Rennlist Member
Joined: Nov 2001
Posts: 9,898
Likes: 33
From: Ocala, FL
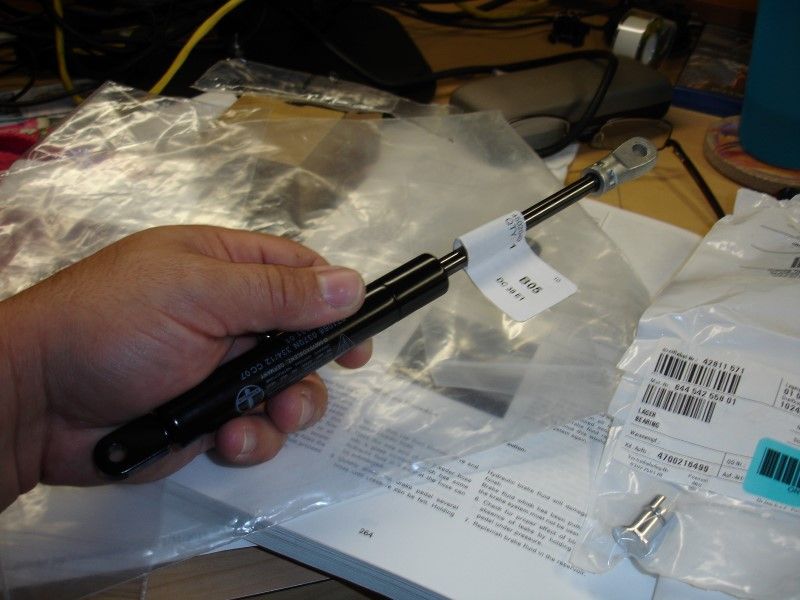
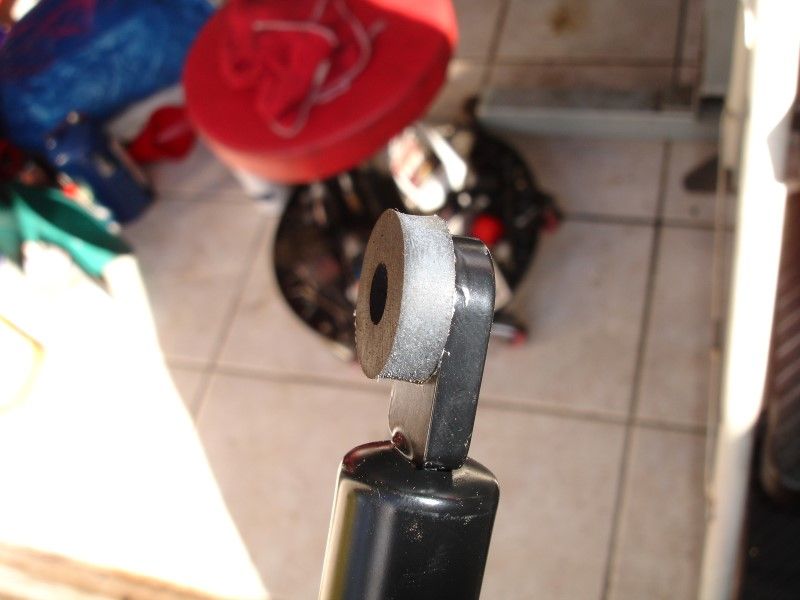
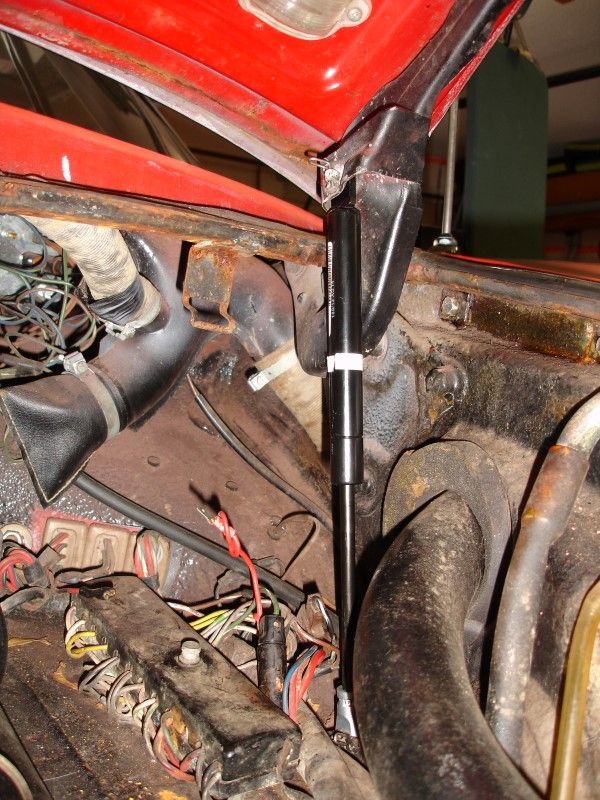
Replaced the engine lid strut.
Old versus New (911-512-331-01 and rubber spacer 911-511-332-00)
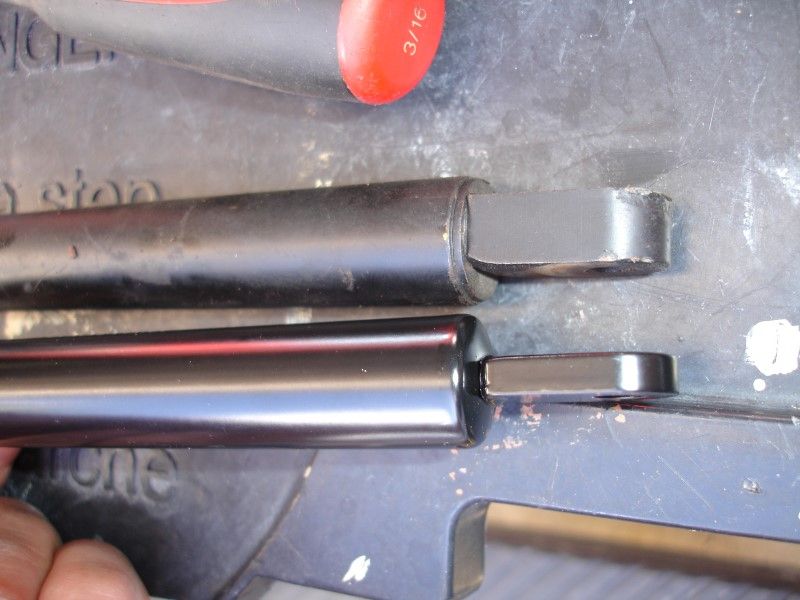
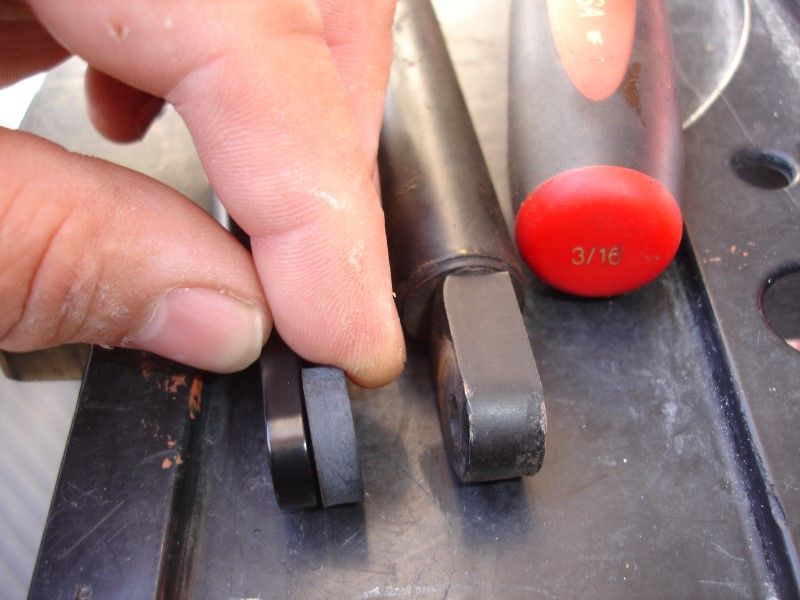
Sprayed some 3M adhesive so it would stay in place while I did the install...
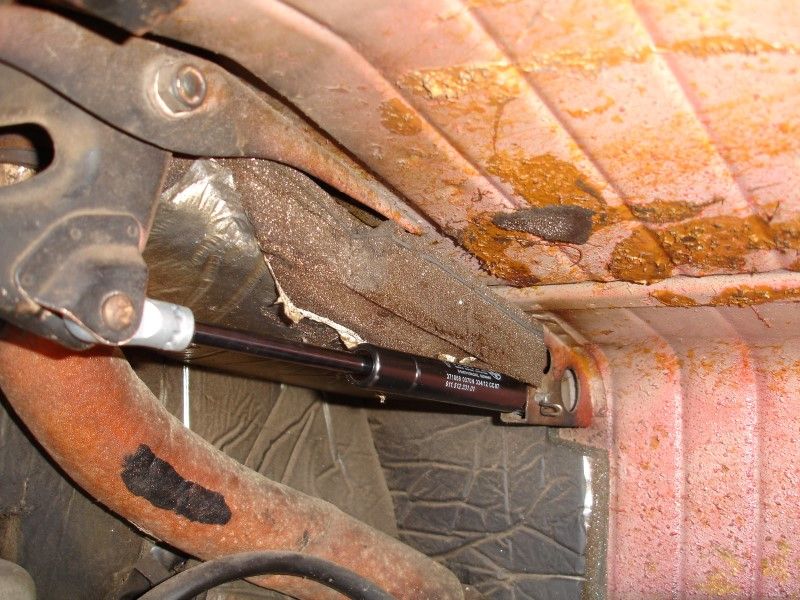
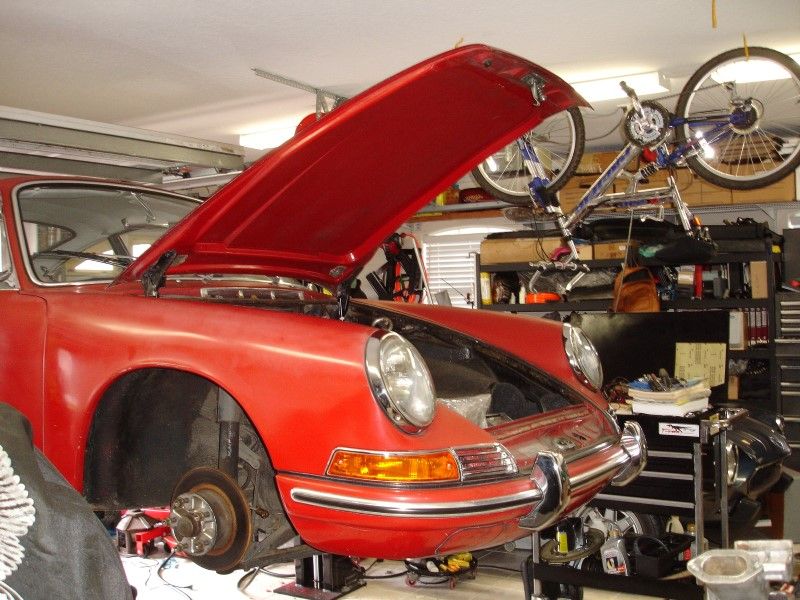
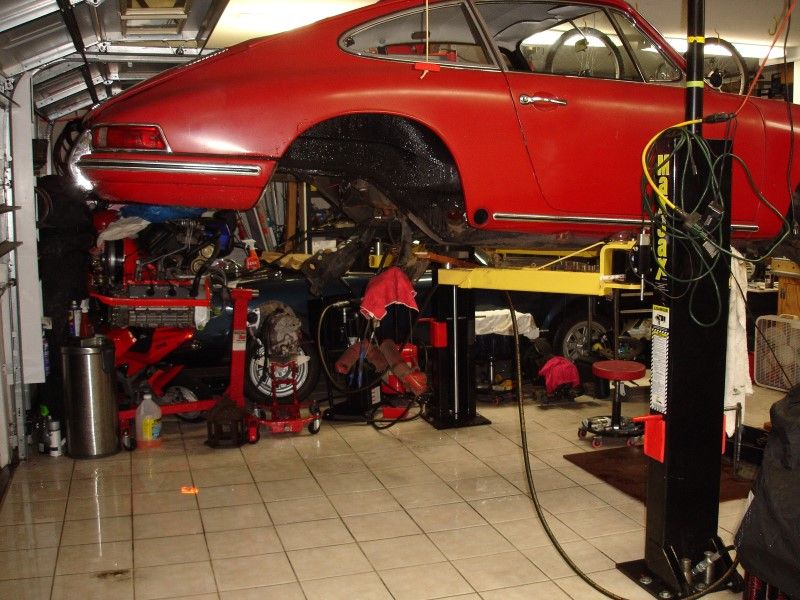
Getting all the stuff out of under the car to lower it enough to replace the front lid struts.
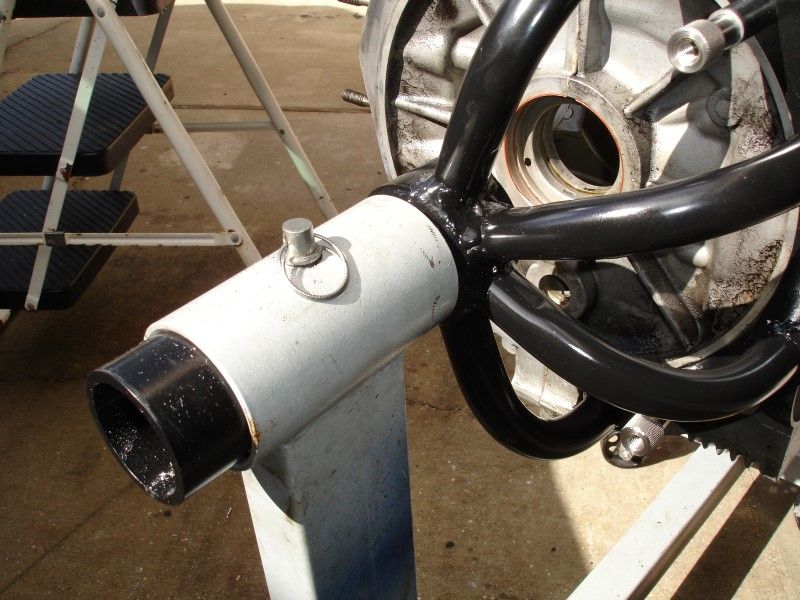
Also drilled the engine stand to use the pin and avoid accidents.
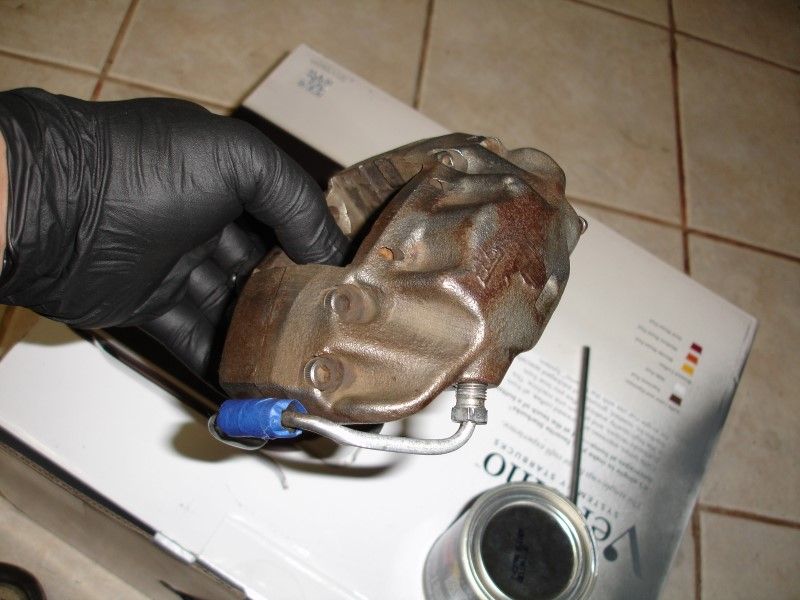
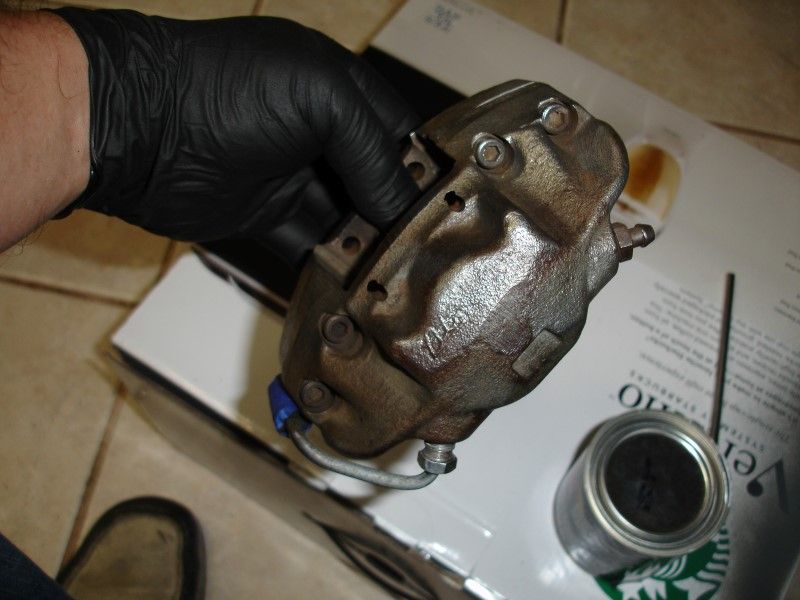
And cleaned one of the front calipers... on to the other side and then to paint them.
Old versus New (911-512-331-01 and rubber spacer 911-511-332-00)
Sprayed some 3M adhesive so it would stay in place while I did the install...
Getting all the stuff out of under the car to lower it enough to replace the front lid struts.
Also drilled the engine stand to use the pin and avoid accidents.
And cleaned one of the front calipers... on to the other side and then to paint them.
Thread Starter
Professor of Pending Projects
Rennlist Member
Rennlist Member
Joined: Nov 2001
Posts: 9,898
Likes: 33
From: Ocala, FL
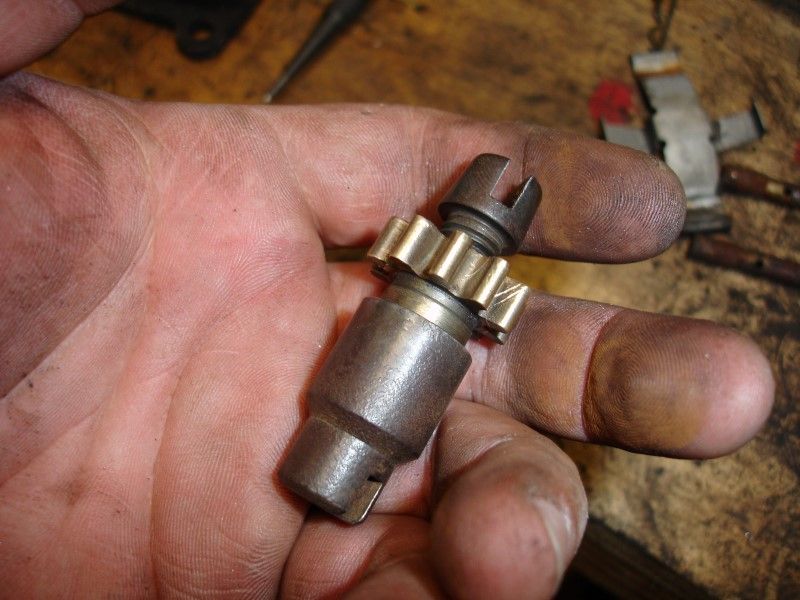
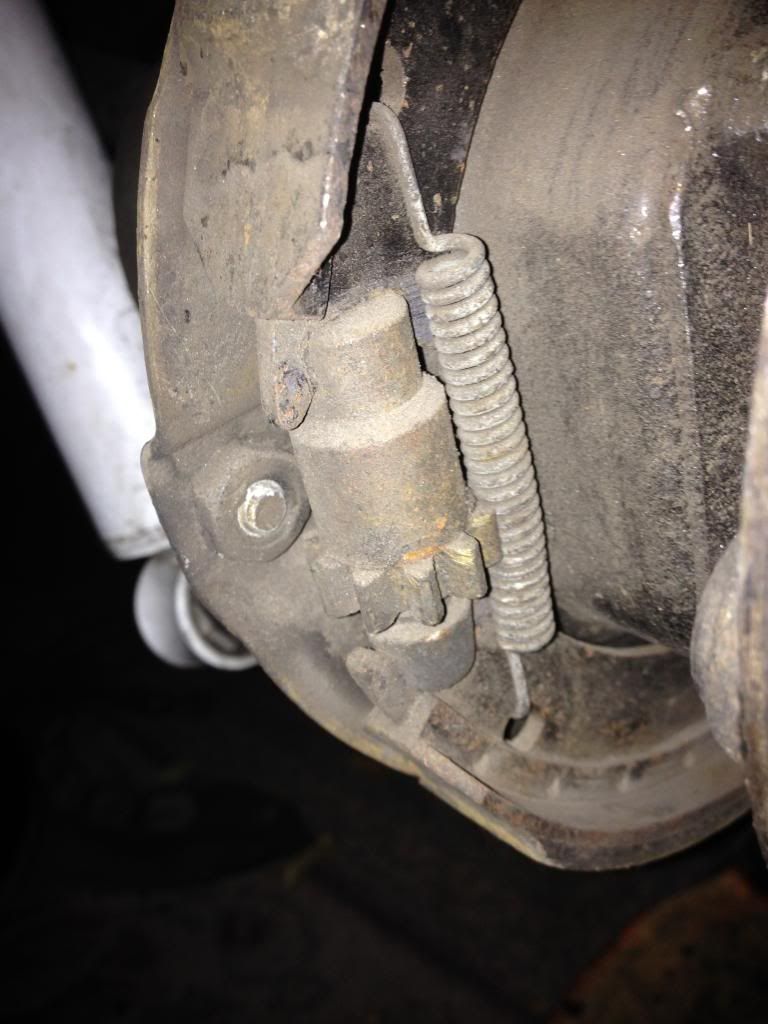
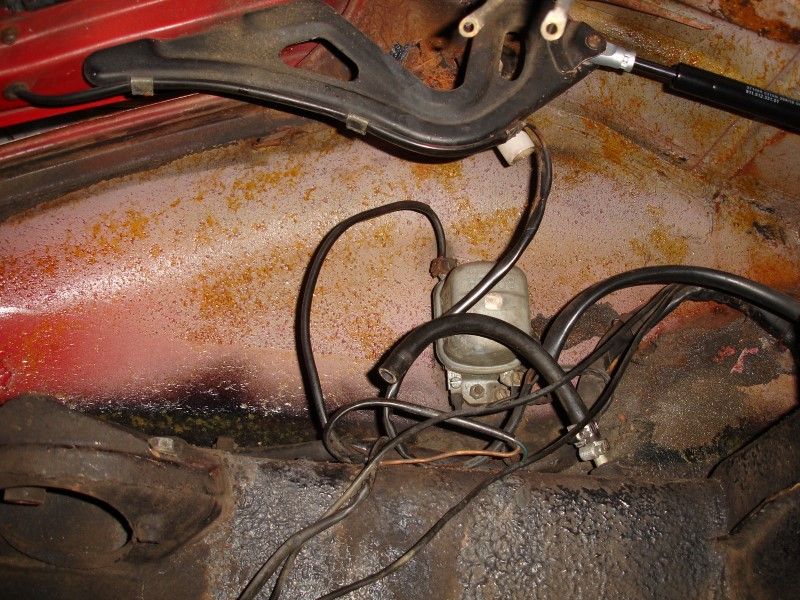
Cleaned the e-brake adjuster
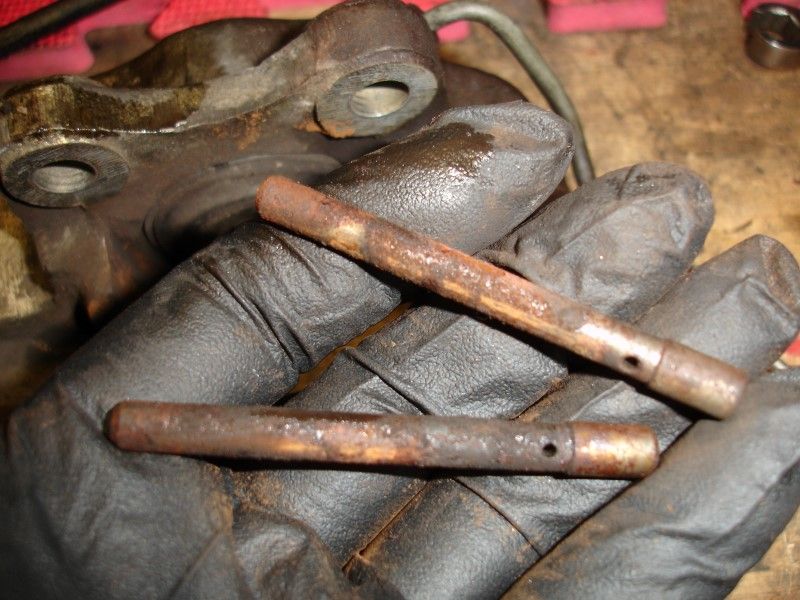
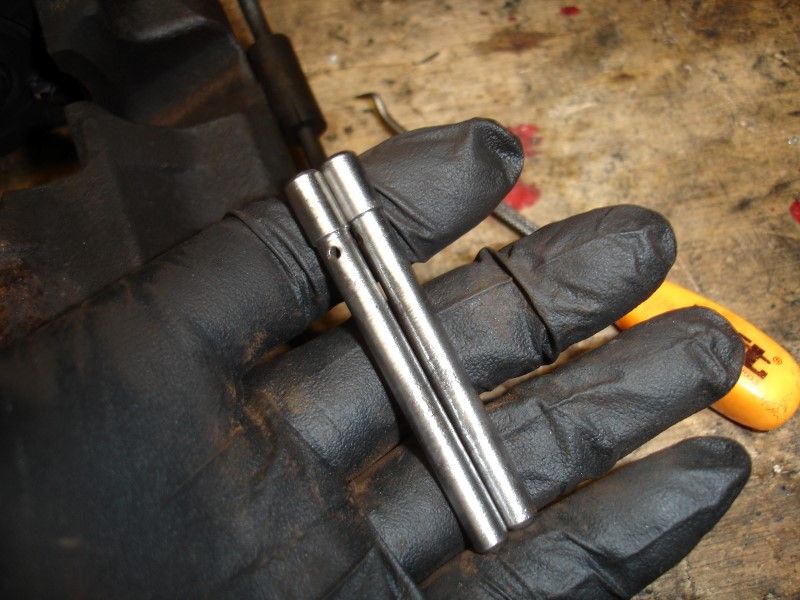
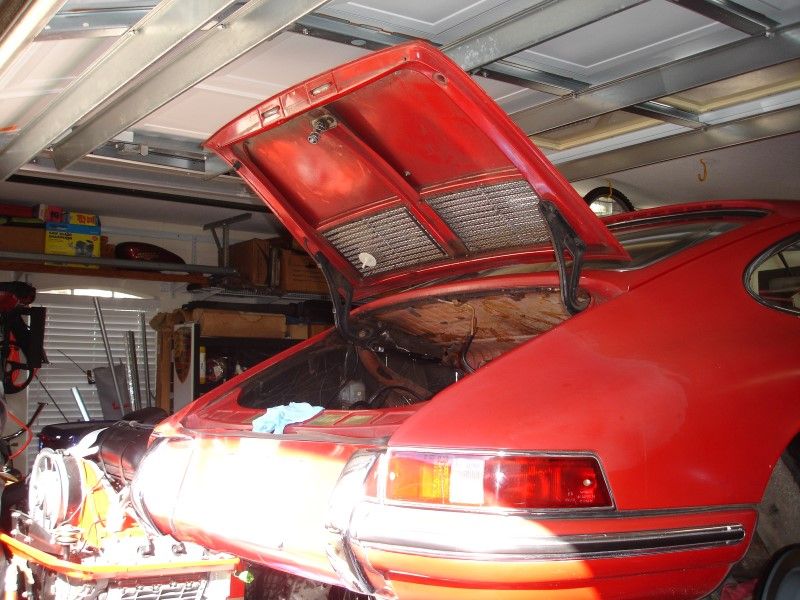
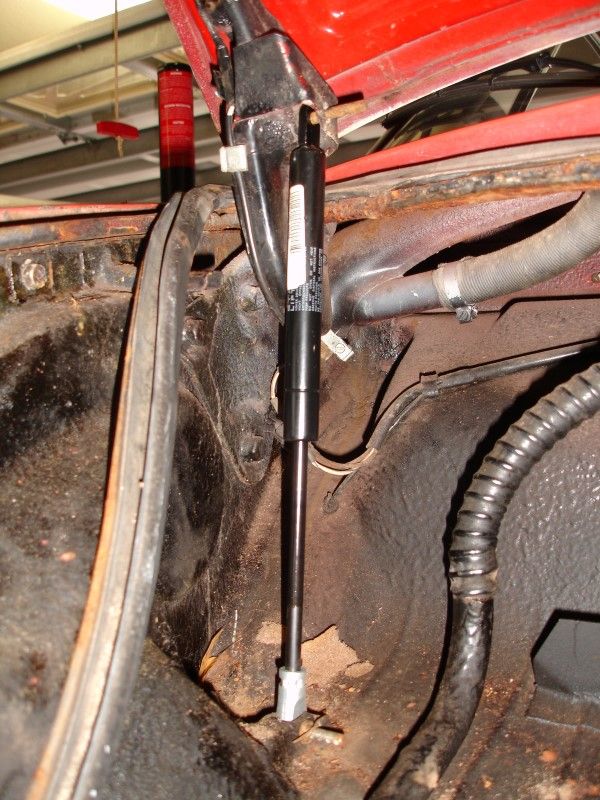
When replacing the front lid struts found that they have installed two on one side...

So I need to order a few more pins and safety clips.
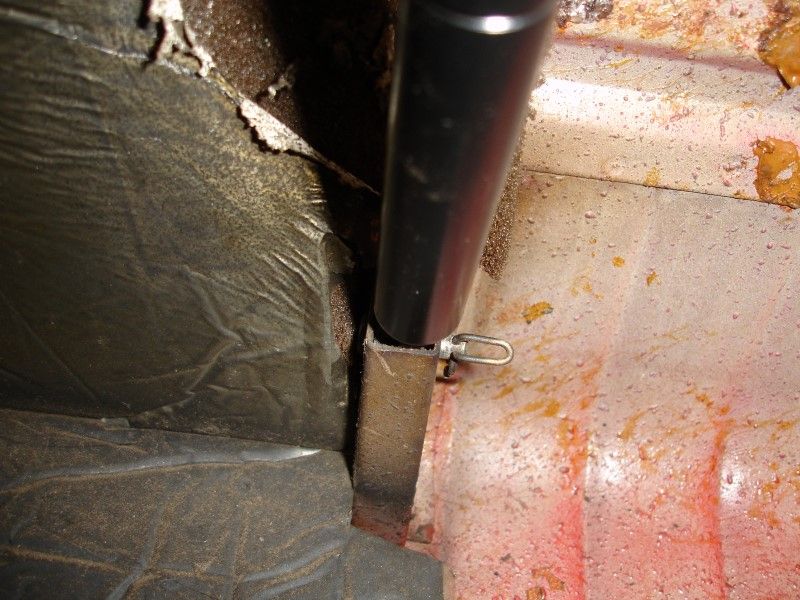
New ones in place and now no more hitting my head with it when the support falls out. ha!
When replacing the front lid struts found that they have installed two on one side...
So I need to order a few more pins and safety clips.
New ones in place and now no more hitting my head with it when the support falls out. ha!
Instructor
Joined: Jan 2013
Posts: 166
Likes: 7
Haven't look at the adjustment hole you referred to yet but does that adjustment access hole connect with that piece. Mine is pretty dirty but not rusty. I think I'll spray it with brake cleaner or maybe some wd40 lithium spray.
Thread Starter
Professor of Pending Projects
Rennlist Member
Rennlist Member
Joined: Nov 2001
Posts: 9,898
Likes: 33
From: Ocala, FL
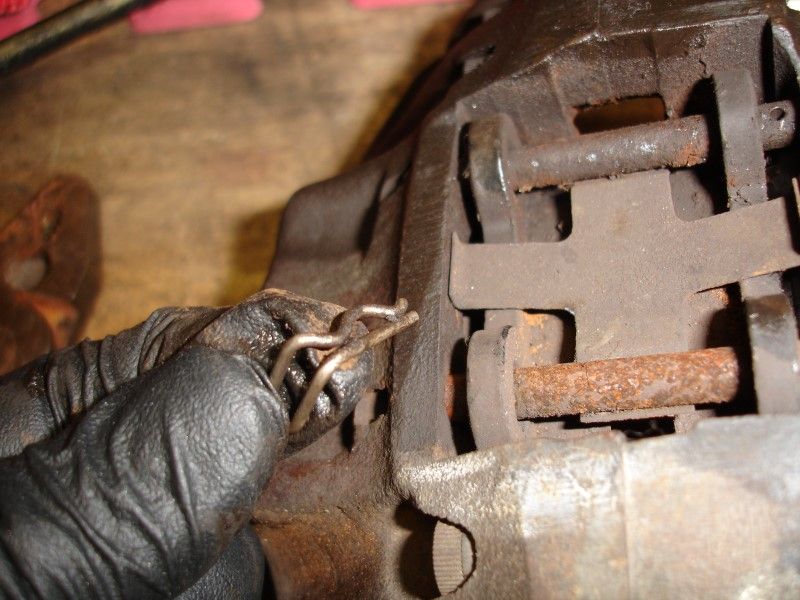
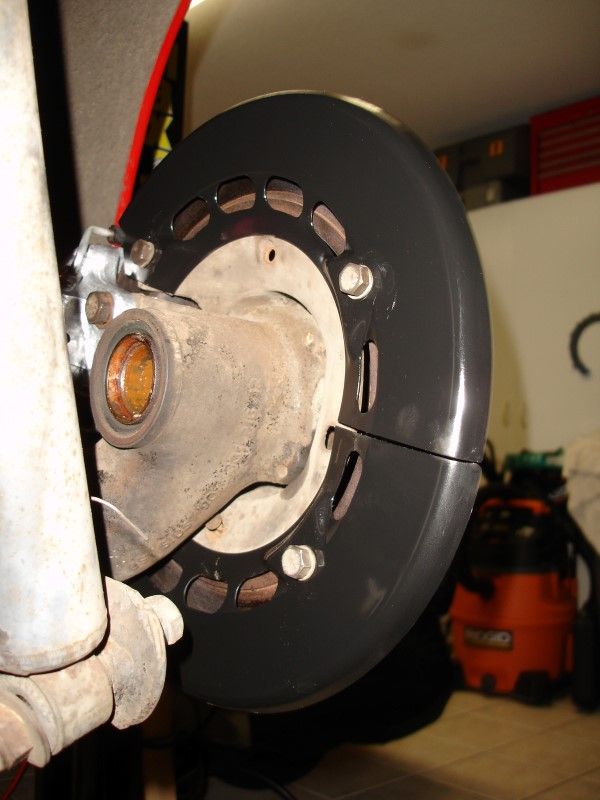
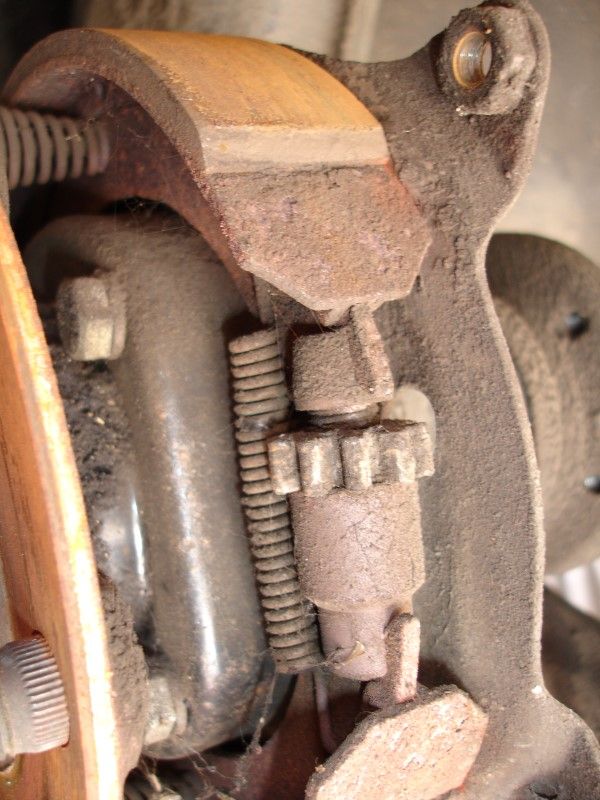
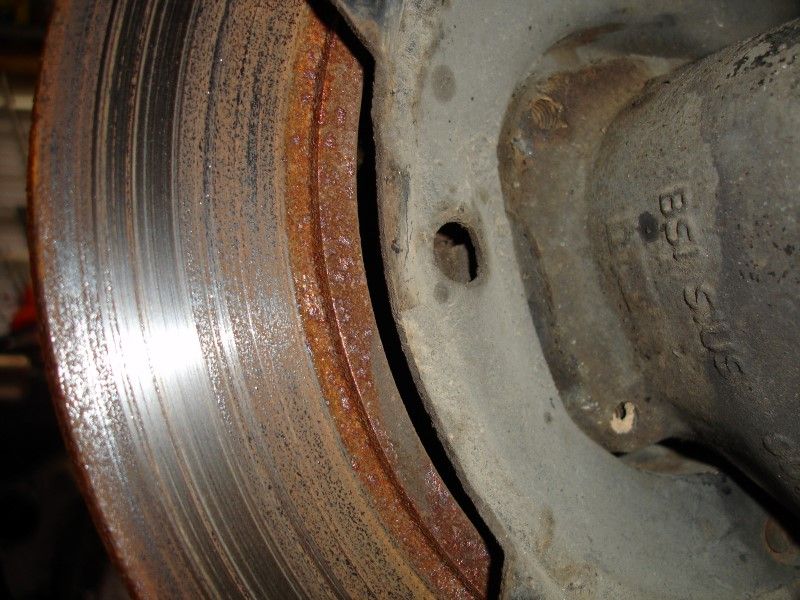
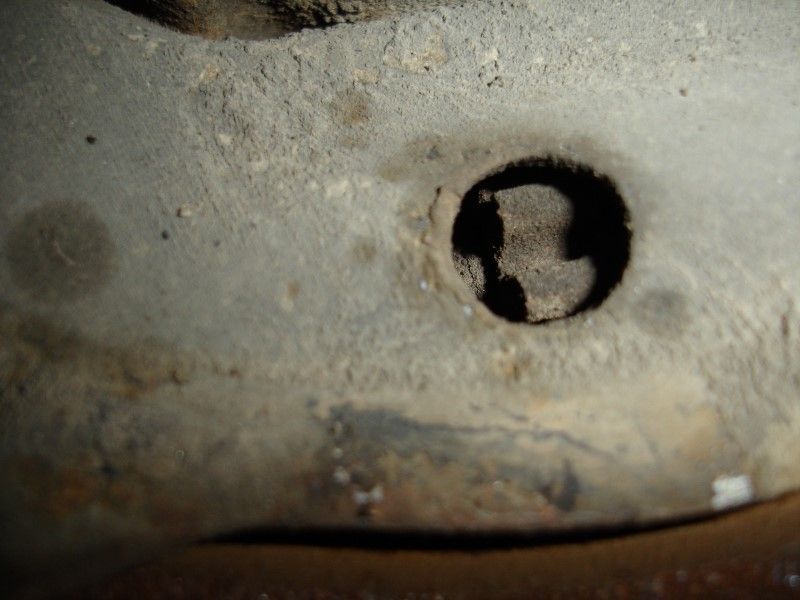
Page 58 in the user manual shows you how to do it.
The dust covers are removed because I am going to paint them... but you do not need to remove them to see the hole...
If you have your wheels out, easy to remove the drum/brake disc and clean that. Or you can spray via the hole, but best to remove, clean and install back.
Here you go:

Thread Starter
Professor of Pending Projects
Rennlist Member
Rennlist Member
Joined: Nov 2001
Posts: 9,898
Likes: 33
From: Ocala, FL
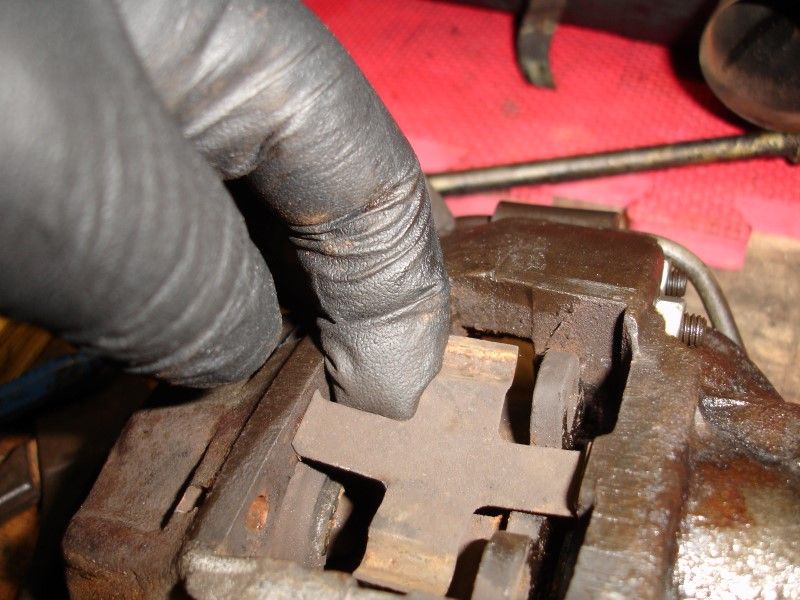
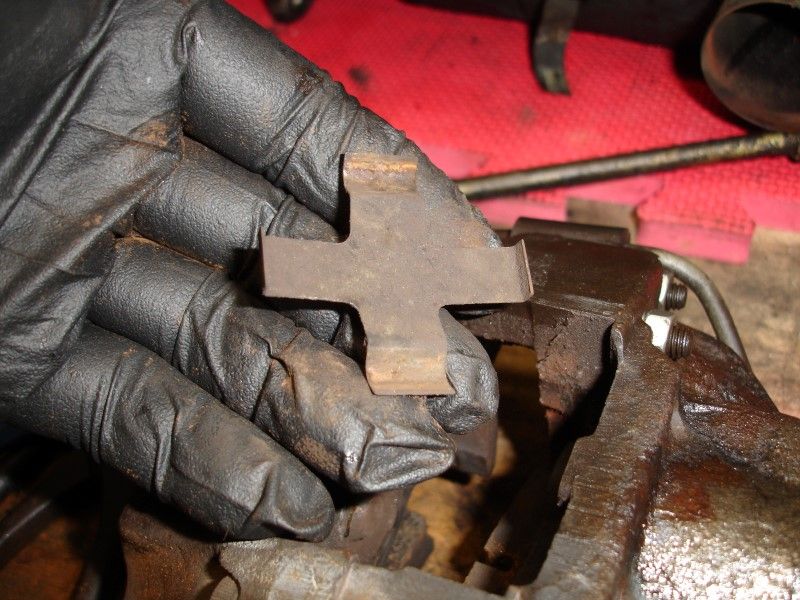
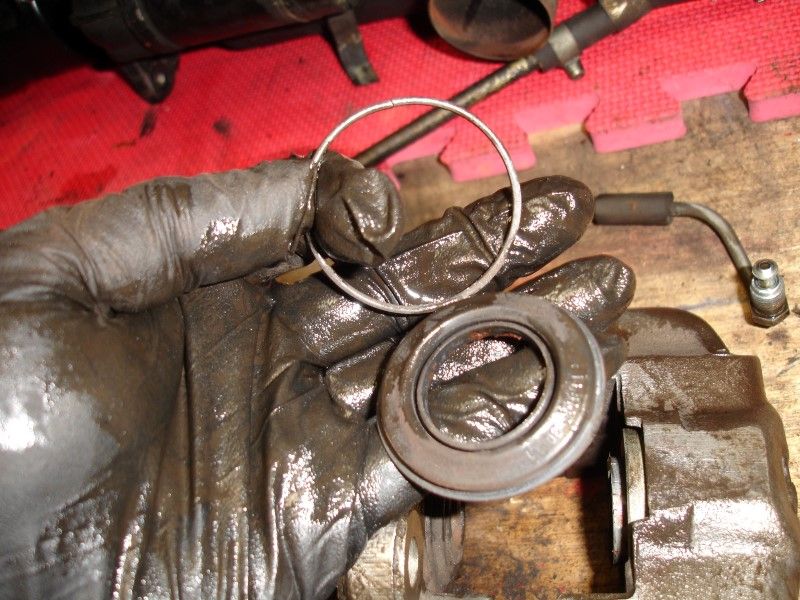
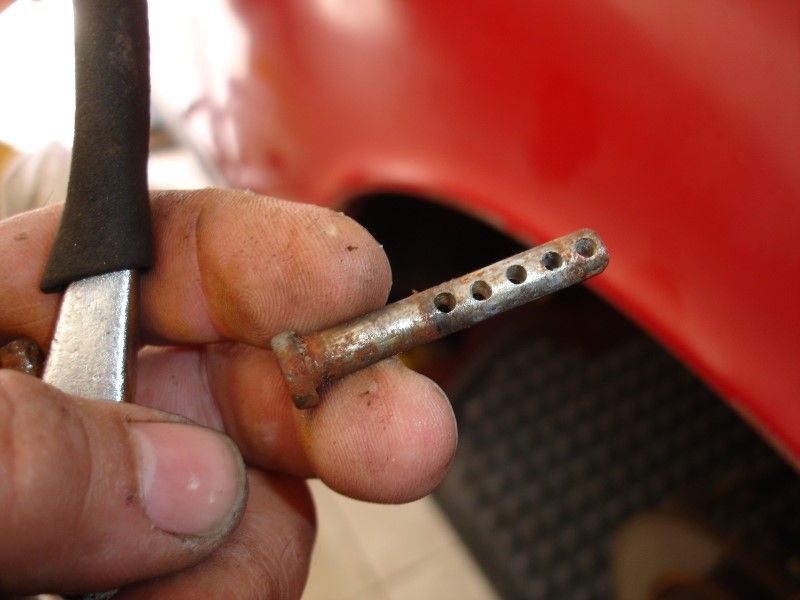
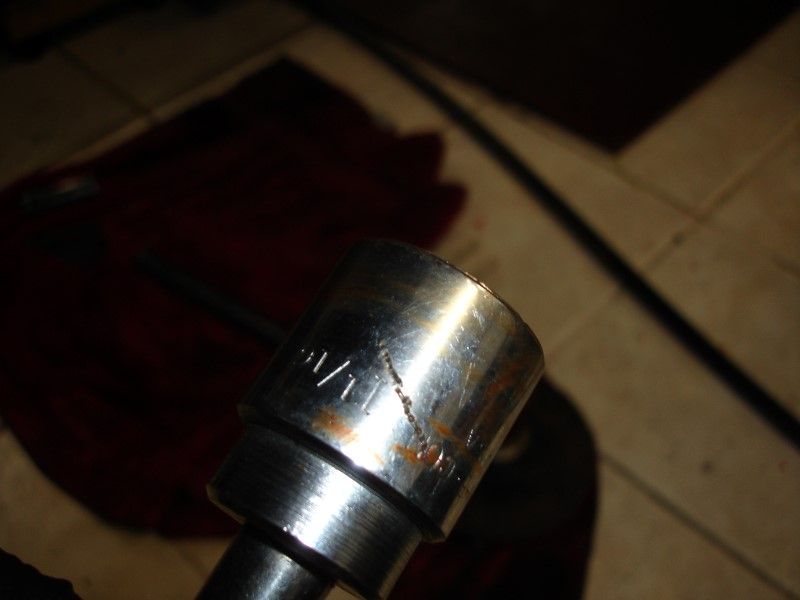
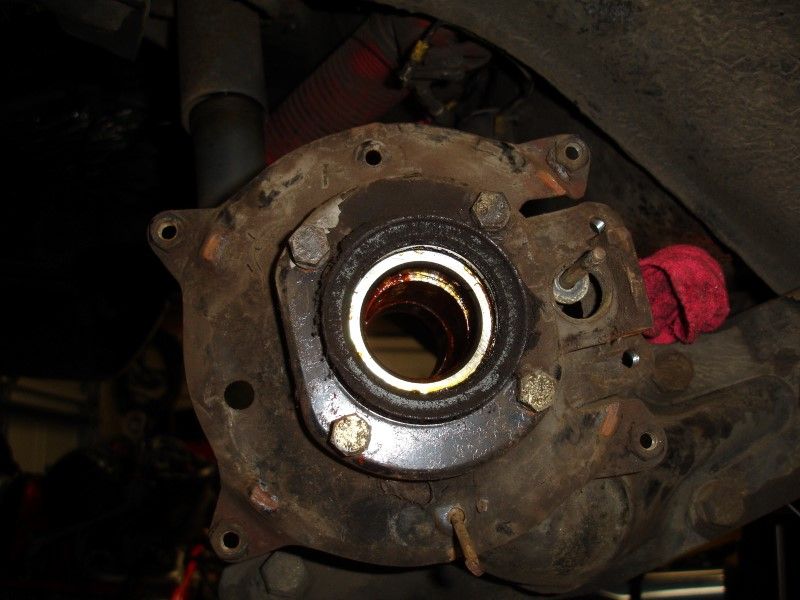
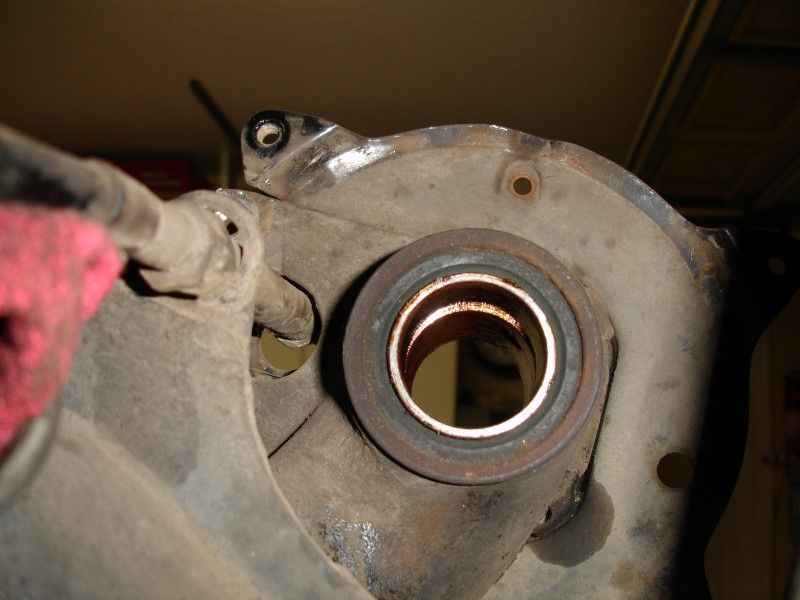
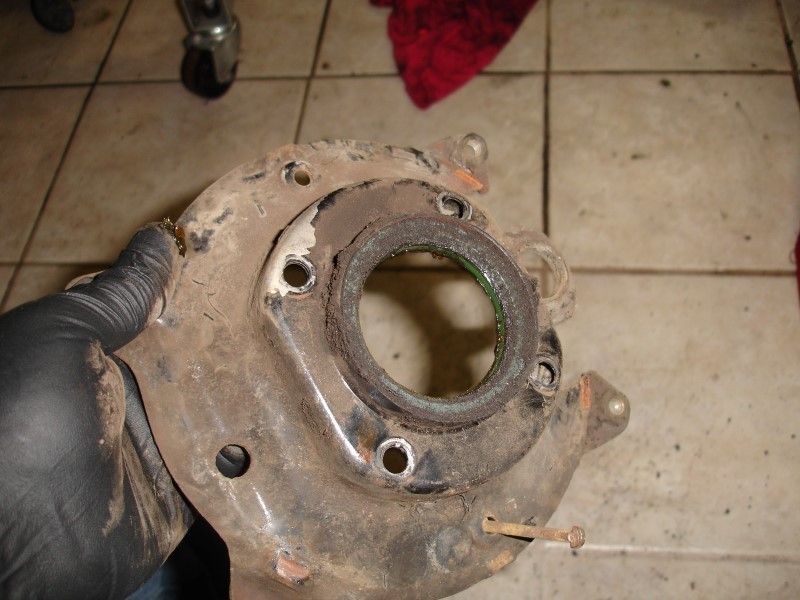
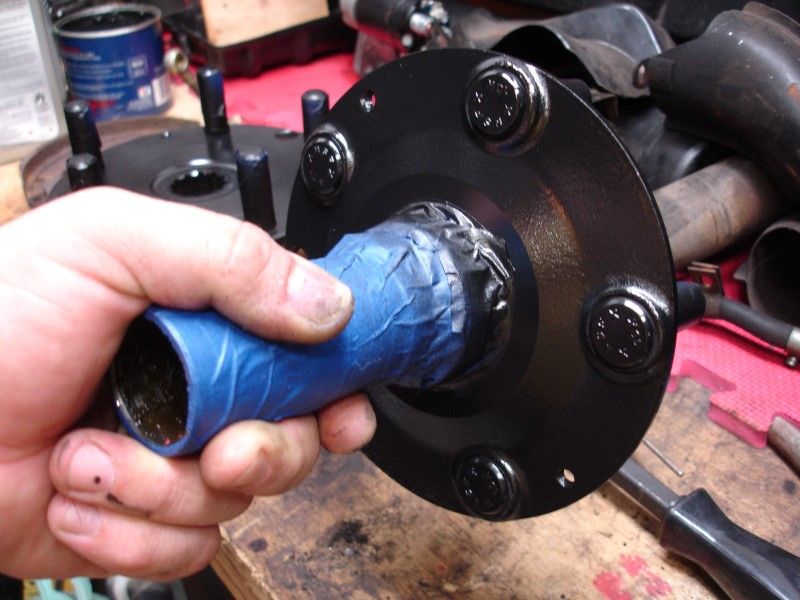
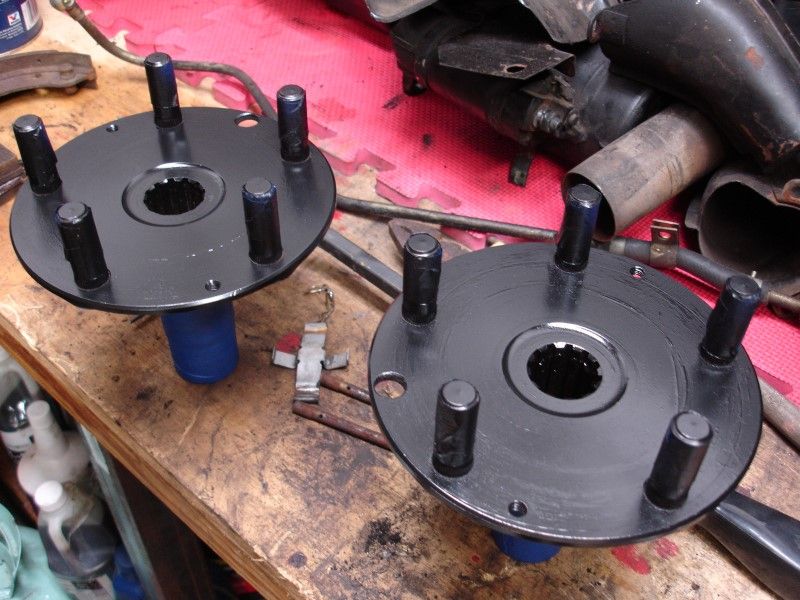
Removed the rear hub. Need to order the two seals and the o-ring.
Using a 1-1/16" socket with an extension and a BFH... tap tap tap slowly tap tap tap... and it comes out.
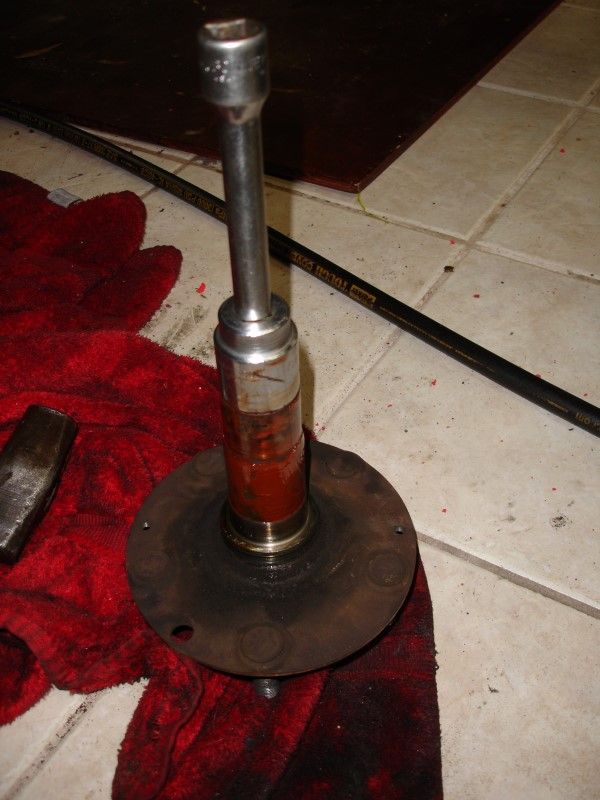
I will repack those bearings...
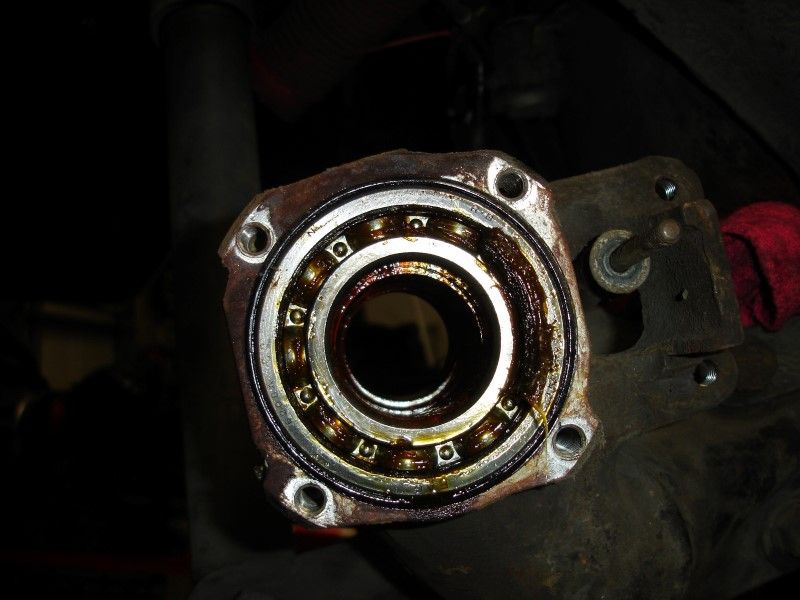
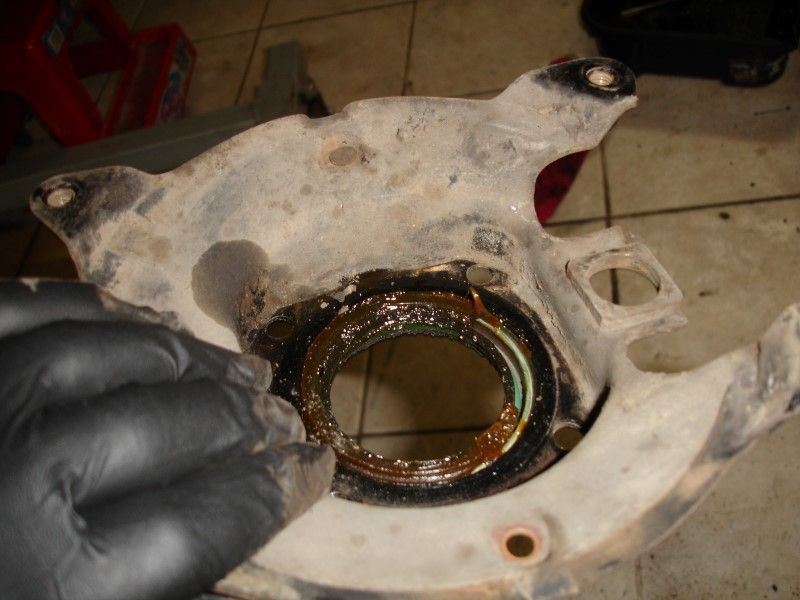
and it the e-brake housing is out. Will clean well and paint.
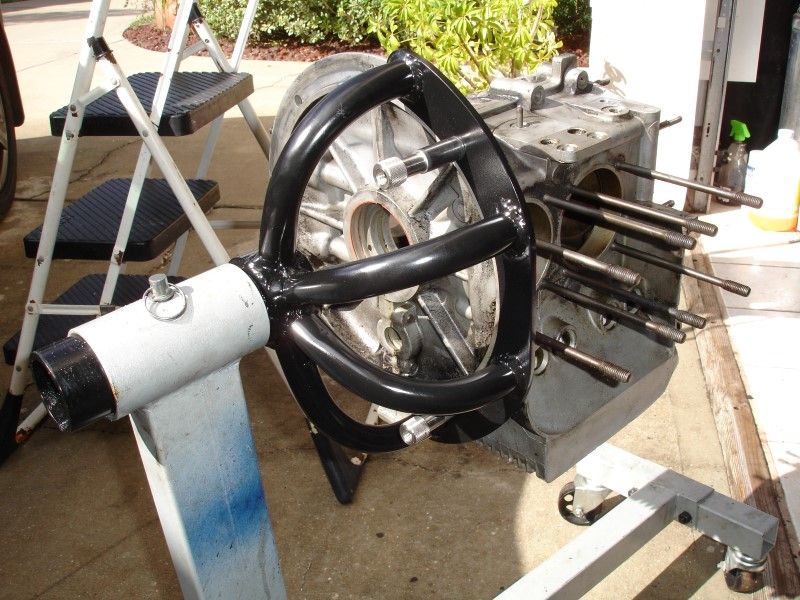
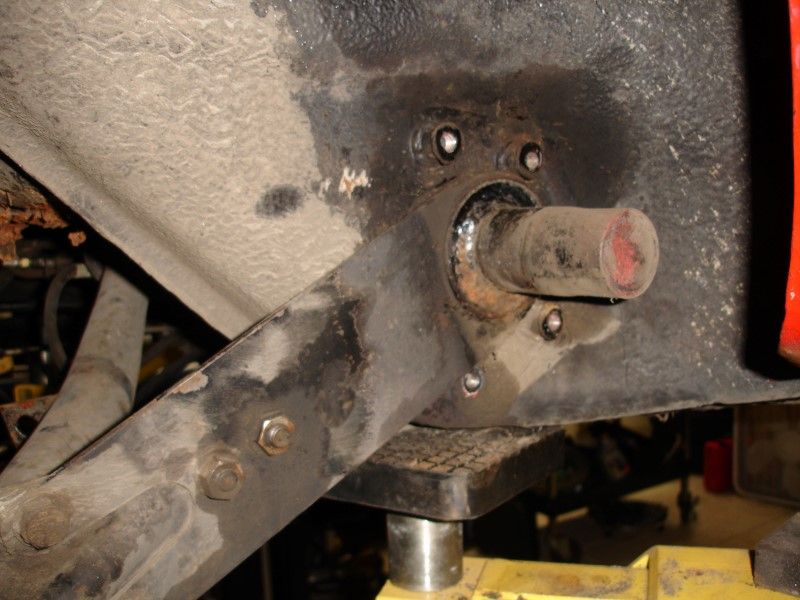
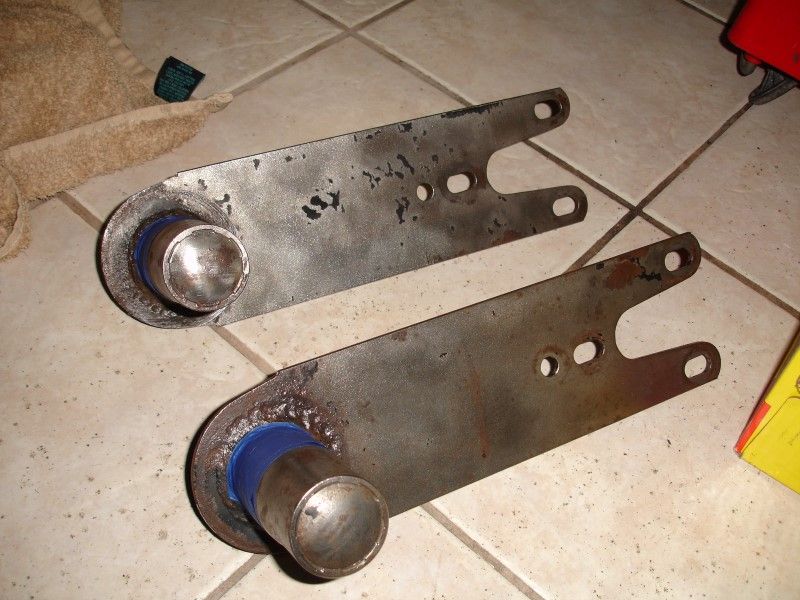
Also removed the rear suspension...
I have the bushings that are different (small inner/large outer).... 67 was a transition year for these bushings... from that transition on, both bushings (inner/outer) are the same size.
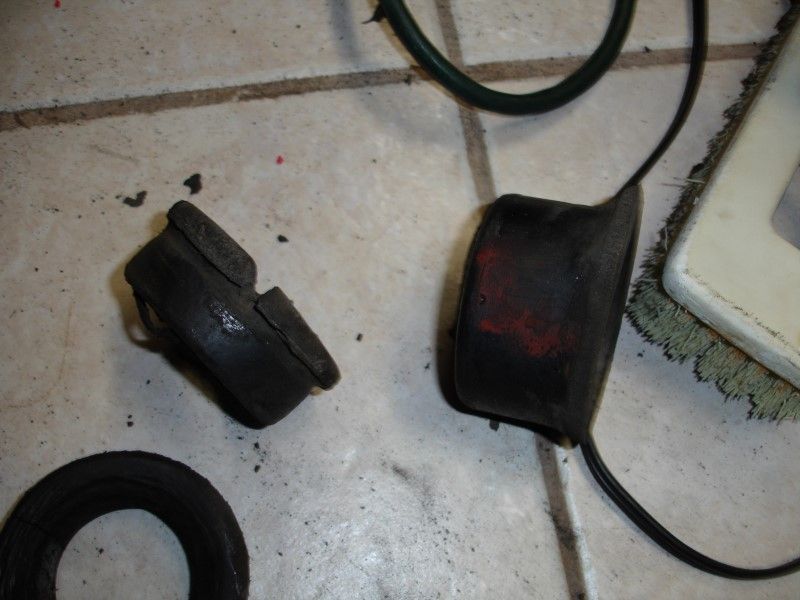
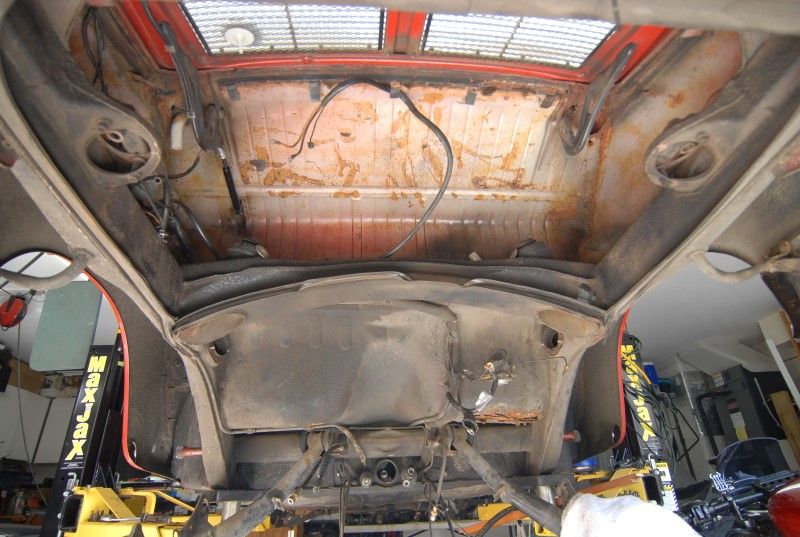
Also removed all the engine pad as it was disintegrating as I watched.

That is all for tonight... cleaned up the garage because the amount of dirt from removing the suspension was huge... Took the time to hose down the wheel well while in there...

Using a 1-1/16" socket with an extension and a BFH... tap tap tap slowly tap tap tap... and it comes out.
I will repack those bearings...
and it the e-brake housing is out. Will clean well and paint.
Also removed the rear suspension...
I have the bushings that are different (small inner/large outer).... 67 was a transition year for these bushings... from that transition on, both bushings (inner/outer) are the same size.
Also removed all the engine pad as it was disintegrating as I watched.
That is all for tonight... cleaned up the garage because the amount of dirt from removing the suspension was huge... Took the time to hose down the wheel well while in there...
Last edited by Wachuko; Feb 3, 2014 at 01:11 PM.
Instructor
Joined: Jan 2013
Posts: 166
Likes: 7
I can't believe you got that off. I hit mine with a mallet and it didn't budge. All for the better since I guess removal means replacing bearings and race and I was just gonna change to longer studs. ESR recommended removing EB cable and R&R through the cable hole. What is that nut torqued at?
Drifting

Joined: Mar 2012
Posts: 2,525
Likes: 555
BTW....I really appreciate all of the work you are documenting. It will help me so much. Thanks
Thread Starter
Professor of Pending Projects
Rennlist Member
Rennlist Member
Joined: Nov 2001
Posts: 9,898
Likes: 33
From: Ocala, FL
I can't believe you got that off. I hit mine with a mallet and it didn't budge. All for the better since I guess removal means replacing bearings and race and I was just gonna change to longer studs. ESR recommended removing EB cable and R&R through the cable hole. What is that nut torqued at?
Outer seal: (2) 999 113 085 40
O-ring: (2) 999 701 091 50
Inner seal: (2) 900 113 011 50 (I see this replaced by 900 113 046 50)
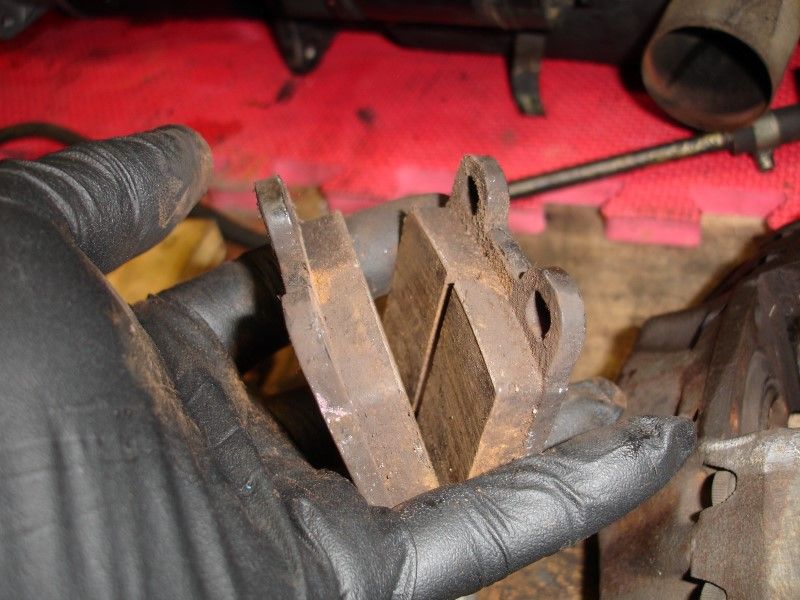
First remove the cotter pin, remove nut (this required a breaker bar and a helper pipe... e-brake engage to hold it in place)... then you remove the inner CVJ coupler, that just slides out. Remove the two small bolts holding the brake disc/drum, disconnect e-brake cable by removing tinyass small cutter pin and nut, using the socket and an extension slide it in place (this was where I almost made the mistake of trying to get the wrong things out. If you notice in the photo, you have two parts in there... the race and the hub... get a socket that fits exactly with the hub (inner part) or you will be trying to get out race and all...) Start hitting it with solid taps, does not require much force, remember it rides on bearings.
Torque value for that outer nut: 217-254 ft-lb
Thread Starter
Professor of Pending Projects
Rennlist Member
Rennlist Member
Joined: Nov 2001
Posts: 9,898
Likes: 33
From: Ocala, FL
So here is a pic...it does not due justice...I used satin black. One thing you'll note, the silver ring needs to be chrome. THe Chrome paint looks like paint and not Chrome. You are doing the right thing getting it chromed.
BTW....I really appreciate all of the work you are documenting. It will help me so much. Thanks
BTW....I really appreciate all of the work you are documenting. It will help me so much. Thanks

As soon as the center leather piece gets here I will do the same. Calling today to see if I found the place to chrome the ring.
Thread Starter
Professor of Pending Projects
Rennlist Member
Rennlist Member
Joined: Nov 2001
Posts: 9,898
Likes: 33
From: Ocala, FL
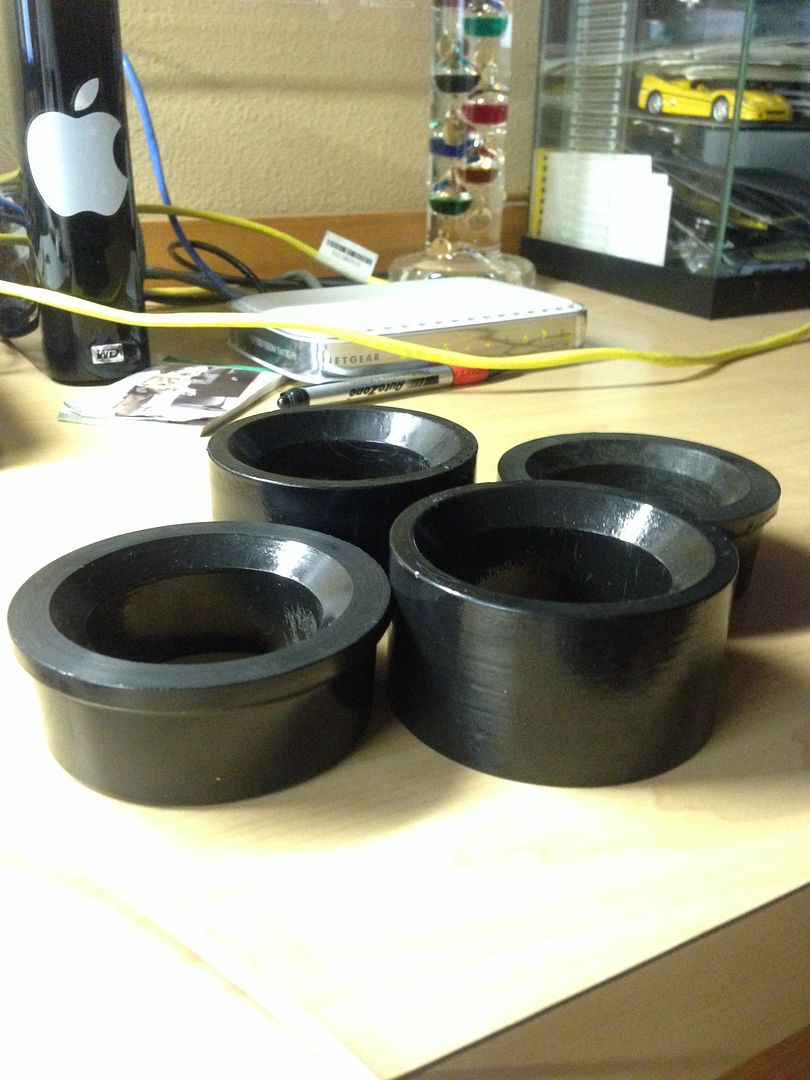
Not much time to work on the car today... did a bit more cleaning of rear suspension parts... painted a few parts, that is it. Also received a gift from Michael (thank you Sir! ) : vinyl seat covers and a new set of bushings for the torsion bar arms.
Ordered the seals for the rear hub, the missing pin and safety clip for the lid shocks, decal for the oil canister, a kit that comes with the rubber boots for the cables (all missing in mine), some copper seals for the front brakes, Red Line 80401 CV-2 Synthetic Grease (for repacking the CVJs and wheel bearings), torsion bar ends, bleeder valves for all the brake calipers, Rubber CV boots to rebuild the shafts, and the gaskets for the CVJs.
More tomorrow night.