
My 1967 912 Build Thread

Thread Starter
Professor of Pending Projects
Rennlist Member
Rennlist Member

Joined: Nov 2001
Posts: 9,898
Likes: 33
From: Ocala, FL
"...Plan is to clean all the wheel well, and make it look nice. Refresh those bushings as well... got to look for some better bushings without going solid... those red polyurethane bushings... if anyone knows where they sell those, chime in please..."
I believe I have a set of black poly bushings for the rear. They came with the car. I have been told it will take an act of congress to get them on - so I went with factory rubber. You want? I am not using.
I believe I have a set of black poly bushings for the rear. They came with the car. I have been told it will take an act of congress to get them on - so I went with factory rubber. You want? I am not using.
 I will PM you my address.
Thread Starter
Professor of Pending Projects
Rennlist Member
Rennlist Member
Joined: Nov 2001
Posts: 9,898
Likes: 33
From: Ocala, FL
Talked to Walt at Competition Engineering ( http://www.competitioneng.com/contact.htm ) to see if they could find blanks that can be cut to 3rd Oversize... and also asked him about taking the case back to accepting standard bearings... it can be done, but not cheap (about US$1,500.00)...
Got Walt's reply later yesterday... not good news... They do not have any bearings this size and the guy that makes them has never made any that big...
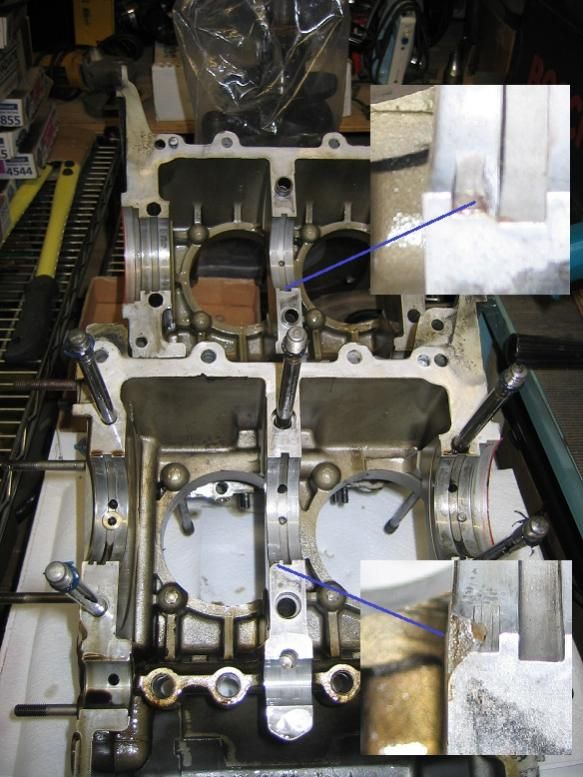
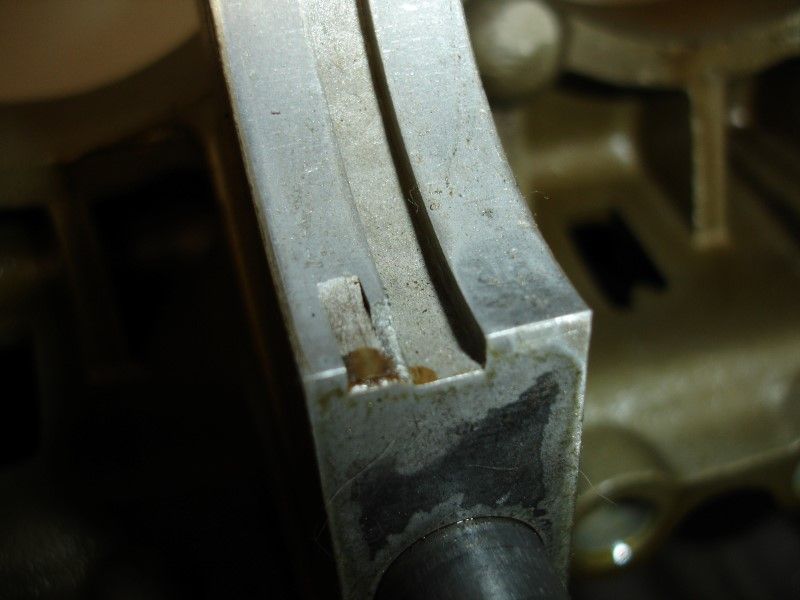
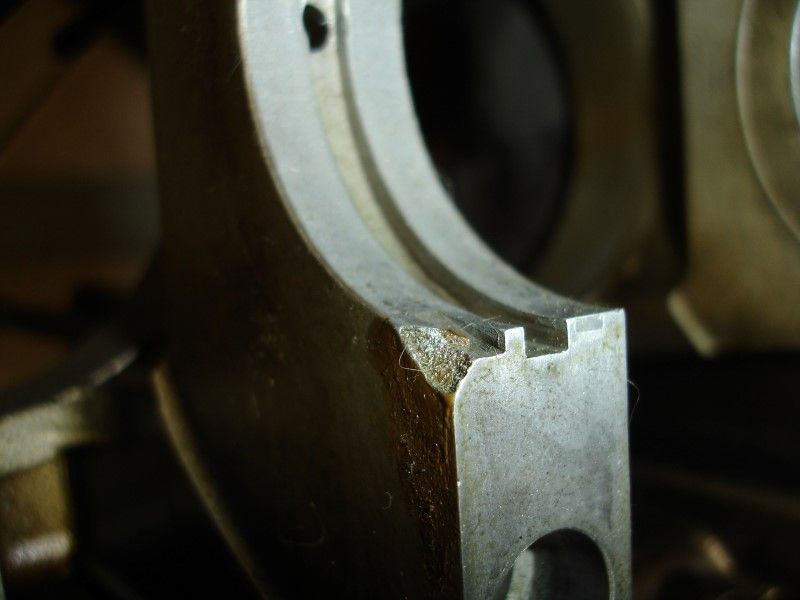
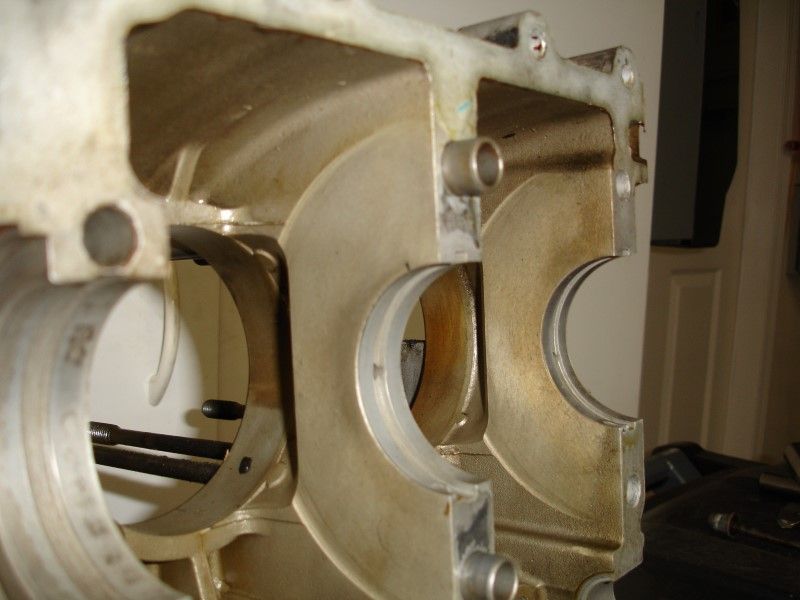
A fellow forum member on the 912bbs.org, Peter Graham, gave me a case! On the case that Peter has so kindly offered, the broken bearing tangs can be fixed. But until a case is torqued together and measured with a bore gauge, it�s all guess work. Case is on its way to me via FedEx. Here is a photo of the damage on that one:
I also have an appointment with Sid (Troy Motorsports here in Orlando) on Wednesday afternoon...
Calling a few other vendors, not completely given up in trying to find a bearing set... but also working on plan C (fix Peter's case, Thank you Peter!!!)... and plan D (finding something standard that does not require additional work, but buying parts remotely via eBay is always a gamble)...
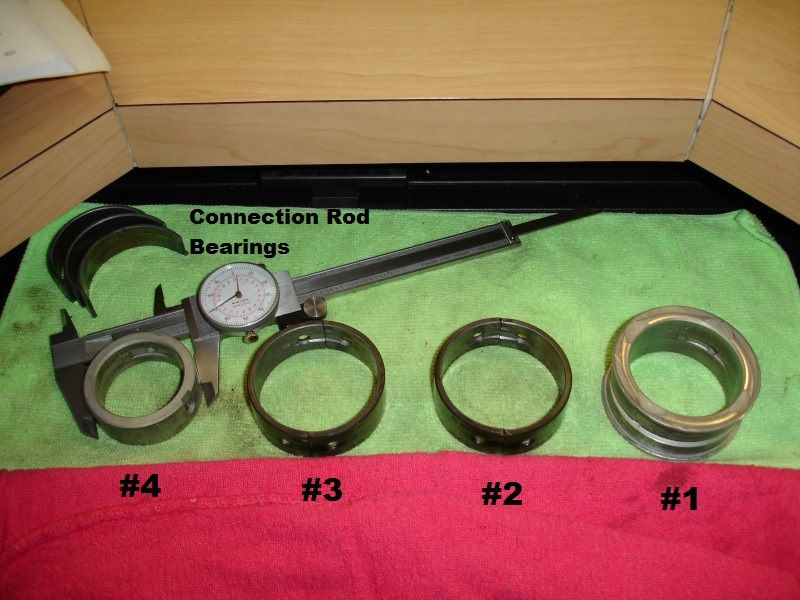
I was told that these engines are matched... meaning, all three case pieces are done to fit with each other. In most cases front cover pieces might work with a different case, but not always. First step was checking the third piece, front cover, that I have. Happy to find that the bearing there (I believe it is bearing #4) is standard. So the front case cover was not machined. As to fitting a different case, well, I will not know that until I present them together and see if both the camshaft and crankshaft align perfectly.
The orange book has been great, great to have seen it as one of the recommended books in the sticky section of this forum. So for those reading this and do not have it, get it!
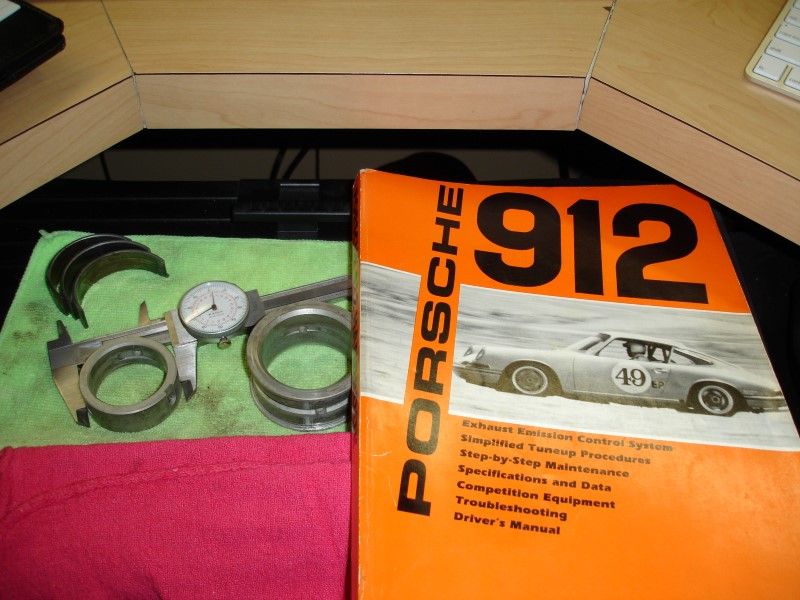
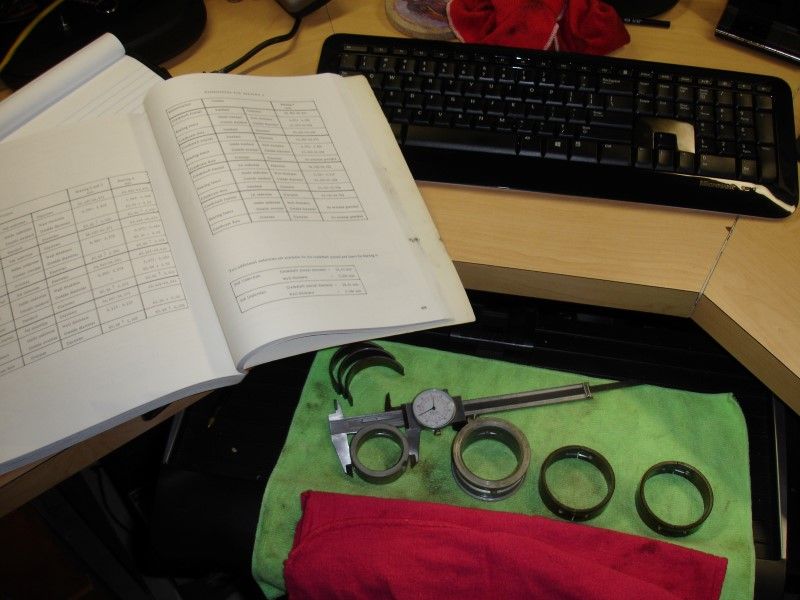
Pages 222-225 provides the dimensions for the bearings... I also have the pdf version of the workshop manual, but nothing beats having a real book in front. I need to print out the workshop manual.
Got Walt's reply later yesterday... not good news... They do not have any bearings this size and the guy that makes them has never made any that big...
A fellow forum member on the 912bbs.org, Peter Graham, gave me a case! On the case that Peter has so kindly offered, the broken bearing tangs can be fixed. But until a case is torqued together and measured with a bore gauge, it�s all guess work. Case is on its way to me via FedEx. Here is a photo of the damage on that one:
I also have an appointment with Sid (Troy Motorsports here in Orlando) on Wednesday afternoon...
Calling a few other vendors, not completely given up in trying to find a bearing set... but also working on plan C (fix Peter's case, Thank you Peter!!!)... and plan D (finding something standard that does not require additional work, but buying parts remotely via eBay is always a gamble)...
I was told that these engines are matched... meaning, all three case pieces are done to fit with each other. In most cases front cover pieces might work with a different case, but not always. First step was checking the third piece, front cover, that I have. Happy to find that the bearing there (I believe it is bearing #4) is standard. So the front case cover was not machined. As to fitting a different case, well, I will not know that until I present them together and see if both the camshaft and crankshaft align perfectly.
The orange book has been great, great to have seen it as one of the recommended books in the sticky section of this forum. So for those reading this and do not have it, get it!
Pages 222-225 provides the dimensions for the bearings... I also have the pdf version of the workshop manual, but nothing beats having a real book in front. I need to print out the workshop manual.
Thread Starter
Professor of Pending Projects
Rennlist Member
Rennlist Member
Joined: Nov 2001
Posts: 9,898
Likes: 33
From: Ocala, FL
I have to take just a moment to say something about what has happened here... I have had strangers letting me borrow DVDs that you can't even find for purchase! Others offering parts (from small parts, seat covers, a case!) for free, just to help out. Those that have shared, with patience, their knowledge so that I can understand what I am doing, what I am looking at, and what options I have.
Guys, I am really touched by your kindness. I just want to say thank you to all of you. You have placed a great responsibility on my shoulder to find ways to pay all this forward. Thank you, thank you, thank you!!
Guys, I am really touched by your kindness. I just want to say thank you to all of you. You have placed a great responsibility on my shoulder to find ways to pay all this forward. Thank you, thank you, thank you!!
Thread Starter
Professor of Pending Projects
Rennlist Member
Rennlist Member
Joined: Nov 2001
Posts: 9,898
Likes: 33
From: Ocala, FL
Took the horn assembly out of the steering wheel. Easy enough. Just hold the steering wheel and do a 1/4 turn counterclockwise of the horn and out it comes.
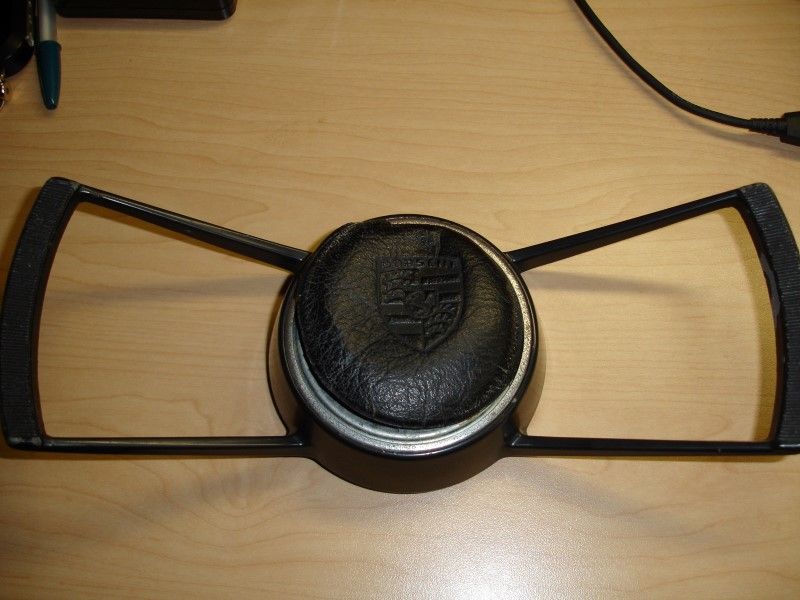
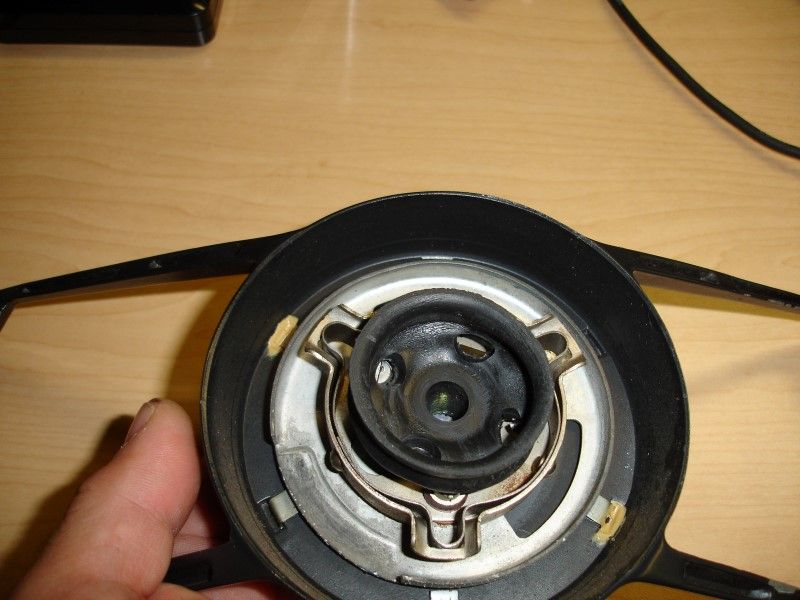

What is the correct way to make it look like new again? Are these painted or powdercoated? Satin gloss, correct?
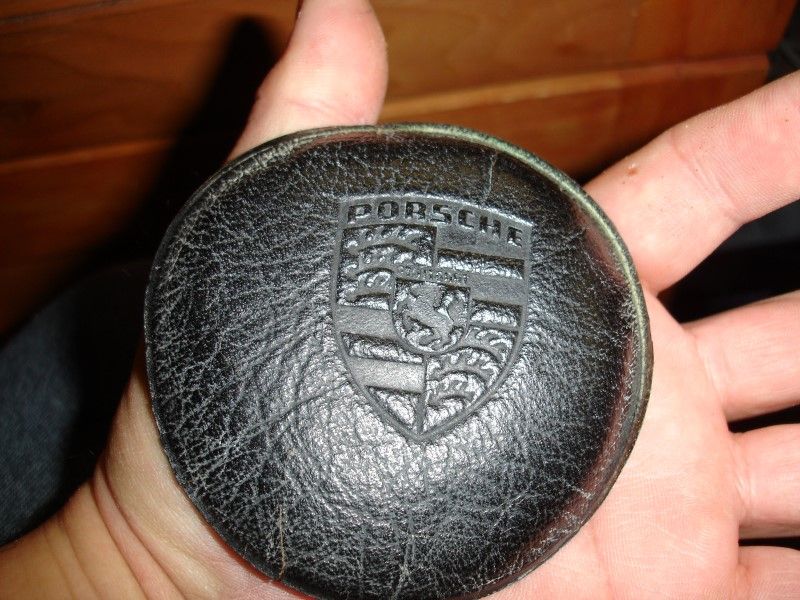
The leather insert, several sources that have them. Any one better than the other?
Sierra Madre Collections - Hockey Puck Button Leather Center
Stoddard - Leather center
Ebay - 912 Horn Button Leather
Someone here in the forum?
What is the correct way to make it look like new again? Are these painted or powdercoated? Satin gloss, correct?
The leather insert, several sources that have them. Any one better than the other?
Sierra Madre Collections - Hockey Puck Button Leather Center
Stoddard - Leather center
Ebay - 912 Horn Button Leather
Someone here in the forum?
Thread Starter
Professor of Pending Projects
Rennlist Member
Rennlist Member
Joined: Nov 2001
Posts: 9,898
Likes: 33
From: Ocala, FL
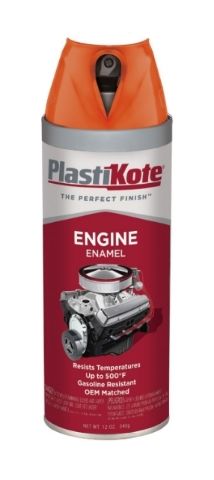
Plan to get Koni shocks for rear and front. For the front, since it currently has Boge, I plan to paint the front strut outer part Koni orange. From searching on this, found that this is the color Koni uses on their shocks: Plasti-Kote 200 Chevrolet Orange Engine Enamel
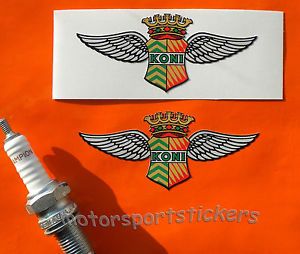
Also got these stickers for the shock absorber strut outer part:
And ordered some silver caliper paint to protect the calipers once I clean them well.
Also got these stickers for the shock absorber strut outer part:
And ordered some silver caliper paint to protect the calipers once I clean them well.
Lifetime Rennlist
Member
Joined: Jun 2001
Posts: 2,346
Likes: 97
From: Central US of A
Perhaps a photo will give you enough detail
Thread Starter
Professor of Pending Projects
Rennlist Member
Rennlist Member
Joined: Nov 2001
Posts: 9,898
Likes: 33
From: Ocala, FL
Hmmm.. I sent my wheel to Bruce Crawford. He is the National expert on all things steering wheel. www.hardwoodclassicsltd.com
Perhaps a photo will give you enough detail
Perhaps a photo will give you enough detail

I will soda blast the steering wheel metal areas and try paint. I ordered the leather center piece from eBay.
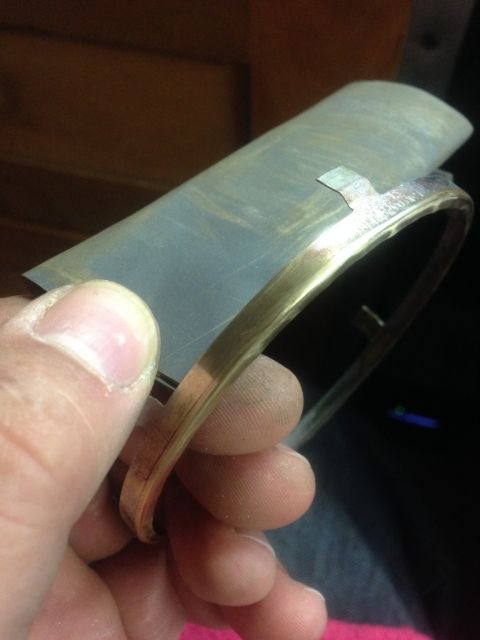
The missing piece is that chromed ring. Sierra Madre has it on back order. A hefty 156.00 for that ring. The one in mine is in need of re-chroming to be able to use it again... not sure what the cost of that would be. And it really needs to be chromed to look right. No amount of polishing will make it look like the one in yours because it is made out of brass
 .
.
Thank you for the photo. I will use it as a reference when doing mine.
Last edited by Wachuko; Jan 30, 2014 at 12:50 PM.
Thread Starter
Professor of Pending Projects
Rennlist Member
Rennlist Member
Joined: Nov 2001
Posts: 9,898
Likes: 33
From: Ocala, FL
Same paint technique used for mirrors and then you clear coat the part. Pretty cool. I will look for where they sell that (there has to be an option to ordering from Europe).I would still like to have the ring chrome plated. I will find a local plating shop to take the ring. Should not be much for chrome plating it.
Thread Starter
Professor of Pending Projects
Rennlist Member
Rennlist Member
Joined: Nov 2001
Posts: 9,898
Likes: 33
From: Ocala, FL
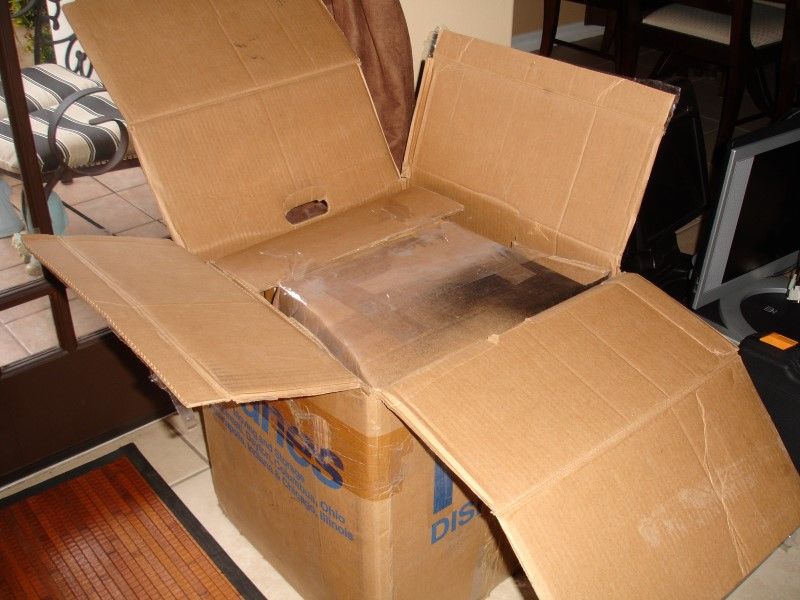
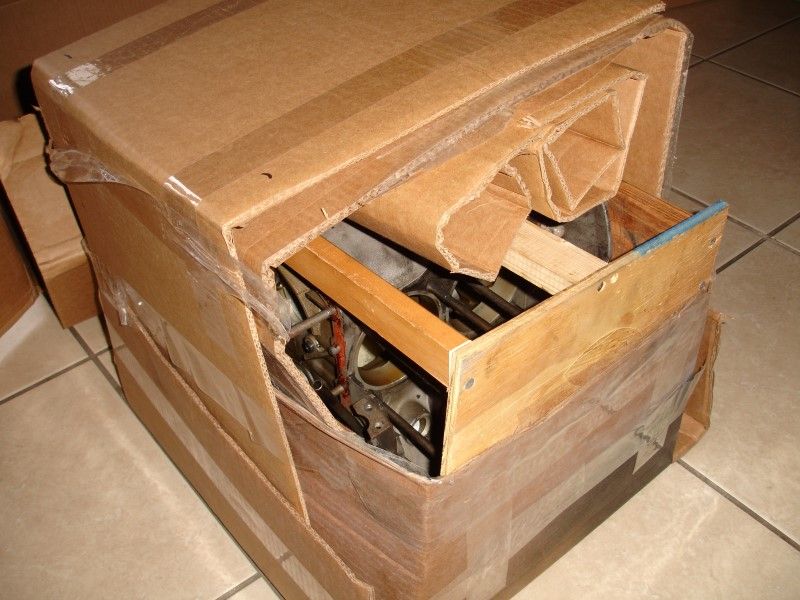
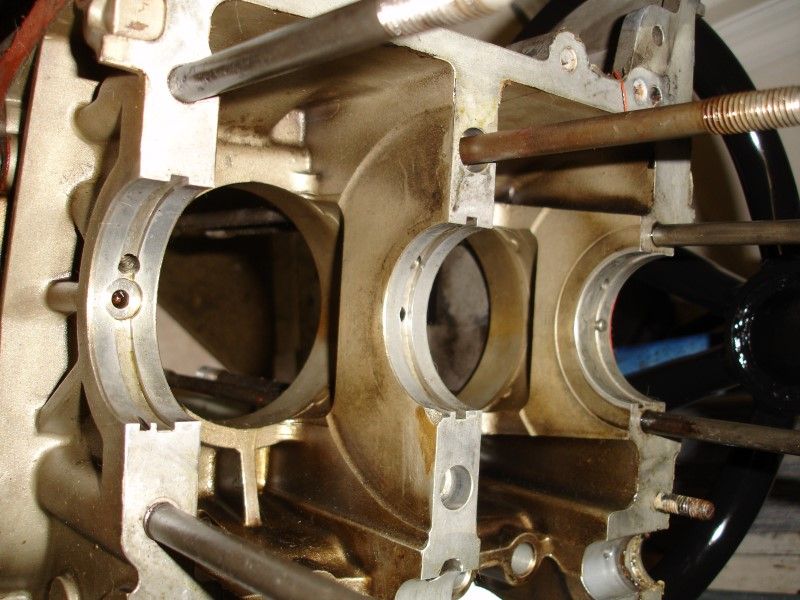
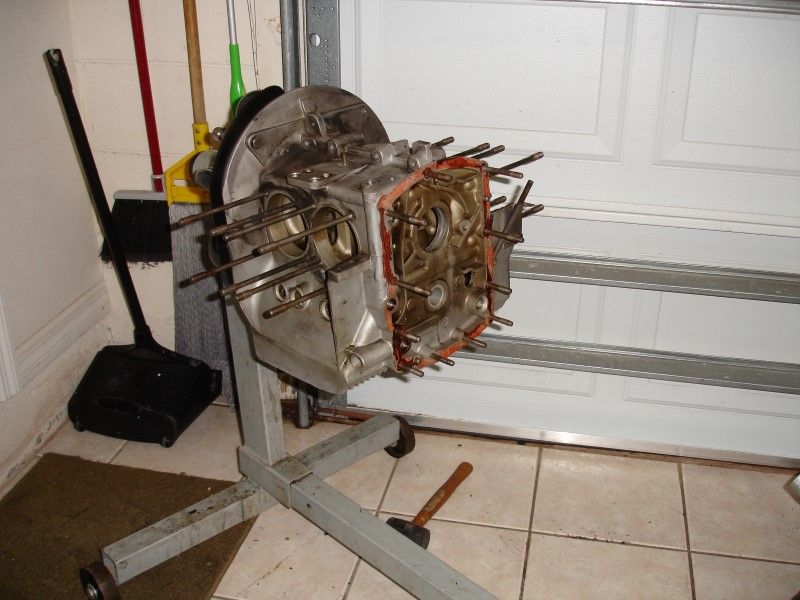
Look at what came in today!!! Peter, you sure can pack a case to avoid any damage to it!!!
I had to take photos to be able to put it back in the box when/if I send it to Walt.
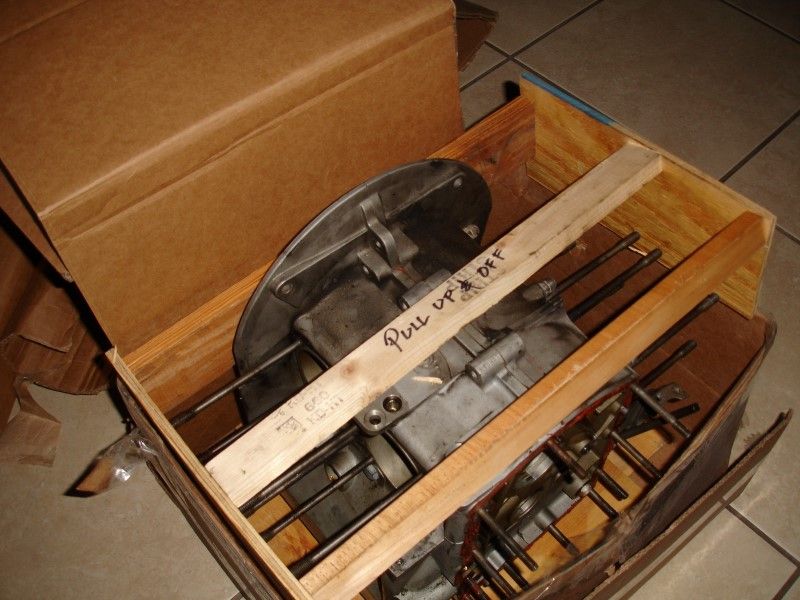
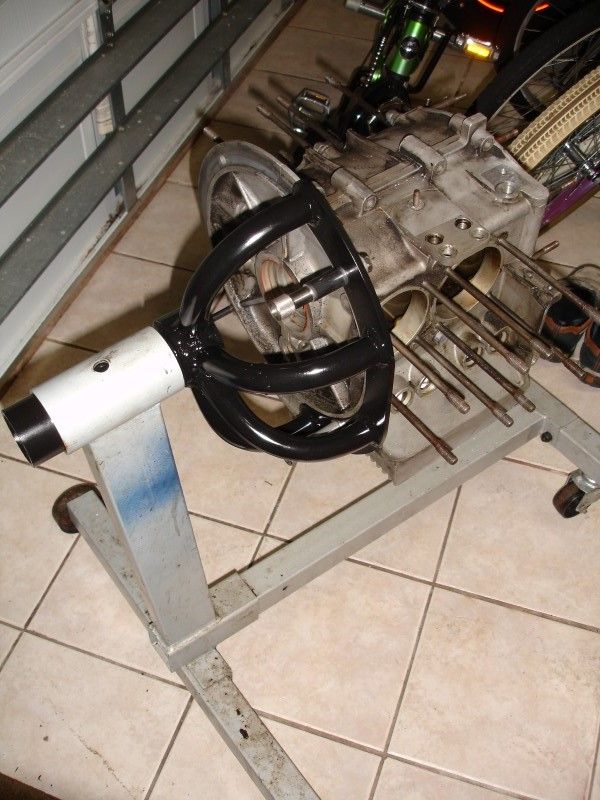
Engine stand also came in today...
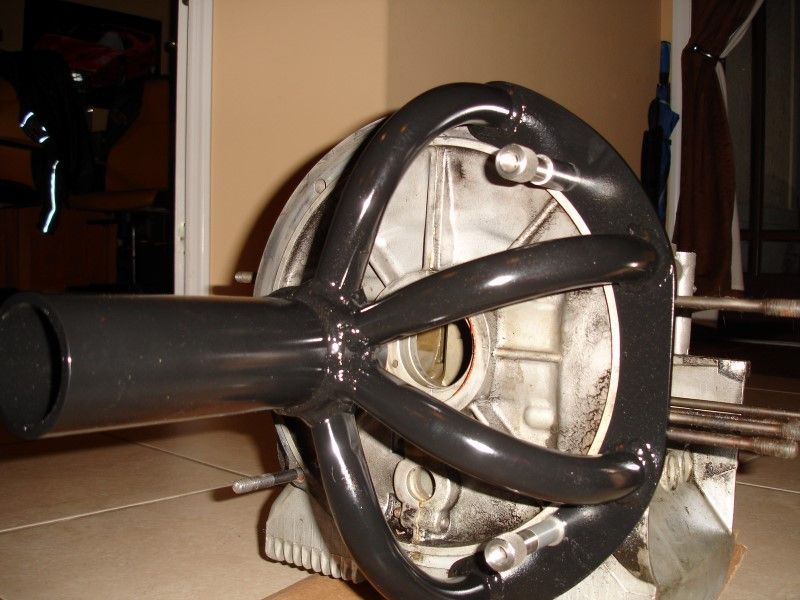
I hope this can be fixed easily:
One side:
The other side:
And a few more photos of the case from Peter:
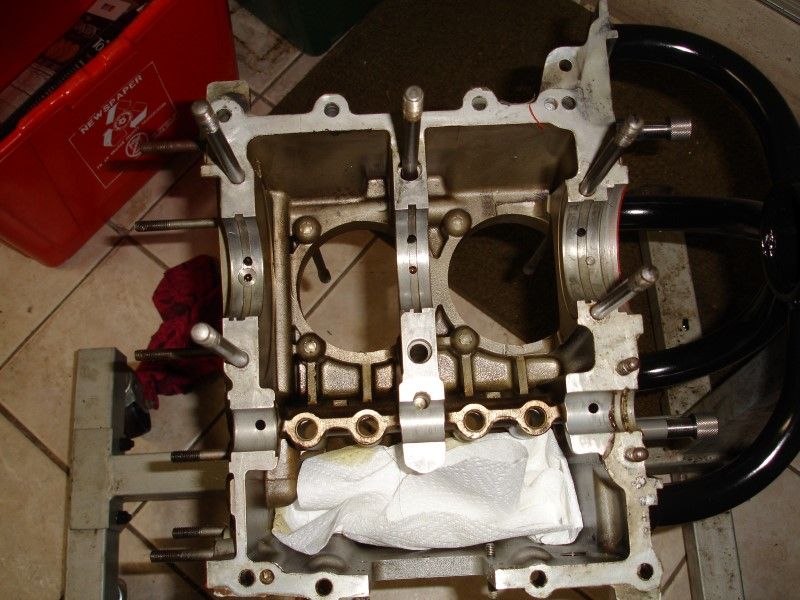


Back together...
The case's condition is so much better than mine... comparing the two I can see now how beat up and tired mine is...
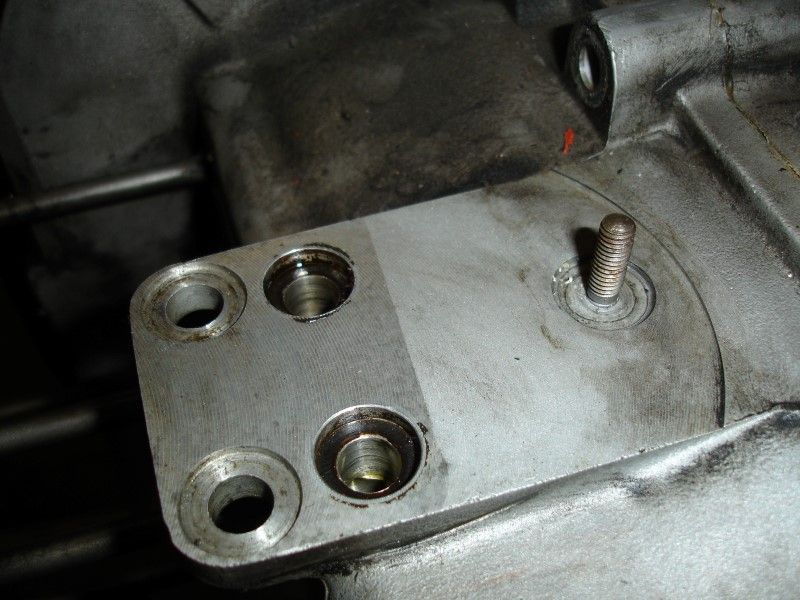
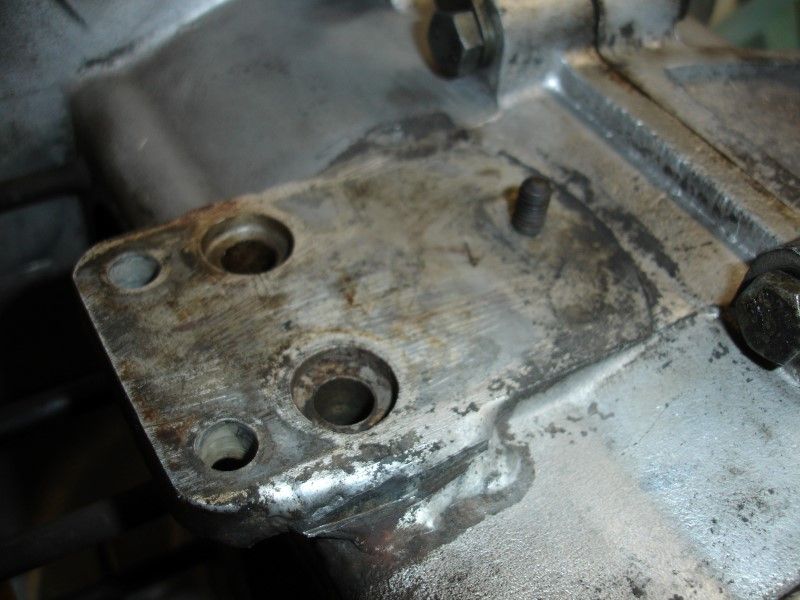
Something that Sid from Troy Motorsport highlighted when I went to see him with my parts, was that the base plate for the oil cooler had been welded.... well now I can clearly see the difference!!
Case from Peter:
Mine:
I need to see if Sid can fix the case locally or if I send it to Walt. I will decide based on my next visit to Sid. While I was at his shop he showed me what the heads done looked like... also explained a few things that I were still not clear to me. Funny as we were talking about the heads and I made the comment that the valves were only like 25.00... he just laughed... that is when I learned the difference between ATE valves and AE...
Anyhow... that is all that I have for now. Family is demanding some quality time... movie night, so we are sitting in the family room with some pop-corn and ice cream to watch a movie together... back with more tomorrow!!
I had to take photos to be able to put it back in the box when/if I send it to Walt.
Engine stand also came in today...
I hope this can be fixed easily:
One side:
The other side:
And a few more photos of the case from Peter:
Back together...
The case's condition is so much better than mine... comparing the two I can see now how beat up and tired mine is...
Something that Sid from Troy Motorsport highlighted when I went to see him with my parts, was that the base plate for the oil cooler had been welded.... well now I can clearly see the difference!!
Case from Peter:
Mine:
I need to see if Sid can fix the case locally or if I send it to Walt. I will decide based on my next visit to Sid. While I was at his shop he showed me what the heads done looked like... also explained a few things that I were still not clear to me. Funny as we were talking about the heads and I made the comment that the valves were only like 25.00... he just laughed... that is when I learned the difference between ATE valves and AE...
Anyhow... that is all that I have for now. Family is demanding some quality time... movie night, so we are sitting in the family room with some pop-corn and ice cream to watch a movie together... back with more tomorrow!!
Drifting

Joined: Mar 2012
Posts: 2,525
Likes: 555
I will soda blast the steering wheel metal areas and try paint. I ordered the leather center piece from eBay.
The missing piece is that chromed ring. Sierra Madre has it on back order. A hefty 156.00 for that ring. The one in mine is in need of re-chroming to be able to use it again... not sure what the cost of that would be. And it really needs to be chromed to look right. No amount of polishing will make it look like the one in yours because it is made out of brass
.Thank you for the photo. I will use it as a reference when doing mine.
Thread Starter
Professor of Pending Projects
Rennlist Member
Rennlist Member
Joined: Nov 2001
Posts: 9,898
Likes: 33
From: Ocala, FL
Jay Leno recommends this chrome spray for small items. I'll find the video.
http://www.youtube.com/watch?v=A-1cTpSZ1l8
http://www.youtube.com/watch?v=A-1cTpSZ1l8
Found the kit for this... US$289.00
http://www.alsacorp.com/products/chromefx/