My 1967 912 Build Thread


 02-13-2014, 12:24 PM
#122
Professor of Pending Projects
Rennlist Member
Rennlist Member
Thread Starter
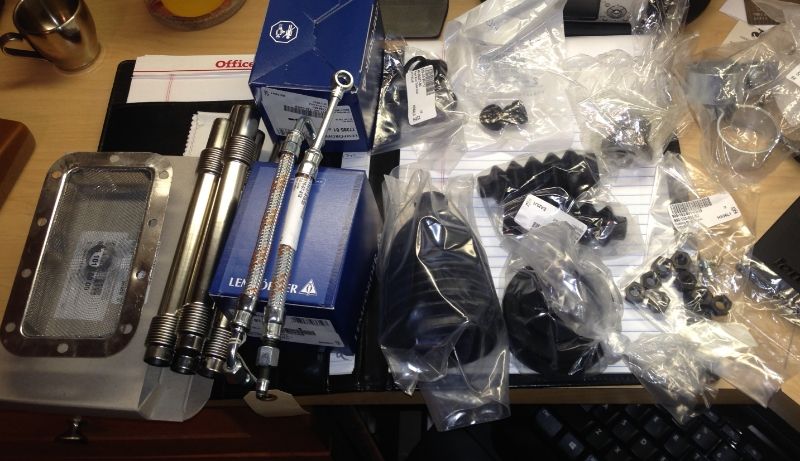
Ordered a few tools to make installing the seals an easier task...
Baum Tools Crank Seal Driver P73 tool to install seal on the pulley side:

To install seal on the flywheel side:

I had one heck of a time removing one of the oil relief pistons... this is the correct tool for removing those...

Also ordered a few parts that I somehow forgot to order earlier... set of beru plug wires, some gaskets, rear window seal for when I remove it for working the rear shelf repair, the shims for the base of the cylinders (4 of each: 1mm and .25mm), fan housing spacer/gasket (that sucker, generator with fan, is giving me a fight to come out of the housing, #$%#$%#@$)
Baum Tools Crank Seal Driver P73 tool to install seal on the pulley side:
To install seal on the flywheel side:
I had one heck of a time removing one of the oil relief pistons... this is the correct tool for removing those...
Also ordered a few parts that I somehow forgot to order earlier... set of beru plug wires, some gaskets, rear window seal for when I remove it for working the rear shelf repair, the shims for the base of the cylinders (4 of each: 1mm and .25mm), fan housing spacer/gasket (that sucker, generator with fan, is giving me a fight to come out of the housing, #$%#$%#@$)
02-13-2014, 08:53 PM
#123
Professor of Pending Projects
Rennlist Member
Rennlist Member
Thread Starter
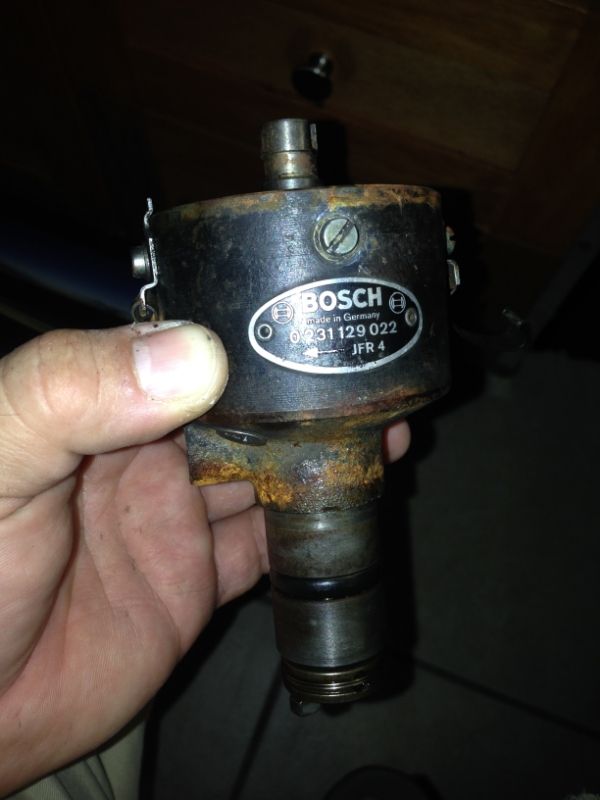
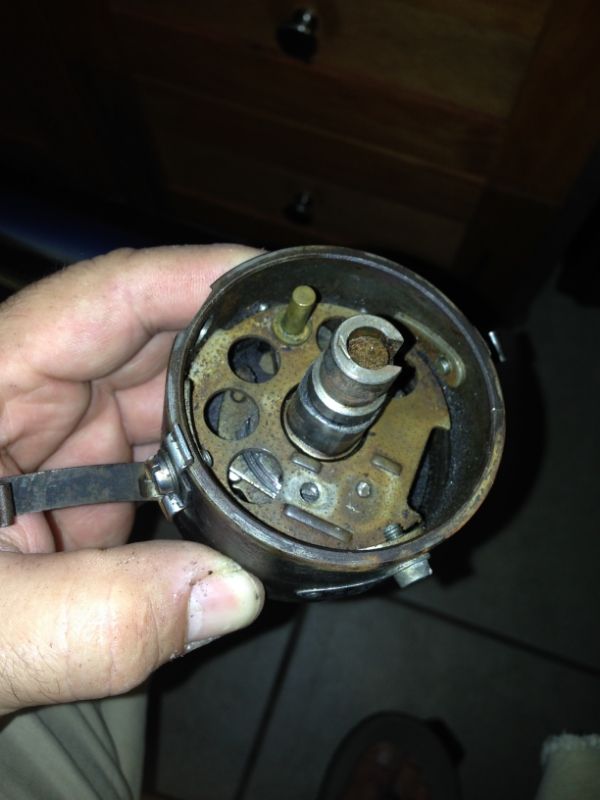
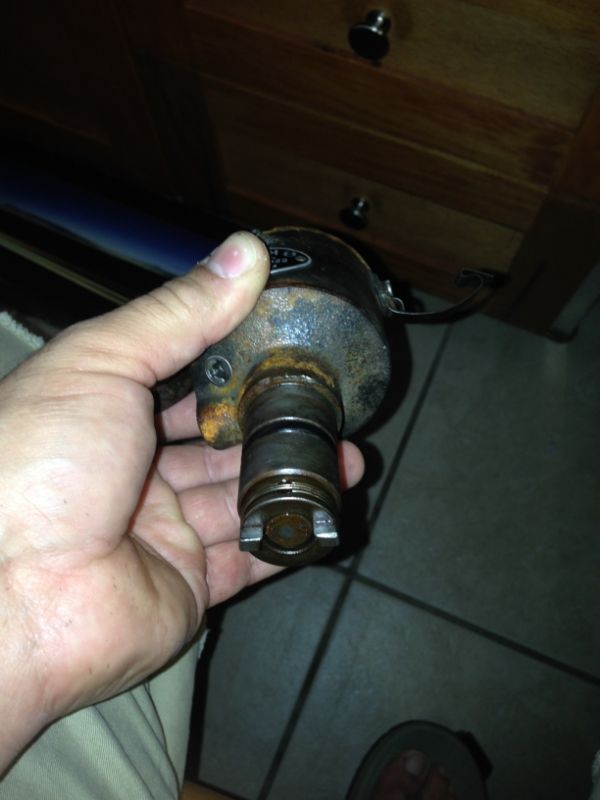
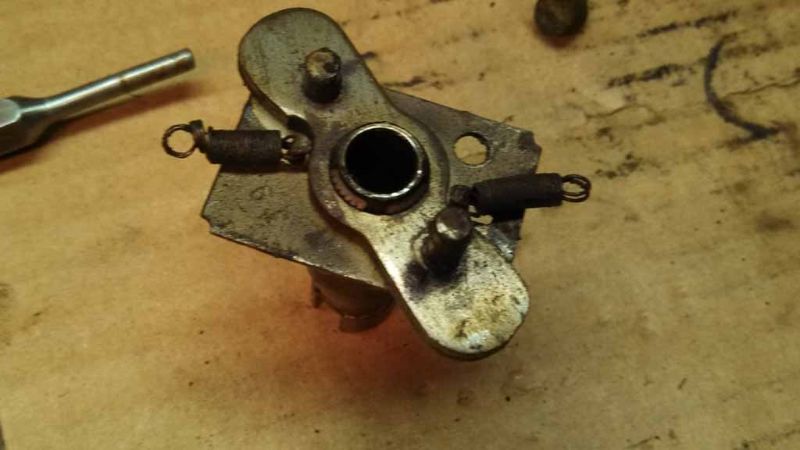
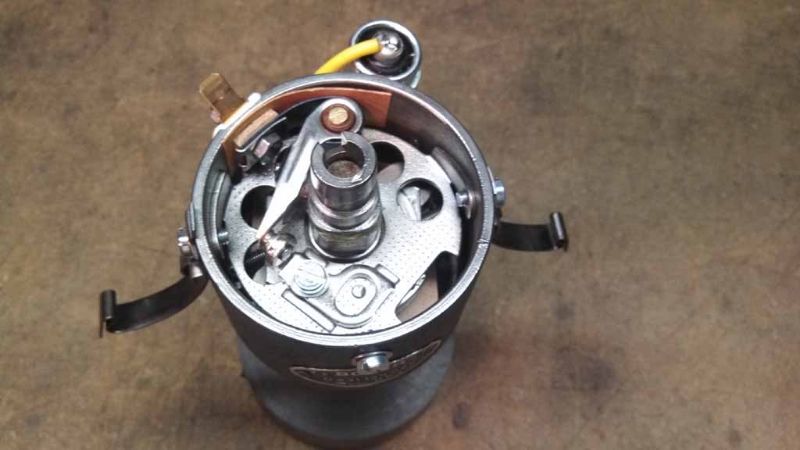
Glenn Ring does it again!!!
http://www.glenn-ring.com/bosch/
Before
After!!!!
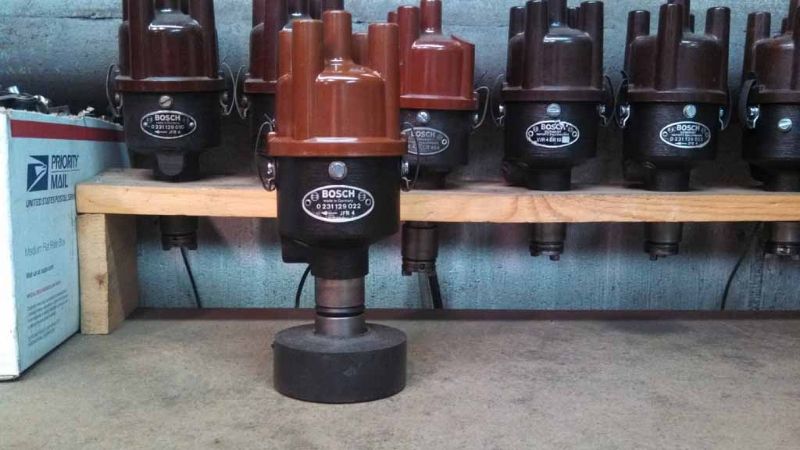
Woohooo! On its way back from Glenn. Should be here in a few days.
Thank you Glenn!!!
http://www.glenn-ring.com/bosch/
Before
After!!!!
Woohooo! On its way back from Glenn. Should be here in a few days.
Thank you Glenn!!!
Last edited by Wachuko; 02-13-2014 at 10:11 PM.
02-13-2014, 10:32 PM
#124
022? Did he restore yours or take yours as a core for a rebuilt? I actually has a 009 and had it rebuilt RS0012 by Benton Performance.
http://www.bentonperformance.com/
http://www.bentonperformance.com/
02-13-2014, 11:00 PM
#125
Professor of Pending Projects
Rennlist Member
Rennlist Member
Thread Starter
022? Did he restore yours or take yours as a core for a rebuilt? I actually has a 009 and had it rebuilt RS0012 by Benton Performance.
http://www.bentonperformance.com/
http://www.bentonperformance.com/
02-14-2014, 08:04 AM
#126
Former Vendor

Join Date: Feb 2004
Posts: 2,139
Likes: 0
Received 0 Likes
on
0 Posts
Hi Jaime,
Fantastic thread, I just found it.
About the Fram water transfer sticker, thinking that a coat of clear paint over the whole cap will help protect the sticker. Done that before and it worked well. Really doesn't change the look of anything either as long as the coat is a light one and the paints match so one doesn't eat the other.
Thanks for sharing your efforts!
02-14-2014, 08:59 AM
#127
Professor of Pending Projects
Rennlist Member
Rennlist Member
Thread Starter
Constantine,
Great suggestion. When the side decal comes in, I will clear coat all.
How is your 1973 911T project coming along? Any updates?
Great suggestion. When the side decal comes in, I will clear coat all.
How is your 1973 911T project coming along? Any updates?
Hi Jaime,
Fantastic thread, I just found it.
About the Fram water transfer sticker, thinking that a coat of clear paint over the whole cap will help protect the sticker. Done that before and it worked well. Really doesn't change the look of anything either as long as the coat is a light one and the paints match so one doesn't eat the other.
Thanks for sharing your efforts!
Fantastic thread, I just found it.
About the Fram water transfer sticker, thinking that a coat of clear paint over the whole cap will help protect the sticker. Done that before and it worked well. Really doesn't change the look of anything either as long as the coat is a light one and the paints match so one doesn't eat the other.
Thanks for sharing your efforts!
02-14-2014, 05:00 PM
#128
Professor of Pending Projects
Rennlist Member
Rennlist Member
Thread Starter
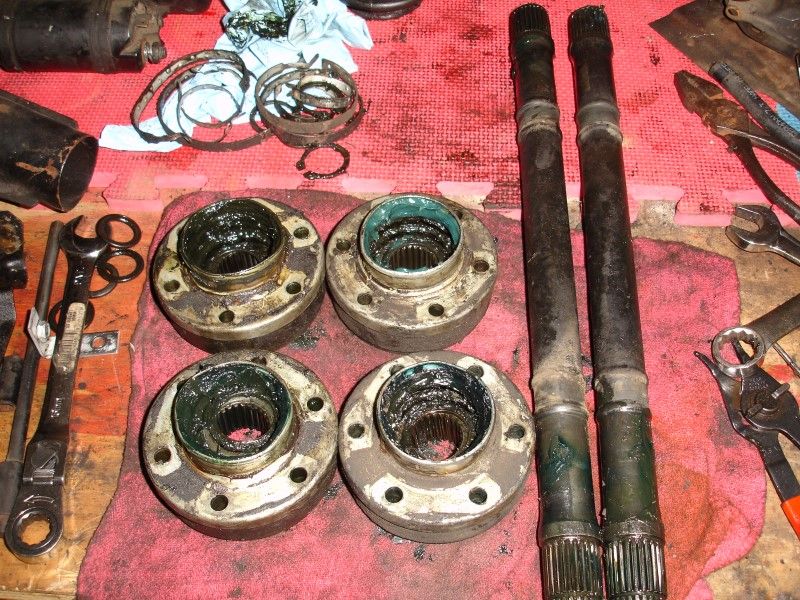
Drive shafts taken apart... easy to do, remove circlip, remove the straps holding the boot in place, slide out... remember that there is a washer inside...
You...you... YOU!! I will deal with you later!
You...you... YOU!! I will deal with you later!
02-15-2014, 02:07 PM
#129
I wake up every morning and the first thing I do is see what is new on this thread. THis is really a legendary Thread. I just can't get enough this stuff. Thanks so much for taking the time to share all of this. While I am sure I will have to out source a lot of the work just cause I don't have your talent. You are kinda making me think I should stretch a little bit!
Thanks again and look forward to future posts.
Thanks again and look forward to future posts.
02-15-2014, 07:34 PM
#131
Professor of Pending Projects
Rennlist Member
Rennlist Member
Thread Starter
I wake up every morning and the first thing I do is see what is new on this thread. THis is really a legendary Thread. I just can't get enough this stuff. Thanks so much for taking the time to share all of this. While I am sure I will have to out source a lot of the work just cause I don't have your talent. You are kinda making me think I should stretch a little bit!
Thanks again and look forward to future posts.
Thanks again and look forward to future posts.
02-15-2014, 07:37 PM
#133
Professor of Pending Projects
Rennlist Member
Rennlist Member
Thread Starter
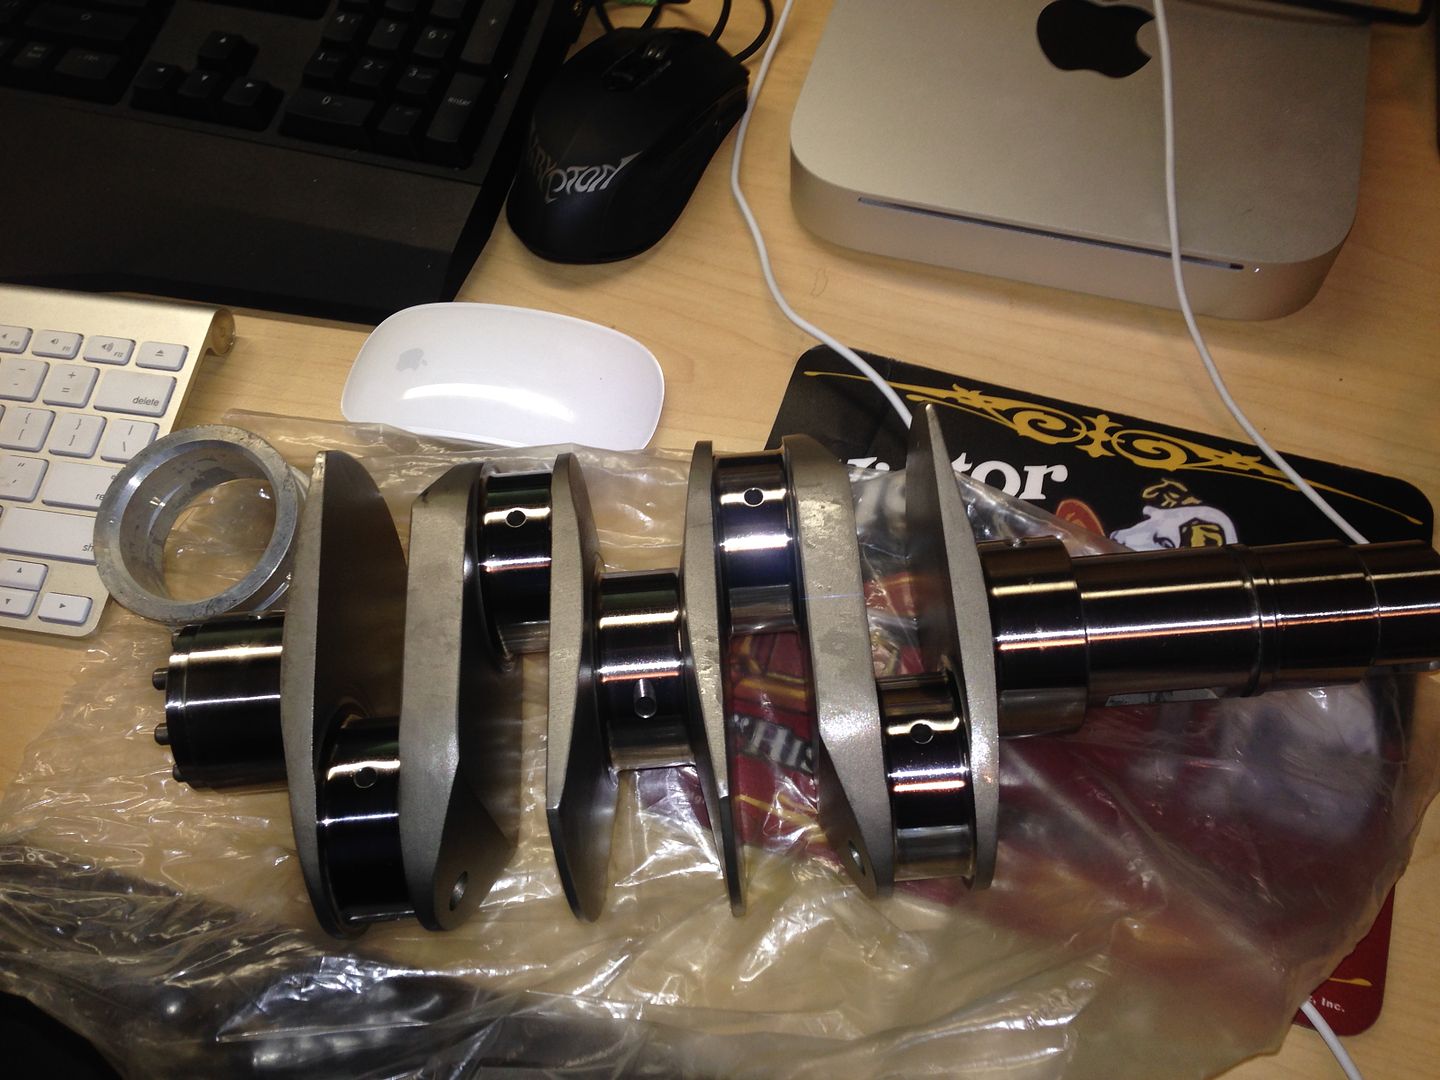
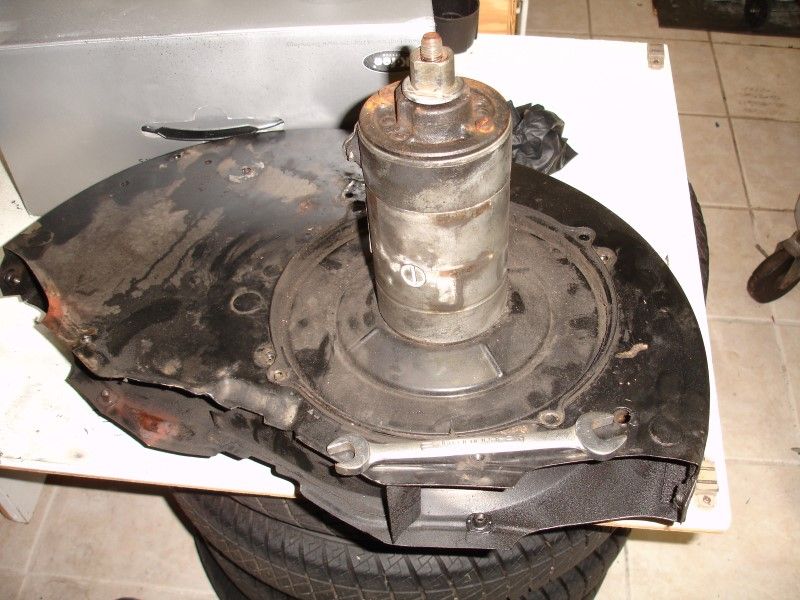
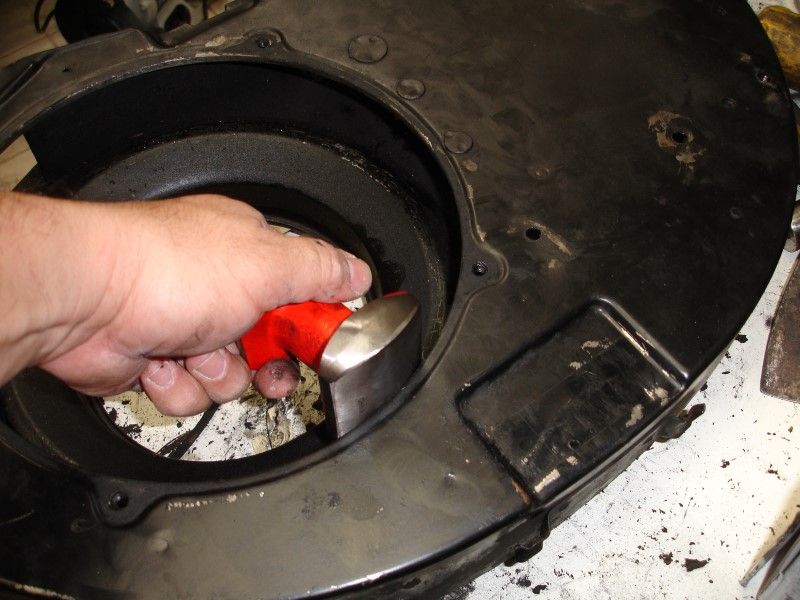
Well... I follow the recommendations of using an impact drill to remove the generator and then dealt with the fan... it is out!
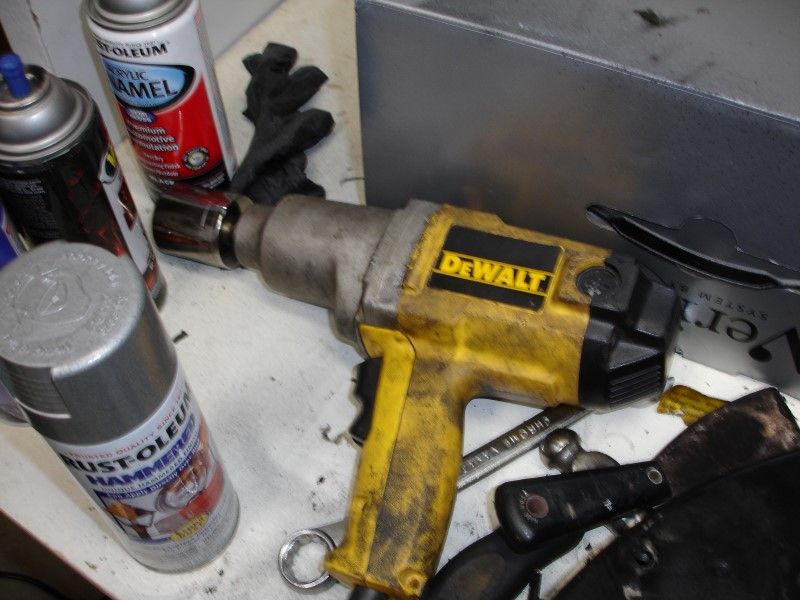
Used this to make the housing just big enough to take it out...
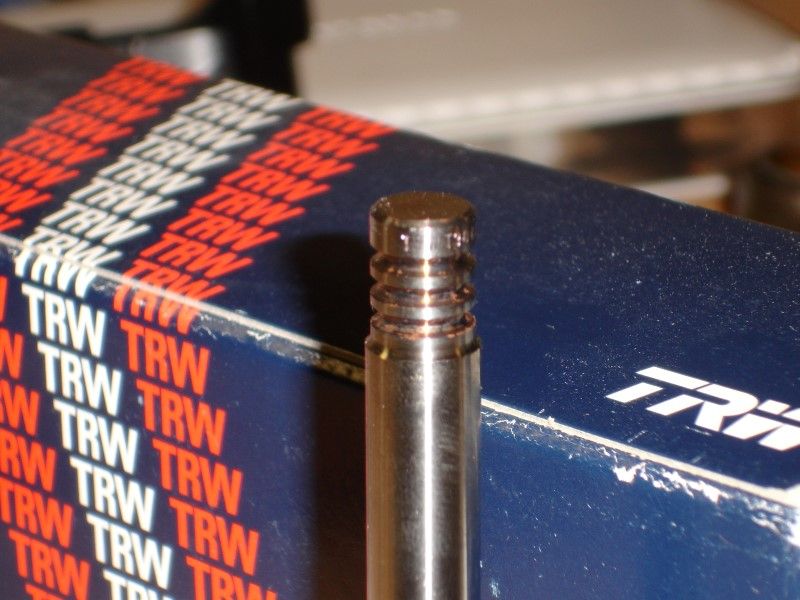
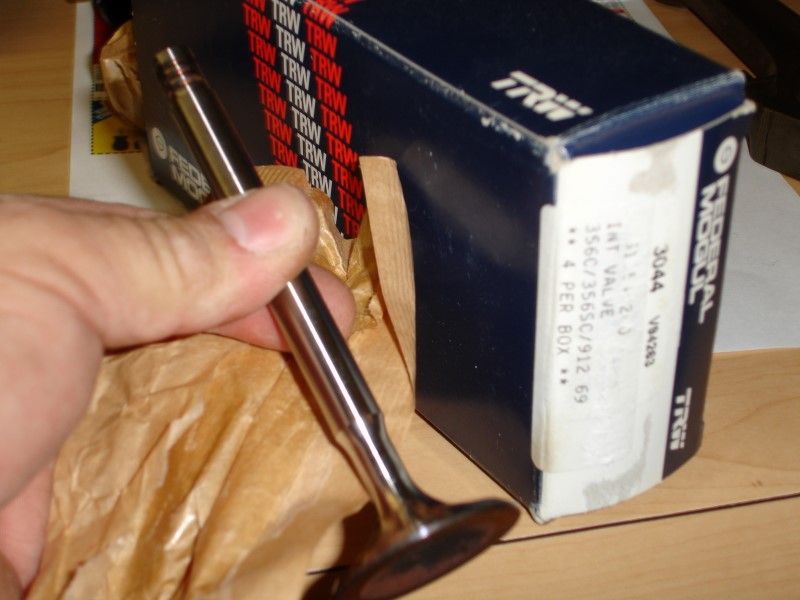
Intake valves are here!
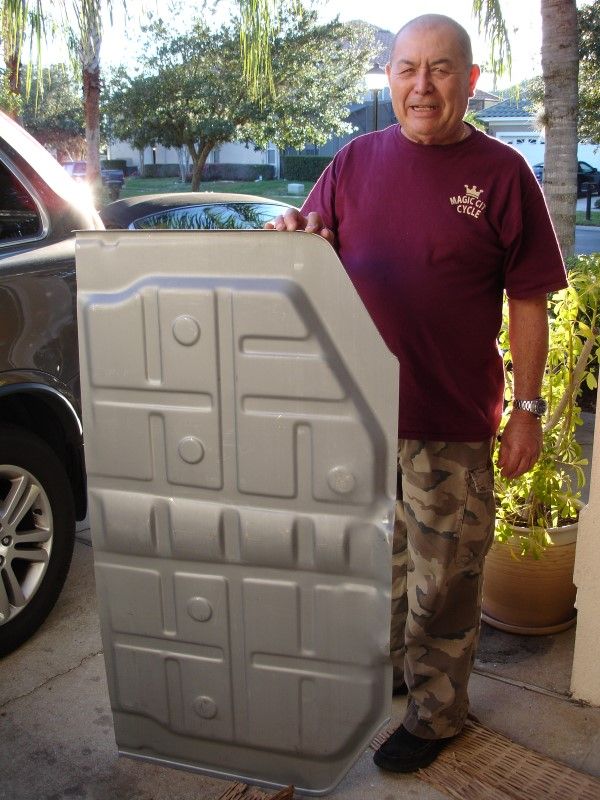
And floor pan is in as well
Used this to make the housing just big enough to take it out...
Intake valves are here!
And floor pan is in as well
02-15-2014, 08:51 PM
#134
Burning Brakes
Join Date: Dec 2009
Location: Montreal, Quebec, Canada
Posts: 1,045
Received 0 Likes
on
0 Posts
I love this thread!!!
Inspired me to get my lazy a** into the garage and do some work on my car. Not as epic a project as yours but she hasn't really run in almost a year and I am hoping to have it back on the road for spring. Thanks for the inspiration
Inspired me to get my lazy a** into the garage and do some work on my car. Not as epic a project as yours but she hasn't really run in almost a year and I am hoping to have it back on the road for spring. Thanks for the inspiration
02-16-2014, 01:00 PM
#135
Professor of Pending Projects
Rennlist Member
Rennlist Member
Thread Starter
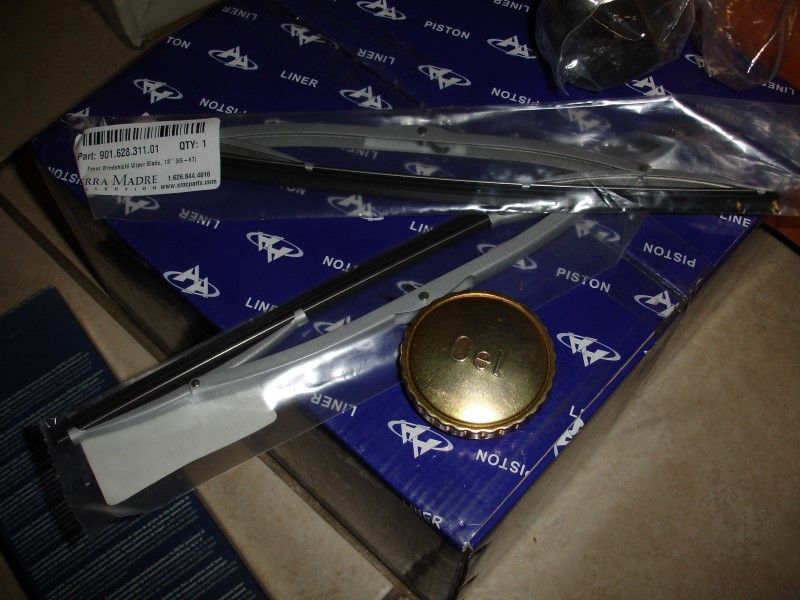
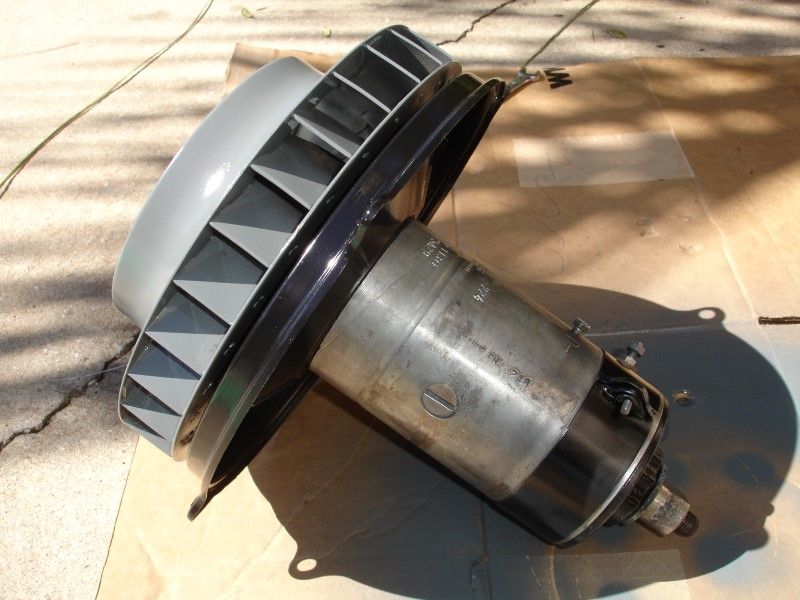
Beru sparkplug wires arrived, wiper blades (with silver finish), and oil breather canister cap.
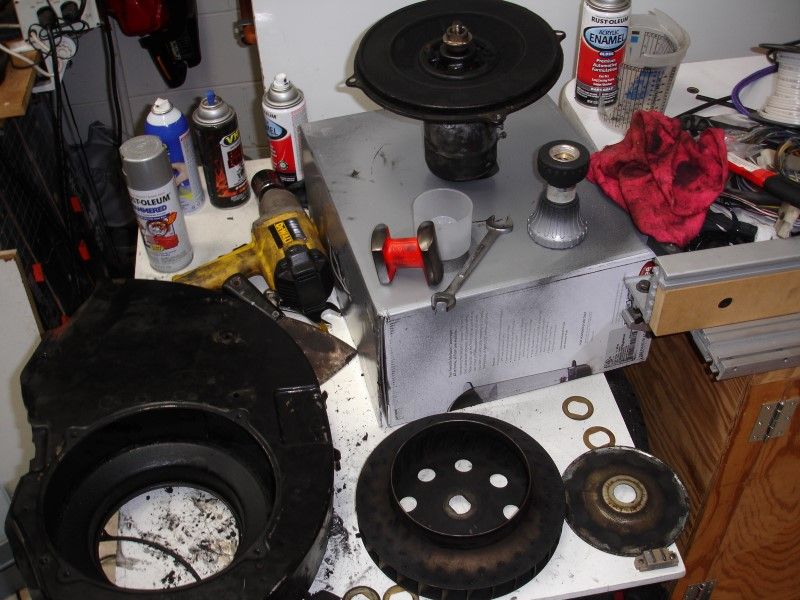
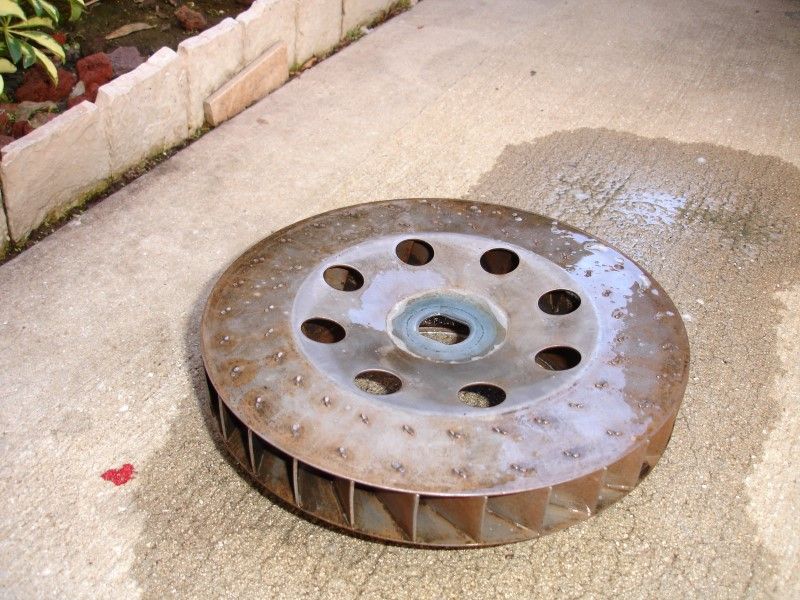
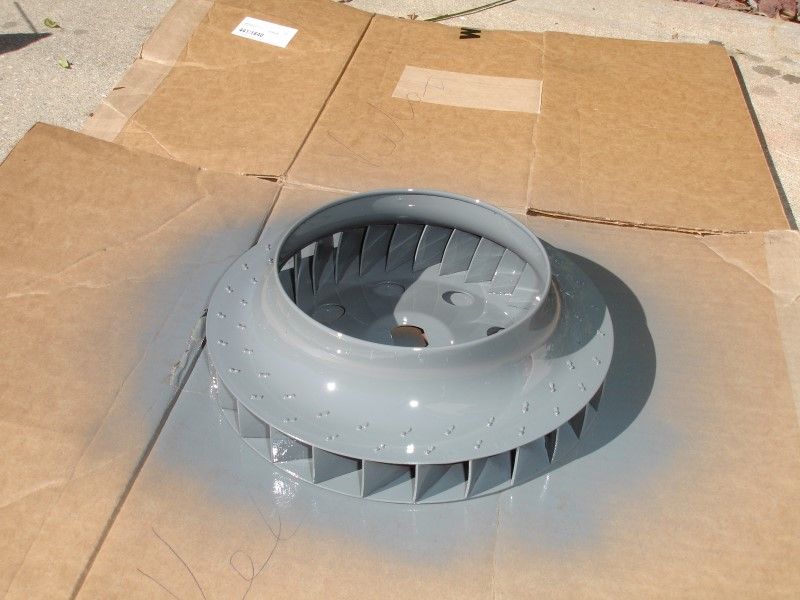
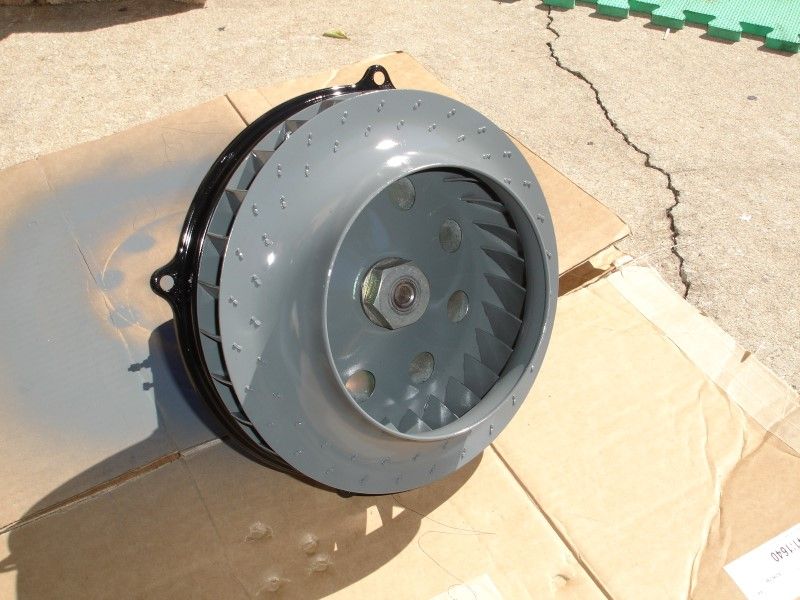
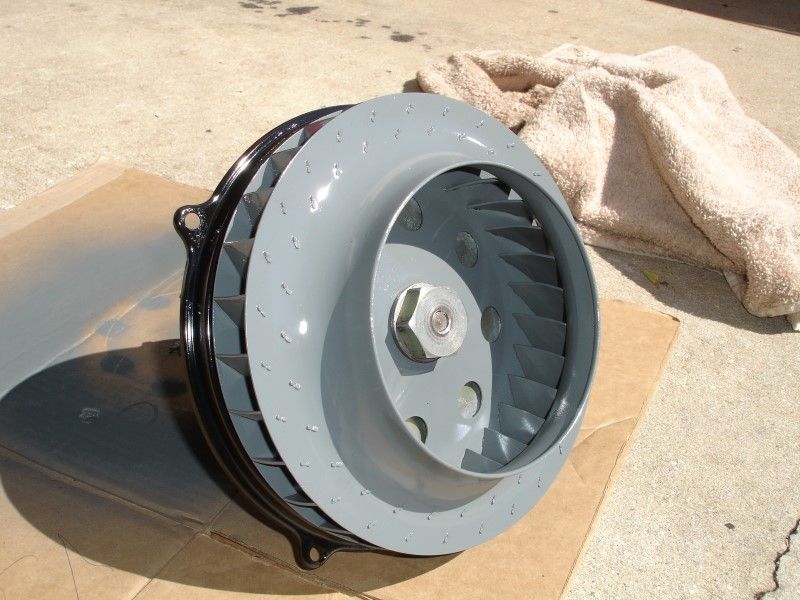
Also worked on cleaning, degreasing, painting the fan...
Before:

During and After...
Just after cleaned... nothing else needed with these, cool...

The fan was full of oil, crud, but after much cleaning...
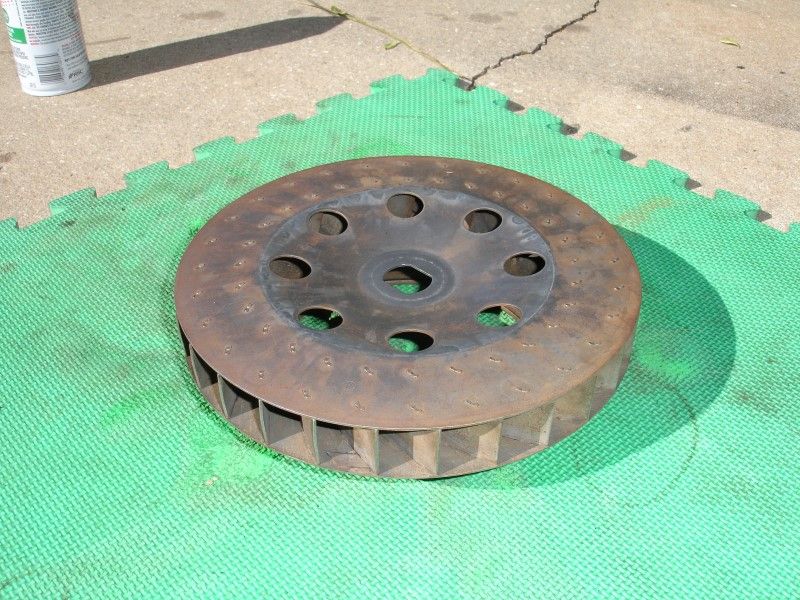
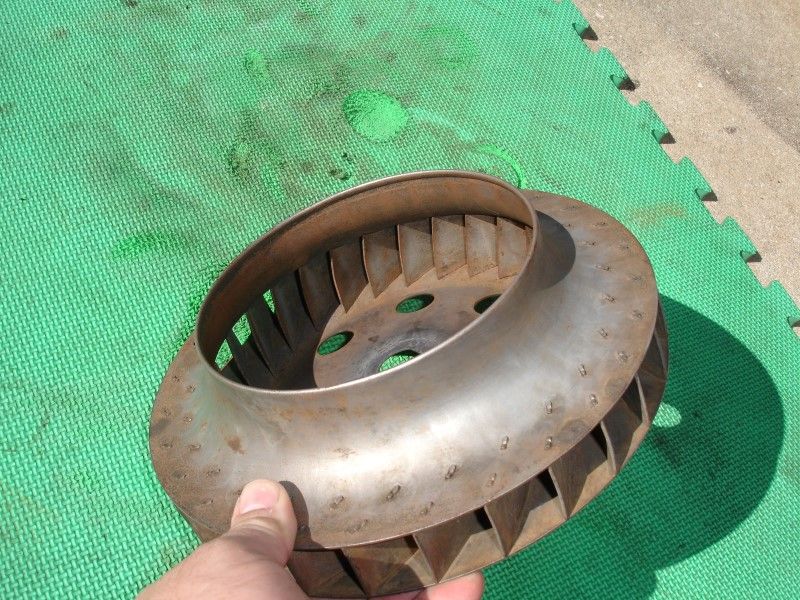
Black, gray?... let's do gray
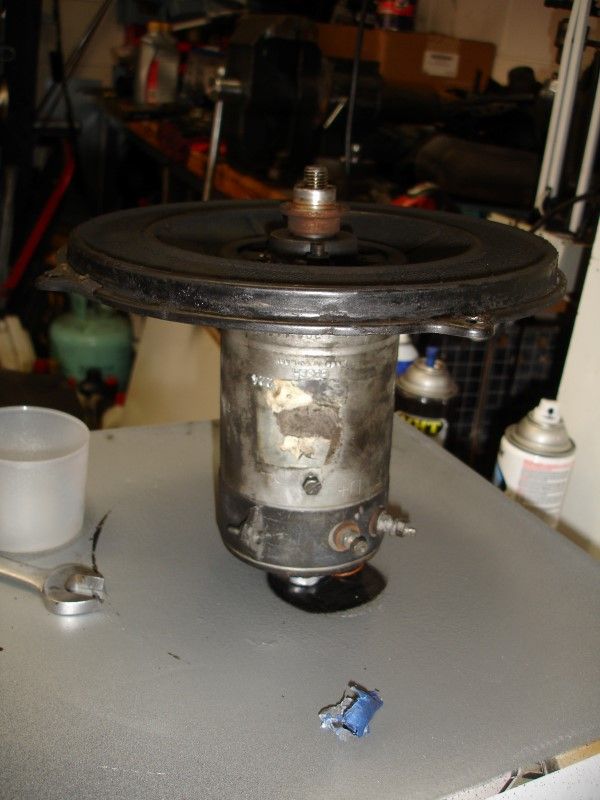
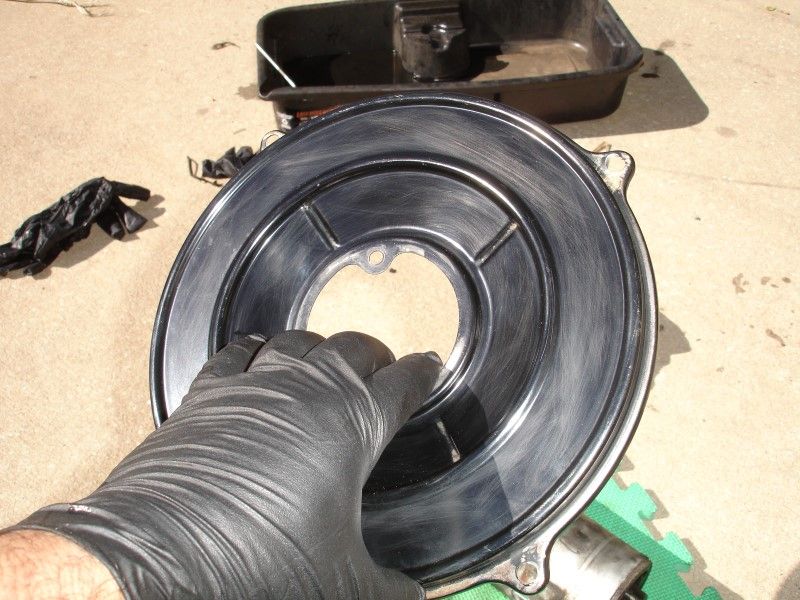
Now the generator and the sheet metal on it...
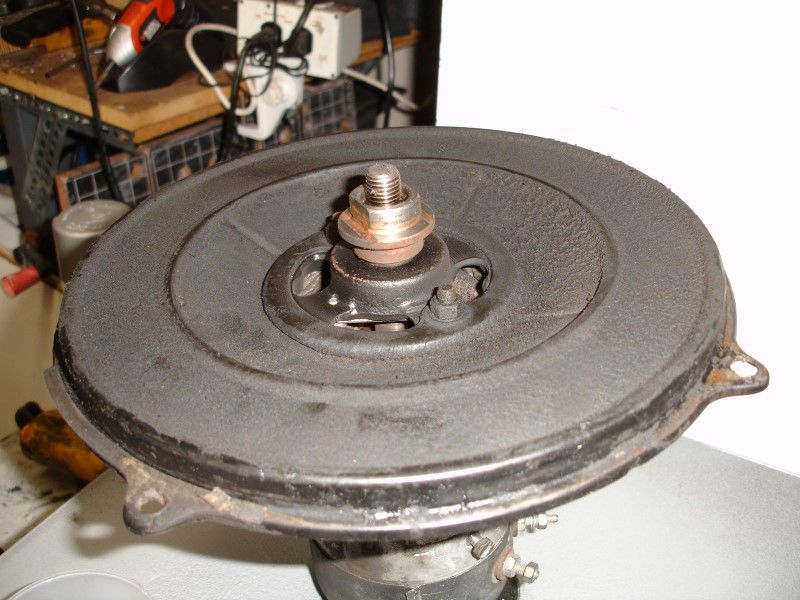
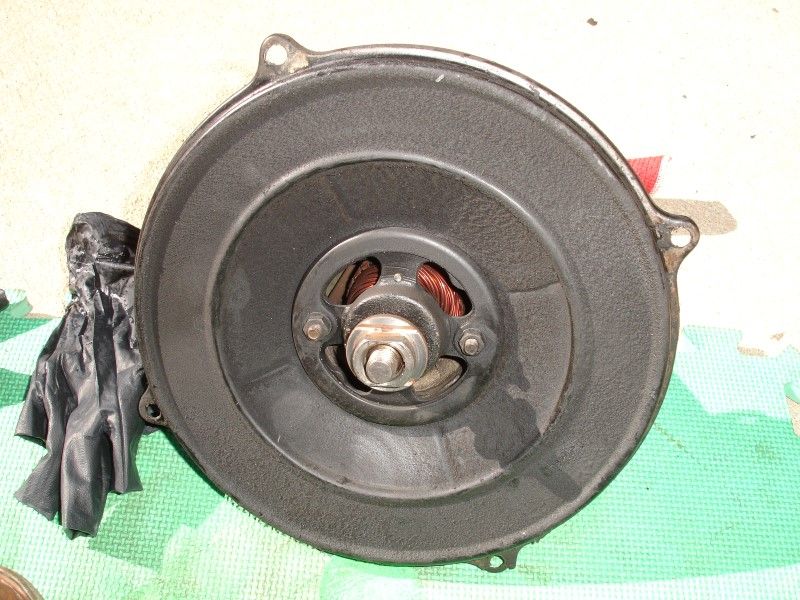
It also looked great after cleaning
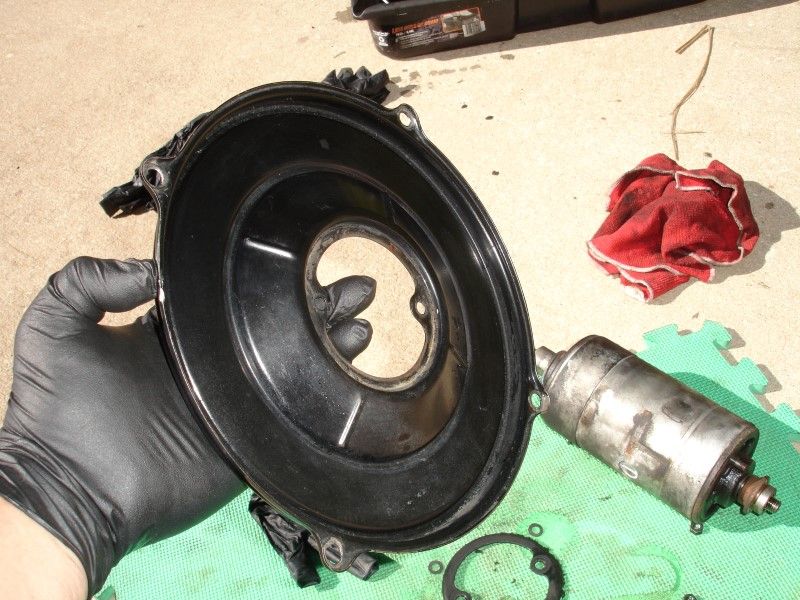
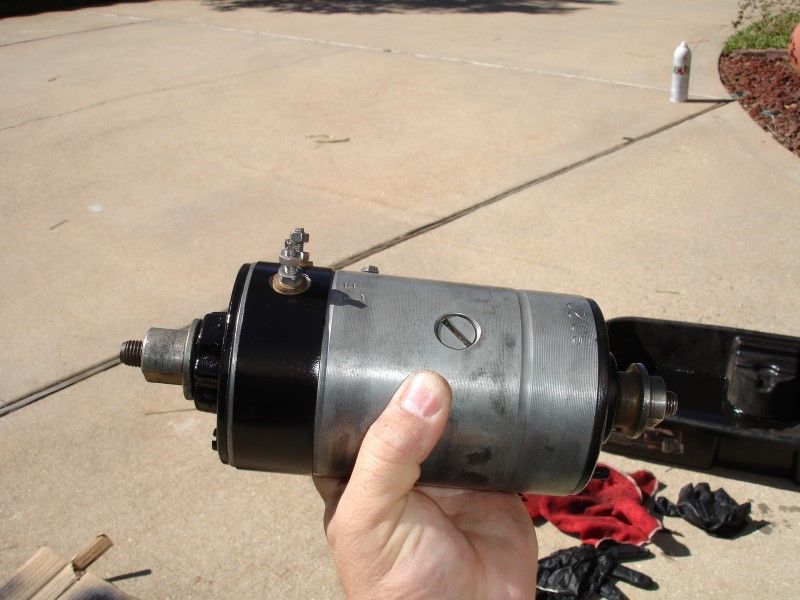
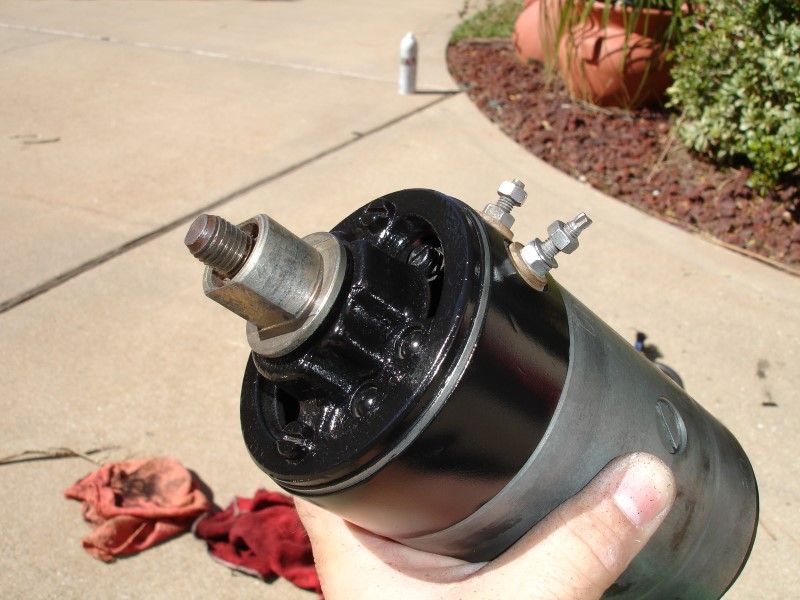
After cleaning the generator, painting the ends and rear strap..
Let's put it all back again...where are those photos of the order of how these go together?? lol
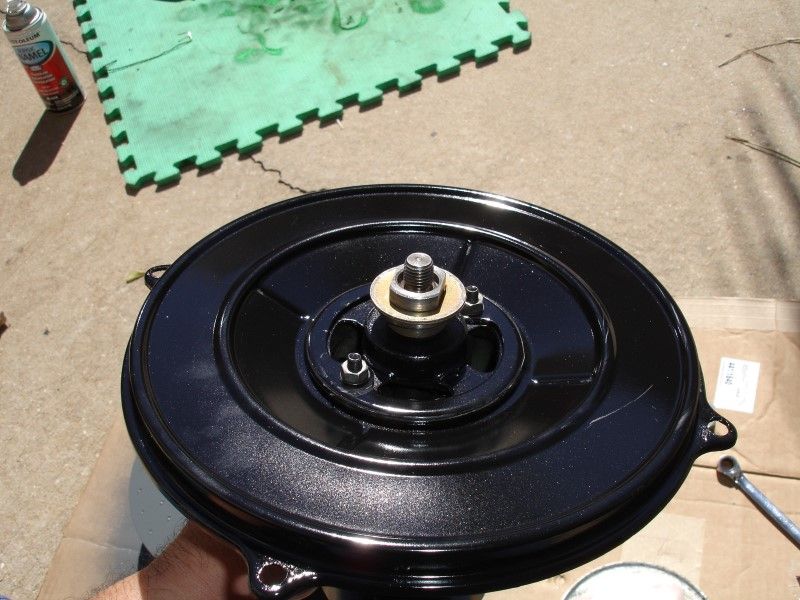
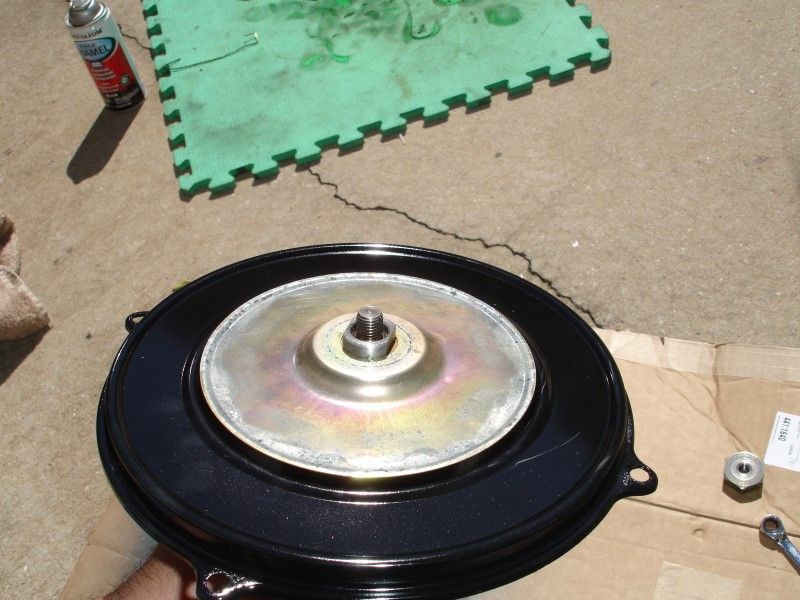
There, much better now...
Also worked on cleaning, degreasing, painting the fan...
Before:
During and After...
Just after cleaned... nothing else needed with these, cool...
The fan was full of oil, crud, but after much cleaning...
Black, gray?... let's do gray
Now the generator and the sheet metal on it...
It also looked great after cleaning
After cleaning the generator, painting the ends and rear strap..
Let's put it all back again...where are those photos of the order of how these go together?? lol
There, much better now...
Last edited by Wachuko; 02-16-2014 at 11:10 PM.