When you click on links to various merchants on this site and make a purchase, this can result in this site earning a commission. Affiliate programs and affiliations include, but are not limited to, the eBay Partner Network.
You definitely want to ditch that rubber center clutch... I've had so many Porsche(as in porsche parts from porsche, not Sachs OEM) pressure plates fail that I personally would just replace it new ...
I'm in this debate right now on clutch package for my car, I have a few options I've gotten from the shop, I have a steel setup in there now pretty sure based on pictures I have of disassembly, and it's so light and easy to work the pedal... but I think I'll need something with more clamping power based on the motor.
Definitely going to ditch that clutch disk. Will most likely go with stock (non-rubber center) disk as it was used with the RS and I am gonna have similar power. Debating the flywheel though - lightweight - hmmm?
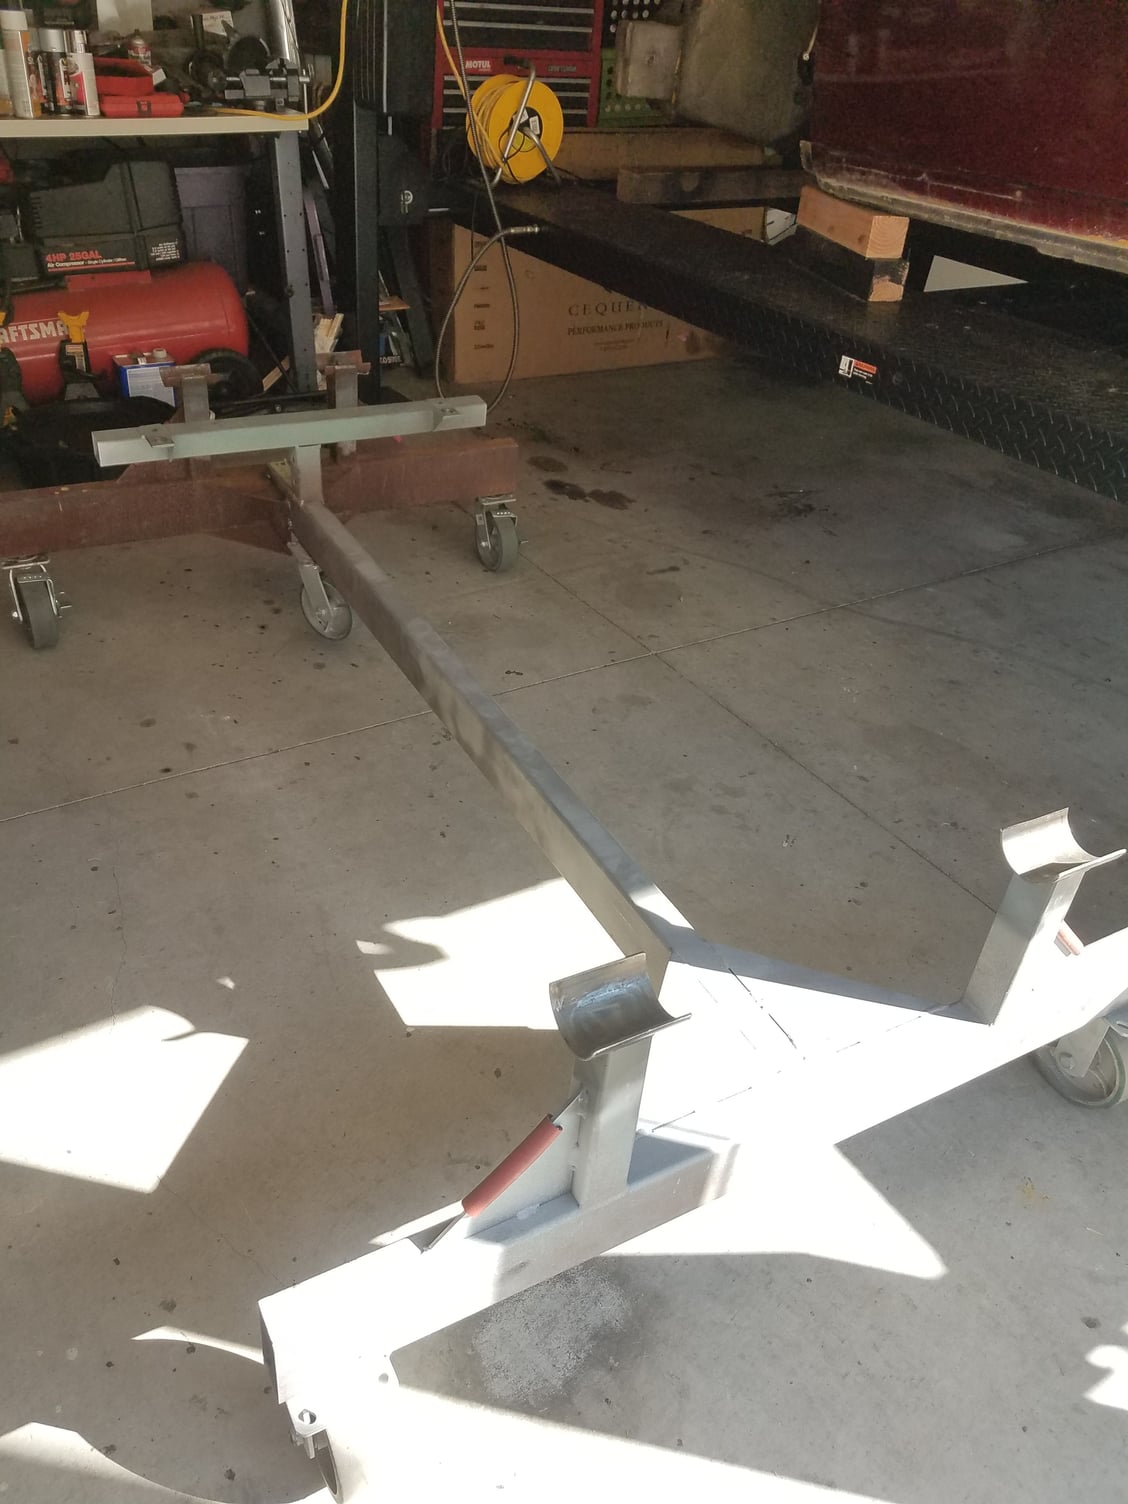
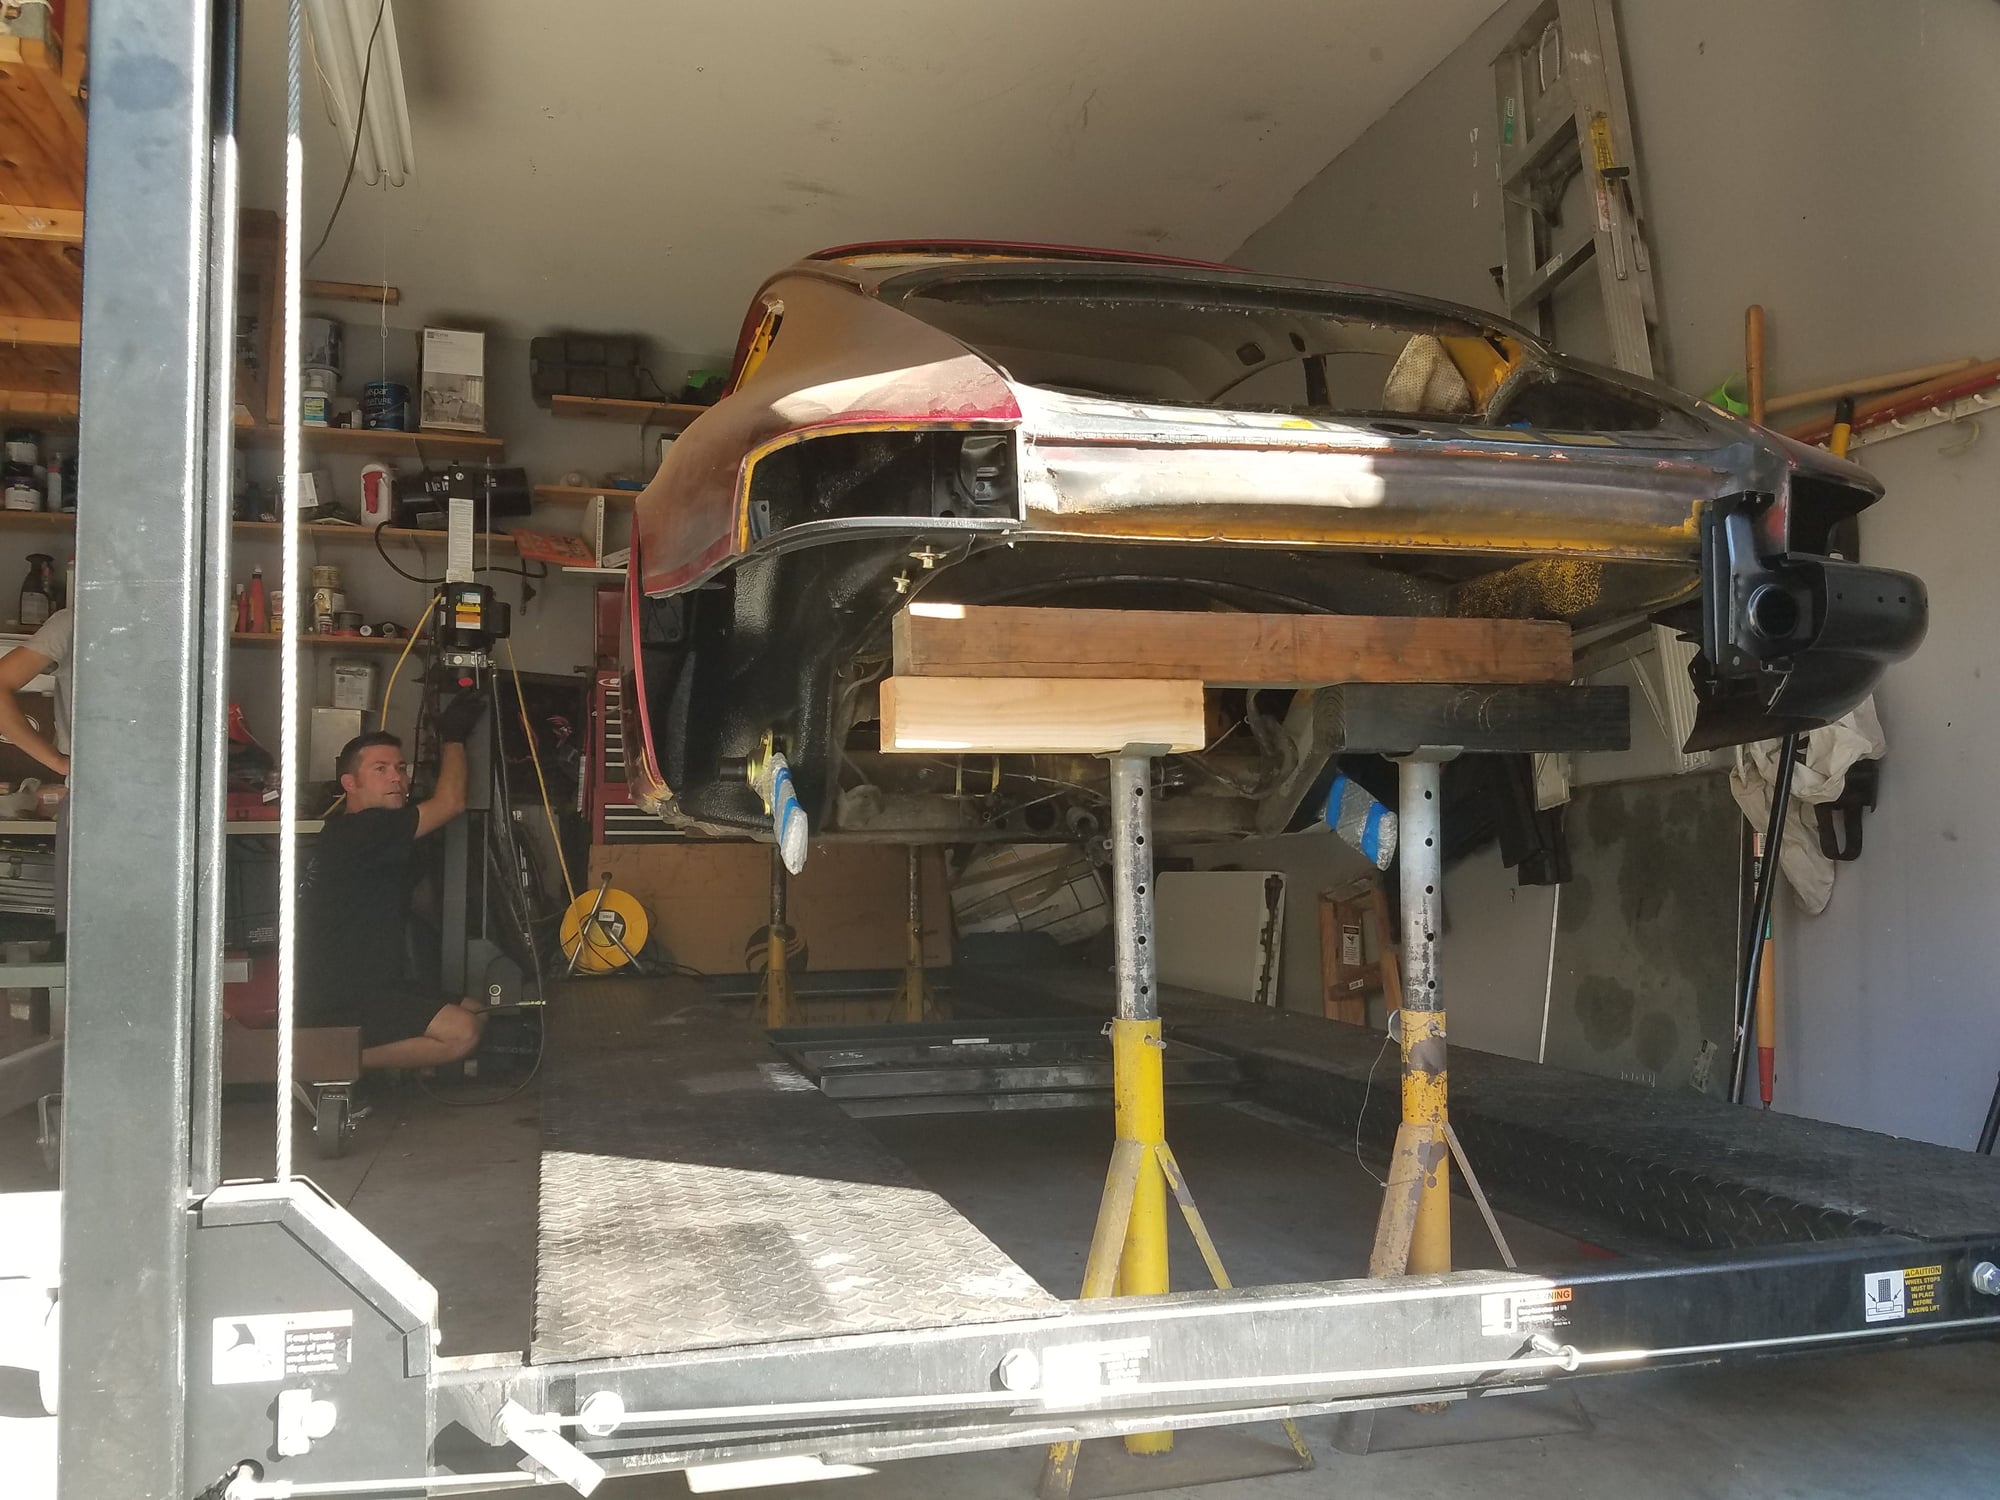
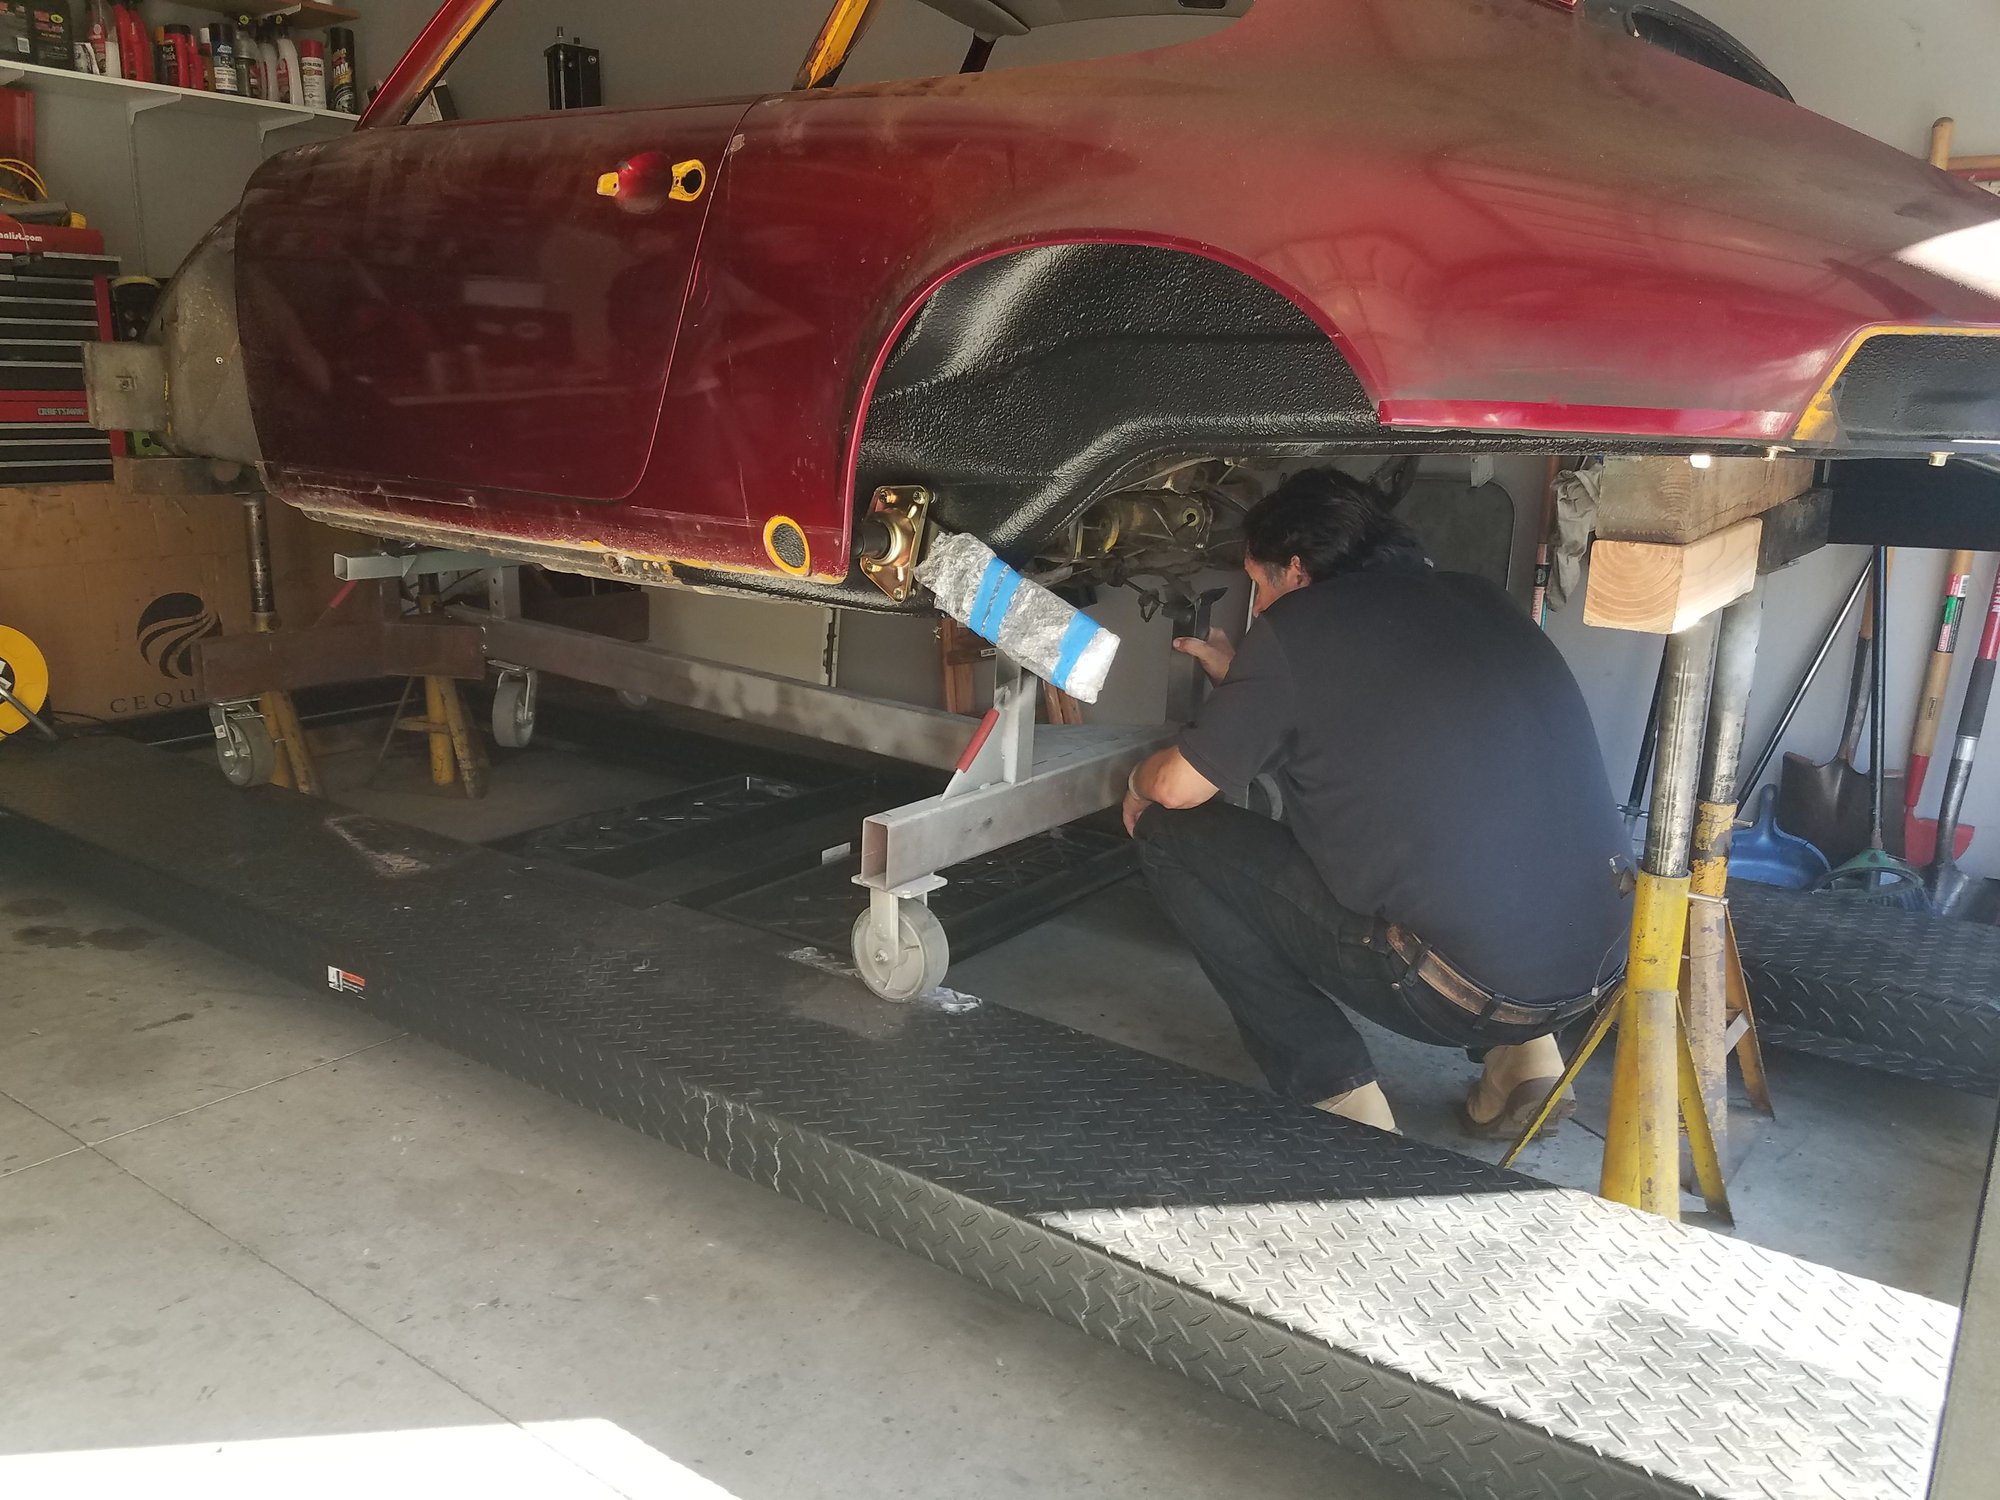
Exciting update to share. As you know, my car has been disassembled and sitting on stands on my lift. Well, this made moving my car to Andy's shop a challenge. He stopped by earlier in the week with dollies but they weren't going to work with the width of the lift rails and other issues.
Andy came back over today with a new plan. He modified one of his dollies and brought some very tall jack stands. Success! The car is now resting on a dolly which will be loaded onto a trailer headed to his shop on Saturday. Feels good to be at this stage of the project. Oh, and I had to order up the rest of the replacement panels that I hadn't purchased yet. I ended up getting a couple aluminum panels to continue with the lightweight goal
Sorry for all of the photos for a minor step in my project - I am just excited to be at this stage.
Here is the dolly he rigged up
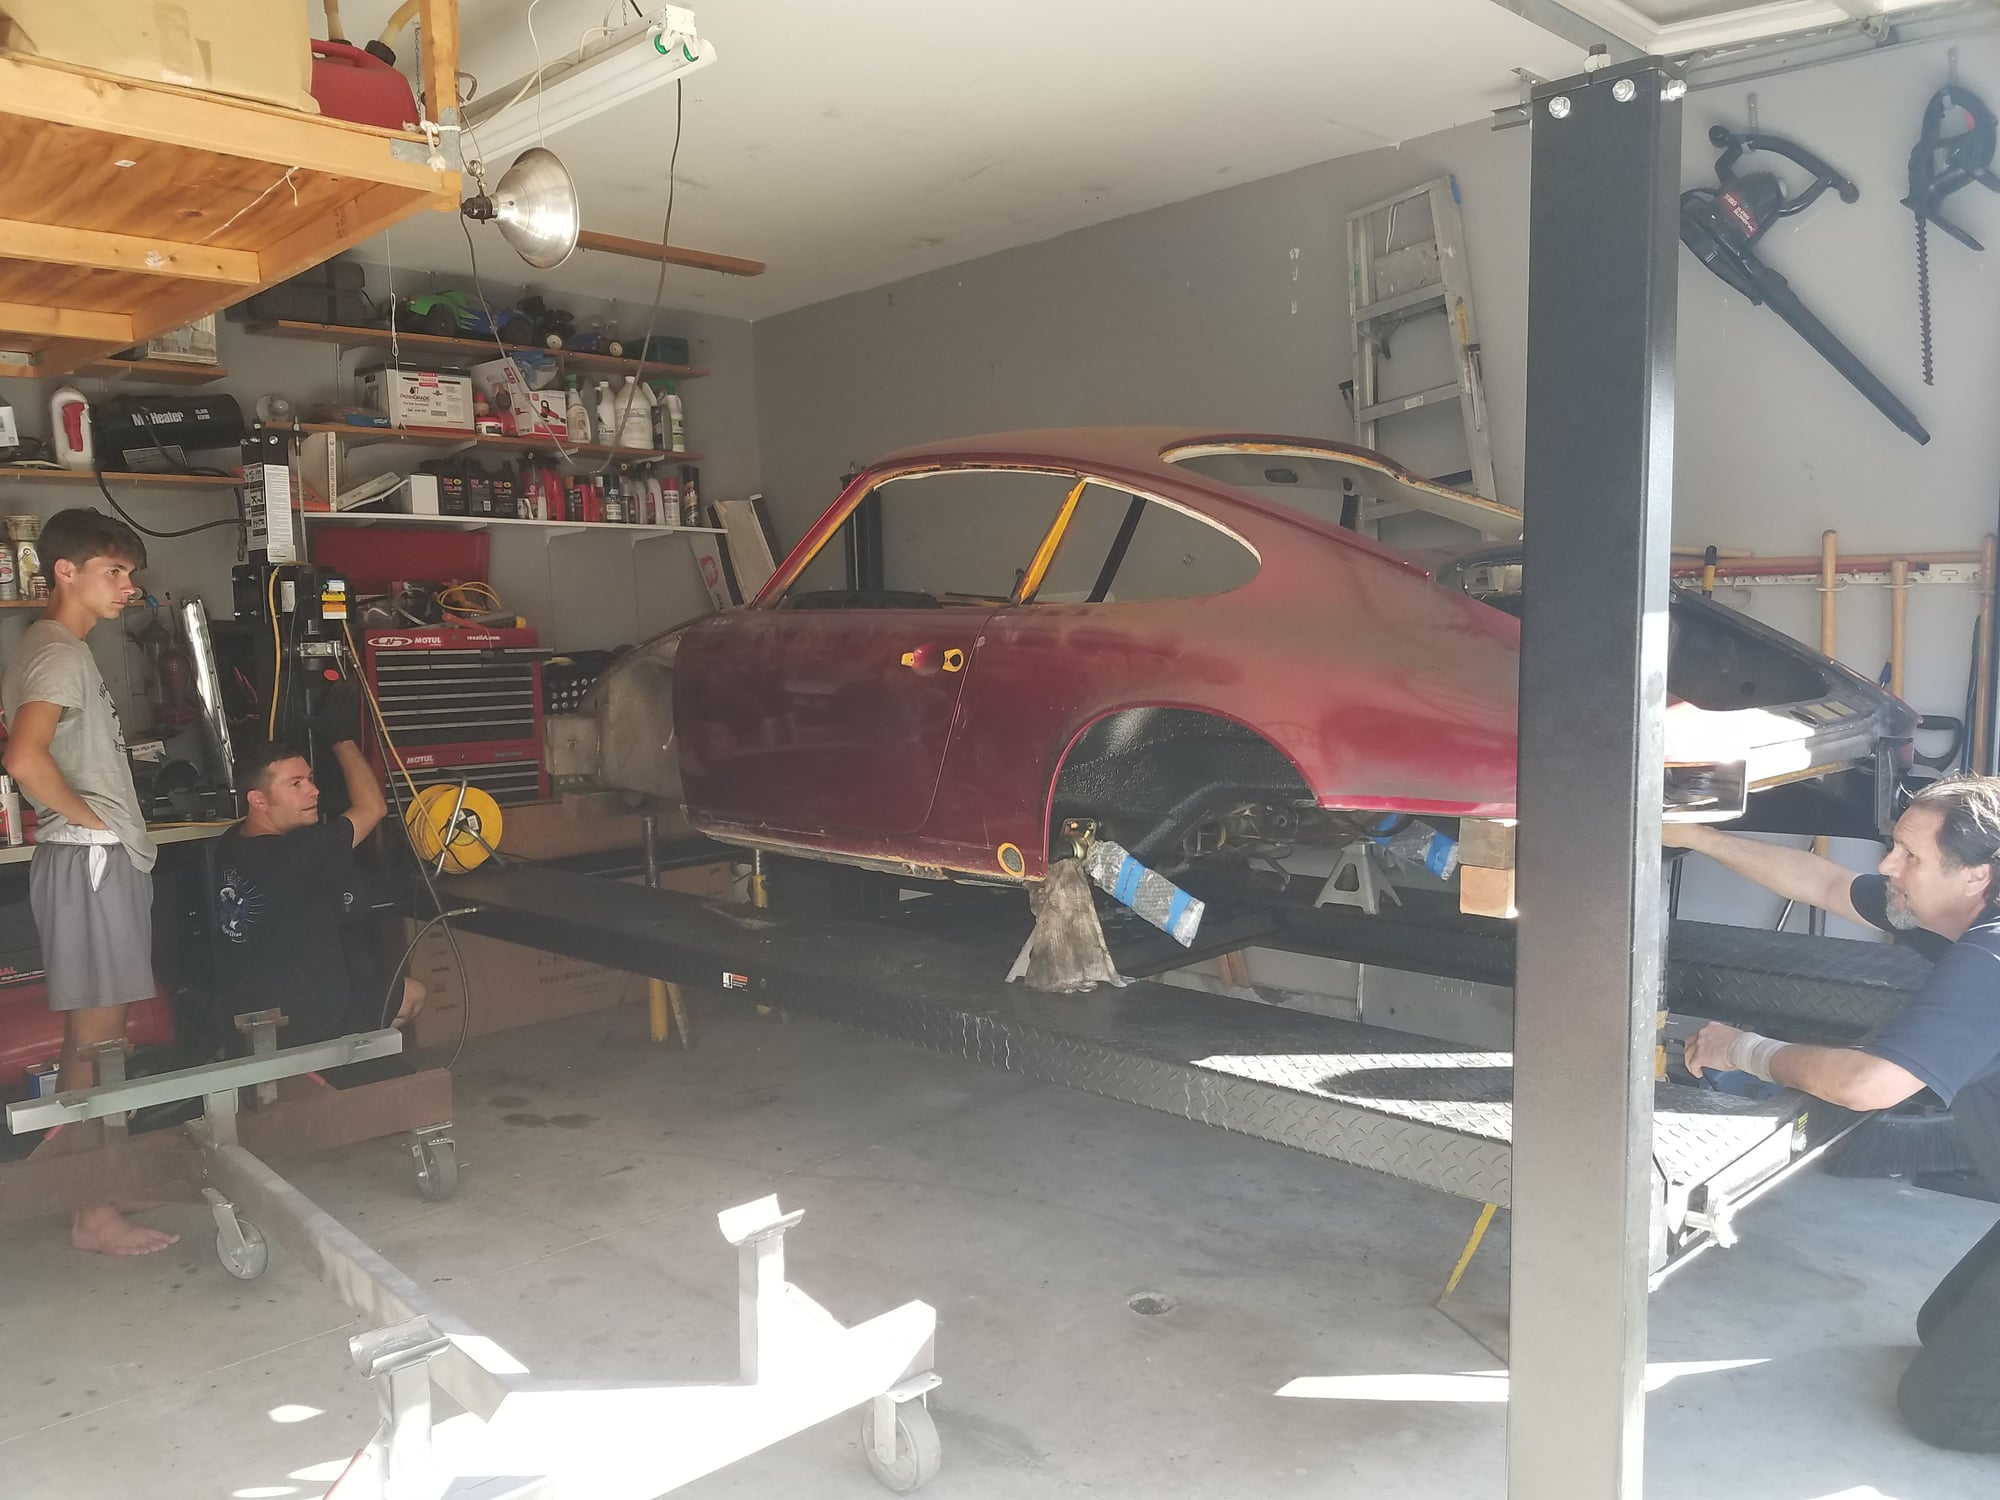
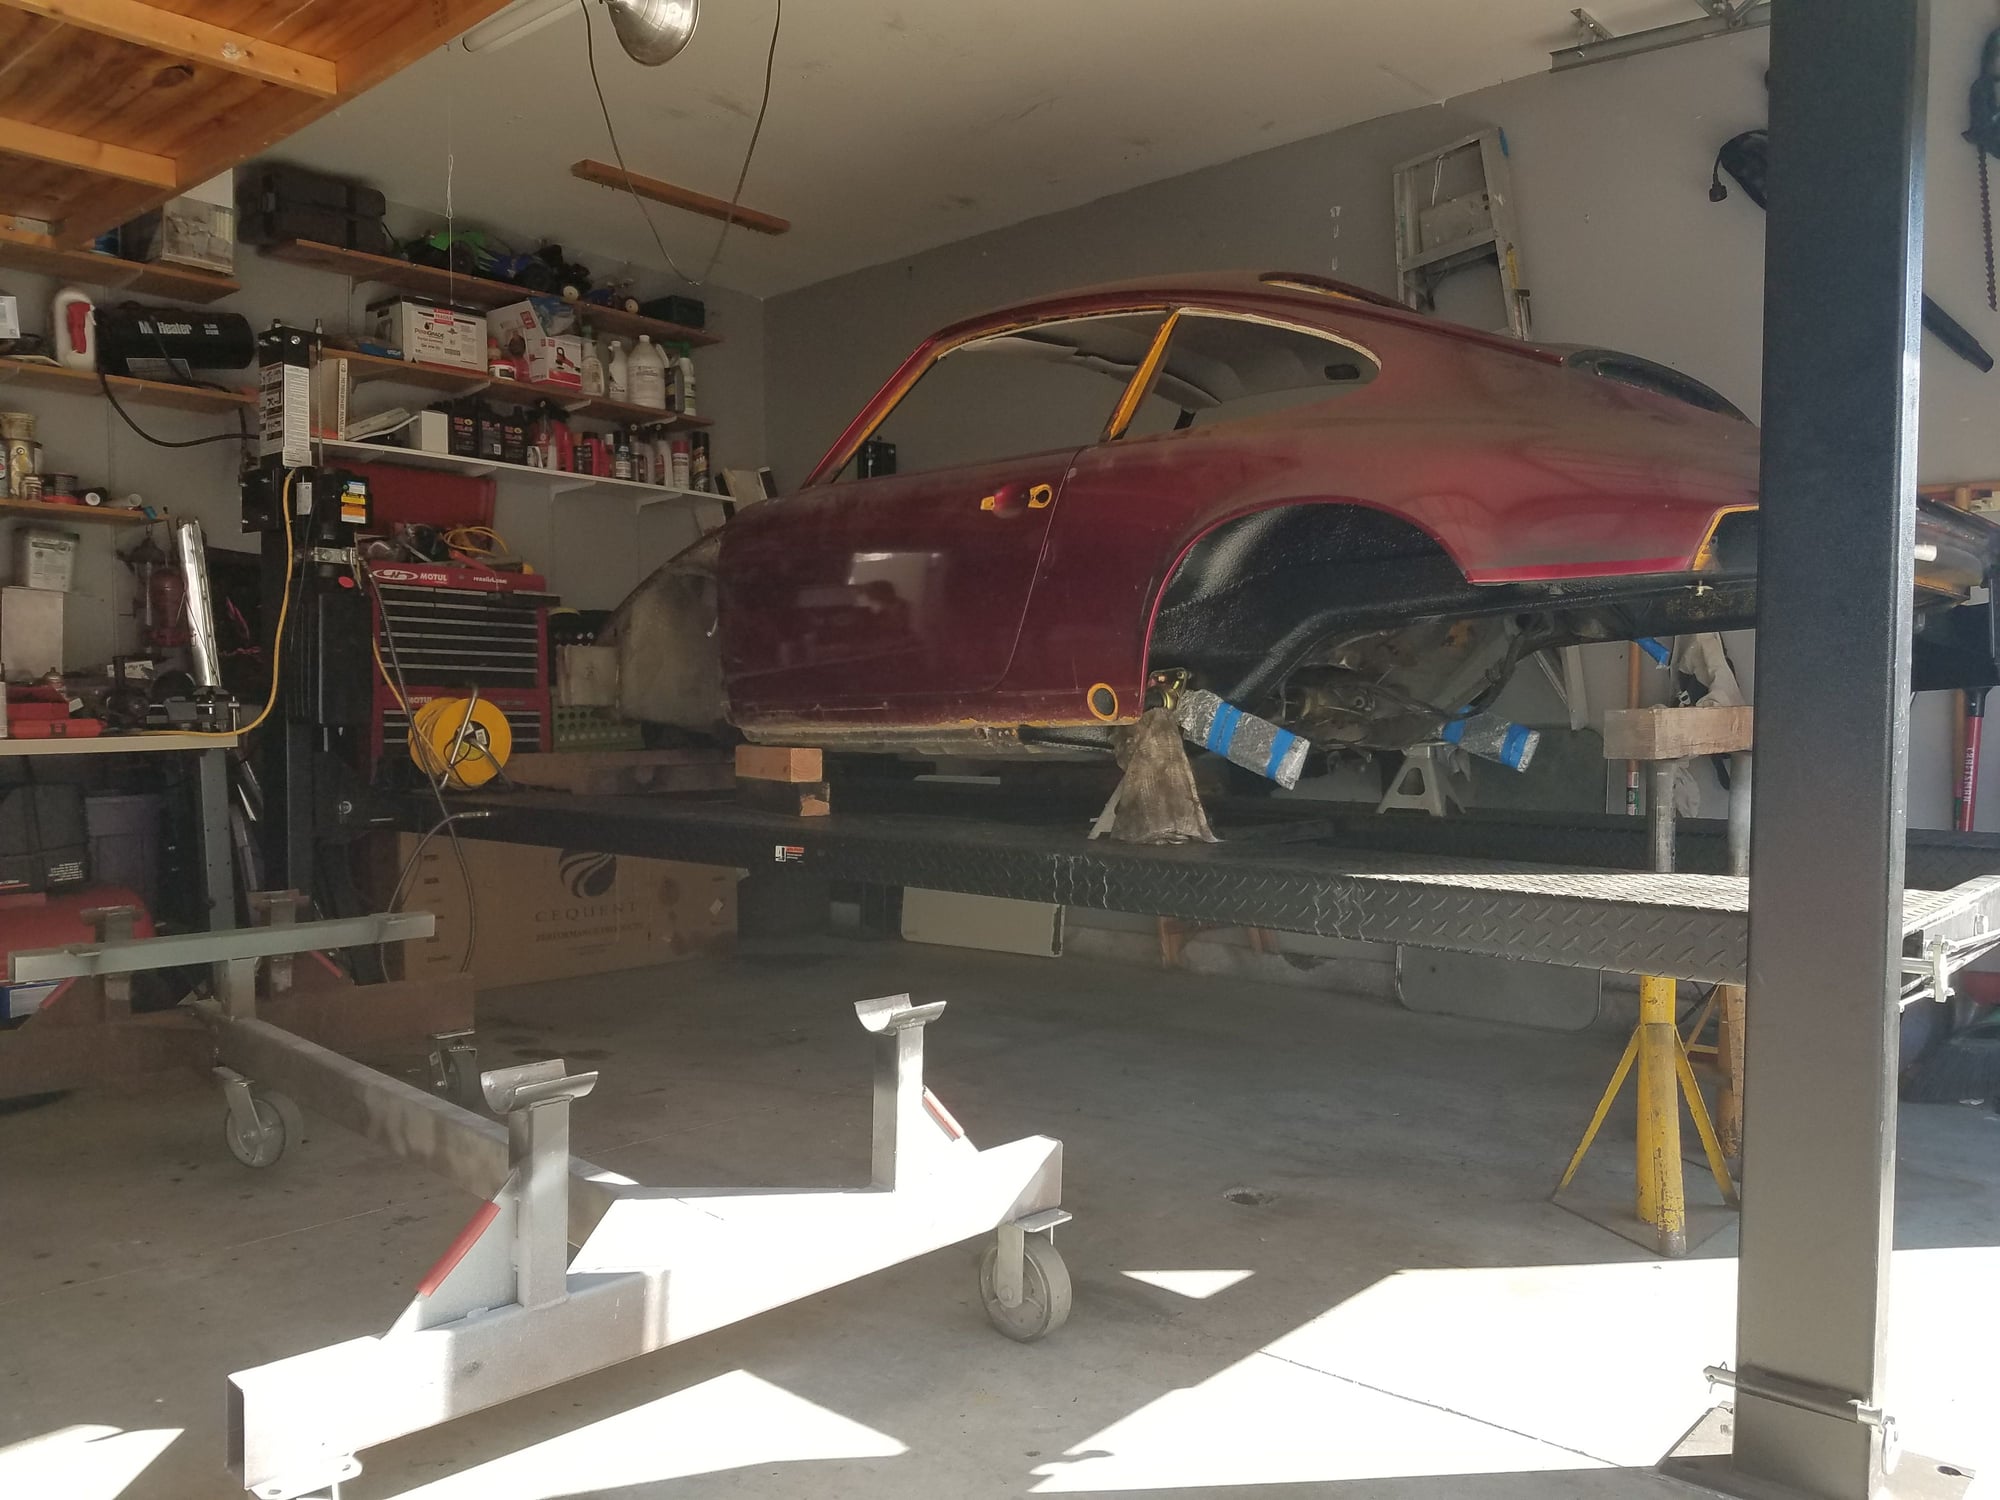
We had to place jack stands under the car and then lower the lift to the ground. The car was floating about 4 feet off the ground on these stands.
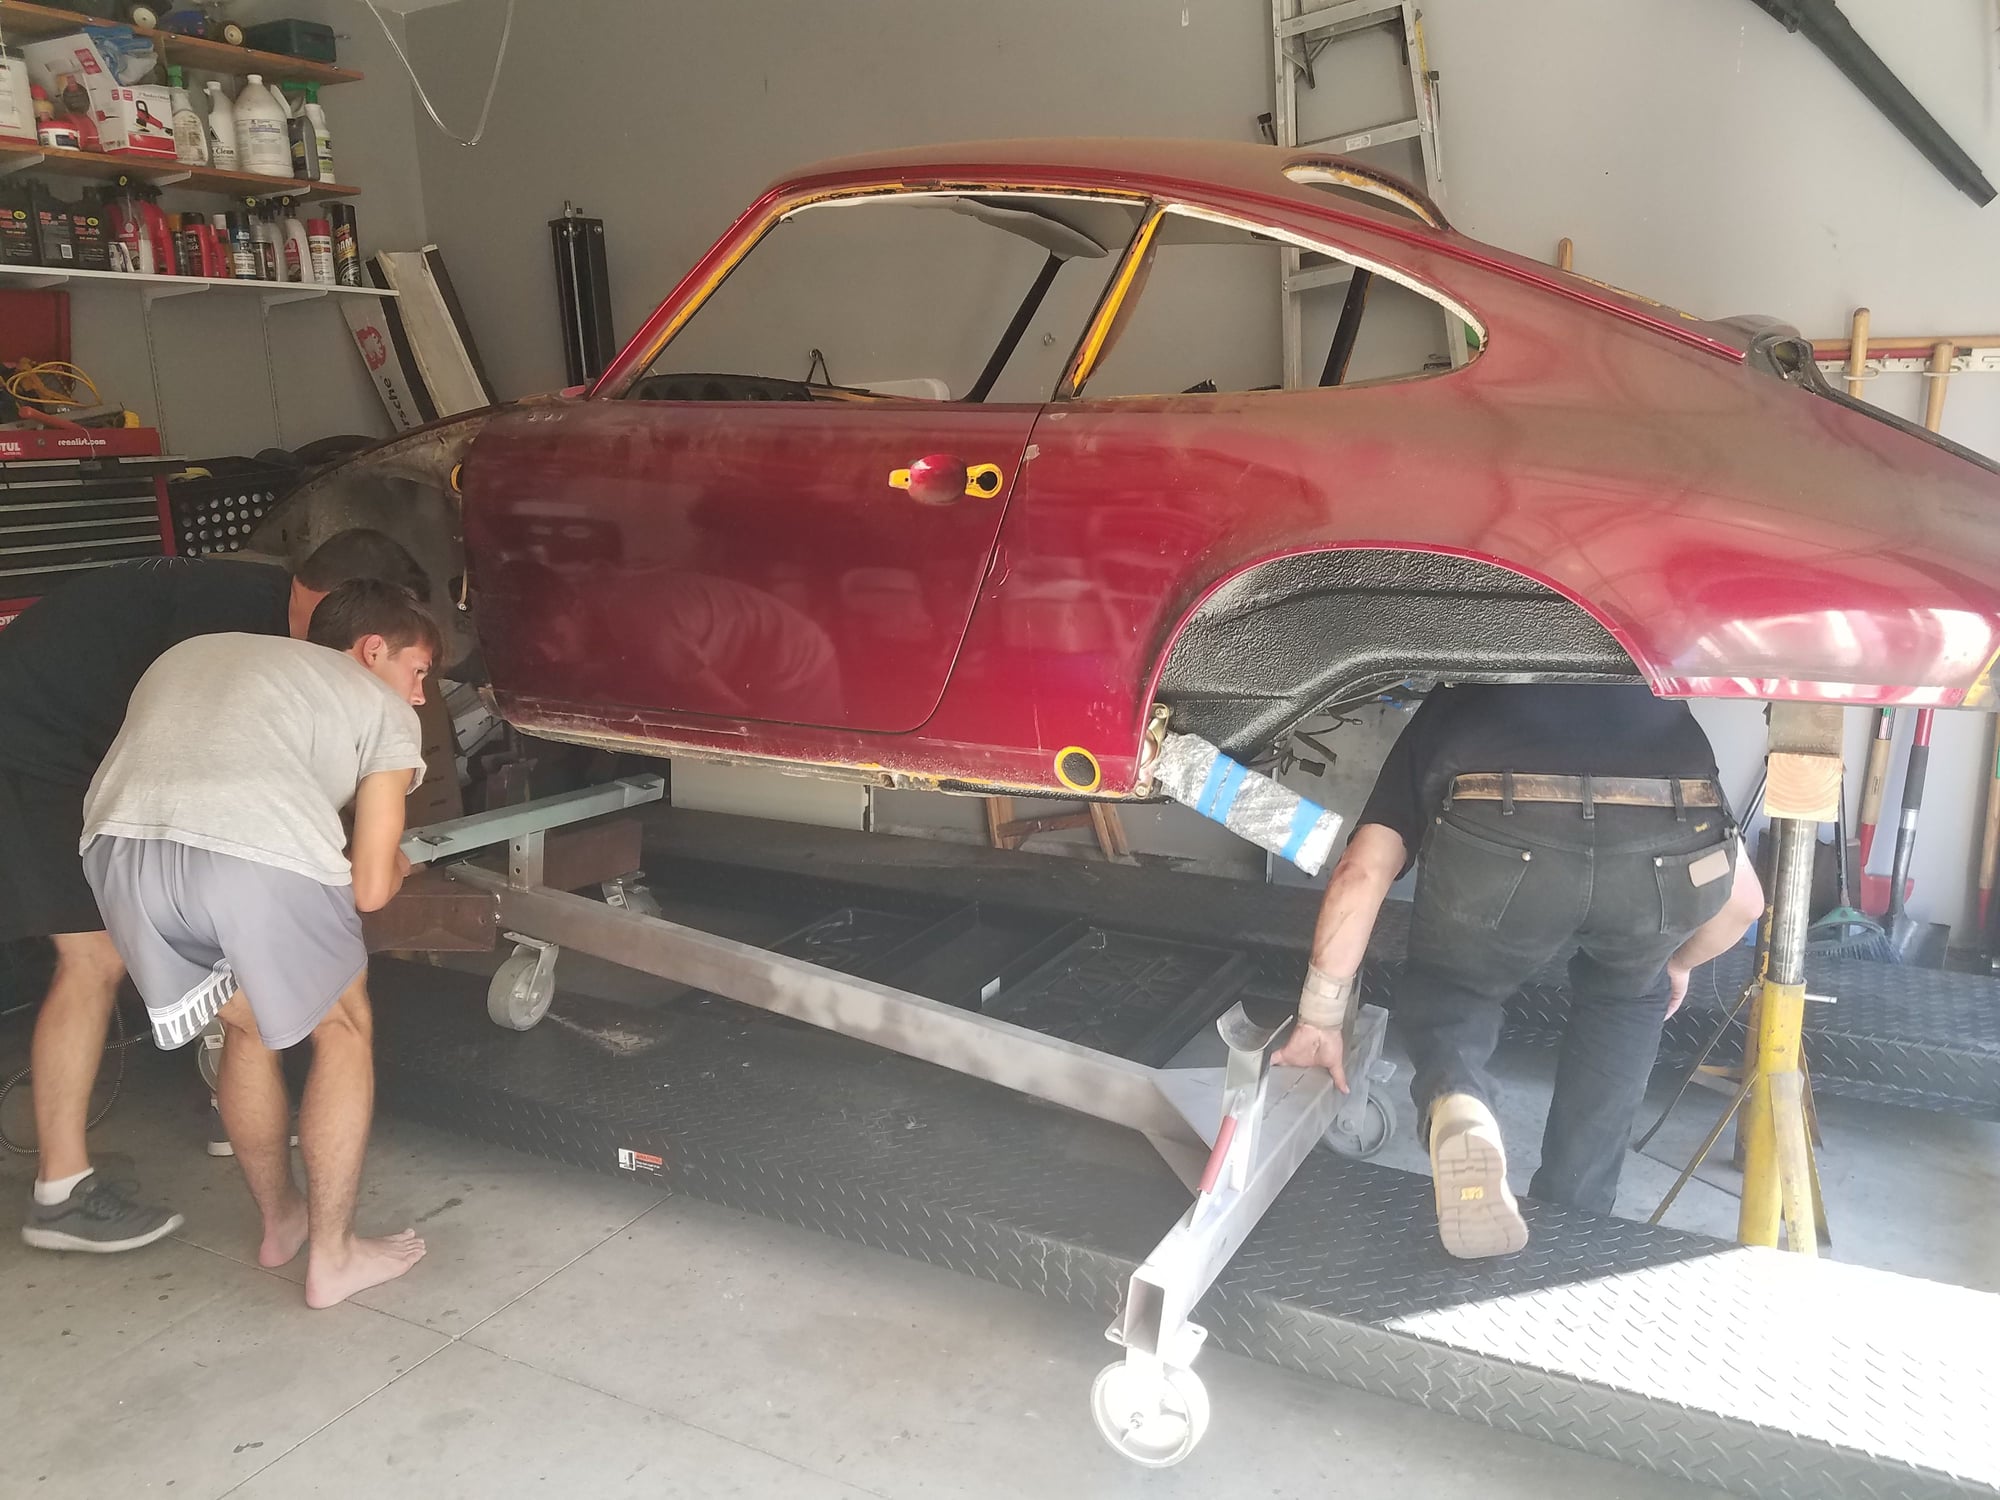
Lift was lowered so we could slide the dolly under the car resting on the lift. Then we lifted the lift up so we could attach the dolly to the car.
Here is me, my son and Andy moving the dolly under the floating car. Of course my son has no shoes on - typical beachside kid always shoe less. Could have lost some toes! Didnt even notice until I looked at this photo.
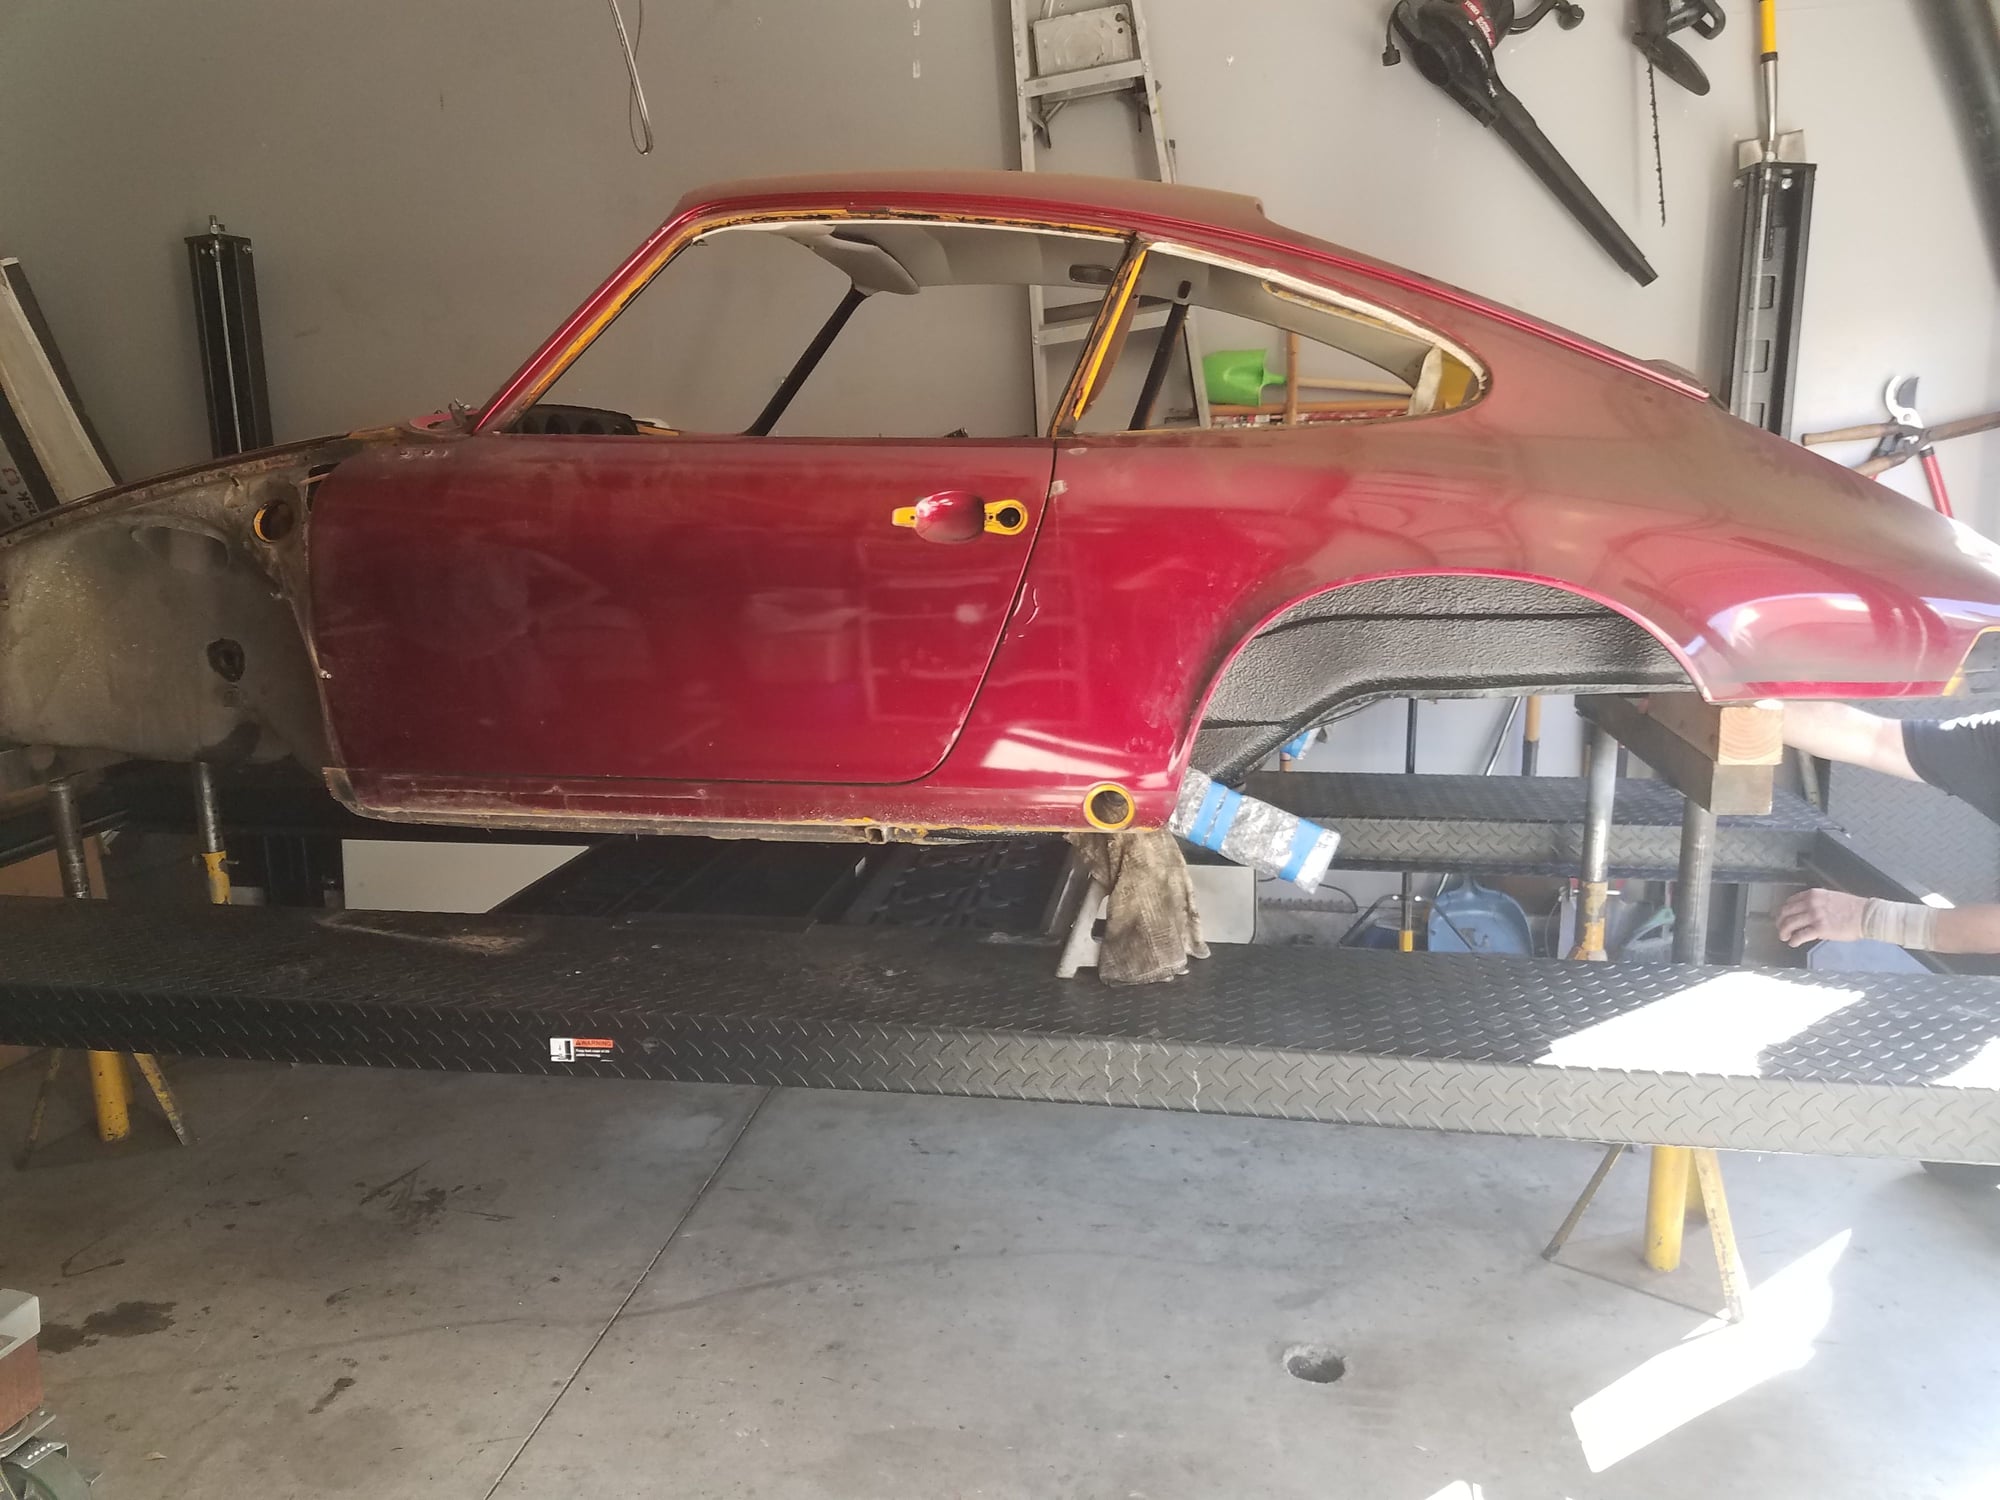
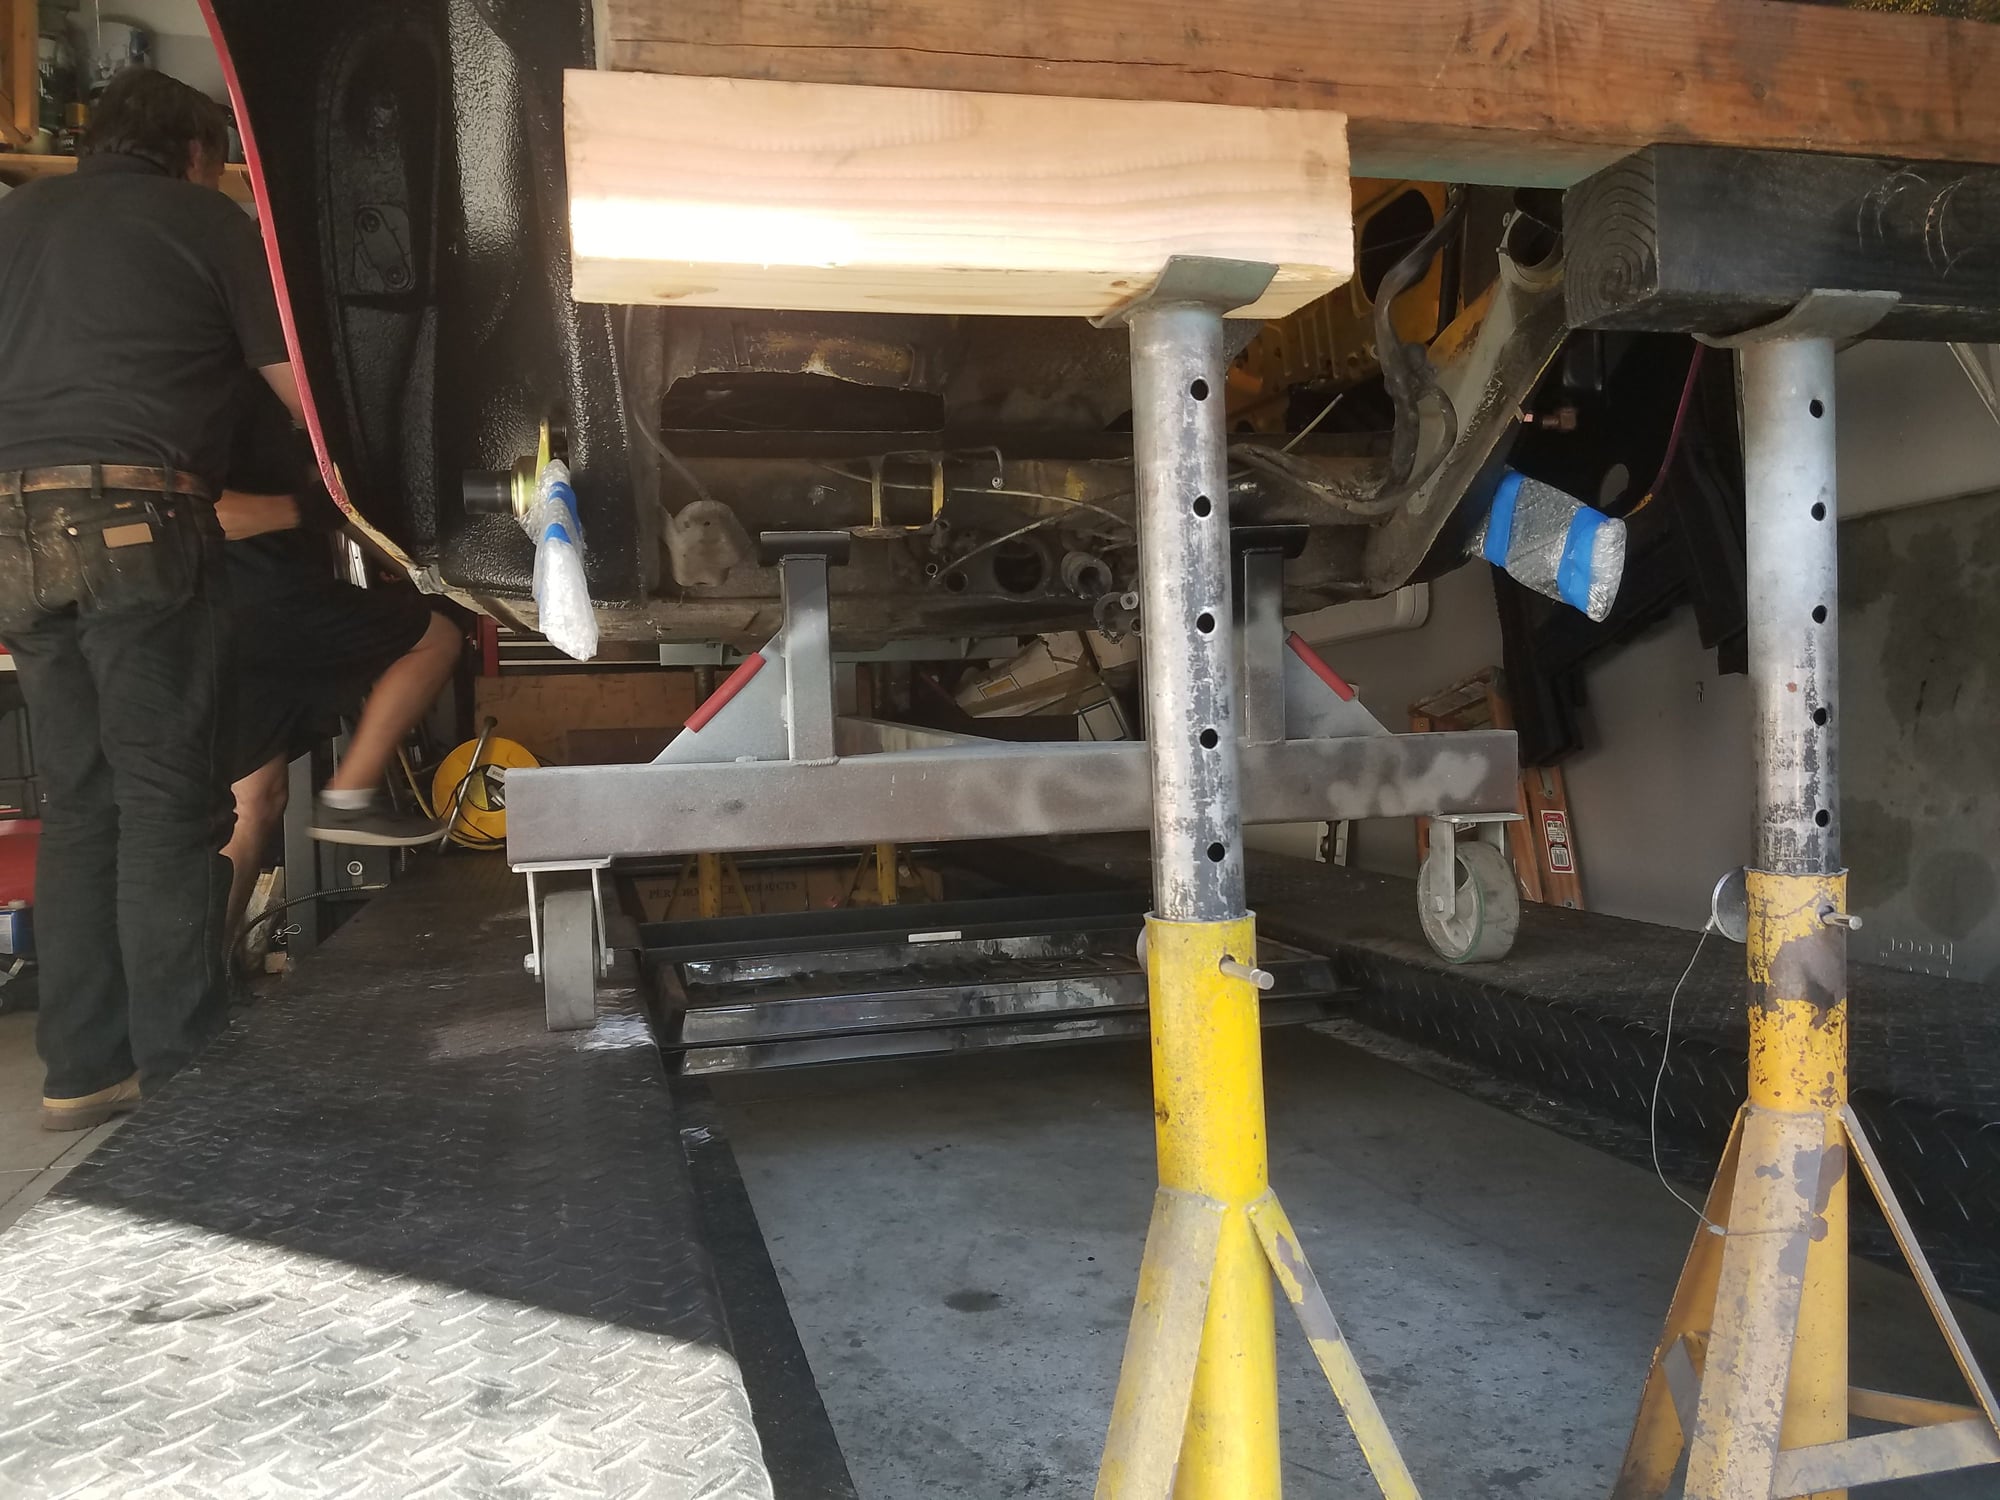
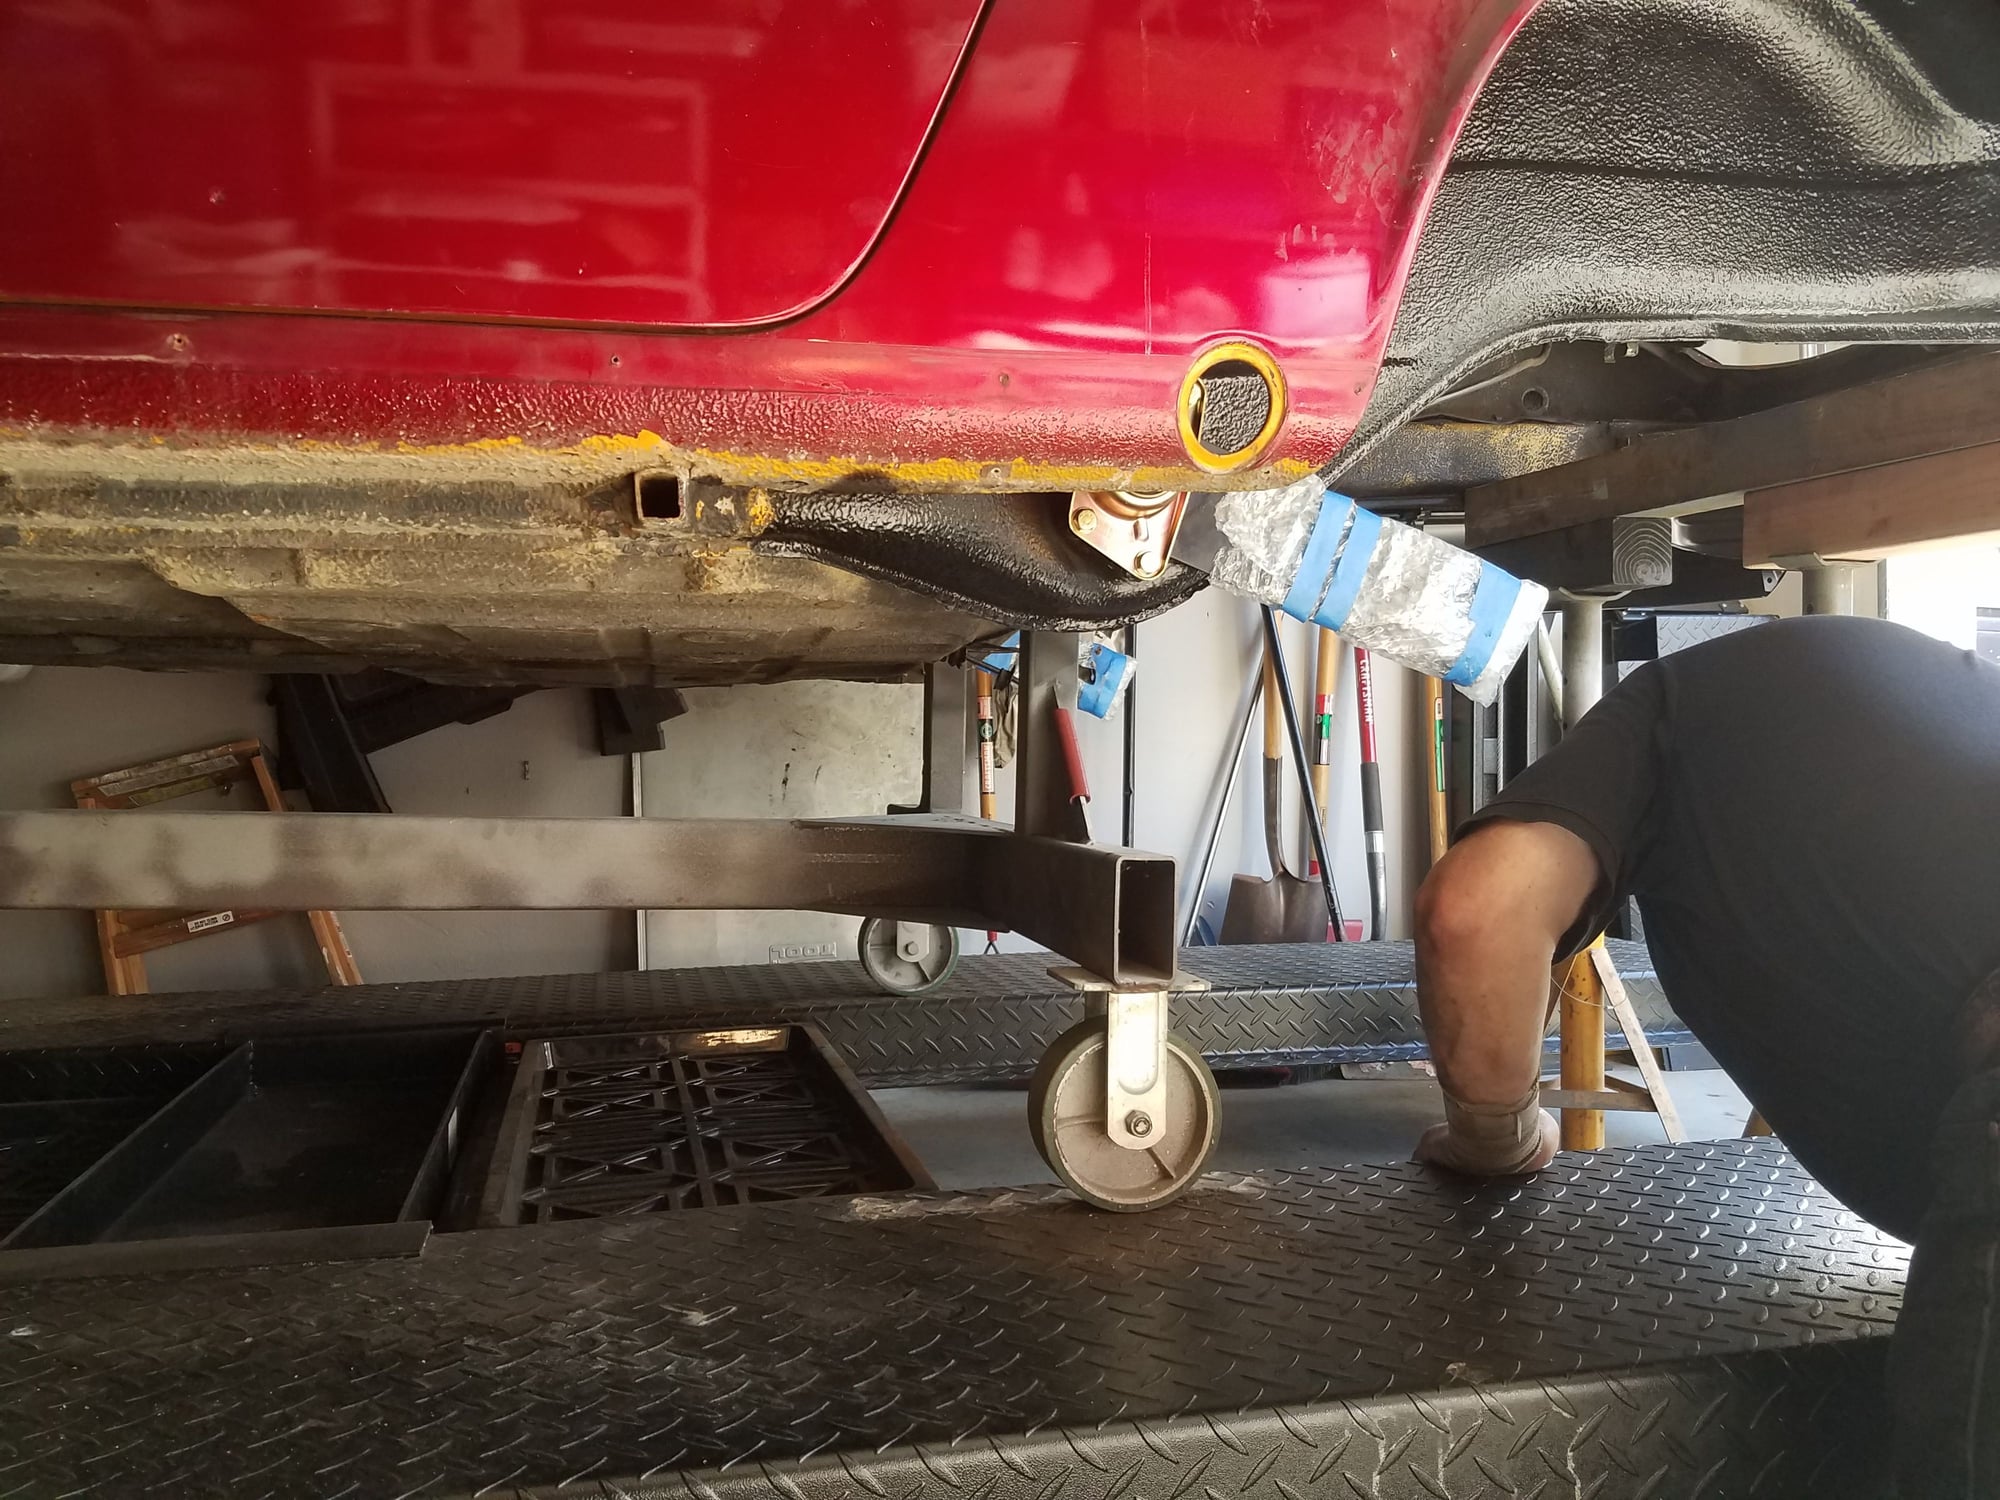
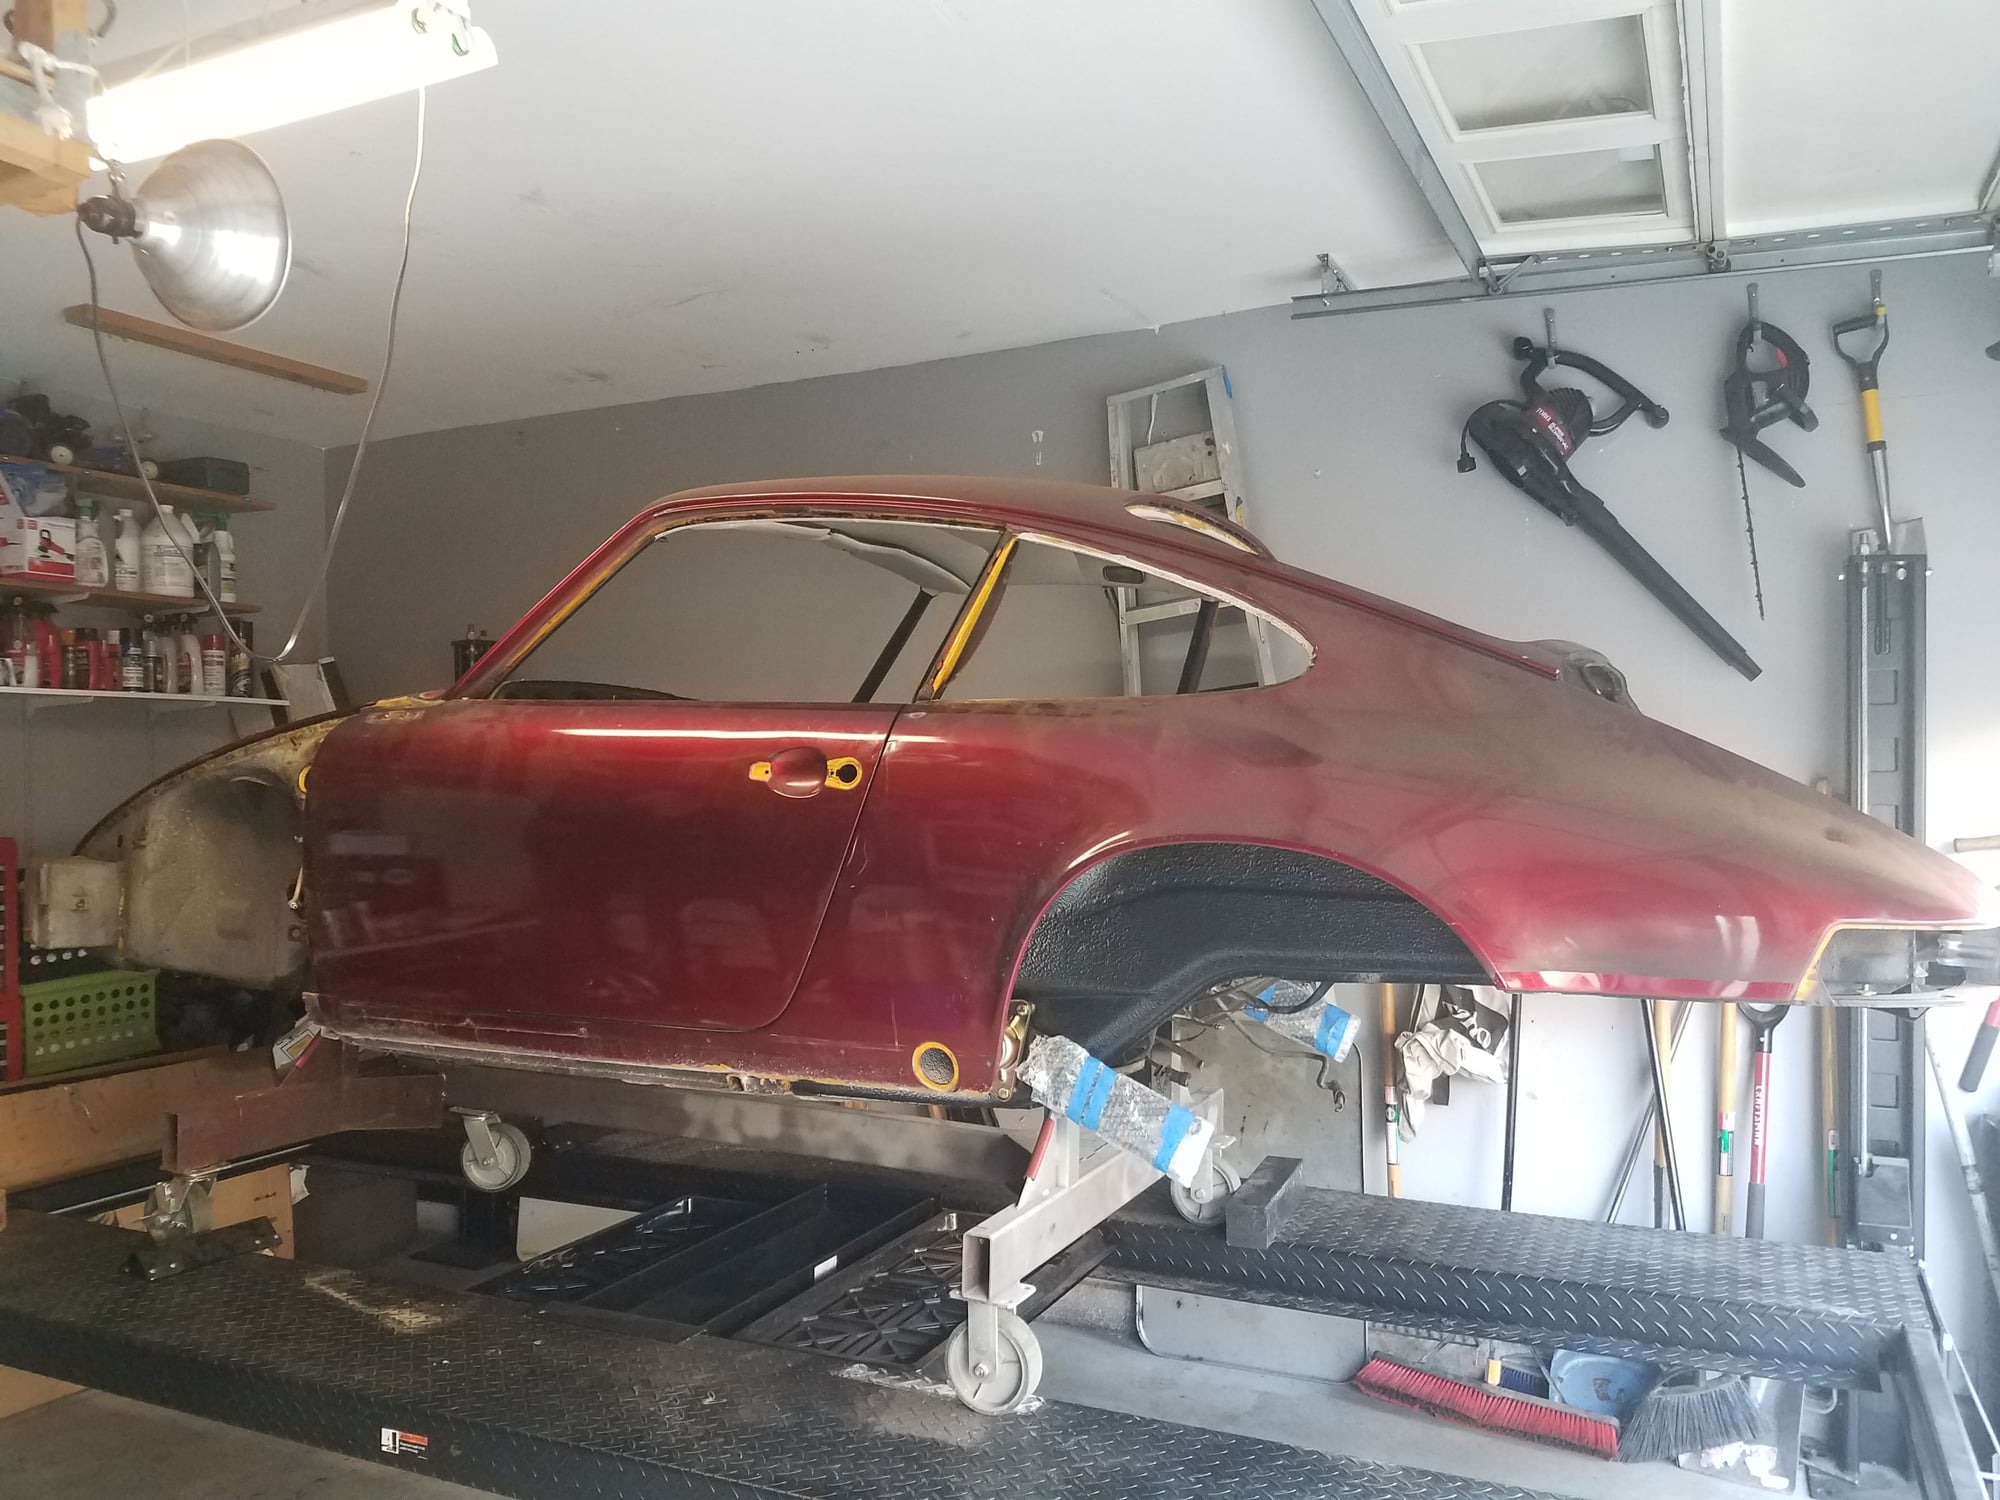
Dolly attached, raise the liftt to remove the jack stands and now she sits on the lift waiting until Saturday.
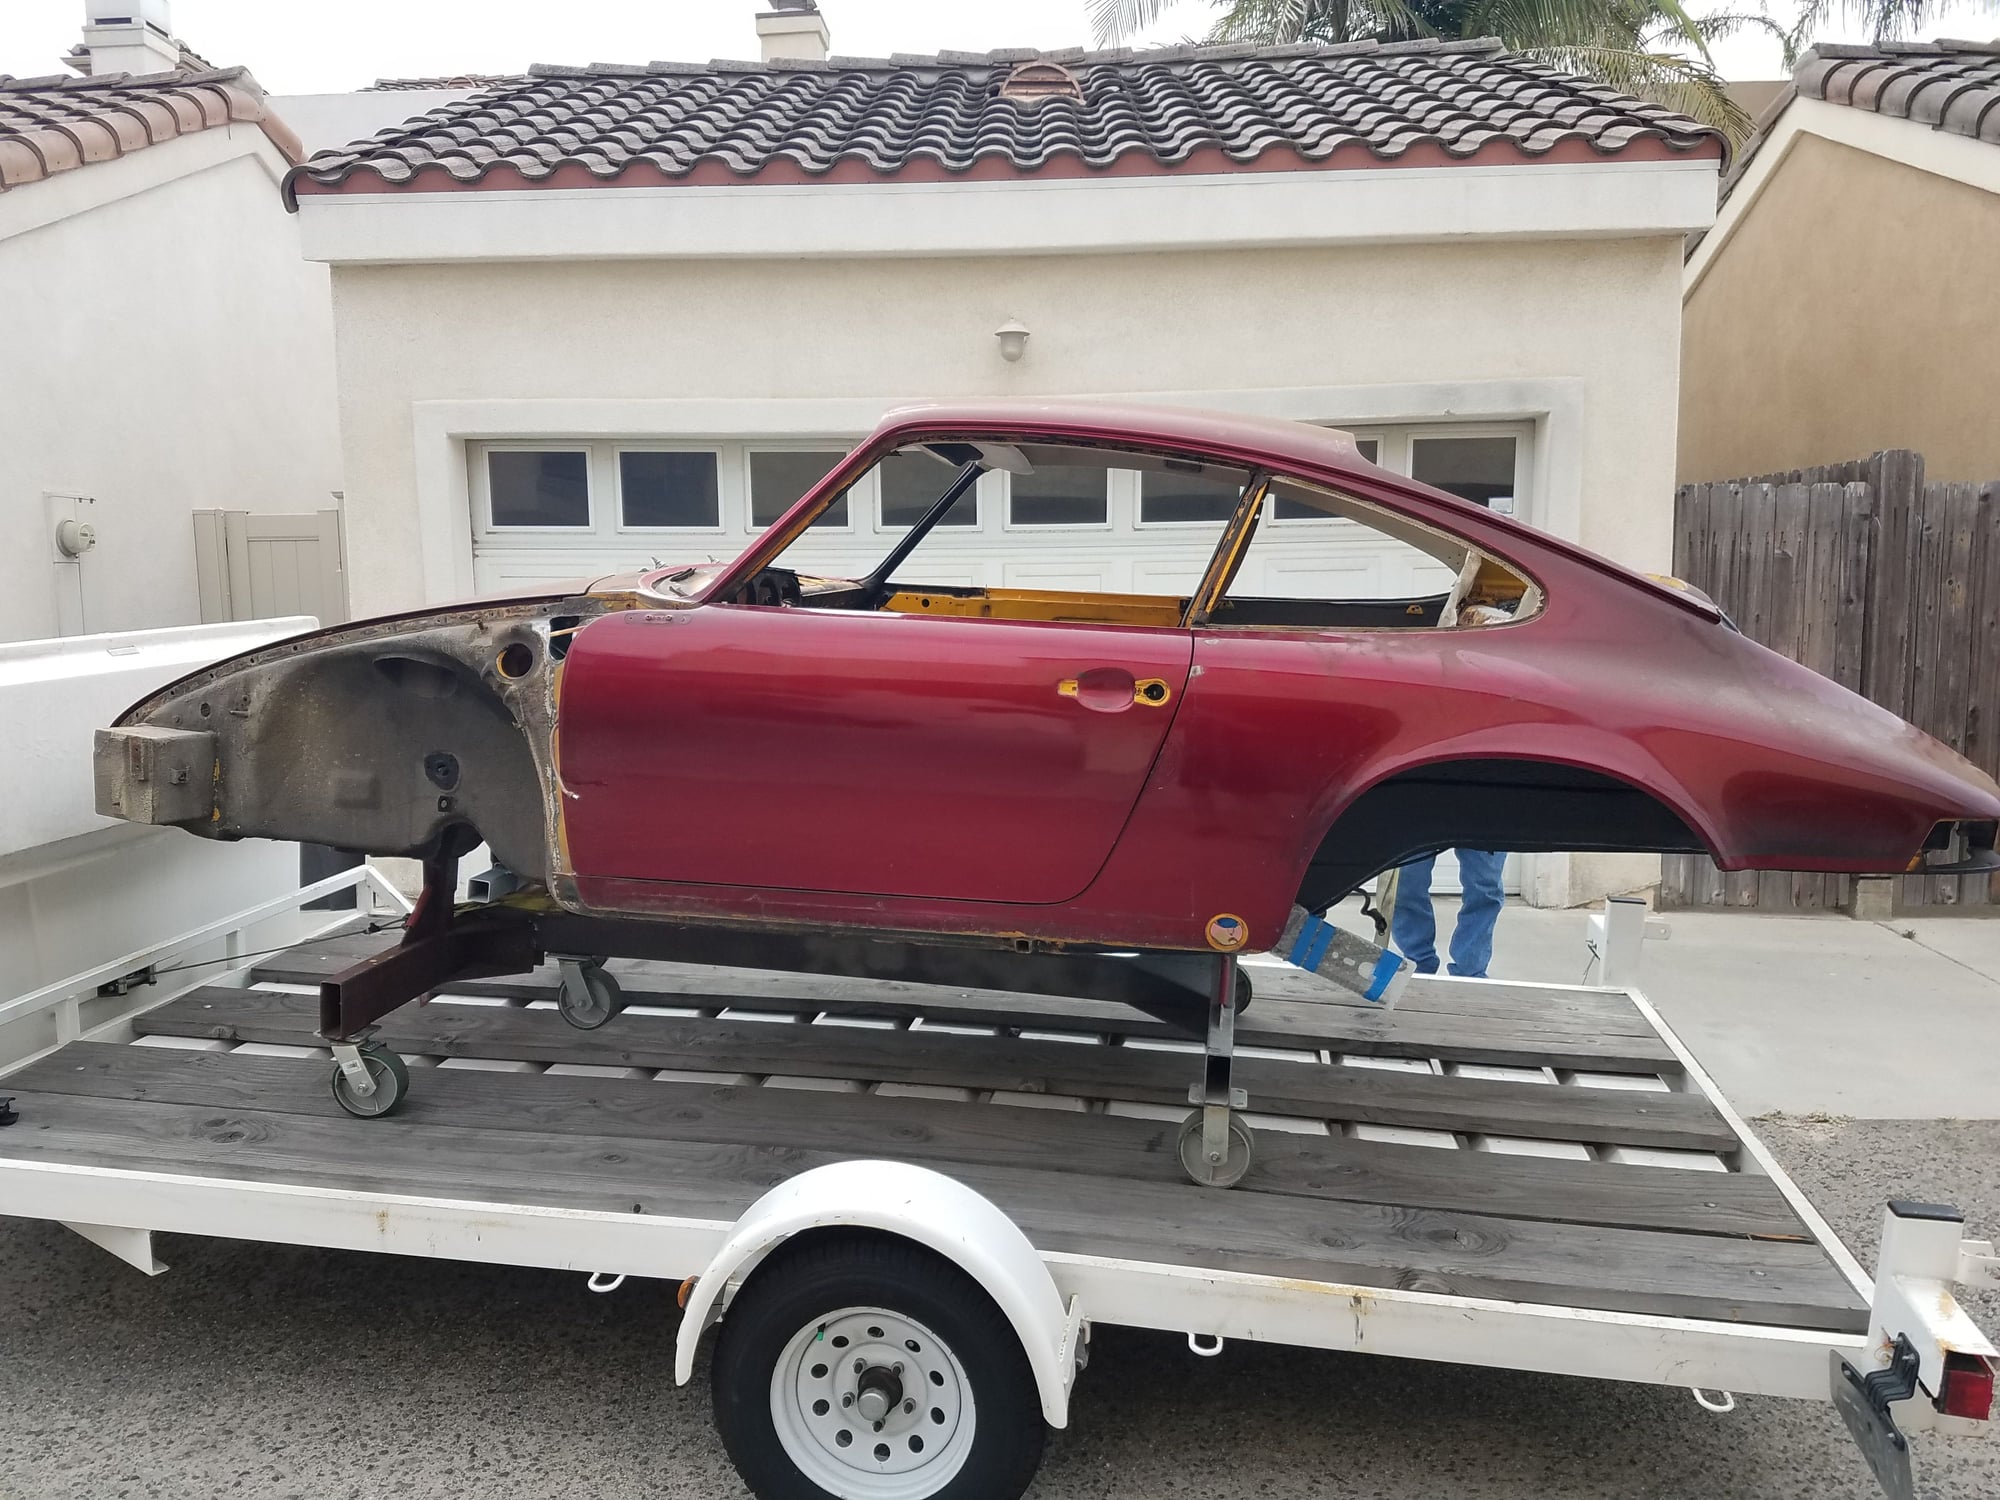
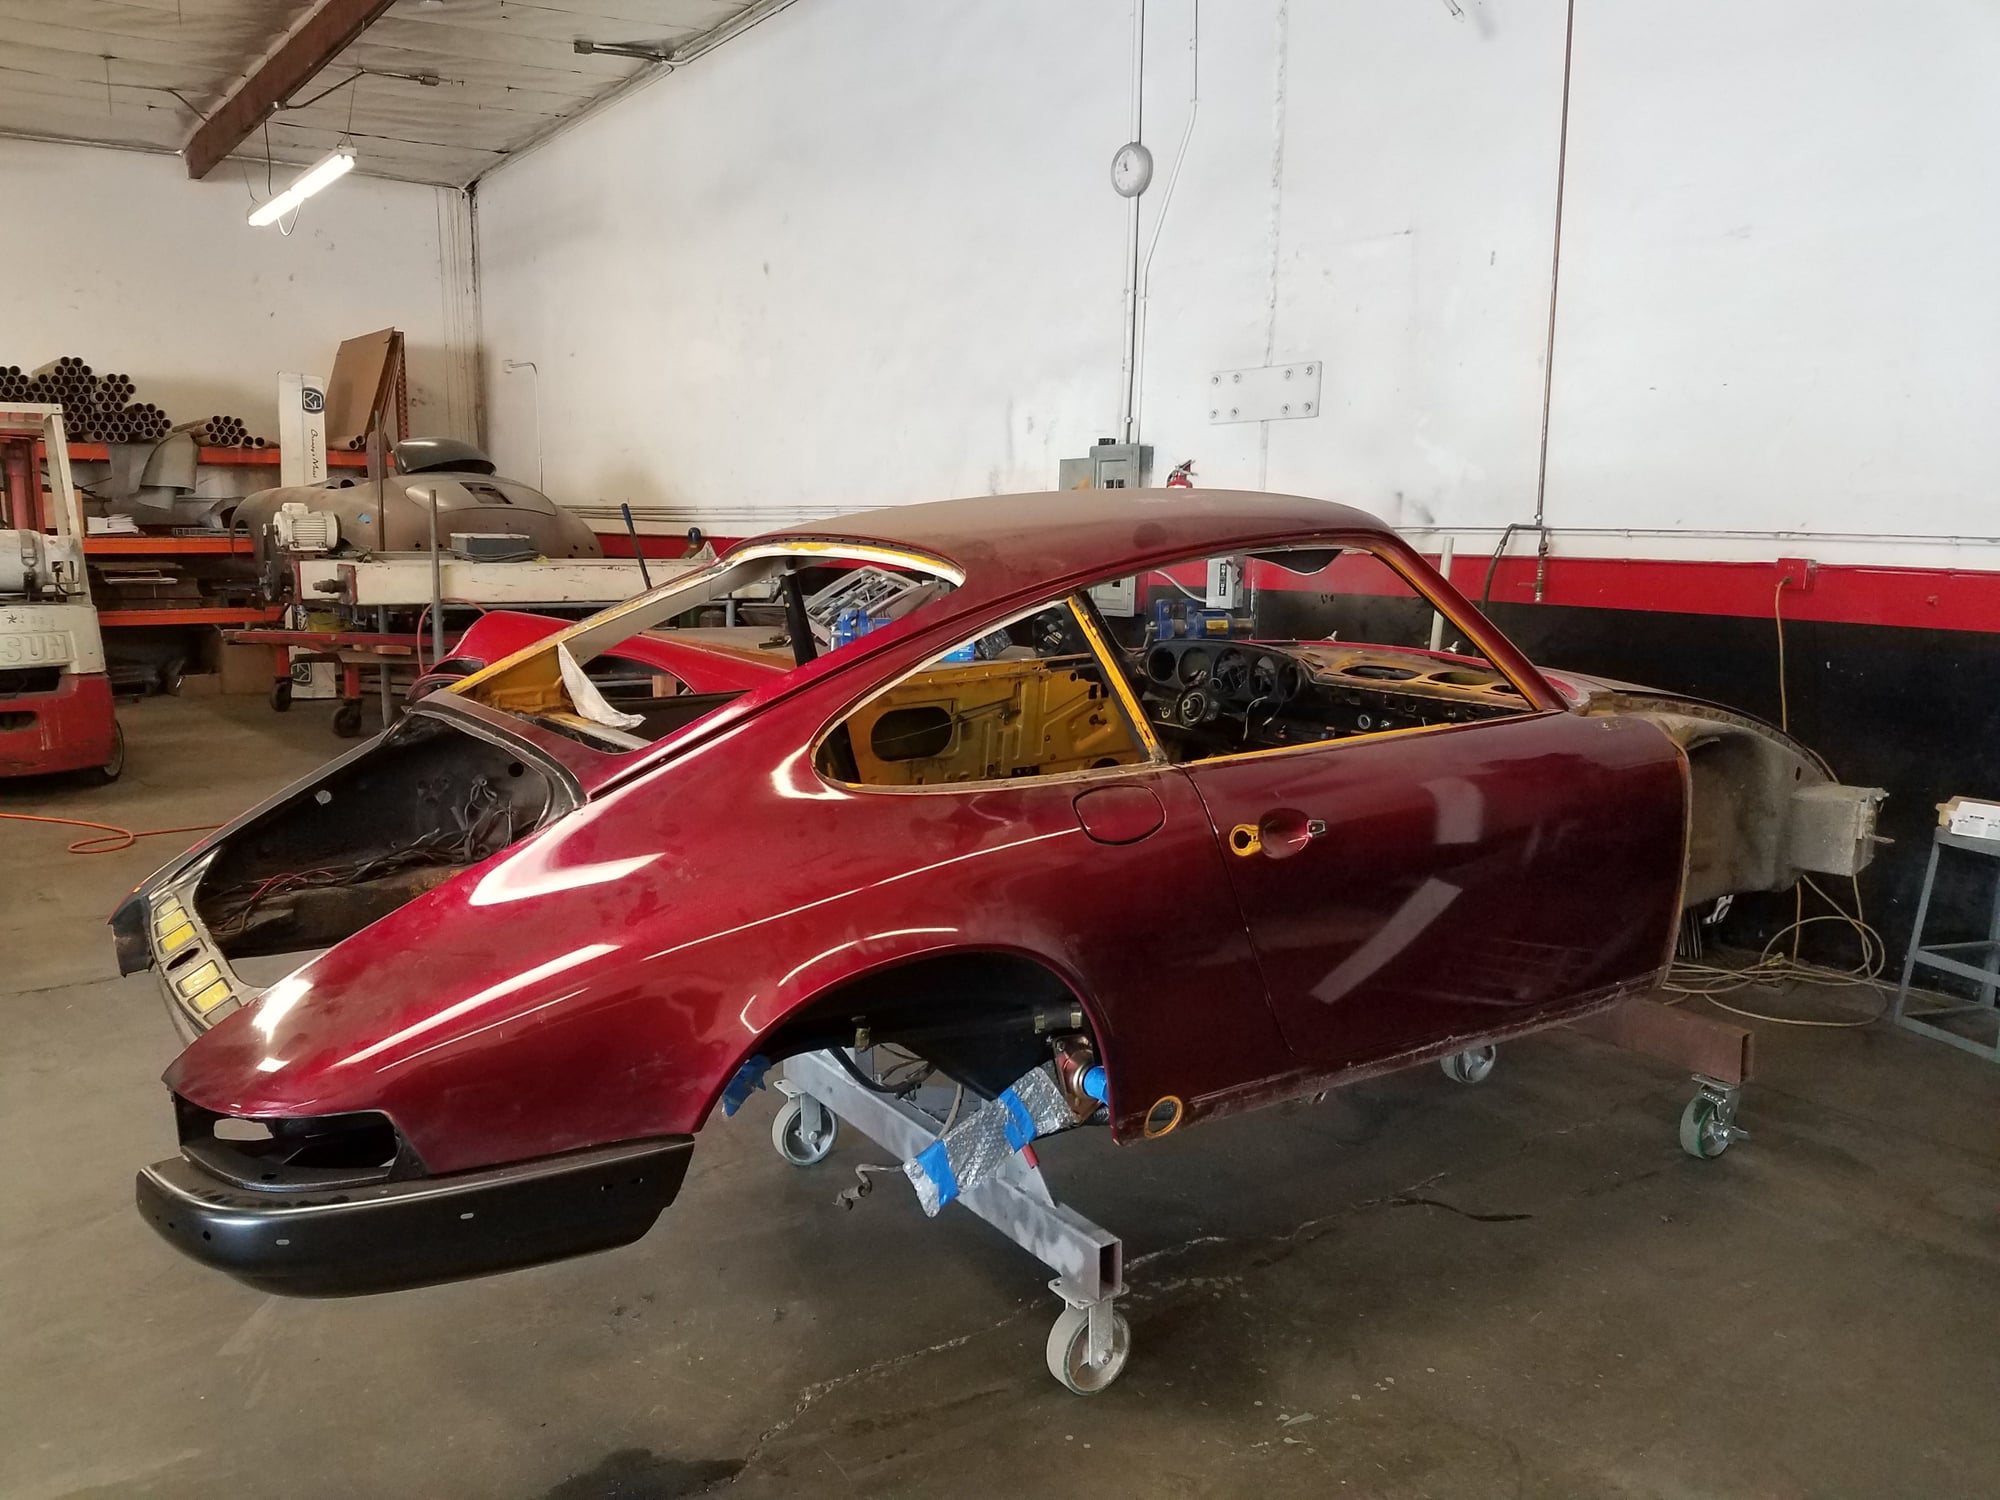
She has now been relocated to her new temporary home. Loaded on the trailer quick and easy and made a short drive to Andy's. My car is the least valuable car in his shop - probably by far lol
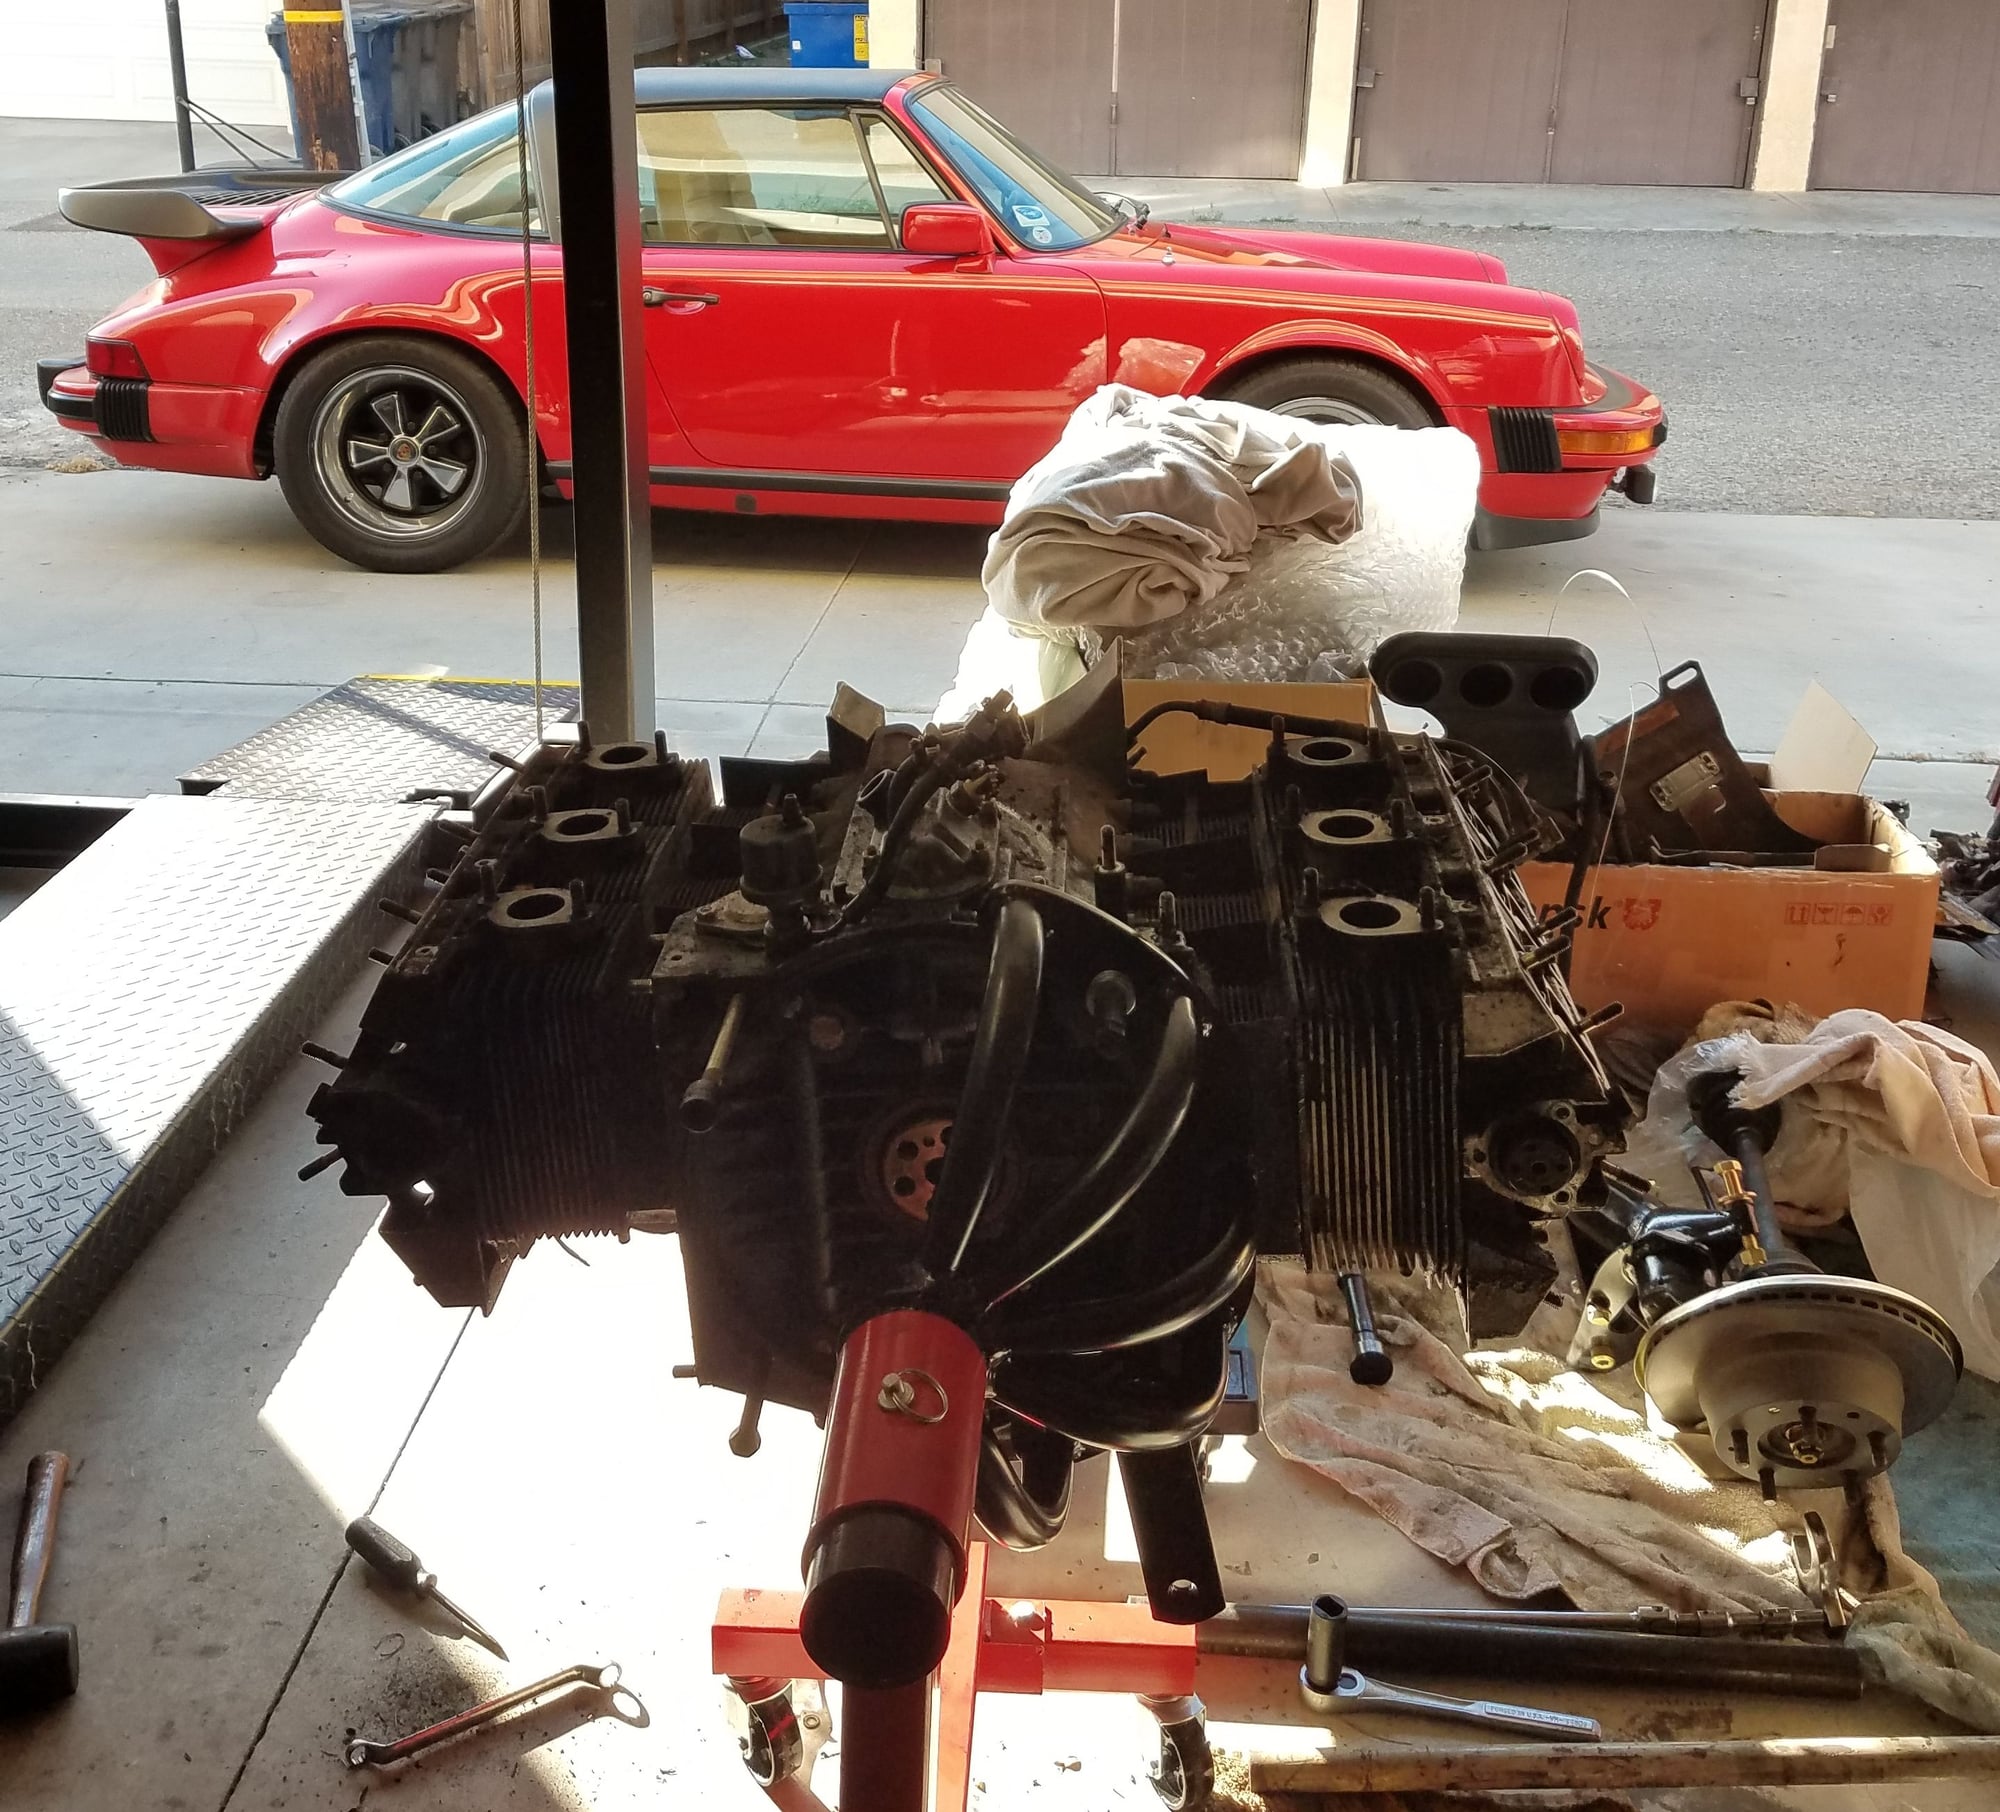
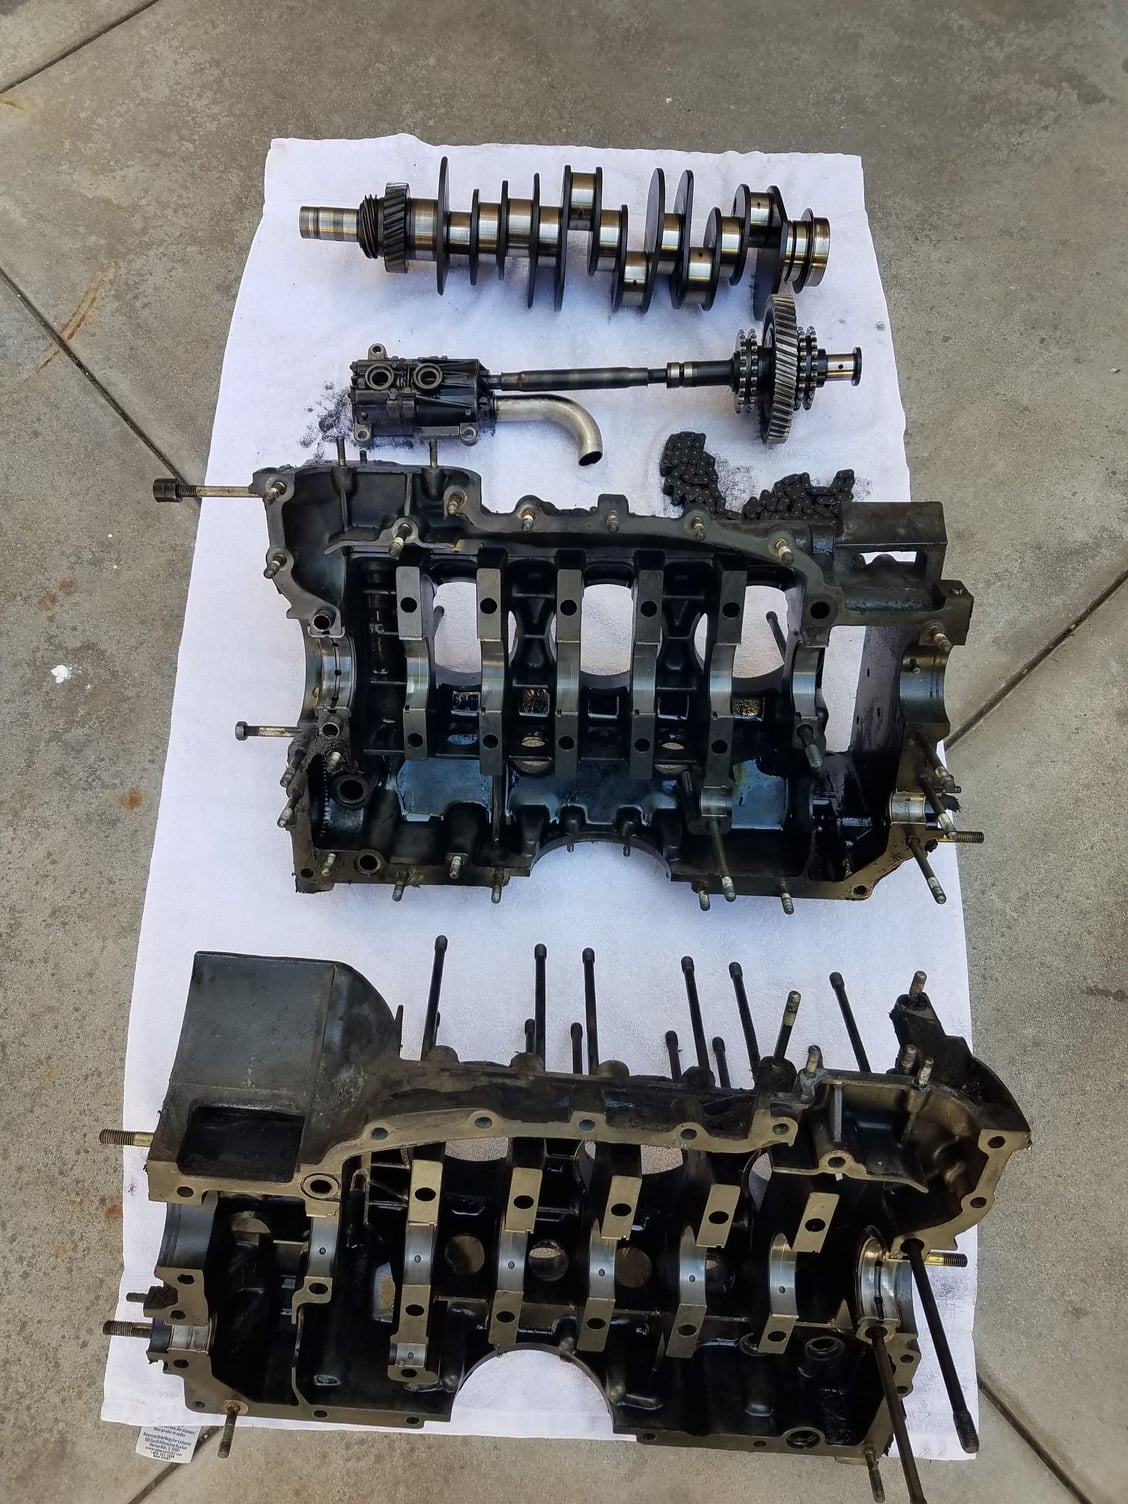
Now that I have room to work in my garage, I started to tear down the motor. I was able to remove the top end and am now close to splitting the case - maybe I'll split the case next weekend.
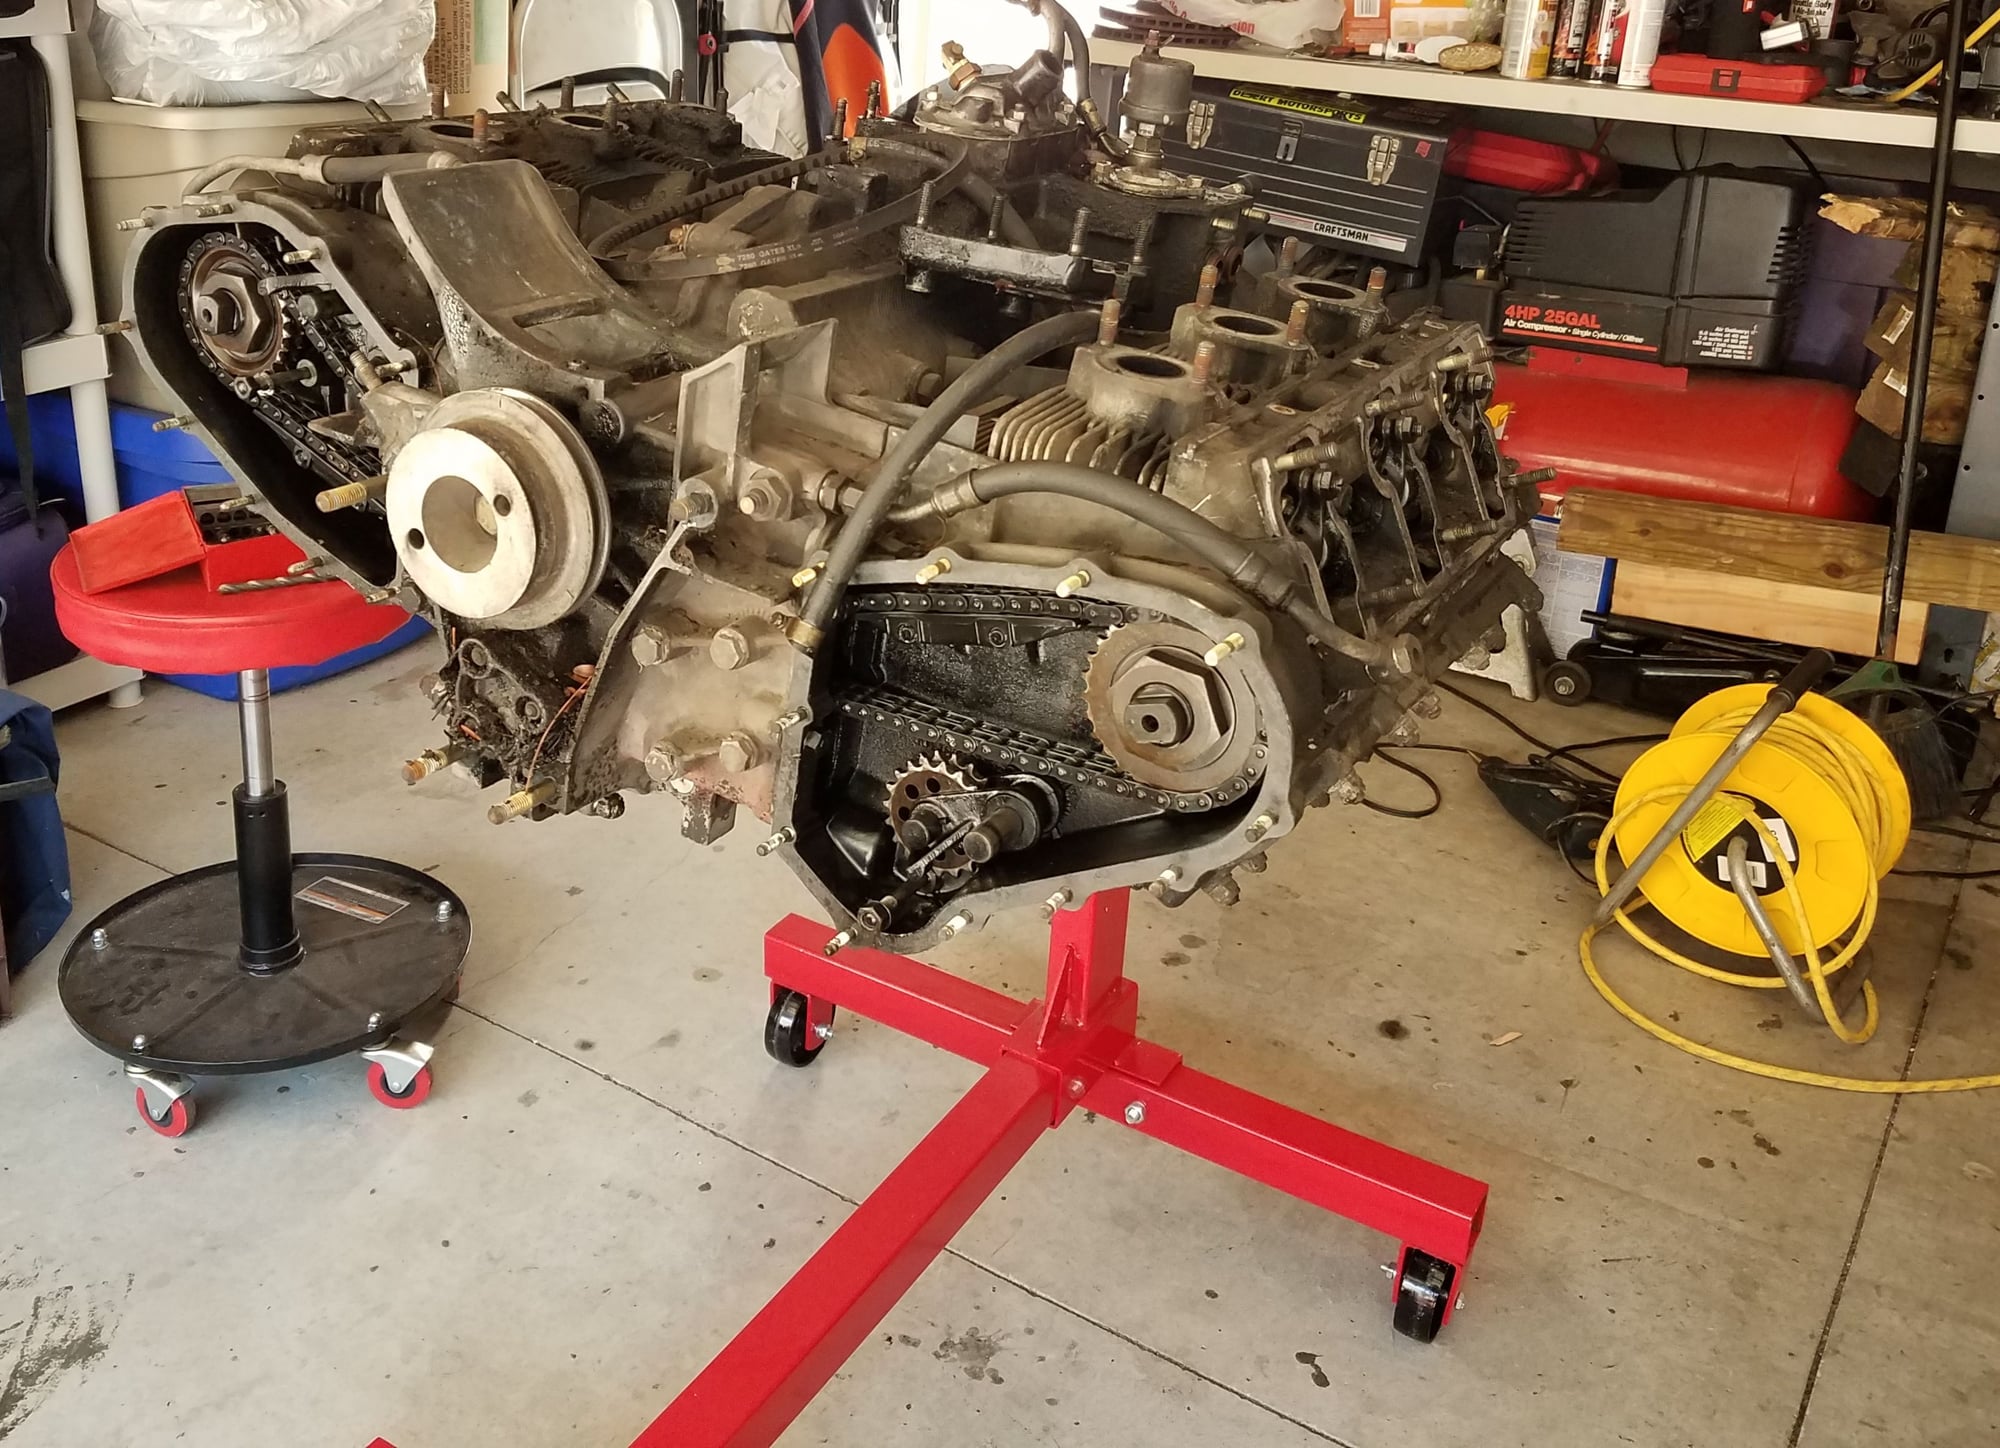
I was ready for the job. Already had the stand, correct yoke and some special tools - particularly the tools to remove the camshaft nuts. Removing the camshaft nuts was a pain (tightened to 110ft-lbs) - my son held a socket wrench with the special P202 camshaft socket using a long cheater bar for leverage and I had my own socket wrench also with a cheater bar using the giant 46mm crowsfoot required to remove the nuts.
Removing all 12 of the rocker arms from the cam towers wasn't too difficult, but time consuming. Slid out the cams and removed the cam towers. Moved on to removing the heads. I sprayed pb blaster on all the head studs to help remove the barrel nuts without snapping any of the head studs. The nuts were rusty and tight but I was able to remove all of them without damaging the head studs.
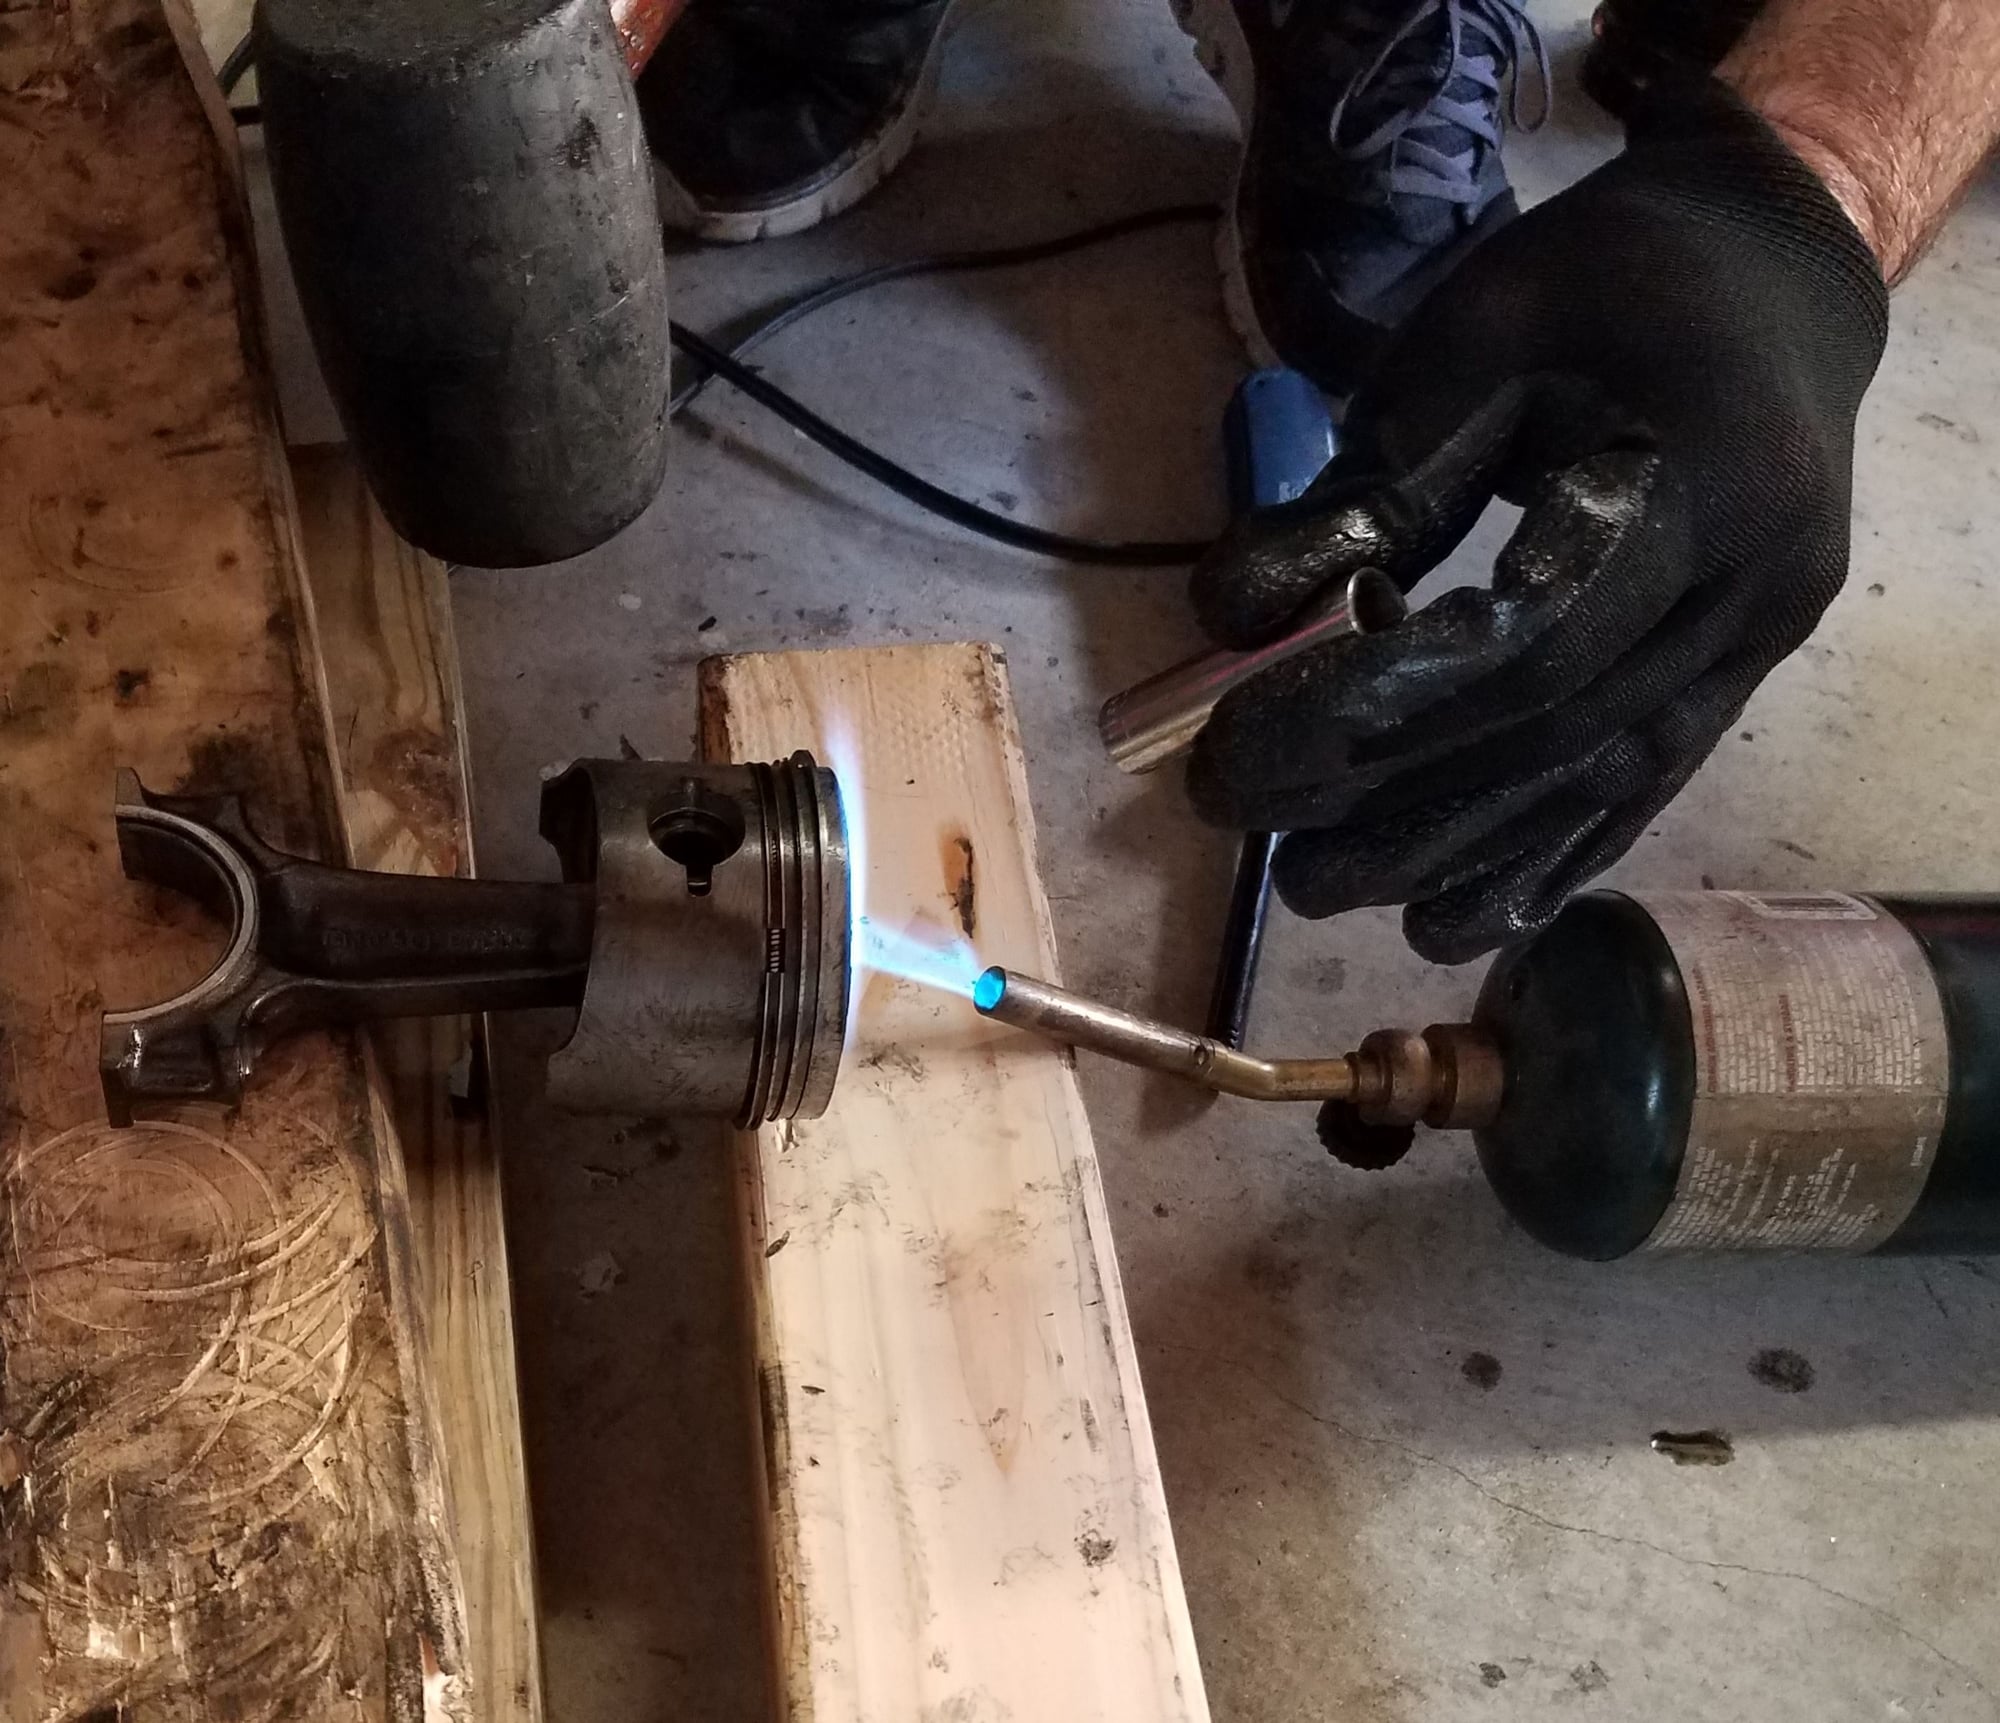
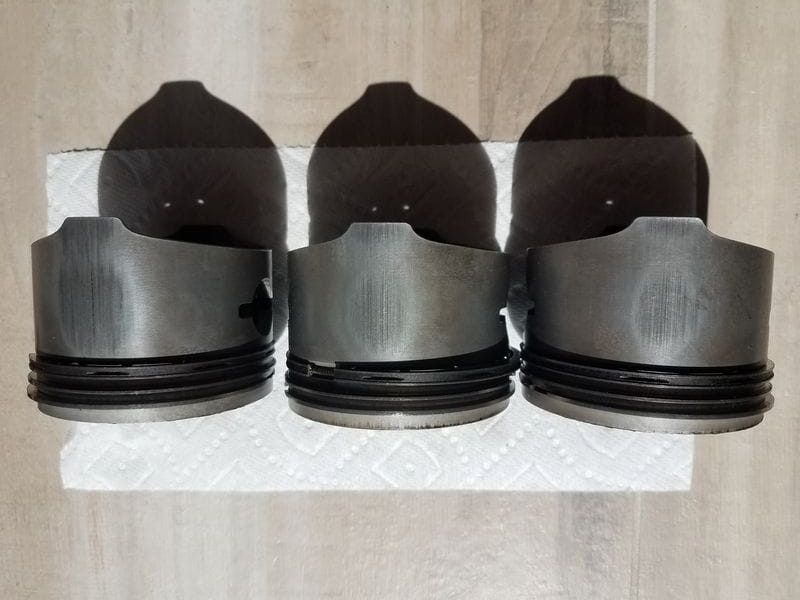
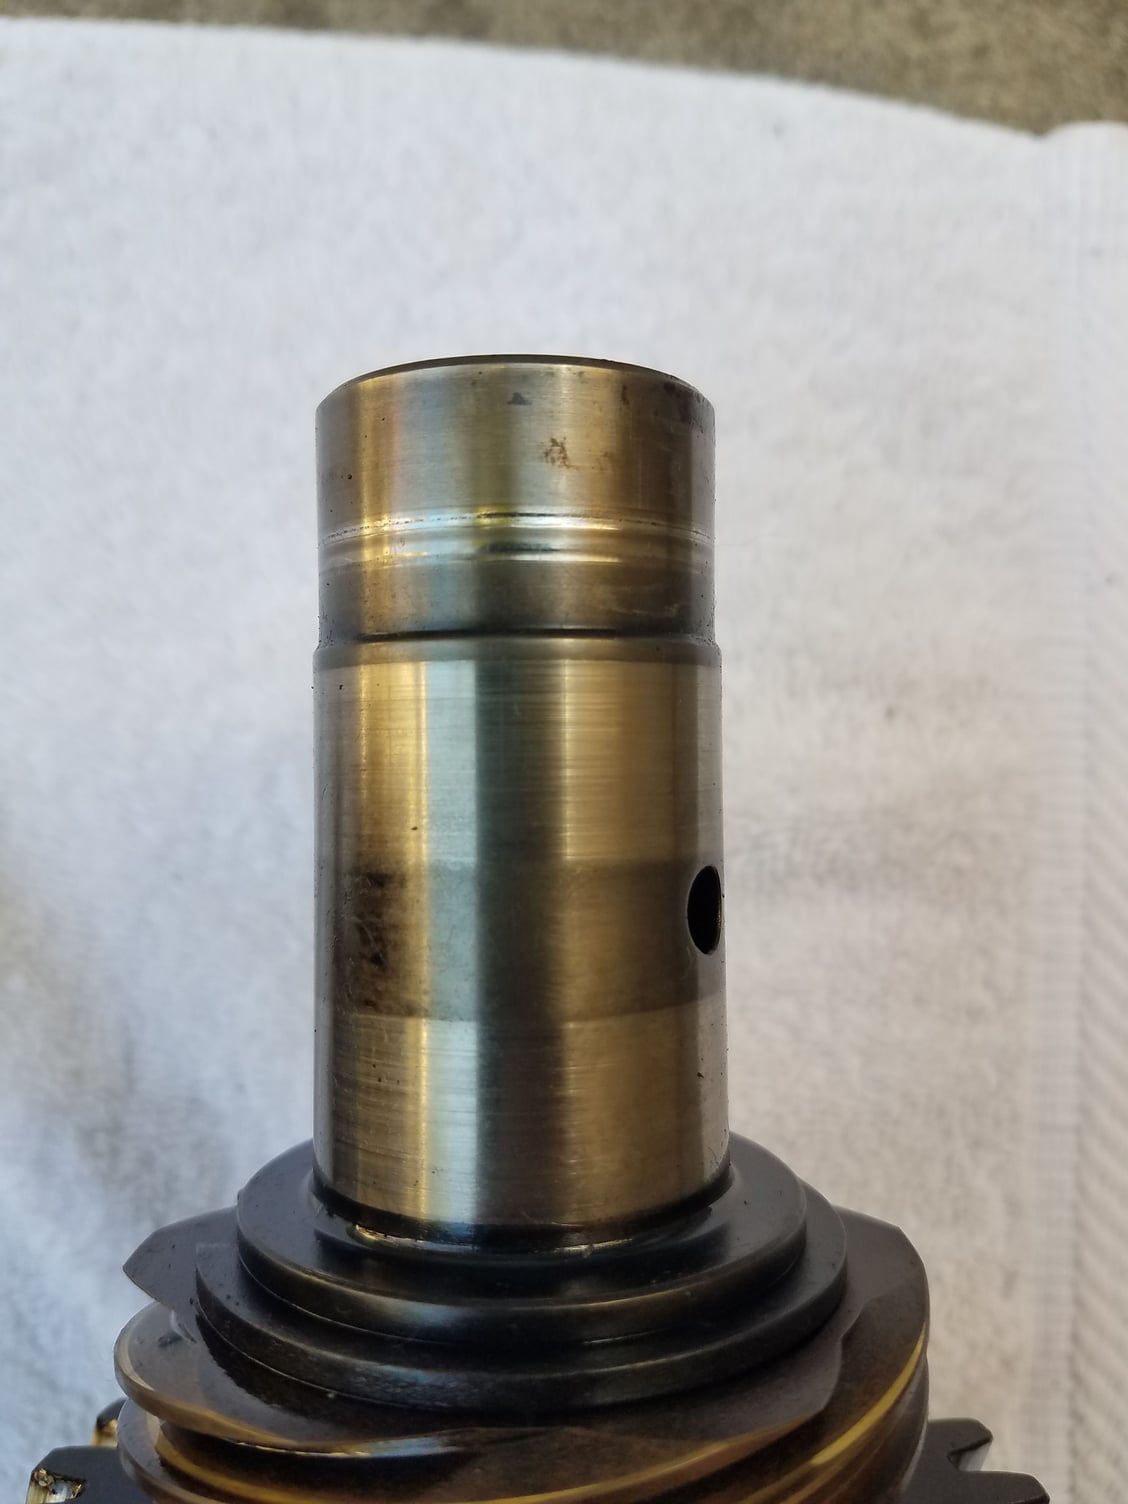
Slid out the cylinders and removed the rods from the crankshaft. Moved on to removing the rods from the pistons. I was able to remove the circlips fairly easily but the wrist pins didn't want to budge much so I heated the piston domes and they were very easily tapped out.
After heating the piston domes for just a couple minutes, I was able to tap out the wrist pins very easily using a small socket and rubber mallet.
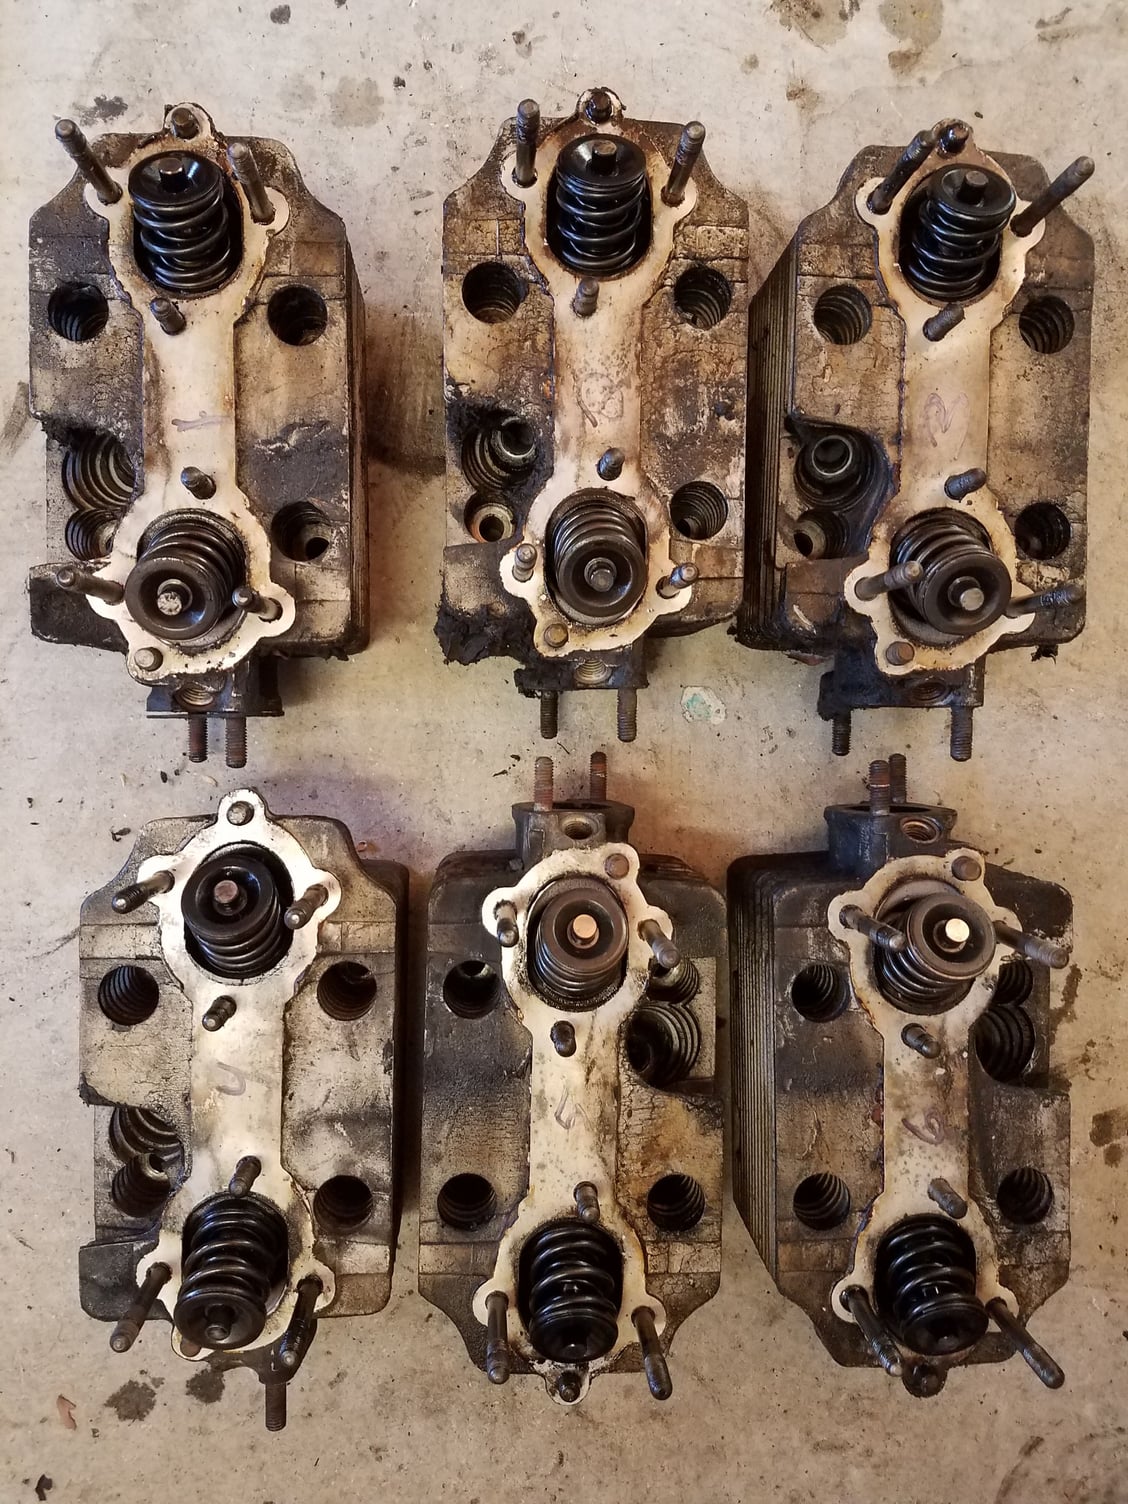
I will be reusing my original MFI heads. They appear to be in good shape, but Ollie's will inspect them for cracks and condition when I send them to be 'enhanced'
Do you have any history on the motor? Was it running?
whats your plan?
ill post a build spec in my thread i next week or 2. Going to start tear down in about a week to get the case and other bits to Ollie’s. Not sure who I’ll have do the heads yet as they will be worked significantly. I’ll probably be using only 1/3 of the donor engine lol.
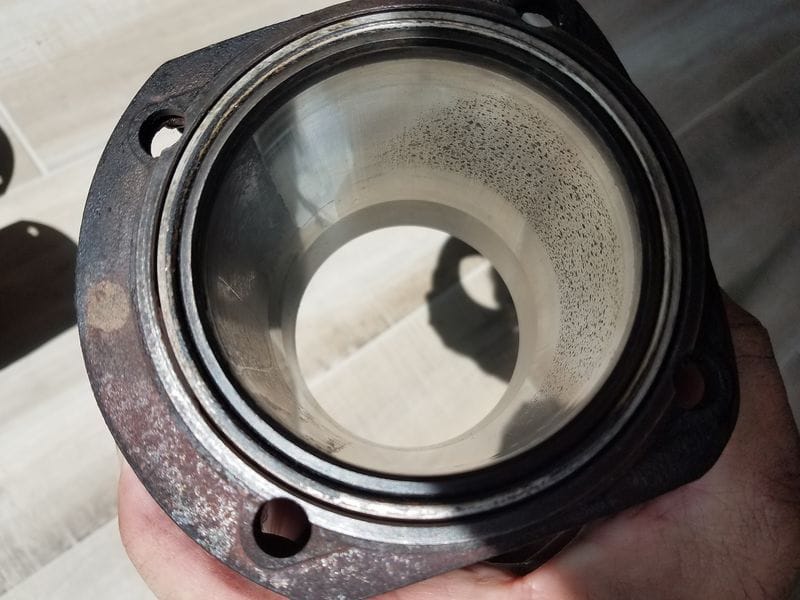
^ The motor was running just fine - didn't smoke and had good oil pressure. My car had little history/records so not much is known about it. I posted some photos below which show some strange wear on the pistons and cylinders. Not sure what caused this. The cylinder seems to show evidence of moisture damage - maybe from sitting so long unused? The pistons show strange wear on the sides - maybe the cylinders overheated and became out of round? I am not a motor expert - I am learning as I go. Hopefully people following this thread can appreciate an average garage do it yourself-er guy working on his car and learning through the journey. If someone knows what might have caused this, please chime in. Good news is that I am not planning to re-use the pistons or cylinders for my motor build. I plan to reuse the crank, rods and case for the most part.
Here are the basic specs that I have worked out to this point:
- Sticking with a '72 ST theme, by going with a 2.5 build
- Keeping stock, numbers matching case
- 87.5mm LN Engineering Nickies aluminum CNC billet NSC-plated cylinderswith forged aluminum JE Pistons
- 9.5:1 compression
- Dougherty Racing Camshafts DC30 grind. I spoke with John Dougherty and landed on these cams as I am looking for strong power band between 3500- 6500. Didn't want a 'peaky' motor that only came alive >6500, especially since I live in SoCal and have lots of traffic to deal with lol. The S or Mod-S grinds sound sexy and are if you are always running in the high revs (track?), but just not practical for me.
- Bore throttle plates, stacks and head ports to 36mm
- Increase flow from MFI pump to match motor specs - courtesy of Mark Jung at MFI Werks
Should be a great period correct motor that will be reliable and balanced enough to not have to flare out the fenders and beef up everything else to handle more power. Also want to make sure I don't overbuild my 4R mag case. Right behind the pistons/cylinders, the most expensive part of this build is the MFI work, but it is worth it to me as it will scream 70's hotrodding
Here is the unusual wear on 3 of the pistons - from what?
Check out this cylinder - is this from moisture sitting in the cylinder?
Very nice.
Piston slap? I’m not sure. Does look like corrosion in the cylinders.
Mfi is expensive. My car has carbs Italian Weber’s. Runs pretty well. But. Funny thing a full efi setup is less expensive than mfi... that mfi howl tho!
im going period but not period :-) for mine.
Target compression will be about 10.5:1
will Use nickies
pistons rods cams custom
Crank likely worked stock
heads likely keep and modify extensively.
Keep redline about 7500 even tho it will spin to 8 supposedly the crank flywheel bolts become a weak point.
Lots of crazy ideas coming from the shop ....
gotta keep it on budget as it’s very easy to spend stupid $ on these
Im looking for 250 crank or so and should be doable. I think it’s good for a skinny car on 185 tires
^ sounds awesome Your 7R case is definitely a better starting point for that build than my case would be. You can't go wrong with EFI and with 10.5:1 it makes more sense for dual plug (I wouldn't get much from dual plug with my build so not doing it). I will have to check it out when it is done - my car will most likely still be in pieces
I may need to continue to lighten my car up more to make up for the HP difference - I am shooting for 200.
MFI is like a divorce; expensive, but worth it if you need it.
Ha too funny. I think just getting the car going with MFI is expensive, then I need someone that can maintain it for me. I may need to go to Callas or some other shop that actually understands these things still (expensive tools for MFI) - like the 356 4-cam motor, seems as though the knowledge of some of this older Porsche technology is fading. I guess MFI will be the expensive gift that will just keep on giving haha.
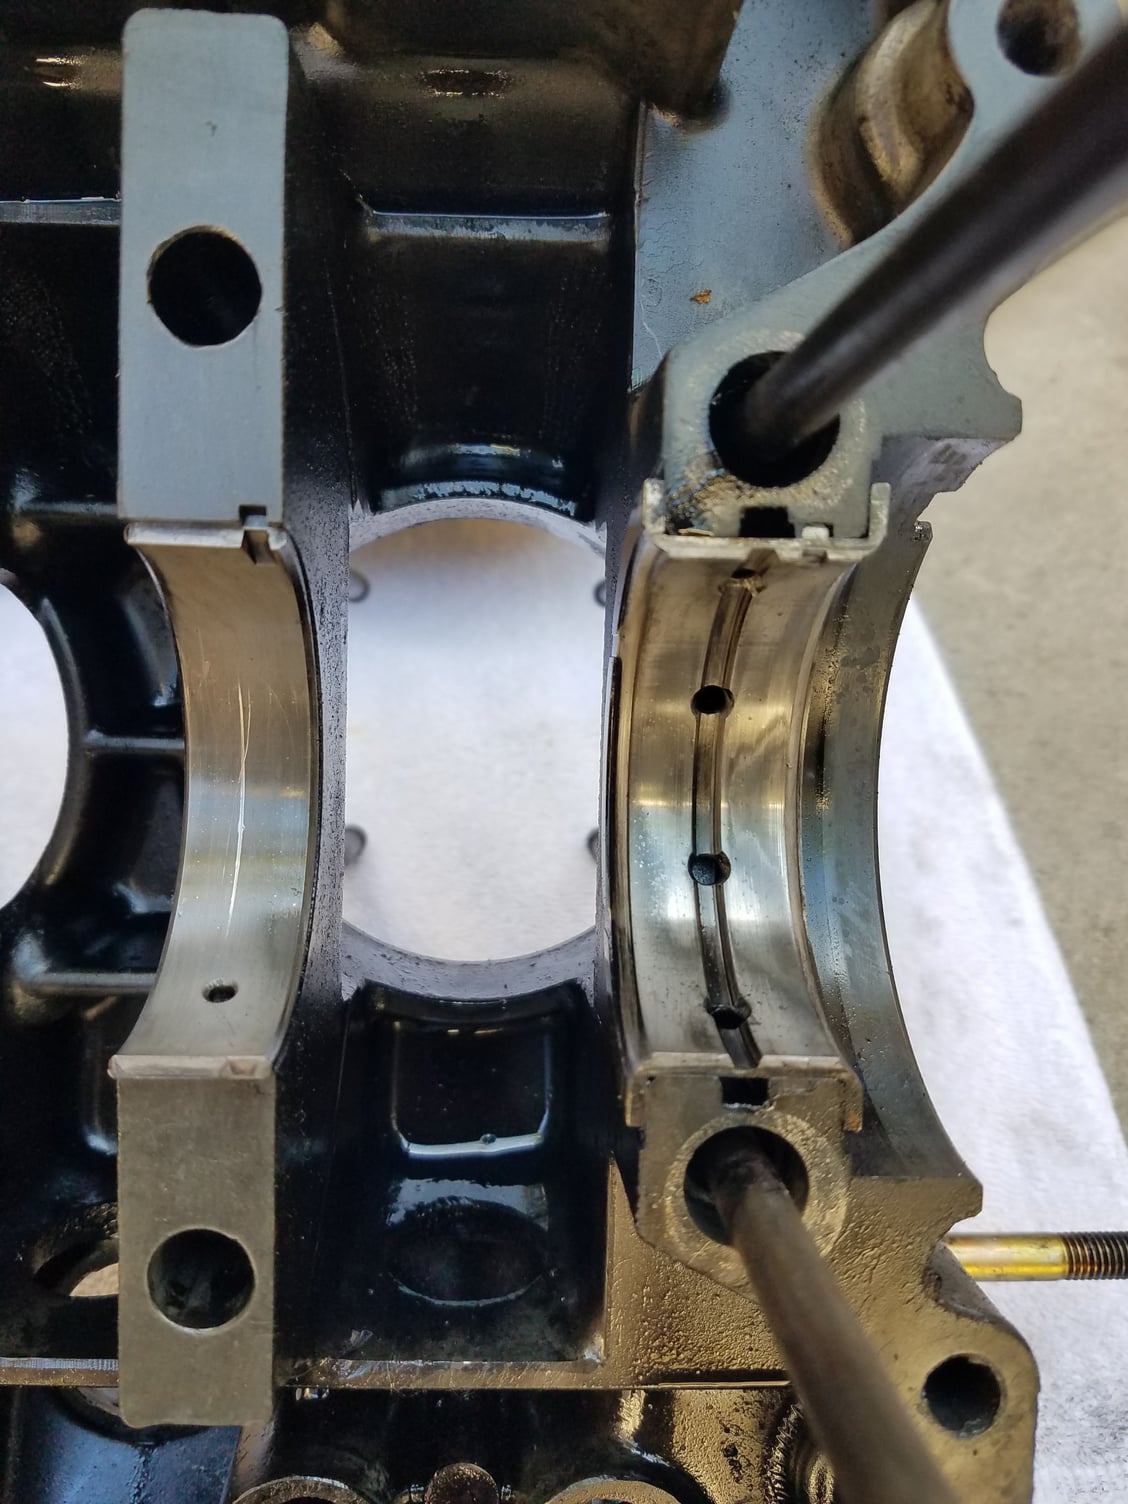
Split the case today. Took longer than I expected as I kept patience and avoided the temptation of sticking in objects between the halves for prying. Instead I used my rubber mallet to tap around and did pry gently in a couple areas where I could wedge between bolts (not the case half seams). Finally separated after a lot of patience.
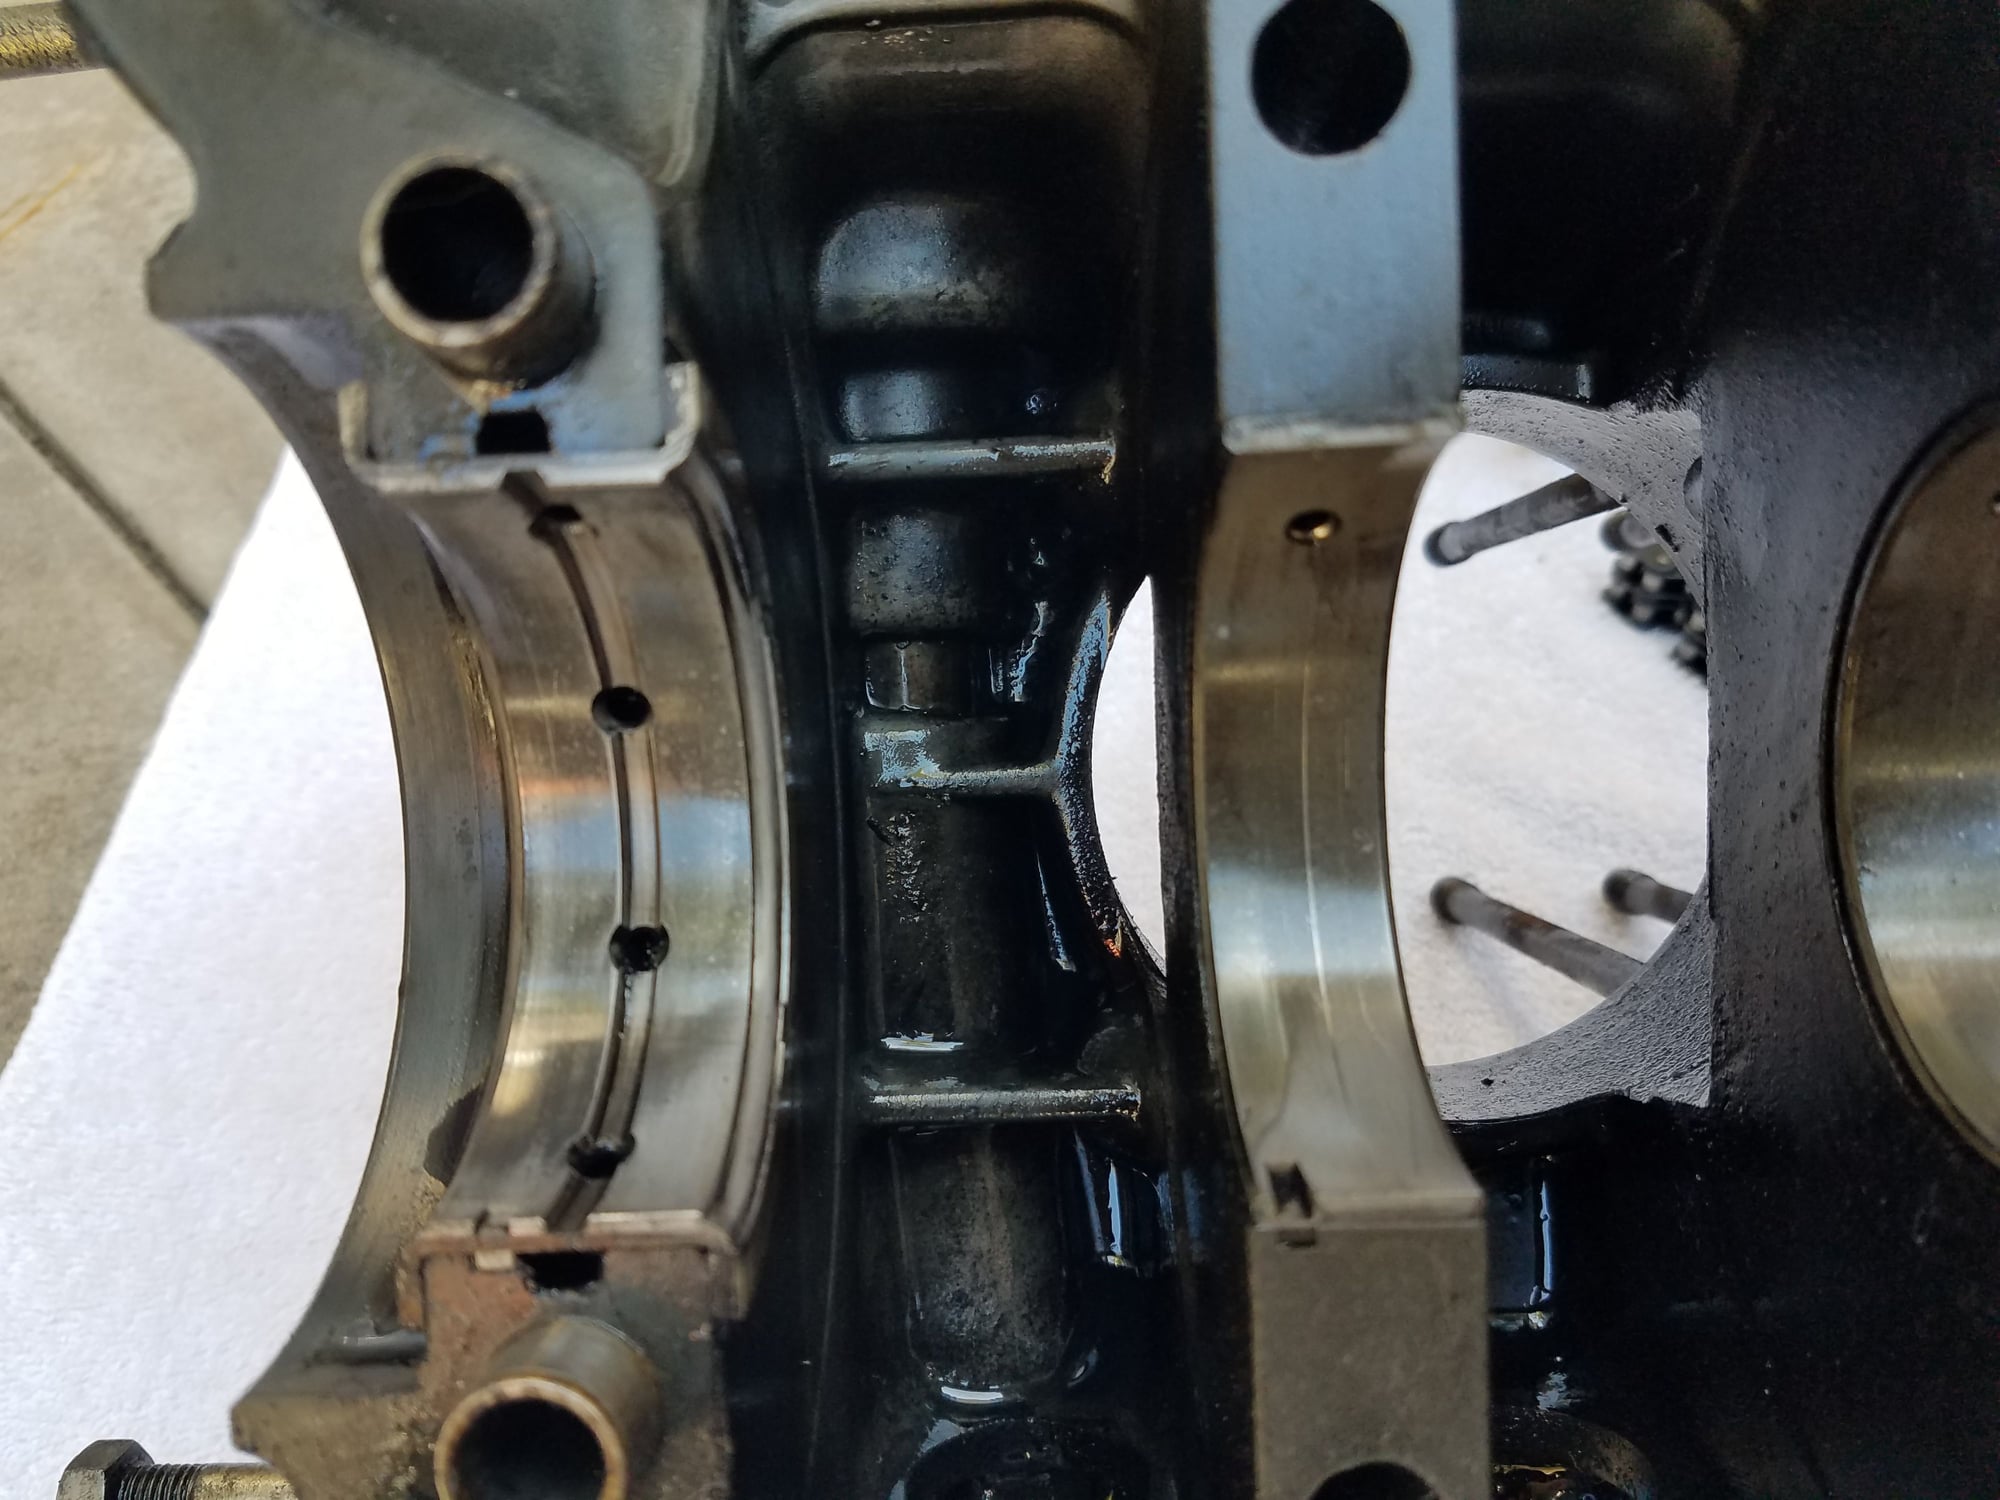
At one time I debated not splitting the case or rebuilding the bottom end. Based on the wear of other parts removed earlier, I was committed to splitting the case and I am glad I did. There is a decent amount of wear on the crankshaft and intermediate shaft bearings.
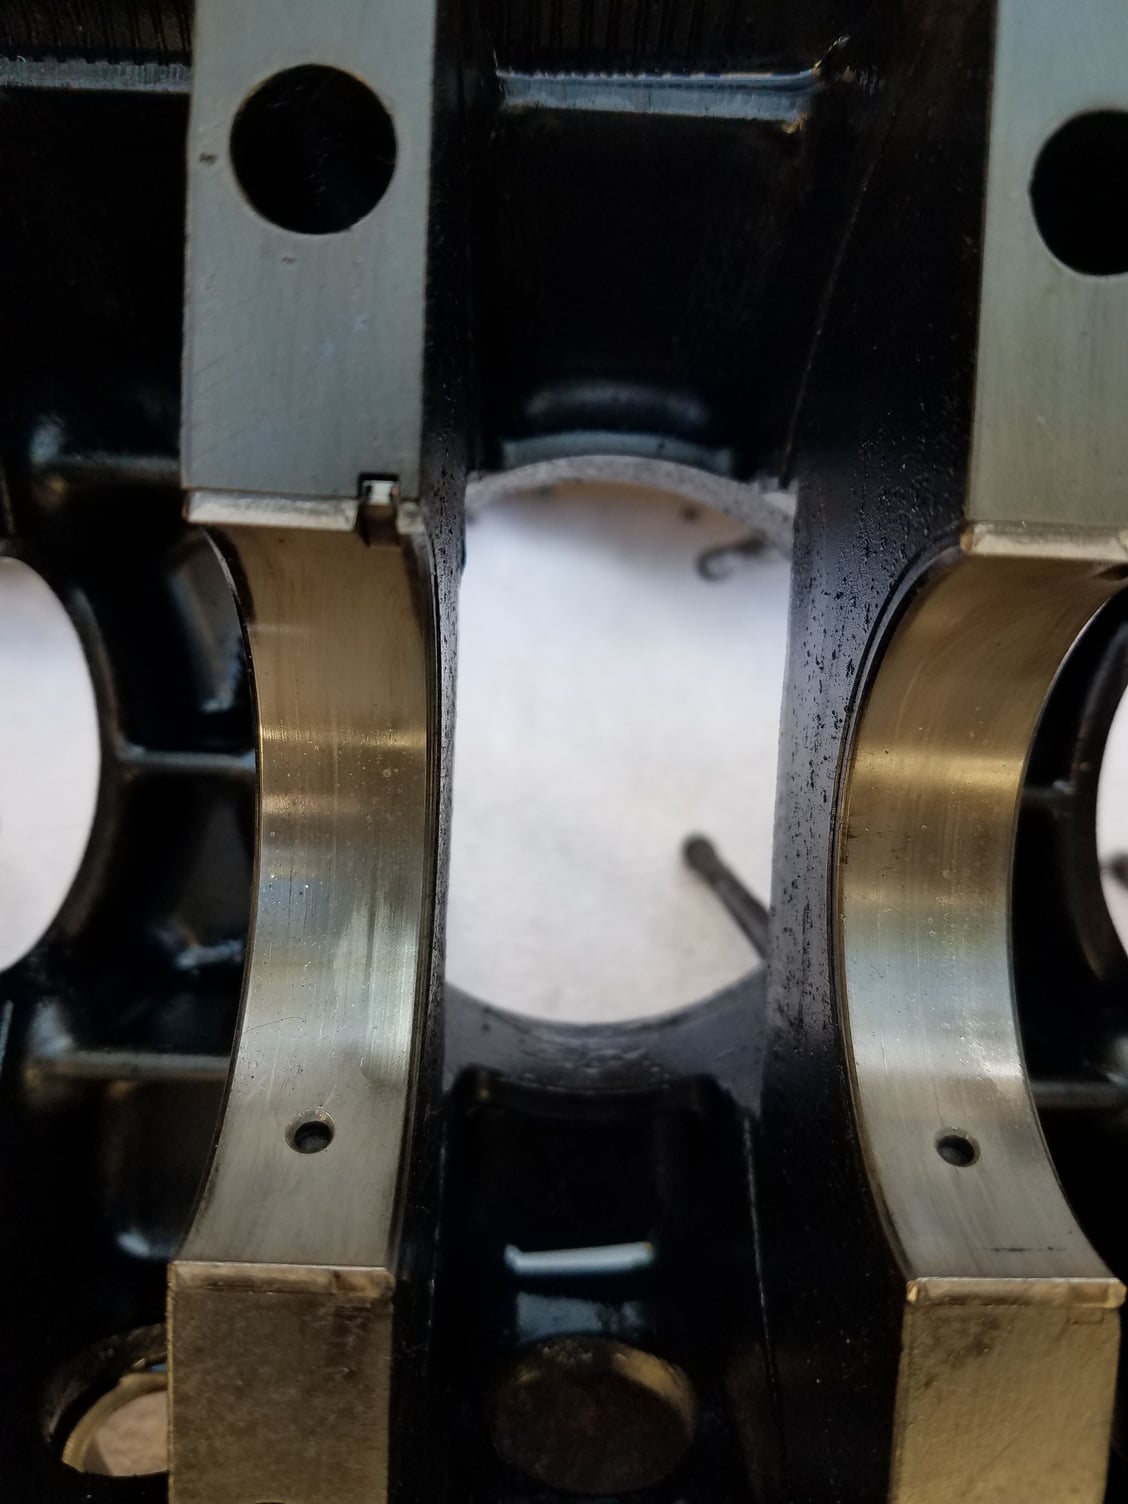
Case halves (3R/4R halves - I read this was typical in the early 2.4's and mine is very early), crankshaft, intermediate shaft with oil pump and timing chains.
Crankshaft bearings showing some wear. Some worse than others.
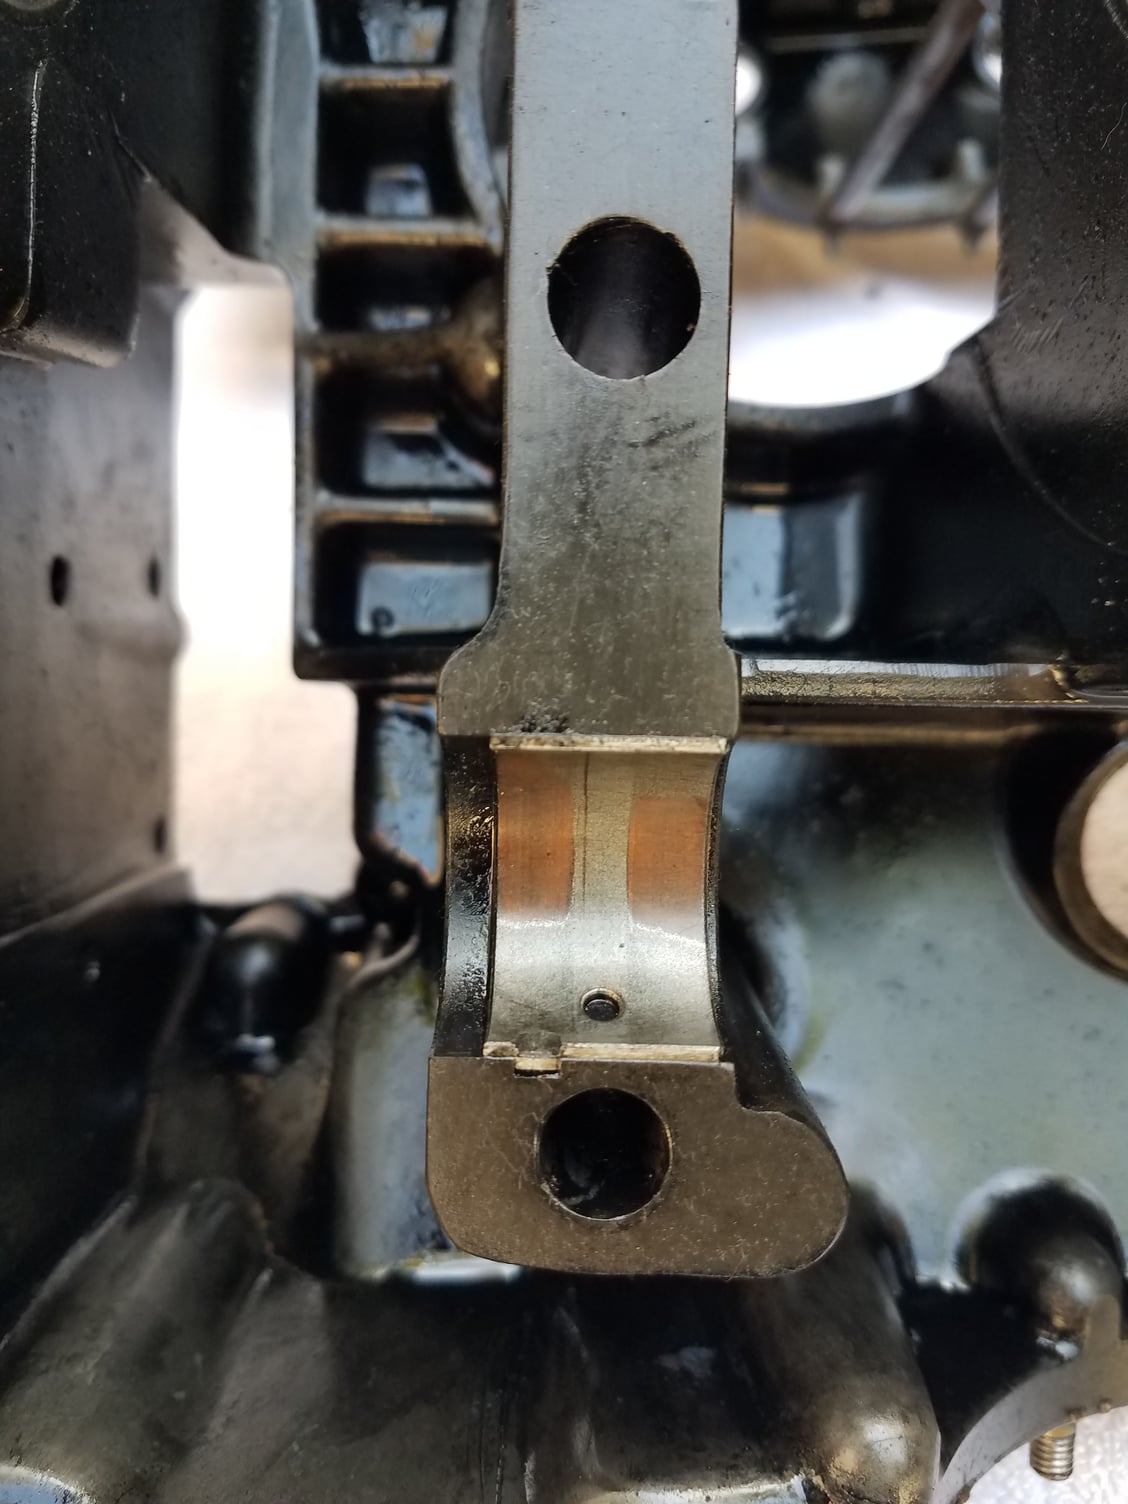
Intermediate shaft bearings are very worn - down to the copper on one.
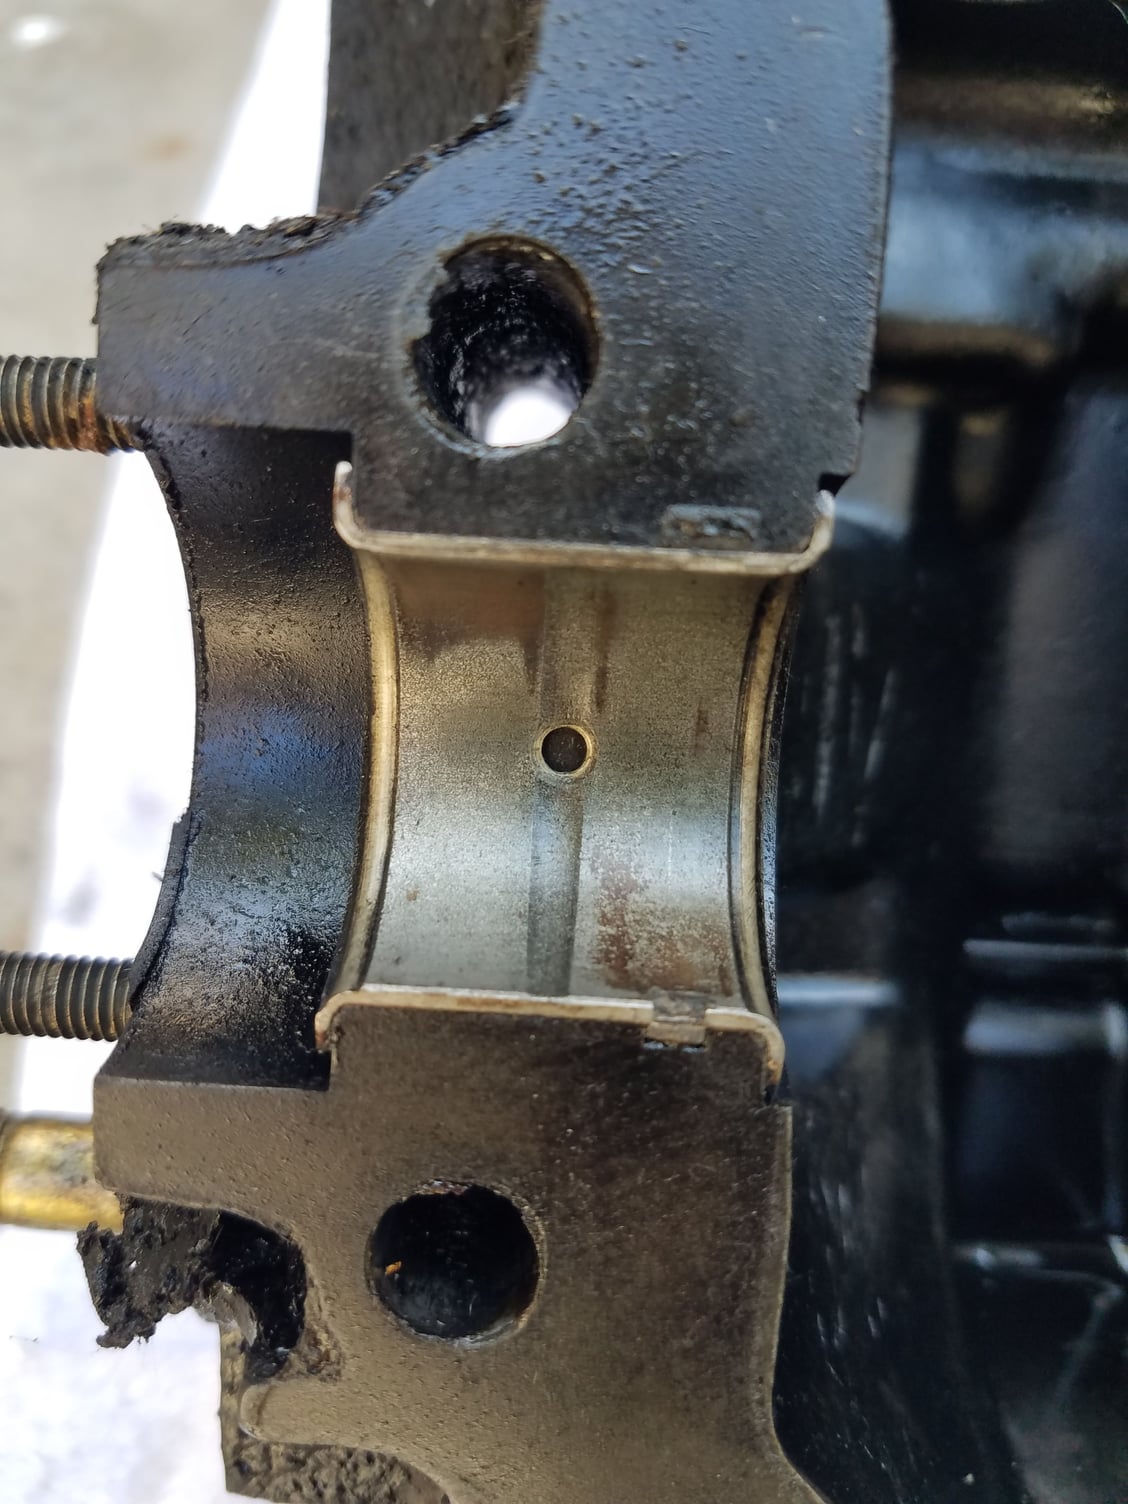
Crankshaft looks ok with a quick glance except for the end where the nose bearing rides. I will let Ollie's determine condition. May upgrade oil pump.


 08-27-2019 | 01:41 AM