When you click on links to various merchants on this site and make a purchase, this can result in this site earning a commission. Affiliate programs and affiliations include, but are not limited to, the eBay Partner Network.
Bill, FWIW, I gave the tube into cabin through the firewall a twist and pull but didn't see an obvious way to release it and since everything I do on my cars needs to 100% reversible I didn't try to hard for fear of breaking it, so... Although Dynamat will certainly cover the opening once the fitting was removed, the 1" expansion plug can be installed in less than a minute and provides a firm seal and is completely reversible in about the same amount of time.
From memory here... the fitting is at 3 o'clock, you will rotate clockwise to about 6 o'clock and it comes free from the firewall.
Last edited by HooosierDaddy; 07-21-2021 at 11:49 AM.
Looking to perform this DIY mod over next weekend. Would anyone be so kind to share a consensus summary of the steps to take and materials to be used please? That would be extremely appreciated. Thank you
Looking to perform this DIY mod over next weekend. Would anyone be so kind to share a consensus summary of the steps to take and materials to be used please? That would be extremely appreciated. Thank you
There are several ways to do and this thread is only 12 pages long so it is probably a good idea to read them since one method may better suit your skills. Personally, I will be doing the easiest one and plugging the hole!
Looking to perform this DIY mod over next weekend. Would anyone be so kind to share a consensus summary of the steps to take and materials to be used please? That would be extremely appreciated. Thank you
OK, I will skip the part where you have to gain open access to the engine compartment...
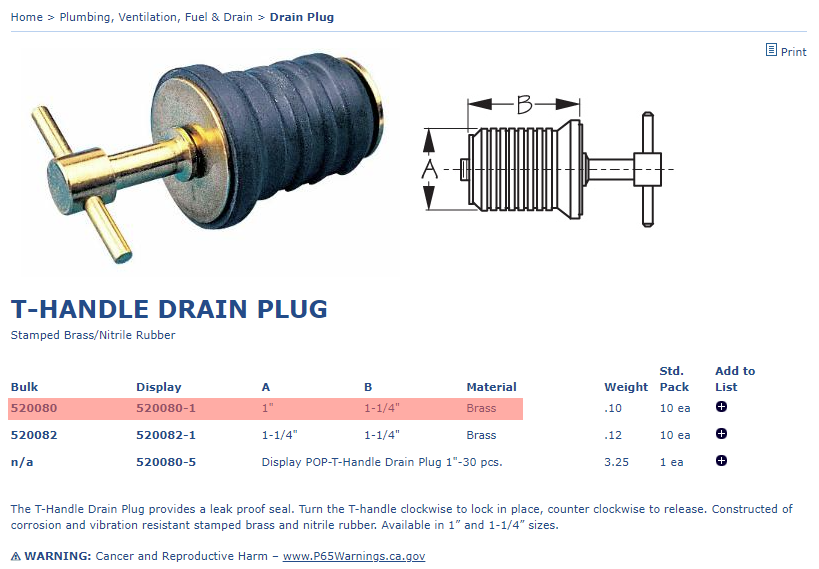
Once this is done locate the symposer tube, pull off the vacuum line from the vacuum valve at the end nearest the intake plenum (rear of engine) and seal it with the appropriate plug, then squeeze the ends to remove the symposer tube from the firewall connection and at the vacuum valve. At this point you can wrestle with the attachments that hold the tube to the bracket or simply remove the 2 Torx screws and remove the entire assemble (my choice). Next up is sealing the open ends left by the removal of the symposer tube, at the firewall you can remove the tube and seal the opening with Dynamat or what some of us did was to leave that fitting in place end seal the tube with a 1" (25.4mm) plug (520080-1), the end nearest the plenum will require the same size so going this route requires 2 plugs. Here is what I used: Sea-Dog : Quality Marine, Industrial and Rigging Hardware
OK, I will skip the part where you have to gain open access to the engine compartment...
Once this is done locate the symposer tube, pull off the vacuum line from the vacuum valve at the end nearest the intake plenum (rear of engine) and seal it with the appropriate plug, then squeeze the ends to remove the symposer tube from the firewall connection and at the vacuum valve. At this point you can wrestle with the attachments that hold the tube to the bracket or simply remove the 2 Torx screws and remove the entire assemble (my choice). Next up is sealing the open ends left by the removal of the symposer tube, at the firewall you can remove the tube and seal the opening with Dynamat or what some of us did was to leave that fitting in place end seal the tube with a 1" (25.4mm) plug (520080-1), the end nearest the plenum will require the same size so going this route requires 2 plugs. Here is what I used: Sea-Dog : Quality Marine, Industrial and Rigging Hardware
Thank you very much sir! When you say "pull off the vacuum line from the vacuum valve at the end nearest the intake plenum (rear of engine) and seal it with the appropriate plug", this plug is one of the 2 you mention?
Thank you very much sir! When you say "pull off the vacuum line from the vacuum valve at the end nearest the intake plenum (rear of engine) and seal it with the appropriate plug", this plug is one of the 2 you mention?
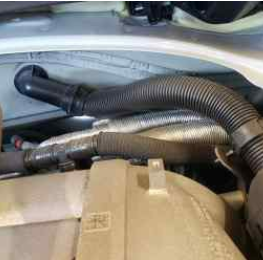
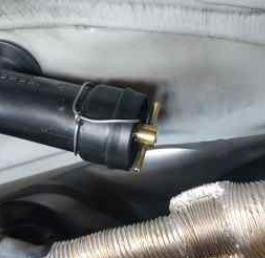
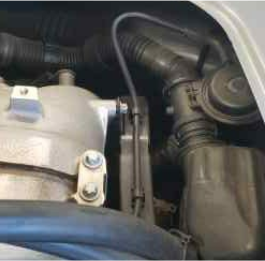
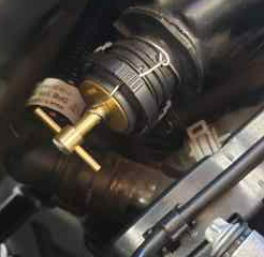
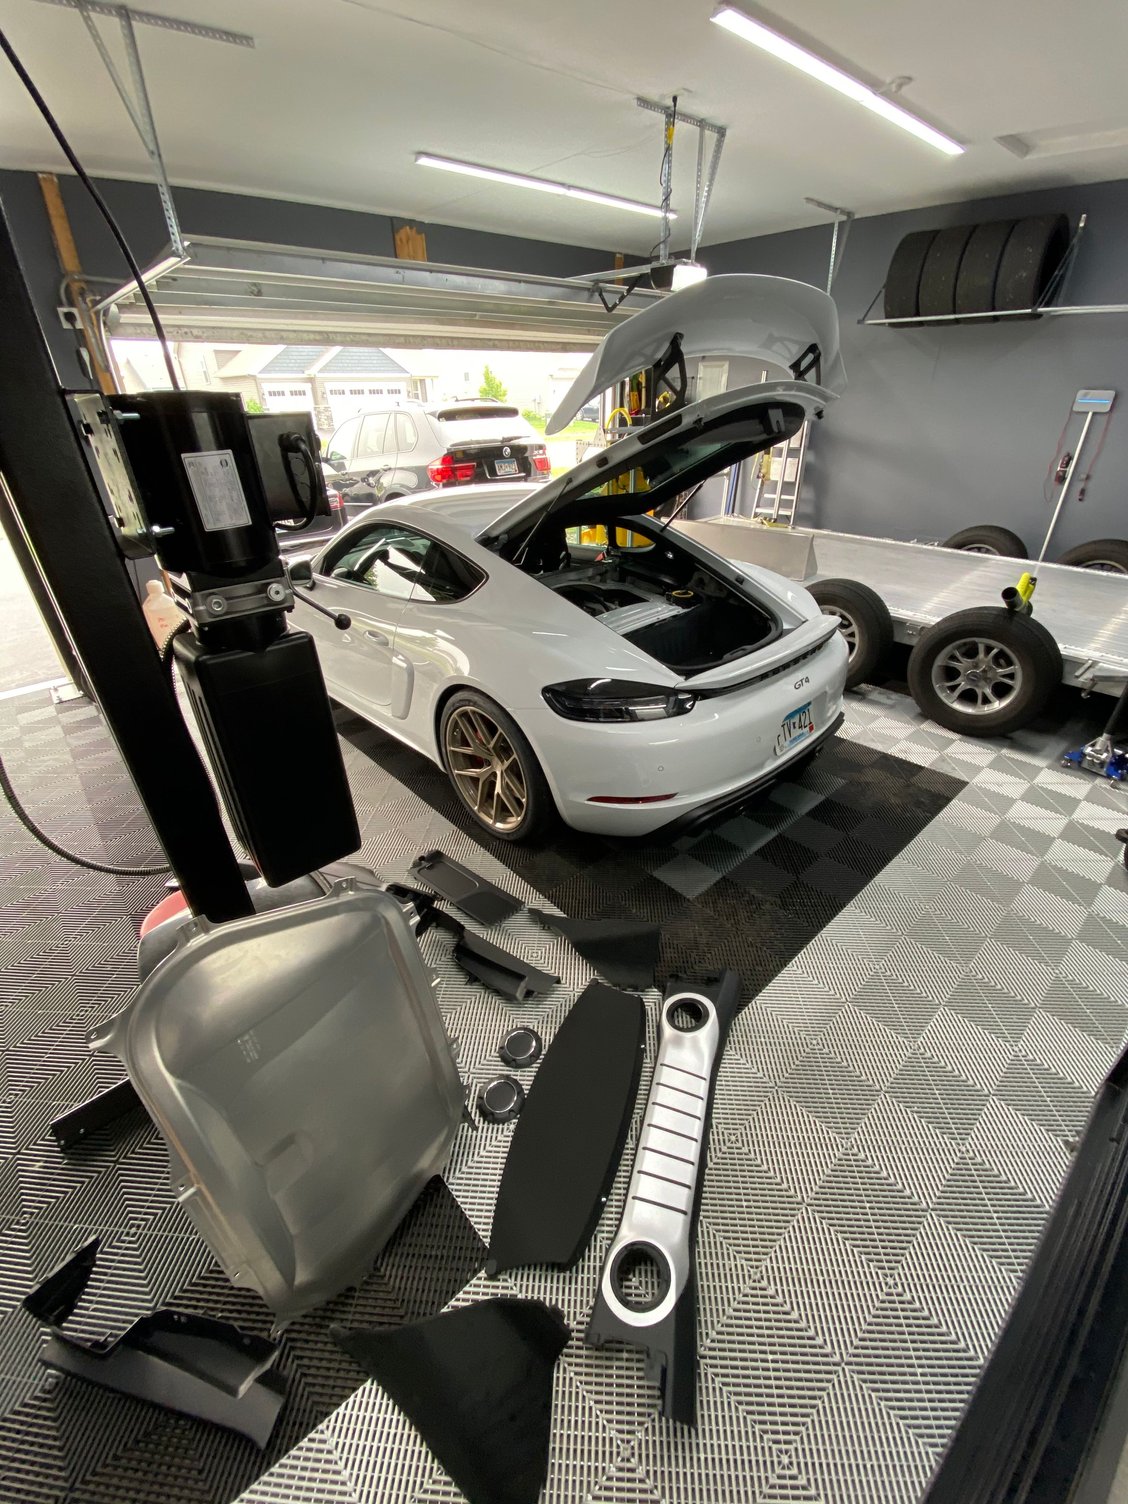
No, the 2 1" (25.4mm) plugs are to seal the symposer tube itself... The sound symposer is controlled by the ECU and a vacuum line attached to a valve assembly, this is the line I am referring to. In the pictures below I indicate the valve assembly and the line you need to pull off and plug, it is about 5/32" (4mm) internal diameter. The mounting bolts are Torx T30.
Intake end of sound symposer showing vacuum line to be removed. plugged vacuum line. symposer assembly, note metal bracket held on by 2 x T30 bolts.
No, the 2 1" (25.4mm) plugs are to seal the symposer tube itself... The sound symposer is controlled by the ECU and a vacuum line attached to a valve assembly, this is the line I am referring to. In the pictures below I indicate the valve assembly and the line you need to pull off and plug, it is about 5/32" (4mm) internal diameter. The mounting bolts are Torx T30.
Intake end of sound symposer showing vacuum line to be removed.
plugged vacuum line.
symposer assembly, note metal bracket held on by 2 x T30 bolts.
Great thread! Thanks for details and updates. As drone is different to each of us, I have been reading this thread knowing my full exhaust was inbound. Was planning to revisit this thread with future intentions of doing many of these things.
My race headers w/out cats, OAP�s, and VALVED Exhaust were installed today. For me, I couldn�t fault SOUL for any drone. Maybe on Decel after a spirited run, but it�s more audio sound than drone. Windows up, trying to induce drone is hardly noticeable. Again, it�s more audio note than drone. No boomyness in my set up. Pretty cool with race headers and no cats. OAP�s, and valved exhaust in full open.
For me, a GT car is a weekend toy and needs to sound proper. Near perfection in my book. I won�t be addressing any of the suspected drone issues. My system combo seems to be spot on.
Sorry if I missed it, but what did you use to plug this line?
I had planned on using a piece of solid foam cording (used for holding in screen mesh for house windows) but remembered that I had the two rubber pins that came in the box holding my CTEK charger in place, they are the perfect size and have a flat head at one end.
As a substitute I would recommend any firm rubber cylinder around 4mm in diameter that provides a pressed in fit, I also used a tiny zip tie just to give a little squeeze ensuring a total seal.

 07-21-2021, 11:48 AM