When you click on links to various merchants on this site and make a purchase, this can result in this site earning a commission. Affiliate programs and affiliations include, but are not limited to, the eBay Partner Network.
If I did this again, I�d lay down three layers of masking tape along the front (door side) edge on the paint, as close to the trim as possible.
Then I�d mark off the tab locations with a small piece of tape on the trim piece and add a sharpie marker line at the 4.75, 8 and 13 inch center locations
(use a square to touch the very bottom of the trim piece and then up the front side to mark the dimensions).
Then I�d get some kind of paperboard like a shoebox, beer cartons, tp rolls, whatever, to help cushion the paint. Double it up to be about a 16th thick. Tape together if needed.
If you�re using a knife like I did, add tape to the backside. If it�s a plastic tool, hopefully it�s sharp enough to start the �pry� to get between and lift the trim piece.
Once you�re in, try to pry open to add more paperboard to hold it open above and below the tab center marks, start with the 4.75 tab.
Then, gently insert a tool, also protected with paperboard on the paint side to press that tab towards the back, �popping� it. You�ll hear it pop.
Then up to the next two using the same process, the top tab should be the easiest to pop. Make sure that you�re holding the trim piece at this point since it could go flying.
Clean the area well, remove the tape, insert grills and then press on the trim piece, going �around the clock� to make all the tabs click tight.
I rekon the mistake being made by those struggling to pop these off is that your are trying to pry before locating the clip. You need to locate and release the clip with the pry tool, then pull the cover outwards.
Well, I got it done on my MY22 Spyder this afternoon, but not without some hiccups. My first mistake was that I incorrectly recalled the video...and tried to get the trim pieces off from the rear rather than the front. This is not a good idea, and I have a small indentation that will remind me every time I wash the car. Fortunately, it will only be noticeable by me. Anyhoo, I rewatched the video, looked at the pics again, and started anew, this time starting at the front edge. I used plastic interior trim tools, which worked great, to "wedge" between the trim piece and the body panel at the bottom, then I gently slid the tool upwards until I found the lowest clip. Popped that one with a second plastic tool, no problem - I got this!! Located clip #2 and popped that one no problem too.... Then I moved onto clip three, which for me was a bear, but I eventually got it.
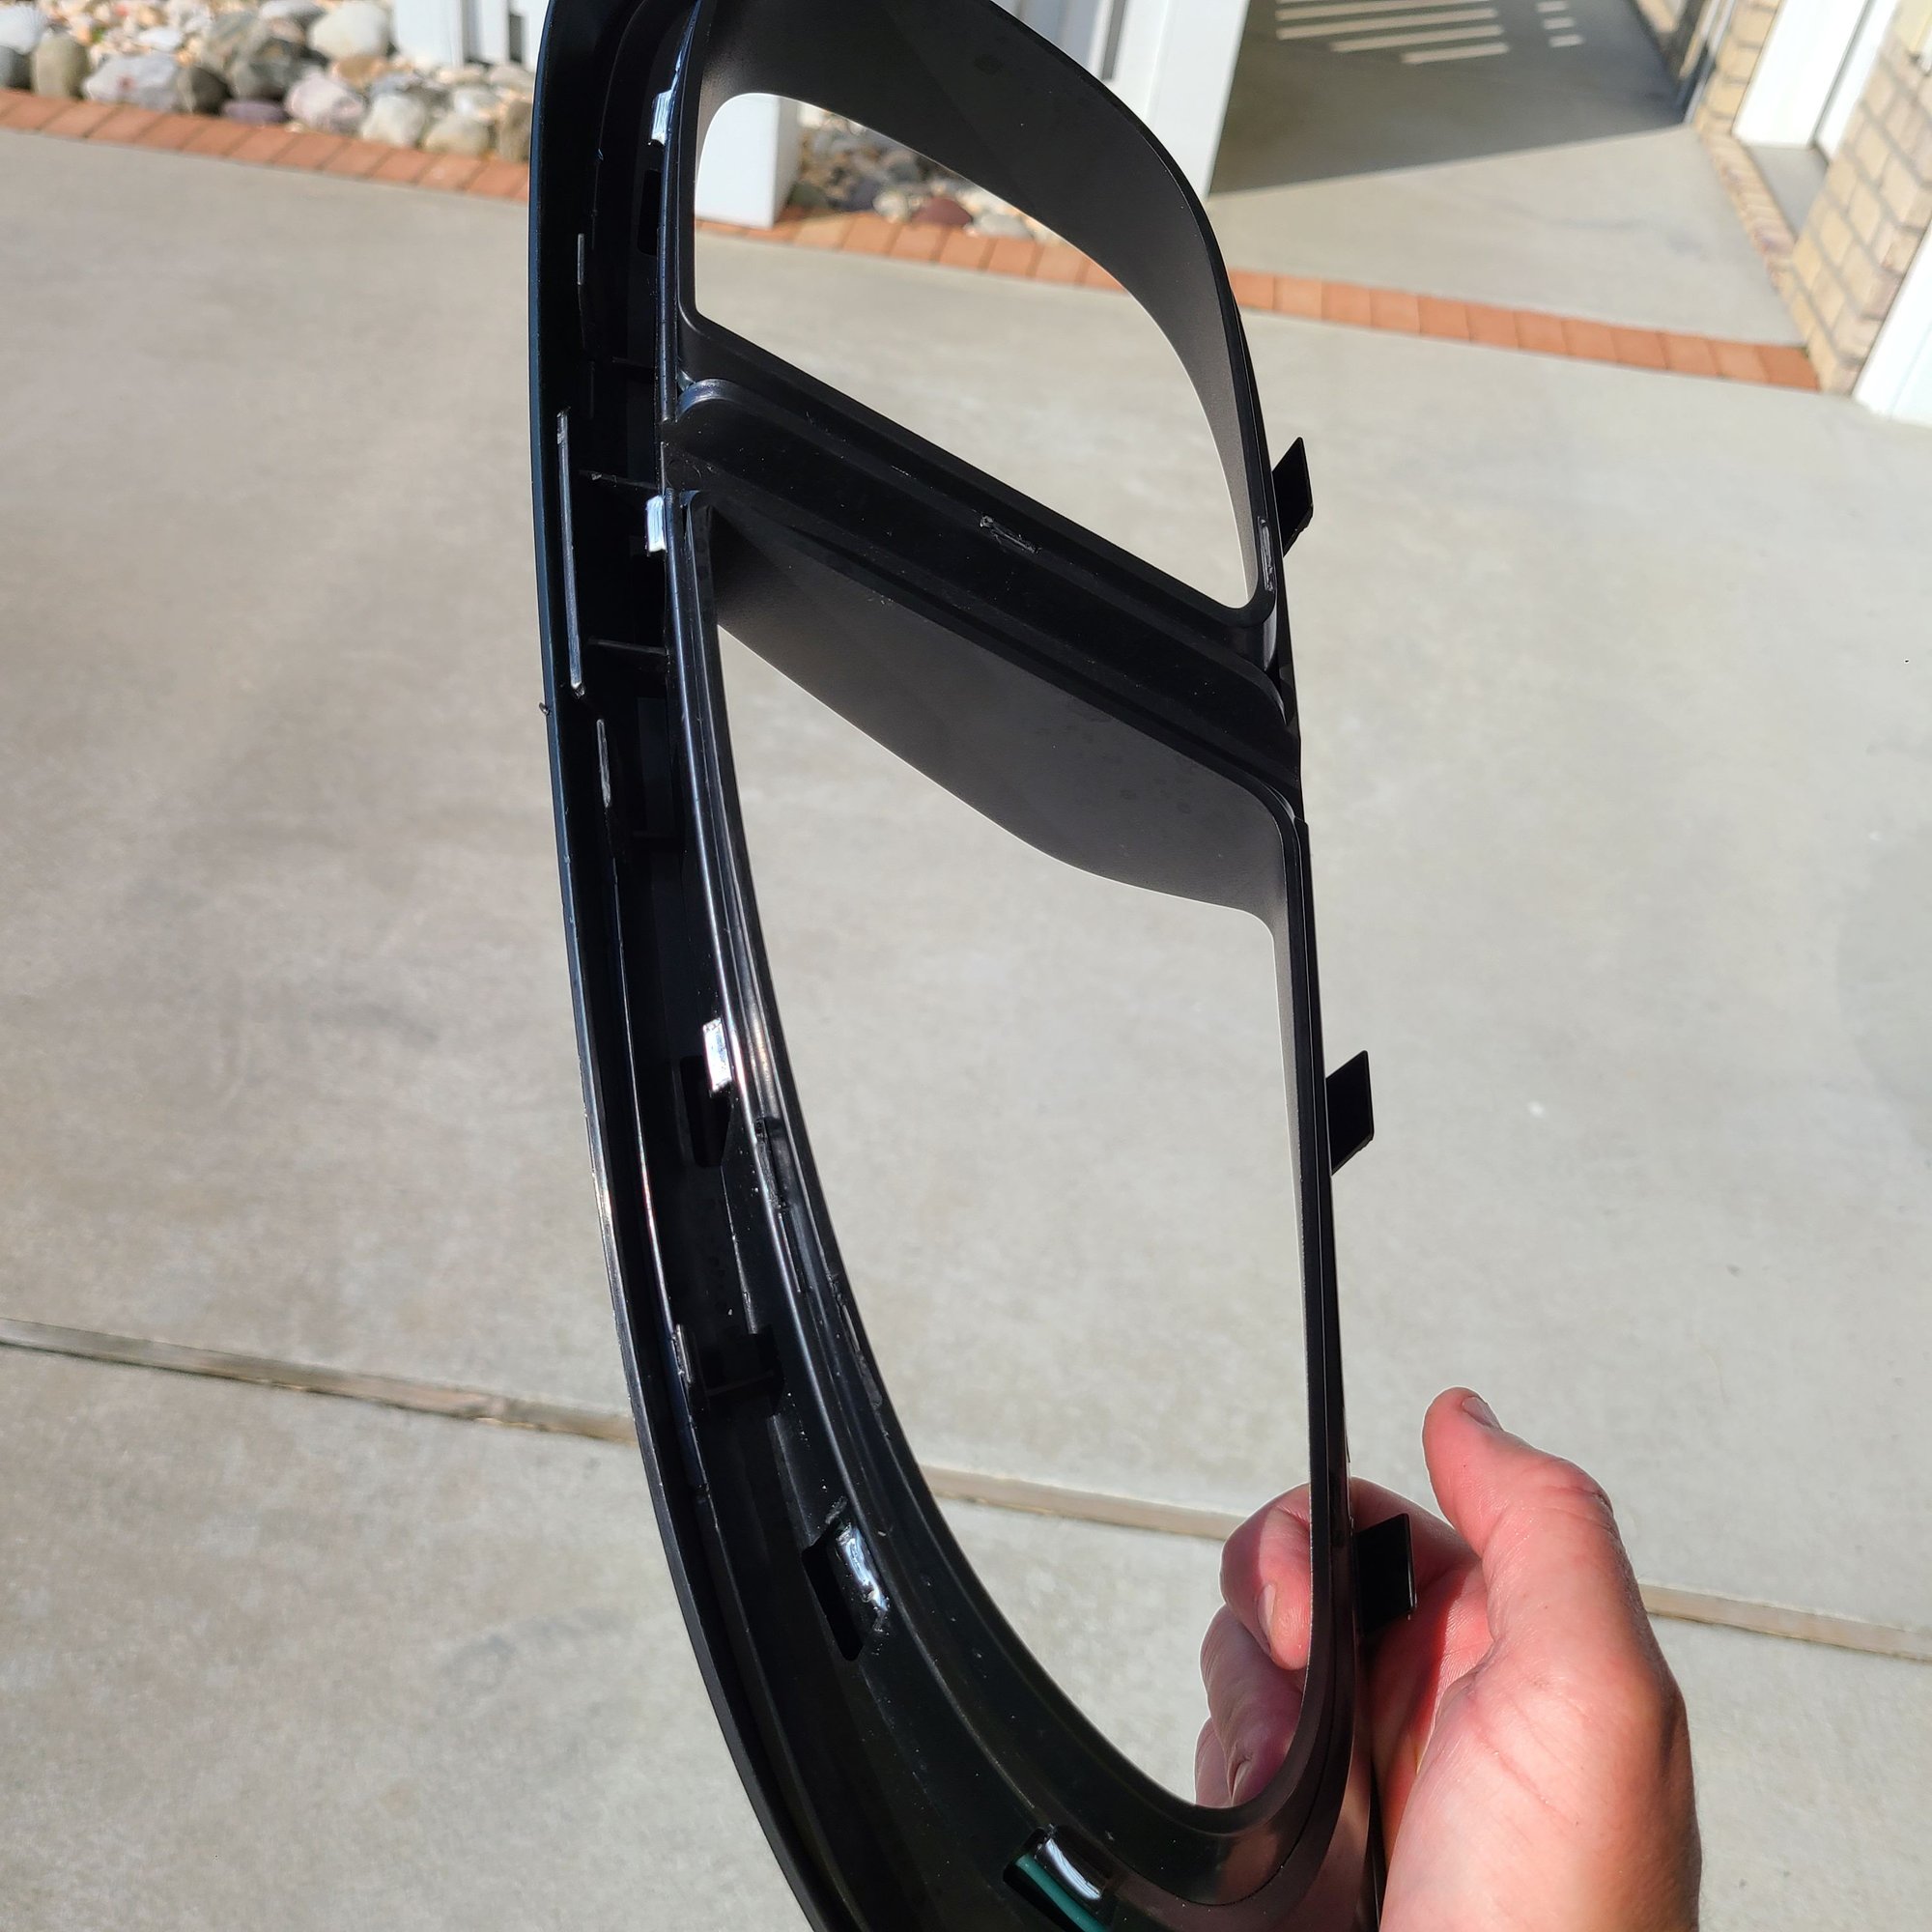
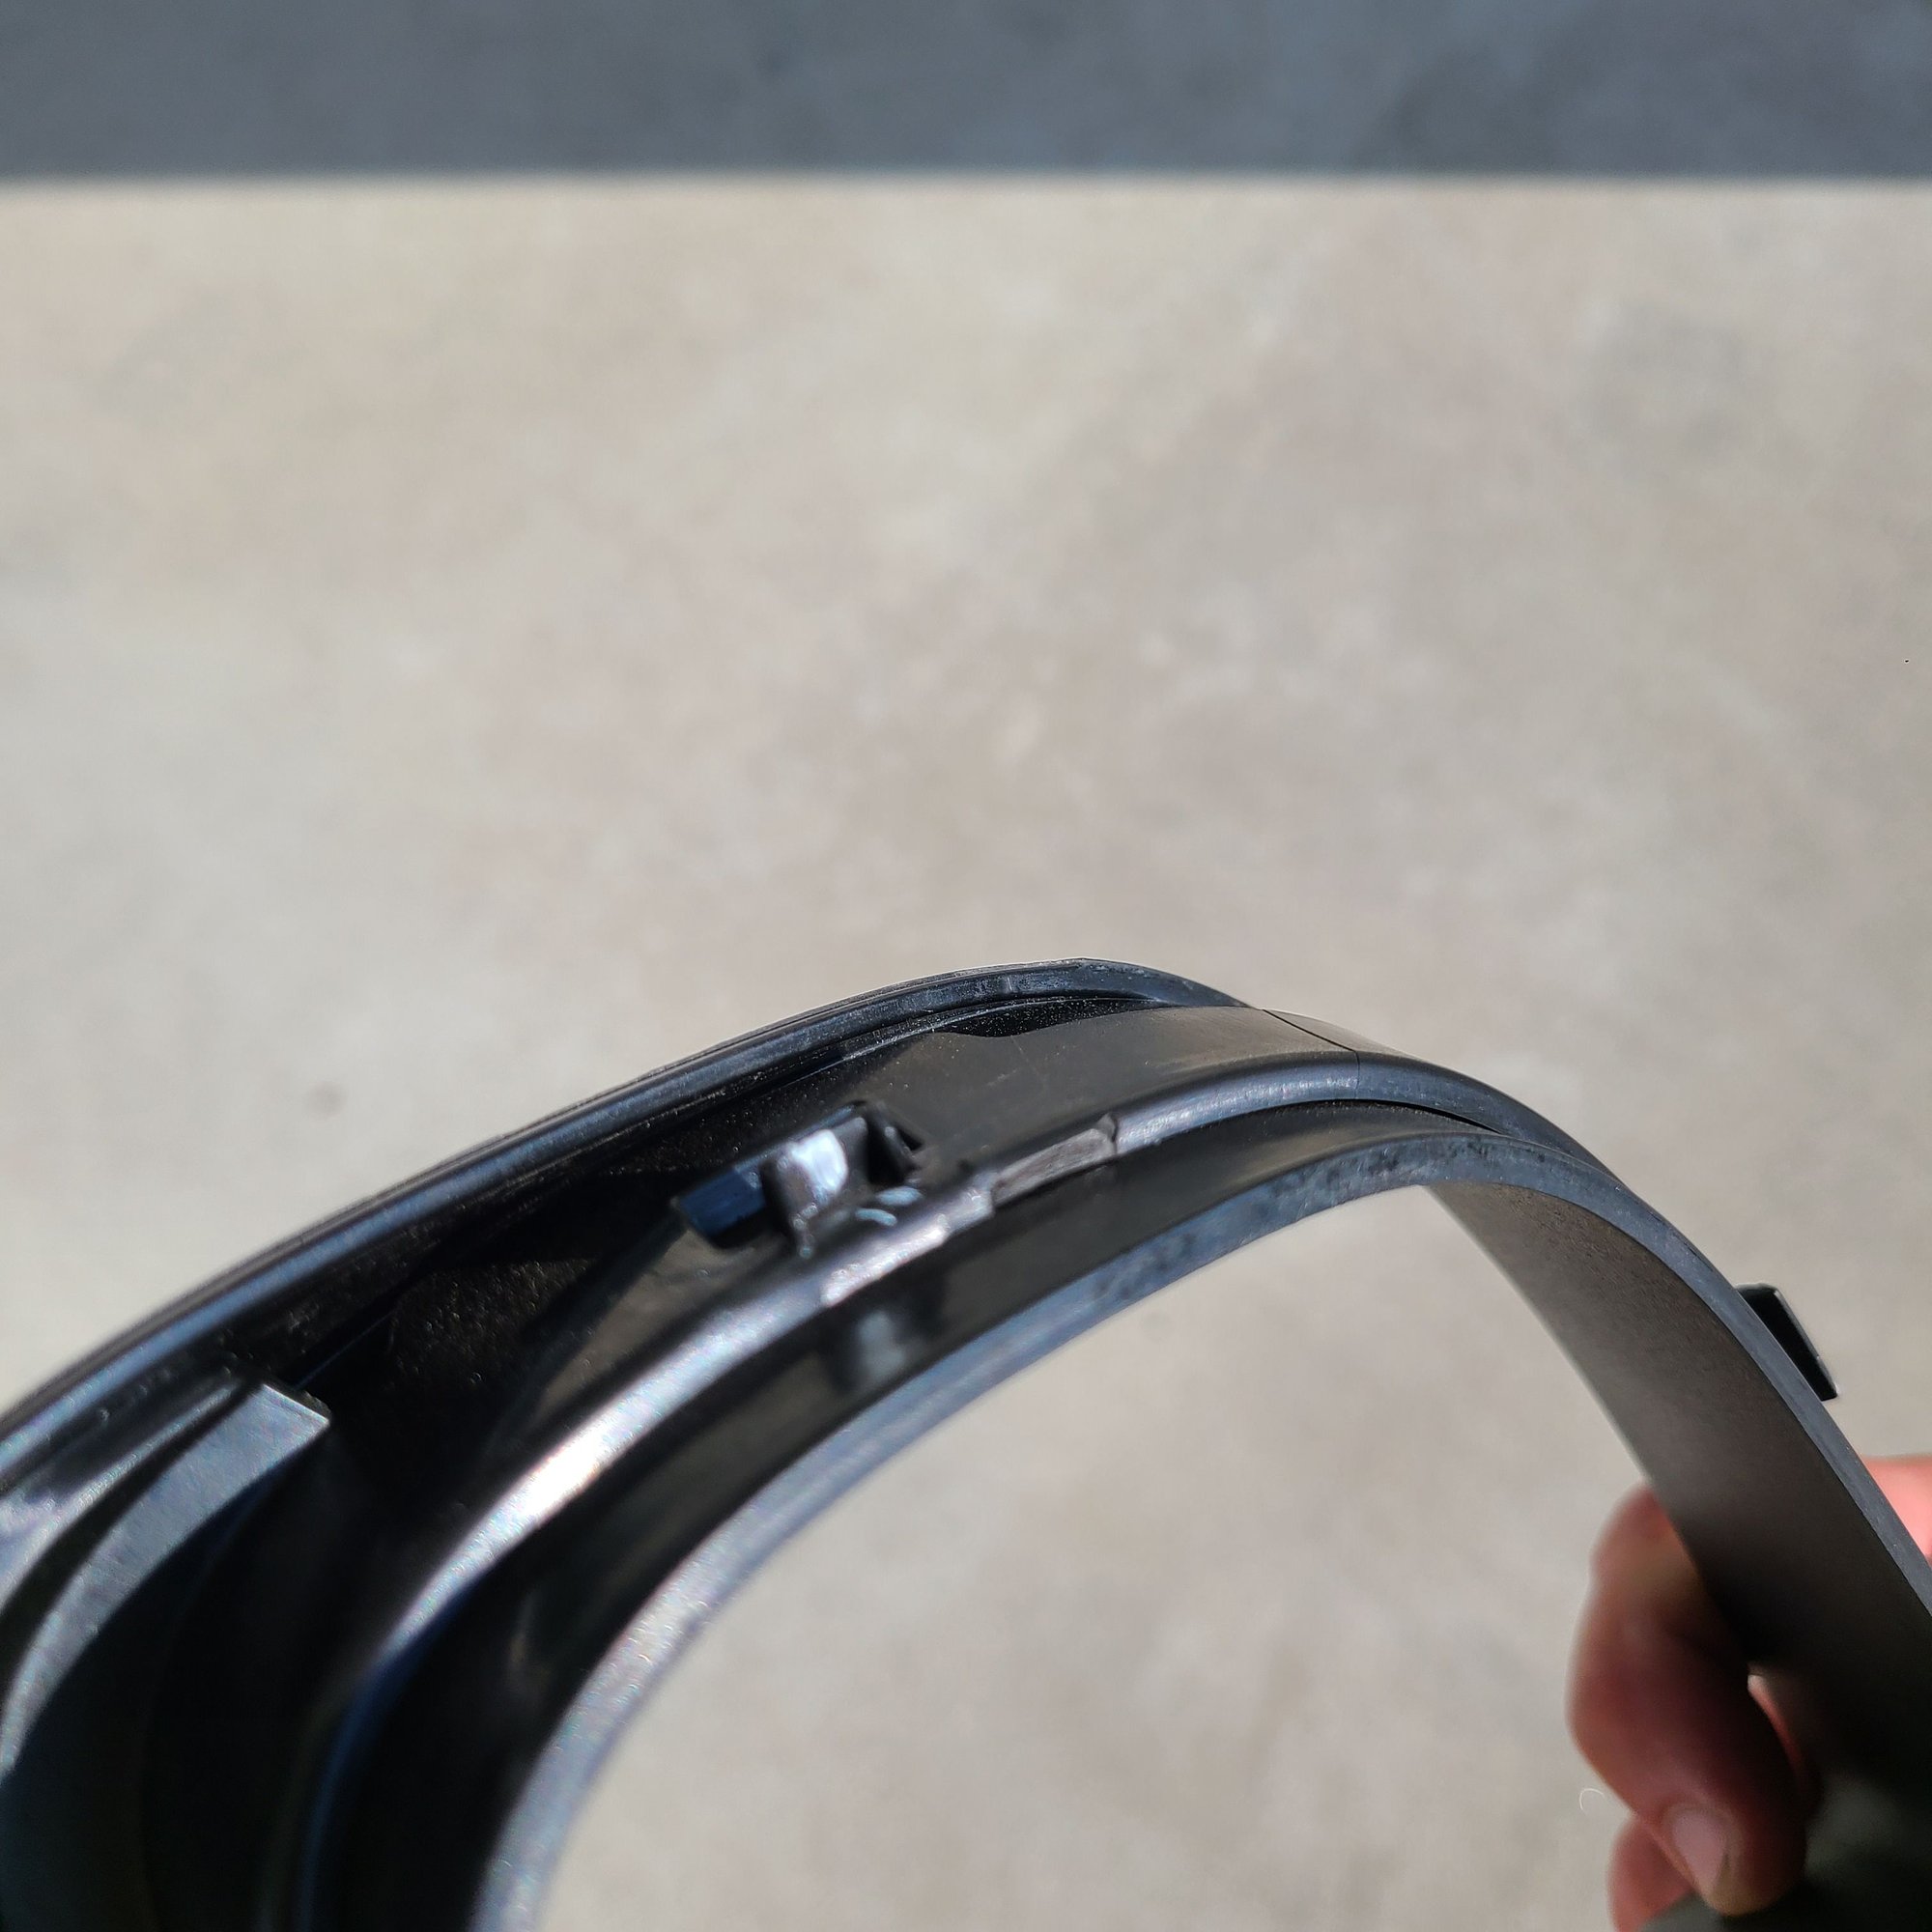
Thinking the hardest part was behind me, I tried to remove the trim....and nada, it was NOT coming out without a fight. It was definitely loose, the clips were definitely "unclipped" but as I tried to finagle the piece out, the body panel pulled right along with it. WTF!!!? I worked on it for a while, then finally it broke free. Upon examination, here is what I found: Yes there are three clips along the front edge, but my car also had a small tab at top and one at bottom along with five (I expected 3) along the rear edge. All of these were attached to the body panel with either a white glue, or paint ( my car is white). I had to break all those points of attachment, then the piece removed easily. I installed the grills and found that I had to bend them slightly to fit properly. Not an issue, I just expected that they would fit perfect outta the box. They look great and OEM - highly recommend them!!
Here are a couple pics of the trim piece showing all the tabs and clips (sorry for the size of them):
The 5 tabs along the rear and 3 clips at front edge:
Well, I got it done on my MY22 Spyder this afternoon, but not without some hiccups. My first mistake was that I incorrectly recalled the video...and tried to get the trim pieces off from the rear rather than the front. This is not a good idea, and I have a small indentation that will remind me every time I wash the car. Fortunately, it will only be noticeable by me. Anyhoo, I rewatched the video, looked at the pics again, and started anew, this time starting at the front edge. I used plastic interior trim tools, which worked great, to "wedge" between the trim piece and the body panel at the bottom, then I gently slid the tool upwards until I found the lowest clip. Popped that one with a second plastic tool, no problem - I got this!! Located clip #2 and popped that one no problem too.... Then I moved onto clip three, which for me was a bear, but I eventually got it.
Thinking the hardest part was behind me, I tried to remove the trim....and nada, it was NOT coming out without a fight. It was definitely loose, the clips were definitely "unclipped" but as I tried to finagle the piece out, the body panel pulled right along with it. WTF!!!? I worked on it for a while, then finally it broke free. Upon examination, here is what I found: Yes there are three clips along the front edge, but my car also had a small tab at top and one at bottom along with five (I expected 3) along the rear edge. All of these were attached to the body panel with either a white glue, or paint ( my car is white). I had to break all those points of attachment, then the piece removed easily. I installed the grills and found that I had to bend them slightly to fit properly. Not an issue, I just expected that they would fit perfect outta the box. They look great and OEM - highly recommend them!!
Here are a couple pics of the trim piece showing all the tabs and clips (sorry for the size of them):
The 5 tabs along the rear and 3 clips at front edge:
The top tab:
Thank you for posting your experience and helpful tips! Any shots of the grilles installed?
My first attempt to install these was a failure - I just couldn't get the side grill off, and I didn't want to damage the car or the paint.
I did find another video showing the removal, but the camera is in the way for the most important part of the process (the start) and it's in Japanese. YouTube will translate the audio into English if you turn that setting on, but trust me, there is nothing to be gained from reading the translation:
I may give it another shot this weekend, but I've got this "Do No Harm" rule with my cars when doing mods, and this is starting to feel too risky to me. I've got a couple sets of plastic trim removal tools, but it feels like a thin spackle knife might be required to pry the grill out and get things started. But metal and paint do not mix well, even with 3-4 layers of protective tape.
The worst case is to take it to your dealer and have them pop them off while you wait, pay them 1/2 hour of labor and finish the job in your garage, with a beer of course.


 09-27-2021 | 10:13 PM