When you click on links to various merchants on this site and make a purchase, this can result in this site earning a commission. Affiliate programs and affiliations include, but are not limited to, the eBay Partner Network.
I got mine yesterday so I'll take some pics of my install.
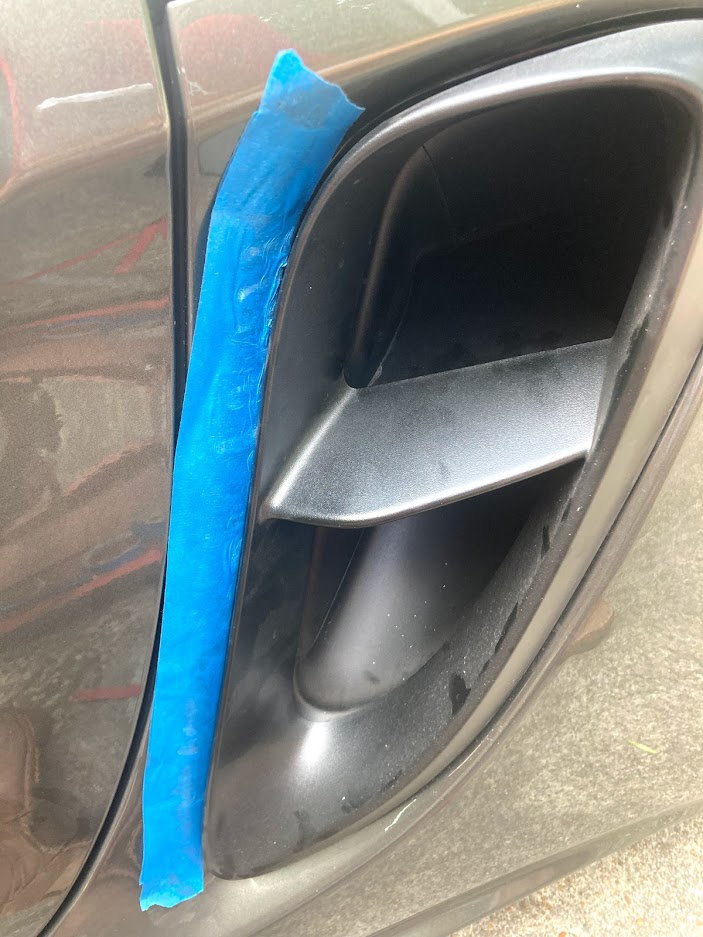
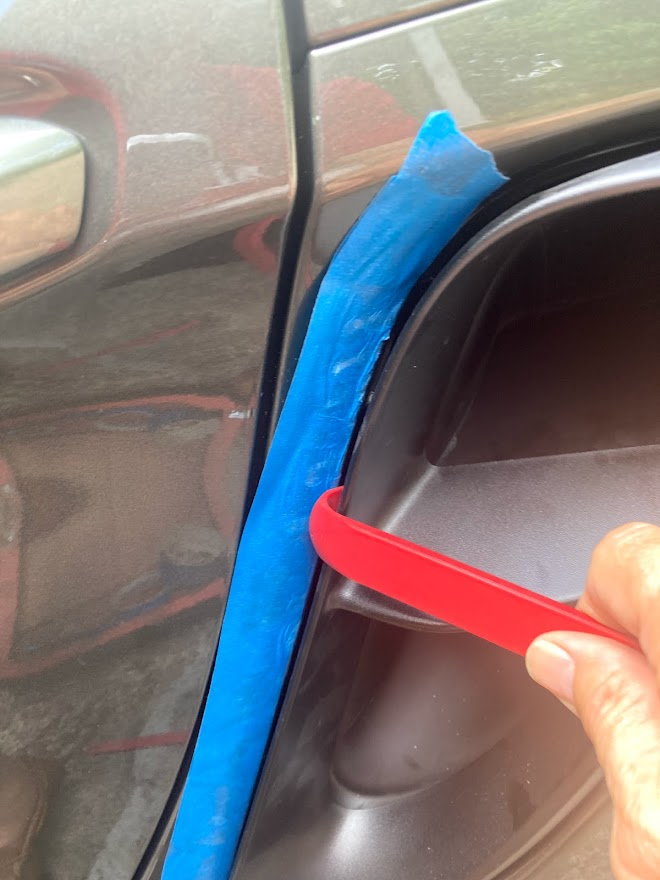
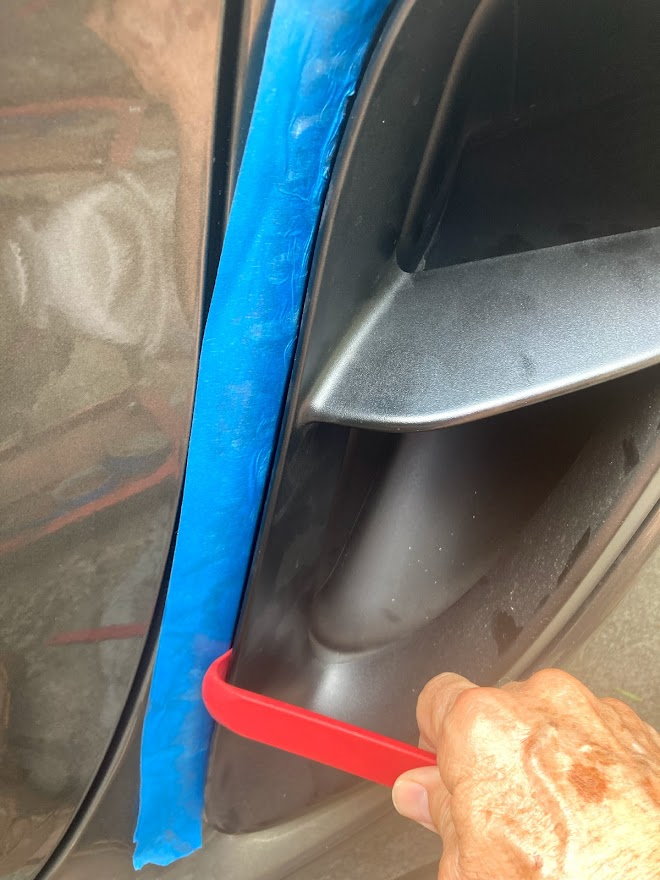
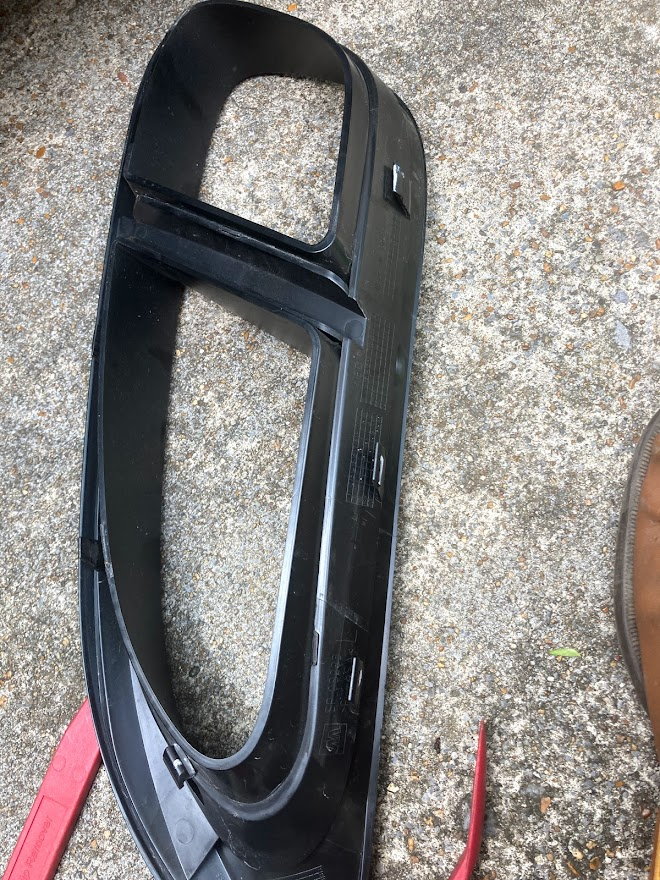
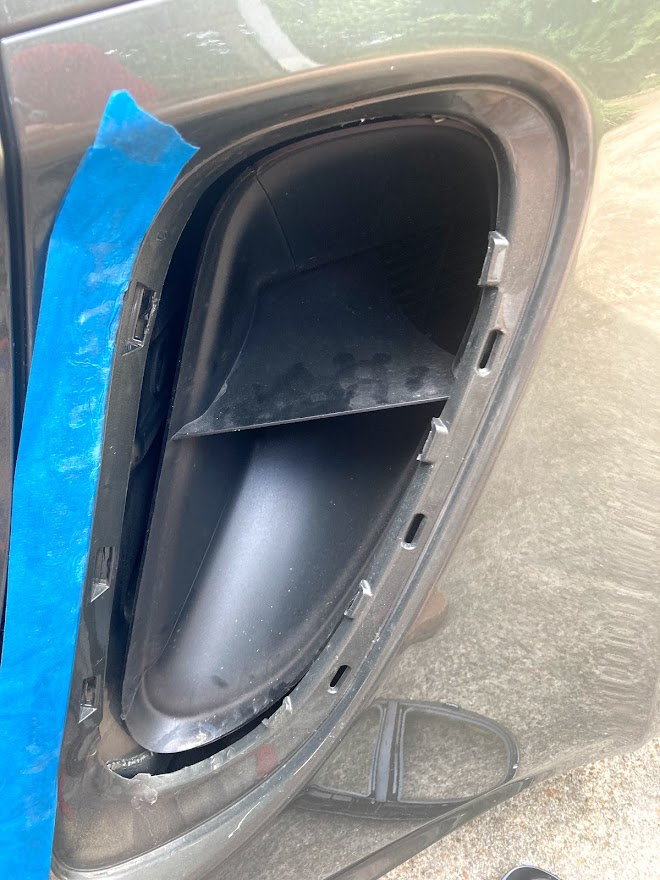
I decided to do the install today since it was so cool in the garage (Not!) It really is just like the YouTube shows, getting the trim piece to release is the hardest part and it just takes some patience and persistence. Having the right tools helps course, and if you own a 718 (or 981 or 987) you need a set of trim removal tools anyway. I took the time to clean the inside of the intakes as well as the trim pieces before reassembling them. Tip: slide the grill forward (toward the front of the car) as far as possible for a good fit. I probably should have taken more pics as I went a long but it goes so quickly I was finished before I knew it.
I also ordered from RGS, and I�m very happy with them. The installation is not for the timid though�
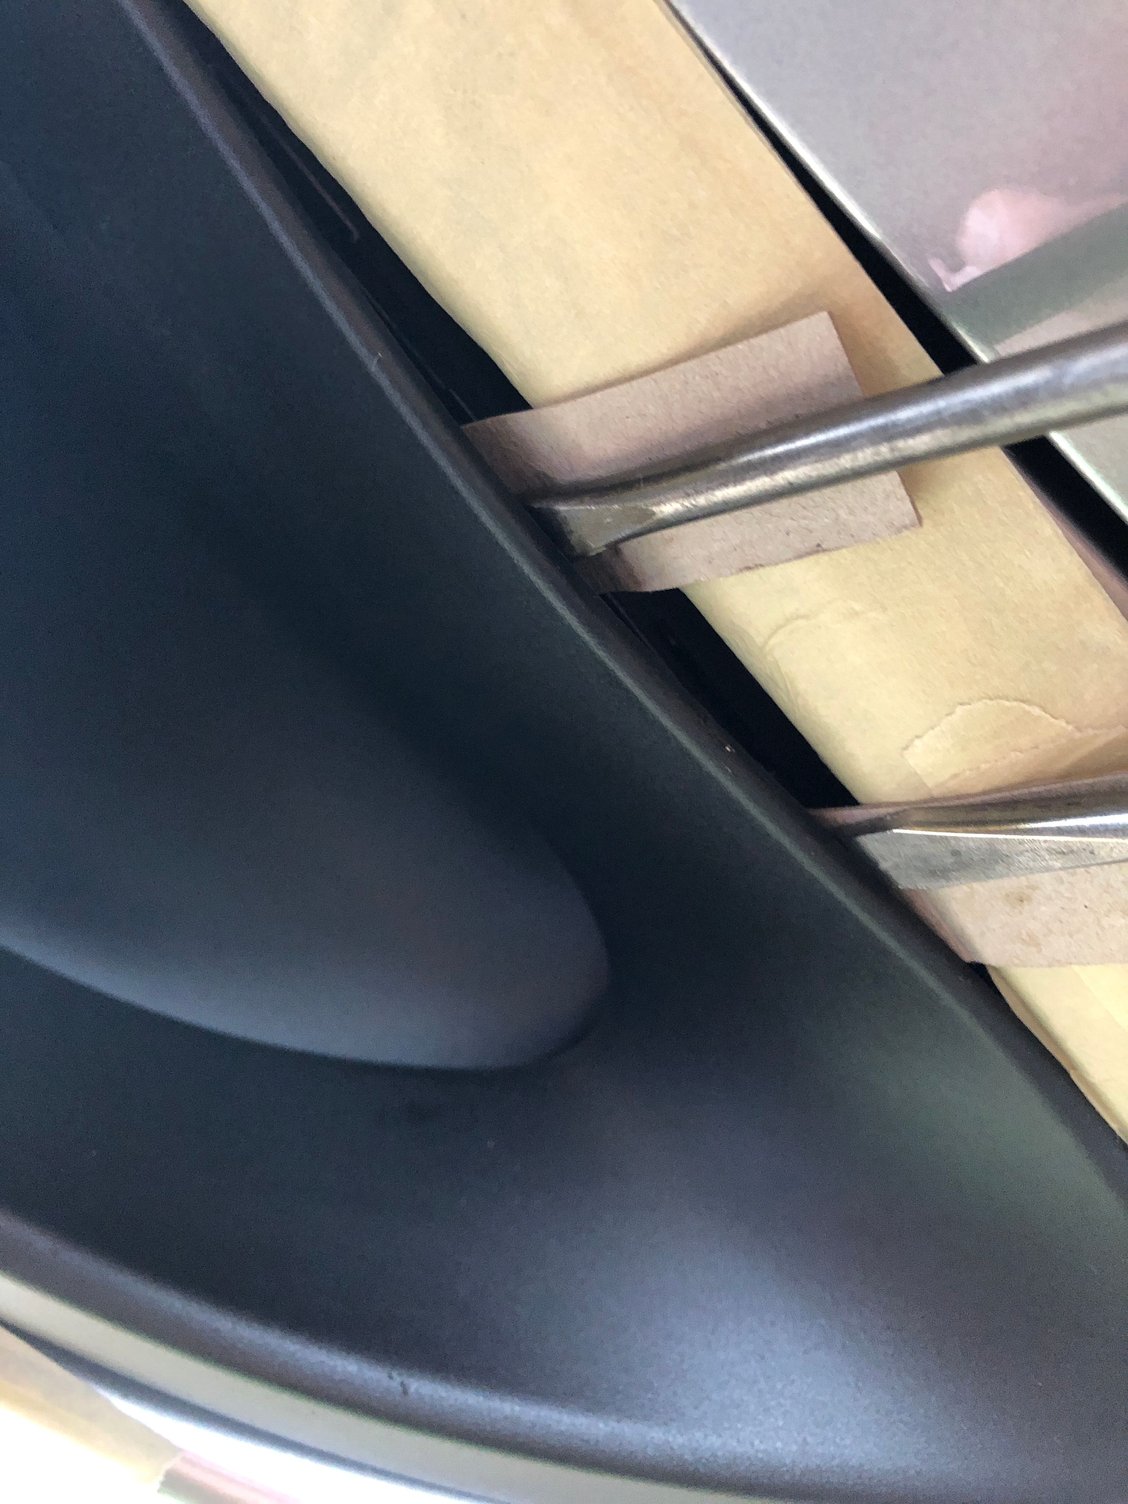
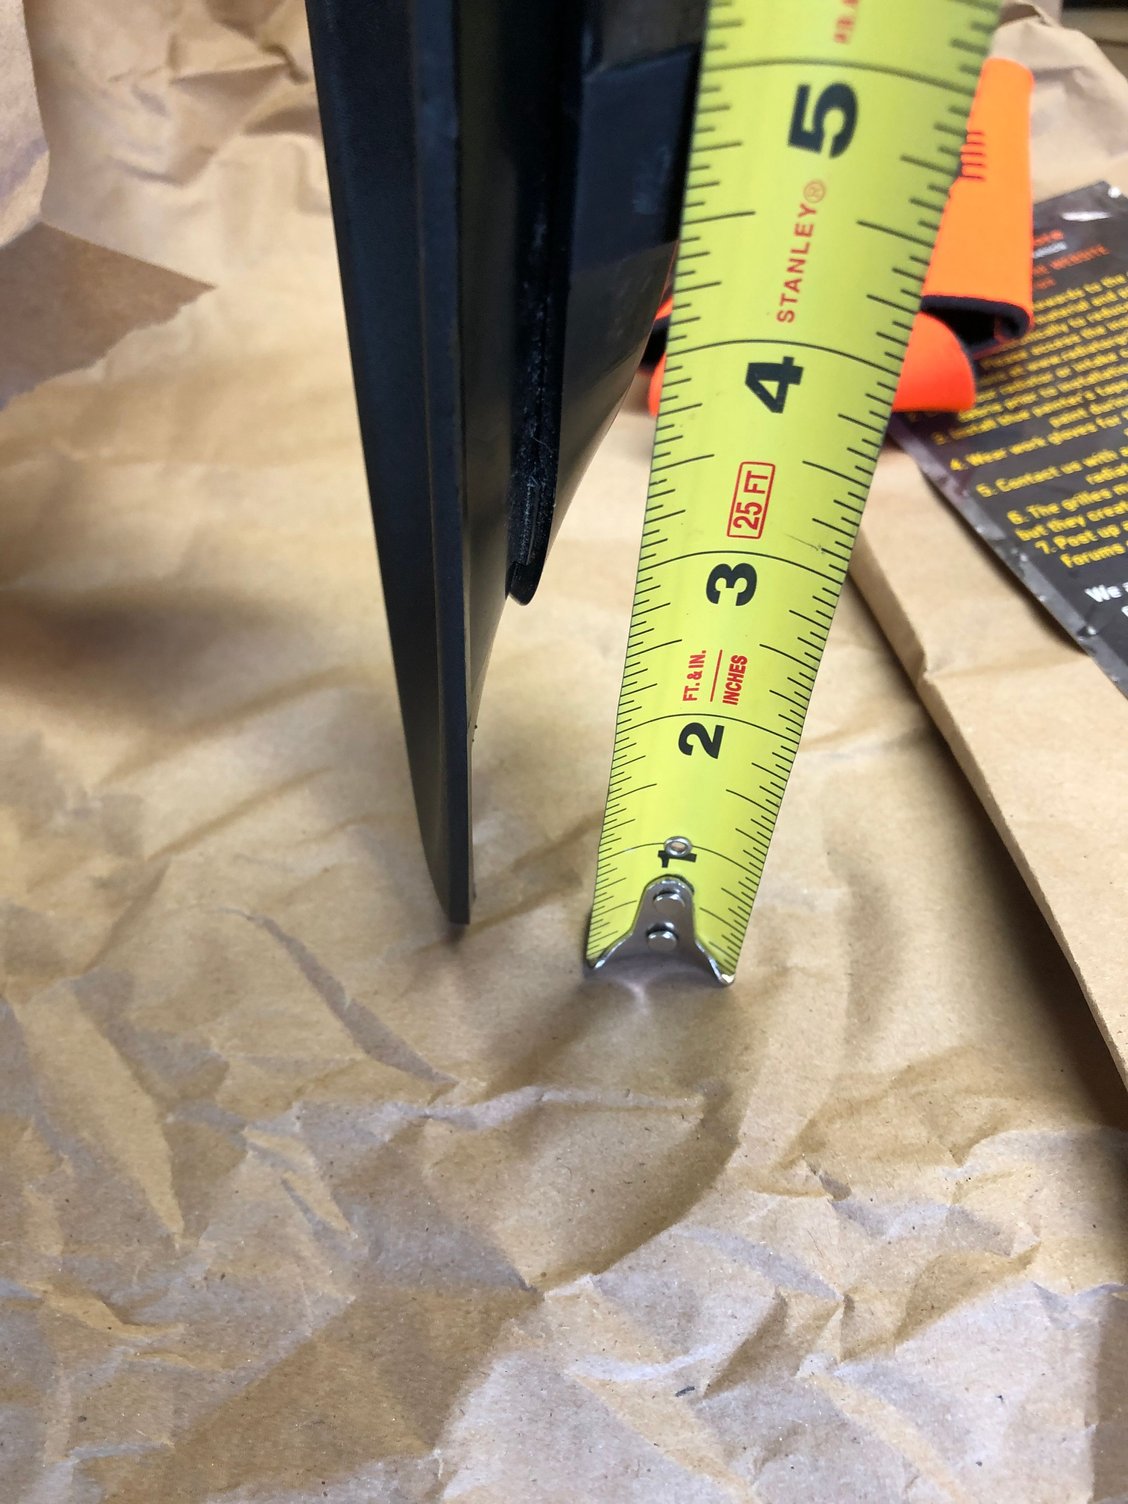
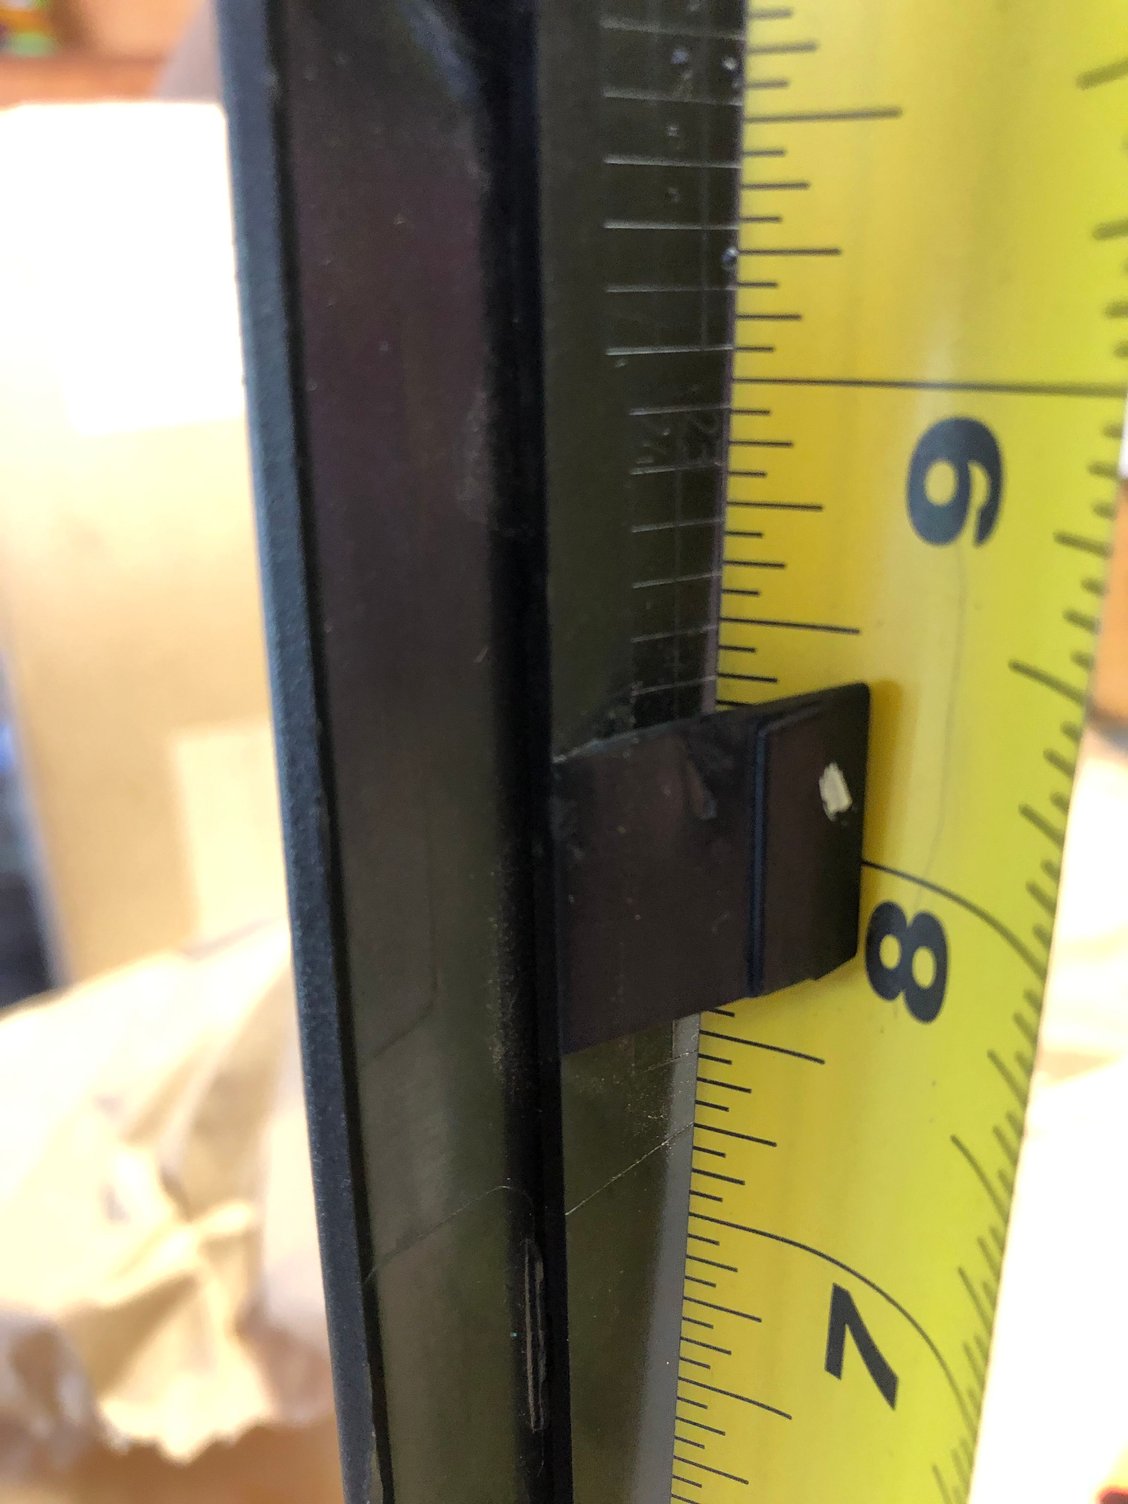
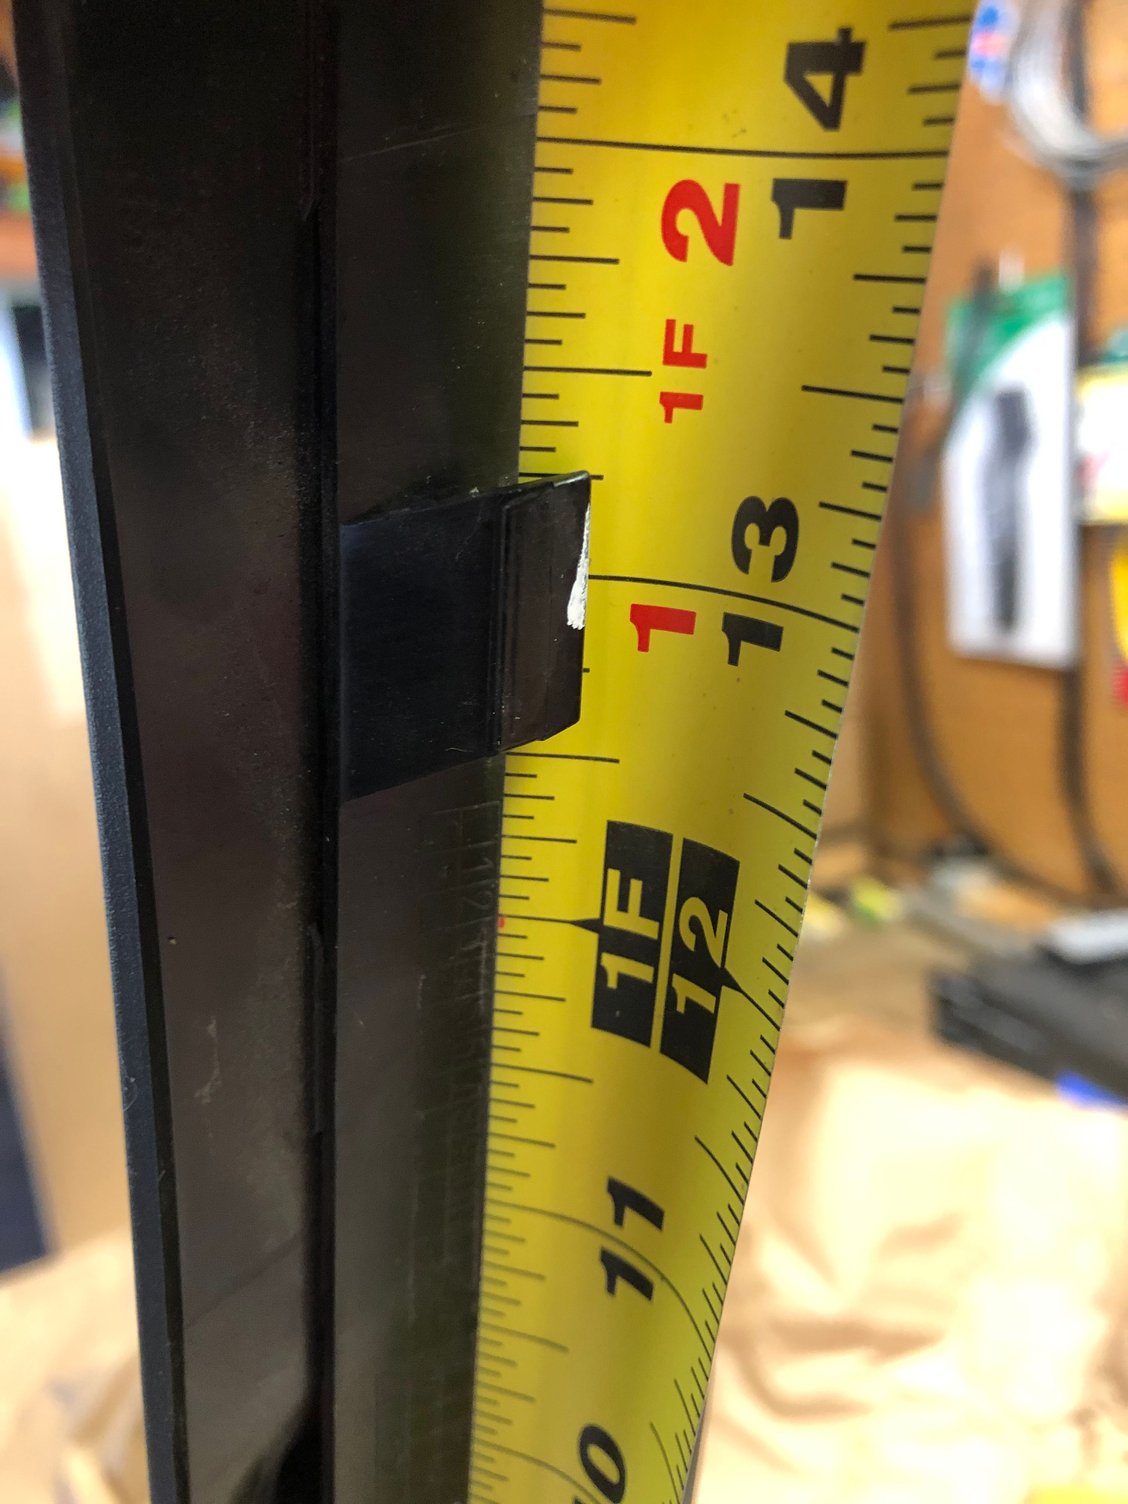
You really need to get in there and find the tabs. I posted measurements from the very bottom, up the front side.
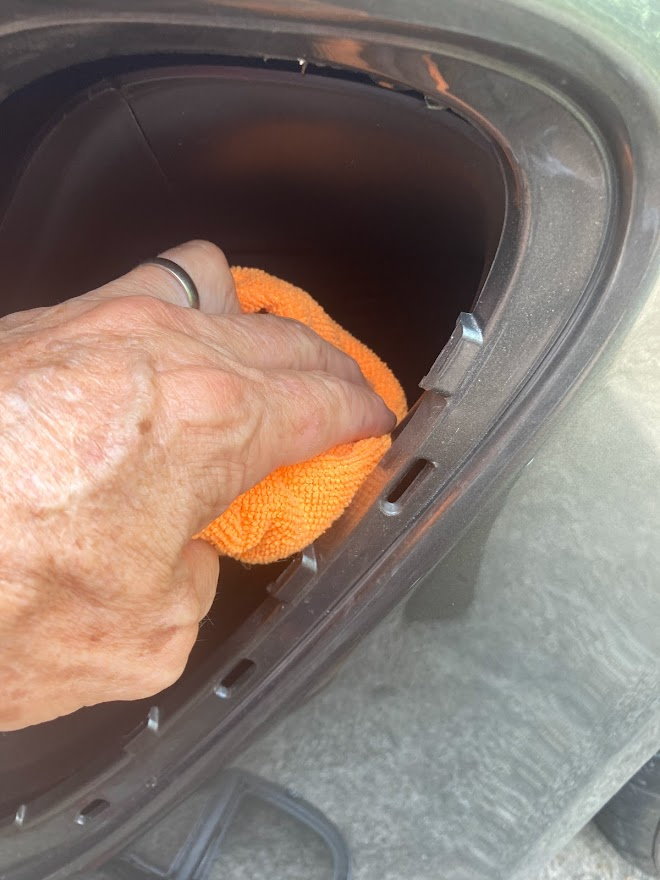
My plastic trim tool broke too, so I used screw drivers and chip board to cushion.
an extra set of hands might help.
Because my plastic tool broke, I actually made a tool by sharpening the top edge of a cheese spread knife enough so I could pry it open enough to slide in chip board to hold it open.
I used 50 pt chip board! If you use 12 pack cartons, you might want to double it up.
The key is finding the tabs so you can �pop� them, the centers are at 4 3/4�, 8� and 13� up from the very bottom.
They also threw in a nice orange Beer Koozie, which when finished, came in extra handy!
Last edited by SpeedySpidey; 09-03-2021 at 01:43 PM.
Reason: Added pic for missed step
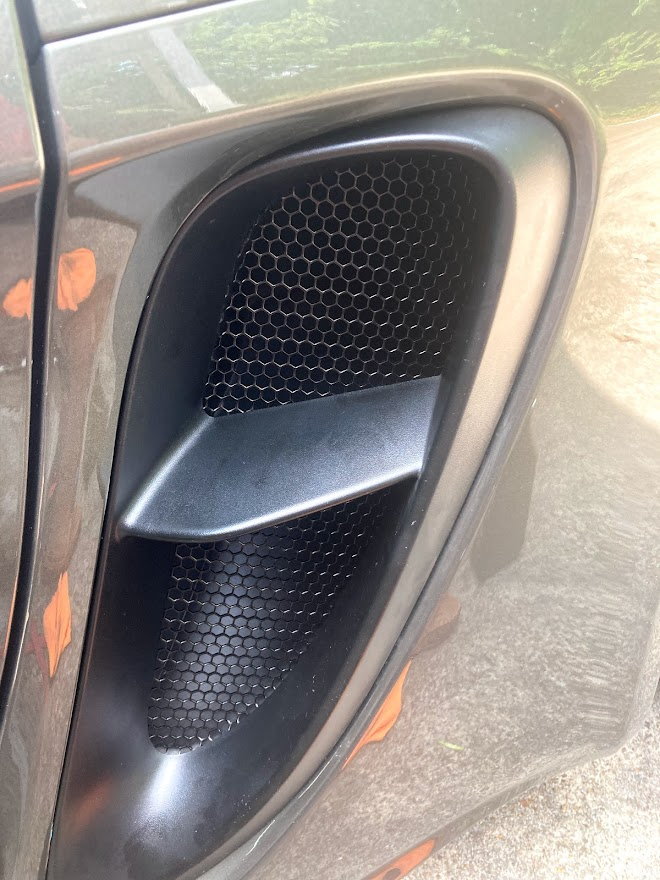
Bill Mitchell's photos were extremely helpful when I did my @RGS side intake and nose grills for my BGTS4. SpeedySpidey's photos have made it that much easier! Everybody has their preferences and favorites in life, but count me as an @RGS fan. The grill pattern looks OEM, the installation isn't terrible while the instructions are clear and simple. When you combine that with a good price and (for those of us state-side) quick shipping from the midwest, it was easy. I've already pulled a few leaves off of the grilles, so I know it's doing its job.
Thank you @sin911 for testing the 718 side intake grilles, and yes we now realized the 718 4 cylinder cars and the 4.0 cars have different side intake duct configurations. We now have the dimensions, set up and jig to create a great OEM looking side intake for one of the greatest car platforms on the market currently.
My grills were just delivered yesterday, but my car's delivery date was just pushed back a month from 10/29 to 11/26.... Oh well, at least I'm preparing in advance...
My grills were just delivered yesterday, but my car's delivery date was just pushed back a month from 10/29 to 11/26.... Oh well, at least I'm preparing in advance...
and with all that spare time ... who knows what else will pile up awaiting a car to install it on ... clear side markers, seat bolsters, DSC, TPC toe links, AM OAPs, AM exhausts ... the list goes on ... and the credit card screams on!
@Larry Cable Larry, we know you had some lessons learned from the install, care to share? Share the photos? Those side vents are buggers to get off huh?
@Larry Cable Larry, we know you had some lessons learned from the install, care to share? Share the photos? Those side vents are buggers to get off huh?
yeah my first attempt was unsuccessful and abortive, I was concerned that I might break or damage the OEM parts, but I tried again with a different (stronger) trim tool and managed to free the side vents and
install the screens - getting the OEM vents to click back in was also a bit of a challenge but it all worked out in the end!
I'll grab some photos and edit them into this post later...
Photos will be greatly appreciated - getting ready to go out and try to pry my side vents off one night this week.... Thanks to all the others who posted pics in this thread too - the ones with the tape measure were very helpful
Photos will be greatly appreciated - getting ready to go out and try to pry my side vents off one night this week.... Thanks to all the others who posted pics in this thread too - the ones with the tape measure were very helpful

 07-26-2021, 06:30 PM