When you click on links to various merchants on this site and make a purchase, this can result in this site earning a commission. Affiliate programs and affiliations include, but are not limited to, the eBay Partner Network.
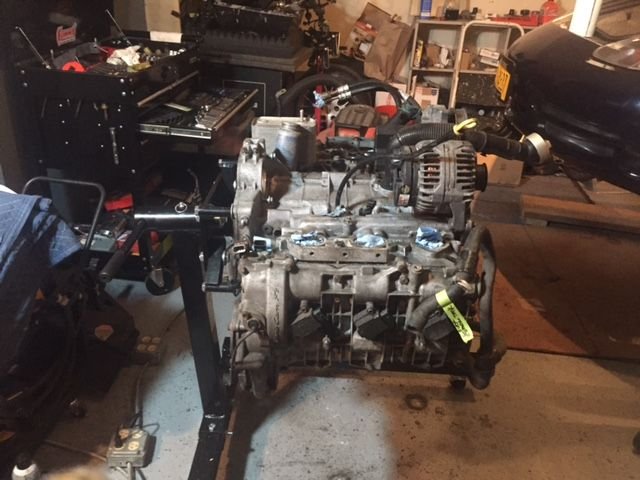
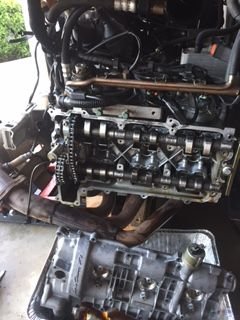
So, I was able to spend a couple hrs. yesterday evening and get all the "over engine stuff" - Intake plenums, wiring harness('s), vacuum valves, switches and lines, hoses, AOS etc. removed. Believe it or not, no breakage (yet) except for 1 "spaghetti" vacuum line.
The top of the engine was unbelievably disgusting with lots of rodent hair, droppings etc. so I spent some time cleaning that mess up. Tonight I should be able to do a little more cleaning and then get the coils, plugs, and tubes out in preparation to remove the cam covers.
Thanks for posting the pictures, this is interesting. Now that I see all the work that is required, I am almost leaning towards having somebody else do this for me. Not that I wouldn't enjoy it, and I have a friend who has a lift, but just looks like a lot of work and to do it first time could be a lot.
Time will tell. LN Engineering is 40 miles away from me and they have the race shop attached to it that does this type of work. Not bad when Charles is 30 feet away from your car when it is being upgraded/repaired.
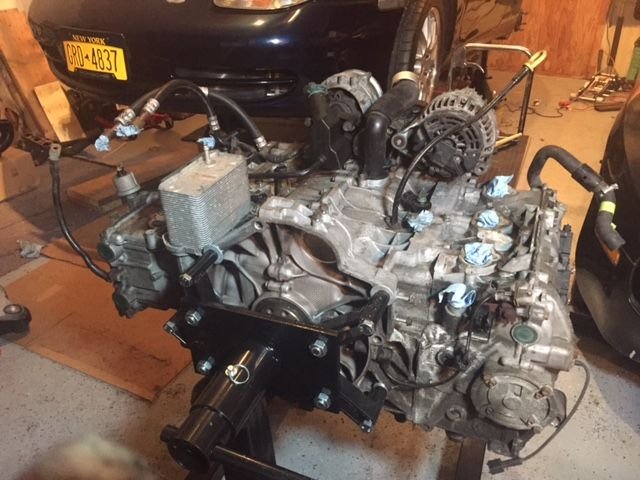
It's a huge amount of work for me because I only get short blocks of time to work on it - certainly not an ideal situation. That being said, it's nice to become "intimately acquainted" with the engine...and hopefully once I get the tensioner pads replaced (and maybe the cam chains) my CEL goes away and stays away for a reasonable period of time. There are at least a few small things that need replacing (vacuum hoses and such) and there was an awful lot of gunk and rust that i'm glad I'm able to address. Bottom line is, I don't think I want to be doing this again any time soon
Suggest you support the engine under the sump a little.That is a huge amount of weight to cantilever off 4 bolts but it is often done with seemingly no ill effects. The HF trans jack(screw -scissor type) works perfectly and has many other uses.
SG - good suggestion and exactly what I've been doing when I'm not working on it! Unfortunately the transmission is still sitting on the HF jack, but I've got a couple others that are free so they get job.
Suggest you support the engine under the sump a little.That is a huge amount of weight to cantilever off 4 bolts but it is often done with seemingly no ill effects. The HF trans jack(screw -scissor type) works perfectly and has many other uses.
I used the same style engine stand and was only able to secure it with 3 bolts.
Stayed on that stand like that for 2 years with 0 issues.
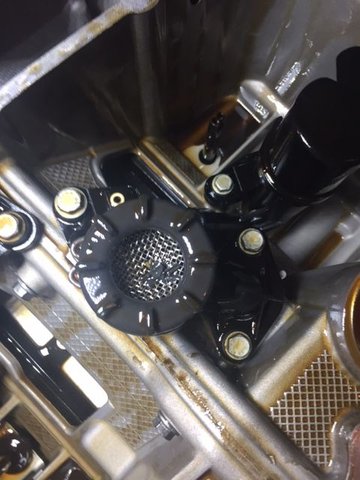
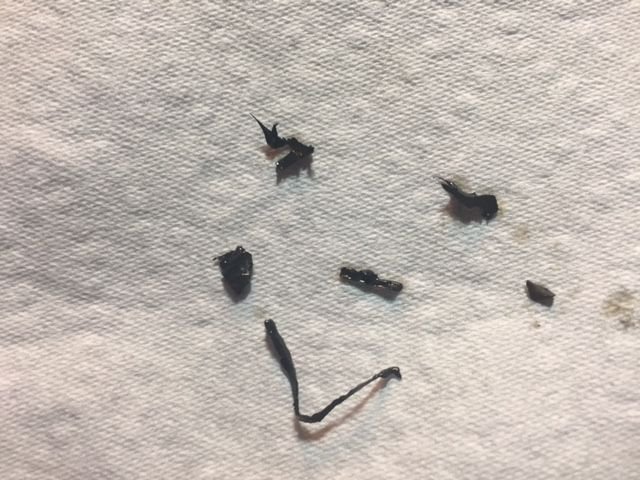
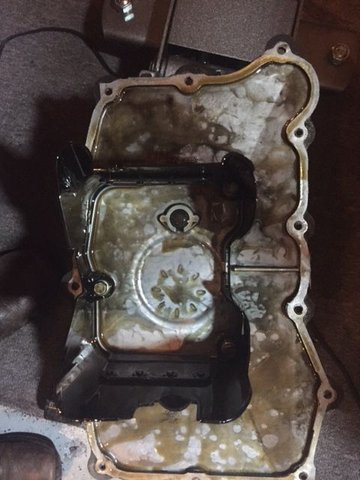
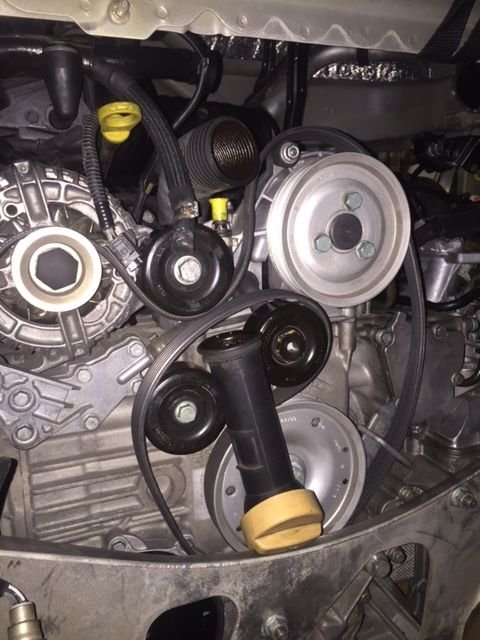
A few little updates. While waiting for a cam lock tool to arrive, I decided to do a little more "house keeping". First, I pulled off the sump plate. No metal at all, just some sealant bits and 1 little piece of plastic (tensioner pad) in the oil pickup tube.
I'm pretty sure this stuff is sealant from the cam covers judging by the rather sloppy job shown in the picture below.
This one is for SG -
One thing that surprised me is that there doesn't seem to be any sealant at all on the sump plate... Is this recommended? It never leaked any oil...
Amazed it did not leak - someone at the factory did some good machining ! A 1mm bad can do no harm if carefully applied. I used warmed Dreibond but guess many alternatives would be O.K.
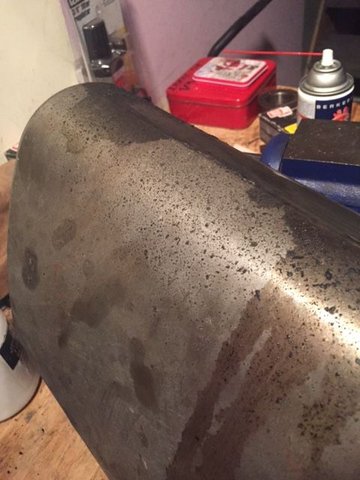
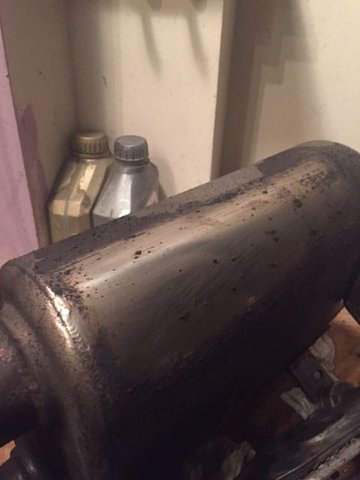
I agree... I was amazed at how easily it popped off - I thought i'd have to pry a little bit. Also, I though these two photos might be of interest. My mufflers are absolutely disgusting compared to some I've seen. The first photo is as it came out of the car. The second is after a quick blast of Gum Cutter and a little wipe. They should clean up quite nicely. Granted you can't really see them once everything is put back together - but I figure while I'm in there it can't hurt to clean things up a little...
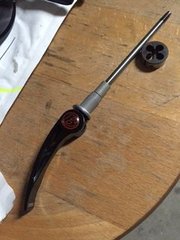
Dporto, looks like you are moving along well. I'm kind of on the same boat as you only having a few hours here and there to turn wrenches and trying to fix a CEL coupled with a P1325 code. I'm working the opposite side of what you are doing, I just finished replacing a bad solenoid, it failed the ohms test on my bank 2. Also if you don't get the Vareocam tensioner cylinder compression tool let me know, as I built my own with a regular mountain bike tire skewer and a reverse thread cutter. A great inexpensive idea that works phenomenally well, I got the idea from Noz1974 a while back when I was replacing my Vareocam pads.
Device2 - That's awesome...I was trying to remember the post/thread with that tool. Wayne Dempsey/Pelican says just use zip ties, but I like the idea of the tool better. Can you give me the actual thread size/pitch so I can go ahead and make one of these things? If I remember correctly, one side is a regular right hand thread and the other is left handed???
Sure thing the dimensions are M5 thread with 0.8 pitch left handed thread. On my engine (99 Manufactured) both VareoCam tensioner units were left handed threaded. Like Noz1974 said in one of his post I used a bike skewer and then used a die cutter and cut new threads for left handed use. plus the compression feature of the skewer works awesomely. You can get a cutter from eBay for $2.
Yesterday afternoon I was getting ready to stuff the engine back in.. Mind you I always work alone for a reason, I had a well intentioned assistant (family friend) who was very enthusiastic about helping. Anyhow with in the first seconds of starting the task of raising the motor he grabbed the oil filler tube and we ended with this.. (Epic Fail)
There I am now at a stand still awaiting delivery of the new part, upgraded to the new Porsche 99710713100 part and we will see how that new part fits, since it looks like the old 996 part is now obsolete.
 05-09-2017, 02:18 PM