When you click on links to various merchants on this site and make a purchase, this can result in this site earning a commission. Affiliate programs and affiliations include, but are not limited to, the eBay Partner Network.
I did 1 - 1" NPT on the underside of the filler neck. I believe you could get one 3/4 NPT on each side of the neck. An alternative is to use one 1" on the underside and do a T union to 2 individual 3/4" NPT fittings..
I used loctite and it's fine on my setup. Remember NPT is a tapered fit so it will seal quite effectively. I also used aluminum NPT fittings so the temp expansion would be closer than with steel fittings and an aluminum filler neck.
Depends on where under the filler neck you place the port, how thick the casting is at that point. I'm sure there are places where you can just drill and tap it. I suspect that if one were drill out the 2mm restricted nipple and tap that boss, one could get a relatively large fitting securely located in that space with threads. Don't know for sure, but suspect.
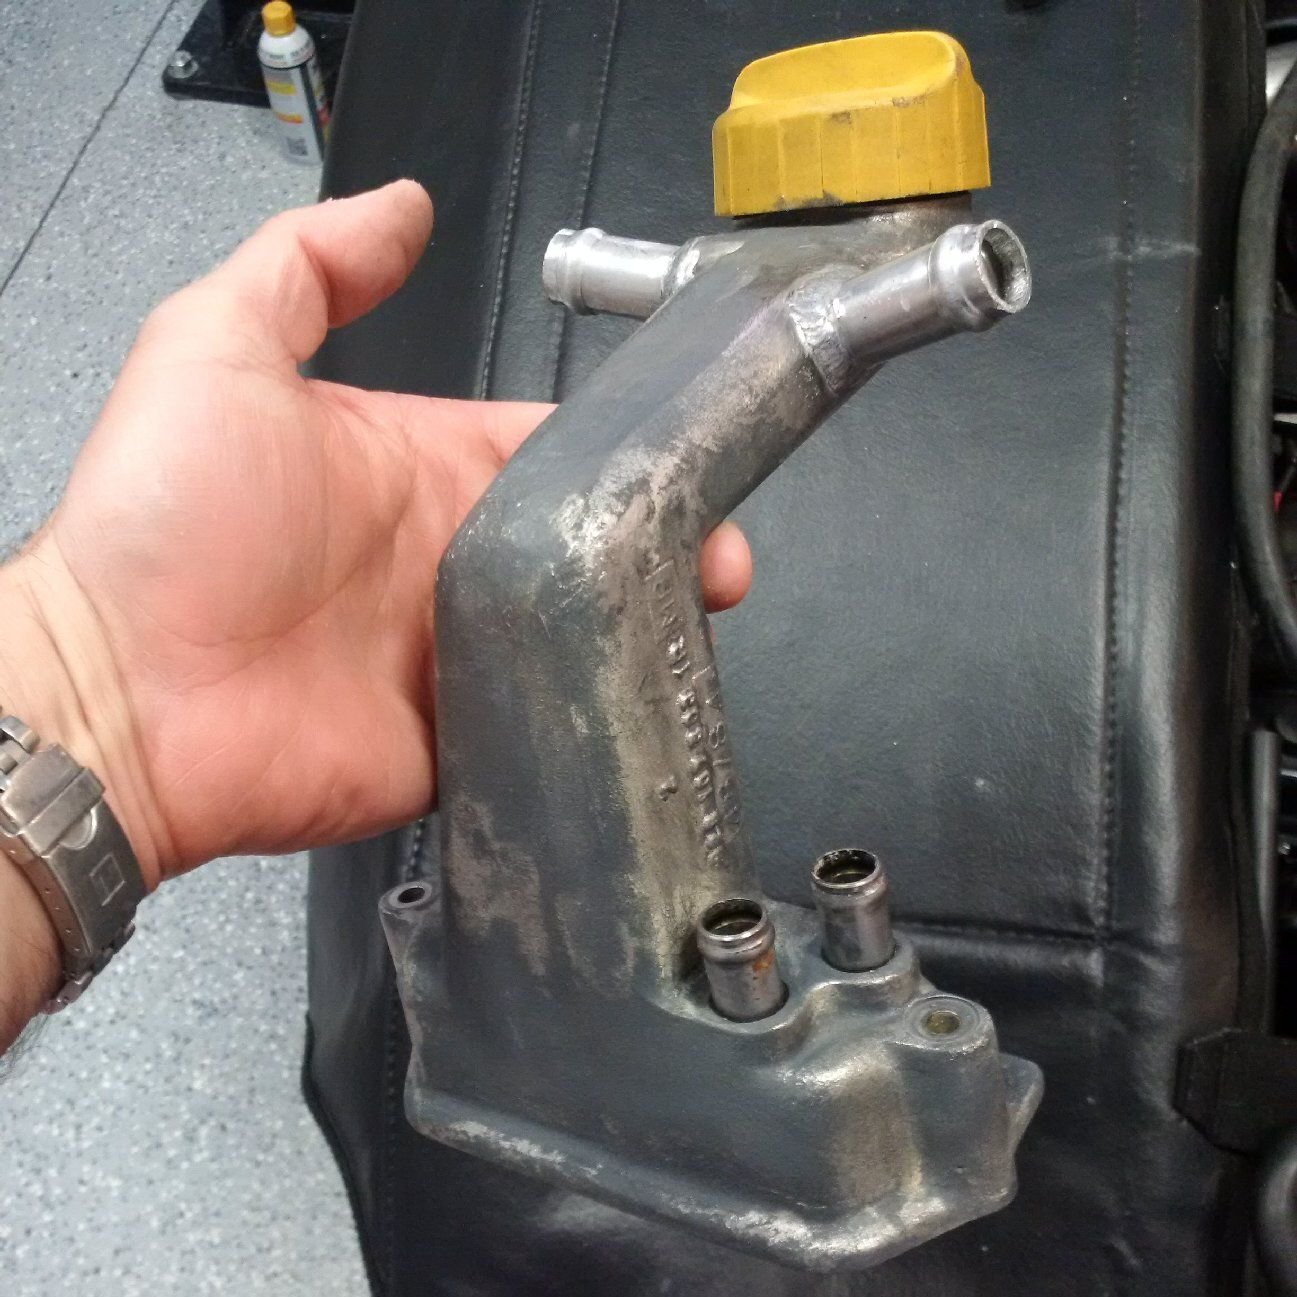
We didn't want to go with under neck port in this version, because since we have perfect freedom of locating the ports with a metal neck, we decided to put them in a position and angle such that we don't need to plug them when filling oil or have to fill in oil any slower than with the stock engine. Because of that reason, we went with ports from the sides inserted at an angle and with the tube sticking in 3mm, which together we predict will be resistant to oil ingestion during both filling and operation.
In our setup, the 0.75" hoses will be attached to the boost pipes (really the separators attached to the boost pipes) and the engine will move in various ways relative to the boost pipes. Not a lot, but a little, since there are the silicone couplers and intercoolers in the other end. The 0.75" hoses are quite heavy and if they get jerked around there are going to be some forces on the filler neck and the ports. There would be workarounds, such as attaching the hoses first to the intake manifold, but those would add further complexity. For our case, welding is the best option. Those by the way are some of the reasons why we have a metal filler neck to start with, and not the plastic one that seems to sometimes warp and leak under its own weight...
Depends on where under the filler neck you place the port, how thick the casting is at that point. I'm sure there are places where you can just drill and tap it. I suspect that if one were drill out the 2mm restricted nipple and tap that boss, one could get a relatively large fitting securely located in that space with threads. Don't know for sure, but suspect.
We didn't want to go with under neck port in this version, because since we have perfect freedom of locating the ports with a metal neck, we decided to put them in a position and angle such that we don't need to plug them when filling oil or have to fill in oil any slower than with the stock engine. Because of that reason, we went with ports from the sides inserted at an angle and with the tube sticking in 3mm, which together we predict will be resistant to oil ingestion during both filling and operation.
In our setup, the 0.75" hoses will be attached to the boost pipes (really the separators attached to the boost pipes) and the engine will move in various ways relative to the boost pipes. Not a lot, but a little, since there are the silicone couplers and intercoolers in the other end. The 0.75" hoses are quite heavy and if they get jerked around there are going to be some forces on the filler neck and the ports. There would be workarounds, such as attaching the hoses first to the intake manifold, but those would add further complexity. For our case, welding is the best option. Those by the way are some of the reasons why we have a metal filler neck to start with, and not the plastic one that seems to sometimes warp and leak under its own weight...
Sounds good.
PS. I use a funnel when filling the oil, and it takes 1 extra minute, but I figure it's ok to wait an extra minute.
Welding that material is likely going to be a nightmare due to it being a magnesium alloy and more importantly because it has been oil soaked it's entire life. As you know, aluminum and magnesium are both porous and that material is going to have all sorts of hydrocarbons in the base metal. John is going to have a fit welding it. Is that a part that is readily available as a NOS part? It might be worth looking into. I'd still try to get it clean and weld it before buying a new one but it might be worth looking into as aback up plan in case he has issues. Good luck.
Welding that material is likely going to be a nightmare due to it being a magnesium alloy and more importantly because it has been oil soaked it's entire life. As you know, aluminum and magnesium are both porous and that material is going to have all sorts of hydrocarbons in the base metal. John is going to have a fit welding it. Is that a part that is readily available as a NOS part? It might be worth looking into. I'd still try to get it clean and weld it before buying a new one but it might be worth looking into as aback up plan in case he has issues. Good luck.
John's guy welded it and it welded fine.
Mission accomplished, to quote (or more accurately misquote) W. Along the path of that analogy, there's now a little bit "nation building" left in terms of introducing it to file, epoxy and paint remover, bead blaster, some acid bath, and then whatever waterboarding the powdercoater does to it. I don't consider the powder coater's shop "US soil" so unless some abugraphic photos emerge nothing happened there...
I don't remember the size, maybe 1/2 each. The neck has more than enough material to tap it for an NTP thread and it will hold the vent pipes, even if it's as big as you guys are using. These are only there to vent air with hardly any air pressure in them. Now if this was some high pressure coolant or oil line then yes, the filler neck is too thin. But not for the crank vents.
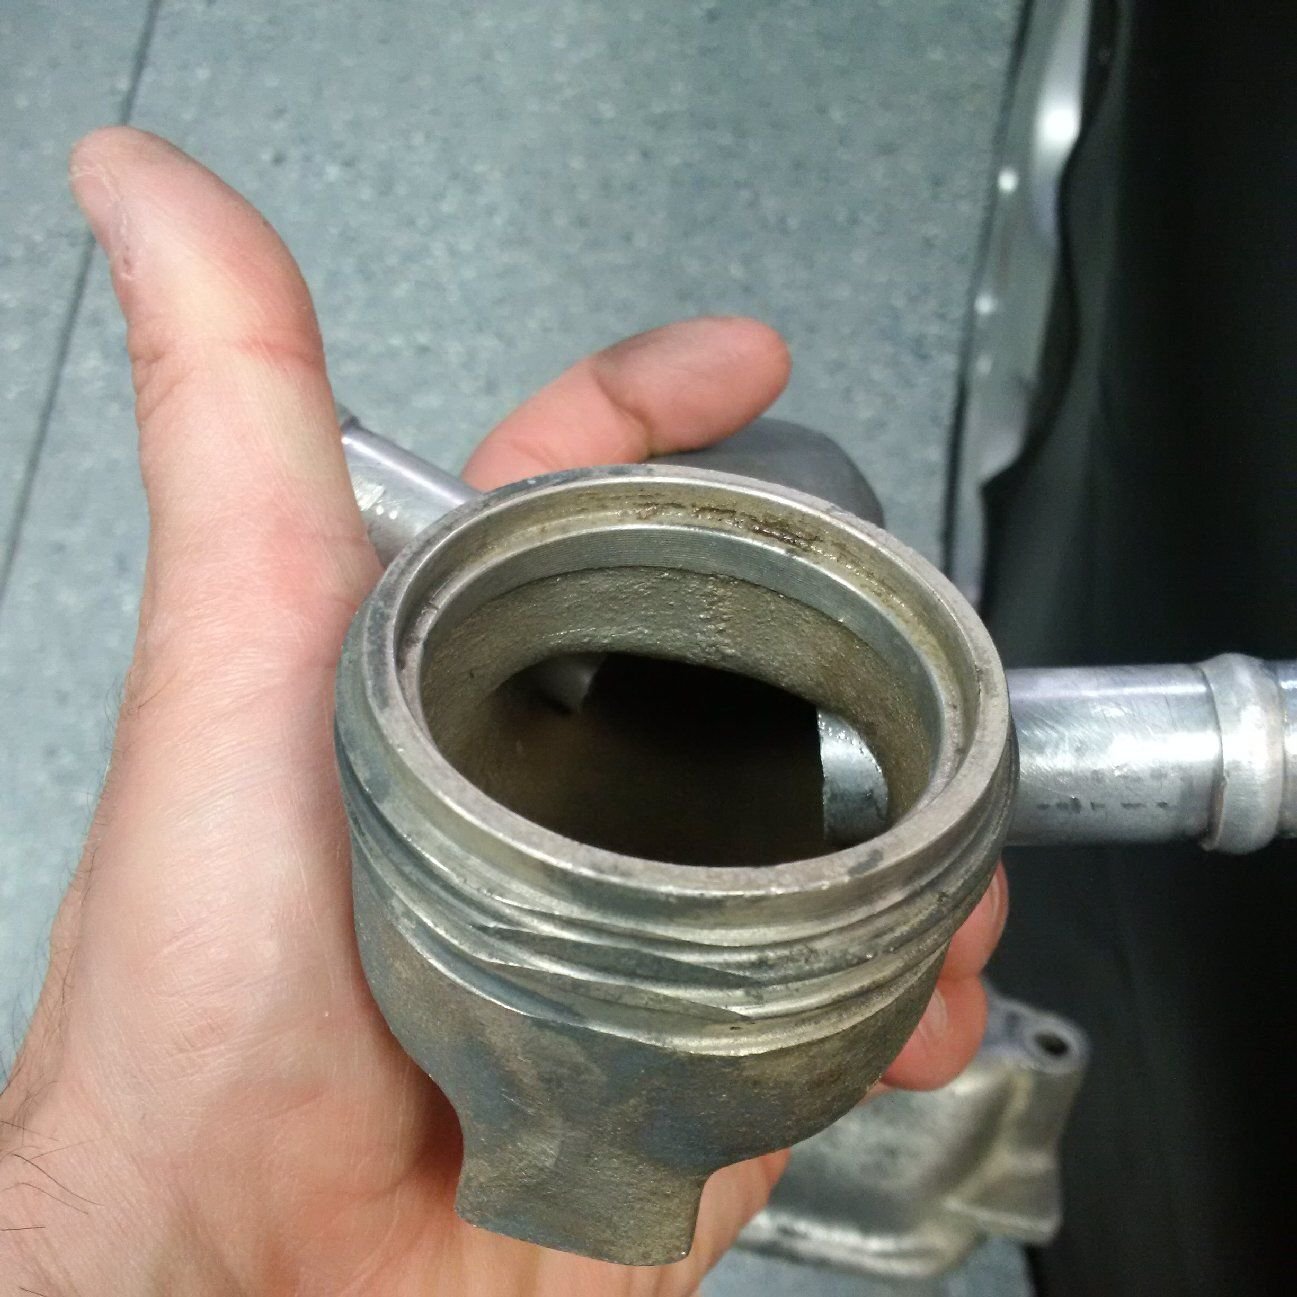
The size makes a huge difference here. First, the diameter determines how much threads you need. Second, this is what an about one-inch port on the filler neck would look like:
You guys are over thinking this. A threaded NTP fitting works just fine. This is not a pressurised line and only has a hose attached to it. My setup has the separator at the bottom left corner of the radiator so the vent lines are pretty long.
You guys are over thinking this. A threaded NTP fitting works just fine. This is not a pressurised line and only has a hose attached to it. My setup has the separator at the bottom left corner of the radiator so the vent lines are pretty long.
Us just "overthinking" the crankcase breather system is an understatement! ;-)
As a result of all this overthinking, I think that we've got it solved now. That after painstakingly going thru every operating mode and thinking thru what happens in each of those operating modes, what are the forces and pressure, etc. and then looking for opportunities to isolate operating modes such that they can be solved separately. We think that two 0.75" breather ports slightly tilted upwards from the sides of the filler neck with the stub sticking 3mm inside the oil filler neck is the best solution.
We took the fabrication route that in our opinion was the most appropriate for the situation. I'm happy with the result. Sounds like you're happy with yours, so everyone's all good then.
You guys are over thinking the threads not being strong enough not the venting. The venting is a copy or a reuse of what others have done before.
Reminds me of the old joke about a mathematician's critique of another: "Your theorem is not true and I proved it first". So not only did we over think it but also copied the design?
Well, I was looking for feedback and this is certainly feedback. Paraphrasing Christopher Wallace: "A stereotype of a designer misunderstood, but it's still all good..."
Originally Posted by blau928
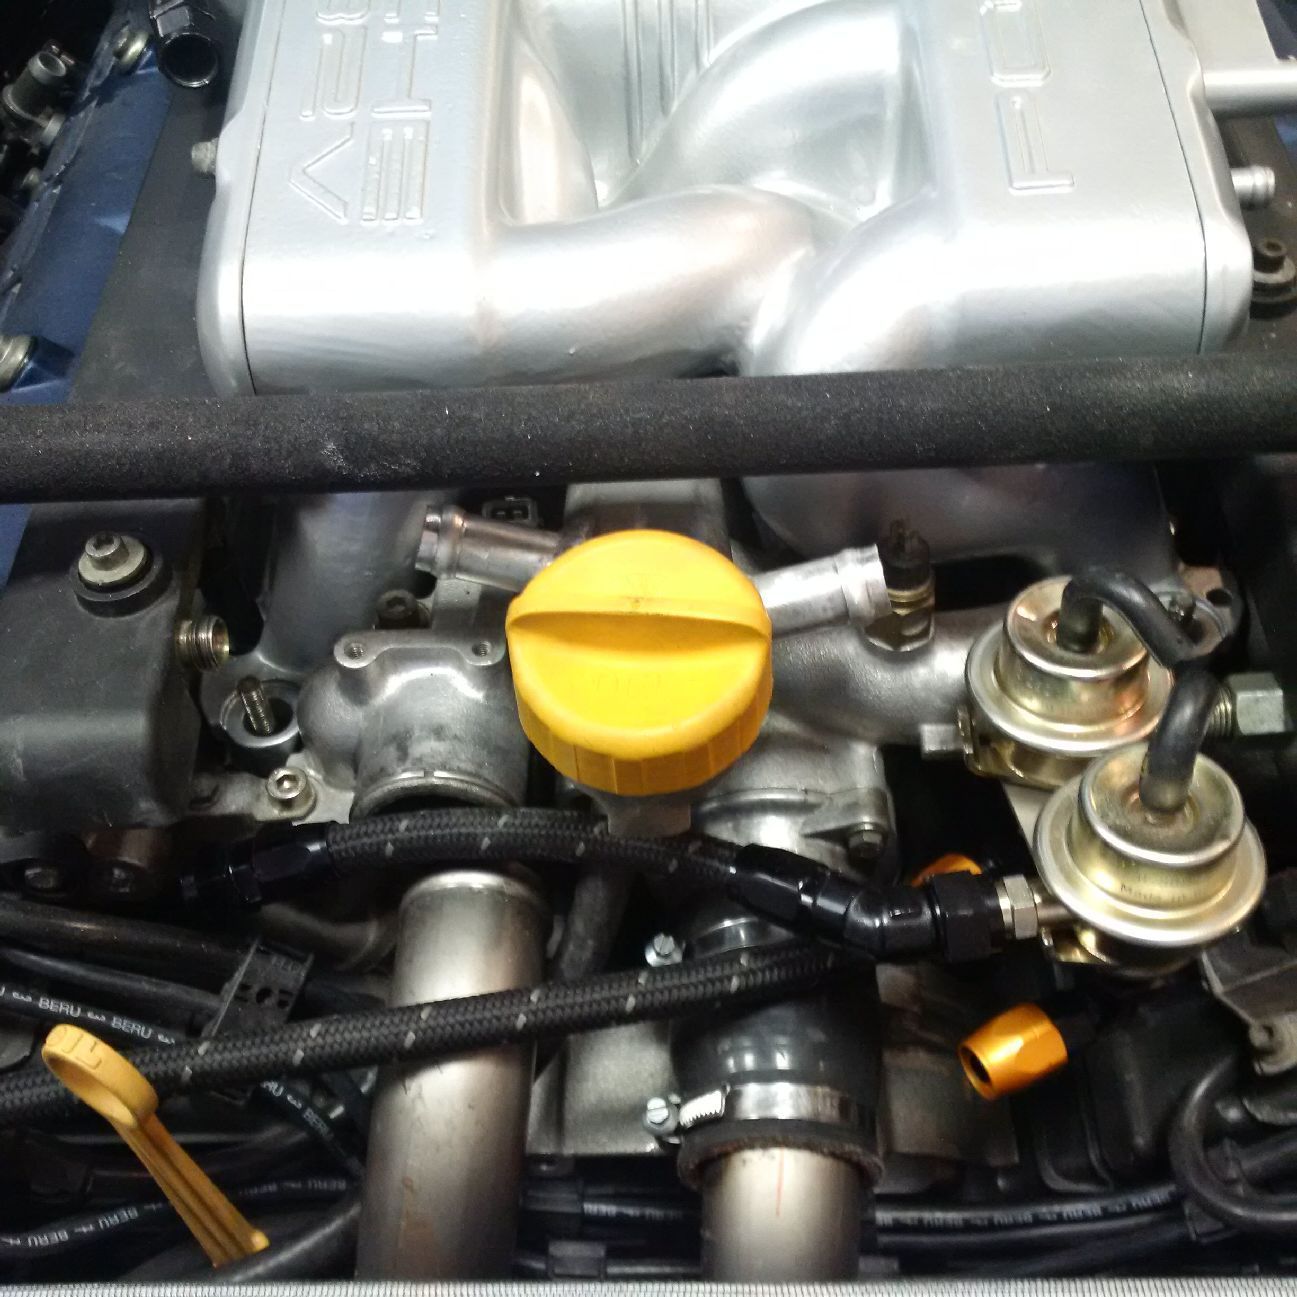
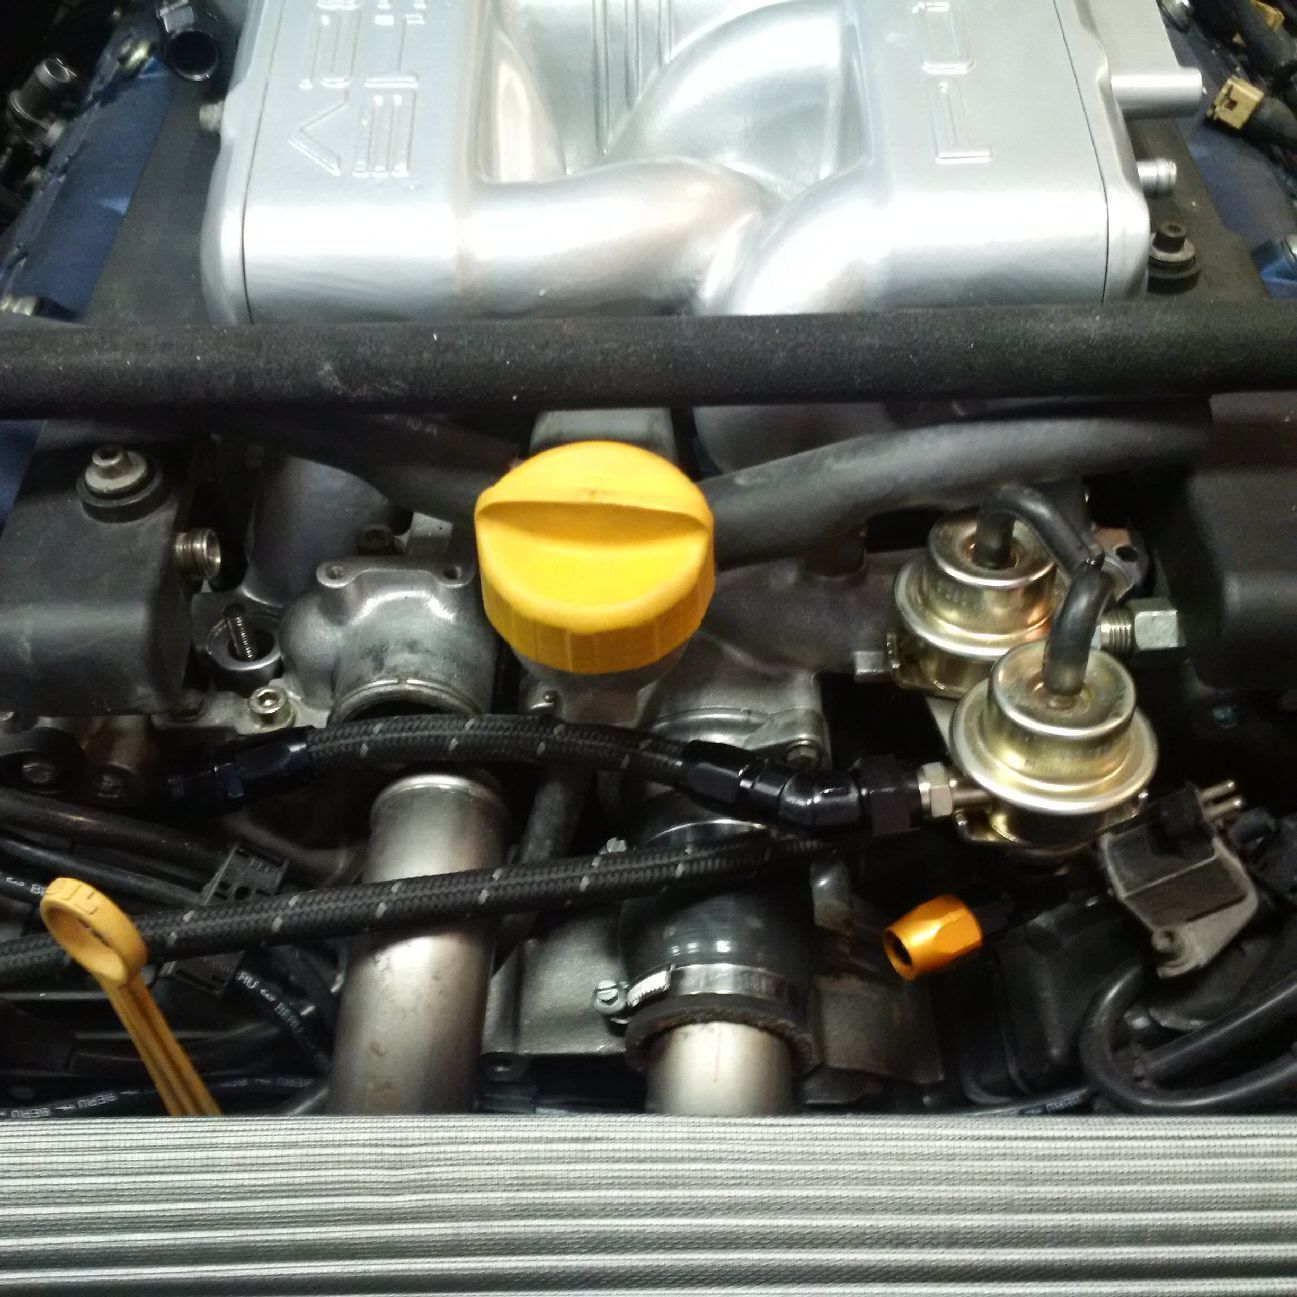
Looks "stock like", the welding turned out great from the pictures. Best of luck with the run in and testing as well as wot runs!
Thanks. I like the looks. I like the fact that it fits with the fuel system components even better. I'm optimistic that the whole breather system is going to work well, but we'll see.

 04-18-2016, 01:04 AM