When you click on links to various merchants on this site and make a purchase, this can result in this site earning a commission. Affiliate programs and affiliations include, but are not limited to, the eBay Partner Network.
Just got my 2022 Macan GTS. Wanting to install my radar detector w/ a Mirror Tap harness I searched forums and the internet for a how-to. Surprisingly I found zero information about using a Mirror Tap on the Macan. Seems most people were running a harness down to the fusebox, which seems like a huge PITA. Having installed Mirror Taps in other Porsches (and other makes) I have owned I was pretty sure it was possible. So I tackled the project and took photos, hopefully this will help others. As far as I know all Macan generations should be the same.
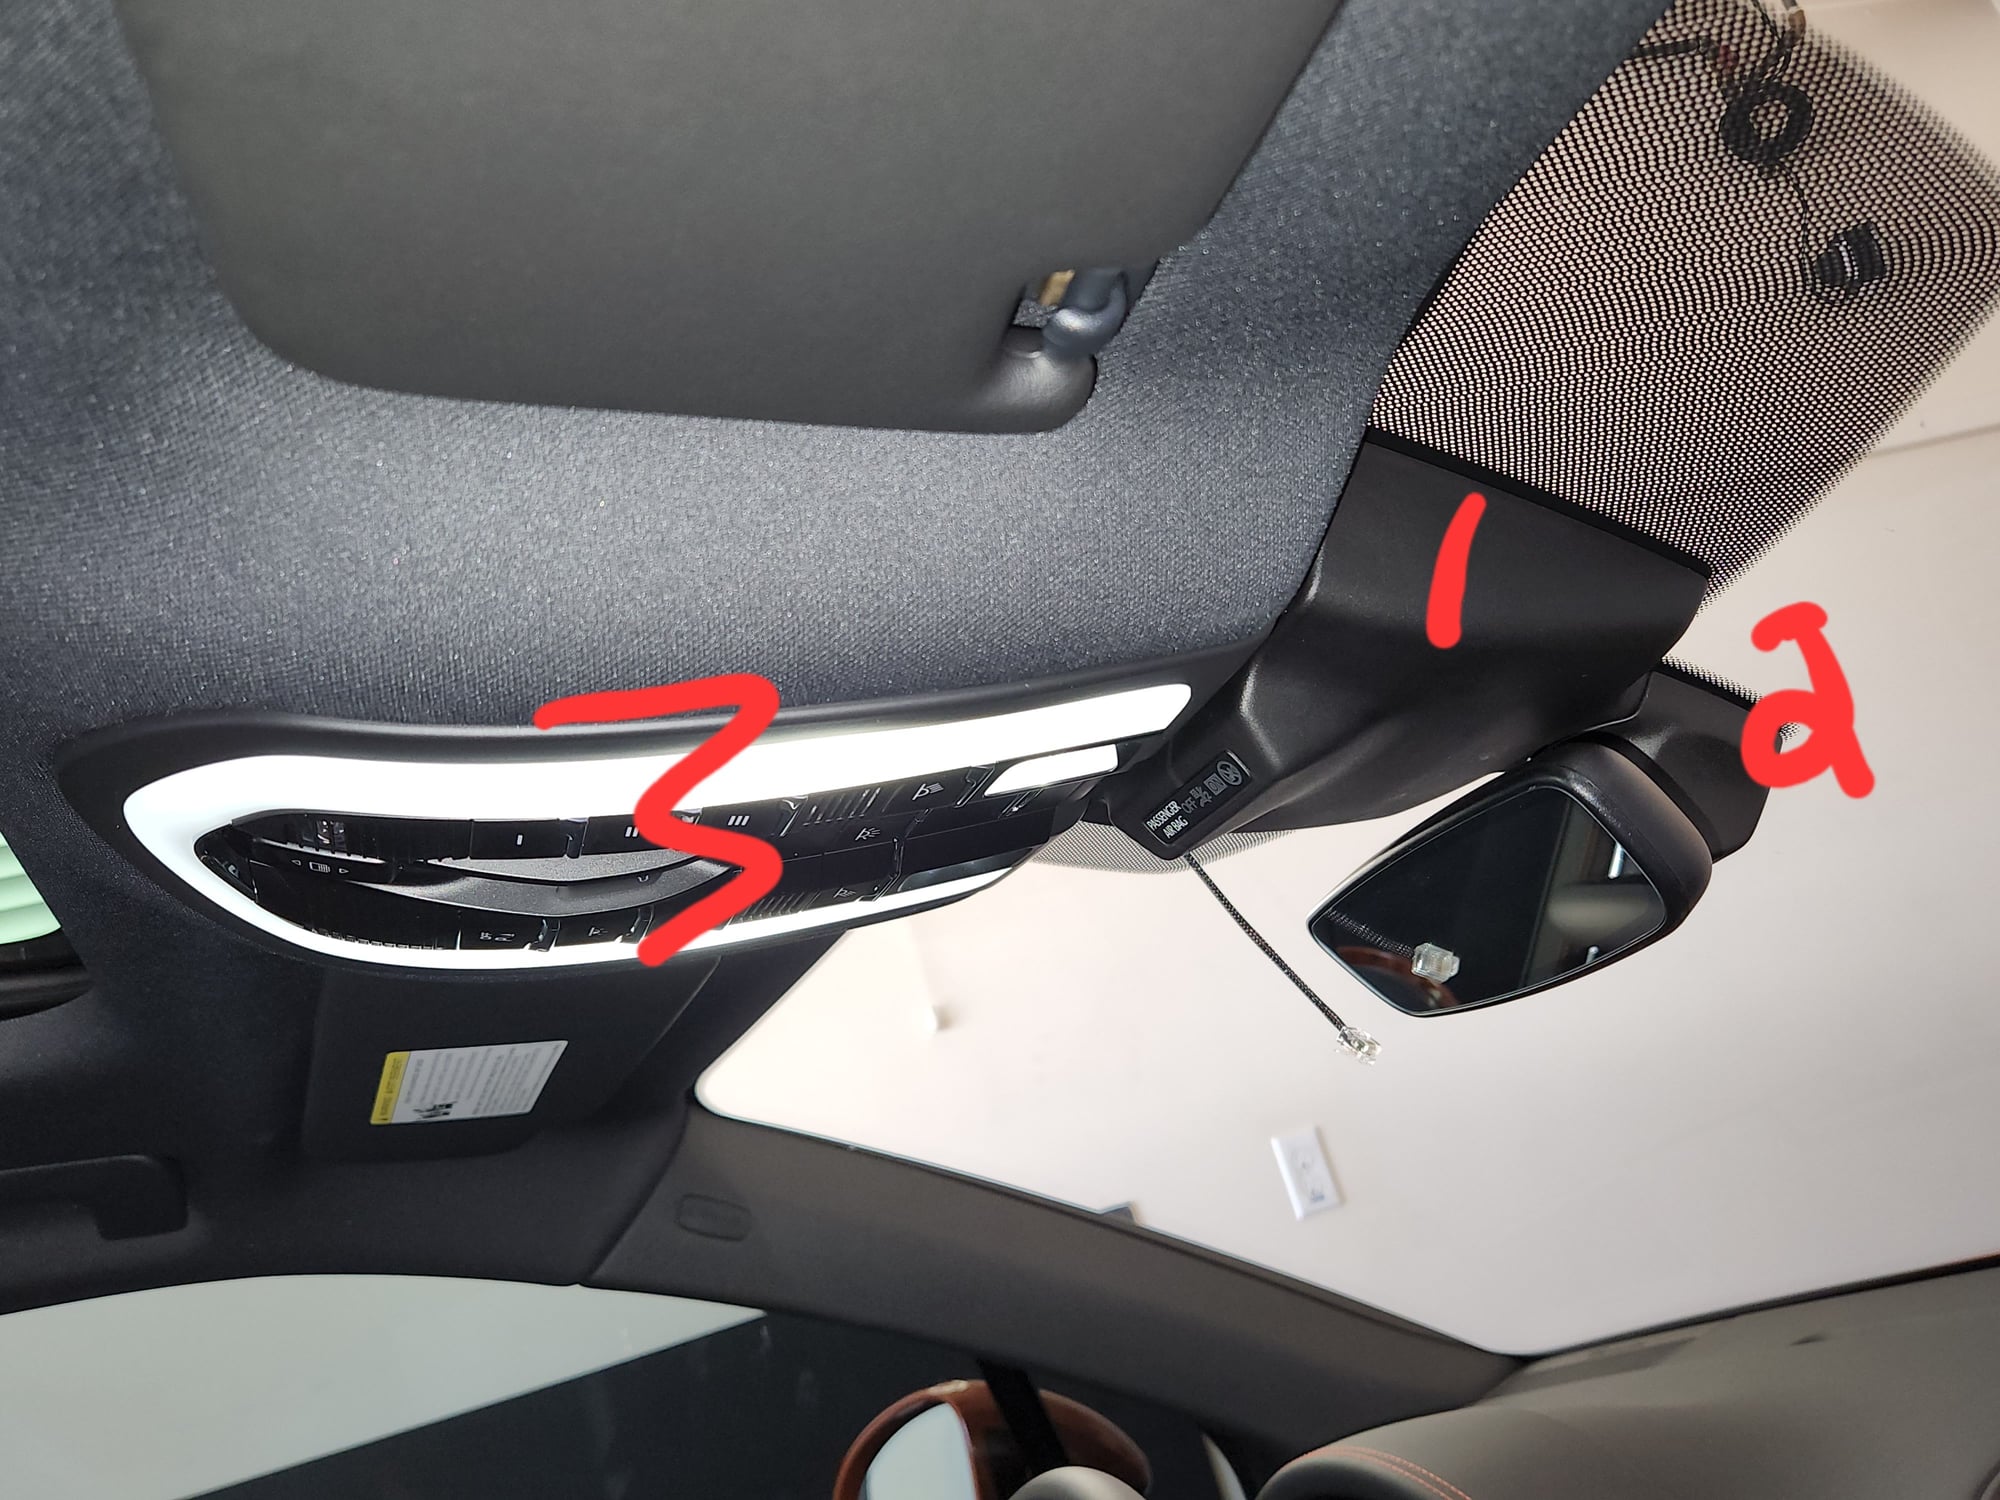
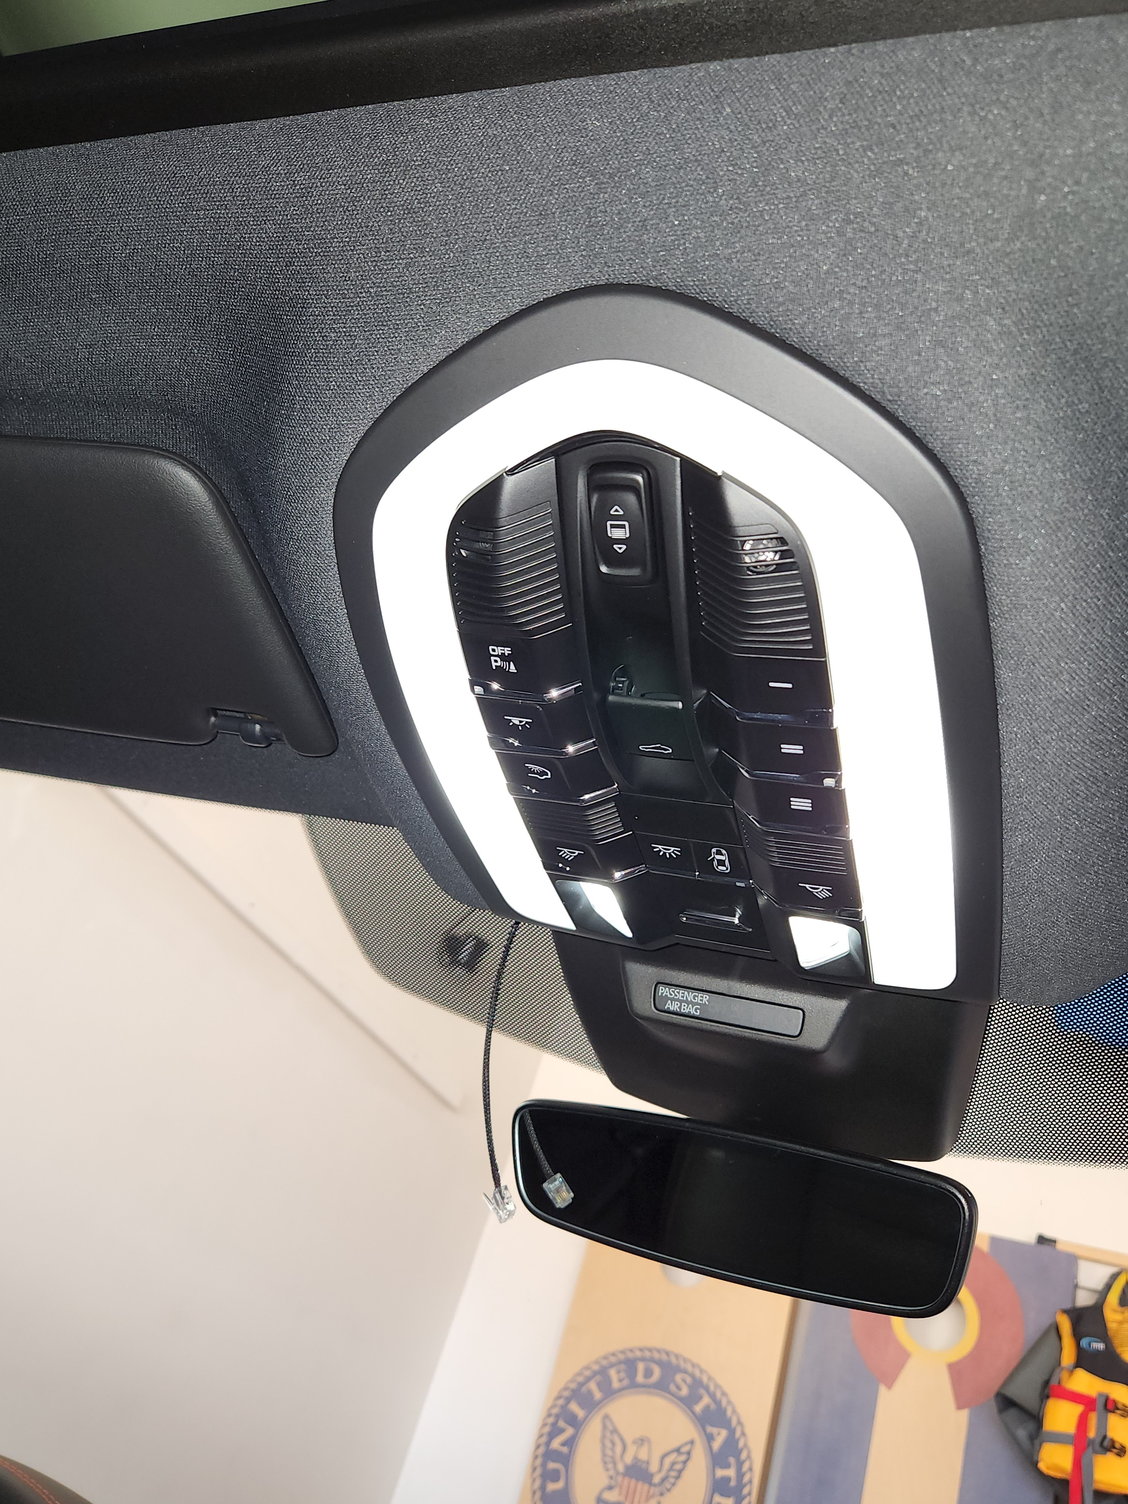
1.) You must remove these 3 panels in the order they are numbered 1-2-3. Reinstallation is the reverse order of removal 3-2-1. Tip the mirror all the way down to maximize clearance.
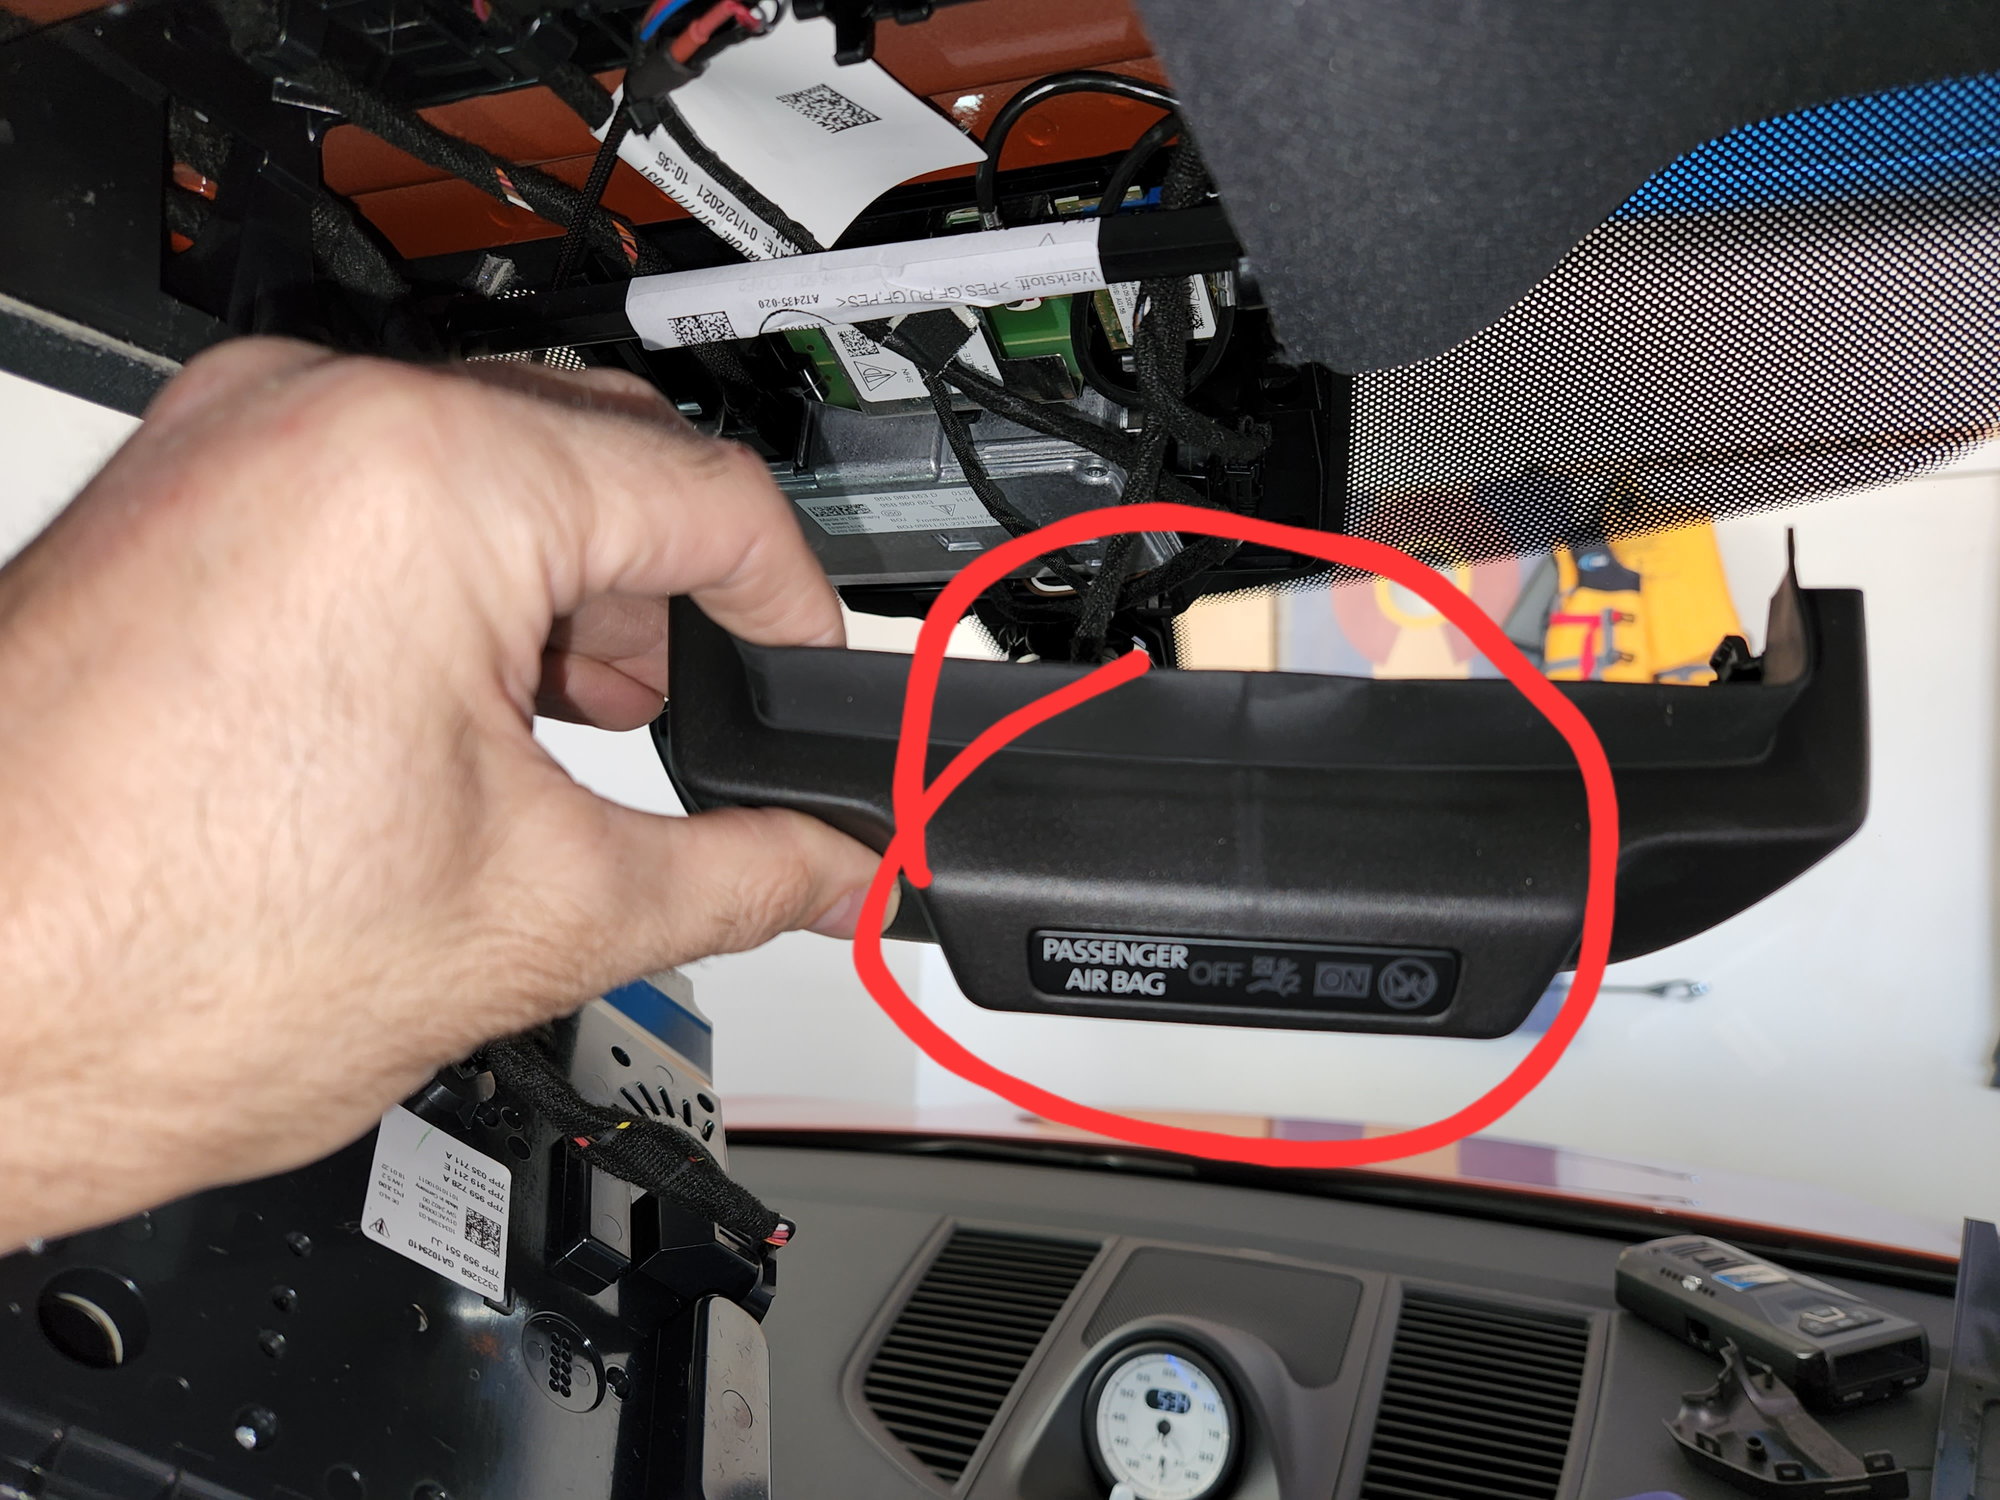
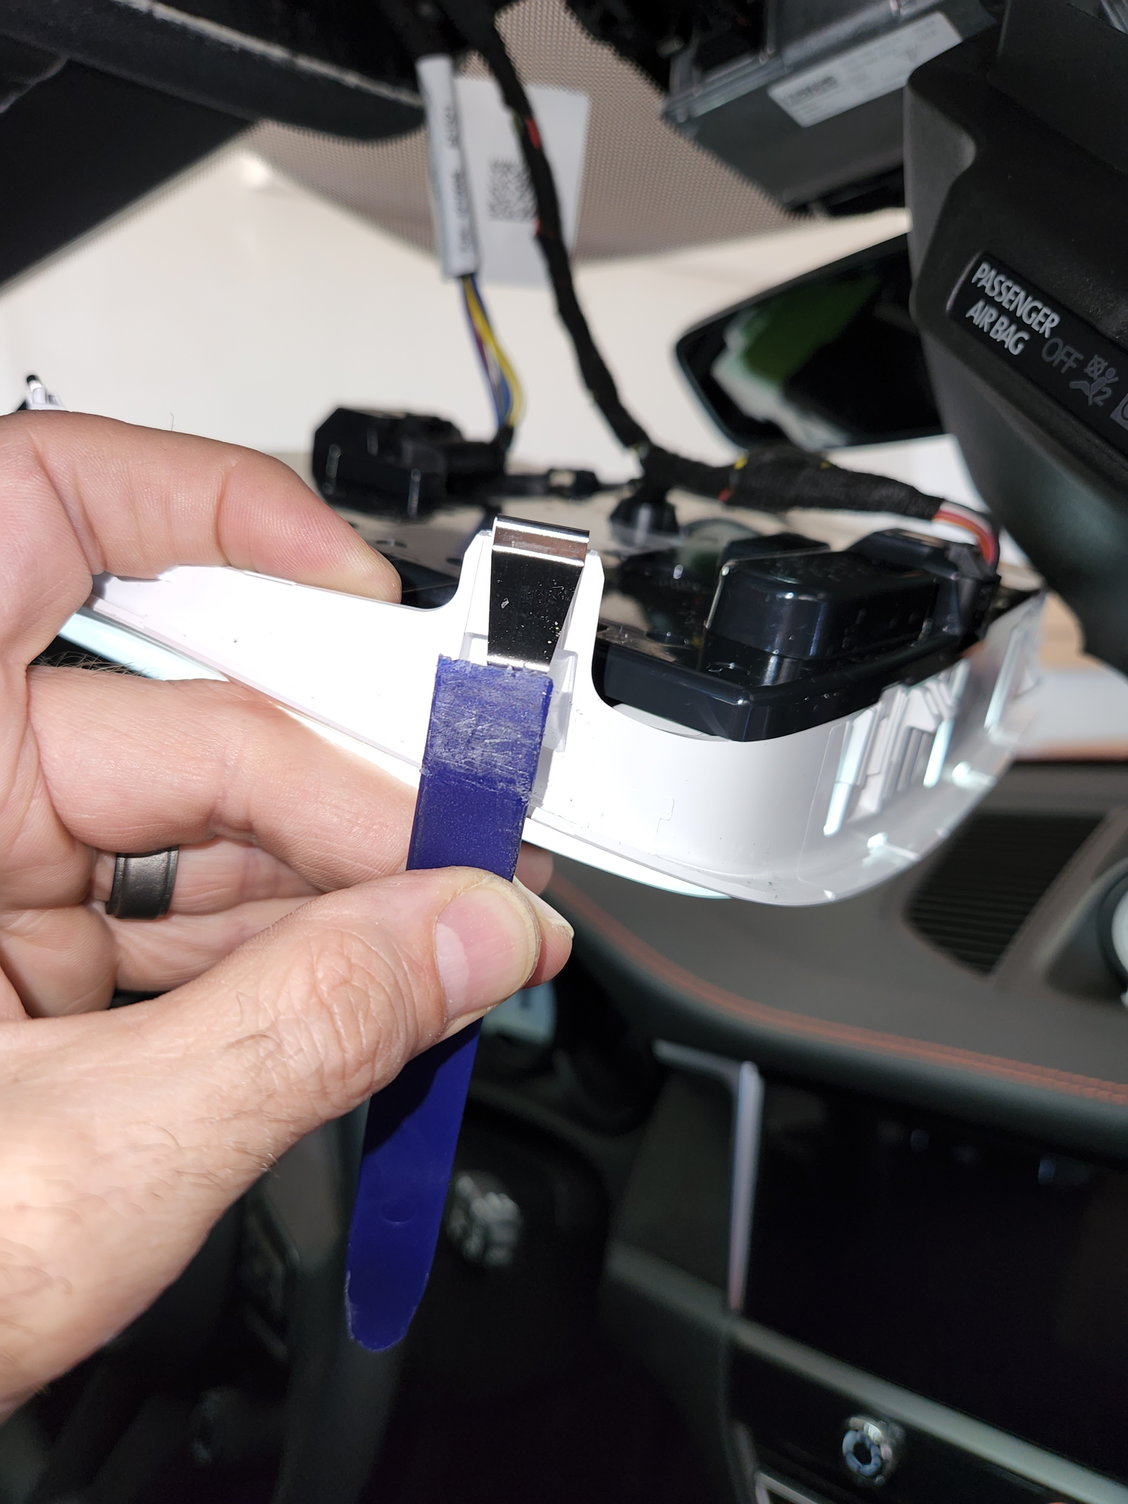
2.) The center panel w/ the passenger airbag light can be easily removed by just putting your fingernails on either side and carefully pulling downwards. (Ignore that the main panel is already removed, I took this photo out of sequence).
IMPORTANT: DO NOT UNPLUG THE CONNECTOR FROM THE BACK OF THE PASSENGER AIRBAG LIGHT - Just let it hang. If you unplug it you could get an Airbag fault. If you do it's not the end of the world, you can just have the dealer clear the fault code and reset the airbag light, but it's avoidable.
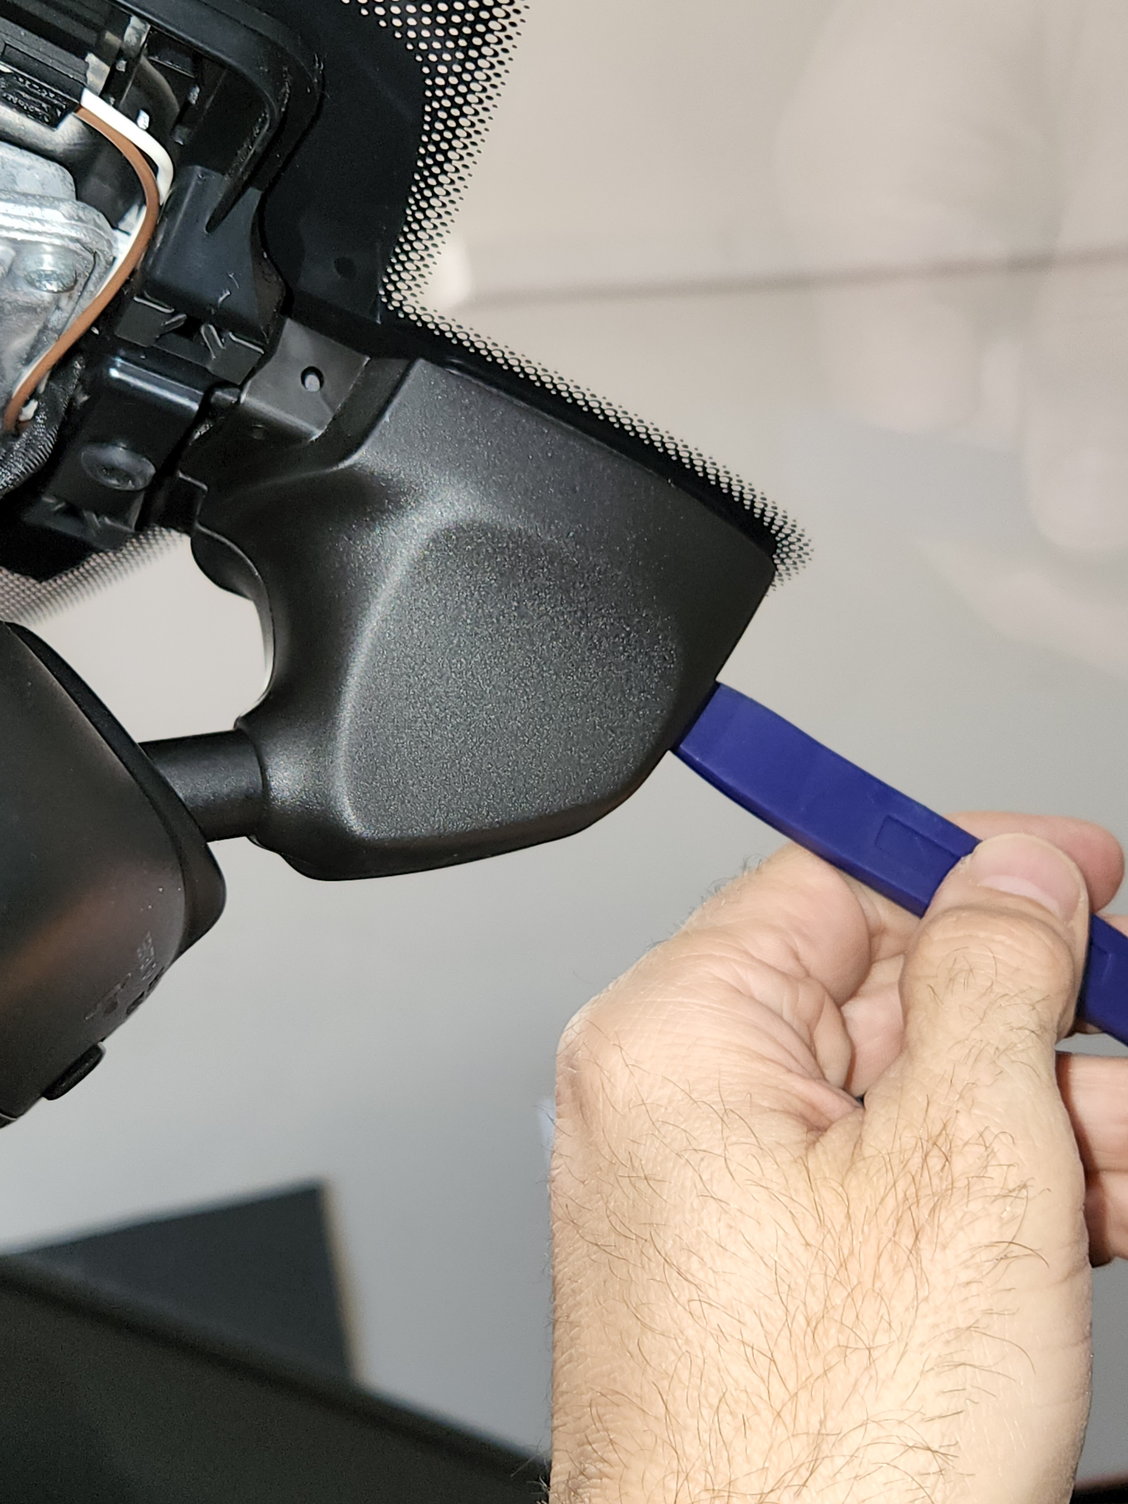
3.) Remove the rear view mirror ball stalk cover. This piece is in two halves. There is a small opening on the forward seam you can insert a nylon pry tool and twist. This takes a bit of effort, be careful, but it's not hard. Importantly you want to take off the passenger's side first, then the drivers, due to the way the tabs are oriented to avoid breaking them. Reinstallation is the reverse of removal....put the driver's side on first then snap the passenger's side into it. Remember you must have the center panel w/ the airbag light off in order to get the stalk cover off/on b/c it goes underneath it at the back edge.
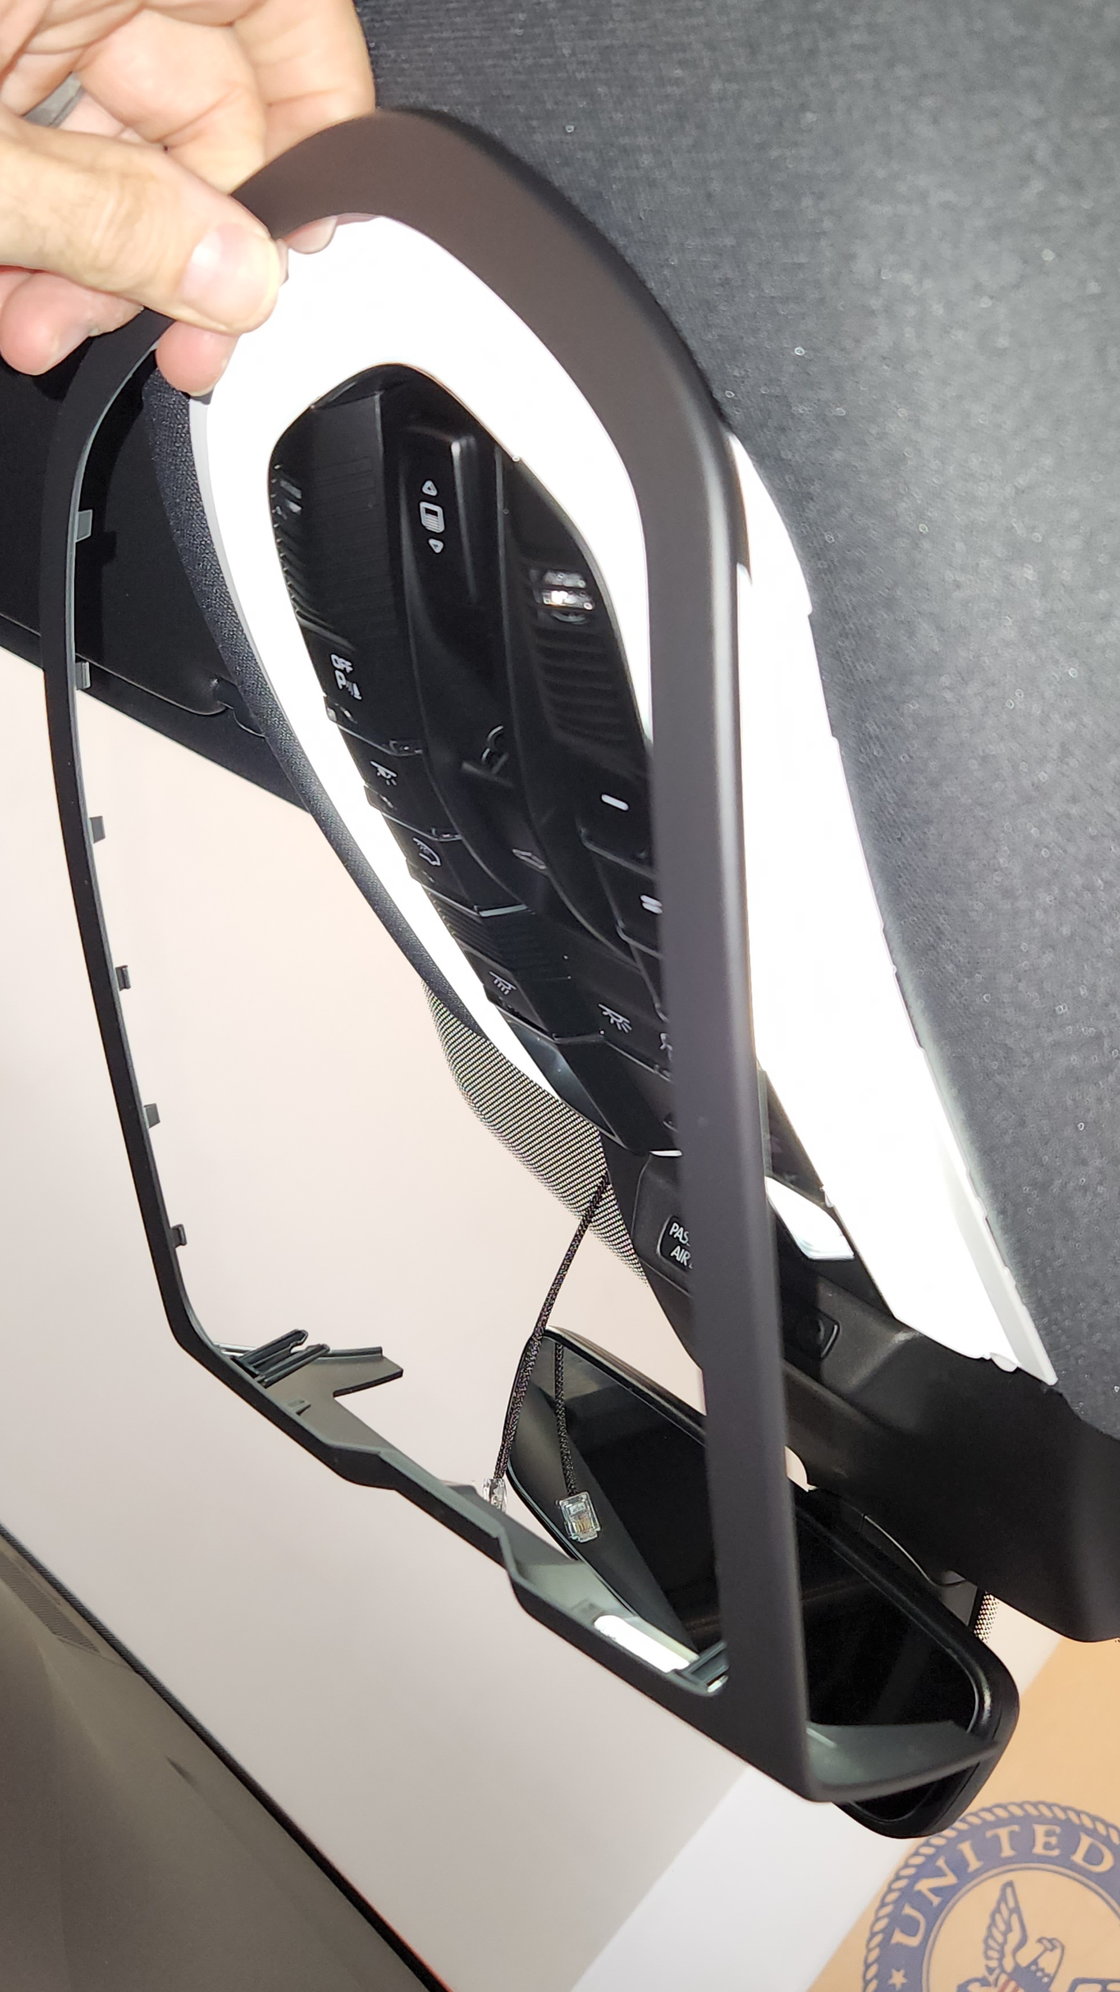
4.) Remove the main roof console panel bezel by starting at the windshield end and gently pulling downwards with your fingers. Work your way backwards separating the tabs. This was very easy to pop off, just be careful not to bend the bezel as you work your way around.
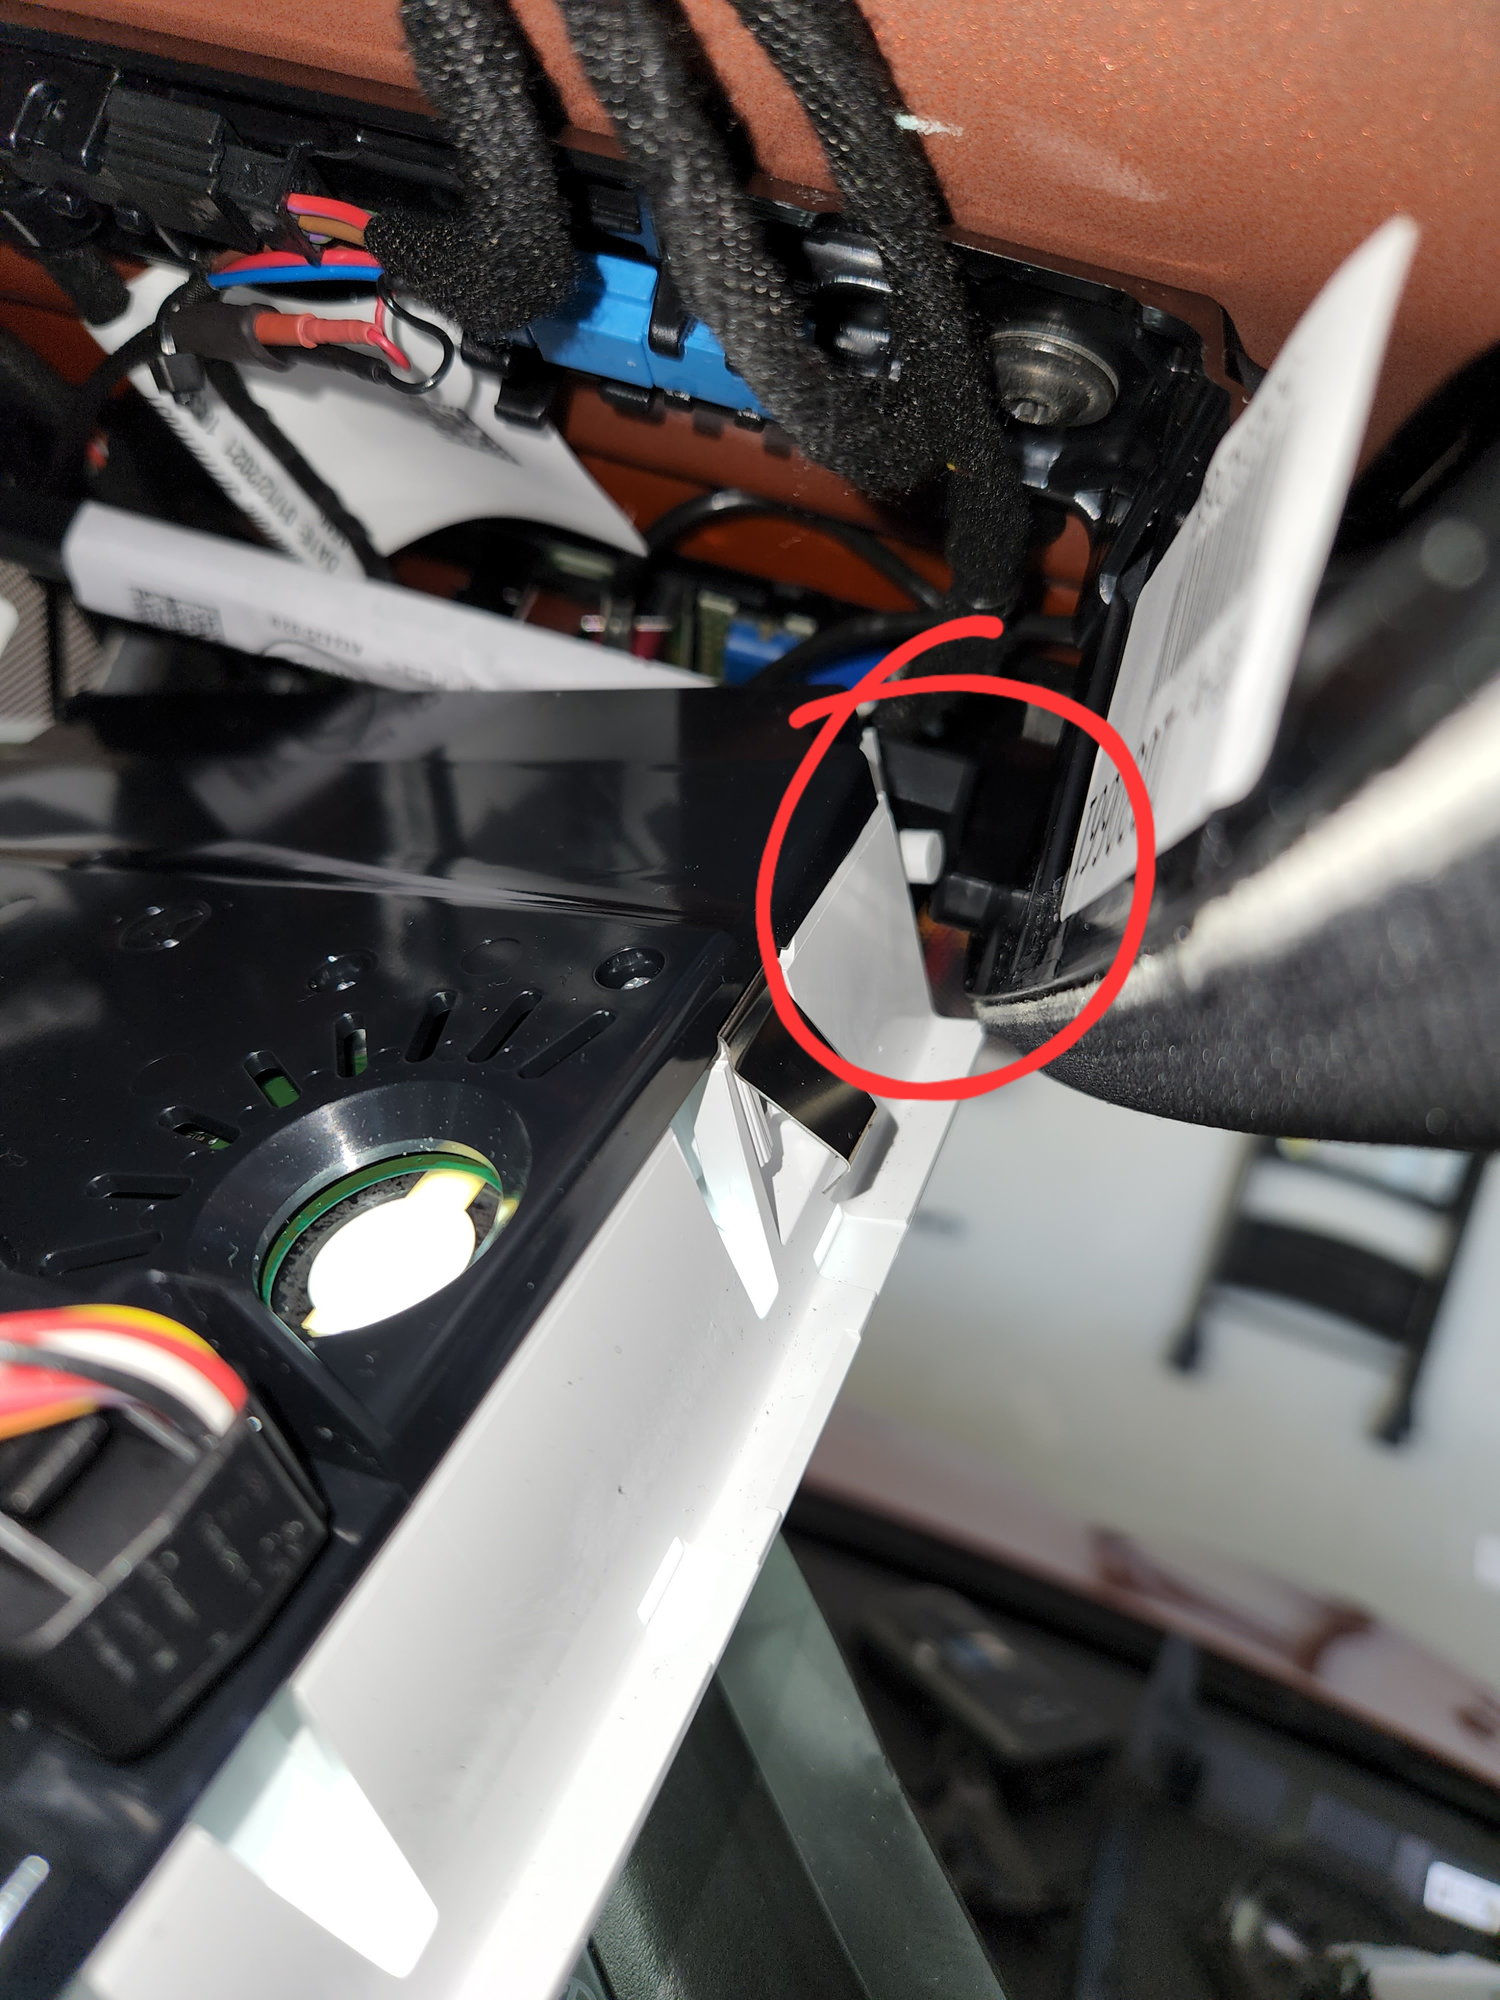
5.) Now for the tricky part. Getting the main roof console panel down. I saw lots of posts about removing this on Cayenne forums and everyone seems to manhandle it and bend the metal clips. You can get it off without any bending or damage. With a thin nylon pry tool slide up between the panel and the headliner and push the clips in as you work the panel downwards. These little indentations I am pointing to correspond to each metal clip.
6.) This shows where you are trying to put the thin nylon pry tool. The main roof console panel is hinged at the front, so start at the rear/center and progressively release each clip w/ one hand and the pry tool while using the other hand to keep downward tension on the panel. Once you get the first 2 clips the rest is easy b/c you can now see each clip.
7.) The main roof console panel is hinged at the front. Once all the clips are released it will hinge forward. You can lift the hinge tabs out of the cradles to free the center panel once it's rotated down and forward.
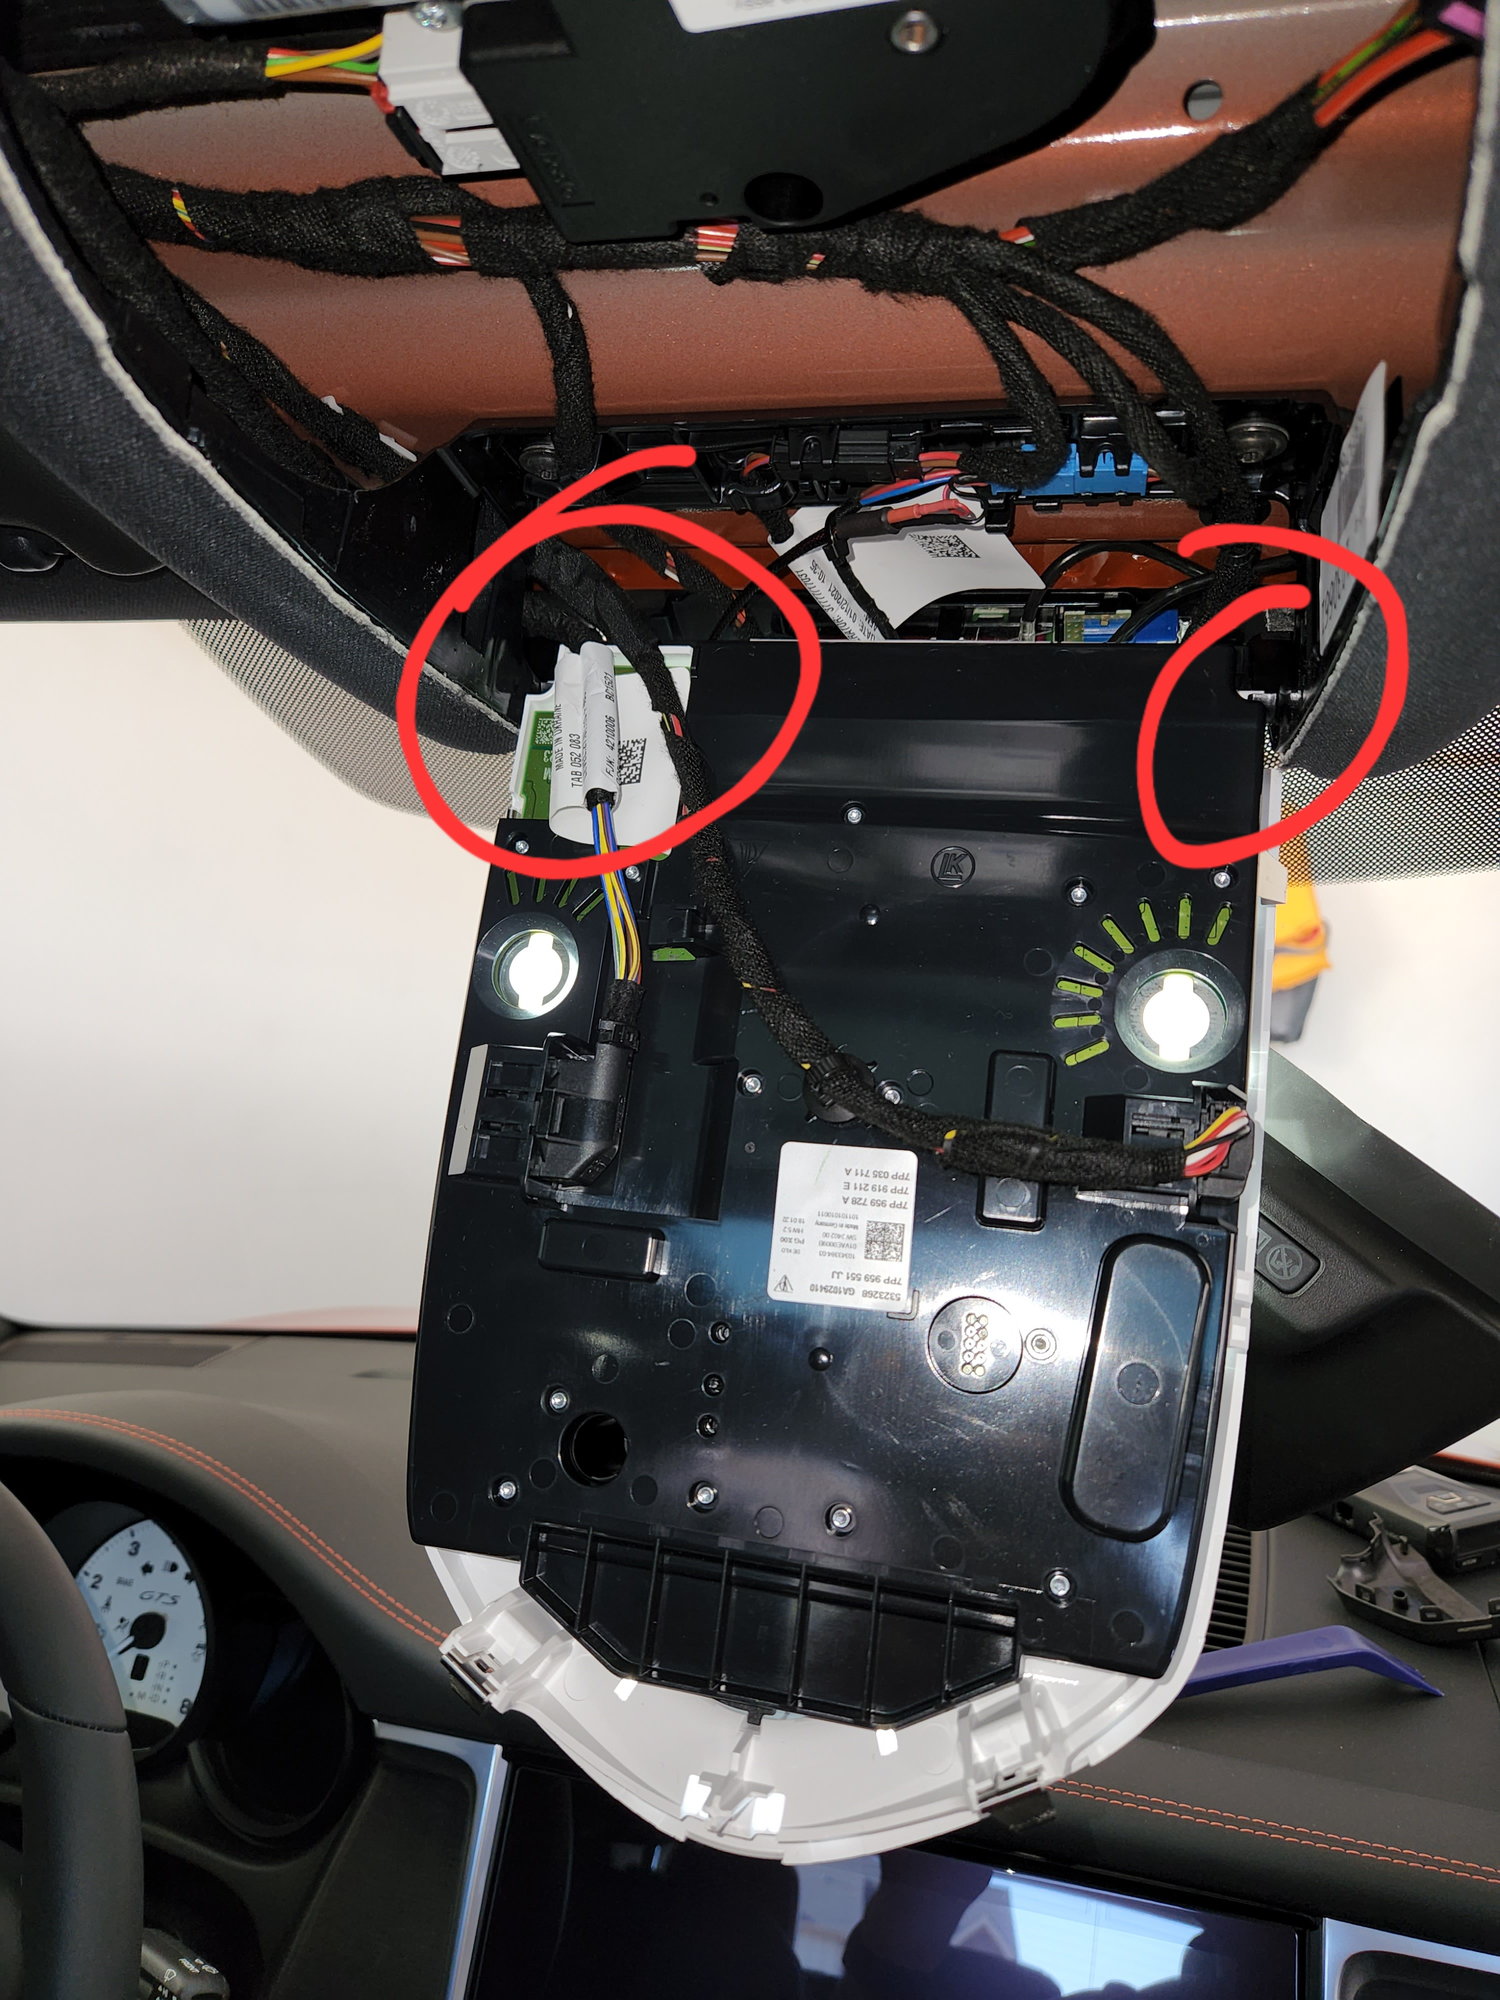
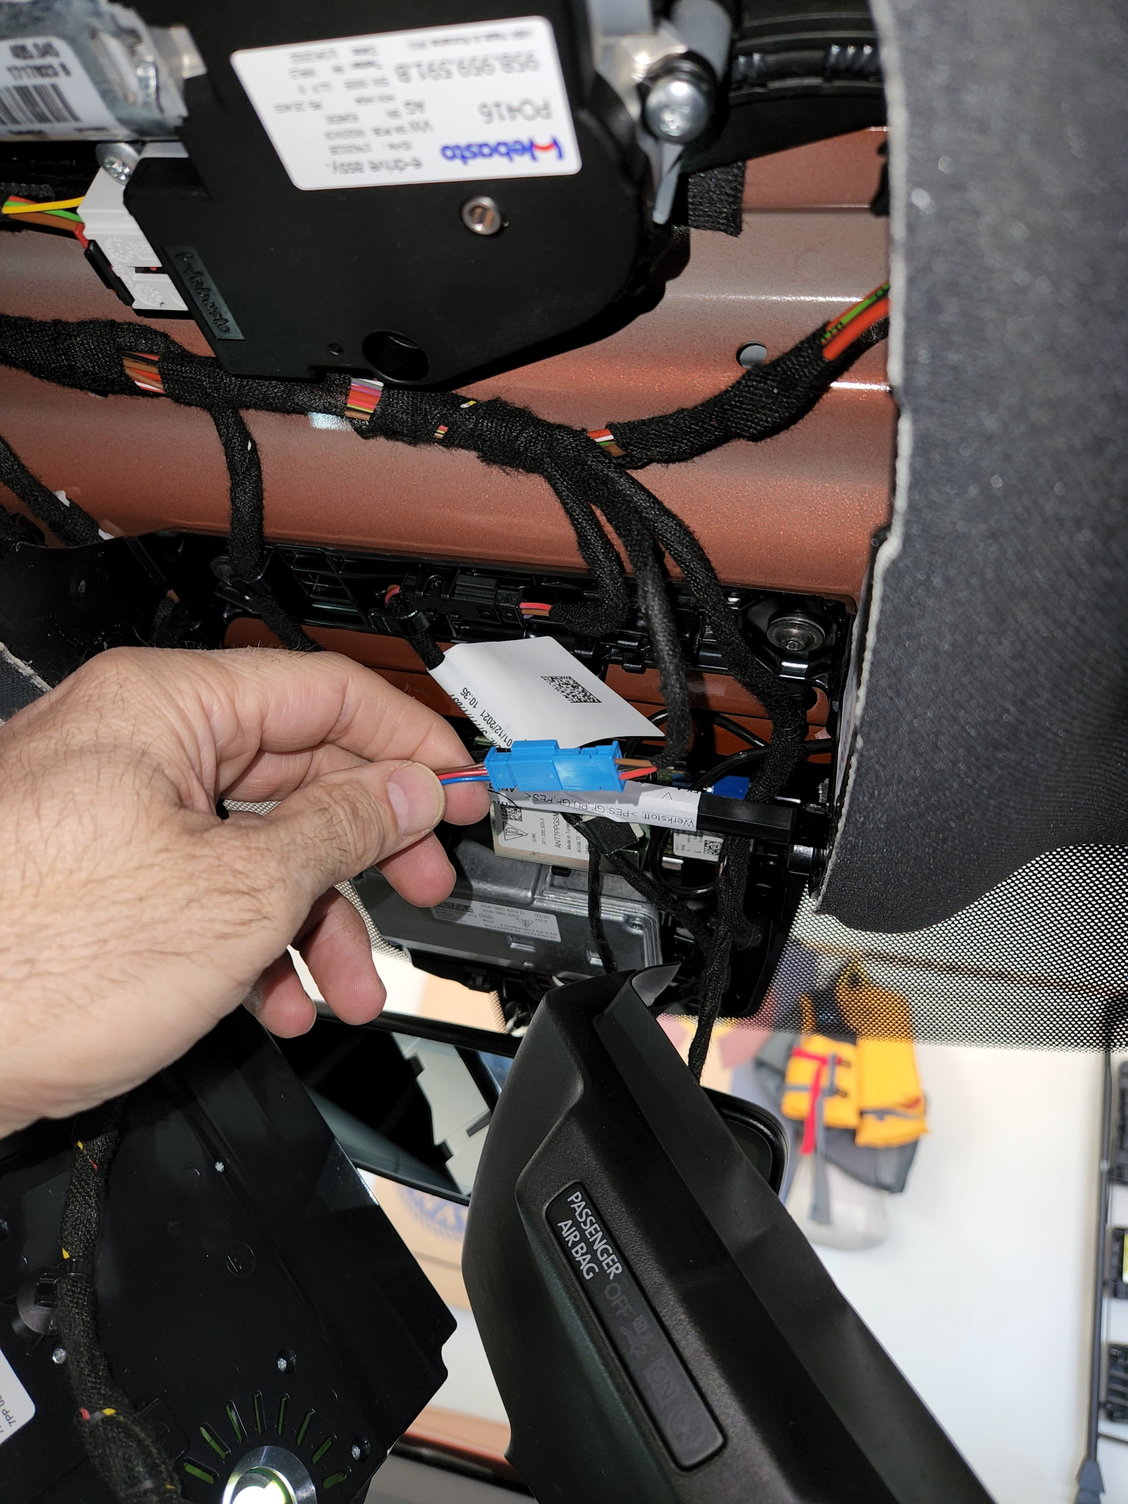
8.) Let the main roof console panel and the center airbag light panel hang by the wiring harnesses, they are not heavy. The connector you want to tap into is the BLUE connector. This is the connector for the rear view mirror.
9.) Pull the blue connector out of it's holder.
The wires are as follows (at least on my 2022 Macan GTS, Porsche may have changed wire colors on different years/models as they often do, so check w/ a multi-meter):
Mirror side of connector: Blue +12v switched / Red +7.5V - variable, assume this is for the auto-dimming / Brown Ground
Vehicle side of connector: Red-blue stripe +12v switched / Black-yellow stripe +7.5v variable / Brown Ground
10.) I chose to tap into the mirror side of the connector b/c that was the side I was going to run the MirrorTap harness out to where I wanted to mount my radar detector.
Tap was to the blue wire for +12v switched power and brown for ground. After putting the taps into the connector I zip tied the MirrorTap harness in place so it would not pull out and snapped the blue connector back into it's holder.
11.) Prior to closing things up I tested to make sure the power was good and it went on/off with the ignition.
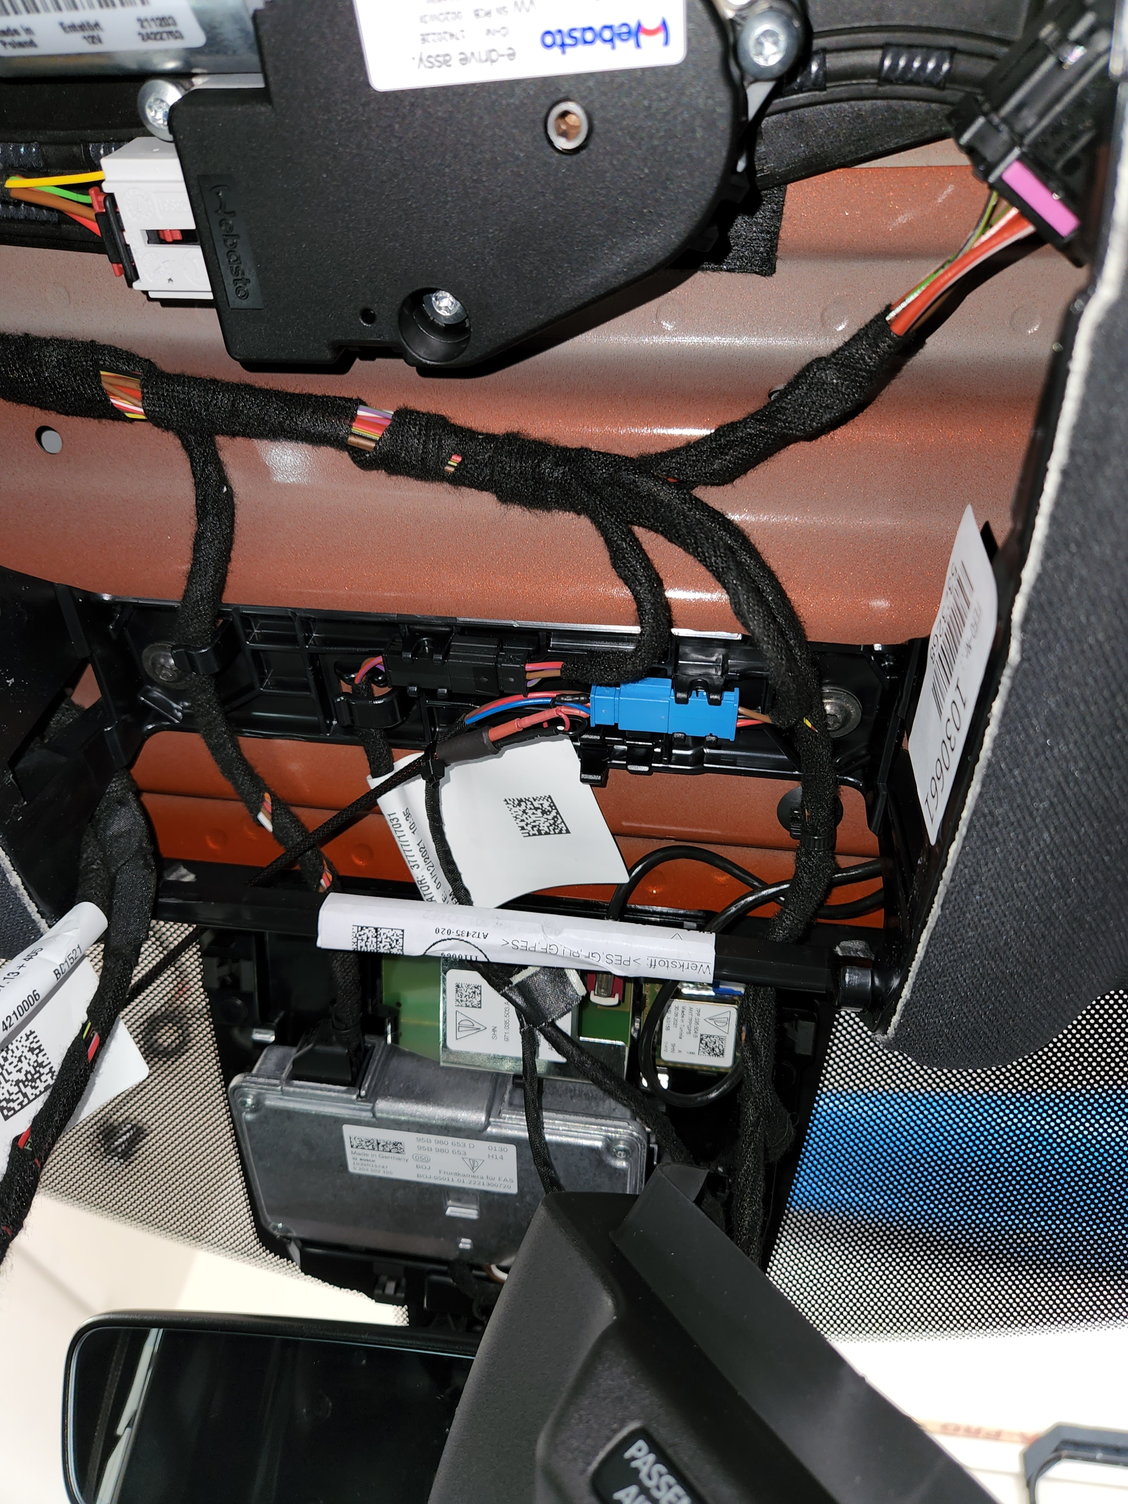
12.) When reinstalling the main roof console panel make sure you get the hinges back into palace first, then rotate the main roof console back into place.
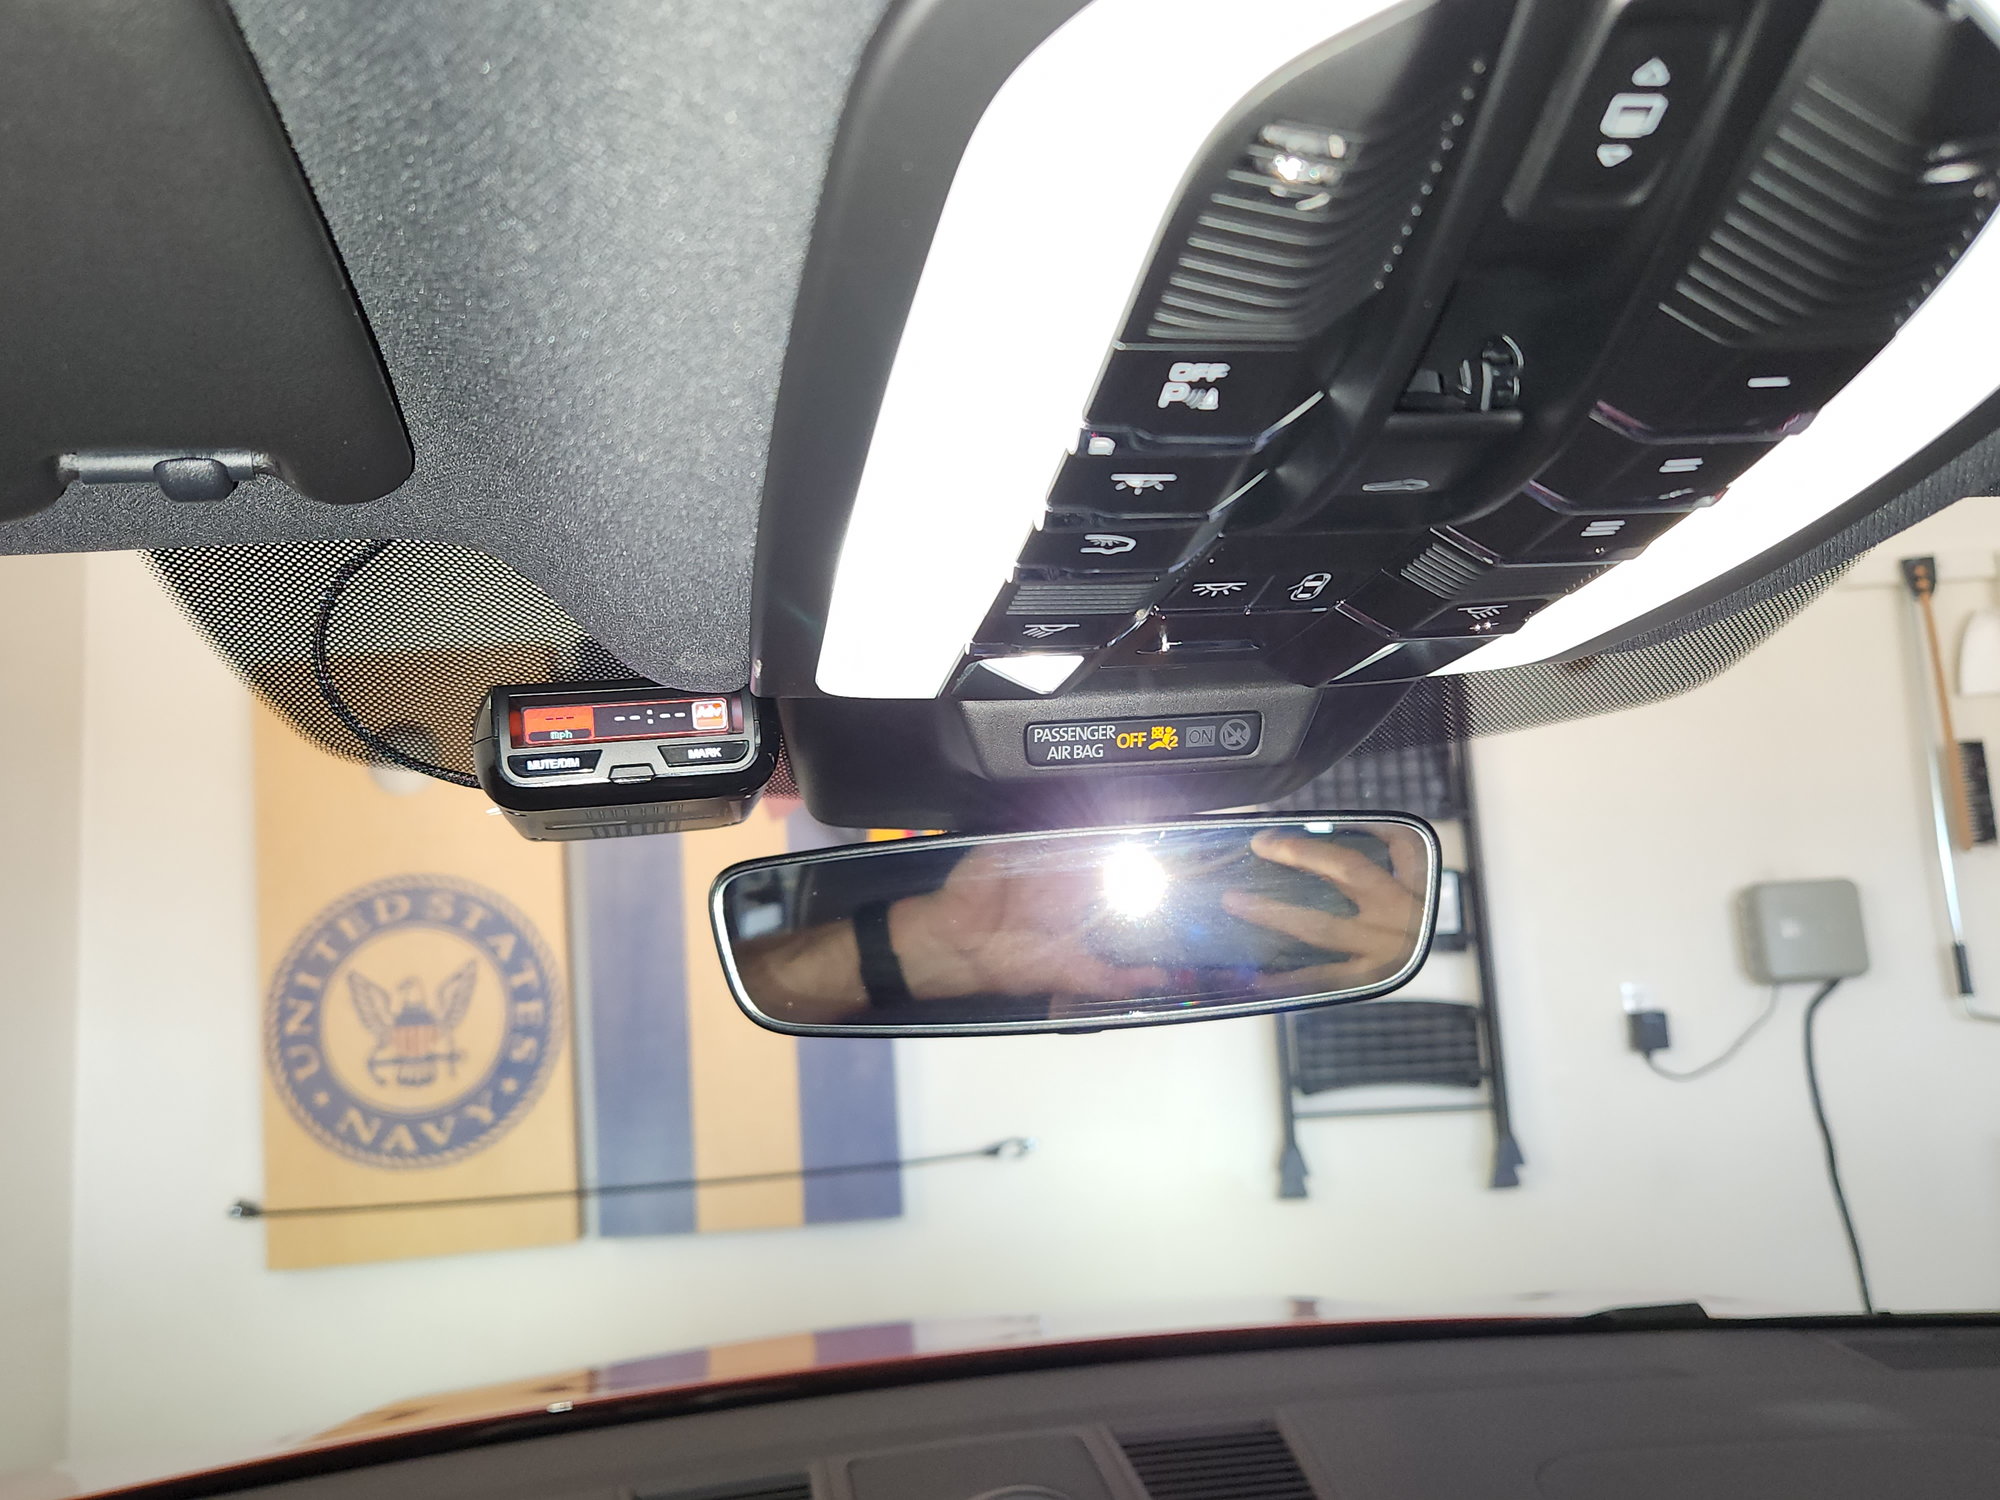
13.) Everything back together w/ the Mirror Tap routed out between the middle airbag light panel and the main roof console.
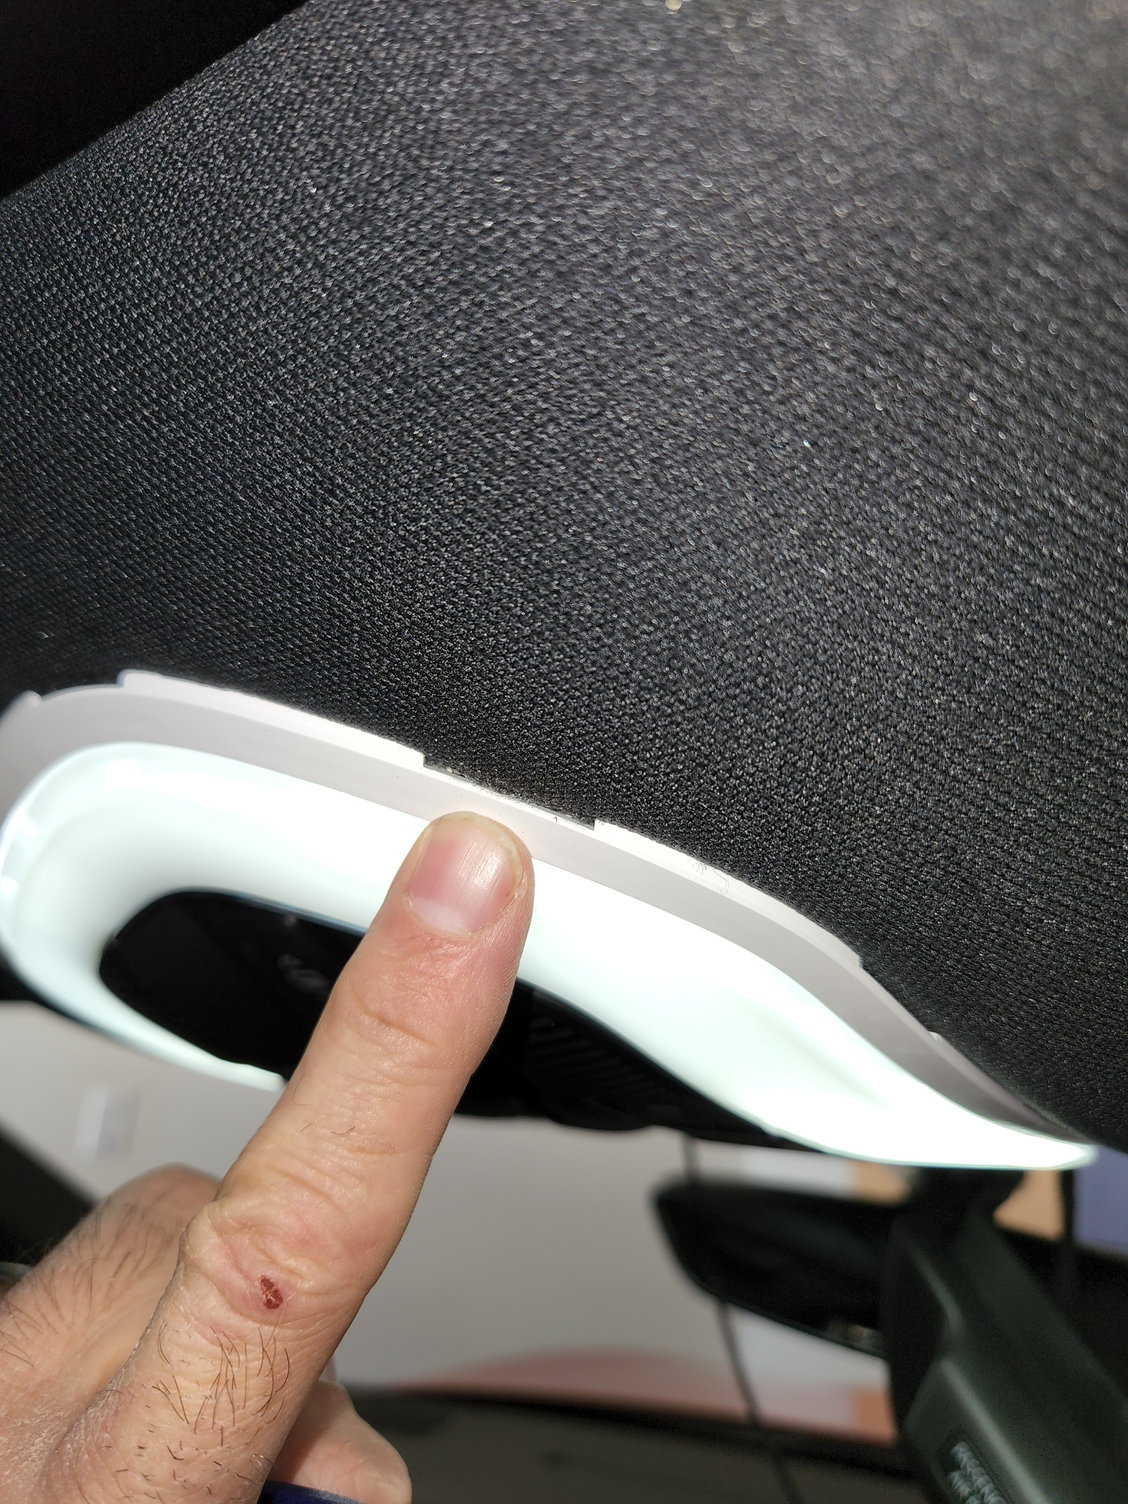
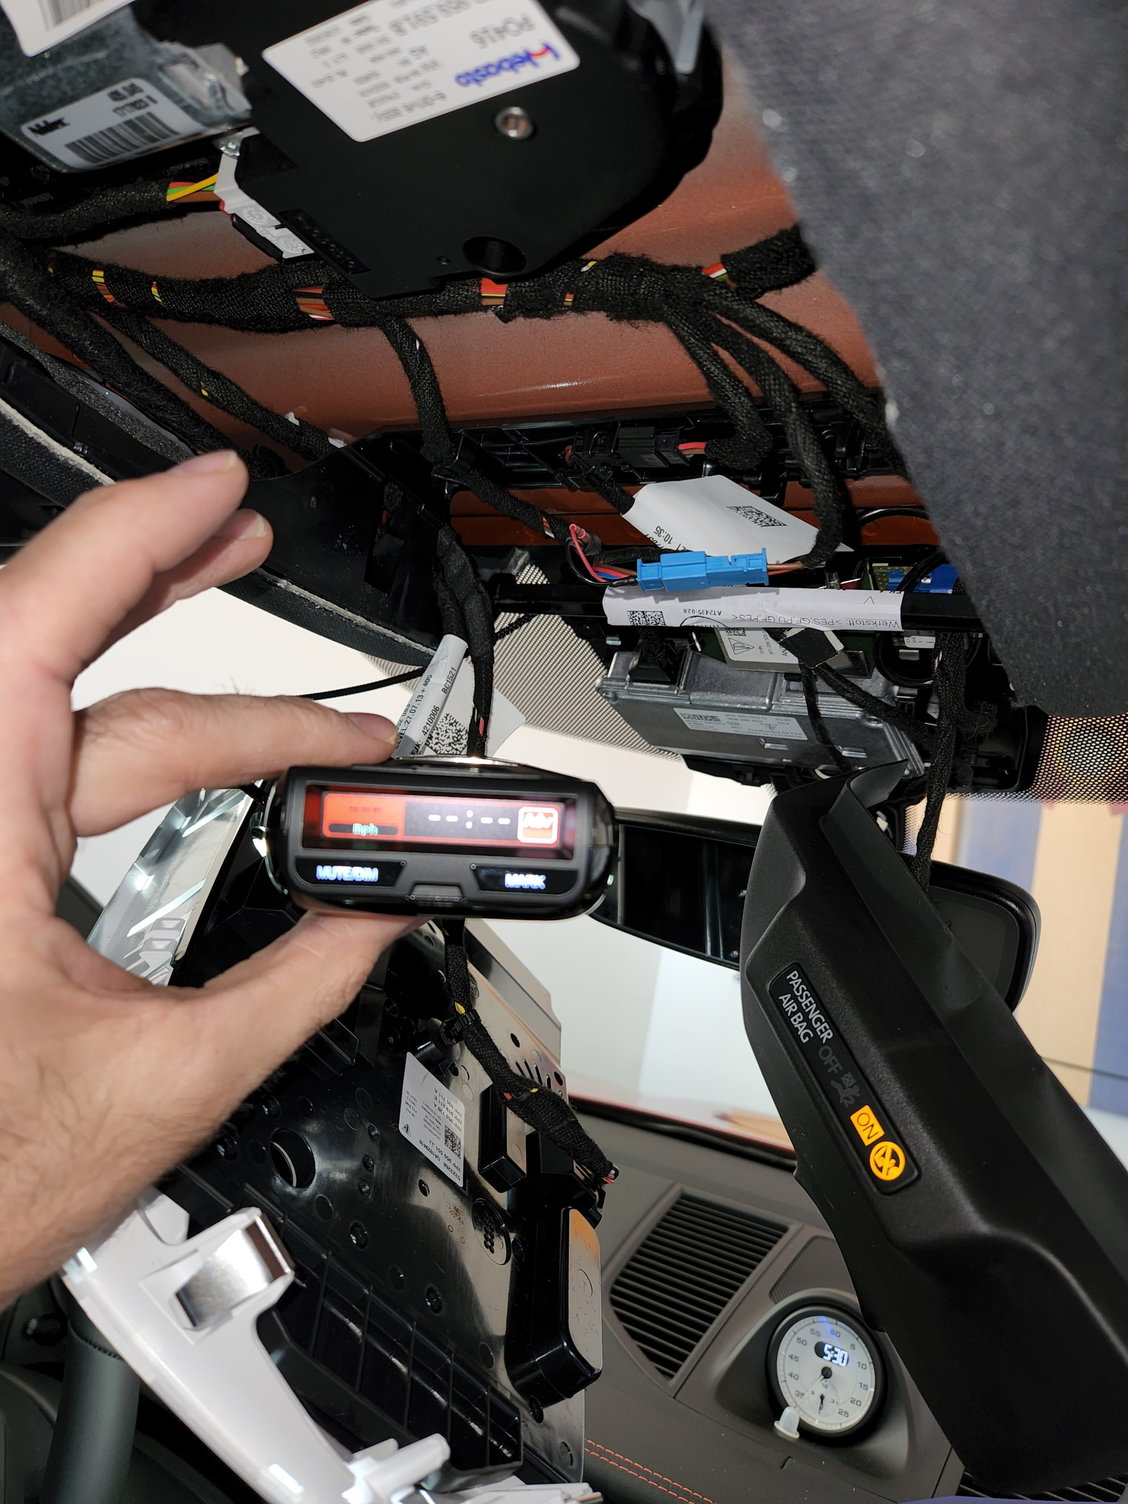
14.) Mounted the detector w/ stick on mount in position as high/close as I could get it into the designated "toll pass" area for those of us with Thermally and Sound Insulated glass option, where electronic signals are supposed to be able to pass through.
15.) I also chose this mounting position so that I can use my sunshade w/o interference. I tried a Blendmount I had left from my GT4 (same mirror stalk) and it hangs down too low for the sunshade (plus not a good spot if you have the insulated glass option).
All done! Hope this helps someone. I was surprised the Macan has been around for coming up on a decade and there is almost no info on the interwebs about using a MirrorTap that I could find. Cheers!!
Great write up Nick, these are gold for so many people.
I do the wire routed under the headliner, down the a-pillar under the rubber and plug into an empty fuse space. Done a few so it's very quick, not as integrated as your setup though.
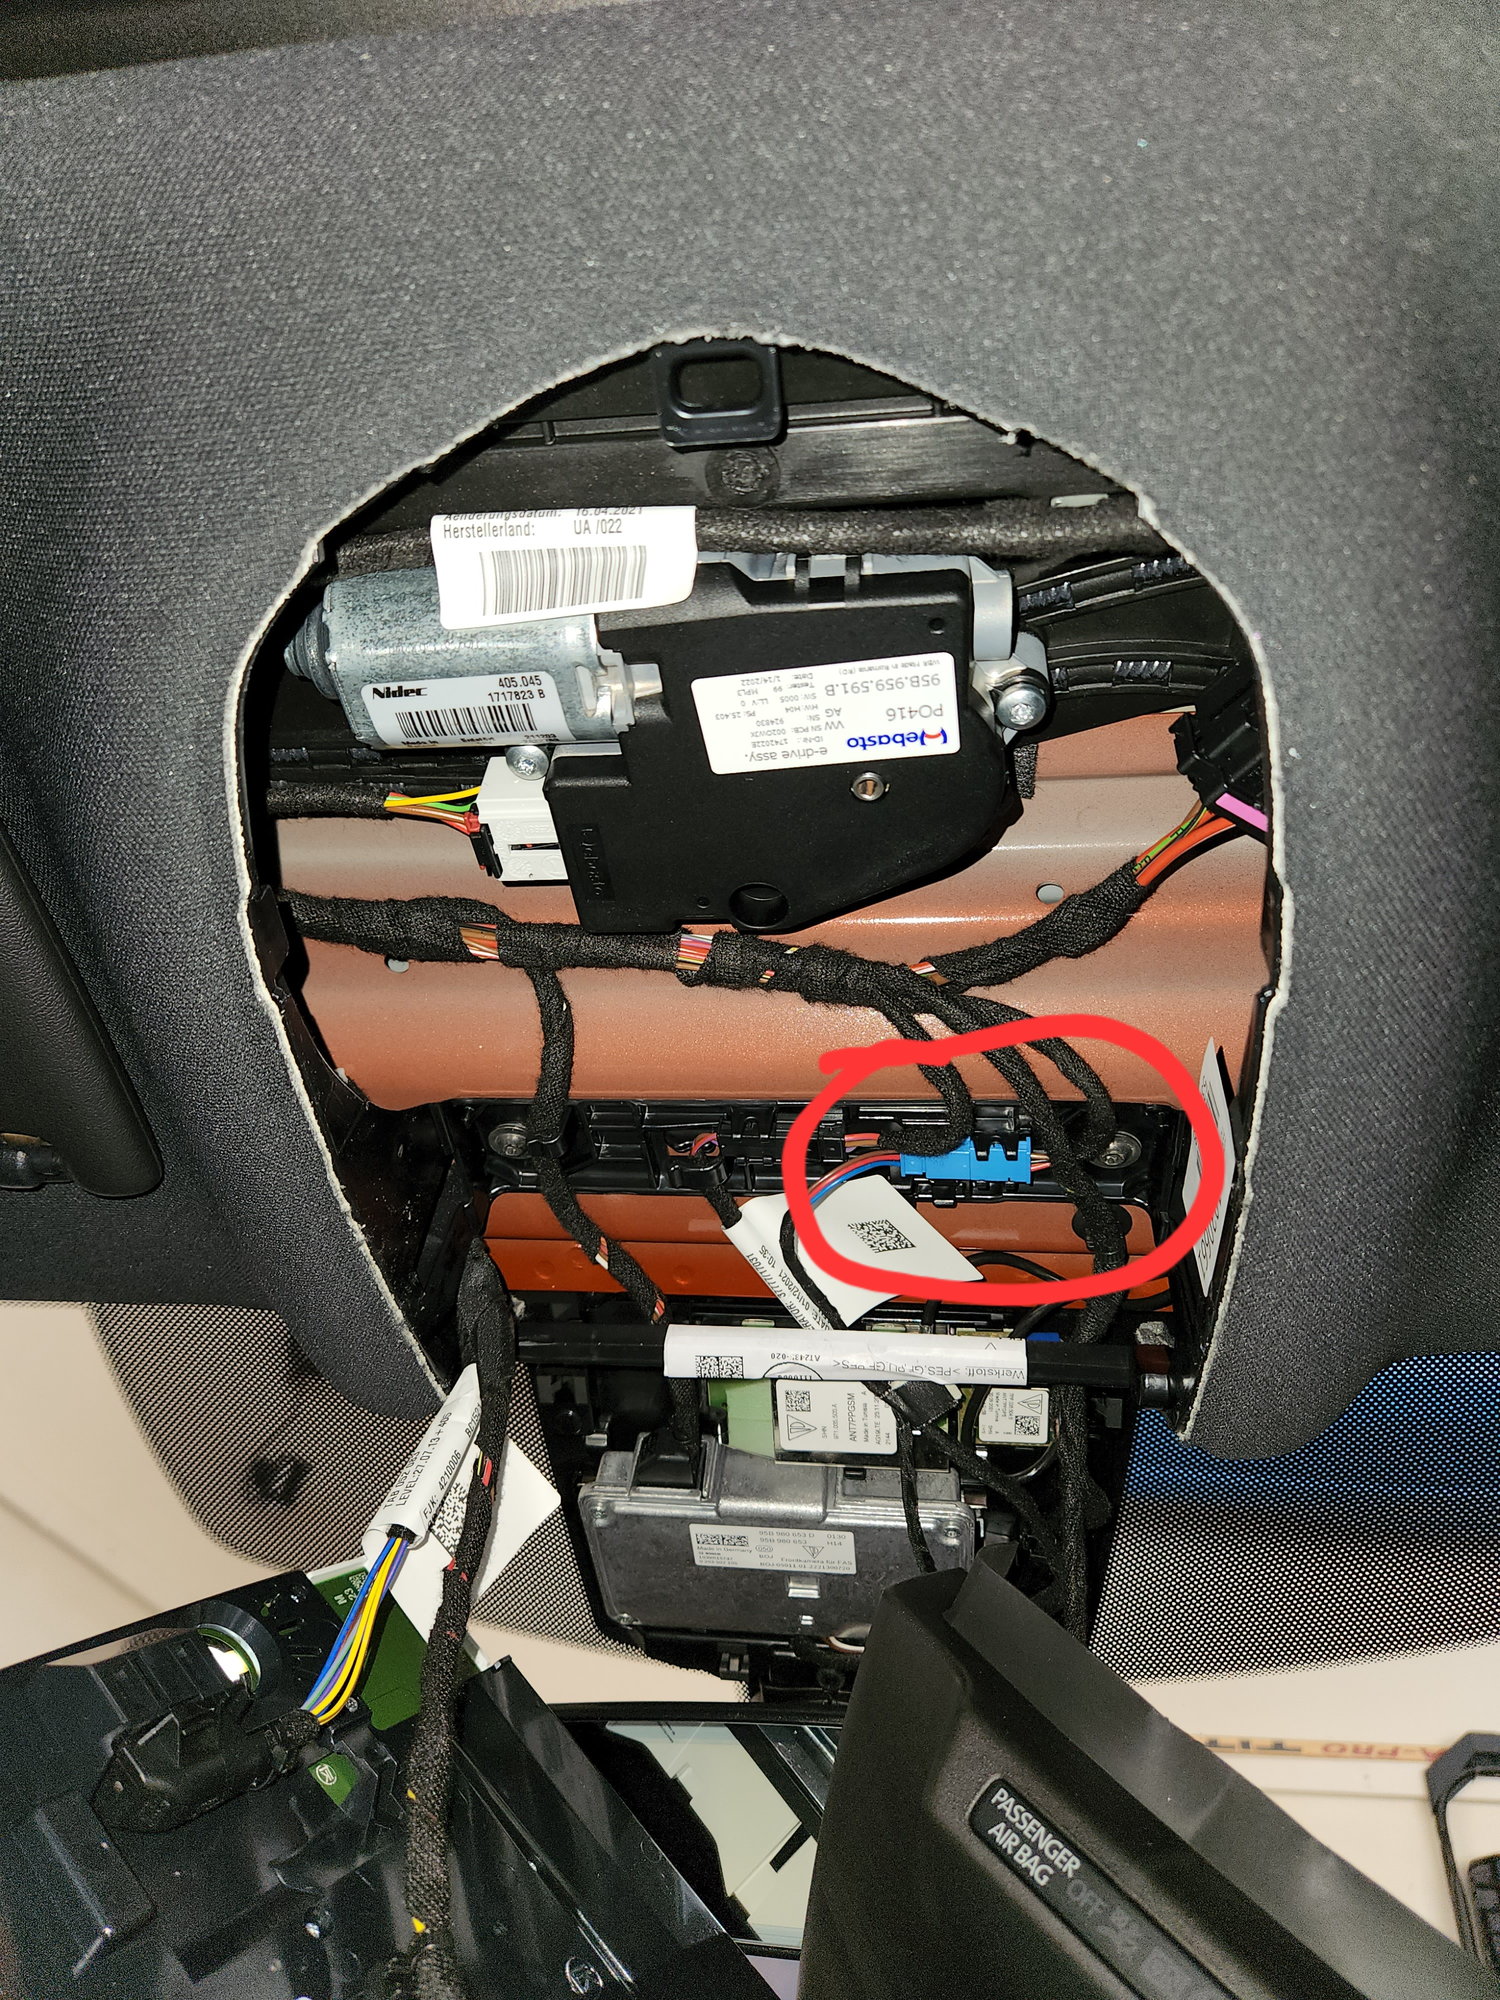
EDIT - Removing the mirror ball stalk cover #2 is actually optional, you can leave it in place unless you need to route the MirrorTap harness out of this area for your specific radar detector mounting application. I removed it just so I could confirm which of the 3 wiring looms in the area actually went to the mirror and up to the blue connector. The other 2 go to the sensor module mounted behind the glass above the mirror.
I just wired my dashcam and routing the cable hidden under the headliner - A-pillar - fuse panel is 100 times easier than removing the whole mirror assembly. Also much less risky with regards to breaking tabs and plastic parts.
I'd to the radar detector the same way, it really is a 5 minute job and the wire is completely hidden, but having the laminated glass option, this goes out the window...
but having the laminated glass option, this goes out the window...
Radar detector appears to be working fine w/ my laminated glass option windshield. As you can see I mounted it in the area designated for transponders, where the glass is not laminated, per the owners manual.
Radar detector appears to be working fine w/ my laminated glass option windshield. As you can see I mounted it in the area designated for transponders, where the glass is not laminated, per the owners manual.
Really? It's working in that position? I'm surprised because even if I hold it completely against the headliner right by the windshield, if it's level it won't clear the cut-out section.
Have you been able to do some sort of range testing with it in that position?
Really? It's working in that position? I'm surprised because even if I hold it completely against the headliner right by the windshield, if it's level it won't clear the cut-out section.
Have you been able to do some sort of range testing with it in that position?
Nothing scientific but I am driving by several known falses that I drive by all the time and it is going off just as early and as much as on my other 3 vehicles that I run the same RD in. Most are K band falses, a couple of them are Ka band falses.
Looks like you are using a Uniden R3 as well. I have 3 Uniden R3's and 1 Uniden R4 across our vehicles. Have not tried the R4 in the Macan yet but in my other vehicle it definitely has more range and sensitivity than the R3, consistent with VortexRadar's comparison test findings on it. Point being that if there is some degree of blockage using the R4 may overcome it more than the R3 does, but so far the R3 appears to be working OK.
Yes, I like the Unidens and this was exactly my plan too, to get an R4 for the Macan. I was considering a DS1 but I'm so used to the R1/R3s I've been using that I'd keep the same format.
I'll try to mount it as high as I can like you did and drive around for a while. Did you just use the suction cups mount or have some other way to secure it there?
I use these in all my cars except one where I have a Blendmount. They are awesome. https://www.ebay.com/itm/173289848012
Maybe use suction cups first before sticking one of these on.
Yeah I considered going to the DS1 but after seeing Vortex's review of the R4 and also that I have liked my R3's I bought an R4 instead. Still waiting for the Raydenso Theta like everyone else....
You were right, that does seem to be a good spot. Even with the suction cups it can sit right up at the headliner level and it's covered by the cutout section. I'm going to start looking for an R4.
Excellent guide. But . . . I’m hesitant. I once had a Tahoe that I upgraded via Becker Automotive and Stillen. When there was a problem it was a three-way blame game between Becker, Chevrolet, and Stillen. This is much simpler, but I’m not doing the work myself and I’m not going to let someone who hasn’t already specifically worked on a 2022 Macan GTS learn on my car.