When you click on links to various merchants on this site and make a purchase, this can result in this site earning a commission. Affiliate programs and affiliations include, but are not limited to, the eBay Partner Network.
2012 Cayenne Turbo Coolant leak and fix (not what you think)
Hello Rennlist! I have a 2012 Cayenne Turbo with about 127,000 miles on it and recently I noted a slight coolant smell after driving, but there were no obvious signs such as leaks on the ground, wet areas around the radiator, coolant tank, or hoses. I also noted that my coolant level was dropping a little at a time, but certainly not drastically.
Like many of you who read posts here and on other sites, I made the assumption that it must be one of my glued in fittings that were coming loose on the thermostat housing, or perhaps the thermostat housing itself or the seals were leaking and the coolant was ending up in the "V" of the engine, which is why I didn't see any obvious signs.
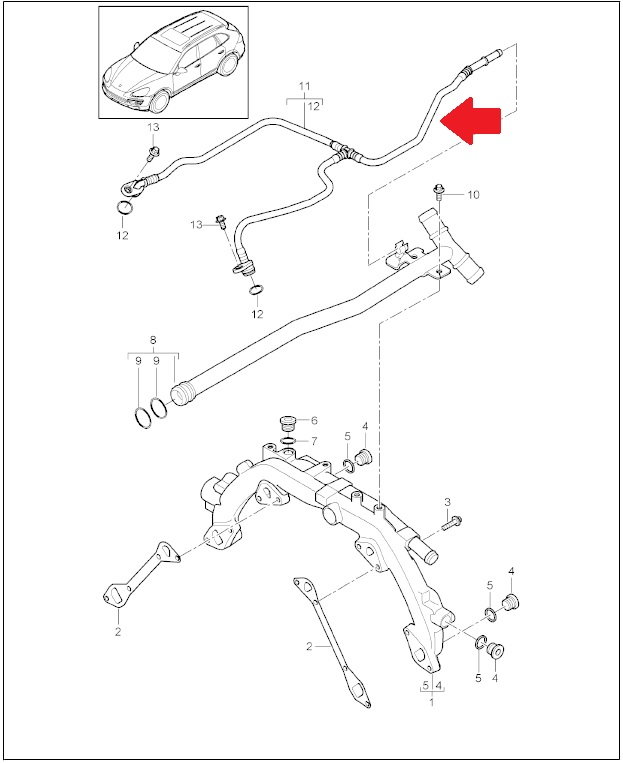
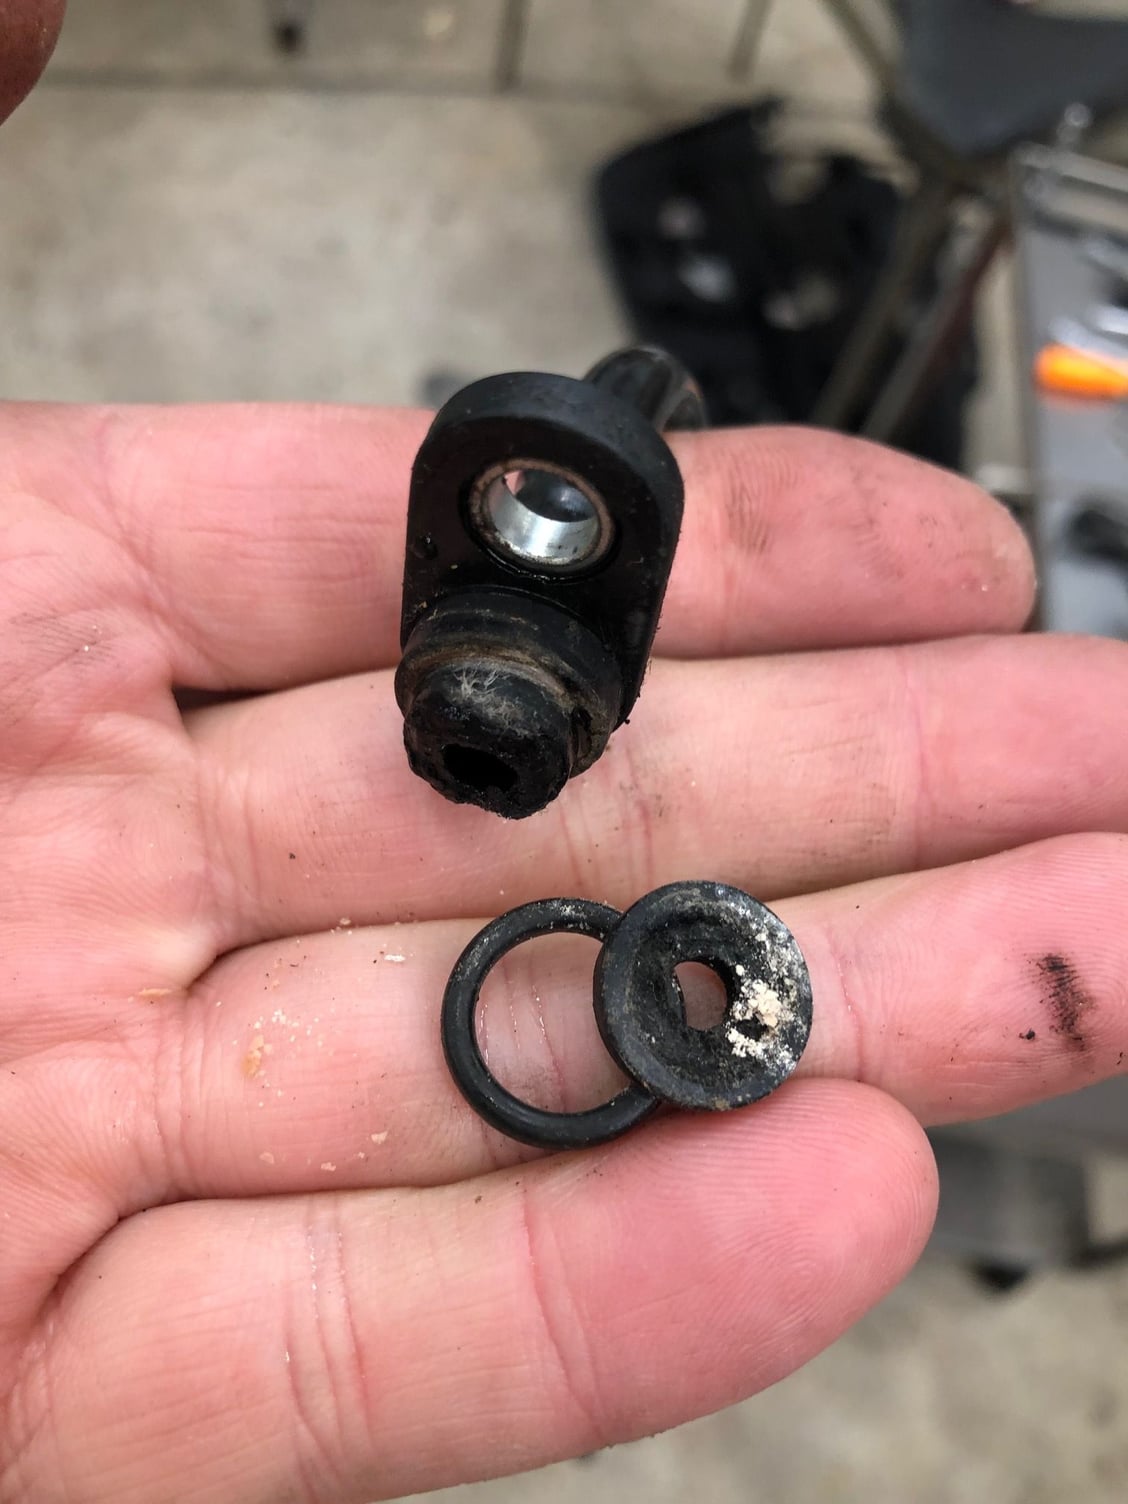
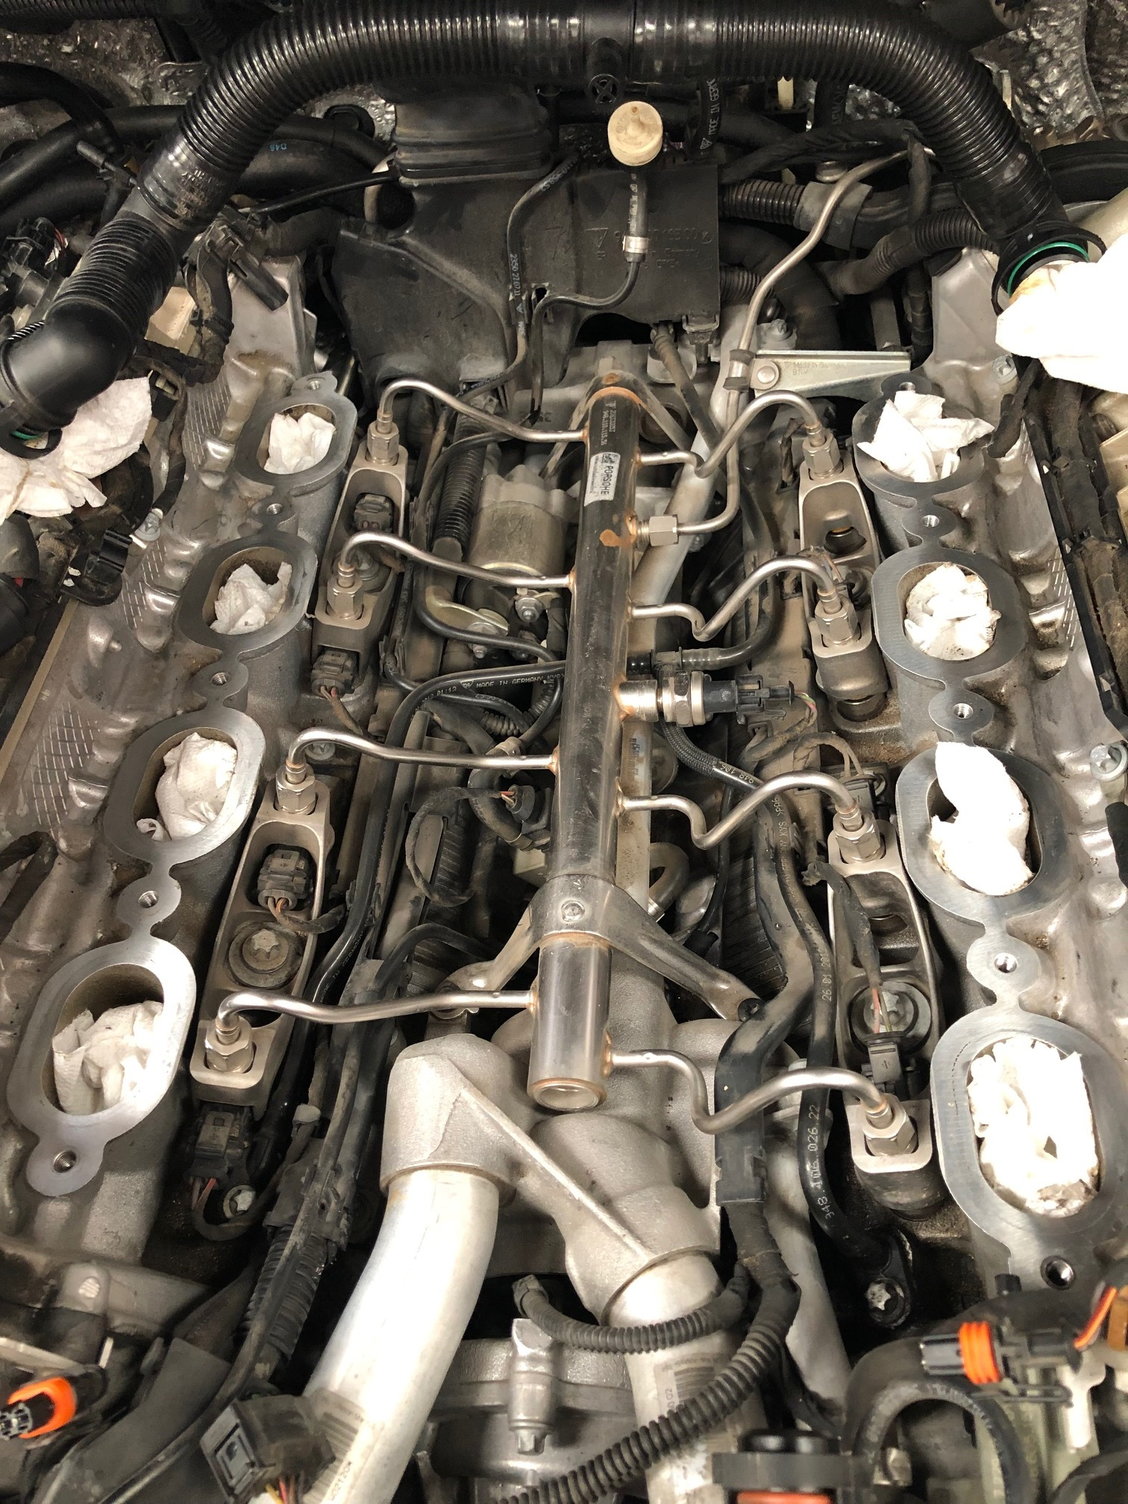
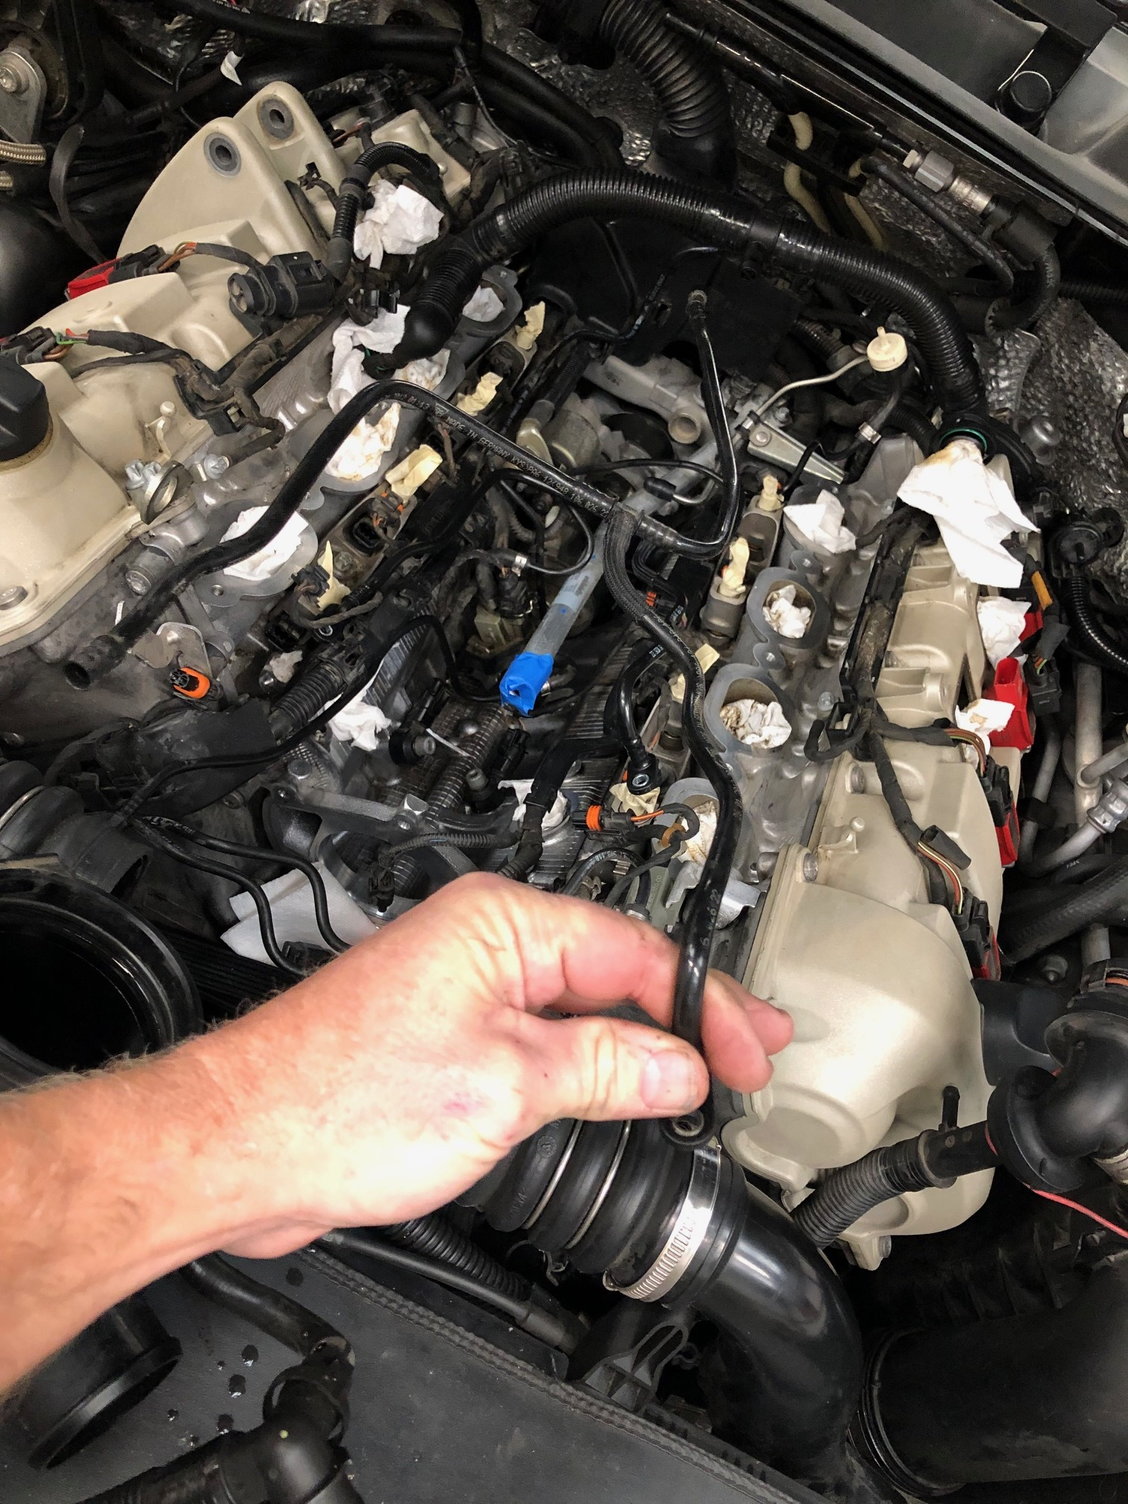
I removed the intake manifold to verify my suspicions, and sure enough, coolant was in the "V" of the engine down under the fuel rail, wire harnesses, and and starter. The interesting thing, however, was that my thermostat housing and the glued in pipes were actually fine and quite strongly fitted ... no leaks from the glue, no leaks from the housing itself, and no leaks from the thermostat insert o-rings either. After further examination, I discovered that there is a plastic "Y" hose that connects to each head on either side of the thermostat housing. This pipe is the coolant vent line, which connects at the back of the engine to a hose. Here is the diagram of this line:
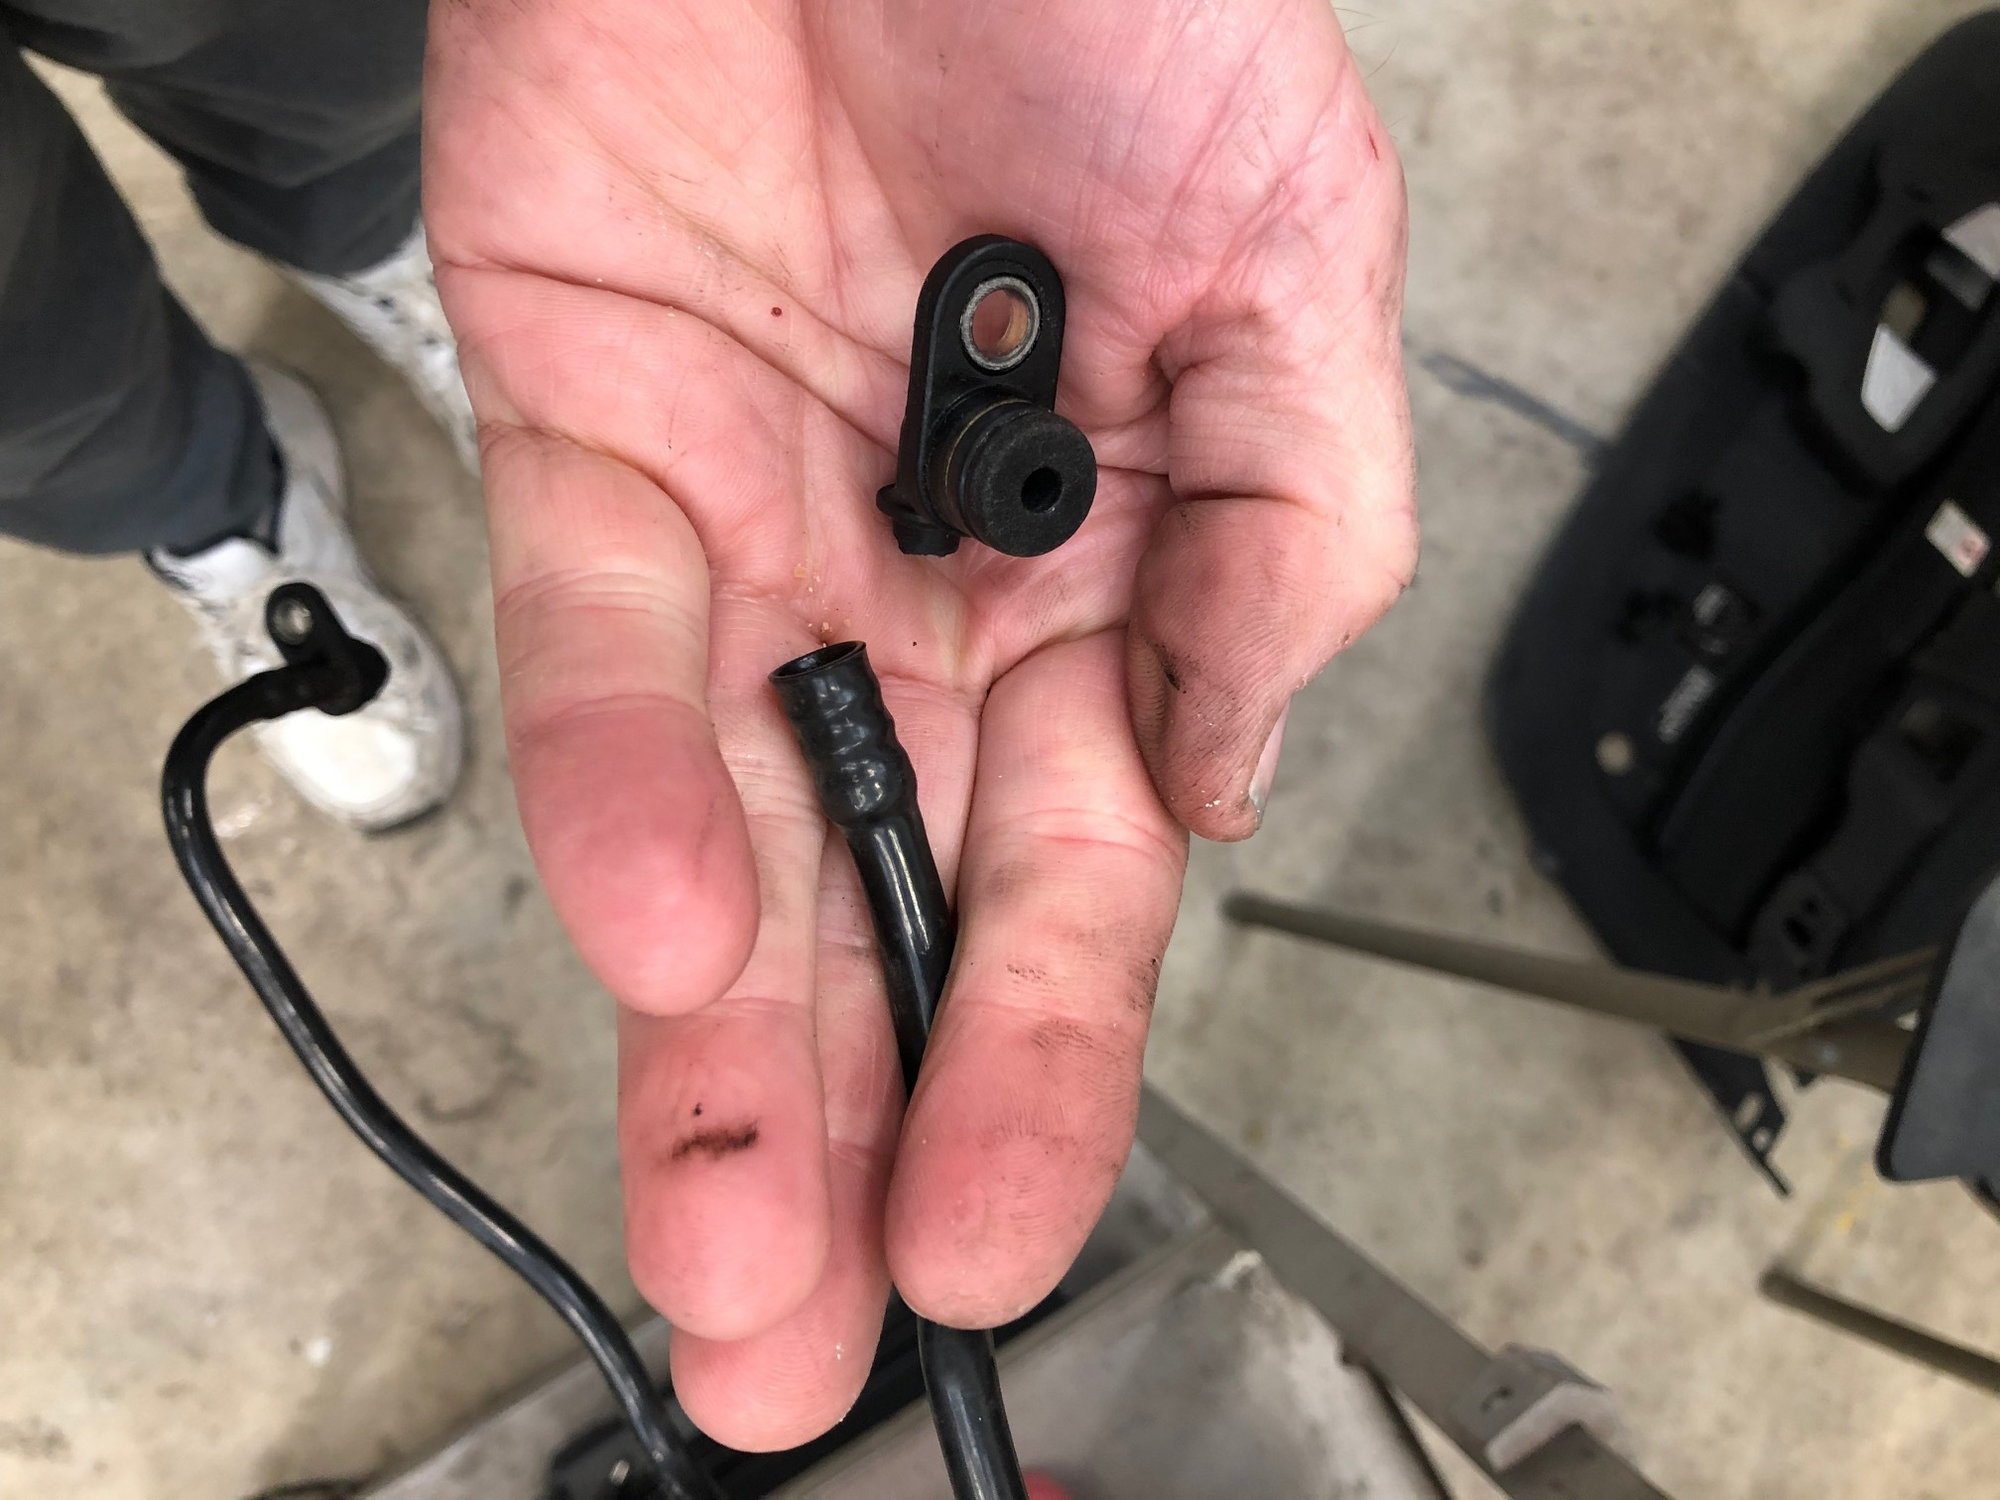
What I noted is that one of the points that connects to the passenger side head had broken nearly off the pipe (it ended up fully breaking on removal) and the other one had broken on the insert where the o-ring is. Both sides being compromised allowed coolant to escape into the "V" of the engine and is why my particular leak was a very slow one. Here are some photos of the actual part and the broken pieces. The first two photos show what cracked/broke, the third shows how it looks right after taking the intake off, and the last photo shows where the pipe is after removing the fuel rail.
Fixing this is actually very easy as the one end connects to a hose with a spring clamp, while the two ends connect to the head with a single torx bolt. The part number for this part is 948-106-026-22 and its about $50. Since I'm already "in there", I've decided to go ahead and replace the thermostat housing with the upgraded Porsche housing that bolts the pipes in (rather than glue) Part # 948-106-080-02 (why take chances) and install a new thermostat unit/seals, Part #948-106-034-01, new water pump, and gasket, and o-rings on the two pipes that attach into the thermostat housing and where the housing mates up to the heads. Based on my experience, I highly recommend you also replace the plastic coolant vent line If you decide to tackle this job as it is likely it is getting brittle with age and can break, causing a small leak that is annoying at best.
I hope this helps someone out on Rennlist and gives something new to consider. Its interesting that the much discussed glued in pipes on my car, at least, were still quite strong and showed no signs of failure despite the amount of miles on my car.
By the way, the thermostat housing, thermostat and water pump on my car was original ... lasted 127,000 miles and showed no signs of failing, but I took the opportunity to replace anyway.
Yes ... but with the caveat that you have to take off the intake manifold to see if its a problem ... which is part way to doing a water pump, thermostat and addressing the glued in fittings, if desired, so you might consider doing these at the same time. To replace this line, you have to remove the fuel rail as its underneath the fuel rail.
Joe - very nice writeup. I might try to make a DIY out of it.. thanks for the clear pics - only problem is you've given me something else to obsess about..
We seem to have a very small leak on our 13 CTT. I wonder if this is the problem. Dealership of course say they don't see anything leaking but my garage floor says otherwise. Might see if I can get my inspection camera in there to see anything first.
Last edited by function12; 01-31-2019 at 04:20 PM.
Twodollardoug ... Not at this point ... it appears to be in good condition at this time, but as you suggest, it is the last remaining glued in fitting.
One thing that may help you as you tackle this and something I've seen in the factory manuals is that the engine firewall is actually a false one made up of three sections that can be removed once the wiper arms and cowl are removed. They just have a few screws to remove and then slide up. The hoses and such that appear to be attached to the firewall you see actually aren't or have easily detached mounts. I would think that by removing this firewall would make access to the manifold and pipe a lot easier and may not require the removal of the high pressure fuel pump. Just food for thought.
That's good to know about the false firewall. That might make it easier. If i don't need to remove the fuel pump that's even better. I'm having a heck of a time trying to find the fuel pump gasket and the little plastic pieces that interface the pump to the cam. I'm going to see what it takes to remove that false firewall panel.
Good info. Thank you
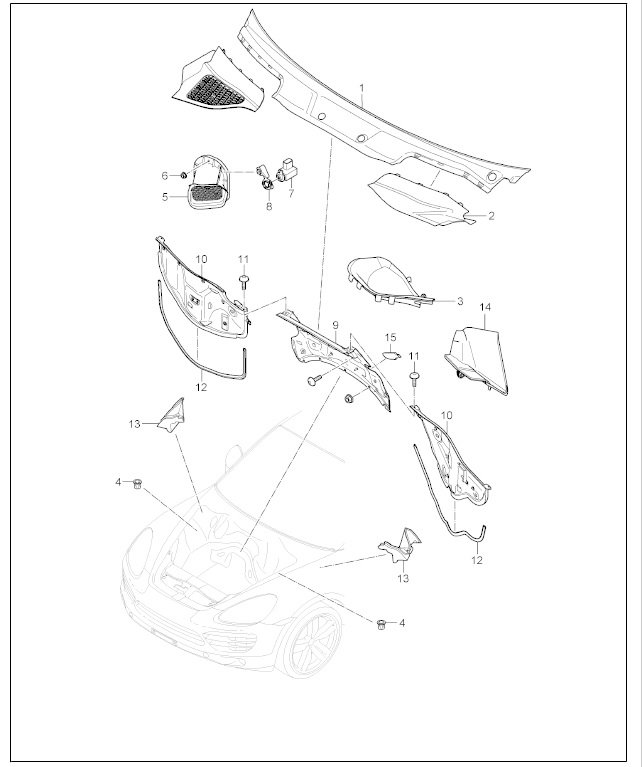
2011-2018 Porsche Cayenne three-piece firewall info
Attached are the instructions to remove the three-piece false firewall ... also called the engine cross panel. Hope this helps some of you guys that might need to work near the rear of the engine.
Here's an illustration from the Porsche Parts Catalog for further clarification.
Attached are the instructions to remove the three-piece false firewall ... also called the engine cross panel. Hope this helps some of you guys that might need to work near the rear of the engine.
Here's an illustration from the Porsche Parts Catalog for further clarification.
Wow. What a discovery. I'd think the firewall has to be there. Maybe this is to remove the silver lining on the firewall?
Nope ... the “silver lining” is attached to the three panels and comes out as a unit with the panels. It gains you about 8 more inches of workspace when you remove them.
Nope ... the “silver lining” is attached to the three panels and comes out as a unit with the panels. It gains you about 8 more inches of workspace when you remove them.
AMCPILOT, just out of curiosity, why didn't you fix the crossover pipe while you were in there? I get the if it ain't broke don't fix it. But won't it be in the back of your mind that that sucker could fail? l Like on a road trip? I hope I don't sound like I'm questioning your judgment because I'm not. Not even close. I'm just wondering your reasoning.


 01-30-2019, 07:51 PM