

2004 Cayenne 955 Turbo Upgrade Build Thread, Custom Manifolds, BW EFR 7163's
 08-09-2017, 02:48 AM
#1
Three Wheelin'
Thread Starter
My Cayenne Turbo Build with a random collection of other offerings
Go ahead and grab yourself some and some
  or some [SIZE="5"]��[/SIZE]and take a ride with me as we try to get this fat[SIZE="7"]��[/SIZE] to smoke all
 .
.
It has been a long journey up to this point for many reasons. Some related and some un-related. I am taking a big[SIZE="7"]��[/SIZE] and rolling the ���� because I am so in[SIZE="7"]��[/SIZE] with this machine. There is no real substitution for the first gen Cayenne IMO.
The first person I have to thank is my lead engineer/emotional support counselor Annie Duran. With a project like this things can get tough and there is always someone sadder than you. You can follow her @#buttspinfatpigAnnie
My original goal was only to figure out a solution for my worthless paper weight with a hurt engine. As my research/solution progressed I ended up with a sleeved block. Next I had to address some pistons. And before you know it, I wound up here. Wait a minute, it was only an exhaust valve to begin with? All you car, plane, motorcycle, "toys", "projects" guys, you know exactly how this onion peels!
I'm already quite far into this project. Because of this there are some area's that I will not be addressing as well as I would have liked to. But, I still have all the info for you. Mostly what we will be missing is some of the engine assembly as I did not document as well as I would have and take pictures that go along with that. The good part is that we don't have to do this for the next two years! I am working very hard to have a running, sorted machine in the next two months. Fingers crossed! I would like to keep this on-topic as much as possible. However if there are questions about areas of the car that we don't normally get to, now would be a good time to ask
A couple of key points:
*None of the information contained here is intended as a "Do It Yourself". More Like a "Did It Myself"
*This applies only to the 2003-2006 955 turbo. The 957 is close in many respects. However the engine is much different and in the interest of keeping things on-topic and the audience captivated I will only address the 955.
I really hope that all you guys and gals enjoy my first Cayenne build and my first online adventure.
Go ahead and grab yourself some
and some or some [SIZE="5"]��[/SIZE]and take a ride with me as we try to get this fat[SIZE="7"]��[/SIZE] to smoke all .It has been a long journey up to this point for many reasons. Some related and some un-related. I am taking a big[SIZE="7"]��[/SIZE] and rolling the ���� because I am so in[SIZE="7"]��[/SIZE] with this machine. There is no real substitution for the first gen Cayenne IMO.
The first person I have to thank is my lead engineer/emotional support counselor Annie Duran. With a project like this things can get tough and there is always someone sadder than you. You can follow her @#buttspinfatpigAnnie
My original goal was only to figure out a solution for my worthless paper weight with a hurt engine. As my research/solution progressed I ended up with a sleeved block. Next I had to address some pistons. And before you know it, I wound up here. Wait a minute, it was only an exhaust valve to begin with? All you car, plane, motorcycle, "toys", "projects" guys, you know exactly how this onion peels!
I'm already quite far into this project. Because of this there are some area's that I will not be addressing as well as I would have liked to. But, I still have all the info for you. Mostly what we will be missing is some of the engine assembly as I did not document as well as I would have and take pictures that go along with that. The good part is that we don't have to do this for the next two years! I am working very hard to have a running, sorted machine in the next two months. Fingers crossed! I would like to keep this on-topic as much as possible. However if there are questions about areas of the car that we don't normally get to, now would be a good time to ask
A couple of key points:
*None of the information contained here is intended as a "Do It Yourself". More Like a "Did It Myself"
*This applies only to the 2003-2006 955 turbo. The 957 is close in many respects. However the engine is much different and in the interest of keeping things on-topic and the audience captivated I will only address the 955.
I really hope that all you guys and gals enjoy my first Cayenne build and my first online adventure.
Last edited by J'sWorld; 07-29-2018 at 12:06 PM. Reason: Change of screen name required an edit.

The following users liked this post:
ElSpoon958 (03-06-2022)
08-09-2017, 12:16 PM
#2
RL Community Team
Rennlist Member
Rennlist Member
Subscribed
 08-09-2017, 01:26 PM
#3
Three Wheelin'
Thread Starter
Where do we start?
First, as a prerequisite, evreyone needs to read this:
_AfterSales_Training_-_Cayenne_Engine_Repair_тАУ_V8_and_V6 (1) (1) (1).pdf
9-2010
I purchased my Cayenne as a one owner out of Coral Gables, FL with 65k miles.
It had the 21's already, a catback exhaust, and the coolant pipes done. It had a very clean and minimal service/warranty history.

During the next 100k miles I only had to address a few issues.
A couple of coil packs, driveshaft, brakes, coolant tees, plenty of tires, and a wheel bearing that was my fault from backing into a curb rapidly
I drove this Pig everyday on road, off road, rain & snow.....rapidly I also took VERY good care of it.
Many say that the 03-04's were the most susceptible to issues but I did not experience that.
Fast forward and around 165k miles I had a rough running issue one cold morning after racing a Subaru on the way to work that felt a lot like coil packs. Got it home and started some diagnostics. First thing, find out which coil pack it was. I had a code for a misfire on several cylinders. Nope. they are all working. Compression test came next and there it was. No compression on #2. There is only 1 way to fix this regardless of it being a valve, rings, or otherwise. A tear down ensued and this is where the onion starts to peel.
This is what I found.
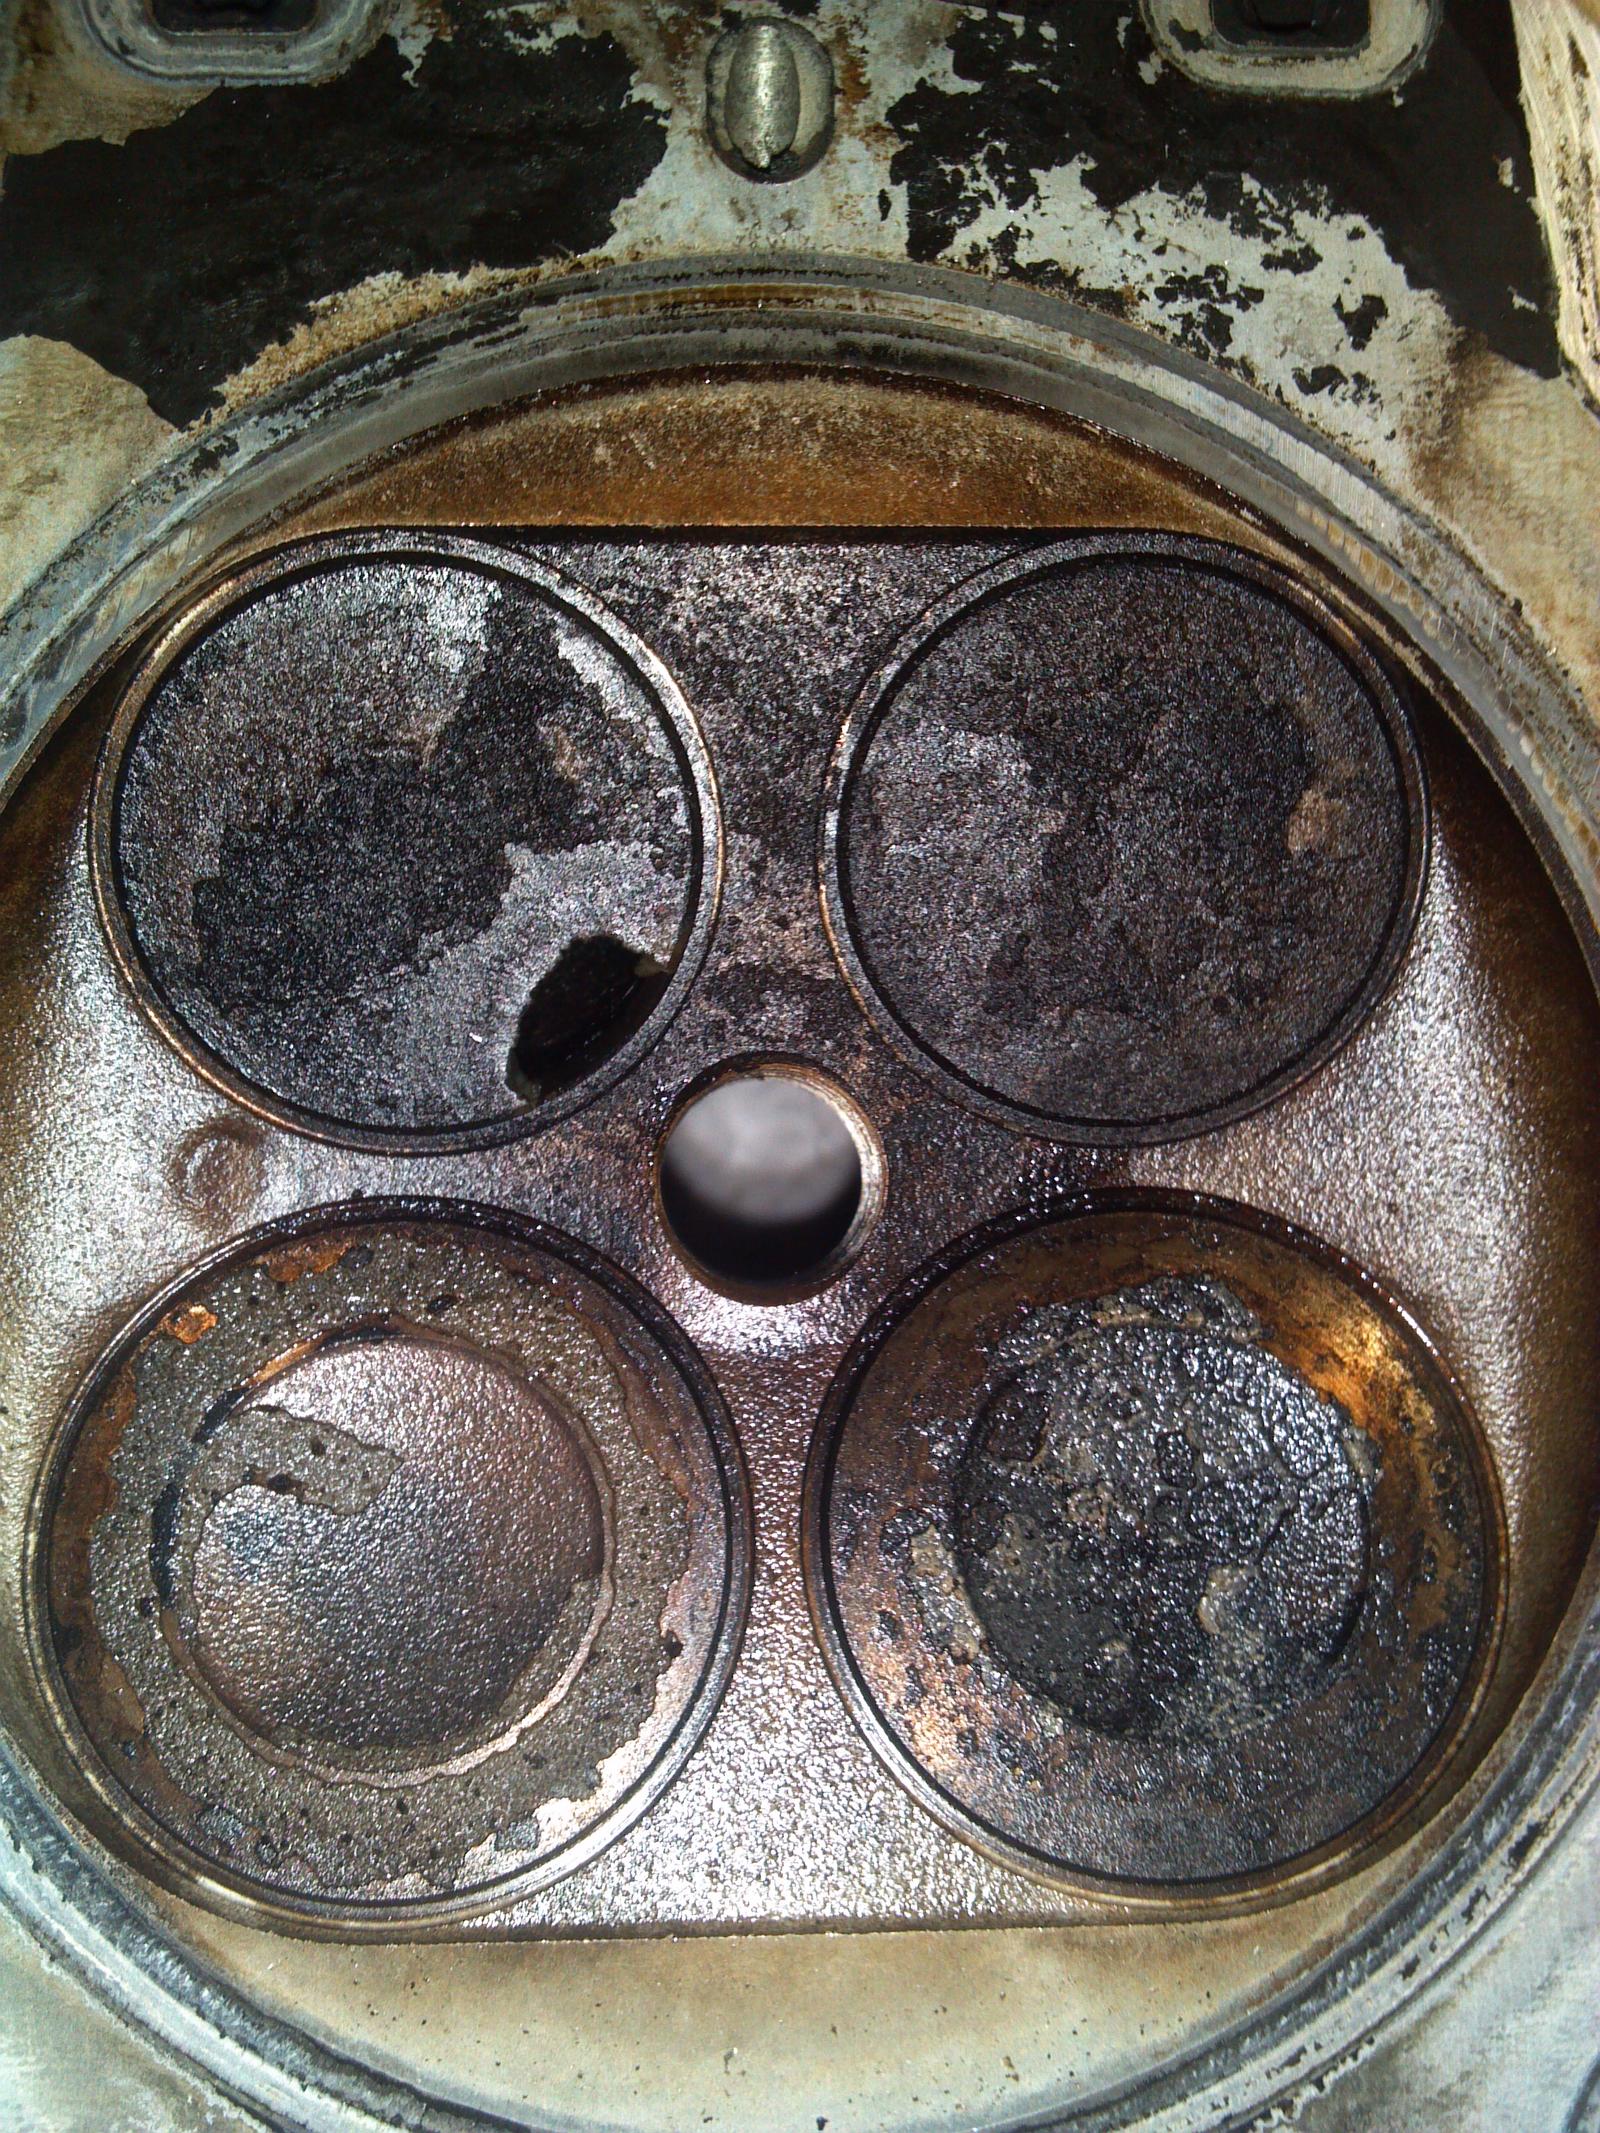
The compression numbers were in line with the mileage on a 450hp v8 with forged pistons. Not awesome. When I started to add up all the "while your in there" cost of gaskets and seals, etc. it became clear to me that I needed to rebuild. I didn't have any plans on getting rid of the car anyway.
After many phone calls and disapointment ala "rejection" I found a place called VAC Motorsports that was willing to give the sleeving a shot. At that time Flat 6 was not offering a machine work only option. Then at the last minute after building a crate and boxing it up I had a little voice that told me to keep looking one last time. This is when I ran across a story about a Cayenne engine winning the Rolex 24 @ Daytona.
http://flatsixes.com/porsche-motorsp...-wins-daytona/
Living in Austin at the time, this was a godsend. I picked up the phone and after a lot of sugar, honey, and downright begging, I got Ben Lozano to agree to at least sleeve my block. Sweet!!
Just for the record like many race shops and builders Lozano's specializes in turnkey engine packages and NOT machine work only services. Last time I spoke with Ben he did NOT express any interest in sleeving blocks or providing only the type of services that I got. Before ya'll start inundating them with phone calls.....lets just say generally Texans take care of Texans
Now that the stage is set, we can get on to right into things.
First, as a prerequisite, evreyone needs to read this:
_AfterSales_Training_-_Cayenne_Engine_Repair_тАУ_V8_and_V6 (1) (1) (1).pdf
9-2010
I purchased my Cayenne as a one owner out of Coral Gables, FL with 65k miles.
It had the 21's already, a catback exhaust, and the coolant pipes done. It had a very clean and minimal service/warranty history.
During the next 100k miles I only had to address a few issues.
A couple of coil packs, driveshaft, brakes, coolant tees, plenty of tires, and a wheel bearing that was my fault from backing into a curb rapidly
I drove this Pig everyday on road, off road, rain & snow.....rapidly
I also took VERY good care of it.Many say that the 03-04's were the most susceptible to issues but I did not experience that.
Fast forward and around 165k miles I had a rough running issue one cold morning after racing a Subaru on the way to work that felt a lot like coil packs. Got it home and started some diagnostics. First thing, find out which coil pack it was. I had a code for a misfire on several cylinders. Nope. they are all working. Compression test came next and there it was. No compression on #2. There is only 1 way to fix this regardless of it being a valve, rings, or otherwise. A tear down ensued and this is where the onion starts to peel.
This is what I found.
The compression numbers were in line with the mileage on a 450hp v8 with forged pistons. Not awesome. When I started to add up all the "while your in there" cost of gaskets and seals, etc. it became clear to me that I needed to rebuild. I didn't have any plans on getting rid of the car anyway.
After many phone calls and disapointment ala "rejection" I found a place called VAC Motorsports that was willing to give the sleeving a shot. At that time Flat 6 was not offering a machine work only option. Then at the last minute after building a crate and boxing it up I had a little voice that told me to keep looking one last time. This is when I ran across a story about a Cayenne engine winning the Rolex 24 @ Daytona.
http://flatsixes.com/porsche-motorsp...-wins-daytona/
Living in Austin at the time, this was a godsend. I picked up the phone and after a lot of sugar, honey, and downright begging, I got Ben Lozano to agree to at least sleeve my block. Sweet!!
Just for the record like many race shops and builders Lozano's specializes in turnkey engine packages and NOT machine work only services. Last time I spoke with Ben he did NOT express any interest in sleeving blocks or providing only the type of services that I got. Before ya'll start inundating them with phone calls.....lets just say generally Texans take care of Texans
Now that the stage is set, we can get on to right into things.
08-10-2017, 01:03 PM
#4
Three Wheelin'
Thread Starter
I am already well into the build but I'd like to share with you the pics that I have.
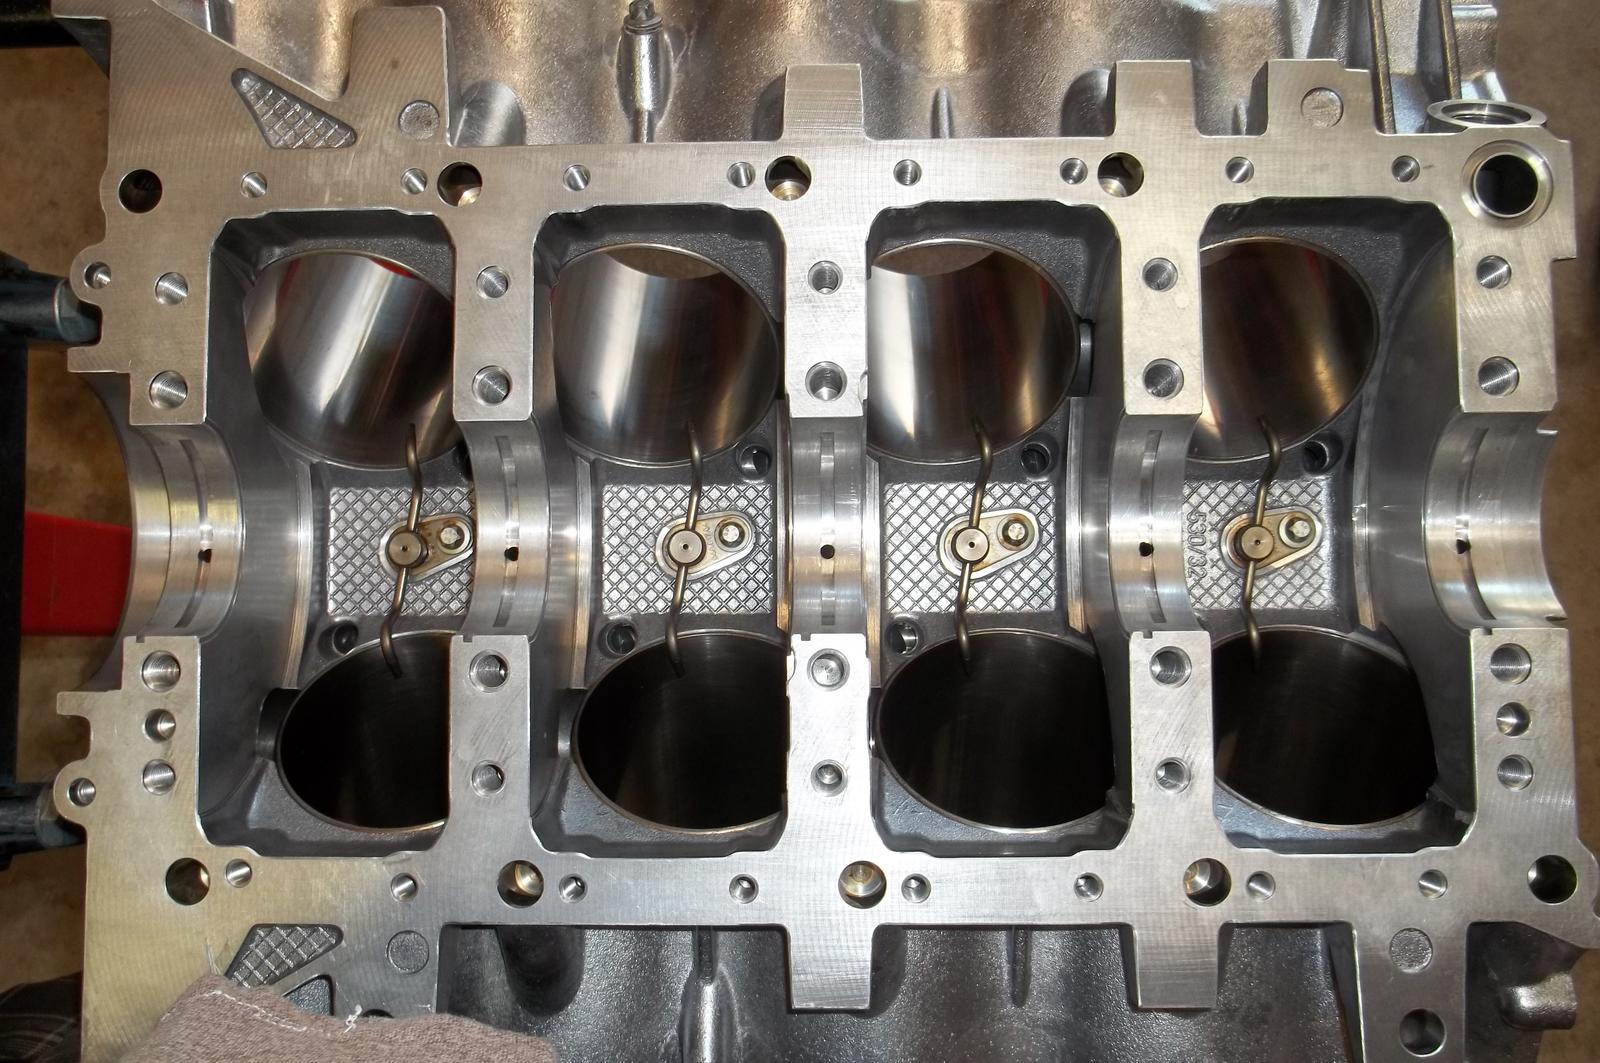
Let's start with the block.
The top half of the crankcase:
Stout compared to a lot of factory stuff that I have seen.
12mm inner main bolts, 10mm outer main bolts, and 8mm perimeter bolts. If you look at the perimeter there are 9 holes. These are for drainback from the top end. This provides the advantage of not dumping this drainback oil into the rotating assembly. The big hole at the upper right is the main oil galley coming from the pump.
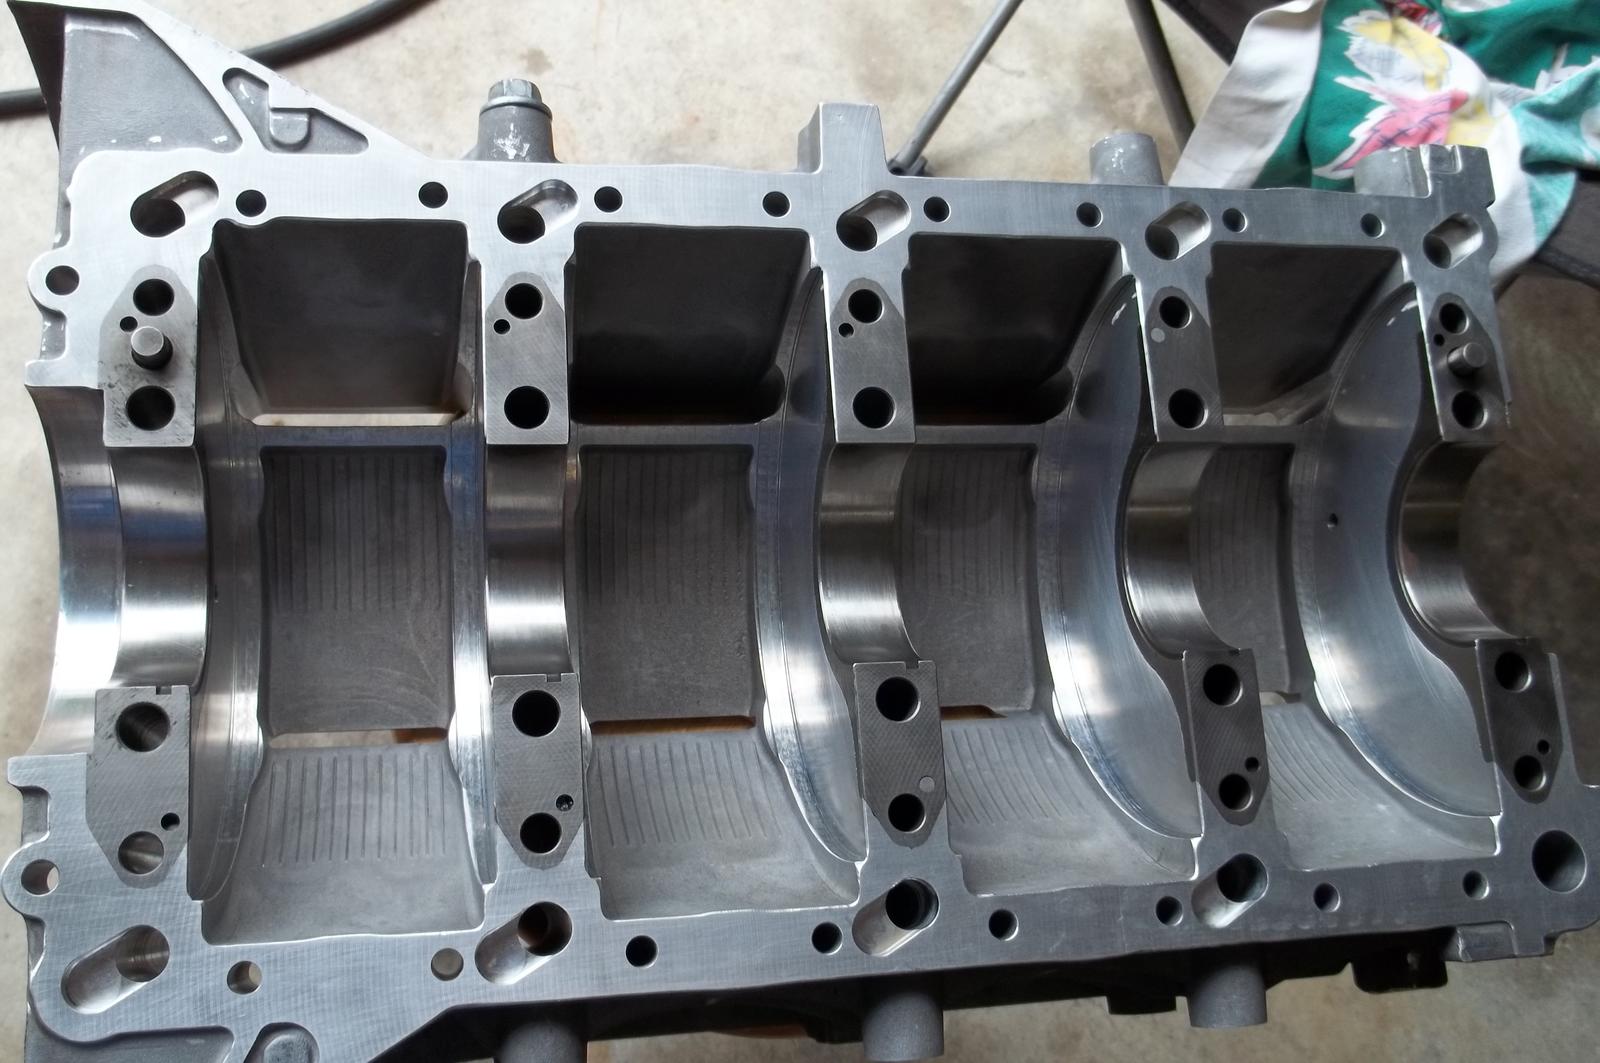
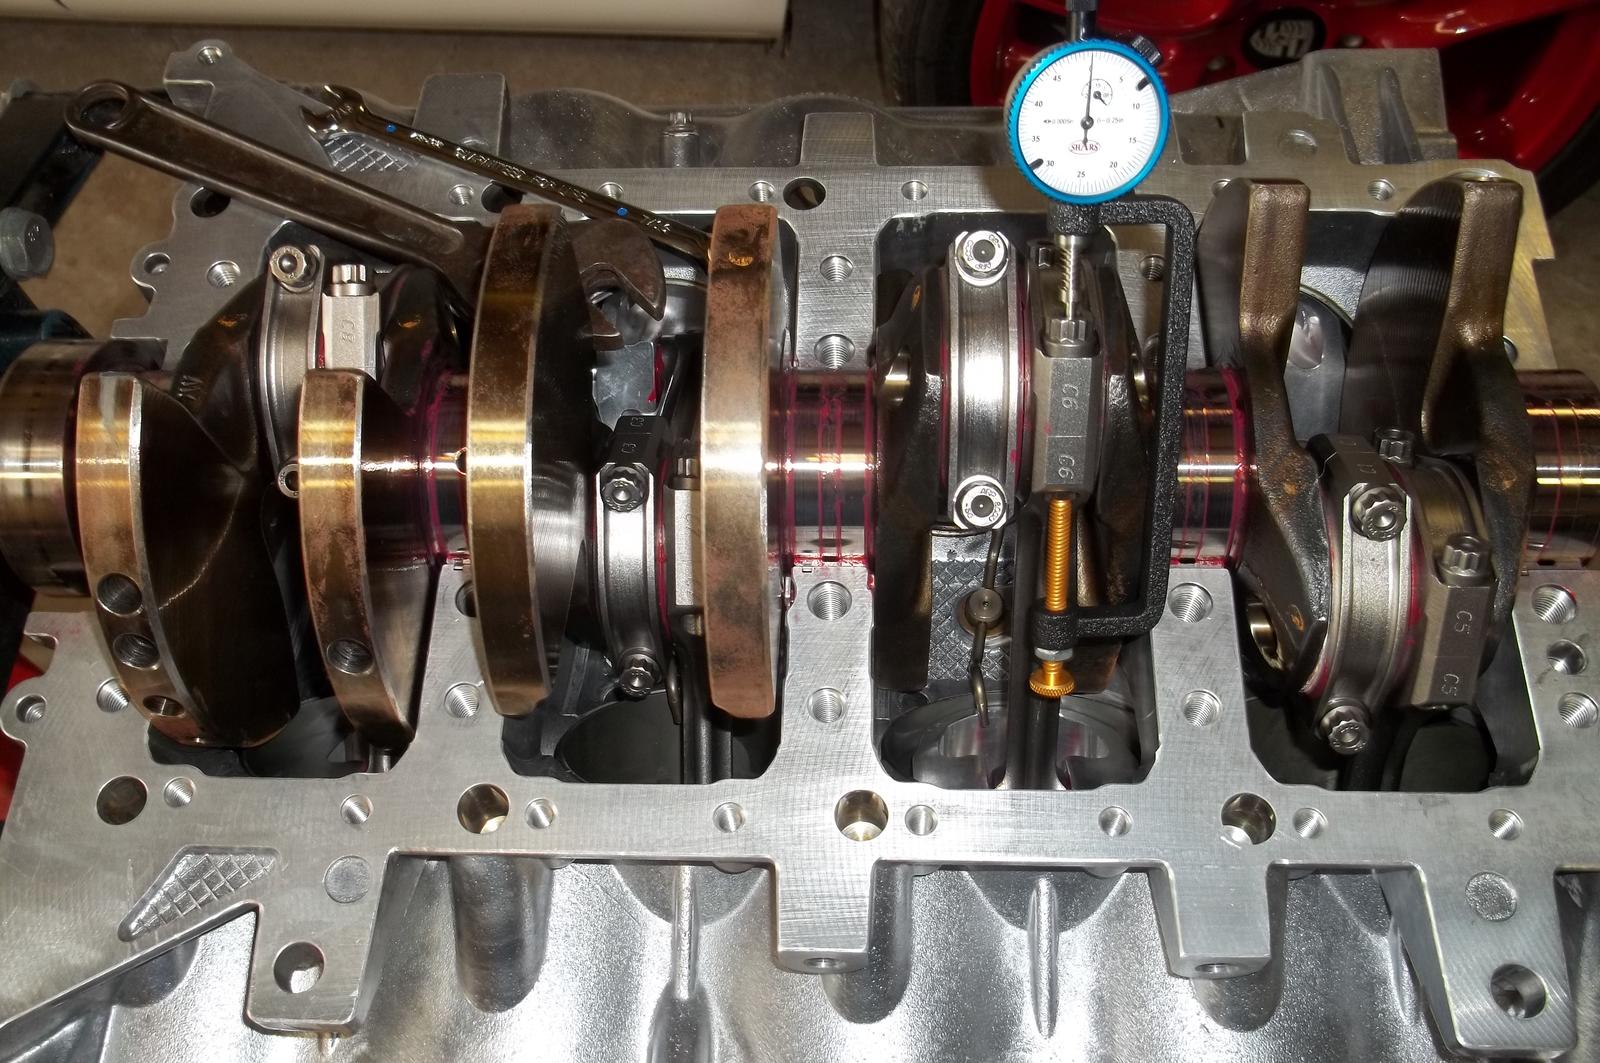
Bottom half:
Again, thick stuff. If you read the aftersales training Porsche talks about why the steel inserts are there. You can see the windage tray/ crank scraper built right in. Pretty legit. Funny that the FSM talks about using a dial indicator to line up the upper and lower parts of the CC. They don't move. When you put the two halves together it's pinned with steel dowels. It's only going together one way.
Attachment 1239989
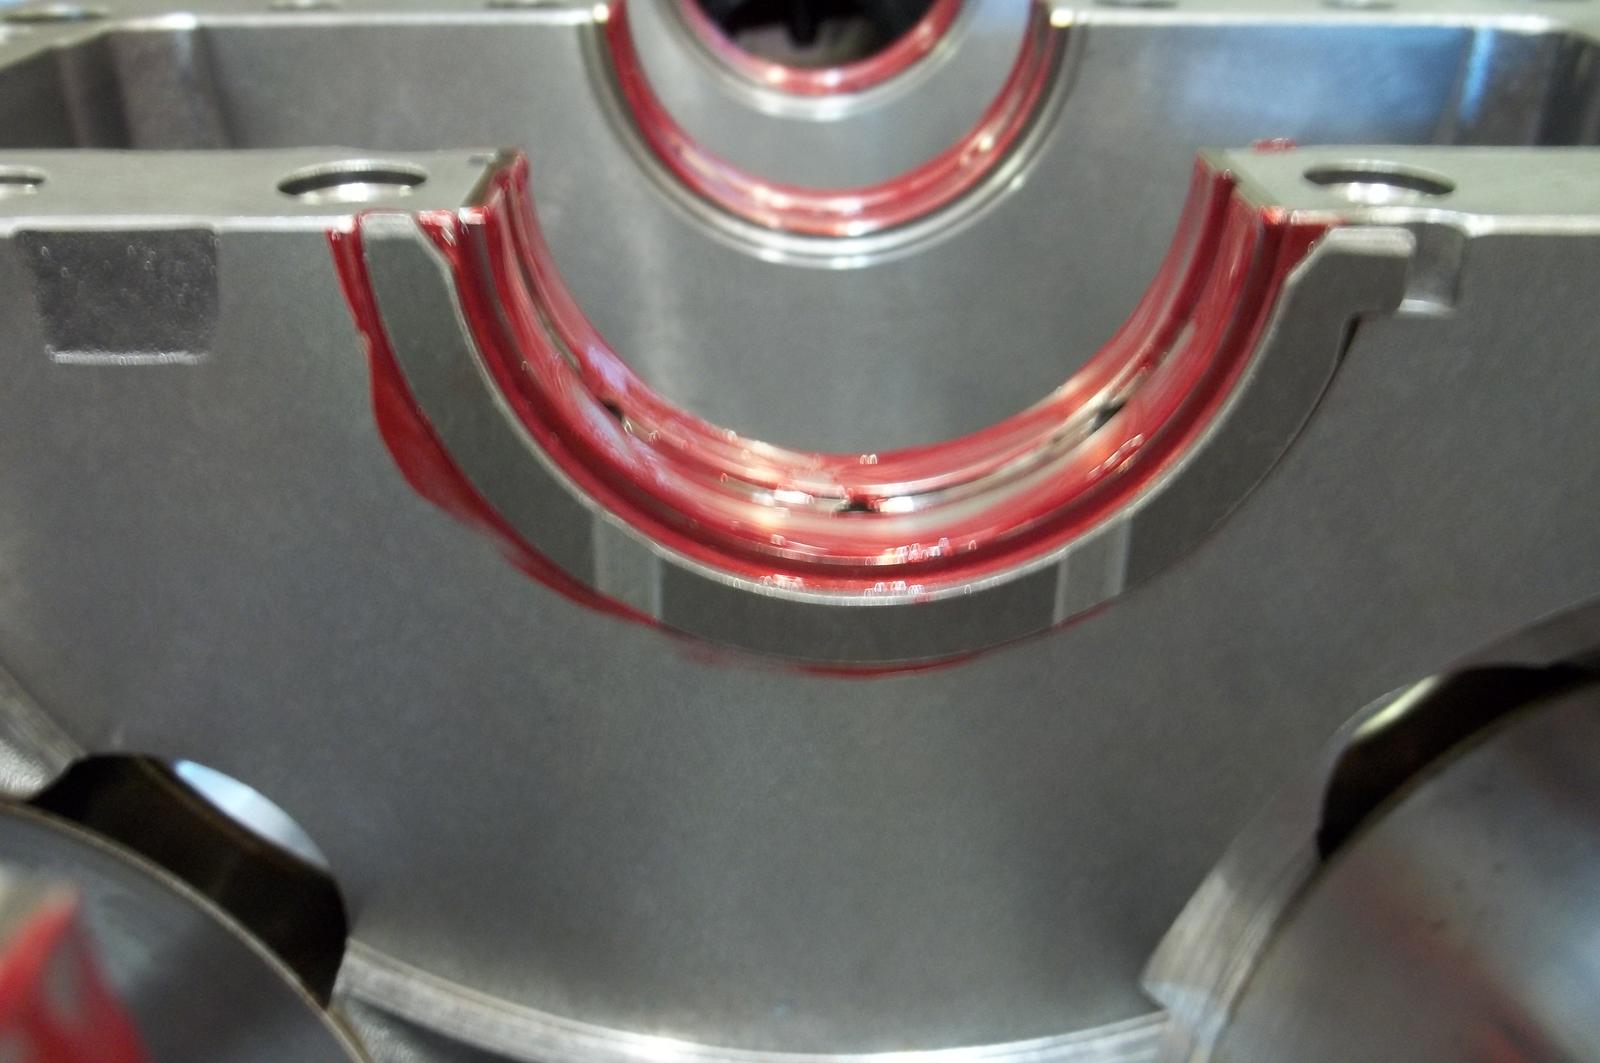
The thrust bearing in the 4.5 is a two piece sickle shaped deal. There is only 1 thickness and 1 part number available. I guess if you need less clearance you would have to build up the crank surfaces. 1 per side of the bearing saddle in the top half.
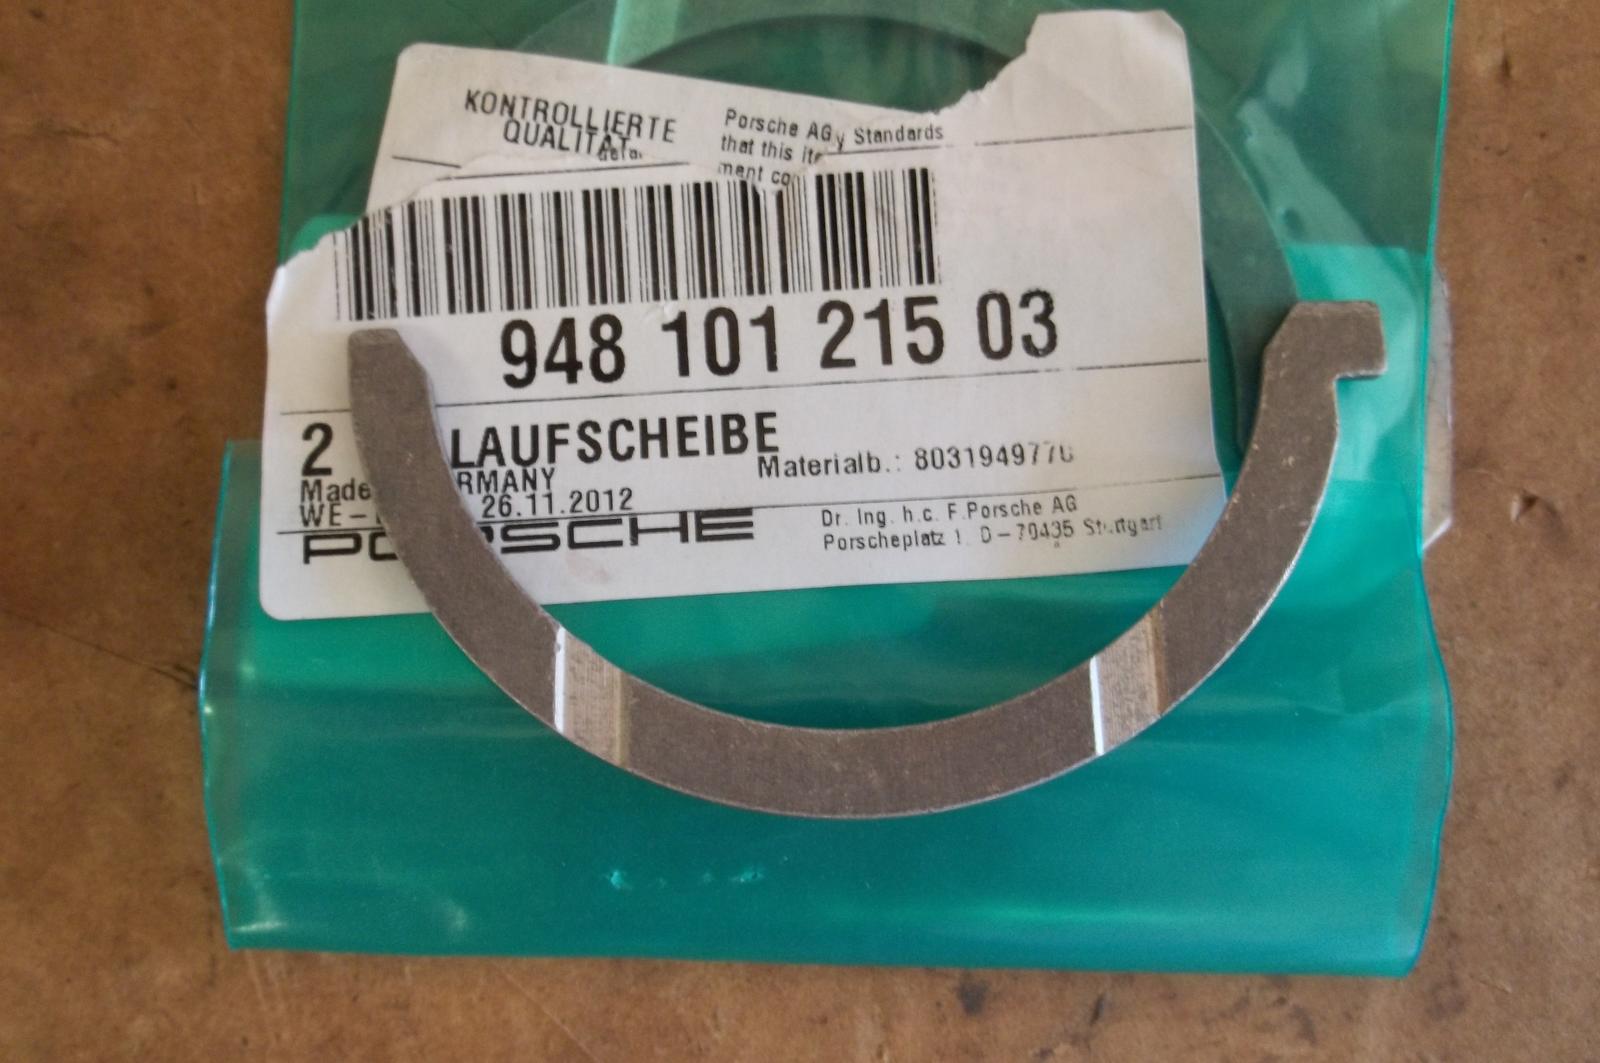
Crankshaft, drop forged, stock. It's a decent piece. Oil hole chamfering is stock. Mine was in GREAT shape @ 165k. We just cleaned it up and did a micropolish.
Let's start with the block.
The top half of the crankcase:
Stout compared to a lot of factory stuff that I have seen.
12mm inner main bolts, 10mm outer main bolts, and 8mm perimeter bolts. If you look at the perimeter there are 9 holes. These are for drainback from the top end. This provides the advantage of not dumping this drainback oil into the rotating assembly. The big hole at the upper right is the main oil galley coming from the pump.
Bottom half:
Again, thick stuff. If you read the aftersales training Porsche talks about why the steel inserts are there. You can see the windage tray/ crank scraper built right in. Pretty legit. Funny that the FSM talks about using a dial indicator to line up the upper and lower parts of the CC. They don't move. When you put the two halves together it's pinned with steel dowels. It's only going together one way.
Attachment 1239989
The thrust bearing in the 4.5 is a two piece sickle shaped deal. There is only 1 thickness and 1 part number available. I guess if you need less clearance you would have to build up the crank surfaces. 1 per side of the bearing saddle in the top half.
Crankshaft, drop forged, stock. It's a decent piece. Oil hole chamfering is stock. Mine was in GREAT shape @ 165k. We just cleaned it up and did a micropolish.
Last edited by J'sWorld; 08-10-2017 at 08:59 PM.
08-10-2017, 08:53 PM
#5
Three Wheelin'
Thread Starter
Moving on,
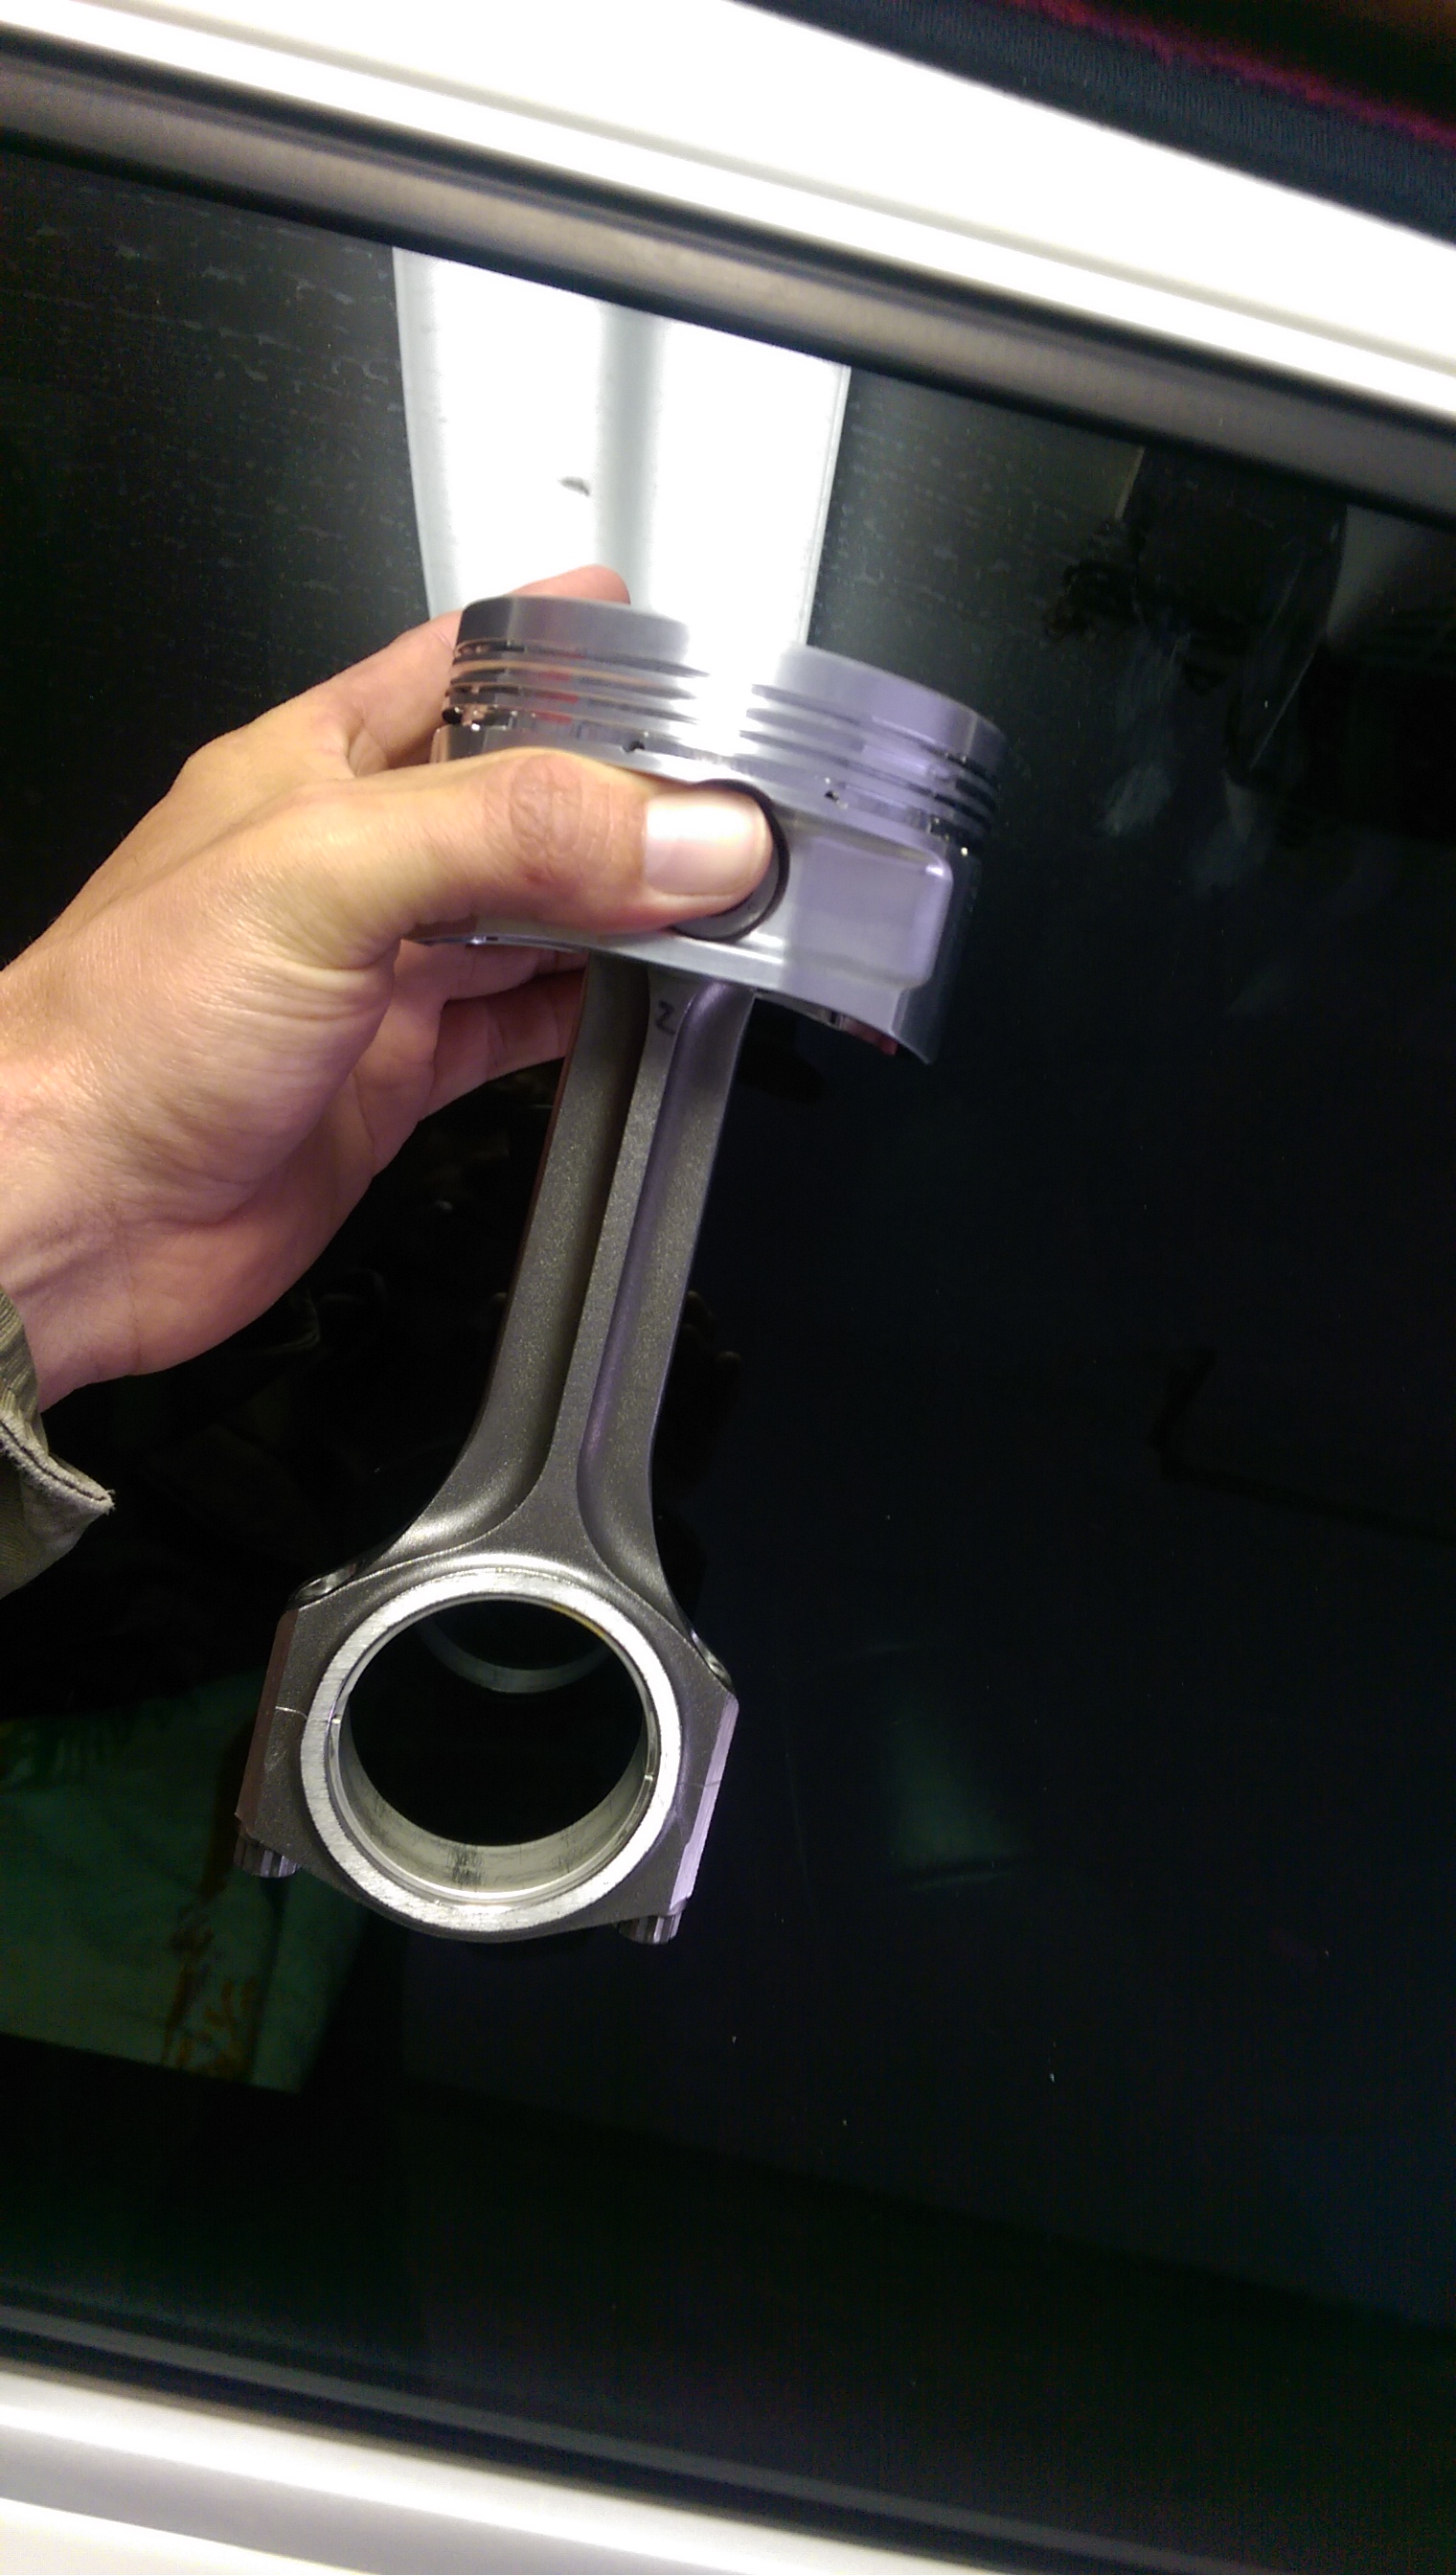
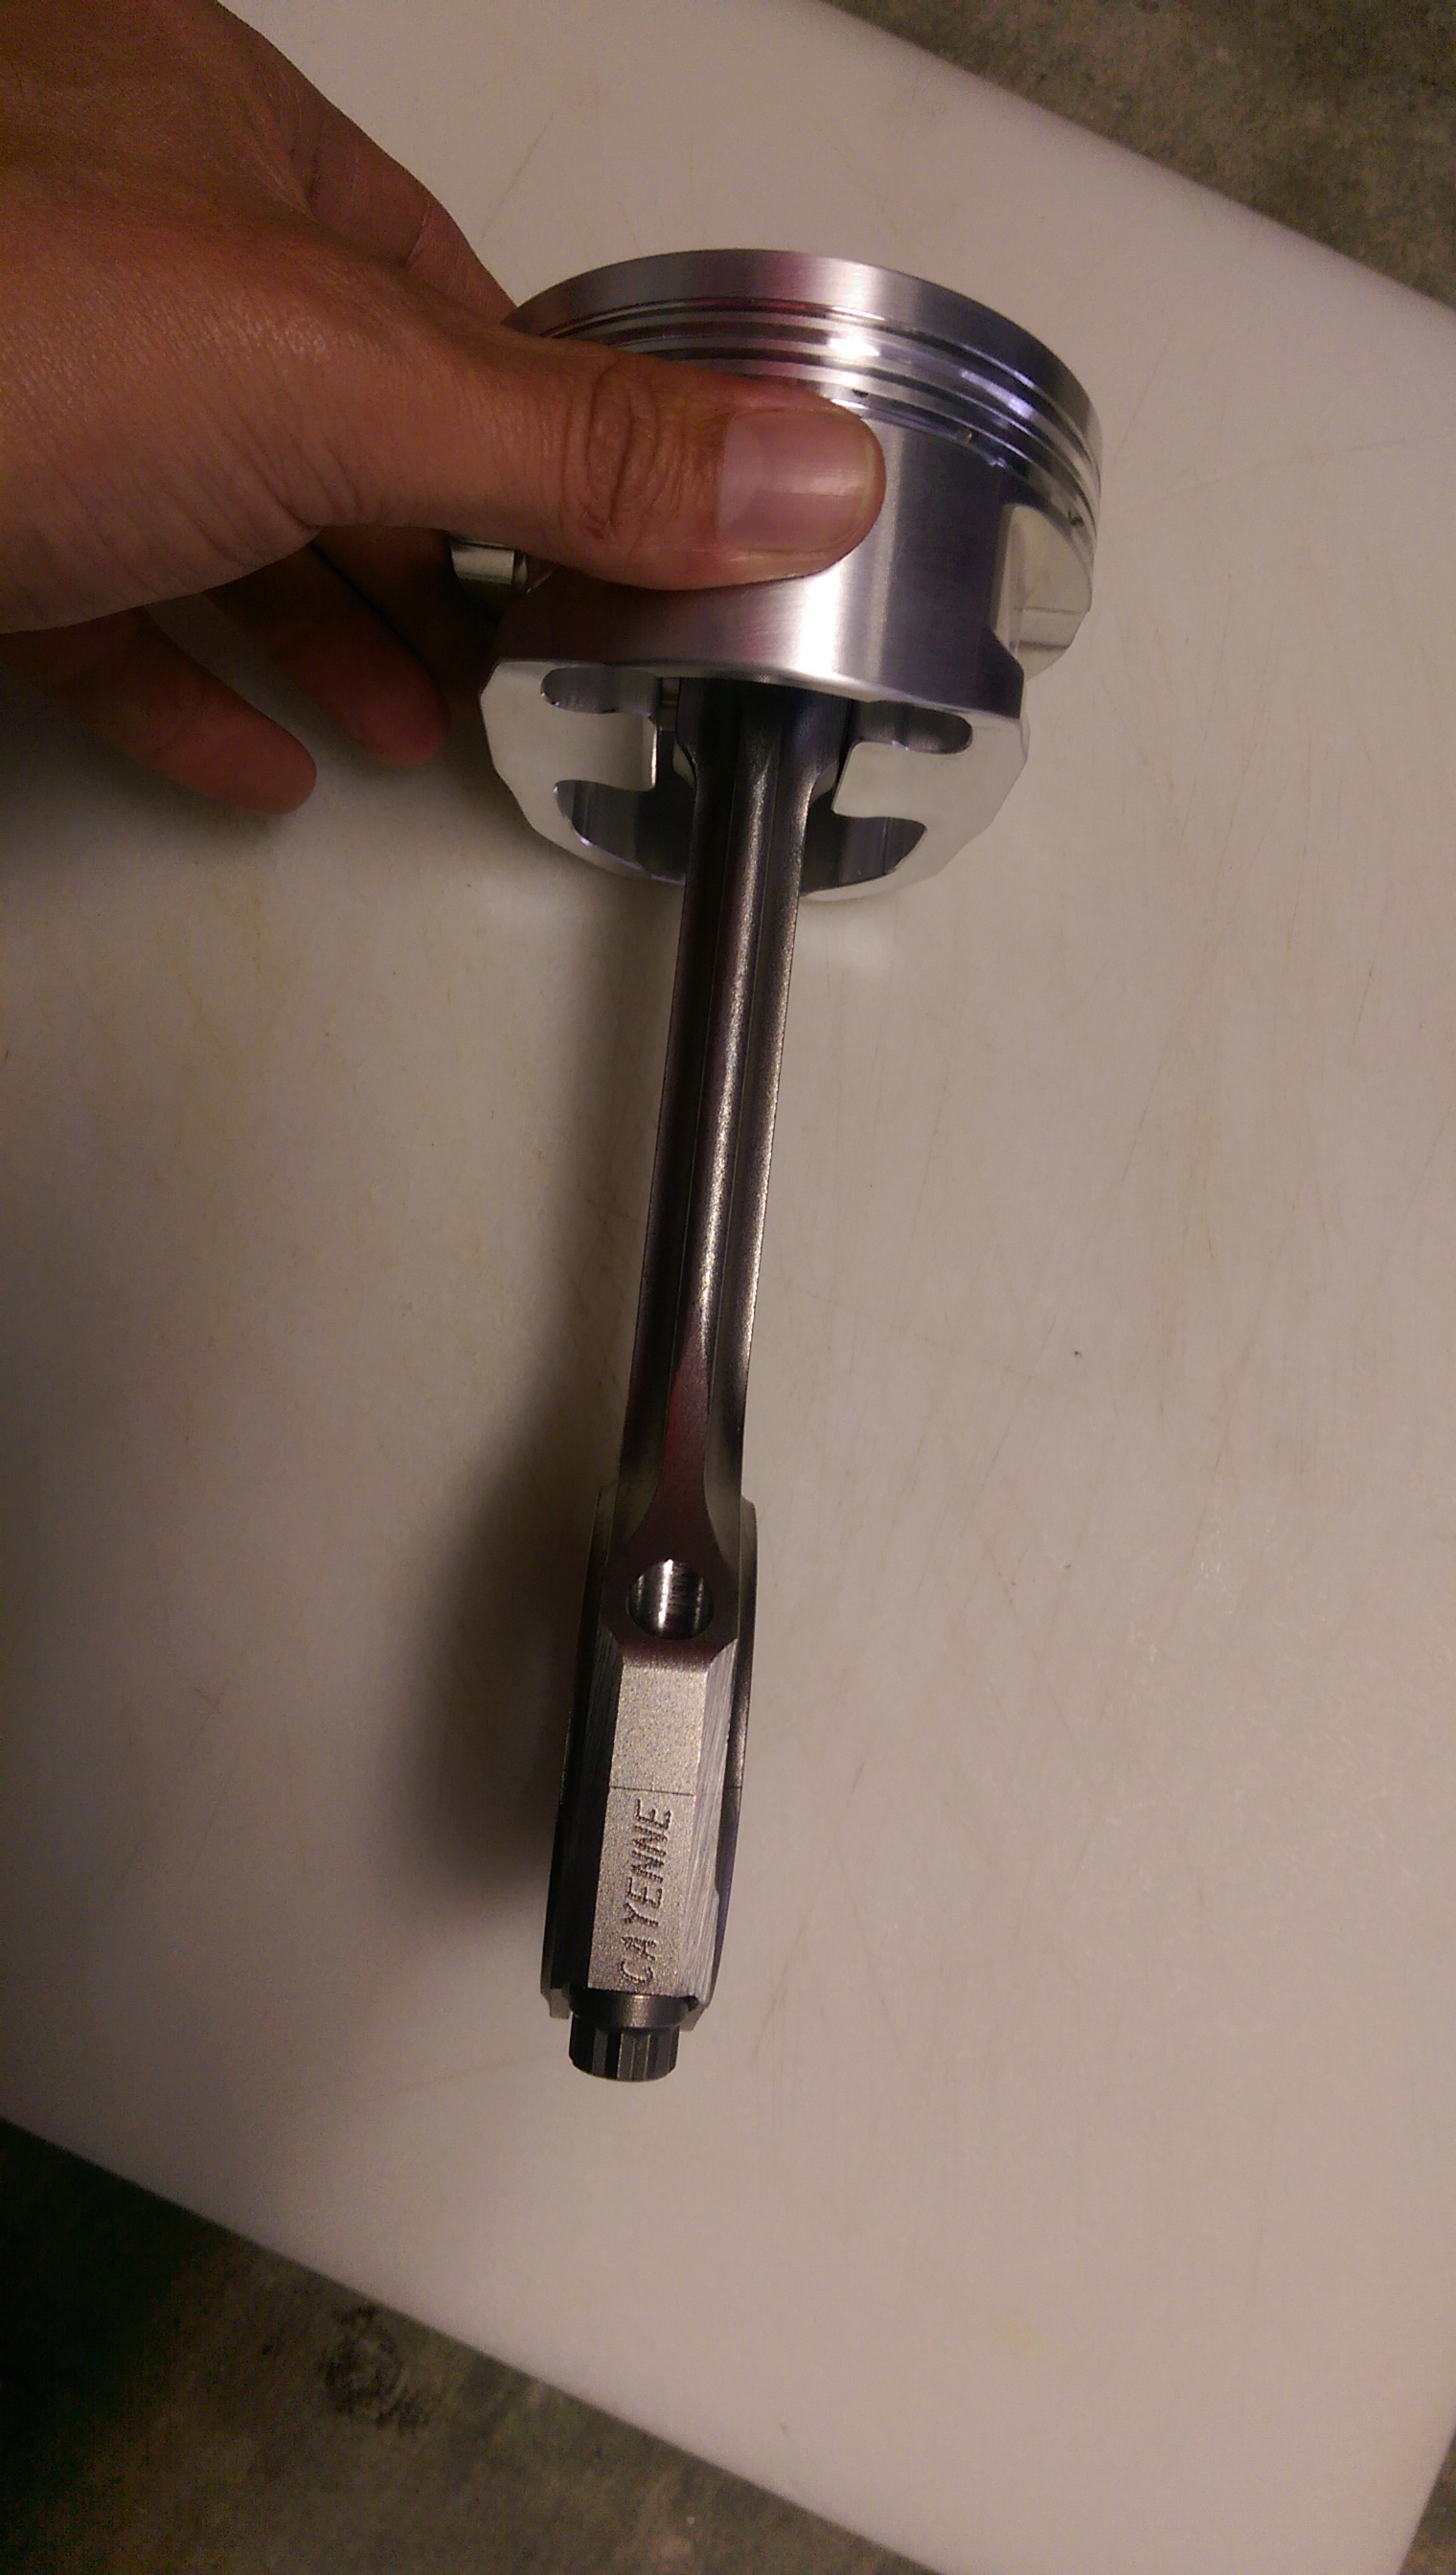
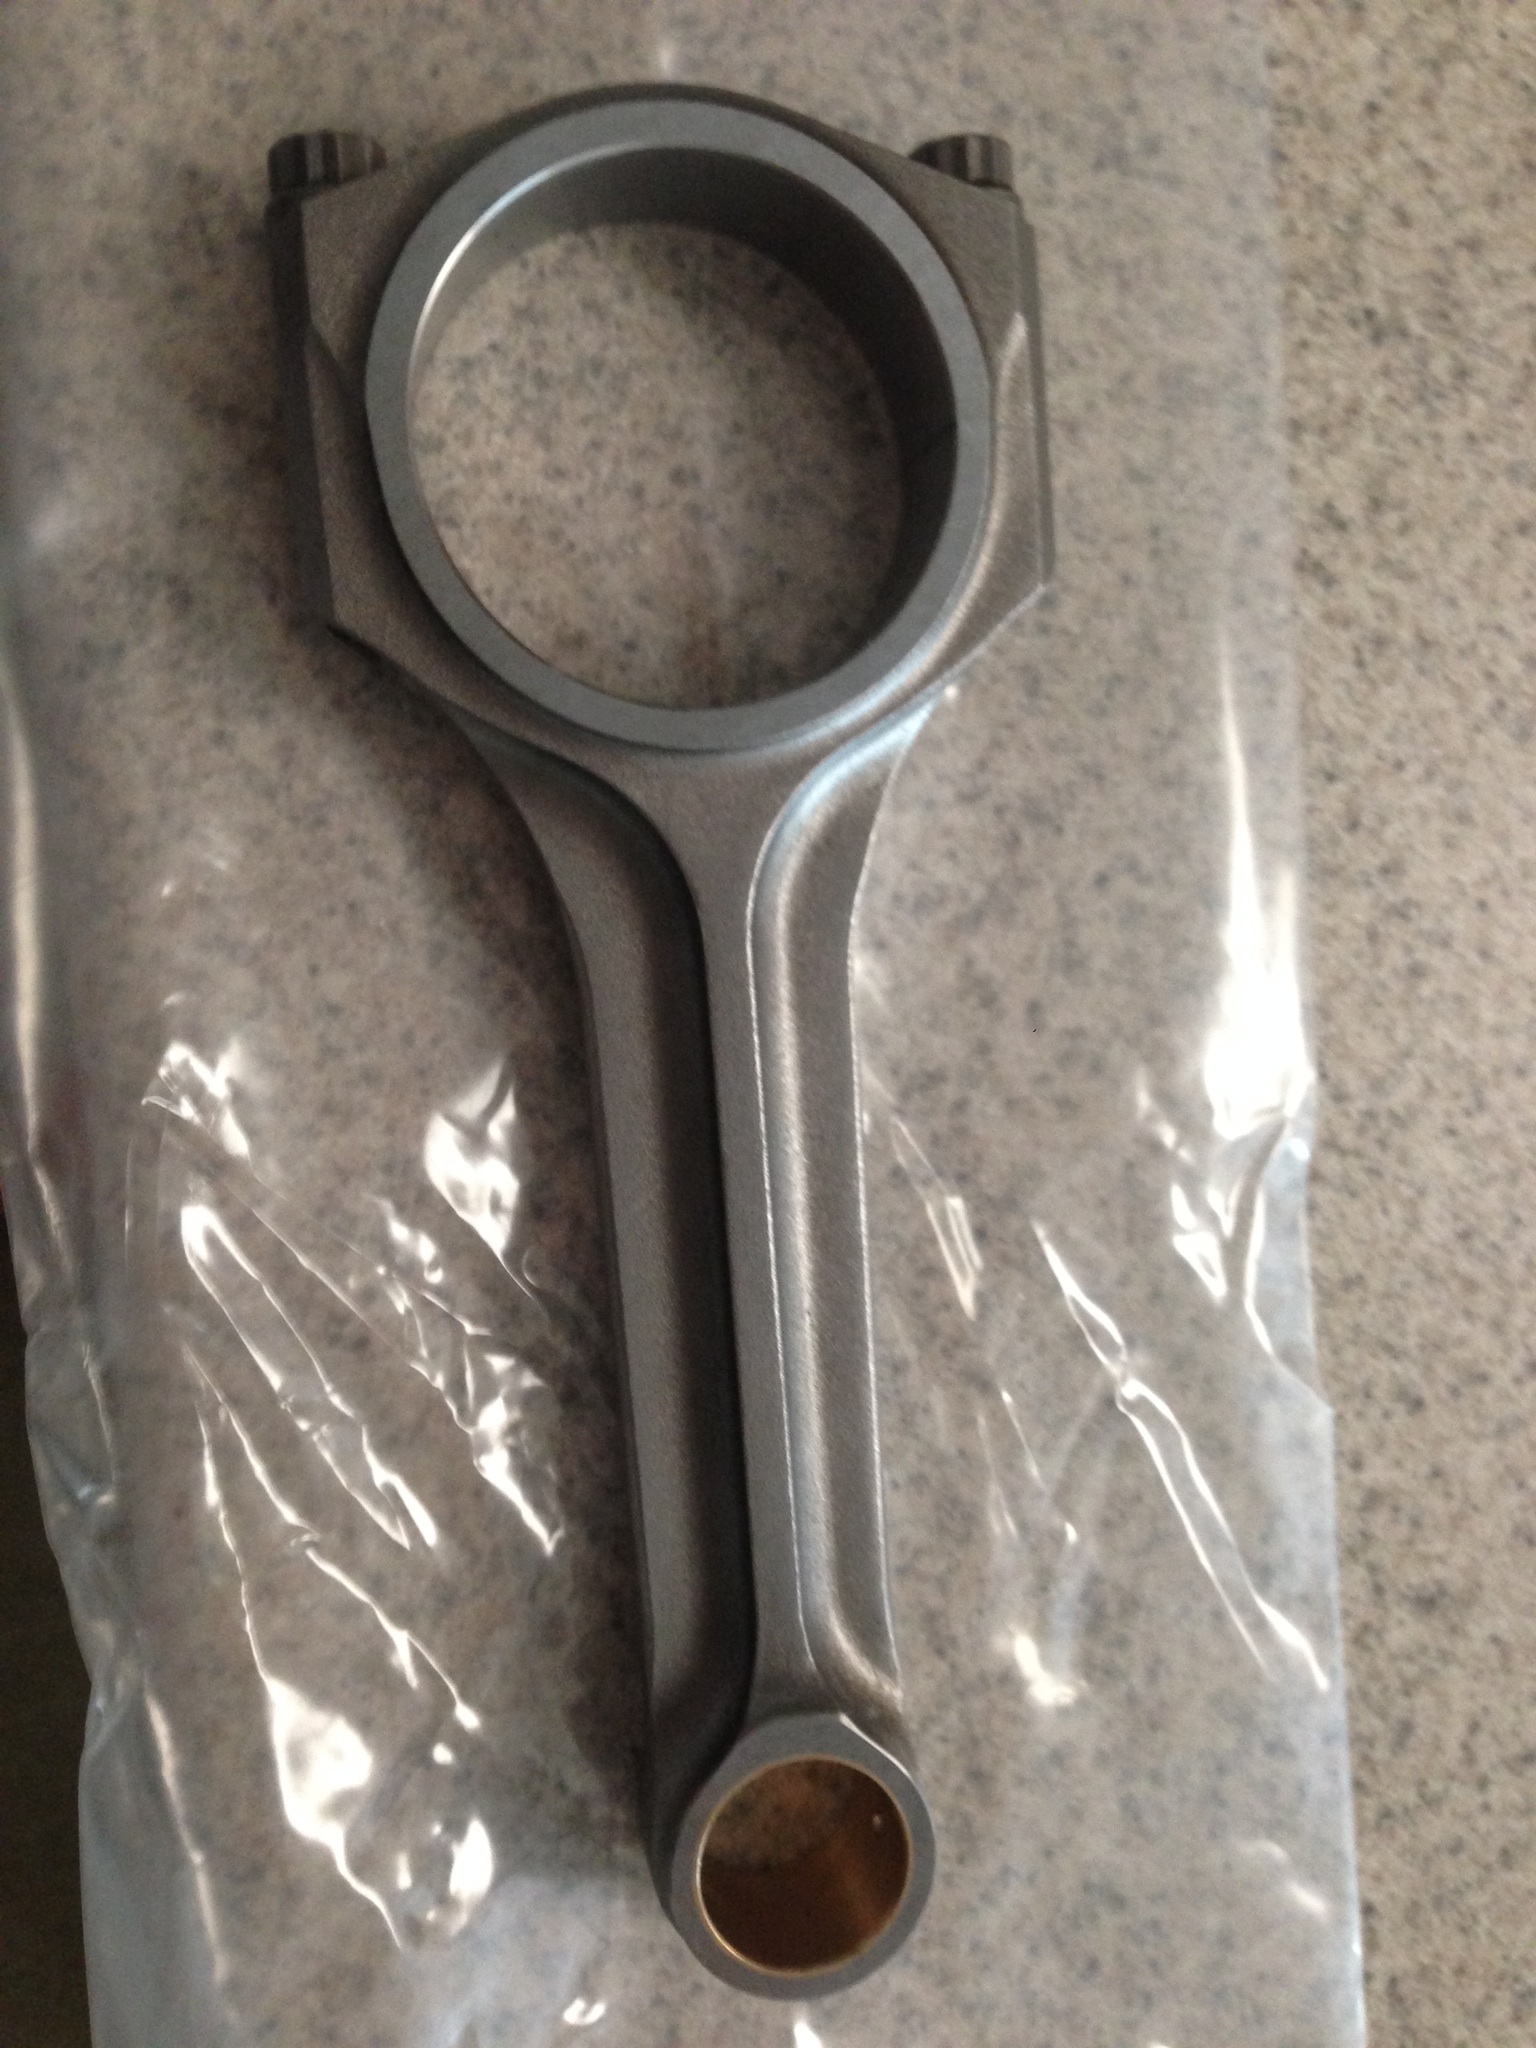
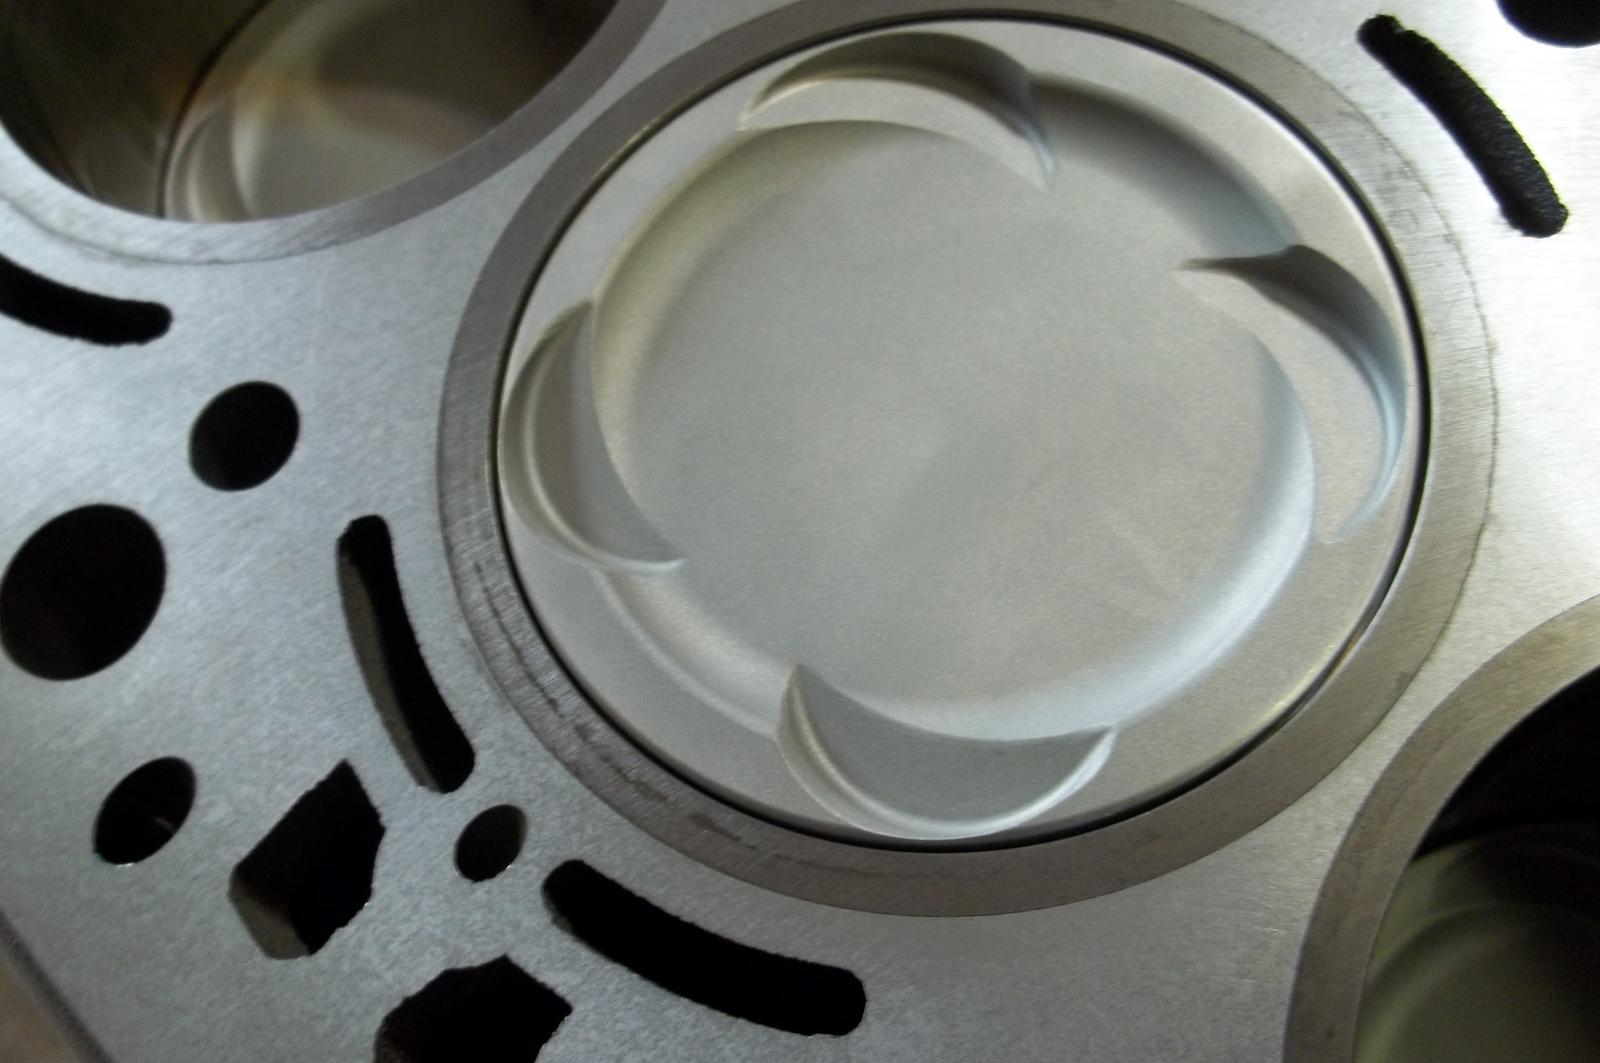
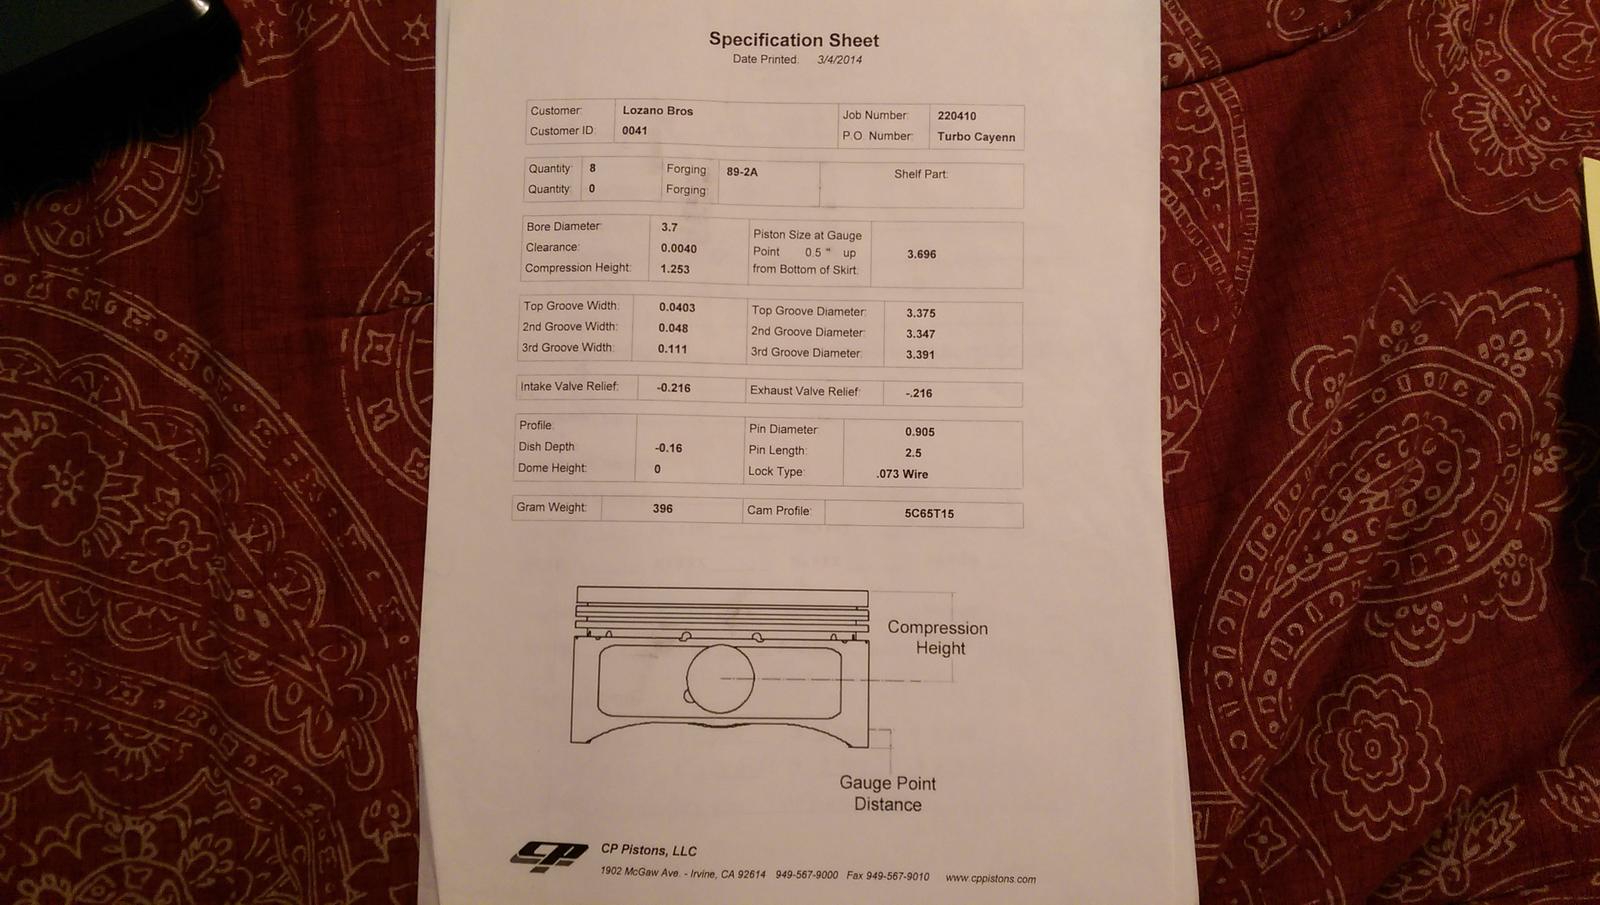
I went with CP Pistons. It's a heavy duty forging. Internally, it is a whole different piston. Externally the pistons are very close to Porsche's design for this engine with the exception of added lateral gas ports. We went with a heavy duty wrist pin and CP's wire locks. The rods are using ARP 2000 bolts. These bolts should be good to around 7k rpm which will work out well for this build. The turbo's I am using wont be keeping up much after that and I didn't want to build for that gray area where other problems with rpm like transmission shifting become an issue. I tried to maximize what we already have as much as possible and leave a little room for improvement. Of course things like rod big and small end side clearance were changed to accommodate the hp goals. The piston/wristpin/rings combo ended up a tiny bit heavier than stock. The rods actually ended up lighter than stock. Overall, we ended up taking weight OUT of the crankshaft to get a neutral balance and the whole rotating assembly ended up lighter than stock.
The pistons use CP's CPN ring package. They are thin and low tension metric rings. These 4.5's also come with low tension rings from the factory.
 Preciate ya main
Trending Topics
08-11-2017, 01:54 PM
#8
Three Wheelin'
Thread Starter
Continued
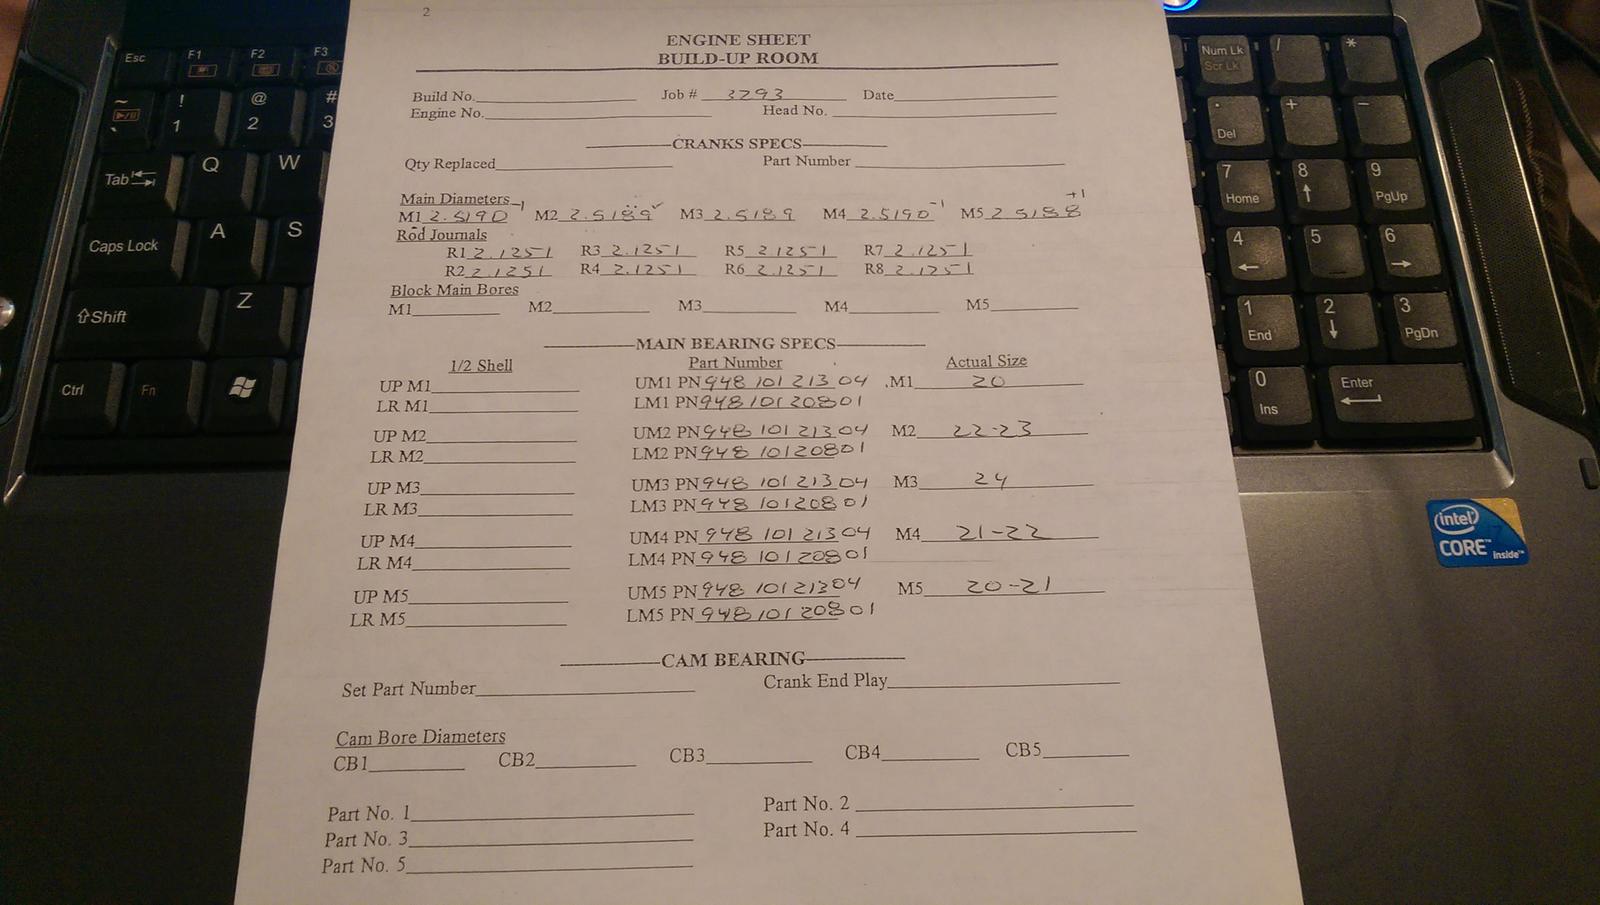
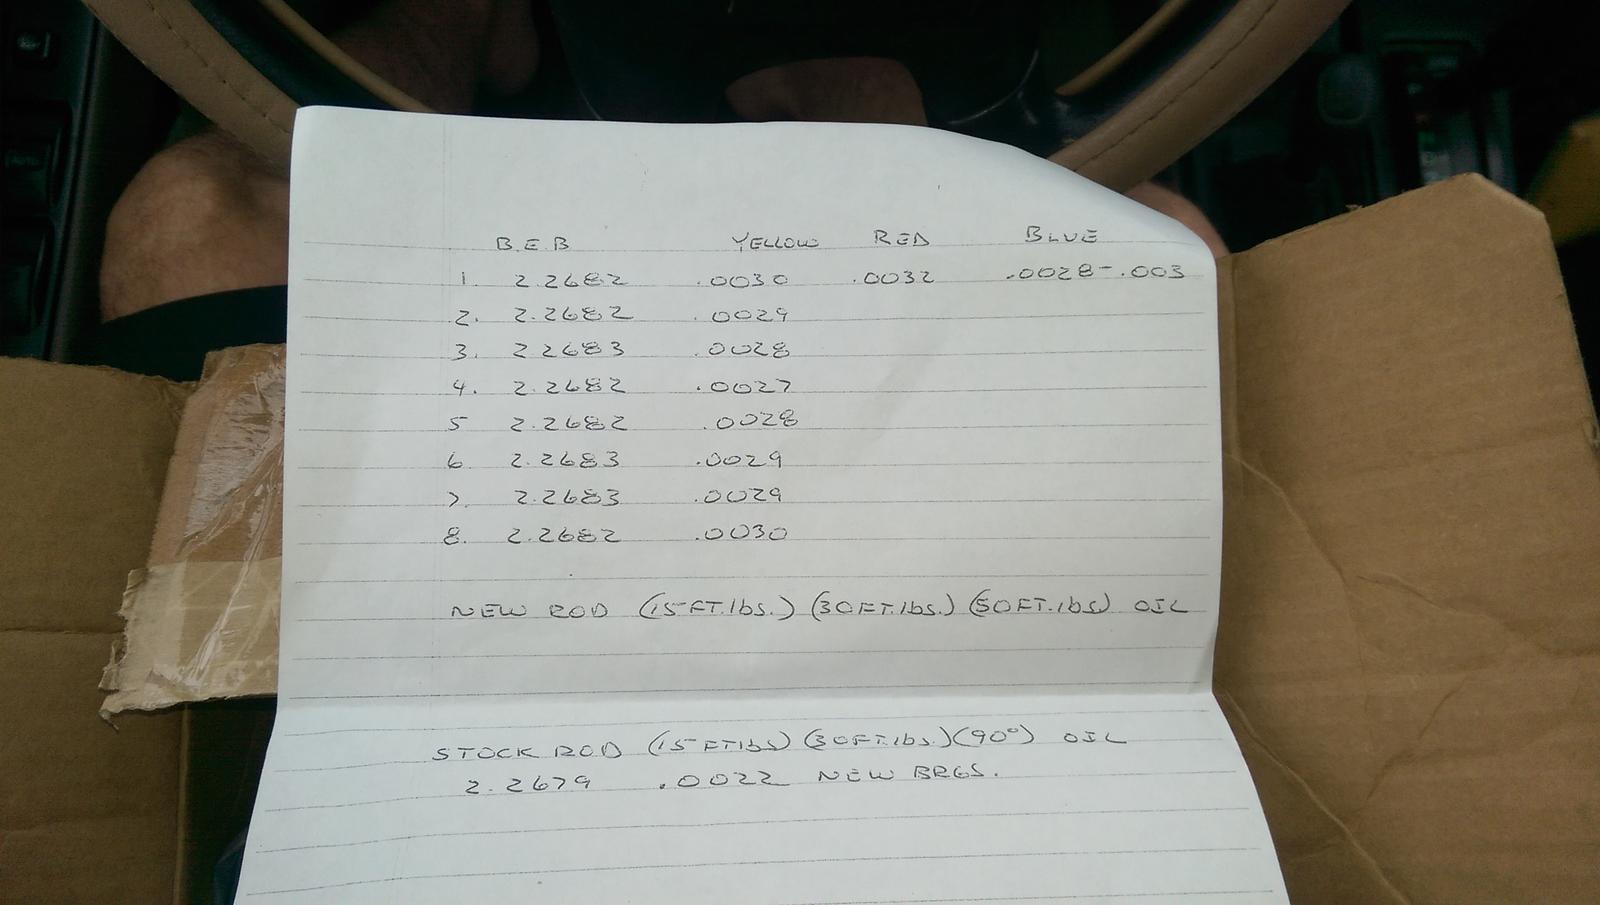
Here are the main and rod bearing specs in thousands.
Keep in mind that we did not remove any material from the crank. The specs given are for the yellow code bearings that my engine was equipped with. In other words, the factory specs, although we do not have them, should be really close to this.
The rods we set up a bit looser on bearing and side clearance. These specs are fairly common for a very high output build. I did not have any data on the oil pump situation and what it would keep up with clearance wise. So we were cautious in the rod side clearance's and set them up towards the tight side of what Pauter recommends. Rod side clearance comes out to about .0010-.0011.
08-11-2017, 02:27 PM
#9
Three Wheelin'
Thread Starter
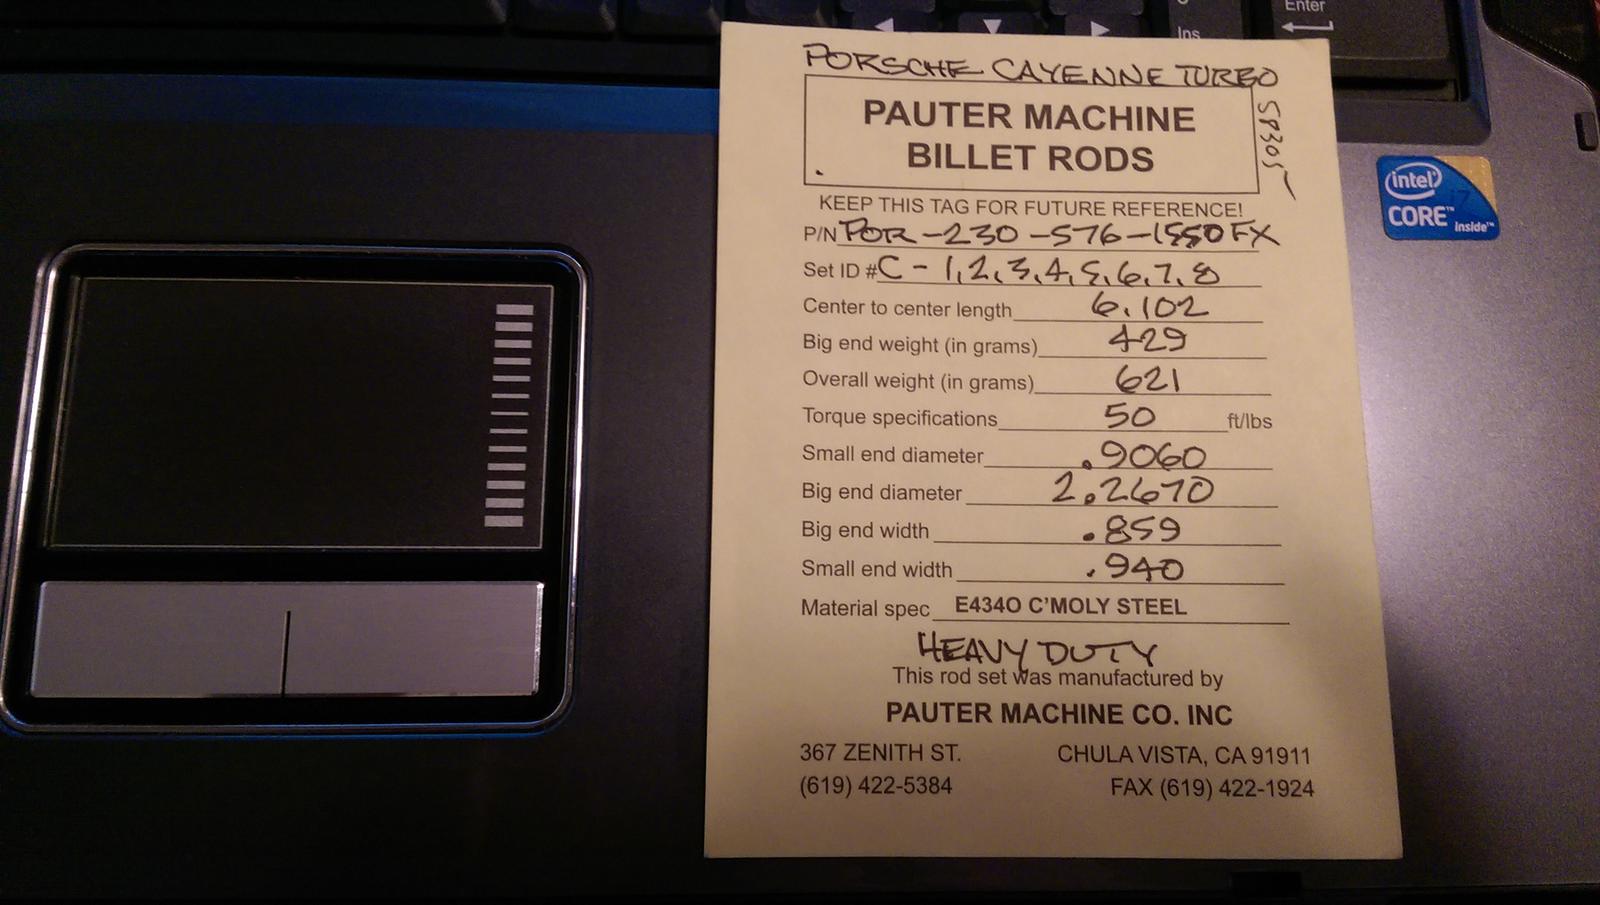
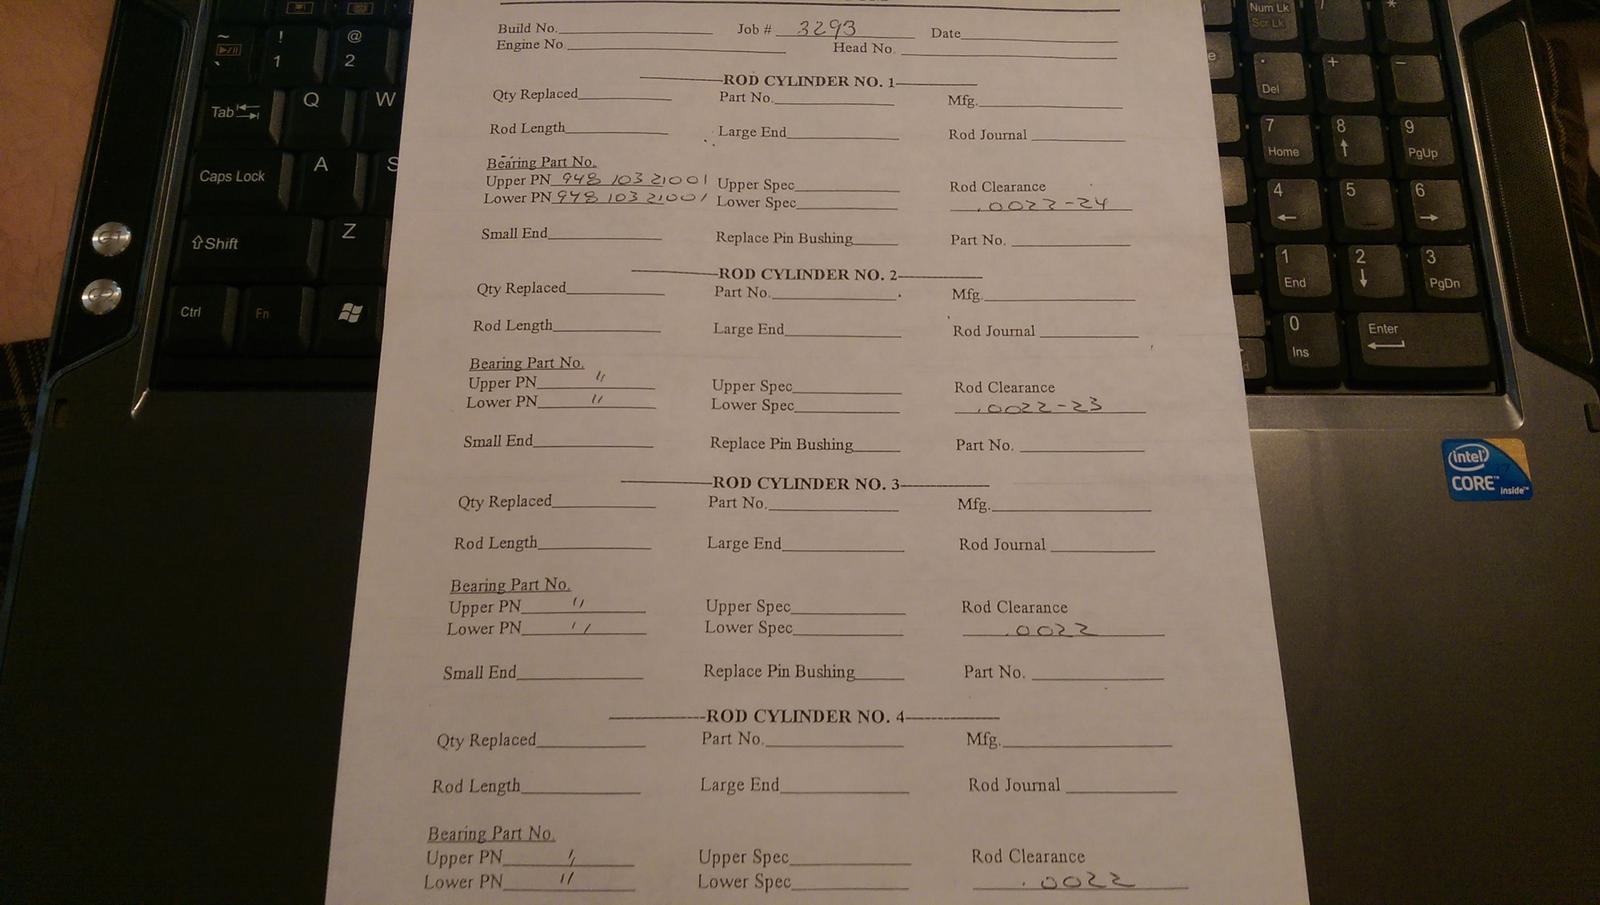
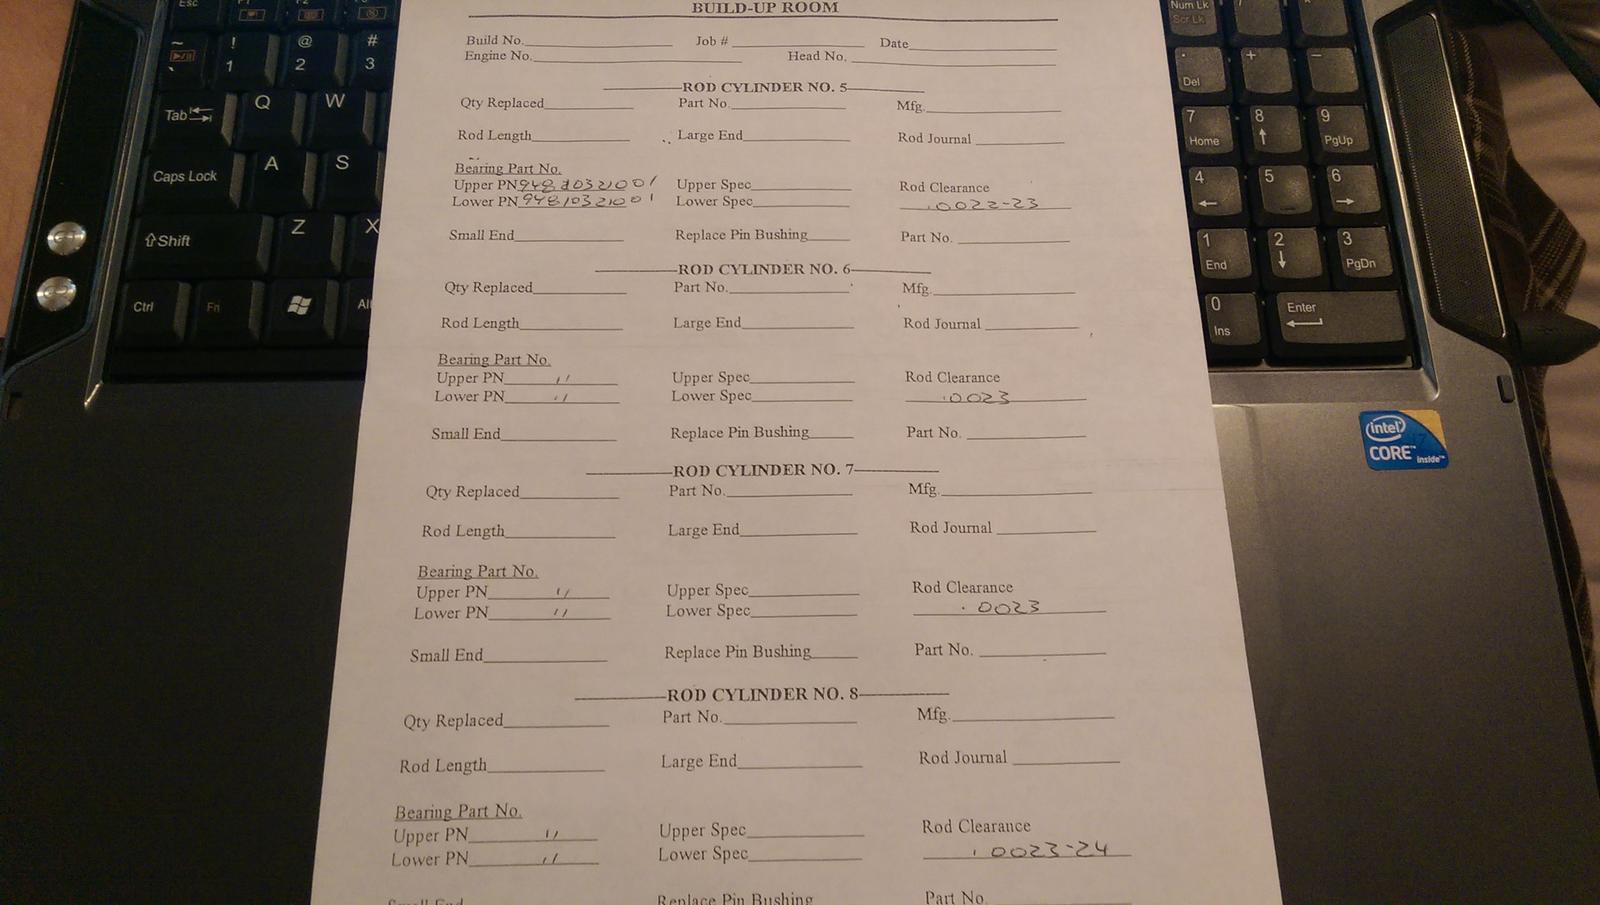
Porsche gives and option of 3 bearing color codes. Red, Yellow, or Blue. I have seen it said that there is no difference in size between the three. That is not exactly true. There is a difference though it is extremely small, about .0002
Here is an example. This sheet shows how my rods came from Pauter. Just a bit too loose. I don't really know why they came in like this and I don't really care. When you are talking measurements this small, the tinyest of details in temp, humidity, tool calibration, and operator error come into play. To that end I decided it was best to have Lozano's who was doing all my machine work tighten them up a bit and make everything right instead of sending rods back and forth like Sherlock Holmes trying to figure it out. Pauter did an amazing job on the rods, and Brian was a real pleasure to do buisness with. Not to mention, the price was RIGHT!
While we are on the subject of clearances-
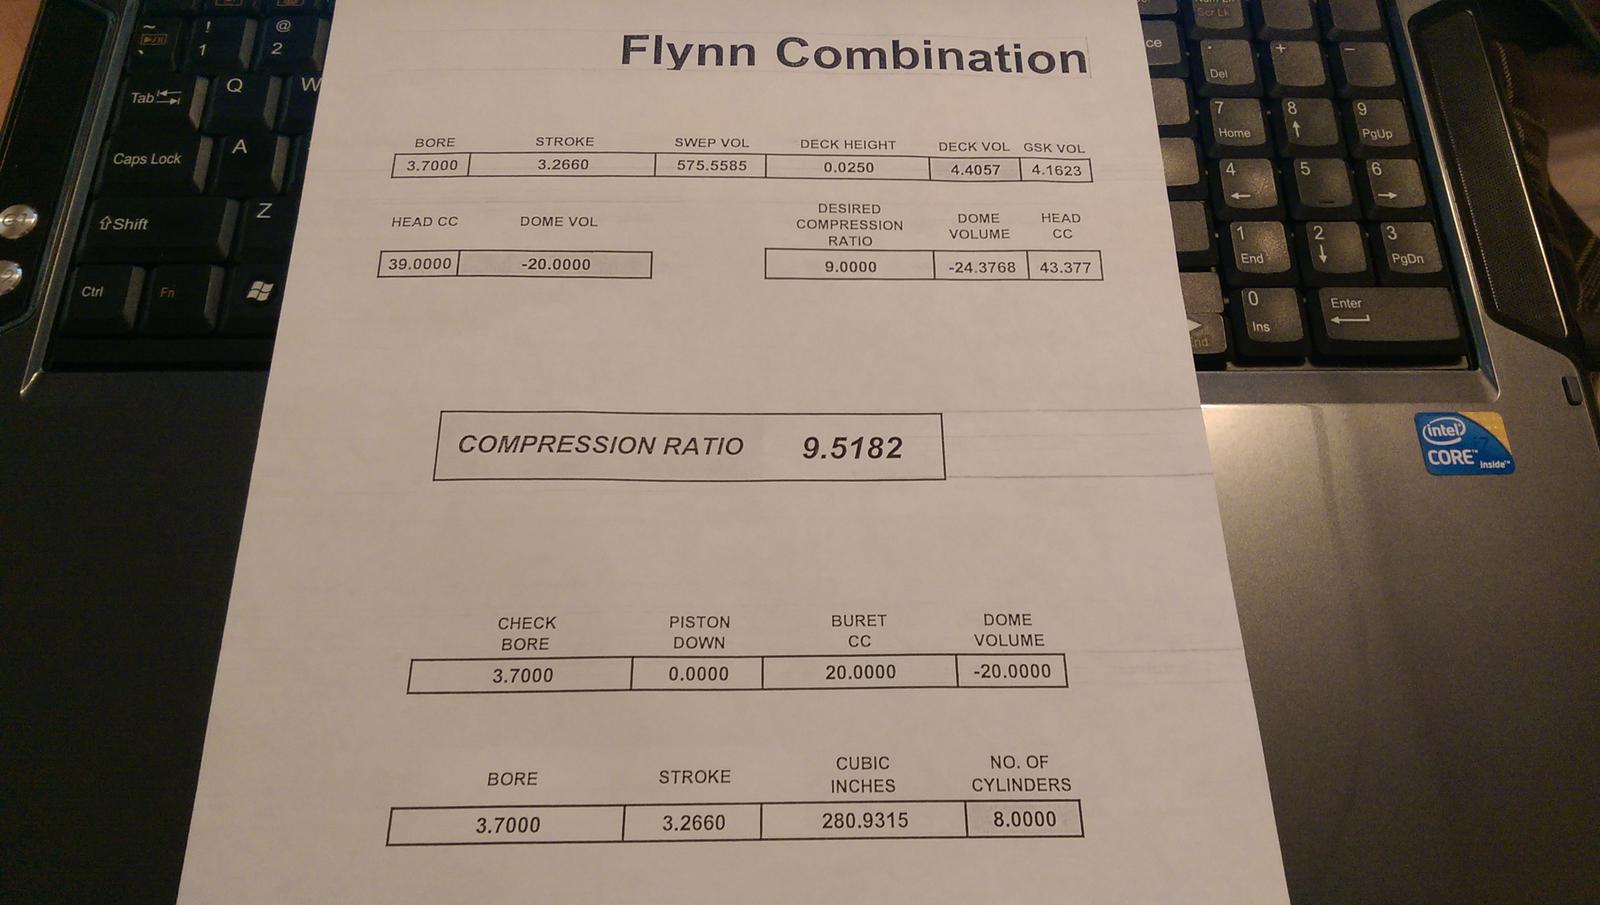
Piston ring gaps were set at a very conservative-
TOP - .026
2nd - .030
This works out to be on the large end. Because I want to be able to lean on this thing REAL HARD and possibly spray some NOS. There aren't any second chances if the gaps aren't large enough. Lesser of two evils here. I would much rather tear down to refresh than tear down due to carnage.
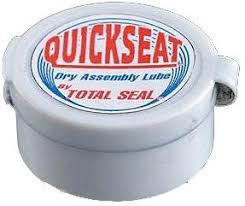
I used Total Seal Quick Seat Dry Film
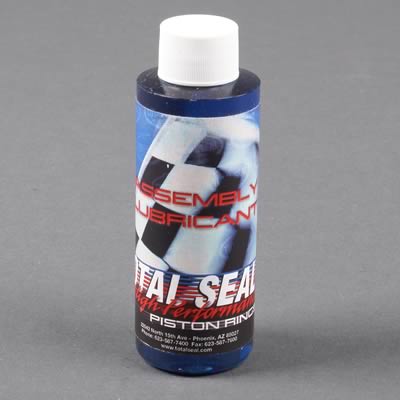
Total Seal Piston Ring Lube
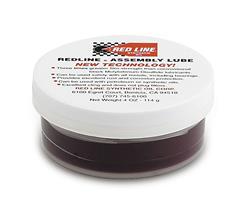
And Red Line Assembly Lube on the rest
I also installed the rod bolts using the stretch method. This is a Yother Stretch gauge and I like it a lot. As you can see the 4.5 is a short engine with minimal clearance and this gauge was able to get all up in it without a problem.
Here is an example. This sheet shows how my rods came from Pauter. Just a bit too loose. I don't really know why they came in like this and I don't really care. When you are talking measurements this small, the tinyest of details in temp, humidity, tool calibration, and operator error come into play. To that end I decided it was best to have Lozano's who was doing all my machine work tighten them up a bit and make everything right instead of sending rods back and forth like Sherlock Holmes trying to figure it out. Pauter did an amazing job on the rods, and Brian was a real pleasure to do buisness with. Not to mention, the price was RIGHT!
While we are on the subject of clearances-
Piston ring gaps were set at a very conservative-
TOP - .026
2nd - .030
This works out to be on the large end. Because I want to be able to lean on this thing REAL HARD and possibly spray some NOS. There aren't any second chances if the gaps aren't large enough. Lesser of two evils here. I would much rather tear down to refresh than tear down due to carnage.
I used Total Seal Quick Seat Dry Film
Total Seal Piston Ring Lube
And Red Line Assembly Lube on the rest
I also installed the rod bolts using the stretch method. This is a Yother Stretch gauge and I like it a lot. As you can see the 4.5 is a short engine with minimal clearance and this gauge was able to get all up in it without a problem.
 08-11-2017, 03:10 PM
#11
Three Wheelin'
Thread Starter
Lets talk about the oil pump a bit. The 4.5 Cayenne actually has three pumps. Two pumps are incorporated into the main pump and the you have the turbocharger scavenge pump which is also an external gear pump.
These are stock photos I gathered off the net because I did not take any.
The oil pump is HUGE! I re-used my old one. The bearings felt great and the gears looked amazing as well. I figured it is an expensive pump and I always kept my oil really clean. One of the first things I will be doing after initial startup is testing/monitoring oil pressure. Replacing the pump later wouldn't be too big a deal.
The Stock pump is an external gear design. It is comprised of a pressure relief valve, a main pump for the front sump, and a secondary pump for the rear sump.
This is a view of the bottom of the main pump. You can see the gears a bit here. They are BIG! I would say they are at least 1
1/4" long. The hole is where the main sump pickup tube bolts to. Nut is the cap for the pressure relief spring.
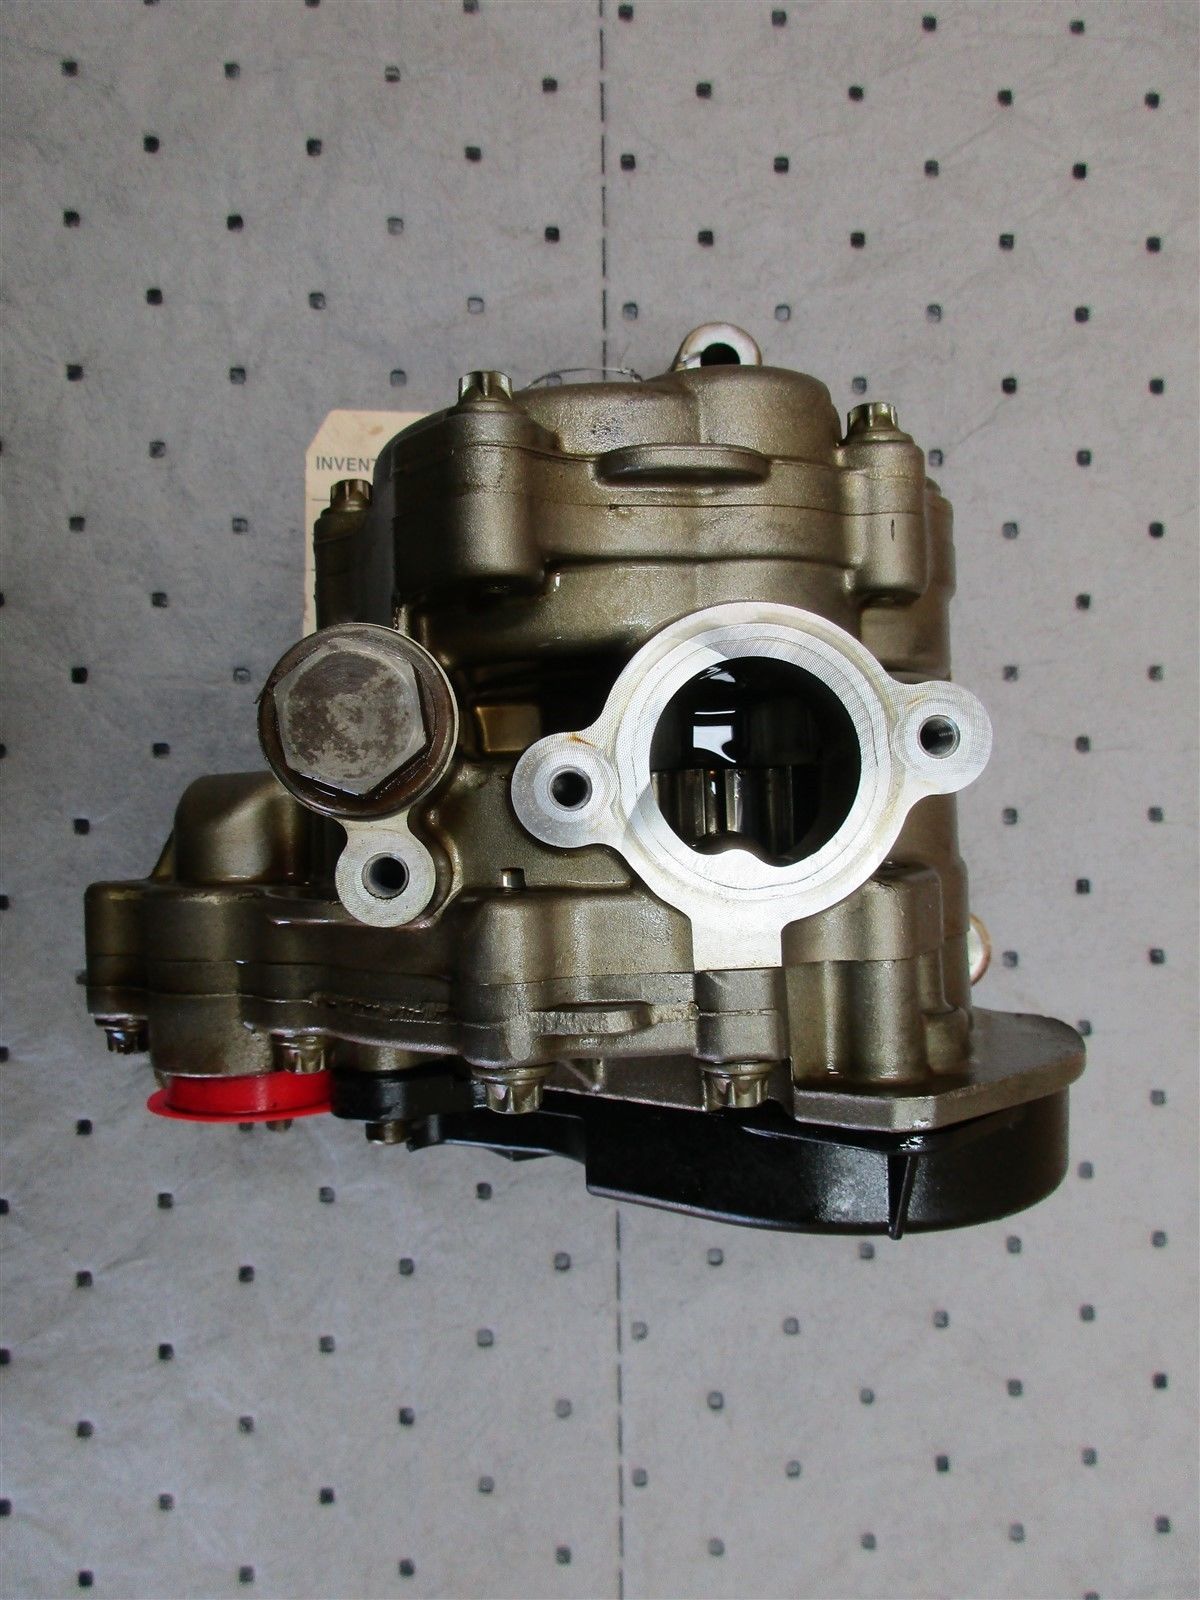
Here we have a view of the rear. Red cap is where the rear sump pickup tube go's.

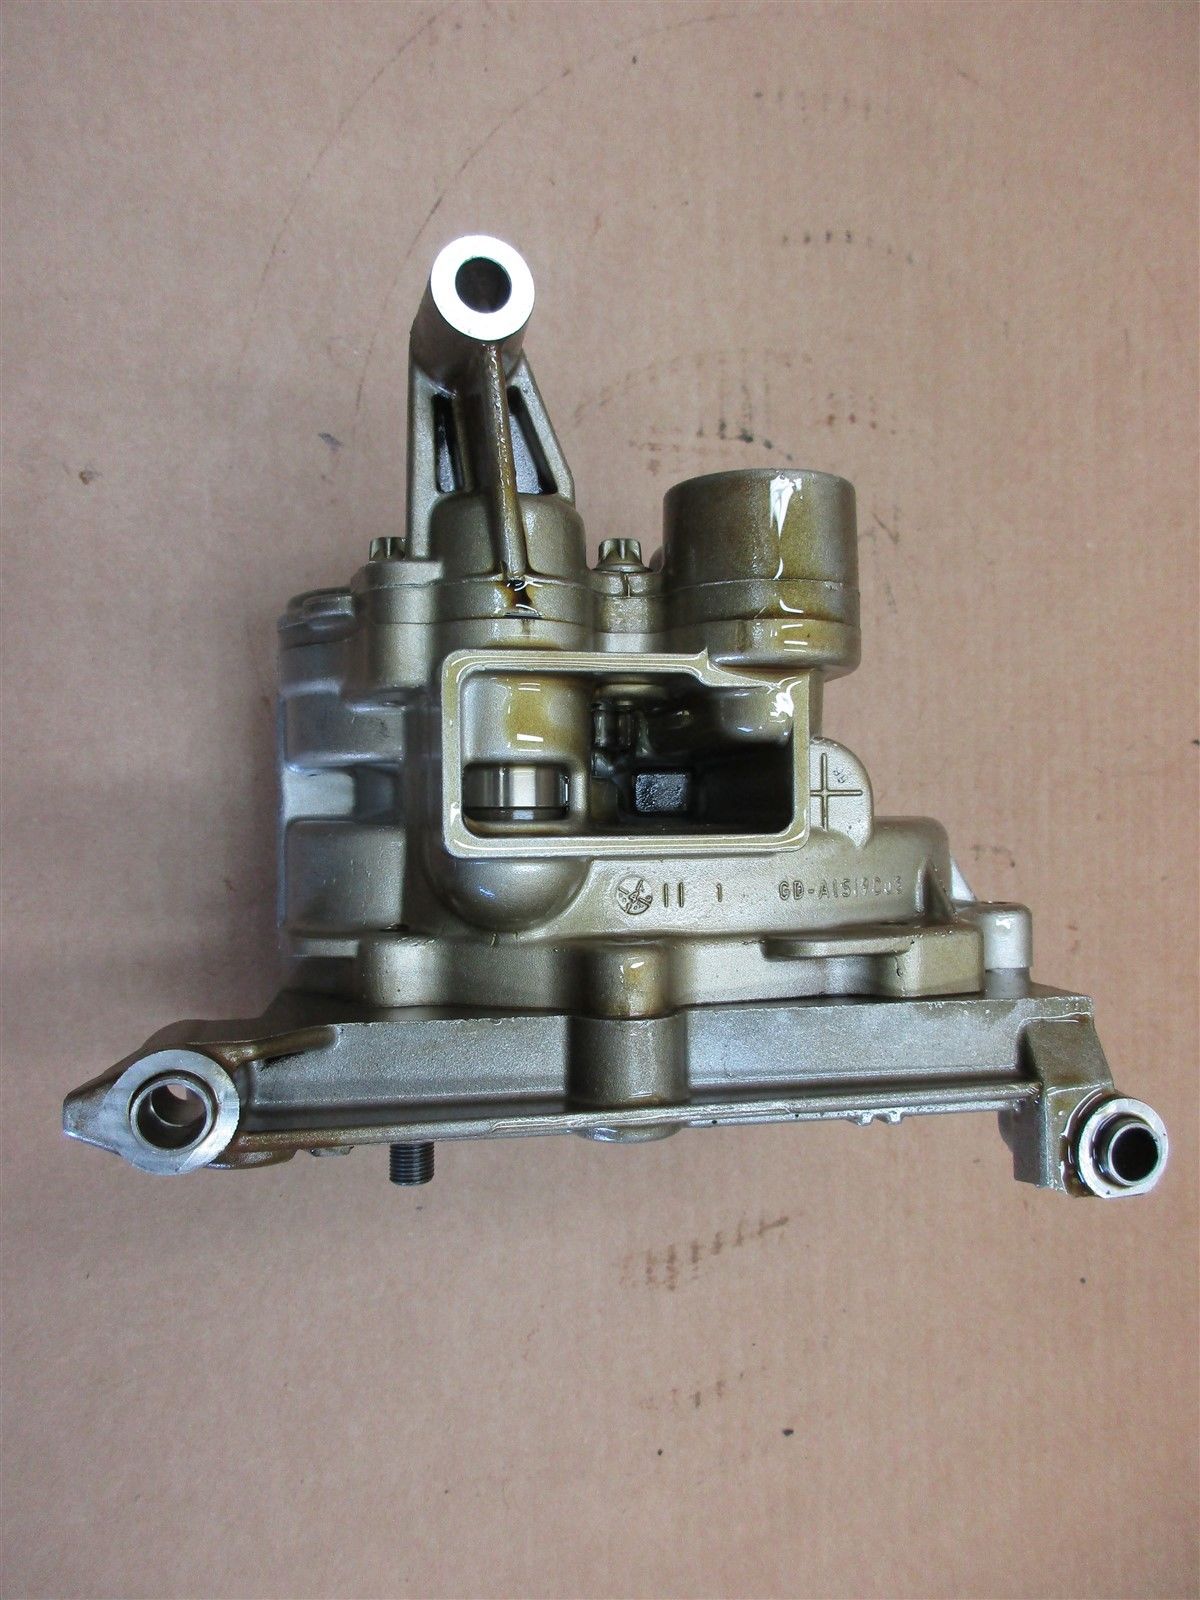
View of the top of the pump. You can barely see the gears for the rear sump pump. The piston is the press. relief for the rear pump. It dumps into this rear boxed hole area where it either feeds the front pump or flows out the top back into the pan.
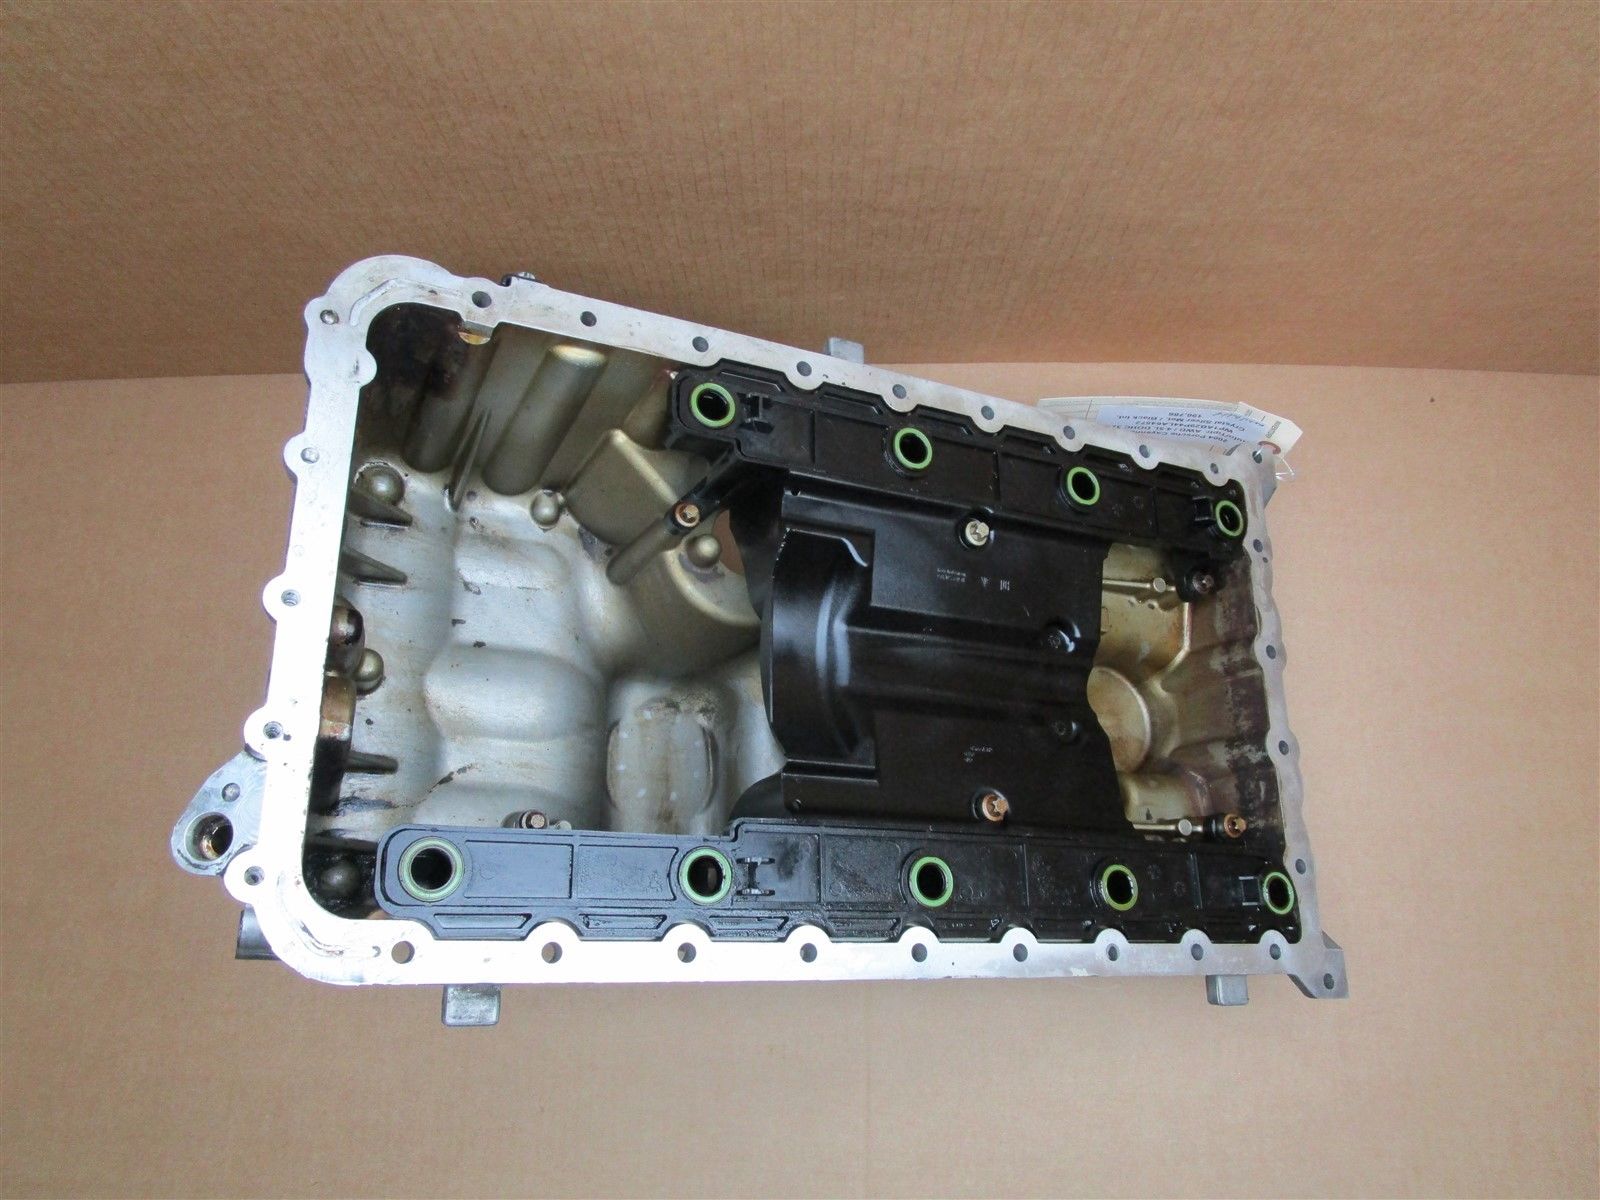
A pic of the pan with the internal baffling. Note how the drain-back from the top end is fed back into the pan evenly from the top end. The baffle is all sealed up with some special stuff so don't remove it! The rear sump is not that deep but it is sealed off from the front.
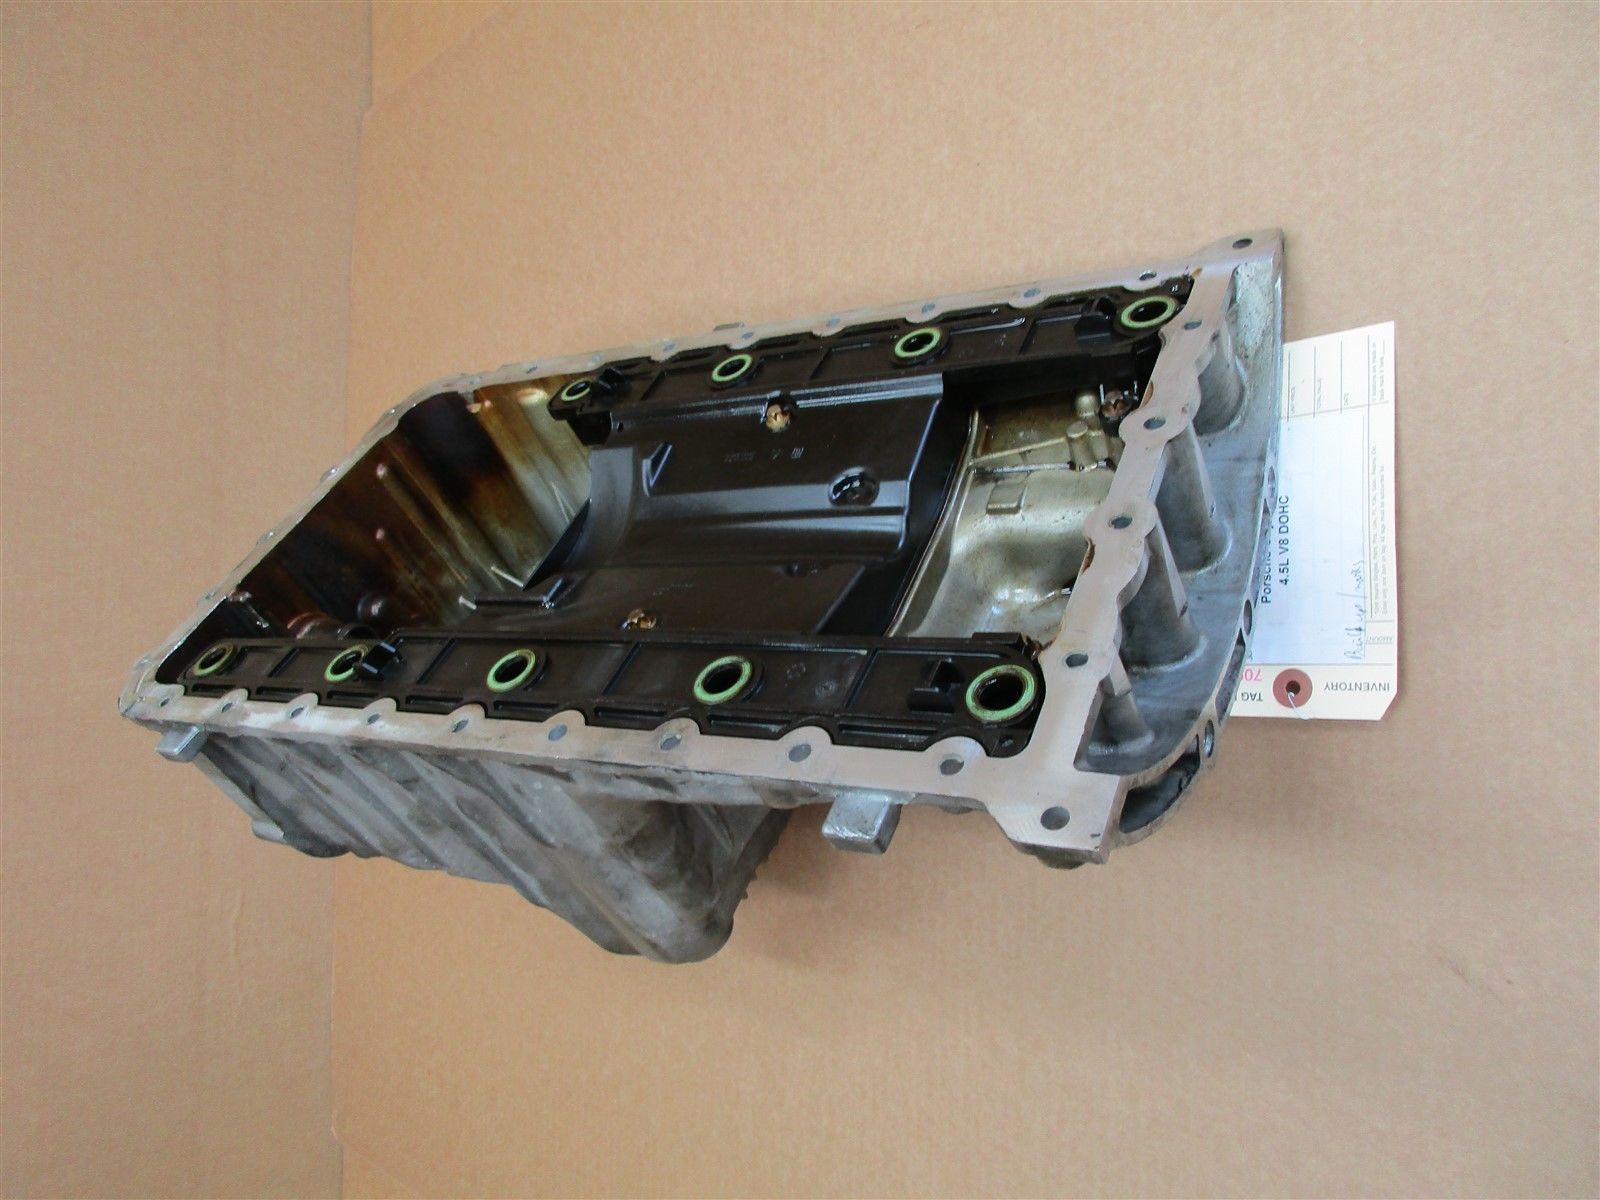
This is another view of the pan. You can see the dipstick hole to the left. The front drain plug is down in the deepest part of the sump. One CANNOT get all the oil vacuuming through the dipstick tube. I'd bet at least half a quart of dirty sedimented oil is left in that front sumped area. I've already mentioned the rear. The 4.5 actually has a total capacity of greater than 9 quarts if you include the entire engine and all the lines, heat exchanger, etc. The pan capacity is 9 quarts. Do yourself a favor and just drain it normally.
These are stock photos I gathered off the net because I did not take any.
The oil pump is HUGE! I re-used my old one. The bearings felt great and the gears looked amazing as well. I figured it is an expensive pump and I always kept my oil really clean. One of the first things I will be doing after initial startup is testing/monitoring oil pressure. Replacing the pump later wouldn't be too big a deal.
The Stock pump is an external gear design. It is comprised of a pressure relief valve, a main pump for the front sump, and a secondary pump for the rear sump.
This is a view of the bottom of the main pump. You can see the gears a bit here. They are BIG! I would say they are at least 1
1/4" long. The hole is where the main sump pickup tube bolts to. Nut is the cap for the pressure relief spring.
Here we have a view of the rear. Red cap is where the rear sump pickup tube go's.
View of the top of the pump. You can barely see the gears for the rear sump pump. The piston is the press. relief for the rear pump. It dumps into this rear boxed hole area where it either feeds the front pump or flows out the top back into the pan.
A pic of the pan with the internal baffling. Note how the drain-back from the top end is fed back into the pan evenly from the top end. The baffle is all sealed up with some special stuff so don't remove it! The rear sump is not that deep but it is sealed off from the front.
This is another view of the pan. You can see the dipstick hole to the left. The front drain plug is down in the deepest part of the sump. One CANNOT get all the oil vacuuming through the dipstick tube. I'd bet at least half a quart of dirty sedimented oil is left in that front sumped area. I've already mentioned the rear. The 4.5 actually has a total capacity of greater than 9 quarts if you include the entire engine and all the lines, heat exchanger, etc. The pan capacity is 9 quarts. Do yourself a favor and just drain it normally.
08-11-2017, 03:13 PM
#12
Three Wheelin'
Thread Starter
 08-11-2017, 04:23 PM
#14
Three Wheelin'
Thread Starter
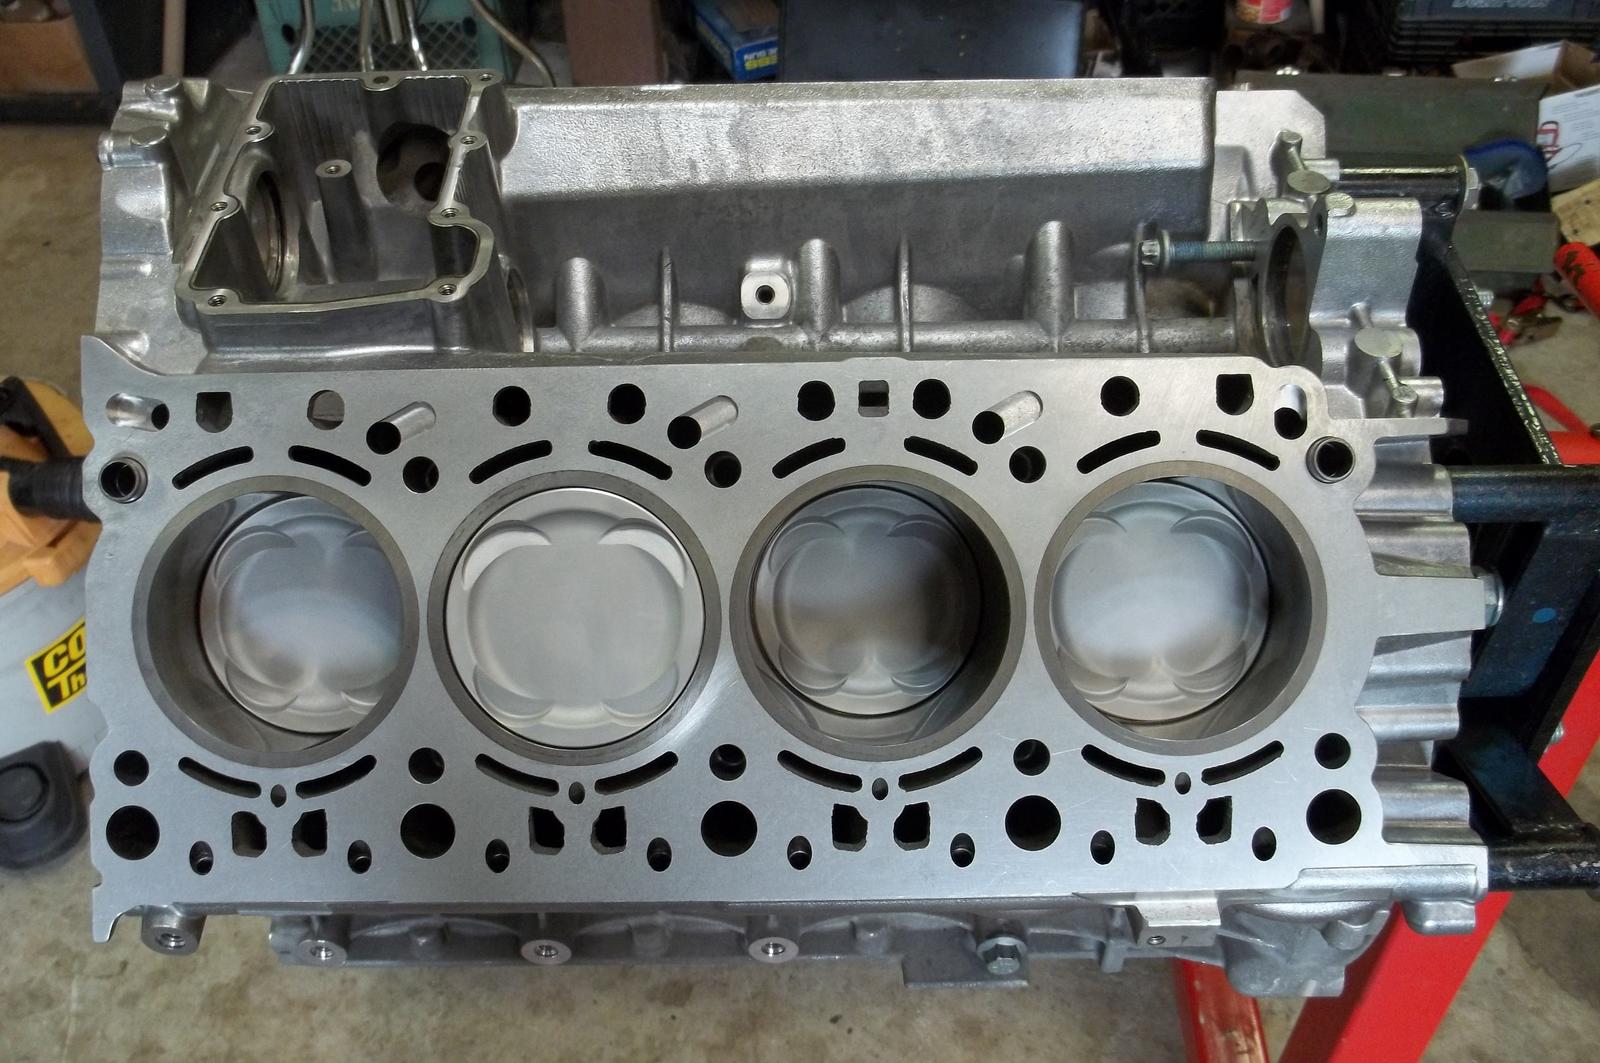
One last pic before we move on to the top end.
Although you can not see it all in this pic, there are a couple more things I like about the 4.5 block and why I think it is a great candidate for sleeving.
The deck has a good amount of material to it. It's not the thickest I have ever seen but comes in above many of the modern engines. It's at least a 1/4 inch thick at the thinnest points. The other great thing is the cylinder head bolt holes. The threads do not start until the bottom 1/3rd of the cylinder and the space in between is solid. Essentially the bottom 1/3rd of the cylinder is solid and the benefit is increased strength in the block and cylinder wall. The real charm though, is much less cylinder distortion during heat cycling, and from bolt preload/tension. The 4.5 uses a 12mm head bolt while the 4.8 went down in size to an 11mm. There is also plenty of meat between the cylinders. Many modern engines are getting more compact and the cylinders are almost touching or have very little room. This means that when you sleeve, the liners will become or come close to being siamesed. At this point usually you would have to go to a more expensive, harder to do, and more prone to failure M.I.D. sleeve design or "wet"sleeve.
08-11-2017, 04:24 PM
#15
Rennlist Member
Thanks for the update!
Anxiously waiting to hear this purring.
Anxiously waiting to hear this purring.
The following users liked this post:
ElSpoon958 (03-06-2022)