When you click on links to various merchants on this site and make a purchase, this can result in this site earning a commission. Affiliate programs and affiliations include, but are not limited to, the eBay Partner Network.
Ohlins R&T have entered the chat. Will get these built and installed in the coming weeks.
@NSXavier curious how you're liking yours and where you ended up on clicks
I went all the way left, rotated all the way right while counting the clicks in between. I adjusted all to the middle value which IIRC was around 12-14. Then after I had that setup I drove around and would fine tune the rear/front to the way I liked it to feel which was biased towards the softer side of things.
I changed the cabin air filter, only to find the existing one not properly installed. It was upside down (arrows indicate air flow direction, duh) and was not properly seated (huge air gaps). That reinforces why I like to do my own work.
Went to Forgeline in Dayton. Toured the factory and made my choices from infinite options. Picked them up at their loading dock to save a little money. Stopped at my friend/detailer�s shop on the way home. Aaron Copler, AC Detailing, ceramic coated them.
Went to Forgeline in Dayton. Toured the factory and made my choices from infinite options. Picked them up at their loading dock to save a little money. Stopped at my friend/detailer’s shop on the way home. Aaron Copler, AC Detailing, ceramic coated them.
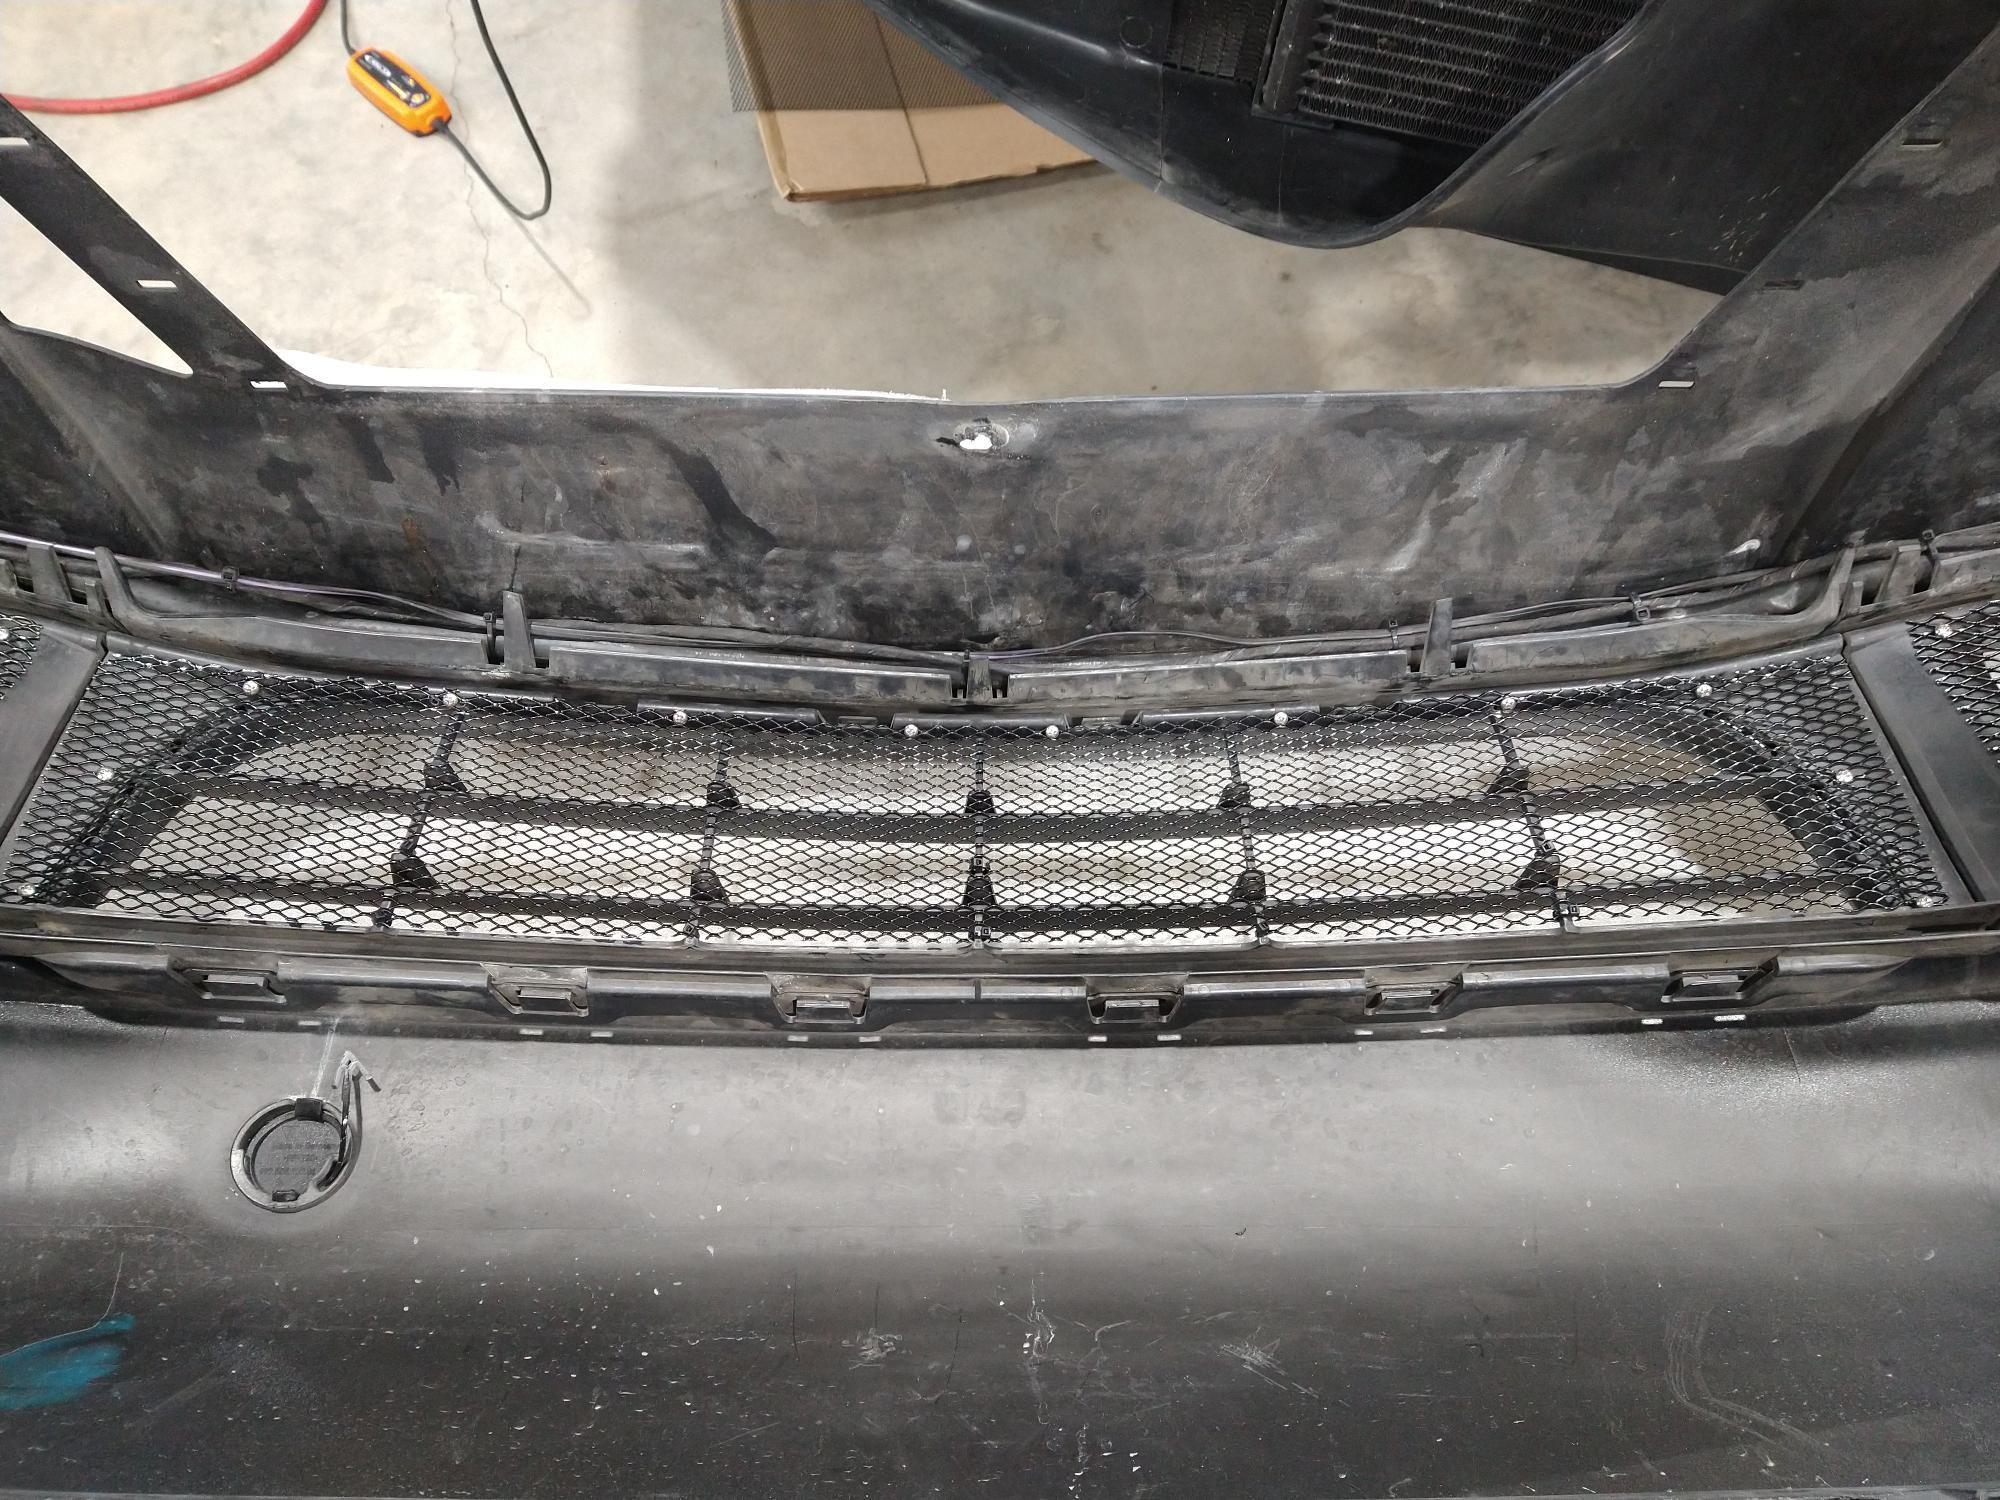
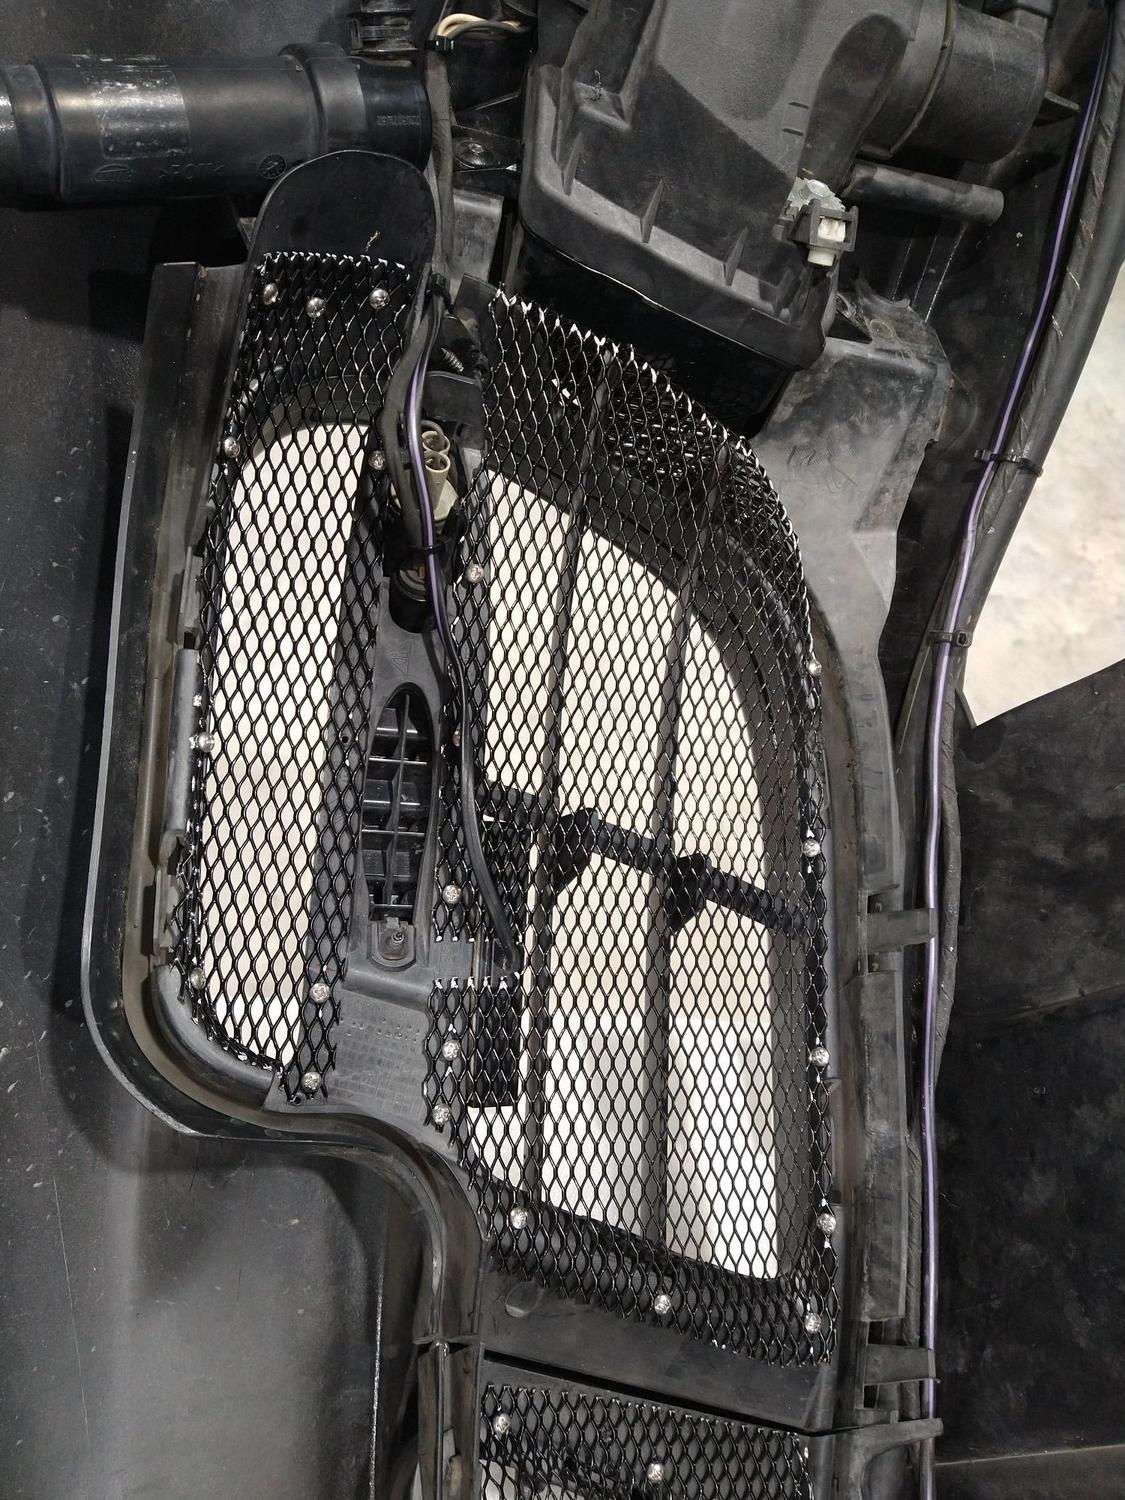
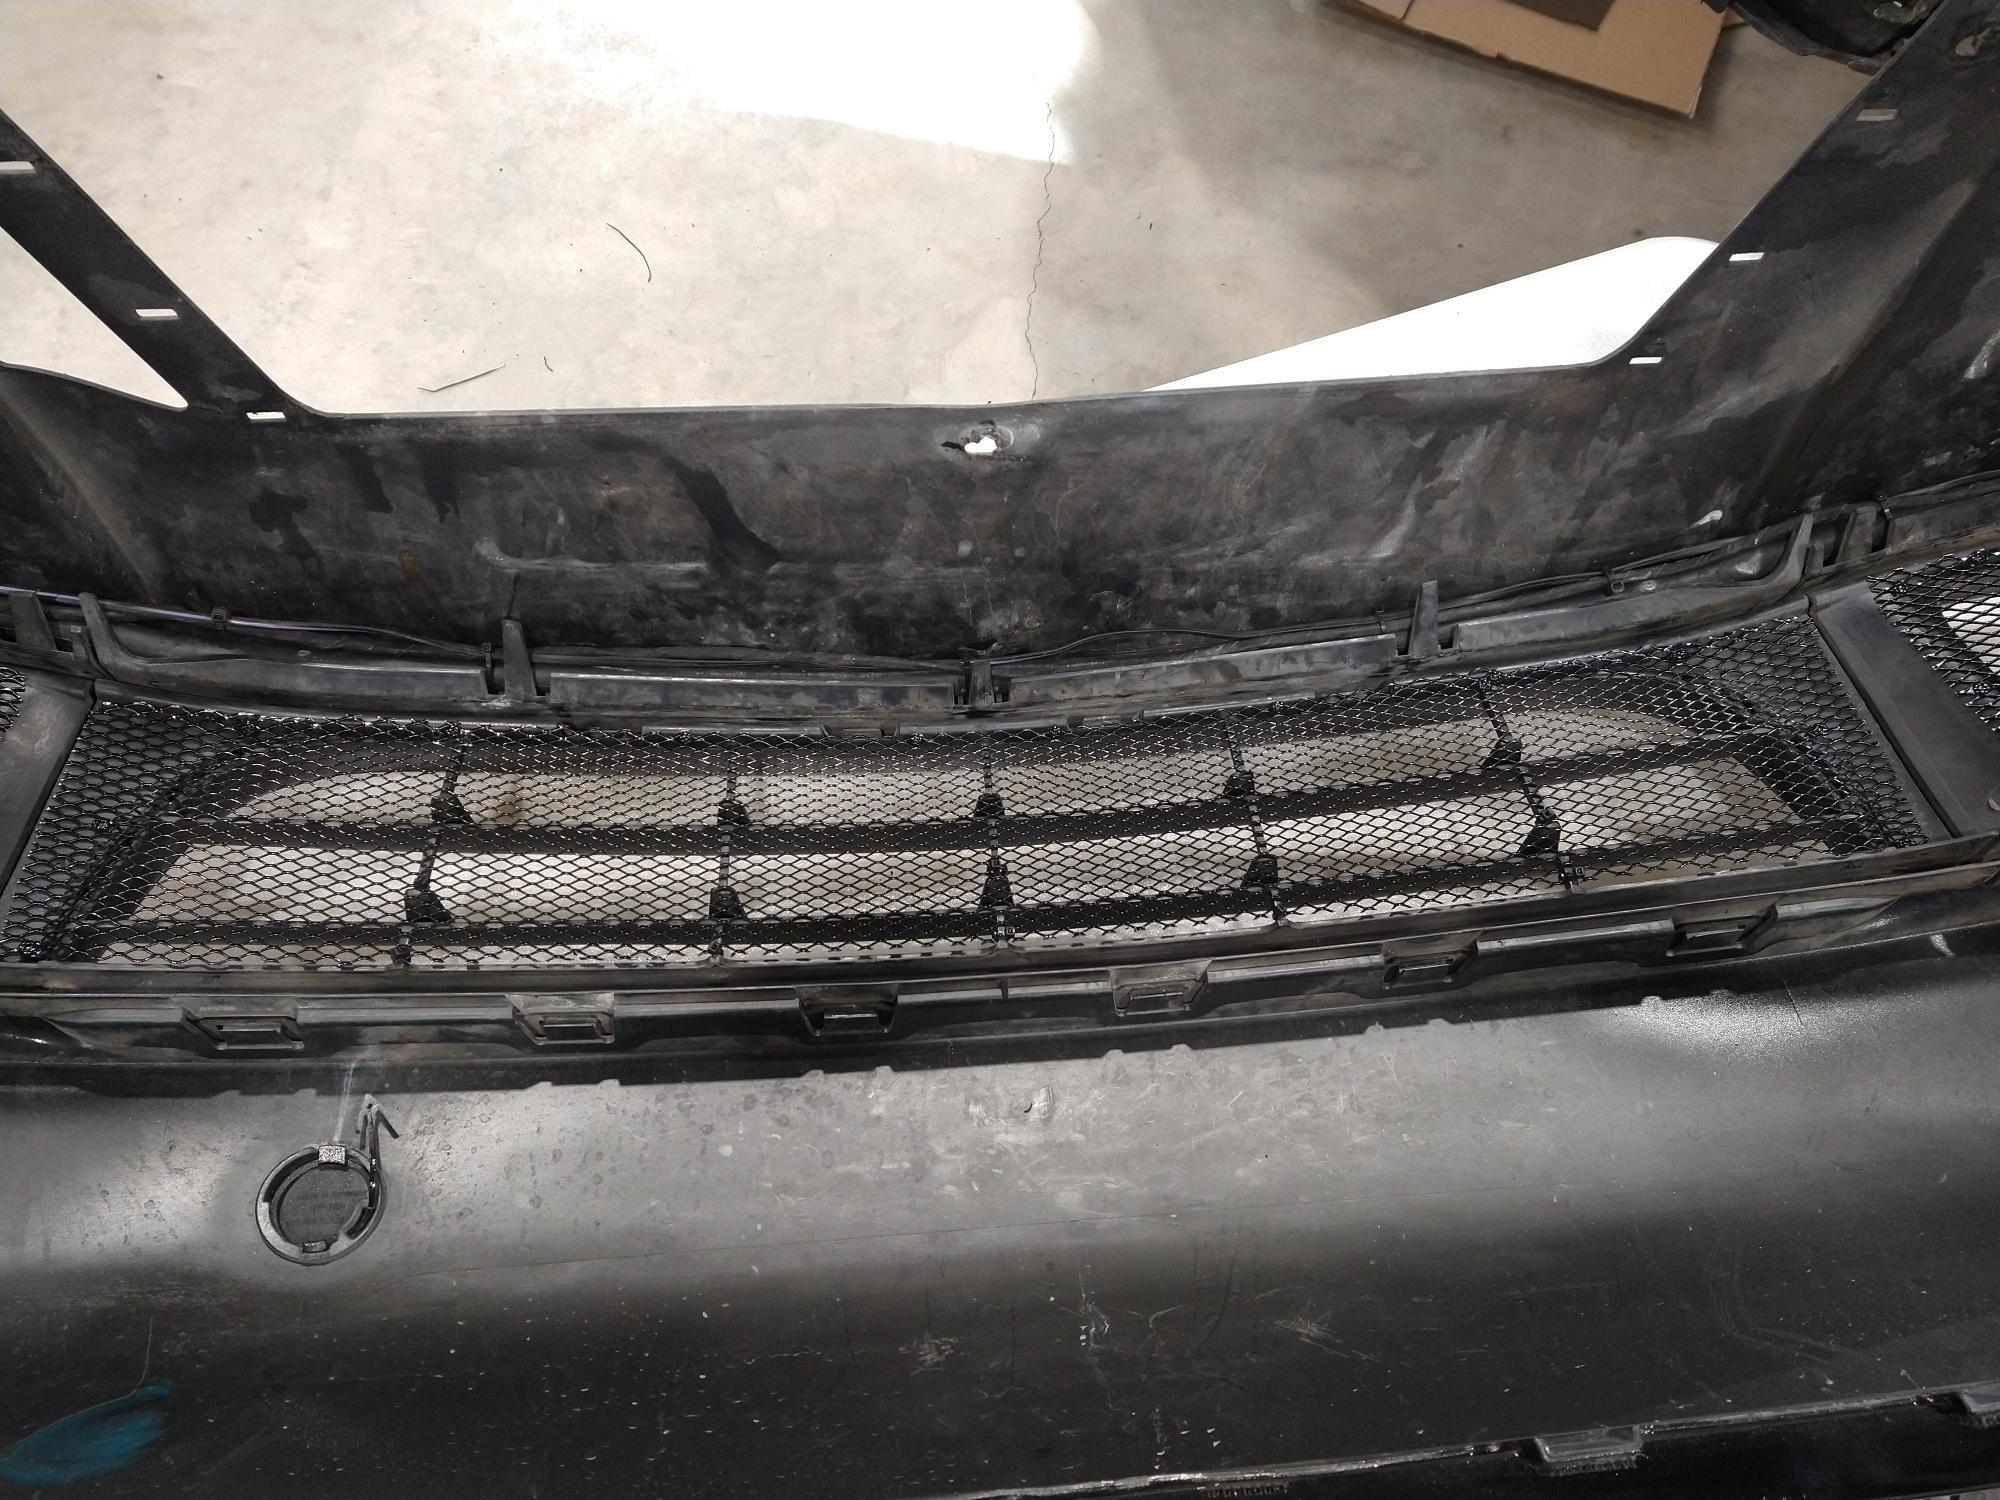
Installed DIY grill guards. Not too bad to do yourself. Just need to go slow and have some patience. The material is powder coated aluminum. So, I was able to form the piece to fit in place. Screws and a few zip ties hold it all in place.
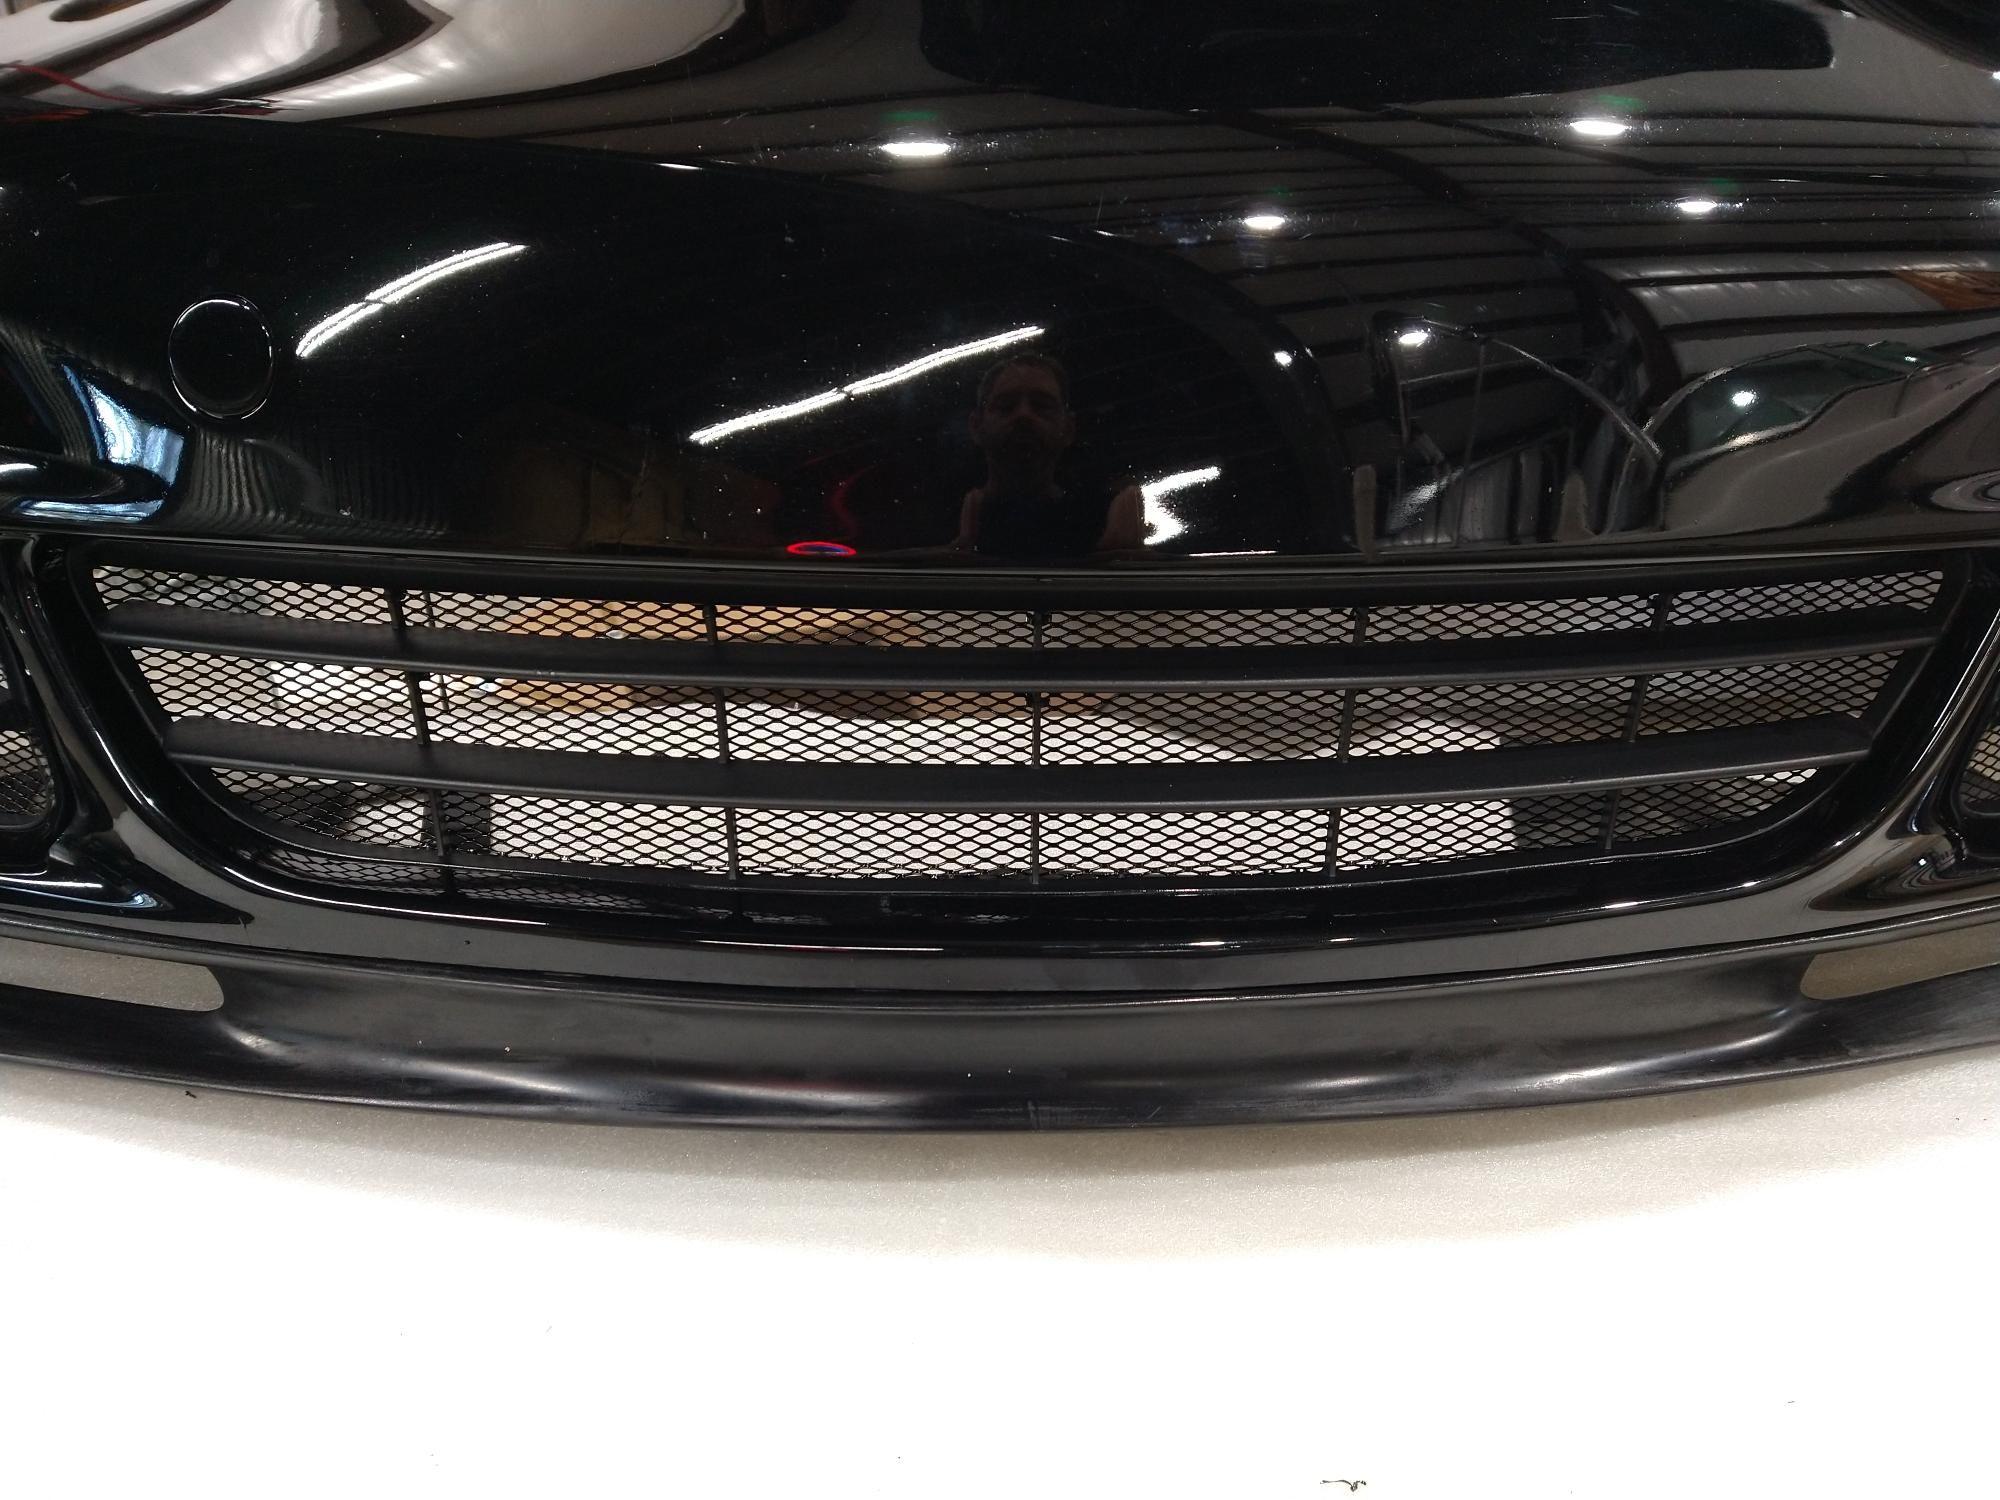
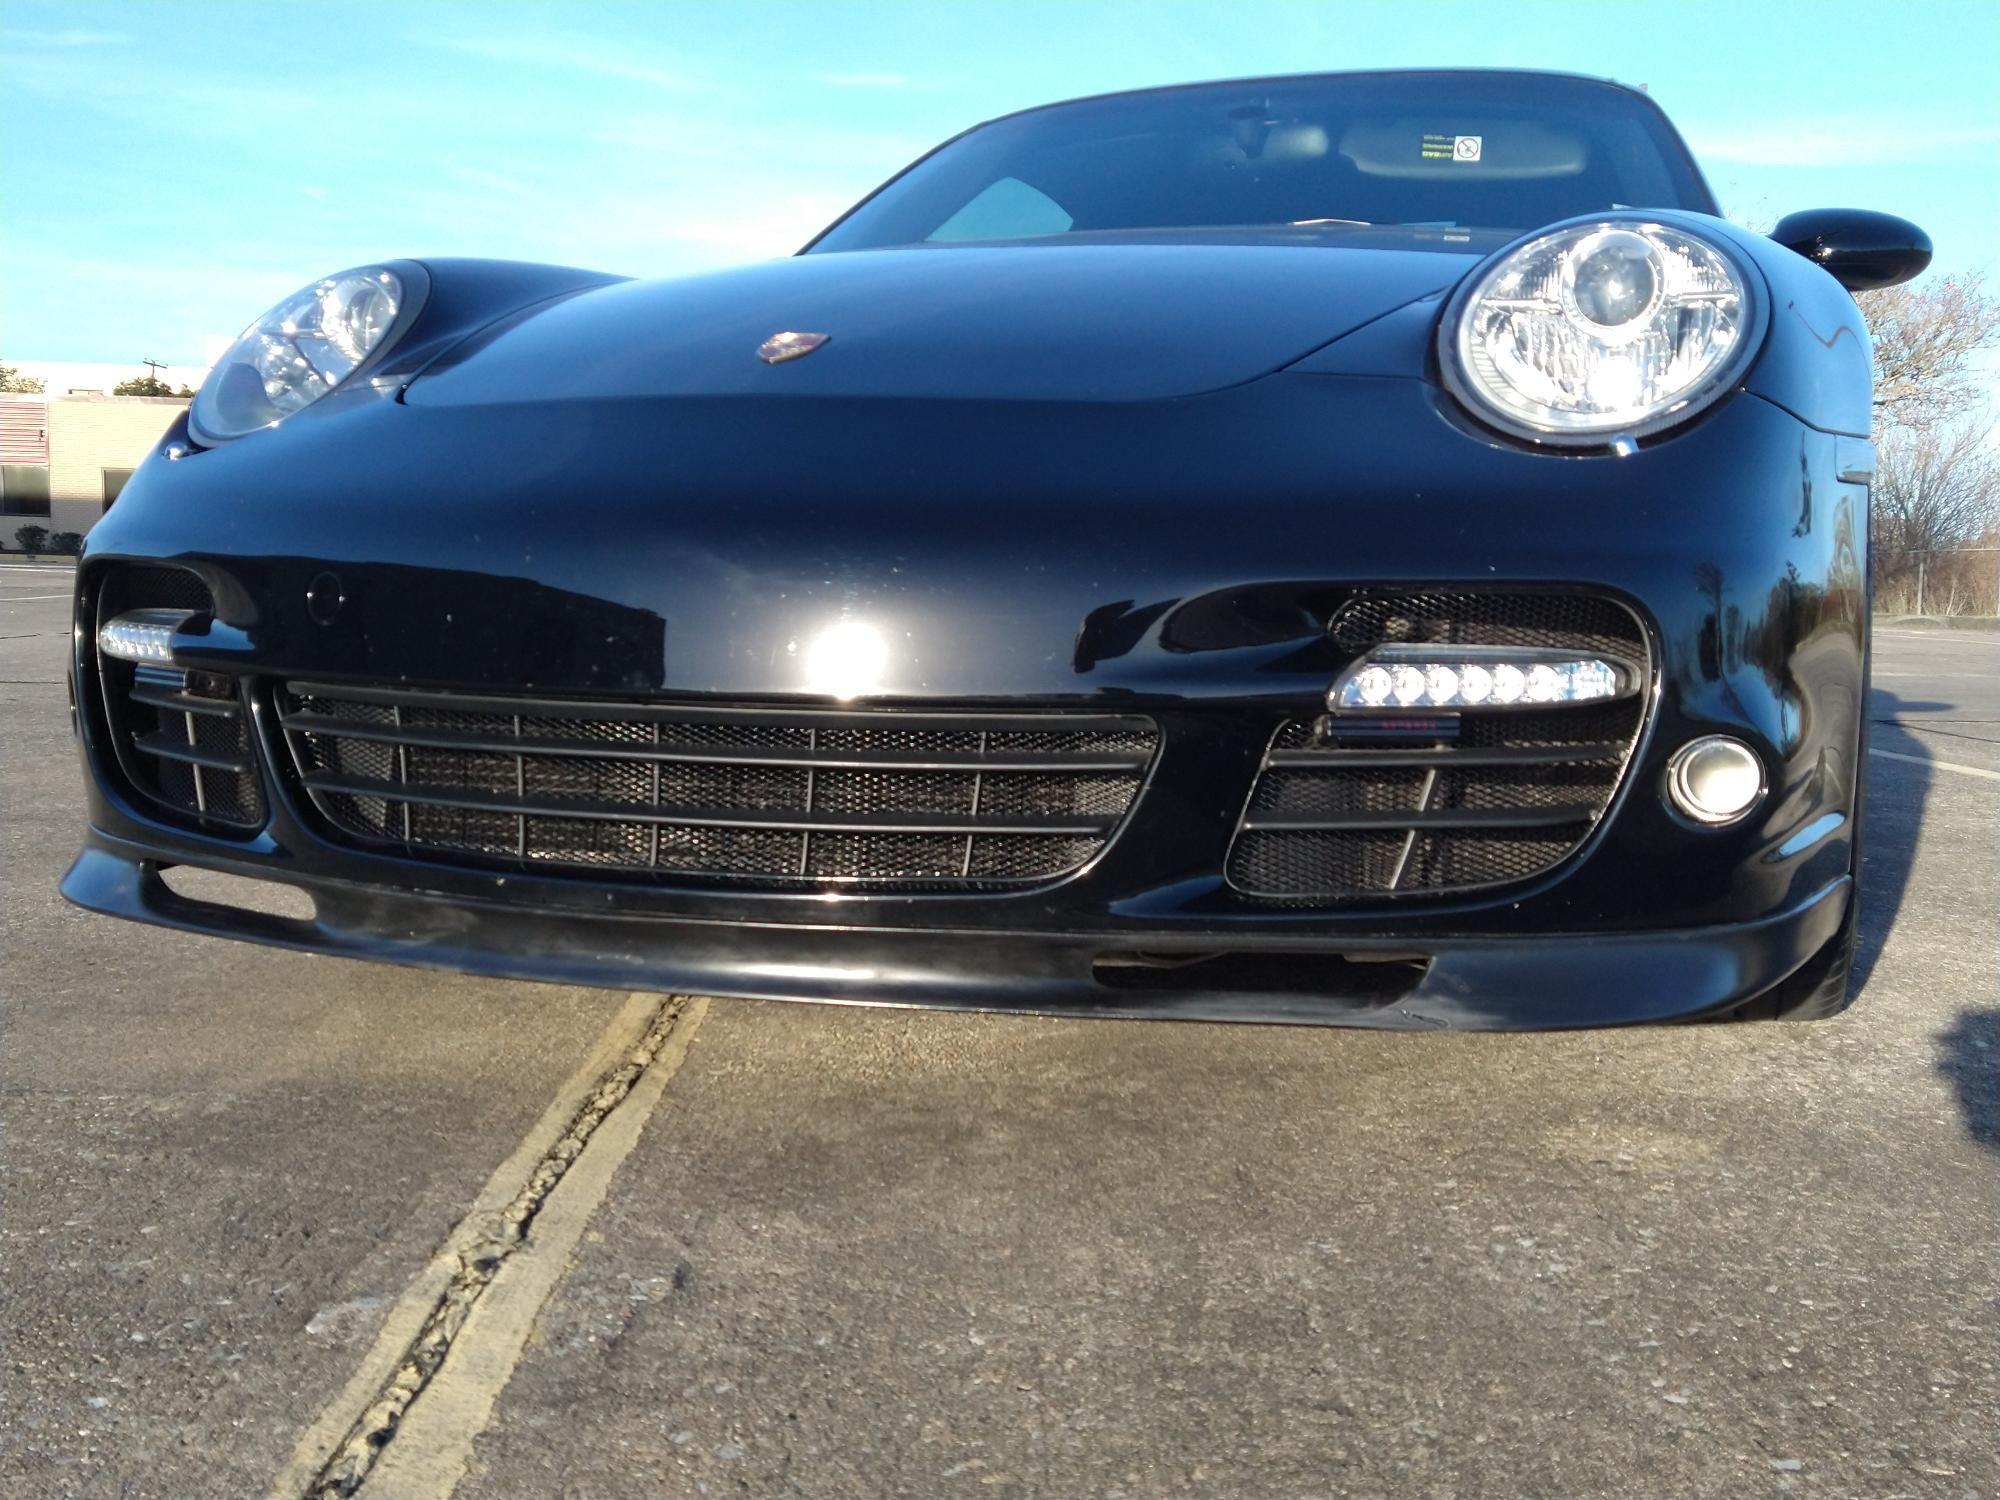
Center grill. End grill. Now with the screw heads painted black. All done. Test drive to round out the day.
Installed DIY grill guards. Not too bad to do yourself. Just need to go slow and have some patience. The material is powder coated aluminum. So, I was able to form the piece to fit in place. Screws and a few zip ties hold it all in place.
All done. Test drive to round out the day.
Excellent result! Rennline charges $350 for precut mesh and some screws.
Installed DIY grill guards. Not too bad to do yourself. Just need to go slow and have some patience. The material is powder coated aluminum. So, I was able to form the piece to fit in place. Screws and a few zip ties hold it all in place.
Center grill. End grill. Now with the screw heads painted black. All done. Test drive to round out the day.
Looks great! What size and type of screws did you use? I�m getting ready to do the same job with some mesh I bought off Amazon.
Looks great! What size and type of screws did you use? I’m getting ready to do the same job with some mesh I bought off Amazon.
Sheet metal screws. #6 x 3/8" long (McM# 90184A127) except near the fog lights, where I used #6 x 1/4" long (McM# 90184A120). I also use some glue when I final installed the screws. The glue dries clear and remains flexible.
Last edited by Ryans Rebel; 01-15-2024 at 02:28 PM.
Reason: Added McMaster part numbers.
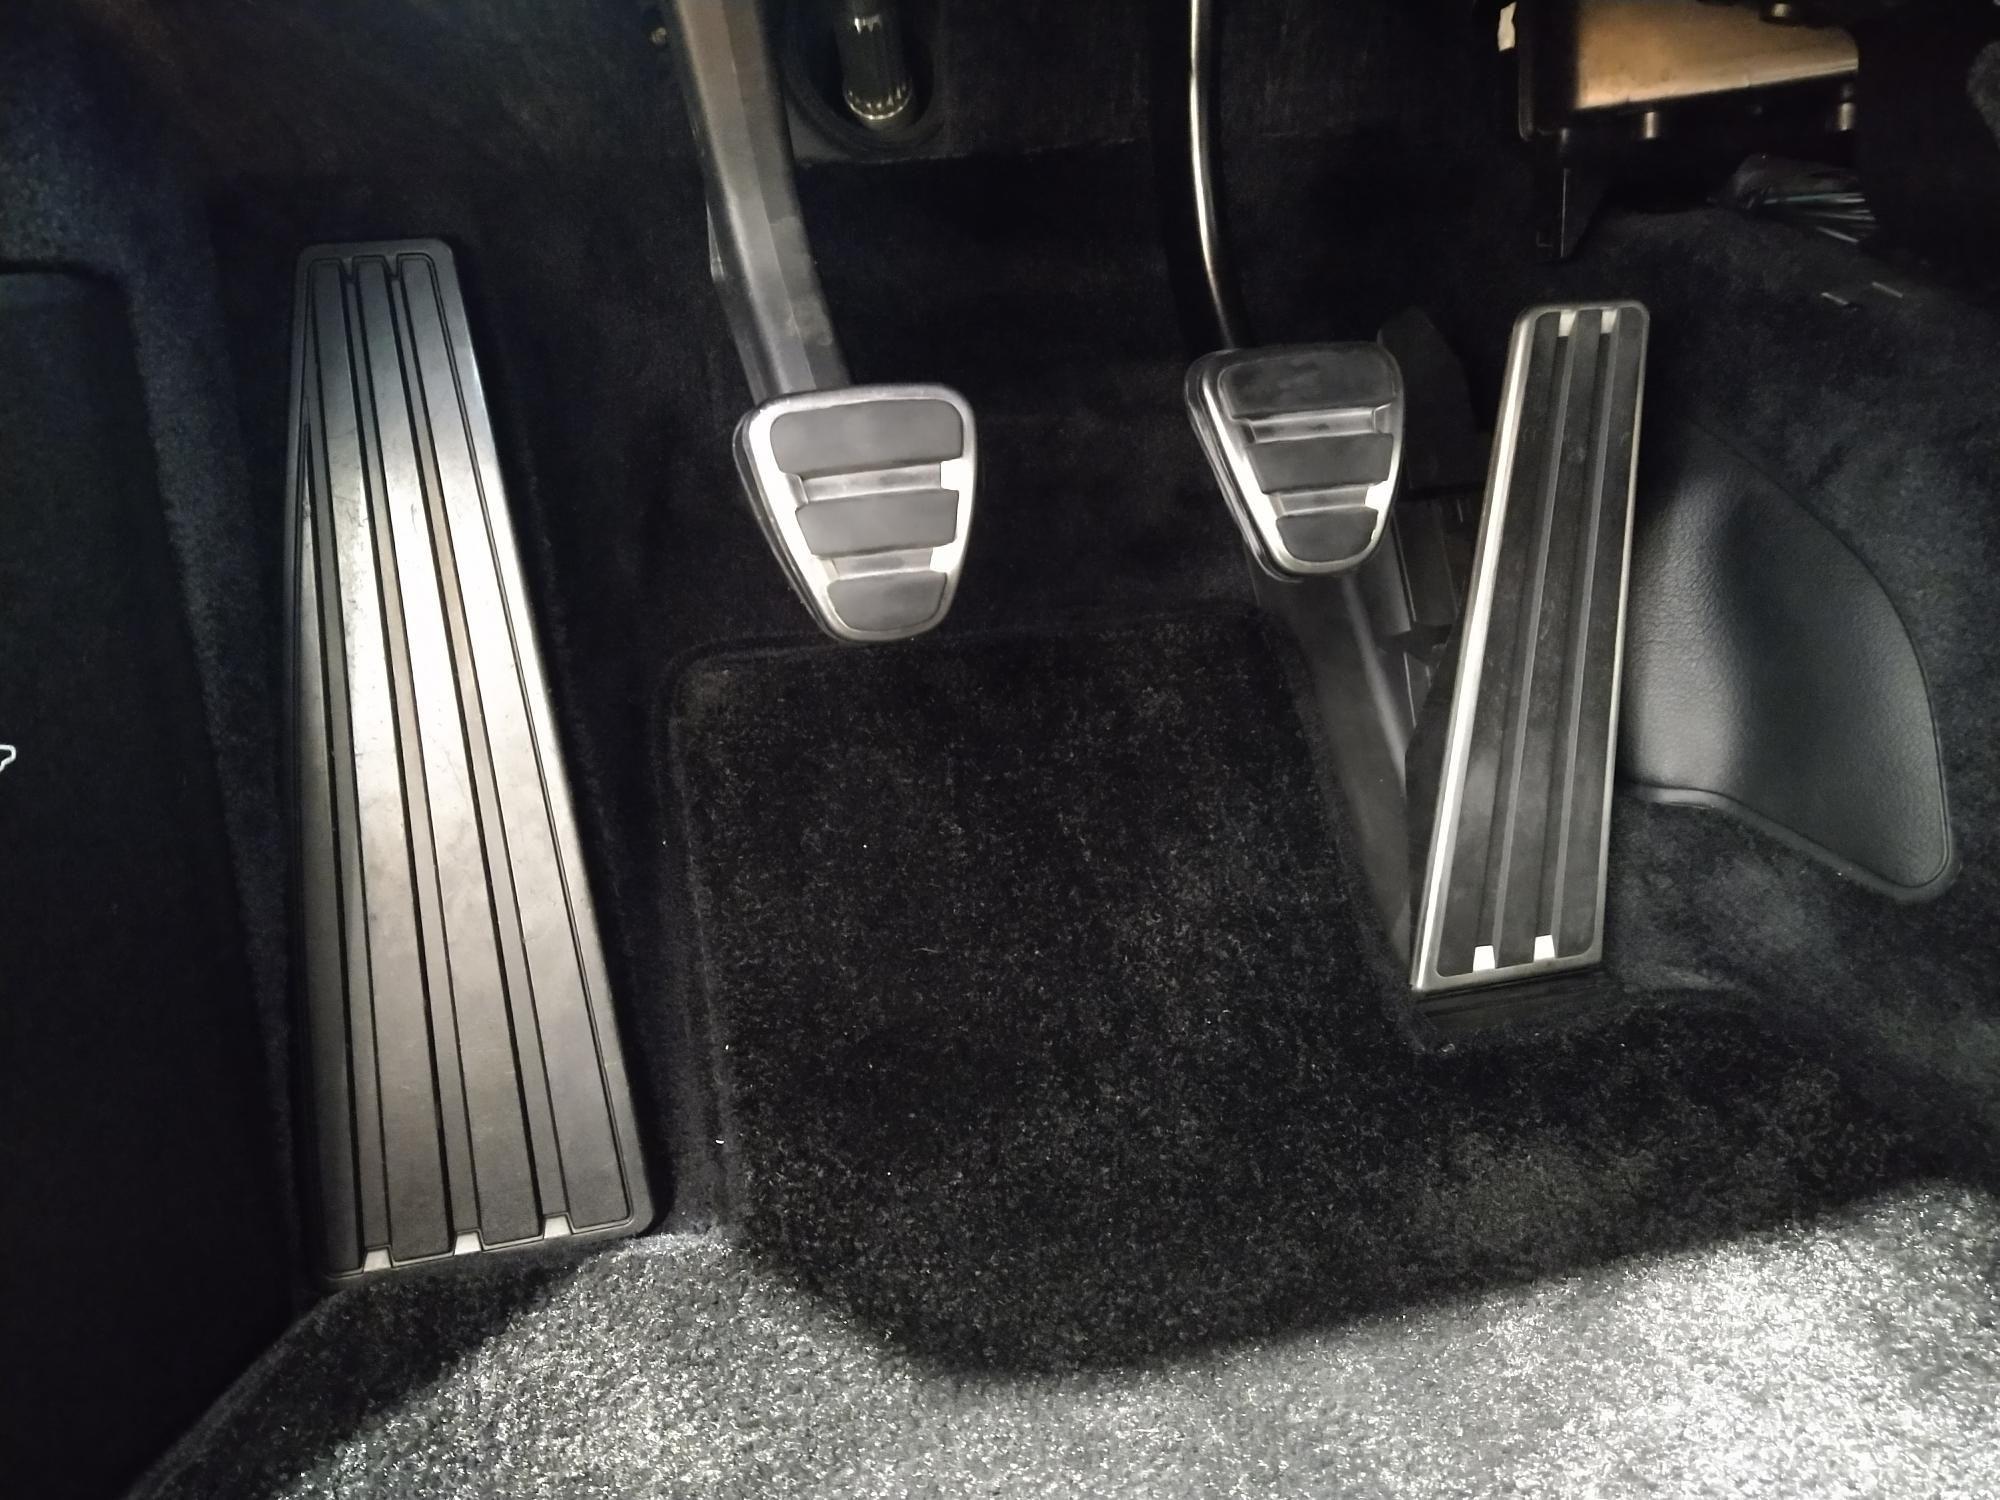
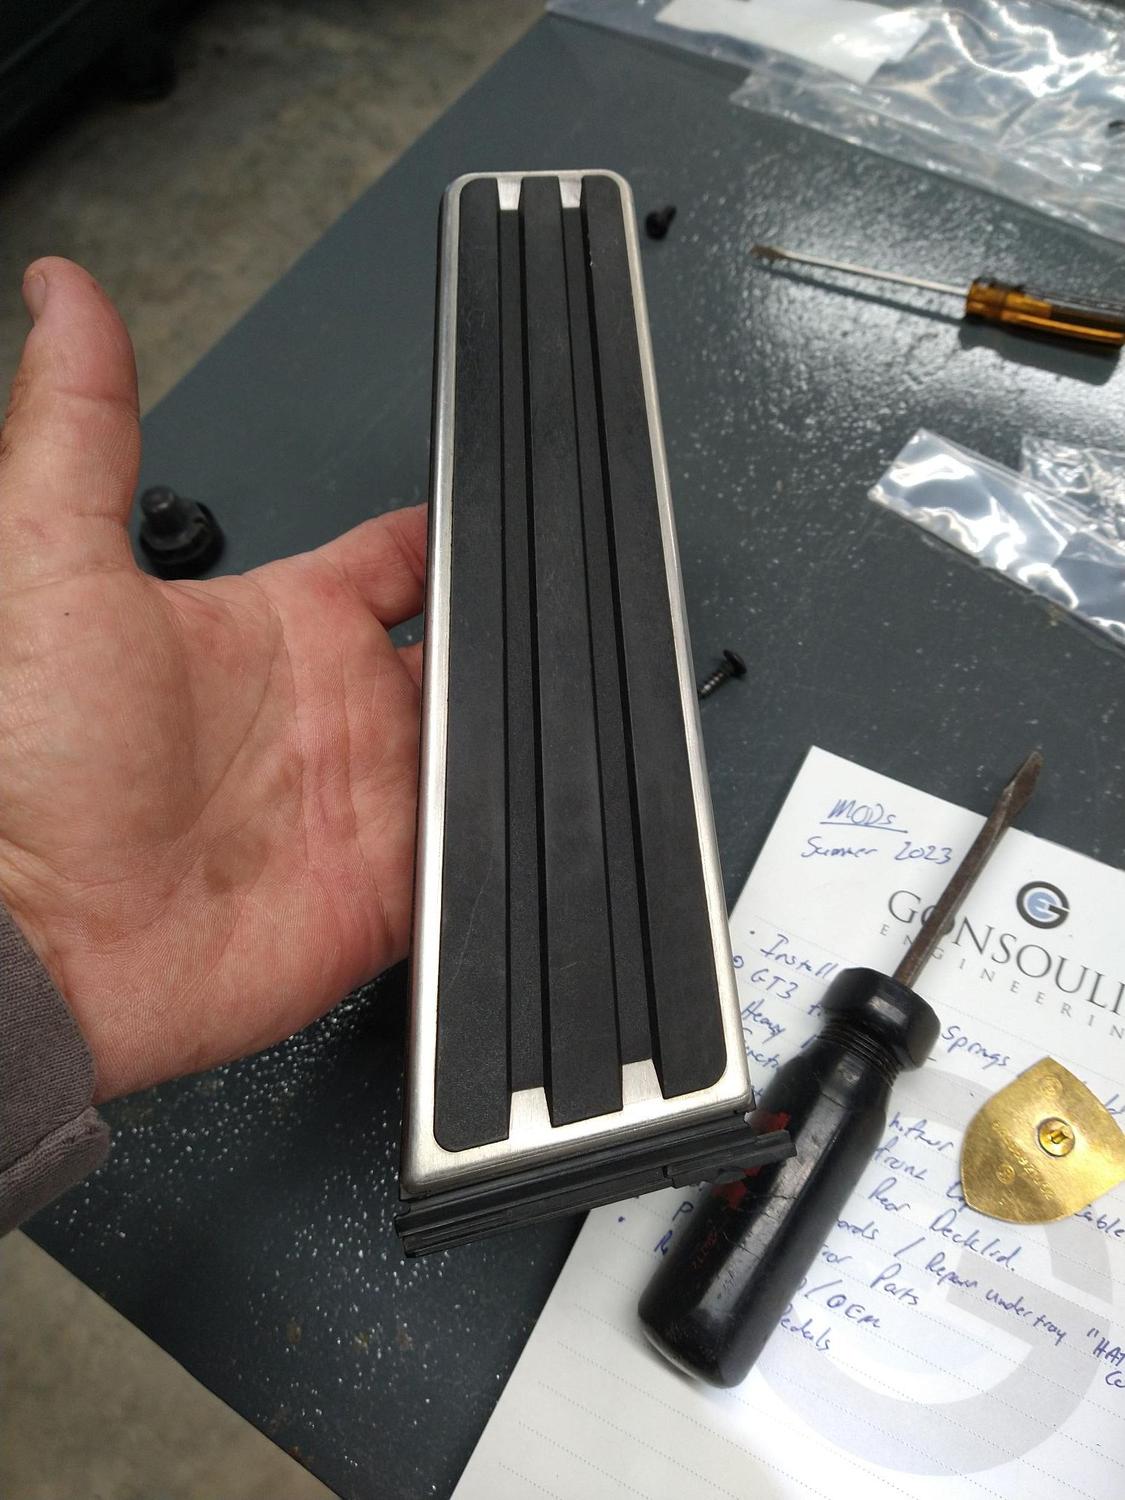
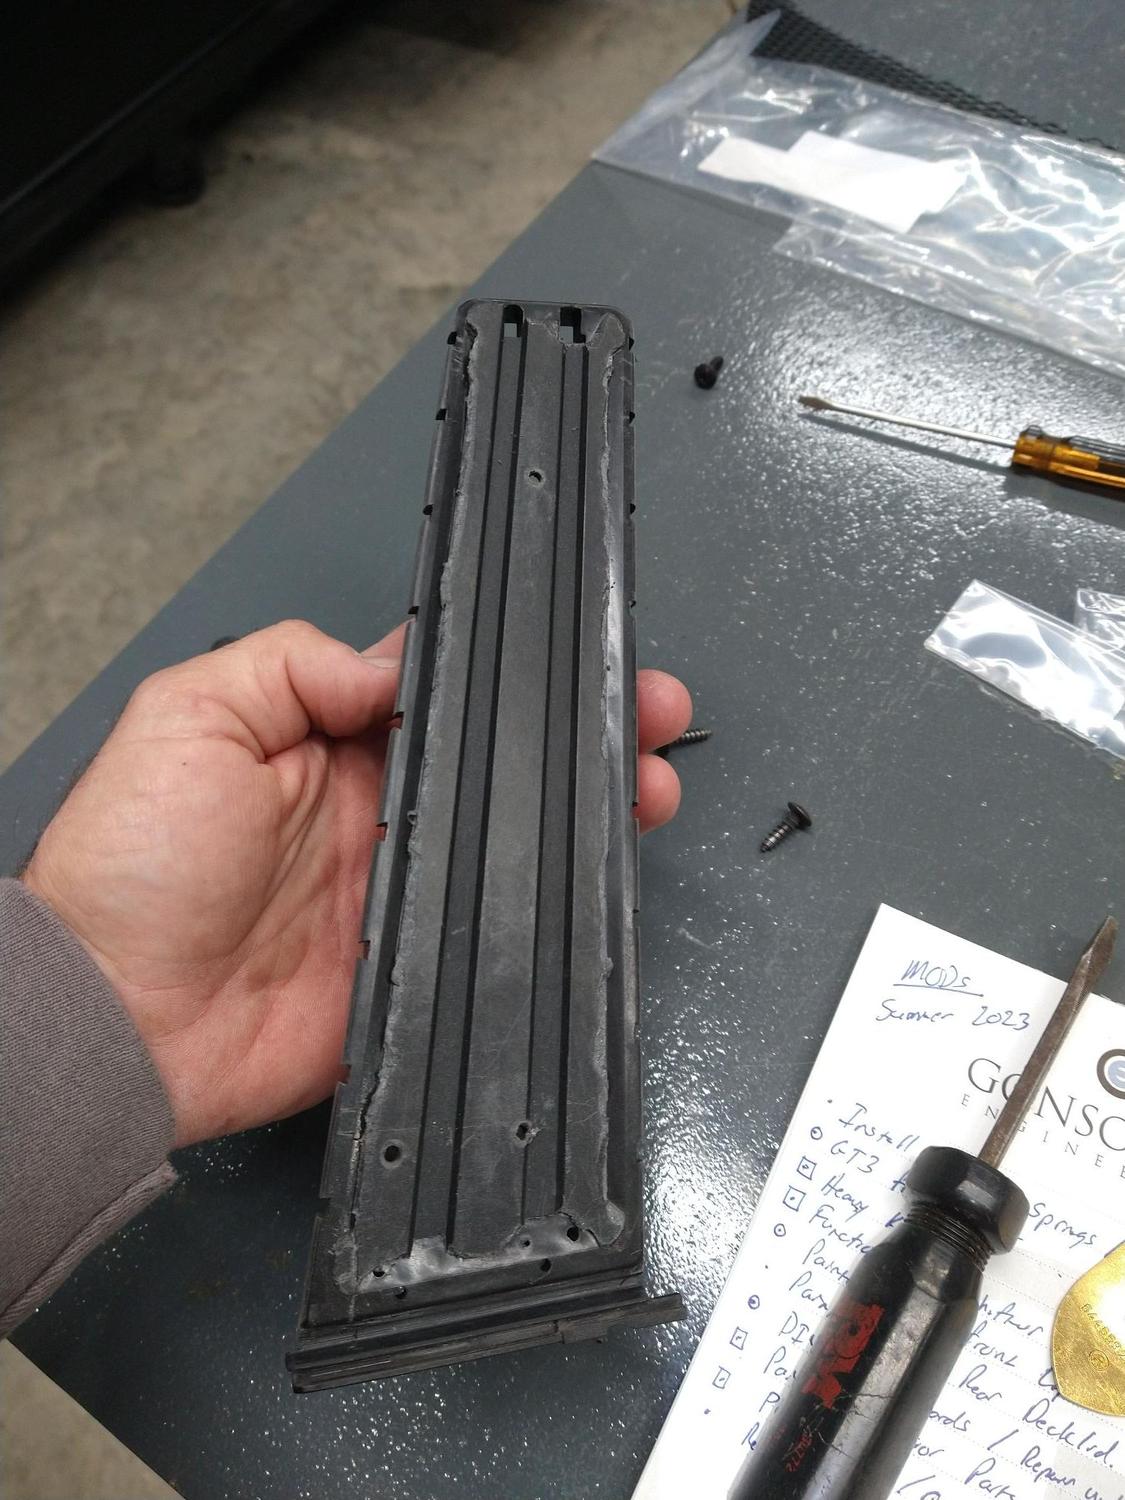
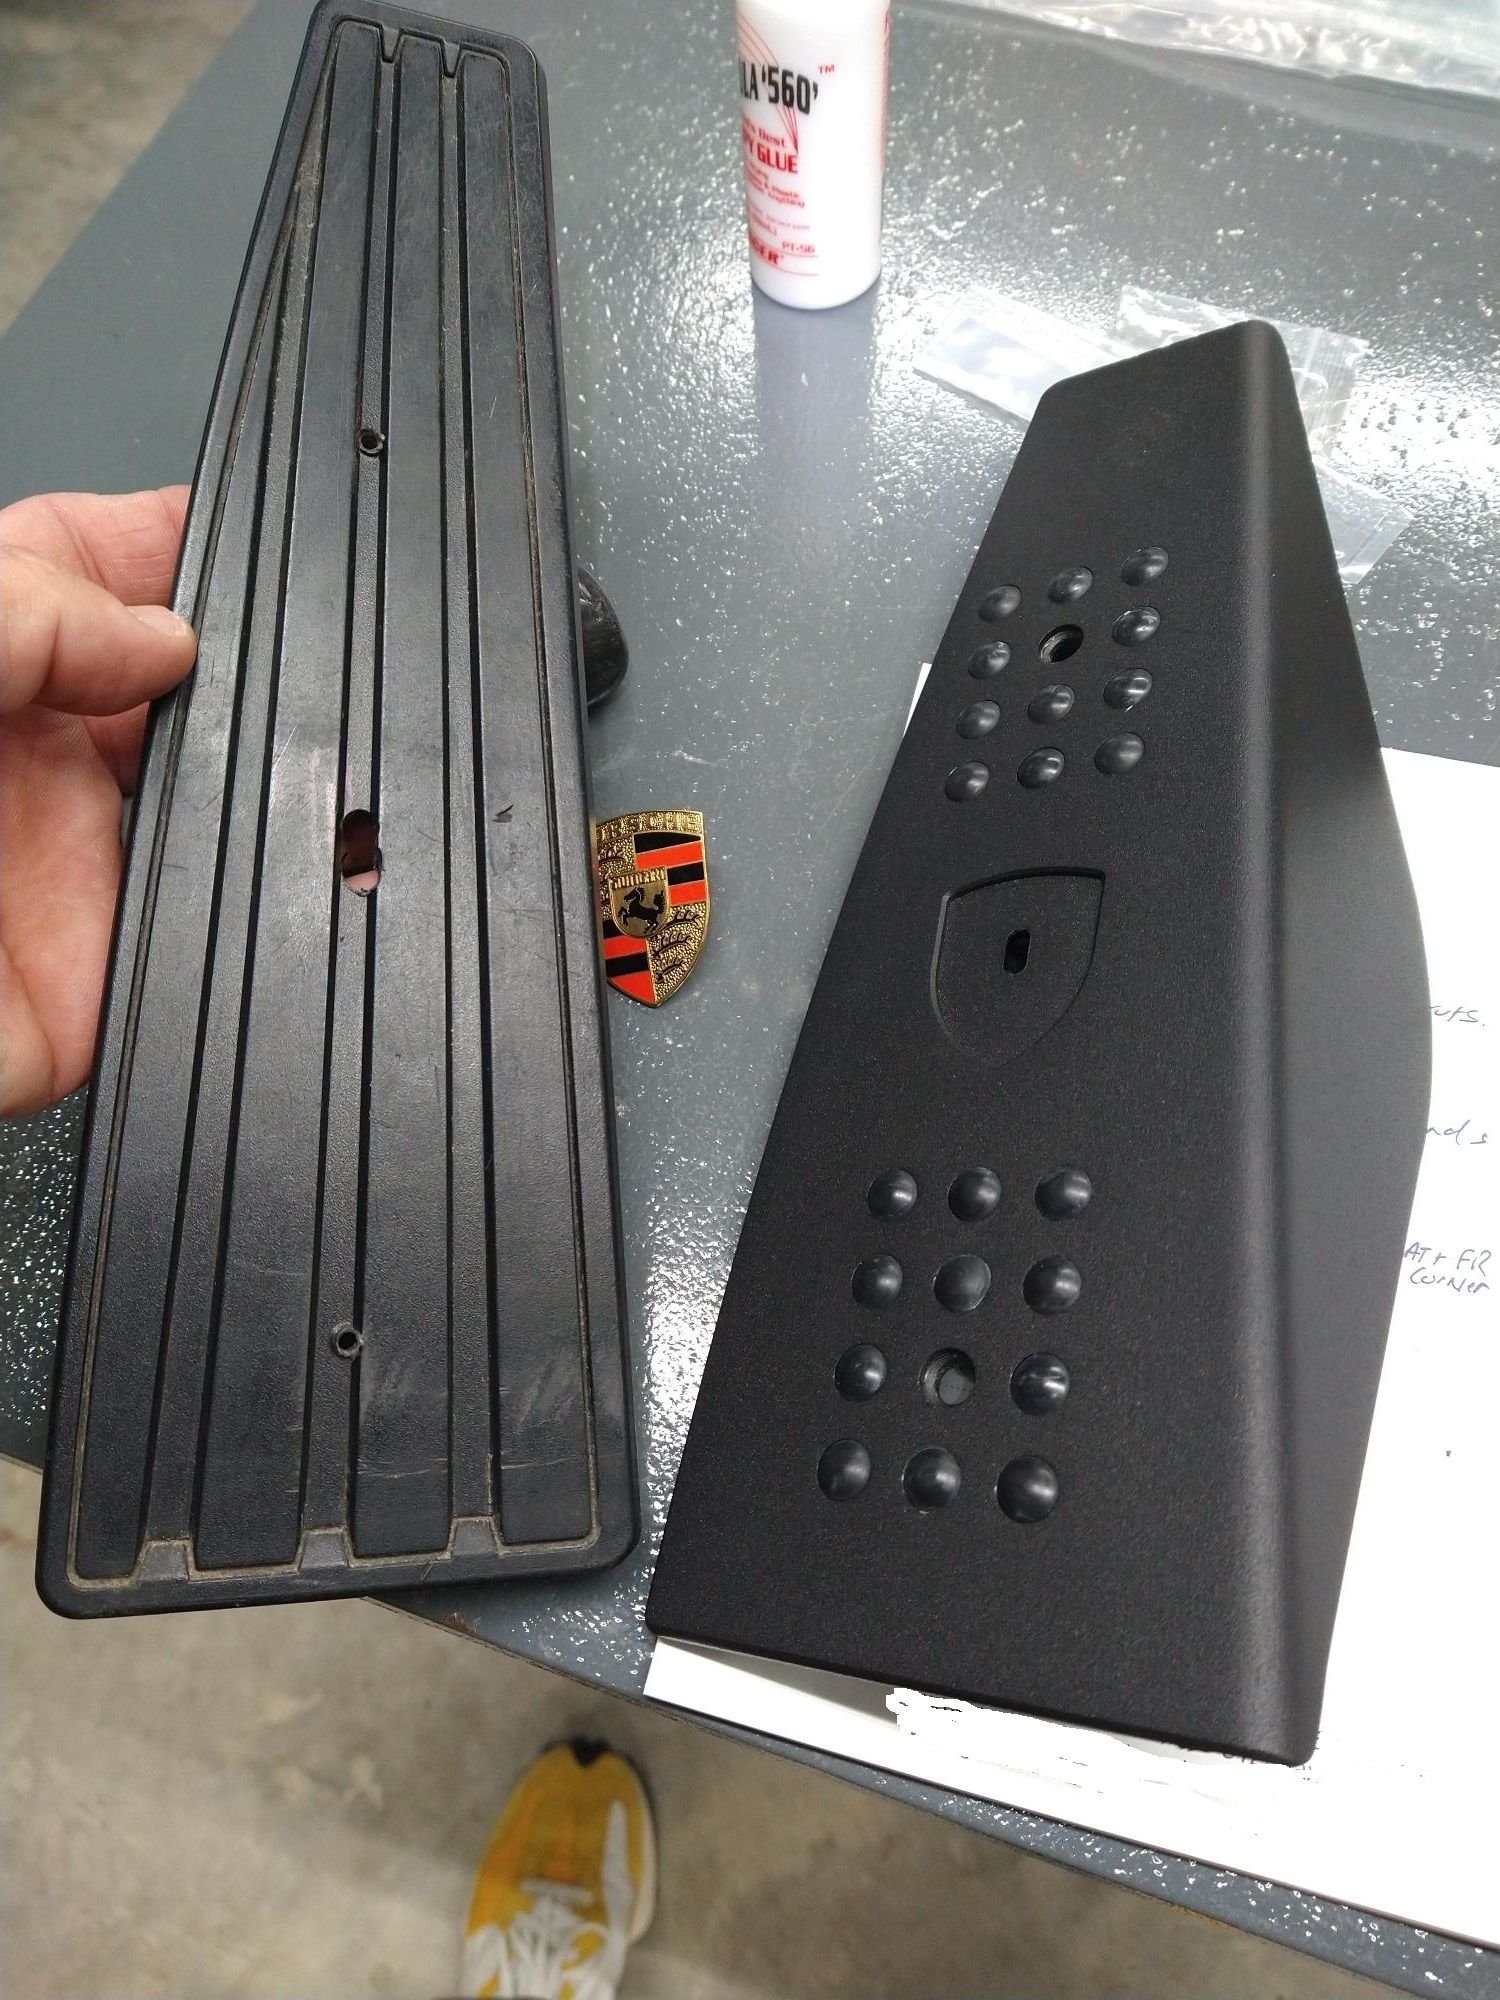
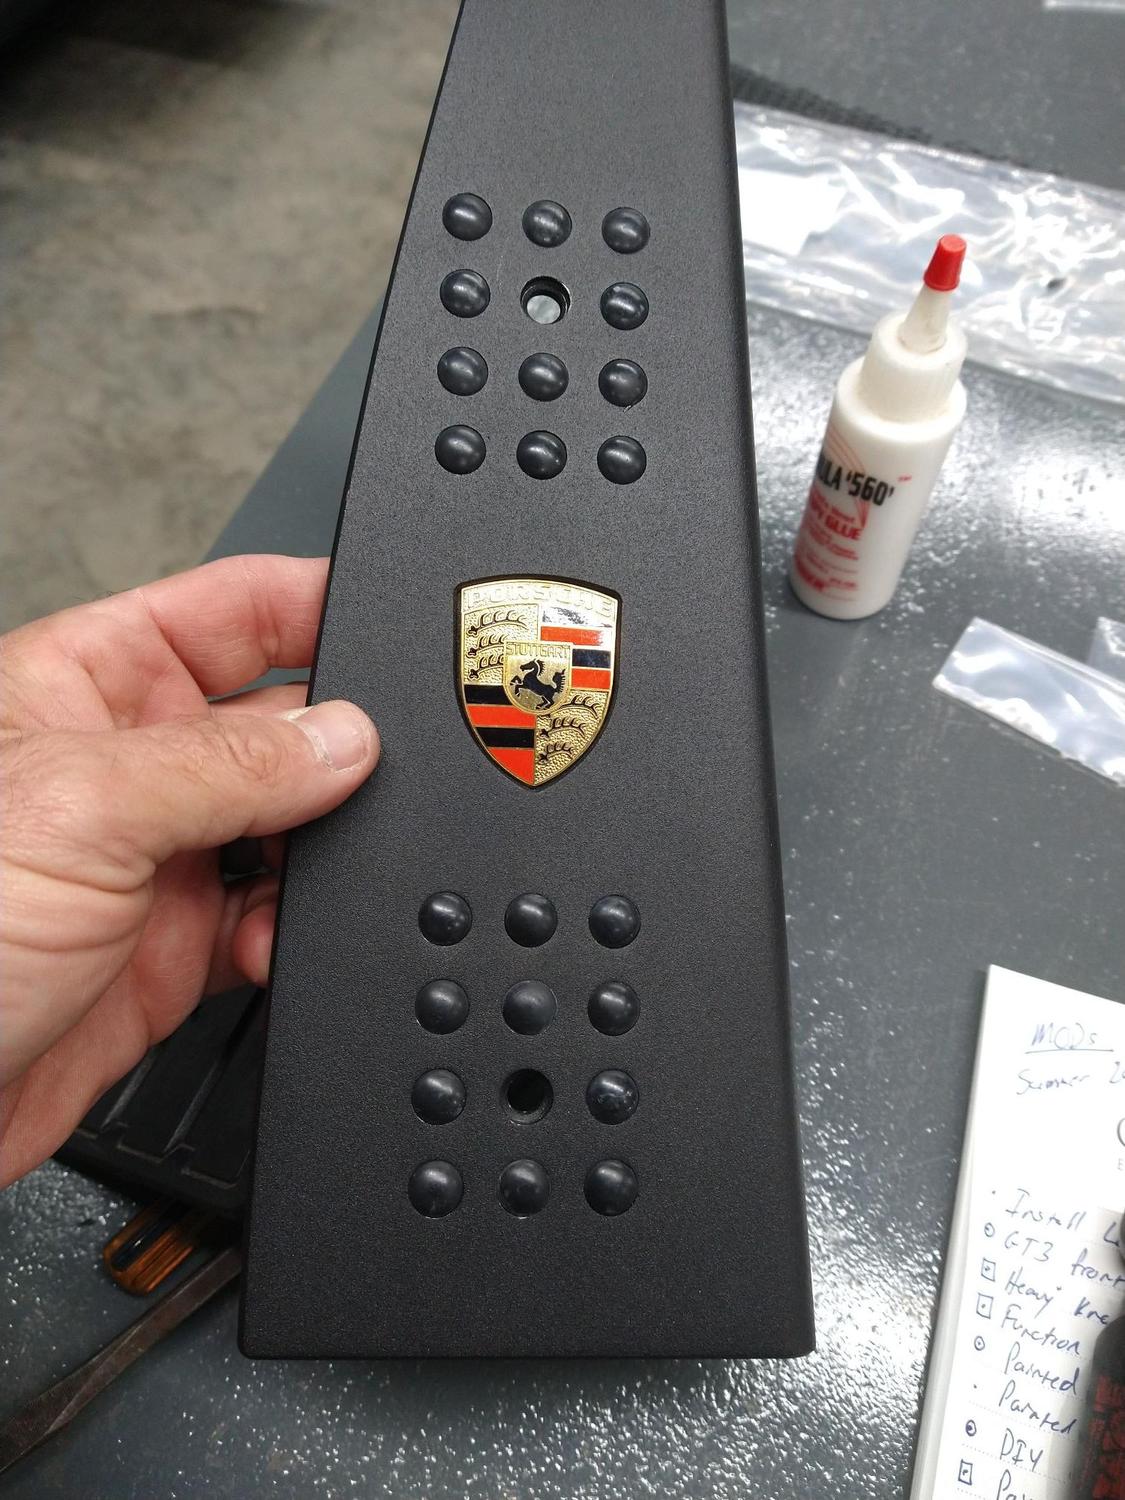
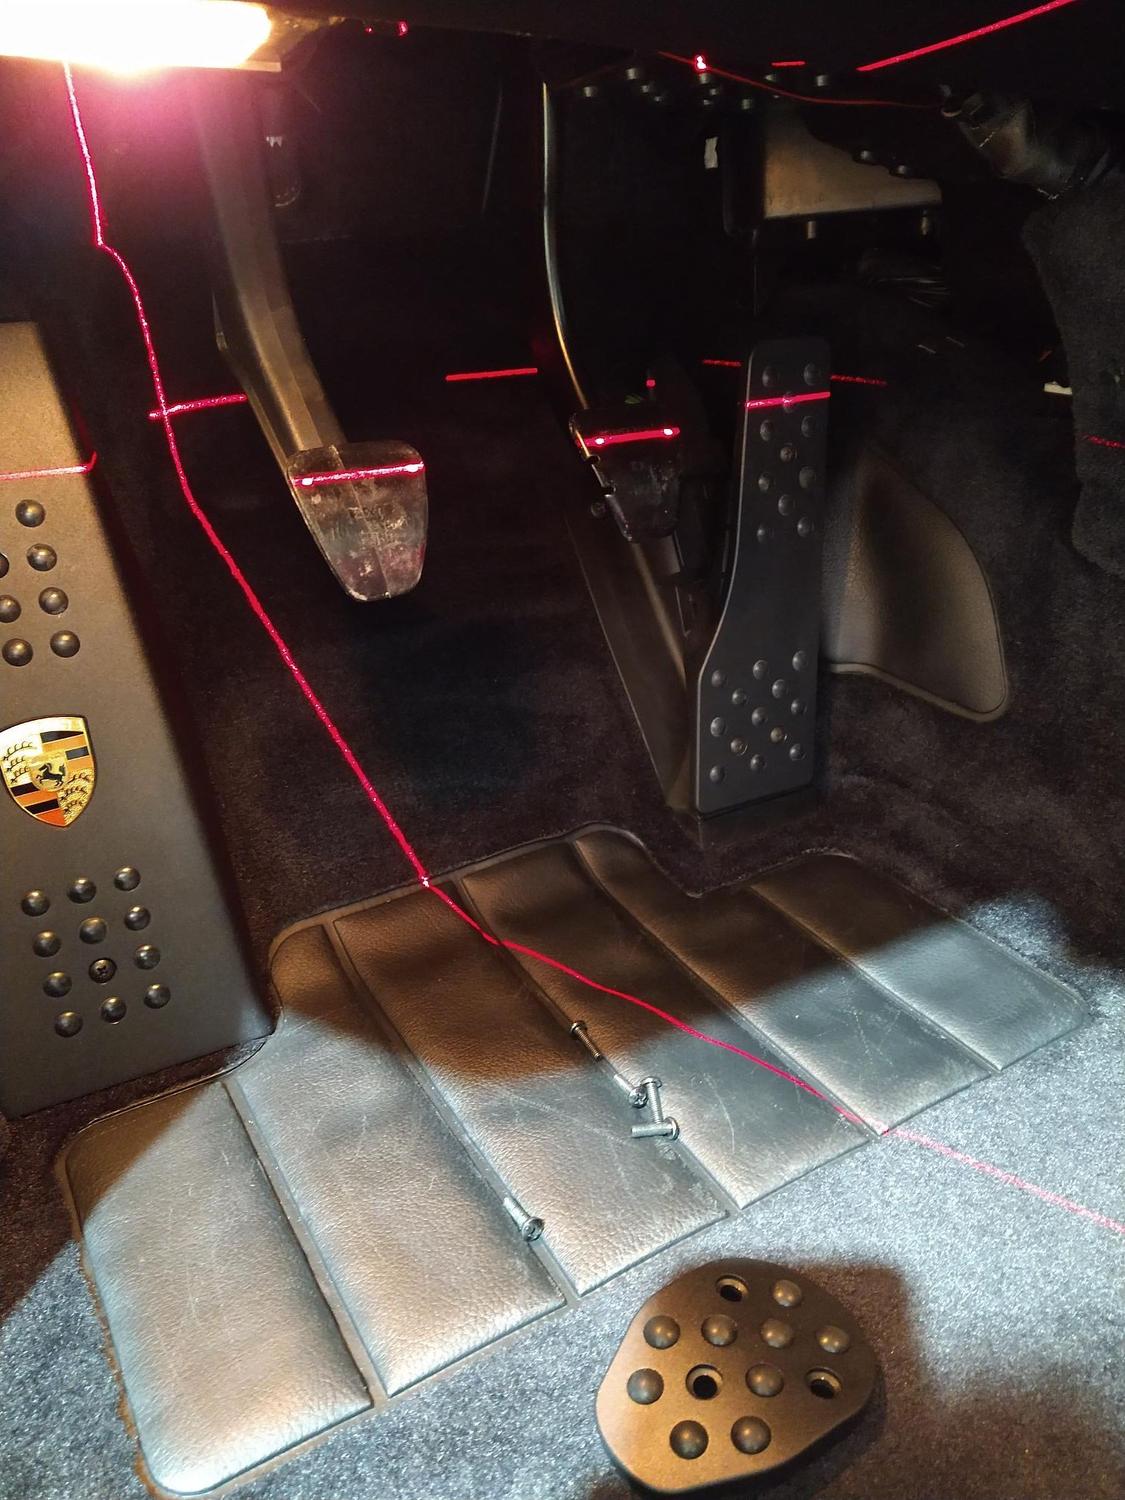
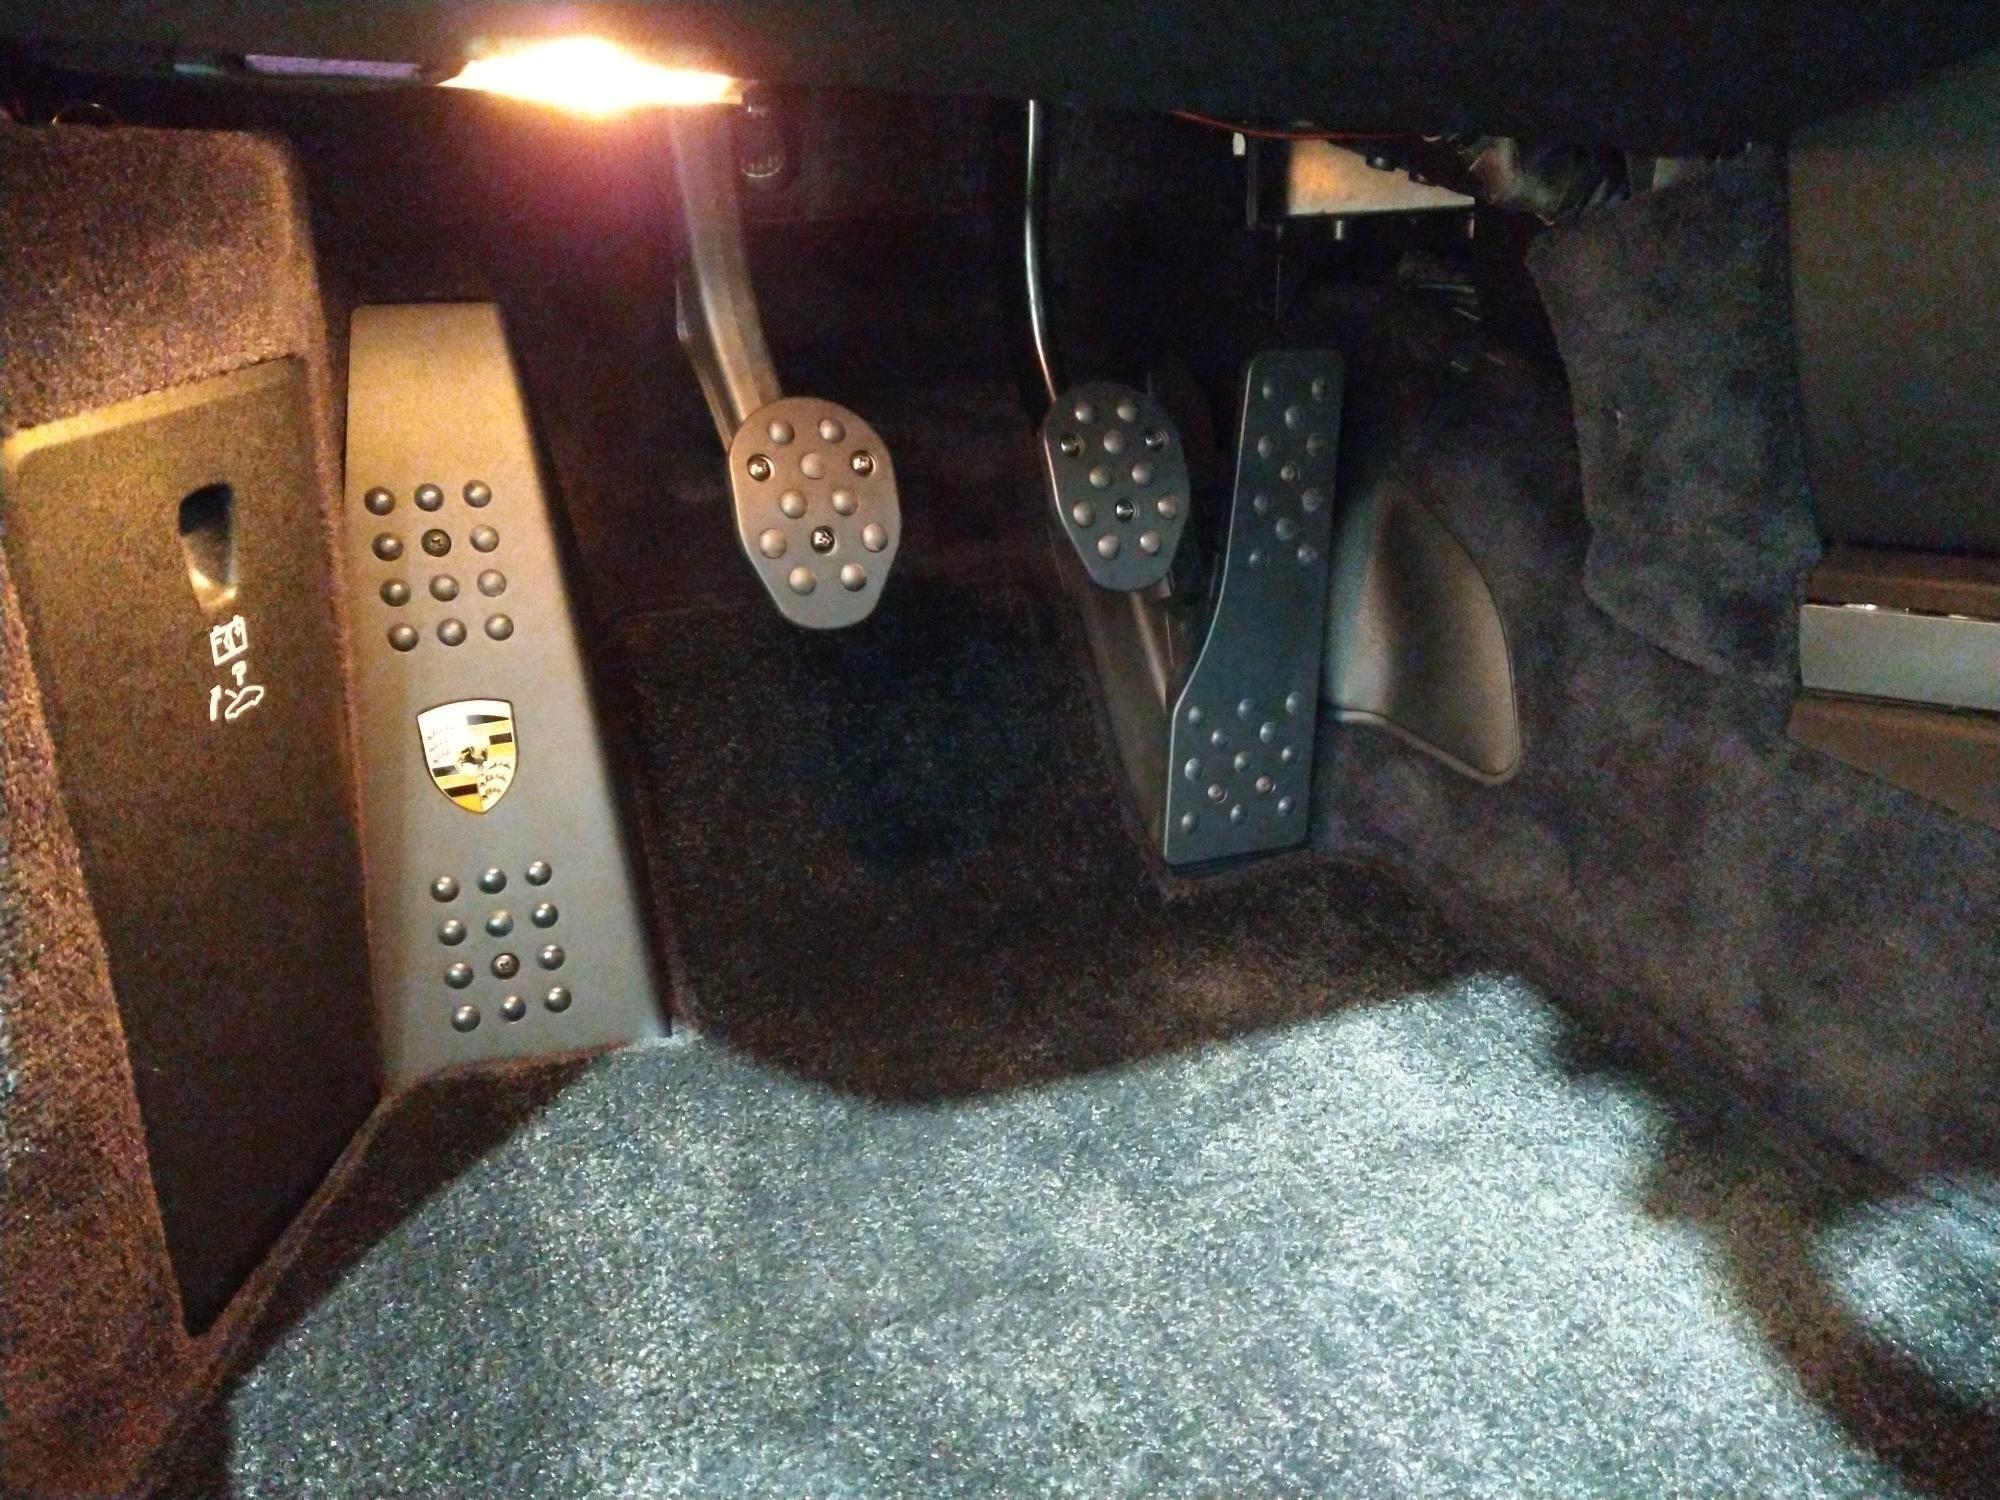
Installed a Rennline 4-pedal set. This set is the black with the dead pedal that accepts the Porsche crest. I went ahead a bought a used dead pedal and accelerator pedal so I could use those for the install, and revert back to stock if need be. The dead pedal and accelerator pedal use sheet metal screws and the clutch & brake pedals use machine screws. The kit comes with nuts for the machine screws, but I just tapped where the machine screws were used. Overall I think it looks much better than the stock chrome trim. If Rennline could cover the screw heads with more of those little rubber *****, the kit would be 10/10. Still looks good IMO. Did you know that our clutch pedals are plastic?
Stock set up.
Used accelerator pedal.
With chrome trim removed. I didn't want to se any chrome after I installed the Rennline pedal.
Dead pedals.
Rennline dead pedal with Porsche crest.
Laser level to be sure I get the clutch & brake pedals aligned.
All done. I could not get a decent pic with the light conditions.
Last edited by Ryans Rebel; 01-21-2024 at 10:35 AM.
Mount Sottozeros so I can safely drive the car in sub 40 degree weather (done today - had to do this twice since they mounted one tire reversed - now the third time this has happened to me with three different installers)
Acquire and install a set of OEM springs - not a fan of the H&R springs currently on the car
Acquire and install an OEM shift **** - not a fan of the metal ball
Address an oil leak I discovered today when re-installing wheels - this should be fun
E-Ram kit installed! Can't say I enjoyed it - was certainly tedious. I got the stock height kit which is indeed more challenging to get everything lined up. The included wiring also leaves something to be desired - I initially still had Spoiler Control Failure warnings because the vampire tap was not making good connection. I will probably have to re-wire things at some point.
OEM springs installed + aligned + axle boots changed all around - farmed this out to a local exotic shop as I was short on time. When I got the bill I remembered why I usually do my own work they did a great job though. They had to replace the front left axle which I found surprising since it wasn't making at noise (but did appear to have a slightly leaking boot)
Installed PCCM upgrade - big difference in usability! I used posi-taps to power the MOST adapter off the CANBUS adapter
OEM shifter in cocoa secured! Strongly prefer it to the Function First ball
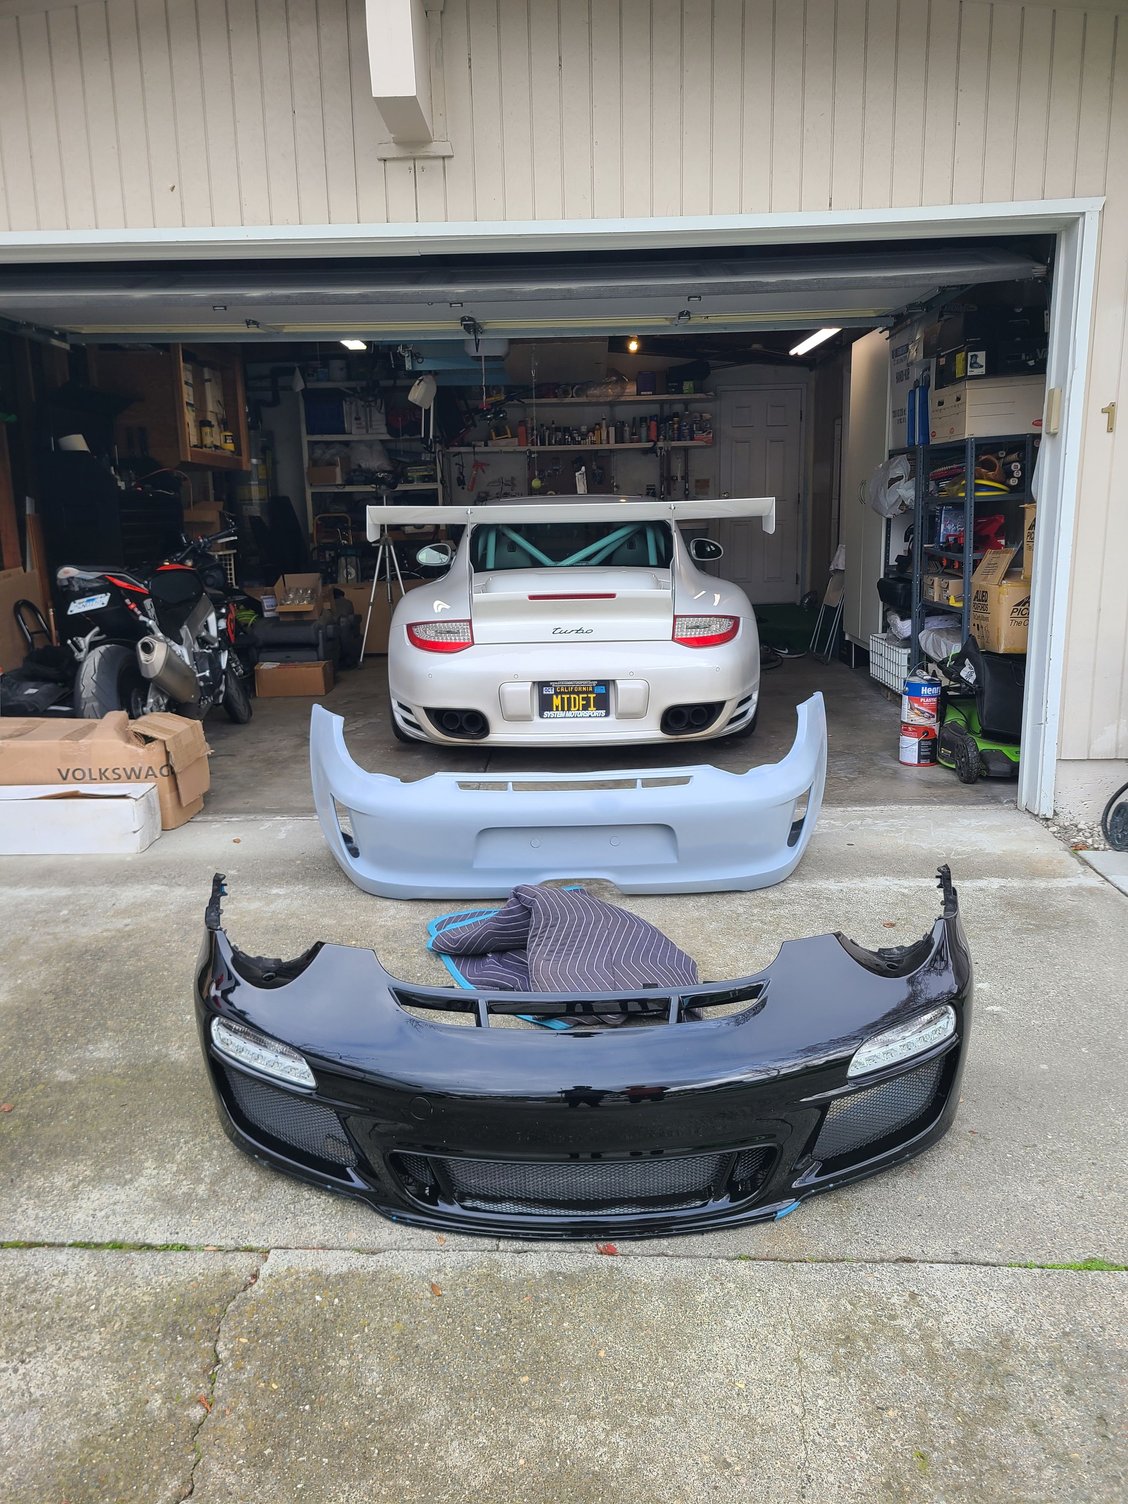
Up next - D088 intercoolers, inlet pipes; catted Kline exhaust
OEM springs installed + aligned + axle boots changed all around - farmed this out to a local exotic shop as I was short on time. When I got the bill I remembered why I usually do my own work they did a great job though. They had to replace the front left axle which I found surprising since it wasn't making at noise (but did appear to have a slightly leaking boot)
Same...Car was in for its annual checkup. When they called to tell me I needed two new front axles, they caught me at a bad time, and told them, "Sure, just do it." I got the bill and remembered why I do this **** myself, even if it takes me longer.
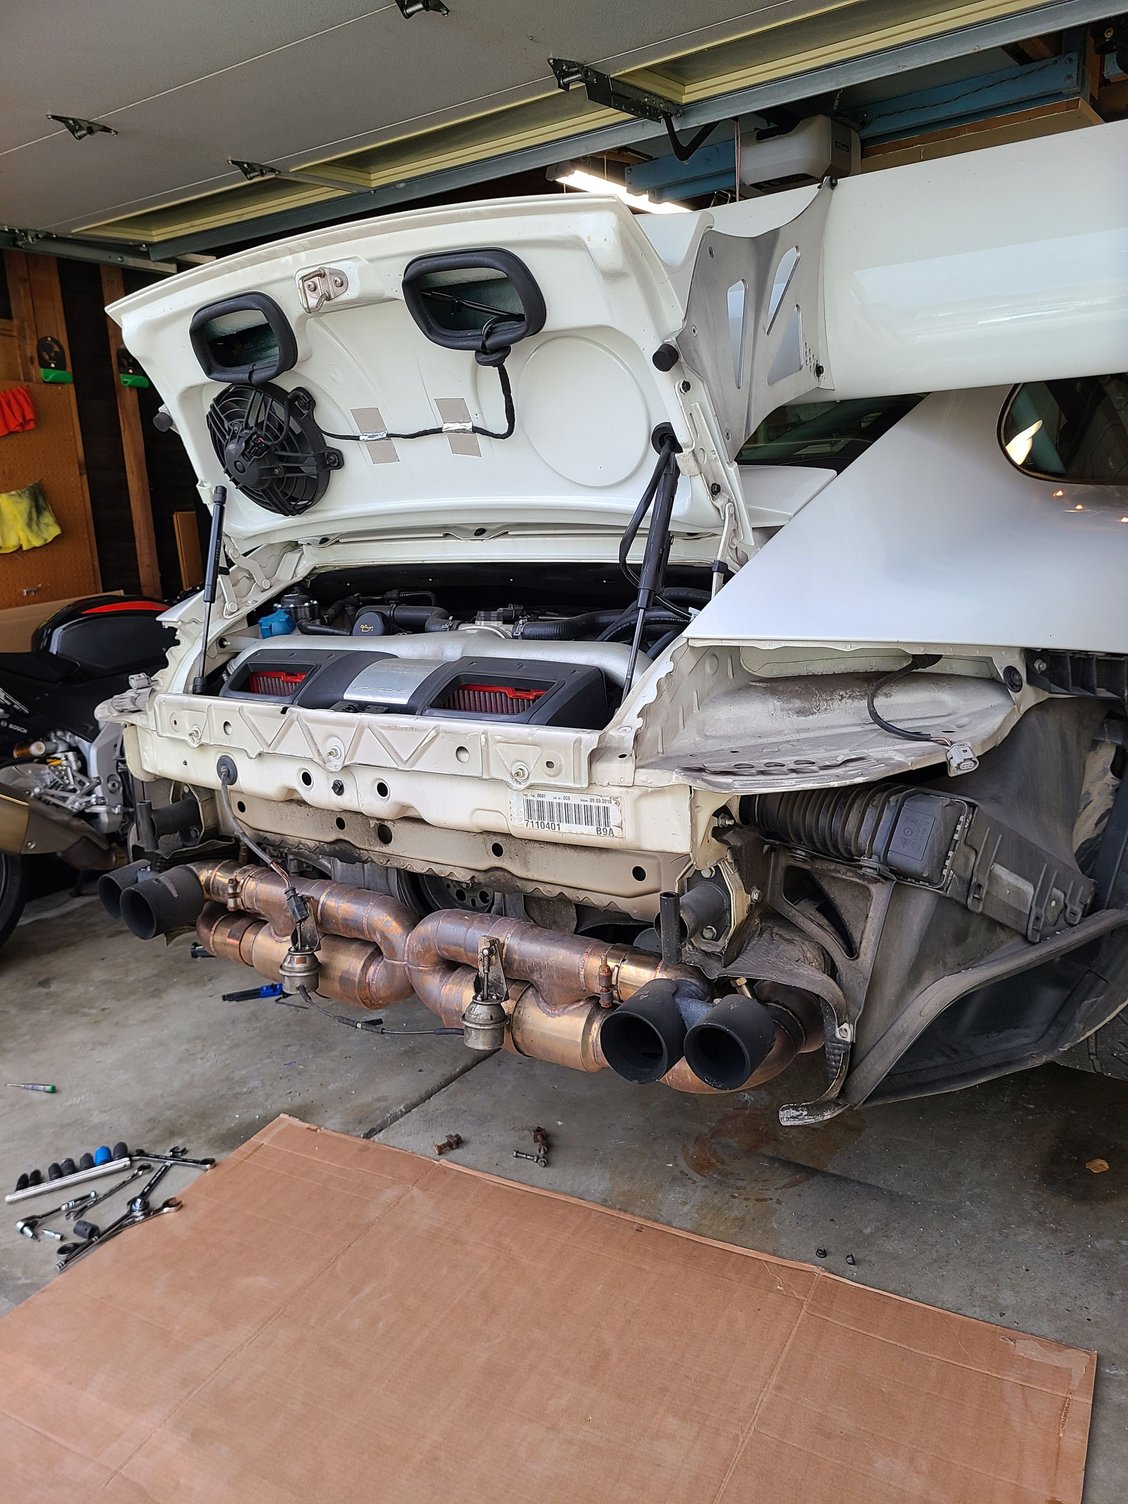
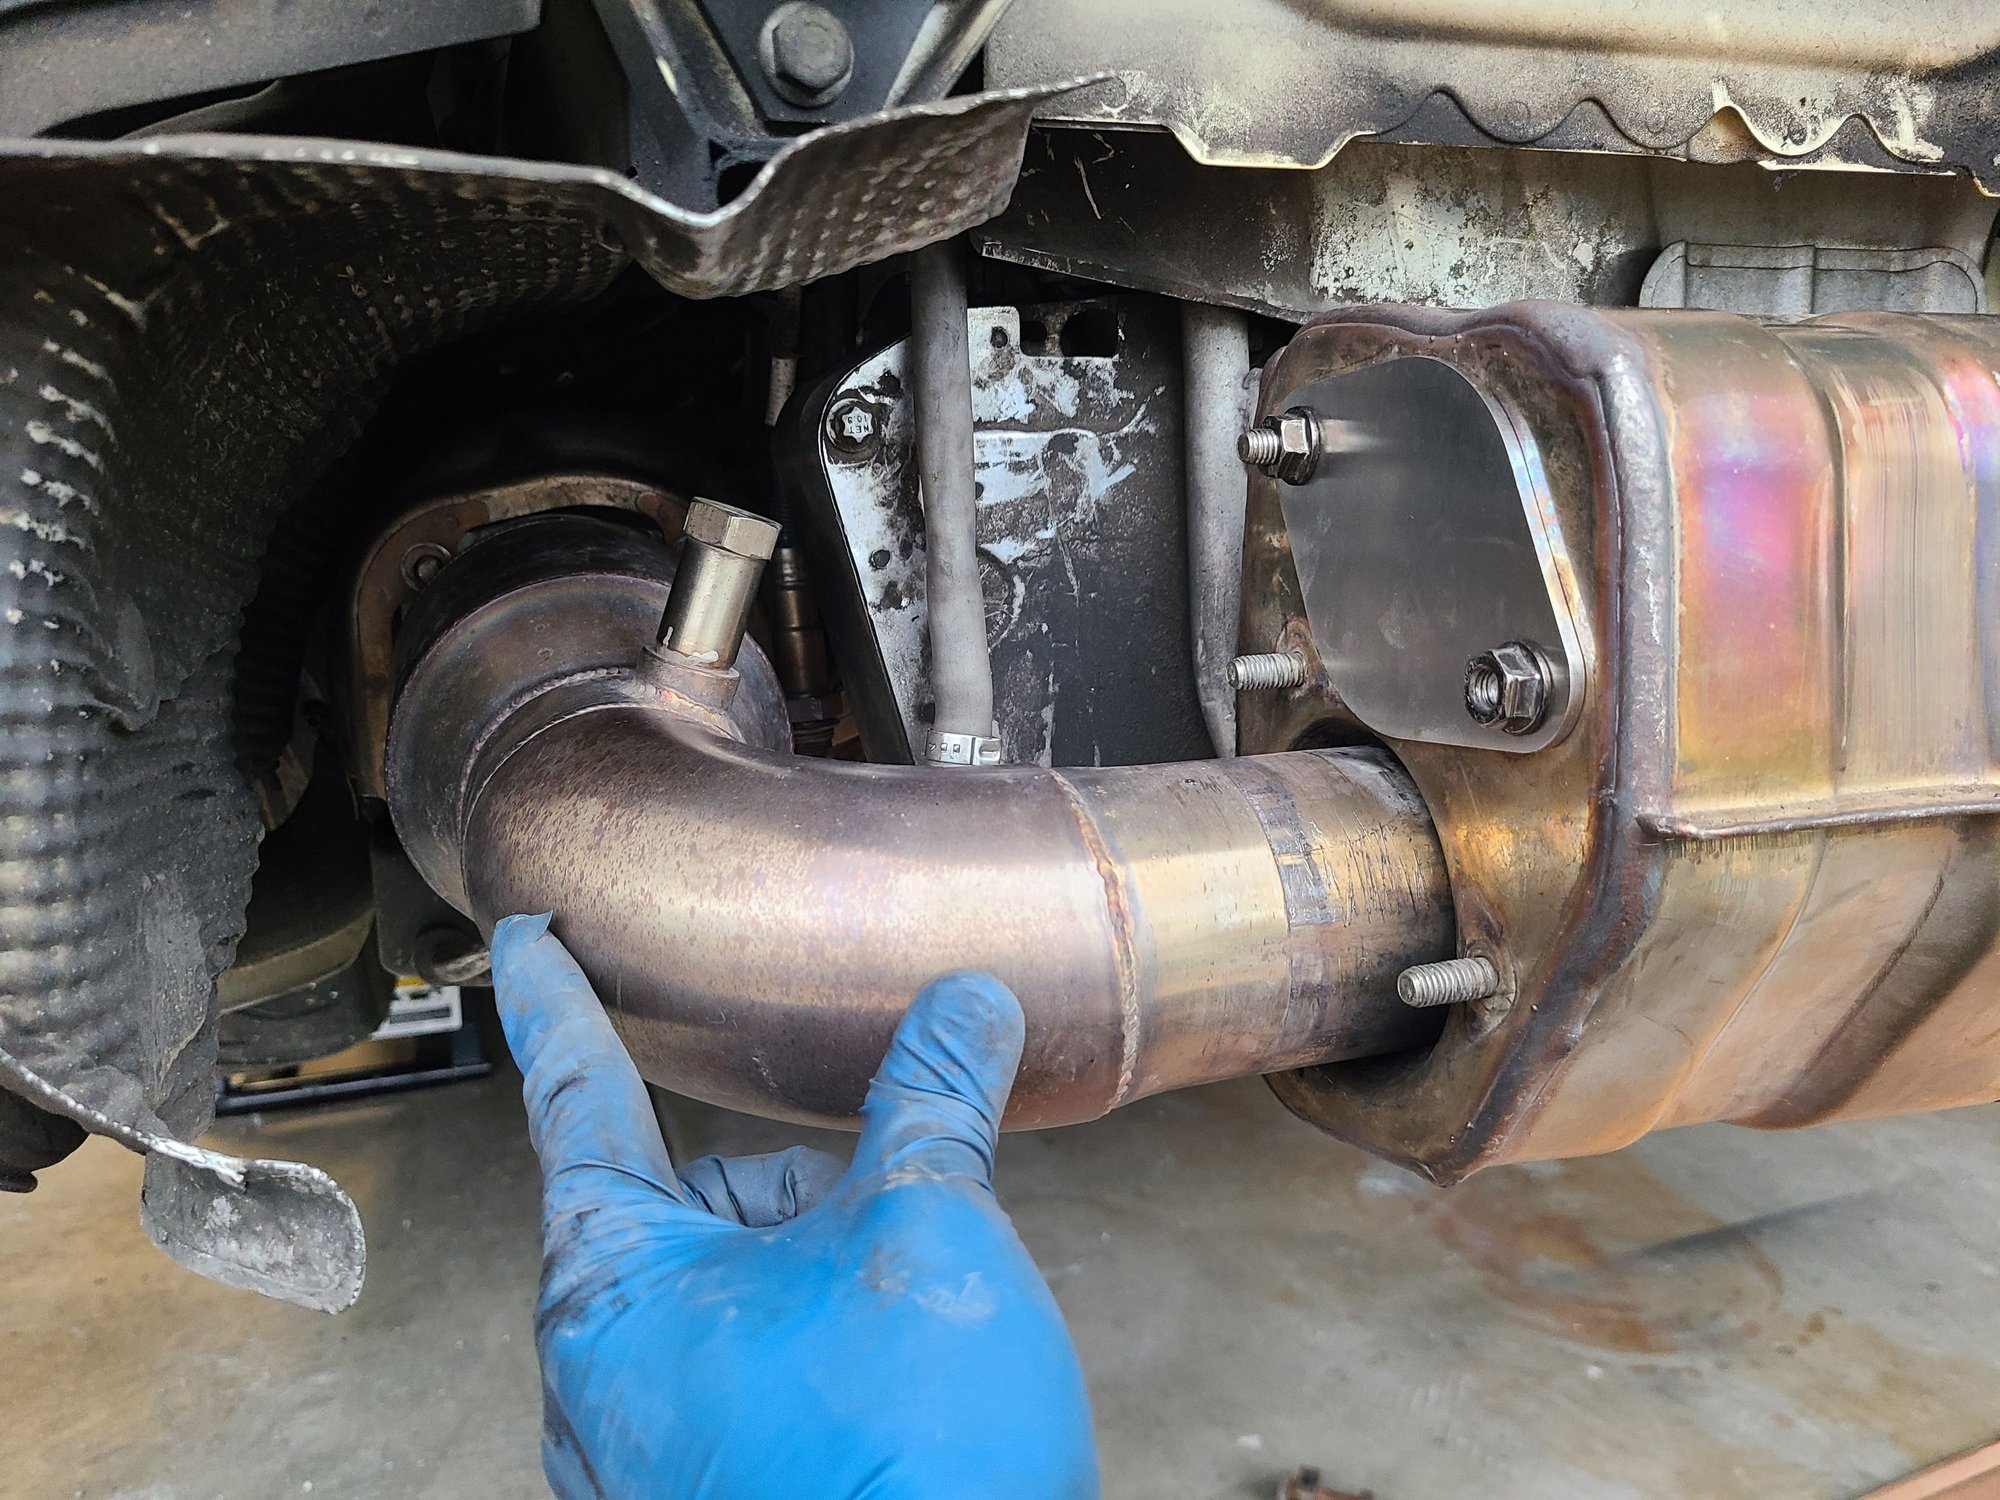
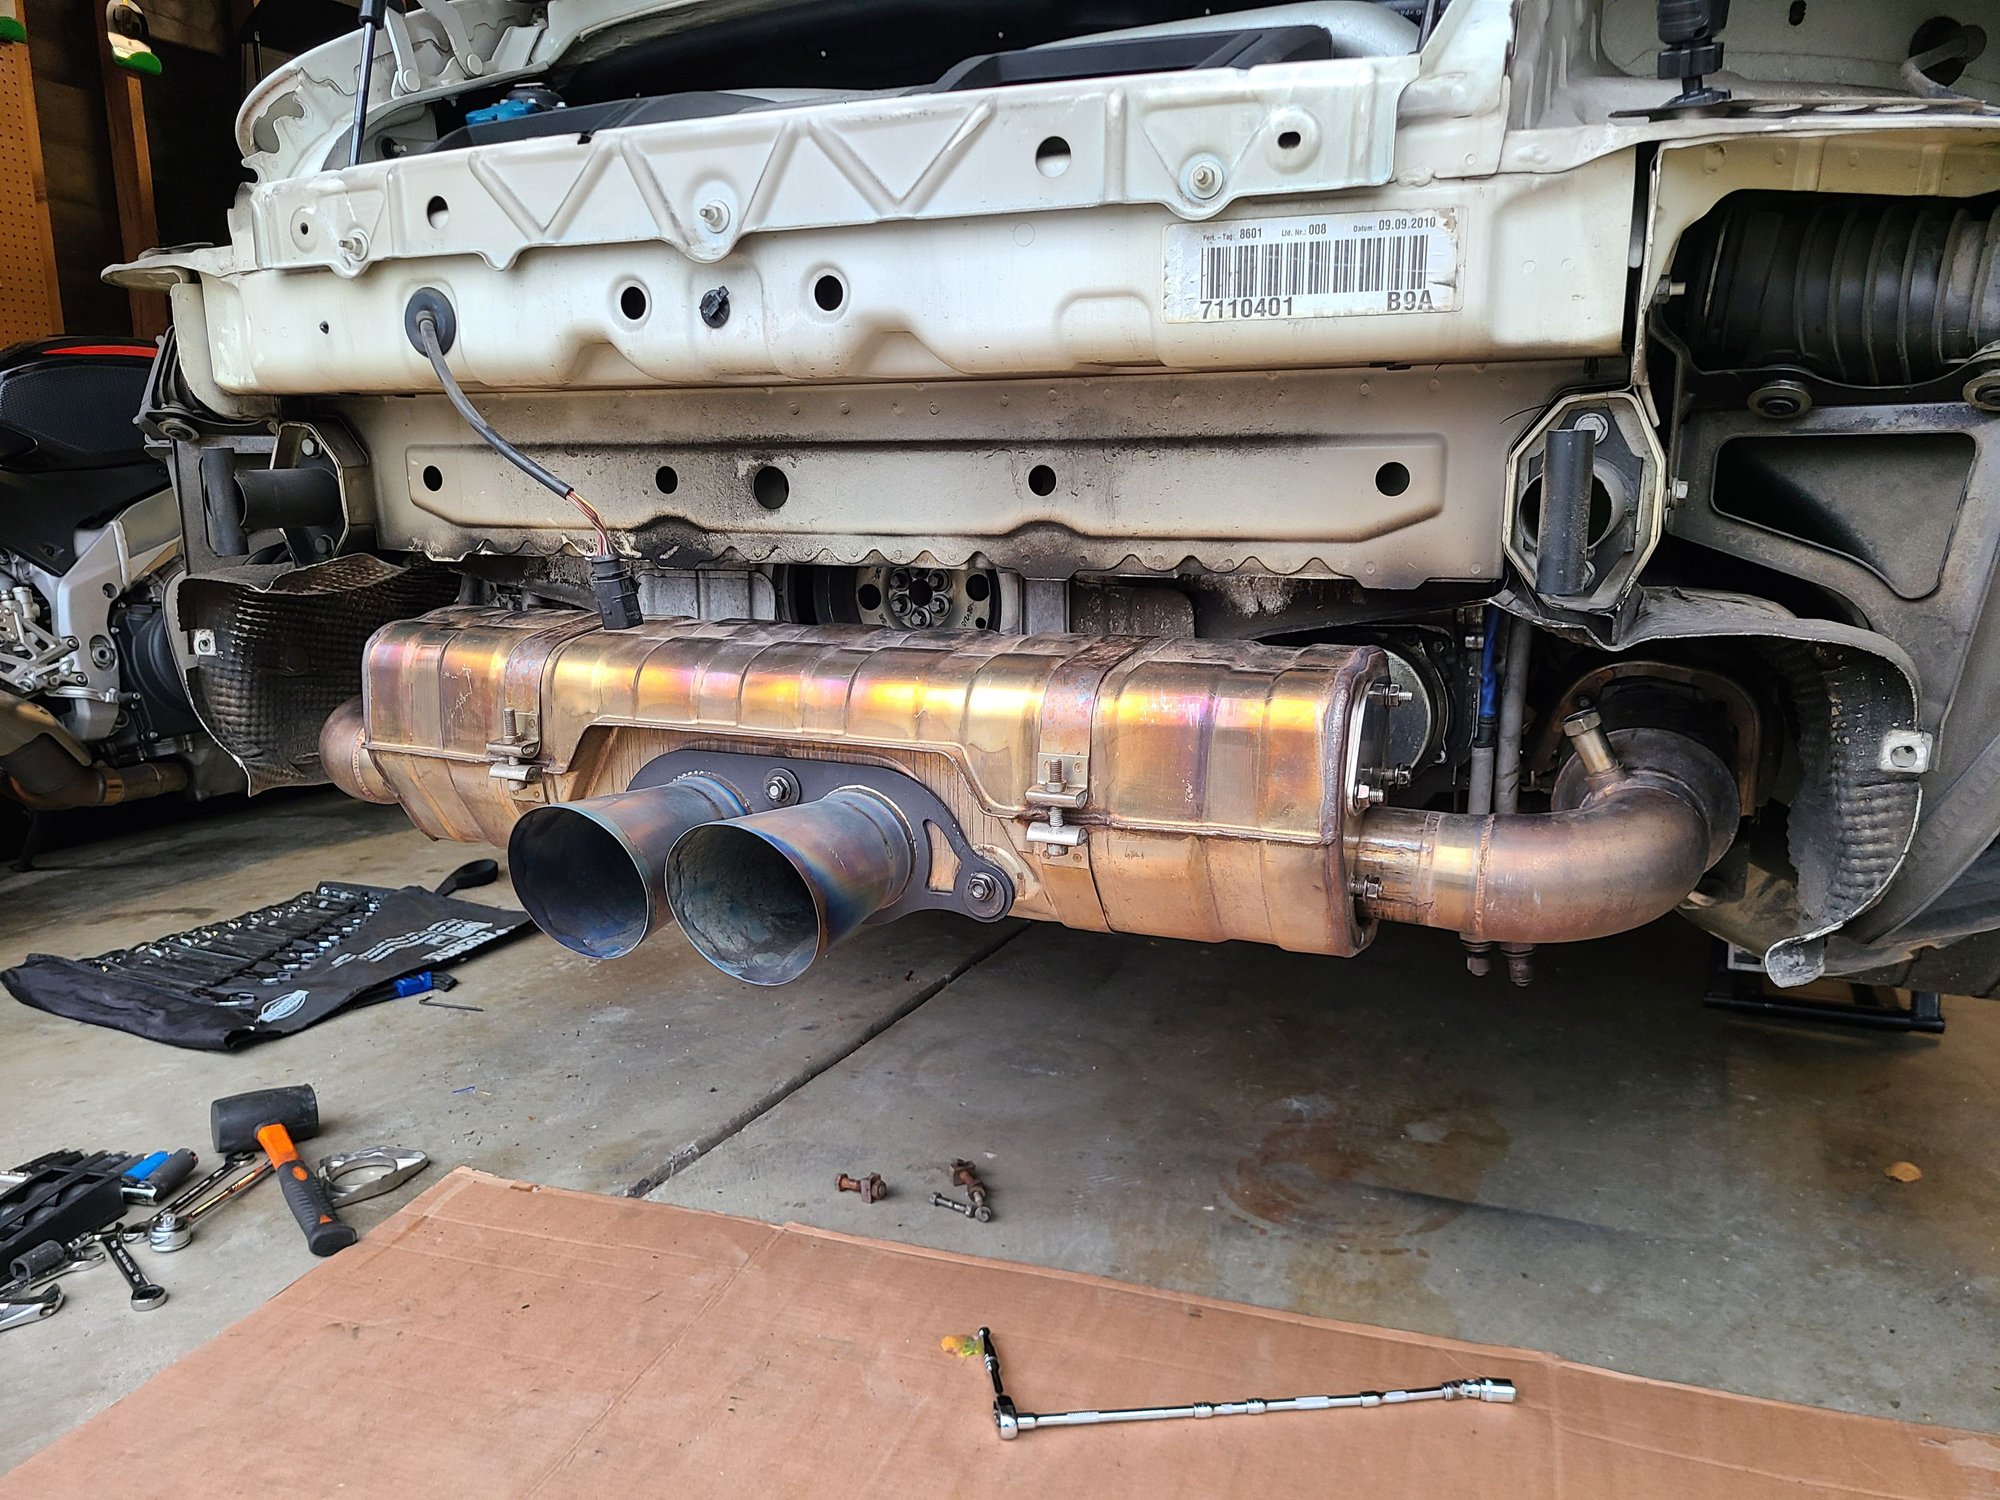
You can really hear the difference when i toggle between Normal and Sport mode, almost like it's valved but it's not lol. Going to need a proper seal for the high flow cat/link pipe connecting to the GT3 muffler, but at least they match perfectly!
The intercooler cage/ducting is bumping against the vents in the bumper. Going to need to do some trimming and custom ducting, as well as cut an outlet on the bumper corners for the airflow.
That turbo is going to be sick. Can't wait to see the finished product
 01-09-2024, 12:11 PM


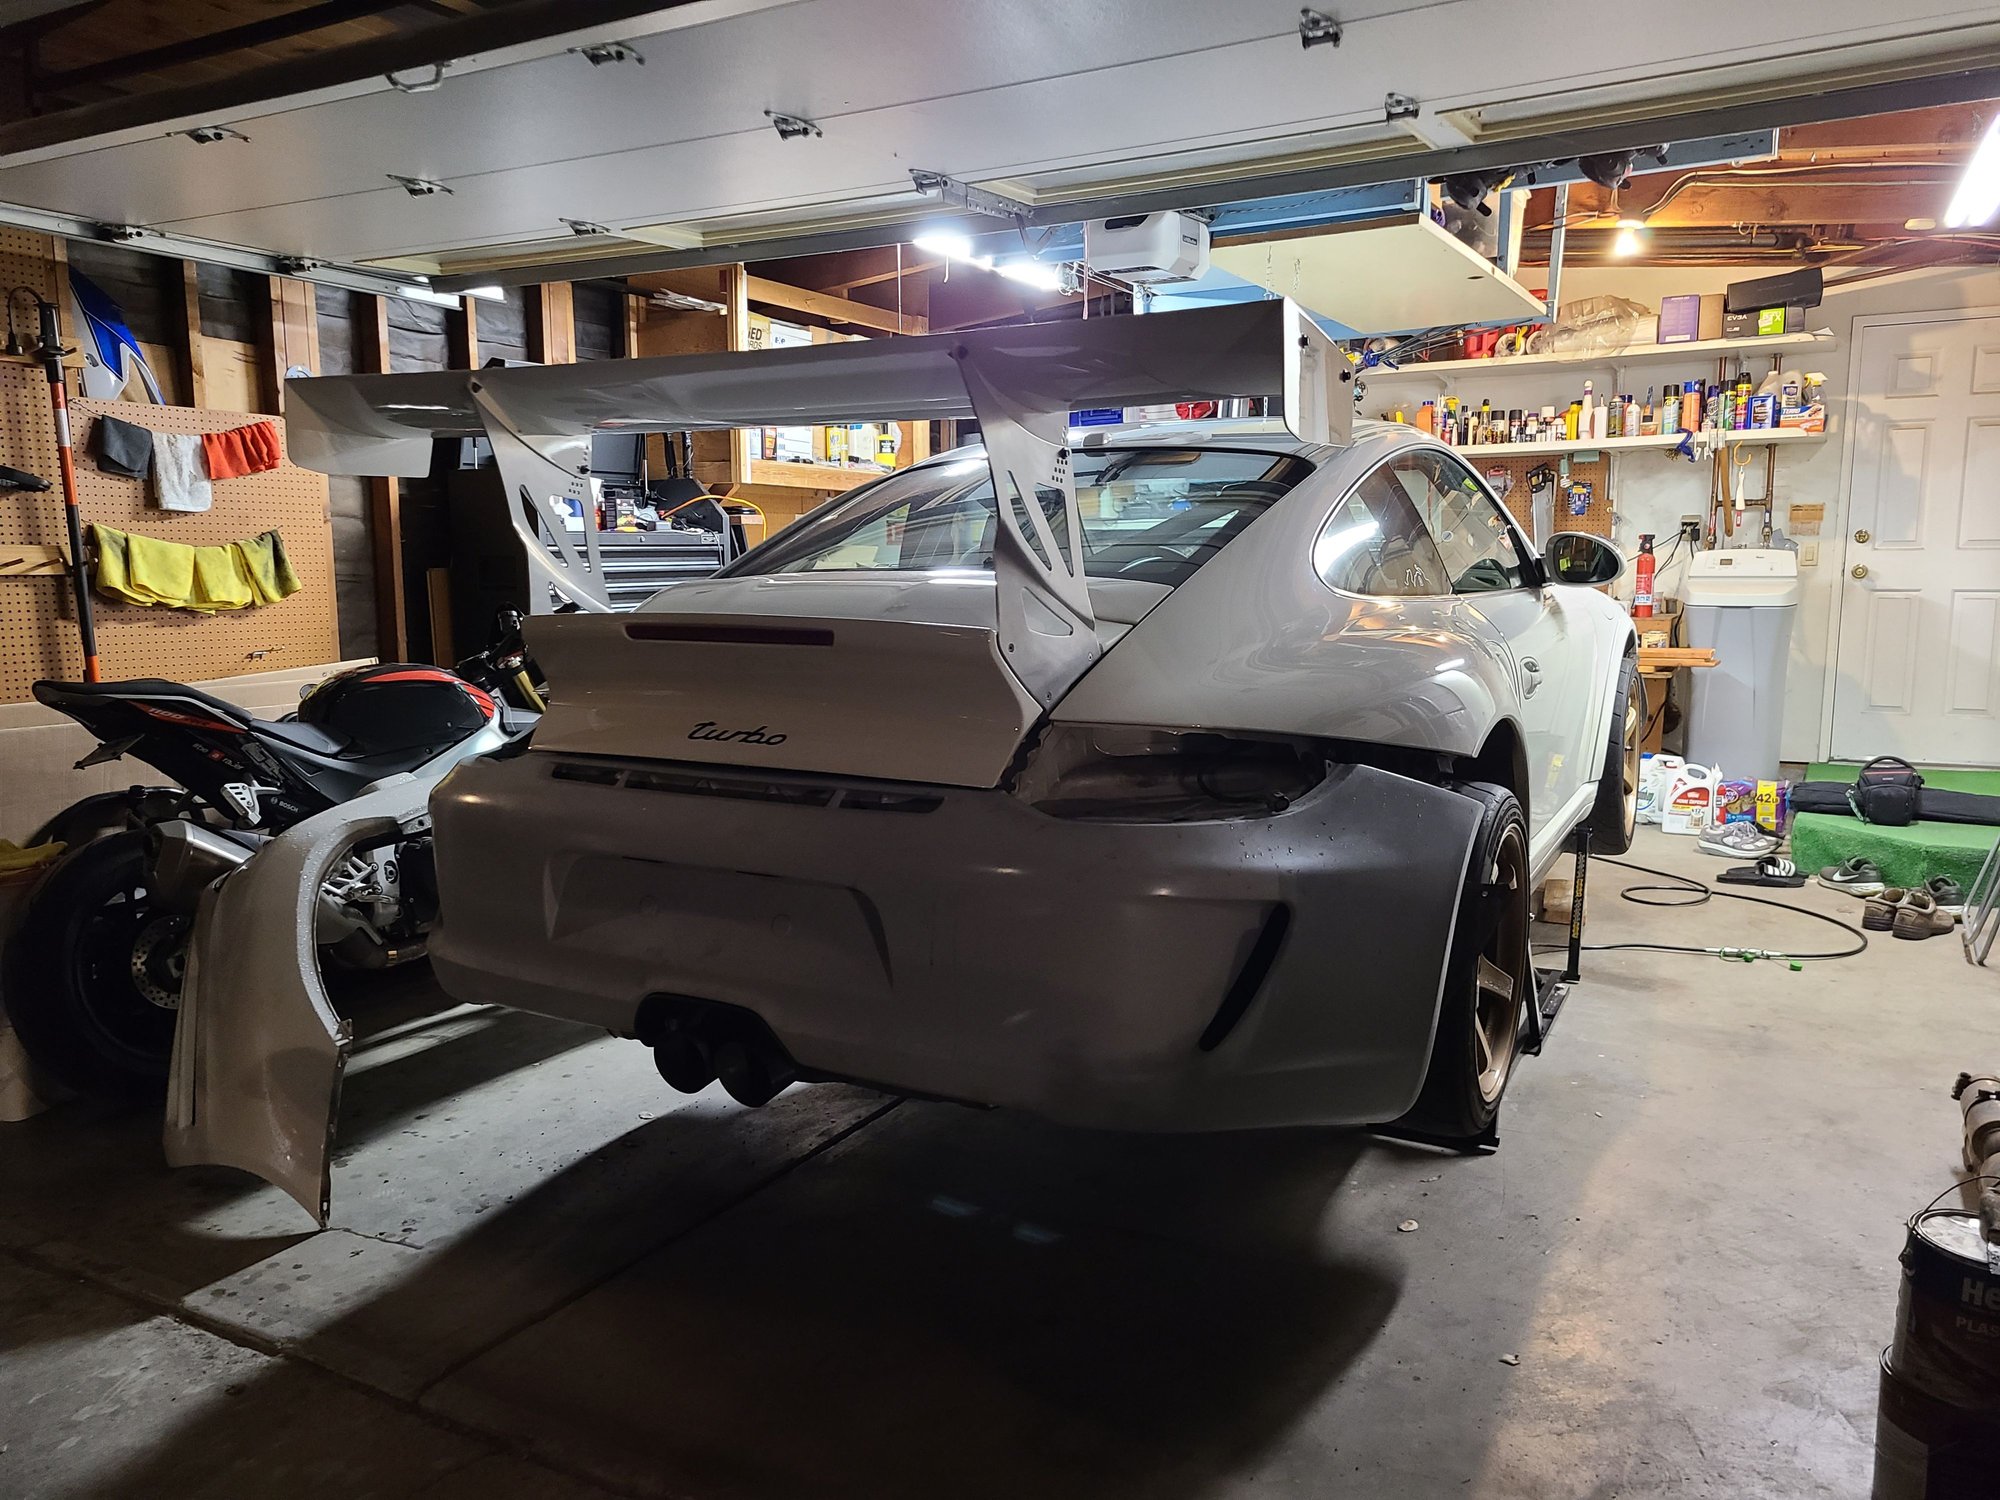
 I am the winning bidder on this BAT auction

 they did a great job though. They had to replace the front left axle which I found surprising since it wasn't making at noise (but did appear to have a slightly leaking boot)