When you click on links to various merchants on this site and make a purchase, this can result in this site earning a commission. Affiliate programs and affiliations include, but are not limited to, the eBay Partner Network.
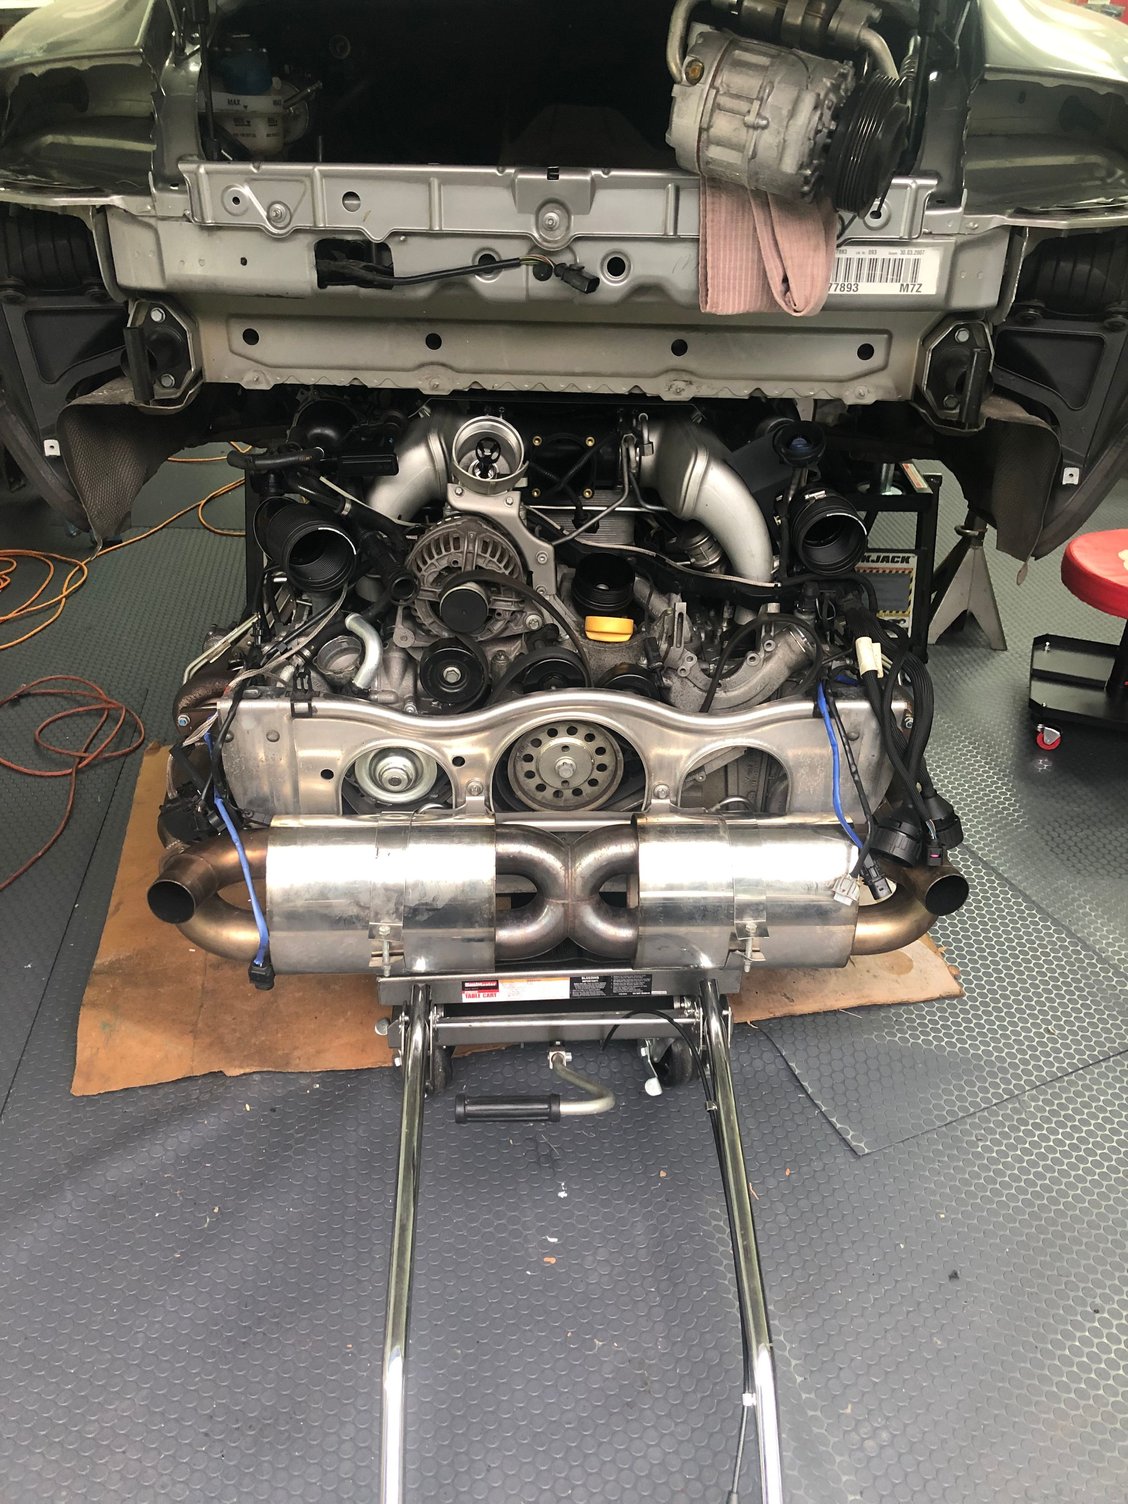
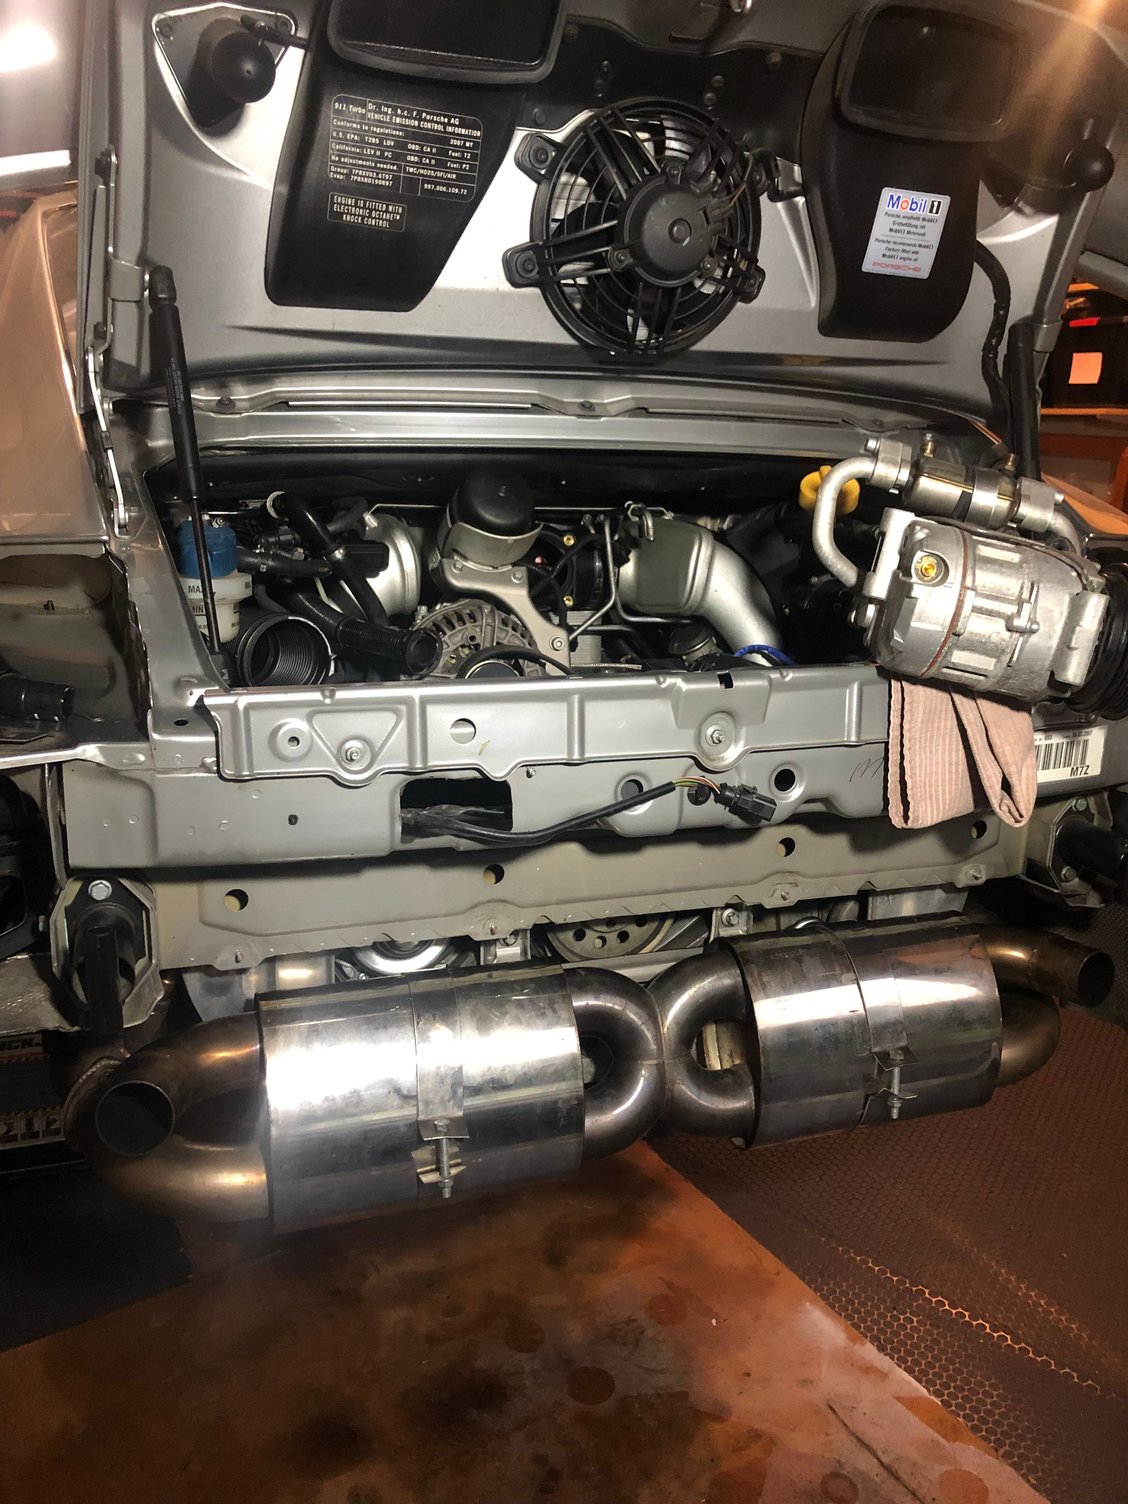
So the engine sits back in its home, with trepidation.
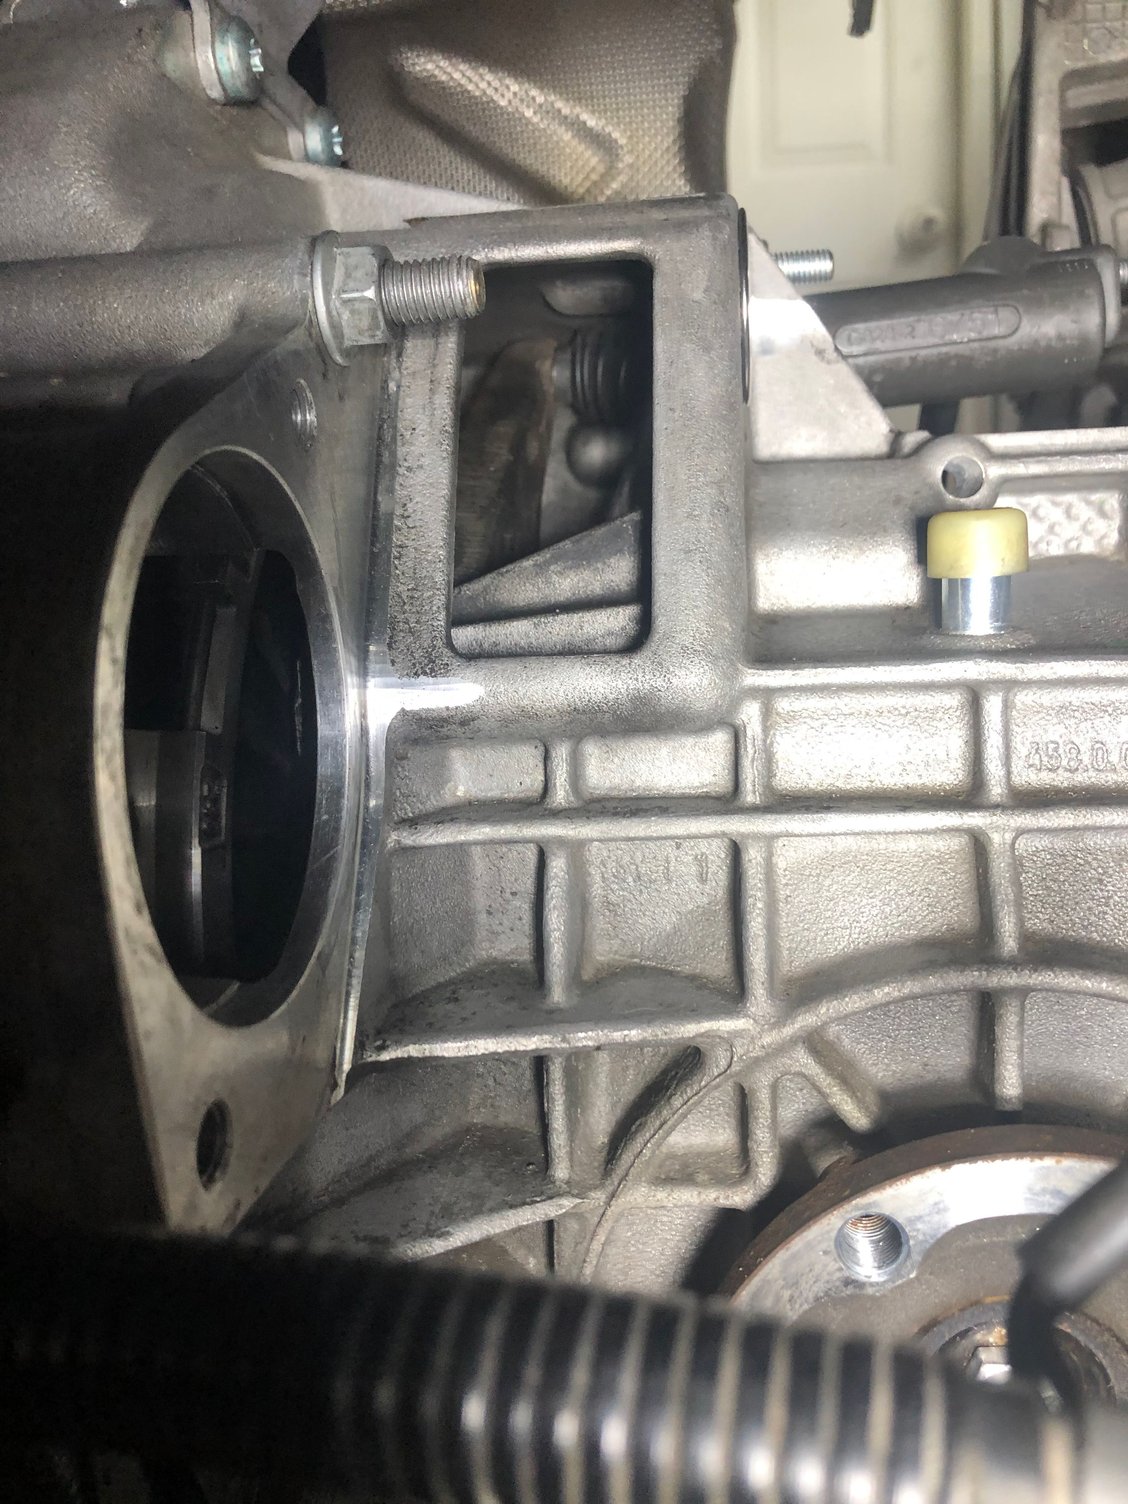
I nixed trying to test the clutch fork, but it looks like I have clearance (I hope I won't eat my words):
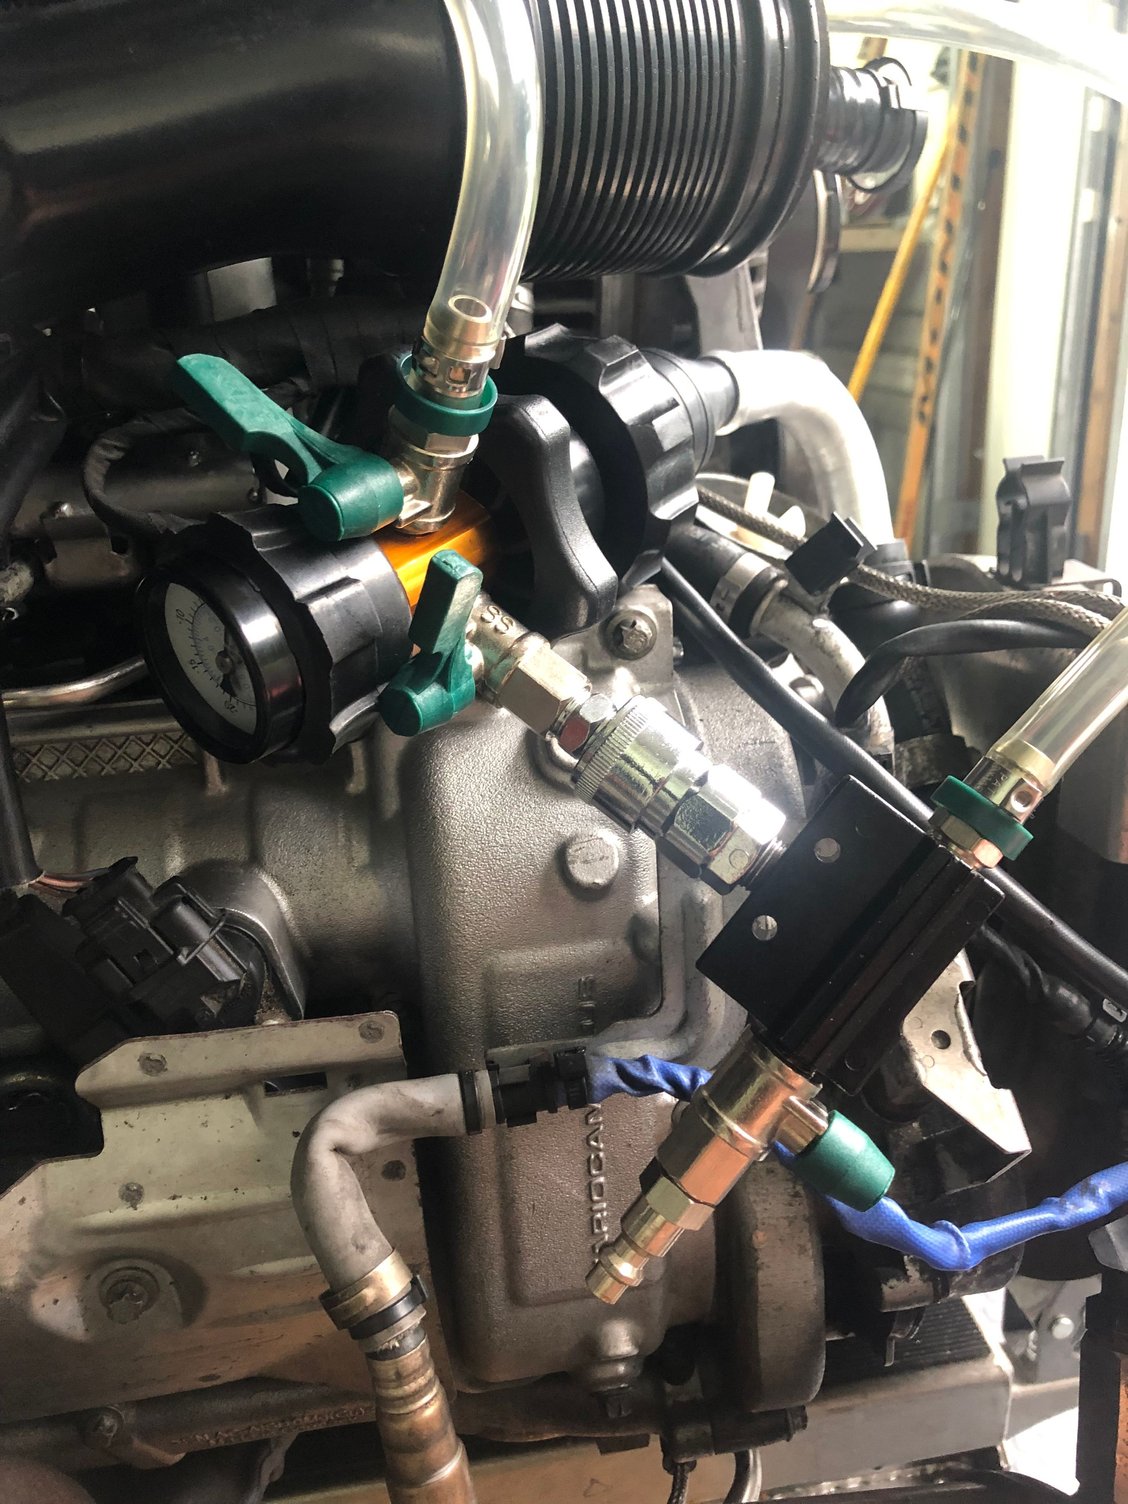
I also was unsuccessful with a vacuum test on the cooling system. I acquired stoppers for most of the holes I knew about (had to use duct tape on the small one existing the engine near the trans) and used my Scwabben tool. I could never create a vacuum. I did create pressure running air in with the valves switched around, but it was not a real test:
So, with the two main concerns looked at, albeit one using judgement and one a partial failure, the engine gets put back in. I used a plumb line on the engine and my eyeball on the trans mounts and maneuvered it into position:
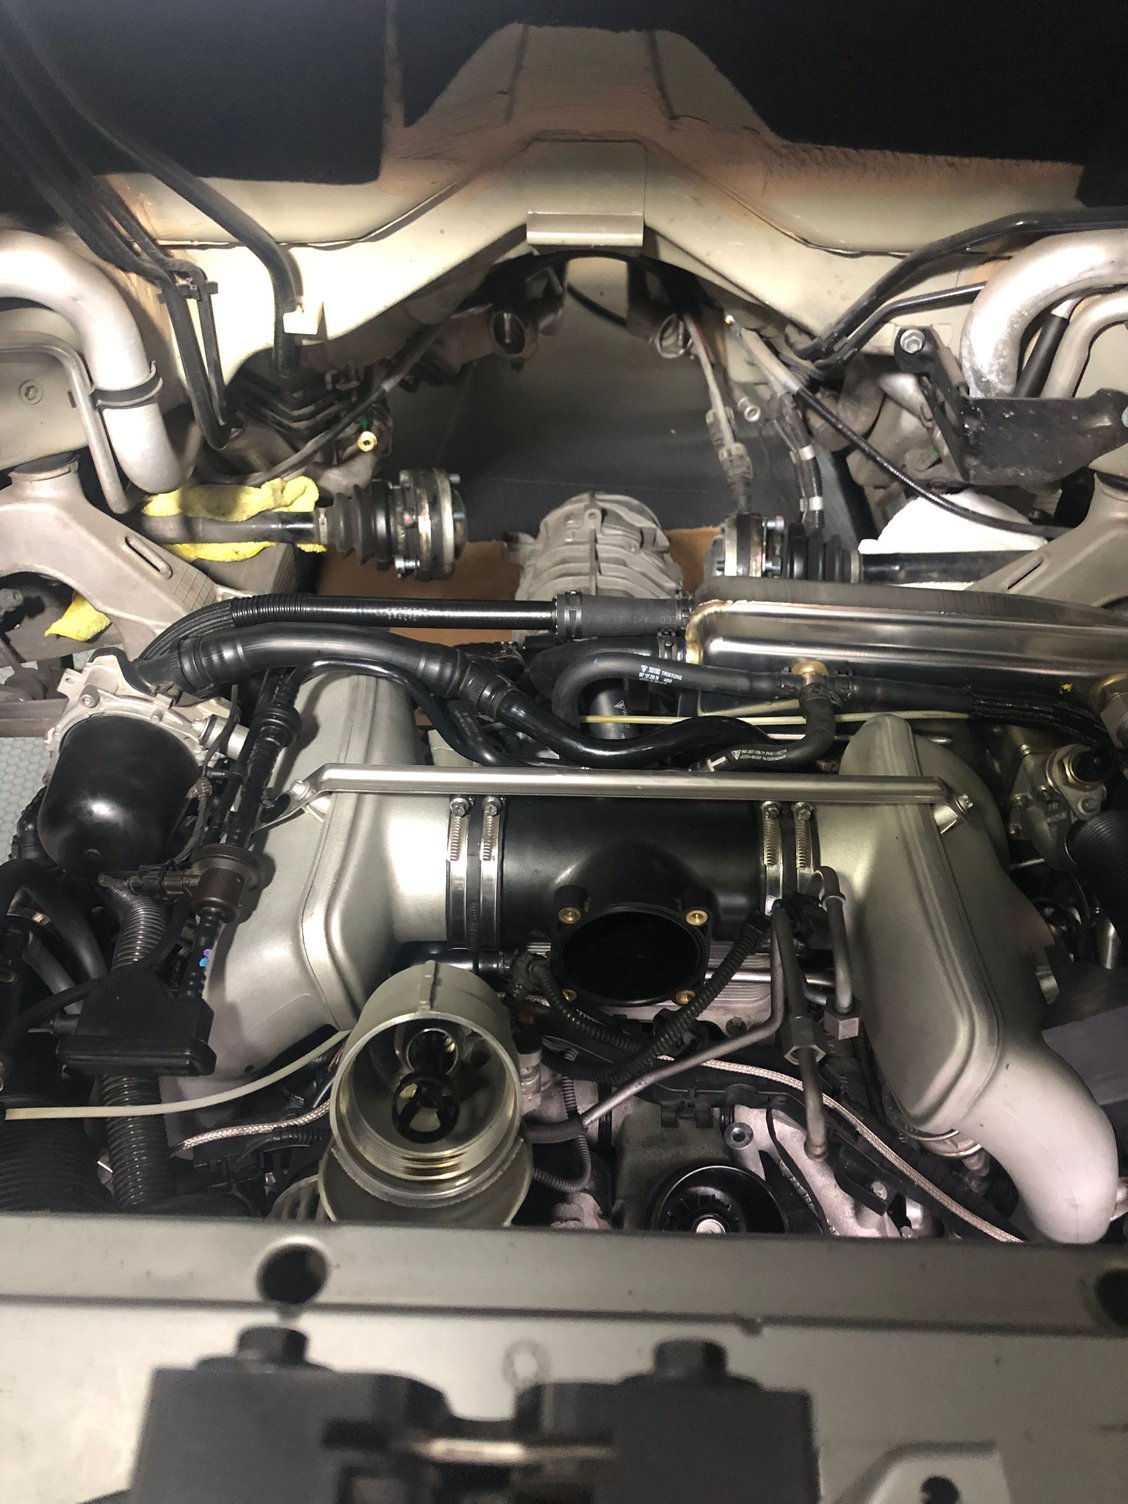
Pretty good view to get everything aligned:
And physically back in:
I still have its circulatory and nervous systems to hook up and I will be acquiring some bolts/washer/sealant to use on the PS pump (I am still trying to avoid the costs of a reservoir) to get it installed. I will also be swapping the Clutch Master Cylinder and filling bleeding that circuit.
The big decision is about test firing the engine. I think my current plan is to hook everything back up, except the wheels and test fire while it is still up on the rack, although I am all ears to anyone who has done this before.
My theory is, if I screwed up the timing, I can drop it from where it is. Well back to hooking stuff up.
Good progress Ed, very nice to see it coming together. I am puzzled by the failed vacuum test though, did you hear air being sucked in anywhere when running the compressor?
would be good to hear from anyone who has tested them engine out what the reason may be (excluding any leaks hopefully)
Good luck with the start up!
Last edited by theanalyst; 08-08-2019 at 08:45 AM.
So the engine sits back in its home, with trepidation.
I nixed trying to test the clutch fork, but it looks like I have clearance (I hope I won't eat my words):
I still have its circulatory and nervous systems to hook up and I will be acquiring some bolts/washer/sealant to use on the PS pump (I am still trying to avoid the costs of a reservoir) to get it installed. I will also be swapping the Clutch Master Cylinder and filling bleeding that circuit.
The big decision is about test firing the engine. I think my current plan is to hook everything back up, except the wheels and test fire while it is still up on the rack, although I am all ears to anyone who has done this before.
My theory is, if I screwed up the timing, I can drop it from where it is. Well back to hooking stuff up.
Ed
As far as starting it. Have a fully charged battery and get a jump box on there. Fill it with oil, pull the fuel pump relay and crank the hell out of it until you see 2-3bar on the oil pressure gauge.
Also the power steering reservoir....are you trying to figure out how to plug the holes?
For the vacuum test, no I did not hear anything (but my garage is not the most quiet place), and the venturi was creating a suck at the end of the pressure gauge connection, when I switched it to pushing air, it immediately created pressure. This was after visiting my P-car friends and my tech laughing at me when I said I was going to try and test the cooling work I had done. He felt that was a bridge too far.
For the engine start, I will follow the suggestions. Oil circulation was my biggest concern, and the suggested procedure addresses that.
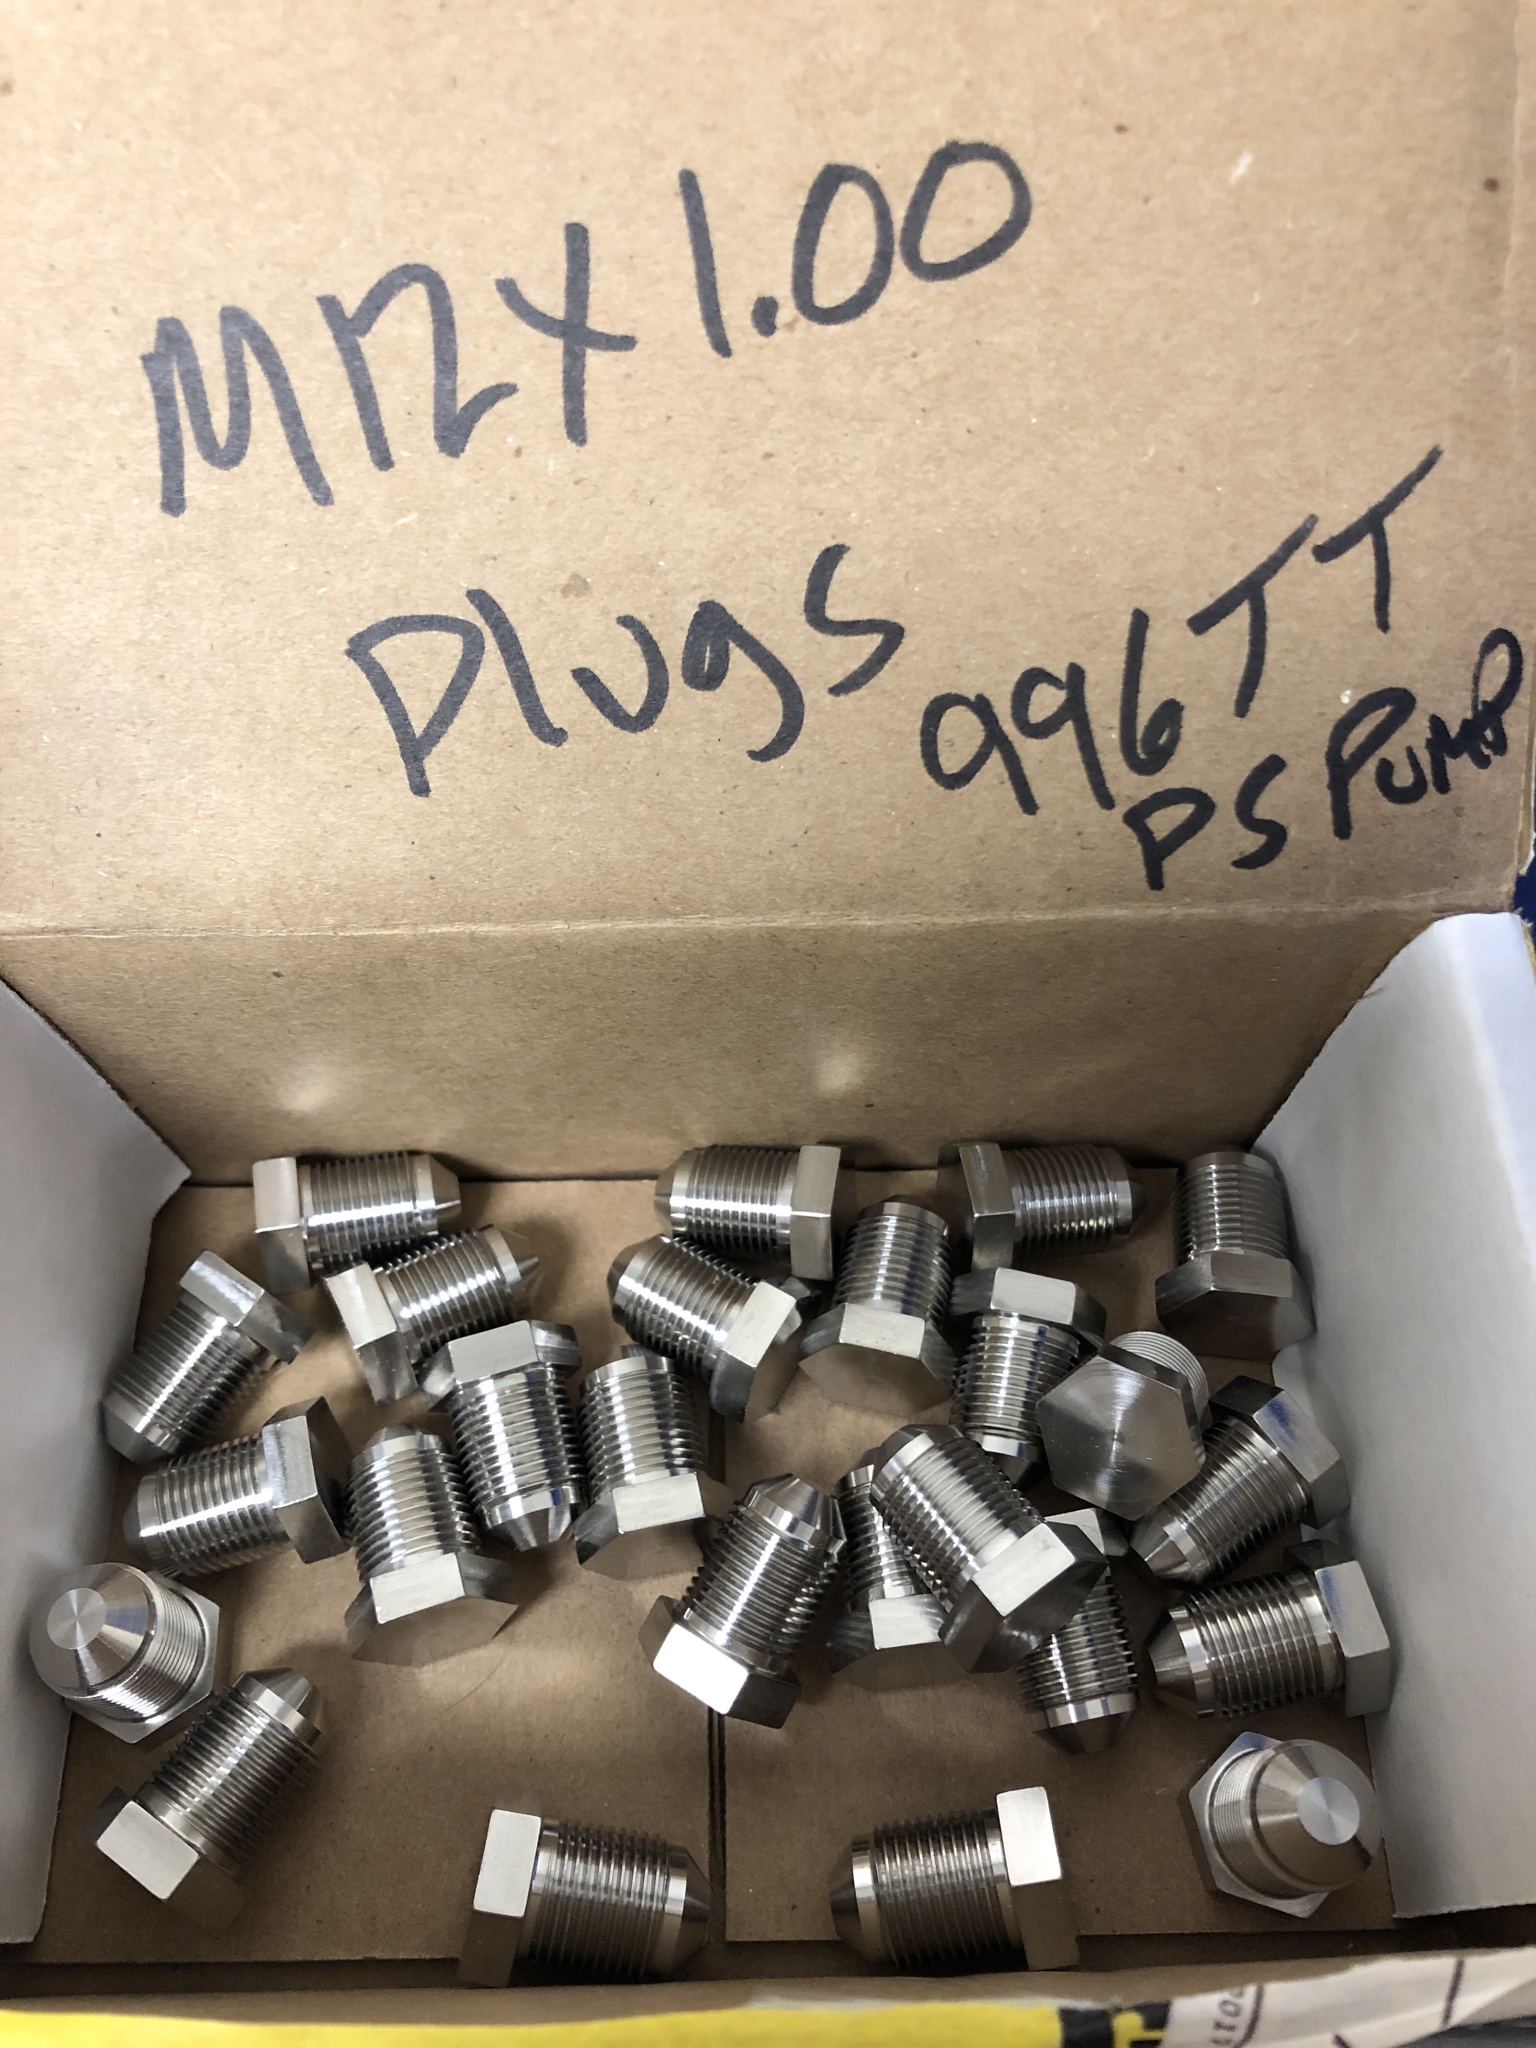
For the PS pump, I have been doing a lot of reading and have seen suggestions from drilling and tapping (which I think is unnecessary since, except for the one return line, all connections are already threaded), using AN fittings, which do NOT match the threads to replacing the reservoir (which solves everything except the rear connection on the pump that used to go to the slave) as alternatives. My gut tells me:
1. Use the already threaded connections and find plugs to fit. Thread pitch is 1 and the three connections appear to be M10 and M12. I thought of using a crush washer with some sealant, as I have done with the banjo connections on my steering rack in my UrS6 that seems to have worked well. The only issue is that the current fittings are angled at the end, and I am sure that is part of the seal. I do not think I am going to find bolts like that with the correct length and my skills at searching for those kinds of pieces are not as good as I would like them to be. My current plan was to head to the hardware store, or go to Fastenal or Grainger or McMaster and try and find something appropriate. (M10X1 & M12x1)
2. For the push in fitting for the return, I was going to drill, tap and plug that one.
In all cases, as Kevin has pointed out, the most critical thing is to get it sealed properly. Warnings of engine fires is enough for me to be very diligent and cautious when doing this particular task, and except for the connection on the pump itself, in the end I may have to fork over the cash for a GT reservoir. Fortunately a post about doing the GT2 slave included an great way to get almost all of the Pentosin out of the res, and the pump is accessible without dropping the engine, so I can do that job later if I have to.
So other than finishing up the connections (this AM and early this evening), installing the new Clutch MC and GT spring (tonight or tomorrow), the PS pump is one of the last items to be handled before the test fire.
Vacuum testing the coolant system with engine could be a bridge too far to be honest!! Did you get torque settings for all the parts you removed and refitted from the WM? Is there a concise list anywhere or is it a case of going through each section :/
Can you clarify why you are not using all the ps pump connections? sorry , seem to have missed that modification in this thread.
I am sunning myself until next weekend when my nightmare will continue lol.
Looking forward to seeing progress on this,
I acquired a book I saw right after getting the car:
that has been helpful, but yes I have gone through the WM's section by section, mainly to know what order, any special considerations and when to use the Kluber grease (and in one case when NOT to use it). But where there was no doubt about what to do except the torque, this book was helpful.
The PS Pump items are due to changing to a GT2 clutch slave setup and removing the plumbing from the car that used to go to the slave. That leaves the pressure out fitting of the rear of the pump, the in & out connections for the line going to the slave and the return from the slave all needing to be plugged. I am thinking now that I may just run the short patch line from the output to the input in the lid, then plugging the lid output and tapping/plugging the return from the slave. That way 2 of the holes are plugged with what was in them already, the third will have nothing going to it since I pulled the coupler and should plug easily and the last is the return, which needs a secure fitting since it terminates in the reservoir and cannot leak.
My wife decided to invite some folks over and combined with my ice hockey coaching starting again, this weekend is going to be slower progress than I wanted. I might be able to get some more of the engine re-installation done, but probably nothing on the PS Pump. Well see.
For the vacuum test, no I did not hear anything (but my garage is not the most quiet place), and the venturi was creating a suck at the end of the pressure gauge connection, when I switched it to pushing air, it immediately created pressure. This was after visiting my P-car friends and my tech laughing at me when I said I was going to try and test the cooling work I had done. He felt that was a bridge too far.
For the engine start, I will follow the suggestions. Oil circulation was my biggest concern, and the suggested procedure addresses that.
For the PS pump, I have been doing a lot of reading and have seen suggestions from drilling and tapping (which I think is unnecessary since, except for the one return line, all connections are already threaded), using AN fittings, which do NOT match the threads to replacing the reservoir (which solves everything except the rear connection on the pump that used to go to the slave) as alternatives. My gut tells me:
1. Use the already threaded connections and find plugs to fit. Thread pitch is 1 and the three connections appear to be M10 and M12. I thought of using a crush washer with some sealant, as I have done with the banjo connections on my steering rack in my UrS6 that seems to have worked well. The only issue is that the current fittings are angled at the end, and I am sure that is part of the seal. I do not think I am going to find bolts like that with the correct length and my skills at searching for those kinds of pieces are not as good as I would like them to be. My current plan was to head to the hardware store, or go to Fastenal or Grainger or McMaster and try and find something appropriate. (M10X1 & M12x1)
2. For the push in fitting for the return, I was going to drill, tap and plug that one.
In all cases, as Kevin has pointed out, the most critical thing is to get it sealed properly. Warnings of engine fires is enough for me to be very diligent and cautious when doing this particular task, and except for the connection on the pump itself, in the end I may have to fork over the cash for a GT reservoir. Fortunately a post about doing the GT2 slave included an great way to get almost all of the Pentosin out of the res, and the pump is accessible without dropping the engine, so I can do that job later if I have to.
So other than finishing up the connections (this AM and early this evening), installing the new Clutch MC and GT spring (tonight or tomorrow), the PS pump is one of the last items to be handled before the test fire.
Ed
Ed,
I made some fittings up for a friend doing a GT2 Slave that wanted to block off his ports on the power steering tanks. I found the M12's, just have to dig around the garage to find the box with the M10's. The tapered seal at the bottom is 45�. I'll dig around for some tonight.
Very cool. Let me know what you want for them. Until I saw this, I was thinking to put the short connector line back into it's 2 places, since nothing would be pumping then just figure out to do with the M10 slot and then cut a new thread for the push in plug.
But this will let me go back to a cleaner install.
If I recall correctly, I believe I saw you mentioned in a GT2 thread when I was compiling all that information.
Ran into my first "oops". When you raise the engine make sure the ground strap is not caught between the air pipe and the suspension.
I tried moving the bracket for the flywheel sensor but it still won't twist up and through the air pipe, even with that loose.
I will have to lower the engine a bit to get it where it should be. Until this was discovered, the cardan shaft, starter, trans mount and half shafts were back in place along with the IC air pipes to the turbos.
Two steps forward,,,, two steps forward normally, have to take a step back now.
For anyone dropping their engine, watch for the ground strap and where it is routed as you jack the engine into place.
Ed
Thats a bummer
Originally Posted by lliejk
Very cool. Let me know what you want for them. Until I saw this, I was thinking to put the short connector line back into it's 2 places, since nothing would be pumping then just figure out to do with the M10 slot and then cut a new thread for the push in plug.
But this will let me go back to a cleaner install.
If I recall correctly, I believe I saw you mentioned in a GT2 thread when I was compiling all that information.
Thanks!
Ed
Yep I found 1 of the M10 plugs. Shoot me a PM with your shipping info and I'll send them out.
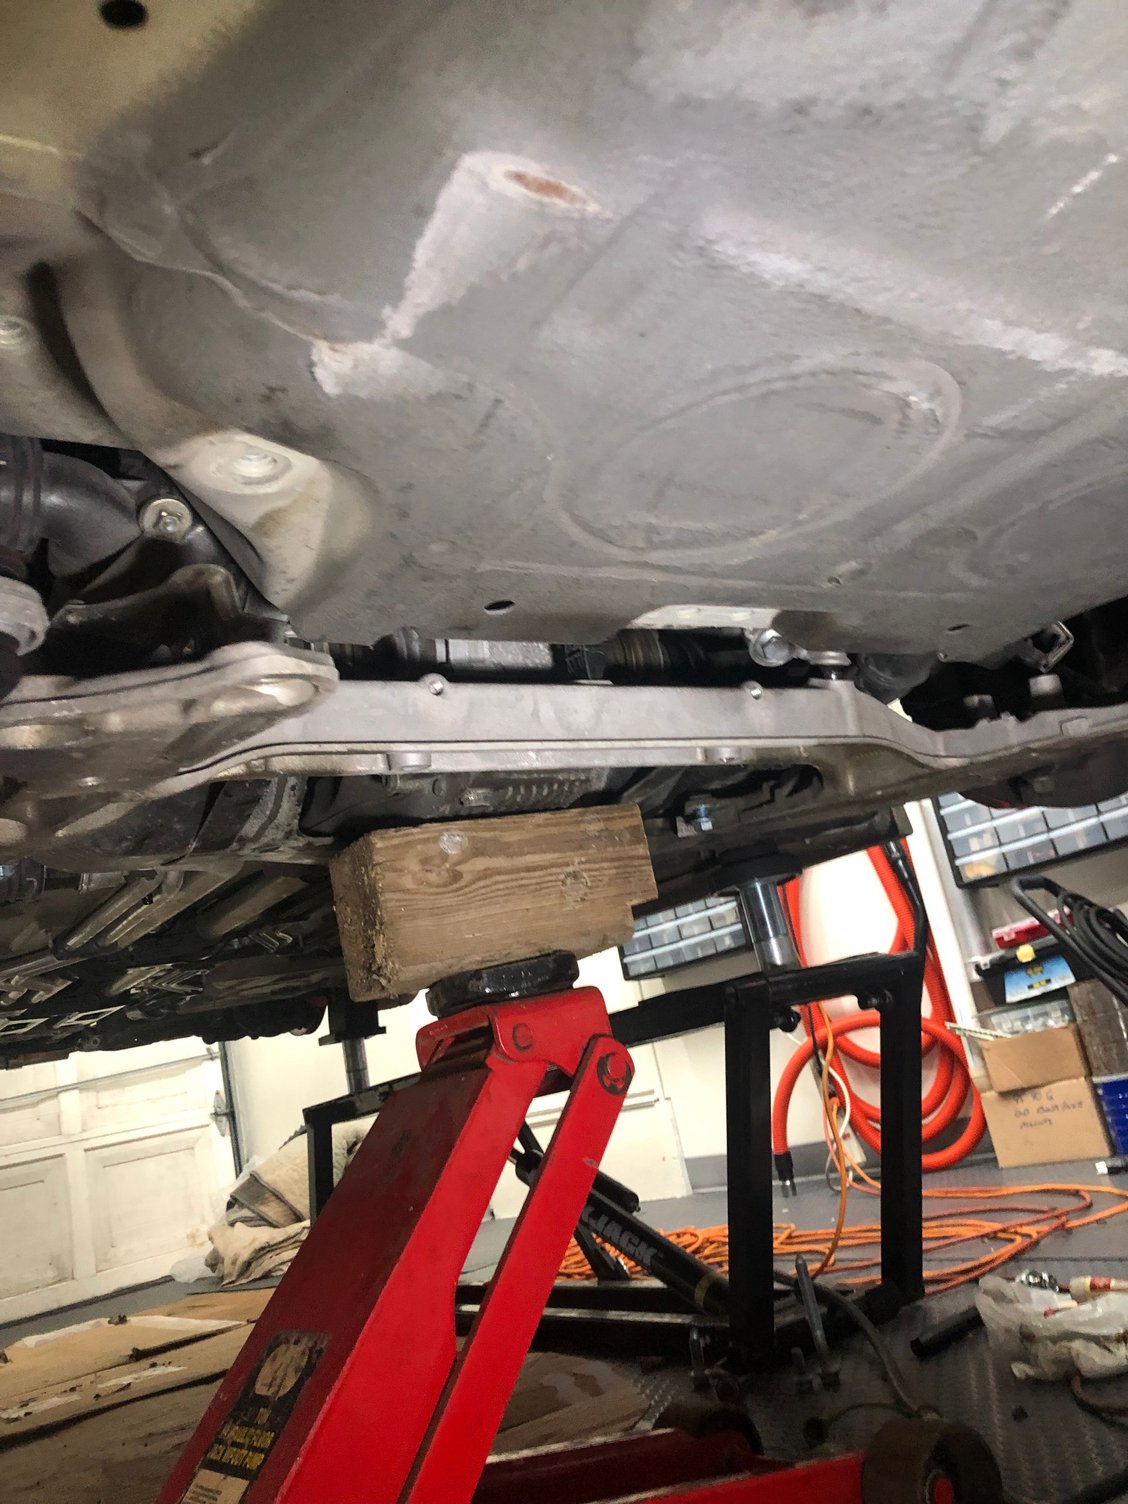
Whew, dodged a bullet there. I was able to keep all connections intact, remove the two bolts from the Trans Support piece to the trans and lowered in pairs and incrementally, the mount bolts (I was worried about torquing/twisting the bolts, so it did it in fairly small moves.)
Got just enough space to squeeze the large fitting below the metal suspension piece and past the plastic of the turbo air pipe.
Needless to say, add this to your list of engine install duties (I would probably tape it to the outside of the turbo air pipe).
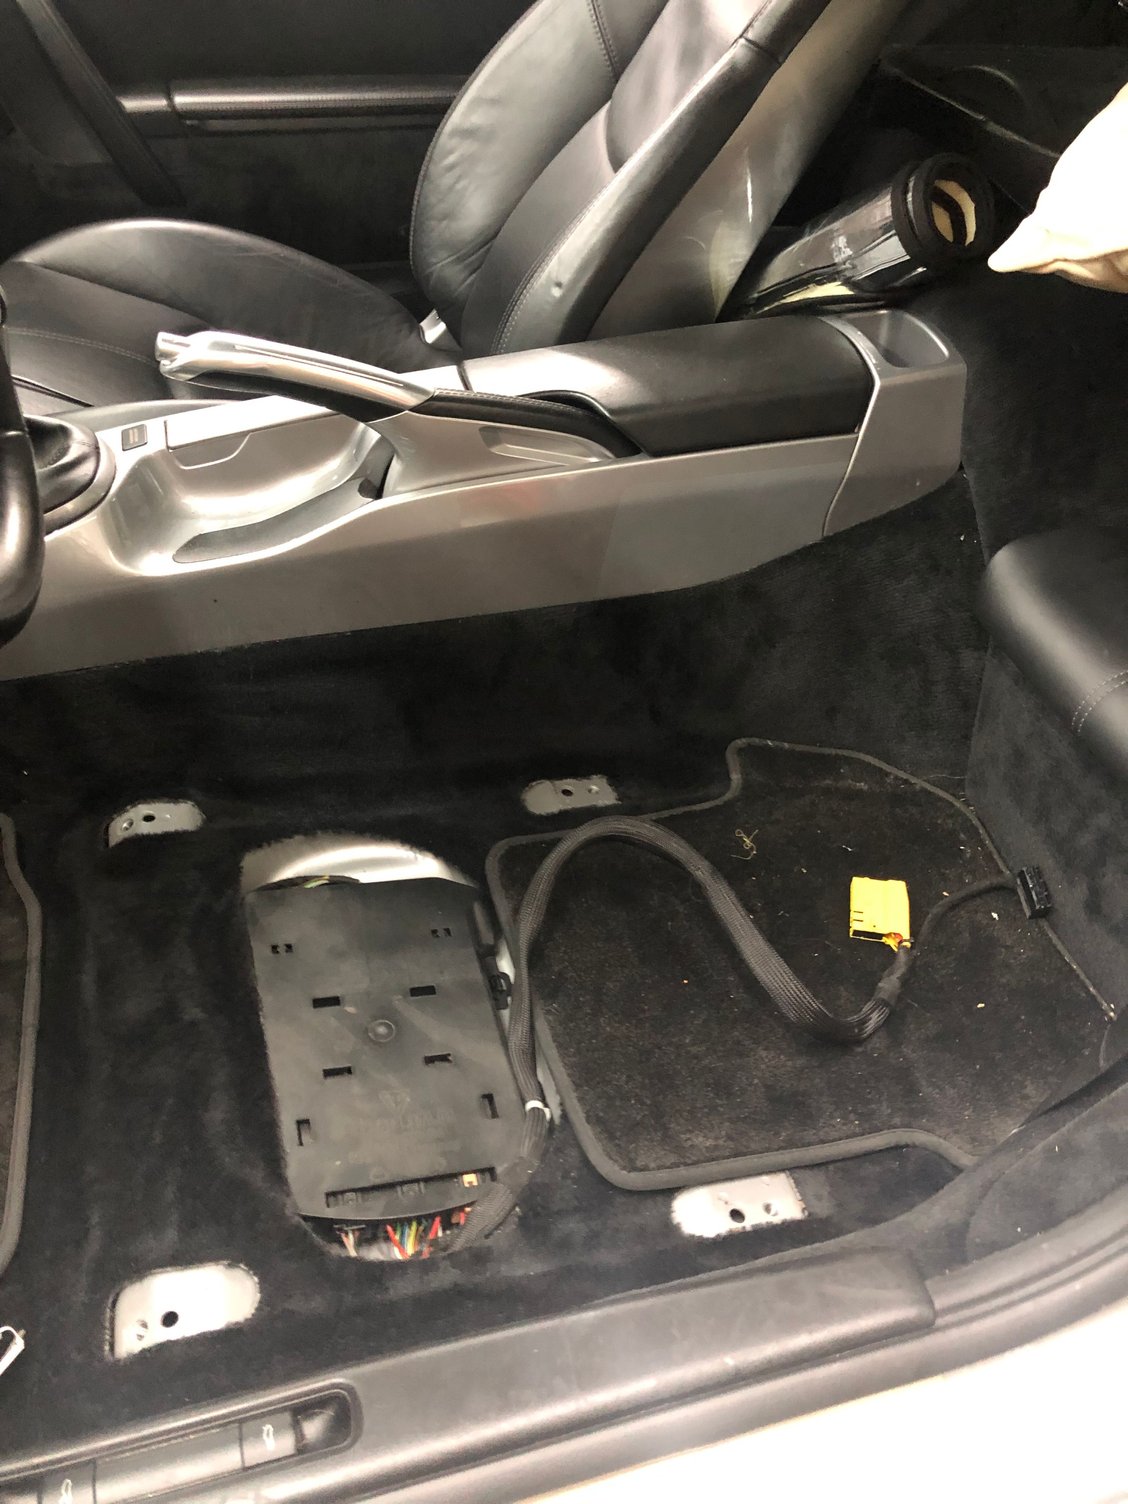
Got the Clutch MC and GT2 spring in place. Out of all the things I do, being upside down on my back with little room to maneuver is one of my least favorite. I forget where I read it, but I heeded the advice of removing the seat. For the seat to move and expose the mounting points, that required connecting the wiring harness (at least in my mind it did), but the car came to life for the first time in 2 months, at least electrically. It was kind of like re-powering up Apollo 13 without the cold and damp.
I could not imagine working in the driver foot well any other way for this, though I did the ignition switch with the seat in the car. That will be the last time I leave it in place if I have anything else to do in that area. The three tasks, remove the reservoir in the frunk, remove the spring behind the clutch and remove the MC itself, were very straightforward, and if not for the tight confines, would have been cake.
Seat out:
Everything is torqued back down from the engine lowering to get the ground free. I have to fill and bleed the clutch hydraulic system, but that will get done tomorrow. Noah's (thank you sir, and I owe you - and other guys on this forum) plugs should be here tomorrow for me to finish up the PS Pump mods for the GT2 clutch slave, so unless I have another surprise, I hope to test fire the engine this weekend.
I replaced another missing bolt attaching the metal piping to the transmission. I think they dropped just the transmission to replace the clutch. I also did not get the two small rubber hoses connecting the same metal pipes to the aluminum pipes coming off the engine. I can get to them easily enough, but I am not sure where I lost track of them. I haven't decided to get them or wait (I will probably order them just due to how nasty the coolant refill job is)
Pictures are very helpful and kept me straight hooking the wiring harness back up (though I failed them when I didn't see that last wiring harness connection that Doug pointed out).
I only have the structural pieces and air pipe/throttle body stuff left on the one table, and I have to get to the nose for the few water pipes up there and the fittings that Atc suggested I get. So the garage is looking pretty devoid of stuff. Once I get the last few pieces on the car, I will take a picture of everything that was replaced. It's mind boggling. I look back on my engine work on the Audi AAN 20v Turbo and laugh at the simplicity. Much less circulatory system, just 5 cylinders and while it had it's challenges, 1 less turbo and only 1 set of cams made things less complicated. Oh and Audi thought it was OK to give me frikkin' timing marks.
Keep your fingers crossed I didn't screw up the timing...
Nice progress and thanks for the tip Ed. Will make sure I look for that. Getting closer to startup time! I will be back on mine on Monday, looking forward to getting the rest of the nasty bits done and start the reassembly
A bit of a slow session today, mainly because I have moved to the front of the car. I usually spend some time looking, comparing to my docs and sometimes grabbing some new information.
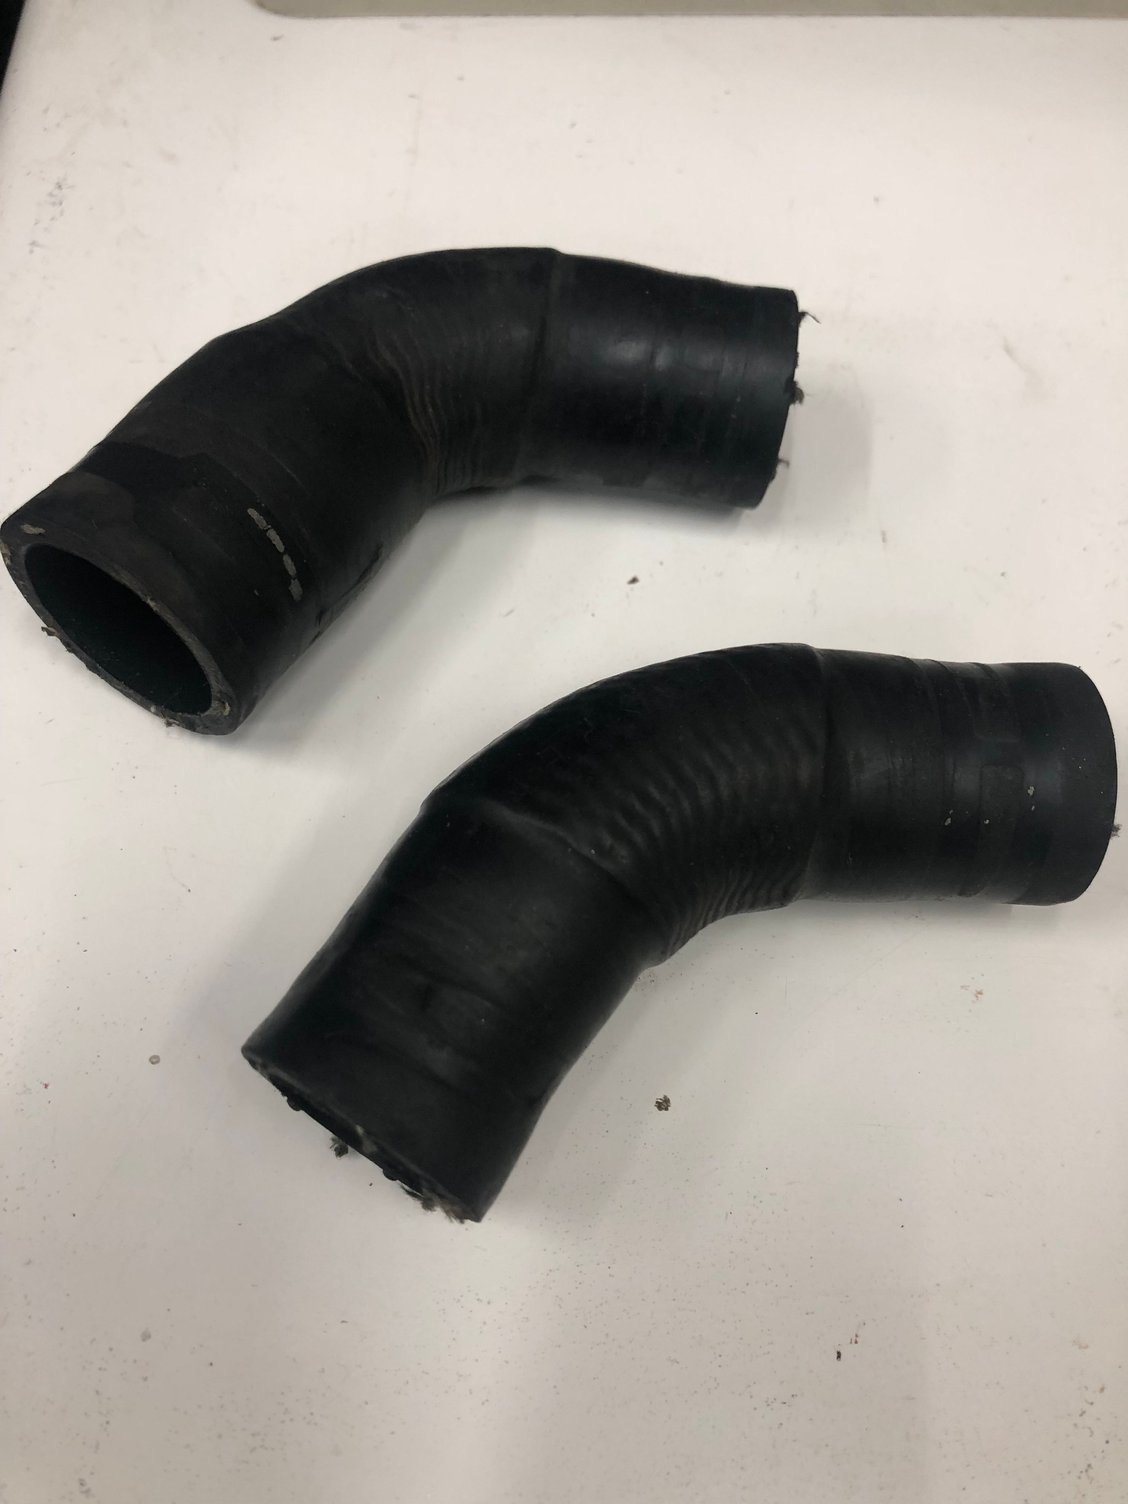
First, I decided to replace the heater hoses (if that's what they are).
I don't want to go through draining and filling coolant on this thing anytime soon. Call me a nut but I am heading toward Allentown to pick them up at the warehouse (the one that flooded and delayed getting some parts earlier in the saga). Also, it seems that I am not replacing every hose up front, not sure what I was doing when ordering, but I have extra O rings and I will be outfitting every connection I can get to with a new O ring. Those little nozzle deals (adapters as KAT calls them) aren't as easy to get to as I thought, at least the passenger one looks like a pain in the butt. I tabled that task until the weekend. I am not too concerned about the front cooling hoses that I am not replacing, they seem in pretty good shape.
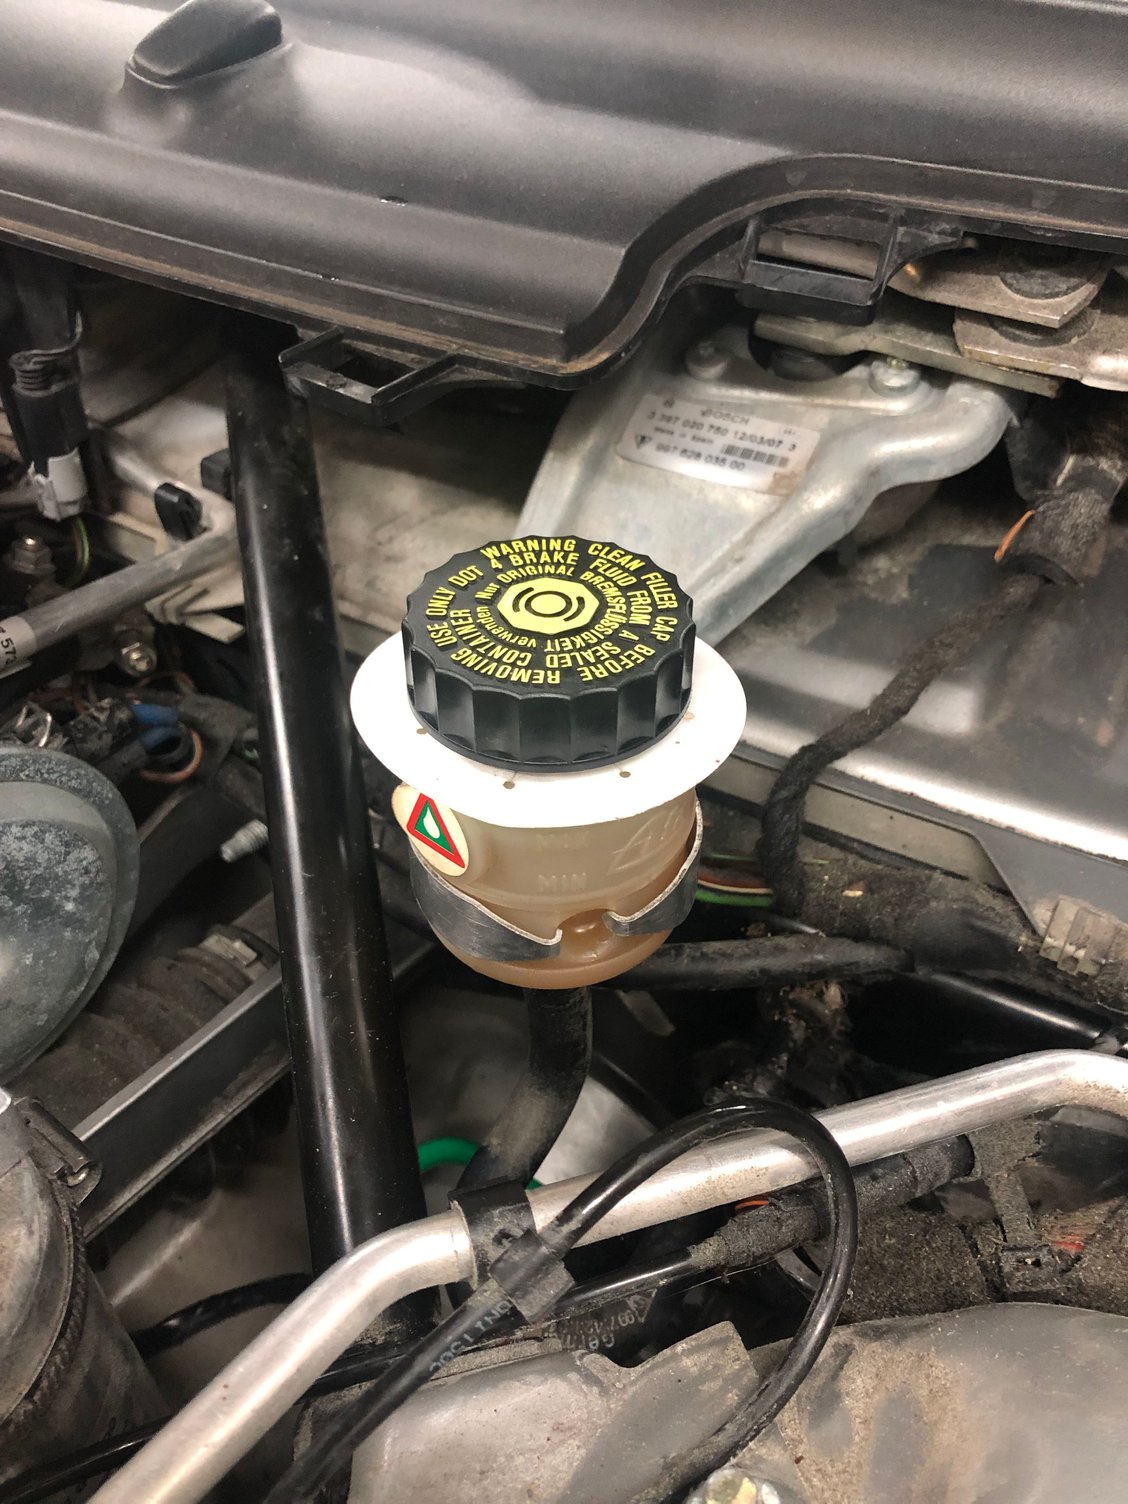
I added flushing the brakes to the flushing/bleeding clutch task. Having a Motive power bleeder is a wonderful thing (I can still remember having to find someone to help operate the brake pedal in the old days).
The new clutch slave's re-capped Dot 4 reservoir:
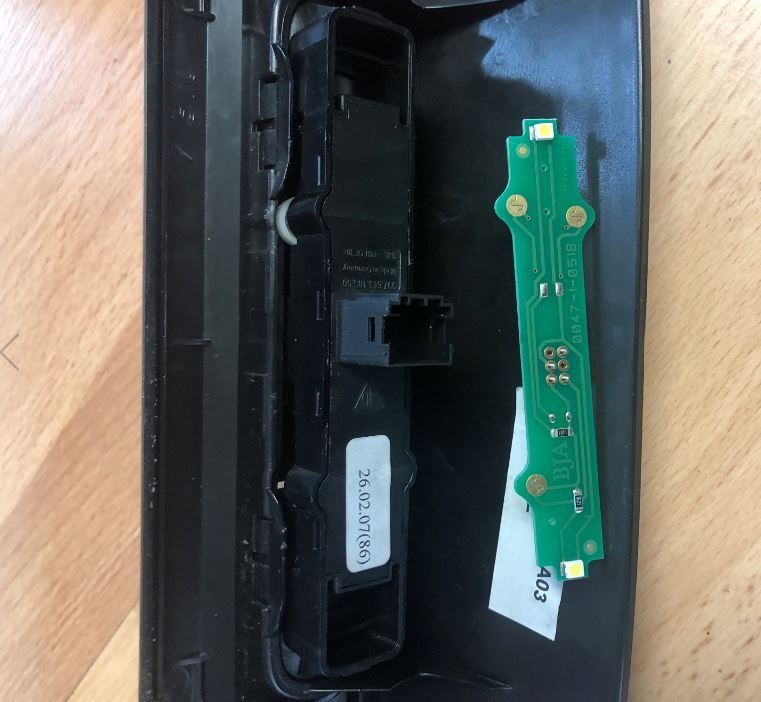
I also had forgotten about the frunk switch flaking out on me a while ago, so while the seat was out, I pulled the assemble, drilled a new hole, used a finishing nail as a fulcrum and did a little filing to let it swing enough to actuate the switch. A post had said to shim the switch, but my shims kept dropping below the guide slots of the switch. Put it all back in to test, and... nothing. Fortunately I tried the engine compartment and it didn't work. What? Well when you reassemble things, it's important you don't have any left over parts. In this case:
Switches don't do anything without their guts intact. Popped it in, all is well.
I moved on to the front, removed the bumper cover and started gazing at the front end.
The list up front included Torque Solutions bump steer kit (I have to get a hold of them tomorrow, there is almost no adjustment left when I try and match the length of the existing tie rods), new inner tie rods (the boots have those funky permanent clamps that you squeeze with plier like devices. I have no idea where to get them, but last time I did this on another car I replaced them with regular clamps), GMG sway bar, a few hoses and the adapters on top of the radiators. Well I was in for quite the surprise going after the sway bar. First I dealt with the outer tie rods and removed them as well as assessing how I would handle the inner tie rods. Then I moved to the say bar. Holy cow, that thing is trapped beneath every front sub frame piece. I was really fretting what to do about the front differential, and there were write ups, but no all wheel drive ones and for the life of me, even though I tried several different terms for sway bar (including stabiliser and anti roll) I could not find the WM that described this procedure. So I went for it anyway. There are a bunch of large bolts that hold the various parts of the sub frame to the frame, and there are some small 10mm nuts the secure some cooling hose mounts and finally there are the two 15mm bolts that hold the power steering in place. I place a jack under the diff, a jack stand under the sub frame and dropped the large bolts. I lowered the frame with the differential attached and managed to squeeze out the sway bar to the front. What a great deal of work to go through to get the sway bar off the car. Glad this isn't on the regular maintenance schedule.
I left the sub frame hanging (on the jack stands) for now, I will be back at it tomorrow and over the weekend. Oh, Fed Ex was going to deliver the plugs today, but that got shifted to tomorrow.
So off to grab some more parts tomorrow, finish the connections below the engine, get the rear frame back on, then hopefully finish up the front end work before Friday night is over and get that frame back in place. I think I bought every bottle of Pentofrost SF for the coolant fill. The old stuff looked OK, but like the brake fluid I replaced, I have no idea how long it has been in the car.
If the plugs arrive tomorrow, I will finish up the PS Pump, get it in the car and connect the rest of the engine, fill it with oil and coolant and try and start the thing.

 08-07-2019, 08:38 PM