When you click on links to various merchants on this site and make a purchase, this can result in this site earning a commission. Affiliate programs and affiliations include, but are not limited to, the eBay Partner Network.
E85 time? The 997 crowd is lucky you already have supporting vendors making e85 tunes...not so much on the 996 side outside from turbo cars
I have not done E85 tunes personally but my brother has done it for his 400+whp Eagle Talon. He said its not difficult if you have access to the tuning software.
__________________
PCA National Instructor
TPC Racing stats:
2023 Porsche Sprint Challenge 992 Cup Am Champion
2023 Porsche Sprint Challenge GT4 Pro-Am Team Champion
2022 Porsche Sprint Challenge 992 Cup & 991 Cup Champion
2020 IMSA GT3 Cup Challenge 2nd Championship
2018 IMSA GT3 Cup Challenge 2nd Championship
2016 IMSA GT3 Cup Challenge Champion
2013 IMSA GT3 Cup Challenge Champion
2006 Rolex-24 @ Daytona GT Champion
2004 Grand-Am SGS Class Champion
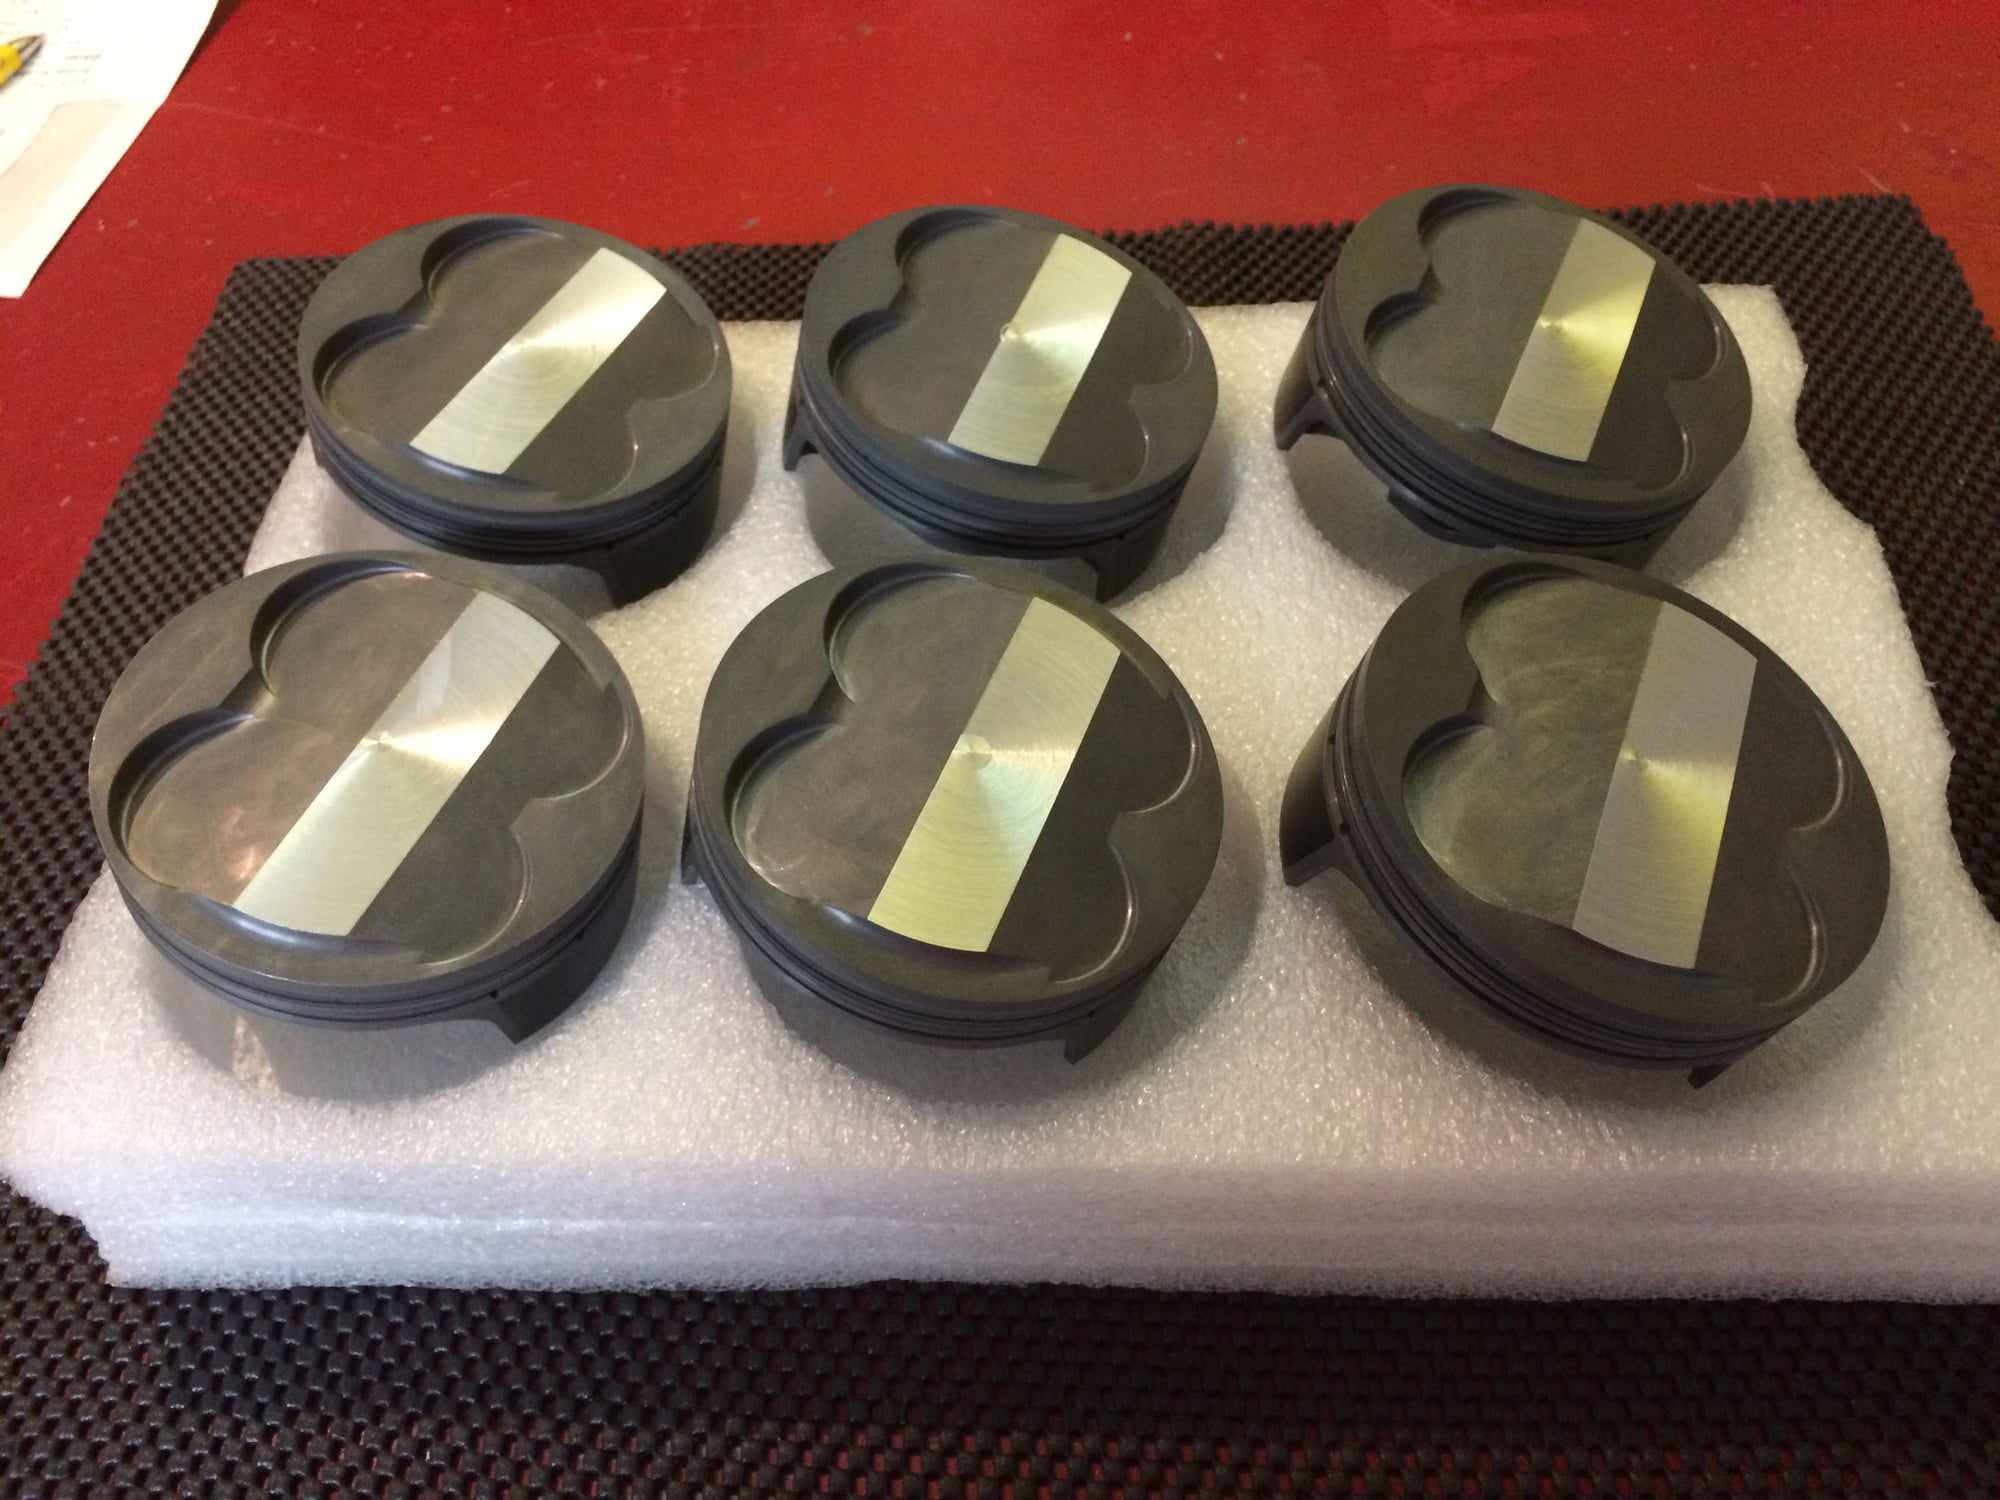
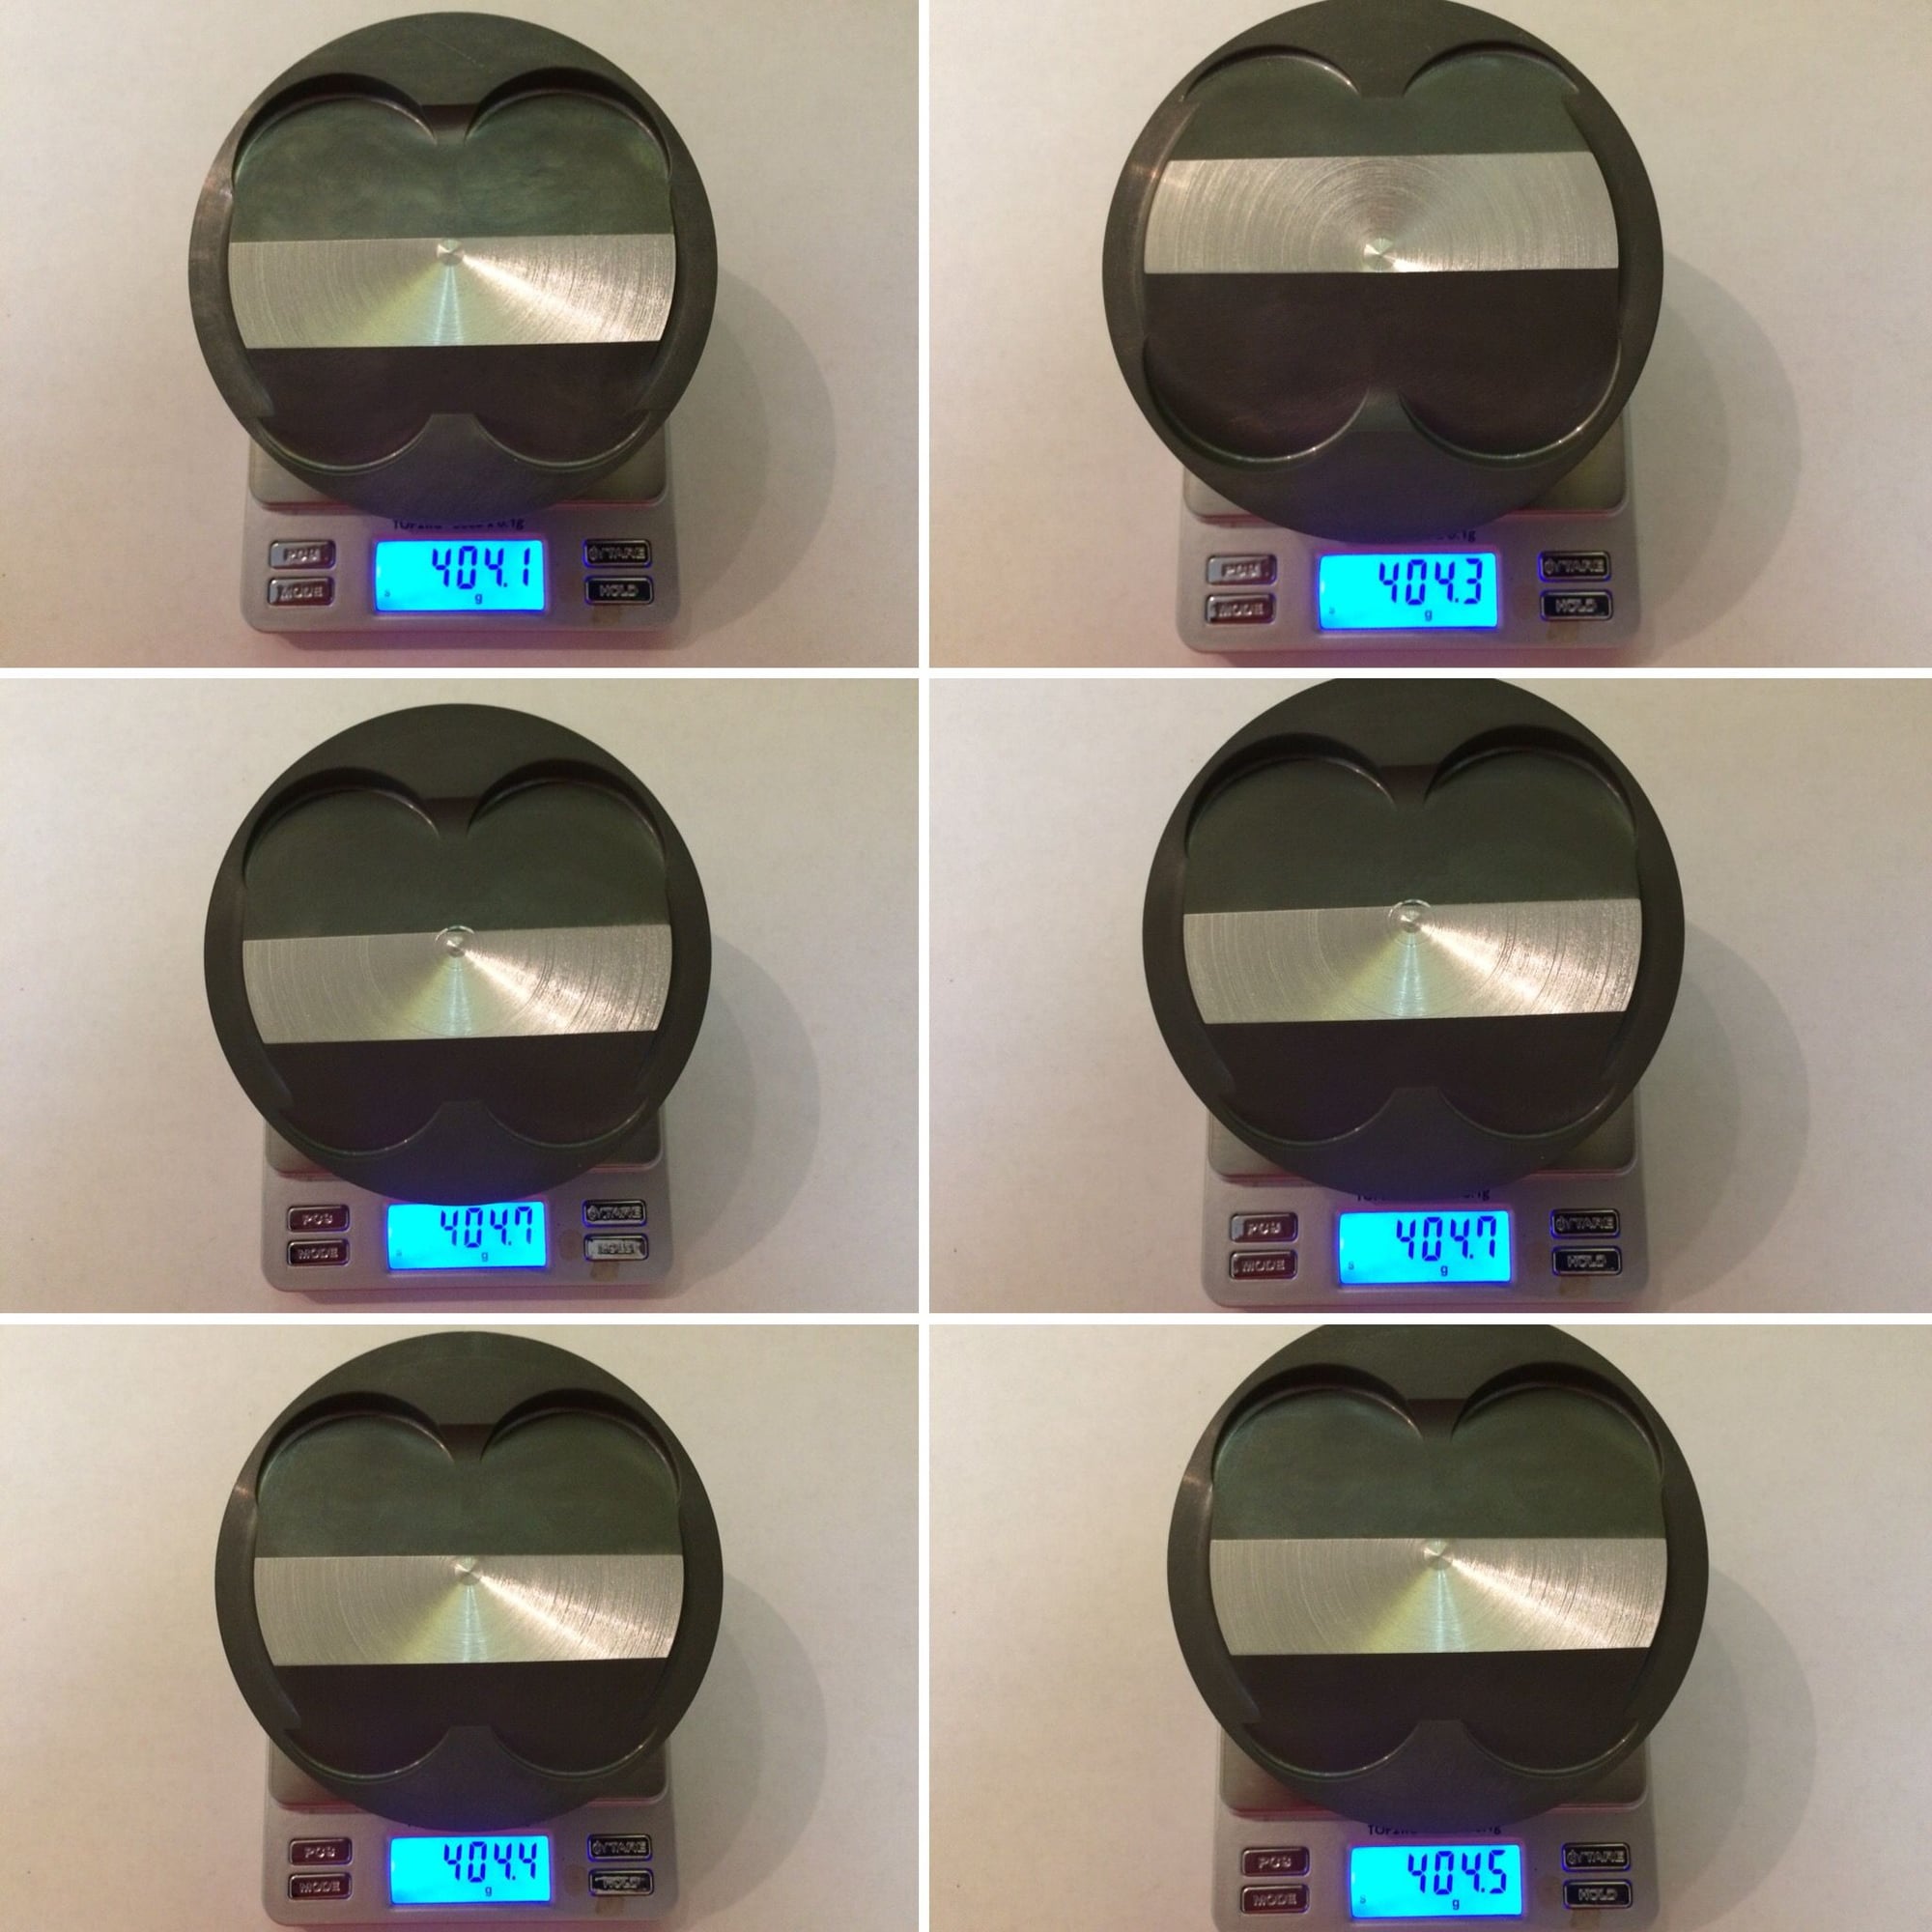
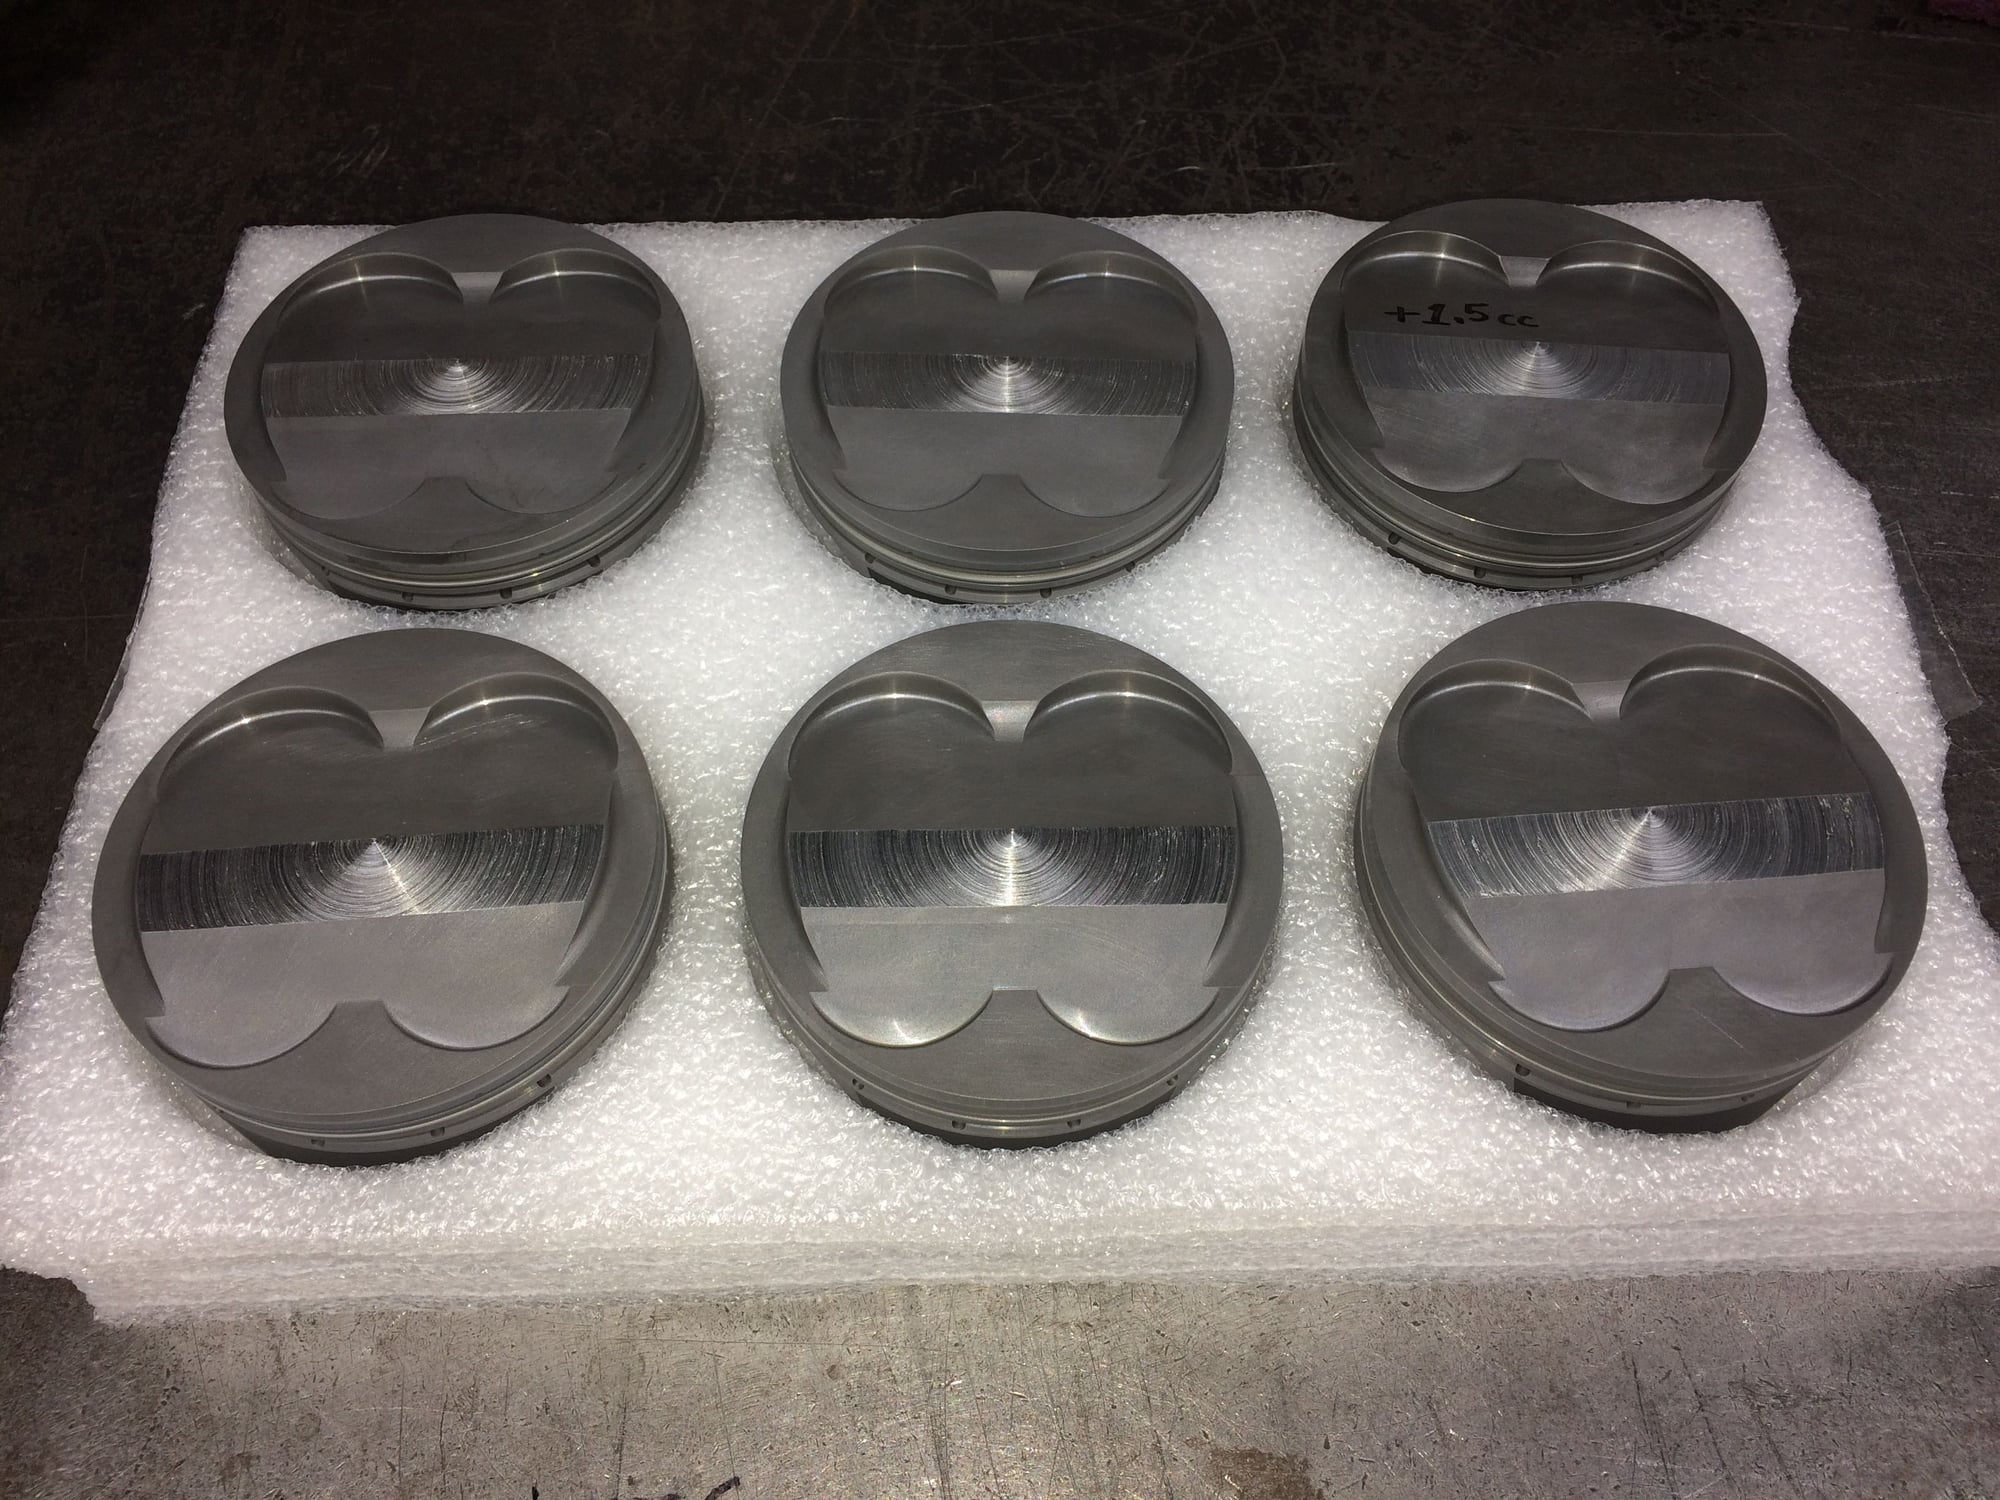
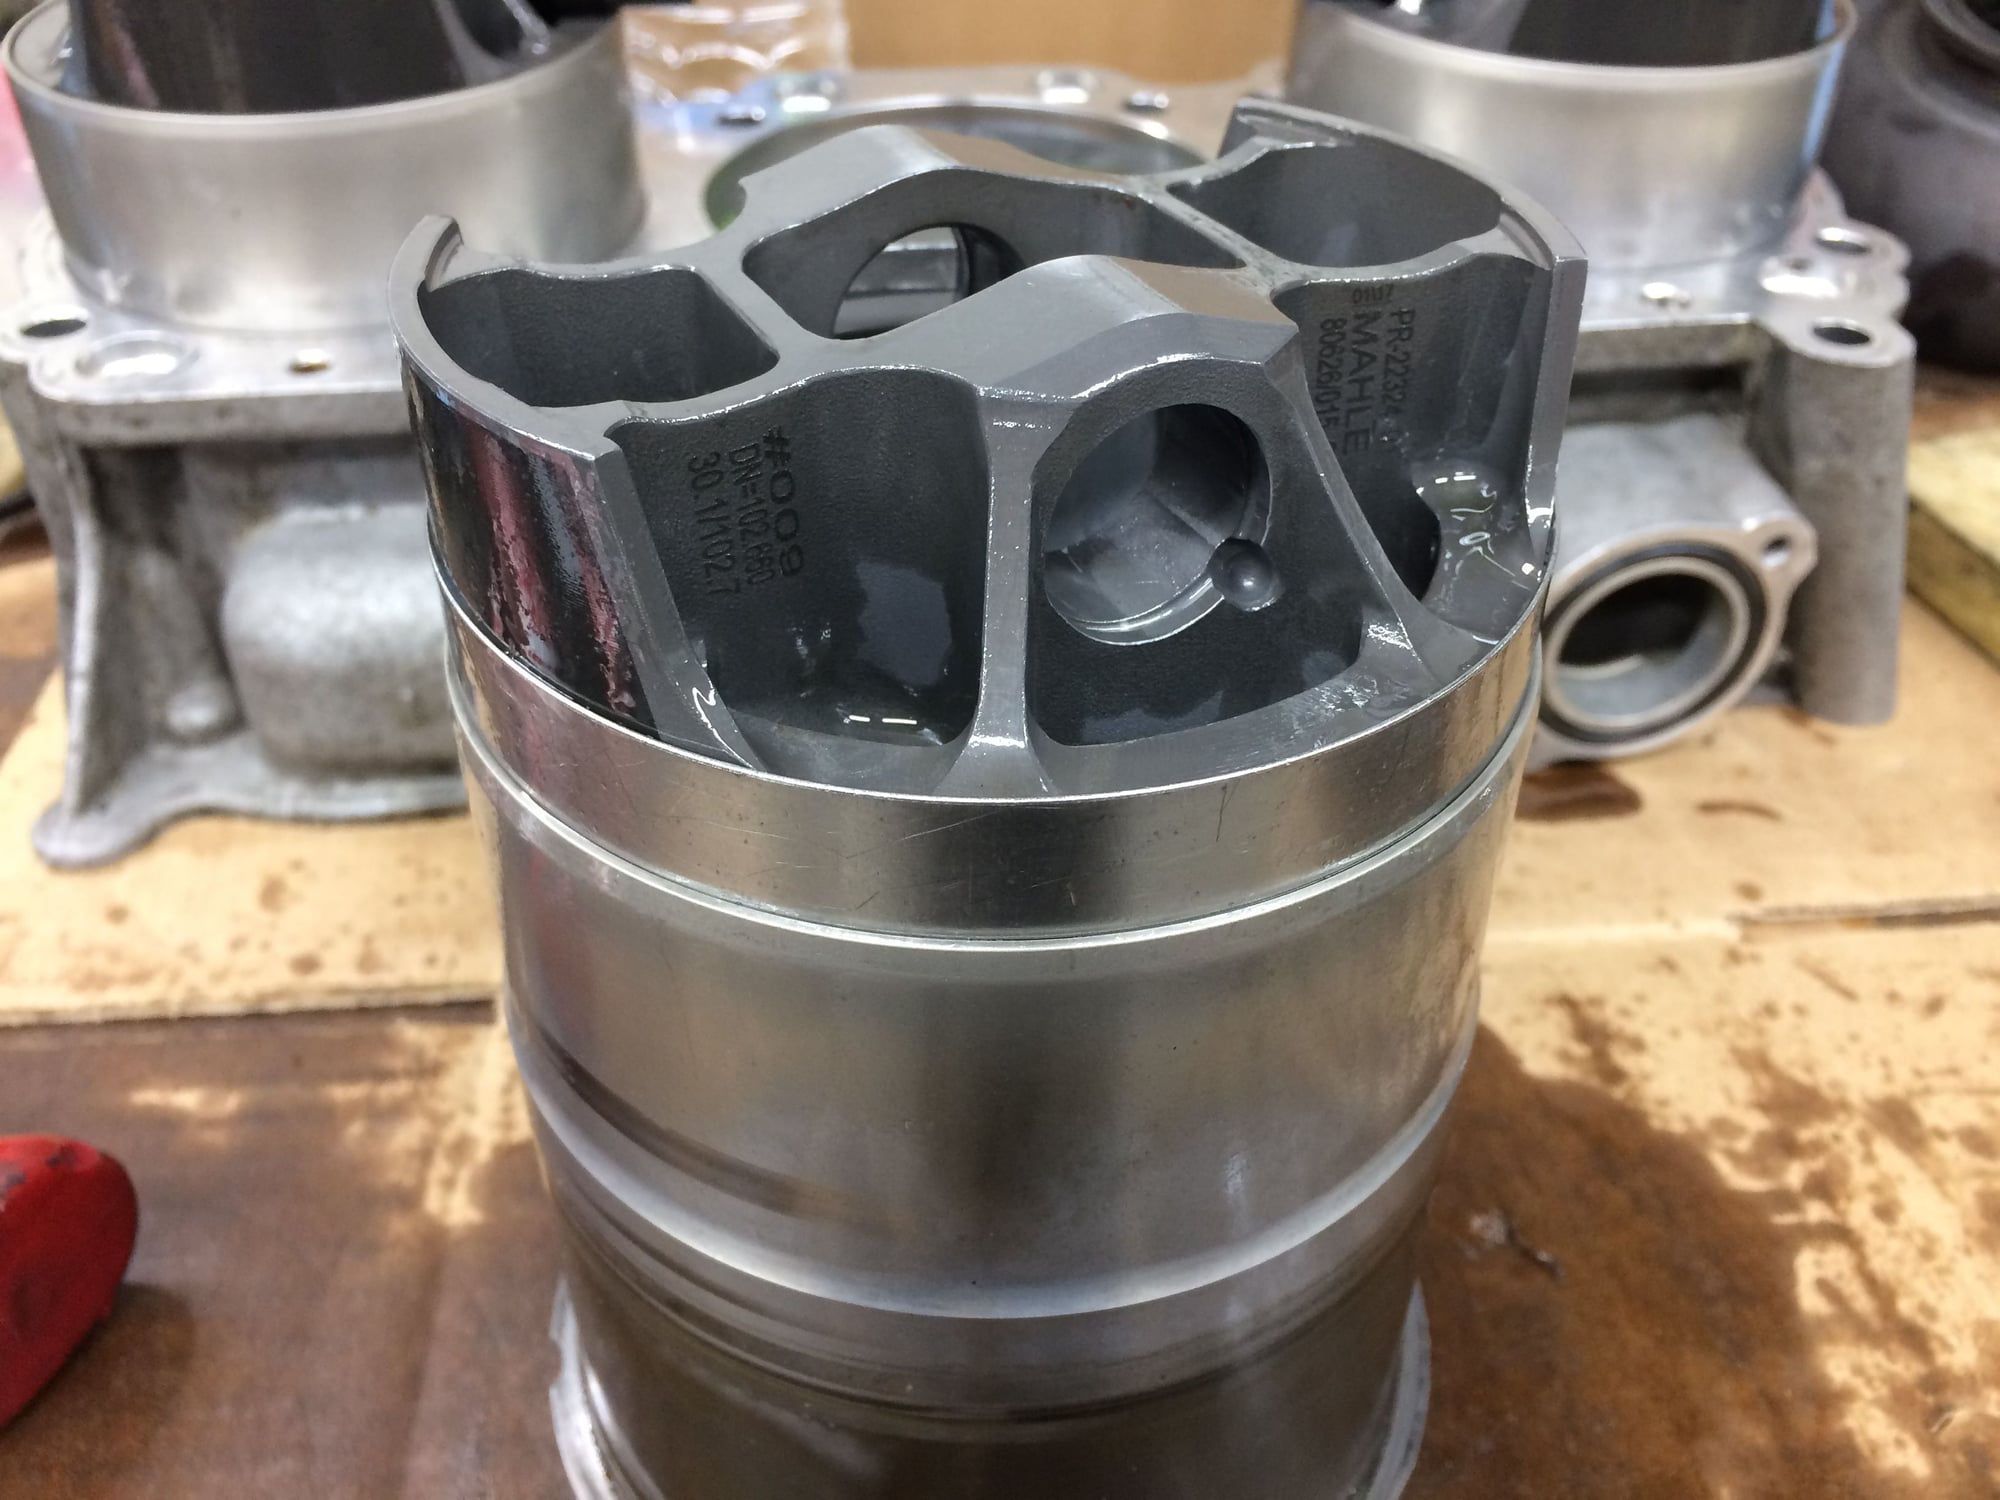
I've got two problems to sort out with the Mahle motorsport pistons- 1) Too high compression ratio for pump gas, 2) Different size wrist pins won't fit the factory Ti connecting rods.
Problem # 1, we'll need to get back to later.
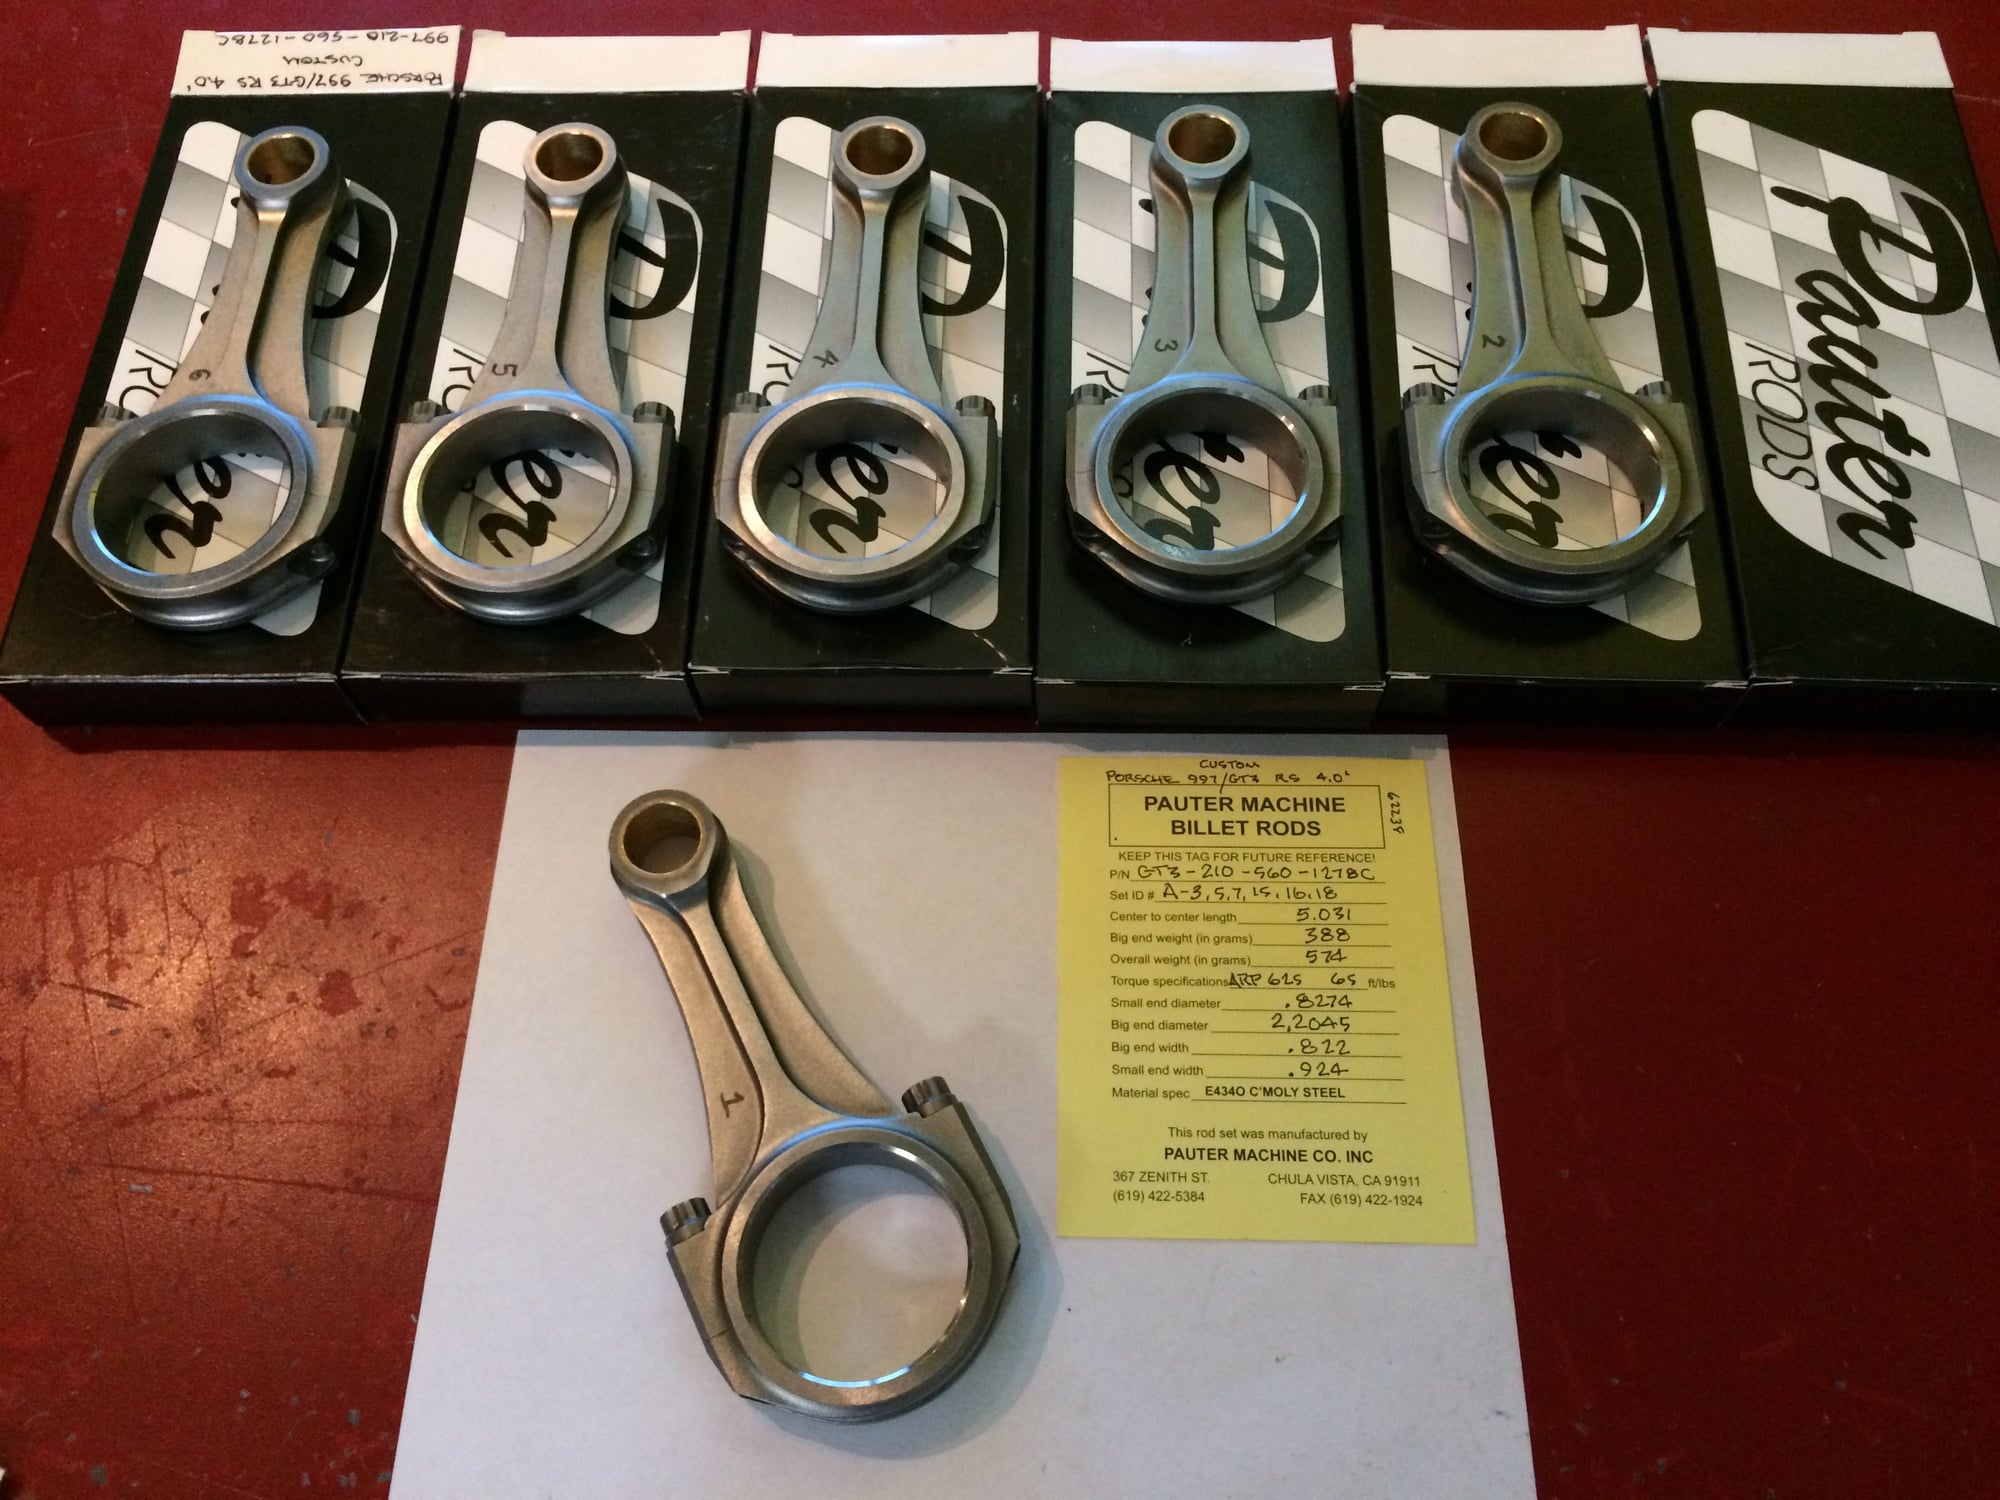
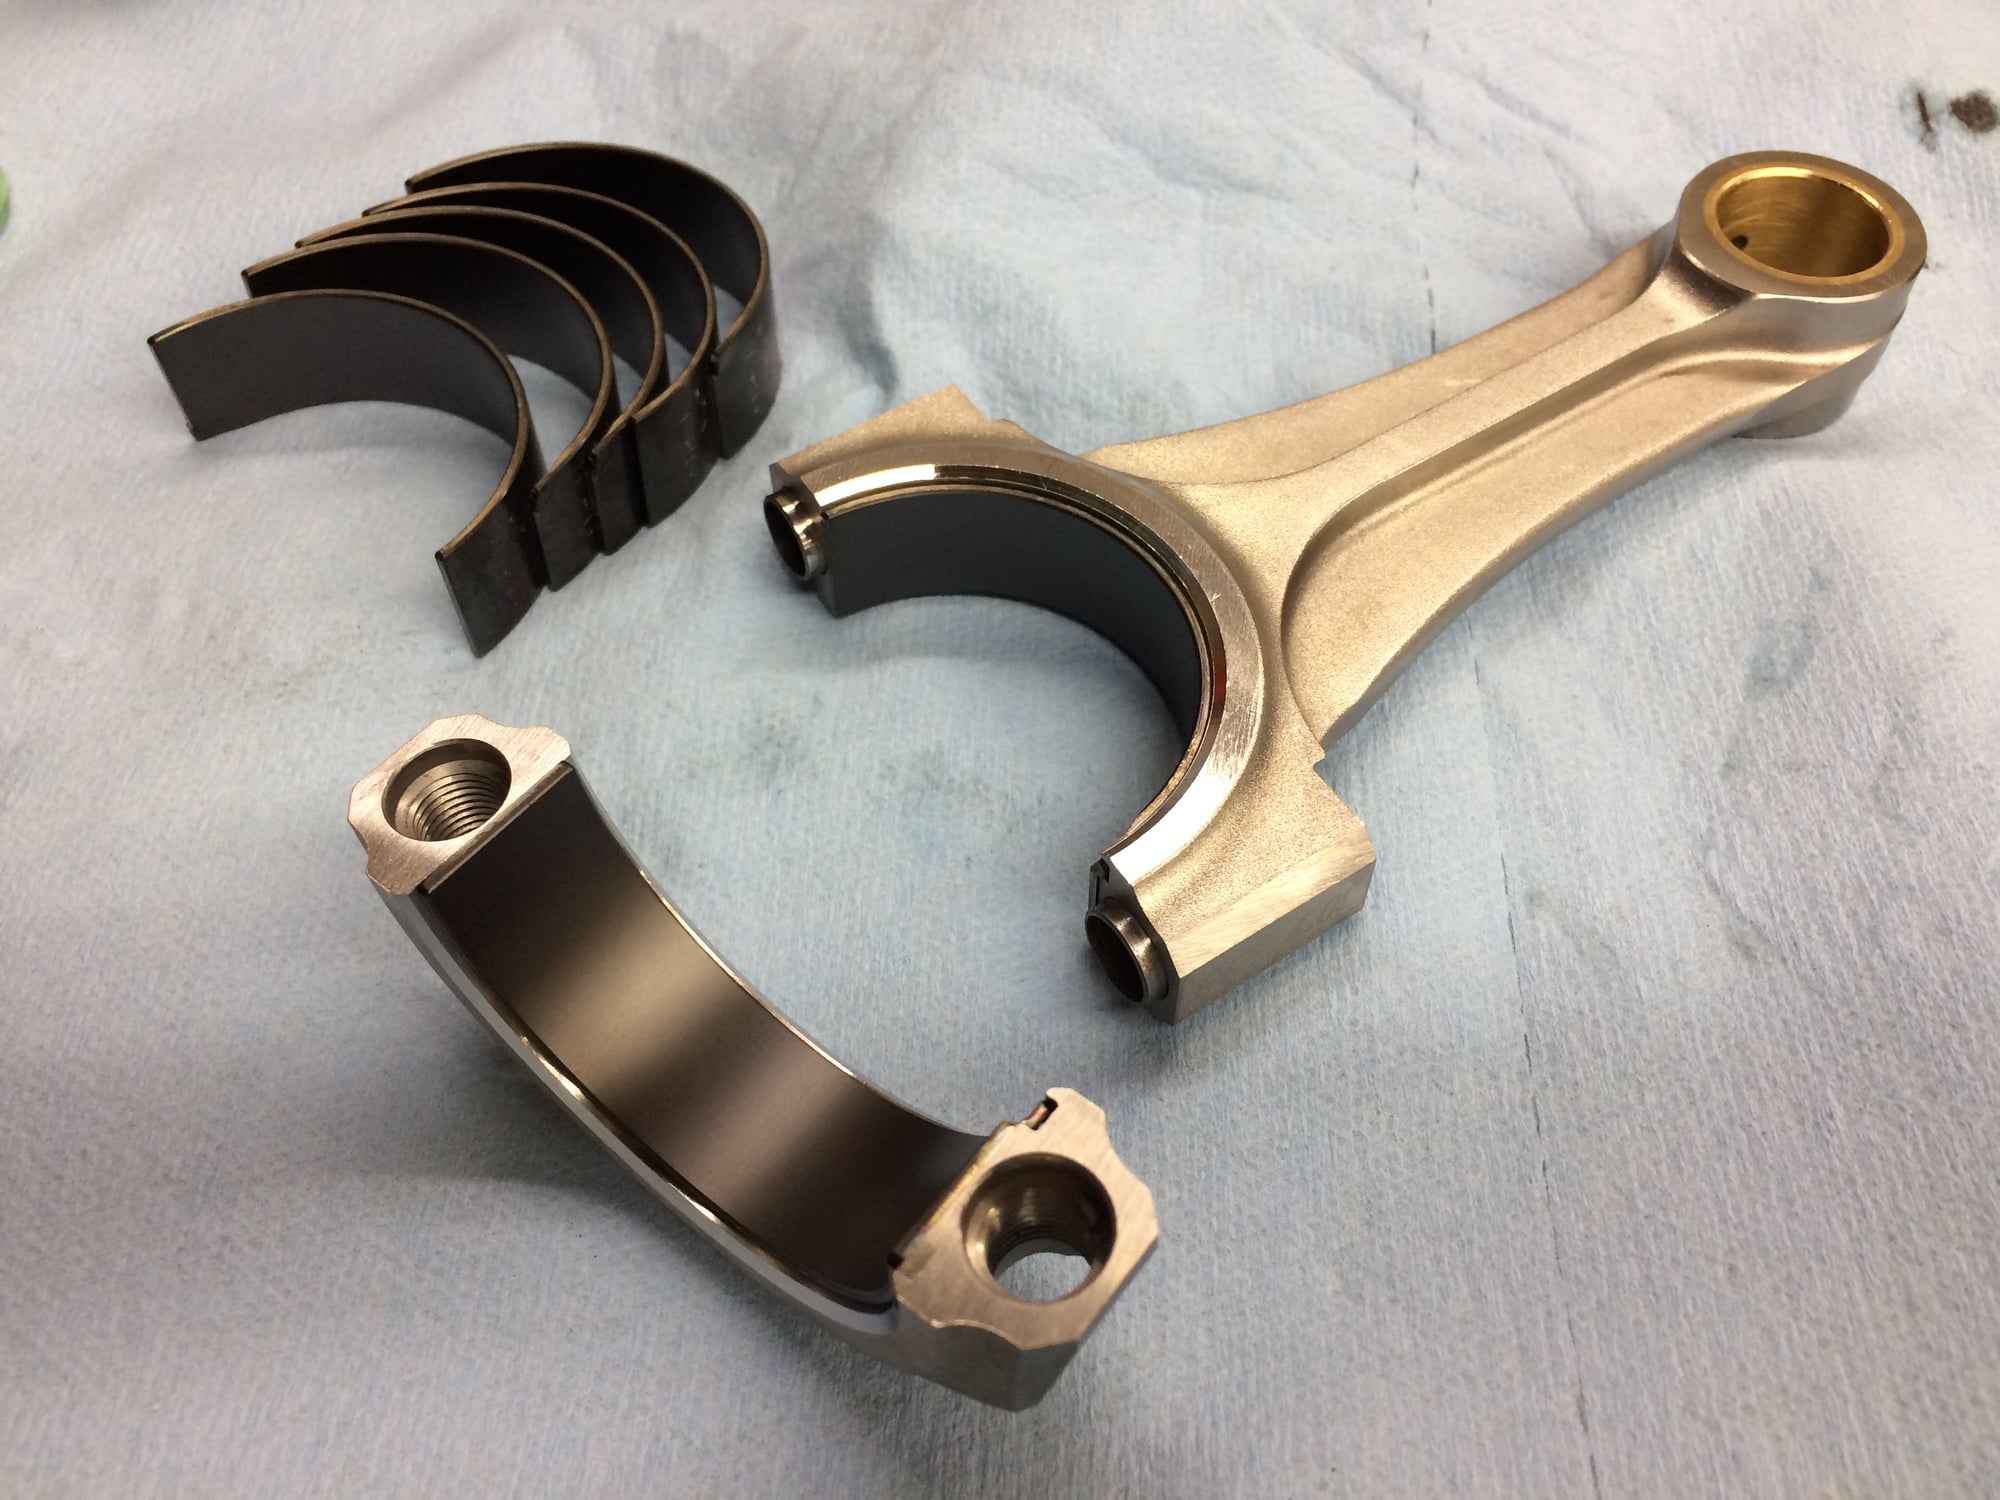
Problem #2, buy a different sets of rods to accompany the motorsport pistons.
These rods aren't elegant and slender like the Ti rods but they sure do go along with the motorport pistons like a pretty girl and her BFF that she'd bring on a date as a wingwoman.
Holding them in hand back to back with the Ti rods the first thought that came to mind was the obnoxious and no-filter type that throws bottles and hits hard...but they'll get the job done.
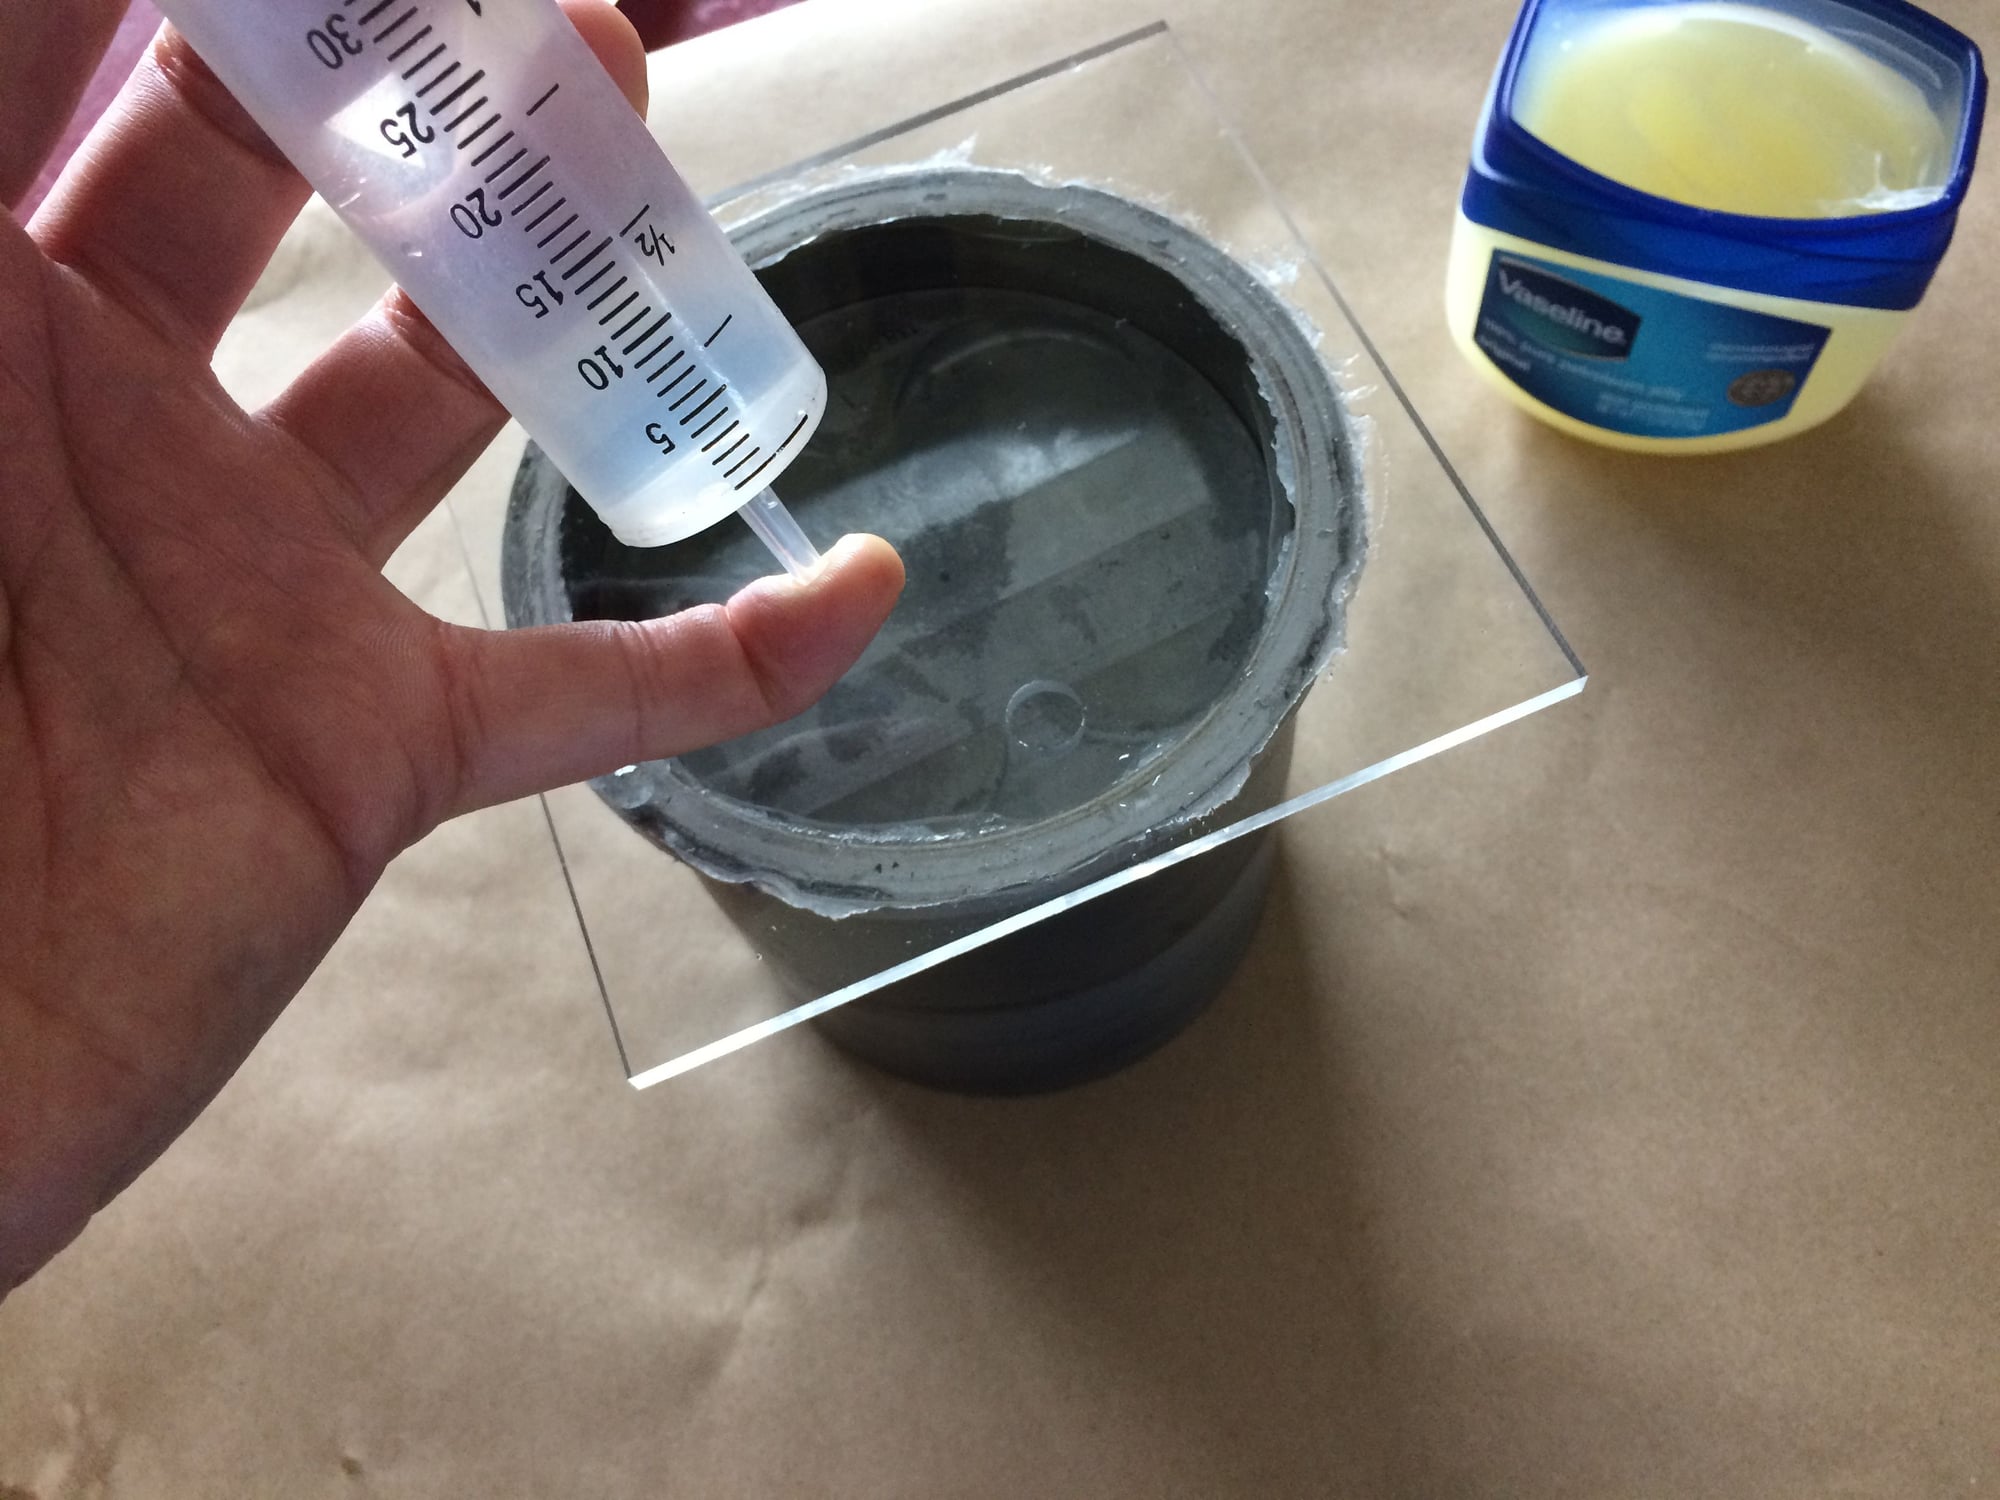
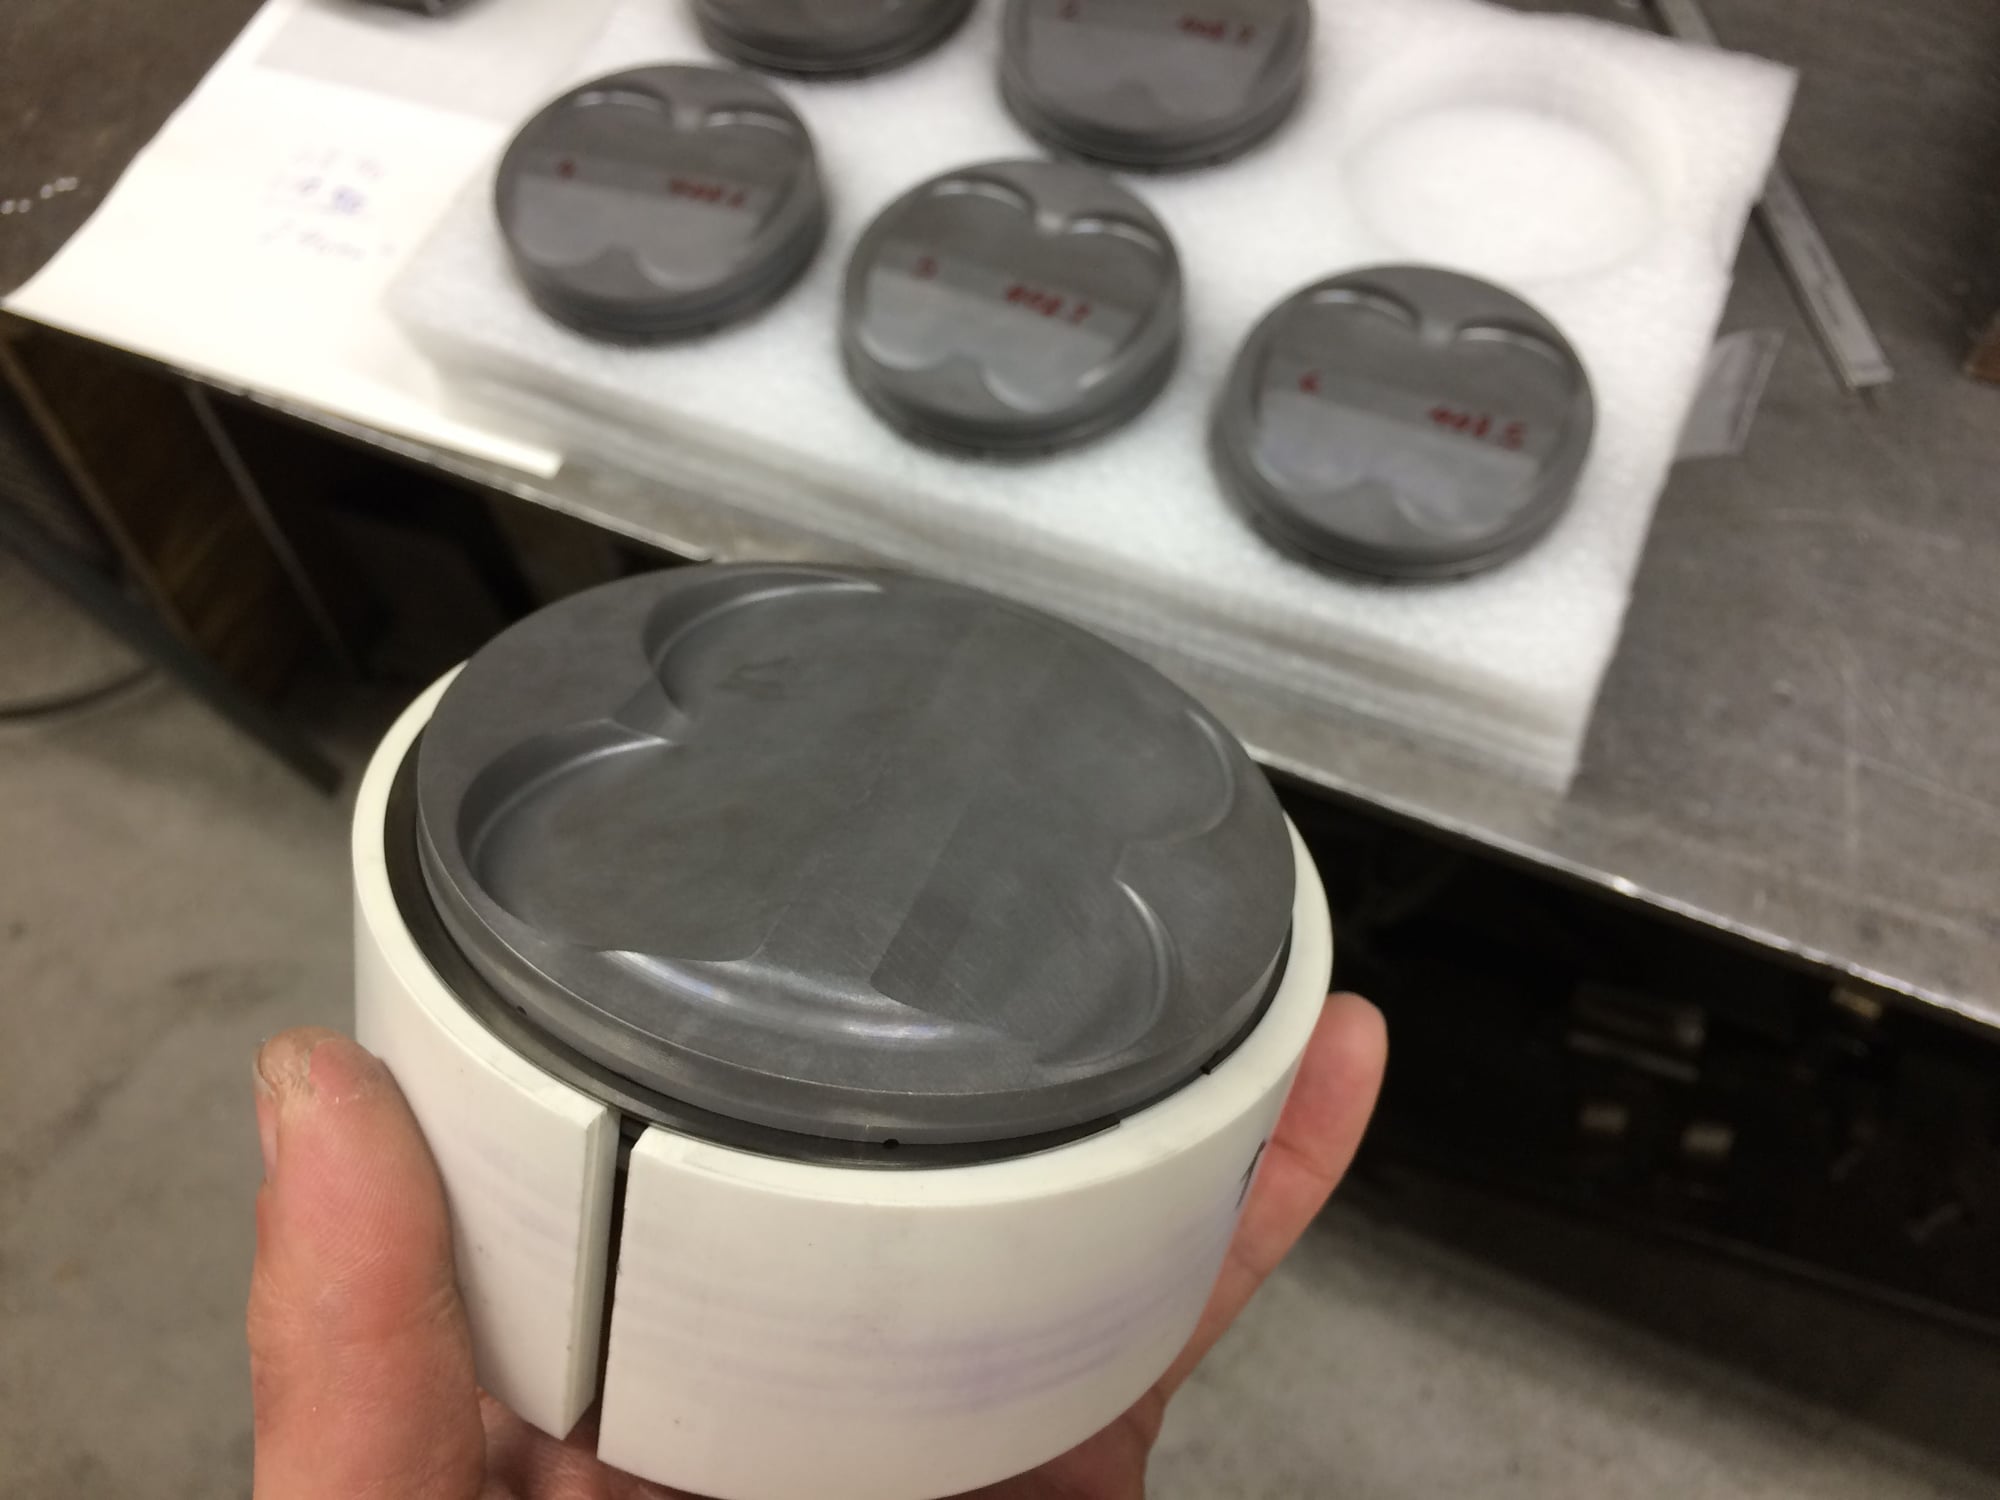
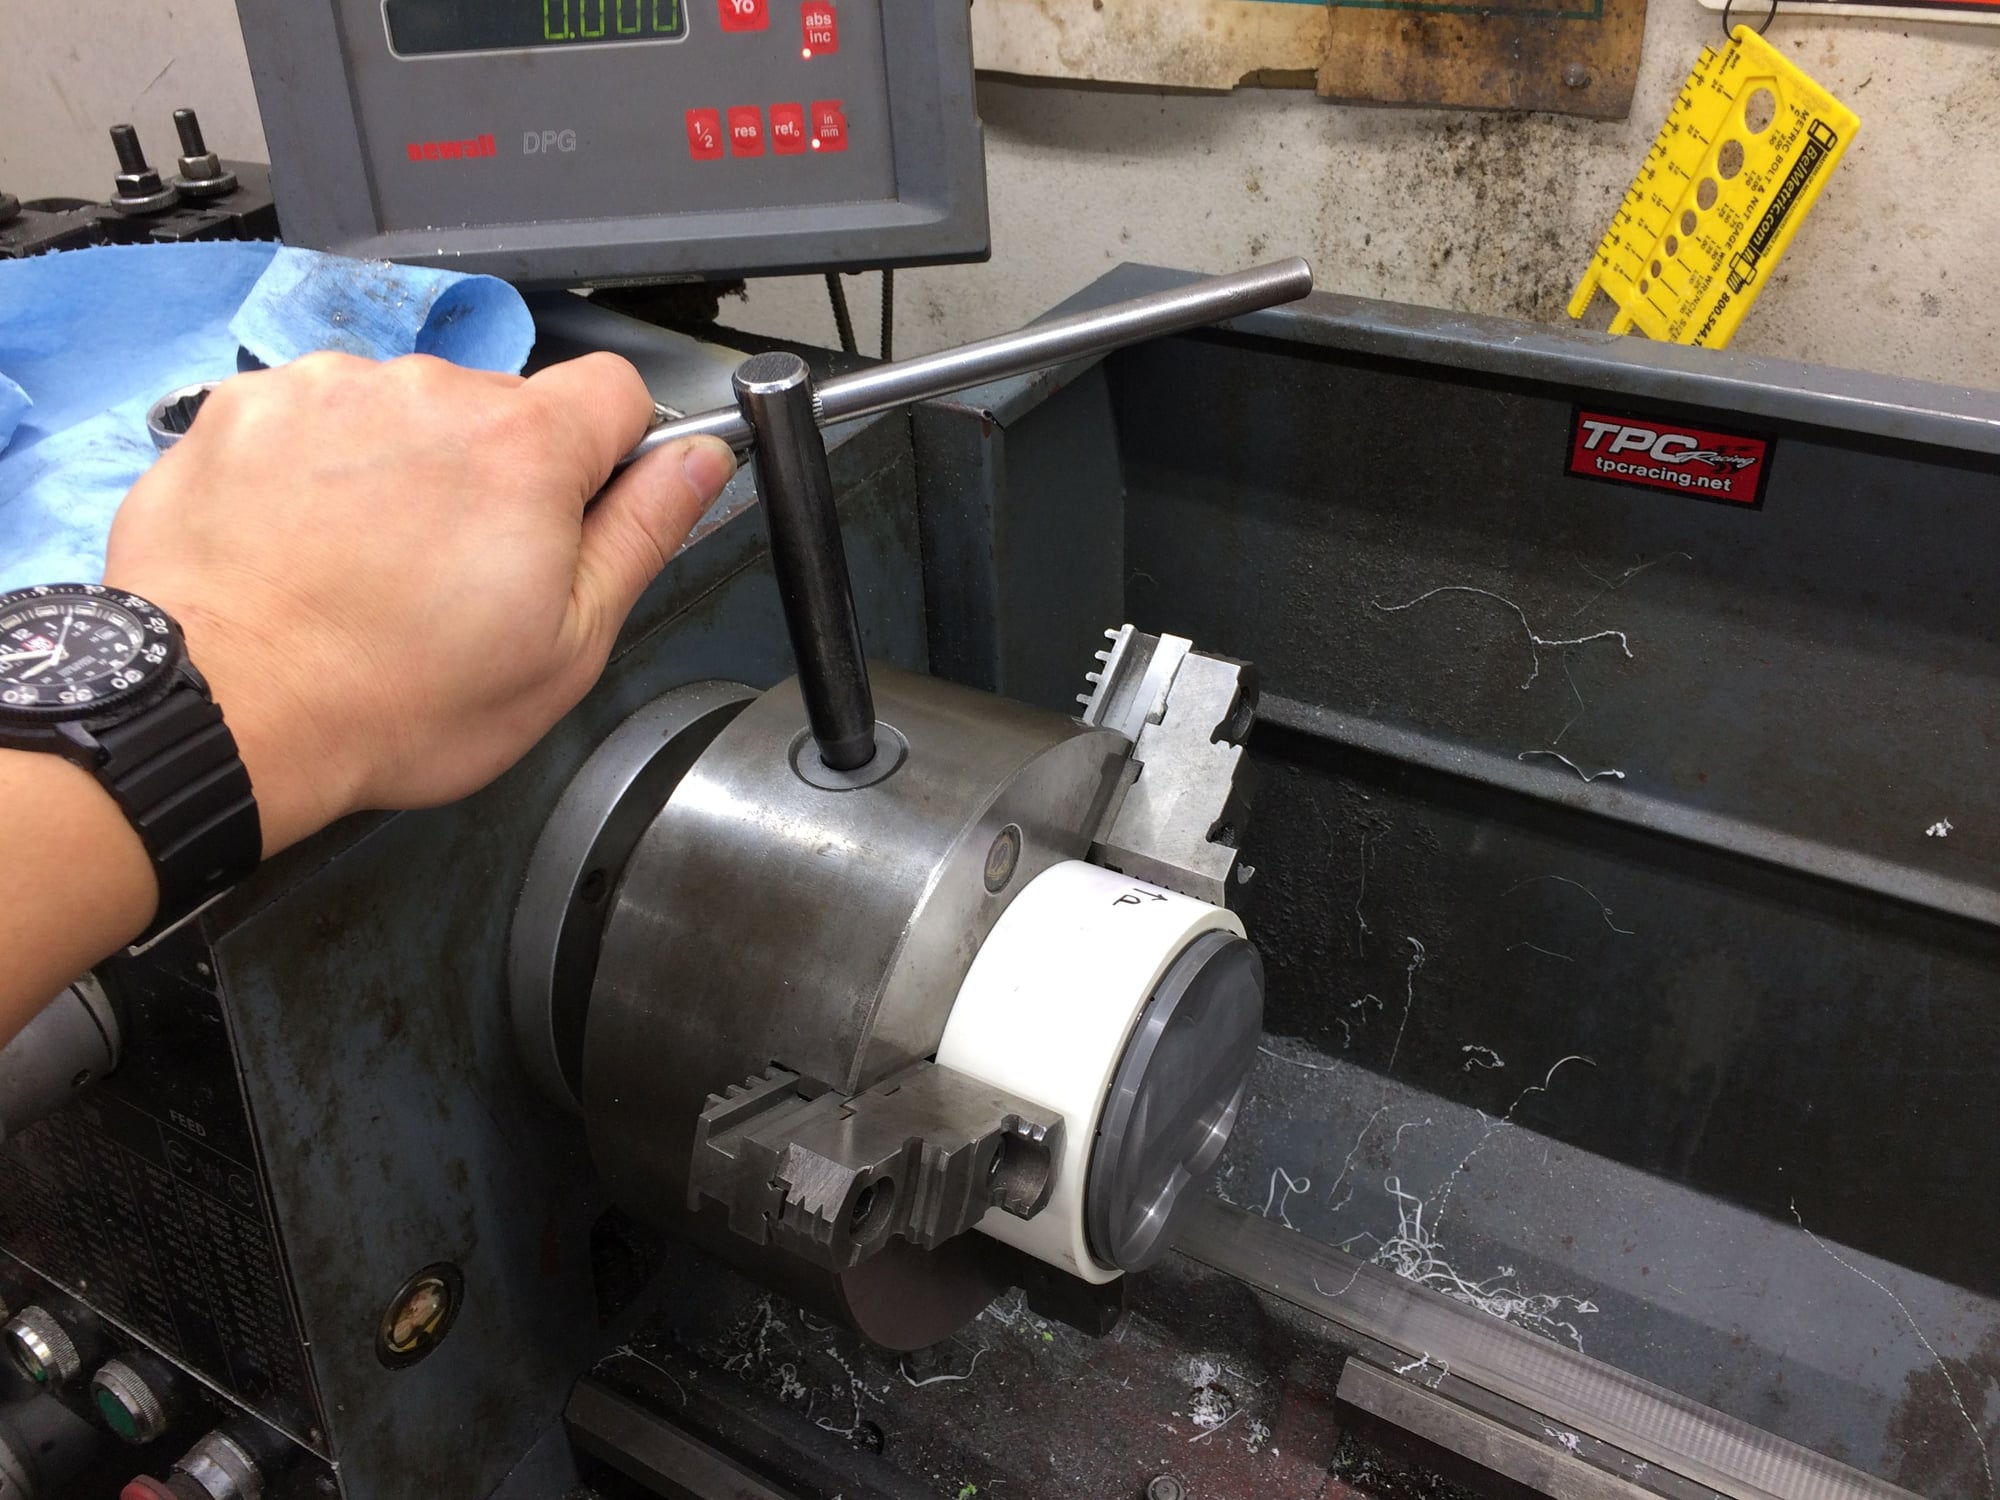
Alright, here's what I'm gonna do, I'm go'in to shave some of the dome off these pistons.
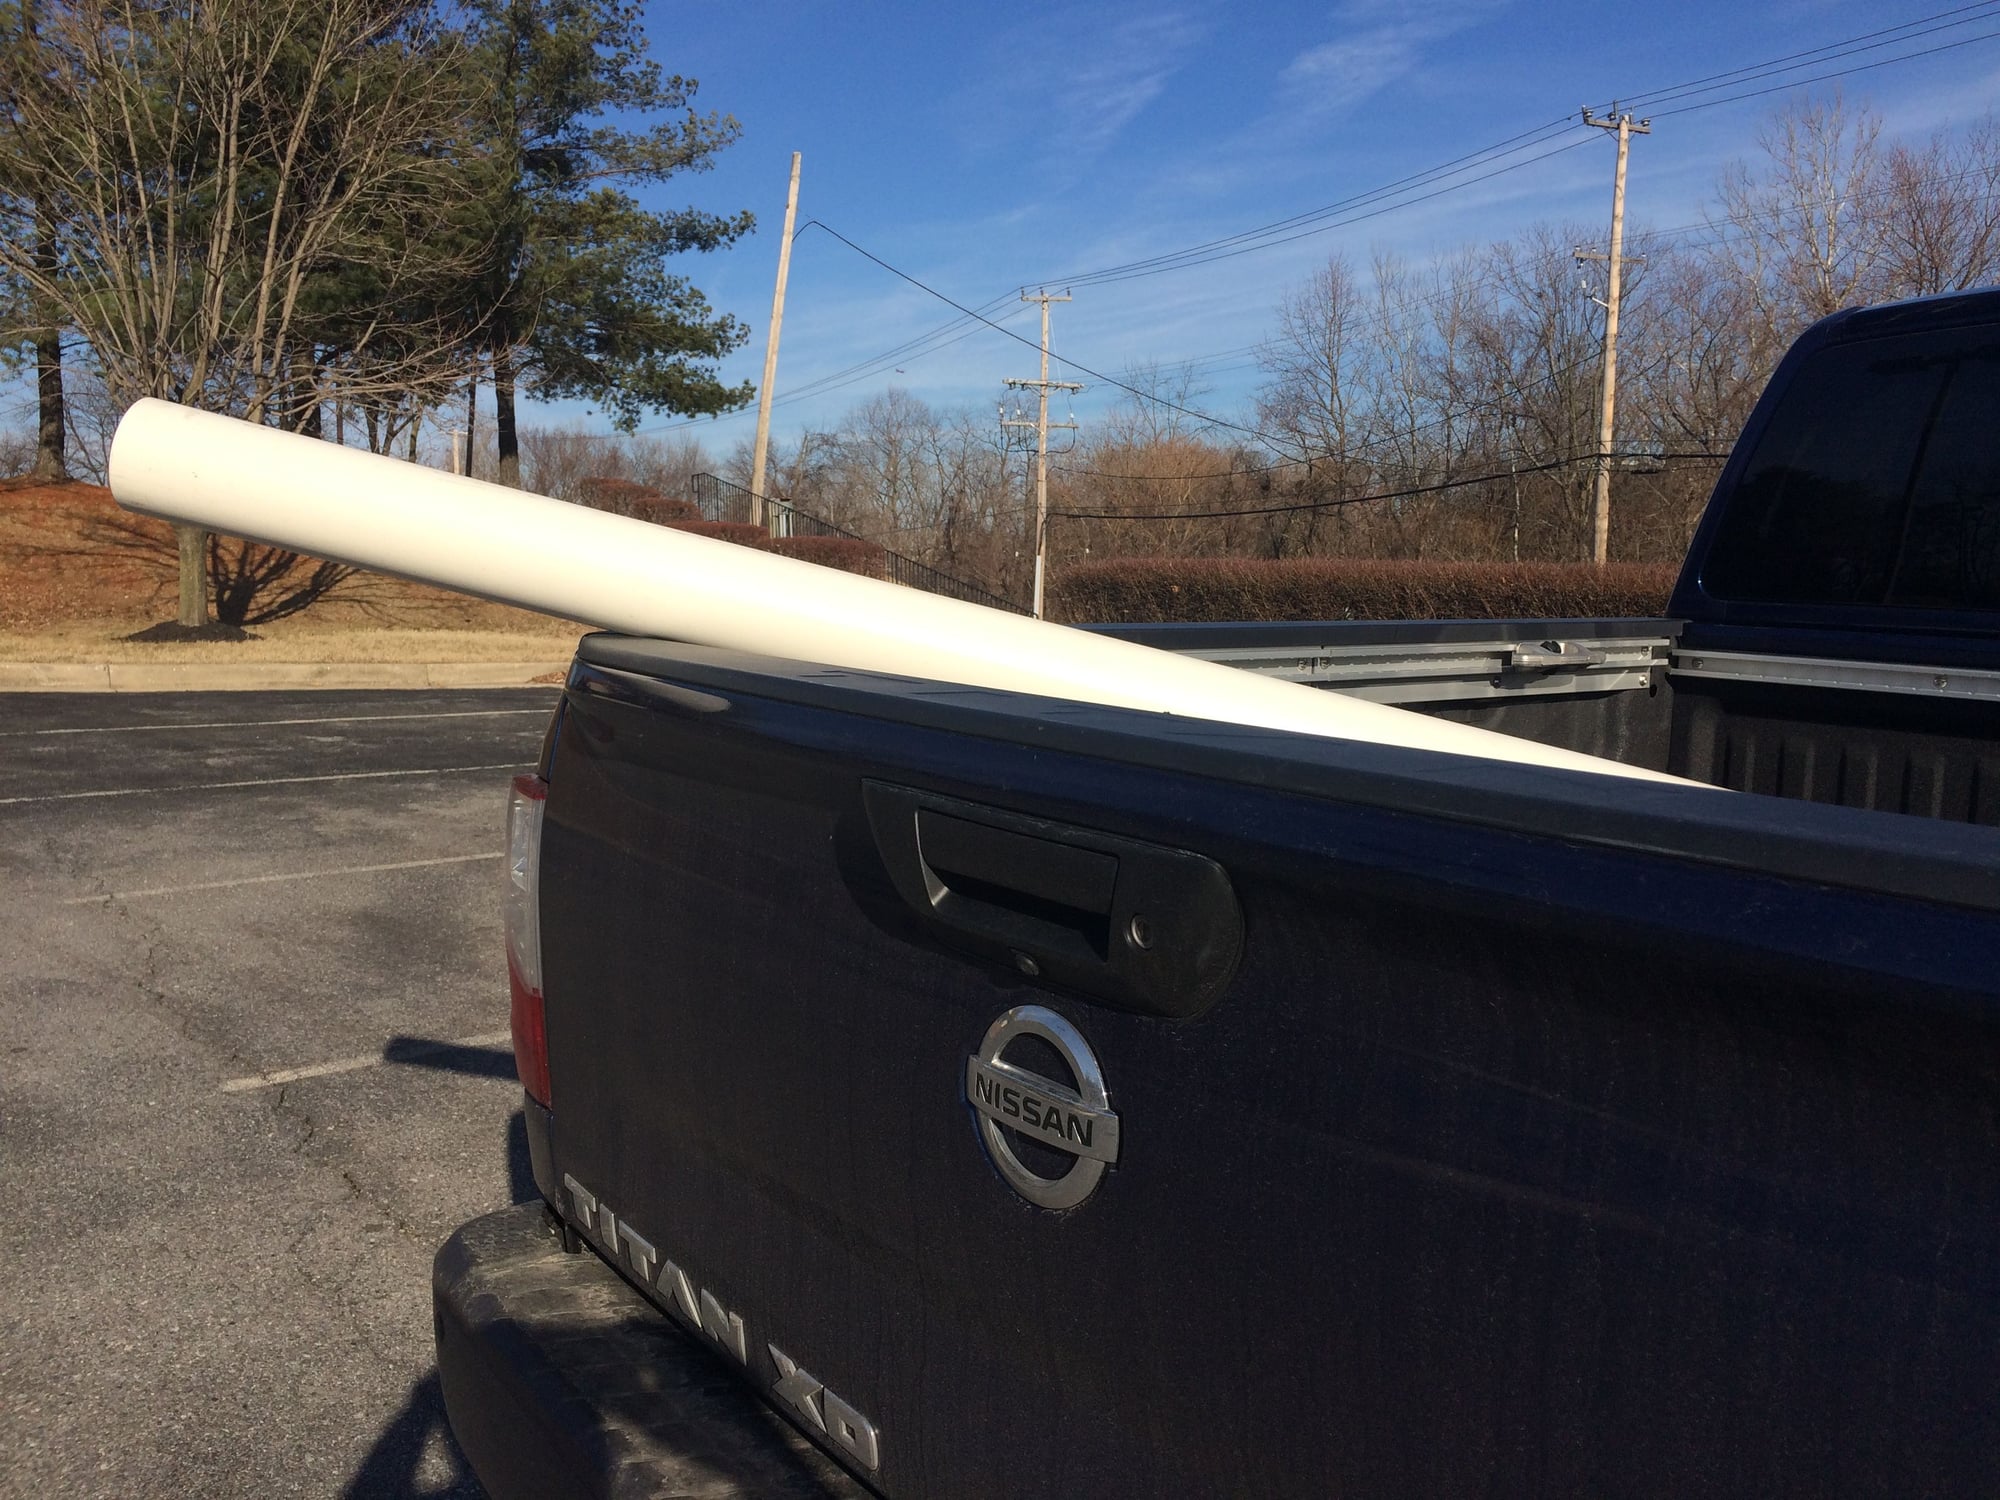
Brilliant idea just popped in my head.First I need a stick of 4" PVC pipe from hardware store. The 4" PVC was only available in 8 feet section. Love my truck.
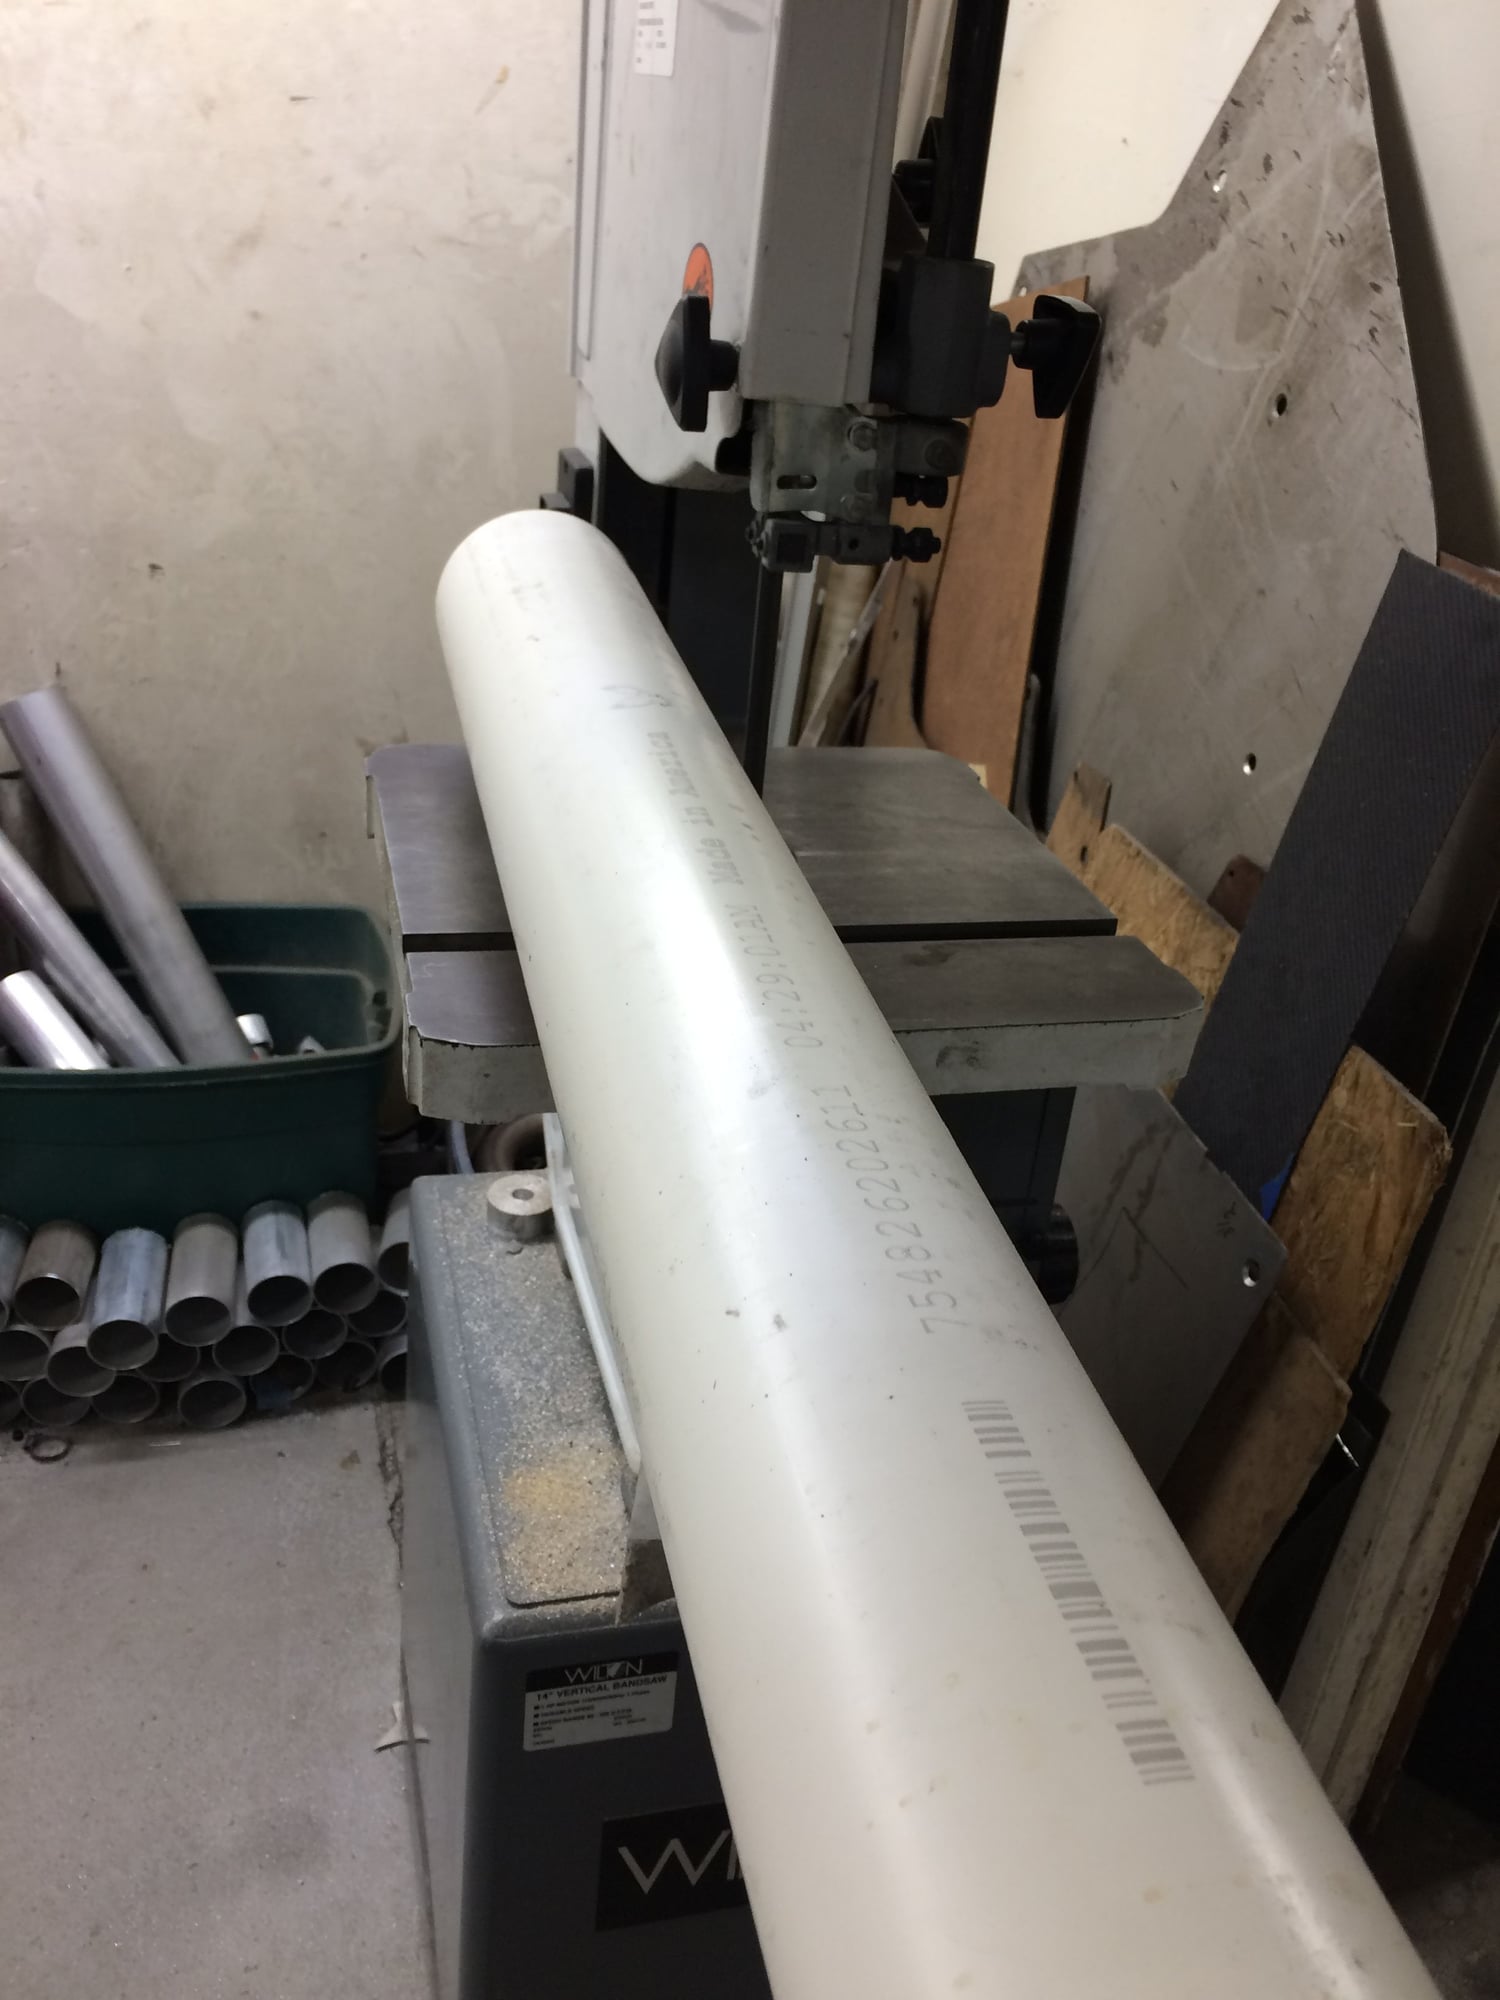
Cutting it down to a more manageable size to work with.
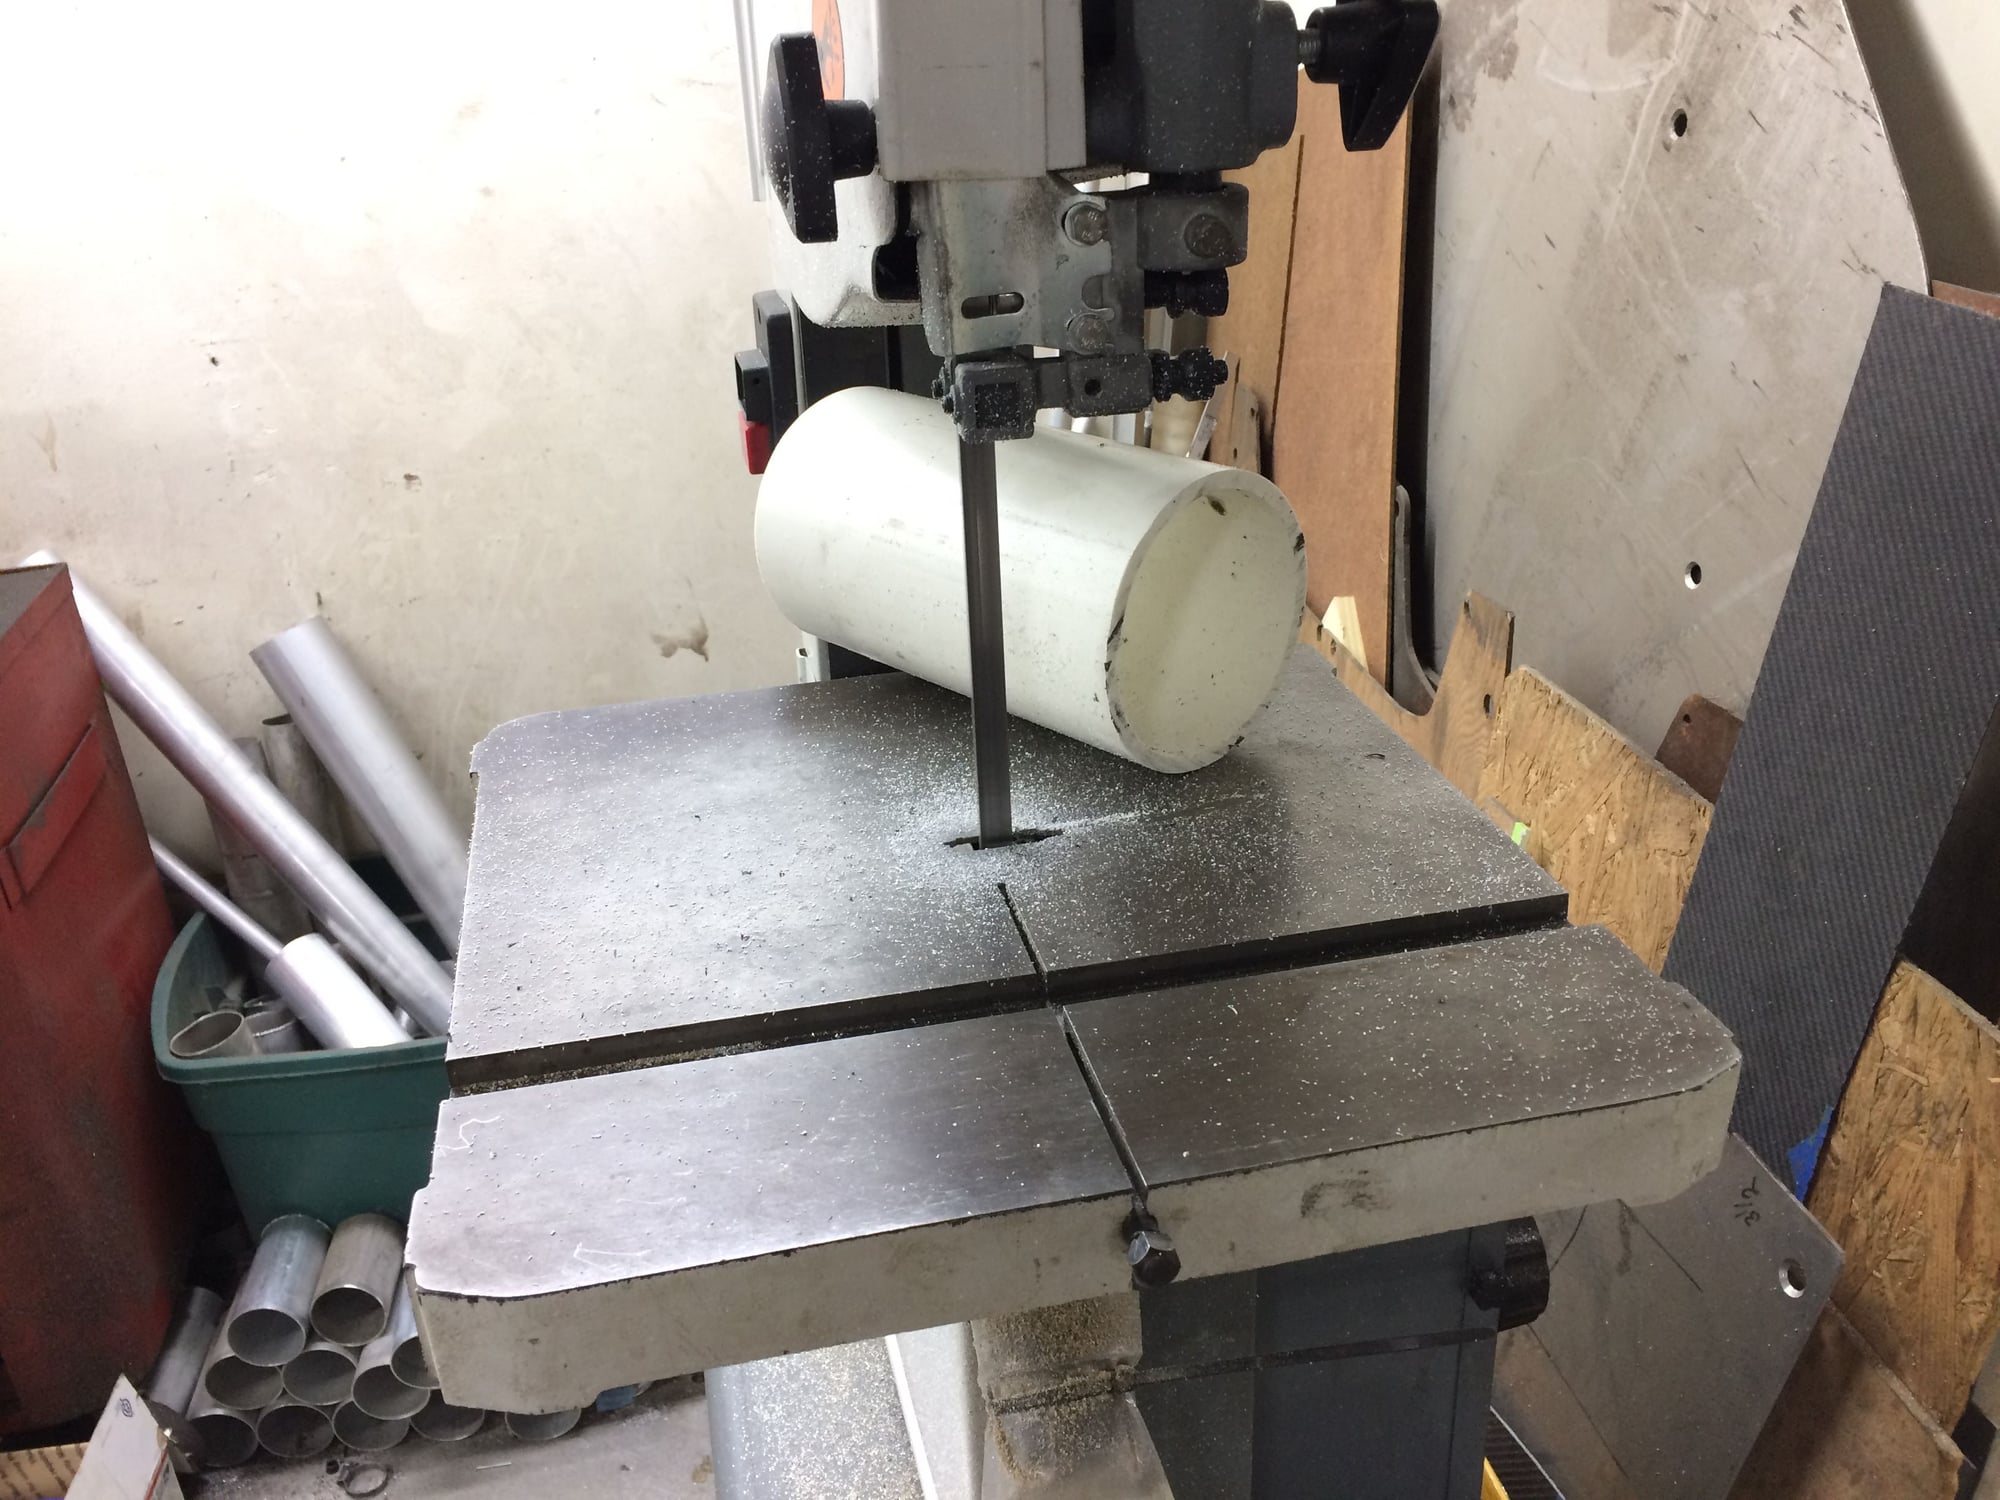
Now I can square off the ends to make a sleeve. And we have youtube video!
Now that the parts situation is under control, but boy I am tired from all these 2am nights after full day of work, but the love of cars keeps me going...and strong coffee..and the 24-hour dinner near my house when I often get so engulf in my build that I ignore hunger. So far there were two times I keep working until 5am then went home to shower and then sleep for an hour or two then come back to the shop to work my day time job. For a period of time I felt like I was getting nothing accomplished since I had to build the bottom end twice and spent a lot time thinking, worrying, machining, and cc'ing pistons. I am glad to report that that period has passed. From here on one task at a time, things are getting done.
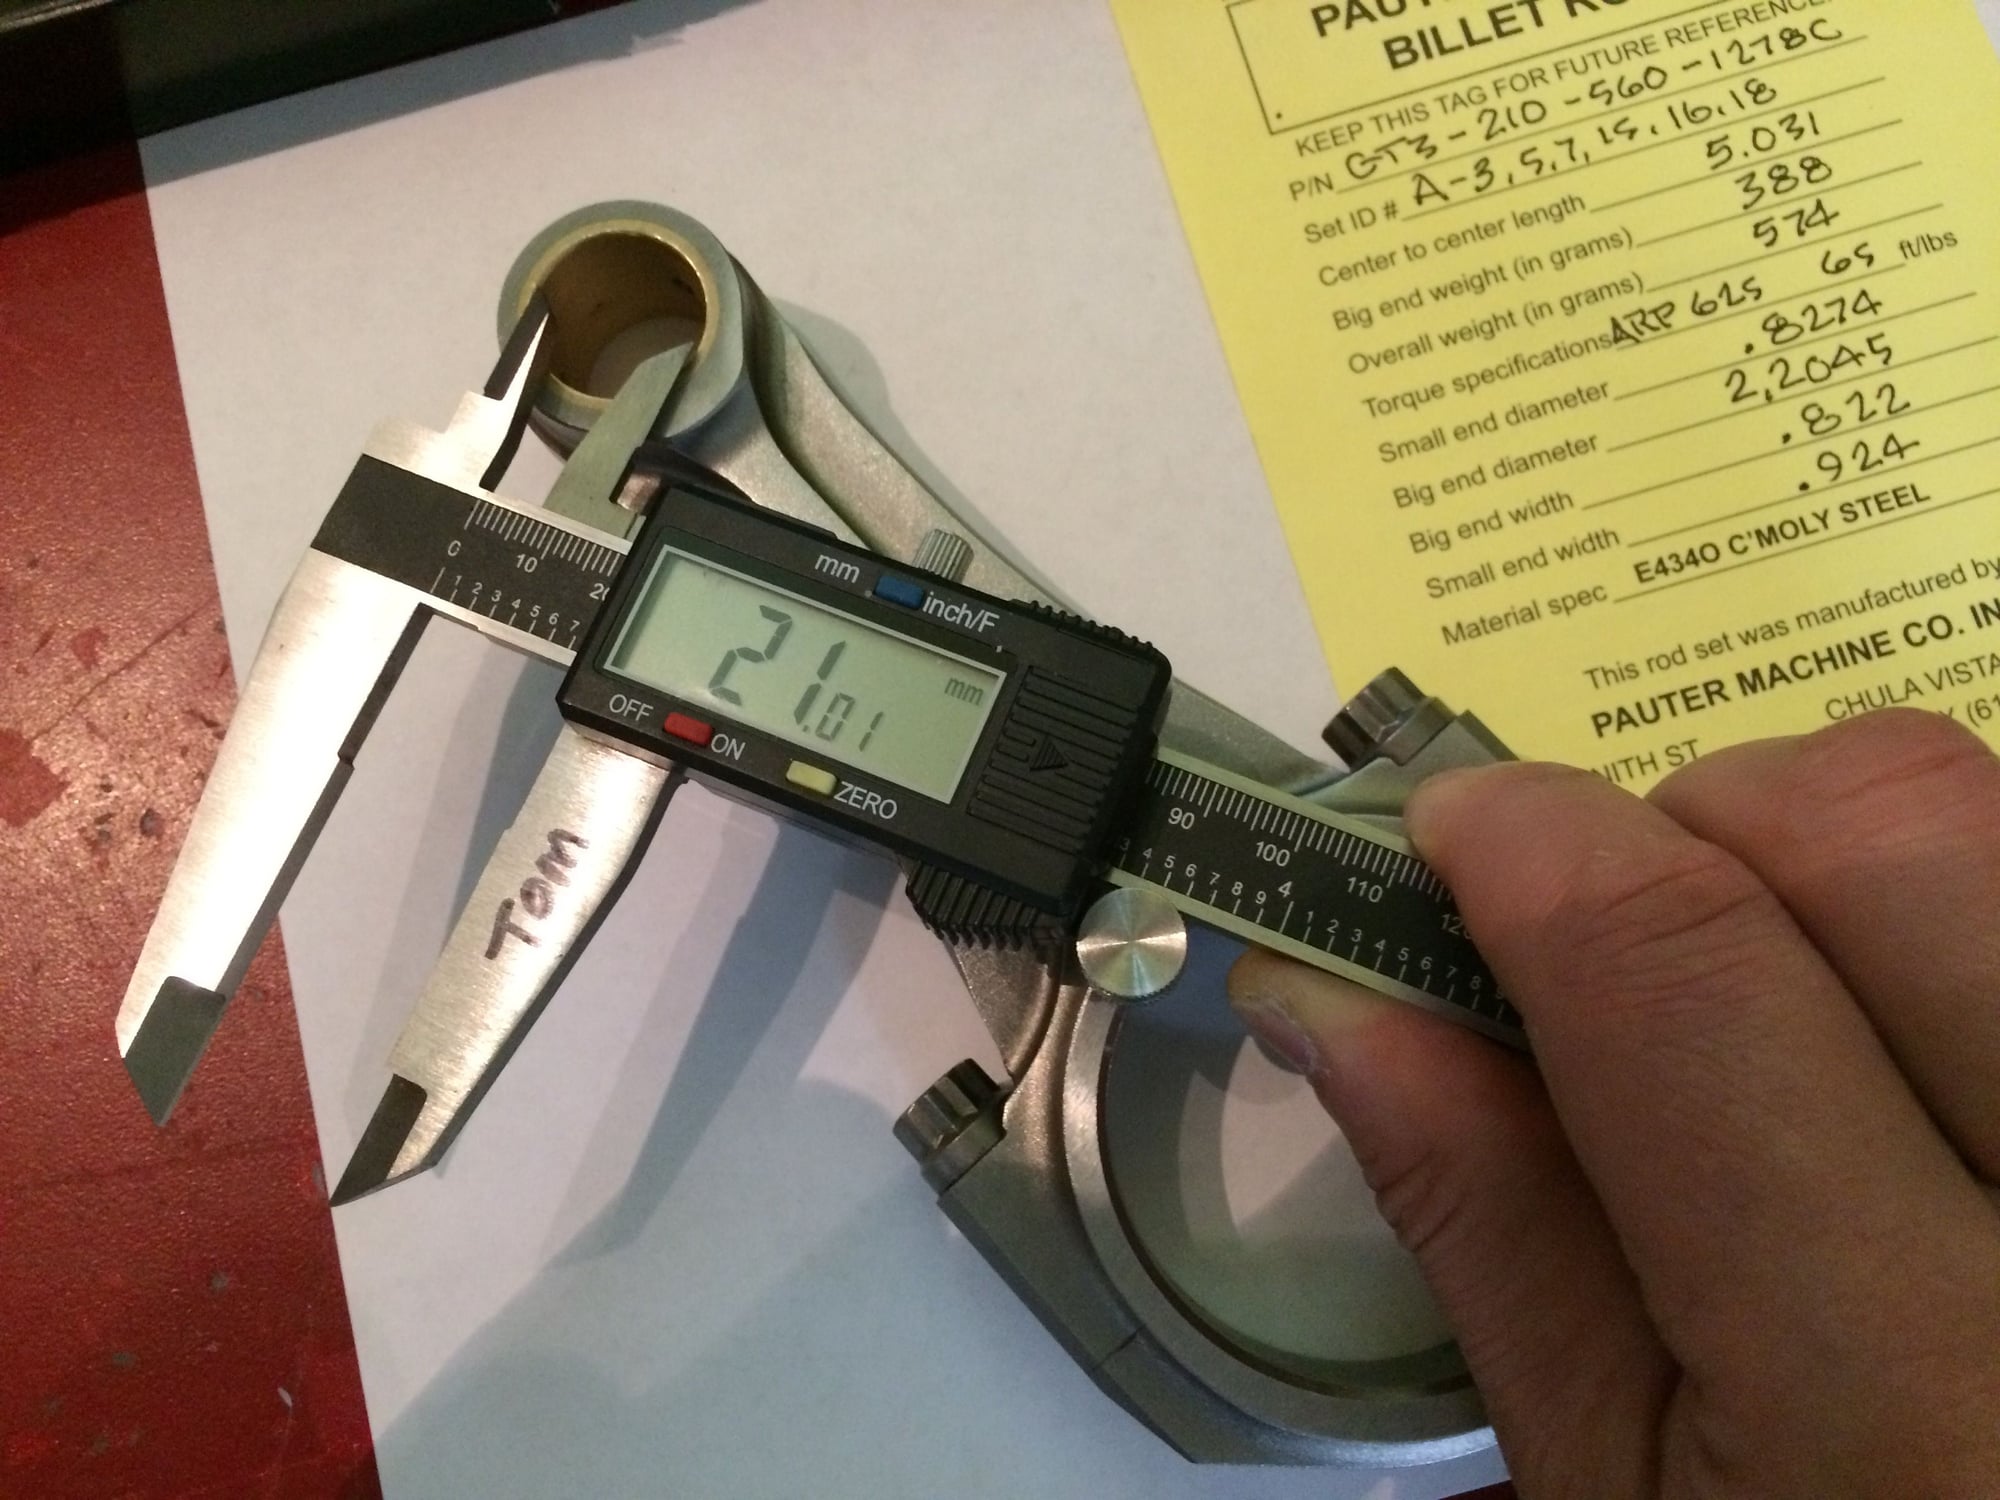
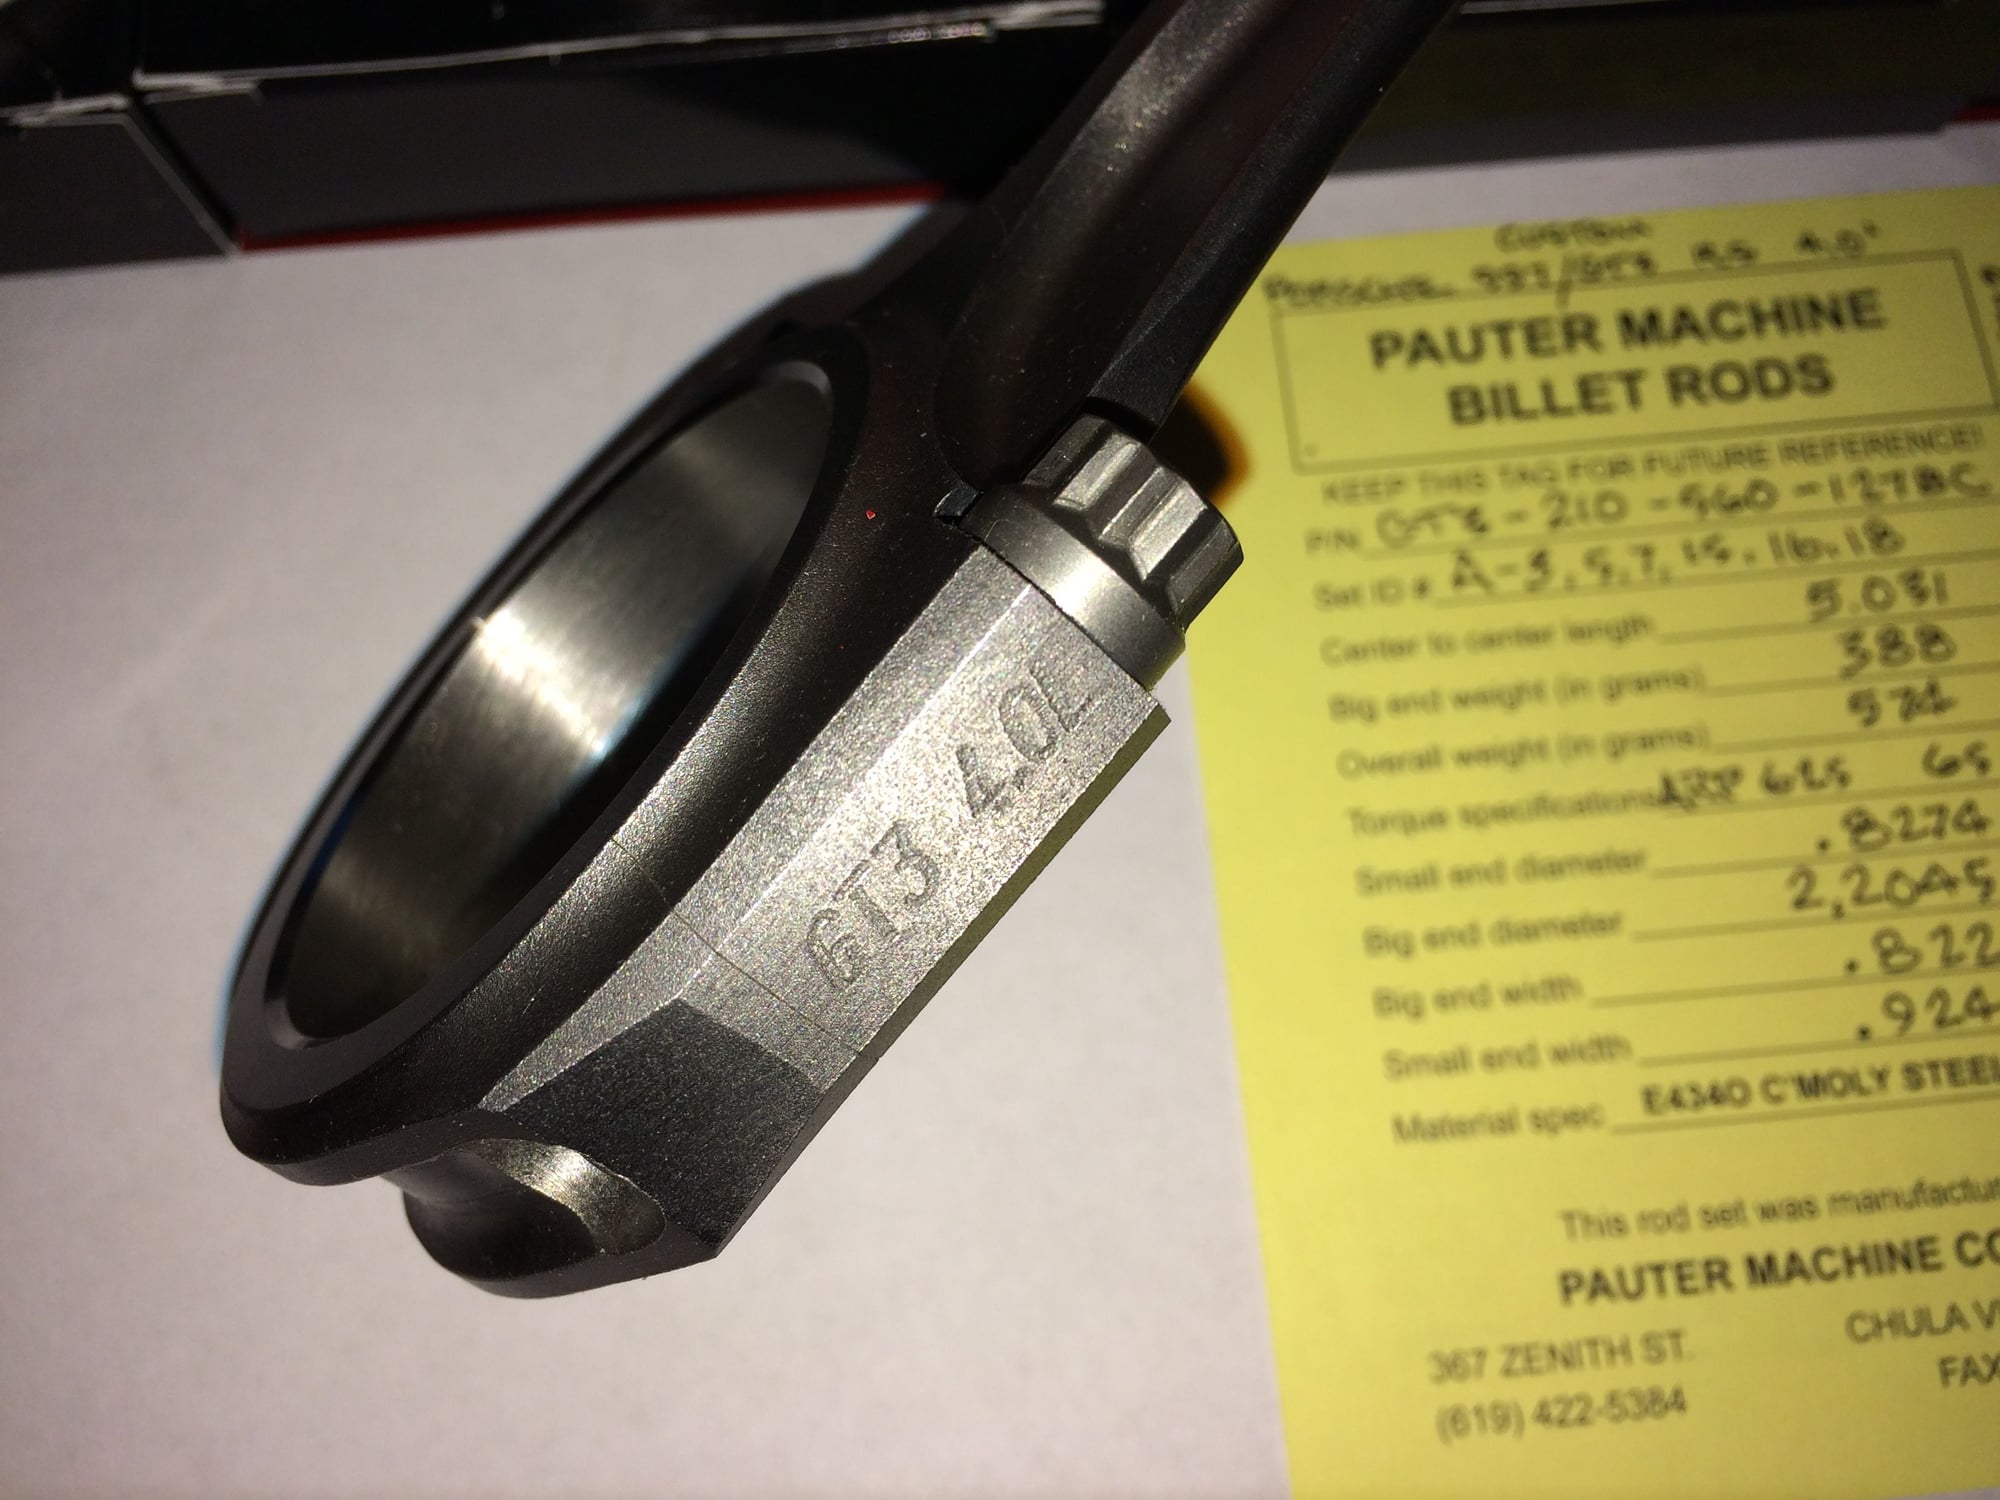
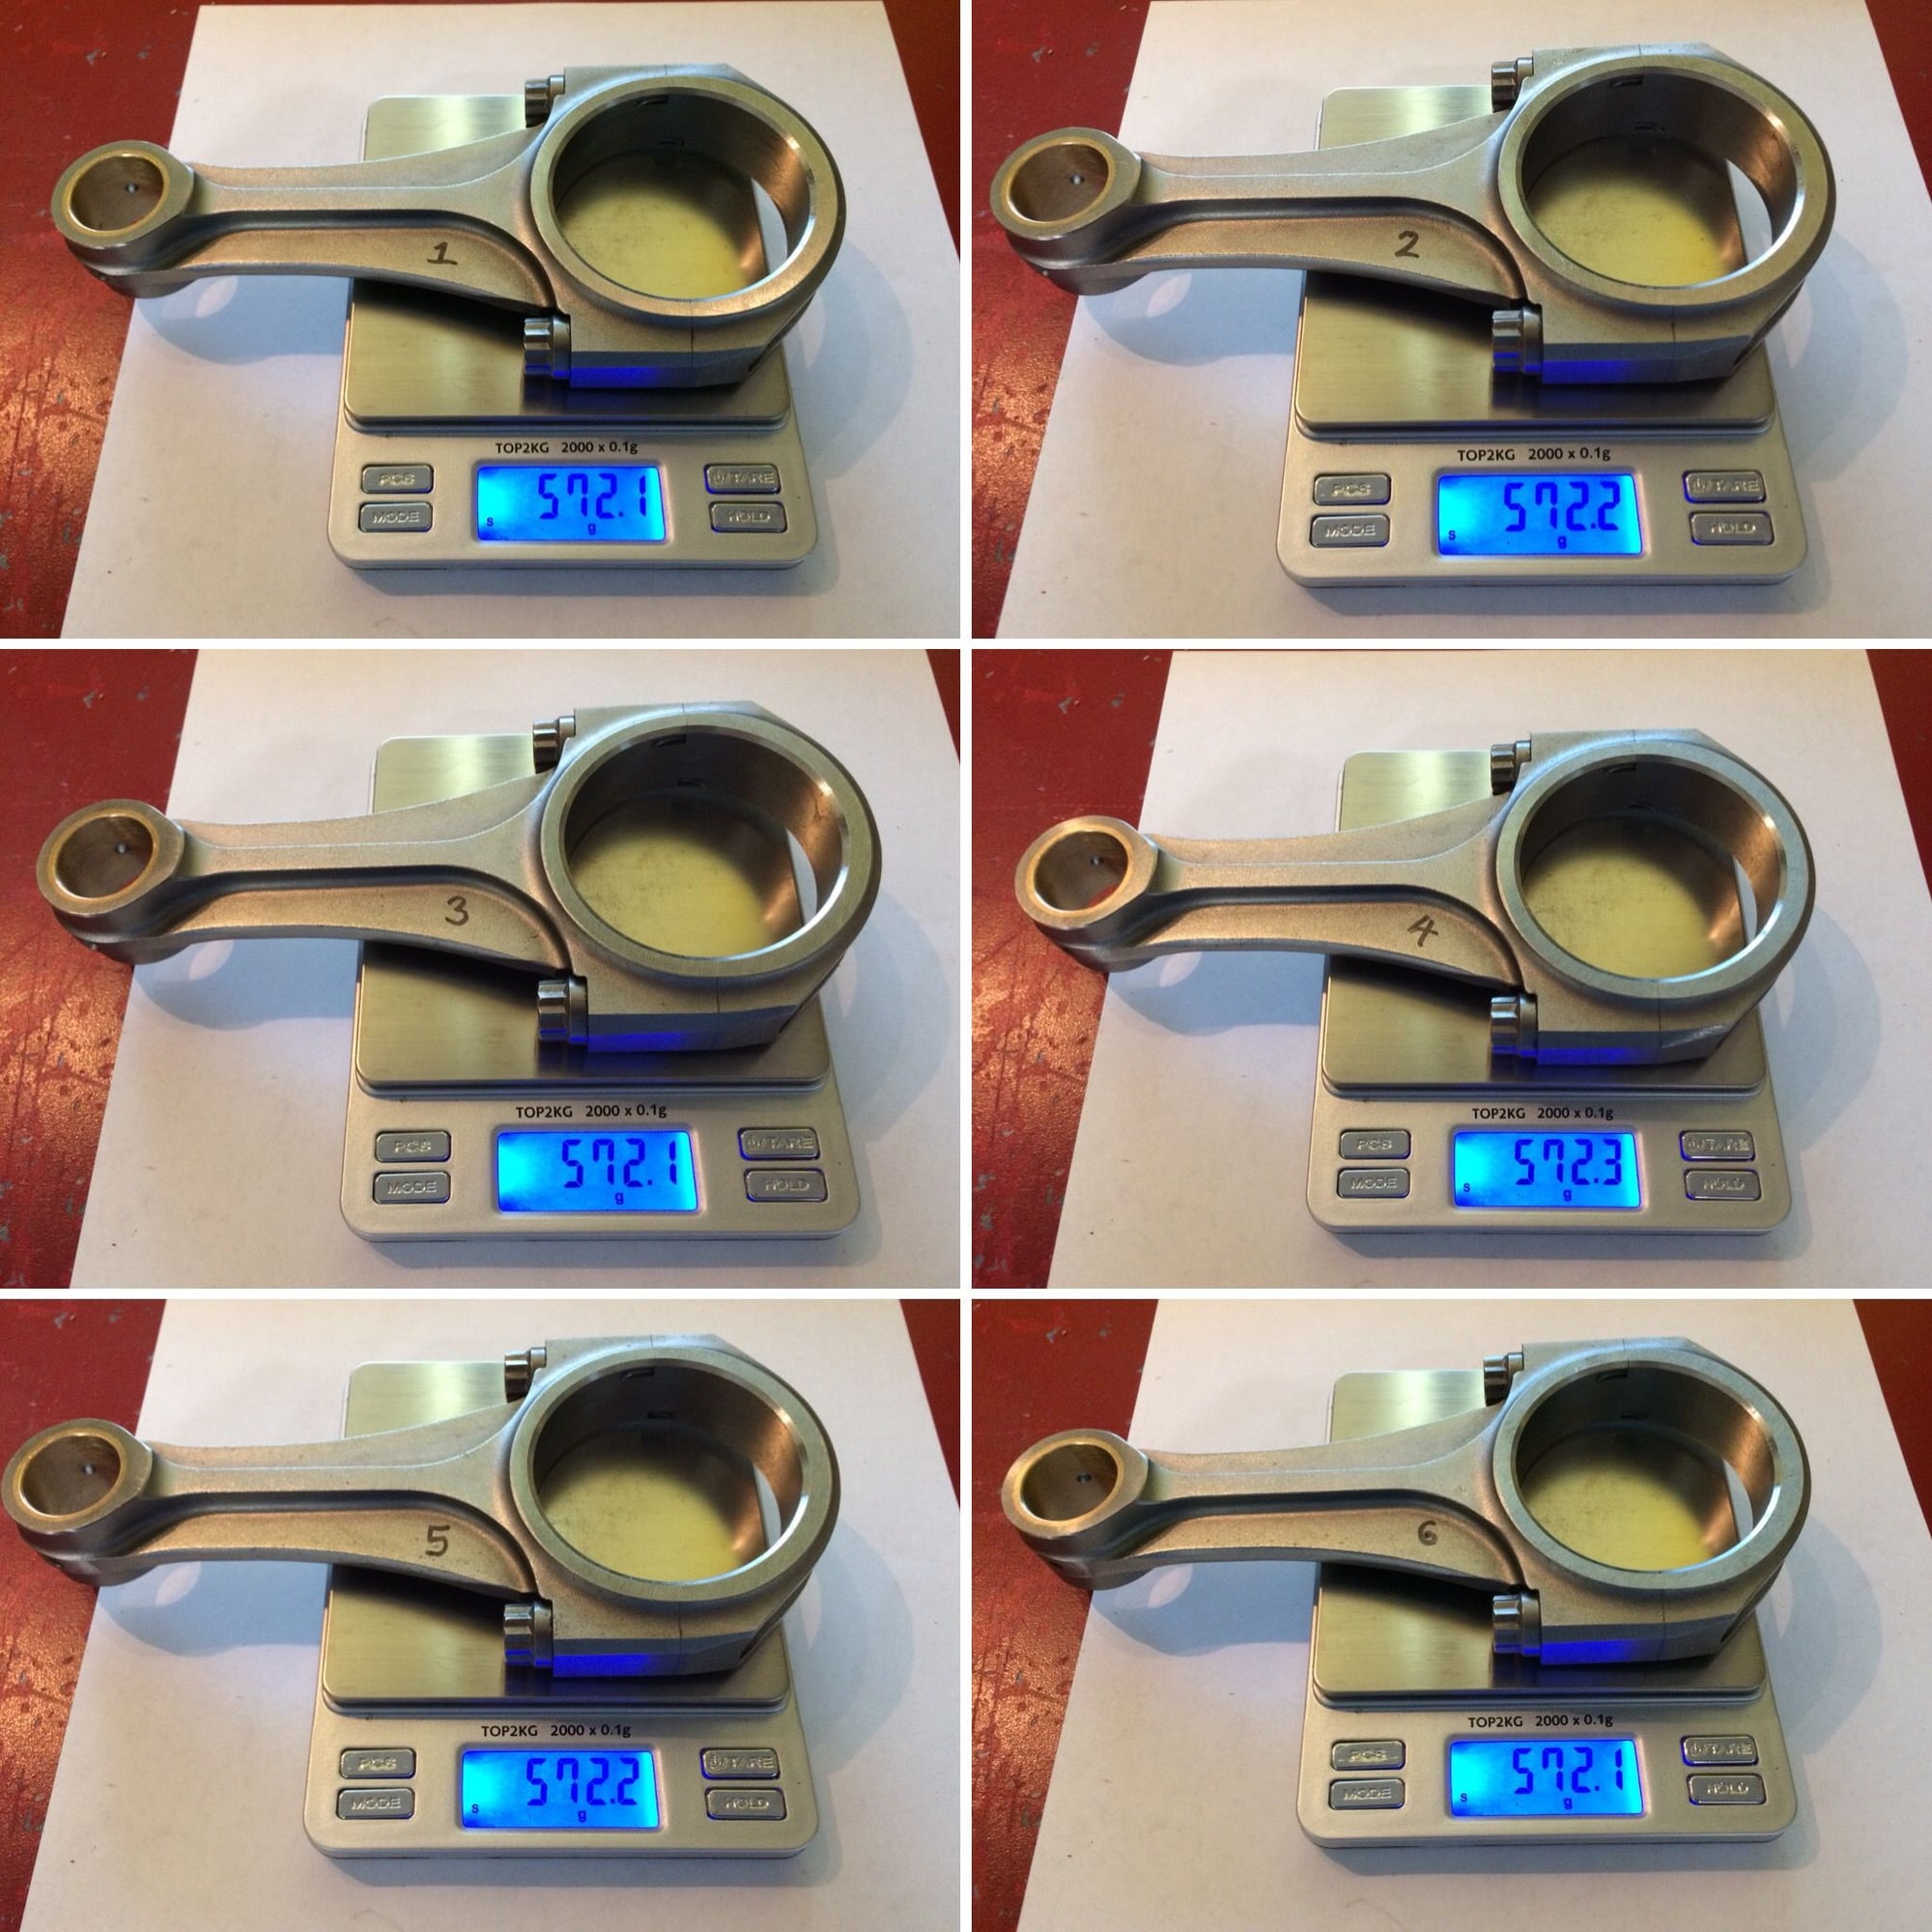
Prepping the Pauter chromoly steel connecting rods with ARP 625+ fasteners and black moly coated bearing shells.
Thank you for sharing and taking the time to post your epic build! I'm a gear head myself and can appreciate the precise attention to detail you show. If you ever hold an engine building workshop i'm signing up! I would really enjoy building my own engine. Cheers!
Thank you for sharing and taking the time to post your epic build! I'm a gear head myself and can appreciate the precise attention to detail you show. If you ever hold an engine building workshop i'm signing up! I would really enjoy building my own engine. Cheers!
Thank you for your kind words. I am no engine expert, just made enough mistakes to know not to repeat. The mechanics at the shop make fun of me for overthinking things because I lack the years of hands on experience that they have. More good stuff to come.
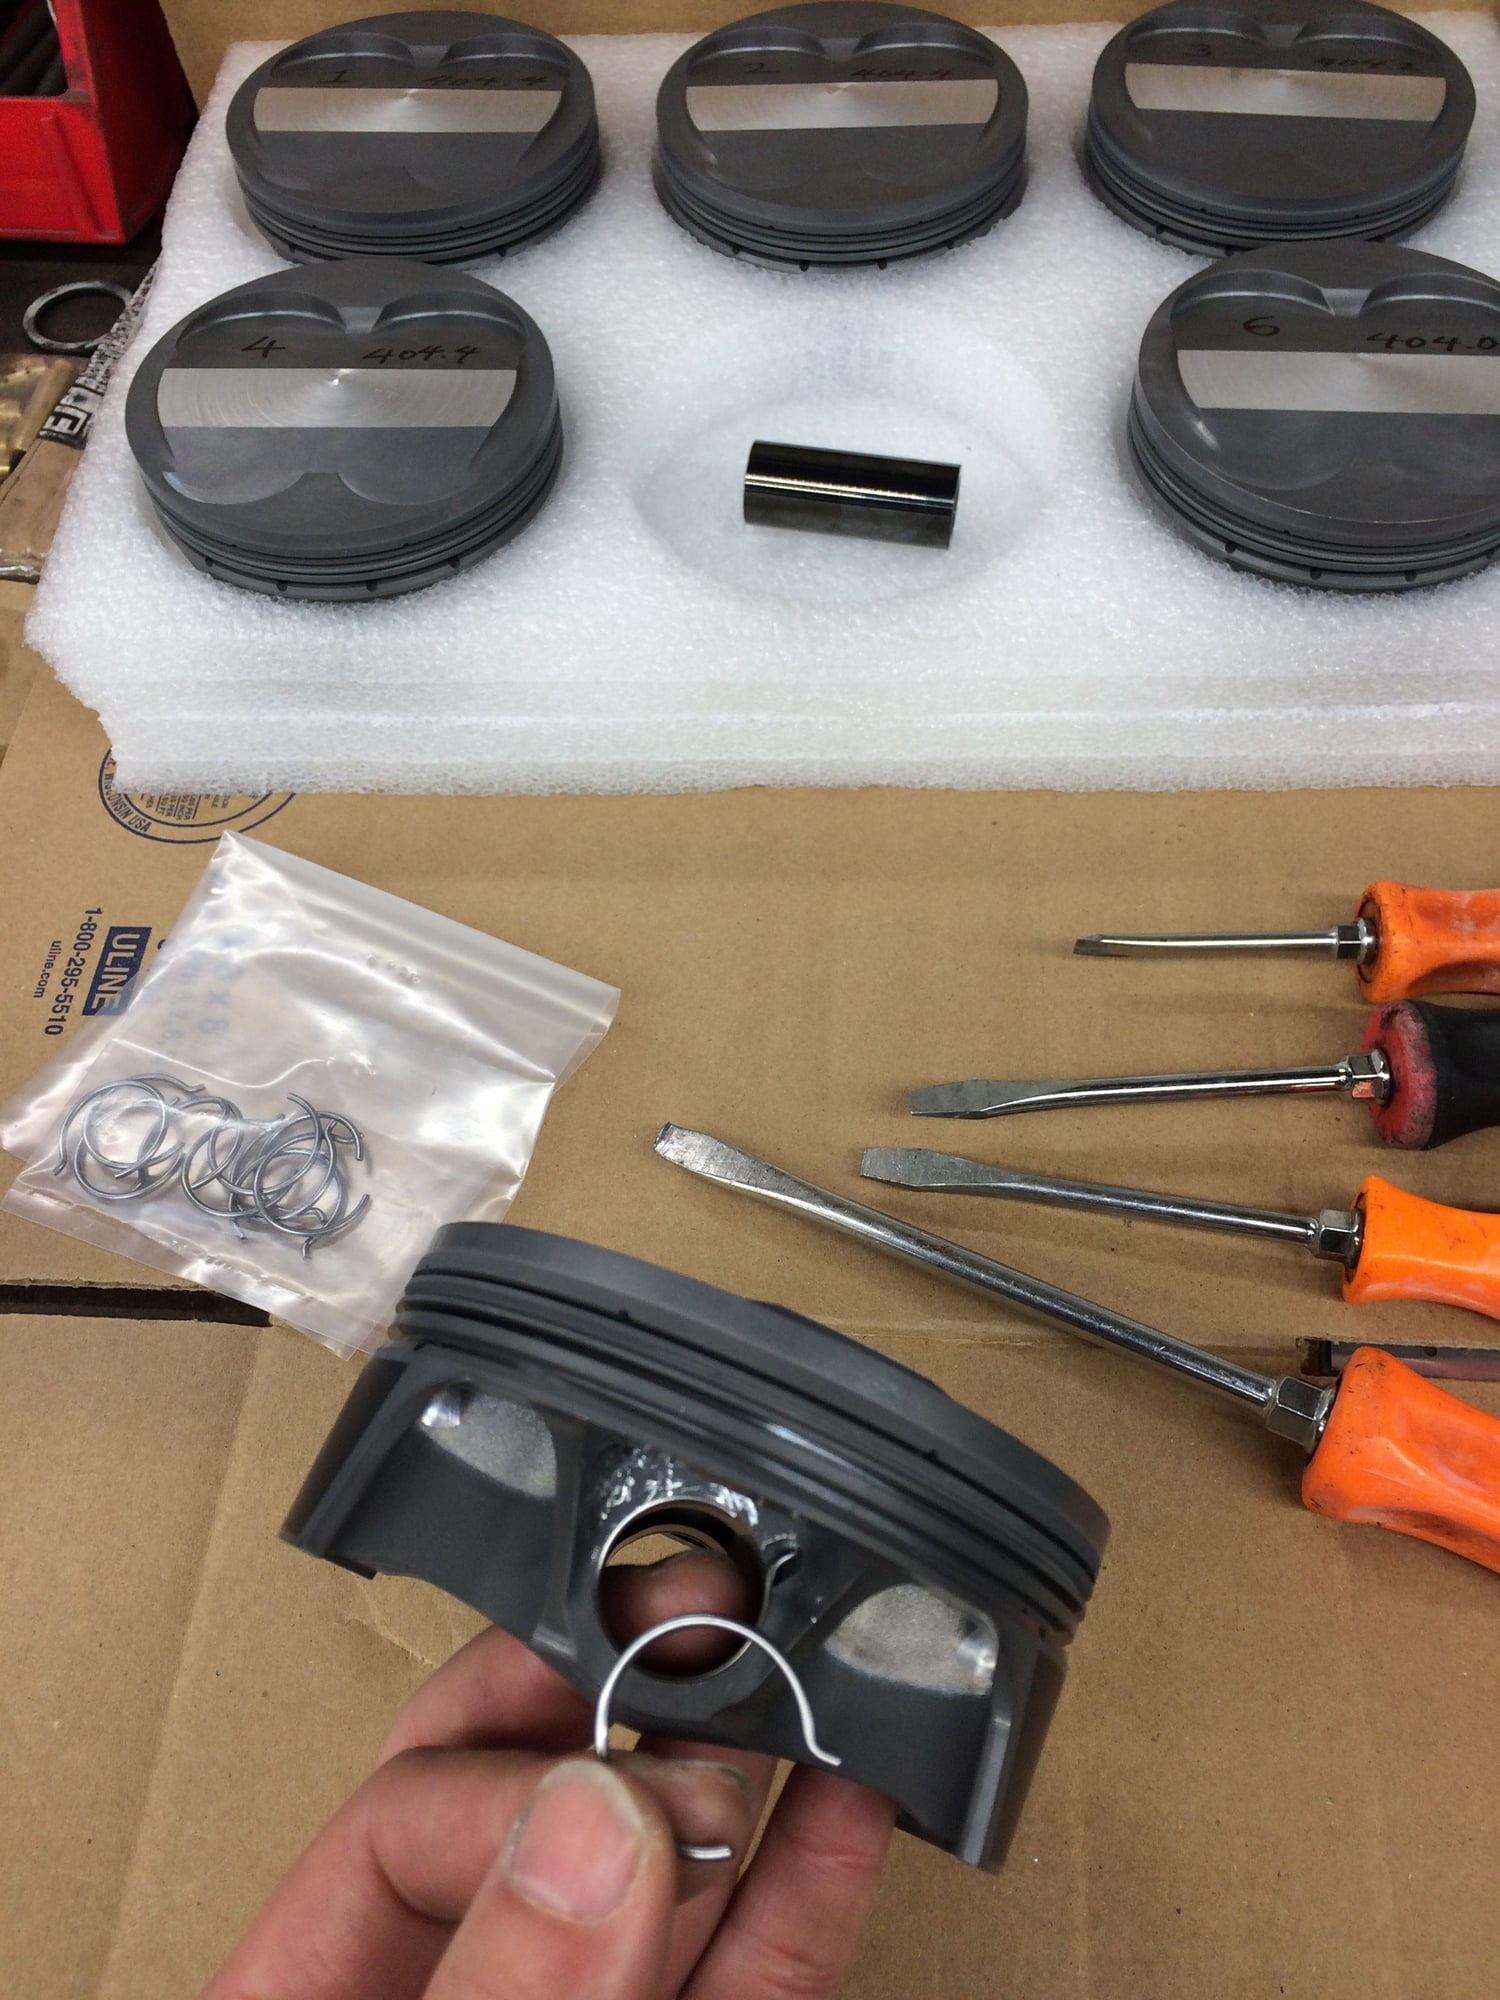
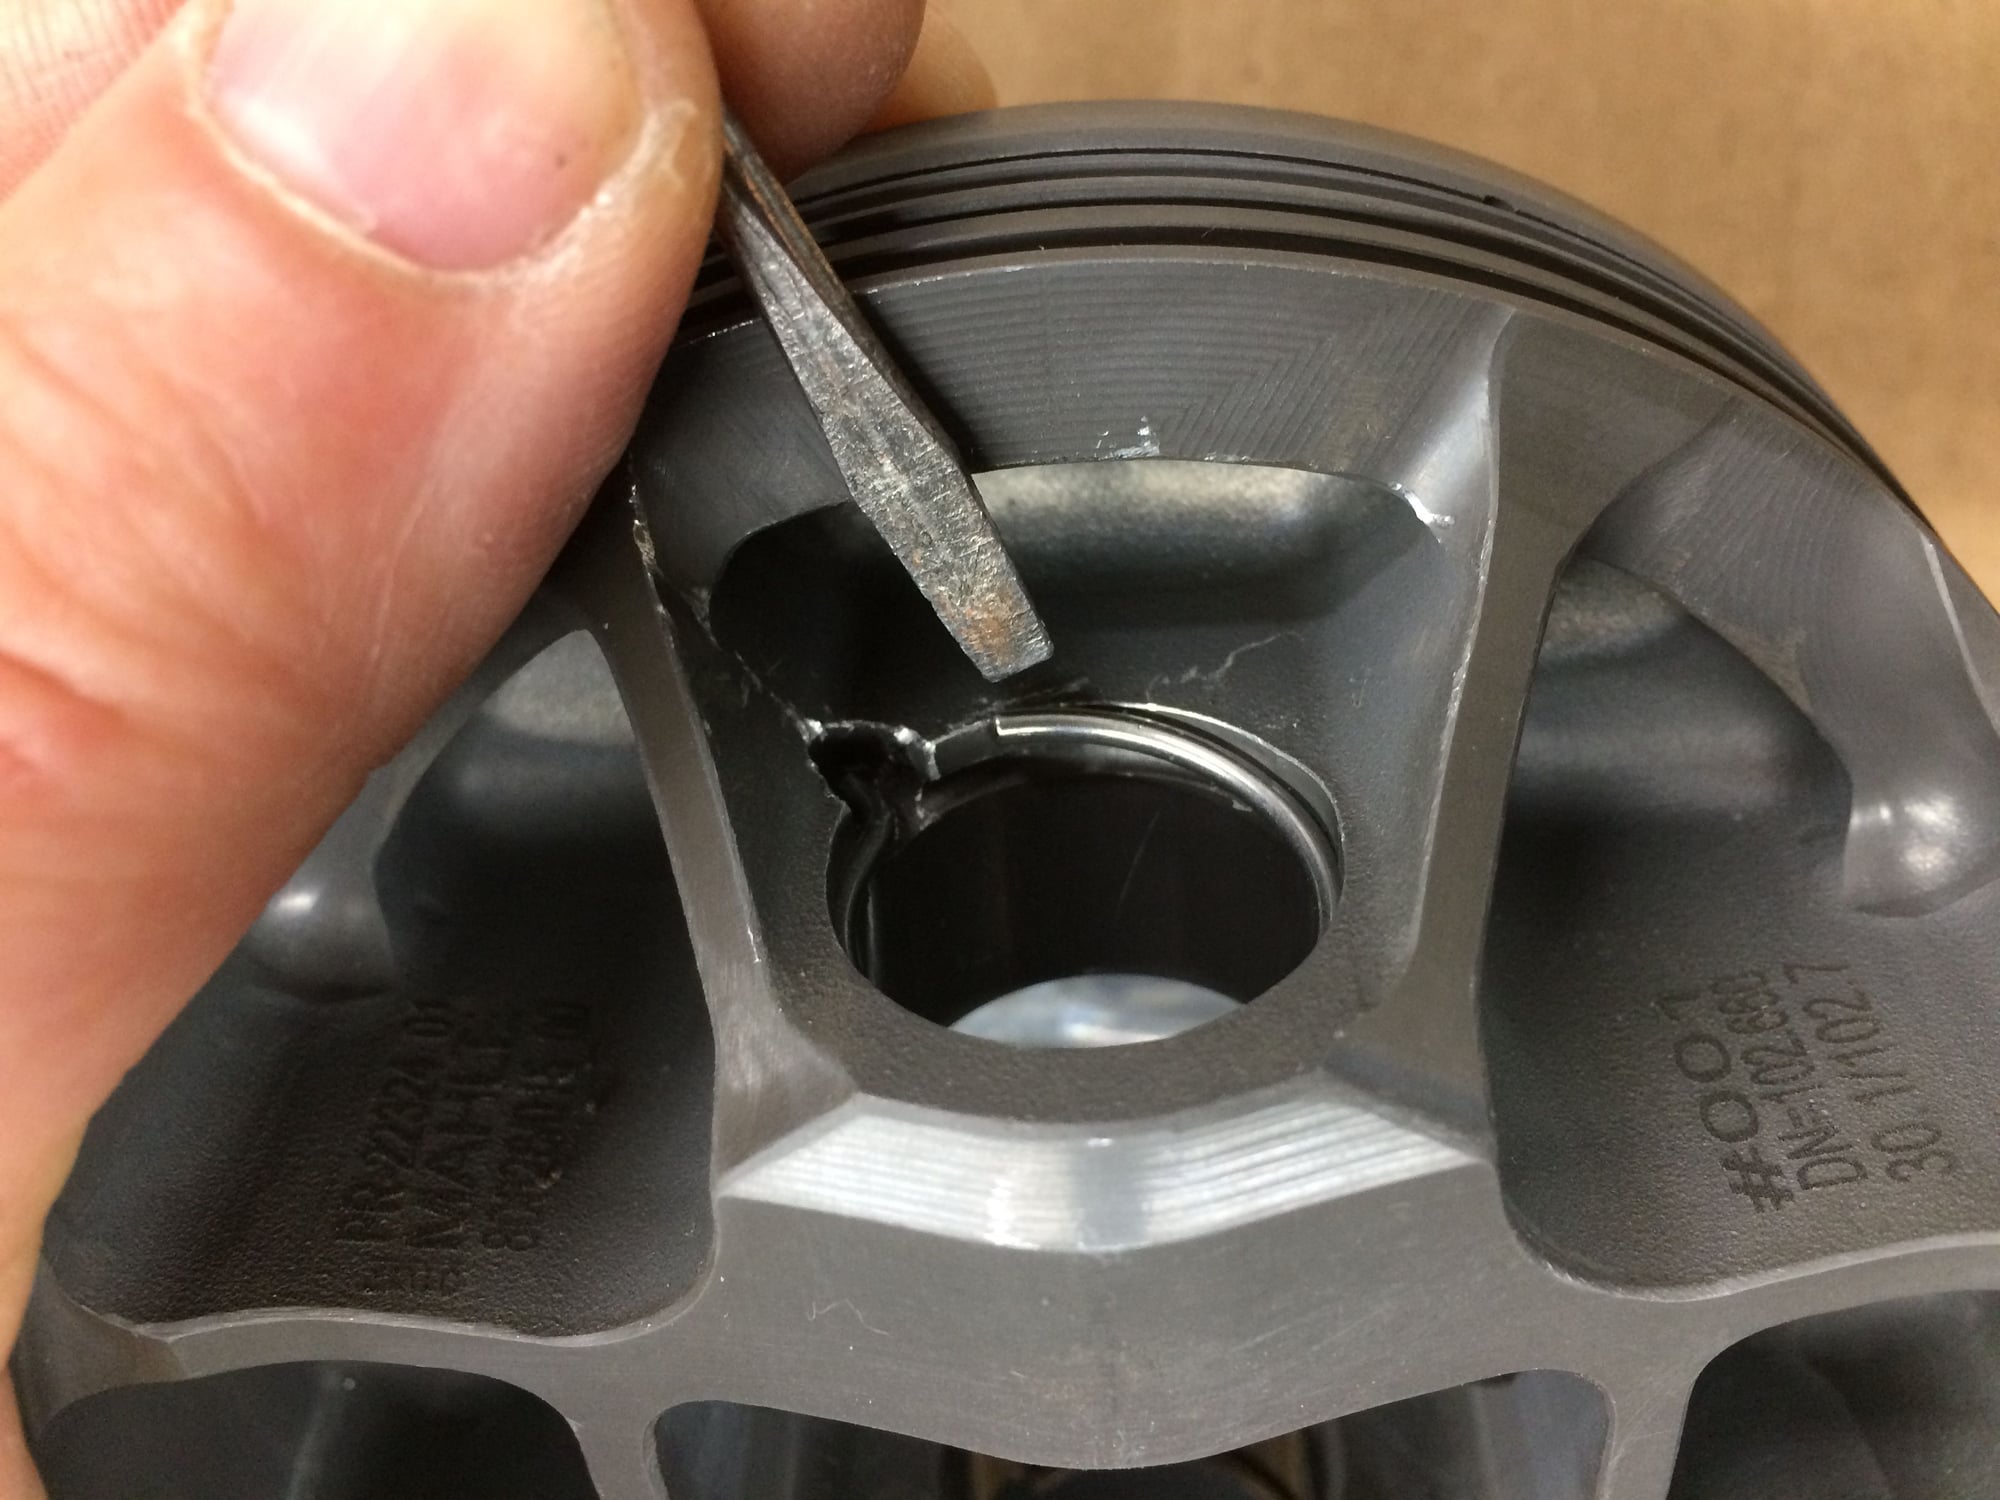
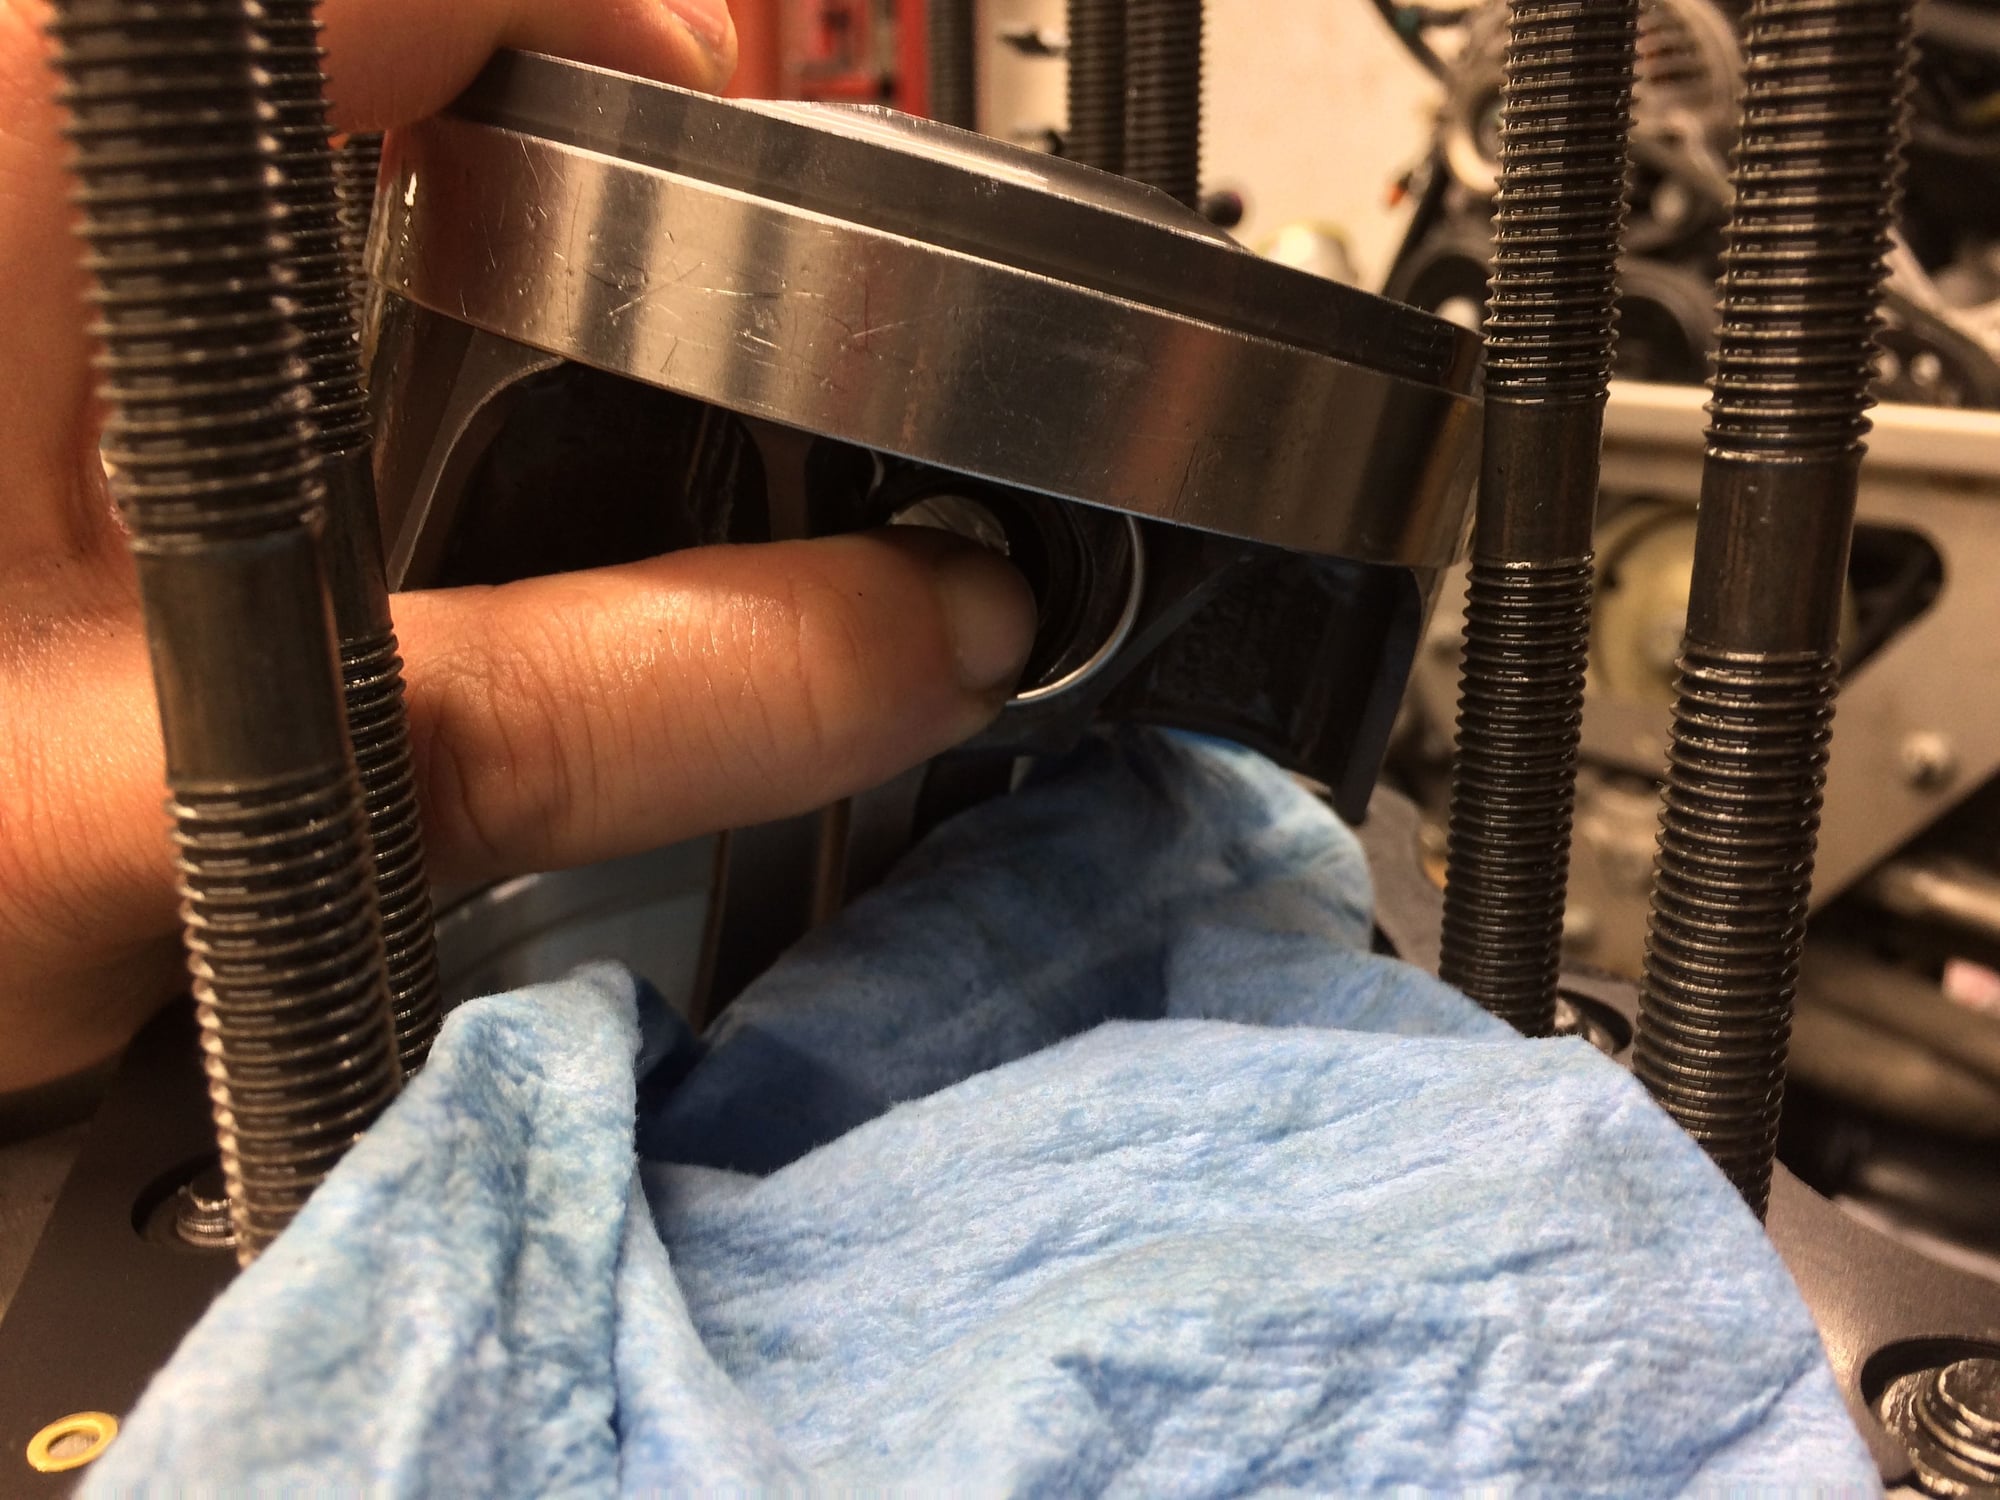
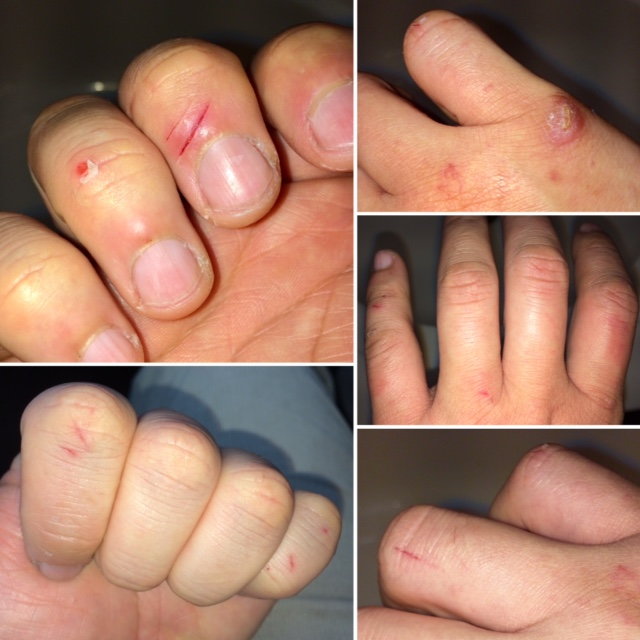
For some, installing the wrist pin circlips is the hateful step of an engine build. Sure, there are fancy tools that are made specifically for this and they are very well made tools and they demo well on videos, but many still prefer the old fashion method of man handling the clips with a screwdriver. I guess this step of a build is rarely shown because its not pretty; its like I enjoy the presentation and taste of a steak dinner at a nice restaurant but I don't necessarily want to see the extraction of the meat from the source.
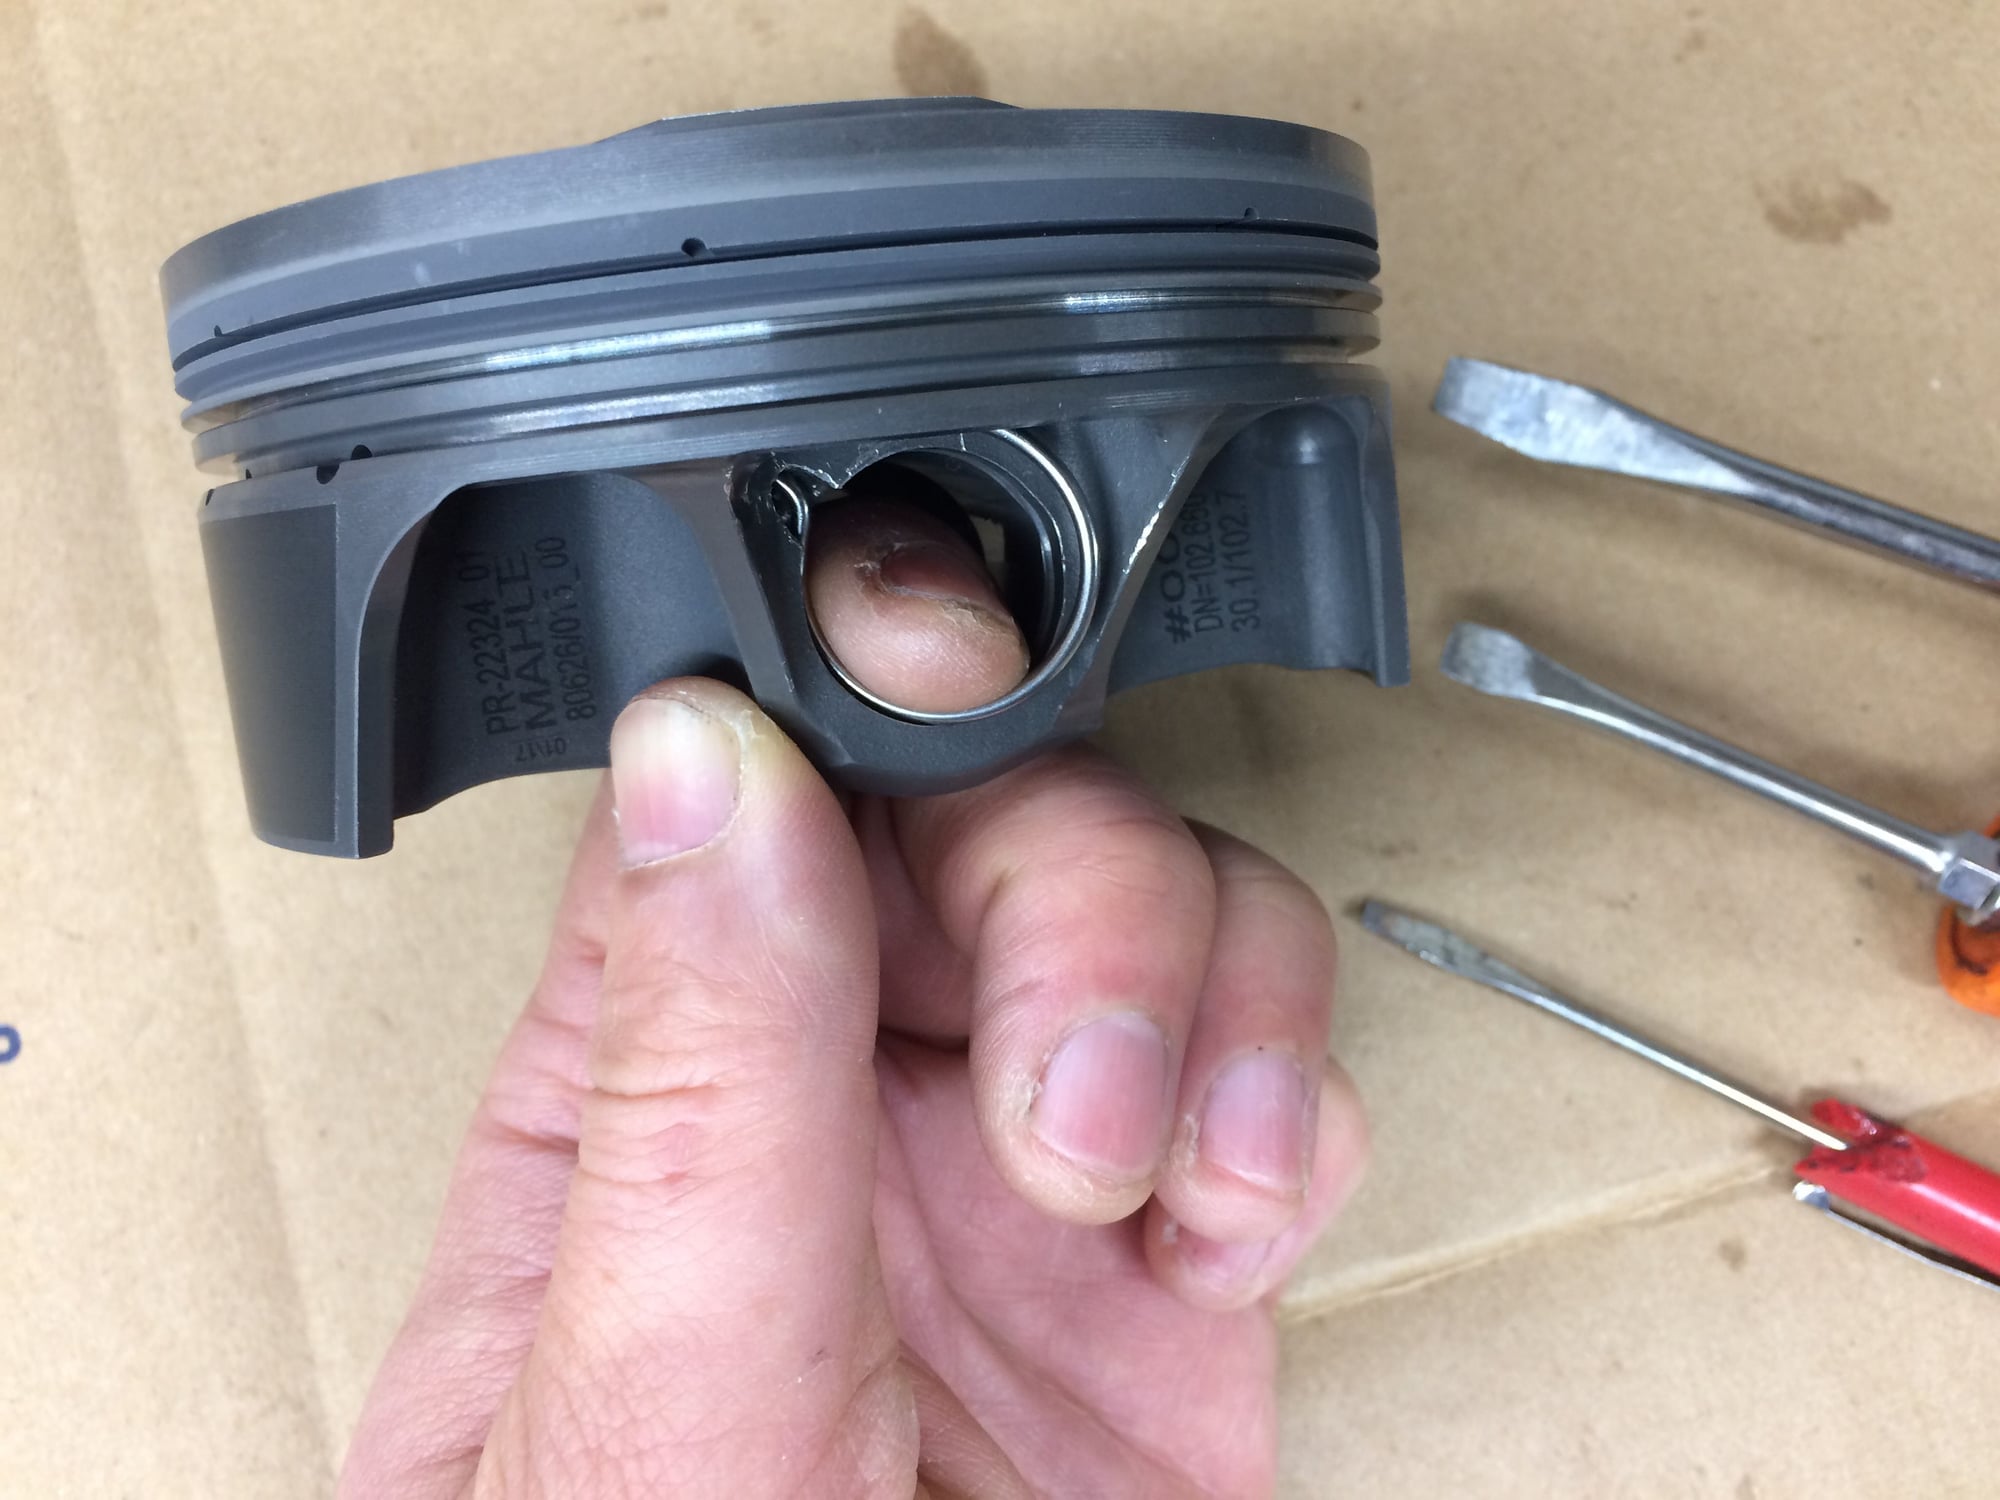
The clip groove area of the piston can get scratched up by the exerting of force on the screwdriver. This is to be expected and won't hurt the pistons at all. Although more experienced hand do create less scratches. This is my first one. Eleven more to go...
Less scratches on my second clip after I figured out the best angle of attack and which screwdriver works best.
Its not that hateful once I was on a roll. But I was still holding my breath and bracing for each clip as things can go way wrong with one slip of a finger! The high spring pressure will cause a clip to launch away to places that can't be found. Or worst into the engine!
Making sure each clip is fully seated in the groove. Engine goes boom if one is not seated and pops out!
Six of clips are installed on the work bench. The other six? Any guess??
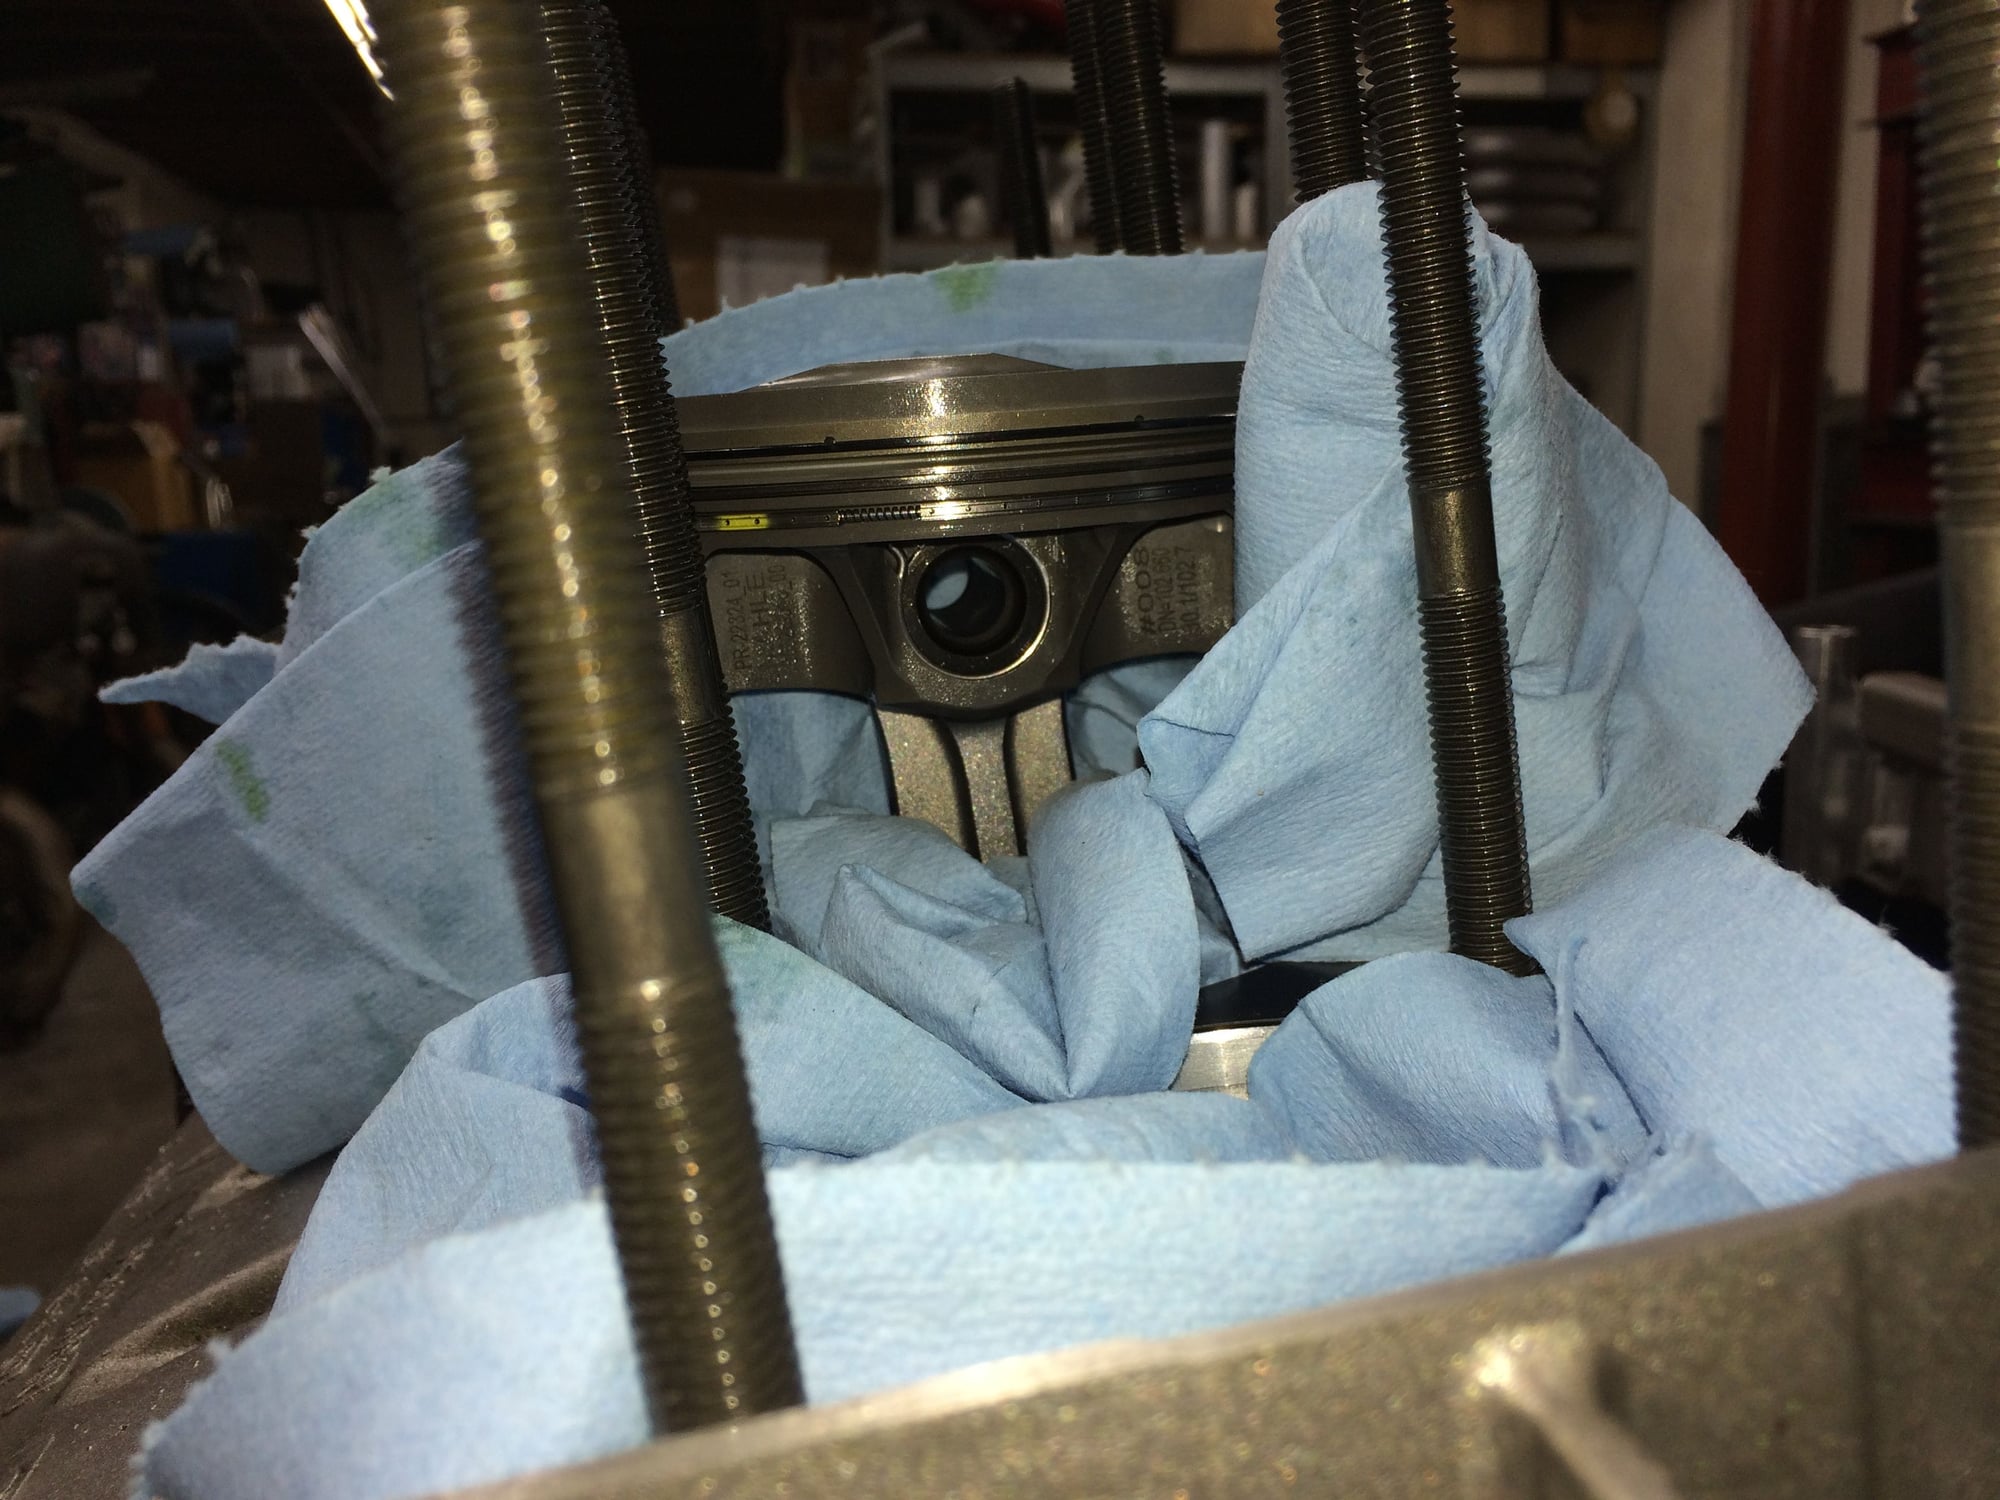
On the engine! Between the head studs.
I stuffed shop towels around the bore in an effort to help catch a flying clip into the engine.
This still is my favorite thread on this board - thank you for doing all the cool stuff I would never even attempt. I'm moving to NJ - can you open up your own shop there?
Ever thought about putting a clear plastic bag around the cylinder, and making a small hole in it for your screwdriver. That way if the ring pops out, it will be caught by the bag.
The locking ring reminds me of what I have to do sometimes when redoing someones hip. If you don't get it right it can pop out, or worse their hip replacement can come apart. The delicate metal ring has to sit in the lip of the metal shell before the white plastic part can snap in. Usually we can't take the metal cup out of the patient either.
Thank you for your very kind words and for sharing the image. Your clip definitely looks way more delicate and requires surgical-precision hands.
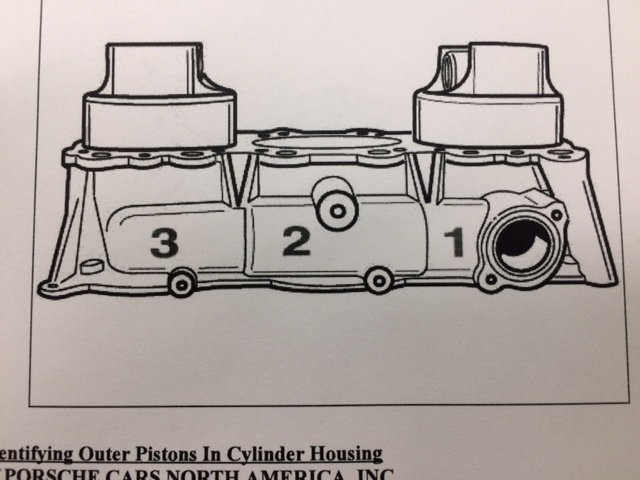
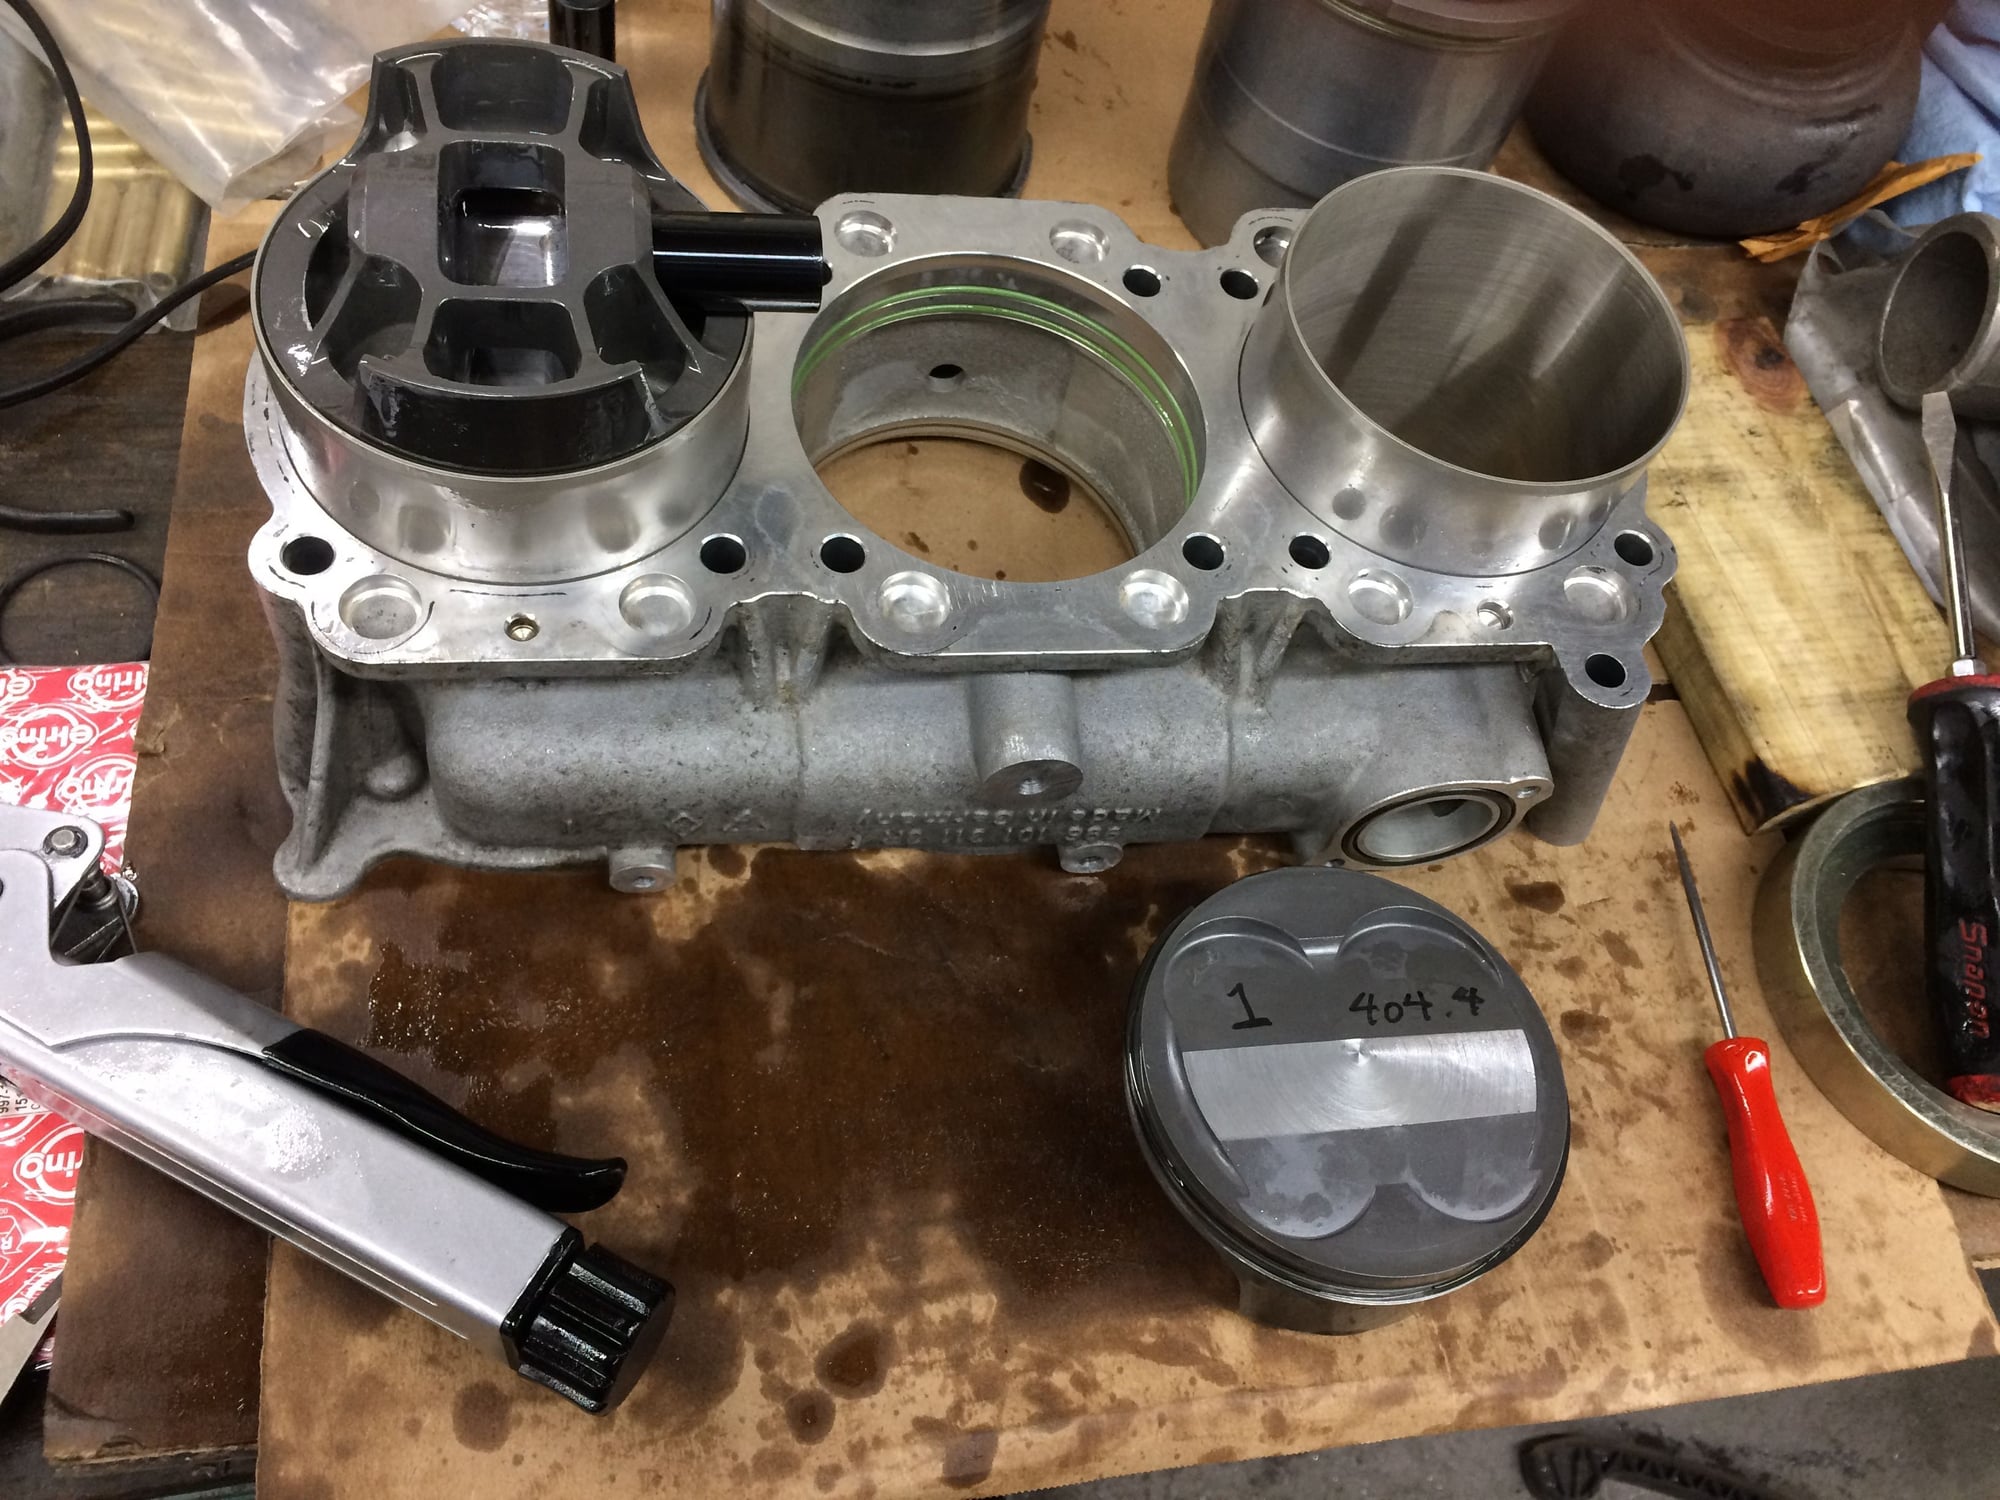
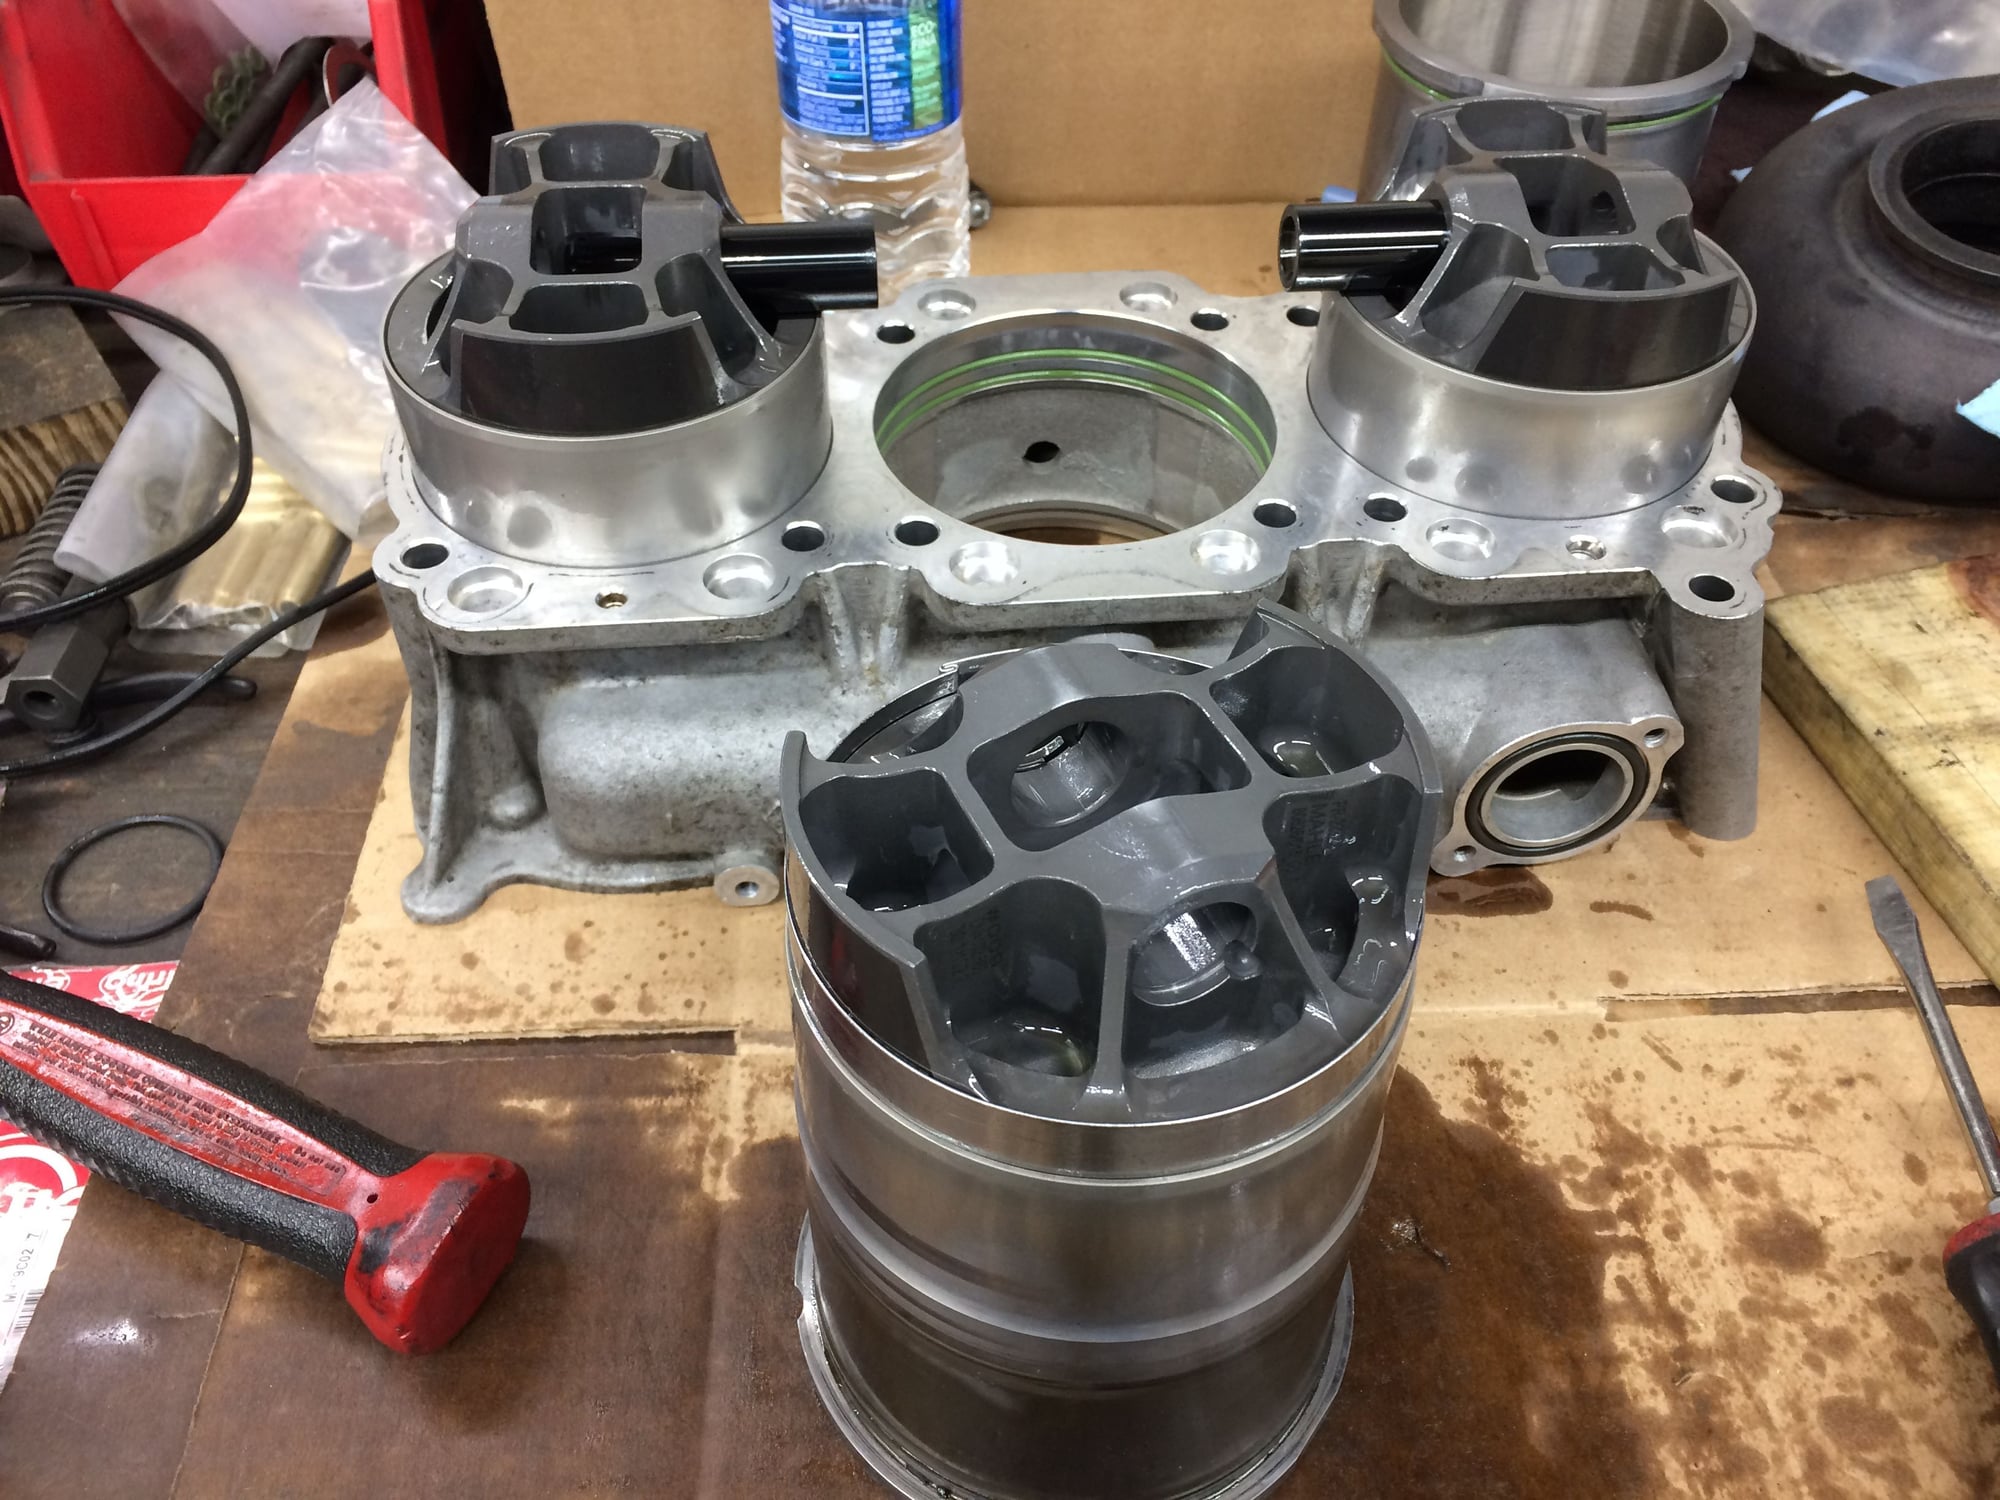
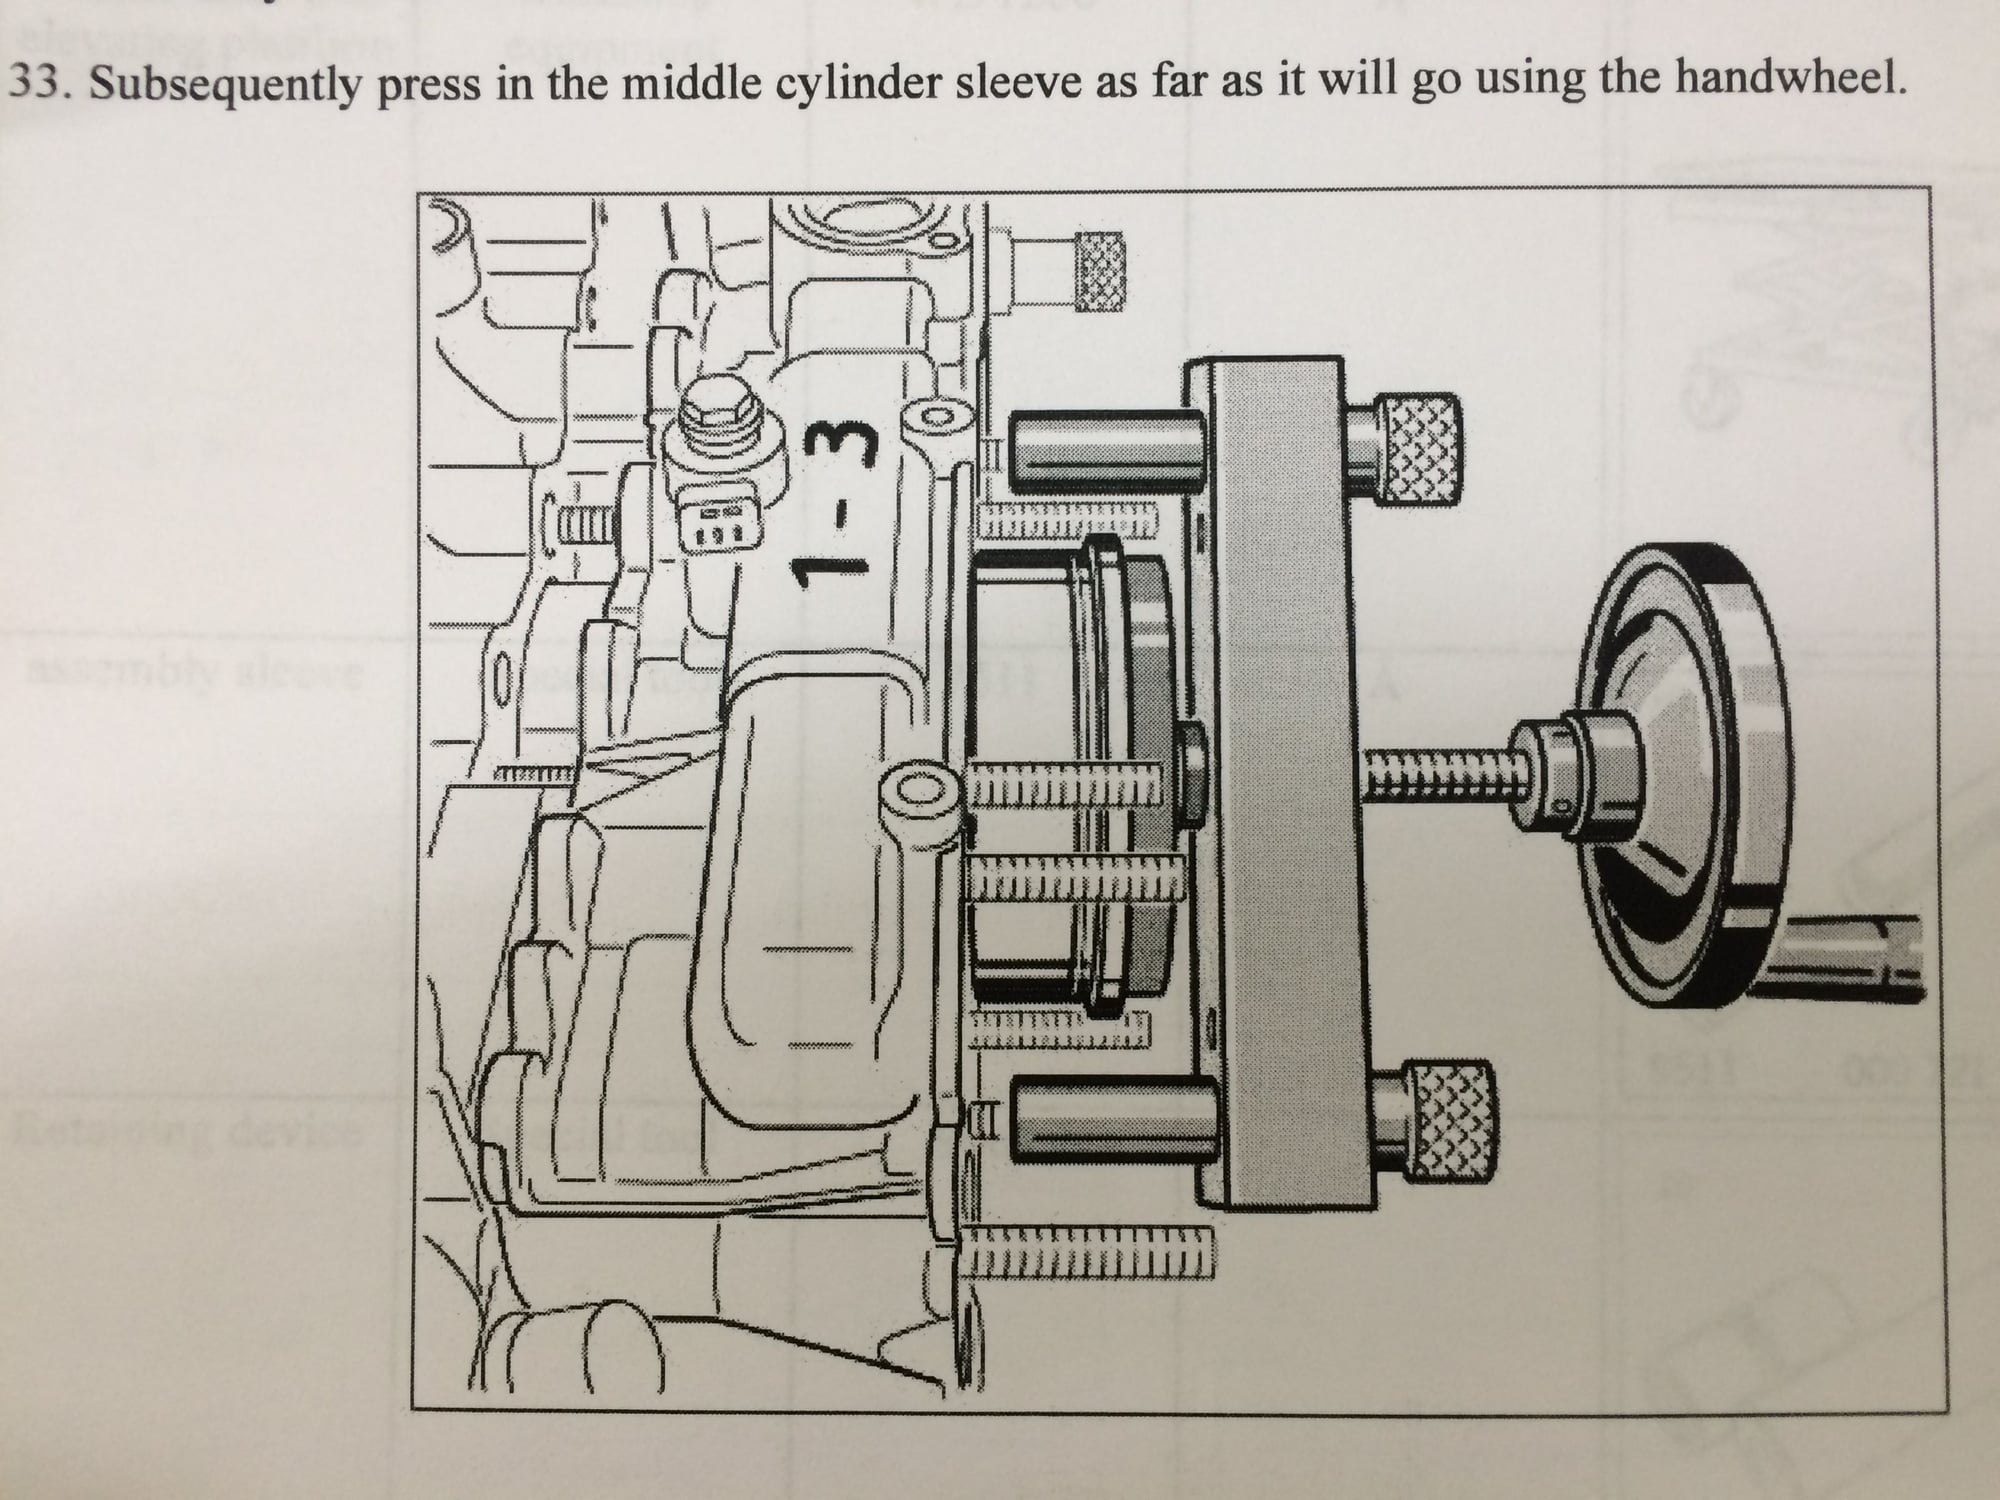
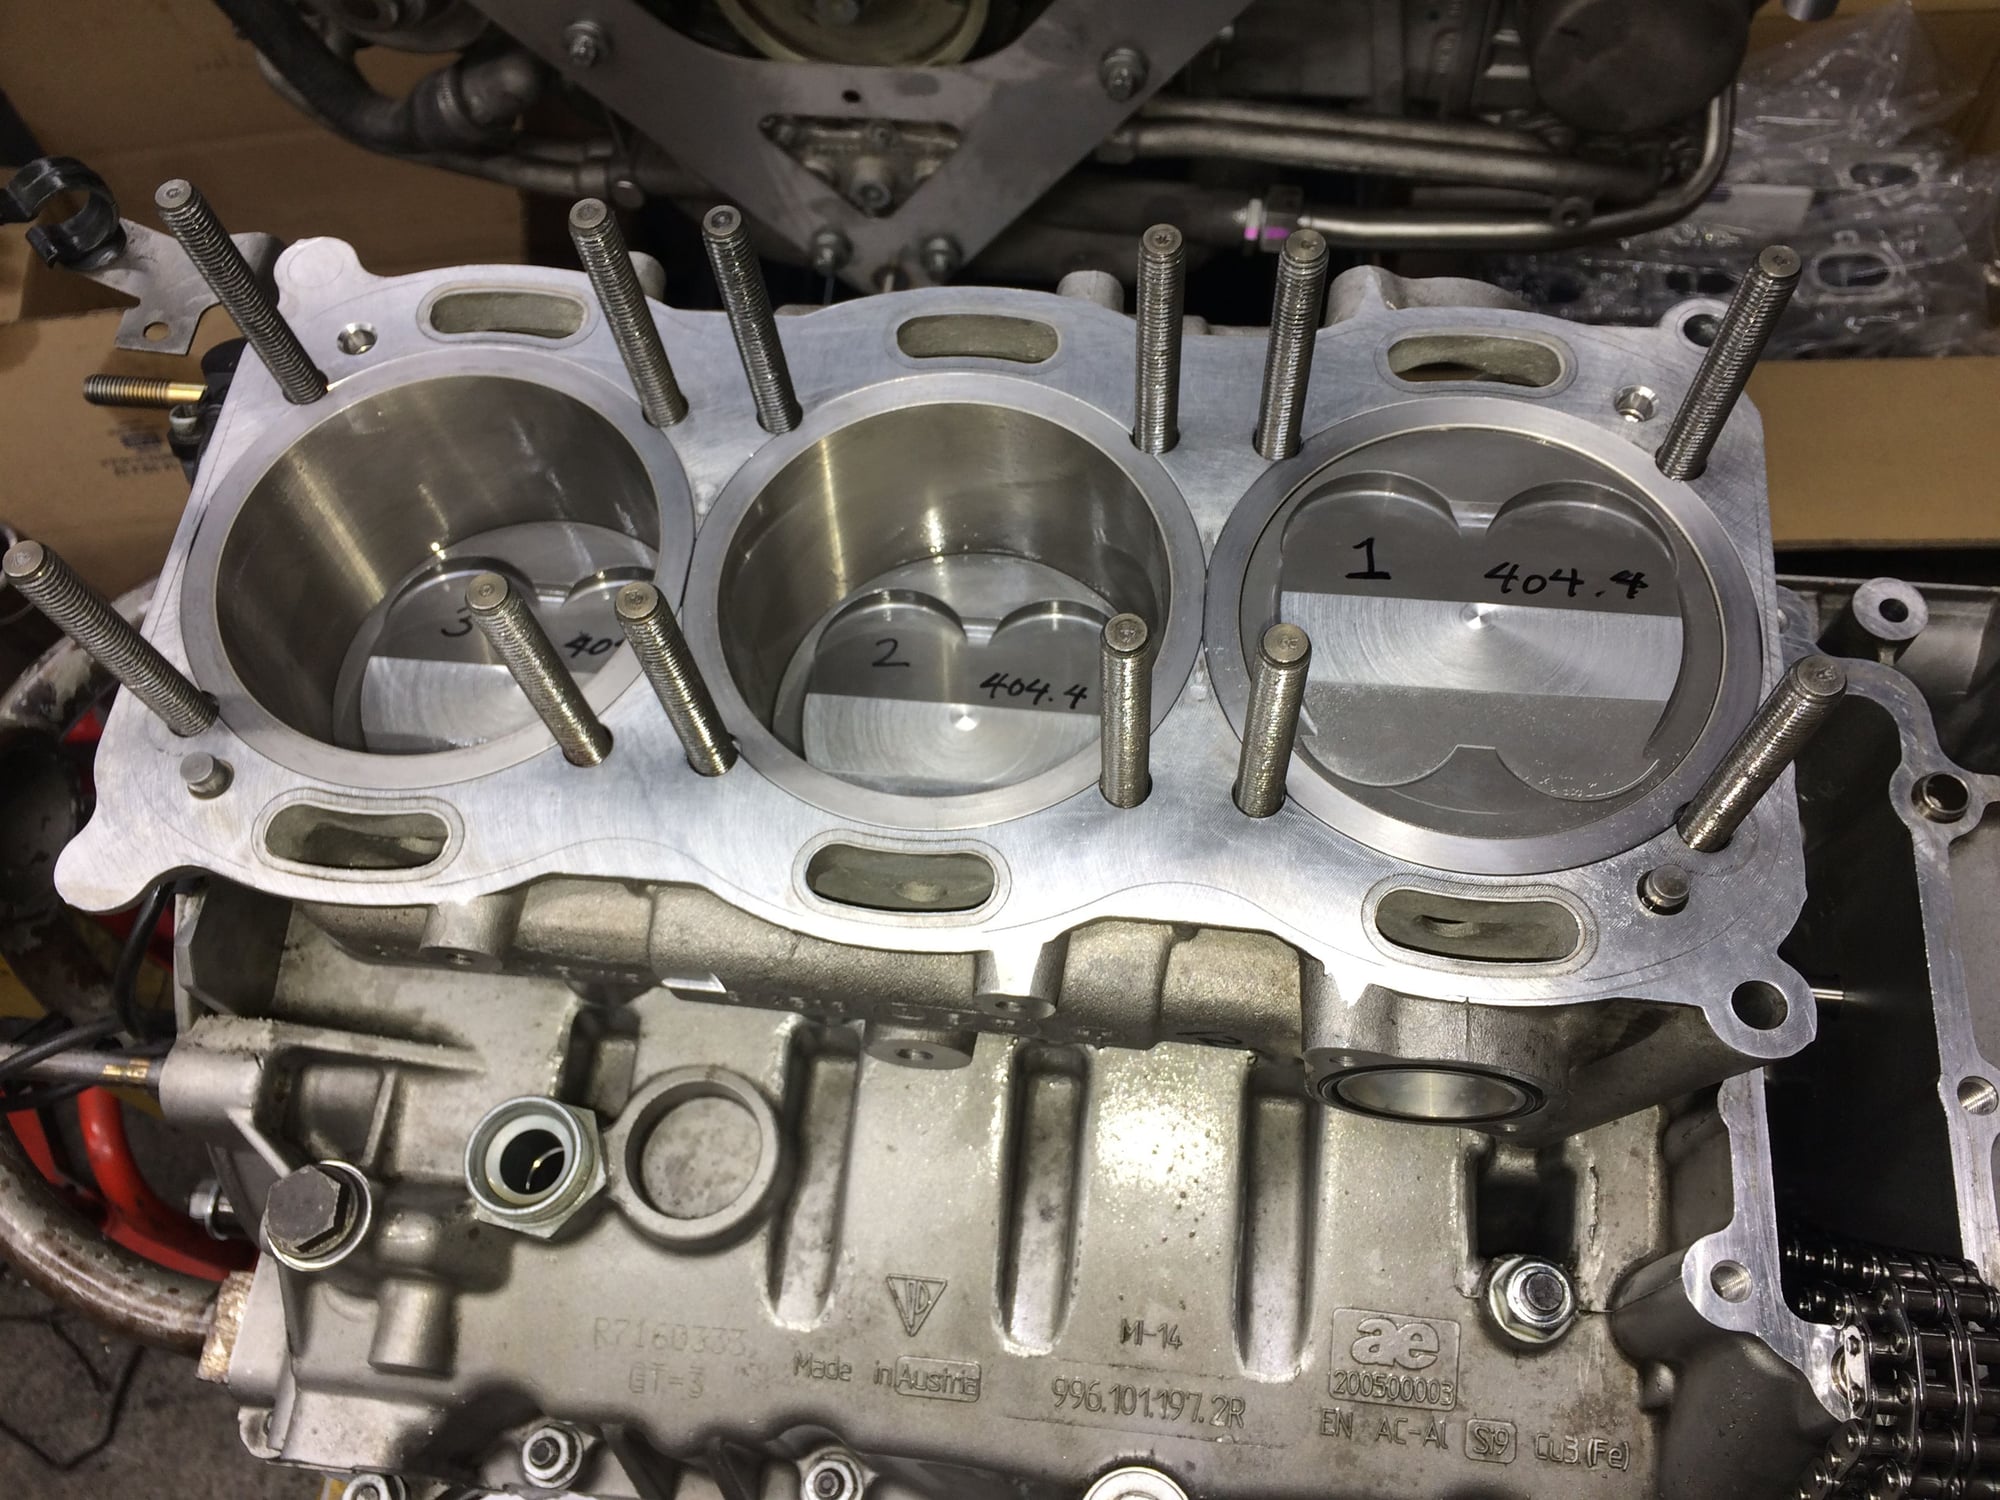
As a project manager my role includes observing some of the work being done and then reporting the progress. In a way this is good because I get to see how the work is done and use the visual as a guide for my own build. But its not good when I cannot stay for the entire duration of task and only see part of the process and then form my own ideas from there! So, I've seen the mechanics here install pistons and cylinders many times, but I had no reason(up until now) to pay particular attention to the order in which they go in. For the small block Chevy engine that I built many years ago(and for some other brands of engines) the sequence order for which cylinder number piston is installed first or last doesn't matter. But it most certainly doesn't on this engine!
This mistake starting out with me having a glance at this image, then instead of reading on further I used my recollection of seeing the mechanics do fragments of the task and made my own conclusion on how the pistons and cylinders are to be installed.
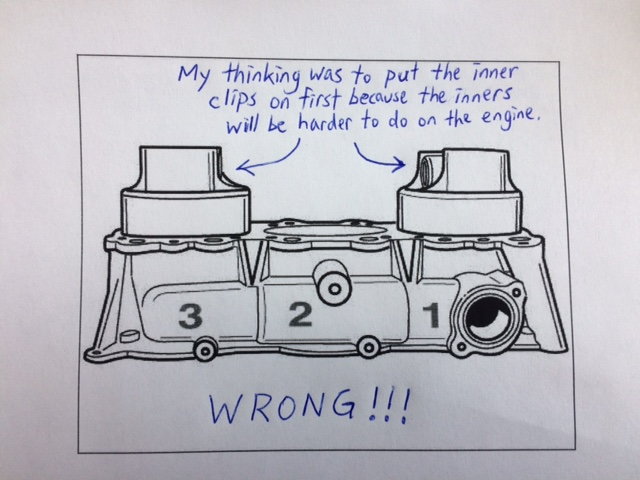
Mistake #1, see below, for anyone who hasn't actually done this first hand, of course it is easier to install the inner clips now and then install the outter clips later.
This may be true in rehearsing this in my mind, BUT, on either end of the engine block the outter clip areas are obstructed and once the cylinder sleeves are in, no f'ing way.
Well damn, I didn't think about that so had to pop out those clips and reinstall them to the correct sides. At least now I am very skilled at handling those clips.
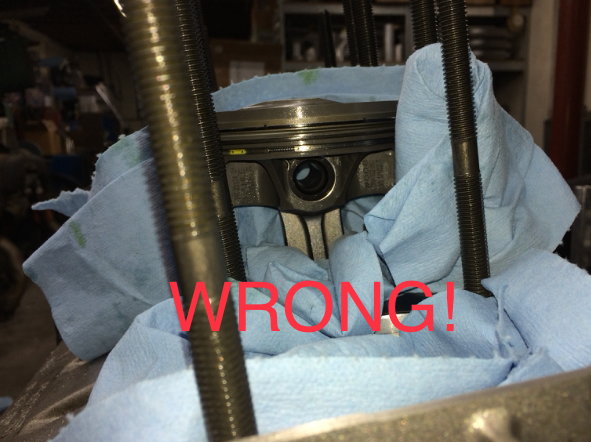
Mistake #2, in post #789, I installed the middle piston the engine thinking there's enough room for a piston ring compressor tool, WRONG! Again, I did not factor in the length of the cylinder sleeve protruding the cylinder housing.
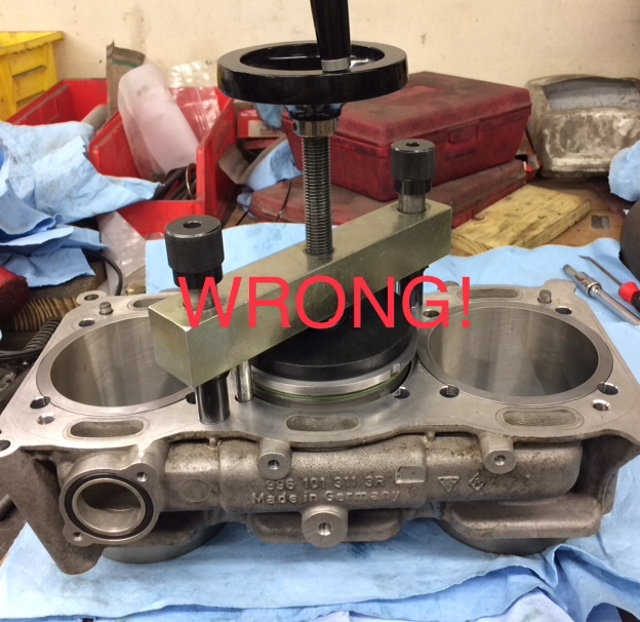
Mistake #3, in post #764, I installed the middle cylinder sleeve in to the cylinder housing, WRONG! Once again, I did not factor in the length of the cylinder sleeve protruding the cylinder housing. There is absolutely no substitute for hands on experience here.
This three mistakes where pointed out to me by my boss Mike Levitas as he saw from the corner of his eye that I was trying to put all this together out of sequence. After he graciously showed me the correct sequence he joking said perhaps I shouldn't have said anything and watch you fumble with this for hours!
Thank you, Mike.
Knowing the correct sequence, I am back in to business!
They say middle kids are often deprived of attention, but that is not at all the case with the middle pistons on this engine.
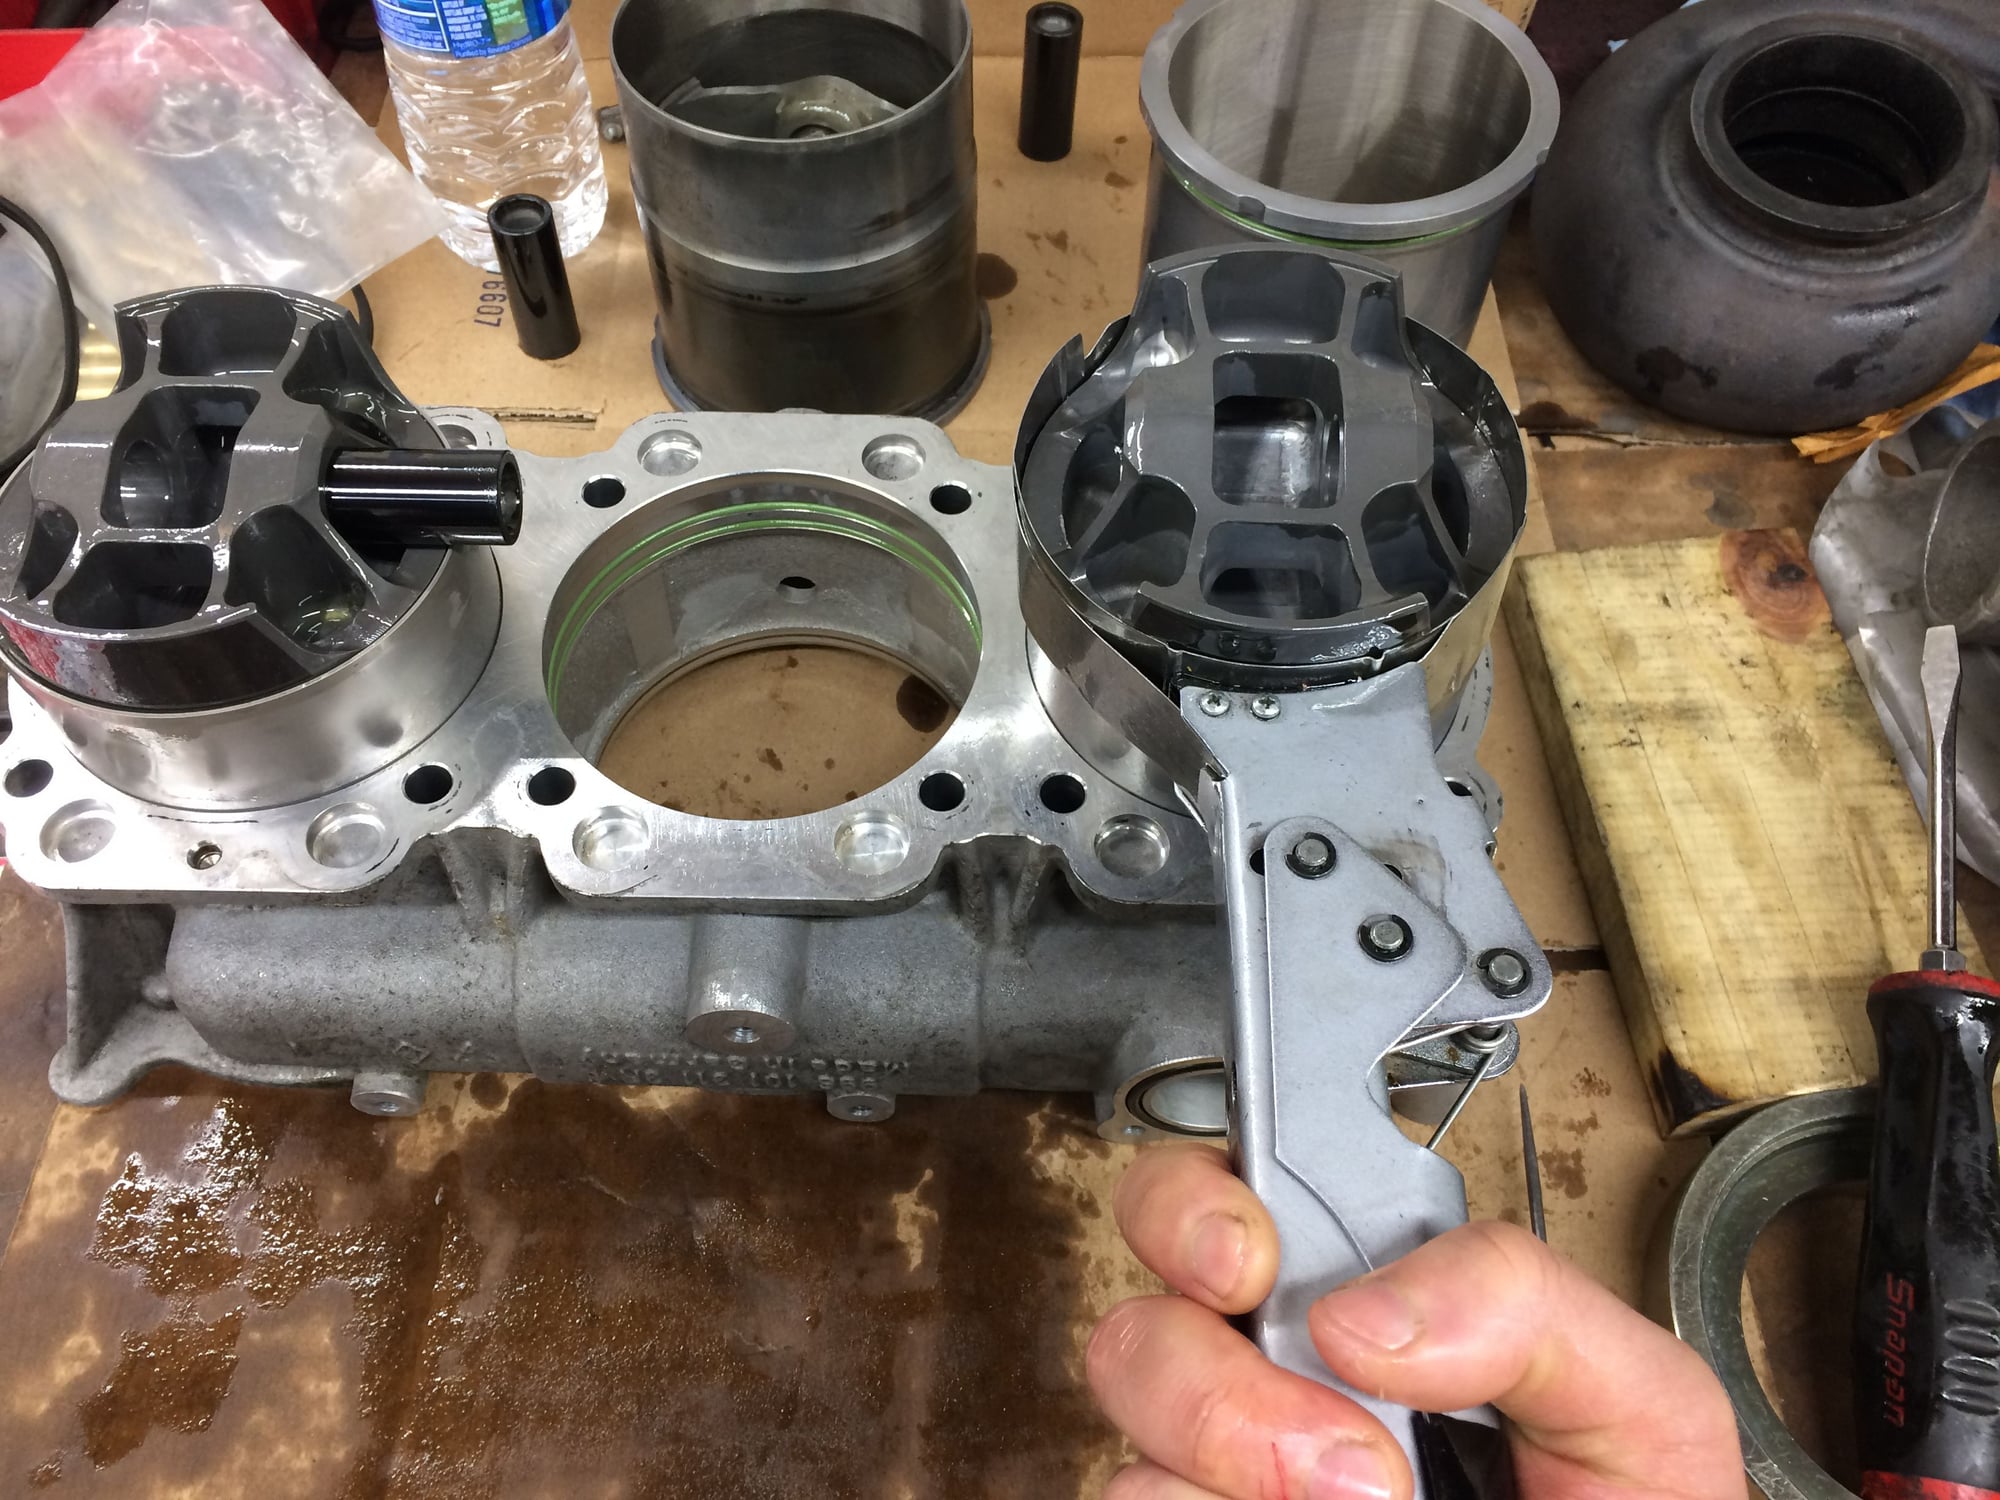
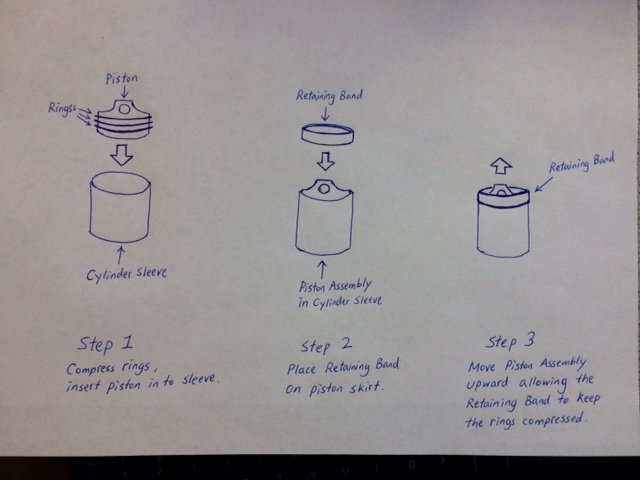
The middle piston- the way to install the middle piston of each bank is first prepare the piston by installing the rings, and then using a ring compressor tool to compress the rings, then temporarily insert the piston assembly into a cylinder sleeve(this is part of the preparation shown to be by Mike Levitas), once all three rings are in the bore of the cylinder sleeve, then VERY carefully move the piston assembly backward by hand letting the metal retaining band keep all three rings compressed. Now we have what is known as a "loaded" piston.
Compressing the rings using a proper tool is easy.
The next part is not so easy...I had my white knuckled hands full so I didn't take any pics, made a hand drawing afterwards instead.
This part requires hand force but not so much that it damages the rings. The rings can be damaged by hand force and not realize that its damaged until the engine is in the car and running.
This is where hands on experience and good mechanical feel are crucial.
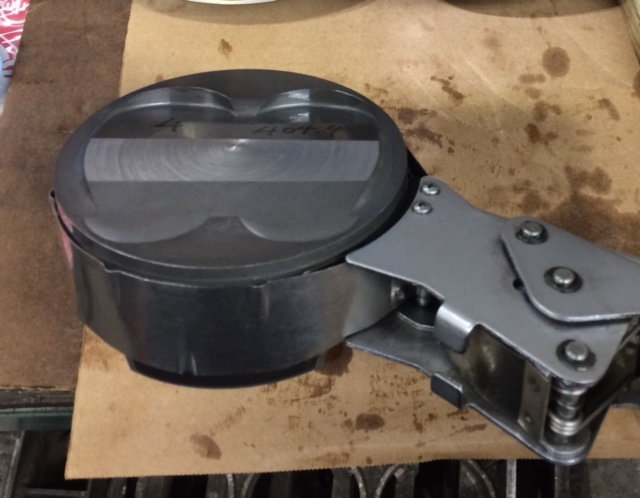
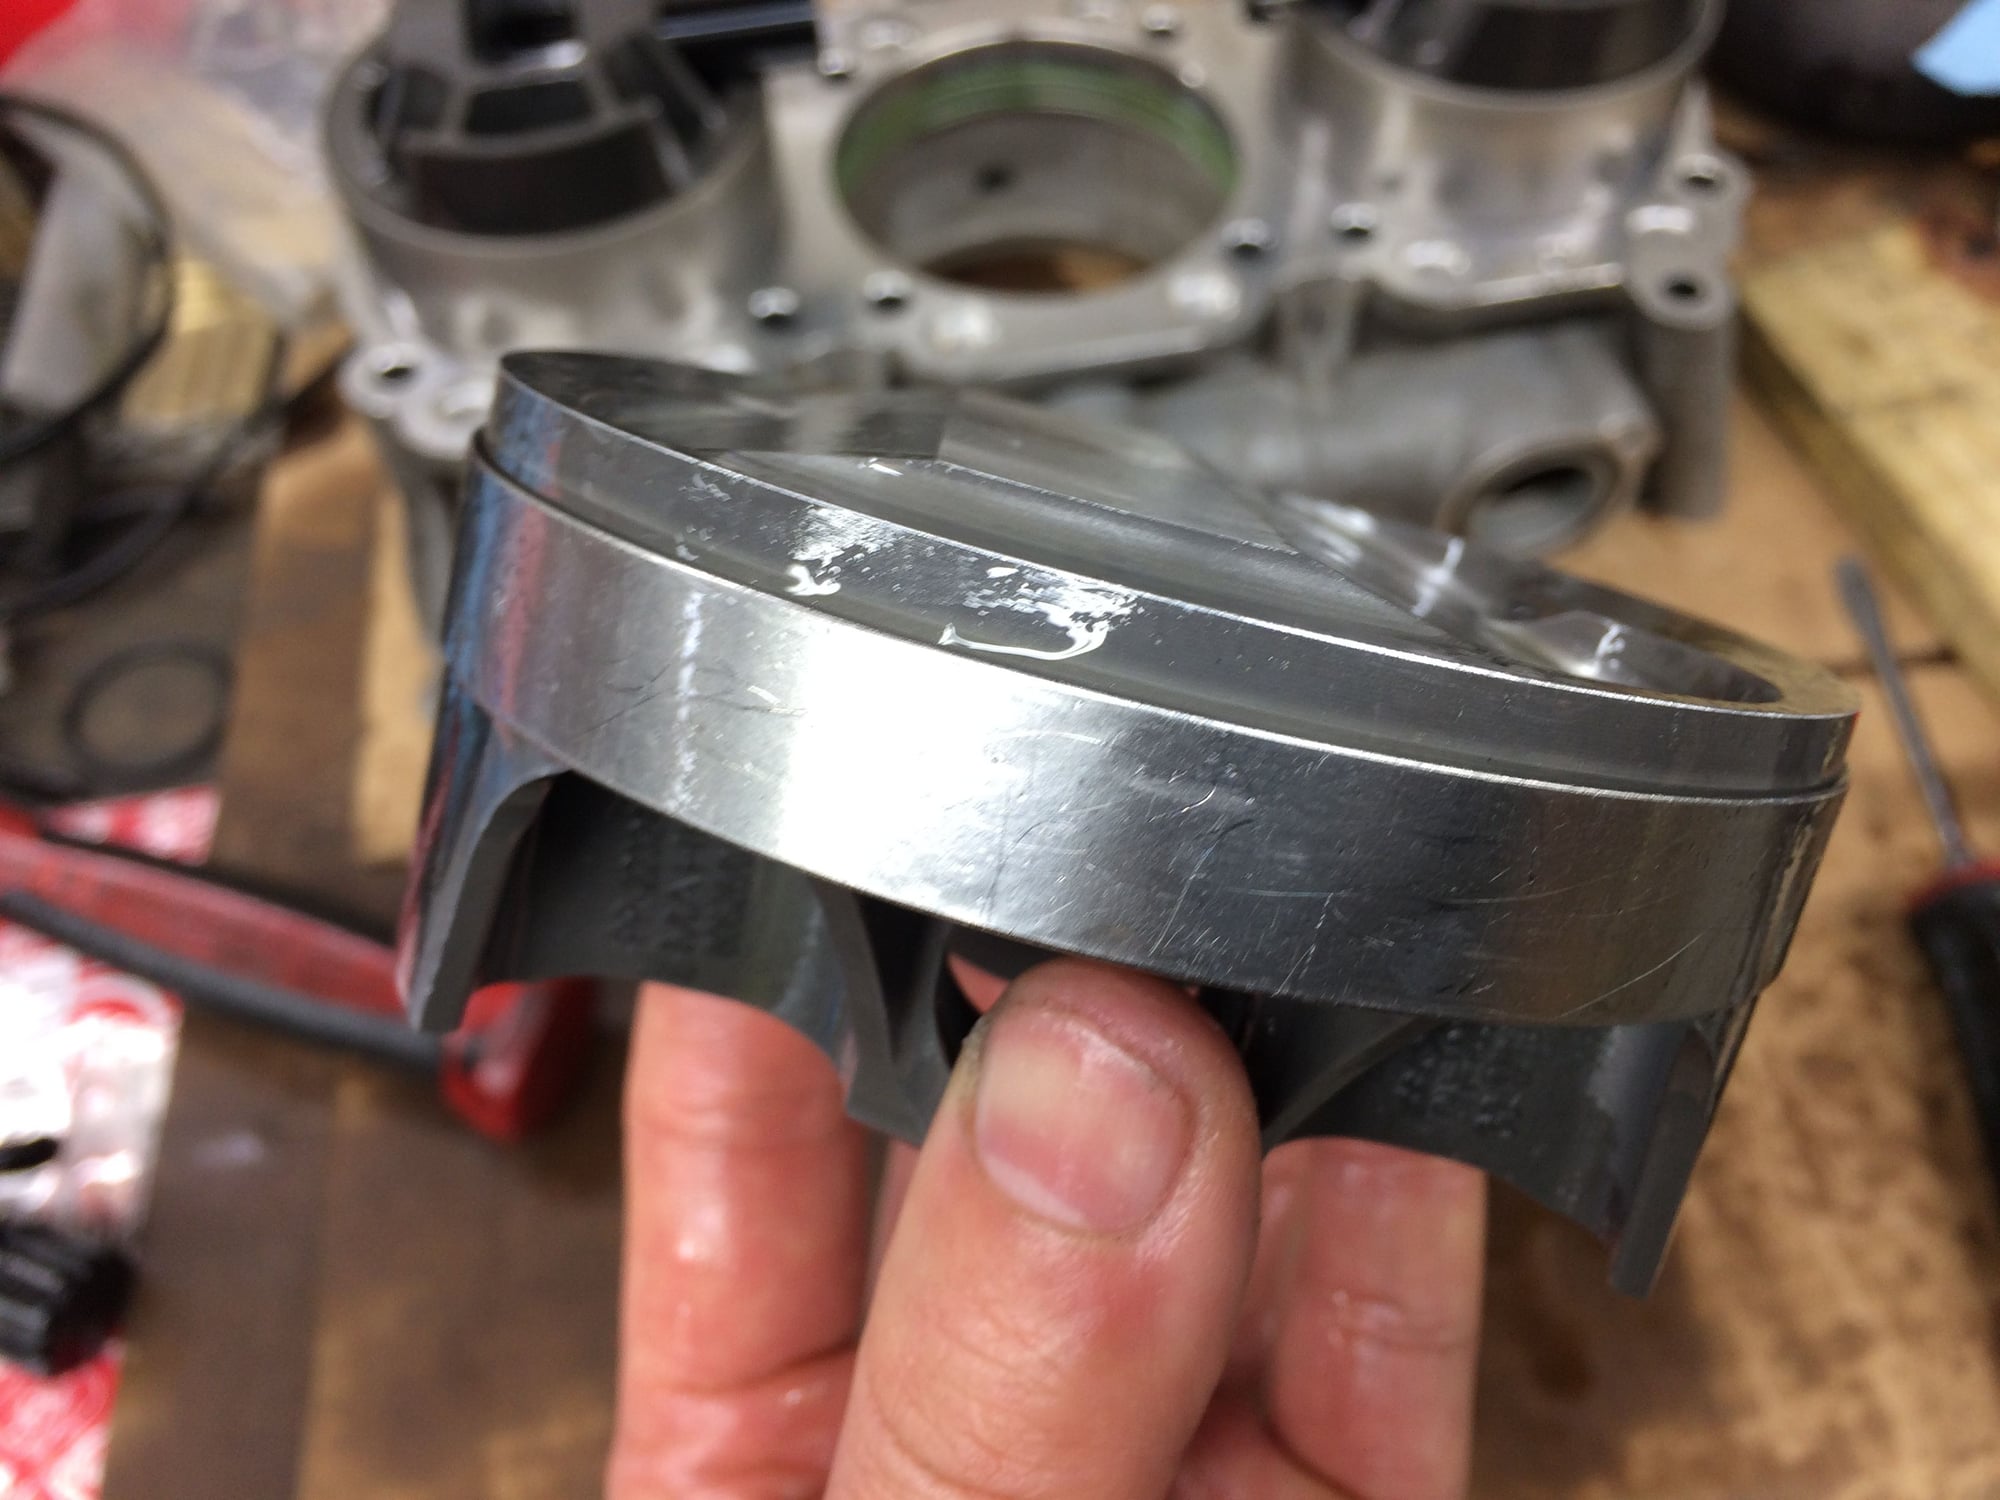
After no less than EIGHT attempts I have this-
The trouble I had was keeping downward pressure on the retaining band against the cylinder sleeve with my left hand while using my right hand to gently yet forceful enough to overcome the spring tension of the three compressed rings to move the piston assembly upward a ring kept popping out between cylinder sleeve and the retaining band. Each time that happened had to start over and make sure each component is cleaned and lubed.
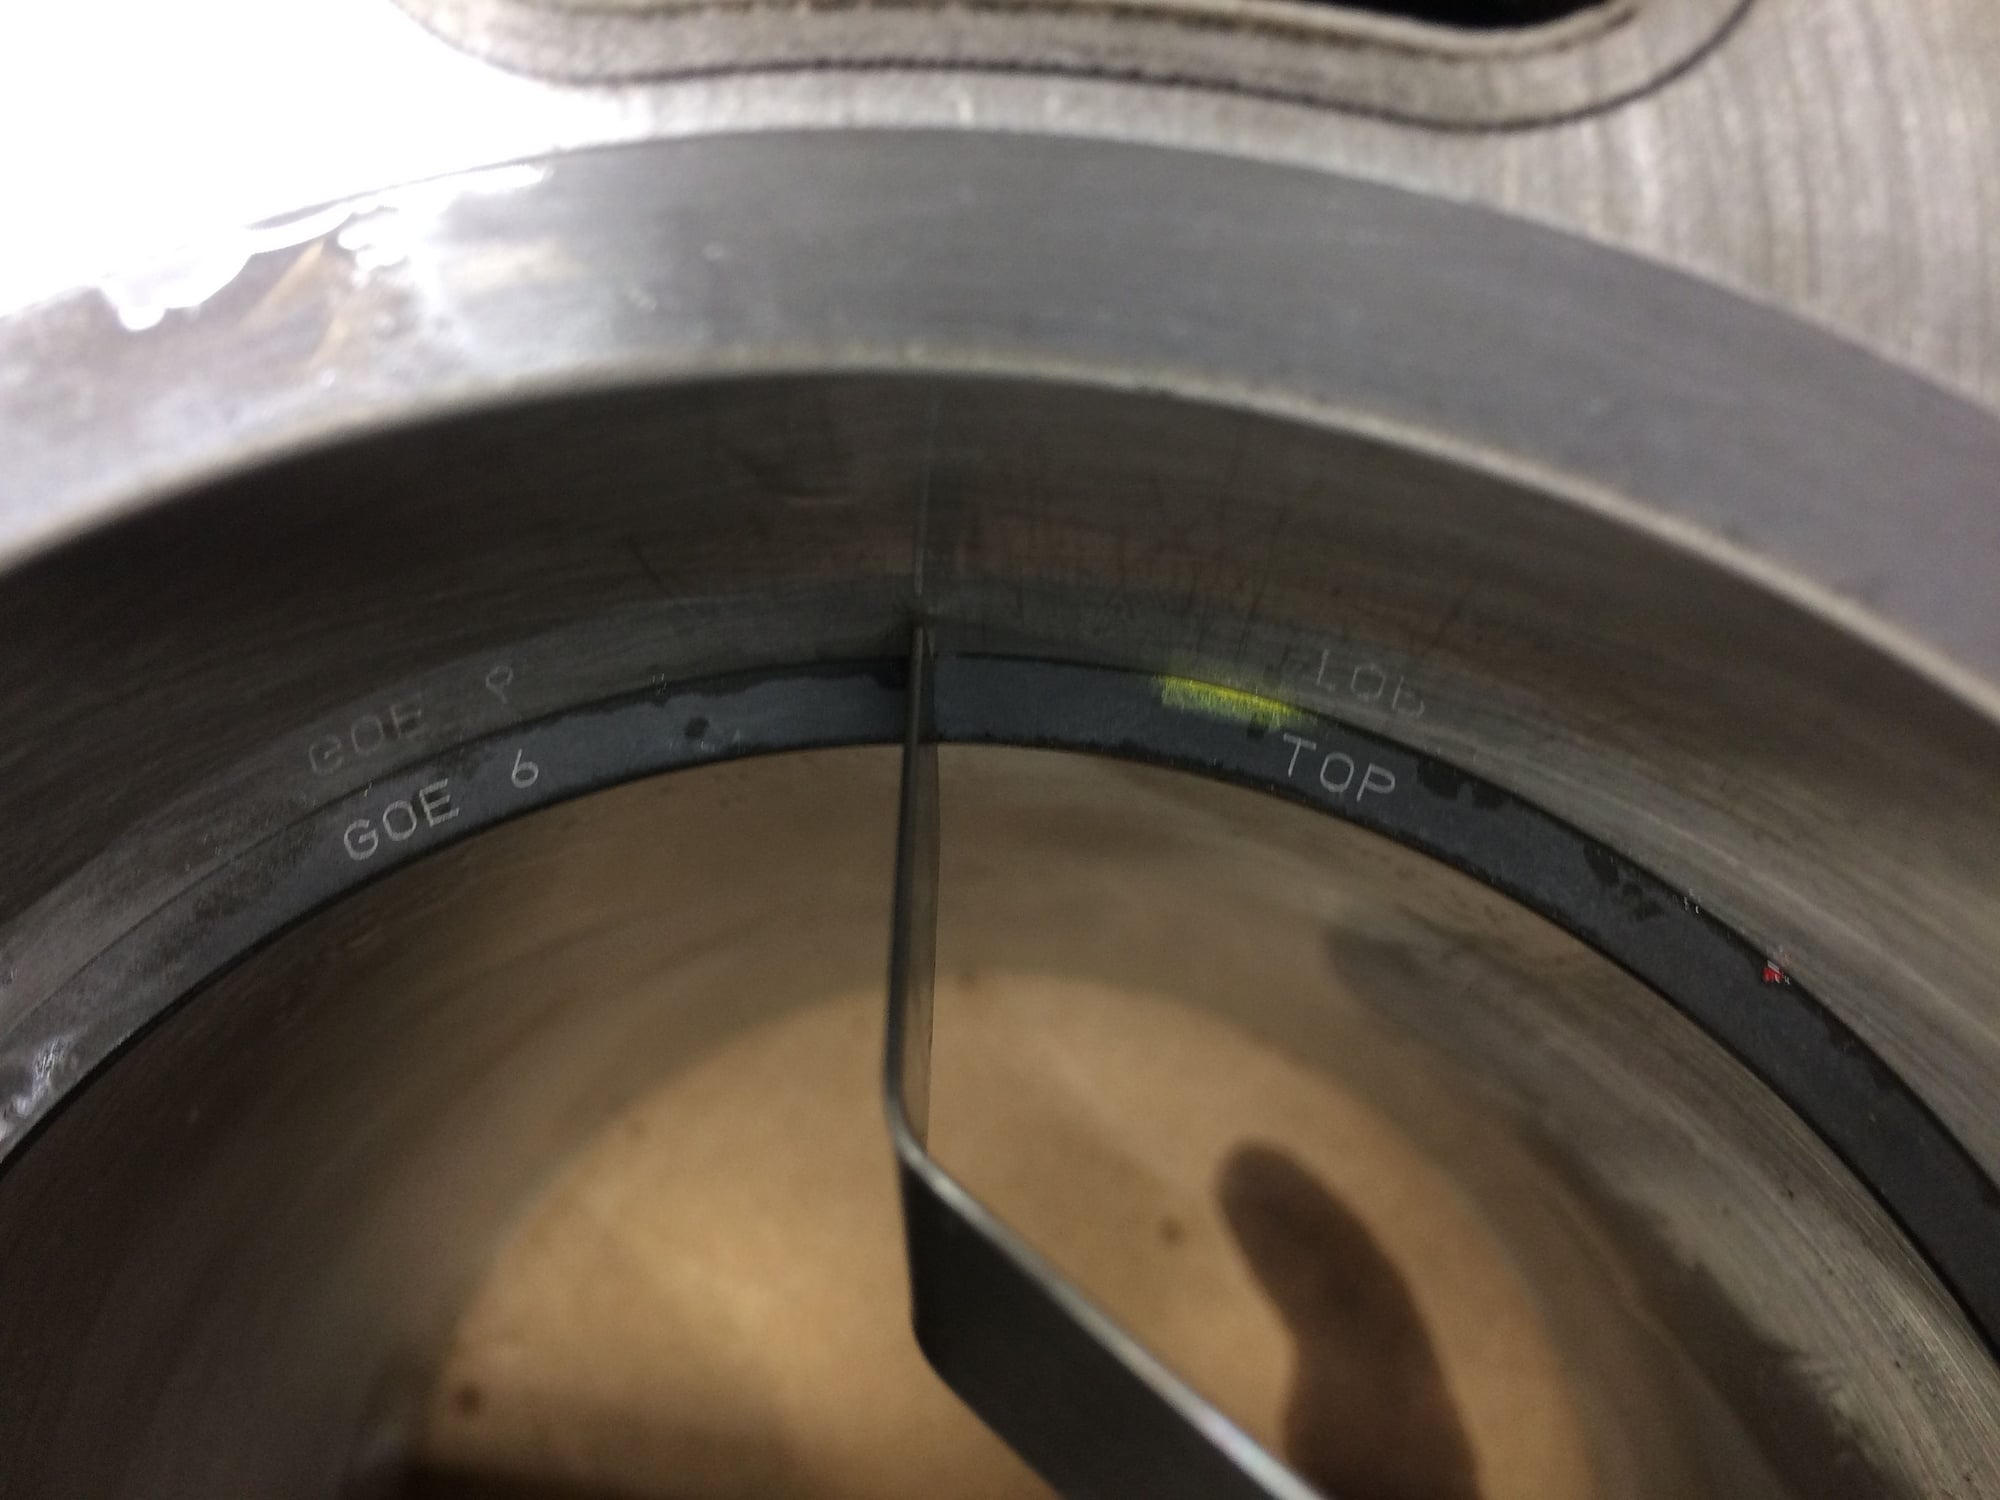
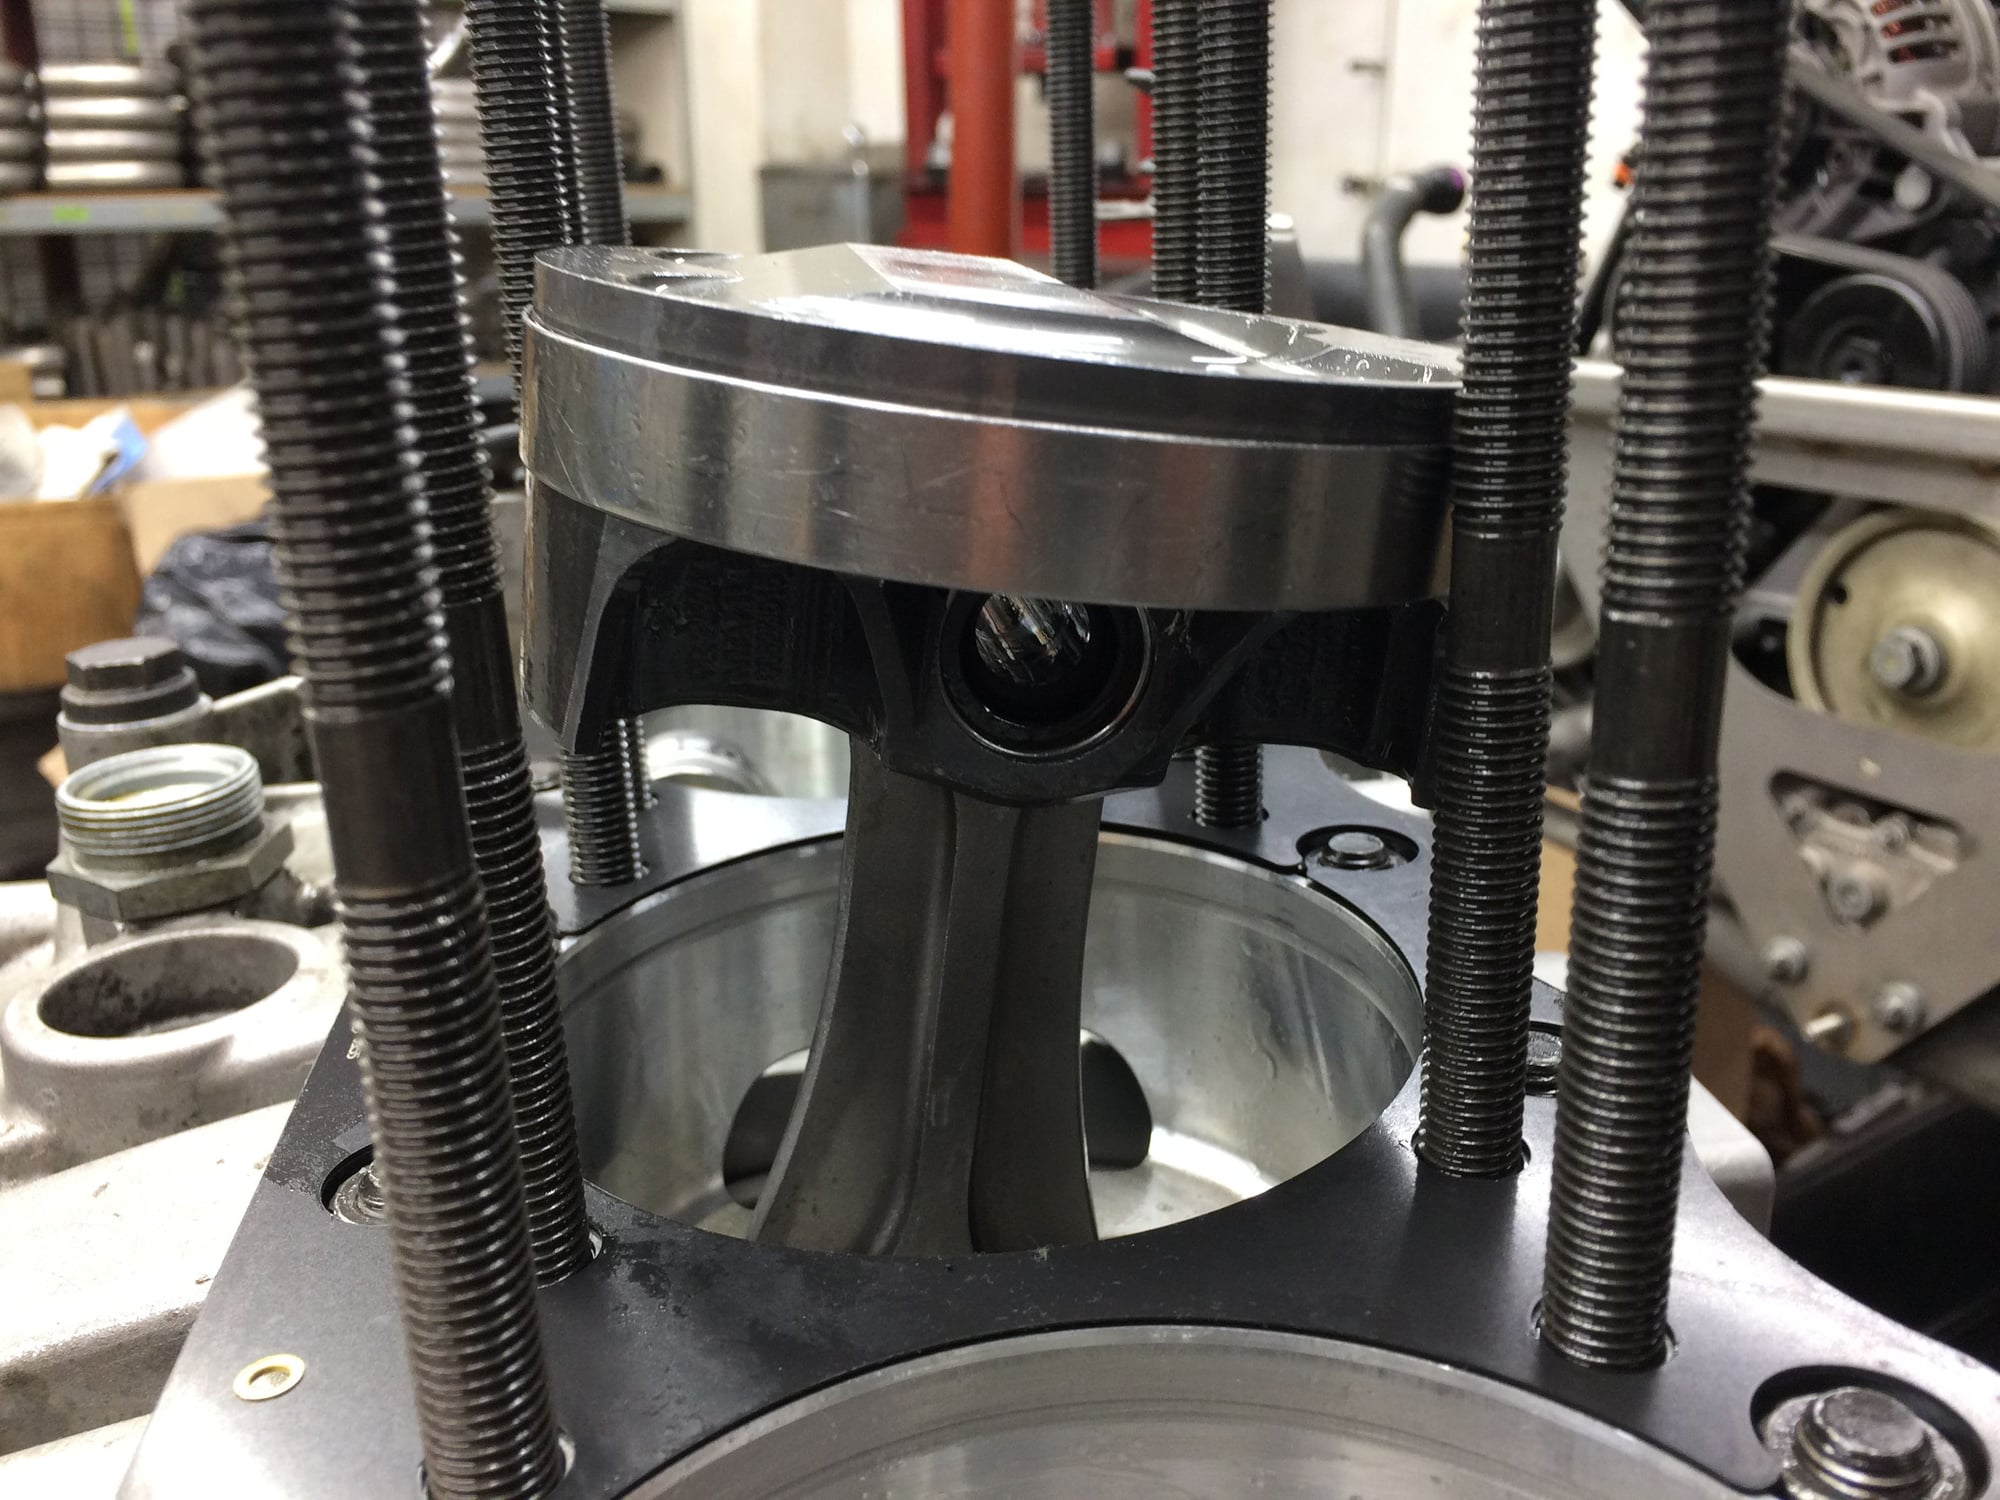
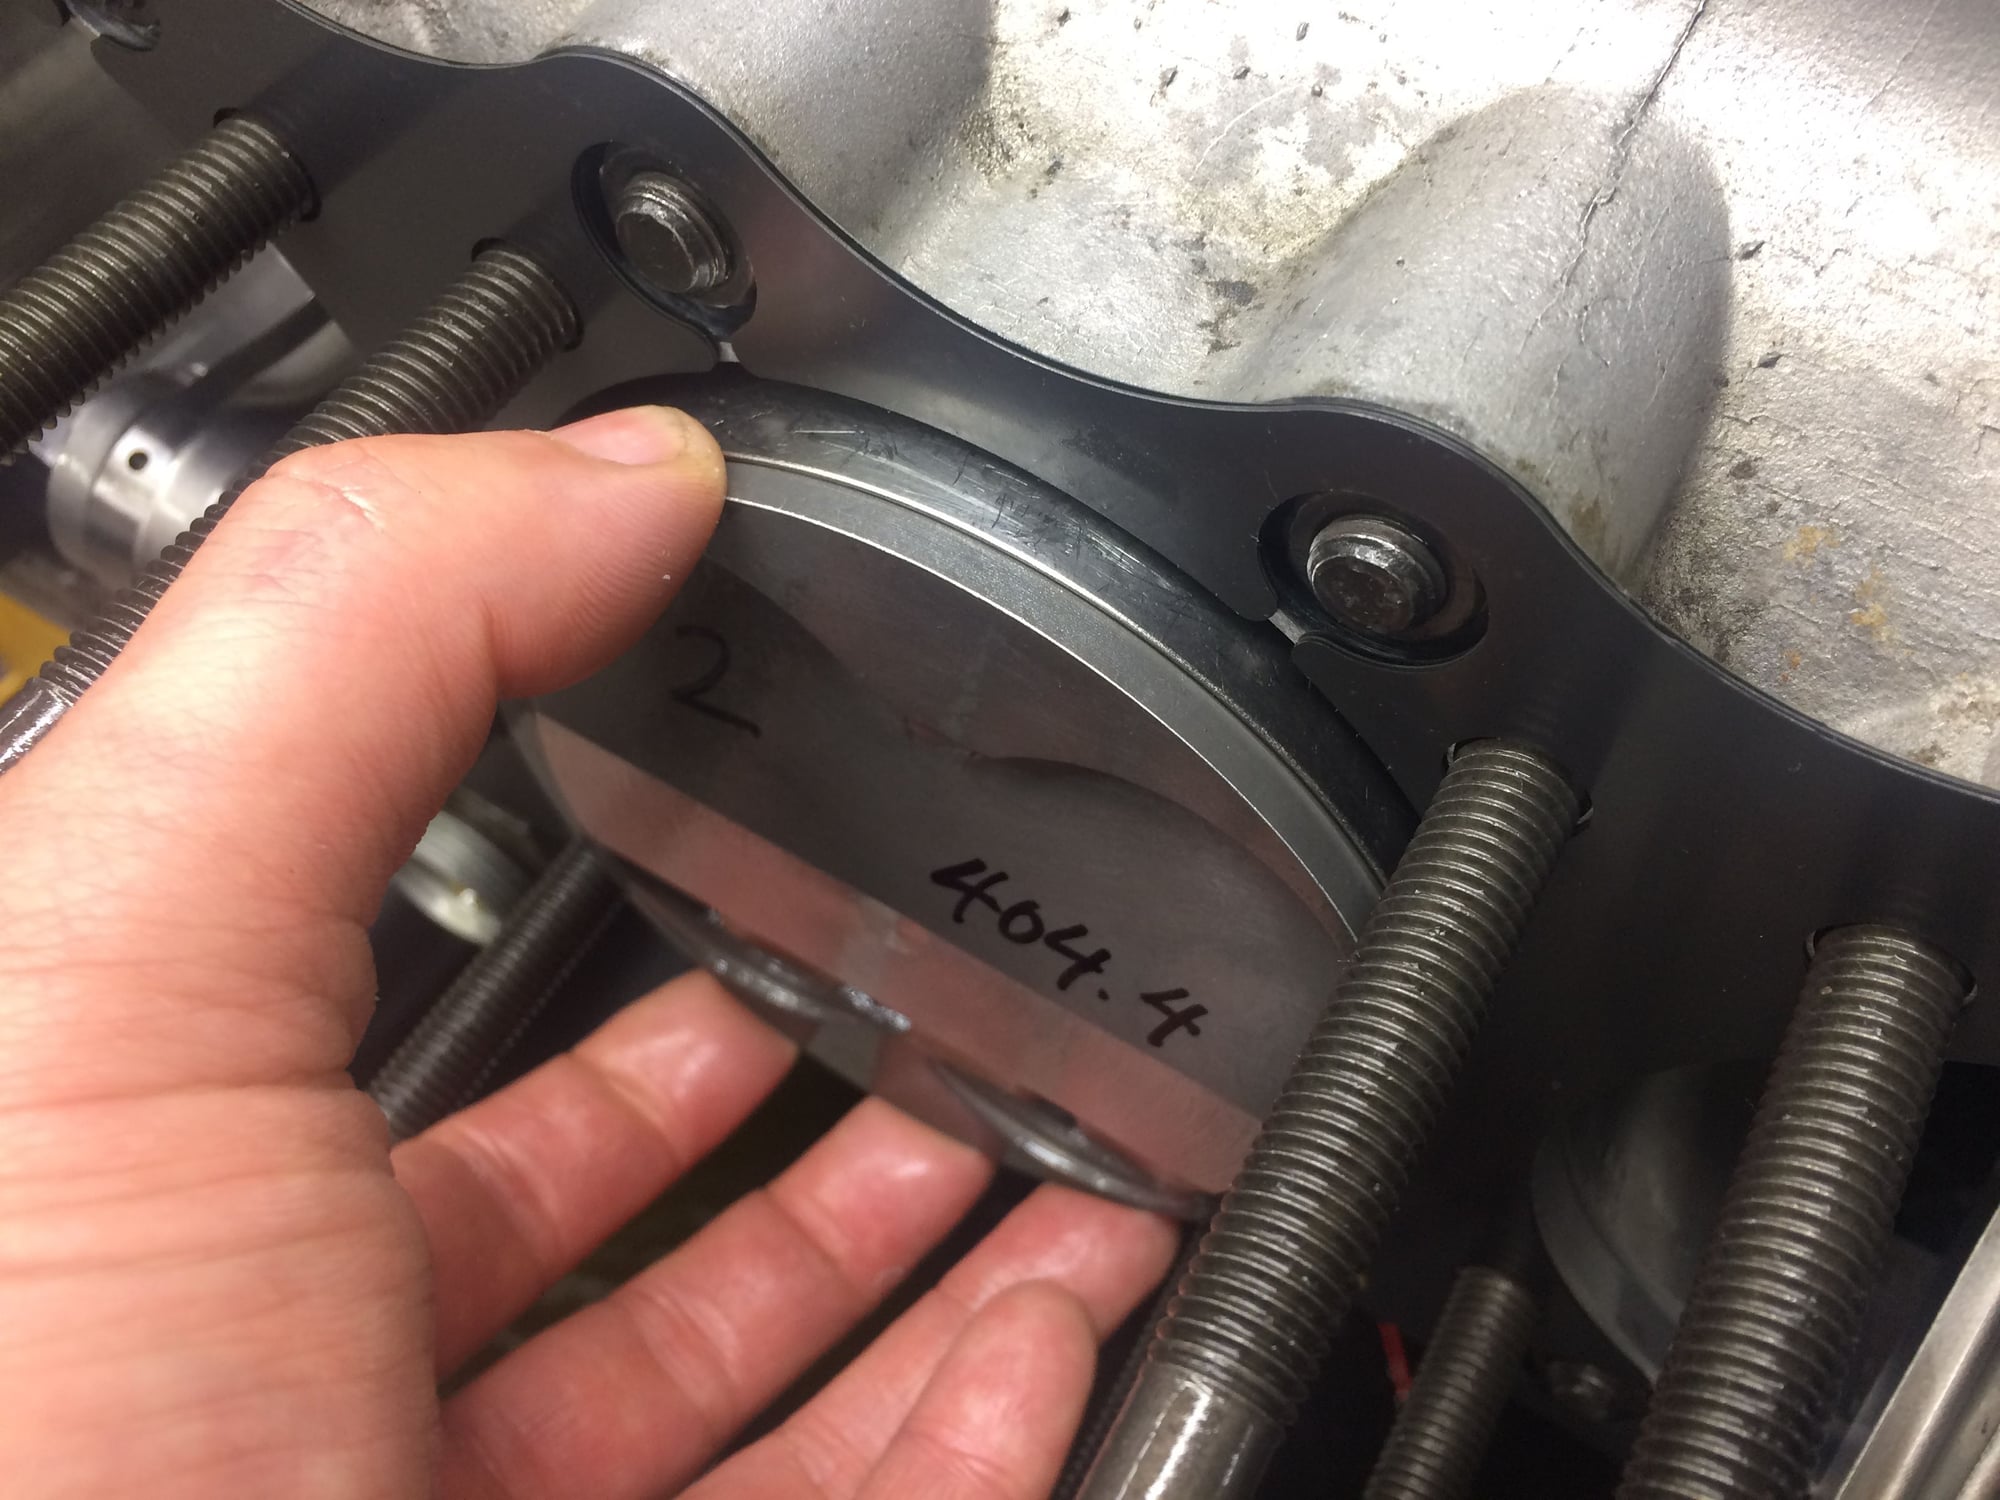
Here is a "loaded" piston. The retaining band barely covers all three rings so one slip of the band means start over.
Next stop, the middle piston wrist pin clip. Not a disappointing act after the middle piston.
Installing the clip between studs without disturbing the retaining band.
Almost have it in. Don't let the band slip!!!
Got it. Wow. That was a rush.
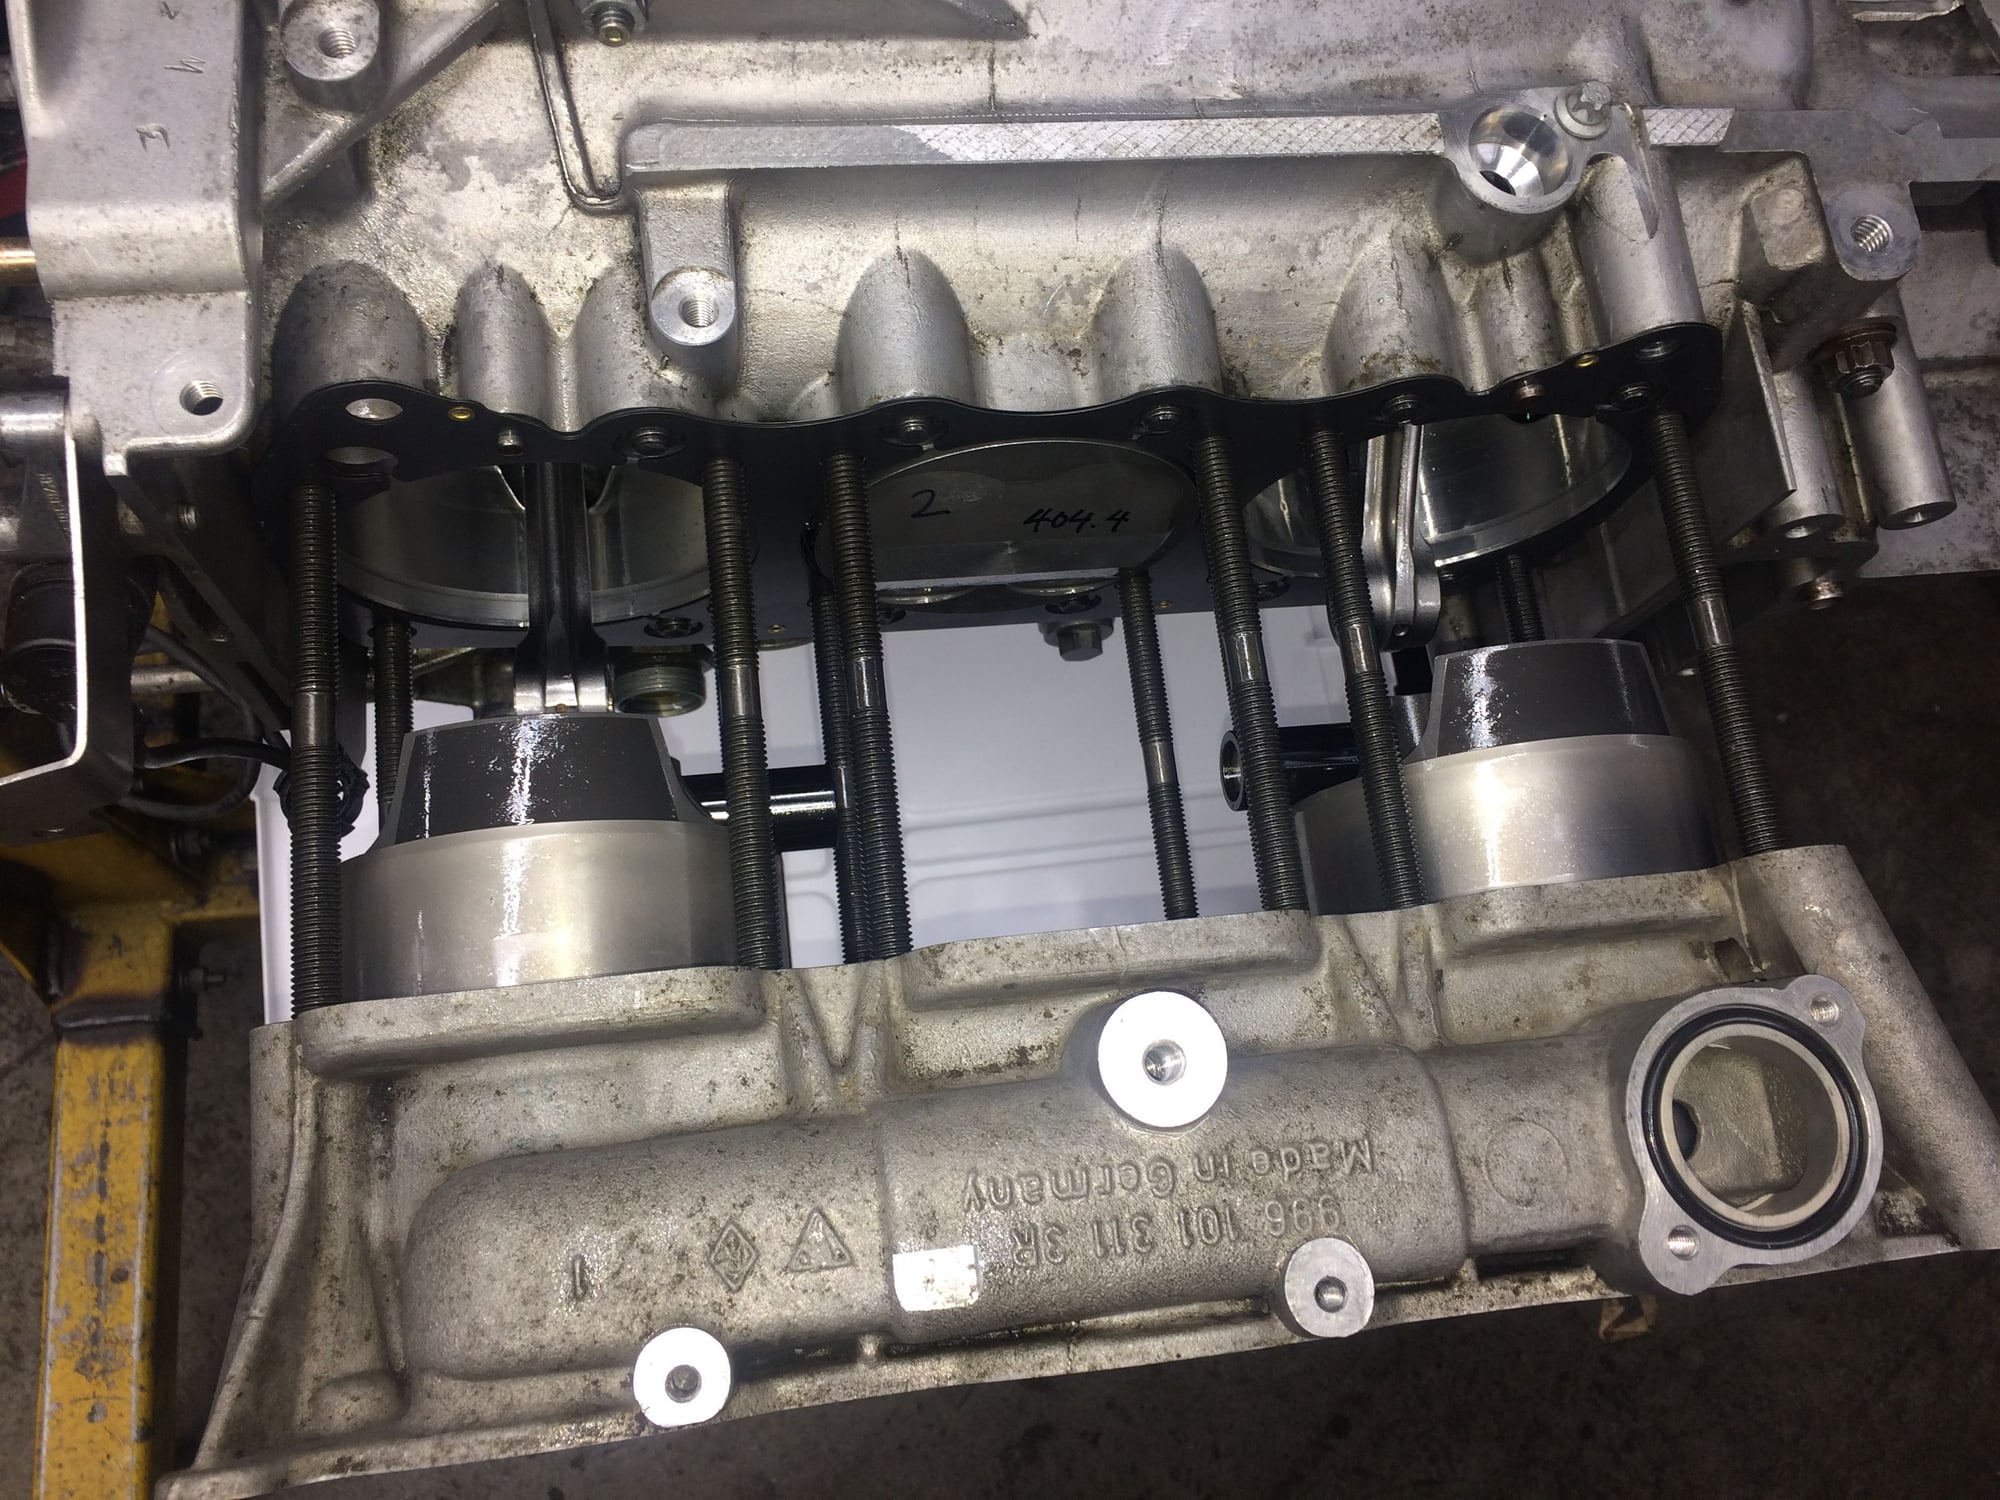
Here's the top view...as I exhale.
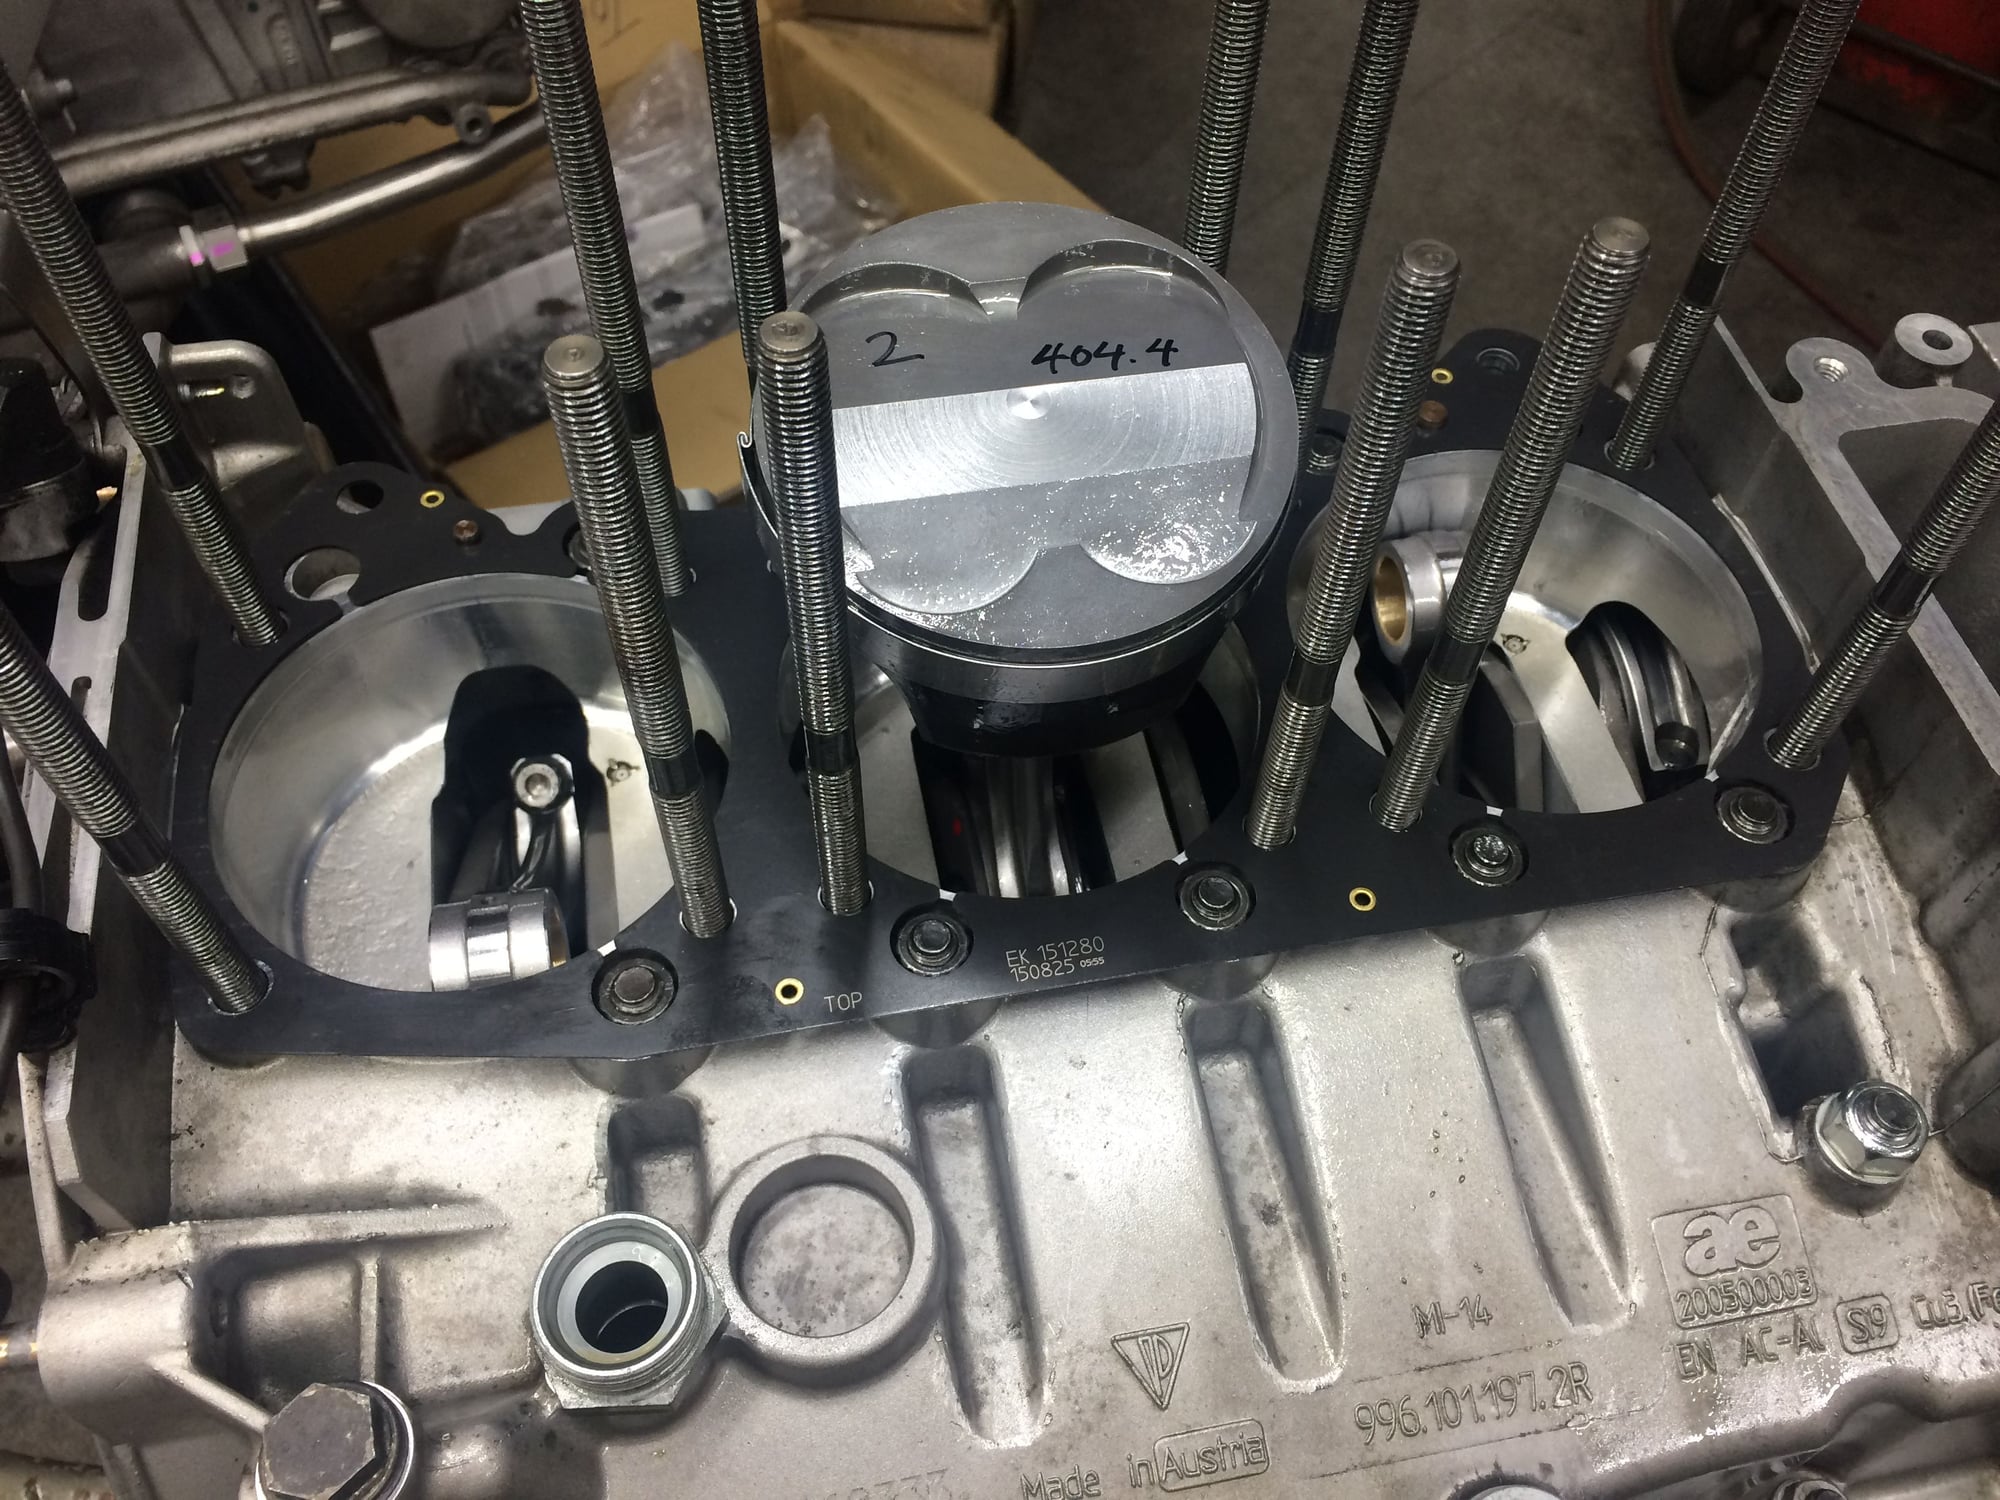
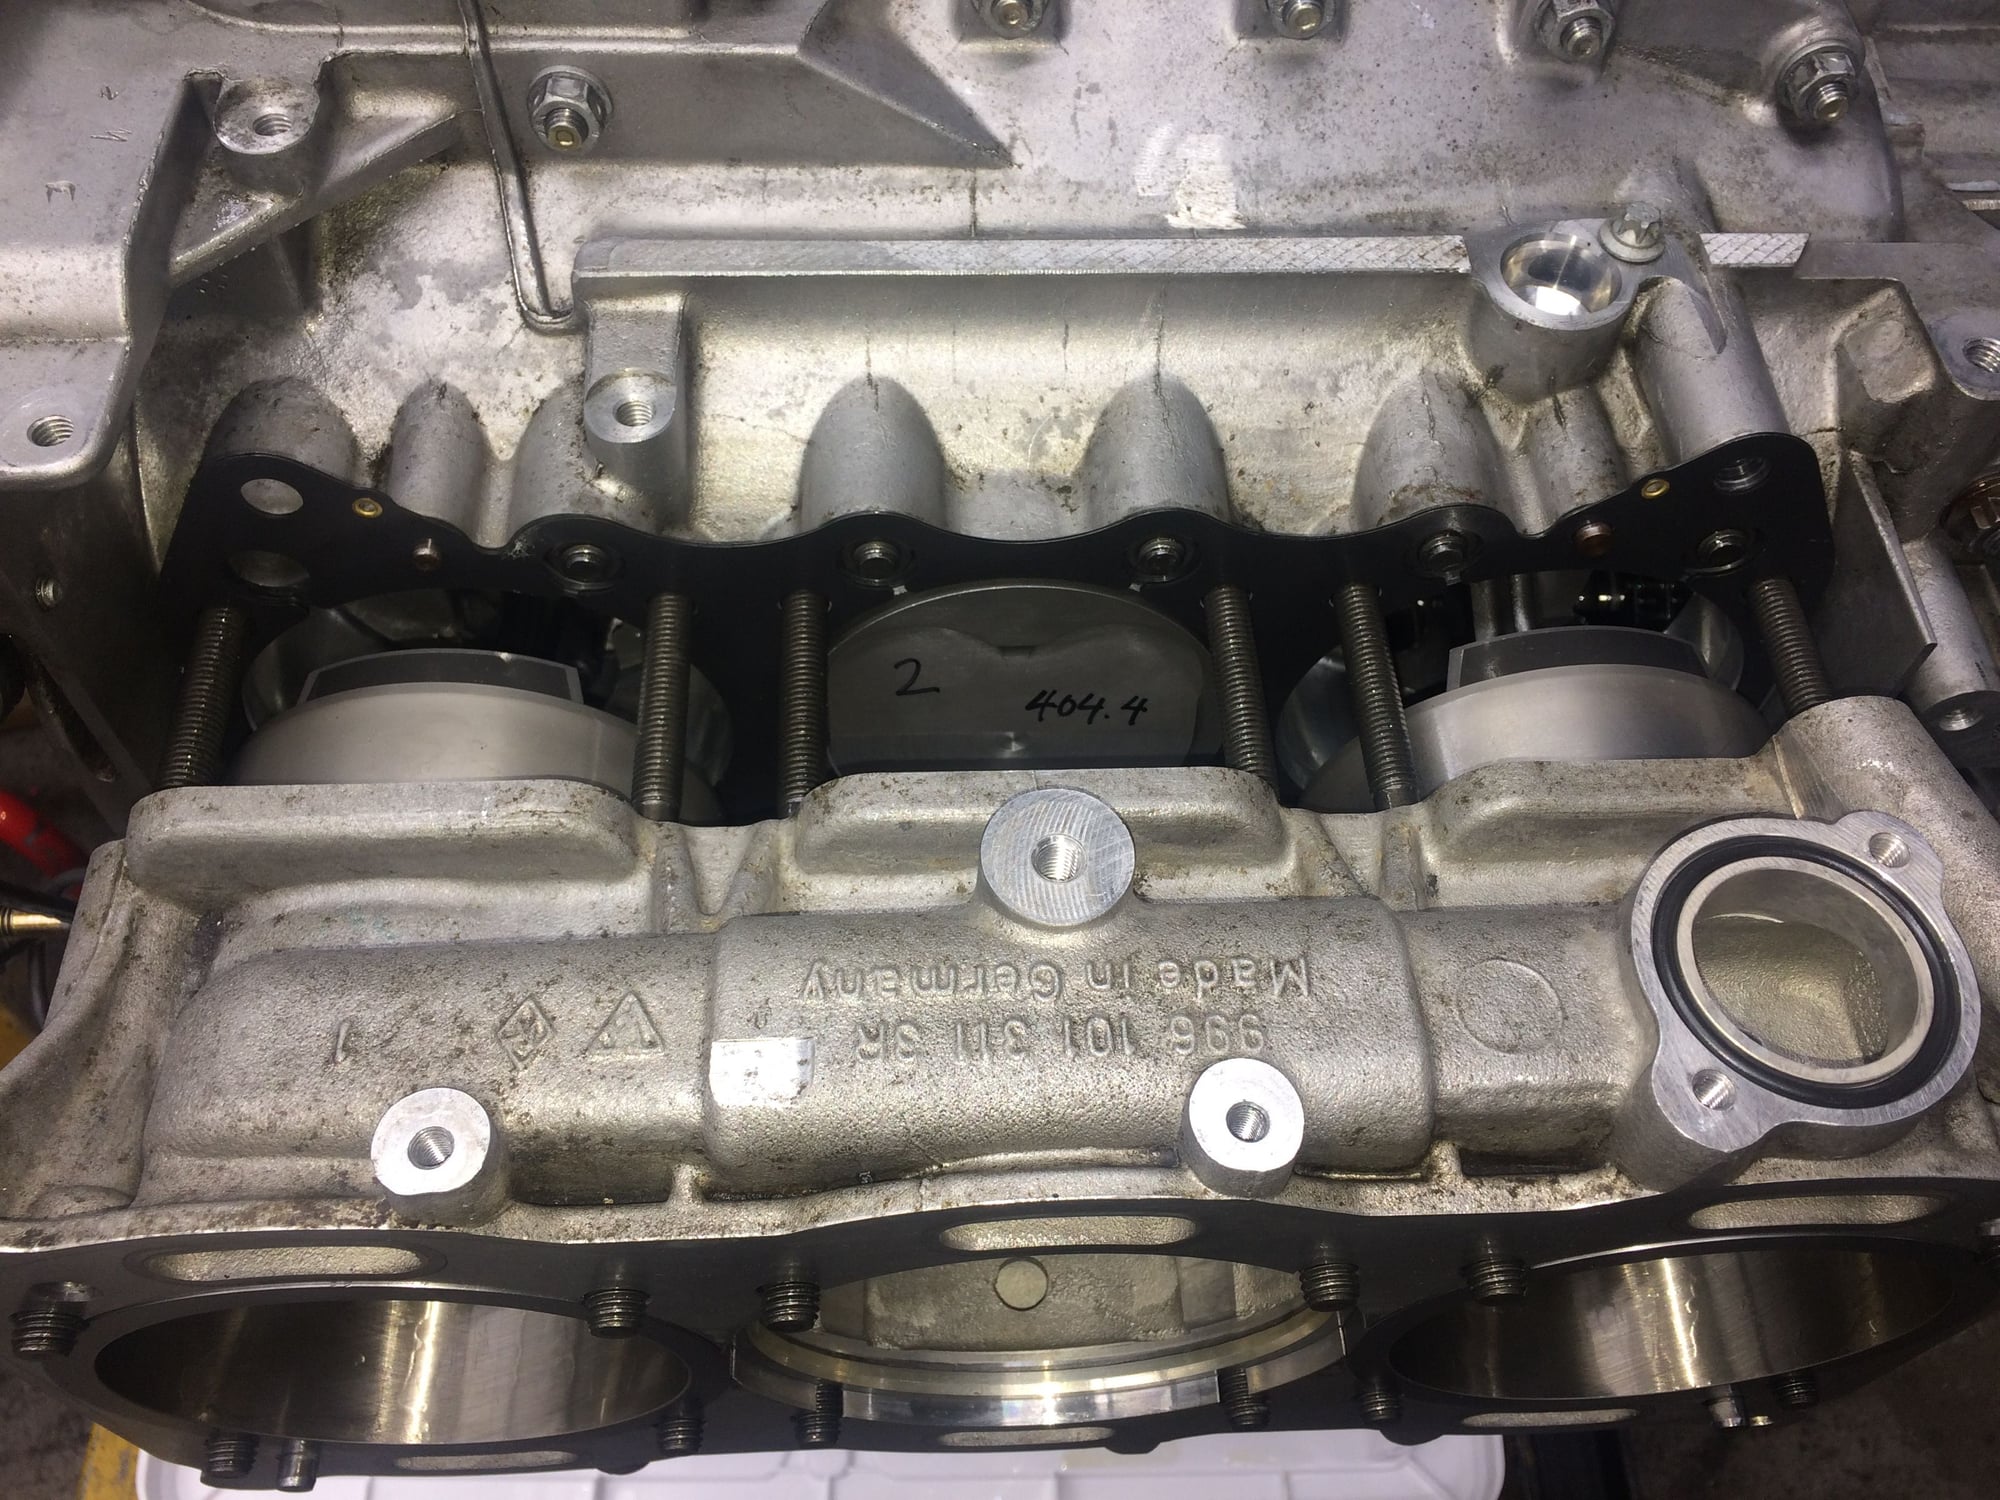
Now carefully and slowly turn the crankshaft to bring the middle piston in to the block, oh and don't lose the band. This puts the outter connecting rods to better positioning.
Next step is to install the cylinder housing(with the outter pistons already loaded). Must align the two outter connecting rods to the wrist pins.
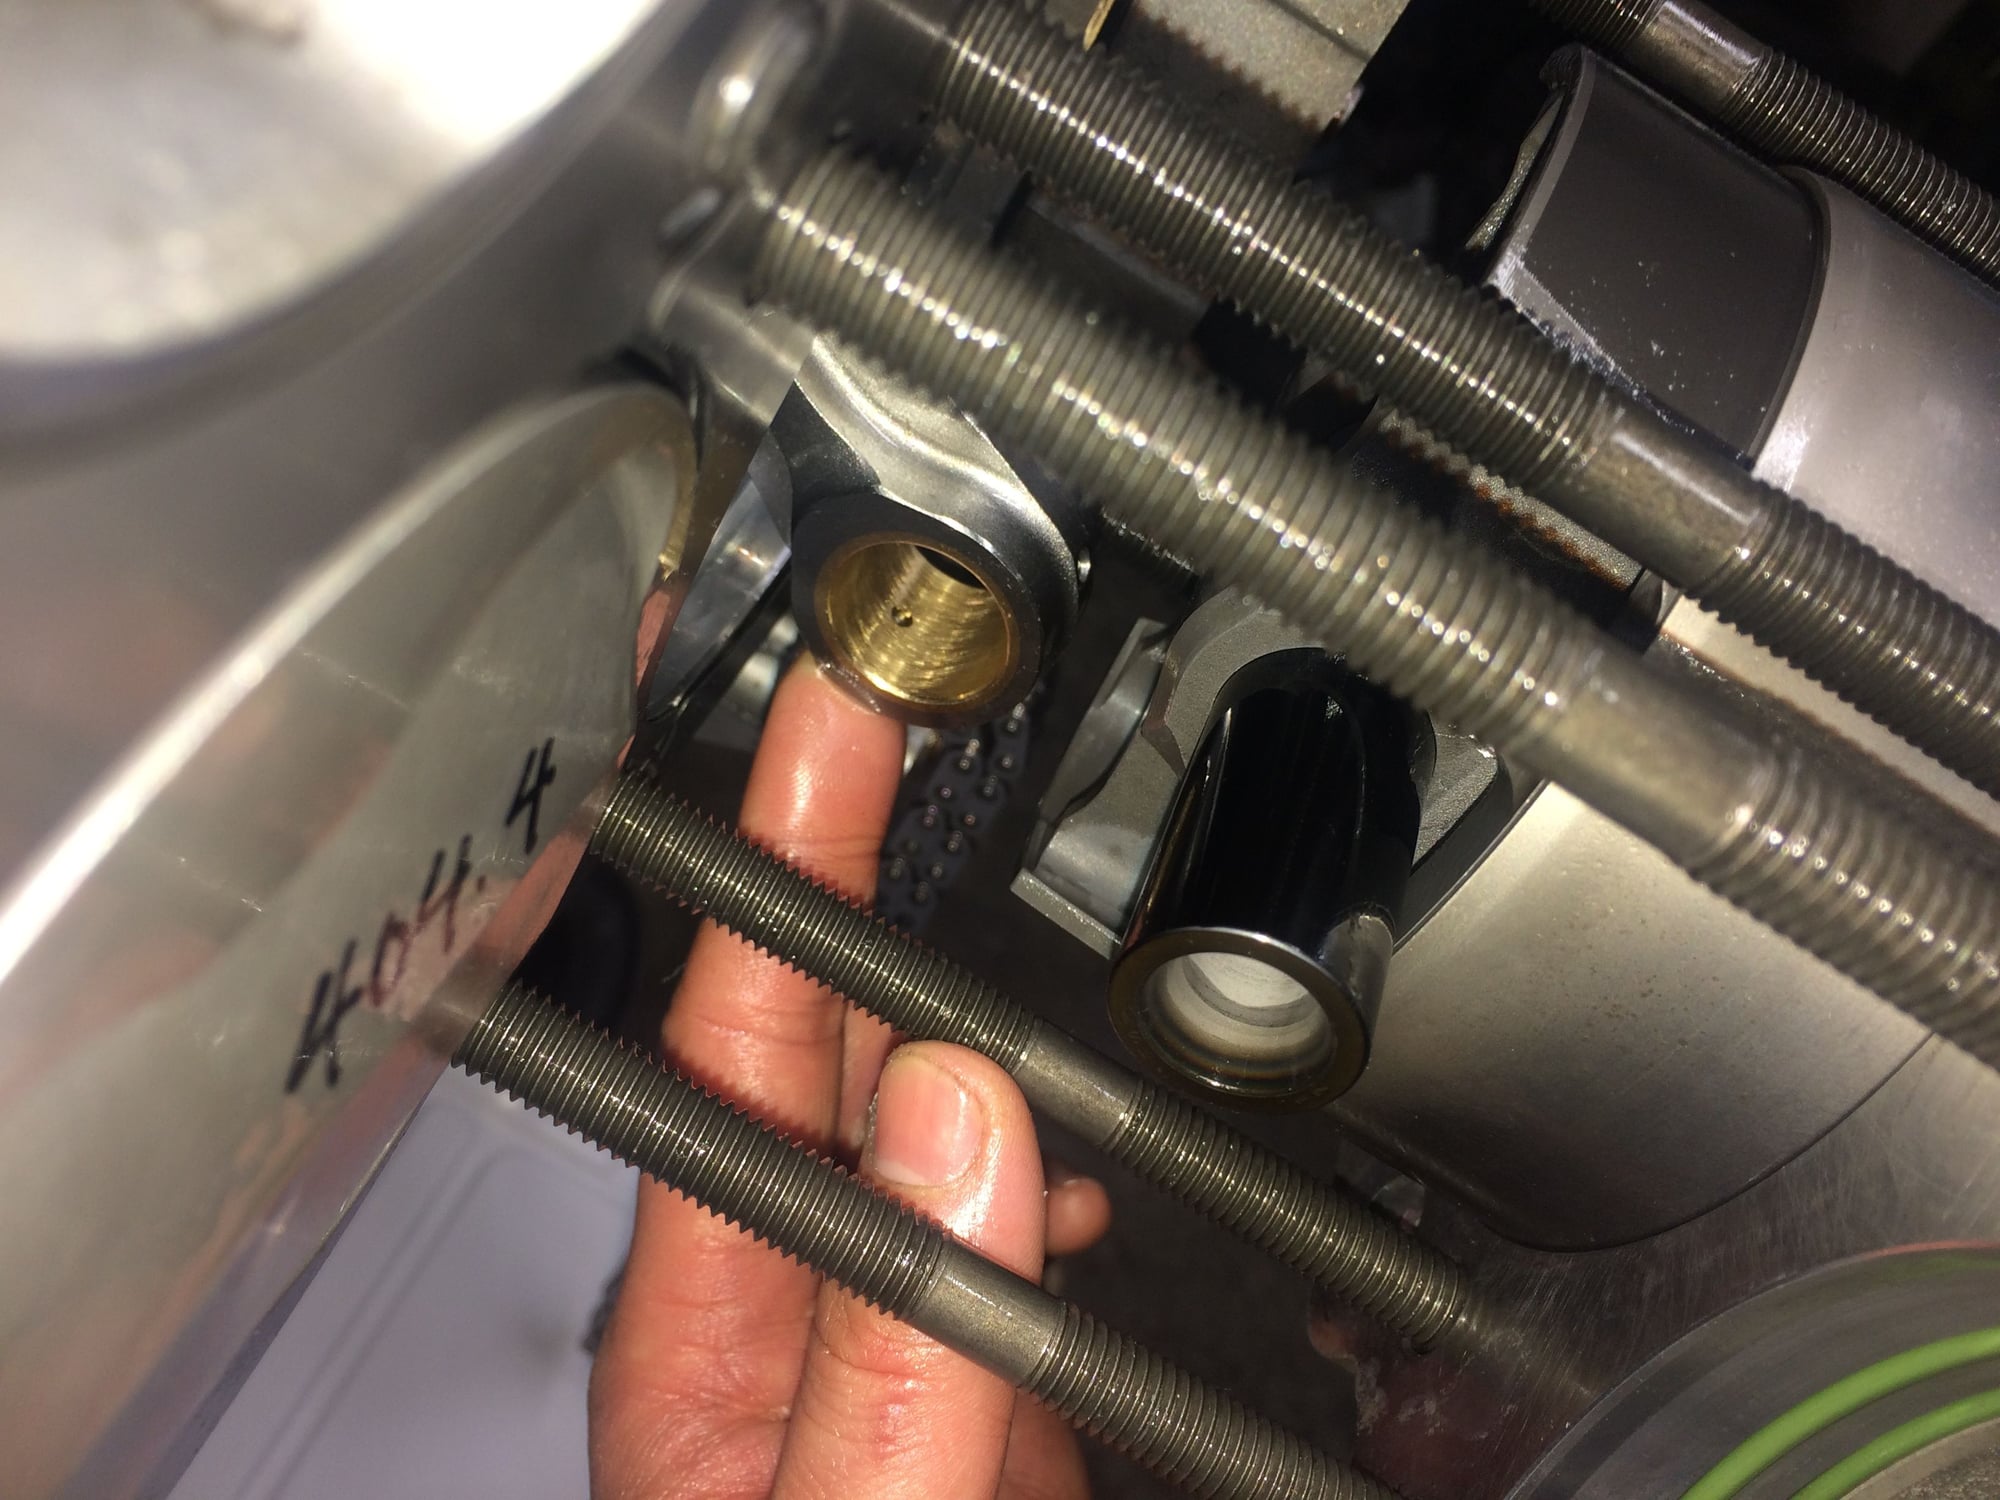
Closer view of the connecting rod small end and wrist pin to be inserted. Same applies to the outter pistons- don't let a ring pop out!
Now I see why the outter clips must be installed first. Because once the loaded piston is close enough to reach the connecting rod there's not enough room to work in the clip with the obstruction on either end of the engine block.
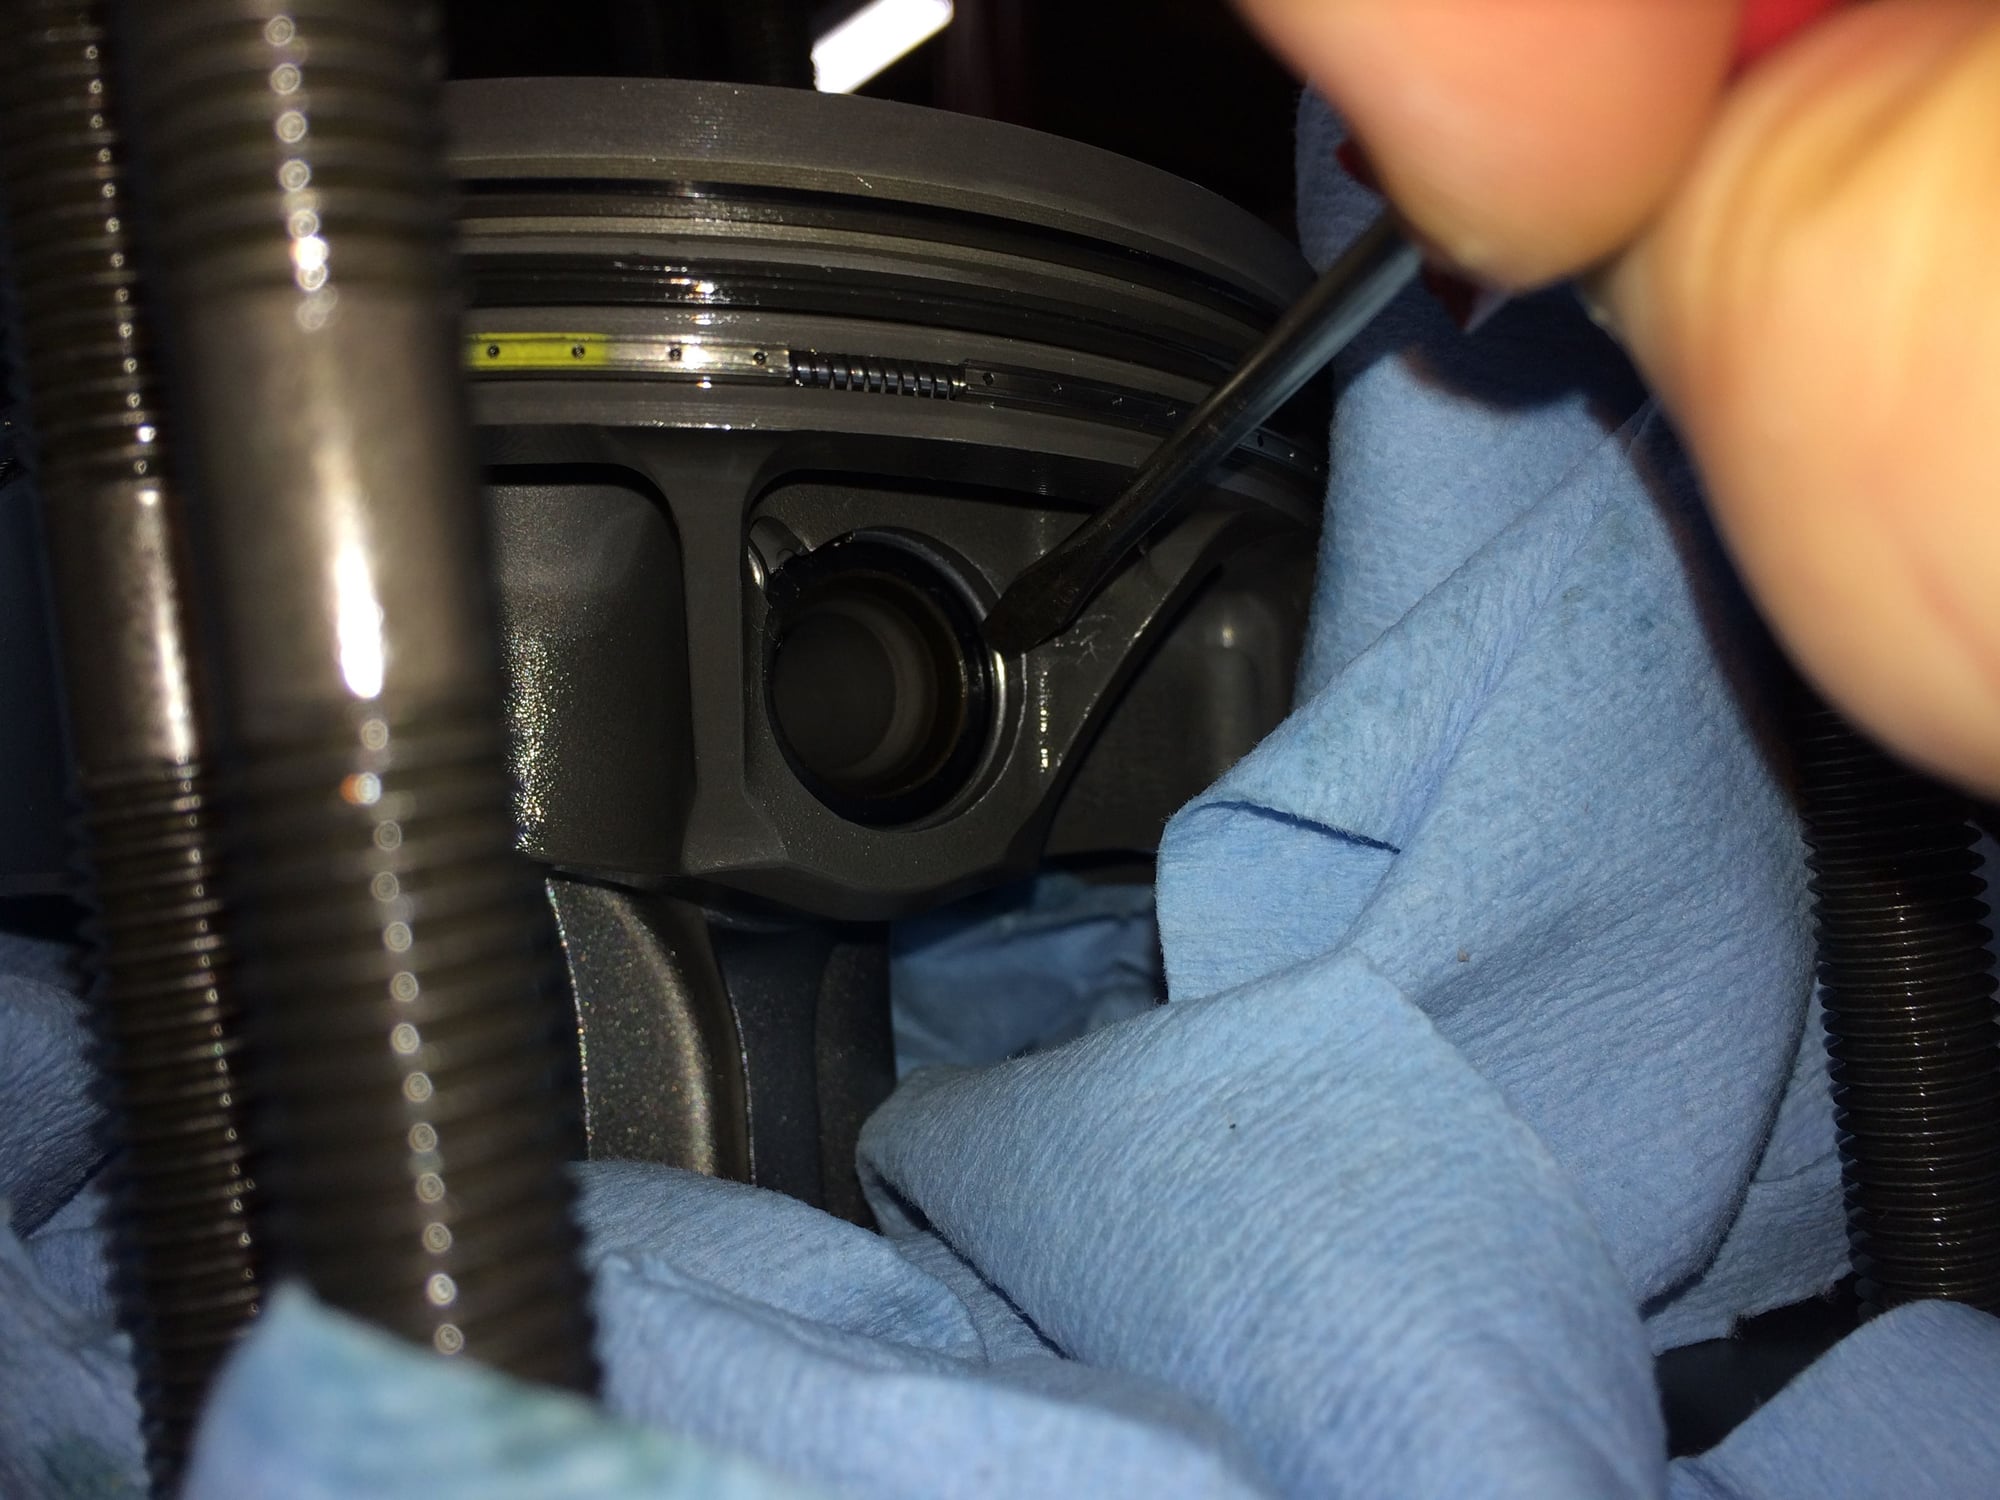
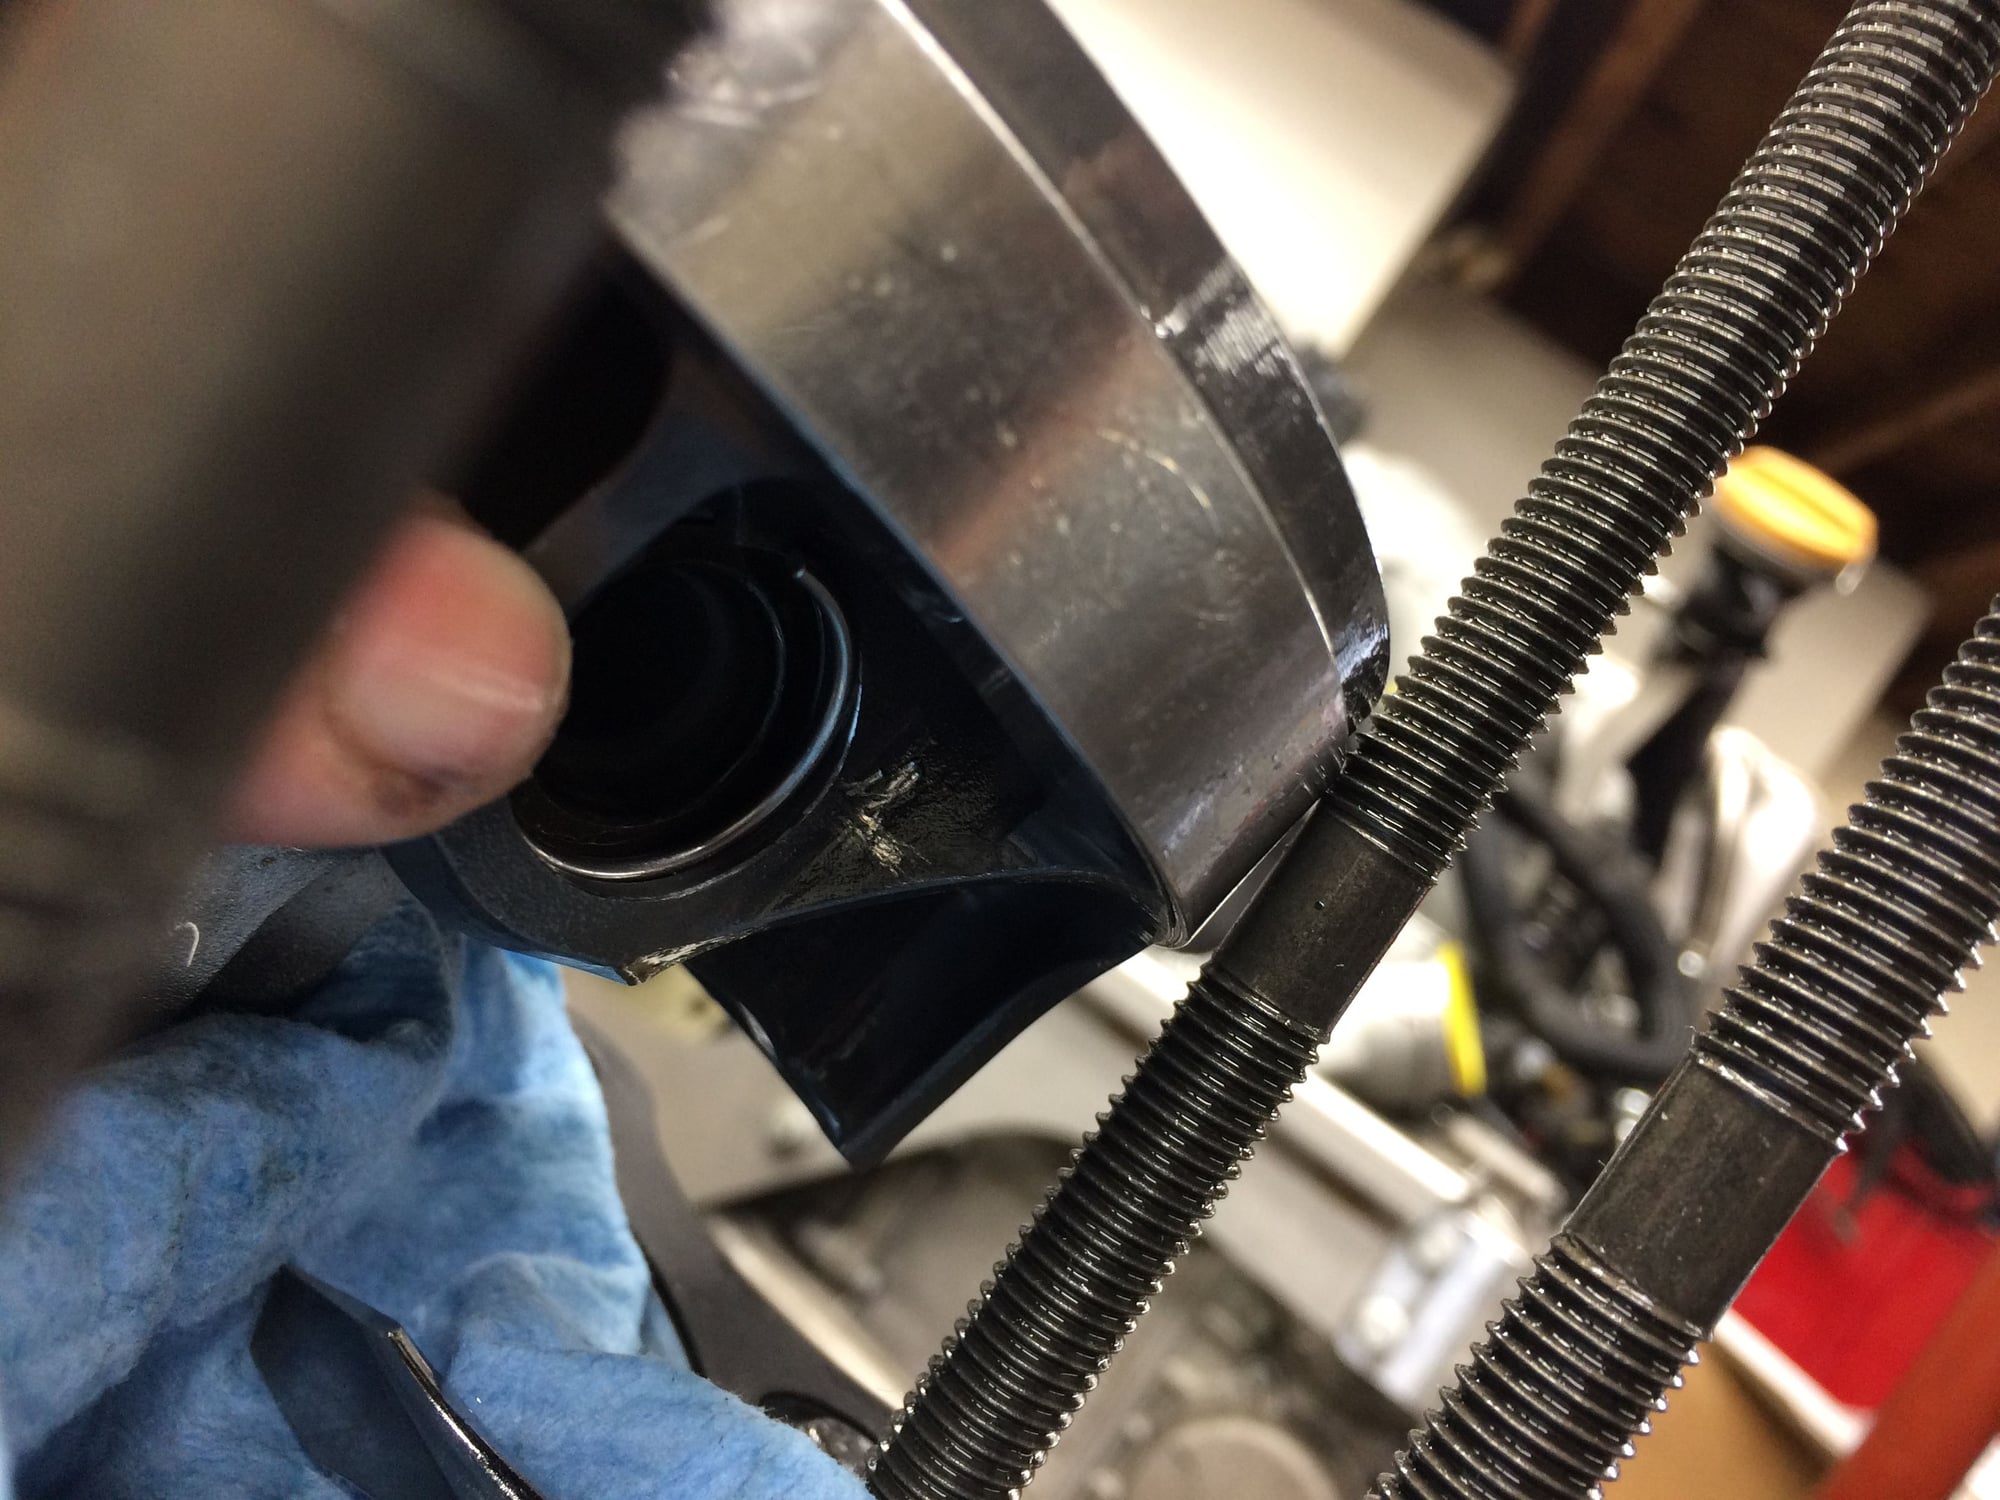
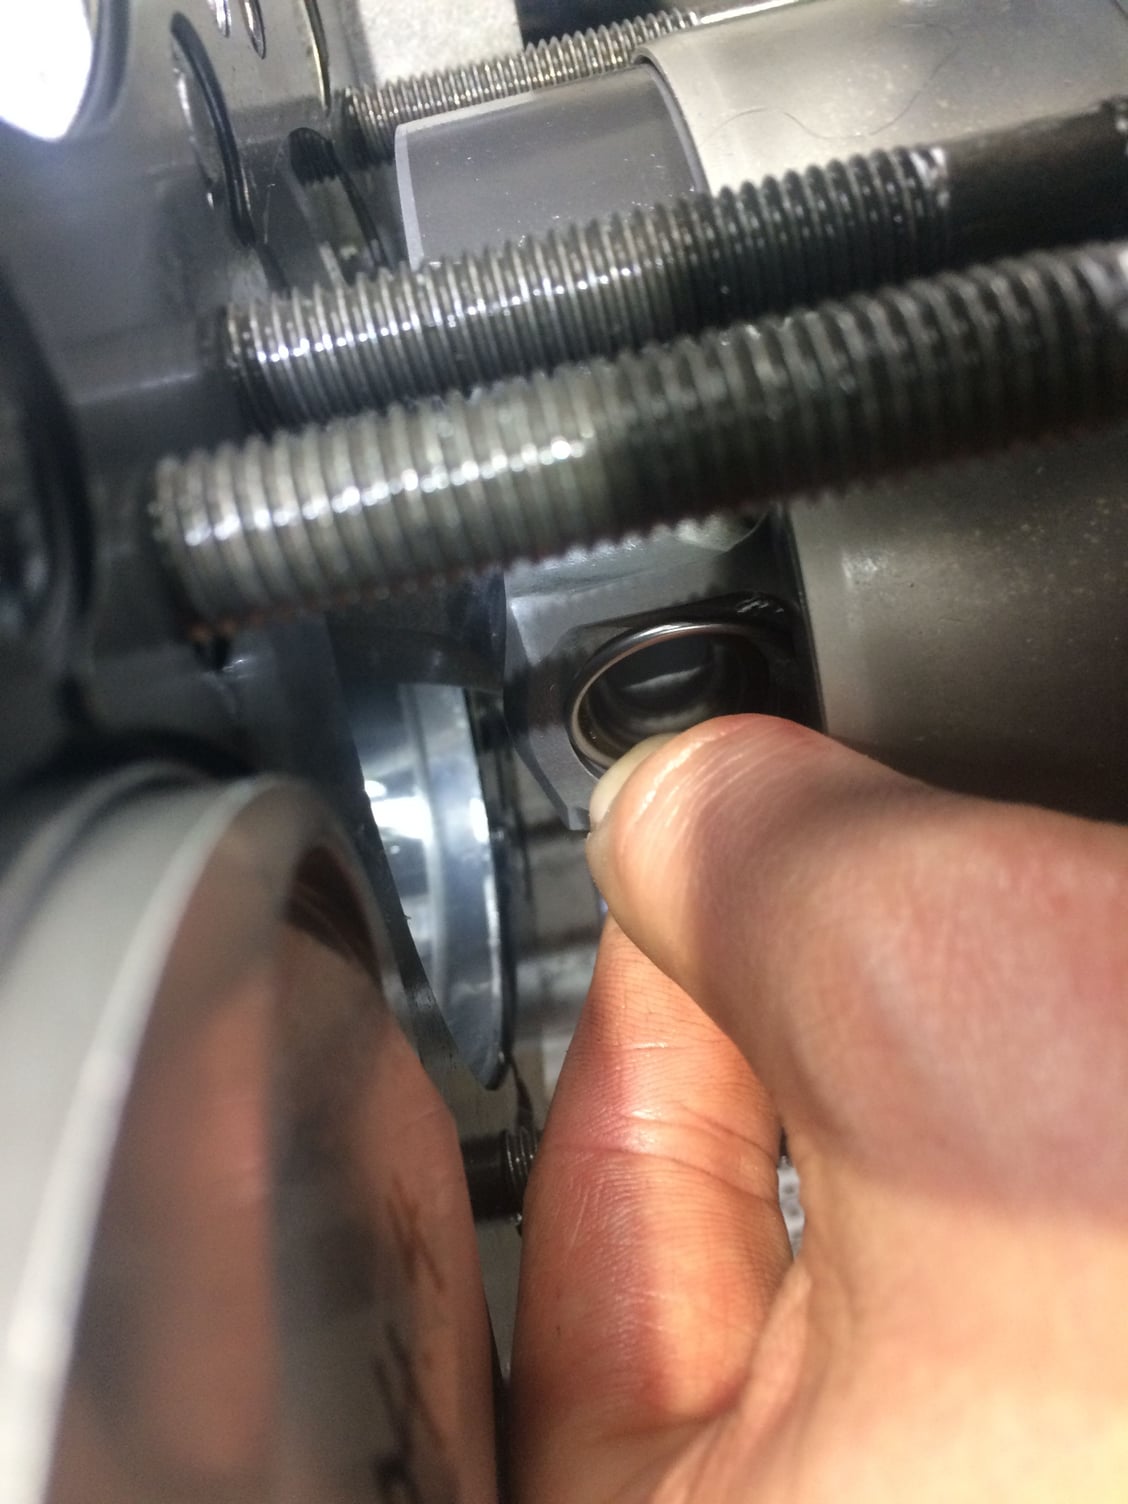
Next is to put my hand through the middle bore to insert the wrist pin in each connecting rods and you guess it...install the clips in this confined space. Note to self- don't let a runaway clip launch into the block! ...while my hand is starting to cramp from bending at a weird angle.
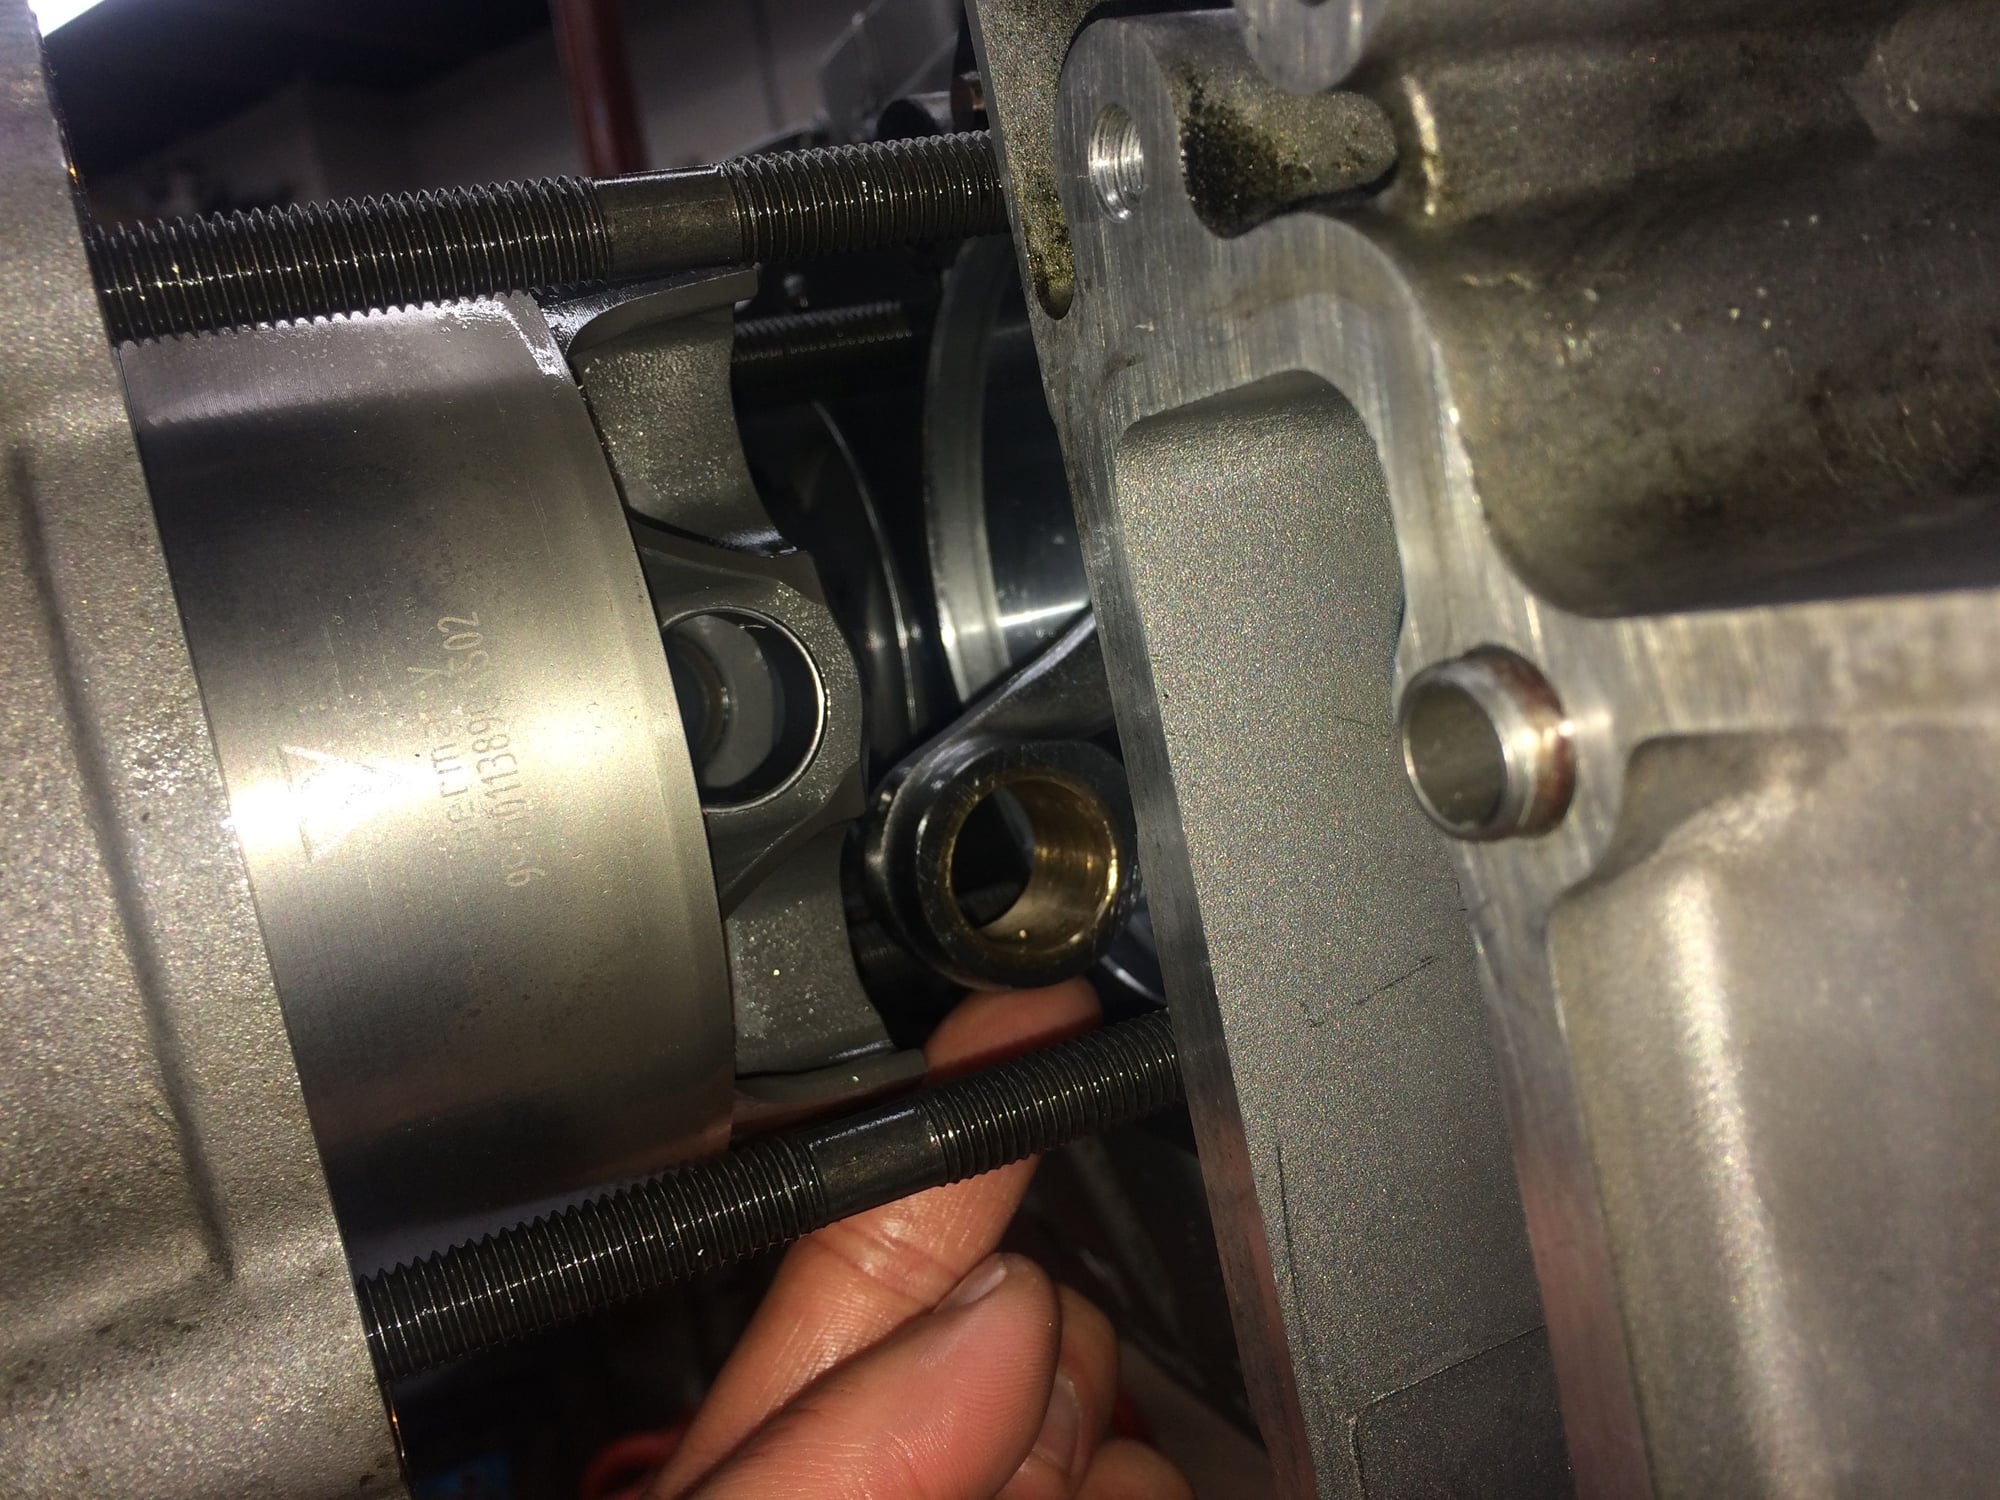
My POV of the inner clip. Have four inner clips to install(two per bank). As you can see there's no enough room for a standard ring compressor tool, which was my false idea to use before knowing the correct method.
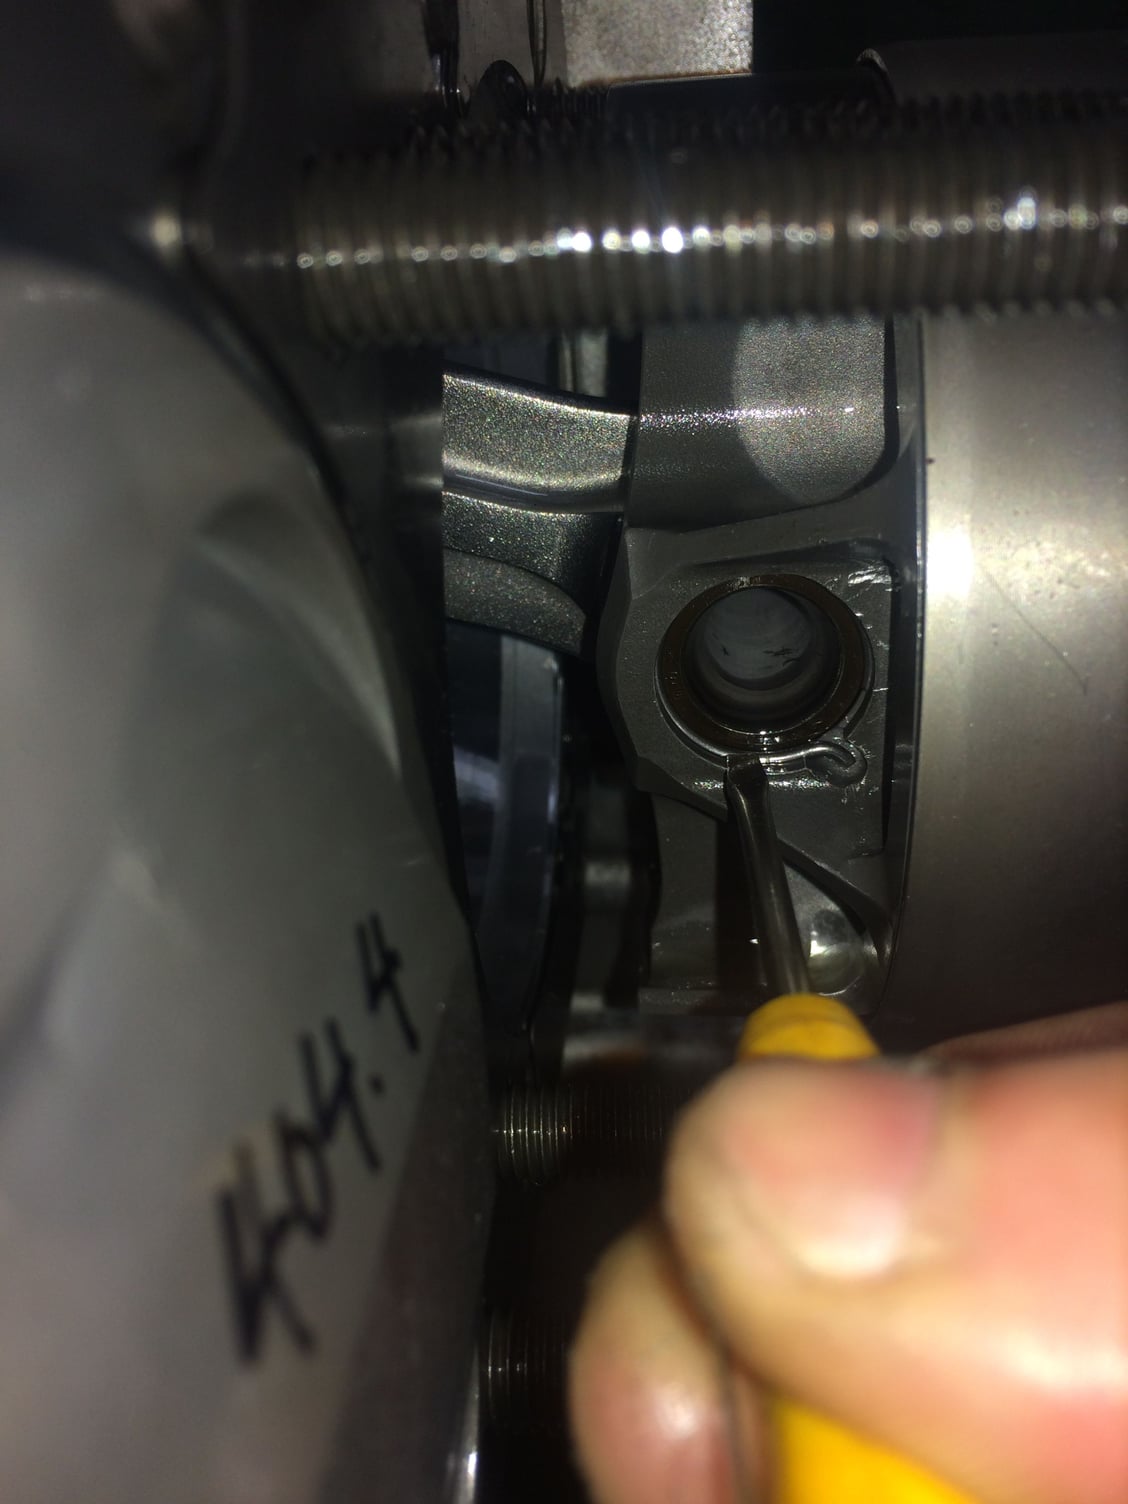
The bigger screw driver won't fit so small one it is. I like using the bigger one to install the opposite side clip when on the bench because the leverage of the bigger screw driver made it easier to overcome the spring pressure of the clip. The small screw driver was bending at certain angles.
It took some tongue biting and bullet sweating but we got this!
Now we can do this- Install the middle cylinder sleeve on to the middle piston. Again, don't let the band slip until the all three rings are in the bore. Otherwise all needs to be undone!
Repeat all of the above on the other bank and now we have a short block.
Silly question, maybe, but why start by putting the piston in the sleeve only to back it out into the band? Couldn't you just put it directly into the band?
Silly question, maybe, but why start by putting the piston in the sleeve only to back it out into the band? Couldn't you just put it directly into the band?
The chance of damaging a ring is a lot higher when tapping the piston in to the band with a plastic hammer.
Need a somewhat stable plaform, which is what the cylinder sleeve temporarily serves as.
That's what I was told by Mike Levitas, who has built many racing engines, I am in no position to question his kind lesson.

 03-03-2018, 09:49 AM